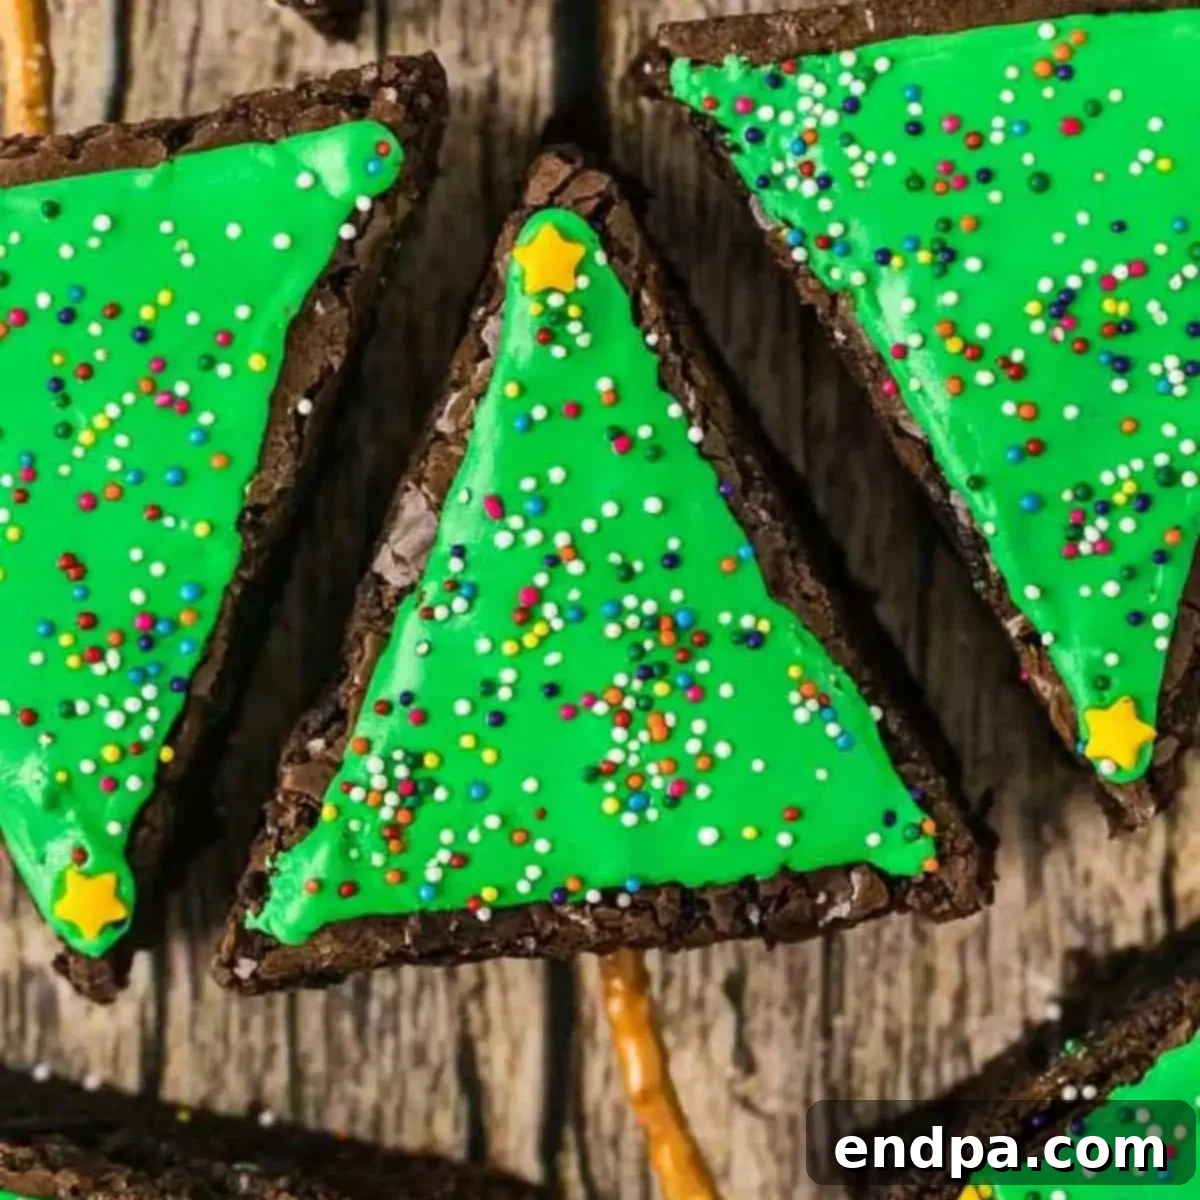
Get ready to spread some serious holiday cheer with these incredibly fun and deliciously festive **Christmas Tree Brownies**! This recipe is an absolute game-changer for anyone looking to whip up adorable, eye-catching treats without spending hours in the kitchen. Whether you’re planning a bustling Christmas party, contributing to a cookie exchange, or simply want a delightful activity to do with the kids, these brownies are your perfect solution. Their charming appearance and rich chocolate flavor make them an instant hit, guaranteed to bring smiles to faces of all ages.
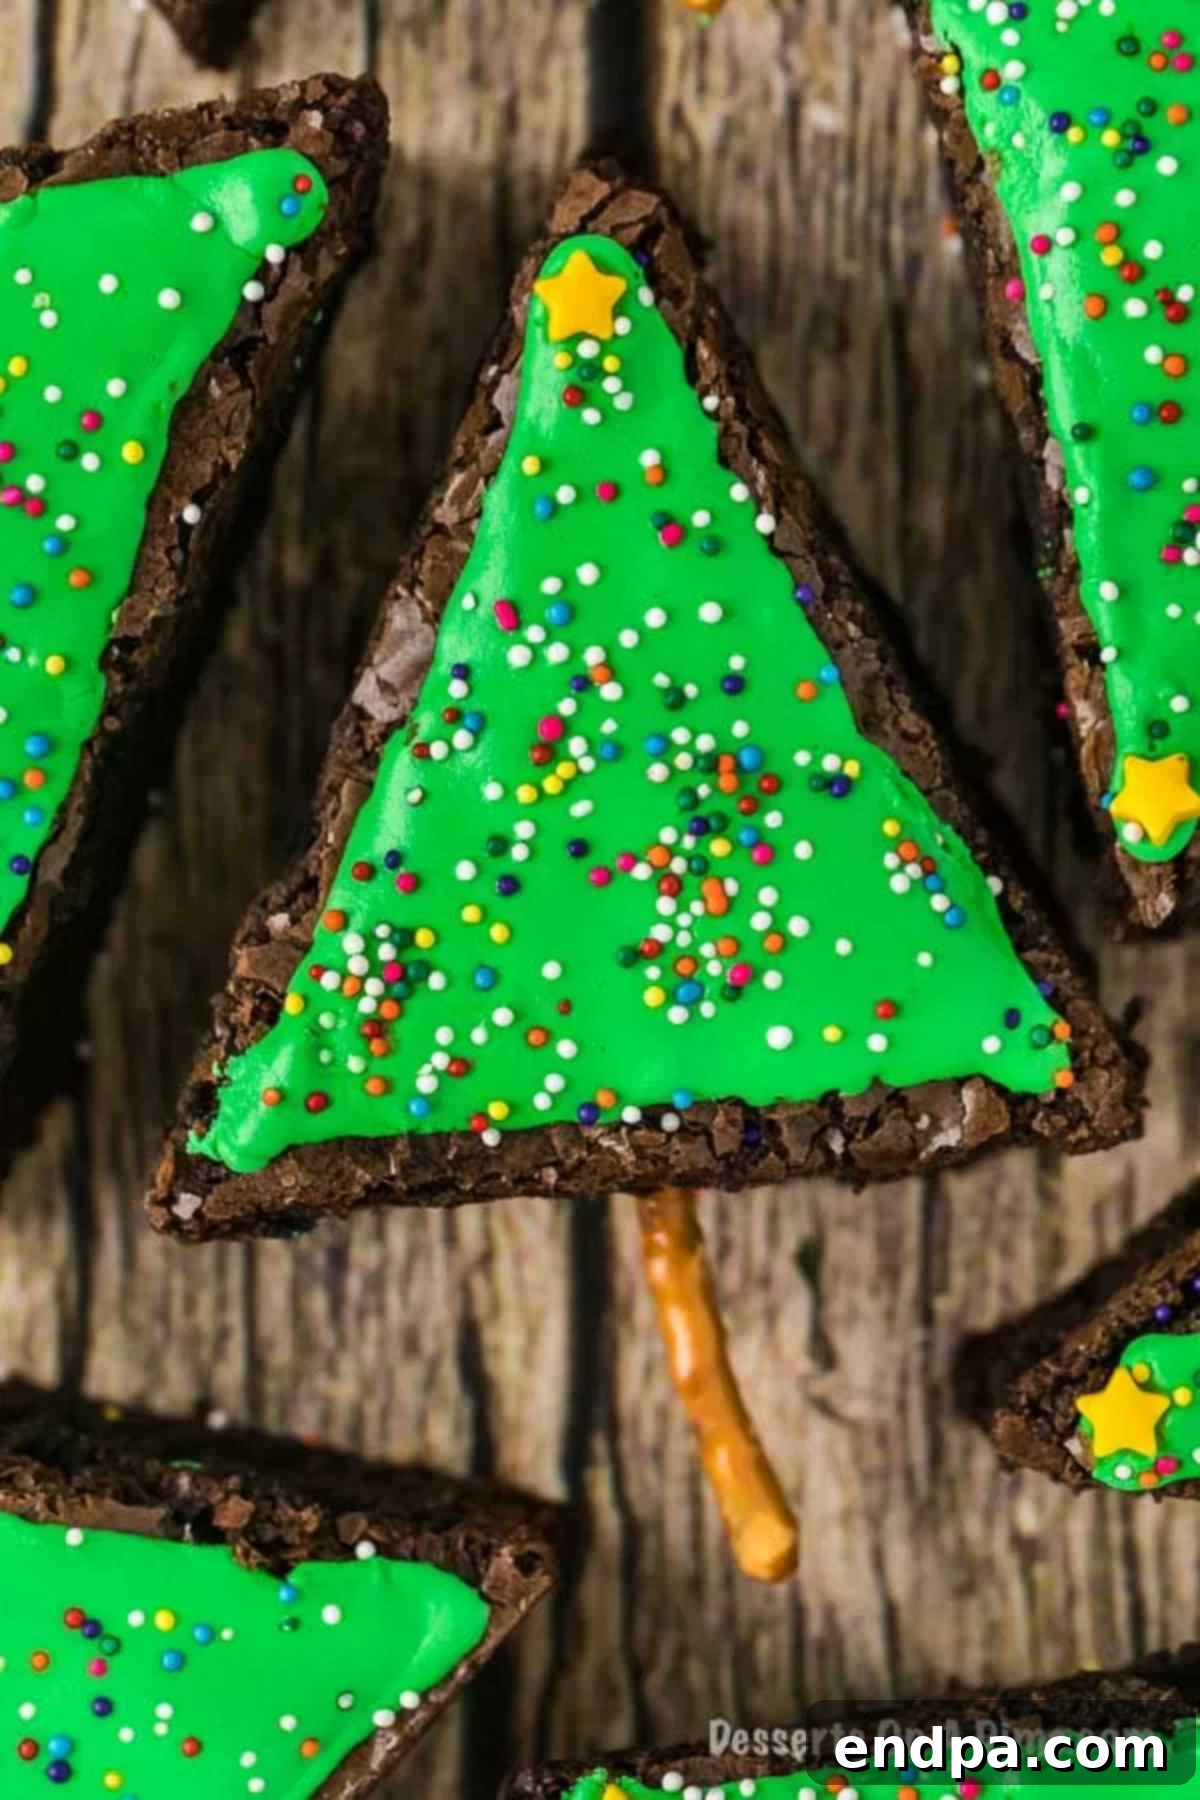
When it comes to easy holiday desserts, these Brownie Christmas Trees truly stand out. They embody simplicity without sacrificing flavor or festive appeal. The beauty of this recipe lies in its flexibility: you can start with a convenient box mix for speed and guaranteed success, or elevate your baking with a batch of rich homemade brownies. Either way, transforming them into these delightful Christmas trees is a straightforward and rewarding process.
Each year, the holidays bring a wonderful opportunity to create memorable treats. Alongside family favorites like Christmas Tree Cupcakes, Christmas Rice Krispie Treats, Christmas Tree Cupcake Cake, and Christmas Tree Cake Pops, these festive brownies slot in perfectly. They are not only ideal for your main Christmas gathering but also make fantastic contributions to work parties, school events, or any holiday celebration. Imagine presenting these unique treats at a cookie exchange – they’re sure to be a conversation starter! Furthermore, decorating these brownies offers a fantastic, engaging activity that kids absolutely adore, much like crafting Meringue Christmas Trees or Easy Santa Hat Cupcakes.
Table of Contents
- Why These Christmas Tree Brownies are a Holiday Must-Make
- Essential Ingredients for Your Brownie Trees
- Equipment You’ll Need
- Delicious Variations to Customize Your Treats
- Step-by-Step Guide to Making Christmas Tree Brownies
- Expert Tips for Perfect Brownie Trees
- Storage and Make-Ahead Suggestions
- Kid-Friendly Fun and Creative Decorating Ideas
- Frequently Asked Questions
- Try These Other Easy Christmas Desserts
- Christmas Tree Brownies Recipe Card
Why These Christmas Tree Brownies are a Holiday Must-Make
These festive brownies aren’t just delicious; they’re incredibly convenient and perfectly embody the spirit of the season. Here’s why they should be at the top of your holiday baking list:
- **Effortlessly Adorable:** Achieve a picture-perfect, festive look without complicated techniques. Even beginner bakers can create these charming tree shapes, making them an ideal project for busy holiday schedules. The simple act of cutting triangles and adding frosting instantly transforms ordinary brownies into something extraordinary.
- **Irresistibly Festive:** The vibrant green frosting and colorful sprinkles capture the magic of Christmas trees, making these treats a delightful addition to any holiday table. They immediately evoke a sense of joy and celebration, serving as edible decorations that guests will love.
- **Rich & Delicious:** At their heart, these are classic brownies – fudgy, chewy, and packed with irresistible chocolate flavor. The simple decorations enhance, rather than overpower, the rich taste of the brownie base, ensuring every bite is a delightful combination of texture and sweetness.
- **Perfect for All Ages:** From baking the brownies to adding the sprinkles, this recipe offers opportunities for everyone to get involved. Children especially love the decorating process, turning it into a cherished holiday memory. It’s a fantastic way to bond with family while creating something delicious.
Essential Ingredients for Your Brownie Trees
One of the best aspects of this recipe is its reliance on readily available ingredients. You likely have most of these in your pantry already, making last-minute baking a breeze. Here’s what you’ll need to create your delightful Christmas Tree Brownies:
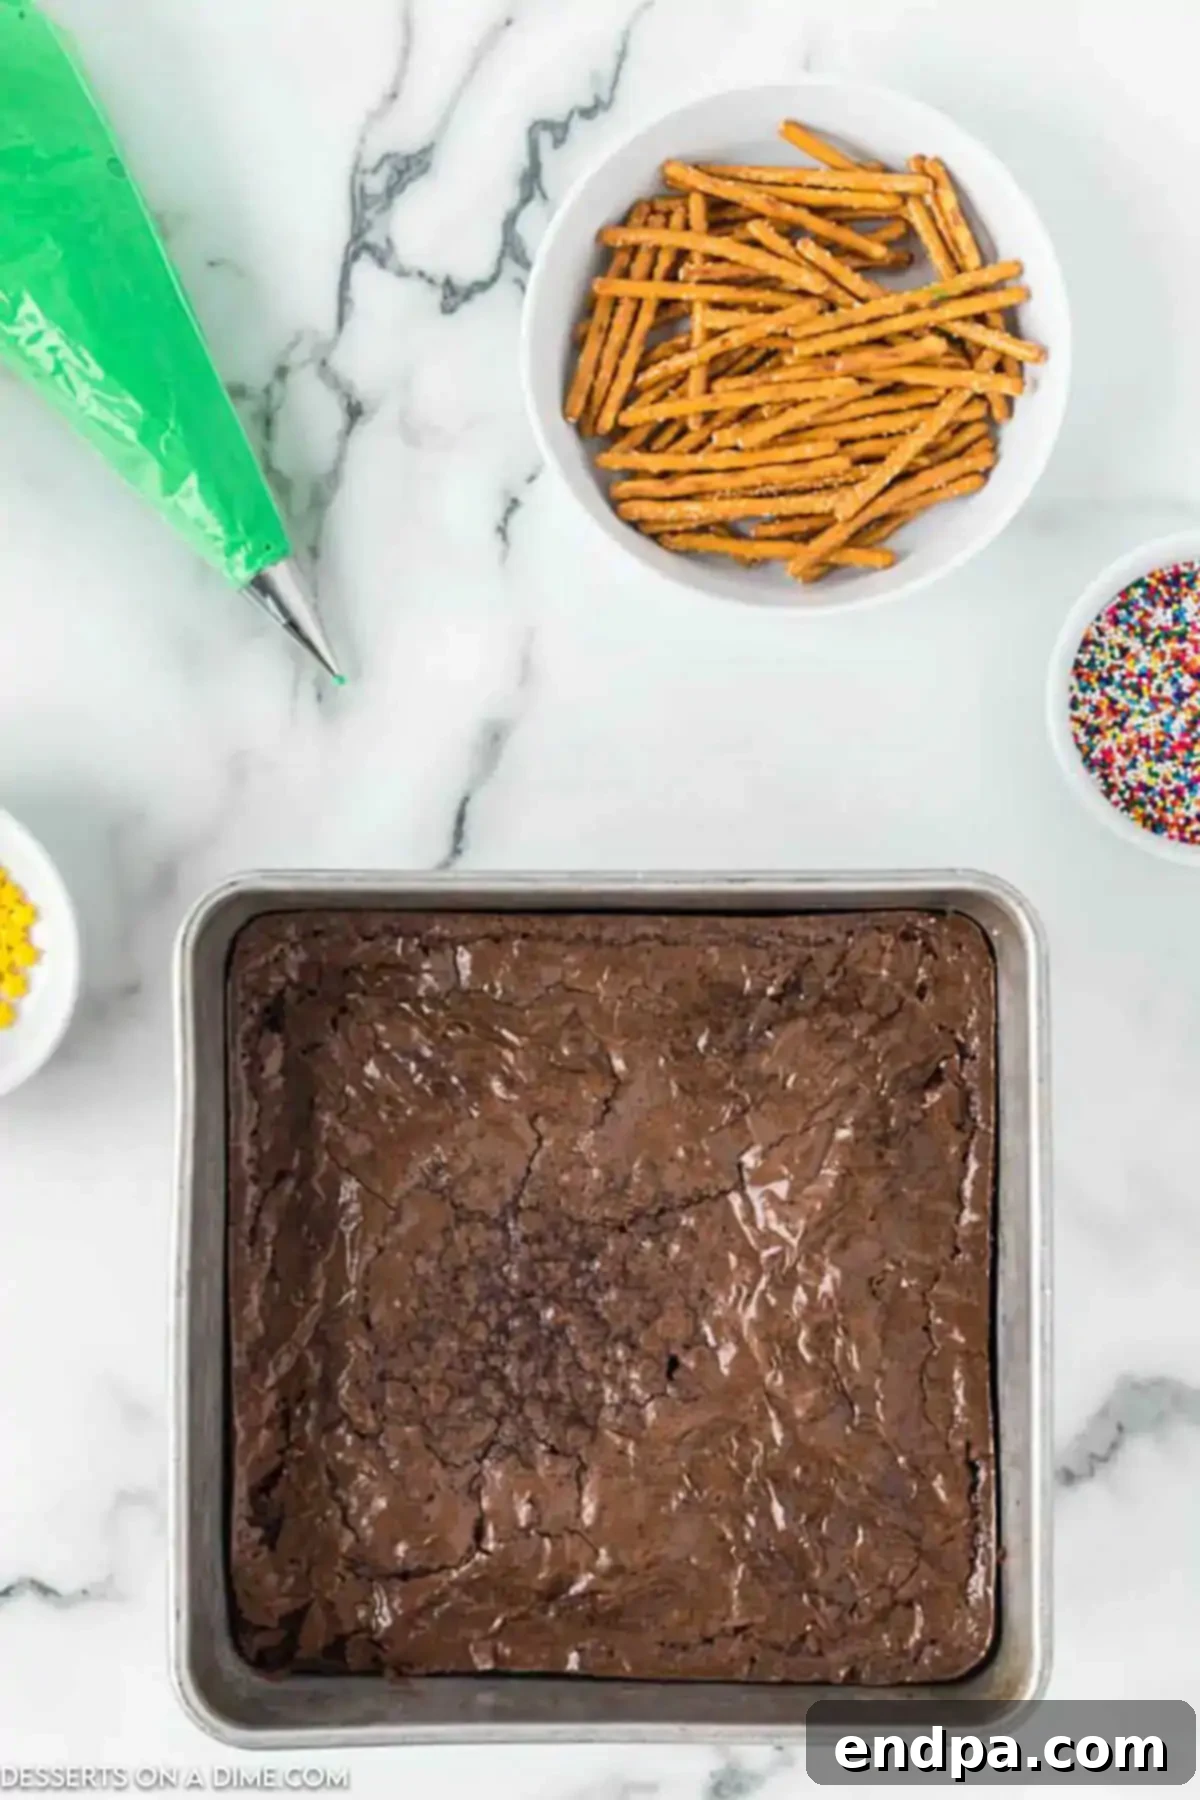
- **Box Fudge Brownie Mix:** This is the shortcut to success! A good quality fudge brownie mix provides a consistently delicious base. Don’t forget any additional ingredients required by the box mix, such as eggs, oil, or water. For those who prefer, a homemade brownie recipe can certainly be used instead.
- **Green Frosting (in a bag for decorating):** Pre-made frosting in a piping bag with a decorating tip saves a lot of time and mess. Look for a vibrant green color to really bring those Christmas trees to life. If you prefer to make your own, see our variations section.
- **Multi-color Sprinkles:** These are your “ornaments”! A mix of classic Christmas colors (red, green, white, gold) will make your trees sparkle. Choose any type of festive sprinkles – nonpareils, jimmies, or sugar crystals work wonderfully.
- **Star Sprinkles:** The crowning glory for each tree! Yellow or gold star sprinkles instantly transform your frosted brownies into recognizable Christmas trees. If star sprinkles are hard to find, don’t worry, we have a great alternative in our variations.
- **Pretzel Sticks:** These sturdy, salty sticks make the perfect “trunk” for your Christmas trees, adding a delightful crunch and a hint of salty-sweet contrast to the rich brownies.
Equipment You’ll Need
You won’t need any fancy gadgets for this recipe, just a few kitchen essentials:
- **8×8 Inch Square Baking Pan:** Essential for baking your brownies into a shape that’s easy to cut into triangles. A 9×13 inch pan can also work, just adjust baking time and cutting.
- **Mixing Bowl & Spatula/Whisk:** For preparing the brownie batter.
- **Parchment Paper or Aluminum Foil:** To line your baking pan, making it incredibly easy to remove the cooled brownies without sticking.
- **Cooking Spray:** For greasing the pan, even if lined, for extra non-stick insurance.
- **Sharp Knife (or Plastic Disposable Knife):** For cleanly cutting the brownies into their iconic tree shapes.
- **Cutting Board:** A stable surface for cutting the brownies.
- **Cooling Rack:** To allow the brownies to cool completely before decorating.
- **Piping Bag and Tip (if using homemade frosting):** For precise application of frosting.
Delicious Variations to Customize Your Treats
While the classic Christmas Tree Brownie is delightful on its own, don’t hesitate to experiment with these creative variations to suit your taste and add a personal touch:
- **Brownie Base:**
- **Homemade Brownies:** For a truly gourmet touch, use your favorite homemade brownie recipe. This allows for control over richness and texture, resulting in an even more decadent treat. Just ensure they are baked in a square pan and cooled completely before cutting.
- **Different Brownie Flavors:** Explore other box mix flavors like dark chocolate, chocolate chip, or even a blondie mix for a lighter “tree” base.
- **Frosting Fun:**
- **Homemade Buttercream:** Elevate your brownies with a rich, creamy homemade buttercream frosting. This offers a smoother texture and custom flavor profiles. You can easily color it green with food coloring.
- **White Icing with Food Coloring:** If you can’t find pre-made green frosting, simply use white icing (store-bought or homemade) and a few drops of green food coloring to achieve the perfect shade. Gel food coloring provides the most vibrant results.
- **Cream Cheese Frosting:** For a tangy twist, a cream cheese frosting can be used. Just ensure it’s firm enough to pipe and hold its shape.
- **Creative Toppings:**
- **M&M’s for Stars:** If star sprinkles are unavailable, yellow M&M’s make excellent, edible stars for the top of your trees. They’re also great for little hands to place!
- **Crushed Peppermint Candy:** For a festive minty flavor, sprinkle crushed peppermint candy over the green frosting. This creates a beautiful “snow” effect and a refreshing taste, turning them into peppermint brownies.
- **Edible Glitter or Sugar Crystals:** Add extra sparkle by dusting your frosted trees with edible glitter or coarse sugar crystals in silver or gold.
- **Mini Chocolate Chips:** Use mini chocolate chips as “ornaments” for a classic brownie decoration.
- **Trunk Alternatives:**
- **Peppermint Sticks:** Instead of pretzel sticks, use small peppermint sticks for a minty trunk and an extra burst of holiday flavor. A candy cane trunk would also be incredibly cute and festive.
- **Chocolate-Covered Pretzels:** Dip your pretzel sticks in melted chocolate and let them set for an even more indulgent trunk.
Step-by-Step Guide to Making Christmas Tree Brownies
Crafting these delightful Christmas Tree Brownies is a straightforward and enjoyable process. Follow these detailed steps to ensure perfectly festive results every time:
Step 1: Prepare and Bake Your Brownies
Begin by preparing your brownie batter. If using a box mix, follow the instructions on the package precisely. For homemade brownies, use your preferred recipe. It’s crucial to bake them in a square pan, ideally an 8×8 inch, as this shape makes cutting triangles much easier. To prevent sticking and simplify removal, line your baking pan with parchment paper or aluminum foil, leaving an overhang on the sides. Spraying the lined pan with cooking spray provides extra non-stick assurance. Once the batter is poured, bake according to instructions until a toothpick inserted into the center comes out with moist crumbs, but not wet batter.
Step 2: Cool and Cut the Brownies
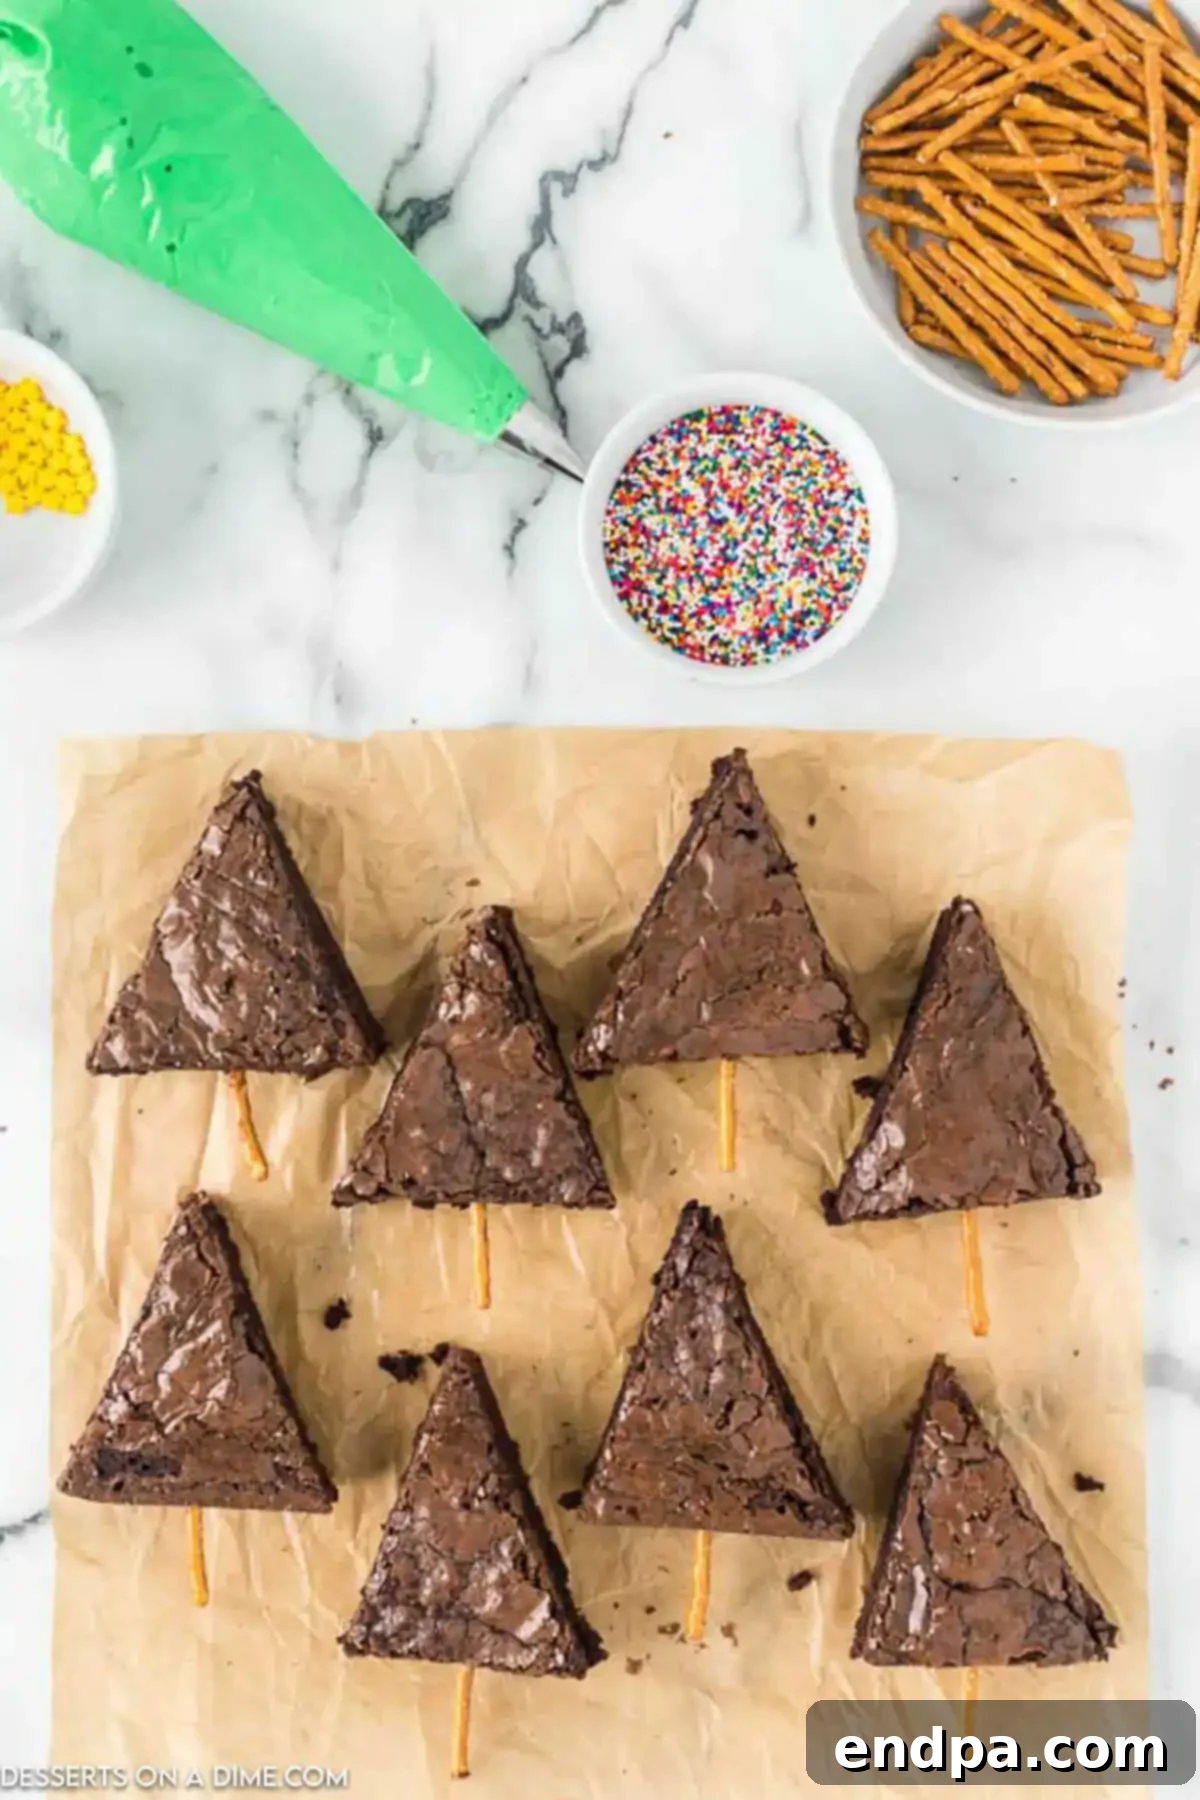
Allow your brownies to cool *completely* in the pan before attempting to cut them. This is a vital step! Warm brownies are much harder to cut cleanly and are more prone to crumbling. Once thoroughly cooled, use the parchment paper overhang to gently lift the entire brownie slab out of the pan and onto a cutting board. Now, for the fun part: cutting them into triangles. Make diagonal cuts across the square brownie slab. A typical 8×8 inch pan will yield 9-12 triangles. For clean edges, wipe your knife after each cut. Next, take a pretzel stick and carefully insert it into the bottom, widest part of each brownie triangle. This forms the sturdy and delicious “trunk” of your Christmas tree.
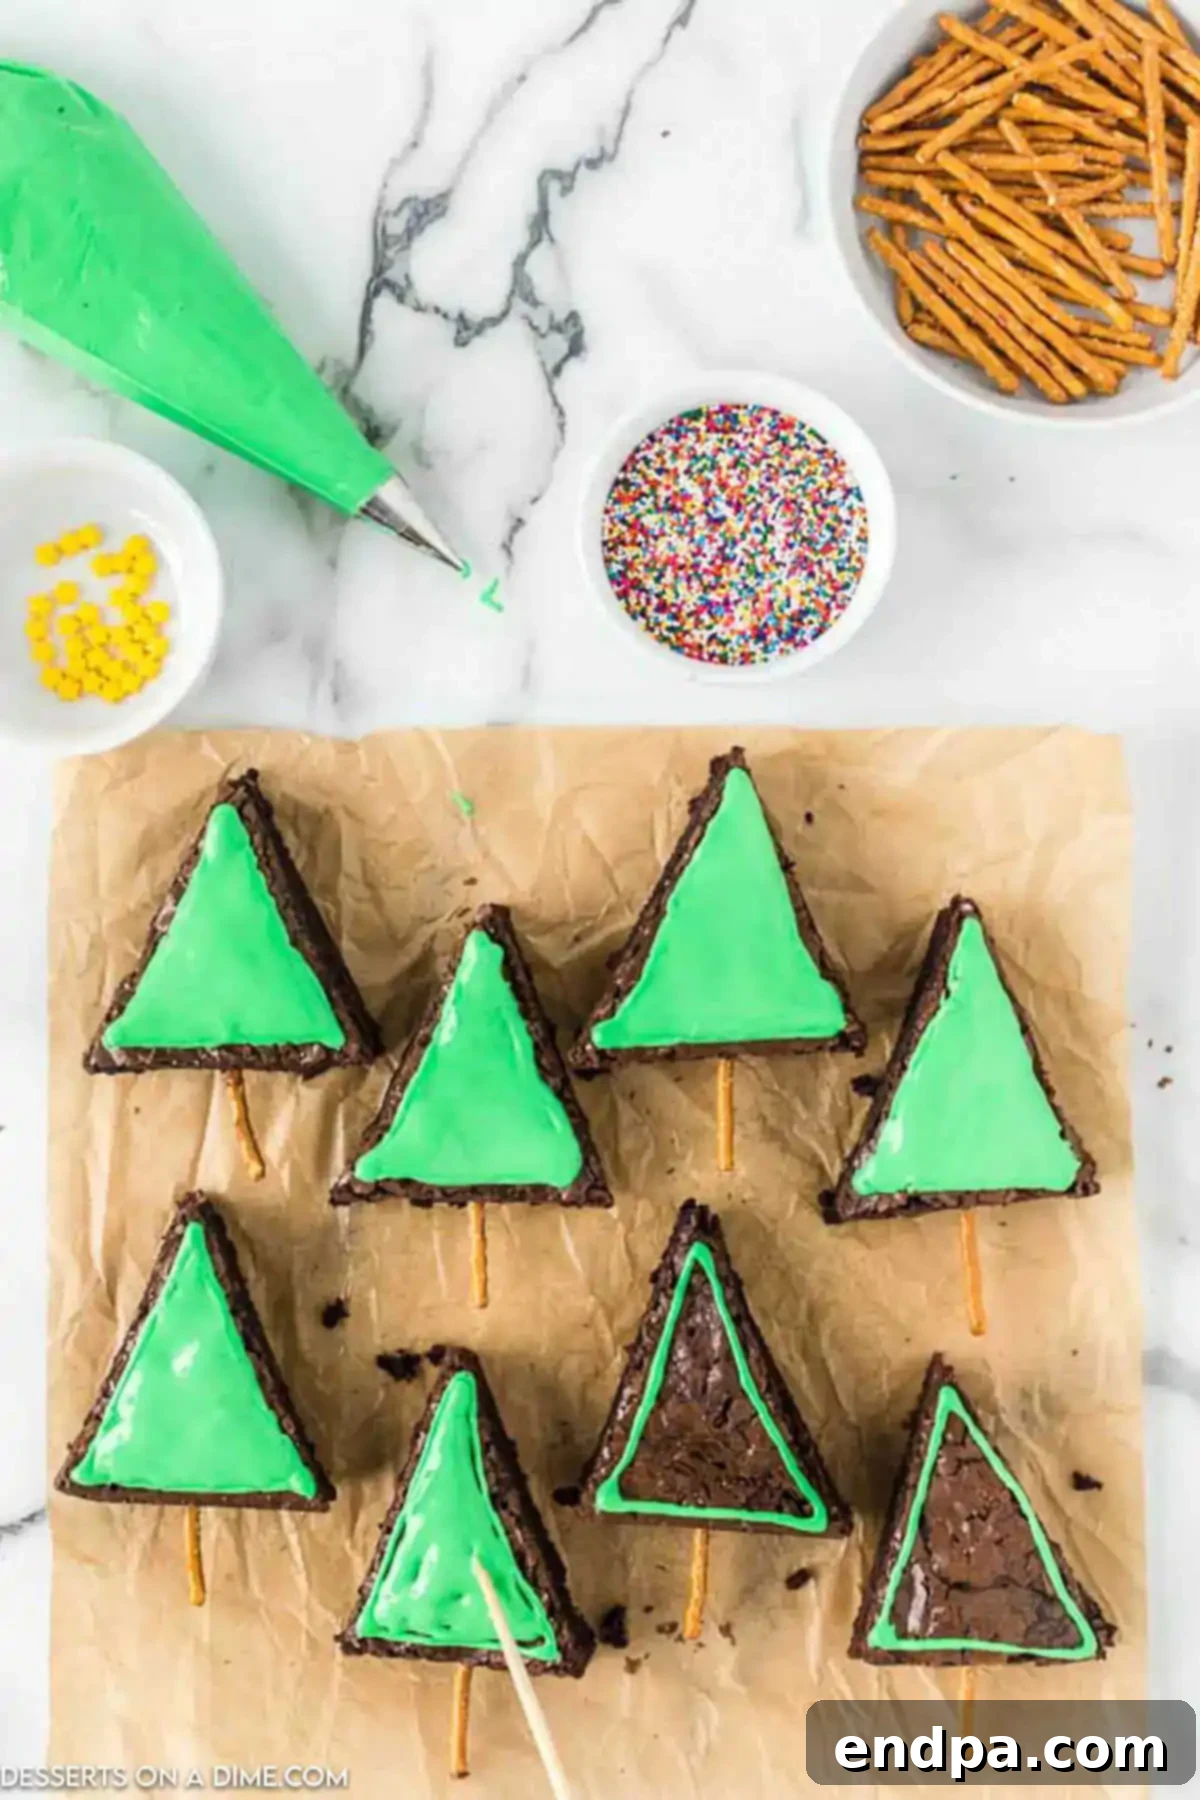
Step 3: Frost Your Christmas Trees
With your pretzel trunks in place, it’s time to frost. If using a store-bought green frosting bag, attach the appropriate decorating tip (a star or round tip works well). For homemade frosting, transfer it to a piping bag. Begin by tracing an outer line along the edges of the brownie triangle. This creates a neat border and helps guide you as you fill in the rest of the tree. Once the outline is complete, fill the entire surface of the brownie triangle with green frosting, spreading it smoothly and evenly with a small offset spatula or knife to create the lush “foliage” of your Christmas tree.
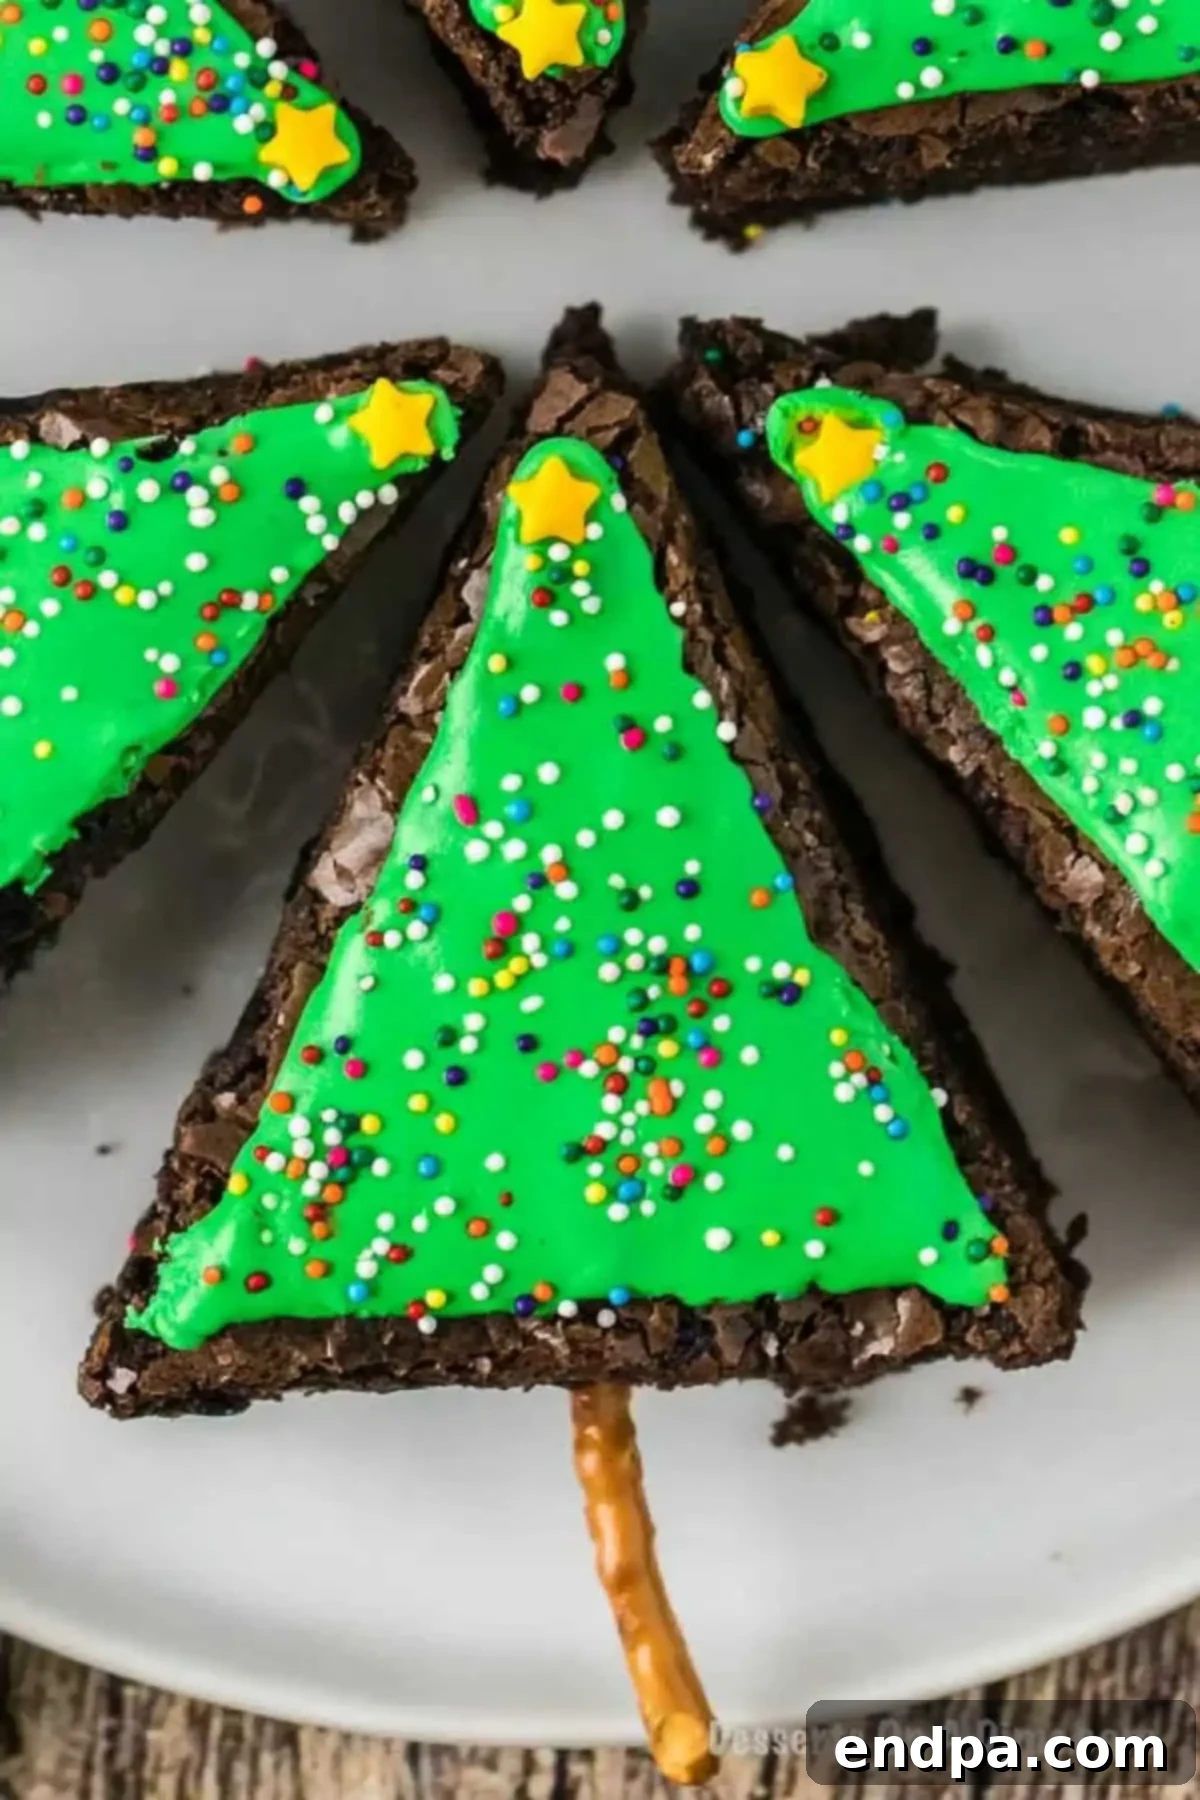
Step 4: Decorate with Sprinkles and Stars
This is where the magic truly happens! While the frosting is still wet and tacky, generously sprinkle your multi-color sprinkles all over the green frosting. These act as your vibrant Christmas tree ornaments. Don’t be shy – more sprinkles mean more festive fun! Finally, place a star sprinkle at the very top of each tree. If you’re using yellow M&M’s as an alternative, carefully press one onto the top. Once decorated, let the brownies sit undisturbed for at least 10-15 minutes. This allows the frosting to slightly set, ensuring the sprinkles adhere properly and the decorations stay in place.
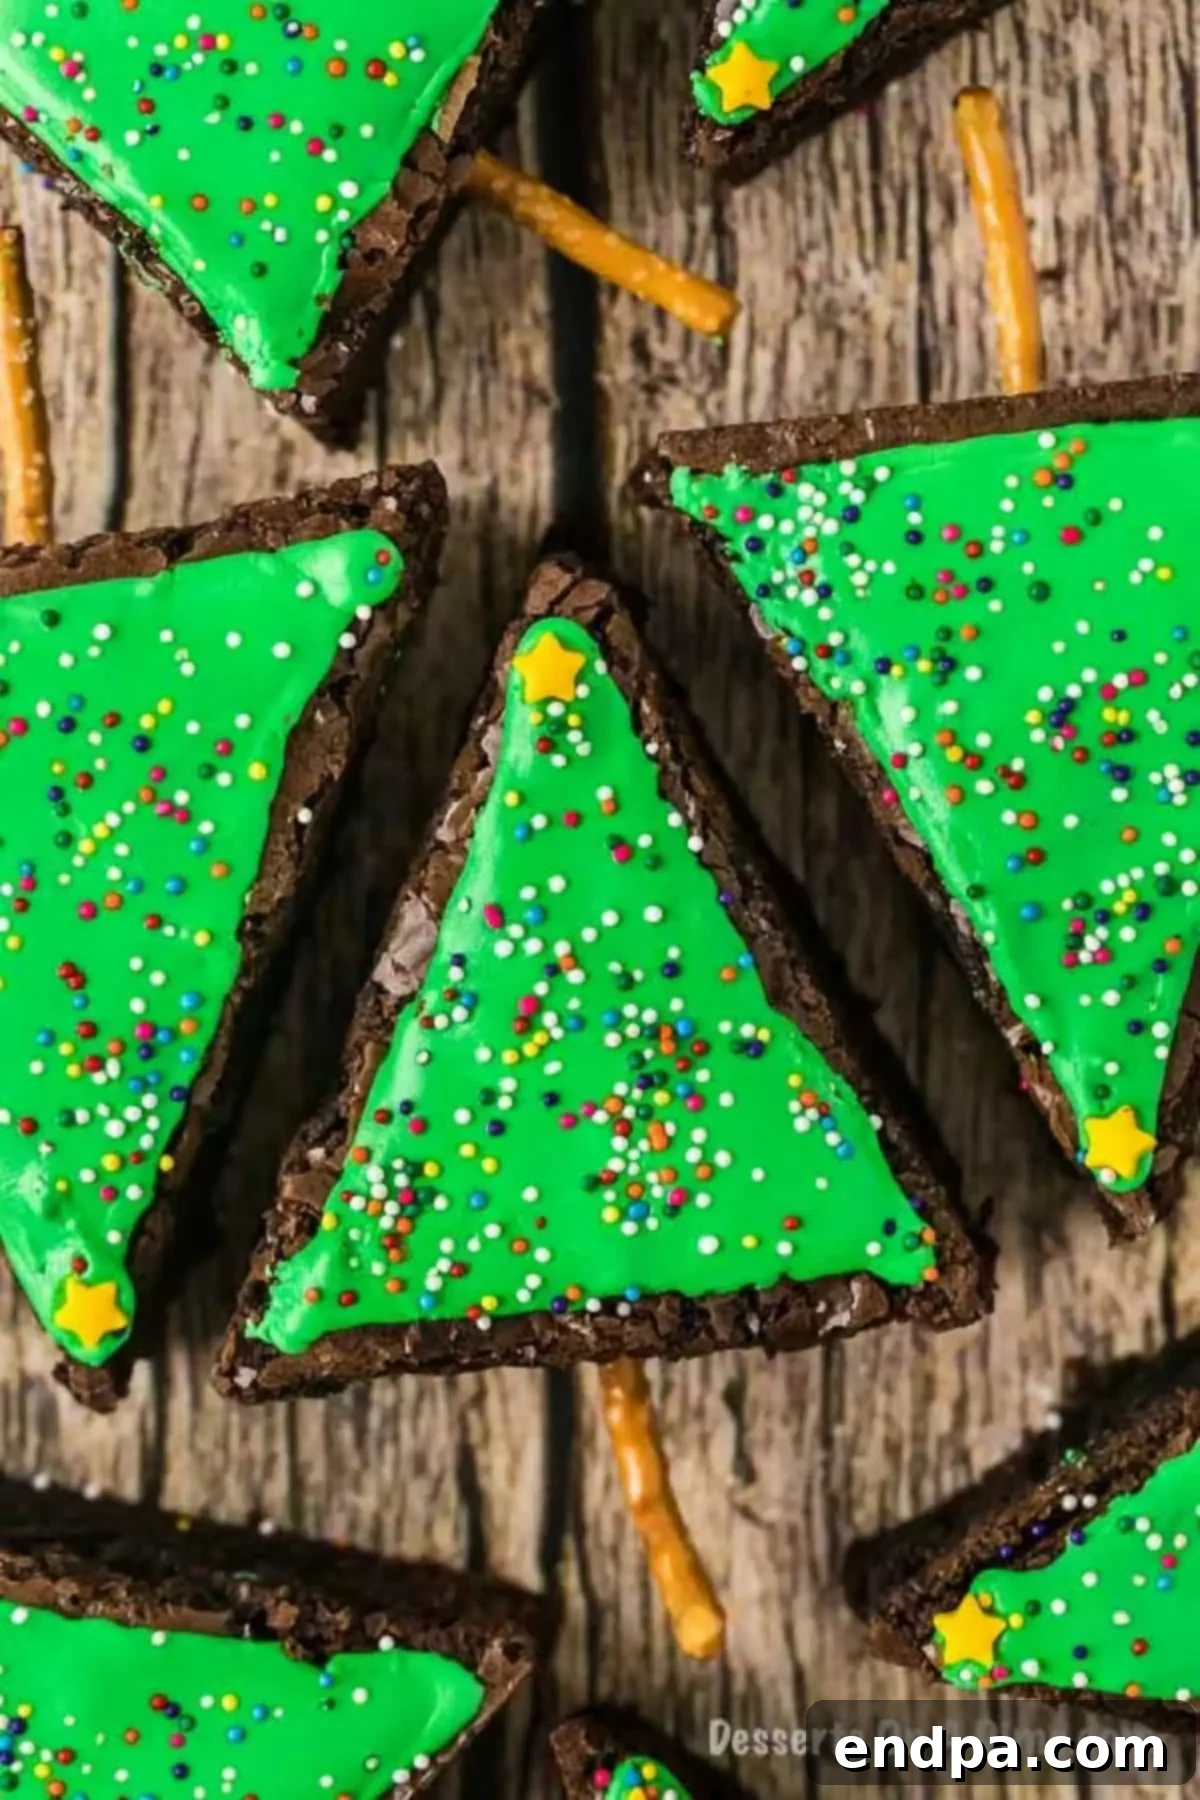
Step 5: Serve and Enjoy!
Once the frosting has set, your adorable and delicious Christmas Tree Brownies are ready to be shared! Arrange them on a festive platter or serve them individually. These treats are not just a dessert; they’re a centerpiece of holiday joy. Watch as they disappear quickly at any gathering, bringing smiles and festive spirit to everyone who enjoys them.
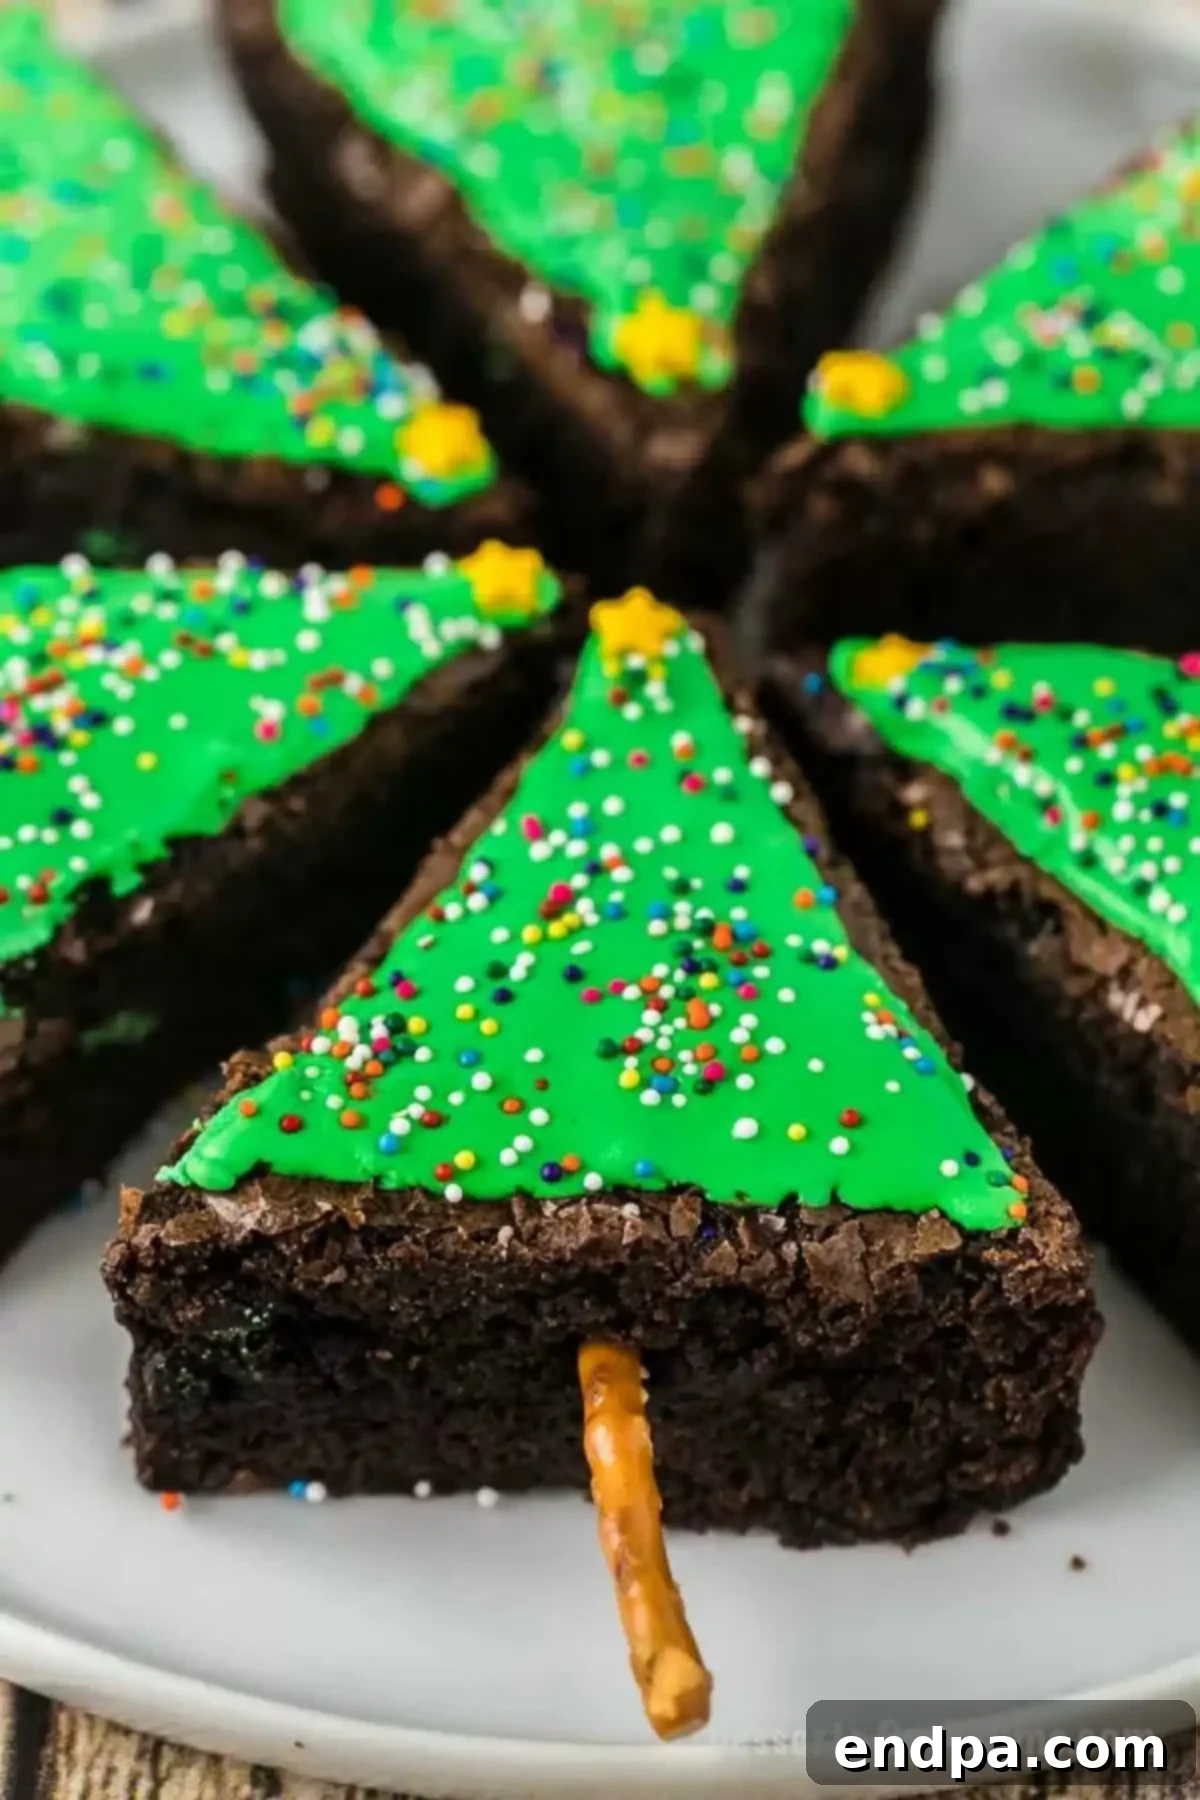
Expert Tips for Perfect Brownie Trees
To ensure your Christmas Tree Brownies turn out absolutely perfect, keep these handy tips in mind:
- **The Perfect Cut:** For clean, crisp edges, try using a plastic disposable knife to cut the brownies. The non-stick nature of plastic often glides through brownies more smoothly than metal. Alternatively, a very sharp metal knife, warmed slightly under hot water and dried, can also work wonders.
- **Clean Knife, Clean Cuts:** After each cut, wipe off any brownie residue from your knife with a paper towel. This simple step prevents crumbs from dragging and ensures every triangle has beautifully clean lines, contributing to a professional-looking finish.
- **Secure the Trunk First:** Always insert the pretzel stick (or chosen tree trunk) *before* you start decorating with frosting and sprinkles. Trying to add the trunk afterward can be difficult and messy, potentially smudging your perfectly applied icing. Make sure the pretzel is pushed in far enough to be stable.
- **Precision Cutting for Triangles:** If your brownie triangles aren’t perfectly symmetrical, don’t fret! You can easily trim the edges with a sharp knife to refine their shape. A ruler can help guide your diagonal cuts for more consistent sizes. Remember, perfection is overrated, but neatness helps!
- **Frosting Application Mastery:**
- If you’re using store-bought green icing in a bag, it’s already set up for easy piping.
- If you’re using homemade frosting or white icing colored green, transfer it to a sturdy Ziploc plastic bag. Snip a small corner off one of the bottom edges to create a makeshift piping bag. This allows for excellent control when tracing the outline and filling in the trees. A dedicated piping bag with a round or star tip will give the most professional finish.
- **Let Them Set:** Don’t skip the step of letting the decorated brownies sit for at least 10-15 minutes. This allows the frosting to firm up slightly and the sprinkles to adhere securely, preventing them from falling off when handled.
- **Brownie Doneness:** For the fudgiest brownies, pull them from the oven when a toothpick inserted into the center comes out with moist crumbs, not liquid batter. Over-baking leads to dry, cakey brownies.
Storage and Make-Ahead Suggestions
Preparing for holiday gatherings often means making things in advance. Here’s how to store your Christmas Tree Brownies and how you can prepare them ahead of time:
Storing Your Brownies
- **Room Temperature:** Decorated Christmas Tree Brownies can be stored in an airtight container at room temperature for up to 3-4 days. Layer them with parchment paper between layers to prevent the frosting from sticking together.
- **Refrigeration:** For longer freshness, especially if your frosting contains dairy (like homemade buttercream), you can refrigerate them in an airtight container for up to a week. Let them come to room temperature for about 15-20 minutes before serving for the best texture.
- **Freezing:** You can freeze unfrosted brownie squares for up to 3 months. Wrap them tightly in plastic wrap and then in foil. Thaw them overnight in the refrigerator, then bring to room temperature before cutting and decorating. While you *can* freeze decorated brownies, the sprinkles might “bleed” slightly, and the pretzel sticks might become soft, so it’s best to decorate them fresh.
Make-Ahead Tips
- **Bake Brownies in Advance:** The brownies can be baked and cooled a day or two before you plan to decorate them. Store the cooled, uncut brownie slab tightly wrapped in plastic wrap at room temperature.
- **Prepare Frosting:** If making homemade frosting, prepare it a day ahead and store it in an airtight container in the refrigerator. Bring it to room temperature and re-whip it slightly before using.
- **Assemble Close to Serving:** For the freshest look and best texture of the pretzel “trunks,” it’s best to cut and decorate the brownies on the day of your event, or the day before at most.
Kid-Friendly Fun and Creative Decorating Ideas
These Christmas Tree Brownies are truly one of the best holiday baking projects to involve children. The simplicity of the steps and the freedom to get creative make it a memorable activity. Here’s how to make it extra special for the little ones:
- **Assign Roles:** Let kids take on different roles. One can be the “sprinkle master,” another the “star placer,” and an older child can help with the frosting (with supervision).
- **Set Up a Decorating Station:** Cover your table with newspaper or a plastic tablecloth. Lay out all the sprinkles, stars, and any other edible decorations in small bowls for easy access.
- **Plenty of Sprinkles:** Kids love sprinkles! Have a variety of colors and shapes available. Encourage them to create unique patterns or go for a full “ornament explosion.”
- **Edible Markers:** For older kids, edible food markers can be used to draw tiny ornaments or garlands on the frosting once it’s set a bit.
- **Gingerbread Men Brownies:** If you have a gingerbread man cookie cutter, you can cut out shapes from the brownies and decorate them with white frosting and candy buttons for a different festive brownie treat.
- **Chocolate Drizzle:** After the green frosting sets, an adult can drizzle white or red melted chocolate over the trees for an extra touch of elegance, resembling tinsel.
Involving children in the kitchen teaches them valuable skills, fosters creativity, and creates wonderful holiday memories. Plus, they’ll be so proud to share their self-decorated treats!
Frequently Asked Questions
Here are answers to some common questions you might have about making Christmas Tree Brownies:
- Can I use a different size baking pan?
- Yes, you can use a 9×13 inch pan, but your brownies will be thinner. Adjust baking time accordingly (they might cook faster). You’ll also get more, smaller triangles from a larger pan.
- How many brownies does this recipe yield?
- An 8×8 inch pan typically yields 9-12 brownie triangles, depending on how large you cut them. A 9×13 inch pan could yield 15-20.
- My brownies are crumbling when I cut them. What went wrong?
- The most common reason for crumbling is not allowing the brownies to cool completely. They must be entirely cool, ideally chilled for a short period, before cutting. A sharp, clean knife also helps immensely.
- Can I make these gluten-free?
- Absolutely! Many brands offer gluten-free brownie mixes that work perfectly for this recipe. Just ensure all your other ingredients (like sprinkles and frosting) are also gluten-free if needed.
- How can I make the frosting look neater?
- Using a piping bag (or a Ziploc bag with a snipped corner) gives you more control. Start by outlining the tree, then fill it in. You can also use a small offset spatula to smooth the frosting once it’s on the brownie.
Try These Other Easy Christmas Desserts
The holiday season is all about indulgence and delicious treats. If you’re looking for more simple and festive dessert ideas to complement your Christmas Tree Brownies, check out some of our other popular recipes:
- Easy Christmas Tree Rice Krispie Treats
- Christmas Tree Sugar Cookies Recipe
- Christmas Sprinkle Cookies
- Christmas Pinwheel Cookies Recipe
- Christmas Ice Cream Cake
- Easy Grinch Cookies Recipe
These easy Christmas Tree Brownies are guaranteed to be a highlight of your holiday season, bringing joy and a touch of festive magic to every bite. Give this delightful recipe a try, and don’t forget to share your creations and leave a comment once you’ve made them!
Christmas Tree Brownies Recipe Card
Christmas Tree Brownies
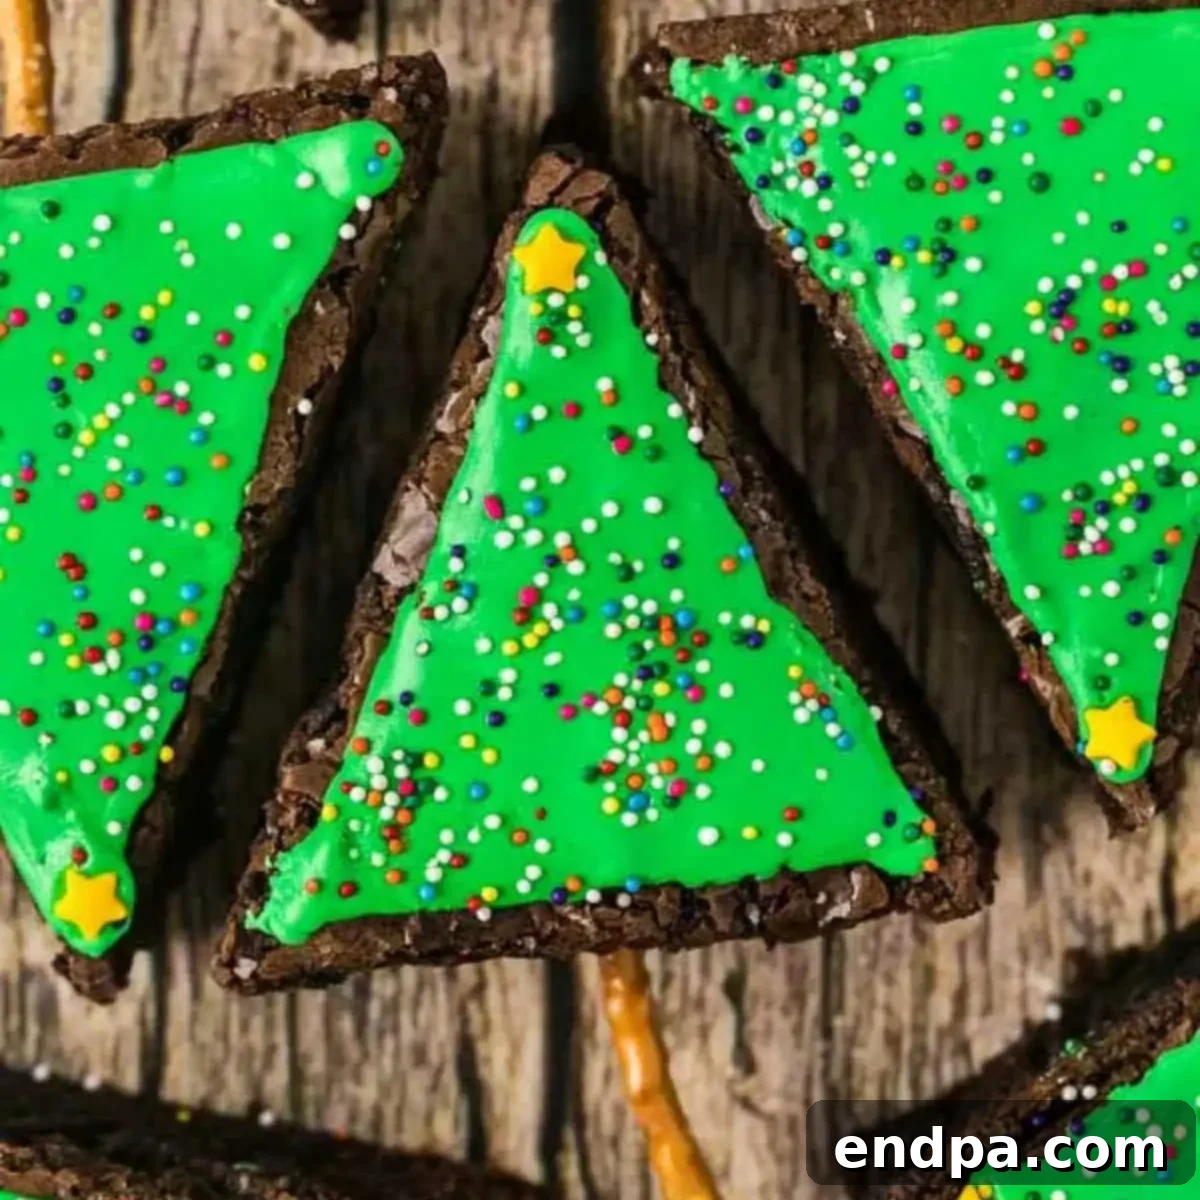
Try this fun and festive treat and make Christmas tree brownies. They are really easy and perfect for Christmas parties.
Prep Time: 10 mins
Cook Time: 25 mins
Total Time: 35 mins
Yields: 8 servings
Cuisine: American
Course: Dessert
Calories: 369 kcal
Author: Carrie Barnard
Ingredients
- 1 box fudge brownie mix + ingredients on box (or use your favorite homemade brownie recipe)
- 1 green frosting bag for decorating (or use homemade buttercream frosting recipe)
- 1 container of multi-color sprinkles
- 1 container of star sprinkles (use yellow M&M’s if stars are unavailable)
- Pretzel sticks
Instructions
- Spray an 8×8 inch pan and flour it (or line with parchment paper) so that the brownies will come out clean.
- Prepare and bake brownies as directed on the back of the box or by your chosen homemade recipe.
- Cool slightly, then carefully scrape around the edge of the pan. If using parchment, use the overhang to lift the brownie slab onto a sheet of parchment paper or a cooling rack.
- Let the brownies cool completely before cutting them into tree shapes. This is crucial for clean cuts.
- Cut the cooled brownies into triangles by making diagonal cuts across the square.
- Insert a pretzel stick into the bottom, widest part of each brownie triangle to create the tree base.
- Using green frosting, pipe an outer line along the edges of the triangle, then fill in the entire surface.
- Decorate the frosted trees generously with multi-color sprinkles and place a star sprinkle (or yellow M&M) at the top.
- Allow the decorated brownies to sit for at least 10-15 minutes to allow the frosting to set and sprinkles to adhere.
- Serve and enjoy these festive treats!
Nutrition Facts (per serving)
Calories: 369 kcal, Carbohydrates: 57g, Protein: 7g, Fat: 12g, Saturated Fat: 3g, Trans Fat: 1g, Cholesterol: 113mg, Sodium: 249mg, Potassium: 46mg, Sugar: 38g, Vitamin A: 164IU, Calcium: 17mg, Iron: 2mg
