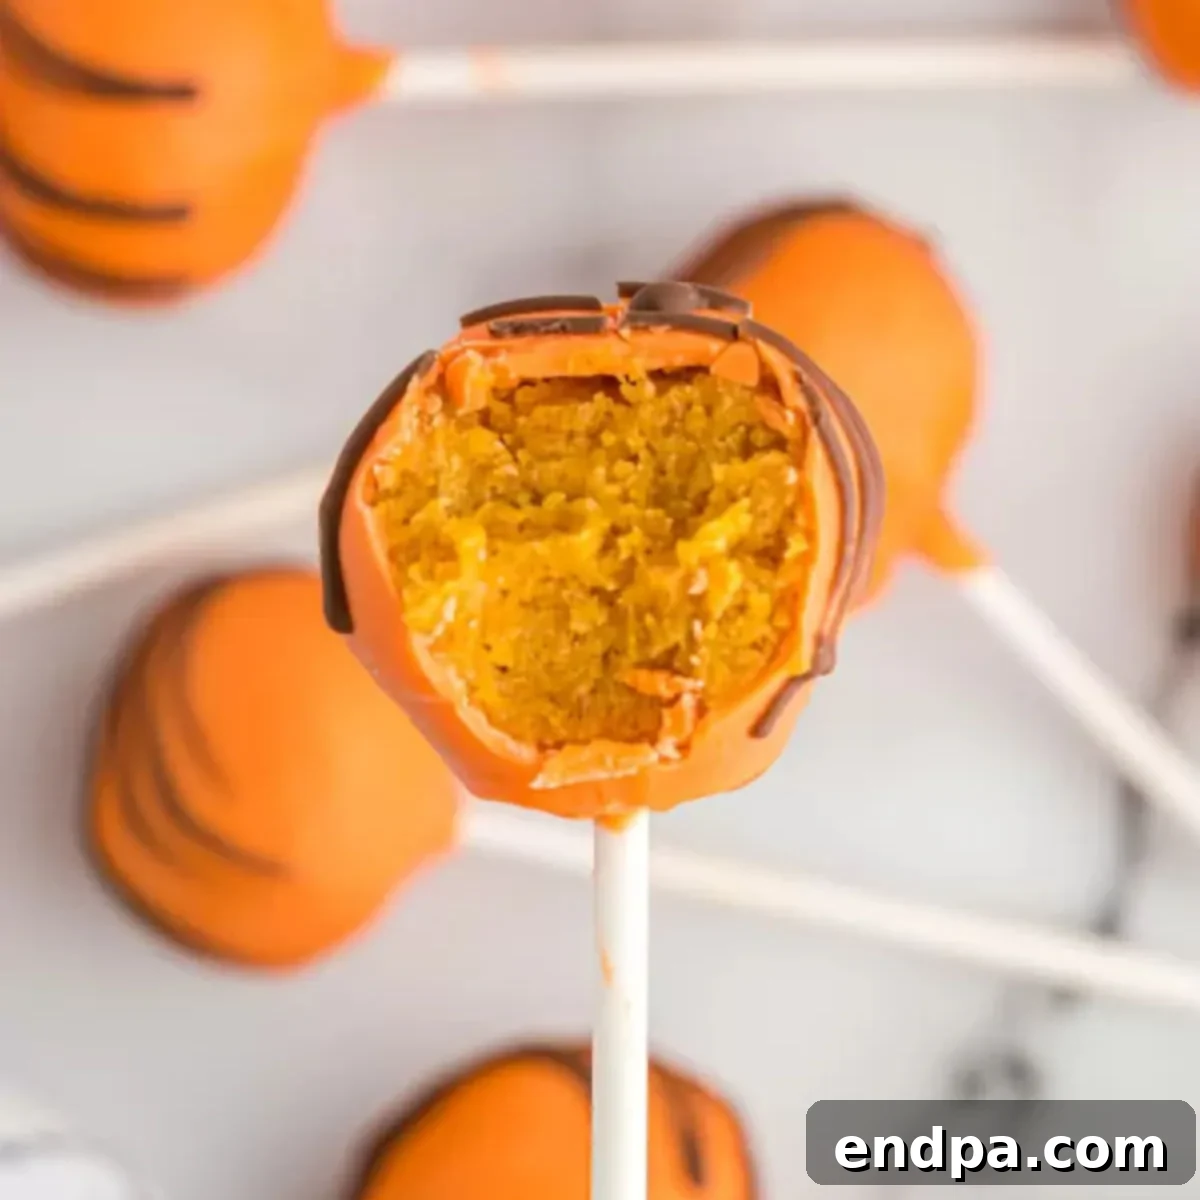
Delightful Pumpkin Cake Pops: Your Ultimate Guide to Fall’s Favorite Treat
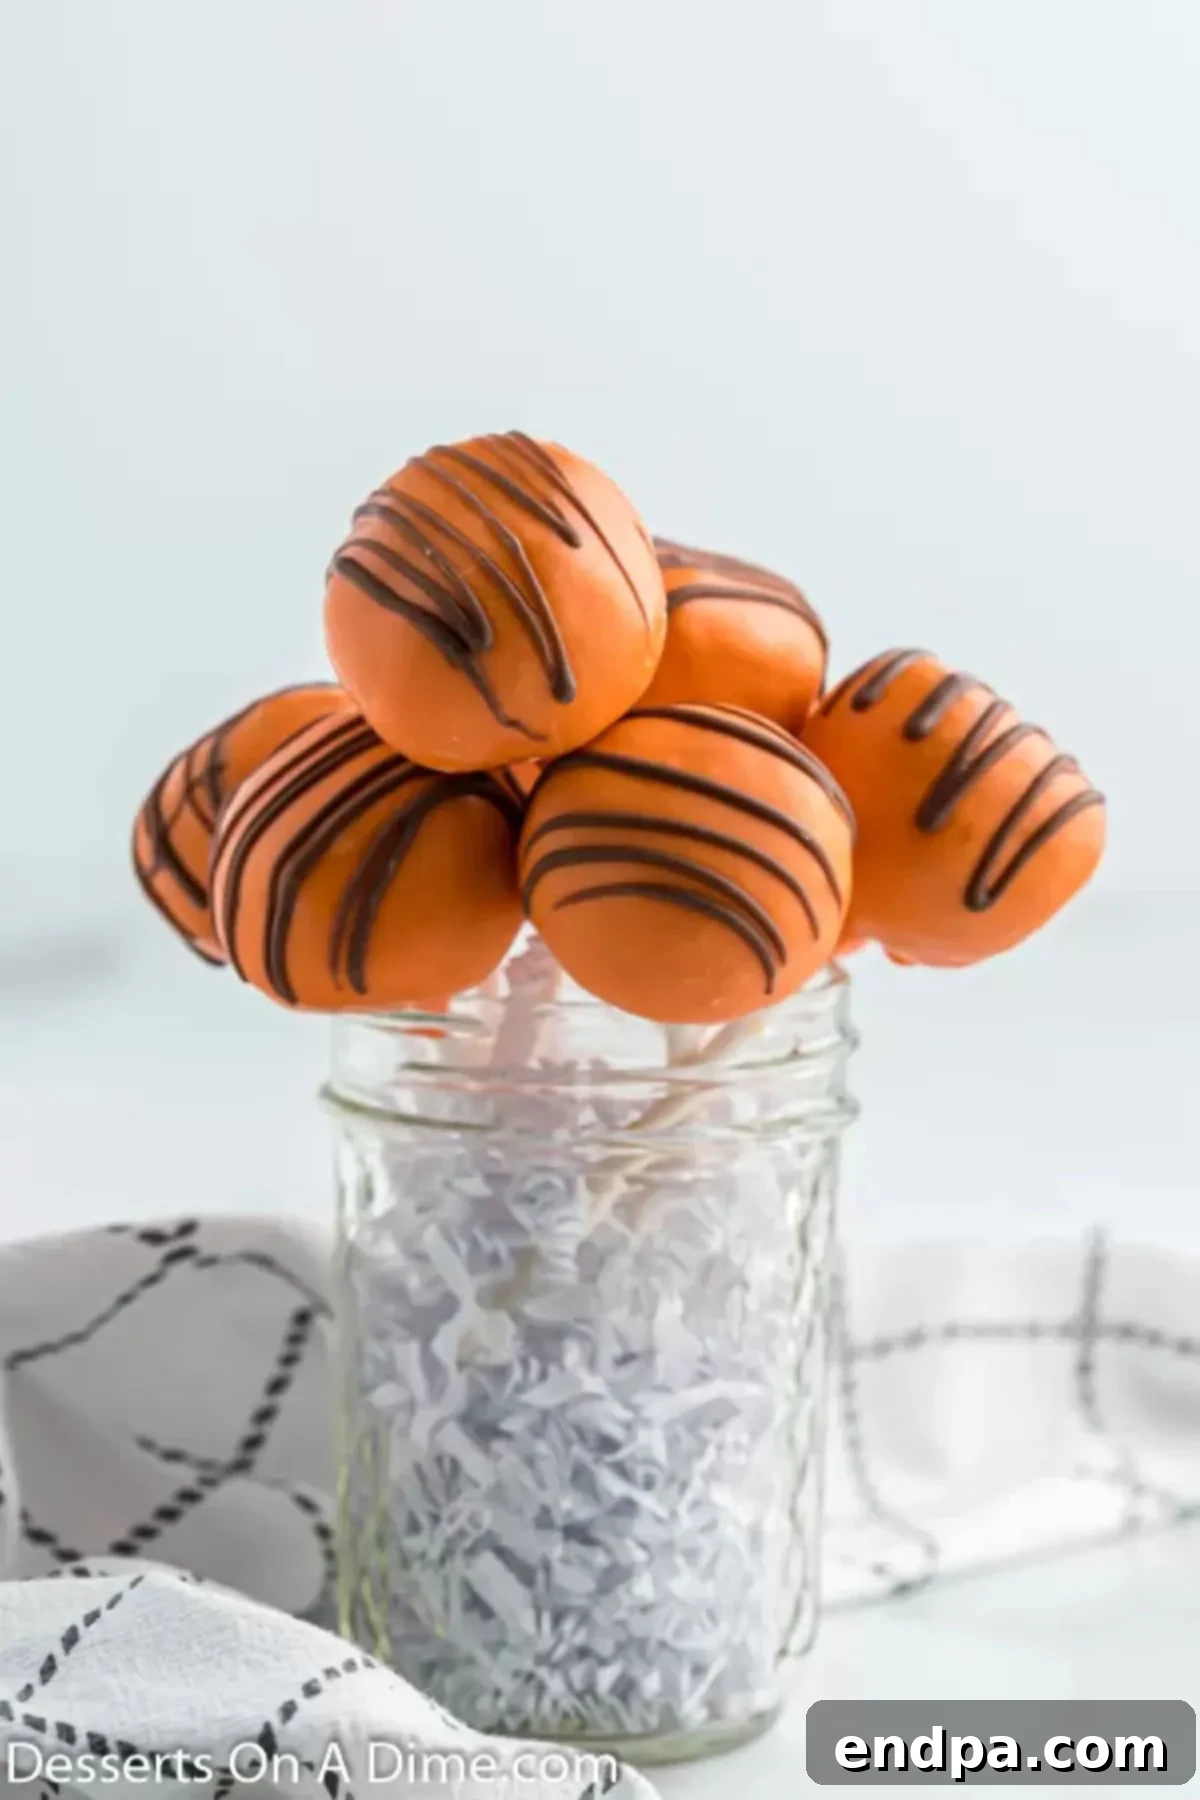
As the leaves begin to turn and the air grows crisp, there’s a certain magic that pumpkin-flavored treats bring to our kitchens. Among the many beloved autumnal delights, Pumpkin Cake Pops stand out as an incredibly charming and irresistibly delicious option. These bite-sized morsels of spiced pumpkin cake, enveloped in a smooth candy coating and often adorned with a delicate chocolate drizzle, are not just desserts; they’re tiny celebrations of the fall season.
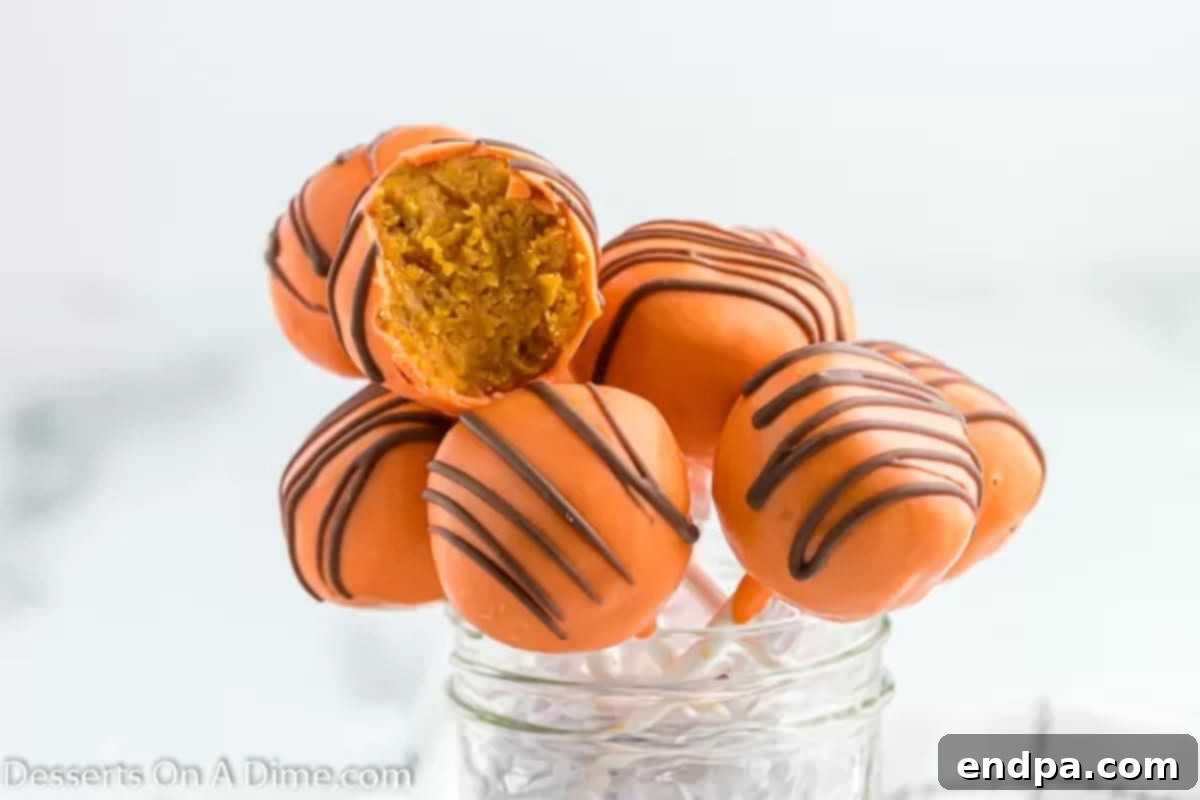
Pumpkin Cake Pops offer a delightful, handheld twist on traditional pumpkin desserts, making them an instant favorite for any occasion. Their smooth candy shell, paired with a rich, spiced interior, creates a flavor and texture combination that’s truly extraordinary. Beyond their incredible taste, these treats shine with a festive, eye-catching presentation that effortlessly elevates any dessert table.
Whether you’re hosting a vibrant fall party, gathering with loved ones for the holidays, or simply craving a sweet, seasonal snack at home, these pumpkin cake pops are a perfect choice. They are remarkably easy to make, and the decorating possibilities are endless, ensuring they’ll impress guests of all ages. Get ready to embark on a baking adventure that promises both fun and delicious rewards!
If you’re looking to expand your repertoire of pumpkin-inspired recipes, I highly recommend trying our Creamy Pumpkin Dip with Cool Whip for an effortless appetizer, or the decadent Pumpkin Lasagna Dessert Recipe for a layered delight. For those seeking other stress-free holiday options, explore our collection of No-Bake Thanksgiving Desserts.
What’s in this post: Delicious Pumpkin Cake Pops Recipe
- Why These Pumpkin Cake Pops are a Must-Try
- Gather Your Ingredients
- Essential Equipment for Cake Pops
- Creative Variations to Try
- Step-By-Step Instructions for Perfect Cake Pops
- Expert Tips for Success
- Fun Decorating Ideas
- Proper Storage Techniques
- Common Cake Pop Mistakes to Avoid
- Serving Suggestions
- More Irresistible Cake Pop Recipes
- More Easy Pumpkin Desserts to Enjoy
- Printable Pumpkin Cake Pops Recipe Card
Why These Pumpkin Cake Pops are a Must-Try
There are countless reasons to fall in love with these delightful pumpkin cake pops. They encapsulate everything wonderful about autumn baking in one perfect bite:
- Perfectly Bite-Sized Fun – Their small size makes them ideal for snacking, sharing, and serving at parties. They offer a neat, portion-controlled indulgence that’s easy for guests of all ages to enjoy without cutlery.
- Irresistible Seasonal Flavor – Infused with warm, aromatic pumpkin spices and moist pumpkin puree, these cake pops deliver the quintessential taste of fall. It’s a flavor profile that evokes comfort, coziness, and holiday cheer.
- Smooth Candy Coating & Elegant Chocolate Drizzle – The crisp candy shell provides a satisfying textural contrast to the soft cake interior, adding an extra layer of sweetness. A delicate chocolate drizzle not only enhances the flavor but also contributes to a sophisticated, festive aesthetic.
- Effortlessly Customizable – This recipe is a fantastic canvas for your creativity! Easily personalize your cake pops with a variety of sprinkles, different colored candy melts, or unique themed designs to match any holiday or celebration.
- Ideal for Gatherings – These cake pops are a guaranteed crowd-pleaser. They are fun to prepare, beautiful to display, and a joy to eat, making them the ultimate dessert for holiday parties, school events, or seasonal family get-togethers.
- Simple & Rewarding Process – Despite their impressive appearance, making pumpkin cake pops is surprisingly straightforward. The process is enjoyable and the results are consistently delightful, leaving you with a sense of accomplishment and a tray full of delicious treats.
Gather Your Ingredients
Creating these heavenly pumpkin cake pops requires a few simple ingredients, easily found at any grocery store. Each component plays a vital role in achieving that perfect balance of flavor and texture:
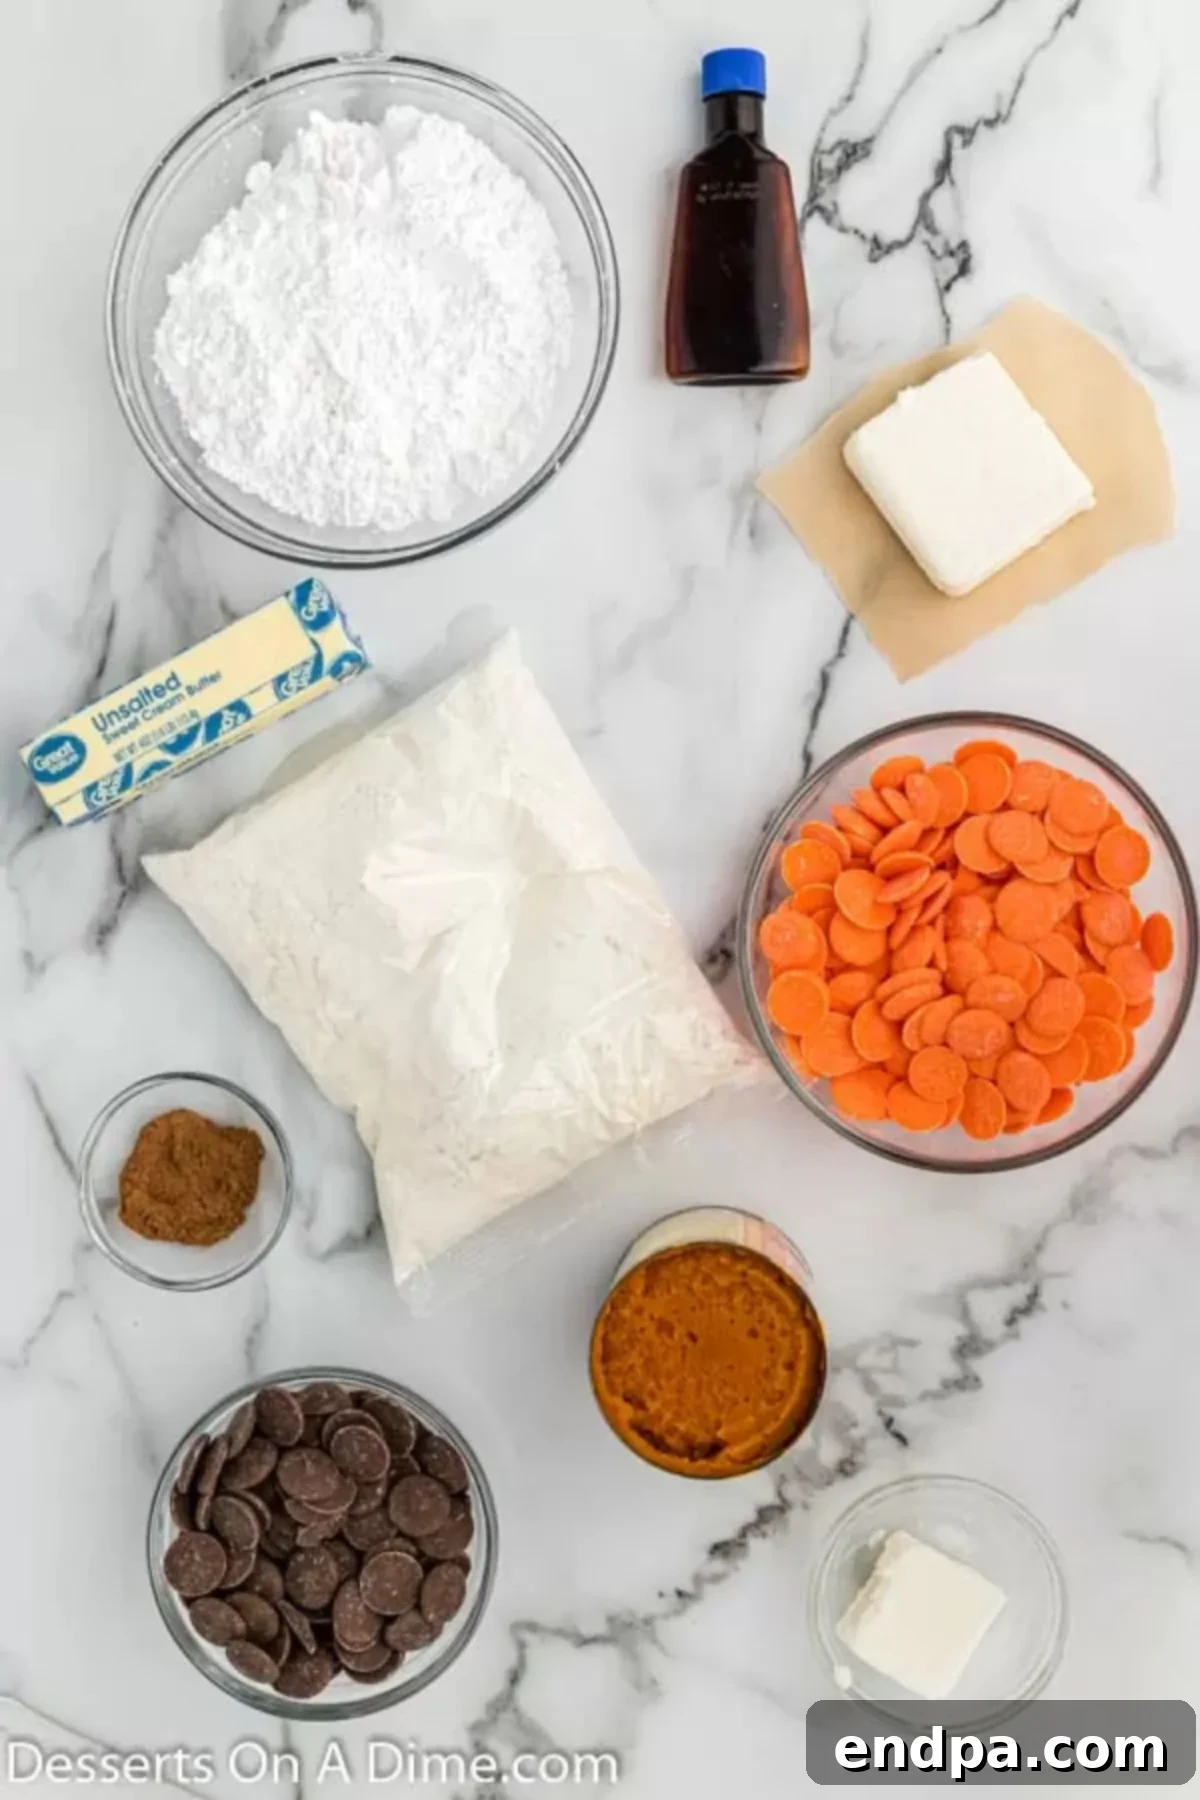
For the Moist Pumpkin Cake Base
- Yellow Cake Mix – This provides a convenient and reliable foundation for our cake pops, ensuring a light and fluffy texture. It’s a fantastic shortcut that doesn’t compromise on taste.
- Pumpkin Puree – The star of the show! Pumpkin puree adds incredible moistness to the cake and infuses it with that quintessential fall flavor. Make sure to use pure pumpkin puree, not pumpkin pie filling.
- Pumpkin Pie Spice – A blend of cinnamon, nutmeg, ginger, and cloves, this spice mix enhances the natural sweetness of the pumpkin and gives the cake its warm, inviting, and truly autumnal aroma.
For the Velvety Cream Cheese Frosting
- Unsalted Butter, softened – Essential for creating a rich, smooth, and creamy frosting that binds the cake crumbs together. Softened butter blends easily without lumps.
- Cream Cheese, softened – Provides the signature tangy flavor and luscious, smooth consistency that makes cream cheese frosting so irresistible. Ensure it’s at room temperature for easy blending.
- Vanilla Extract – A touch of vanilla brightens and balances the rich flavors of the butter and cream cheese, adding depth to the frosting.
- Powdered Sugar (Confectioners’ Sugar) – Sweetens the frosting and helps it achieve a smooth, stable texture that can easily hold the cake pop shape.
For the Perfect Cake Pop Assembly & Coating
- Orange Candy Melts – These vibrant candy melts provide a beautiful, festive, and smooth coating for your pumpkin cake pops. They melt easily and set quickly, creating a professional finish.
- Chocolate Candy Melts – Used for drizzling, chocolate candy melts add an appealing visual contrast and a delightful hint of chocolate flavor, complementing the pumpkin spice perfectly.
- Vegetable Shortening – A secret weapon for perfect dipping! Adding a small amount of vegetable shortening helps to thin out the candy melts, making them easier to work with and ensuring a wonderfully smooth, streak-free finish.
- Lollipop Sticks – Crucial for turning your cake balls into actual “cake pops,” making them easy to hold, dip, and display.
- Optional: Sprinkles or Edible Glitter – For an extra touch of festivity and personalization.
You can find the complete ingredient quantities and precise measurements in the detailed recipe card at the bottom of this post.
Essential Equipment for Cake Pops
While the ingredients are key, having the right tools can make the cake pop making process even smoother and more enjoyable. Here’s what you’ll need:
- 9×13 Inch Baking Pan: For baking your pumpkin cake base.
- Large Mixing Bowls: Several for combining cake ingredients, preparing frosting, and mixing cake crumbs with frosting.
- Electric Mixer (Stand or Handheld): Essential for easily beating butter and cream cheese for the frosting, ensuring a smooth and fluffy consistency.
- Rubber Spatula: For scraping bowls and folding ingredients.
- Parchment Paper or Silicone Baking Mats: To line cookie sheets, preventing sticking and making cleanup a breeze.
- Cookie Scoop (1.5-2 tablespoon size): This is highly recommended for portioning out uniform cake balls, which leads to consistent cake pop sizes.
- Microwave-Safe Bowls: For melting candy melts in short intervals.
- Styrofoam Block or Cake Pop Stand: Absolutely essential for holding your freshly dipped cake pops upright while the candy coating sets. This prevents flat spots and ensures a perfect finish.
Creative Variations to Try
While the classic pumpkin cake pop is undeniably delicious, there are many ways to customize this recipe to suit your taste or occasion. Don’t be afraid to get creative!
- Rich Dark Chocolate Coating – For a more sophisticated and less sweet option, dip the cake balls in high-quality melted dark chocolate instead of using candy melts. This provides an intense, rich flavor that beautifully complements the pumpkin spice.
- Elegant White Chocolate Finish – Dip your cake balls in melted white chocolate for a creamy, sweet coating and a lighter, more ethereal aesthetic. You can leave them plain or add a contrasting drizzle.
- Spice It Up (or Down) – Adjust the amount of pumpkin pie spice to your preference. For a bolder flavor, add an extra ½ teaspoon. If you prefer a milder spice, reduce it slightly. You could also add a pinch of ground cloves or ginger for a different nuance.
- Nutty Texture – For an added crunch and flavor dimension, finely chop some pecans or walnuts and fold them into the cake mixture before rolling. Be careful not to add too many, as it might affect the cake balls’ ability to hold their shape.
- Holiday Sprinkles – Beyond orange and chocolate, use themed sprinkles for different holidays. Think ghost shapes for Halloween, colorful leaf sprinkles for Thanksgiving, or festive red and green for Christmas.
- Colored Candy Melts – Experiment with different colored candy melts. Green for a “Grinch” theme, brown for a “dirt” effect, or even a mix of colors swirled together for a marbled look.
- Caramel Drizzle – Instead of or in addition to chocolate, drizzle warmed caramel sauce over the set candy coating for an extra layer of sweetness and a sticky, delightful finish.
Step-By-Step Instructions for Perfect Cake Pops
Follow these detailed steps to create your own batch of irresistible pumpkin cake pops. Precision and patience are your best friends here!
- Step 1: Prepare Your Oven and Pan. Preheat your oven to 350 degrees F (175°C). Lightly spray a 9×13 inch baking pan with non-stick cooking spray, ensuring full coverage to prevent sticking.
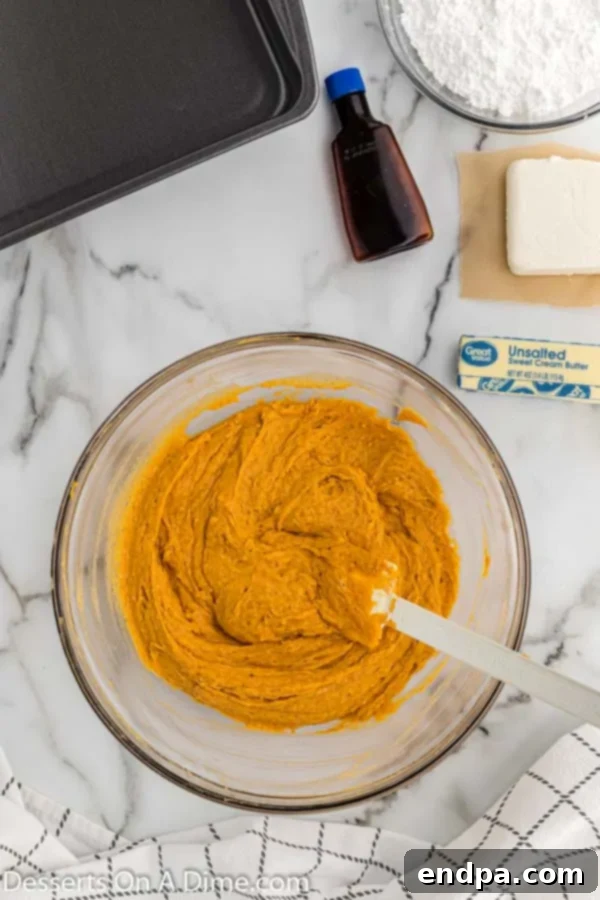
Step 2: Bake the Pumpkin Cake. In a large mixing bowl, combine the yellow cake mix, pumpkin puree, and pumpkin pie spice. Mix thoroughly until no dry streaks remain. Pour the batter evenly into your prepared 9×13 inch pan. Bake for approximately 30-35 minutes, or until a toothpick inserted into the center comes out clean. Once baked, remove the cake from the oven and allow it to cool completely on a wire rack. This is crucial for the texture of your cake pops.
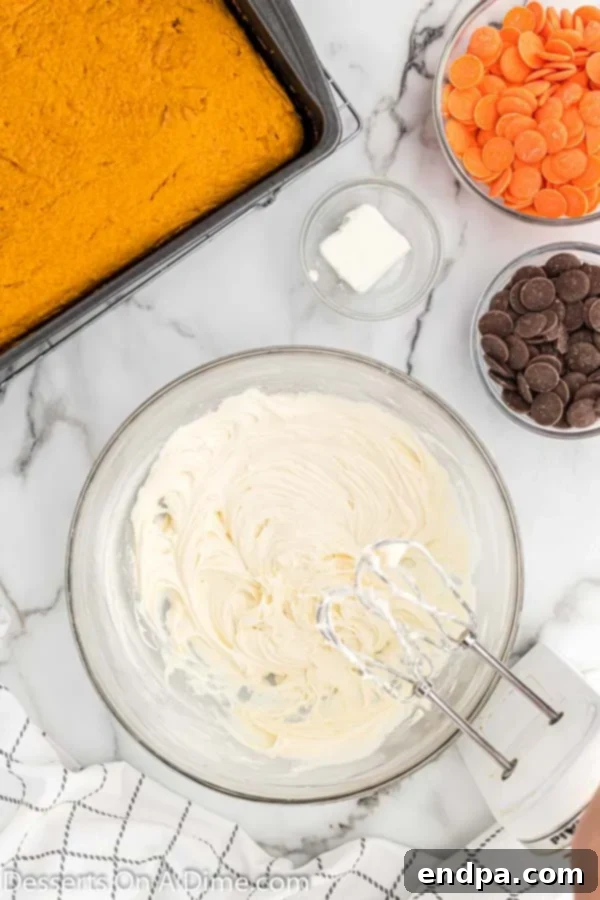
Step 3: Prepare the Cream Cheese Frosting. While the cake bakes and cools, prepare your frosting. In a separate large bowl (or a stand mixer with the paddle attachment), beat the softened unsalted butter and cream cheese together until the mixture is incredibly smooth and fluffy. Scrape down the sides of the bowl as needed. Next, add the vanilla extract and mix until just combined. Gradually add the powdered sugar, a half-cup at a time, beating on low speed until it is fully incorporated and the frosting is smooth and free of lumps. Increase speed to medium-high and beat until light and airy.
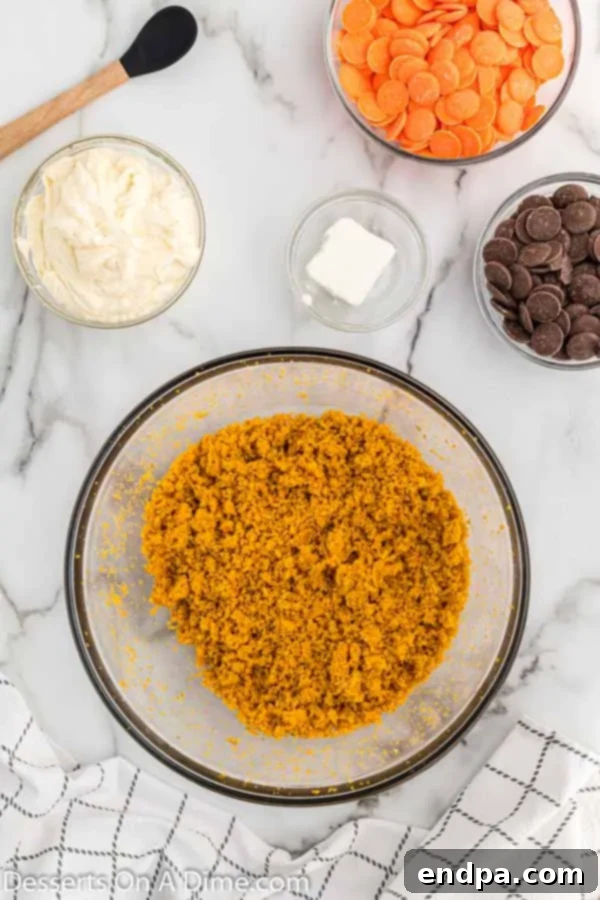
Step 4: Combine Cake and Frosting. Once the cake is completely cool, remove it from the pan. Discard the slightly firmer outside edges and bottom layer of the cake. Crumble the remaining soft cake into a large bowl. Add approximately 1 to 1 ½ cups of your prepared cream cheese frosting to the crumbled cake. Using your hands or a sturdy spatula, mix everything together until well combined. The mixture should be moist enough to hold together when squeezed but not overly sticky. Adjust frosting quantity as needed until you achieve the desired consistency.
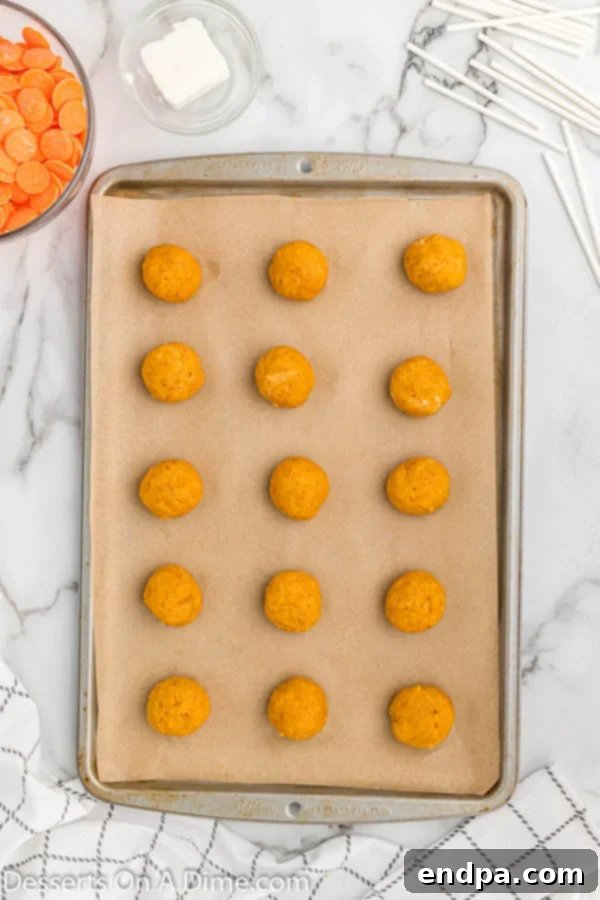
Step 5: Roll and Chill Cake Balls. Line a large cookie sheet with parchment paper. Using a cookie scoop (about 1.5-2 tablespoons), portion out the cake mixture and roll each portion into a smooth, compact ball. This recipe yields about 24-36 cake balls, depending on their size. Place the rolled cake balls onto the prepared cookie sheet. Freeze the cake balls for 10-15 minutes. This chilling step is essential for them to hold their shape during dipping.
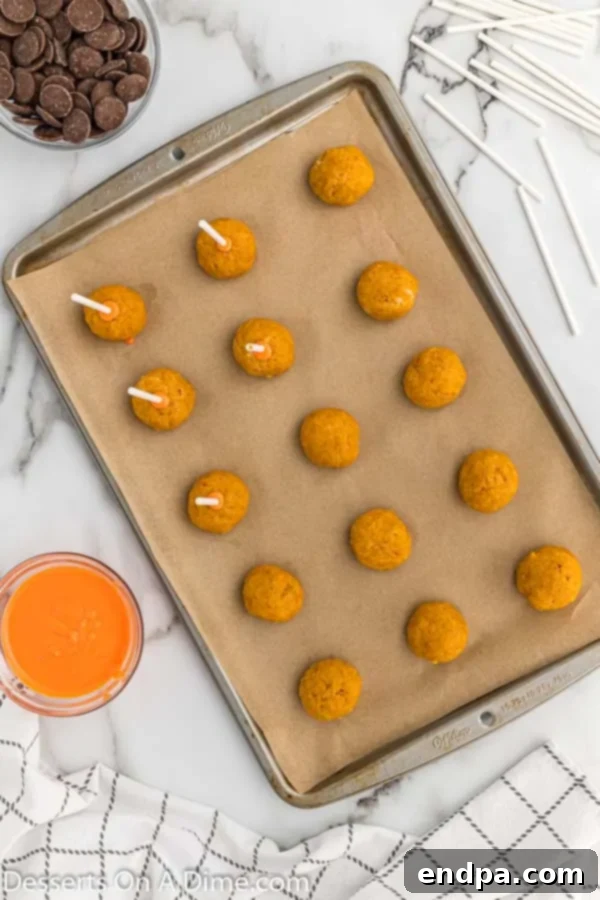
Step 6: Prepare Sticks and First Chill. In a small microwave-safe bowl, melt about half of the orange candy melts with 1 tablespoon of vegetable shortening. Microwave in 30-second intervals, stirring thoroughly after each, until smooth and fluid. Dip one end of each lollipop stick into the melted candy coating, then insert the candy-coated end about halfway into each chilled cake ball. The candy melt will act as “glue” to secure the stick. Return the cake pops to the freezer for another 10-15 minutes to allow the candy on the sticks to set firmly. Do not freeze for longer than 15 minutes at this stage, or the cake balls may crack when dipped.
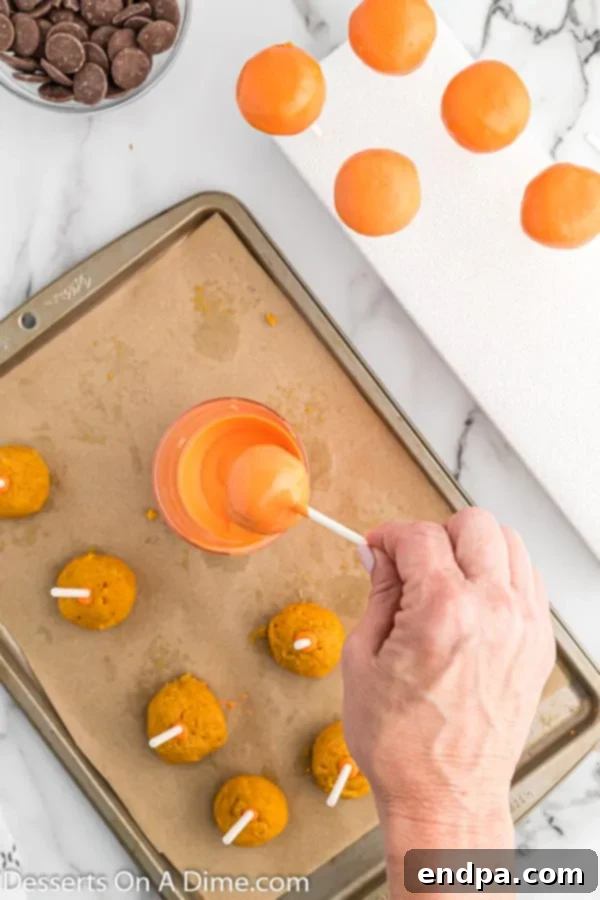
Step 7: Dip the Cake Pops. Re-melt the orange candy melts (and the remaining portion of orange candy melts with 1 tablespoon of shortening, if needed) until smooth and creamy. If it’s too thick, add a bit more shortening slowly until it reaches a good dipping consistency. Hold a cake pop by its stick and immerse it completely into the melted orange candy coating. Gently tap the stick against the side of the bowl to allow any excess candy to drip off. Rotate the cake pop slowly to ensure an even coating. Work quickly, as the cold cake pop will cause the candy to set rapidly. Continue until all cake balls are coated.
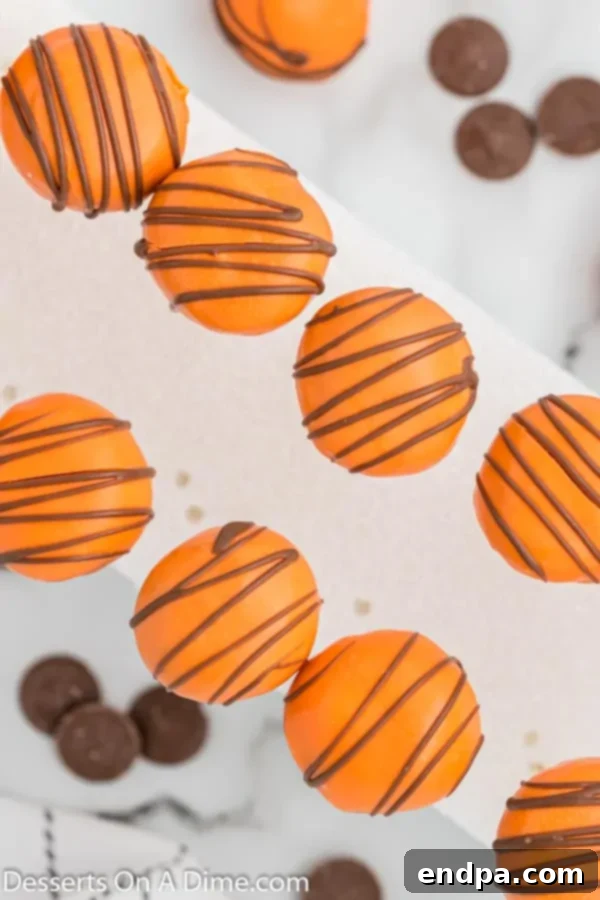
Step 8: Decorate and Set. Immediately after dipping, if you’re using sprinkles, gently sprinkle them over the wet candy coating. Place the stick of each coated cake pop into a styrofoam block or a cake pop stand. This allows the candy coating to dry and solidify evenly without any flat spots. Continue this process until all cake pops are dipped and decorated with sprinkles (if desired).
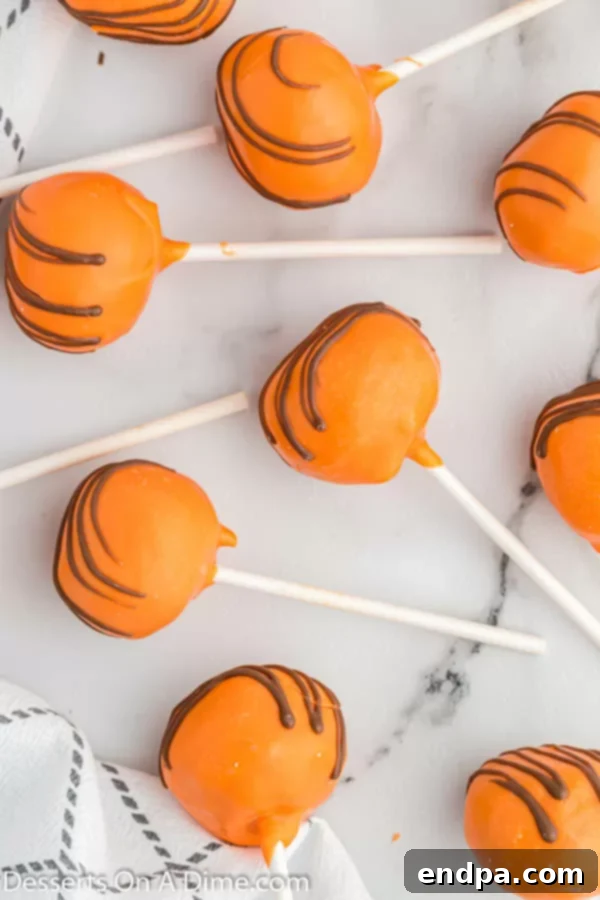
Step 9: Add Chocolate Drizzle (Optional). Melt the chocolate candy melts with the remaining 1 tablespoon of vegetable shortening in a small microwave-safe bowl. Heat in 30-second intervals, stirring until smooth and fluid. Using a spoon or a piping bag with a tiny hole, artfully drizzle the melted chocolate over the set orange cake pops. Allow the chocolate drizzle to set completely (this can be sped up by briefly chilling in the refrigerator) before serving. Once everything is cool and set, your delightful pumpkin cake pops are ready to be enjoyed!
Expert Tips for Success
Achieving perfect cake pops every time can be easy with these insider tips:
- Thin the Candy Melts Properly – This is perhaps the most crucial tip! If your melted candy coating is too thick, it will be hard to dip, create lumps, and may cause the coating to crack. Gradually add vegetable shortening (or a specialized candy melt thinning agent) a tiny bit at a time, stirring continuously, until it reaches a smooth, liquid consistency that’s easy to dip. Think of it like a thin paint.
- Use a Cookie Scoop for Uniformity – To ensure all your cake pops are roughly the same size and cook/chill evenly, use a cookie scoop to portion out the cake mixture. This also makes the rolling process much faster and less messy.
- Achieve the Right Cake Mixture Moisture – The cake and frosting mixture should be moist enough to easily form into a ball without crumbling, but not so sticky that it won’t hold its shape or is difficult to handle. If it’s too dry, add a touch more frosting. If it’s too wet, you can add a tablespoon or two of powdered sugar or finely crushed vanilla wafers to absorb excess moisture.
- Melt Candy in Short Intervals – Overheating candy melts can cause them to seize, become grainy, or burn. Always microwave in short 30-second increments, stirring thoroughly after each interval, until fully melted and smooth. This gentle heating prevents scorching.
- Allow Melted Candy to Cool Slightly – Dipping cold cake balls into very hot candy melts can lead to cracks in the coating. Let your melted candy melts sit for a minute or two after melting to cool slightly before you begin dipping. This minimizes temperature shock.
- Work with Chilled Cake Balls – Ensure your cake balls are adequately chilled before dipping. This helps them stay firm and prevents them from crumbling or losing their shape in the warm candy coating. However, avoid freezing them for too long (more than 15-20 minutes total), as extremely cold cake can also cause the coating to crack.
- Tap Off Excess Coating – After dipping, gently tap the stick of the cake pop against the edge of the bowl. This helps remove excess candy coating, ensuring a thinner, smoother layer and preventing drips.
- Instant Decorating – If you’re adding sprinkles or other small decorations, do so immediately after dipping while the candy coating is still wet. This ensures they adhere properly.
Fun Decorating Ideas
Beyond a simple drizzle, cake pops are a fantastic canvas for creativity. Here are some ideas to make your pumpkin cake pops truly spectacular:
- Autumn Leaves: Use small leaf-shaped sprinkles in red, orange, and yellow to mimic fall foliage.
- Spooky Fun (Halloween): Dip in white candy melts, then use an edible black marker to draw spooky faces for ghost pops, or use green candy melts and chocolate chips for Frankenstein pops.
- Festive Sparkle: Before the coating sets, sprinkle with edible glitter in gold, silver, or iridescent hues for a touch of glamour.
- Patterned Drizzle: Instead of simple lines, try a crosshatch pattern or concentric circles with your chocolate drizzle.
- Miniature Pumpkins: Use green candy melts for a small “stem” on top of the orange cake pop, or even small green nonpareils to resemble vines.
- Nutty Crunch: Finely crush some walnuts, pecans, or even graham crackers and sprinkle them over the wet coating for added texture and flavor.
Proper Storage Techniques
To keep your delicious pumpkin cake pops fresh and delightful for as long as possible, proper storage is key:
Room Temperature: For immediate consumption, cake pops can be stored in an airtight container at room temperature for up to 2 days. Keep them away from direct sunlight or heat sources, as this can melt the candy coating.
Refrigerator: To extend their freshness, place cake pops in a sealed, airtight container in the refrigerator for up to 5 days. The cold temperature helps preserve the cake’s moistness and prevents the candy coating from becoming sticky. Before serving, allow them to come to room temperature for optimal flavor and texture.
Freezer: Cake pops are freezer-friendly! Individually wrap each cake pop tightly in plastic wrap, then place them in a freezer-safe container or resealable bag. They can be stored in the freezer for up to 2 months. To enjoy, thaw them at room temperature for several hours (or overnight in the refrigerator) before unwrapping and serving.
Avoid Humidity: Cake pops, particularly their candy coating, are susceptible to humidity. Store them in a cool, dry place and ensure your containers are properly sealed to prevent the coating from softening, sweating, or becoming sticky.
Common Cake Pop Mistakes to Avoid
Even seasoned bakers can run into issues with cake pops. Knowing these common pitfalls can help you avoid frustration and achieve picture-perfect results:
- Too Much Frosting: Over-mixing cake crumbs with too much frosting results in a very sticky, dense mixture that’s hard to roll and can cause the cake balls to crack when dipped or become too soft. Stick to the recommended amount or add gradually until just combined and moldable.
- Insufficient Chilling: If your cake balls aren’t cold enough, they will fall off the stick or crumble when dipped into the warm coating. Ensure they are firm, but not frozen solid, before dipping.
- Over-Frozen Cake Balls: Paradoxically, cake balls that are too cold (frozen for too long) can also cause problems. The drastic temperature difference between a rock-solid cake ball and warm candy coating can lead to the coating cracking as it sets.
- Overheating Candy Melts: As mentioned in our pro tips, overheating candy melts leads to seizing and a thick, unworkable consistency. Always use short intervals and stir well.
- Too Thick Coating: Not thinning your candy melts enough will result in a heavy, uneven, and clumpy coating. A smooth, thin coating is key for an elegant finish.
- Dipping Too Slowly: The longer a cake pop stays in the warm candy, the softer the cake ball gets, increasing the chance of it falling apart or off the stick. Dip quickly and efficiently.
- Incorrect Stick Insertion: If the stick isn’t glued into the cake ball with candy melt, or isn’t inserted deep enough, the cake pop will likely fall off when dipped or handled.
- Not Tapping Off Excess: Failure to tap off excess candy coating leads to drips, puddles, and an unappealing base, as well as a thicker, less desirable coating.
Serving Suggestions for Pumpkin Cake Pops
These delightful treats are versatile and can be presented in many ways to suit your event:
- Dessert Platter: Arrange them artfully on a large platter with other fall-themed desserts like mini pumpkin pies or apple tarts.
- Styrofoam Display: Use a decorative styrofoam block or a dedicated cake pop stand to display them upright, creating an impressive centerpiece.
- Individual Favors: Wrap each cake pop in a small cellophane bag with a ribbon for charming party favors or hostess gifts.
- Coffee or Tea Pairing: Serve them alongside freshly brewed coffee, spiced chai tea, or a warm mug of apple cider for a cozy autumn treat.
- Kids’ Parties: These are always a hit with children! Arrange them on a colorful stand for easy grabbing.
- Dessert Skewers: For a varied display, alternate cake pops with fresh fruit or brownies on longer skewers.
More Irresistible Cake Pop Recipes
If you’ve enjoyed making these pumpkin cake pops, you’ll love exploring other flavors and themes:
- Decadent Chocolate Cake Pops
- Festive Birthday Cake Pops
- Copycat Starbucks Cake Pops Recipe
- Classic Red Velvet Cake Balls Recipe
- Crunchy Oreo Cake Pops
- Spooktacular Halloween Cake Pops
More Easy Pumpkin Desserts to Enjoy
The deliciousness of pumpkin doesn’t stop here! Discover more simple and satisfying pumpkin desserts:
- Effortless Pumpkin Dump Cake Recipe
- Simple No-Bake Pumpkin Pie
- Hearty Pumpkin Crisp Recipe
- Easy Pumpkin Cobbler Recipe
- Delightful Pumpkin Whoopie Pies
I’m incredibly excited for you to try this delightful Pumpkin Cake Pops recipe! It’s truly one of my favorite ways to celebrate the flavors of fall. Please leave a comment and let me know how they turned out once you make them. Happy baking!
Pumpkin Cake Pops Recipe
Rating: 4.80 from 145 votes
10 mins
30 mins
15 mins
55 mins
24
American
Dessert
224
Carrie Barnard
Ingredients
FOR THE PUMPKIN CAKE:
- 1 box Yellow Cake mix (15 oz)
- 1 can Pumpkin Puree (15 oz)
- 1 tsp Pumpkin Pie Spice
FOR THE CREAM CHEESE FROSTING:
- ½ cup unsalted butter (softened)
- 4 oz Cream Cheese (softened at room temperature)
- 1 tsp Vanilla Extract
- 1 ½ cup Powdered Sugar
FOR THE CAKE POPS:
- 12 oz Orange Candy Melts
- 6 oz Chocolate Candy Melts
- 3 Tbsp Vegetable Shortening (divided)
Instructions
FOR THE CAKE:
- Preheat the oven to 350 degrees F (175°C) and spray a 9×13 inch baking pan with non-stick cooking spray.
- Mix together the yellow cake mix, pumpkin puree, and pumpkin pie spice in a large mixing bowl until well combined.
- Pour the batter into the prepared pan and bake for 30-35 minutes, or until a toothpick inserted into the center of the cake comes out clean.
- Allow the cake to cool completely on a wire rack before proceeding.
FOR THE FROSTING:
- Beat the softened unsalted butter and cream cheese together in a large bowl until smooth and fluffy.
- Add in the vanilla extract and mix until just combined.
- Gradually add the powdered sugar, slowly incorporating it until the frosting is smooth, creamy, and free of lumps.
TO MAKE THE CAKE POPS:
- Remove the cooled cake from the pan. Discard the outer crust and edges of the cake.
- Crumble the remaining soft cake into a large bowl.
- Add approximately 1 to 1 ½ cups of the prepared cream cheese frosting to your crumbled cake. Stir everything together until well combined. The mixture should be moist enough to hold its shape when rolled into balls, but not overly sticky. Adjust frosting amount if necessary.
- Shape the mixture into about 24-36 cake balls (depending on your desired size) and place them on a parchment-lined cookie sheet. Use a cookie scoop to ensure uniform sizing.
- In a small microwave-safe bowl, melt 6 oz of the orange candy melts with 1 Tbsp of vegetable shortening. Microwave in 30-second intervals, stirring after each, until fully melted and creamy.
- Dip one end of each lollipop stick into the melted candy, then insert it about halfway into each cake ball. This “glues” the stick in place. Place the cake pops (with sticks) in the freezer for 10-15 minutes to firm up (do not freeze for longer than 15 minutes).
- Re-melt the remaining 6 oz of orange candy melts with 1 Tbsp of vegetable shortening until smooth (re-melt the first batch if it has solidified). Holding a chilled cake pop by its stick, dip it completely into the melted orange candy coating. Gently tap off any excess coating back into the bowl.
- Immediately after dipping, if desired, add sprinkles or other decorations. Place the stick of each coated cake pop into a block of styrofoam or a cake pop stand while the candy dries and solidifies.
- Continue until all cake pops have been covered and decorated. Next, melt the chocolate candy melts with the remaining 1 Tbsp of shortening in a microwave-safe bowl in 30-second intervals until melted and smooth. Drizzle this melted chocolate over the orange cake pops.
- Allow the chocolate drizzle to set completely (you can briefly refrigerate to speed this up). Once cool and firm, they are ready to enjoy!
Recipe Notes
Store leftover cake pops in an airtight container at room temperature for up to 1 week, or refrigerate for longer freshness.
If the melted candy coating becomes too thick during dipping, thin it out by adding a small amount of vegetable shortening (half a teaspoon at a time), stirring until it reaches a smooth, dip-able consistency.
Nutrition Facts
Carbohydrates 28g,
Protein 2g,
Fat 12g,
Saturated Fat 7g,
Polyunsaturated Fat 2g,
Monounsaturated Fat 3g,
Trans Fat 1g,
Cholesterol 15mg,
Sodium 175mg,
Potassium 104mg,
Fiber 1g,
Sugar 21g,
Vitamin A 2940IU,
Vitamin C 1mg,
Calcium 38mg,
Iron 1mg
