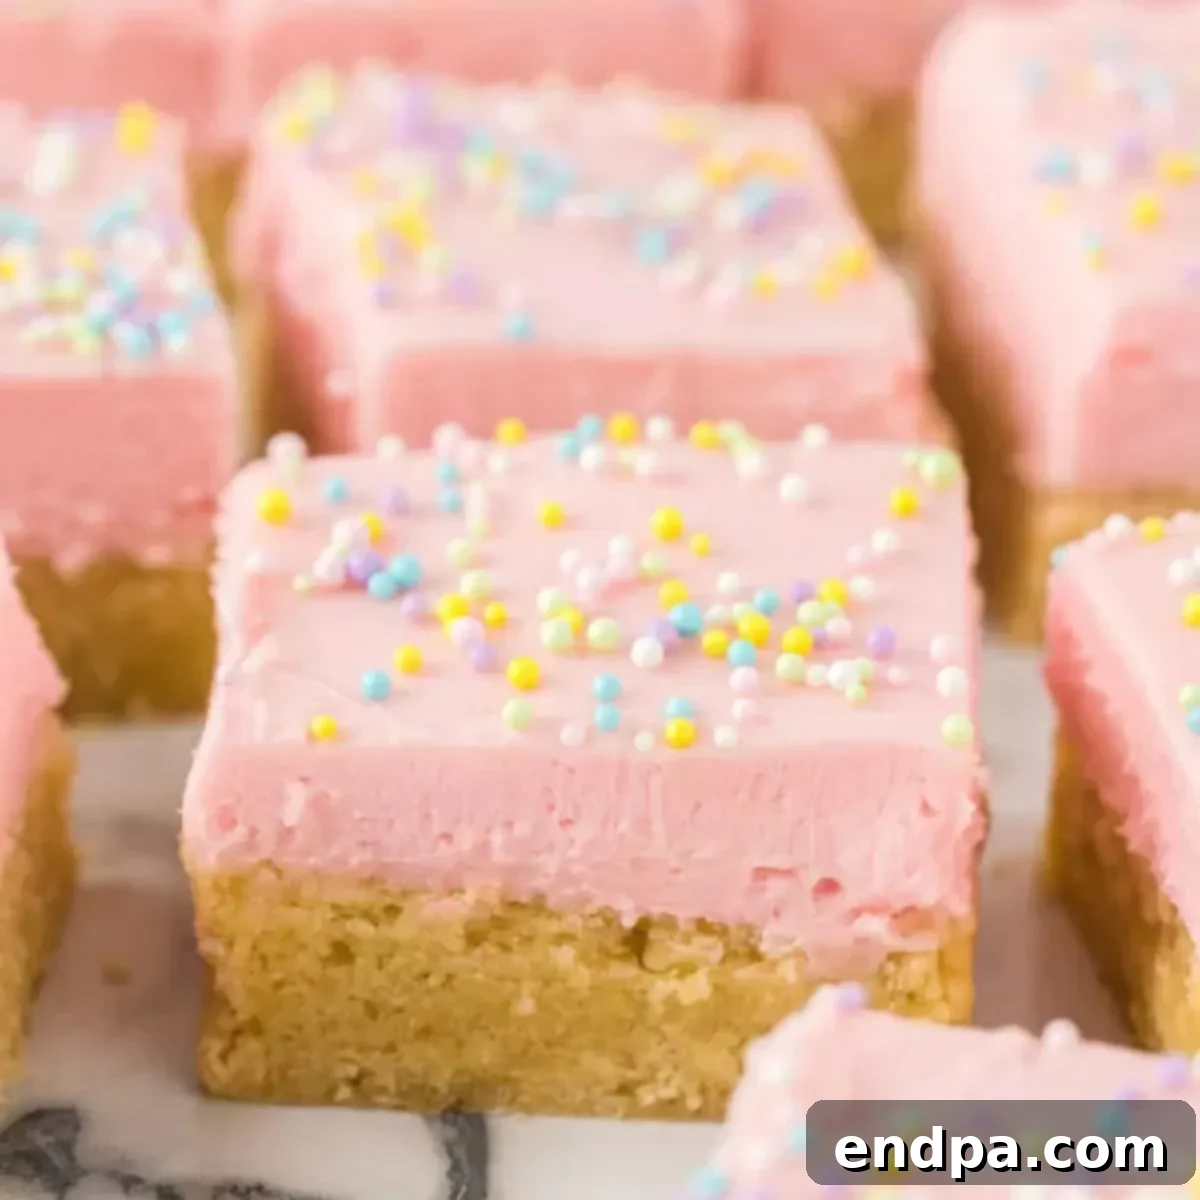
Sugar Cookie Bars are a delightful twist on a classic favorite, offering all the beloved flavors of traditional sugar cookies in an easy-to-serve bar format. These thick, soft, and utterly delicious bars are topped with a dreamy, creamy frosting and festive sprinkles, making them the perfect treat for any occasion. Forget the fuss of rolling and cutting individual cookies; these bars come together quickly, delivering decadent results with minimal effort. Whether you’re a seasoned baker or just starting out, this recipe promises a delightful experience and a crowd-pleasing dessert that everyone will adore.
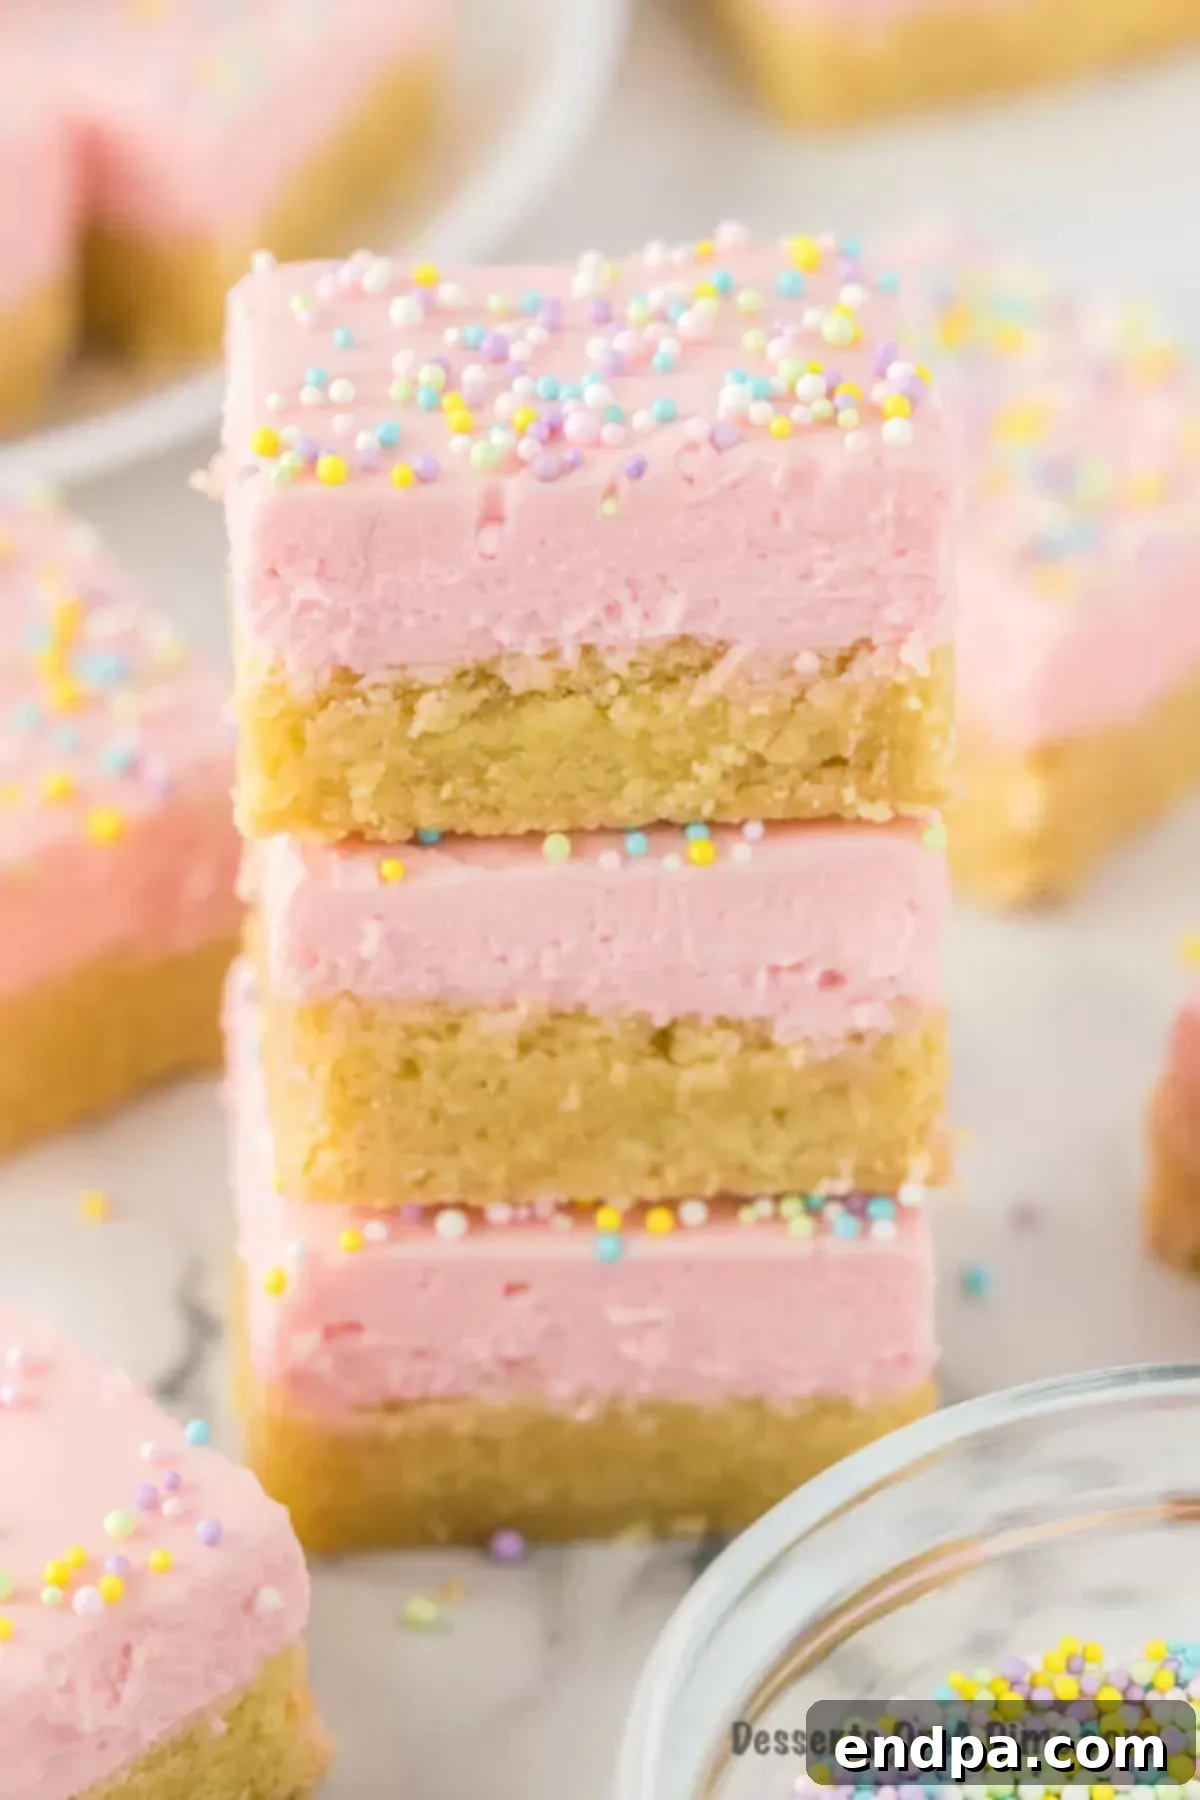
There’s something truly special about these homemade sugar cookie bars. They capture the nostalgic taste of a soft sugar cookie, but with a rich, chewy texture that’s simply irresistible. The convenience of baking them in a single pan means less time in the kitchen and more time enjoying your delicious creation. The luscious frosting, which can be tinted any color you desire, elevates these bars from a simple dessert to a festive masterpiece. We often opt for vibrant pink to add a pop of color, but feel free to get creative with your palette to match holidays, parties, or simply your mood!
If you’re a fan of easy-to-make dessert bars, you’ll find these sugar cookie bars to be a fantastic addition to your repertoire. They are as satisfying and versatile as our popular Cookie Dough Bars and Magic Cookie Bars. For those who can’t get enough of that classic sugar cookie flavor, explore other delightful options like our Sugar Cookie Dip, a festive Fruit Pizza, or our unique Sour Cream Sugar Cookies. Each recipe offers a different way to enjoy the beloved taste of sugar cookies, ensuring there’s always a perfect treat for every craving.
Table of Contents
- Why You’ll Love This Recipe
- Essential Equipment
- Ingredients for Sugar Cookie Bars
- Ingredients for Creamy Frosting
- Delicious Variations
- Step-by-Step Guide to Making Sugar Cookie Bars
- Expert Baking Tips for Perfect Bars
- Frequently Asked Questions
- More Irresistible Cookie Recipes
Why You’ll Love This Recipe: The Ultimate Sugar Cookie Bar Experience
If the mere mention of soft, chewy sugar cookies makes your mouth water, then these sugar cookie bars are about to become your new obsession. This recipe transforms the classic sugar cookie experience into an effortlessly delightful dessert that’s perfect for any occasion. Here’s why we, and soon you, will absolutely adore them:
- Incredibly Soft and Chewy Texture: Unlike some sugar cookies that can be stiff or crumbly, these bars boast an irresistible softness and chewiness that makes every bite pure bliss. They are thick, moist, and perfectly tender, offering a comforting chew that’s simply divine.
- Effortless Preparation: Say goodbye to the tedious process of chilling dough, rolling it out, and cutting individual cookies. These sugar cookie bars are baked in a single pan, significantly cutting down on prep time and making cleanup a breeze. It’s one of the easiest cookie bar recipes you’ll ever master, ideal for busy weeknights or spontaneous gatherings.
- Versatile Decoration: The simple yet divine buttercream frosting is a blank canvas for your creativity. Add food coloring to match any holiday, party theme, or personal preference, and finish with a sprinkle of your favorite decorations to make them truly pop.
- Crowd-Pleasing Perfection: Whether it’s a birthday party, a festive holiday gathering, a casual potluck, or just a sweet treat for your family, these sugar cookie bars are guaranteed to be a hit. Their familiar flavor and appealing presentation make them universally loved by all ages.
- Adaptable for Any Season or Celebration: With a quick change of frosting color and sprinkles, these bars can seamlessly fit into any season or celebration throughout the year. Think vibrant red and green for Christmas, delicate pastels for Easter, spooky orange and black for Halloween, or cheerful bright colors for summer picnics.
- A Step Up from the Basics: While incredibly simple to prepare, this recipe feels gourmet. It offers a rich, decadent flavor profile that rivals any bakery treat, proving that homemade truly is best and most rewarding.
These bars are not just a dessert; they’re a celebration in every bite, offering convenience without sacrificing flavor or texture. They’re a fantastic alternative to traditional cookies, providing a different experience and an even easier serving solution for any gathering. If you love simple yet spectacular treats, you’ll also enjoy exploring our Easy Blondie Recipe for another delightful bar dessert.
Essential Equipment for Baking Success
Having the right tools can make all the difference in your baking experience, transforming the process from a chore into a joy. For these sugar cookie bars, you’ll need a few basic kitchen essentials to ensure smooth preparation and perfectly baked, beautifully frosted results:
- 9×13 Inch Baking Pan: This standard pan size is ideal for achieving the perfect thickness and chewiness for your sugar cookie bars. A light-colored metal pan is generally recommended for even heat distribution and baking, preventing overly browned edges while the center remains undercooked.
- Large Mixing Bowls (2-3): You’ll need at least two – one for creaming your wet ingredients and another for combining the dry ingredients. A third can be helpful for preparing the frosting separately. Choose bowls large enough to prevent ingredients from spilling during mixing.
- Electric Mixer (Stand or Handheld): While a good sturdy whisk can work for some parts, an electric mixer is highly recommended. A stand mixer fitted with the paddle attachment will make creaming the butter and sugar for both the cookie dough and frosting significantly easier and more efficient. It ensures a consistently smooth and aerated mixture, which is crucial for soft cookie bars and fluffy frosting. A handheld mixer is also a great option if a stand mixer isn’t available.
- Rubber Spatula: An indispensable tool for scraping down the sides of your mixing bowls, folding in dry ingredients without overmixing, and gently spreading the cookie dough evenly into the baking pan. Its flexibility allows you to get every last bit of batter and frosting.
- Measuring Cups and Spoons: Accurate measurements are paramount in baking. Ensure you have a reliable set for both dry ingredients (flour, sugar) and liquid ingredients (vanilla, milk). Leveling dry ingredients properly is key to preventing a dense or dry final product.
- Wire Cooling Rack: Allowing the baked bars to cool completely and evenly on a wire rack is absolutely vital before you even think about applying the frosting. This prevents condensation from forming on the bottom of the bars and stops the frosting from melting prematurely.
- Sharp Knife or Pizza Cutter: For cleanly slicing your cooled and frosted bars into neat, individual servings. A sharp knife ensures smooth cuts, while a pizza cutter can be surprisingly efficient for straight lines.
- Parchment Paper or Non-Stick Cooking Spray: To ensure your bars don’t stick to the pan and lift out easily for frosting and slicing. Parchment paper also makes cleanup incredibly simple.
- Sifter (Optional but Recommended): For the powdered sugar in the frosting. Sifting ensures a silky-smooth, lump-free frosting texture that is a joy to spread.
Gathering these items before you begin your baking adventure will streamline the entire process, minimize stress, and set you up for absolute success in creating these irresistible sugar cookie bars!
Ingredients for Sugar Cookie Bars: The Building Blocks of Deliciousness
Crafting the perfect sugar cookie bar starts with selecting quality ingredients. This recipe utilizes simple, everyday pantry staples, yet each plays a crucial role in creating the rich, buttery, and irresistibly soft base that defines these delectable bars. Here’s a detailed look at what you’ll need for the cookie portion of this delightful treat:
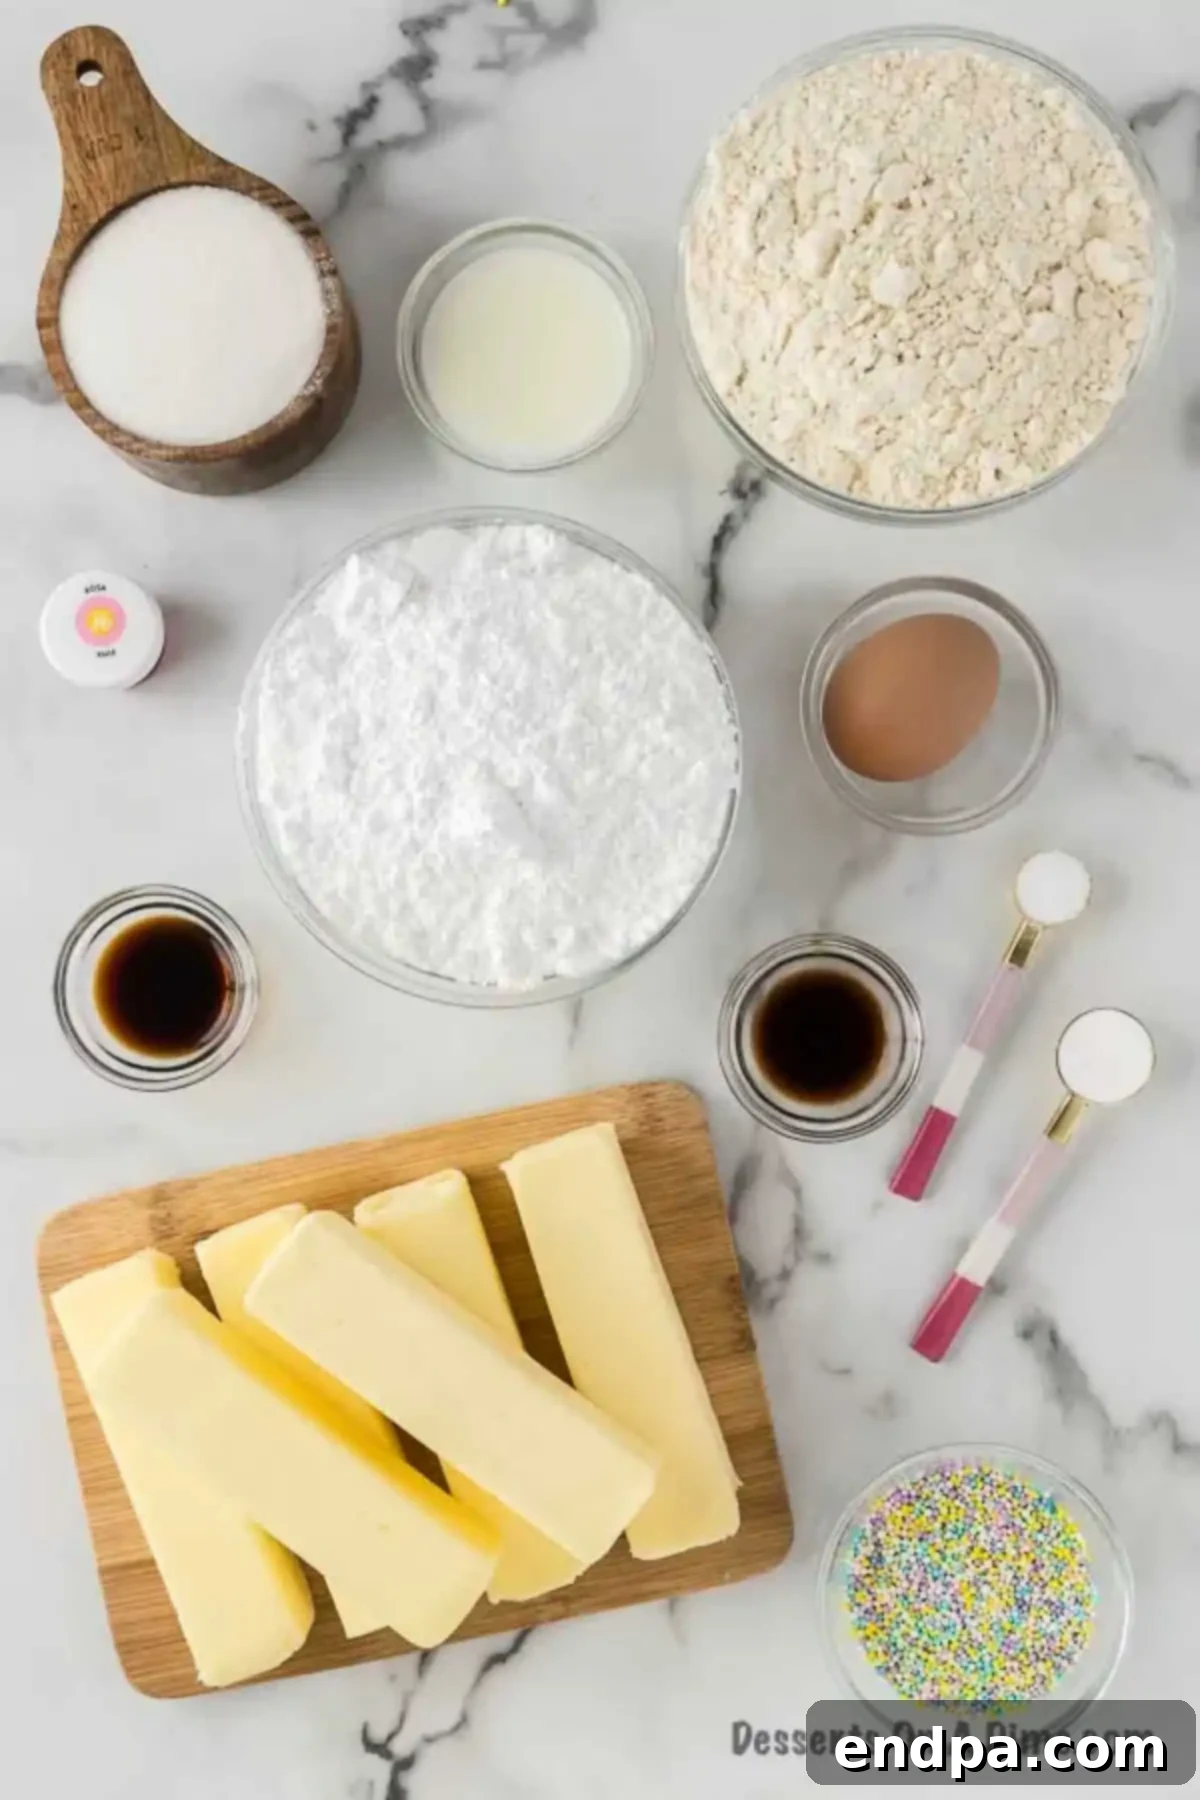
For the Cookie Bars:
- Unsalted Butter (¾ cup / 1 ½ sticks): This is the foundation of flavor and tenderness. Using unsalted butter allows you to control the overall saltiness of the recipe. Ensure it’s properly softened to room temperature before you begin. Softened butter creams optimally with sugar, creating tiny air pockets that are vital for a lighter, fluffier dough and a tender, melt-in-your-mouth cookie texture.
- Granulated Sugar (1 cup): Provides the primary sweetness for the bars and also contributes significantly to their tender texture. When creamed with butter, it helps to aerate the dough, resulting in a perfectly soft crumb with just a hint of crispness at the edges.
- Large Egg (1): Acts as a crucial binder in the dough, adding moisture, richness, and helping to hold all the ingredients together. The egg also contributes to the chewy texture and helps the bars rise slightly during baking.
- Pure Vanilla Extract (2 tsp): A generous amount of high-quality pure vanilla extract is absolutely key to achieving that classic, inviting, and warm flavor profile synonymous with beloved sugar cookies. Avoid imitation vanilla for the best taste outcome.
- All-Purpose Flour (2 ¼ cups): This is the main structural component of your cookie bars. For accurate and consistent results, it’s best practice to spoon the flour into your measuring cup and then level it off with the back of a knife or a straight edge, rather than scooping directly from the bag. This prevents compacting the flour and inadvertently adding too much, which can lead to dry, dense, or tough bars.
- Baking Powder (1 tsp): The essential leavening agent in this recipe. Baking powder reacts with moisture and heat to create carbon dioxide bubbles, which give the cookie bars their characteristic soft, slightly cakey, and risen texture, preventing them from being too flat or dense.
- Salt (½ tsp): A small but mighty ingredient! Salt plays a critical role in balancing and enhancing all the other flavors in the cookie, particularly the sweetness. It prevents the bars from tasting bland and adds depth to the overall profile.
Ingredients for Creamy Frosting:
No sugar cookie bar is truly complete without a generous layer of decadent, smooth, and easily spreadable frosting. This simple buttercream comes together beautifully and offers endless possibilities for customization, adding both visual appeal and a burst of flavor.
- Unsalted Butter (¾ cup / 1 ½ sticks): Just like in the cookie dough, softened real unsalted butter is the cornerstone of a rich, creamy, and flavorful frosting. It provides the smooth base and luxurious mouthfeel. Using margarine or butter substitutes will noticeably alter the flavor and texture of your frosting.
- Powdered Sugar (2 ¼ cups): Also widely known as confectioners’ sugar or icing sugar. This finely milled sugar is what gives the frosting its characteristic smooth, silky, and melt-in-your-mouth texture. Sifting the powdered sugar before mixing is a highly recommended step to prevent any lumps and ensure a perfectly silky-smooth finish.
- Milk (2 Tbsp): Used to adjust the consistency of the frosting. You can use any type of milk you prefer (whole milk for a richer frosting, or a dairy-free alternative for dietary needs). Begin by adding one tablespoon at a time and gradually increase until you reach your desired spreadable consistency—thick enough to hold its shape but soft enough to spread easily.
- Pure Vanilla Extract (1 tsp): Provides that classic, sweet, and comforting aroma and flavor that perfectly complements the rich sugar cookie base, making the frosting utterly irresistible.
- Food Coloring (optional): A fantastic and fun way to add a festive touch and visual appeal to your sugar cookie bars! Gel food coloring is often preferred as it offers vibrant hues with less liquid than traditional liquid drops, preventing the frosting from becoming too thin. Experiment with various colors to match your theme, holiday, or personal preference.
- Sprinkles (optional): The ultimate decorative flourish for sugar cookie bars! Sprinkles add a delightful pop of color and texture. Choose sprinkles that match your chosen food coloring or holiday theme for an extra fun and celebratory presentation. They adhere best when applied immediately after the frosting is spread.
These thoughtfully selected ingredients work in perfect harmony to create a sugar cookie bar that is truly unforgettable, from the soft, buttery cookie base to the luscious, customizable frosting. Each component contributes to a balanced and utterly delicious dessert experience.
Delicious Variations to Customize Your Sugar Cookie Bars
One of the most appealing aspects of these sugar cookie bars is their incredible versatility. While the classic recipe is perfectly delightful on its own, you can easily adapt and customize them to suit different tastes, holidays, or specific occasions. Get creative with these delightful variations to make each batch uniquely yours:
- Alternative Frostings:
- Cream Cheese Frosting: For a tangy and slightly less sweet counterpoint, try our cream cheese frosting. Its subtle tartness beautifully complements the sweetness of the cookie bar, offering a different flavor profile that many adore and find incredibly satisfying.
- Lemon or Almond Frosting: Infuse your basic buttercream frosting with a brighter flavor by adding lemon zest and a few drops of lemon extract, or achieve a sophisticated, nutty aroma by swapping vanilla for almond extract. These flavor variations can dramatically change the character of your bars.
- Chocolate Ganache or Chocolate Frosting: For the ultimate chocolate lover, a smooth layer of chocolate ganache or a rich chocolate buttercream would be a decadent topping.
- Store-Bought Frosting: In a pinch or simply looking for an extra shortcut? Don’t hesitate to use your favorite store-bought frosting. It’s a quick and easy solution that still yields delicious results. For easier spreading, warm it slightly in the microwave for a few seconds until pliable.
- Color Your World with Food Coloring:
- The beauty of these bars lies in their ability to adapt to any celebration or theme. Swap the pink frosting for any color imaginable! They are perfect for holiday gatherings like Christmas (using red and green), Easter (with vibrant pastels), Valentine’s Day (romantic reds or pinks), patriotic events (red, white, and blue), or even Halloween (spooky orange, black, or purple). While food dye is optional, it certainly adds a festive and visually appealing touch that makes these bars truly stand out and delight your guests. Gel food colorings are recommended for vibrant shades without thinning the frosting.
- Seasonal Sprinkles and Toppings:
- Sprinkles are more than just decoration; they’re a fun and easy way to express creativity and seasonal cheer. It’s incredibly simple to find sprinkles that coordinate with any holiday, event, or season. Use vibrant rainbow sprinkles for birthdays or everyday fun, patriotic red, white, and blue for summer holidays, autumnal mixes for fall festivities, or themed sprinkles for specific celebrations. Beyond sprinkles, consider other toppings like mini chocolate chips, toasted coconut, chopped nuts, or even a drizzle of caramel or melted white chocolate for extra indulgence. This simple addition makes your festive treat perfect to enjoy year-round, transforming a basic bar into a themed delight.
- Plain and Simple Bars:
- If you prefer a less sweet dessert or truly appreciate the pure, unadulterated flavor of a perfectly baked cookie, skip the frosting altogether. The texture of the plain sugar cookie bars is amazing on its own – incredibly soft, delightfully chewy, and richly buttery. Sometimes, simplicity truly is the most delicious and satisfying option. These unfrosted bars can also be rolled in cinnamon sugar before baking for a snickerdoodle-like twist.
- Transform into a Cookie Cake:
- Want to create a show-stopping dessert that’s guaranteed to impress? Bake the dough in a round pizza pan or a larger round cake pan instead of a traditional rectangular baking dish to create a magnificent cookie cake! Once cooled, this large format dessert offers ample surface area for decoration. You can use a piping bag with various tips to decorate it elaborately with frosting, writing celebratory messages, or creating intricate designs for birthdays, anniversaries, or special announcements.
- Flavorful Add-Ins to the Dough:
- Before baking, stir in miniature chocolate chips, white chocolate chips, butterscotch chips, or even finely chopped nuts (such as pecans or walnuts, if not serving to those with allergies) into the cookie dough for an extra layer of flavor and delightful texture.
- Add a hint of citrus zest, like lemon or orange, directly into the dough for a brighter, more aromatic sugar cookie bar. A pinch of ground cardamom or nutmeg can also add a unique spice note.
These numerous variations ensure that your sugar cookie bars can be a unique and exciting treat every time you bake them, limited only by your imagination and what delights your taste buds!
Step-by-Step Guide to Making Perfect Sugar Cookie Bars
Creating these delightful sugar cookie bars is a straightforward and enjoyable process, even for novice bakers. Follow these detailed instructions meticulously to achieve beautifully soft, wonderfully chewy bars topped with luscious, creamy frosting that will impress everyone.
- Prepare Your Baking Pan and Preheat Oven:
Begin by preheating your oven to 350°F (175°C). Next, lightly grease a 9×13 inch baking pan with non-stick cooking spray or butter. For even easier removal and cleanup, consider lining the pan with parchment paper, allowing a slight overhang on the longer sides. This will create “handles” to lift the entire baked slab out of the pan once cooled.

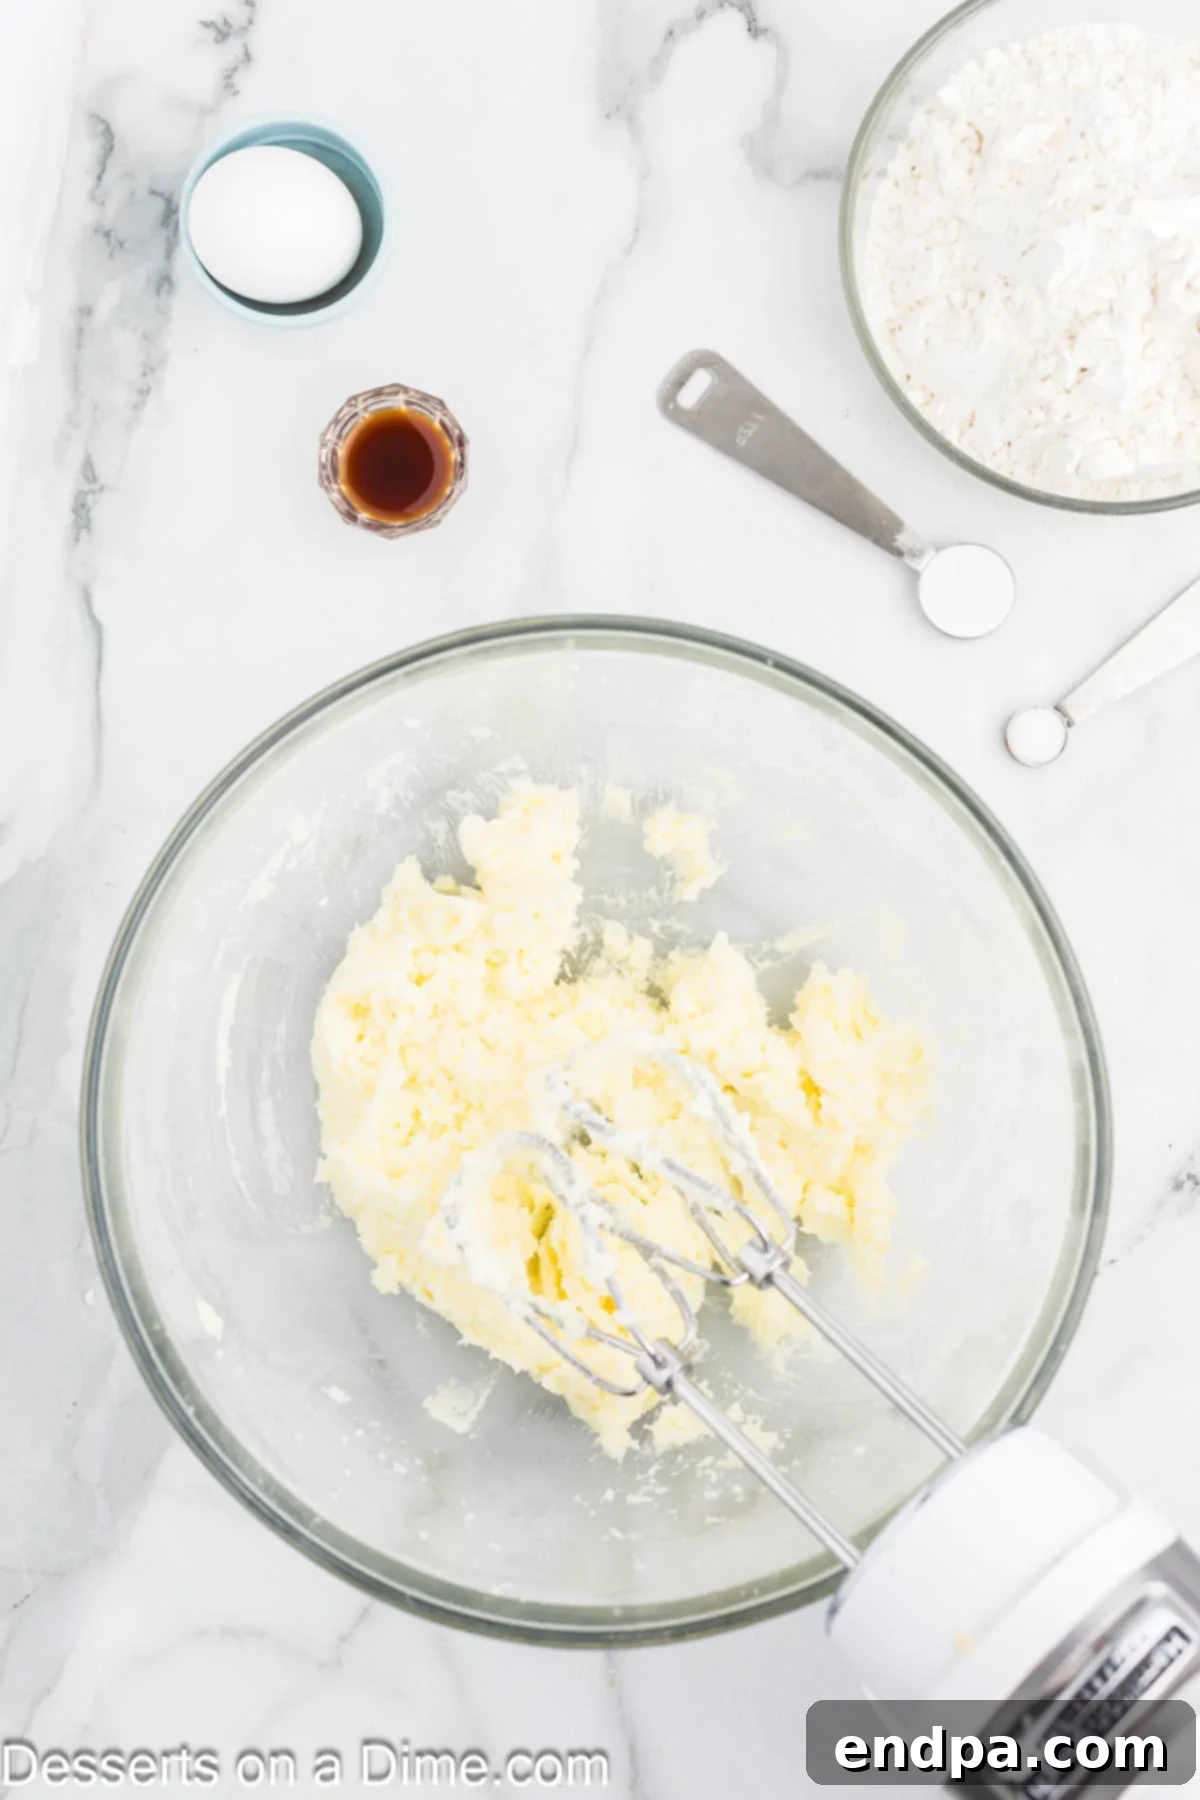
Creaming butter and sugar until light and fluffy, essential for a soft cookie texture. Cream Butter and Sugar, Then Add Wet Ingredients: In a large mixing bowl, using an electric mixer (either a stand mixer with a paddle attachment or a handheld mixer), cream together the softened unsalted butter and granulated sugar. Beat on medium speed for 2-3 minutes until the mixture is visibly light in color, fluffy, and well combined. This step is crucial as it incorporates air, which is vital for achieving a light and tender cookie texture. Next, crack in the large egg and pour in the pure vanilla extract. Continue mixing for another 1-2 minutes until all the wet ingredients are thoroughly incorporated and the mixture appears smooth and cohesive. Scrape down the sides of the bowl as needed to ensure everything is evenly mixed.

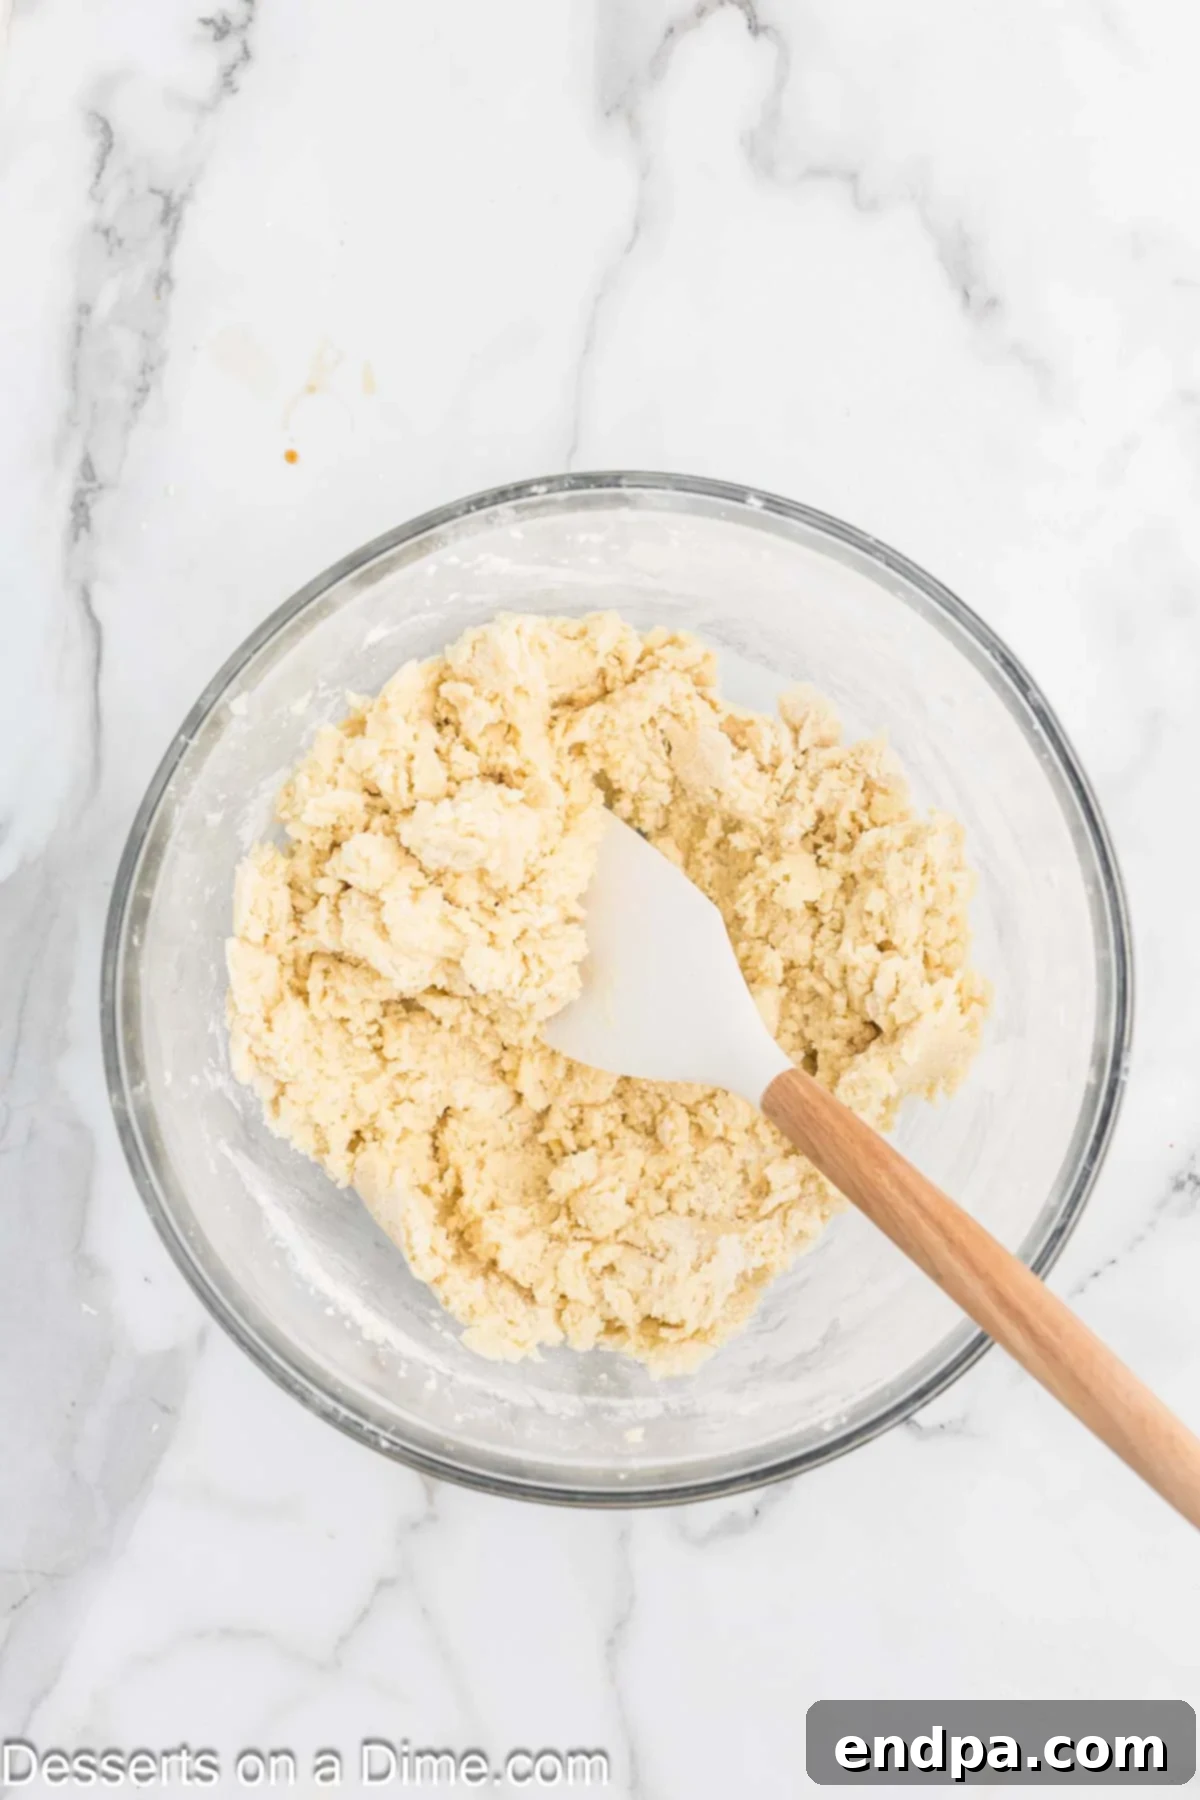
Gently folding in the dry ingredients to avoid overmixing the dough. Incorporate Dry Ingredients: In a separate, medium-sized bowl, whisk together the all-purpose flour, baking powder, and salt until they are well combined. Gradually add these dry ingredients to the wet mixture in the larger bowl. Using a rubber spatula, gently stir by hand until the dry ingredients are just combined and no streaks of flour remain. It’s imperative to avoid overmixing the dough at this stage, as excessive mixing can develop the gluten in the flour, which will result in tough, dense, and less tender cookie bars. Mix just until a cohesive dough forms.

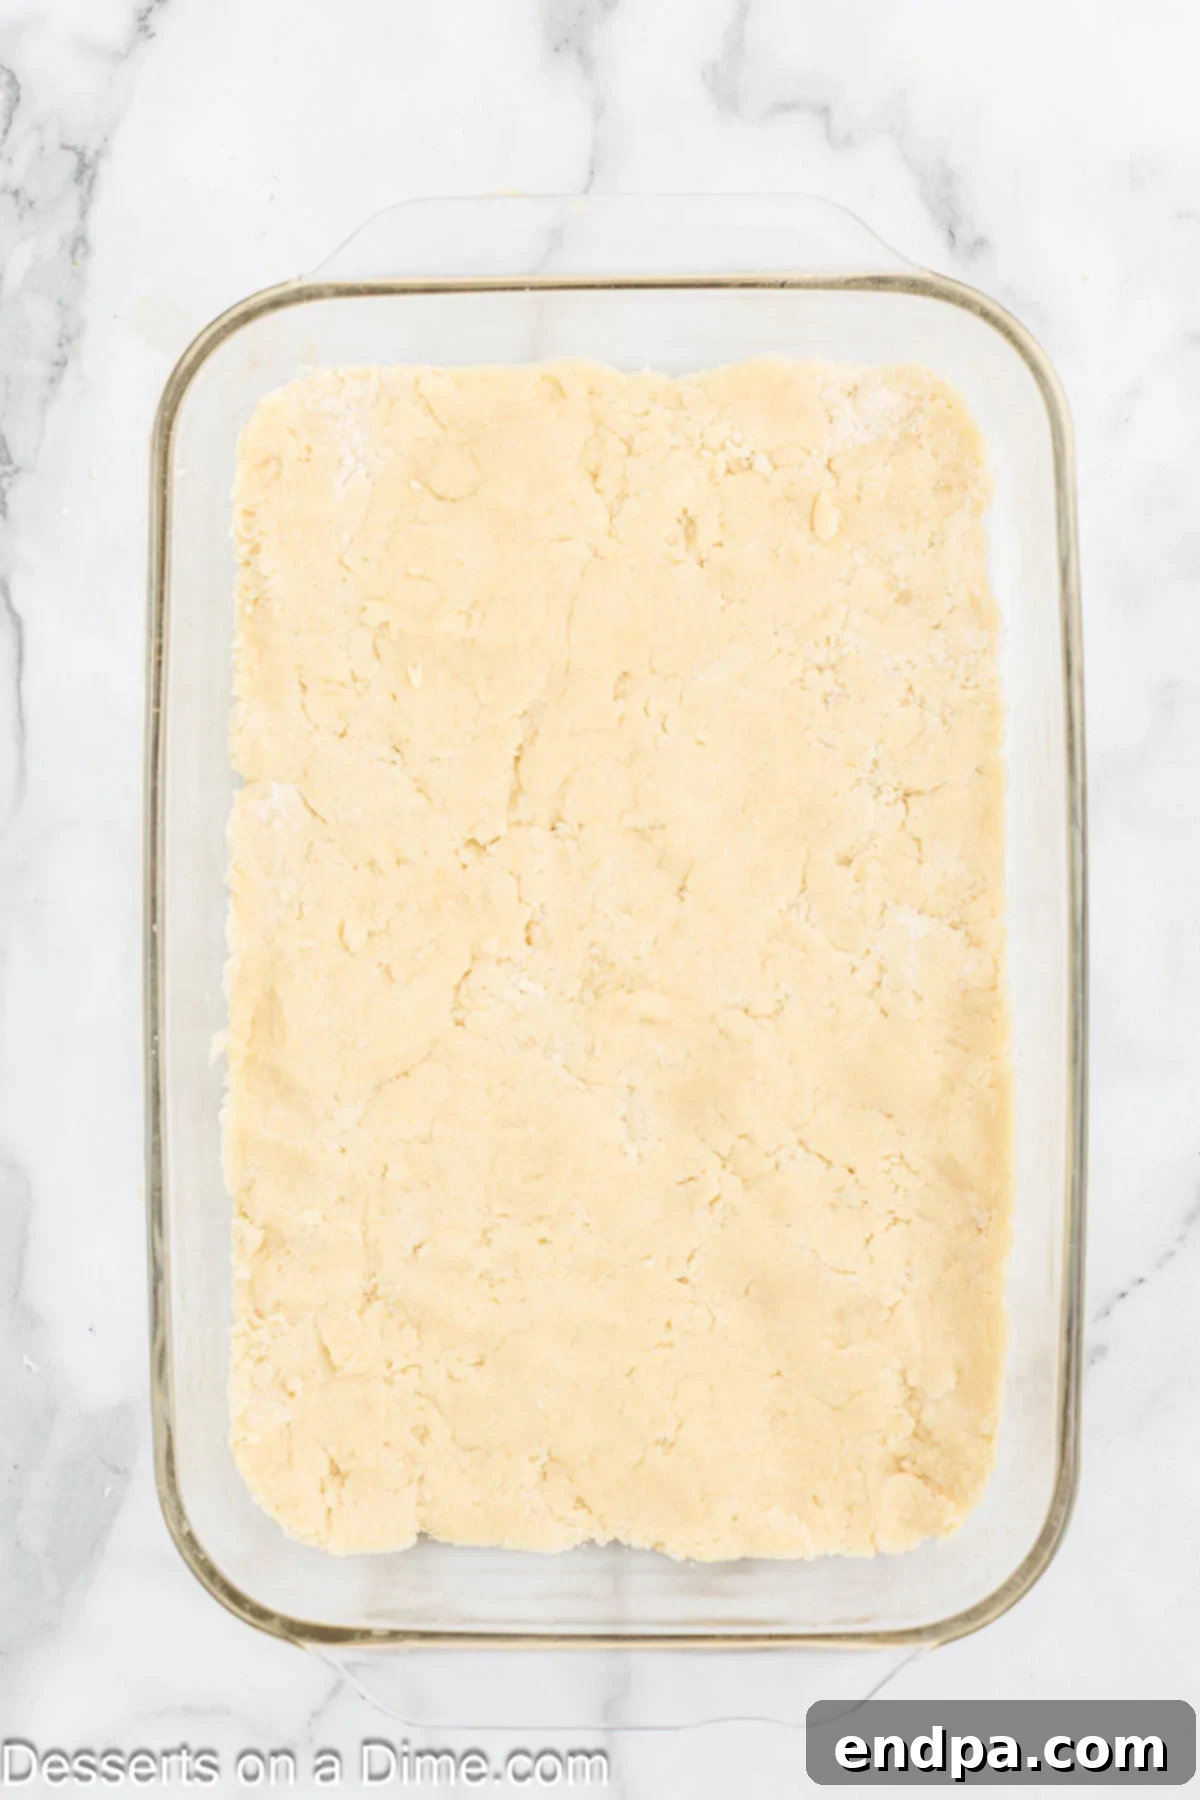
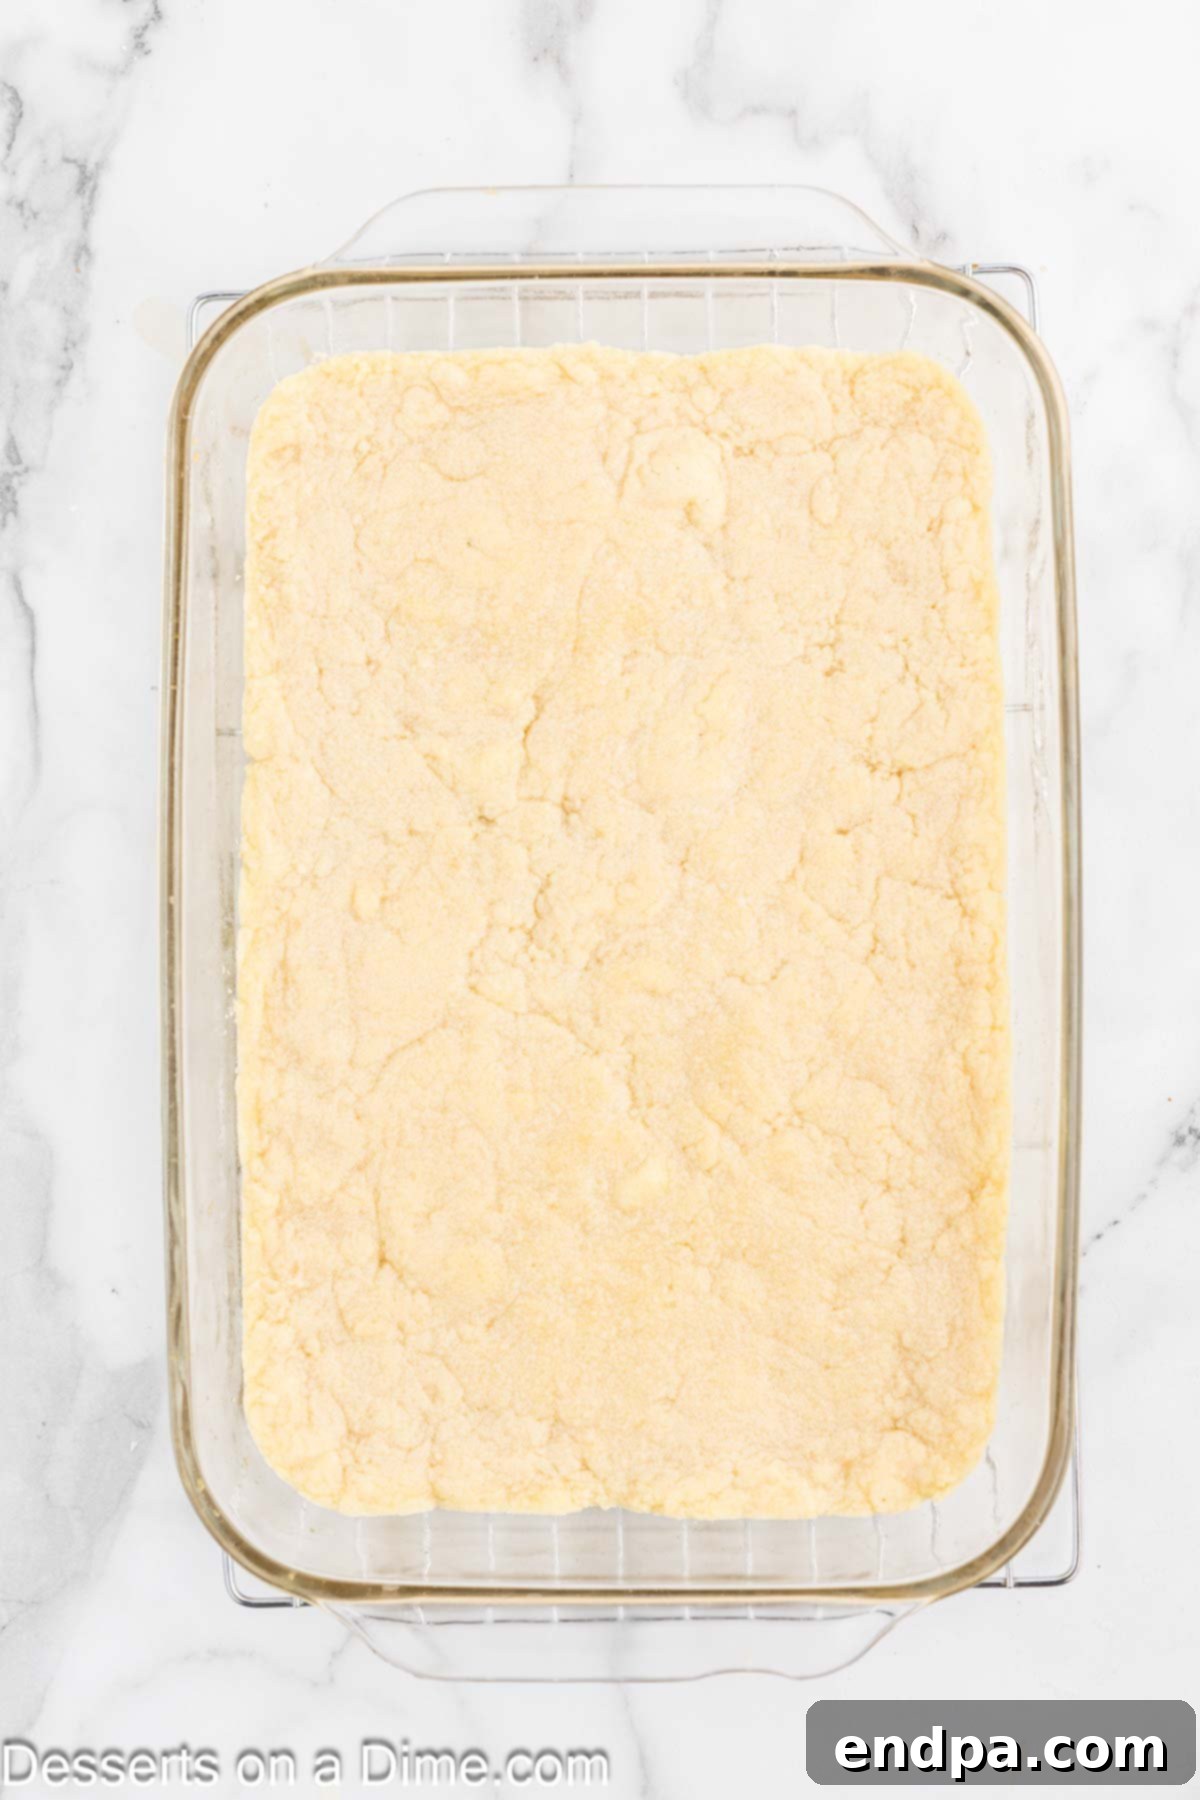
Evenly spreading the dough into the prepared pan for consistent baking. Spread Dough and Bake: Transfer the prepared cookie dough into the greased (or parchment-lined) 9×13 inch baking pan. Use your rubber spatula, or lightly floured hands, to evenly spread and gently press the dough down into an even layer across the entire bottom of the pan. Ensure the thickness is consistent to promote uniform baking. Bake in the preheated oven for 10-13 minutes. Baking times can vary depending on your oven, so it’s essential to keep a close eye on your bars.

Cooling the baked sugar cookie bars completely before frosting is crucial. Cool Completely: It is absolutely crucial not to overbake these bars! The center of the cookie slab should appear just set and slightly pale, while the edges should have only a very slight golden color. The bars will continue to firm up and cook slightly from the residual heat in the hot pan even after they’re removed from the oven. Immediately transfer the pan to a wire cooling rack and allow the bars to cool completely to room temperature before attempting to frost them. Rushing this step will inevitably result in melted, runny, and messy frosting.
- Prepare the Creamy Frosting:
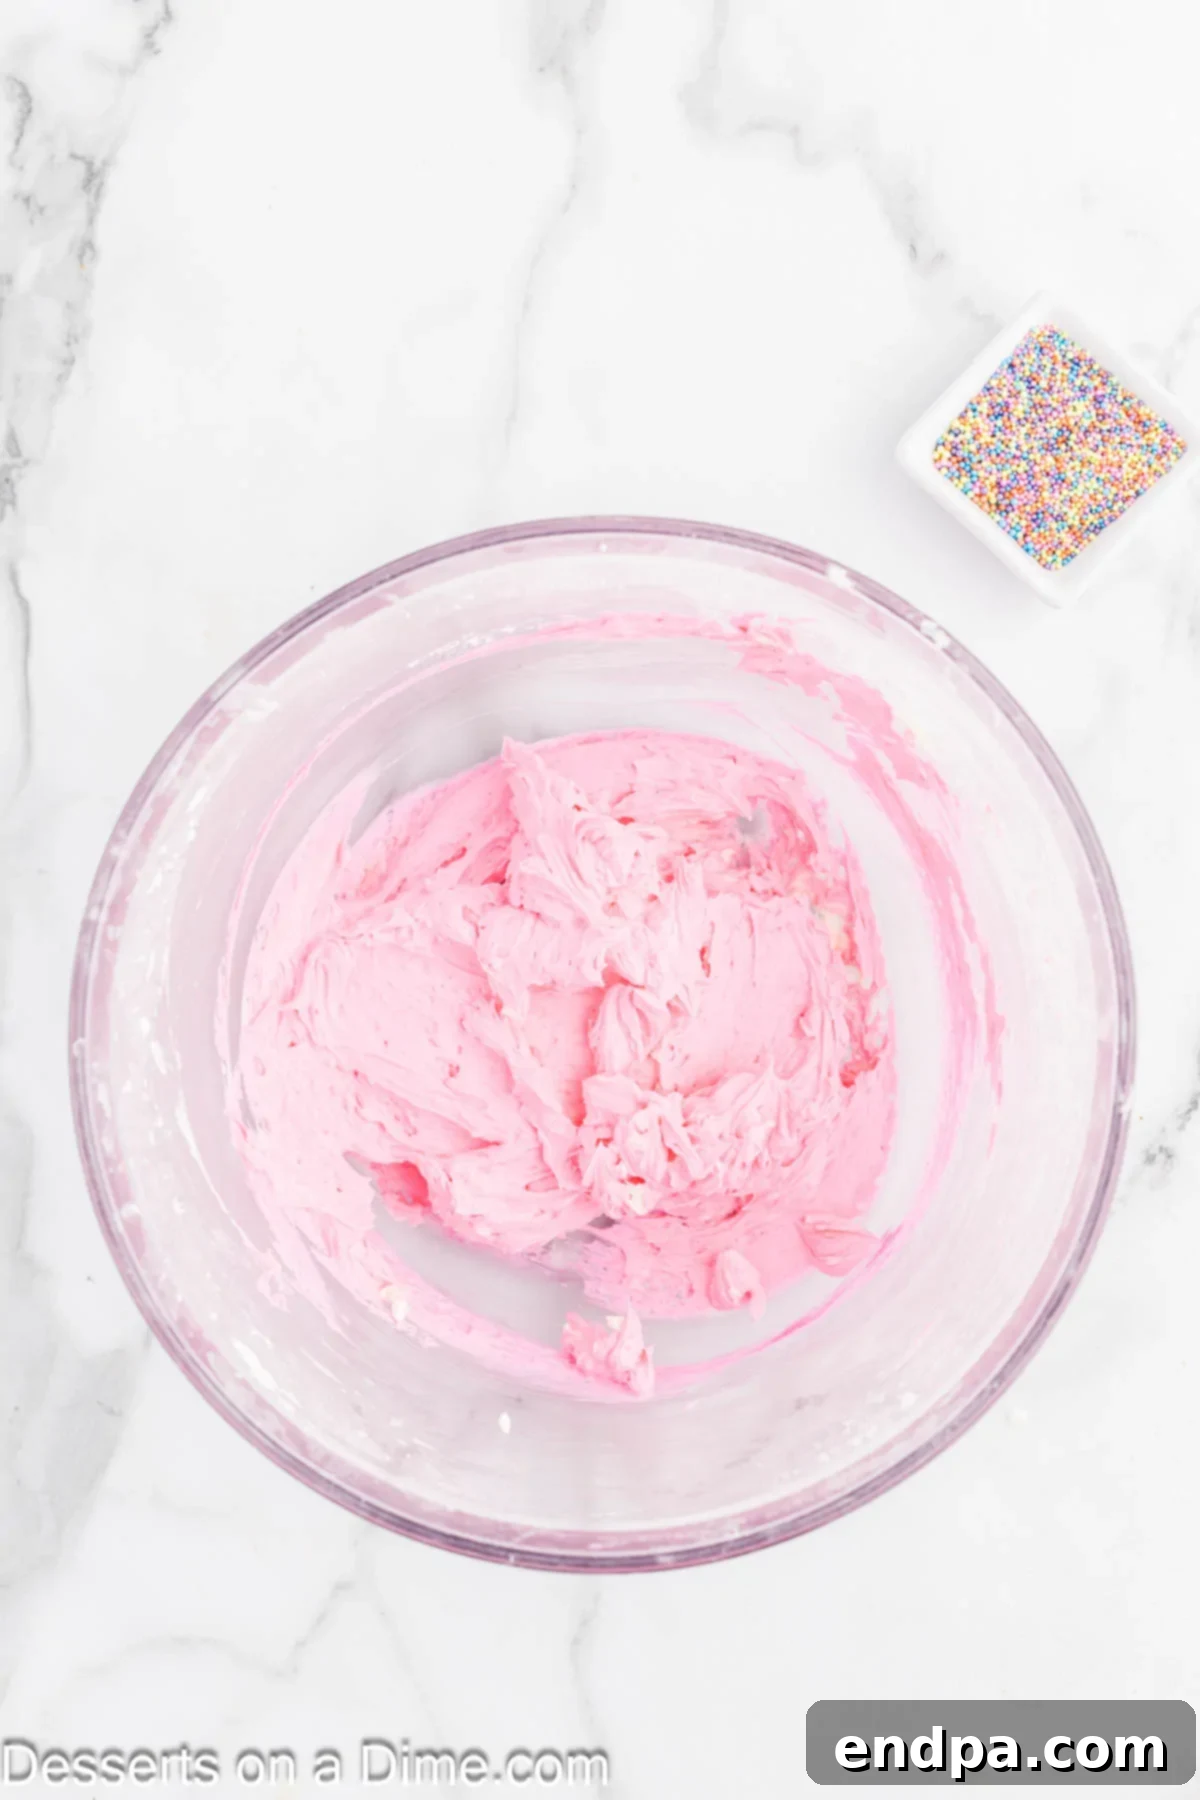
While your cookie bars are cooling, prepare your decadent buttercream frosting. In a medium mixing bowl, cream together the softened unsalted butter and sifted powdered sugar until they are well combined and smooth. Begin on low speed to avoid a cloud of powdered sugar, then increase to medium. Next, add the milk and pure vanilla extract. Beat with an electric mixer for an additional 1-2 minutes, increasing the speed to medium-high, until the frosting is wonderfully light, fluffy, and perfectly spreadable. Scrape down the bowl as needed.

Adding a touch of food coloring to create vibrant, custom-colored frosting. Add Food Coloring (Optional): If you plan to dye your frosting, now is the perfect time! Add your desired food coloring a few drops at a time, mixing thoroughly with the electric mixer after each addition until you achieve your preferred shade. Remember that gel food colors often provide more vibrant and intense results with less liquid, which helps maintain the frosting’s ideal consistency.

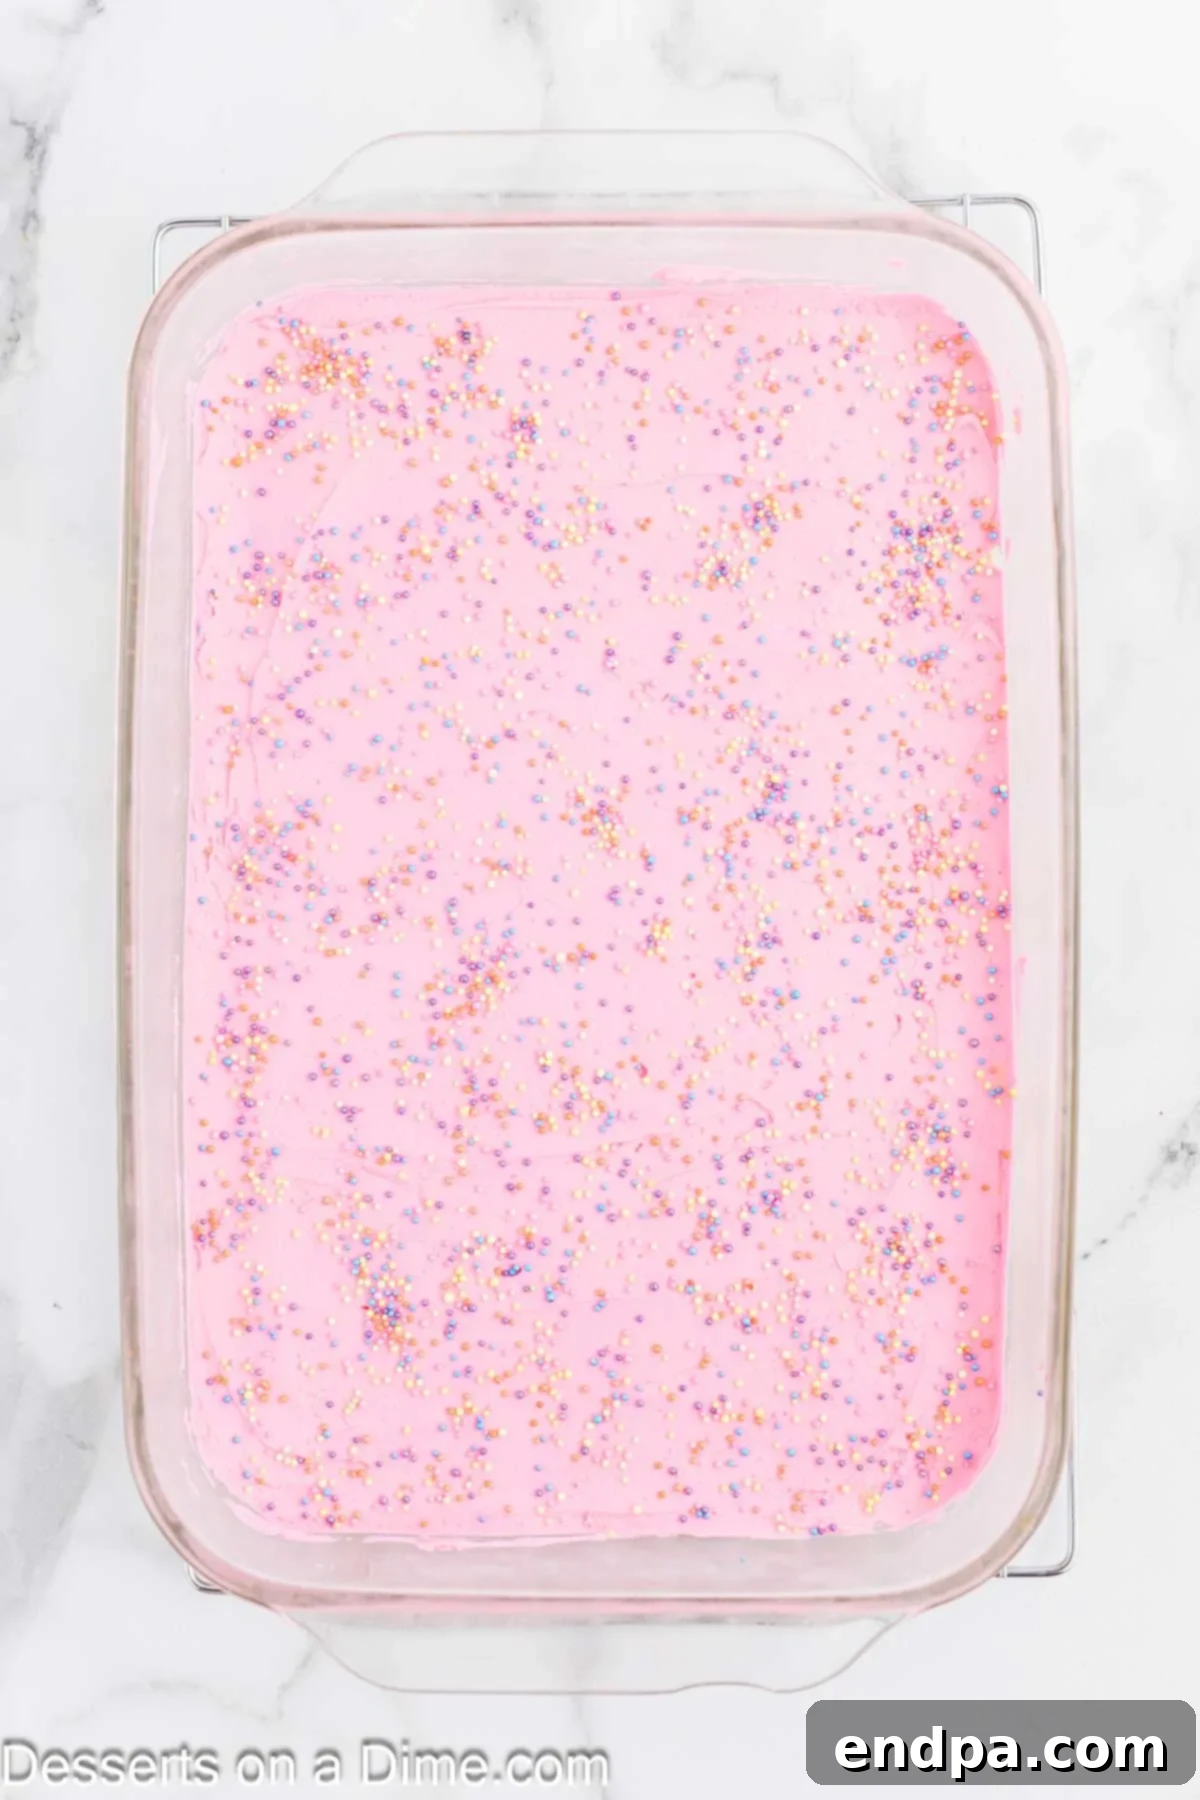
Generously spreading the fluffy frosting evenly over the cooled cookie bars. Frost and Decorate: Once the cookie bars are completely, unequivocally cool (this cannot be stressed enough!), generously spread the prepared frosting evenly over the entire top surface of the cookie slab. Use an offset spatula or the back of a spoon for a smooth, appealing finish. If desired, immediately add sprinkles or other decorative toppings, as they adhere best to freshly applied frosting before it begins to set.

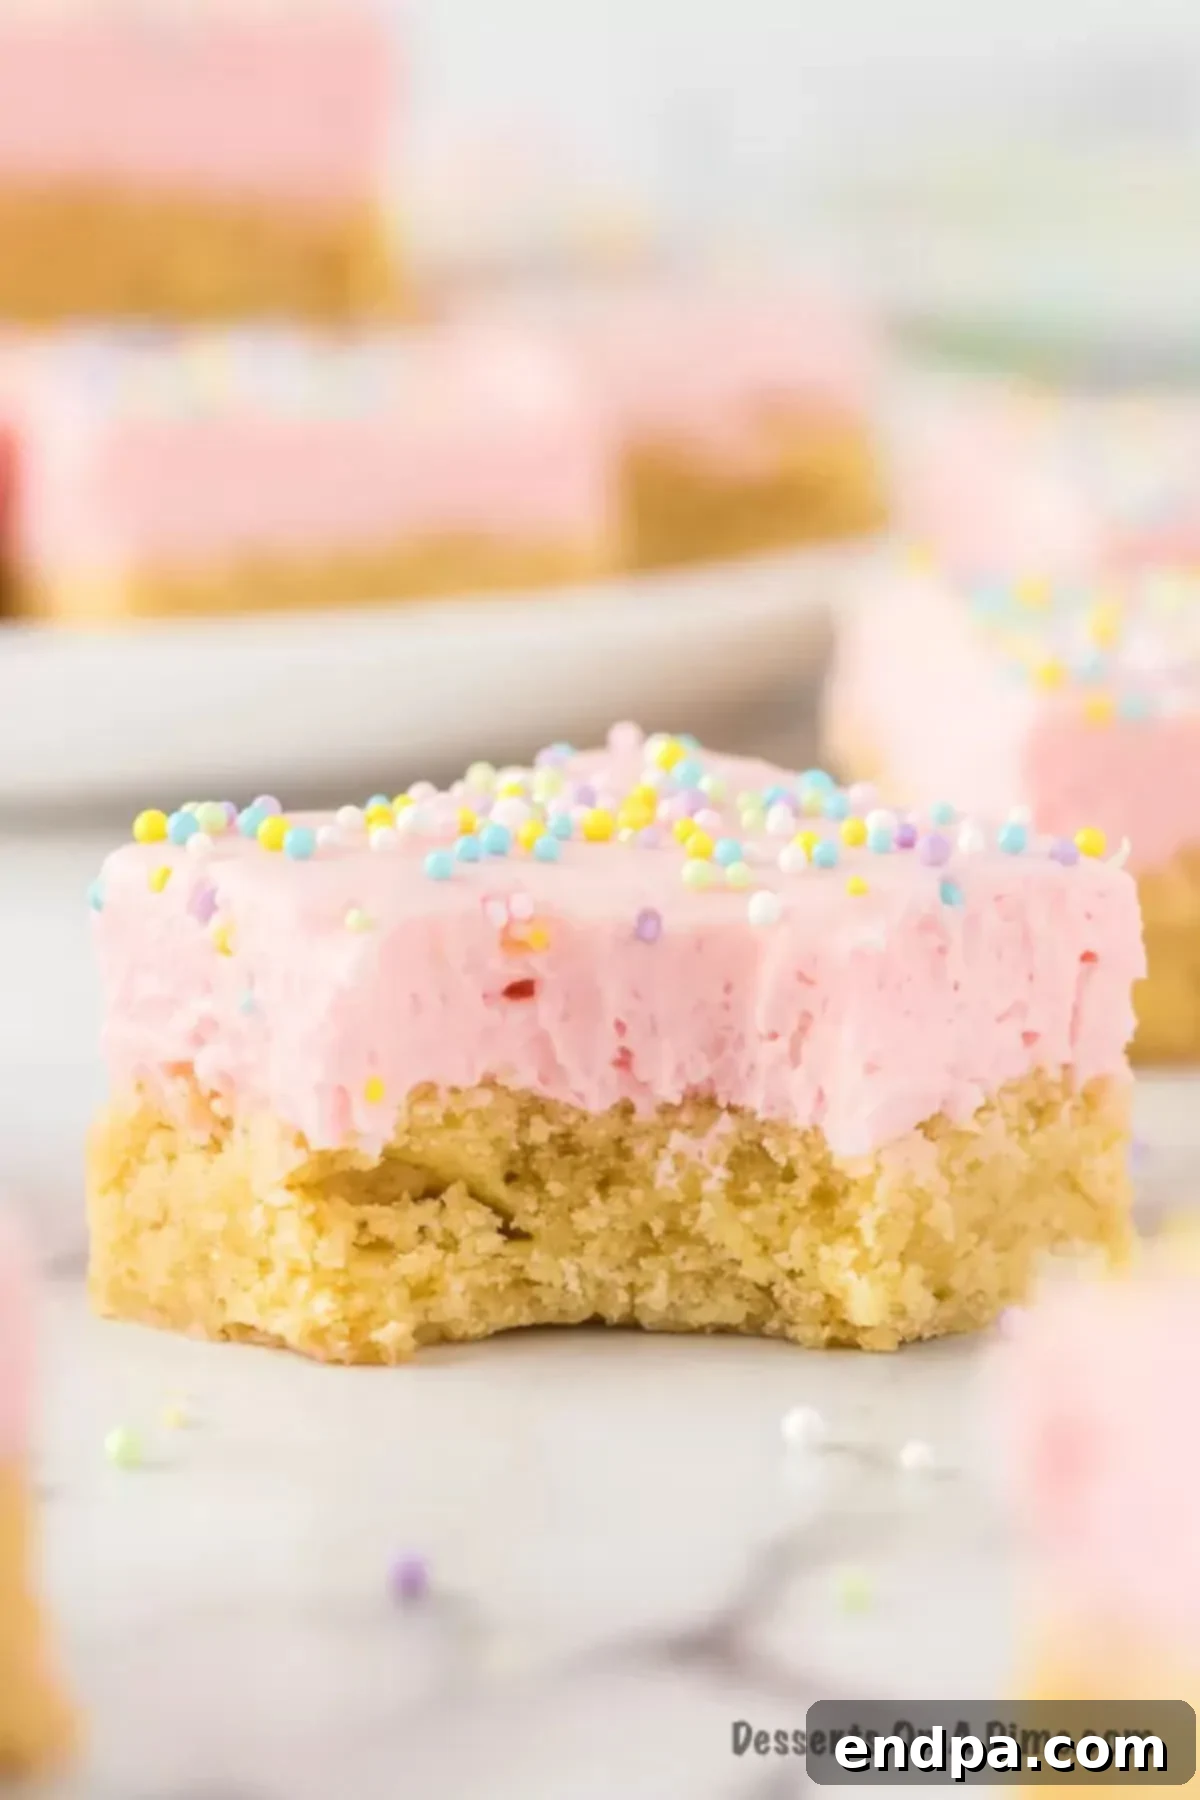
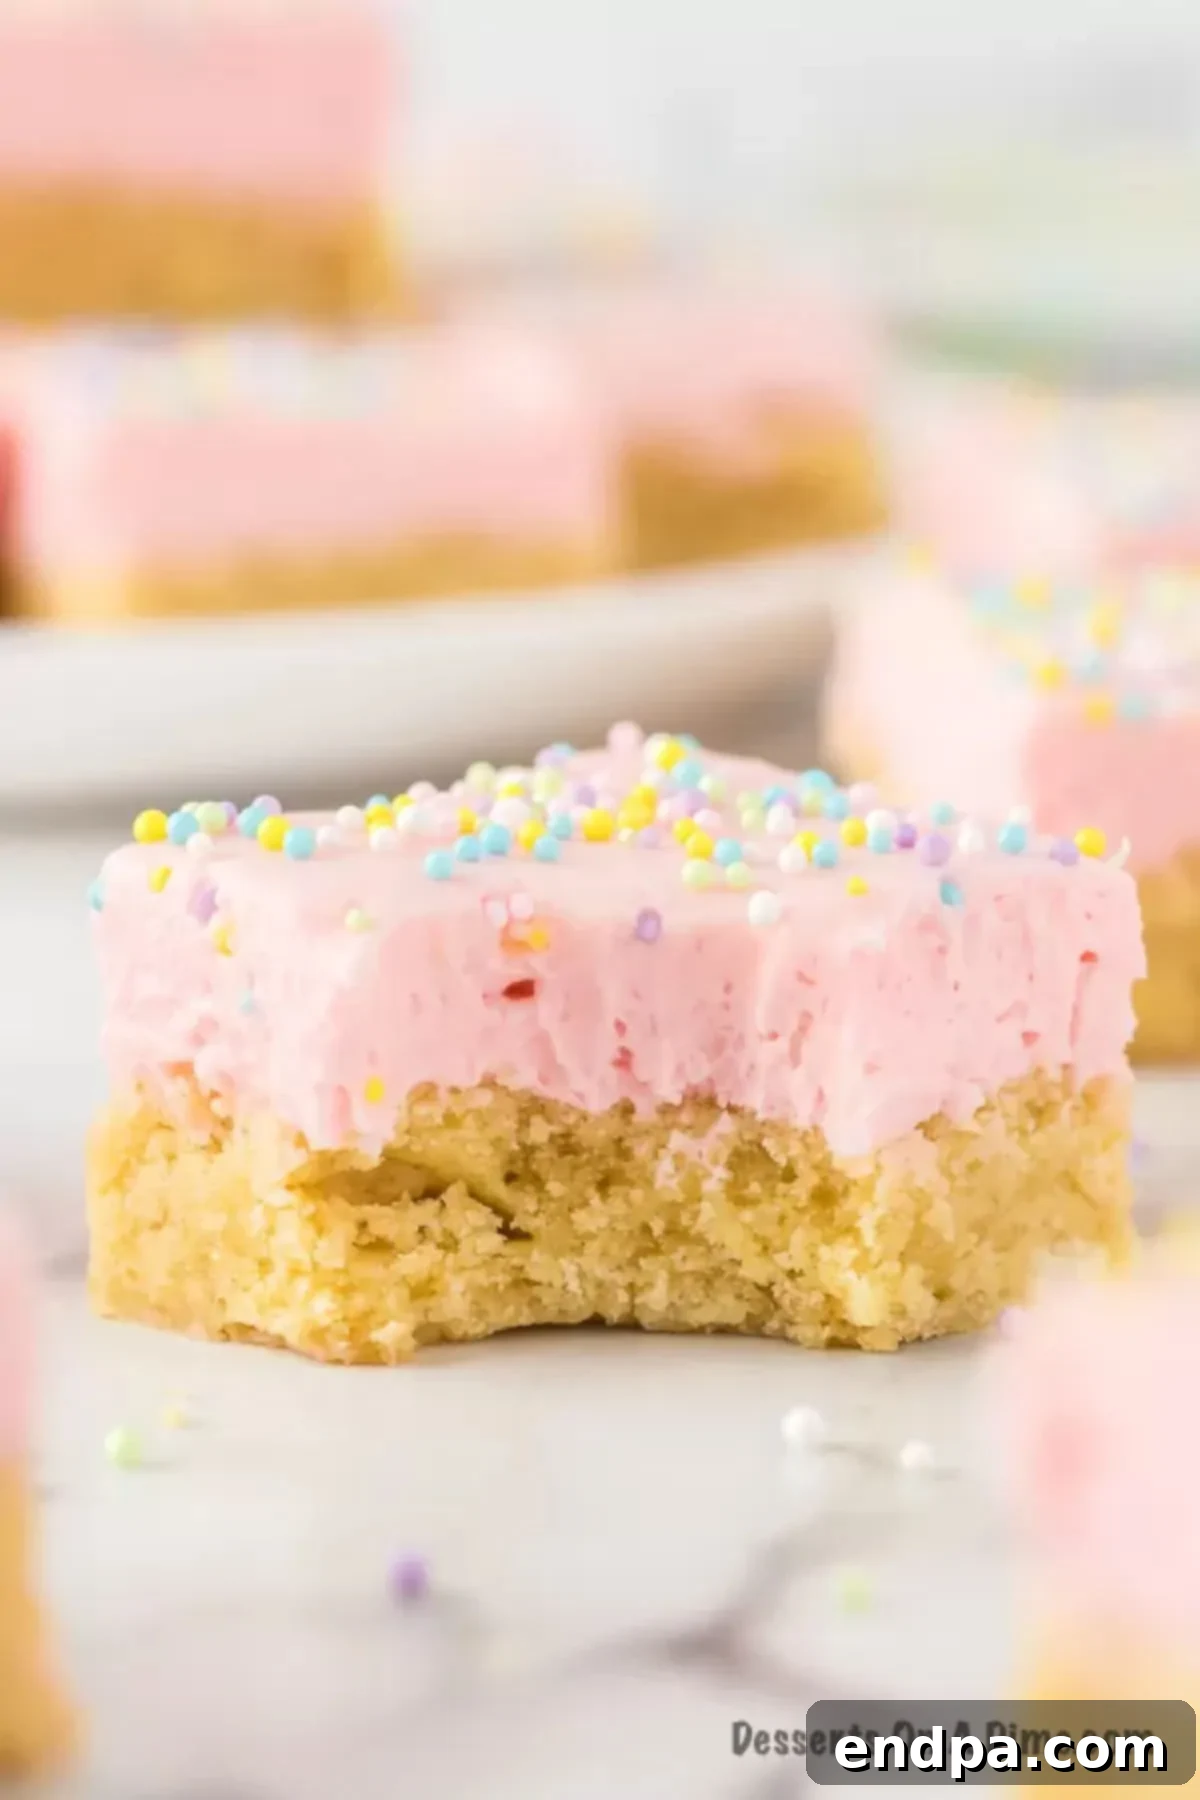
Freshly cut sugar cookie bars, showcasing their irresistible layers, ready to be devoured. Slice and Serve: With a sharp knife, carefully slice the frosted cookie slab into individual bars of your desired size. For neat, clean edges, you can run your knife under hot water and wipe it clean between each slice, especially after cutting through the frosting. Now, your homemade sugar cookie bars are perfectly ready to be served and enjoyed! Watch them disappear quickly!
Expert Baking Tips for Perfect Sugar Cookie Bars Every Time
Achieving bakery-quality sugar cookie bars is far easier than you might think, especially when you arm yourself with a few expert tips and tricks. Paying close attention to these details can elevate your baking from good to absolutely phenomenal, ensuring your bars turn out perfectly soft, delightfully chewy, and utterly delicious every single time:
- The Power of a Stand Mixer: While a sturdy hand mixer can certainly get the job done, a stand mixer fitted with the paddle attachment is truly your best friend for this recipe. It makes the crucial step of creaming the butter and sugar for both the cookie dough and the frosting significantly easier, faster, and more efficient. This hands-free operation ensures a perfectly smooth and aerated consistency without much effort on your part, directly contributing to lighter, fluffier cookie bars and a beautifully smooth frosting.
- Room Temperature Softened Butter is Key: Do not skip or rush this fundamental step! Allow your butter to sit at room temperature for at least 30-60 minutes, or longer in a cool kitchen, before you begin baking. Properly softened butter (it should yield slightly when gently pressed with your finger but not be greasy or melted) creams beautifully with sugar. This process creates tiny, stable air pockets that are incorporated into the mixture, which is vital for a lighter, more tender crumb in your cookie bars and a smoother, lump-free, easily spreadable frosting. Cold butter won’t cream correctly, resulting in a dense product, while melted butter will lead to greasy, flat bars.
- Measure Flour Correctly: For accurate and consistent baking results, always use the “spoon and level” method for measuring all-purpose flour. Spoon the flour into your dry measuring cup until it overflows, then level off the excess with the back of a knife or a straight edge. Never scoop flour directly from the bag with your measuring cup, as this can compact the flour, leading to significantly more flour than needed. Too much flour will result in dry, crumbly, or tough sugar cookie bars that lack the desired tender texture.
- Avoid Overmixing the Dough: Once you add the dry ingredients to the wet mixture, mix only until they are just combined. Use a rubber spatula and fold gently. Overmixing is a common pitfall in baking; it develops the gluten in the flour excessively, which can make your sugar cookie bars tough, dense, and less tender, taking away from their melt-in-your-mouth quality. A few small streaks of flour are acceptable and will disappear during baking.
- Don’t Overbake the Cookie Bars: This is arguably the most important tip for achieving perfectly soft and chewy bars! Sugar cookie bars cook relatively quickly. Begin checking for doneness around the 10-minute mark. They are typically done when the edges are set and show only a very slight golden tint, but the center still looks slightly soft or just set. Remember, the bars will continue to firm up and cook slightly from residual heat in the hot pan even after they’re removed from the oven. Resist the urge to bake them longer once the timer goes off, as this will lead to dry, hard edges and a less desirable, crumbly texture.
- Cool Completely Before Frosting: Patience is truly a virtue in baking, especially when it comes to frosting. The cookie bars *must* be completely cooled to room temperature before you even think about spreading on that delicious, creamy frosting. If the bars are even slightly warm, the frosting will melt, slide off, and create a sticky, unappetizing mess. Allow them to cool on a wire rack for at least 1-2 hours, or even longer if your kitchen is particularly warm, to ensure optimal frosting results.
- For Thinner or Crispier Bars, Use a Sheet Pan: If you have a preference for thinner, slightly crispier sugar cookie bars, you can easily adapt the recipe by baking the dough in a larger jelly roll pan (e.g., approximately 10×15 inches) instead of a standard 9×13 inch baking dish. Be sure to significantly adjust your baking time downwards, as thinner bars will cook much faster. Keep a very close eye on them to prevent overbaking and achieve that perfect delicate crispness.
- Clean Cuts for Perfect Presentation: For neat, professional-looking individual slices, use a very sharp knife. For even cleaner cuts, especially after the frosting has set, you can run your knife under hot water and wipe it clean between each slice. This technique helps prevent the frosting from sticking to the knife and dragging, ensuring each bar looks pristine.
- Parchment Paper for Easy Removal: Lining your baking pan with parchment paper, allowing a slight overhang on the longer sides, makes lifting the entire cooled cookie slab out of the pan incredibly easy and mess-free. Once lifted, you can then frost and slice the bars on a clean cutting board, which is often more convenient and allows for precise cuts.
By diligently following these simple yet highly effective baking tips, you’ll be consistently able to create stunning and delectable sugar cookie bars that are sure to impress everyone who has the pleasure of trying them!
Frequently Asked Questions About Sugar Cookie Bars
Here are some common questions and helpful answers to ensure your sugar cookie bar baking, storage, and enjoyment are as seamless and delicious as possible.
Can you make these sugar cookie bars in advance?
Absolutely! These sugar cookie bars are a fantastic make-ahead dessert, making them perfect for busy schedules, holiday preparations, or party planning. You can bake the cookie bars (the base, unfrosted) up to one day in advance. However, it is generally recommended to wait and frost them closer to your serving time. Once the baked bars have cooled completely to room temperature, store them unfrosted in an airtight container at room temperature. Prepare your frosting and frost the bars just a few hours before your event to ensure the freshest taste and the best, most appealing appearance. If you plan to refrigerate or freeze the bars, follow the specific storage directions below, and always add the frosting fresh before serving.
How to store sugar cookie bars?
Once your delicious sugar cookie bars are frosted, any leftovers should be stored in an airtight container. If you have multiple layers of bars, it’s a good practice to place a piece of parchment paper or wax paper between each layer to prevent them from sticking to the frosting above and getting messy. Store the container in the refrigerator for up to 1 week. For the best flavor and texture, particularly if you prefer a softer bar, allow the refrigerated bars to come to room temperature for about 15-30 minutes before serving. The frosting will also soften slightly, enhancing the overall experience.
How to freeze sugar cookie bars?
Freezing these bars is an excellent strategy for meal prep, preparing ahead for future events, or simply preserving leftovers for a later treat. The best method for freezing is to prepare and freeze the plain, unfrosted cookie bars. After they have cooled completely to room temperature, wrap the entire slab or individual bars tightly in plastic wrap, then place them inside a freezer-safe airtight container or a heavy-duty freezer bag. If stacking multiple pieces, place a layer of wax paper between them to prevent sticking. The unfrosted bars can be frozen for up to 3 months without compromising quality. When you’re ready to serve, allow the unfrosted bars to thaw in the refrigerator overnight. Once thawed, you can whip up a fresh batch of frosting and decorate them as usual. This is a brilliant time-saver for parties and holidays, allowing you to free up valuable oven space and prep time on the day of your event.
Can you double the recipe?
Yes, you can absolutely double this recipe with fantastic results! This recipe scales up beautifully, making it perfect for larger gatherings, bake sales, potlucks, or simply when you want to have extra deliciousness on hand. When doubling, you can use a larger baking sheet (such as a half-sheet pan, which is typically 18×13 inches) for thinner bars, or use two standard 9×13 inch pans to maintain a similar thickness. Remember to adjust the cooking time accordingly – a larger or thicker batch might require a few extra minutes in the oven, while a thinner batch will cook faster. Always rely on the visual cues for doneness (slightly golden edges, just-set center) rather than strictly adhering to the original bake time. Everyone will undoubtedly love these sugar cookie bars, so don’t hesitate to double it; they have a way of disappearing quickly!
More Irresistible Cookie Recipes to Try
If you’ve fallen in love with the ease and deliciousness of these sugar cookie bars and are eager to explore more delightful cookie creations, you’re in luck! Here are some other easy and incredibly delicious recipes from our collection that are sure to satisfy your sweet tooth and expand your baking repertoire:
- Homemade Snickerdoodle Cookie Recipe: A timeless classic known for its wonderfully soft, chewy texture and its comforting, distinctive cinnamon-sugar coating. These cookies are pure nostalgia in every bite.
- Chocolate Crinkle Cookie Recipe: Indulge in these rich, fudgy chocolate cookies that boast a distinctive cracked, powdered sugar coating. They are visually stunning and deeply satisfying for any chocolate lover.
- Thanksgiving Sugar Cookies Recipe: Get into the holiday spirit with these festive sugar cookies, easily adaptable to various holiday themes beyond Thanksgiving. Perfect for decorating and sharing with loved ones.
- Funfetti Cake Mix Cookies: Super easy to make and bursting with colorful sprinkles, these cookies use a cake mix base for a quick, convenient, and incredibly cheerful treat that’s perfect for any celebration.
- Red Velvet Cookies Recipe: Experience the decadent flavor of red velvet cake in cookie form. These cookies are rich, with a hint of cocoa, and boast a tender, slightly chewy crumb that’s truly irresistible.
- Grinch Cookie Bars: Bring some festive cheer to your baking with these fun and vibrant green-themed cookie bars, inspired by the beloved holiday character. They are perfect for holiday parties and spreading smiles.
We are confident you will absolutely love exploring and baking these easy and delicious cookie recipes. Each one offers a unique twist on beloved classics, promising delightful results and endless enjoyment. Happy baking and sweet indulging!
Sugar Cookie Bars Recipe
Sugar Cookie Bars
These soft and delicious sugar cookie bars are topped with creamy frosting and sprinkles for a festive treat. Enjoy all the classic flavors of sugar cookies in this incredibly easy bar format.
- Prep Time:
- 10 mins
- Cook Time:
- 10 mins
- Total Time:
- 20 mins
- Servings:
- 16 bars
- Cuisine:
- American
- Course:
- Dessert
- Calories:
- 381 kcal
- Author:
- Carrie Barnard
Ingredients
FOR THE COOKIE BARS:
- ¾ cup Unsalted Butter, softened
- 1 cup Granulated Sugar
- 1 large Egg
- 2 tsp Vanilla Extract
- 2 ¼ cup All Purpose Flour
- 1 tsp Baking Powder
- ½ tsp Salt
FOR THE FROSTING:
- ¾ cup Unsalted Butter, softened
- 2 ¼ cup Powdered Sugar
- 2 Tbsp Milk
- 1 tsp Vanilla Extract
- Food Coloring (optional)
- Sprinkles (optional)
Instructions
- Preheat the oven to 350°F (175°C) and lightly grease a 9×13 inch baking pan.
- To Make the Cookie Bars: In a large bowl, cream together the softened butter and granulated sugar until well combined, light, and fluffy (2-3 minutes). Then, beat in the large egg and vanilla extract for another 1-2 minutes until fully incorporated.
- In a separate bowl, whisk together the flour, baking powder, and salt. Gradually add these dry ingredients to the wet mixture, stirring by hand with a rubber spatula until just combined. Be careful not to overmix.
- Spread the dough evenly into the prepared 9×13 inch pan and press it down slightly. Bake for 10-13 minutes. Do not overbake; the middle should be just set, and the edges should have a very slight golden color. Transfer the pan to a wire rack to cool completely.
- To Make the Frosting: In a medium mixing bowl, cream together the softened butter and powdered sugar until combined and smooth. Add the milk and vanilla extract, then mix for 1-2 minutes until the frosting is light and fluffy. If desired, dye the frosting with food coloring.
- Once the cookie bar is completely cool, spread the frosting evenly on top and adorn with sprinkles (optional).
- Slice the bars with a sharp knife and serve. Enjoy your delicious homemade sugar cookie bars!
Recipe Notes
Refrigerate any leftover frosted bars in an airtight container for up to 1 week. For best results, allow them to come to room temperature for about 15-30 minutes before serving.
Nutrition Facts (per serving)
Calories: 381 kcal, Carbohydrates: 43g, Protein: 6g, Fat: 21g, Saturated Fat: 12g, Polyunsaturated Fat: 1g, Monounsaturated Fat: 6g, Trans Fat: 1g, Cholesterol: 169mg, Sodium: 150mg, Potassium: 74mg, Fiber: 1g, Sugar: 29g, Vitamin A: 714IU, Calcium: 44mg, Iron: 1mg.
