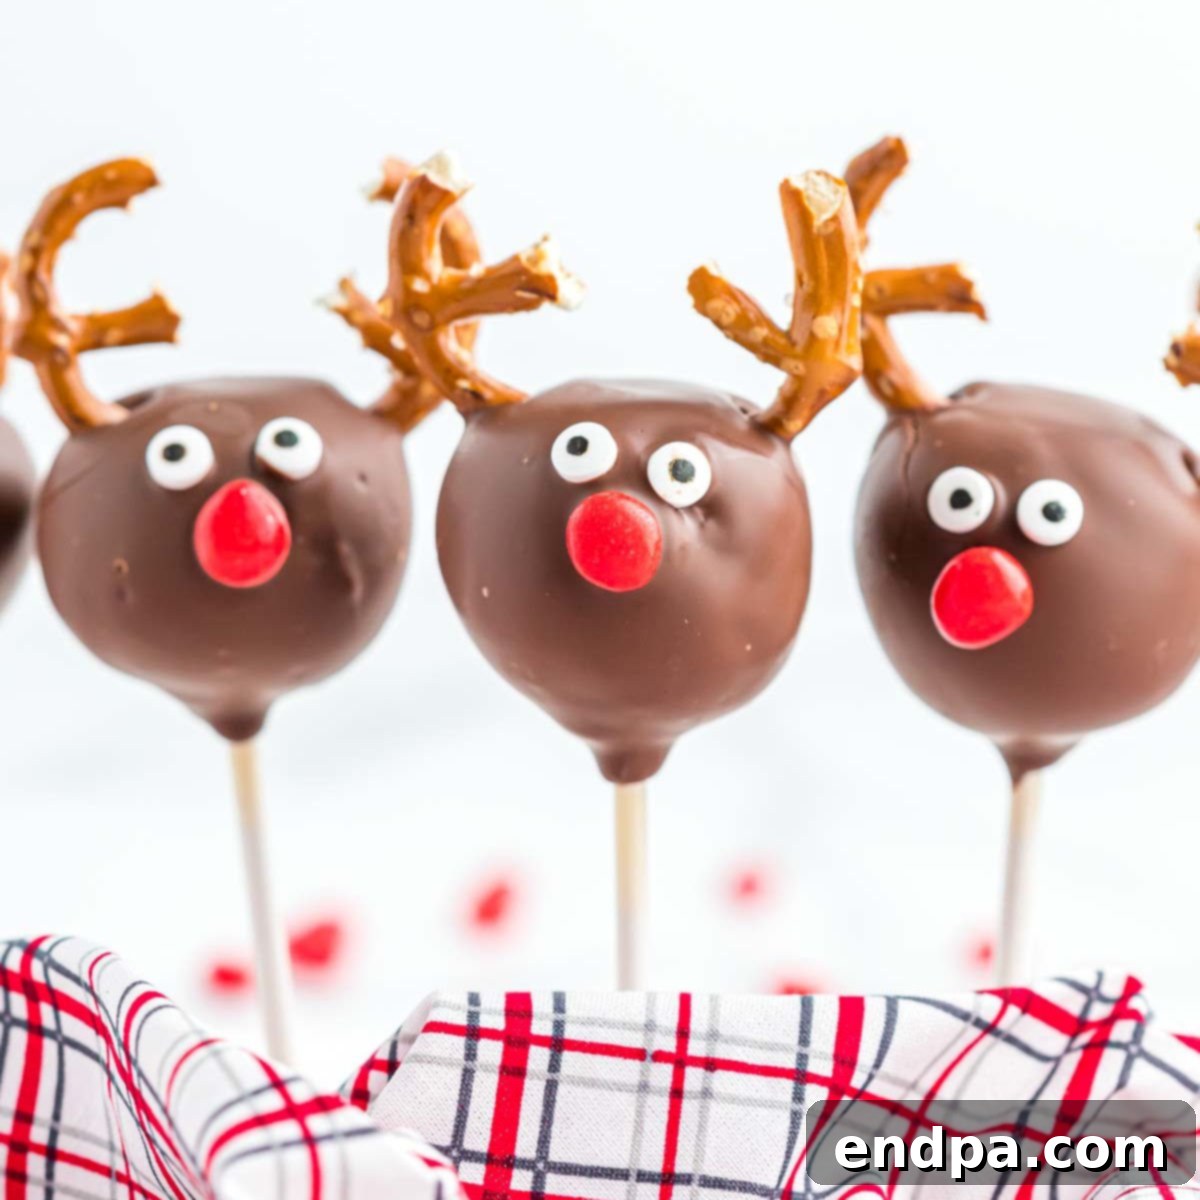
Reindeer Cake Pops are the quintessential holiday treat, bringing joy and a touch of whimsy to any Christmas celebration. These adorable, bite-sized desserts are not only incredibly fun to make but also surprisingly simple, making them a perfect activity for families during the festive season. Imagine the delight on children’s faces as they help transform a humble cake mix into charming Rudolph-inspired delights, complete with crunchy pretzel antlers and bright red candy noses. Whether you’re hosting a grand Christmas party, looking for a delightful edible gift, or simply want to add a dash of cheer to your holiday baking, these cake pops are an absolute must-try. They embody the spirit of Christmas in every delicious bite, promising a treat that is as memorable as it is tasty.
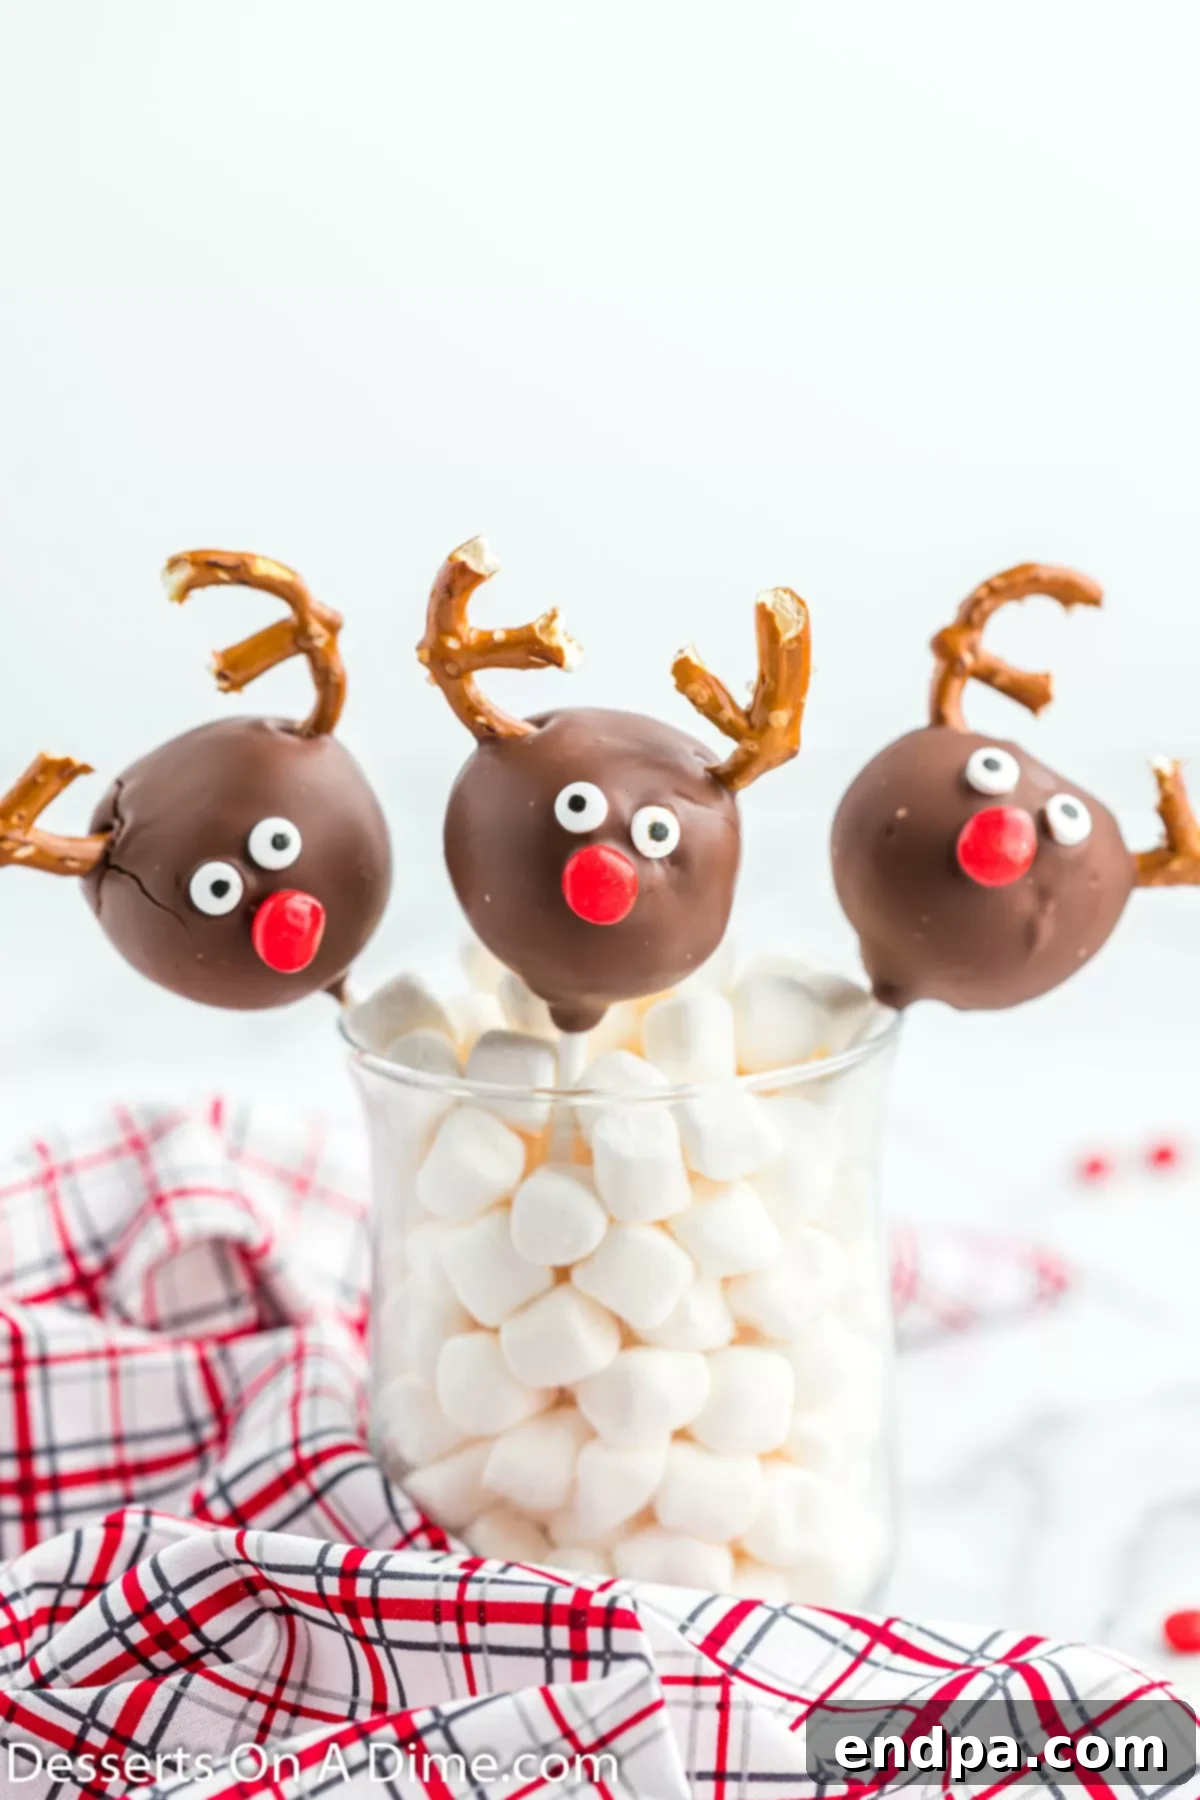
Get ready for an incredibly fun and festive holiday baking experience with these easy-to-make Reindeer Cake Pops. This recipe is a huge hit with kids and adults alike, sparking excitement and creativity in the kitchen. They are the perfect complement to a whole range of other delightful Christmas treats, creating a charming festive spread. Consider serving them alongside delightful Nutter Butter Reindeer, classic Reindeer Cookies, and crunchy Reindeer Pretzel Rods for an ultimate reindeer-themed dessert extravaganza. These Christmas Desserts are not just treats; they’re edible works of art that add an extra layer of charm to your holiday celebrations. We also love to whip up a batch of Reindeer Brownies to complete our collection of adorable holiday sweets.
What’s in this post: Reindeer Cake Pops
- What Are Reindeer Cake Pops?
- Why You’ll Love This Reindeer Cake Pop Recipe
- Simple Ingredients for Reindeer Cake Pops
- Creative Variations and Substitutions
- Step-by-Step Guide: How to Make Reindeer Cake Pops
- Expert Tips for Perfect Reindeer Cake Pops
- Serving and Storage Suggestions
- Frequently Asked Questions
- More Easy Cake Pop Creations
- Expand Your Reindeer Dessert Collection
- Reindeer Cake Pops Recipe Card
What Are Reindeer Cake Pops?
Reindeer Cake Pops are delightful bite-sized confections, essentially miniature cake balls expertly blended with frosting, then dipped in a smooth chocolate coating and adorned to resemble the beloved festive reindeer. Each whimsical pop features crunchy pretzel pieces ingeniously shaped into antlers, adorable candy eyes that bring them to life, and a vibrant red hot candy for that iconic Rudolph nose. These charming treats encapsulate the essence of holiday cheer, offering a perfect fusion of moist cake texture with a sweet, decorative exterior. They are a beloved addition to any Christmas gathering, captivating both young and old with their irresistible cuteness and delicious flavor.
Why You’ll Love This Reindeer Cake Pop Recipe
There are countless reasons why these Reindeer Cake Pops will become a cherished part of your holiday traditions. First and foremost, they are incredibly **fun for the whole family** to make. The simple steps, from crumbling the cake to decorating each little reindeer, offer a fantastic opportunity for kids to get involved in the kitchen, fostering creativity and making lasting memories. Secondly, their **bite-sized nature** makes them ideal for parties and gatherings. Guests can easily grab a pop without the need for plates or cutlery, minimizing mess and maximizing enjoyment. Thirdly, these cake pops are wonderfully **versatile**. While we love the classic vanilla, you can easily adapt the cake flavor and decorations to suit your preferences or match a specific theme. Finally, they are a **visual delight**. The transformation from simple ingredients into an adorable reindeer is truly magical, making them a stunning centerpiece on any dessert table and a conversation starter at any festive event. This recipe truly offers a combination of ease, enjoyment, and undeniable charm.
Simple Ingredients for Reindeer Cake Pops
Crafting these festive Reindeer Cake Pops requires just a handful of readily available ingredients. The beauty of this recipe lies in its simplicity, allowing you to create impressive treats without a lengthy shopping list. Here’s what you’ll need to gather:
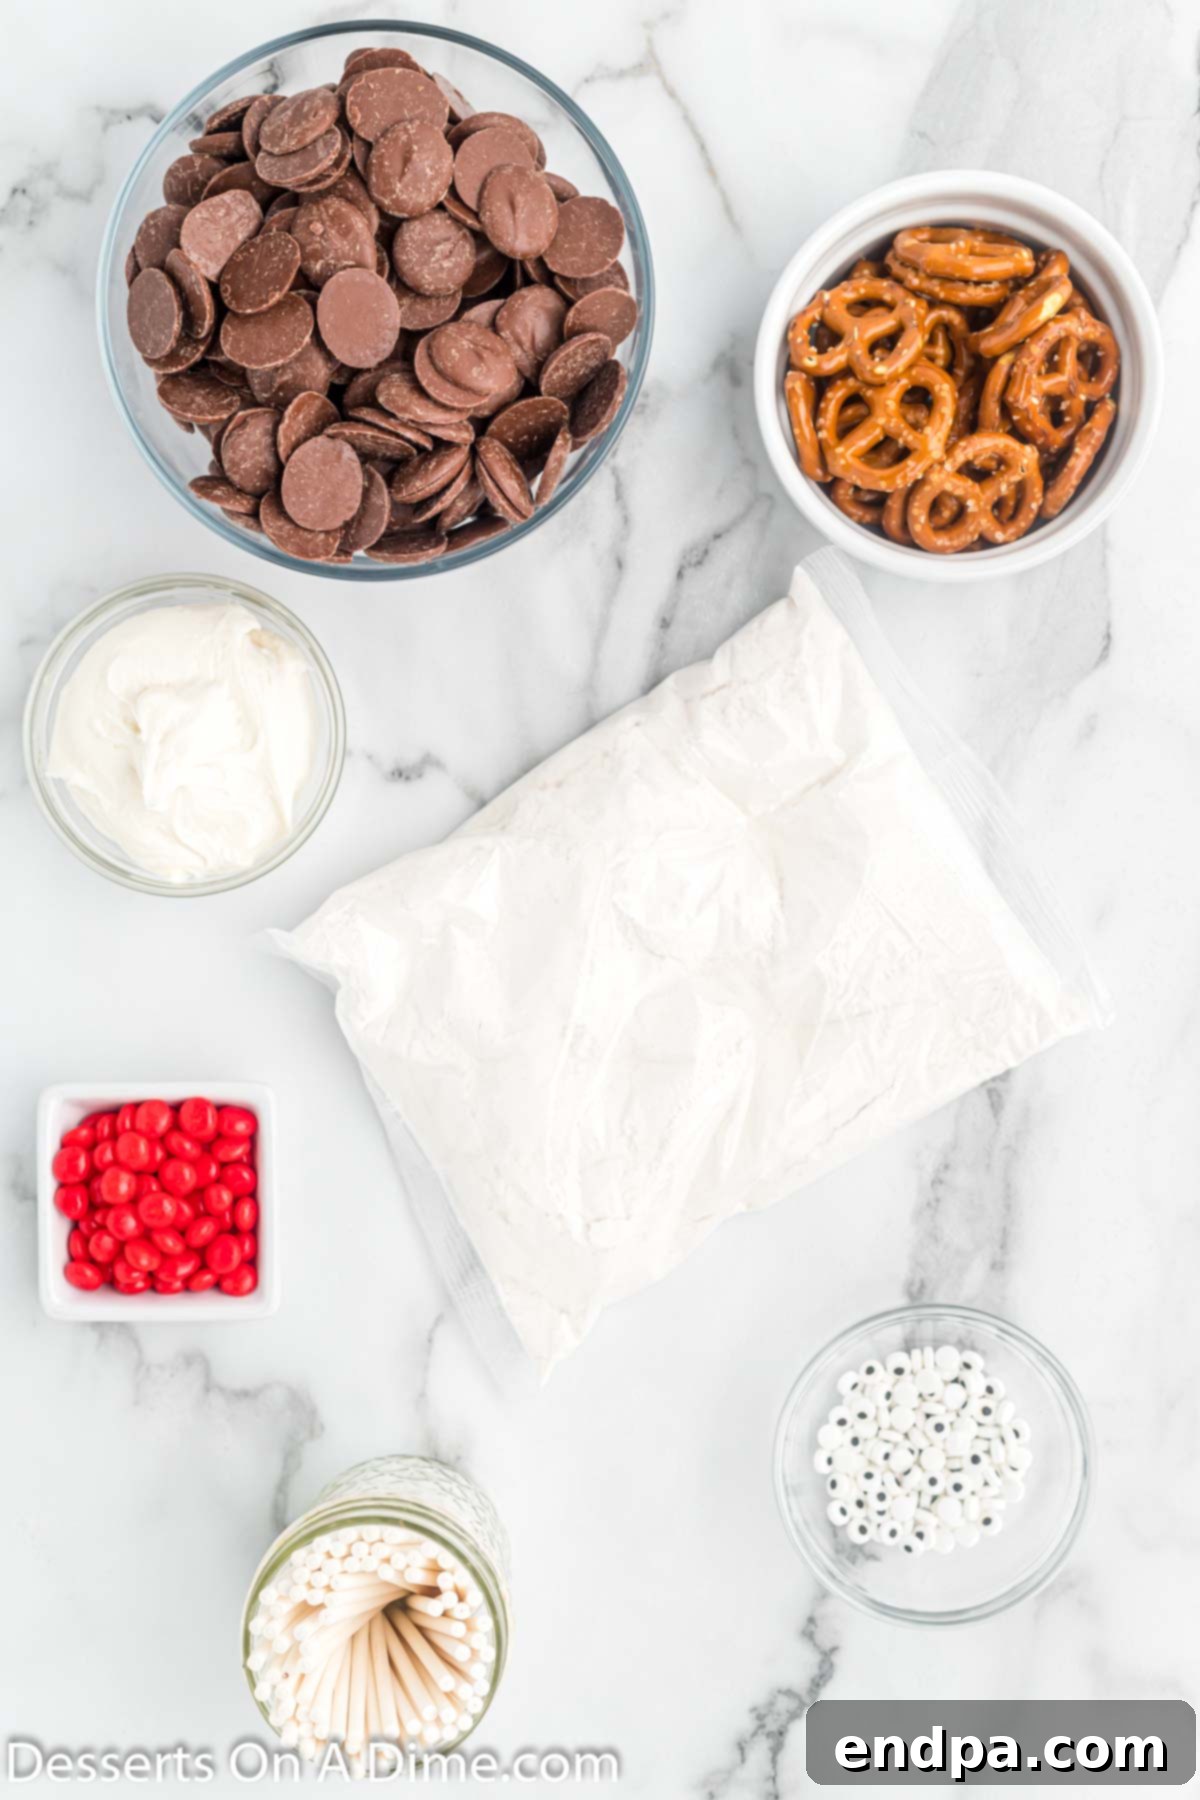
- Vanilla Cake Mix: A standard 15 oz box of vanilla cake mix forms the base of our cake pops. Feel free to use your favorite brand. Remember to also have the additional ingredients required to prepare the cake, as specified on the back of the box (typically eggs, oil, and water).
- Vanilla Frosting: About ⅓ cup of pre-made vanilla frosting is what binds the crumbled cake into the perfect pop consistency. You can use canned frosting for convenience, or whip up a simple homemade batch for an extra touch.
- Chocolate Candy Melts: A 16 oz bag of chocolate candy melts will provide that smooth, reindeer-brown coating. Candy melts are specifically designed to melt smoothly and harden quickly, making them ideal for dipping.
- Candy Eyes: Approximately 40 candy eyes are needed to give each reindeer its unique expression. These are widely available in baking supply aisles during the holidays.
- Red Hots Candy: Around 20 small red hots candies will serve as the iconic bright red nose for each Rudolph. If you can’t find Red Hots, small red M&M’s or even small red jelly beans can be charming alternatives.
- Small Pretzels: You’ll need about 20 small, twisted pretzels. These will be broken in half to create the distinctive reindeer antlers. Choose classic salted pretzels for a nice sweet and salty contrast.
- Lollipop Sticks: These are essential for holding your cake pops. Standard 6-inch lollipop sticks work perfectly.
This simple list ensures you’re well-equipped to create a batch of festive Reindeer Cake Pops that are both delicious and visually appealing!
Creative Variations and Substitutions
One of the joys of making Reindeer Cake Pops is the freedom to get creative with flavors and decorations. While our classic vanilla and chocolate combination is a crowd-pleaser, don’t hesitate to experiment!
- Cake Flavor: Don’t limit yourself to vanilla!
- Chocolate Cake: For a richer, deeper flavor, use a chocolate cake mix.
- Red Velvet Cake: A red velvet cake base adds a touch of sophistication and a beautiful color contrast.
- Spice Cake: Perfect for autumn or a more complex holiday flavor profile.
- Gingerbread Cake: Embrace the festive season fully with a gingerbread cake mix for a truly seasonal treat.
- Frosting Flavors: The frosting binds the cake crumbs, but it also adds flavor!
- Cream Cheese Frosting: Pairs wonderfully with red velvet or carrot cake variations.
- Peanut Butter Frosting: A delightful choice if you love peanut butter and chocolate combinations.
- Chocolate Frosting: Doubles down on the chocolate flavor, especially with a chocolate cake mix.
- Candy Coating: Beyond classic chocolate, there are many options.
- White Candy Melts: You can use white candy melts and tint them with food coloring to create different colored reindeers, or even snowy white reindeers.
- Dark Chocolate: For a more intense chocolate flavor, opt for dark chocolate candy melts or tempered dark chocolate.
- Sprinkles: Before the chocolate coating fully sets, add festive sprinkles, edible glitter, or even finely chopped nuts for extra texture and sparkle.
- Antler Alternatives:
- Chocolate-Dipped Pretzels: For extra indulgence, dip your pretzel antlers in a contrasting chocolate (e.g., white chocolate) and let them set before adding to the cake pops.
- Piped Chocolate: If you’re feeling ambitious, you can pipe melted chocolate into antler shapes on parchment paper, let them harden, and then insert them.
- Edible Decorations: Look for edible fondant antlers or candy pieces shaped like antlers in baking supply stores.
- Nose Variations: While Red Hots are iconic, feel free to use:
- Red M&M’s: A larger, softer red nose.
- Mini Chocolate Chips: For a classic brown nose.
- Gummy Candies: Small red gummy candies can add a chewy texture.
- Dietary Considerations:
- Gluten-Free: Simply substitute with a gluten-free cake mix and ensure your pretzels are certified gluten-free.
- Dairy-Free: Use a dairy-free cake mix, a dairy-free frosting alternative, and dairy-free chocolate candy melts (check labels carefully).
These variations allow you to customize your Reindeer Cake Pops to fit any taste preference, dietary need, or creative vision, ensuring every batch is unique and delightful.
Step-by-Step Guide: How to Make Reindeer Cake Pops
Creating these festive Reindeer Cake Pops is a fun and straightforward process. Follow these detailed steps for a batch of perfect holiday treats.
- Step 1: Prepare and Cool the Cake. Begin by preparing your chosen cake mix according to the box instructions. Bake it in a 9×13 inch pan. Once baked, allow the cake to cool completely at room temperature. This step is crucial; attempting to crumble a warm cake will result in a messy, sticky mixture.
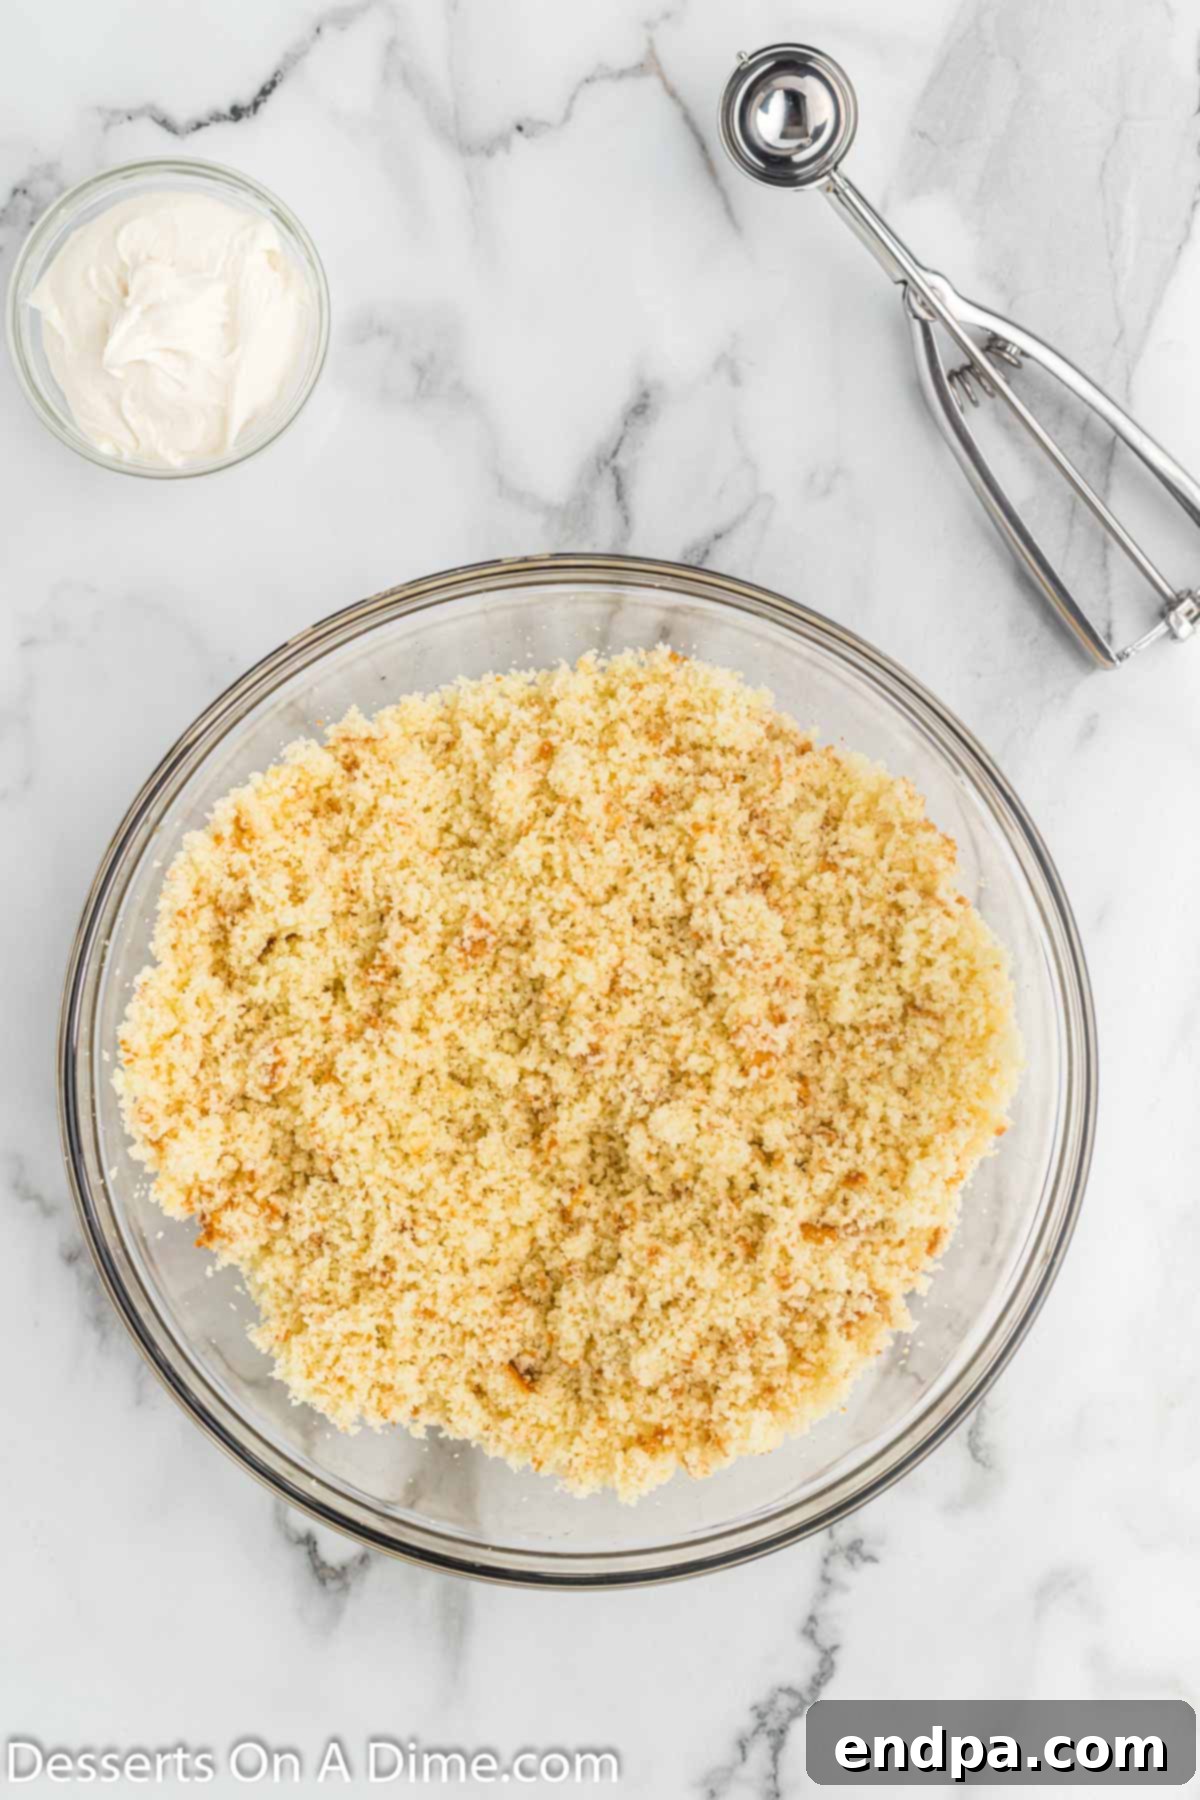
Step 2: Crumble the Cake. Once the cake is fully cooled, remove it from the pan. Carefully trim and discard any overly browned or crusty edges from the outside layer of the cake. These drier parts can affect the texture of your cake pops. Crumble the remaining, moist cake into very fine crumbs. The finer the crumbs, the smoother your cake pop mixture will be. Place these fine crumbs into a large mixing bowl.
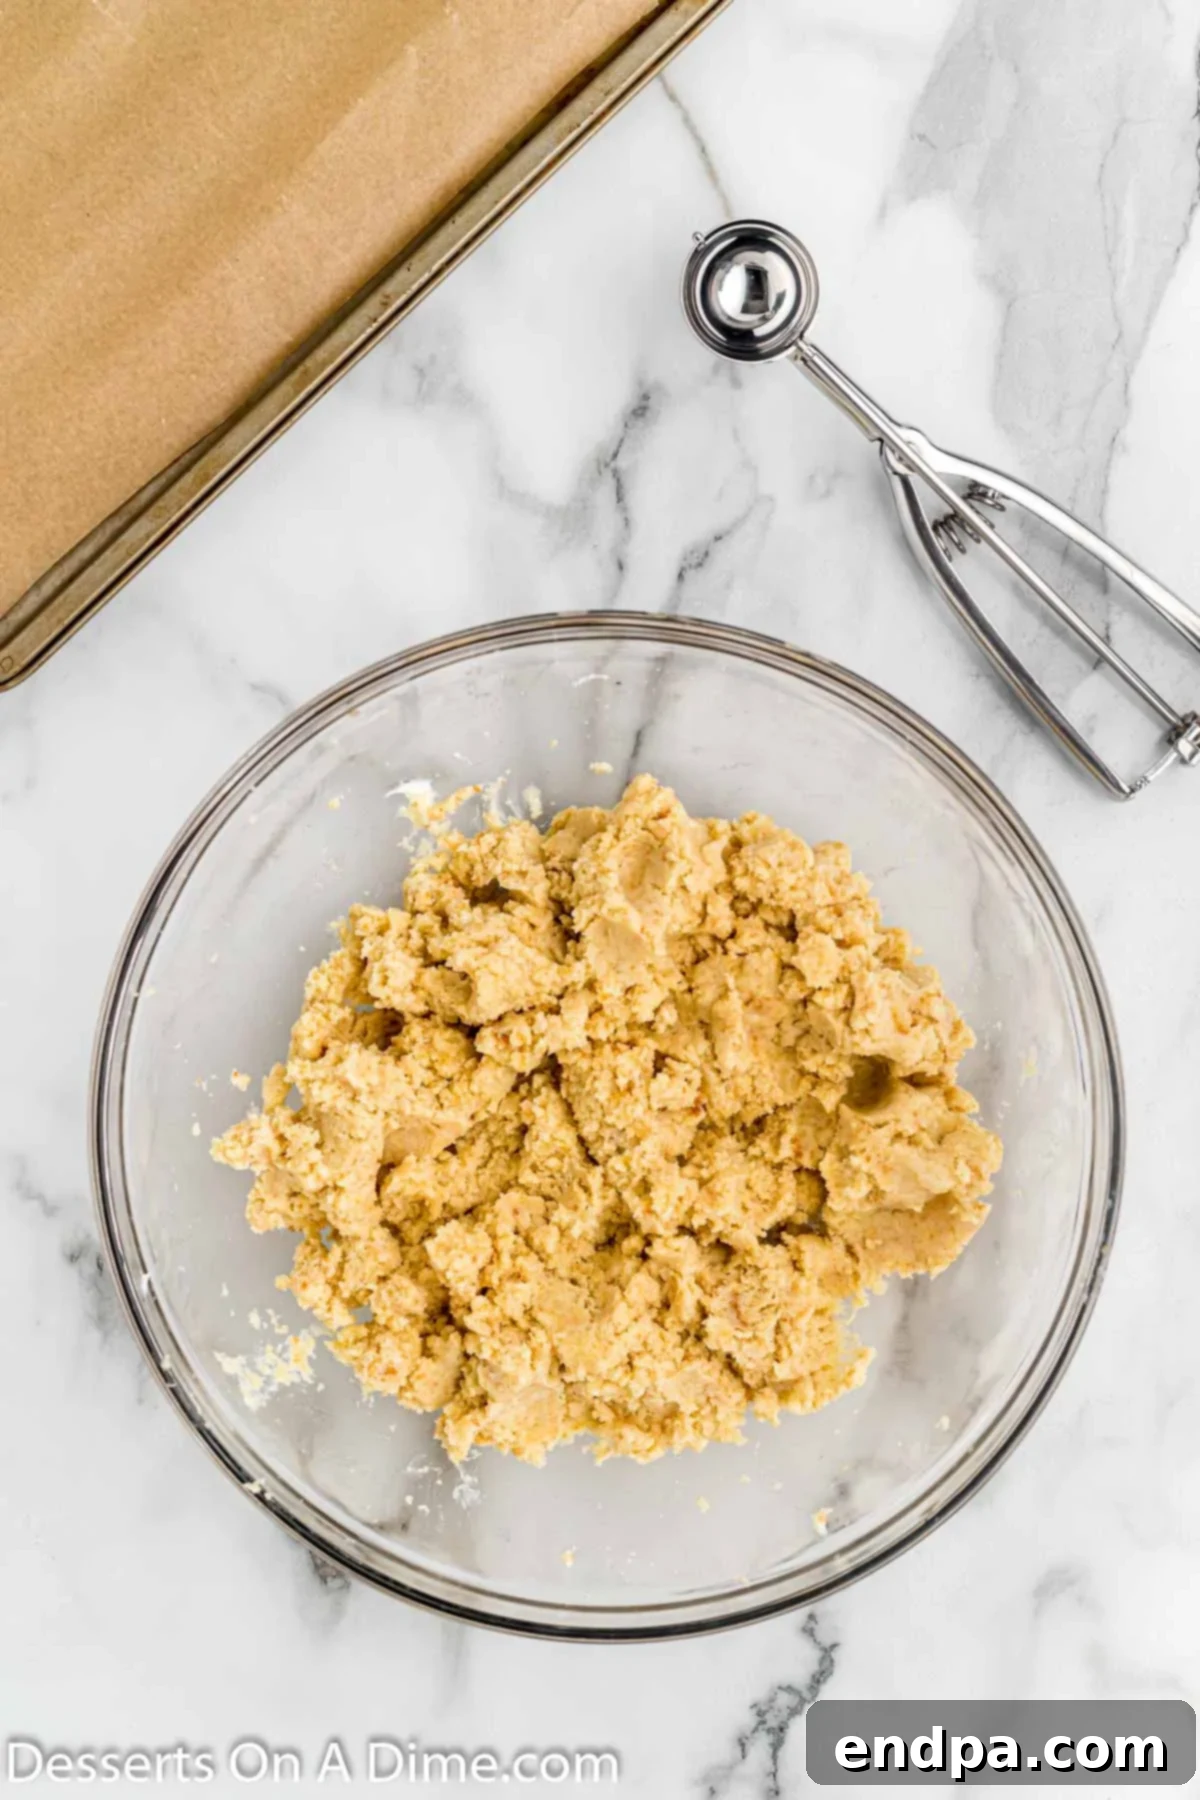
Step 3: Combine Cake and Frosting. Add the vanilla frosting to your crumbled cake. Using a sturdy spoon or your hands (which often works best for even distribution), mix everything together until it is thoroughly combined. The mixture should be dense, moist, and sticky enough to hold its shape when rolled, similar to cookie dough or play-doh. It should not be too wet or too dry.
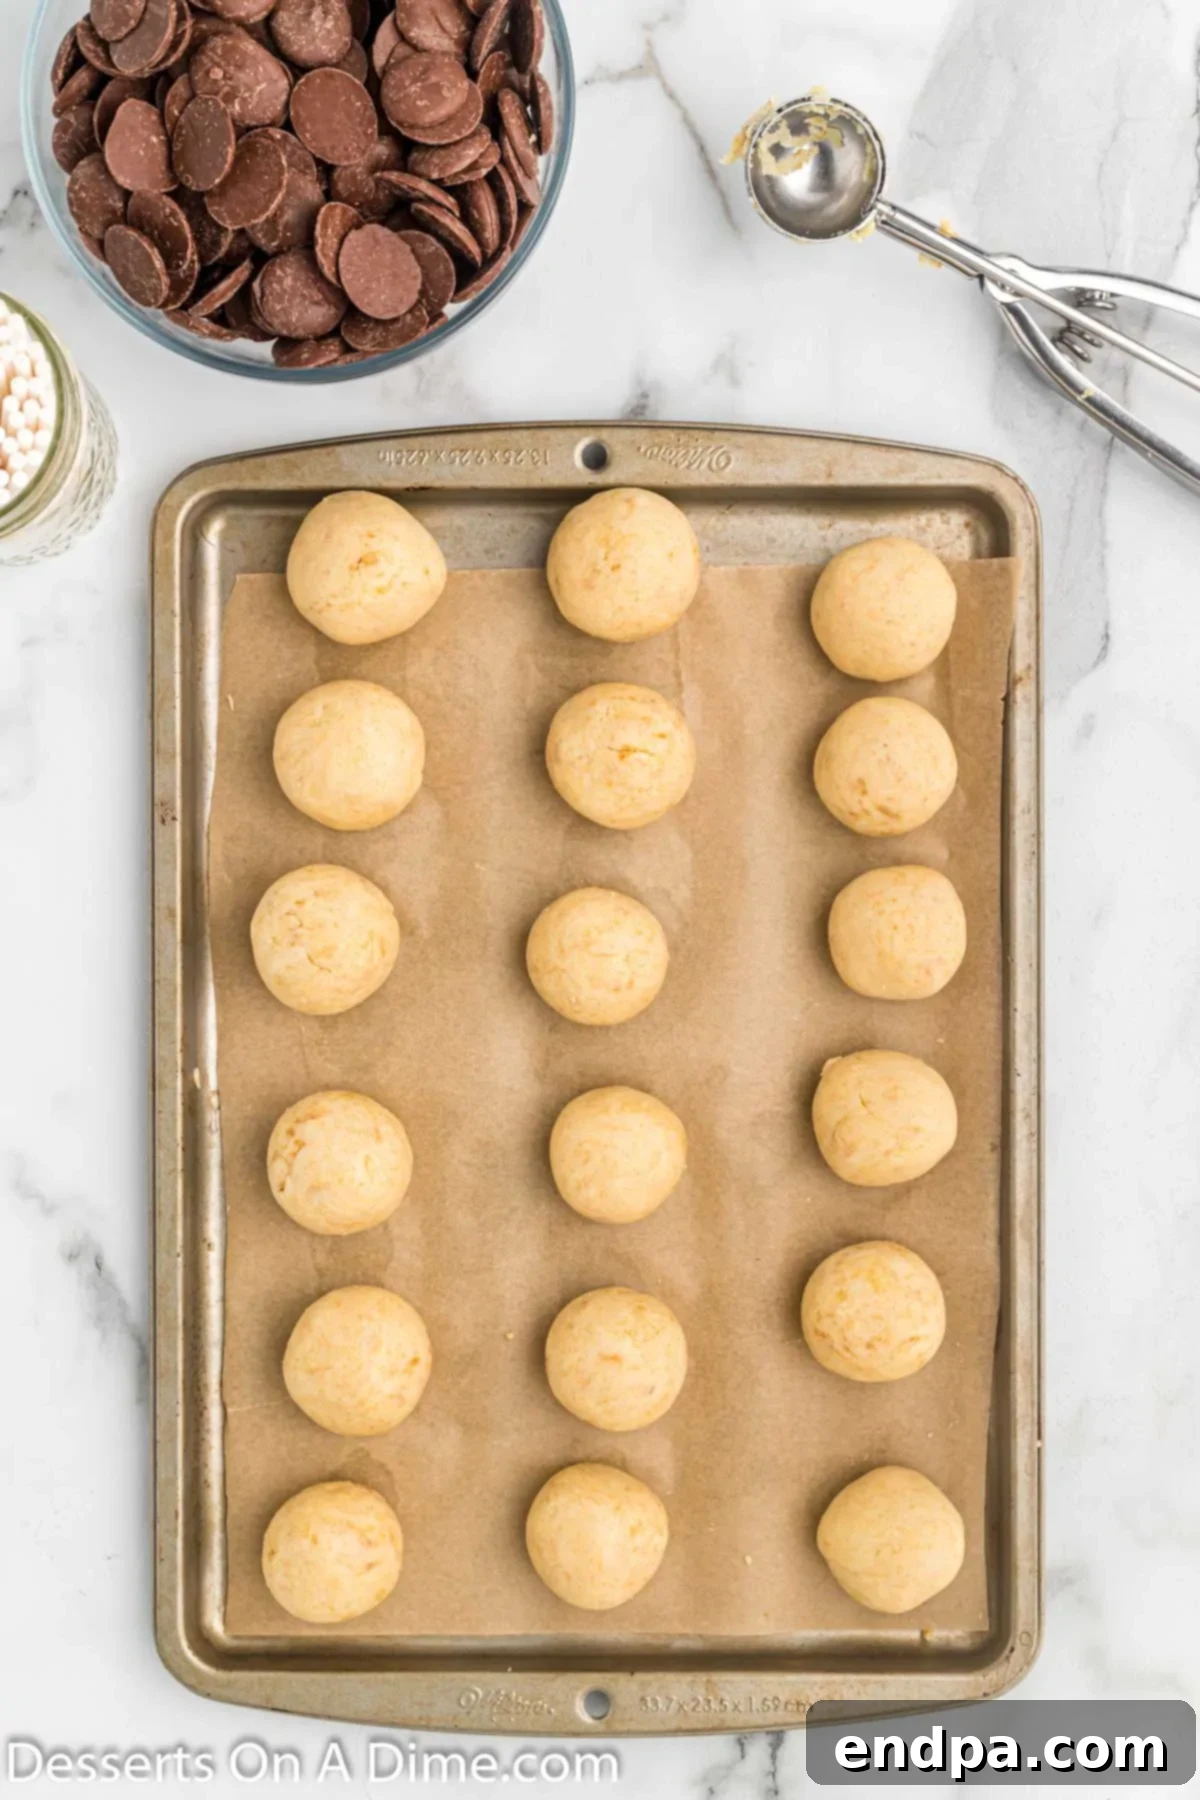
Step 4: Form Cake Balls. Using a cookie scoop (a 1.5-inch scoop works well for uniform size), portion out the cake mixture. Roll each portion firmly between your palms to form smooth, dense cake balls. Aim for about 24-36 cake balls, depending on your desired size. Place these cake balls onto a baking sheet lined with parchment paper. This preparation ensures they don’t stick and are easy to handle.
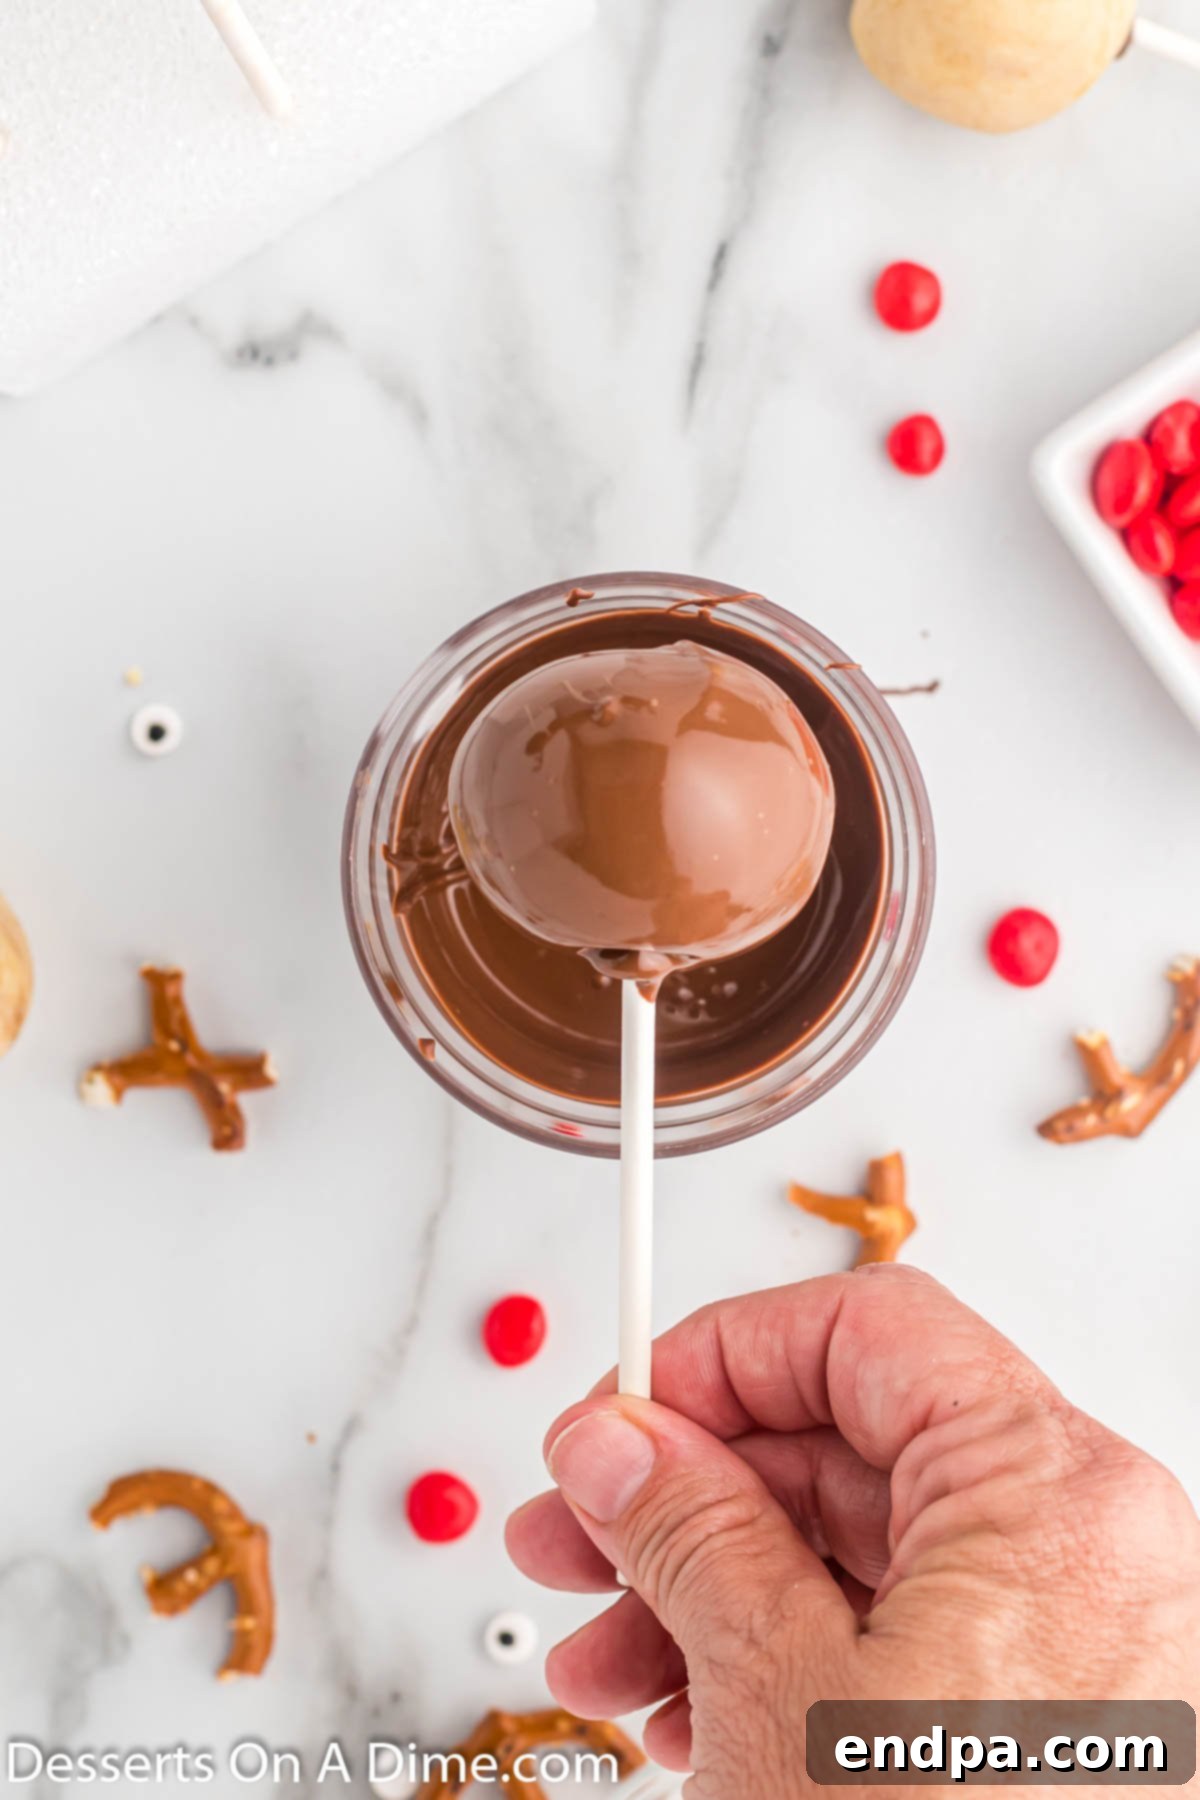
Step 5: Prepare for Dipping. In a small, microwave-safe bowl, melt your chocolate candy melts. Heat them in 30-second intervals, stirring thoroughly after each interval, until the chocolate is completely smooth and creamy. Take a lollipop stick, dip the tip about half an inch into the melted chocolate, then gently insert it about halfway into a cake ball. The melted chocolate acts as “glue” to secure the stick. Repeat for all cake balls. Place the prepared cake balls (with sticks) in the freezer for 10-15 minutes. This chilling period helps the cake balls firm up and prevents them from falling off the sticks during dipping. Do not freeze longer, as they can crack.
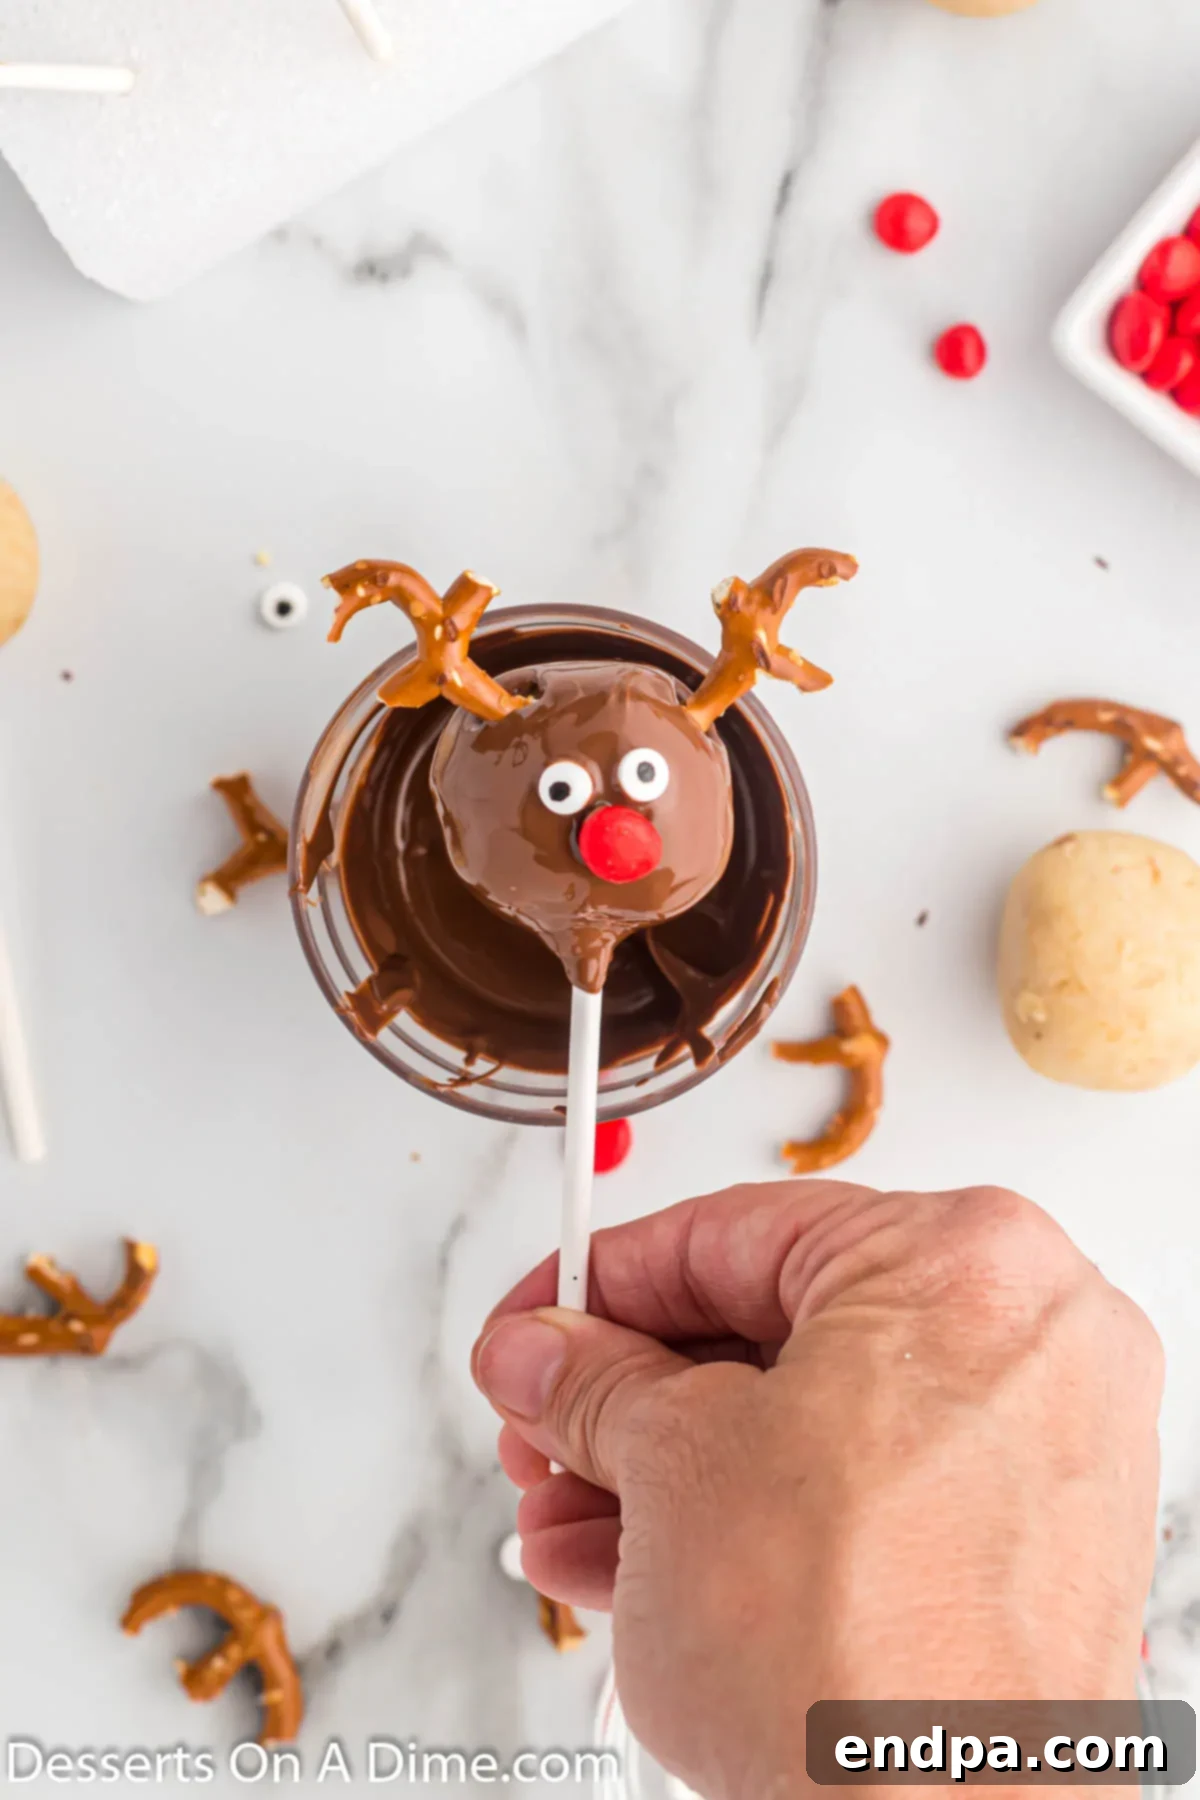
Step 6: Dip and Decorate. Once chilled, remove the cake pops from the freezer. If your chocolate melts have solidified, re-melt them to a smooth, dippable consistency. Dip each cake pop into the melted chocolate, swirling gently to ensure it’s fully coated. Lift it out, allowing any excess chocolate to drip back into the bowl. Immediately, while the chocolate is still wet, press two pretzel halves into the top for antlers, add two candy eyes, and place a red hot candy for the nose. Work quickly as the chocolate sets fast.
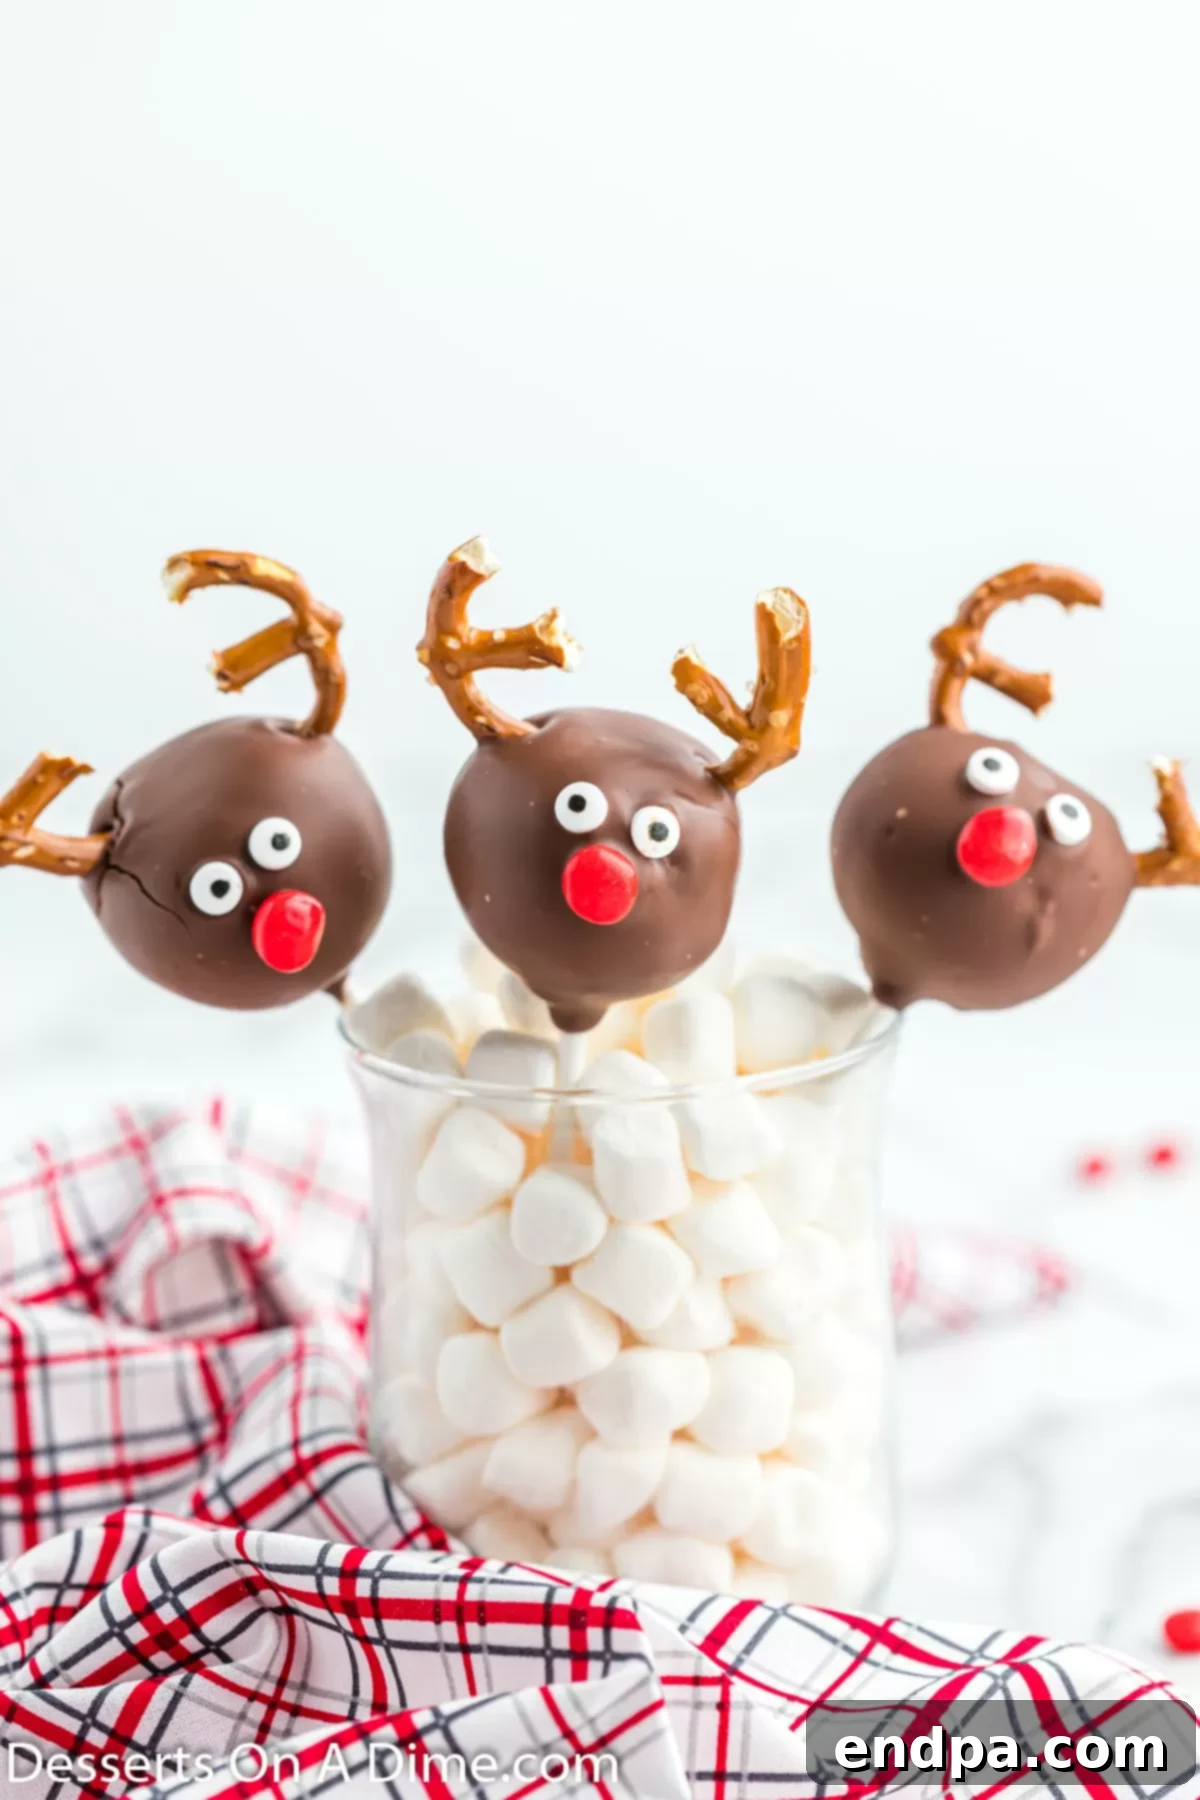
Step 7: Set and Dry. Insert the decorated cake pops upright into a cake pop stand or a block of Styrofoam. Allow them to dry completely at room temperature until the chocolate coating is firm and hard to the touch. This can take anywhere from 15-30 minutes, depending on the room temperature and humidity. Once dry, your adorable Reindeer Cake Pops are ready to be served and enjoyed!
Expert Tips for Perfect Reindeer Cake Pops
Achieving bakery-quality cake pops is easier than you think with a few simple tricks up your sleeve. These tips will help ensure your Reindeer Cake Pops turn out beautifully every time:
- Consistency is Key: The cake and frosting mixture should be firm enough to roll into a ball without crumbling, but not so wet that it’s sticky or difficult to handle. If it’s too crumbly, add a tiny bit more frosting. If it’s too wet, you can add a tablespoon of powdered sugar, or chill it for a bit longer.
- Chill Thoroughly, But Not Too Long: Freezing the cake balls for 10-15 minutes is crucial for them to firm up and stay on the stick. However, freezing them for too long can cause cracks in the chocolate coating once they are brought back to room temperature.
- Melting Chocolate: Heat candy melts in short bursts (30 seconds) and stir well between each, even if they don’t look melted yet. Overheating can cause the chocolate to seize or become too thick. If your chocolate is too thick, thin it with a small amount of vegetable oil or coconut oil (start with ½ teaspoon and add more gradually).
- Smooth Dipping: For a smooth coating, ensure your melted chocolate is not too hot (it can melt the cake ball) and not too cool (it will be too thick). A deep, narrow container for melting chocolate is ideal for easy, even dipping.
- Shake Off Excess: After dipping, gently tap the stick against the side of the bowl to allow any excess chocolate to drip off. This prevents puddles at the base and ensures a clean, professional finish.
- Work Quickly While Decorating: Candy melts harden fast! Have all your decorations (pretzels, eyes, noses) ready and within arm’s reach before you start dipping. Decorate each cake pop immediately after dipping while the chocolate is still wet to ensure everything sticks.
- Styrofoam Stand: A block of Styrofoam with holes poked in it is invaluable for holding the cake pops upright while they dry. This prevents flat spots on your beautifully round treats.
- Patience with Antlers: Breaking pretzels can be a bit tricky. For cleaner breaks, you can gently cut them with a sharp knife where you want them to split. Have extra on hand, as some might not break perfectly.
By following these expert tips, you’ll be well on your way to creating stunning and delicious Reindeer Cake Pops that will be the talk of your holiday party!
Serving and Storage Suggestions
Once your Reindeer Cake Pops are fully dried and set, they are ready to be displayed and devoured! Here are some ideas for serving and storing them:
- Display: Arrange your cake pops upright in a decorative cake pop stand, a festive mug filled with candy, or a block of Styrofoam covered with holiday fabric. They make a fantastic centerpiece for any dessert table. You can also individually wrap them in small cellophane bags tied with ribbon for party favors or edible gifts.
- Best Served: Cake pops are best enjoyed at room temperature, where their cake and frosting mixture is soft and moist, and the chocolate coating has a nice snap.
- Storage: Store any leftover Reindeer Cake Pops in an airtight container at room temperature for up to 1 week. Keeping them sealed will prevent them from drying out and will maintain their freshness and flavor.
- Freezing Cake Pops: You can freeze undecorated cake balls without the sticks for up to 3 months. Thaw them in the refrigerator overnight, then insert sticks, dip, and decorate as usual. If you freeze fully decorated cake pops, place them in a freezer-safe container, ensuring they don’t touch each other to prevent decorations from breaking. They are best when thawed in the refrigerator for several hours or overnight. While freezing is an option, they are truly at their peak when prepared and served fresh. For more detailed information, you can refer to our dedicated post on How to Freeze Cake Pops.
Frequently Asked Questions
Leftover cake pops should be stored in an airtight container at room temperature. They will stay fresh and delicious for up to 1 week. Ensure they are not exposed to direct sunlight or excessive heat, which could cause the chocolate to melt.
Yes, you can freeze cake pops, but they are generally best when prepared and served fresh. If you do choose to freeze them, it’s often best to freeze the undecorated cake balls on their sticks first. Once frozen, you can transfer them to a freezer-safe airtight container. When you’re ready to serve, thaw them, dip them in candy melts, and then decorate. This method helps prevent the decorations, especially the fragile pretzel antlers, from breaking. If freezing fully decorated pops, use a container where they won’t jostle. For comprehensive details, check out our guide on How to Freeze Cake Pops.
Creating the antlers is quite simple. Take small, twisted pretzels and carefully break them in half. The natural curves of the pretzel often create a perfect antler shape. For a cleaner break and more control over the shape, you can gently cut them with a sharp knife. Have a few extra pretzels on hand, as some might not break exactly as desired.
Absolutely! Preparing components in advance is a great time-saver. You can bake the cake and even crumble it and mix it with the frosting up to 24 hours ahead of time. Store the cake mixture covered in the refrigerator. Just bring it back to room temperature for about 15-20 minutes before rolling into balls to make it easier to work with.
Yes, making these Reindeer Cake Pops gluten-free is straightforward. Simply substitute the regular vanilla cake mix with your favorite brand of gluten-free cake mix. Additionally, ensure that the pretzels you use for the antlers are certified gluten-free. All other ingredients are typically naturally gluten-free, but it’s always wise to double-check labels if serving to individuals with severe gluten sensitivities.

More Easy Cake Pop Creations
If you’ve enjoyed making these delightful Reindeer Cake Pops, you’ll love exploring other variations of this popular bite-sized treat. Cake pops are incredibly versatile, offering endless possibilities for flavor and decoration. Here are some more easy cake pop recipes to inspire your next baking adventure:
- Cookie Dough Cake Pop Recipe: A delicious twist that combines two favorite desserts.
- Brownie Cake Pops: For the ultimate chocolate lover, rich and fudgy.
- Red Velvet Cake Pops: Elegant and flavorful, perfect for any occasion.
- Vanilla Cake Balls Recipe: The classic foundation for any creative cake pop design.
- Oreo Cake Pops: A crunchy, creamy, and undeniably popular choice.
Expand Your Reindeer Dessert Collection
Our Reindeer Cake Pops are just one of many charming reindeer-themed treats perfect for the holiday season. If you’re planning a festive spread or simply adore Rudolph and his friends, consider adding these other adorable desserts to your collection. They’re all easy to make and guaranteed to bring smiles:
- Reindeer Pretzels: A quick and simple sweet and salty snack.
- Nutter Butter Reindeer: Peanut butter lovers rejoice with these easy-to-decorate cookies.
- Easy Reindeer Brownies: Fudgy brownies dressed up for the holidays.
- Reindeer Cookies: Classic cookies with a festive twist.
- Delicious Reindeer Cupcakes: Individual treats that are as cute as they are tasty.
Go ahead and bring some extra sparkle to your holiday season by trying this fun and delightful Reindeer Cake Pops recipe. It’s an easy project that yields impressive results, perfect for sharing with loved ones or enjoying all to yourself. We’re confident these charming treats will become a cherished part of your festive baking traditions. Once you’ve created your batch of these adorable reindeers, please come back and share your experience with us by leaving a comment and rating the recipe!
Pin
Reindeer Cake Pops Recipe
15 minutes
25 minutes
15 minutes
55 minutes
24
American
Dessert
167
Carrie Barnard
Ingredients
- 1 box Vanilla Cake Mix 15 oz
- *Plus ingredients to prepare the cake on the back of the box
- ⅓ cup Vanilla Frosting I use pre-made
- 16 oz. Chocolate Candy Melts
- 40 Candy Eyes
- 20 Red Hots Candy
- 20 Small Pretzels
- Lollipop Sticks
Instructions
- 1. Prepare and Cool the Cake: Prepare your chosen cake mix and bake according to the box instructions in a 9×13 inch pan. Once baked, allow the cake to cool completely at room temperature.
- 2. Crumble the Cake: Remove the cooled cake from the pan. Discard any dry or overly browned outside layers. Crumble the remaining moist cake into very fine crumbs and place them in a large mixing bowl.
- 3. Combine Cake and Frosting: Add the vanilla frosting to your crumbled cake. Stir everything together until well combined and the mixture is dense enough to hold its shape.
- 4. Form Cake Balls: Using a cookie scoop, form the cake mixture into about 24-36 uniform cake balls. Roll each firmly to ensure smoothness and place them on a parchment-lined cookie sheet.
- 5. Melt Chocolate and Insert Sticks: In a small microwave-safe bowl, melt the chocolate candy melts in 30-second intervals, stirring until smooth. Dip each lollipop stick tip into the melted candy, then insert it halfway into each cake ball.
- 6. Chill Cake Pops: Place the prepared cake balls (with sticks) into the freezer for 10-15 minutes. This firming step is crucial for preventing them from falling apart during dipping. Do not freeze for longer than 15 minutes.
- 7. Prepare Antlers: While the cake pops are chilling, carefully cut the small pretzels in half to create the antler shapes. Have them ready for immediate decoration.
- 8. Dip in Chocolate: Remove cake pops from the freezer. Re-melt the candy melts if needed. Dip each cake pop into the melted chocolate, ensuring full coverage, and gently shake off any excess.
- 9. Decorate Immediately: While the chocolate is still wet, quickly insert two pretzel halves for antlers, attach two candy eyes, and place a red hot for the nose.
- 10. Dry and Serve: Insert the decorated cake pops into a cake pop stand or Styrofoam block, upright, and allow them to dry completely until the chocolate is firm. Once dry, they are ready to serve and enjoy!
Recipe Notes
*If the melted candy melt seems too thick for dipping, you can thin it out by adding a small amount (start with ½ teaspoon) of vegetable oil or coconut oil. Stir it in slowly until you reach the desired smooth, flowing consistency.
Nutrition Facts
Pin This Now to Remember It Later
Pin Recipe
