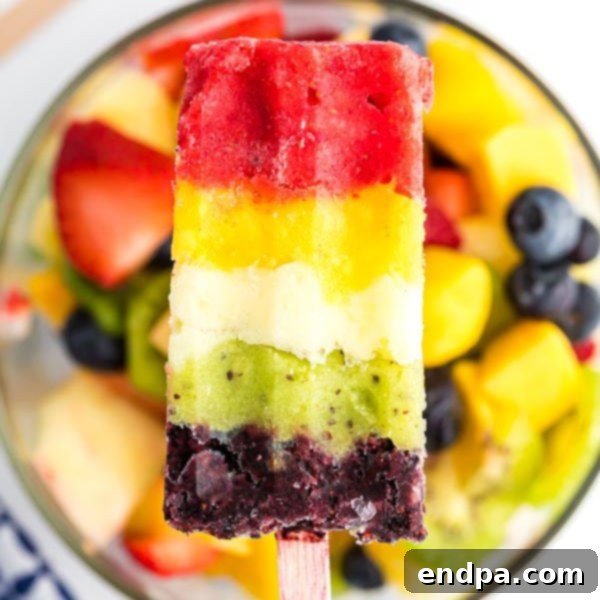
Experience the vibrant joy of summer with our incredibly easy and utterly delicious Rainbow Popsicle Recipe! These homemade fruit popsicles aren’t just a treat for the eyes; they’re packed with wholesome ingredients, making them a refreshing and guilt-free indulgence perfect for beating the heat. Each layer bursts with bright, natural colors and intense fruity flavors, creating a stunning visual and a delightful taste experience that both kids and adults will adore.
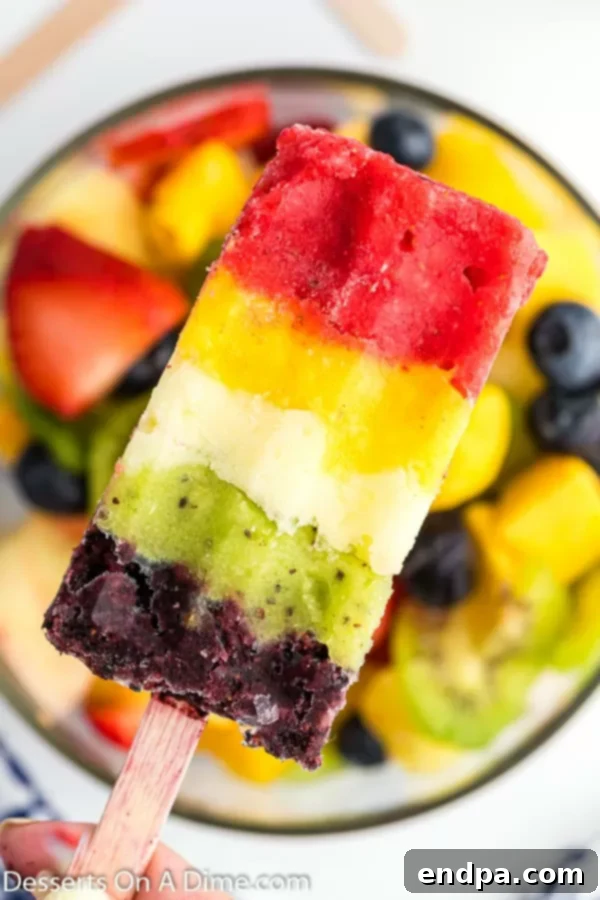
Say goodbye to artificial flavors and refined sugars found in store-bought options. Our recipe empowers you to create healthy fruit popsicles with gorgeous layers of pure fruit mixture that taste absolutely amazing. The magic lies in the simple layering technique, which transforms everyday fruits into an edible work of art. Imagine the smiles on faces as these beautiful, flavorful frozen treats emerge from their molds – a perfect antidote to a hot day, and a wonderful way to encourage healthy eating habits.
Beyond popsicles, the allure of rainbow treats brings joy to any occasion. If you love colorful culinary creations, you might also enjoy exploring our Rainbow Cupcakes and Easy Rainbow Sugar Cookies for more festive dessert ideas. For those who can’t get enough of homemade frozen delights, be sure to check out other family favorites like Cherry Pineapple Popsicles, our creamy Greek Yogurt Popsicles Recipe, and the sweet tang of Blueberry Yogurt Popsicles. And for a classic taste, our Cherry Popsicles are always a hit!
Table of Contents
- Why You’ll Love This Homemade Rainbow Popsicle Recipe
- The Magic of Layered Fruit Popsicles
- Essential Ingredients for Your Rainbow Popsicles
- Equipment You Will Need
- Customizing Your Rainbow Popsicles: Creative Variations
- Step-by-Step Guide to Making Rainbow Popsicles
- Pro Tips for Perfect Popsicles
- Frequently Asked Questions About Homemade Popsicles
- Serving and Storage Suggestions
- More Rainbow Desserts
- More Homemade Popsicle Recipes
Why You’ll Love This Homemade Rainbow Popsicle Recipe
Making homemade popsicles, especially ones with stunning rainbow layers, is surprisingly simple and incredibly rewarding. The beauty of this recipe lies in its straightforward approach: minimal effort, maximum impact. With just a blender and a few fresh or frozen fruits, you can transform simple ingredients into an extraordinary treat. Each layer is crafted by blending fruit separately, ensuring distinct, vibrant colors that captivate the eye.
There are numerous reasons why this recipe will become a household favorite:
- Effortless Preparation: The blender does most of the work, pureeing the fruit mixture in minutes.
- Visually Stunning: The distinct layers of yellow, green, red, and blue create a captivating rainbow effect that’s hard to resist.
- Naturally Delicious: Made with real fruit and a touch of honey, these popsicles are bursting with authentic, refreshing flavors.
- Healthy & Wholesome: A fantastic way to sneak in extra fruit servings for the family, free from artificial additives.
- Perfect for Any Occasion: Ideal for summer parties, a refreshing snack, or simply a fun kitchen activity with the kids.
- Highly Customizable: Easily adapt the fruits and sweeteners to suit your taste preferences and what’s in season.
These popsicles aren’t just food; they’re an experience. They embody the joy of summer, the fun of vibrant colors, and the satisfaction of a healthy, homemade treat. You might even find them a perfect accompaniment to an Ice Cream Charcuterie Board for a truly epic dessert spread!
The Magic of Layered Fruit Popsicles
The secret to these show-stopping rainbow popsicles is the layering technique. By preparing each fruit puree separately and adding them one by one to the molds, you achieve distinct, beautiful stripes that make these popsicles truly special. This isn’t just about aesthetics; it also allows you to appreciate the individual flavors of each fruit before they meld into a harmonious blend. The process itself is part of the fun, a creative endeavor that yields a delicious reward.
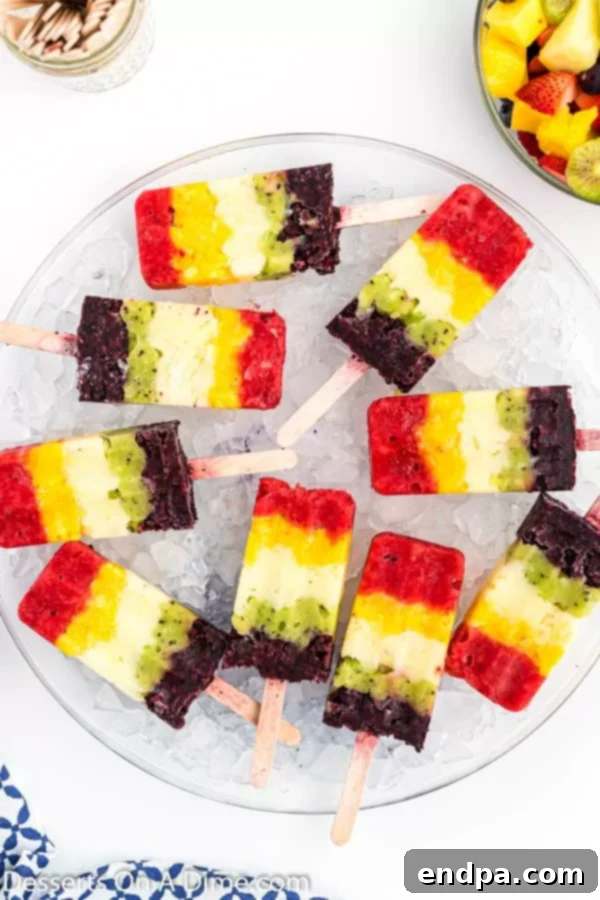
When the vibrant fruit purees come together, they create a mesmerizing gradient of colors. The finished product showcases a spectrum of hues, often featuring a luscious red strawberry layer, a sunny yellow mango layer, a bright green kiwi layer, and a deep blue blueberry layer, among others. This visual appeal makes them incredibly inviting, especially for children who might otherwise be hesitant to try certain fruits. It’s a fantastic way to engage their senses and make healthy eating an exciting adventure.
Essential Ingredients for Your Rainbow Popsicles
Crafting these colorful frozen treats starts with a selection of vibrant, naturally sweet fruits. We’ve chosen a combination that not only delivers a beautiful rainbow but also offers a spectrum of flavors and nutritional benefits. Using frozen fruit is highly recommended as it results in a thicker, colder puree that holds its layers better, though fresh or canned can also work with a pre-freezing step.
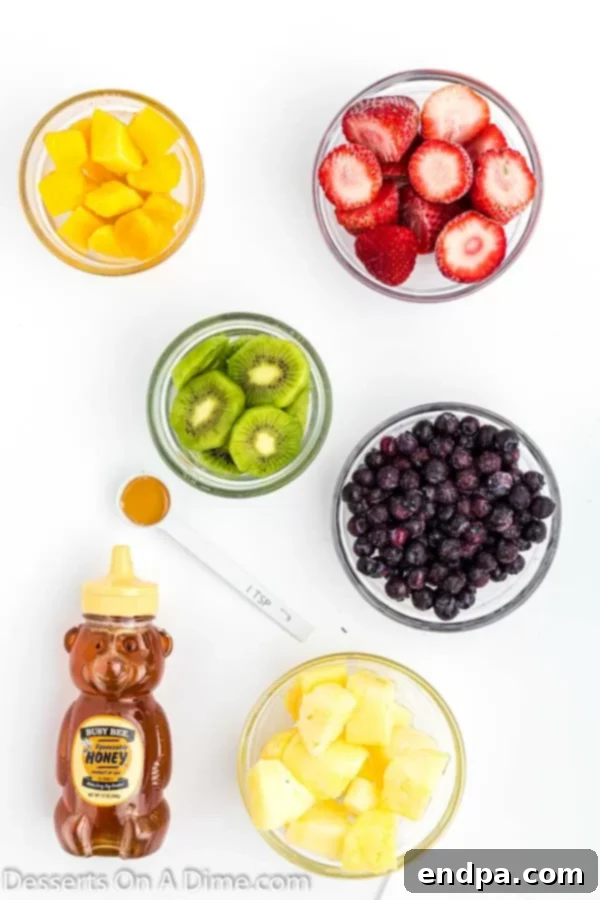
- Strawberries: These provide a beautiful red layer and a classic sweet-tart flavor. Rich in Vitamin C and antioxidants, strawberries are a refreshing addition.
- Mango: For a luscious yellow layer, frozen mango chunks are perfect. Mangoes add a tropical sweetness and are packed with vitamins A and C, and fiber.
- Pineapple Chunks: Another fantastic fruit for a bright yellow or pale orange layer, offering a tangy-sweet tropical note. Pineapple is known for its bromelain enzyme and high Vitamin C content.
- Sliced Kiwi: Peel and freeze your kiwi to create a vibrant green layer. Kiwis are tiny powerhouses of Vitamin C, K, and E, offering a unique tangy flavor.
- Blueberries: The deep purple-blue hue of blueberries makes for a stunning top or bottom layer. These berries are famous for their antioxidant properties and sweet-tart taste.
- Honey: A natural sweetener that complements the fruit flavors beautifully. You can adjust the amount to your preference or substitute with maple syrup or agave nectar.
Equipment You Will Need
Making these rainbow popsicles requires just a few basic kitchen tools:
- Blender: A high-speed blender is ideal for smooth fruit purees, but any standard blender will work.
- Popsicle Molds: Essential for shaping your popsicles. There are many fun shapes and sizes available.
- Popsicle Sticks: If your molds don’t come with reusable sticks, you’ll need wooden popsicle sticks.
- Measuring Cups and Spoons: For accurate ingredient quantities.
- Small Bowls or Containers: To hold each fruit puree after blending, before layering.
- Spoon: For carefully spooning the layers into the molds.
Customizing Your Rainbow Popsicles: Creative Variations
One of the best aspects of homemade popsicles is the freedom to customize them! This recipe is a fantastic starting point, but feel free to get creative with your fruit choices and additions to make these frozen treats truly your own.
- Explore More Fruits: The possibilities are endless! Consider plums, cantaloupe, raspberries, peaches, or even watermelon for different color and flavor profiles. Just remember to aim for distinct colors if you want to maintain the rainbow effect. For example, use raspberries for a brighter red, or blackberries for a deeper purple.
- Adjust Sweetness: While honey provides a natural sweetness, you can easily adjust the amount based on the natural sweetness of your fruit and your personal preference. For a vegan option, use maple syrup or agave nectar instead of honey.
- Add a Creamy Touch: For a richer, creamier popsicle, consider blending some of the fruit purees with a spoonful of Greek yogurt or coconut milk. This can add a lovely creaminess and a slightly different texture to your layers.
- Herbal Infusion: For a sophisticated twist, add a few fresh mint leaves or a sprig of basil to a fruit puree before blending. This can introduce a subtle, refreshing aroma and flavor.
- Spice It Up: A tiny pinch of ginger or a dash of cinnamon could add an unexpected warmth to certain fruit layers, like apple or pear.
- Sneak in Veggies (The Unnoticeable Way!): This is a brilliant trick for parents! The key to incorporating vegetables without your kids detecting them is to match colors. For example, spinach blends seamlessly with kiwi for a super green layer, as their colors are similar and the mild flavor of spinach is easily masked by the fruit. Carrots can be blended with mango or pineapple for an extra boost of Vitamin A.
Step-by-Step Guide to Making Rainbow Popsicles
Creating these vibrant fruit popsicles is an enjoyable process. Follow these detailed steps to achieve perfectly layered, delicious frozen treats.
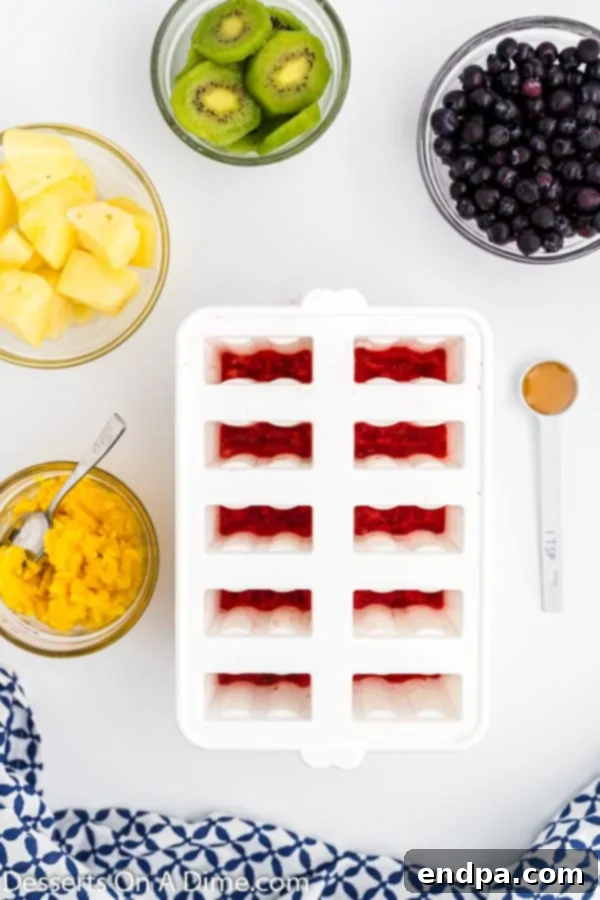
Step 1: Prepare Your Fruit Purees
Separately blend each type of frozen fruit with approximately 1-2 teaspoons of honey (adjust to taste). You want a smooth, thick consistency that is easy to pour but not too watery. If your fruit is very thick, add a tiny splash of water (about 1 tablespoon at a time) to help it blend, but be careful not to make it too thin. After blending each fruit, transfer the puree to a separate small bowl. It’s crucial to thoroughly clean out your blender between each fruit type to prevent colors from mixing and muddying your beautiful rainbow.
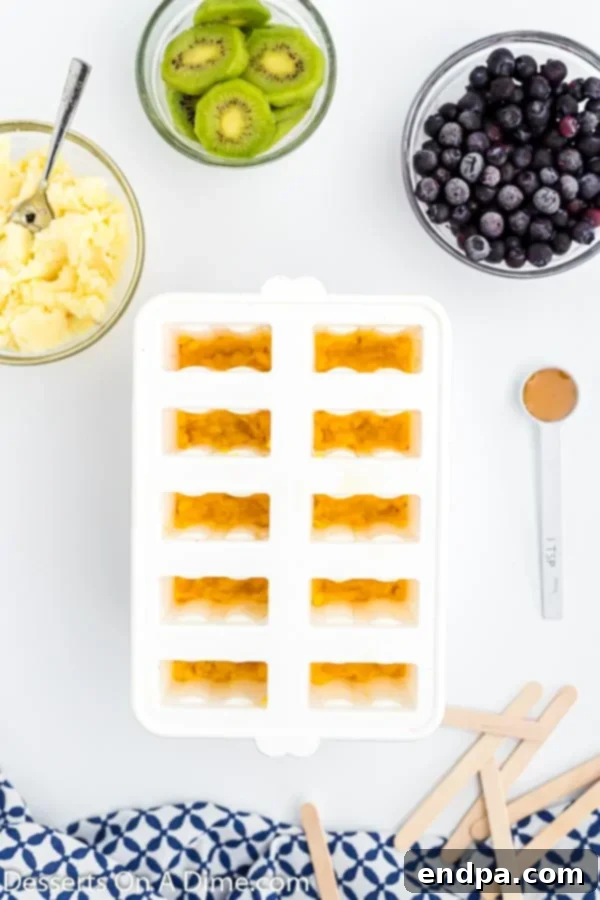
Step 2: Begin Layering with Strawberry
Using a spoon or a small pouring jug, carefully add the strawberry puree as your first layer into the popsicle molds. Fill each mold about 1/5th of the way. If you desire very distinct layers, freeze this first layer for approximately 30-60 minutes until it is mostly firm before adding the next layer.
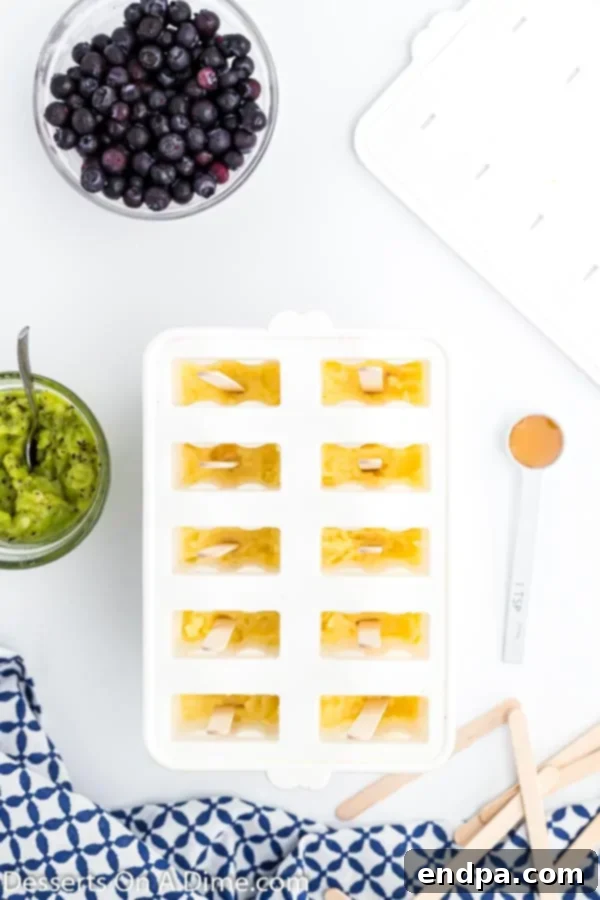
Step 3: Add Mango and Pineapple Layers
Next, gently spoon in the mango puree on top of the strawberry layer, filling another 1/5th of the mold. If you froze the previous layer, this step is easier as the mango won’t bleed into the strawberry. Repeat the process with the pineapple puree, adding it as the third layer. These will create gorgeous yellow hues in each ice pop, contributing to the rainbow effect.
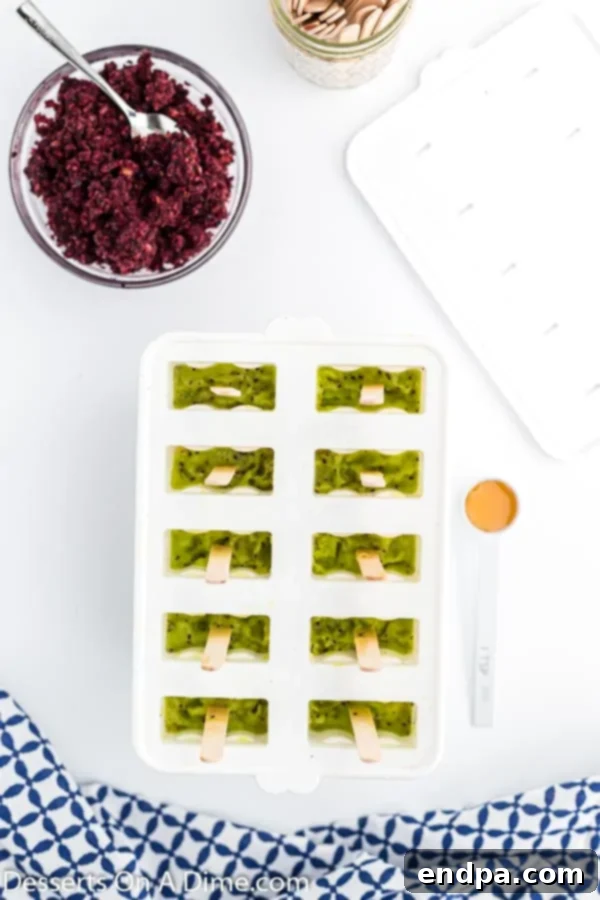
Step 4: Complete with Kiwi and Blueberry Layers
Carefully add the kiwi puree as the fourth layer. Finally, top it off with the blueberry puree, filling the mold to just below the brim. If you’ve been freezing between layers, remember to give each layer enough time to set. Insert your popsicle sticks into the center of each mold. Ensure the sticks are straight. Place the filled molds in the freezer for at least 6-8 hours, or ideally, overnight, to allow them to freeze solid.
Pro Tips for Perfect Popsicles
- Choosing Your Fruit: While frozen fruit is recommended for its convenience and ability to create a thick puree, you can certainly use fresh or even canned fruit. If using fresh or canned, we highly recommend freezing the fruit beforehand. This will prevent a watery puree and help maintain the distinct layers when poured into the molds.
- Achieving Distinct Layers: The colors will naturally blend a little when you’re adding them to the popsicle molds, especially if the purees are thin or if you pour them too quickly. For perfectly defined layers, a little patience goes a long way. After adding each layer, place the popsicle molds in the freezer for approximately 30-60 minutes, or until that layer is firm enough to support the next without bleeding significantly. This technique will take more time, but the resulting layers will be beautifully sharp and distinct. Wait until the previous layer is frozen solid before pouring the next.
- Popsicle Molds: Don’t be afraid to experiment with different shapes and types of molds! While standard molds work perfectly, novelty molds can add an extra element of fun. Use whatever you have on hand or find a set that inspires you.
- Puree Consistency: Aim for a consistency similar to a thick smoothie or applesauce. If your puree is too thin, the colors will blend too easily. If it’s too thick, it will be hard to spread evenly. Adjust with a tiny bit of water or more fruit.
Frequently Asked Questions About Homemade Popsicles
How to remove popsicles from the mold?
When you’re ready to enjoy your popsicles, run the outside of the molds under warm water for just a few seconds. This gentle warmth will slightly loosen the popsicle from the mold, making it easy to slide out. Be careful not to use hot water or expose it for too long, as this can cause the popsicle to melt too quickly. Warm water is sufficient to release it. Once loosened, they are ready to enjoy!
Can you make rainbow popsicles in advance?
Absolutely! These rainbow popsicles are perfect for making ahead. You can blend all the fruit purees and store them in airtight containers in the fridge for a day or two. Then, when you’re ready to assemble, you’ll have one less step to do. Once fully frozen, the popsicles themselves can be stored for an extended period.
How to store homemade popsicles?
For best results and to prevent freezer burn, once your popsicles are completely frozen and firm, remove them from their molds. Wrap each popsicle individually in plastic wrap, then place them all into a freezer bag or an airtight freezer-safe container. Stored this way, they will last wonderfully for up to 2 to 3 months in the freezer. We don’t recommend leaving them in the molds indefinitely, as most molds are not airtight, which can lead to freezer burn and a less enjoyable texture. Plus, storing them individually makes it much more convenient for kids (and adults!) to grab a quick, refreshing snack whenever they like.
Serving and Storage Suggestions
These rainbow popsicles are best enjoyed on a warm day, as a refreshing dessert, or a healthy snack. They make a fantastic addition to summer gatherings, pool parties, or simply as an after-school treat. For an extra special presentation, you can serve them on a bed of crushed ice or garnish with a fresh mint sprig.
As mentioned in the FAQs, for storage, always remove popsicles from their molds once frozen solid. Wrap them tightly and store them in a dedicated freezer bag or container. This simple step ensures their vibrant flavor and smooth texture are preserved for weeks, allowing you to enjoy a taste of summer whenever the craving strikes.
Keep the popsicles in the freezer until you are ready to enjoy them. They will last for 2-3 months in the freezer.
You can use canned, fresh or frozen fruit. If you use canned or fresh, we recommend freezing the fruit before using it to make these rainbow popsicles.
The colors will blend some when you’re adding them to the popsicle molds. If you want perfect layers, you can freeze the popsicles for approximately 1 hour after adding each layer.
More Rainbow Desserts
- The Best Rainbow Popcorn
- Rainbow Cupcakes
- Easy Rainbow Cookies
- Rainbow Donuts
More Homemade Popsicle Recipes
- Mango Tajin Popsicle
- Orange Creamsicle Popsicle
- Jello Popsicles Recipe
- Orange Julius Popsicle Recipe
- Homemade Lemon Popsicles Recipe
- Lime Popsicles Recipe
The entire family will enjoy this delightful frozen treat. Make these today and share your thoughts in the comments below! We love hearing about your colorful creations.
Rainbow Popsicle Recipe
Summary: This Rainbow Popsicle Recipe is loaded with healthy ingredients for a refreshing treat. Each layer is bright and vibrant with blended fruit.
Prep Time: 10 mins
Freeze Time: 6 hrs
Total Time: 6 hrs 10 mins
Servings: 6
Cuisine: American
Course: Dessert
Calories: 83 kcal
Author: Carrie Barnard
Ingredients
- 1 cup Strawberries (frozen)
- 1/2 cup Mango (frozen)
- 1 cup Pineapple Chunks (frozen)
- 1/2 cup Sliced Kiwi (peeled and frozen)
- 1 cup Blueberries (frozen)
- 2 Tbsp Honey (divided)
Instructions
- Blend each type of frozen fruit separately with approximately 2 tsp of honey. Ensure the blender is thoroughly cleaned between each fruit type to prevent color mixing.
- Using a spoon, carefully add a layer of each fruit into the popsicle molds in this order: strawberries, mango, pineapple, kiwi, and blueberries. This layering sequence will create the beautiful rainbow effect.
- Insert popsicle sticks into the center of each filled mold. Freeze for at least 6 hours, though overnight freezing is preferred for best results.
- When ready to serve, run warm water on the outside of the molds for a few seconds to loosen the popsicles.
- Your delicious rainbow popsicles are now ready to enjoy!
Recipe Notes
- Keep the popsicles in the molds in the freezer until you are ready to enjoy them. They will last for 2-3 months in the freezer.
- You can use canned, fresh, or frozen fruit. If using canned or fresh, we recommend freezing the fruit before using it to make these rainbow popsicles to achieve the best consistency.
- The colors will blend somewhat when adding them to the popsicle molds. For perfectly defined layers, you can freeze the popsicles for approximately 1 hour after adding each layer before proceeding with the next.
Nutrition Facts (per serving)
Calories: 83kcal
Carbohydrates: 21g
Protein: 1g
Fat: 1g
Saturated Fat: 1g
Polyunsaturated Fat: 1g
Monounsaturated Fat: 1g
Sodium: 2mg
Potassium: 161mg
Fiber: 2g
Sugar: 18g
Vitamin A: 198IU
Vitamin C: 36mg
Calcium: 19mg
Iron: 1mg
