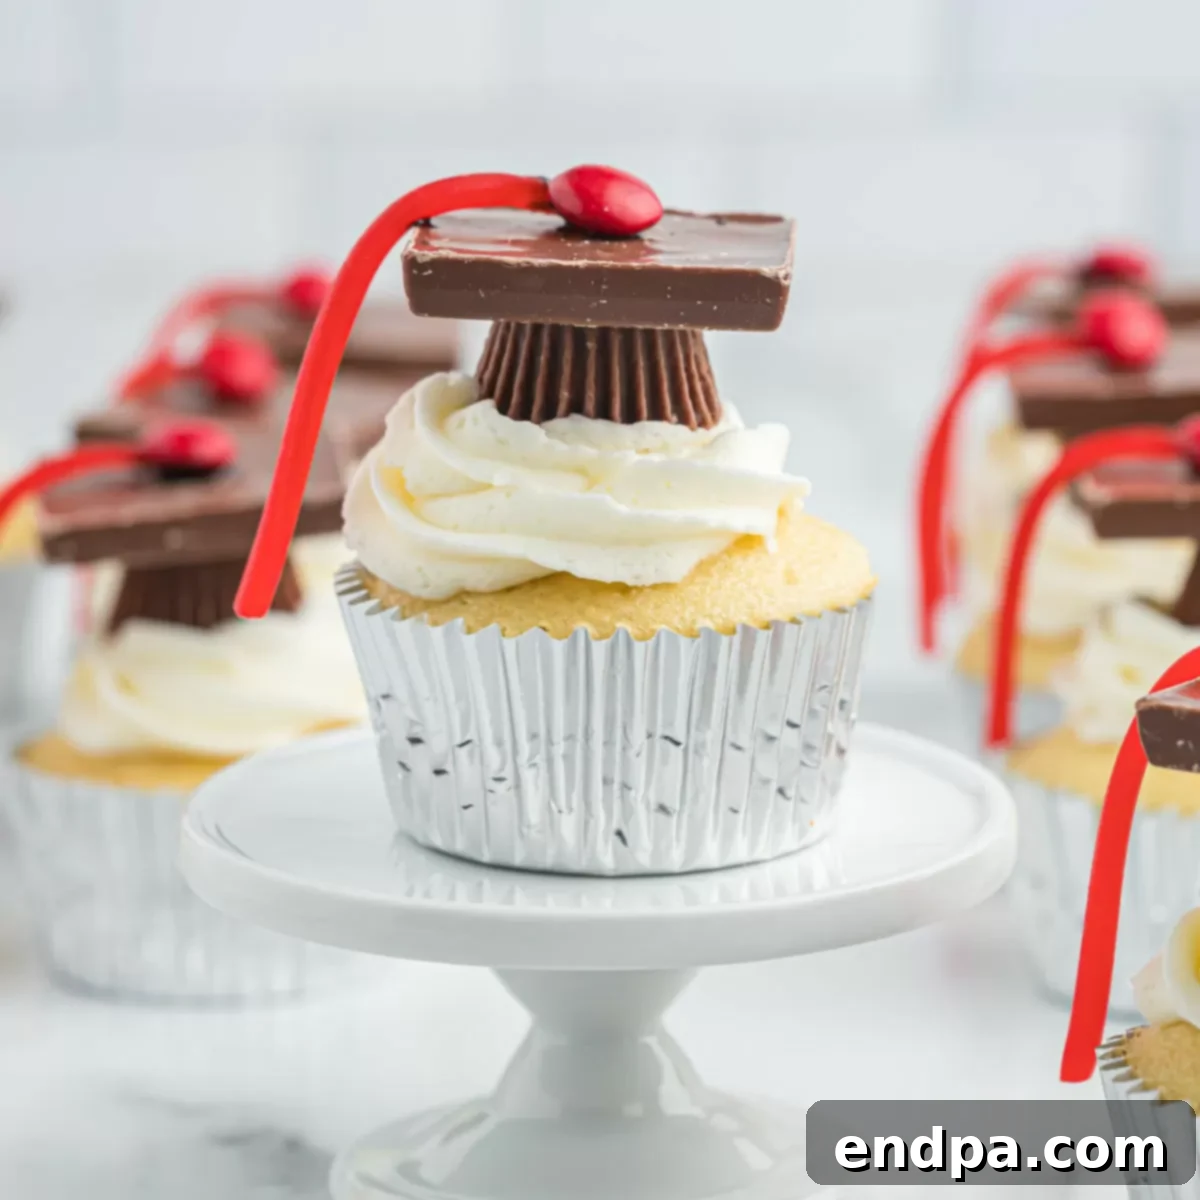
Homemade Graduation Cap Cupcakes: The Ultimate Recipe for a Sweet Celebration
Graduation is a momentous occasion, a time to honor years of hard work, dedication, and significant achievement. What better way to celebrate your graduate’s success than with a batch of beautifully themed desserts? These Homemade Graduation Cap Cupcakes are not just visually impressive; they’re also incredibly fun to make and delicious to eat. Whether you’re celebrating a preschooler’s first big step, a high schooler’s grand exit, or a college graduate’s triumphant milestone, these easy-to-make cupcakes will add a personalized and memorable touch to any party. Forget expensive bakery orders; with this straightforward recipe, you can craft stunning, celebratory treats right in your own kitchen. You can even customize them with your graduate’s school colors, making them truly special and a heartwarming tribute. Let’s dive into making these perfect congratulatory confections!
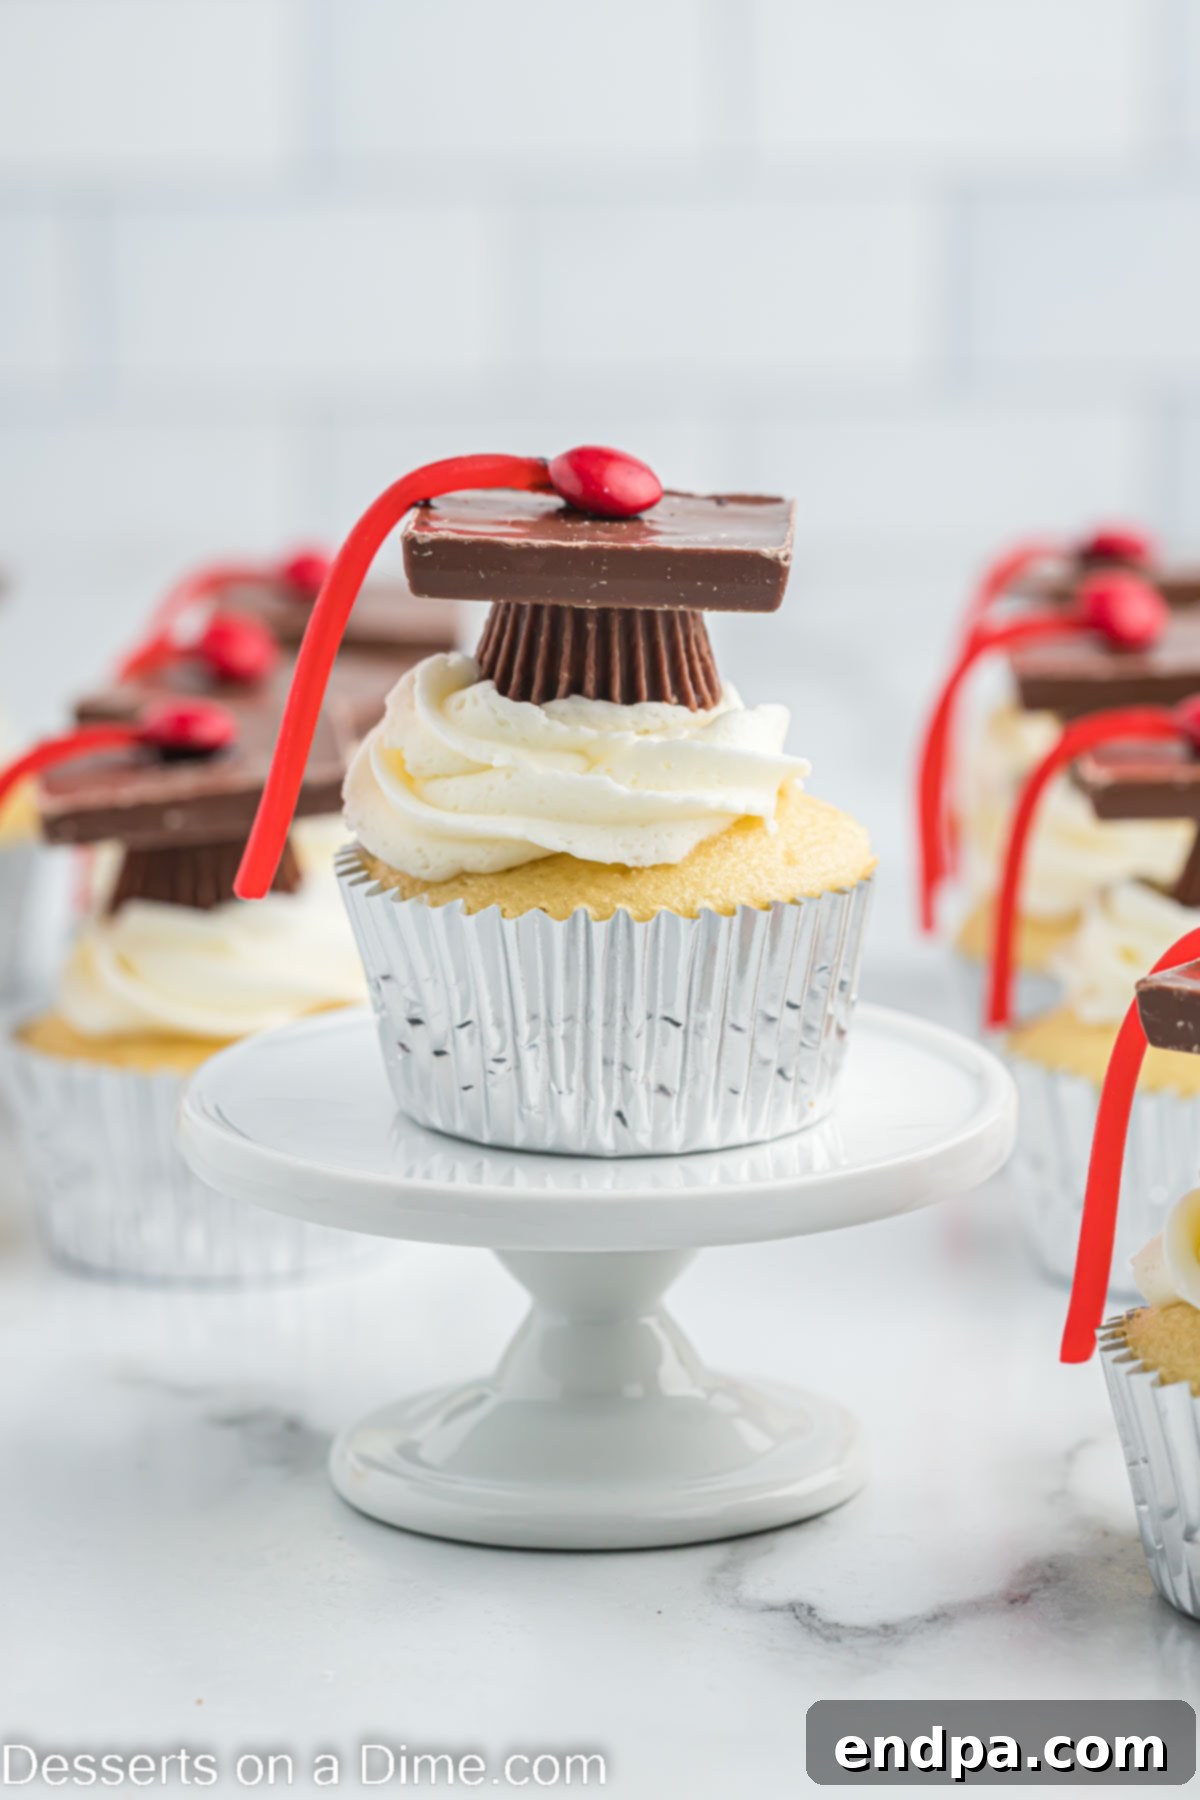
These Graduation Cap Cupcakes are an excellent way to honor your loved one’s accomplishments. They are the ideal cupcake recipe for celebrations marking high school, preschool, or college graduation. For more delightful ideas to complete your dessert table, be sure to explore our collection of Graduation Desserts. These treats aren’t just for eating; they create lasting memories and fantastic photo opportunities!
Table of contents
- Why You’ll Love Making These Graduation Cap Cupcakes
- Essential Ingredients for Your Sweet Success
- For the Perfect Cupcake Base:
- For the Irresistible Buttercream Frosting:
- Creative Additions and Smart Substitutions to Personalize Your Cupcakes
- Step-by-Step Guide: Crafting Your Graduation Cap Cupcakes
- Expert Tips for Achieving Perfect Graduation Cap Cupcakes
- Frequently Asked Questions About Graduation Cap Cupcakes
- More Delightful & Easy Cupcake Recipes to Try
Why You’ll Love Making These Graduation Cap Cupcakes
This recipe is designed for both seasoned bakers and complete beginners, making it an accessible and rewarding project for anyone planning a graduation celebration. Here’s why these cupcakes are a guaranteed hit and the perfect choice for your graduate’s special day:
- Budget-Friendly Brilliance: Skip the hefty price tags of custom bakery cakes. Crafting these cupcakes at home using a simple cake mix base significantly reduces costs without compromising on taste or appearance. You get professional-looking results for a fraction of the price, allowing you to allocate your budget to other party essentials.
- Effortless Customization: The beauty of these cupcakes lies in their adaptability. You can easily incorporate your graduate’s school colors into the frosting, M&M toppings, or sprinkles, transforming a generic dessert into a deeply personal and meaningful tribute. This personal touch shows extra care and thought.
- Delectable Taste Guaranteed: Starting with a high-quality cake mix ensures a consistently moist, tender, and flavorful cupcake every single time. Paired with a rich, silky homemade buttercream frosting, these aren’t just pretty faces; they’re genuinely delicious and will leave your guests asking for the recipe.
- Simple & Straightforward Process: Our detailed step-by-step instructions break down the decorating process into manageable parts, ensuring success even for those new to cupcake decorating. You’ll be amazed at how easily you can create such an intricate and impressive design.
- Impressive Presentation: The graduation cap design is instantly recognizable and incredibly charming. These cupcakes make for a fantastic centerpiece on your dessert table, sparking conversation and admiration, and are sure to draw compliments from all your guests.
- Perfect for Any Graduation Level: From kindergarten commencements and elementary school promotions to middle school advancements, high school farewells, and university ceremonies, these cupcakes are universally appropriate and bring a touch of joy and whimsy to any graduation event. They celebrate achievement at every stage.
We love making cupcakes and enjoy creations like our Cherry Limeade Cupcakes, proving that delicious desserts don’t have to be complicated!
Essential Ingredients for Your Sweet Success
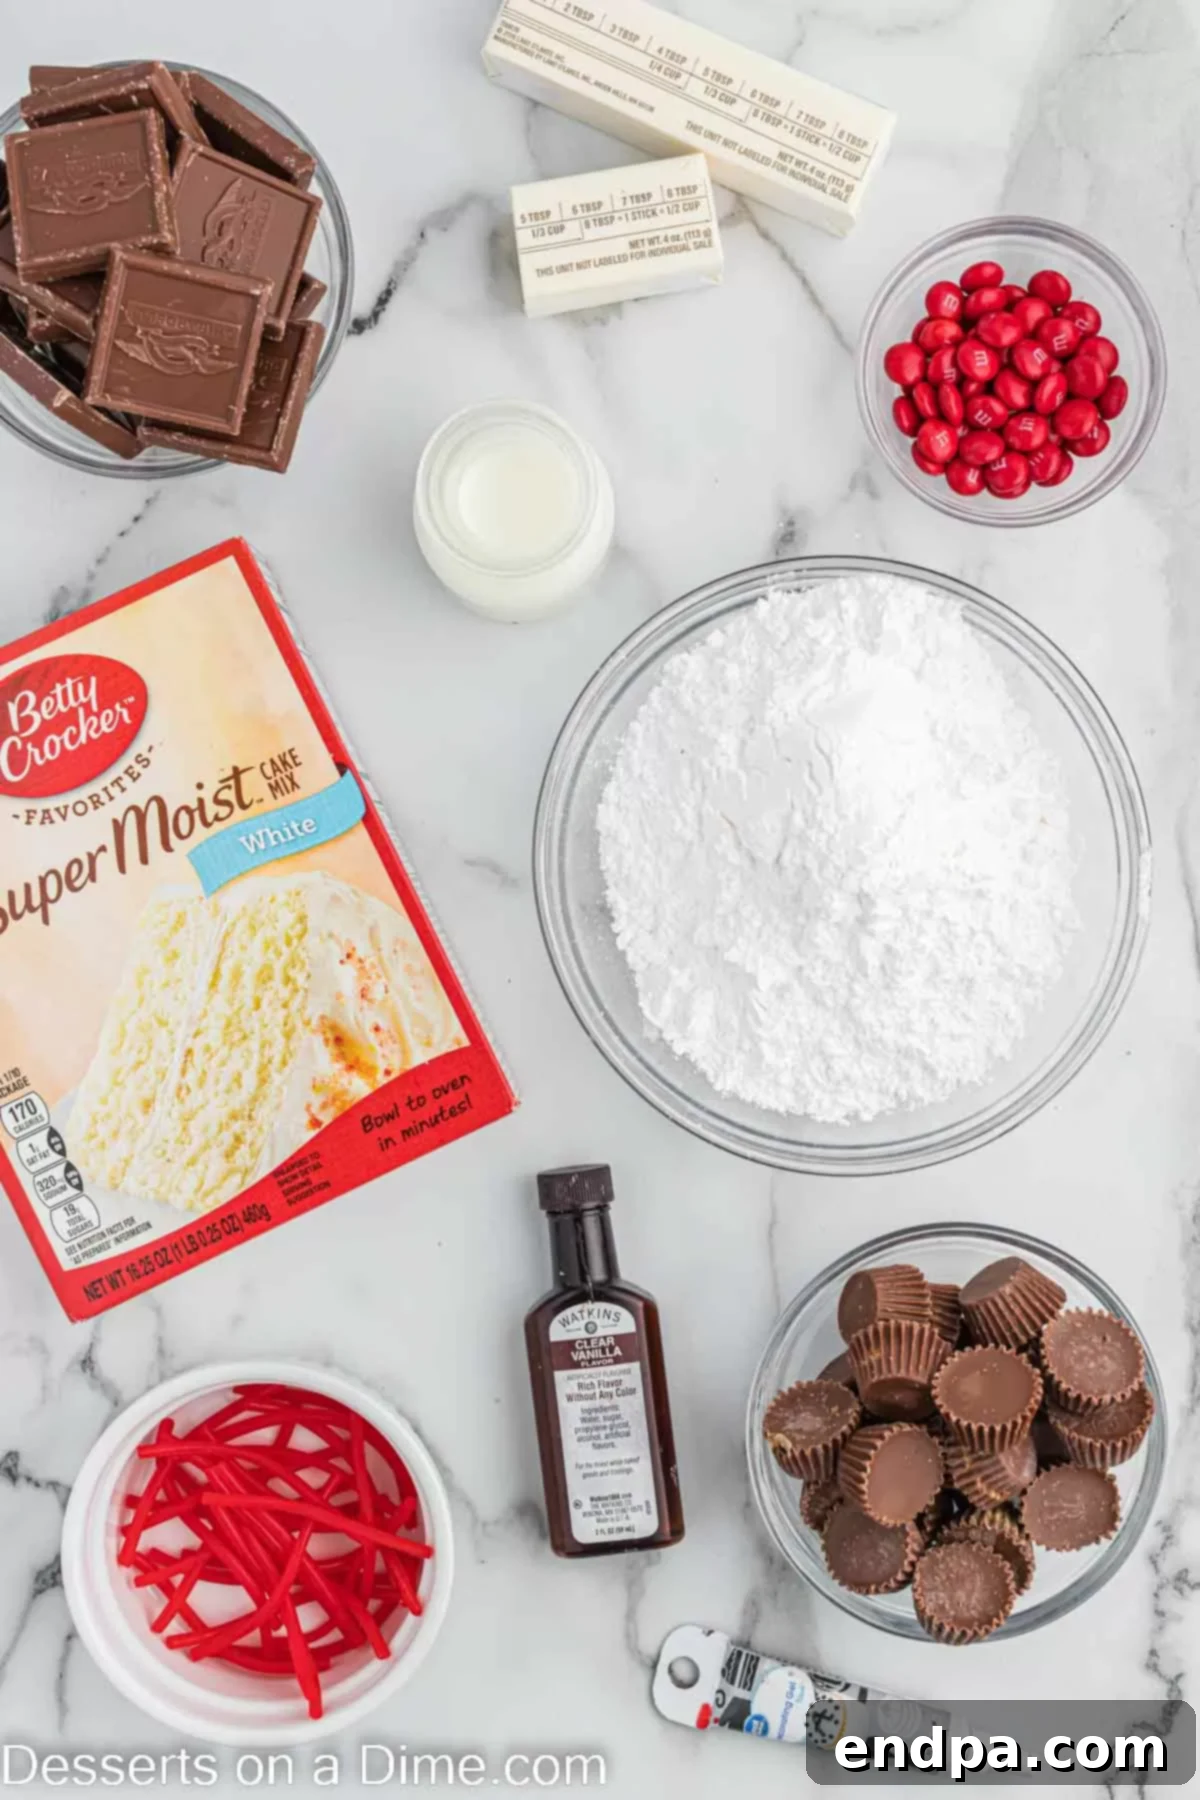
Crafting these festive graduation cupcakes requires a few key components, divided into the cupcake base and the luxurious buttercream frosting, plus the clever edible decorations that transform them into mini graduation caps. Each ingredient plays a vital role in both taste and presentation.
For the Perfect Cupcake Base:
- White Cake Mix: This serves as the convenient and consistent foundation of our easy recipe. A standard white cake mix (or yellow, if preferred) provides a tender, fluffy crumb that’s always a crowd-pleaser. You will also need the additional **ingredients listed on the cake mix package** to prepare the batter, which typically includes eggs, oil, and water or milk.
- Mini Peanut Butter Cups: These are ingeniously used to form the raised base of our graduation cap “hats.” It’s highly recommended to **unwrap all of them** before you begin the decorating process to streamline assembly and save time.
- Chocolate Square Candies: These flat, square chocolates will be carefully placed on top of the peanut butter cups to create the iconic flat top of the graduation cap. Ghirardelli squares work wonderfully for their perfect size and smooth finish, but any similar flat, square-shaped chocolate candy will do the trick.
- Red M&M’s (or school color of choice): These vibrant candies serve as the decorative button at the very center of the graduation cap. To truly personalize your cupcakes, opt for M&M’s in your graduate’s **school colors**. Alternatively, small red hots can also be used for a slightly spicy kick and an intense red hue.
- Peel-apart String Licorice: This creative element is skillfully used to craft the graduation cap’s flowing tassel. You’ll need to **separate the individual strands** and then **cut them into manageable 3-inch pieces** to achieve the perfect tassel length.
- Brown Decorating Gel: This essential tool acts as an edible “glue,” providing a strong hold to secure the chocolate squares and M&M’s firmly in place. It ensures your meticulously crafted caps stay perfectly intact until they are devoured.
For the Irresistible Buttercream Frosting:
- Unsalted Butter: The cornerstone of a rich, creamy, and flavorful buttercream. It is crucial to ensure your butter is **softened to room temperature** before you begin mixing. This allows it to cream smoothly with the sugar, creating a light, airy, and lump-free frosting consistency.
- Powdered Sugar (Confectioners’ Sugar): This fine sugar is the primary sweetener and provides structure to the buttercream. **Sifting the powdered sugar** is a vital step to remove any potential lumps, guaranteeing a silky-smooth frosting texture that’s easy to pipe and spread.
- Milk: A small amount of milk (or cream) is added to adjust the frosting’s consistency, helping it become light, fluffy, and perfectly pipeable without being too stiff or too runny.
- Clear Vanilla Extract: Using clear vanilla extract is an important detail if you aim to achieve a **bright white frosting**, especially if you plan to tint it with vibrant school colors. Regular vanilla extract has a natural brown tint that can subtly alter the final color of your frosting.
The entire ingredient list with specific measurements can be found in the detailed recipe card at the bottom of this page.
Creative Additions and Smart Substitutions to Personalize Your Cupcakes
One of the most enjoyable aspects of this recipe is its incredible versatility. Feel free to get creative and adapt these graduation cupcakes to perfectly suit your graduate’s unique style, preferences, and your party’s specific theme. These ideas will help you make each cupcake truly one-of-a-kind:
- Drizzle with Melted Chocolate: For an extra layer of decadence and visual appeal, consider lightly drizzling melted white, milk, or dark chocolate over the frosted cupcakes before adding the cap toppers. This adds a sophisticated touch and another dimension of flavor. You can use a piping bag with a very fine tip or simply a spoon for a rustic drizzle.
- Miniature Magic: Easily scale down this recipe by opting for a mini cupcake pan. Simply place a smaller amount of cake batter into mini cupcake liners and adjust the baking time accordingly (typically 10-15 minutes). Miniature graduation cap cupcakes are incredibly adorable and perfect for bite-sized snacking, ideal for larger gatherings where guests might want to sample multiple desserts without committing to a full-sized treat.
- Homemade Cupcakes for Extra Flair: While a convenient cake mix offers incredible ease and saves time, seasoned bakers can certainly substitute their favorite homemade cupcake recipe from scratch. Combining flour, sugar, eggs, butter, milk, and leavening agents allows for deep, rich flavors that can truly impress. Just remember to ensure your homemade cupcakes are completely cooled before attempting any decorating.
- Vary the Topping Elements: Don’t feel limited to the specified M&M’s and licorice! The creative possibilities are endless:
- Candy Alternatives for the Button: Explore other small, round candies for the cap’s button, such as Skittles (perfect for a rainbow of school colors), small gumdrops, or even personalized candy melts in specific shapes or colors.
- Tassel Twists: Instead of string licorice, consider using a cut-up fruit roll-up for a different texture and fruity flavor. You could also pipe thin strands of colored frosting with a very fine tip to create edible tassels.
- Sprinkle in School Spirit: Before the frosting sets completely, add sprinkles! This is a fantastic way to further coordinate the cupcake with your graduate’s school colors. Use jimmies, nonpareils, or even edible glitter in hues that match their alma mater for an extra festive and sparkling touch.
- Alternate Frosting Flavors: While classic vanilla buttercream is always a hit, consider experimenting with other frosting flavors like rich chocolate, zesty lemon, or tangy cream cheese frosting to complement your chosen cupcake base. Just be mindful that darker frostings might make it harder to achieve vibrant school colors if you plan to dye them.
Step-by-Step Guide: Crafting Your Graduation Cap Cupcakes
Creating these celebratory treats is a straightforward process, broken down into simple and easy-to-follow steps. Follow along closely to bring your delicious and visually stunning vision to life!
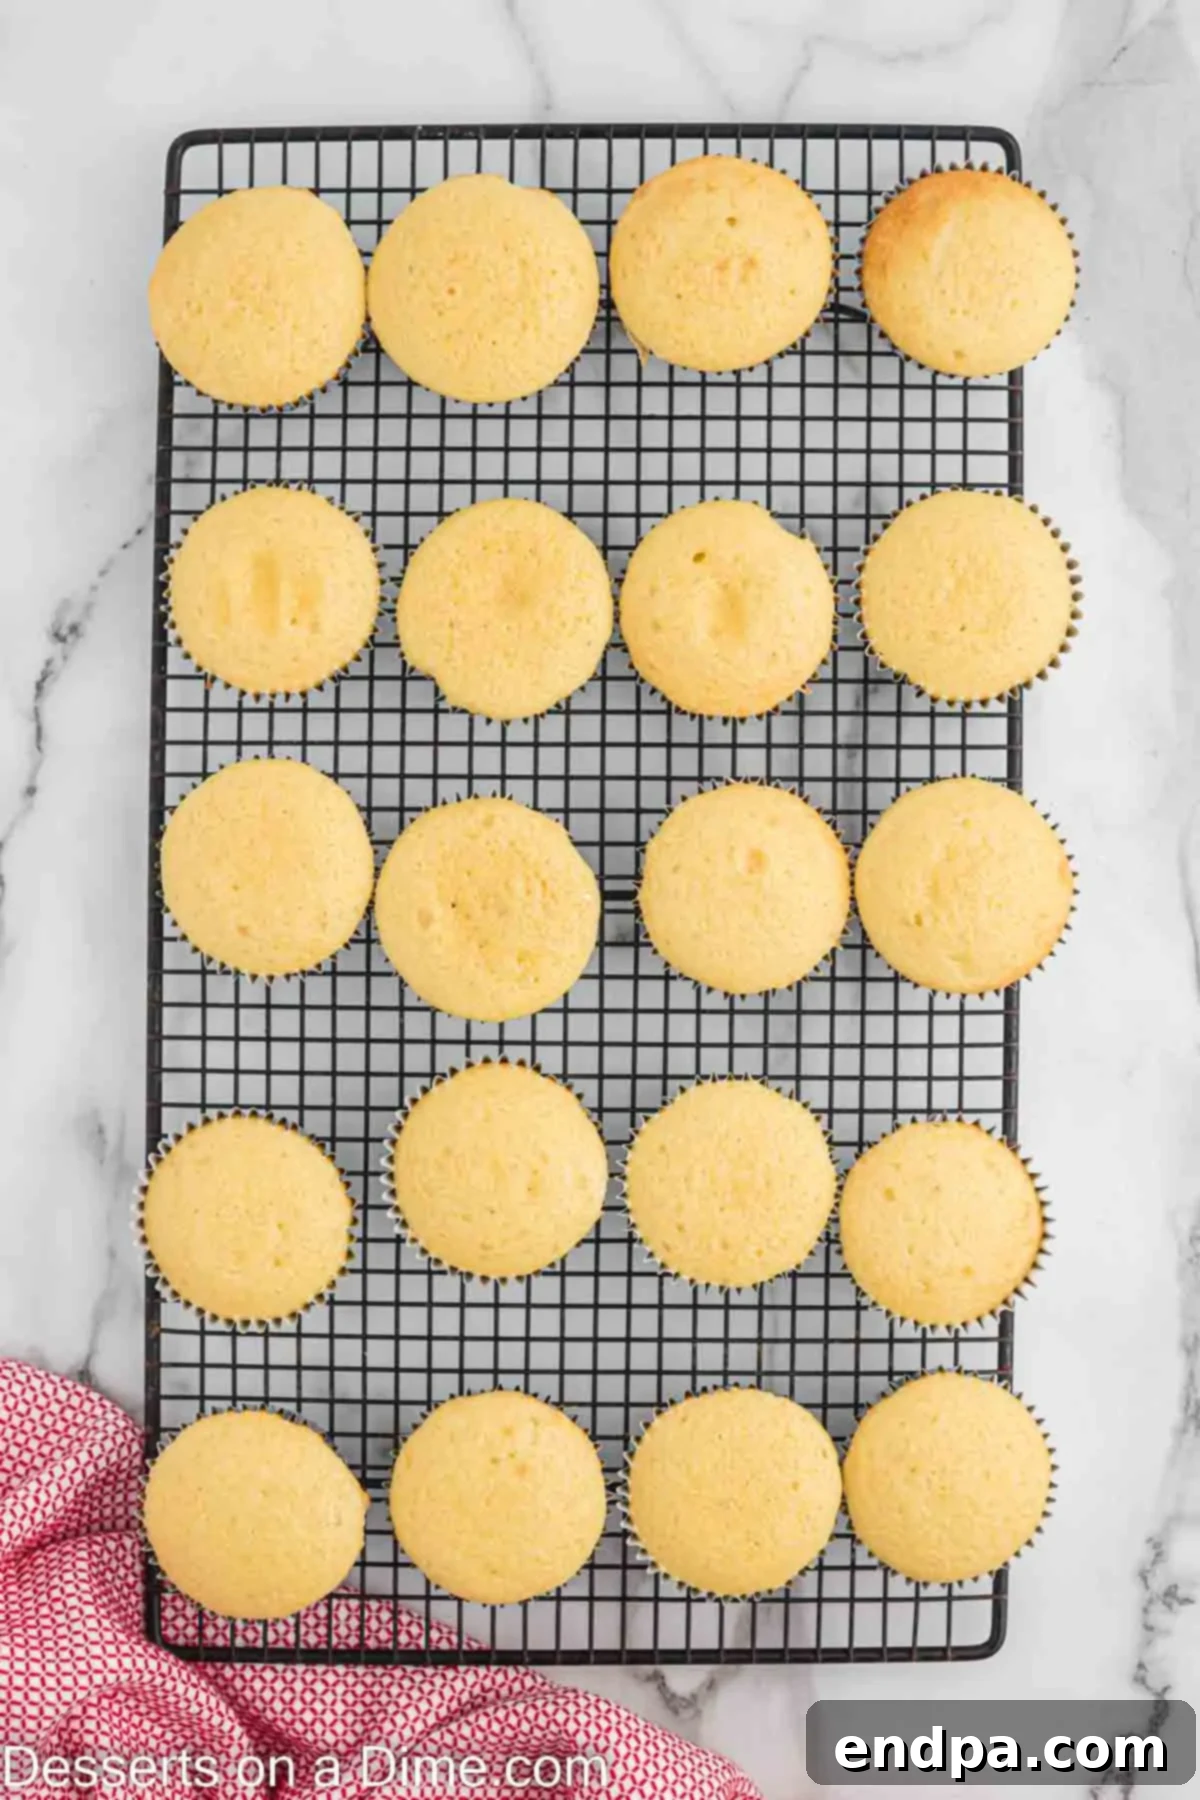
Step 1: Bake and Cool the Cupcakes. Begin by preparing your chosen cake mix according to the package instructions in a medium bowl. Line a cupcake pan with paper liners and fill each about two-thirds full with batter. Bake at the recommended temperature for the specified time, or until a toothpick inserted into the center comes out clean. Once baked, promptly remove the cupcakes from the oven and transfer them to a wire rack to allow them to cool completely. This is a crucial step for preventing melted frosting and ensuring a neat decoration.
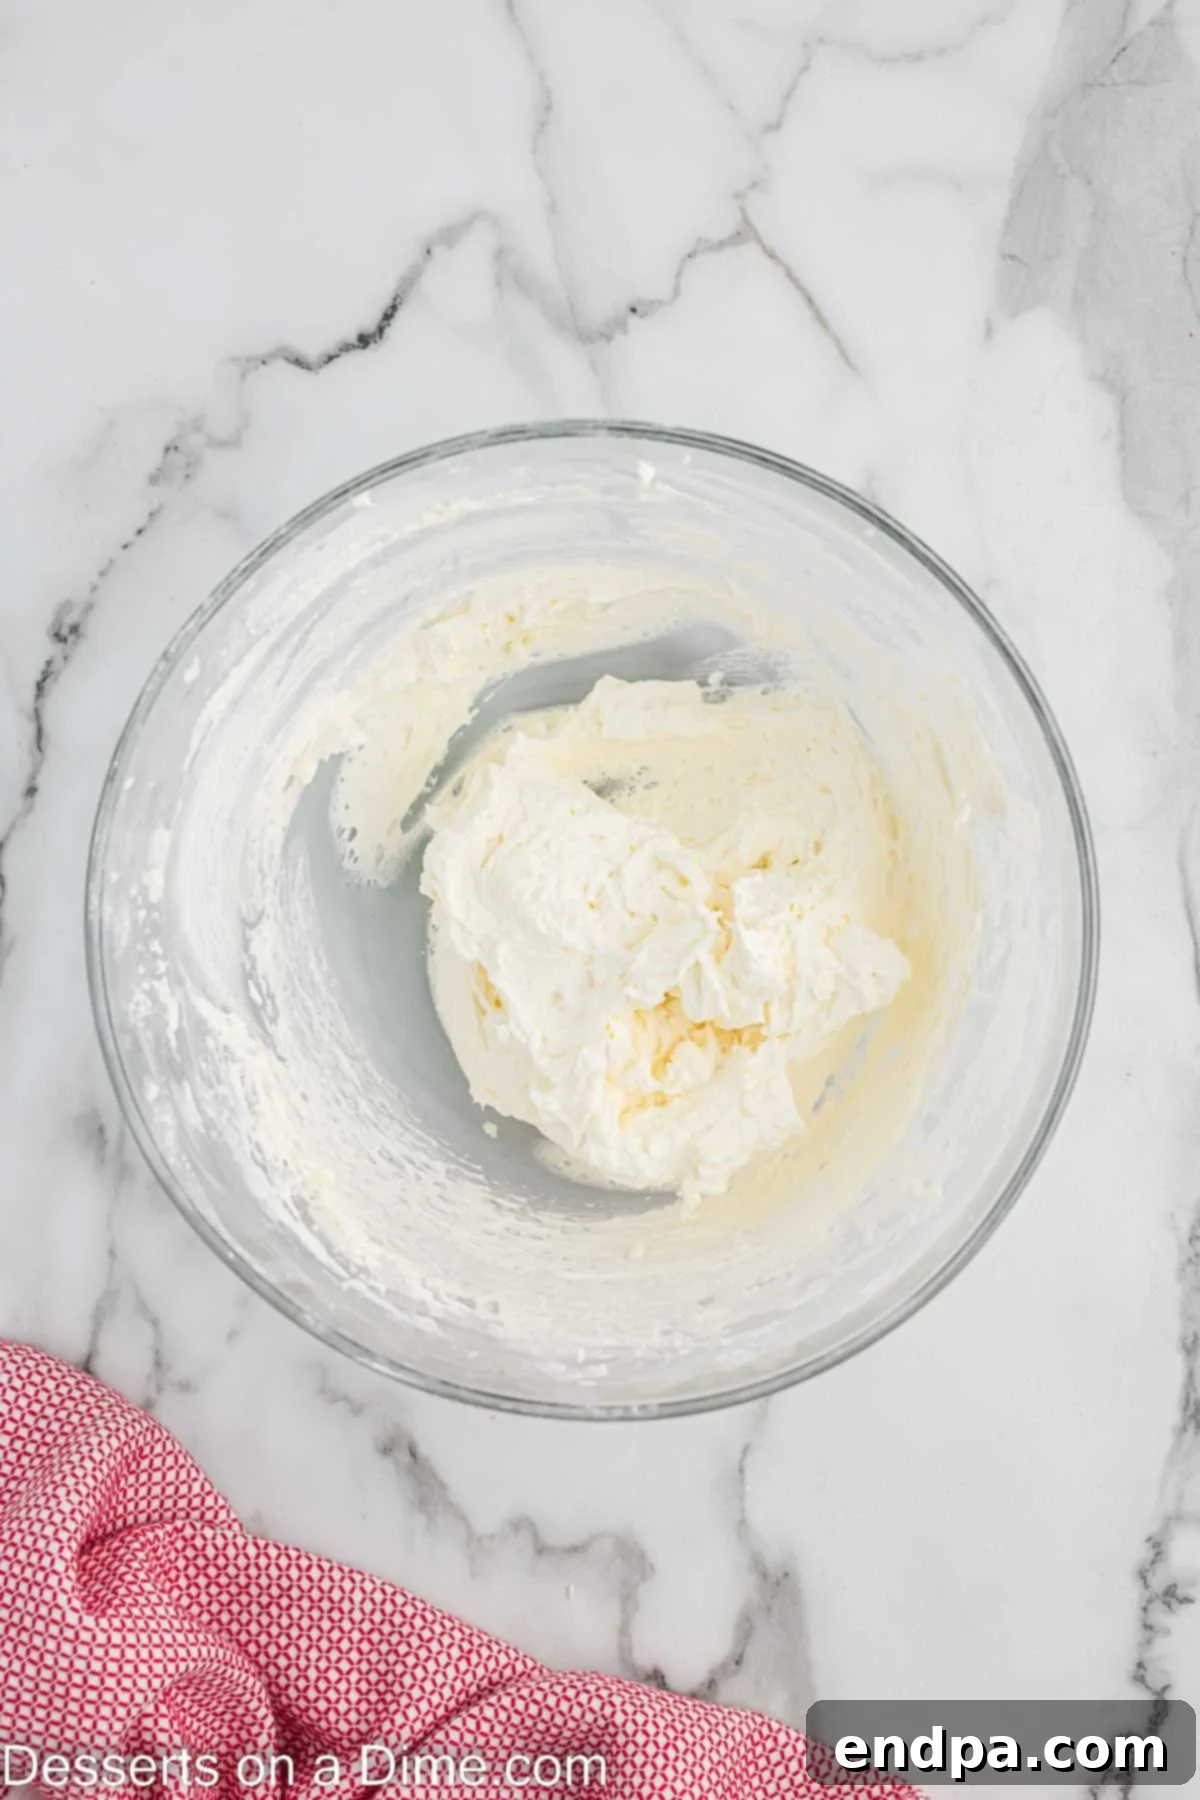
Step 2: Prepare the Fluffy Buttercream Frosting. While your cupcakes are cooling on the rack, it’s the perfect time to whip up the delicious buttercream. In a large mixing bowl, using an electric mixer (handheld or stand mixer), cream together the softened unsalted butter and sifted powdered sugar until the mixture is well combined and beautifully smooth. Gradually add in the milk and clear vanilla extract. Continue to beat on medium-high speed for 1-2 minutes until the frosting becomes wonderfully light, airy, fluffy, and easily spreadable. If desired, now is the ideal moment to add food coloring to match your graduate’s school colors.
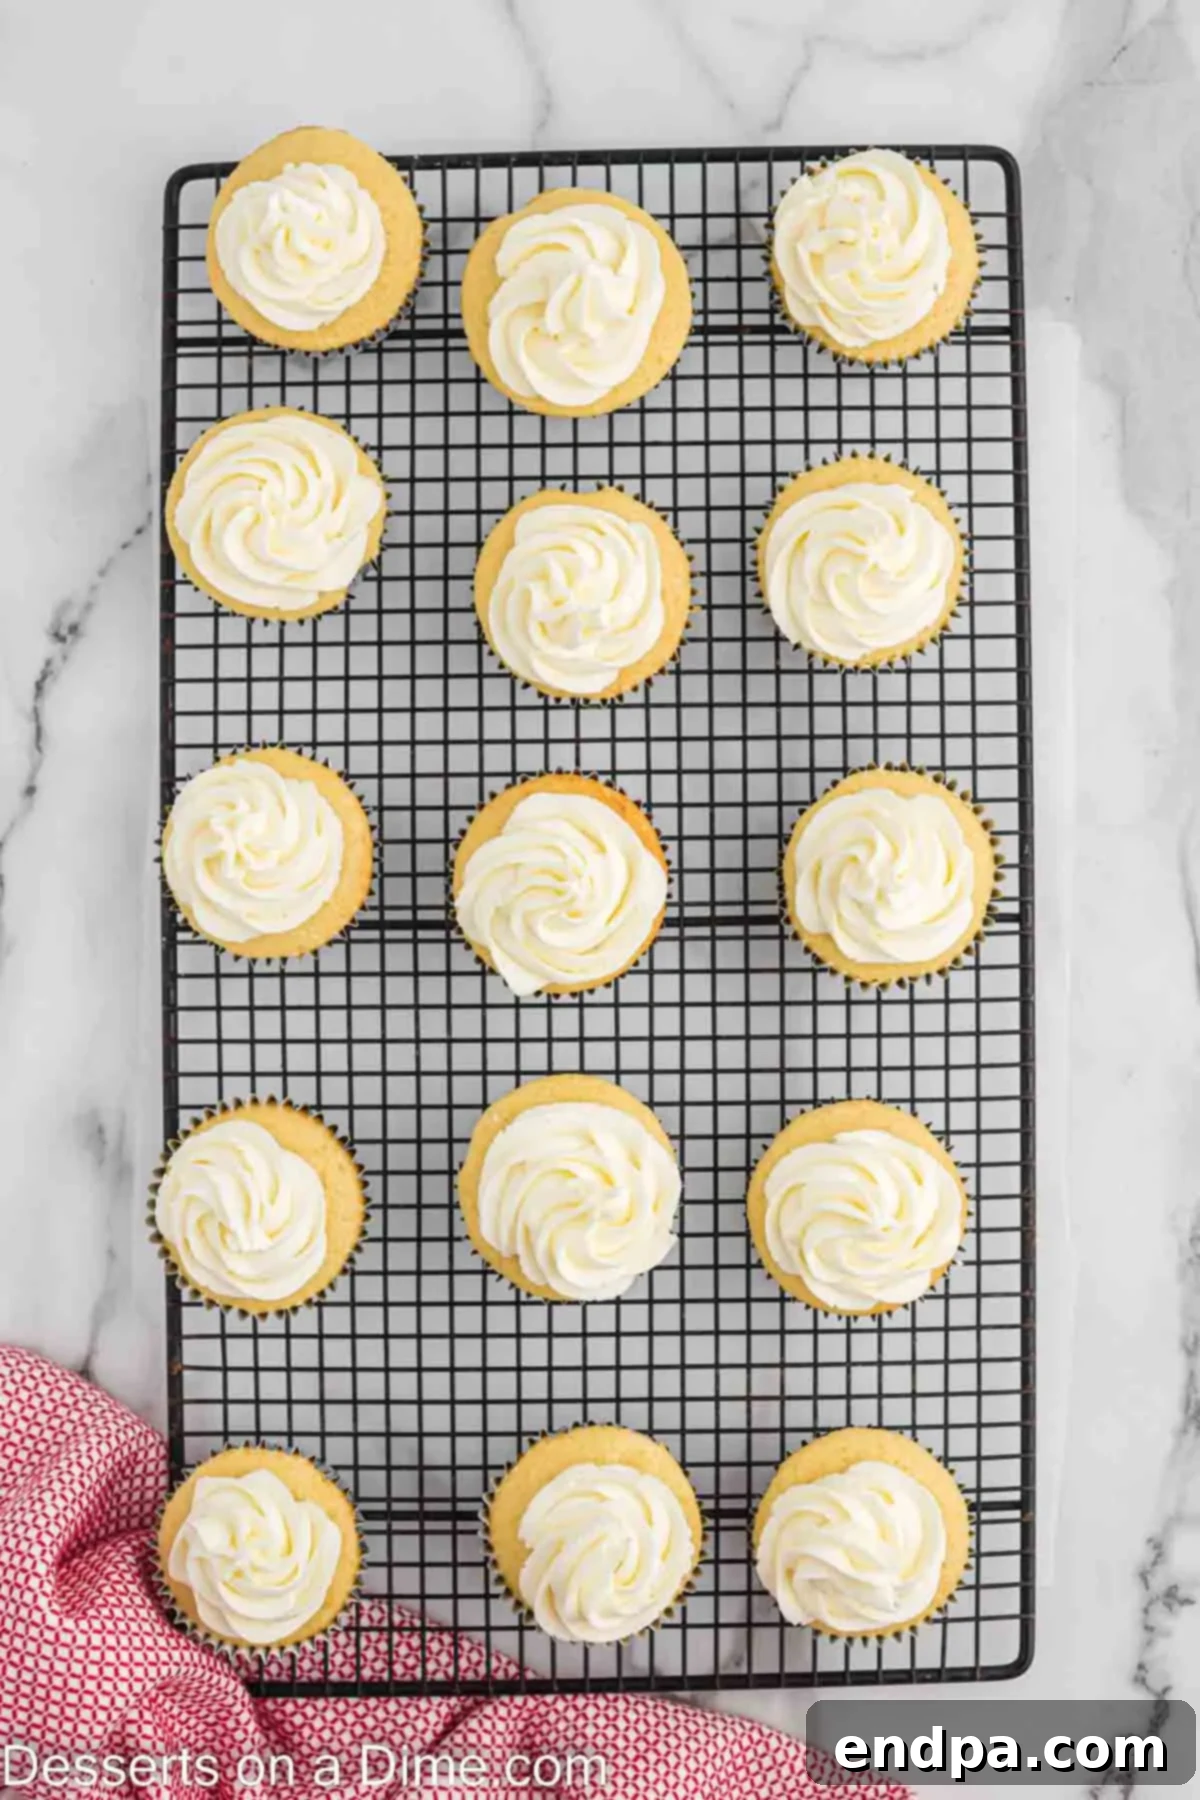
Step 3: Frost the Cooled Cupcakes. Once the cupcakes are completely cool to the touch, transfer your prepared vanilla buttercream frosting to a piping bag fitted with your desired tip (a large round tip or star tip works exceptionally well for a clean finish). Pipe a generous and appealing swirl of frosting onto the top of each cupcake. Alternatively, if you don’t have a piping bag, you can simply use an offset spatula or a butter knife to spread the frosting evenly across the top.
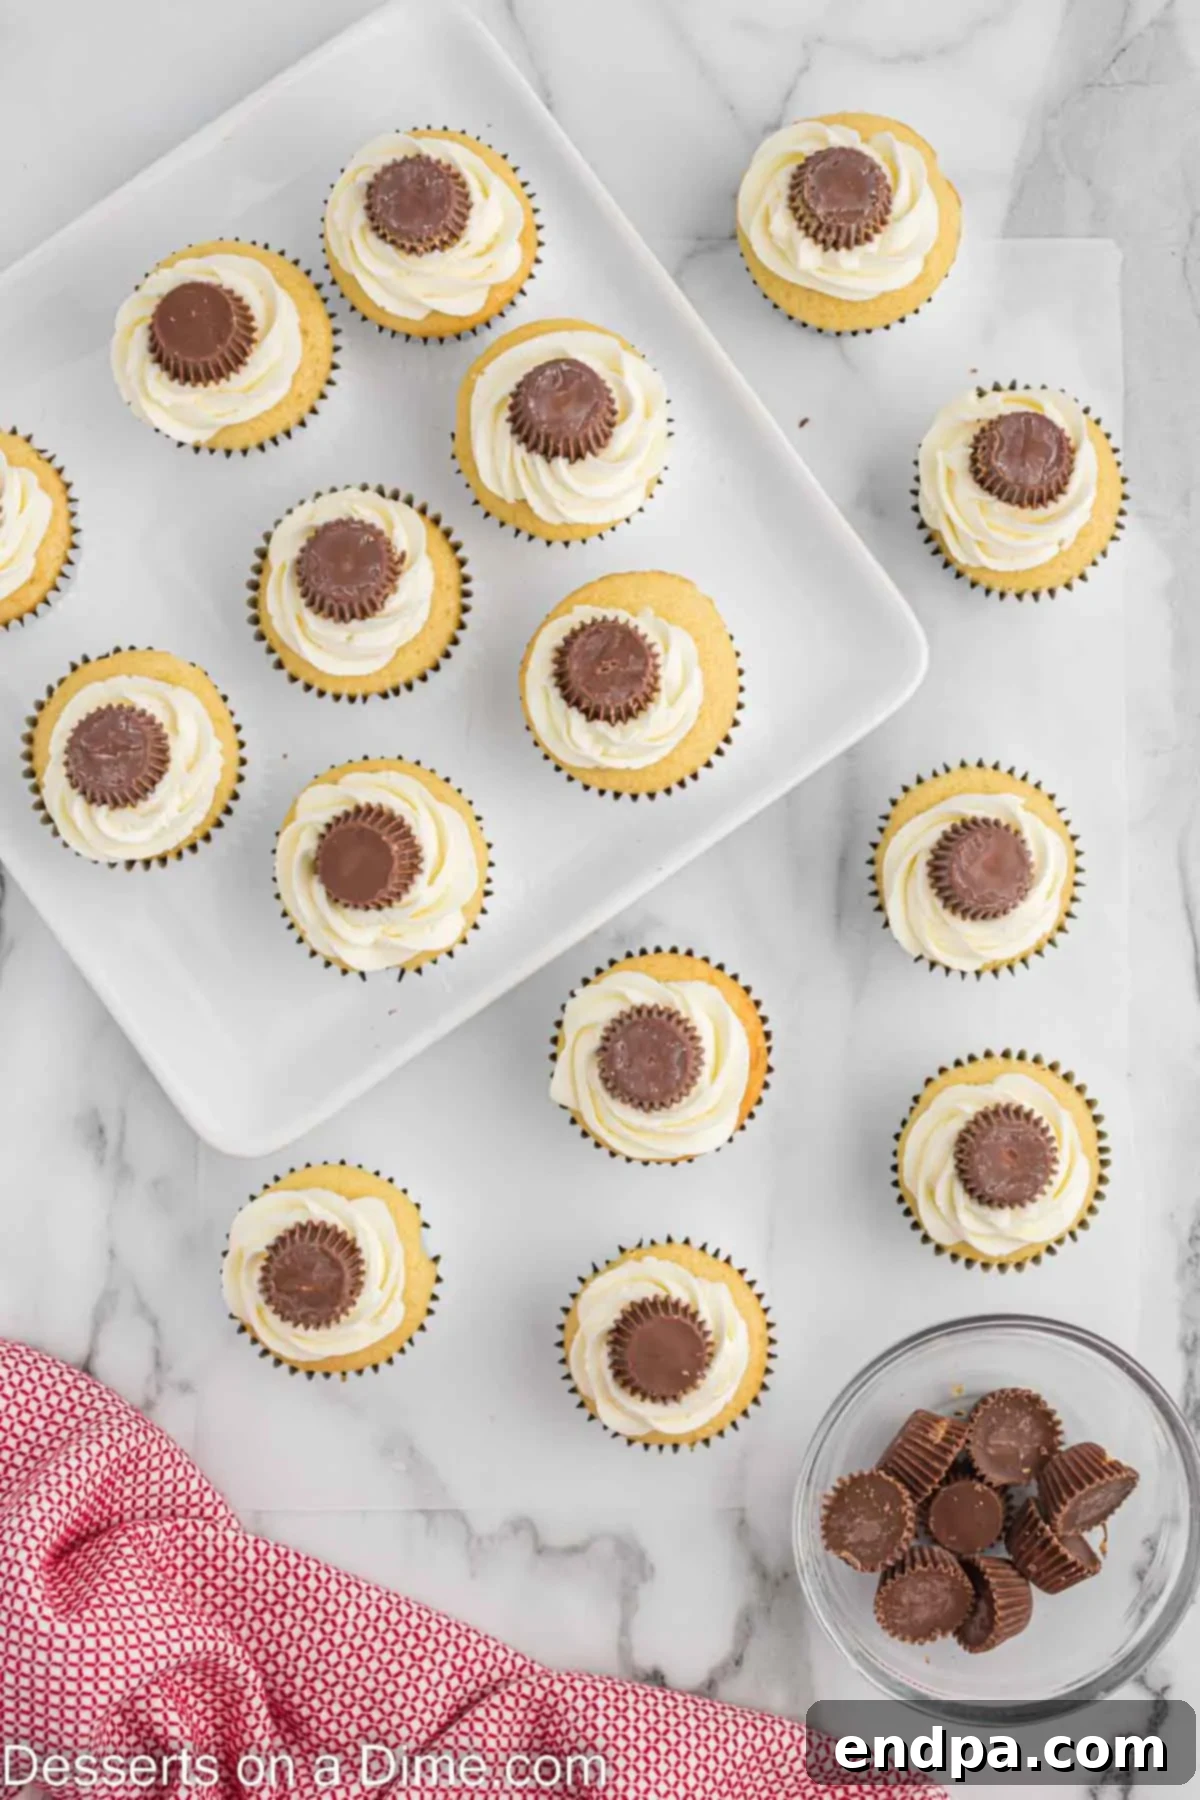
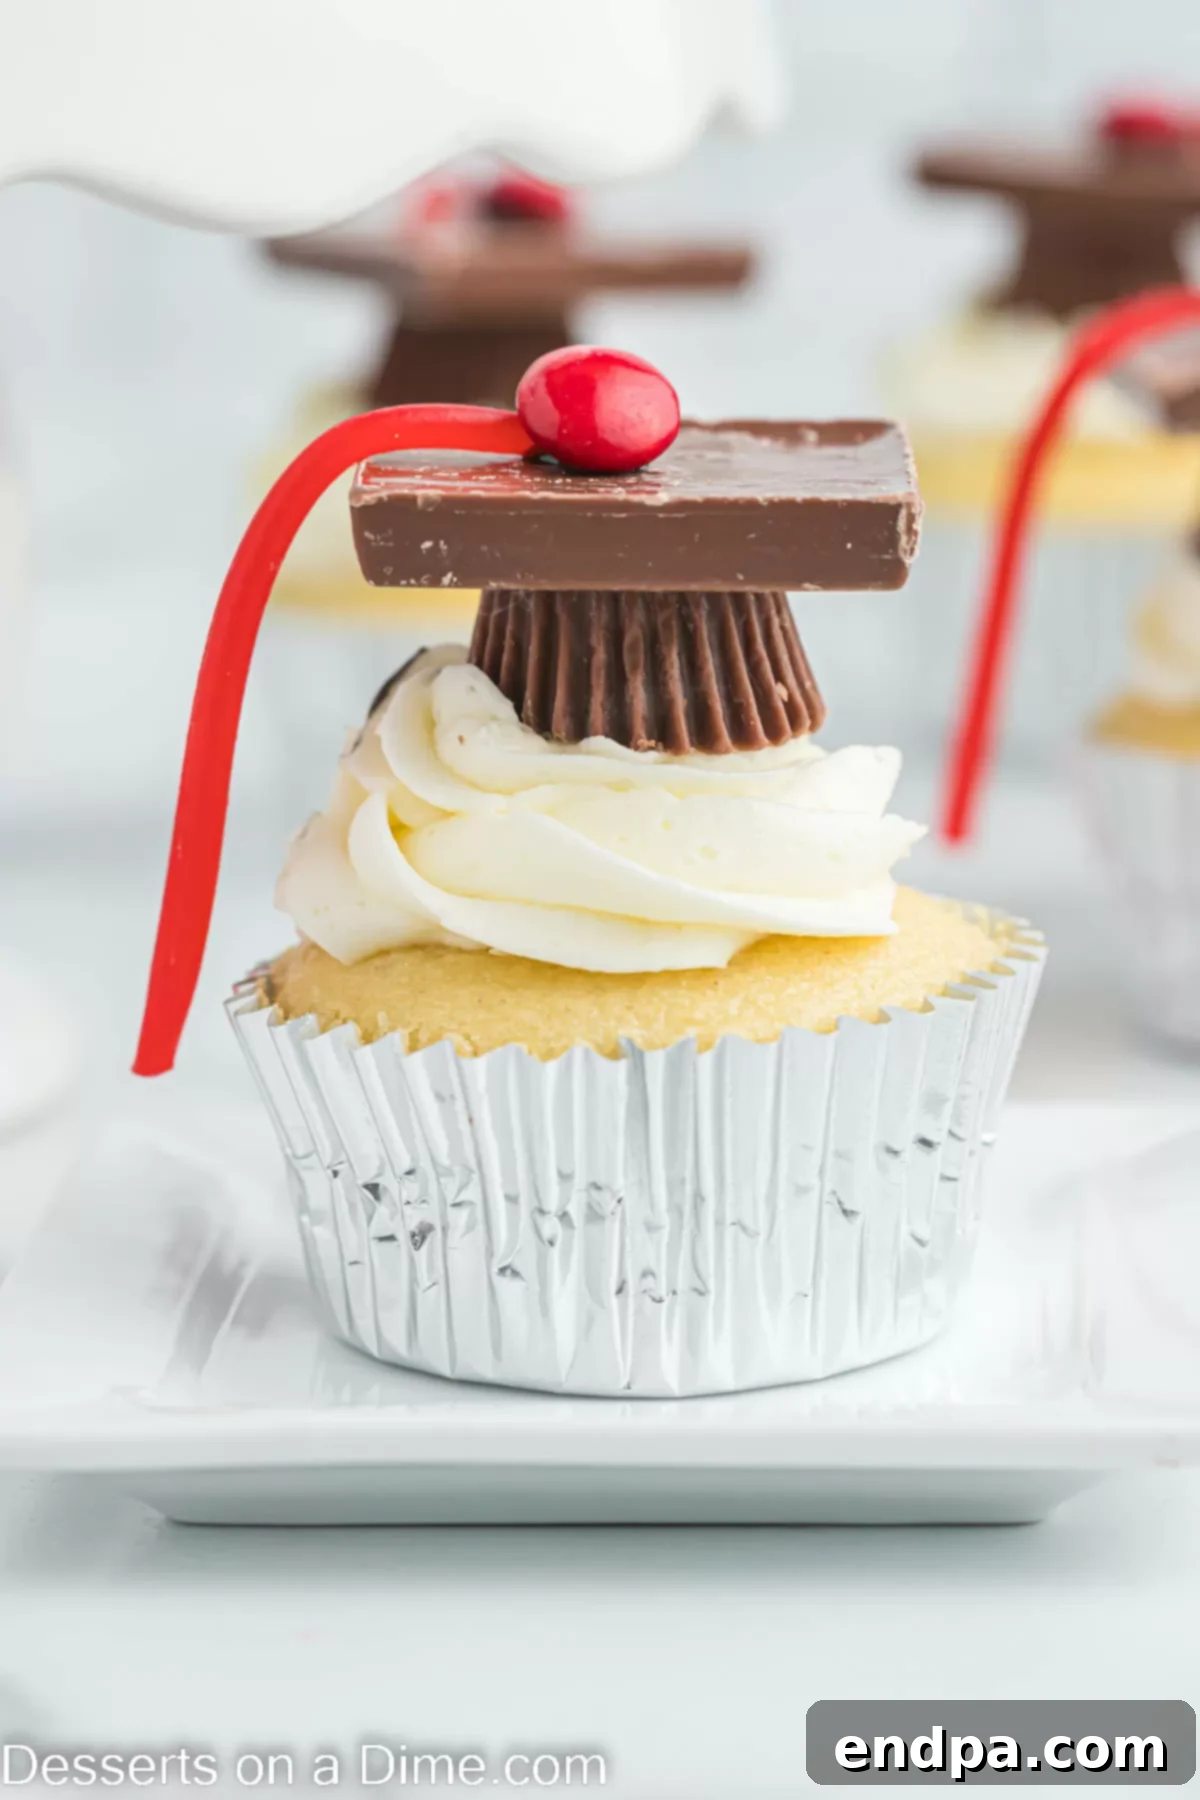
Step 4: Create the Cap Base. Carefully unwrap all of your mini peanut butter cups. Take one miniature peanut butter cup and place it upside down (with the flat, chocolatey bottom facing upwards) directly on top of the frosting on each cupcake. Gently press it down slightly so that it adheres securely to the buttercream. This forms the foundational “hat” of your charming graduation cap design, giving it height and stability.
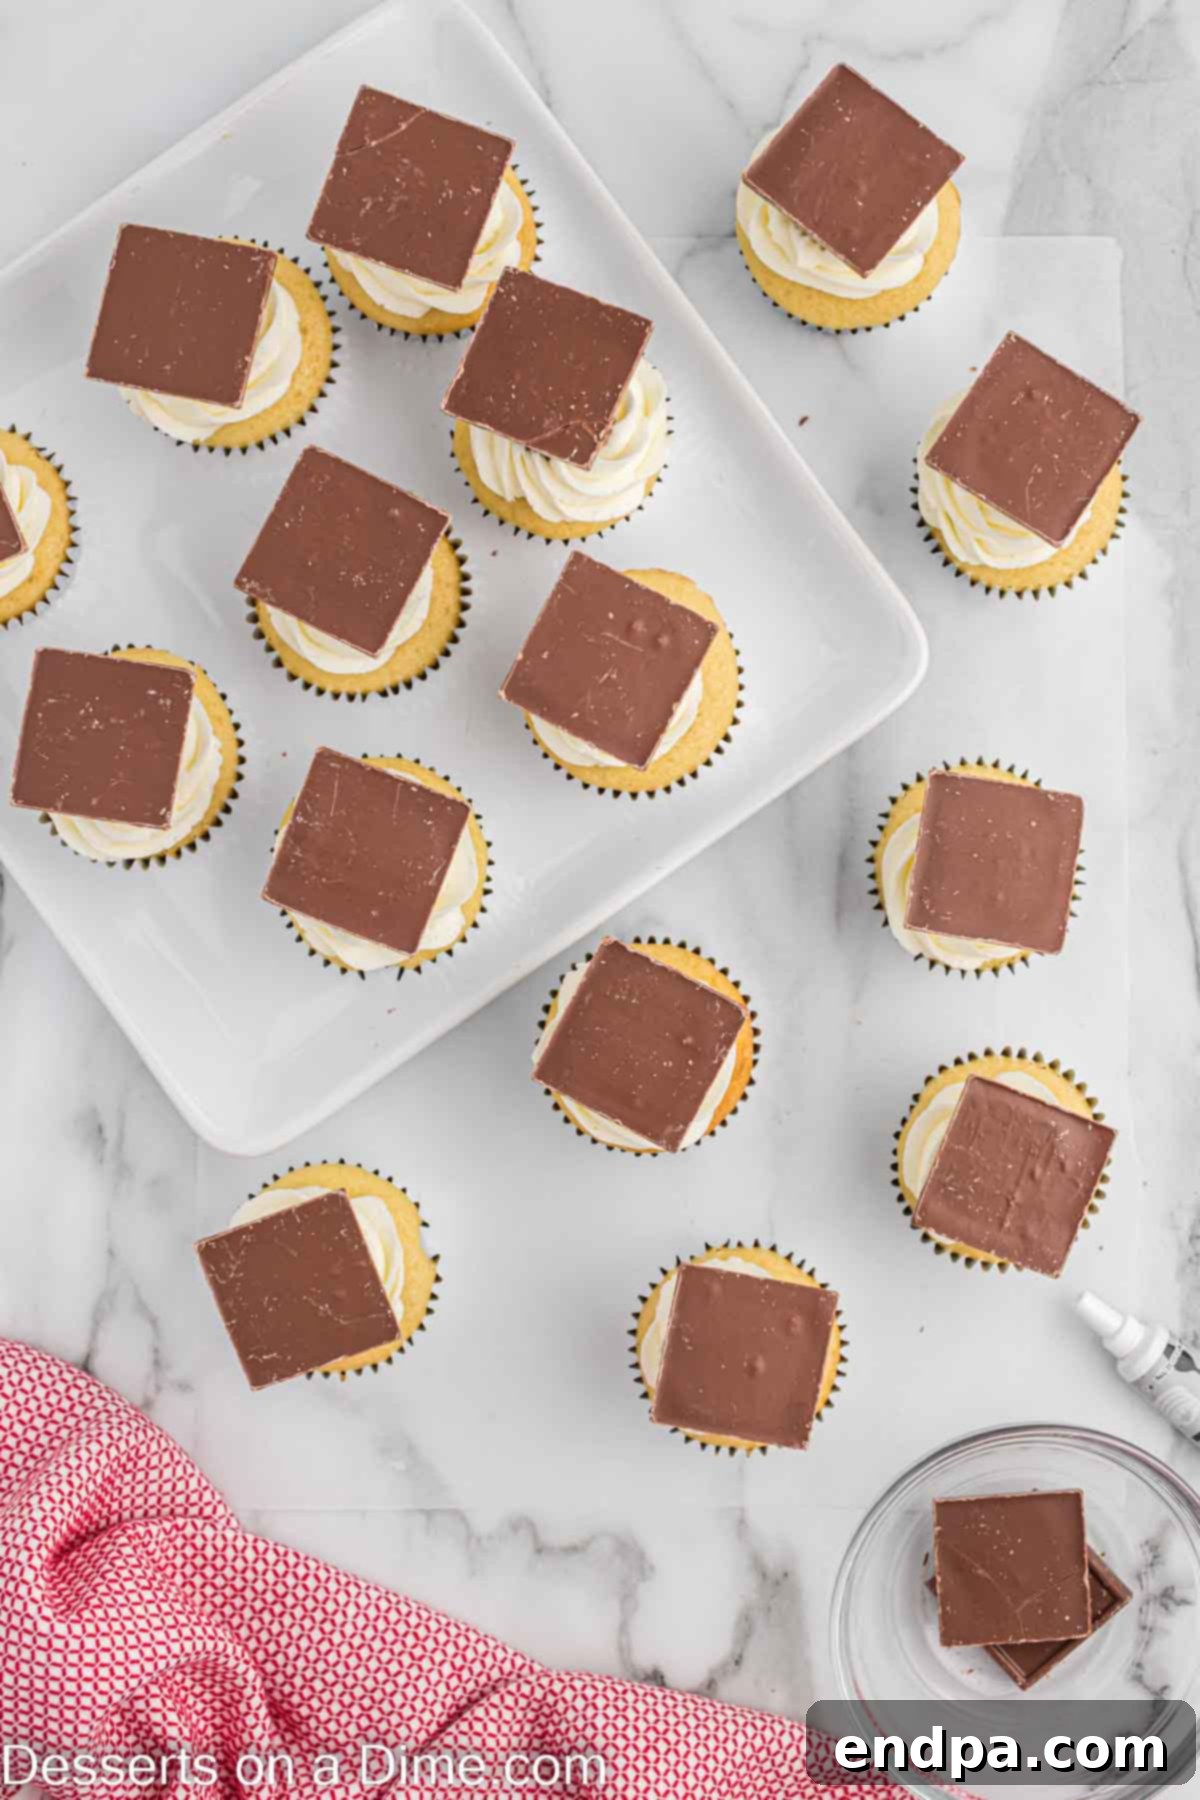
Step 5: Attach the Chocolate Square. Take your brown decorating gel and pipe a small, neat dot or a thin line of gel onto the very center of the upside-down peanut butter cup. This gel serves as an effective edible adhesive. Carefully place one chocolate square candy directly on top of the gel, ensuring it is perfectly centered over the peanut butter cup. Press gently but firmly to secure the chocolate square, forming the flat top of your graduation cap.
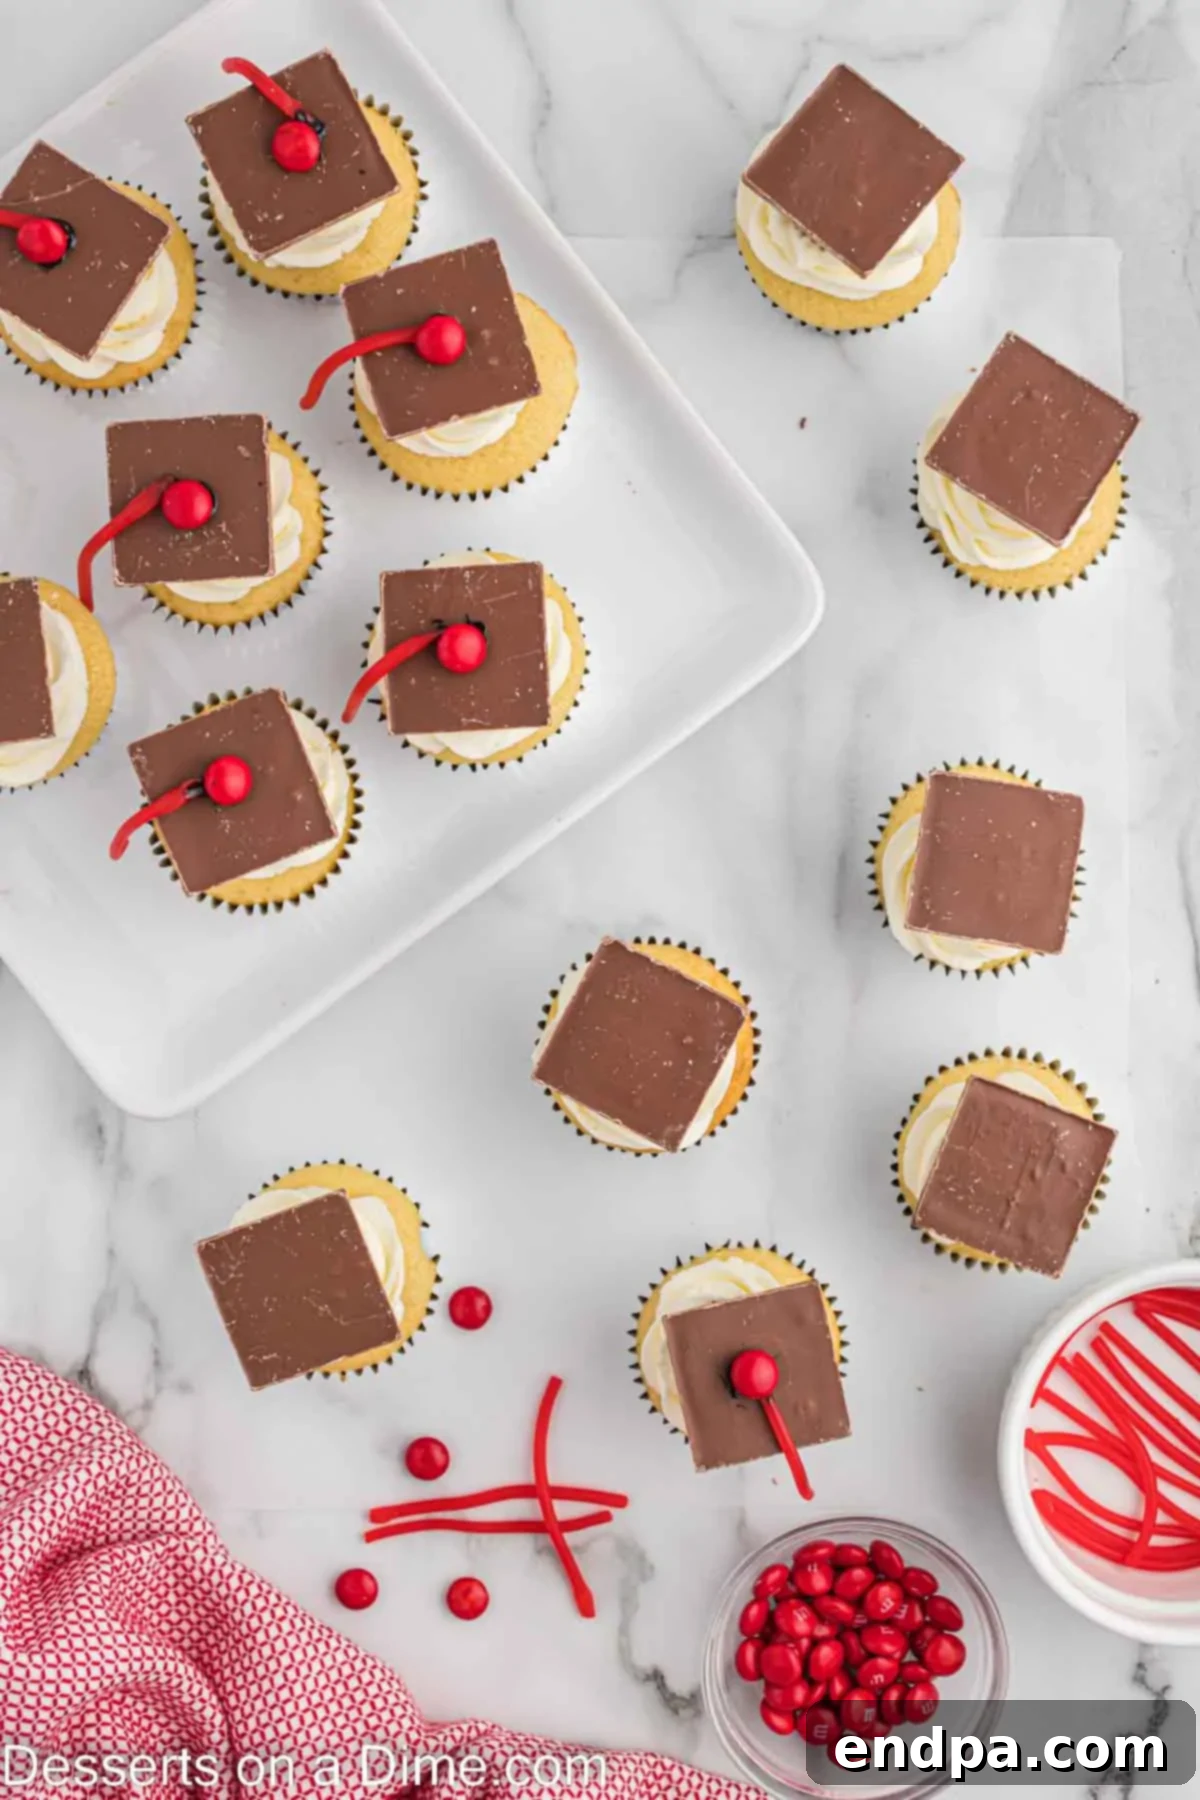
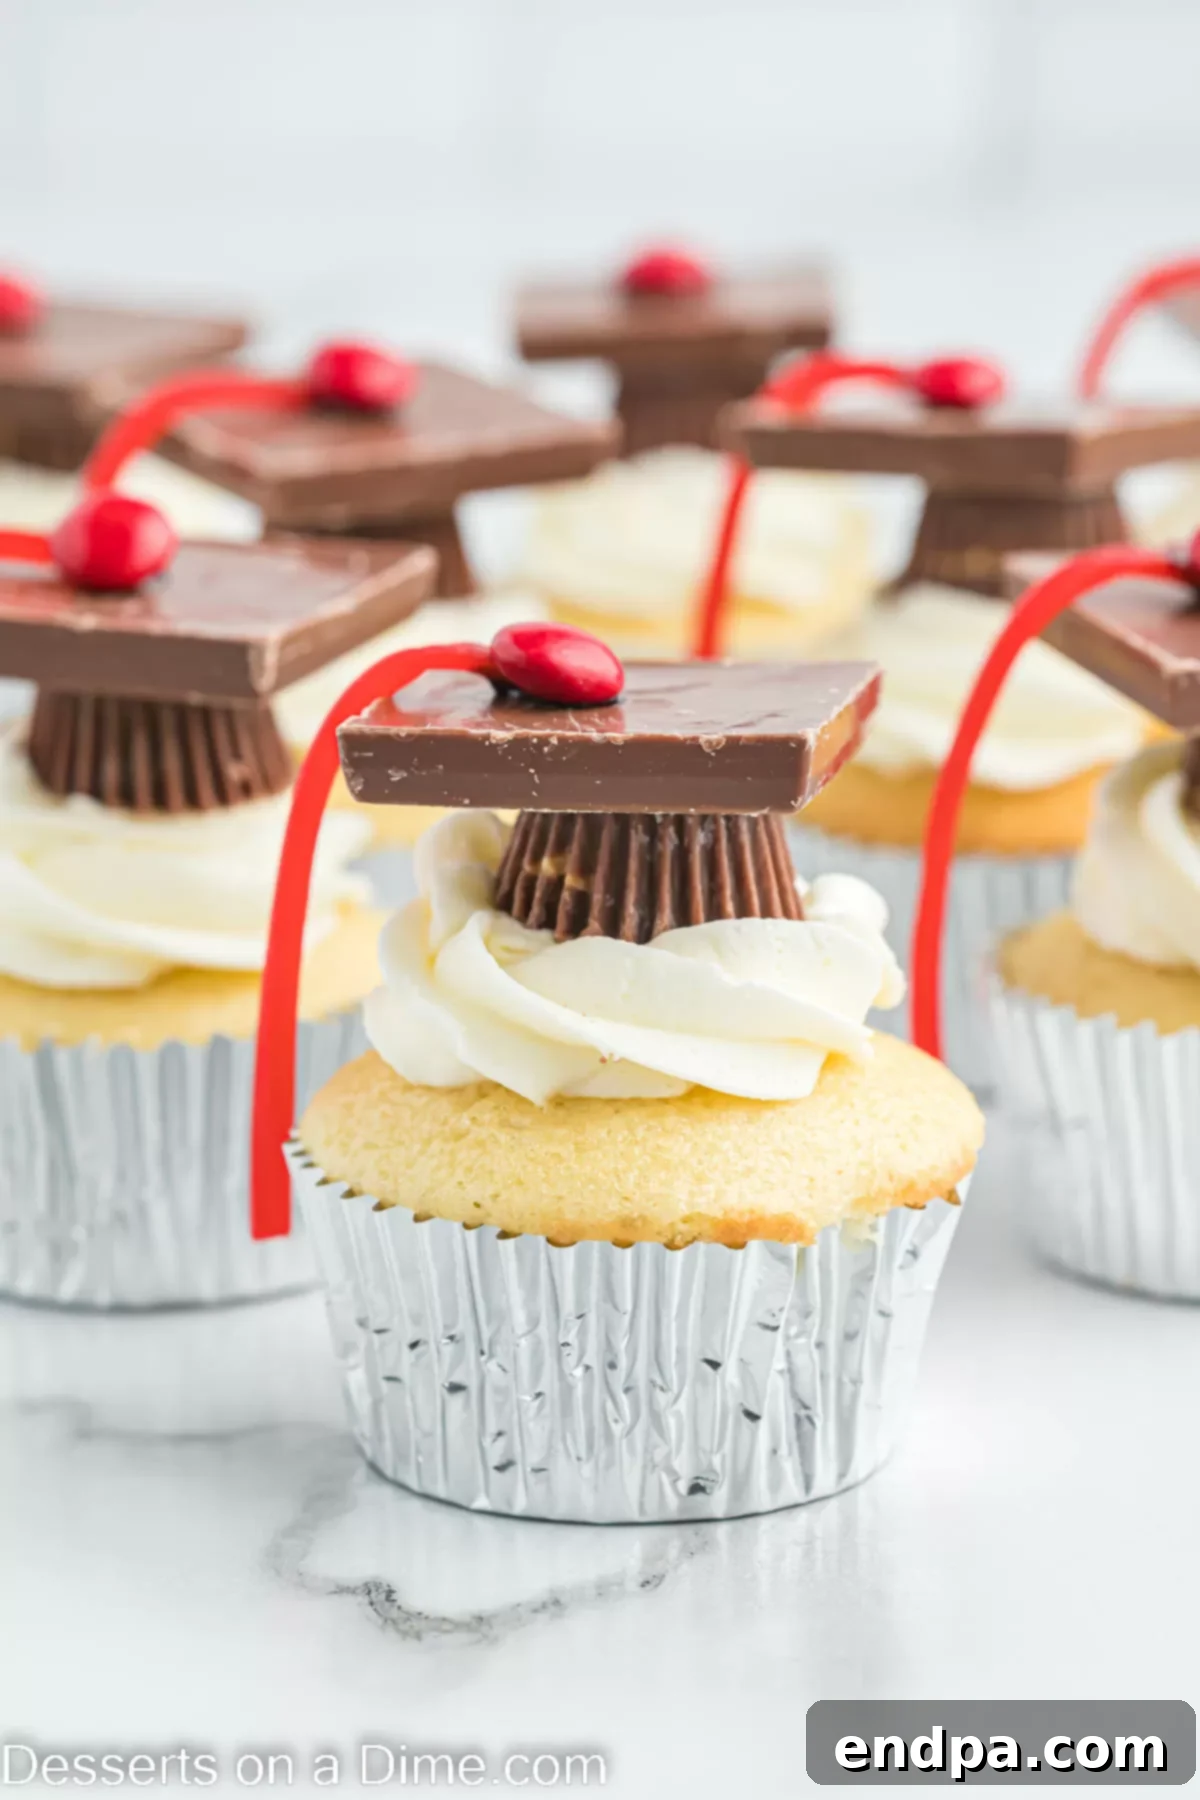
Step 6: Add the Tassel and Button. To create the tassel, pinch one end of a 3-inch piece of separated string licorice to flatten it out slightly. Apply another small dot of decorating gel to the center of the chocolate square. Place the pinched end of the licorice onto the gel, allowing the rest of the licorice strand to dangle gracefully down the side of the chocolate square, mimicking a real tassel. Finally, place a single M&M (or your chosen candy) directly on top of the end of the licorice where it meets the chocolate square, securing it with another tiny dab of decorating gel. Allow the decorating gel to set completely before serving to ensure all pieces are firm.
Expert Tips for Achieving Perfect Graduation Cap Cupcakes
These professional insights will help ensure your graduation cupcakes are not only beautiful but also stress-free and enjoyable to create, even for novice bakers. Follow these tips for flawless results every time:
- Chocolate Square Selection Matters: While the recipe specifically suggests Ghirardelli Chocolate Squares for their ideal flat shape and consistent size, don’t hesitate to use other brands or types of square-shaped chocolates you prefer or have readily available. The key is to select a chocolate that is relatively flat to sit nicely and securely on top of the peanut butter cup, creating a stable cap.
- Time-Saving Frosting Options: If you find yourself short on time, or simply prefer a simpler approach, a high-quality store-bought vanilla frosting can be an excellent and perfectly acceptable substitute for homemade buttercream. Many brands offer rich, creamy options that are ready to use. Simply tint it with food coloring if you wish to match your graduate’s school colors.
- Versatile Cupcake Base Options: Feel empowered to use any cake mix flavor you love! While white cake mix offers a neutral base for vibrant frosting colors, chocolate, yellow, or even red velvet mixes can make an equally delicious and celebratory foundation. For an ultimate shortcut, you can even purchase plain, unfrosted cupcakes directly from a grocery store bakery and jump straight to the fun decorating steps.
- Room Temperature is Paramount: Always, always ensure your cupcakes are **completely cooled to room temperature** before you even think about frosting them. Applying frosting to warm or even slightly warm cupcakes will cause the buttercream to melt, slide off, and create a messy, unappealing presentation. Patience here is truly a virtue!
- Mastering Color Matching: When using food coloring for your frosting, start with a very small amount, such as a drop or a tiny dab of gel, and gradually add more until you achieve the desired shade for your graduate’s school colors. Gel food colorings are highly recommended as they offer more vibrant and concentrated hues without thinning the frosting as much as liquid food coloring drops.
- Preparation is Power: To make the decorating process much smoother and significantly faster, especially if you’re making a large batch, get organized. Unwrapping all peanut butter cups, cutting all licorice pieces, and having your M&M’s sorted and ready *before* you start the assembly line will save you valuable time and reduce stress.
Frequently Asked Questions About Graduation Cap Cupcakes
Got questions about making these festive treats? We’ve got answers to help ensure your baking and decorating experience is a smooth success!
Absolutely! These cupcakes are fantastic for making in advance, which is a huge stress-reliever when planning a party. You can bake the cupcakes themselves up to 2-3 days ahead of time and store them in an airtight container at room temperature to keep them fresh. The buttercream frosting can also be prepared a few days in advance and stored in an airtight container in the refrigerator; just let it come to room temperature and re-whip it slightly with an electric mixer before frosting. The fully decorated cupcakes can be stored for up to 5 days, making them perfect for pre-party prep and allowing you to enjoy the celebration without last-minute baking.
To maintain their freshness and, most importantly, prevent the delicate cap toppers from getting damaged, store your decorated graduation cupcakes in an airtight container at room temperature. It’s crucial to choose a container that is deep enough so that the lid does not touch or smudge the cap decorations. If your home is particularly warm, or if your frosting contains ingredients that require refrigeration (like cream cheese), you can store them in the refrigerator. However, for the best flavor and texture of the cupcake and frosting, allow them to come to room temperature for about 15-20 minutes before serving.
When hosting a graduation party, a good rule of thumb is to plan for approximately one and a half standard-sized cupcakes per guest. This generous estimate accounts for guests who might enjoy more than one dessert or those who might opt to try a cupcake in addition to other sweet treats available. If you are serving mini cupcakes, you can adjust that estimate slightly, planning for about 2 to 3 mini cupcakes per guest, as their smaller size often encourages sampling multiple varieties.
Yes, absolutely! Customizing the colors is highly encouraged and is one of the best ways to personalize these cupcakes. The M&M’s used for the “button” on the cap and the buttercream frosting itself are excellent opportunities to incorporate your graduate’s school colors. You can often buy single-color M&M’s online or sort them from a regular bag. For the frosting, use gel food coloring to achieve vibrant and rich shades without significantly altering the frosting’s perfect consistency. This personal touch will make the cupcakes even more special and celebratory.
More Delightful & Easy Cupcake Recipes to Try
If you loved making these festive graduation cap cupcakes, you’ll surely enjoy exploring other fun and simple cupcake creations. Here are some more fantastic recipes to satisfy your sweet tooth and keep the baking joy going:
- Pink Champagne Cupcakes
- Green Velvet Cupcakes
- Easy Ice Cream Cone Cupcakes
- Piñata Cupcakes
- Key Lime Cupcakes
- S’mores Cupcakes Recipe
These Graduation Cap Cupcakes are more than just a dessert; they are a heartfelt symbol of accomplishment and joyous celebration. Simple to make yet incredibly impressive, they offer a personal and memorable touch to your graduate’s special day. We sincerely hope you and your loved ones enjoy making and savoring these festive treats as much as we do. Happy baking, and congratulations to all the deserving graduates!
Have you tried this recipe for Graduation Cap Cupcakes? We would absolutely love to hear your thoughts and see your creations! Please feel free to leave a comment and a star recipe rating below to share your experience with our community. Your feedback helps us and other bakers!
Graduation Cupcakes
Celebrate your loved one with these festive Graduation Cupcakes! Customize them with school colors for a fun and memorable graduation topper cupcake.
15 mins
20 mins
35 mins
24 cupcakes
American
Dessert
256 kcal
Carrie Barnard
Ingredients
FOR THE CUPCAKES:
- 1 pkg White Cake Mix
- *Ingredients to prepare the cupcakes based on the package instructions
- 24 Mini Peanut Butter Cups, unwrapped
- 24 Chocolate Square Candies (e.g., Ghirardelli)
- 24 Red M&M’s (or your graduate’s school color)
- Peel-apart String Licorice, separated and cut into 3-inch pieces
- Brown Decorating Gel
FOR THE BUTTERCREAM FROSTING:
- ¾ cup Unsalted Butter, softened
- 2 ¼ cup Powdered Sugar, sifted
- 2 Tbsp Milk
- 1 tsp Clear Vanilla Extract
Instructions
- Prepare the cupcakes based on the cake mix package instructions. Once baked, allow them to cool completely on a wire rack before decorating.
- While cupcakes cool, prepare the frosting. In a large bowl, cream together the softened butter and sifted powdered sugar until combined and smooth. Then add the milk and clear vanilla extract. Mix for 1-2 minutes until the frosting is light and fluffy.
- Pipe or spread the frosting onto each of the cooled cupcakes.
- Place one unwrapped mini peanut butter cup upside down on top of each frosted cupcake.
- Use a small dot of brown decorating gel as “glue” to attach a chocolate square candy on top of each peanut butter cup.
- To create the tassel, pinch one end of a 3-inch piece of string licorice to flatten it out. Use decorating gel to secure the pinched end to the center of the chocolate square. Place a single M&M on top of the licorice end, securing it with a tiny dab of gel.
- Allow the decorating gel to set completely before serving. Then the cupcakes are ready to serve and enjoy!
Recipe Notes
For a quicker option, feel free to use pre-made frosting if you prefer.
Store leftover decorated cupcakes in an airtight container for up to 5 days. Ensure the container is deep enough to prevent damage to the cap toppers.
Nutrition Facts (per serving)
- Calories: 256 kcal
- Carbohydrates: 36g
- Protein: 2g
- Fat: 12g
- Saturated Fat: 6g
- Polyunsaturated Fat: 1g
- Monounsaturated Fat: 4g
- Trans Fat: 0.3g
- Cholesterol: 17mg
- Sodium: 180mg
- Potassium: 41mg
- Fiber: 1g
- Sugar: 27g
- Vitamin A: 185 IU
- Vitamin C: 0.03mg
- Calcium: 66mg
- Iron: 1mg
Pin This Now to Remember It Later
Pin Recipe
