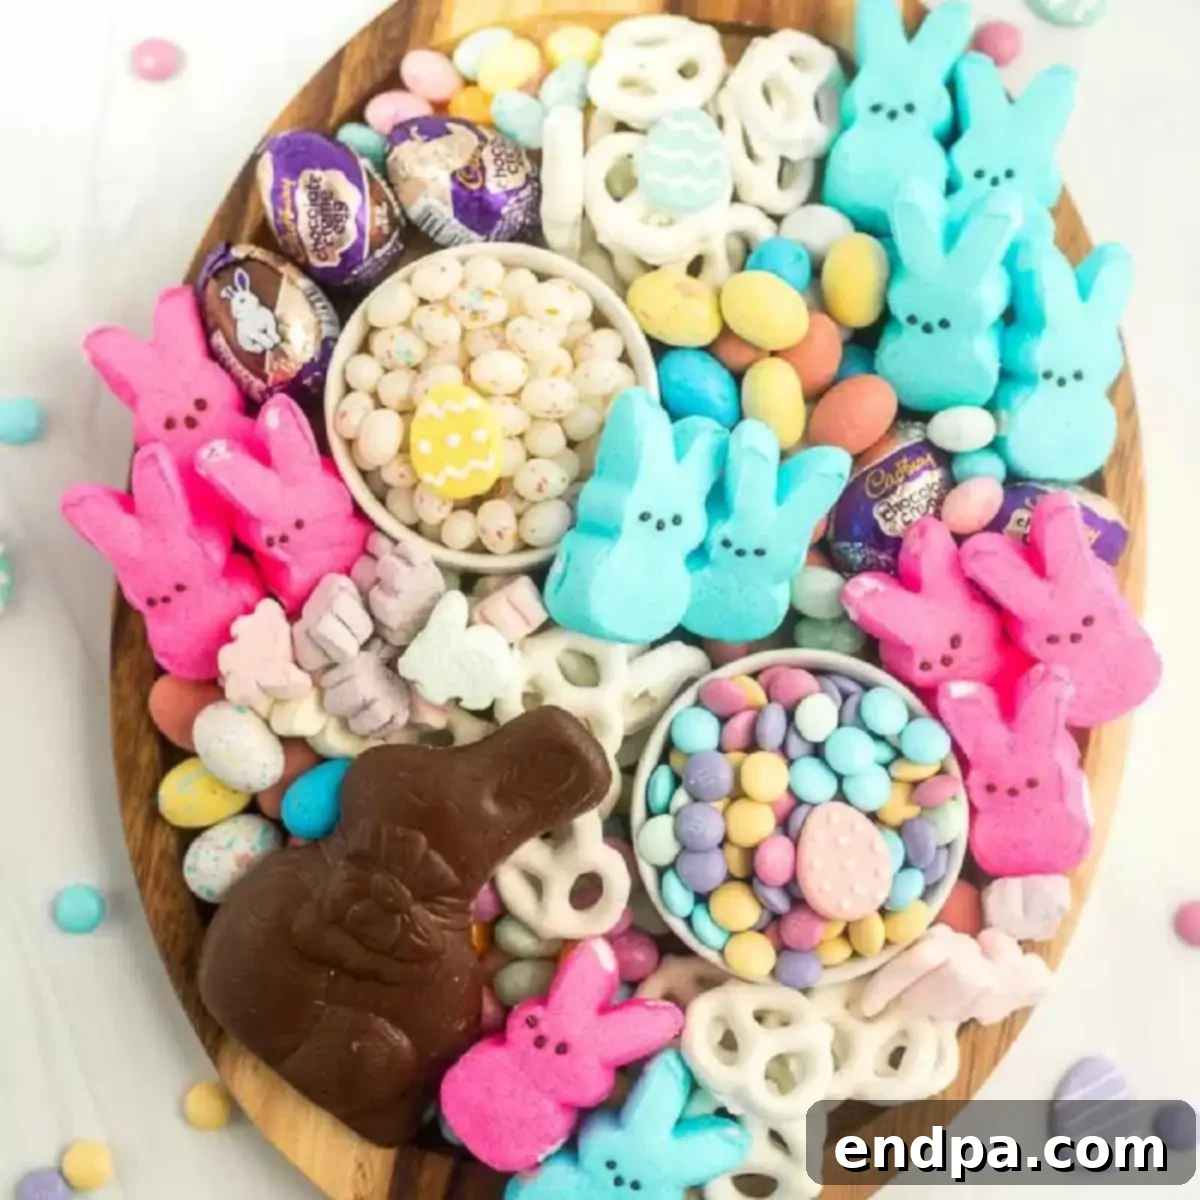
The Easter Candy Charcuterie Board is an irresistibly fun and vibrant way to present a delightful array of your favorite Easter treats. More than just a simple dessert, it transforms a collection of candies into a stunning centerpiece, making your Easter dinner or celebration feel complete and truly special. Imagine a beautifully arranged platter brimming with pastel colors, tempting textures, and all the sweet delights of the season – an instant crowd-pleaser that invites everyone to gather, graze, and enjoy.
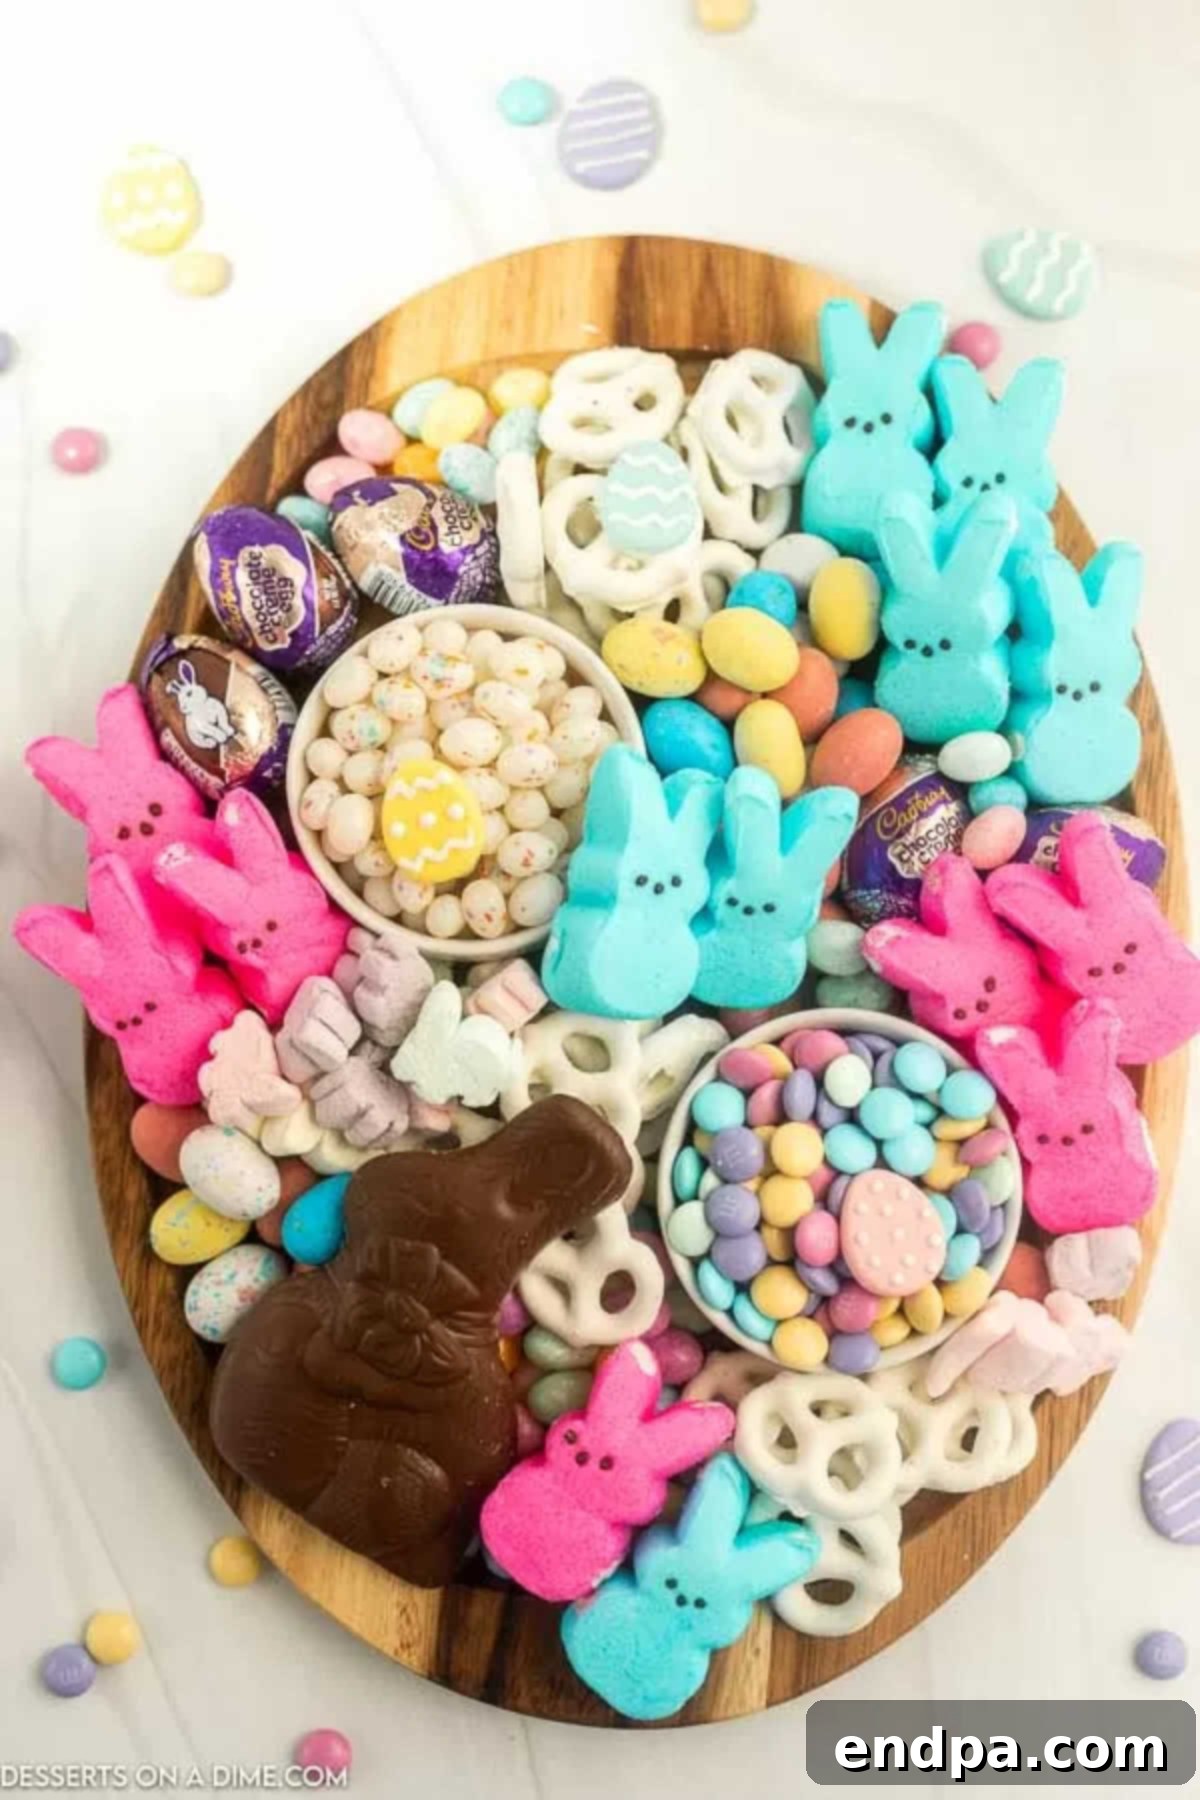
We adore crafting charcuterie boards for all major holidays, and Easter provides the perfect canvas for a truly spectacular sweet display. This particular Easter Candy Charcuterie Board holds a special place in our hearts because it allows us to showcase an abundance of beloved seasonal confections. Beyond this festive candy board, we also love preparing other delightful Easter desserts like Easter Bunny Chow, a whimsical and crunchy snack; Easter Egg Fruit Pizza, a refreshing and colorful treat; and Crock Pot Easter Candy Clusters, an incredibly easy and shareable dessert. These homemade options, alongside a dazzling candy board, add a thoughtful and delicious touch to any Easter gathering.
The beauty of charcuterie boards lies in their incredible versatility and ease of assembly. What starts as a simple concept of arranging items on a board quickly evolves into an artistic expression. It’s so straightforward and enjoyable that we’ve created various themed boards for different special occasions, such as a refreshing Ice Cream Charcuterie Board for summer parties and a patriotic American Flag Candy Charcuterie Board for national holidays. Each board brings its unique charm, but the Easter candy version is particularly delightful with its bright, cheerful palette and nostalgic appeal. It’s a fantastic way to simplify holiday entertaining while still making a grand statement with minimal effort.
Table of contents
- What Does Charcuterie Mean?
- Why an Easter Candy Charcuterie Board?
- Essential Supplies for Your Easter Candy Board
- Selecting Your Easter Candy Ingredients
- Creative Variation Ideas for Your Board
- How to Assemble Your Easter Candy Charcuterie Board
- Design Tips for a Stunning Candy Display
- FAQs About Easter Candy Charcuterie Boards
- More Charcuterie Board Ideas
What Does Charcuterie Mean?
Traditionally, the term “charcuterie” is a French word that refers to a branch of cooking dedicated to prepared and cured cold meats, such as salami, prosciutto, and pâté. When served on a charcuterie board, these meats are often elegantly paired with an assortment of complementary items like artisanal cheeses, fresh and dried fruits, crunchy nuts, and a selection of crackers or crusty bread. This classic arrangement creates a sophisticated savory grazing experience, offering a delightful interplay of flavors and textures.
However, in recent years, the concept of a “charcuterie board” has beautifully evolved beyond its savory origins. It has expanded to embrace a wide range of themed displays, including fruit boards, breakfast boards, and, much to our delight, exquisite dessert boards. The core idea remains the same: an artful arrangement of various items on a platter, designed for communal sharing and visual appeal. This modern interpretation allows for incredible creativity, transforming any collection of foods into an inviting and impressive spread. Sweet charcuterie boards, in particular, have soared in popularity, allowing hosts to craft stunning edible landscapes using everything from baked goods to, as we’ll explore here, an abundance of colorful candies.
Why an Easter Candy Charcuterie Board?
An Easter Candy Charcuterie Board isn’t just a dessert; it’s an experience. Here’s why this board is the perfect addition to your Easter festivities, combining effortless charm with irresistible sweetness:
- Endless Customization Options: The beauty of a candy charcuterie board lies in its ultimate flexibility. You are truly limited only by your imagination and candy aisle selection! You can include every family favorite, from classic chocolate eggs and peanut butter delights to brightly colored marshmallow Peeps in every hue. It’s a wonderful opportunity to get creative, mix and match different textures and flavors, and tailor the board precisely to your guests’ preferences. For an extra special touch, consider adding homemade treats like Easter Chocolate Covered Oreos, which are simple to make and always a hit.
- A Stunning Edible Centerpiece: Forget complicated floral arrangements – your Easter candy board will naturally become the focal point of your holiday table. Its vibrant colors, varied shapes, and playful arrangement draw the eye and spark conversation. It’s not just a dish; it’s a decorative element that brings joy and a festive atmosphere to your celebration. Guests will be delighted by its visual appeal before they even take their first bite.
- Perfect for All Ages (and Skills!): This is truly a dessert board that everyone, from the youngest child to the oldest adult, can appreciate and enjoy. Children will love picking out their favorite candies, and adults will appreciate the nostalgic selection and the sheer variety. Best of all, there’s absolutely no baking involved! All you need to do is gather your favorite candies and arrange them. This makes it a fantastic, stress-free option for busy hosts and a fun project for kids who want to help prepare for Easter.
- Effortless Elegance for Entertaining: Hosting an Easter gathering can be a lot of work, but a candy charcuterie board alleviates much of the dessert-making pressure. It requires minimal prep time – essentially just unwrapping and arranging – allowing you to focus on other aspects of your meal or spend more quality time with your loved ones. Despite its simplicity, the finished board exudes an elegant and thoughtful presentation that will impress all your guests.
Essential Supplies for Your Easter Candy Board
Crafting your perfect Easter candy charcuterie board begins with the right foundation. While the candies are the stars, the board and a few other simple items are key to an attractive and functional display.
- The Board or Platter: Start with a sturdy board or large platter. We highly recommend using one with slightly raised edges or a lip. This small detail is incredibly helpful, as it prevents smaller, round candies like jelly beans or M&M’s from rolling off the board as guests graze, keeping your beautiful arrangement intact. Material-wise, consider a wooden cutting board for a rustic feel, a slate board for a modern touch, or a ceramic platter for classic elegance. The size of your board should correspond to the number of guests you expect and the quantity of candy you plan to display.
- Small Bowls and Ramekins: These are indispensable for adding height, structure, and containment to your board. Small bowls can hold tiny candies, preventing them from scattering, or keep different types of jelly beans separate. They are also perfect for dips if you decide to include something like a Chocolate Fondue Recipe, which pairs wonderfully with many Easter candies and fresh fruit. Using bowls of varying sizes and heights adds visual interest and dimension to your display.
- Serving Utensils (Optional): For certain candies or if you prefer guests not to use their hands, consider adding small tongs or candy scoops. This can be particularly useful for jelly beans or other loose items.
- Parchment Paper (Optional): If you’re using a wooden board and want to protect it from sticky candies or simply make cleanup a breeze, line the board with parchment paper before arranging your treats. This also creates a clean, crisp background for your colorful candies.
Once you have your basic supplies, the real fun begins: selecting your favorite candies from your local grocery store and getting ready to build your beautiful Easter display!
Selecting Your Easter Candy Ingredients
The heart of any Easter Candy Charcuterie Board is, of course, the candy itself! The key to a truly stunning and appealing board is to choose a variety of colors, textures, and flavors. Think pastels, spring themes, and a mix of chewy, crunchy, and melt-in-your-mouth delights. Here’s a comprehensive list of suggested ingredients, designed to inspire your own personalized creation:
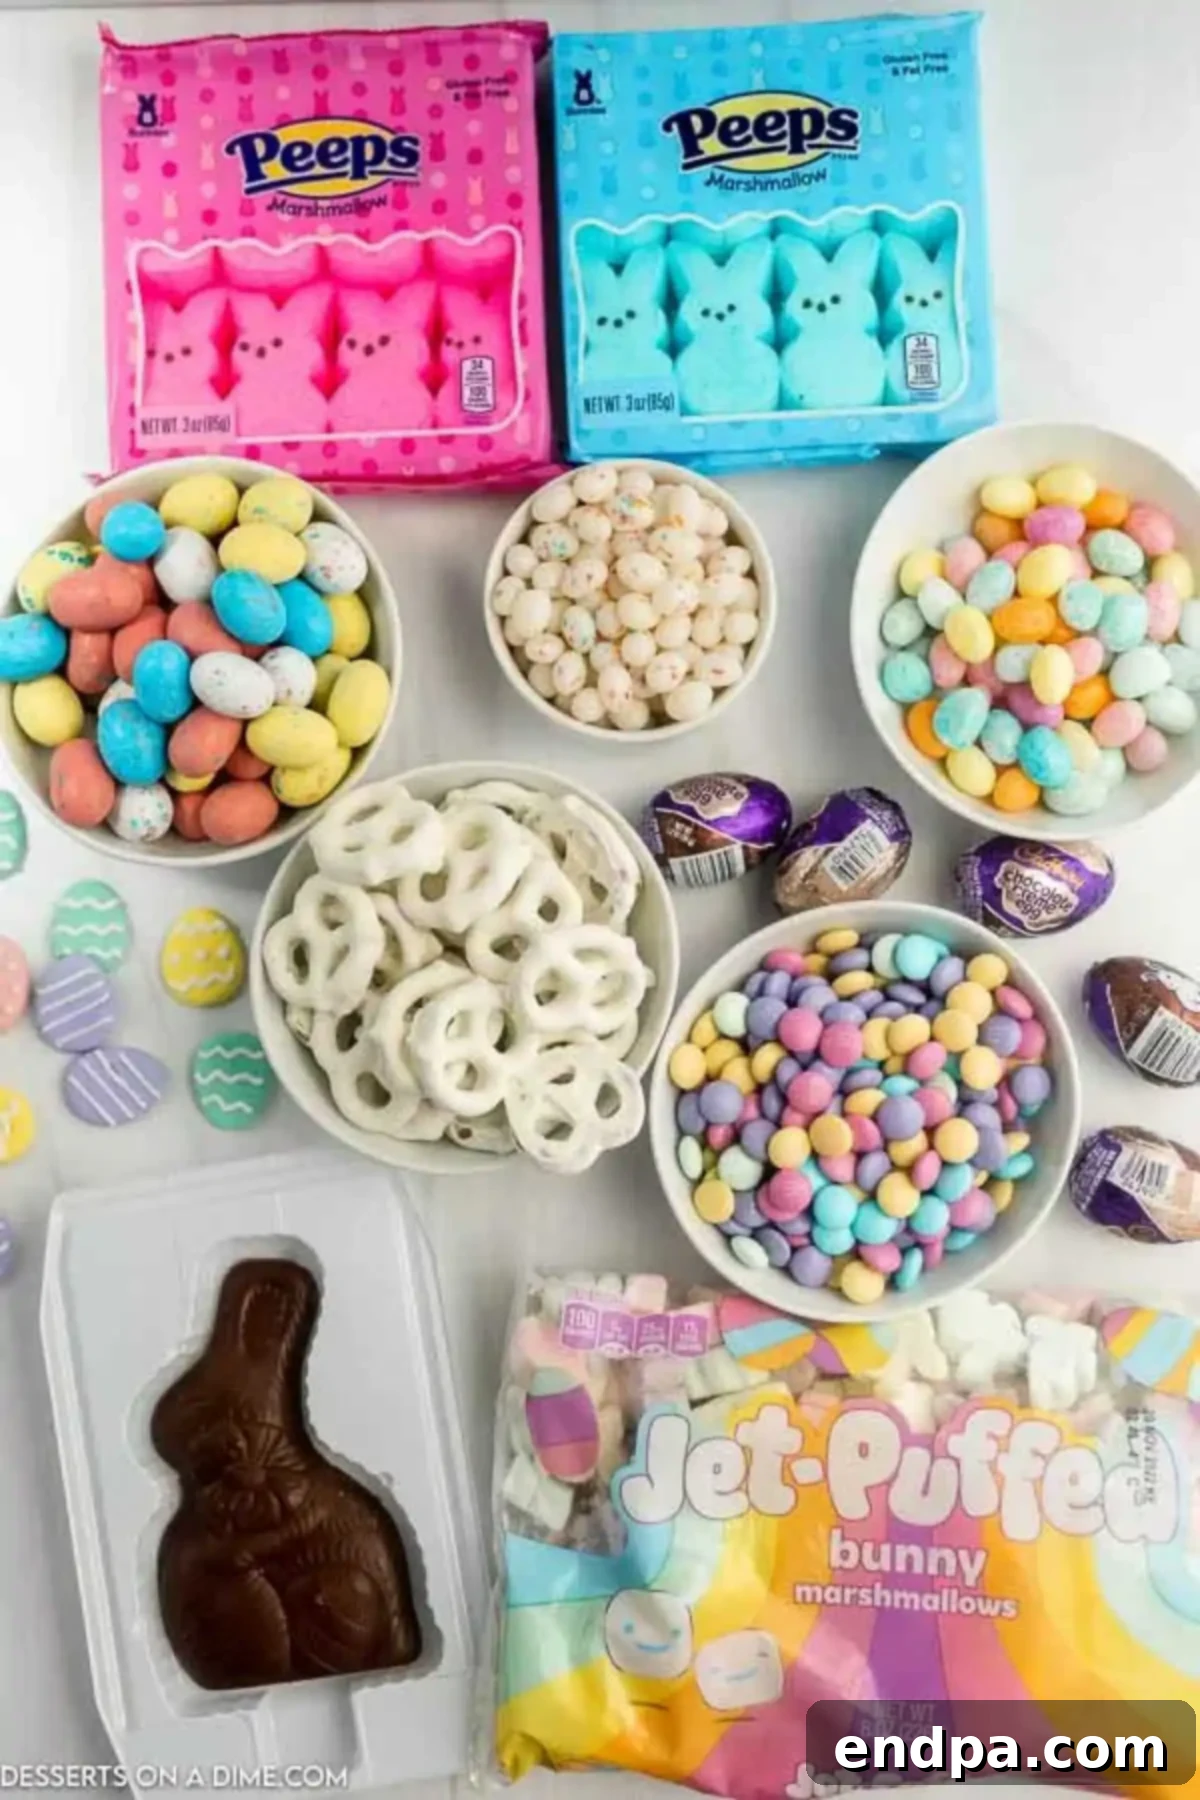
- Marshmallow Peeps:
- Blue Bunny Peeps (for a touch of cool blue)
- Pink Bunny Peeps (a classic Easter pastel)
- Yellow Chick Peeps (the iconic Easter treat)
- Other pastel-colored Peeps (experiment with various shapes and colors)
- Chocolate Delights:
- Chocolate Easter Bunny (a large one makes a perfect centerpiece!)
- Cadbury Creme Eggs (a rich, creamy holiday staple)
- Robin Egg Candy (speckled chocolate eggs are a must-have)
- Easter M&Ms (look for pastel-colored varieties)
- Miniature chocolate eggs (solid or filled)
- Fruity & Chewy Favorites:
- Jelly Beans (a mix of classic and gourmet flavors adds variety)
- Funfetti Jelly Beans (for an extra pop of color and festivity)
- Gummy candies (such as gummy bears, worms, or specific Easter shapes like bunnies or carrots)
- Fruit slices or fruit jellies in pastel colors
- Crunchy & Unique Additions:
- Yogurt Covered Pretzels (offer a delightful sweet and salty crunch)
- Bunny Marshmallows (cute and soft, perfect for filling gaps)
- Mini pretzels (plain or dipped in white chocolate)
- Small wafer cookies in pastel colors
The key is to select candies that evoke the spirit of Easter – bright colors, spring themes, and a sense of playful indulgence. Don’t be afraid to mix and match from this list, choosing items that you know your family and friends will love. For those with dietary restrictions, consider including gluten-free candies or other allergen-friendly options. The full, detailed ingredient list with precise measurements can typically be found in the recipe card at the end of this article.
Creative Variation Ideas for Your Board
While a classic assortment of Easter candies is always a hit, incorporating variations can elevate your Easter Candy Charcuterie Board to an even more memorable and personalized display. Think about adding elements that introduce new textures, homemade charm, or unique themed flair. Any pastel-colored candy or white chocolate treat will fit right in, but these ideas will truly make your board pop:
- Homemade Baked Goods:
- Easter Egg Sugar Cookies Recipes: Cut out and decorate sugar cookies in festive egg shapes, using pastel icings.
- Easter Chocolate Covered Pretzel Rods: Dip pretzel rods in white chocolate dyed with pastel food coloring and sprinkle with Easter nonpareils.
- Easy Easter Chocolate Covered Oreos: Similar to pretzel rods, these are quick to make and look incredibly festive.
- Easter Egg Rice Krispie Treats: Form Rice Krispie treats into egg shapes and decorate them with icing or sprinkles.
- Easter Bunny Cookies: Adorable bunny-shaped cookies add a playful touch.
- Peeps Rice Krispie Treats Recipe: Integrate extra Peeps into these gooey treats for a double dose of marshmallowy goodness.
- Bunny Butt Cupcakes: While larger, miniature versions or just the cute bunny butt toppers can be placed on the board.
- Bunny Bait Recipe: A delightful mix of pretzels, cereal, white chocolate, and sprinkles – perfect for adding a crunchy, snackable element.
- Themed & Decorative Elements:
- Edible Grass: Green shredded coconut or a fine green candy grass can provide a festive base or filler, mimicking an Easter basket.
- Chocolate Carrots: Small, decorative chocolate carrots (often found in candy shops or specialty stores) are a charming addition.
- Bunny Grahams: These small, cute crackers add a subtle crunch and a clear Easter theme.
- Spring-themed Meringues: Light, airy, and often pastel, meringues can add height and a delicate texture.
- Miniature Cupcakes or Cake Pops: Small, bite-sized versions decorated for Easter can add a bakery-quality touch.
- Freshness & Balance:
- Fresh Berries: Strawberries, blueberries, raspberries, or grapes can provide a refreshing contrast to the sweetness and add vibrant natural colors.
- Mini Fruit Skewers: Small skewers of colorful fruit can introduce a healthy element.
- Whipped Cream or Yogurt Dip: Served in small bowls, these can offer a lighter accompaniment to some of the candies or fruits.
The goal is to create a visually rich and diverse board that caters to various tastes and preferences. By combining store-bought favorites with a few homemade touches or decorative elements, you can craft a truly unique and inviting Easter display.
How to Assemble Your Easter Candy Charcuterie Board
Assembling an Easter Candy Charcuterie Board is a fun and creative process that’s much easier than it looks. Follow these steps to create a show-stopping dessert display:
- Step 1: Choose Your Foundation. Begin by selecting your board or large platter. A board with edges is often the easiest to work with as it helps contain all the delicious treats. If you prefer, you can line your board with parchment paper first. This makes cleanup incredibly simple and provides a clean backdrop for your candies. Consider the size of your gathering when choosing your board – a larger crowd will require a more expansive display.
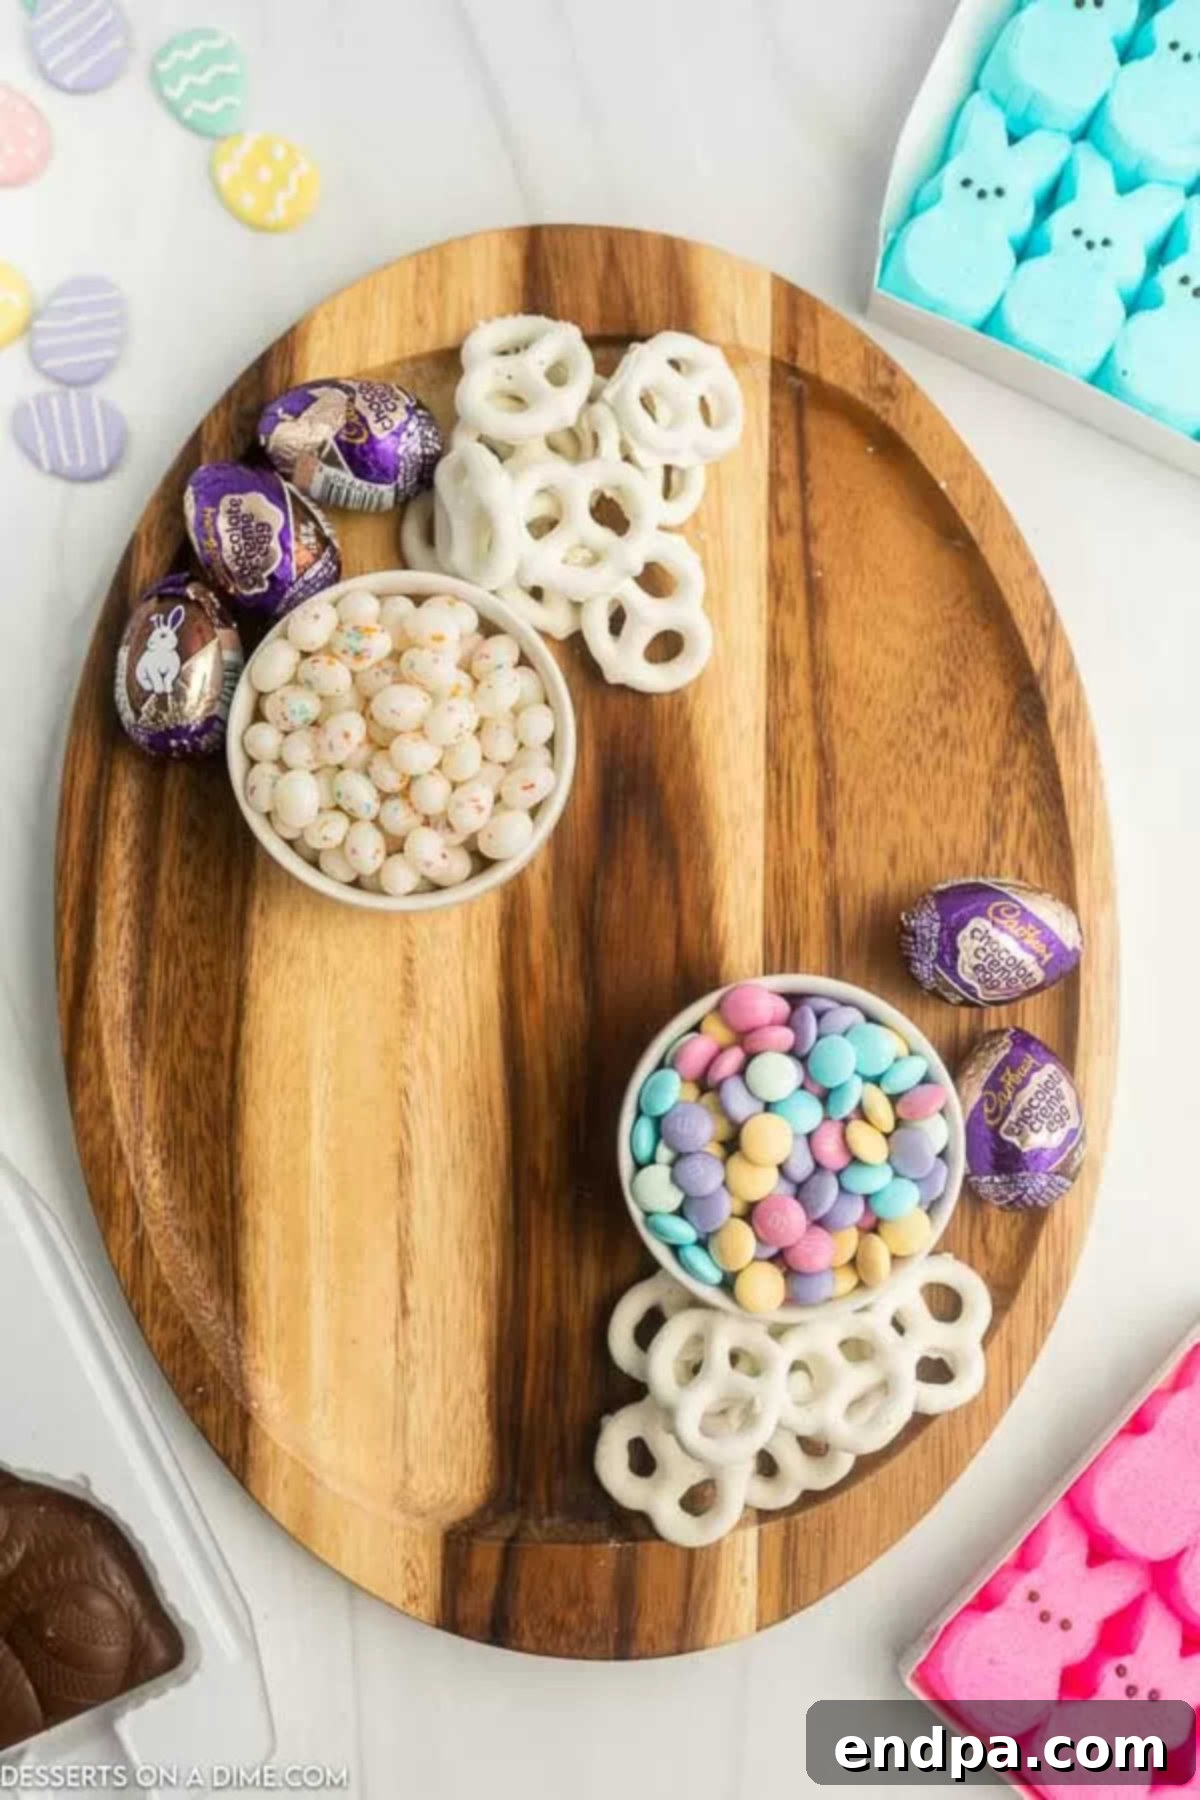
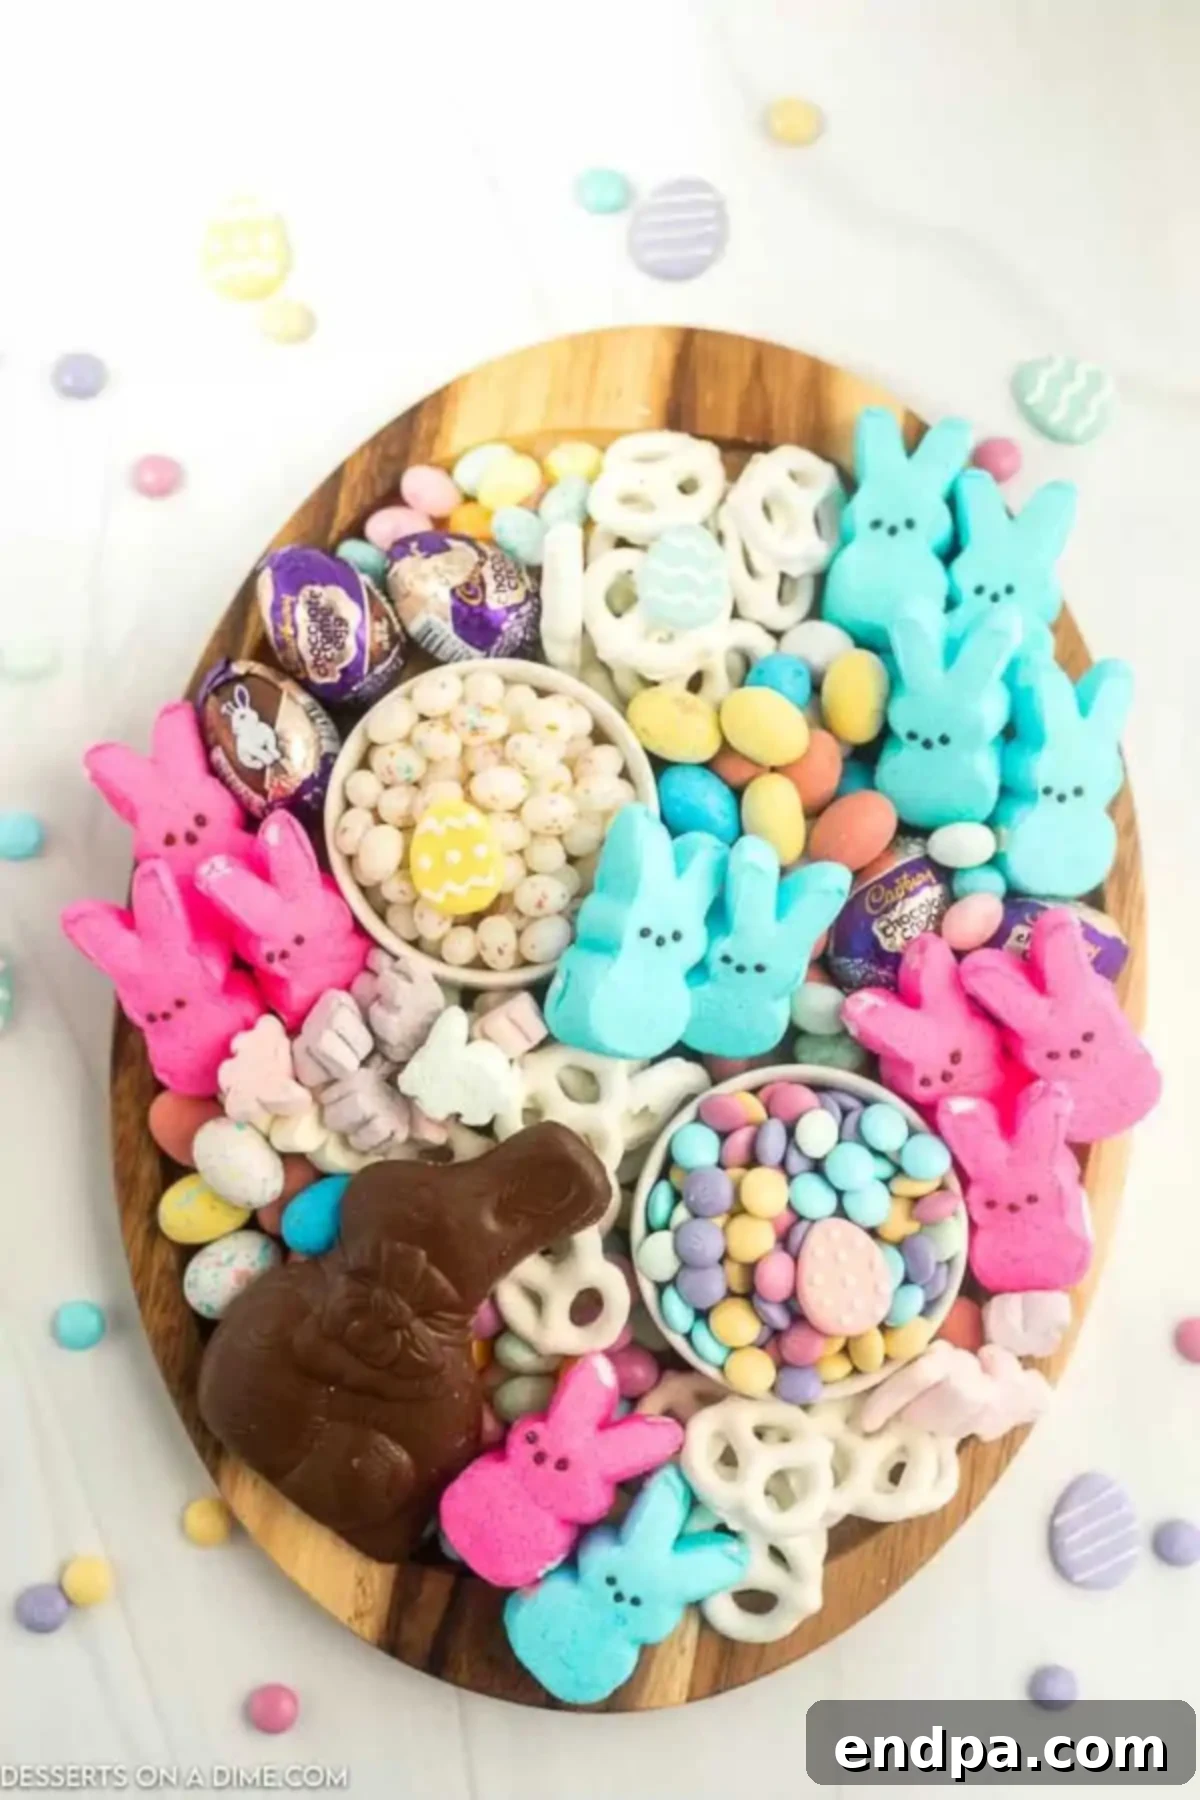
Step 2: Place Your Anchor Bowls and Smaller Candies. Start by strategically placing a few small bowls around your board. These bowls will serve as anchors and can be filled with smaller, loose candies like jelly beans, M&M’s, or even small chocolate eggs. We find it works well to put varieties like funfetti jelly beans and regular M&M’s in separate small bowls to prevent them from mixing too much. Scatter these smaller candies around the bowls to begin filling in the board, creating colorful patches and setting the stage for larger items.
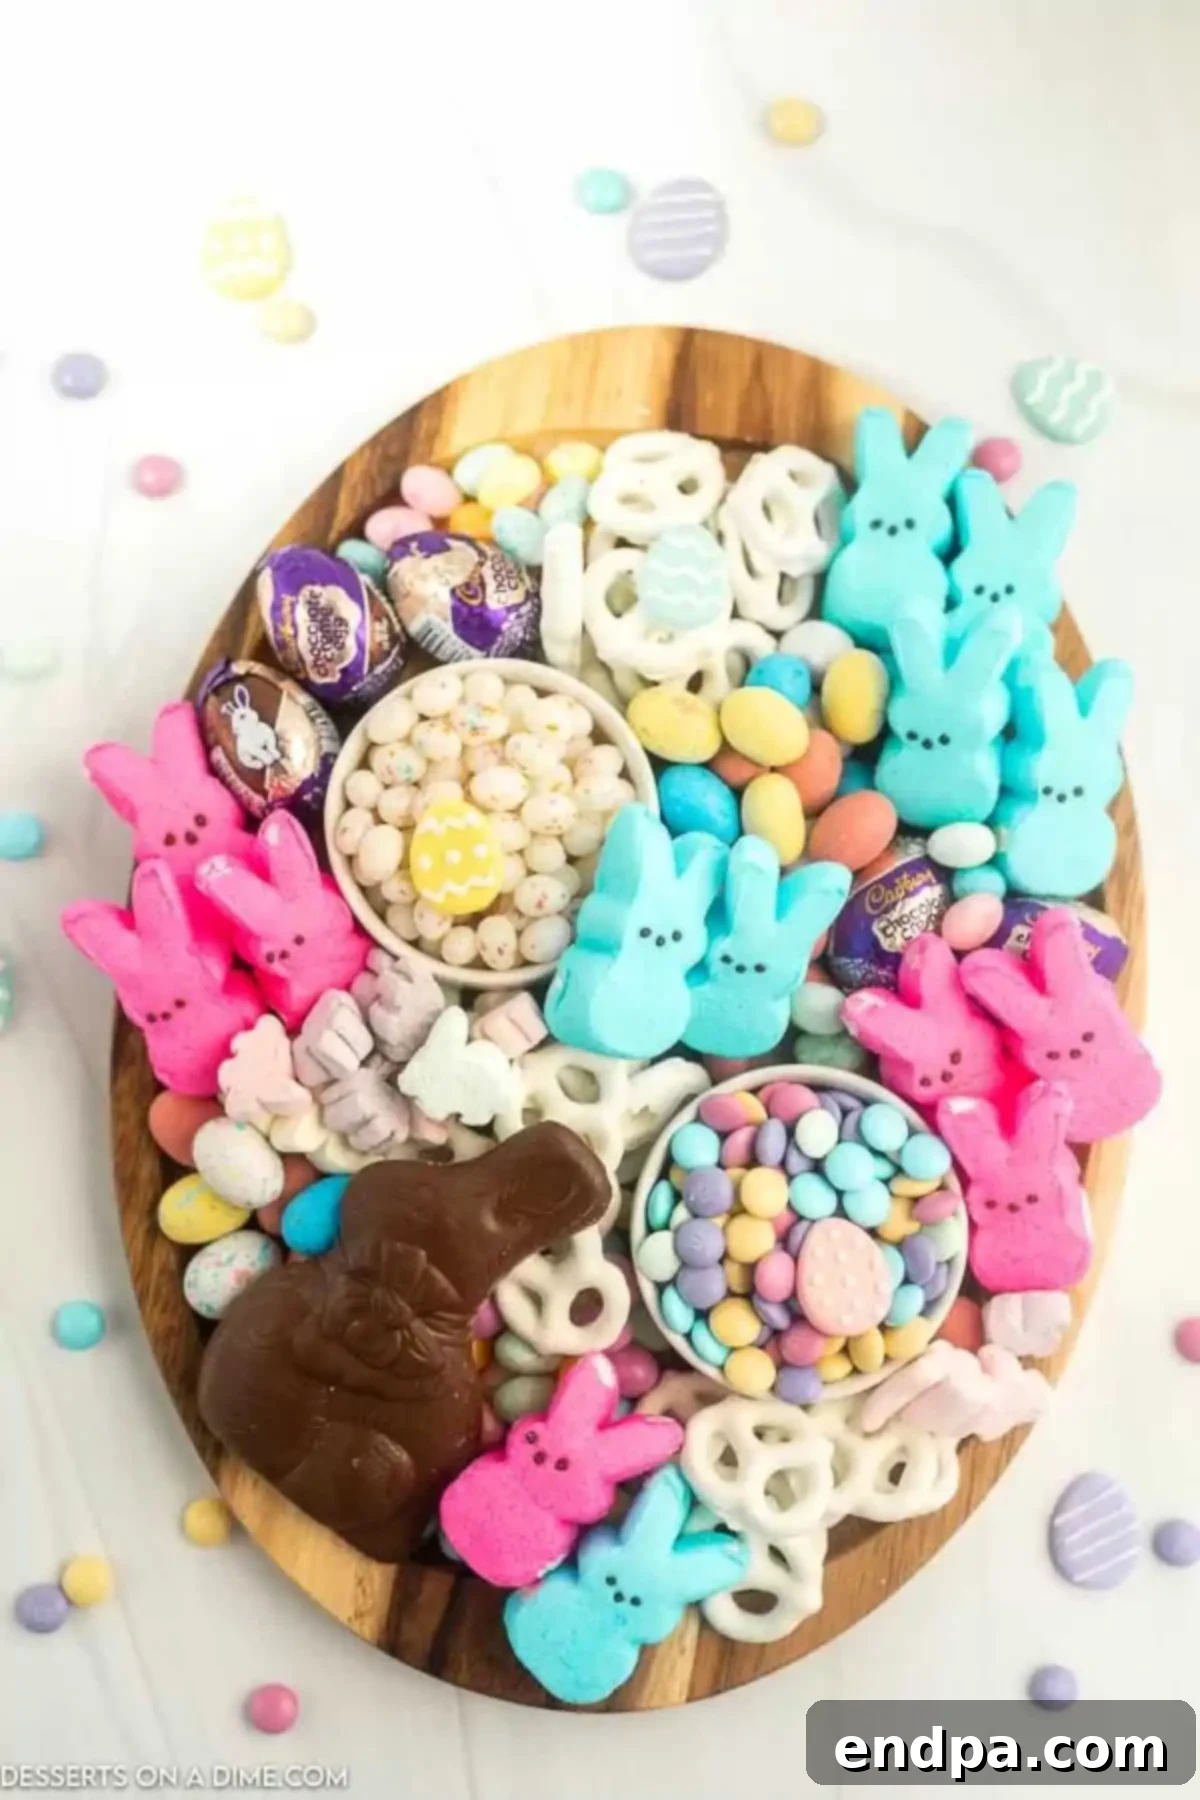
Step 3: Integrate Larger Items and Fill Gaps. Next, incorporate your larger candy items. This includes marshmallow Peeps, Cadbury Eggs, Yogurt Covered Pretzels, and Bunny Marshmallows. Arrange these in clusters, making sure to distribute colors and textures evenly across the board. The goal is to create visual balance and ensure easy access to all the treats. Finally, fill in any remaining open spaces with the other types of candy you’ve selected. Once your board is largely assembled, place your large Chocolate Easter Bunny prominently on top – it makes for an excellent focal point and a grand finale to your candy masterpiece.
A key tip for a more appealing look is to avoid grouping all of the same items in one place. Instead, scatter similar items around the board to create a dynamic and inviting display. This not only makes the board more visually interesting but also encourages guests to explore all the different sections and discover new favorites. With these simple steps, you’ll have a stunning and delicious Easter Candy Charcuterie Board ready to share in no time!
Design Tips for a Stunning Candy Display
Creating a beautiful and enticing charcuterie board, whether savory or sweet, involves more than just gathering ingredients; it’s about thoughtful design. Dessert grazing boards have become incredibly popular because of their instant crowd-pleasing appeal and the freedom they offer in presentation. Here are some expert design tips to help you prepare an unforgettable Easter Candy Charcuterie Board:
- Pick a Color Scheme: For Easter, pastels are naturally the go-to choice. Focus on soft pinks, blues, yellows, greens, and purples to create a cohesive and harmonious look. Choosing a specific color palette allows you to streamline your candy selection and ensure everything works well together visually. You can also add pops of brighter colors or whites to make the pastels truly stand out.
- Choose a Variety of Items (10 to 12 Recommended): To create a visually rich and diverse board, we recommend selecting at least 10 to 12 different types of candy and treats. This ensures there’s something for everyone and adds incredible eye-appeal. Think about variety in terms of:
- Texture: Crunchy (pretzels, chocolate eggs), chewy (jelly beans, gummies), soft (marshmallows, Peeps), smooth (chocolate bars).
- Shape: Round (M&M’s, small eggs), elongated (pretzel rods), whimsical (bunny shapes, Peeps).
- Flavor: Fruity, chocolatey, sweet-and-sour, mint, salty-sweet.
- Utilize Small Bowls for Height and Structure: As mentioned in the assembly steps, small bowls are essential. Not only do they contain loose candies, but they also add varying heights to your board. This creates visual interest and prevents the board from looking flat. Place them strategically and fill them with colorful items like M&M’s, jelly beans, or chocolate eggs. You can even create miniature “birds’ nests” in some bowls using edible grass and small eggs to enhance the Easter theme.
- Build in Layers and Clusters: Instead of spreading everything out individually, create small clusters or piles of similar candies. Then, arrange these clusters next to different items to create a sense of abundance and visual flow. Start with larger items as anchors, then fill in around them with medium-sized candies, and finally use the smallest candies to fill any remaining gaps.
- Consider a Focal Point: A large chocolate Easter bunny, a beautifully decorated cookie, or a small tiered stand with cupcakes can serve as a central focal point, drawing the eye and anchoring your entire display.
- Add Garnishes and Non-Candy Elements: A few sprigs of fresh mint or small edible flowers can add a touch of freshness and a vibrant color contrast to all the sweetness. Small, colorful sprinkles scattered over certain areas can also enhance the festive look.
By applying these design principles, your Easter Candy Charcuterie Board will be not only delicious but also a stunning work of edible art that delights all your guests.
FAQs About Easter Candy Charcuterie Boards
When creating any charcuterie board, the arrangement is key to its appeal. For an Easter candy board, we recommend arranging items in small, organic clusters rather than perfect rows. Begin by placing your larger items and small bowls first, using them as structural anchors. Then, fill in the spaces around them, moving from medium-sized candies to smaller ones. Think about creating a balance of colors and textures across the entire board. Avoid grouping all the same items together in one large pile; instead, scatter them strategically to encourage grazing and visual discovery. You can aim for a symmetrical look for a more formal presentation or a more organic, free-flowing arrangement for a relaxed vibe. Adding small bowls helps immensely by giving the tray varying heights and preventing the board from looking flat, making the entire display more dynamic and appealing.
While it is certainly possible to prepare some elements in advance, it is generally best to assemble the entire board right before serving for optimal freshness and presentation. Candies can sometimes become sticky or melt if left out too long, and some items might lose their crunch. However, you can definitely do a lot of prep work the night before! Unpack all your candies, sort them into categories, and store them in airtight containers at room temperature. You can also wash and dry any small bowls or serving utensils you plan to use. This way, on the day of your event, all you have to do is quickly arrange everything on your chosen board, making the final assembly a breeze and ensuring your treats look their absolute best.
No problem at all! You don’t need a specialized charcuterie board to create a beautiful candy display. Many common kitchen items can be repurposed. Consider using a large cutting board (wooden or bamboo works great), a flat baking sheet (you can cover it with parchment paper for aesthetics), a large ceramic platter, a serving tray, or even a clean, flat wooden slab. The key is to have a stable, food-safe surface that is large enough to hold your desired quantity of candy. The presentation comes from the thoughtful arrangement, not necessarily the board itself.
While Easter is a fantastic theme, you can easily narrow it down further! For example, you could create a “Pastel Paradise” board focusing solely on soft pinks, blues, and purples, or a “Chocolate Lover’s Dream” with only chocolate candies (milk, dark, white, and various fillings). Consider textures too: a “Crunchy Delights” board could feature pretzels, nuts (if no allergies), and hard candies. When selecting for a tighter theme, prioritize candies that fit both the color and flavor profile you’ve chosen. This adds another layer of creativity and makes your board even more unique.
More Charcuterie Board Ideas
Once you discover the joy and ease of creating charcuterie boards, you’ll want to make them for every occasion! They are perfect for holidays, casual get-togethers, or simply to elevate an ordinary evening. Here are a few more inspiring charcuterie board ideas to get your creative juices flowing:
- Summer Snack Charcuterie Board: Perfect for warm weather, featuring fresh fruits, light dips, and refreshing treats.
- How to Make a Charcuterie Board: A comprehensive guide that covers the basics and advanced tips for building any type of board.
- S’mores Dip Charcuterie Board: An interactive and incredibly fun board centered around a warm s’mores dip, surrounded by dippable delights.
Experiment with different themes, ingredients, and arrangements to find your favorites. Each board is an opportunity to express your creativity and share delicious food with loved ones.
We hope you feel inspired to create this magnificent Easter Candy Charcuterie Board for your next Easter celebration! It’s a wonderful way to bring smiles to faces and add a burst of color and sweetness to your holiday spread. After you’ve crafted and shared your beautiful board, please come back and leave a comment and star rating to let us know how it turned out. We love hearing from you and seeing your creative interpretations!
Pin
Easter Candy Charcuterie Board
Ingredients
- 1 pkg Blue Bunny Peeps 3 oz
- 1 pkg Pink Bunny Peeps 3 oz
- 8 oz Yogurt Covered Pretzels
- 13 oz Robin Egg Candy
- 5 count Cadbury Creme Eggs
- 7 oz Jelly Beans
- 10 oz Easter M&Ms
- 10 oz Funfetti Jelly Beans
- 8 oz Bunny Marshmallows
- 1 Large Chocolate Easter Bunny
Instructions
- 1. Start with a large board, using one with edges is easiest for containment.
- 2. Place some of the candy in small bowls and strategically scatter them throughout the board. For example, we put the funfetti jelly beans and the regular M&Ms in separate small bowls.
- 3. Then, add in the large items such as marshmallow Peeps, Cadbury Eggs, Yogurt Covered Pretzels, and the Bunny marshmallows.
- 4. Finally, fill in any open spaces with the other types of candy, ensuring a full and abundant look.
- 5. When assembling our board, we find that it’s best not to group all of the same items in one place. We like to scatter items around the board for a more appealing, dynamic look, creating clusters and visual pathways.
- 6. Once the board is assembled and looks just right, place the large chocolate bunny prominently on top. It’s then ready to be shared and enjoyed with your friends and family!
Recipe Notes
However, you can prepare all the individual ingredients the night before by unwrapping and sorting them, then store them appropriately. This allows for a quick and easy assembly of the board just before it’s ready to be enjoyed.
Nutrition Facts
Pin This Now to Remember It Later
Pin Recipe
