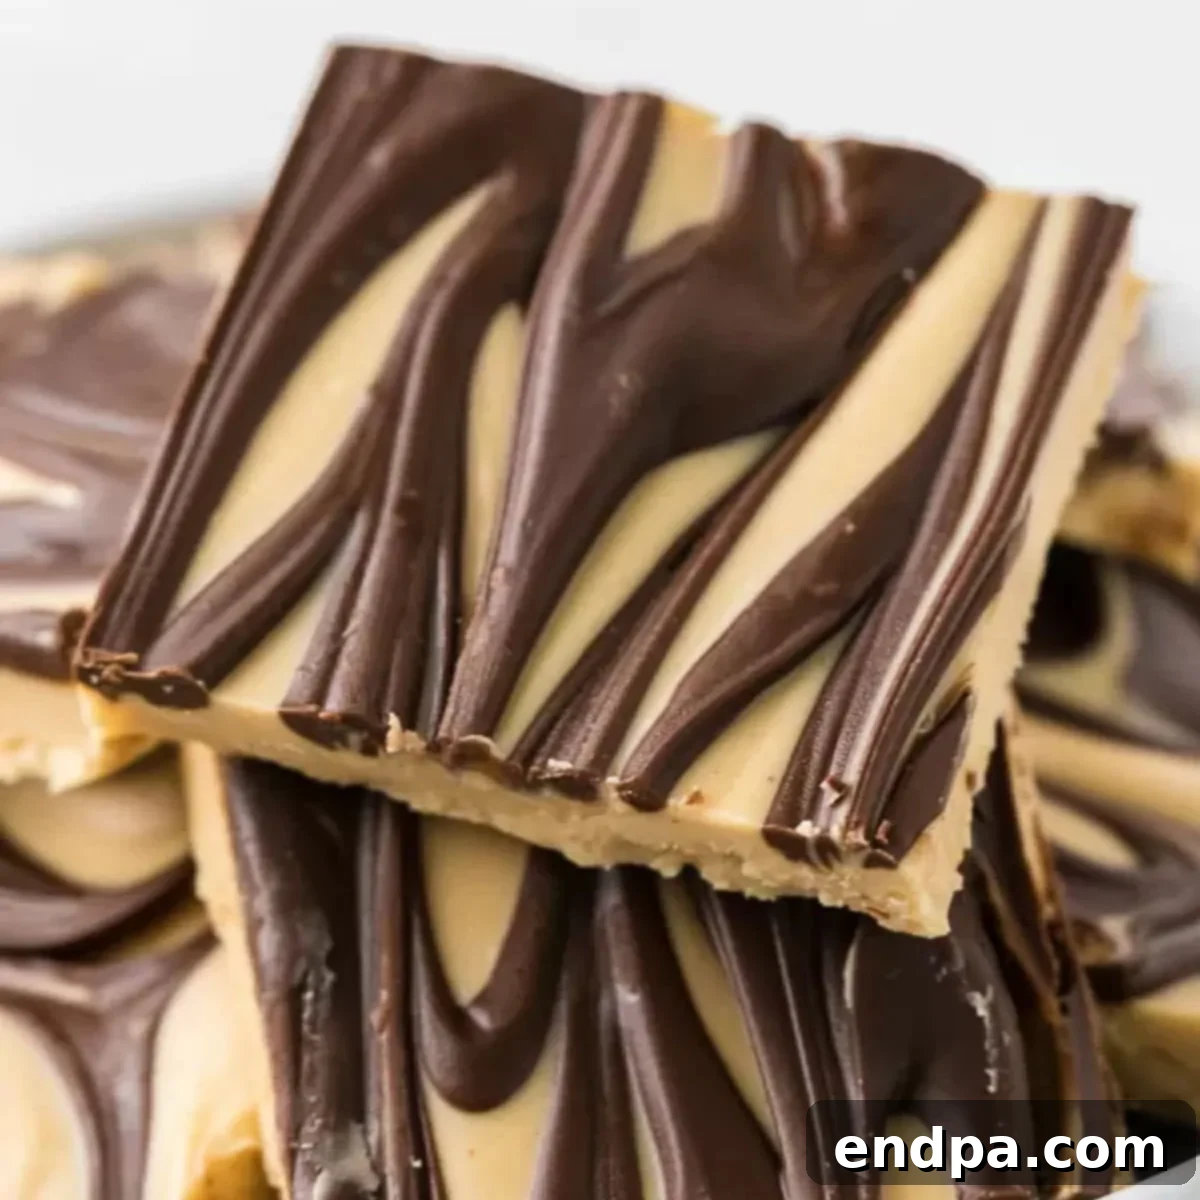
Tiger Butter Fudge is a dazzling dessert that’s as delightful to behold as it is to taste. This luxurious fudge presents a striking swirl of rich chocolate and creamy peanut butter, making it an irresistible treat. It’s the quintessential indulgence, perfect for satisfying any sweet tooth or adding a touch of elegance to your holiday dessert table.
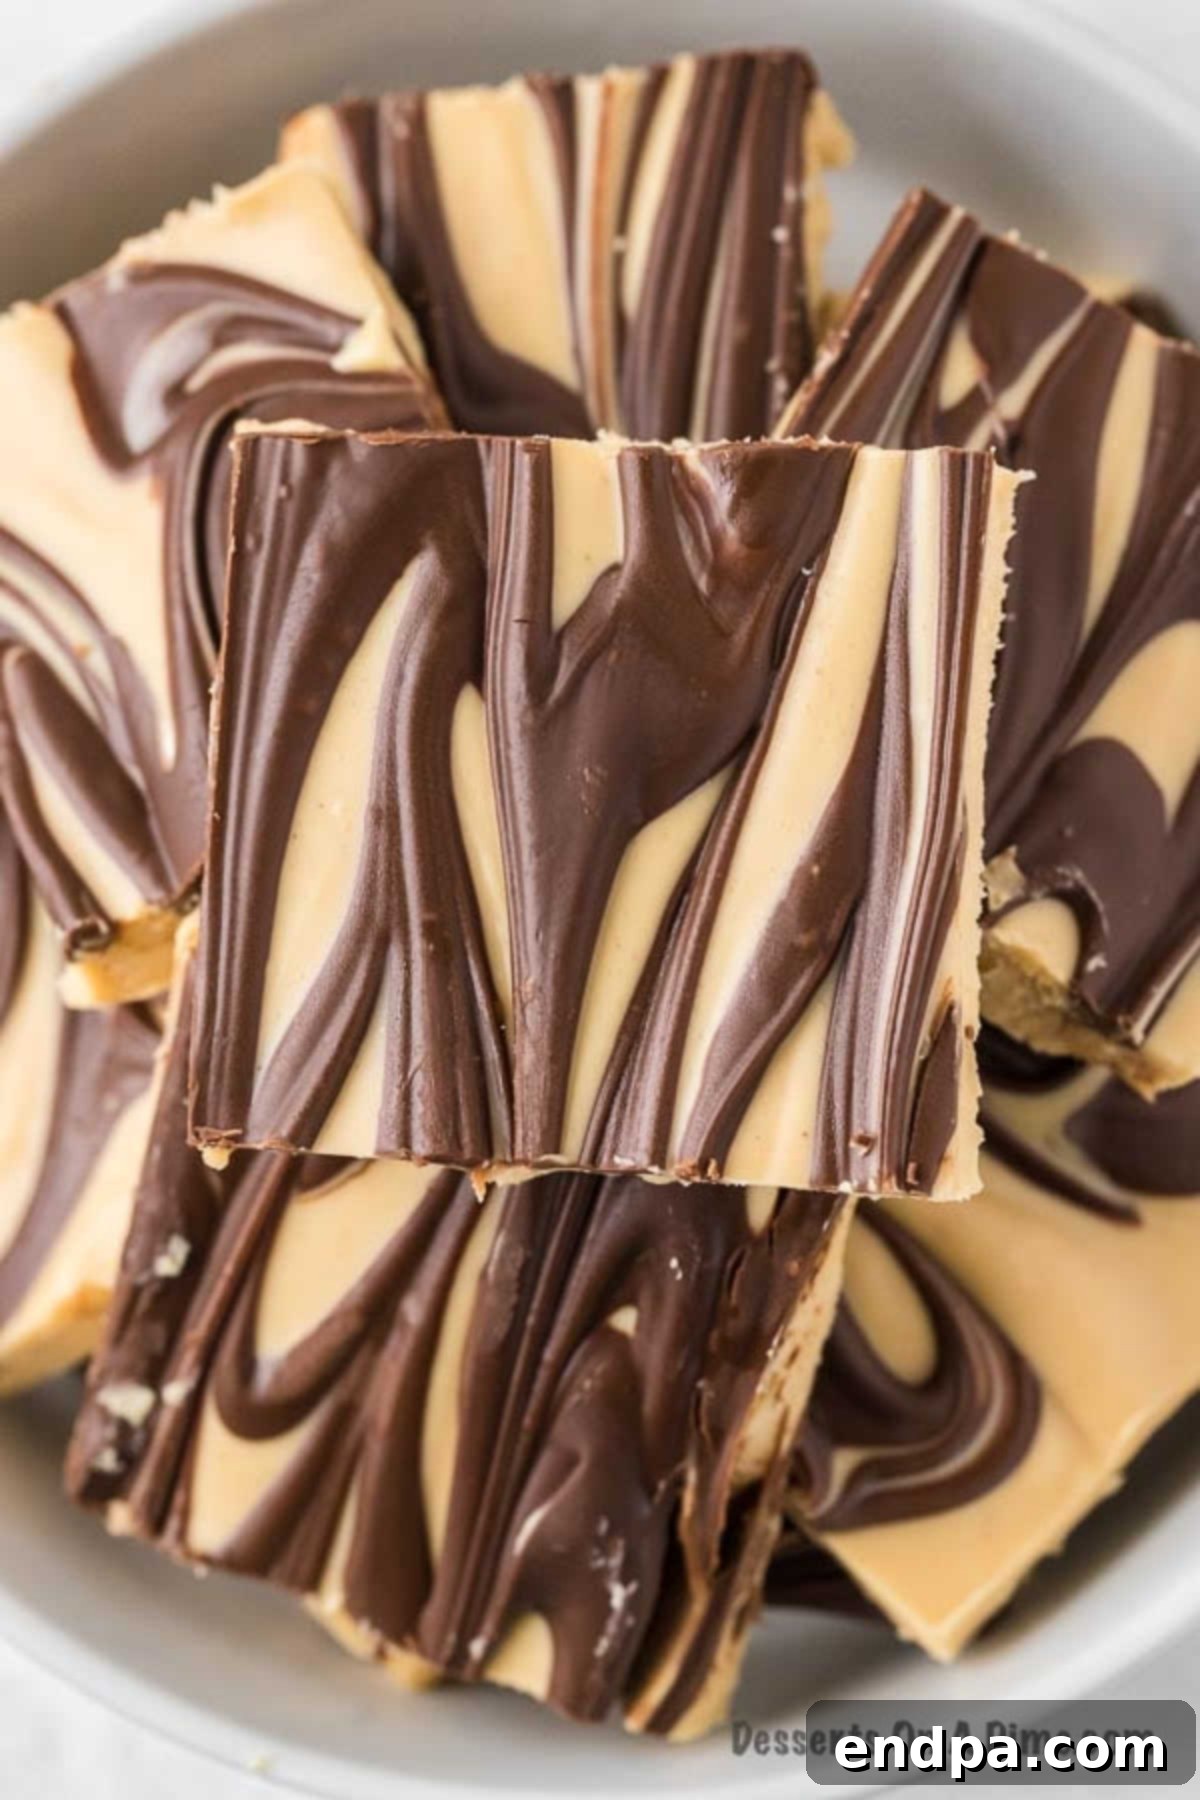
The holiday season, in particular, calls for an array of homemade candy recipes, and this 3-ingredient fudge stands out as a true favorite. The timeless pairing of chocolate and peanut butter creates a flavor profile that is simply divine. Its ease of preparation and stunning appearance make it an exceptional Christmas treat or a delightful addition to any celebration throughout the year.
Simple fudge recipes are often celebrated for their remarkably creamy texture and straightforward preparation, making them some of the easiest holiday desserts to master. If you’re a fan of this decadent combination, you might also enjoy exploring other delightful variations such as 2-Ingredient Chocolate Peanut Butter Fudge, the buttery sweetness of Butterscotch Fudge, or the perfect salty-sweet balance of Salted Caramel Fudge.
What’s in This Post: Your Guide to Perfect Tiger Butter Fudge
- What is Tiger Butter Fudge?
- Why You’ll Love This Easy Recipe
- Simple Ingredients for Decadent Fudge
- Creative Variations to Try
- Step-by-Step Instructions: Crafting Your Fudge
- Expert Recipe Tips for Success
- Mastering the Melt: Best Ways to Melt Chocolate
- How to Store Homemade Fudge
- Can You Freeze Fudge?
- More Irresistible Fudge Recipes to Explore
- Printable Recipe Card: Tiger Butter Fudge
What is Tiger Butter Fudge?
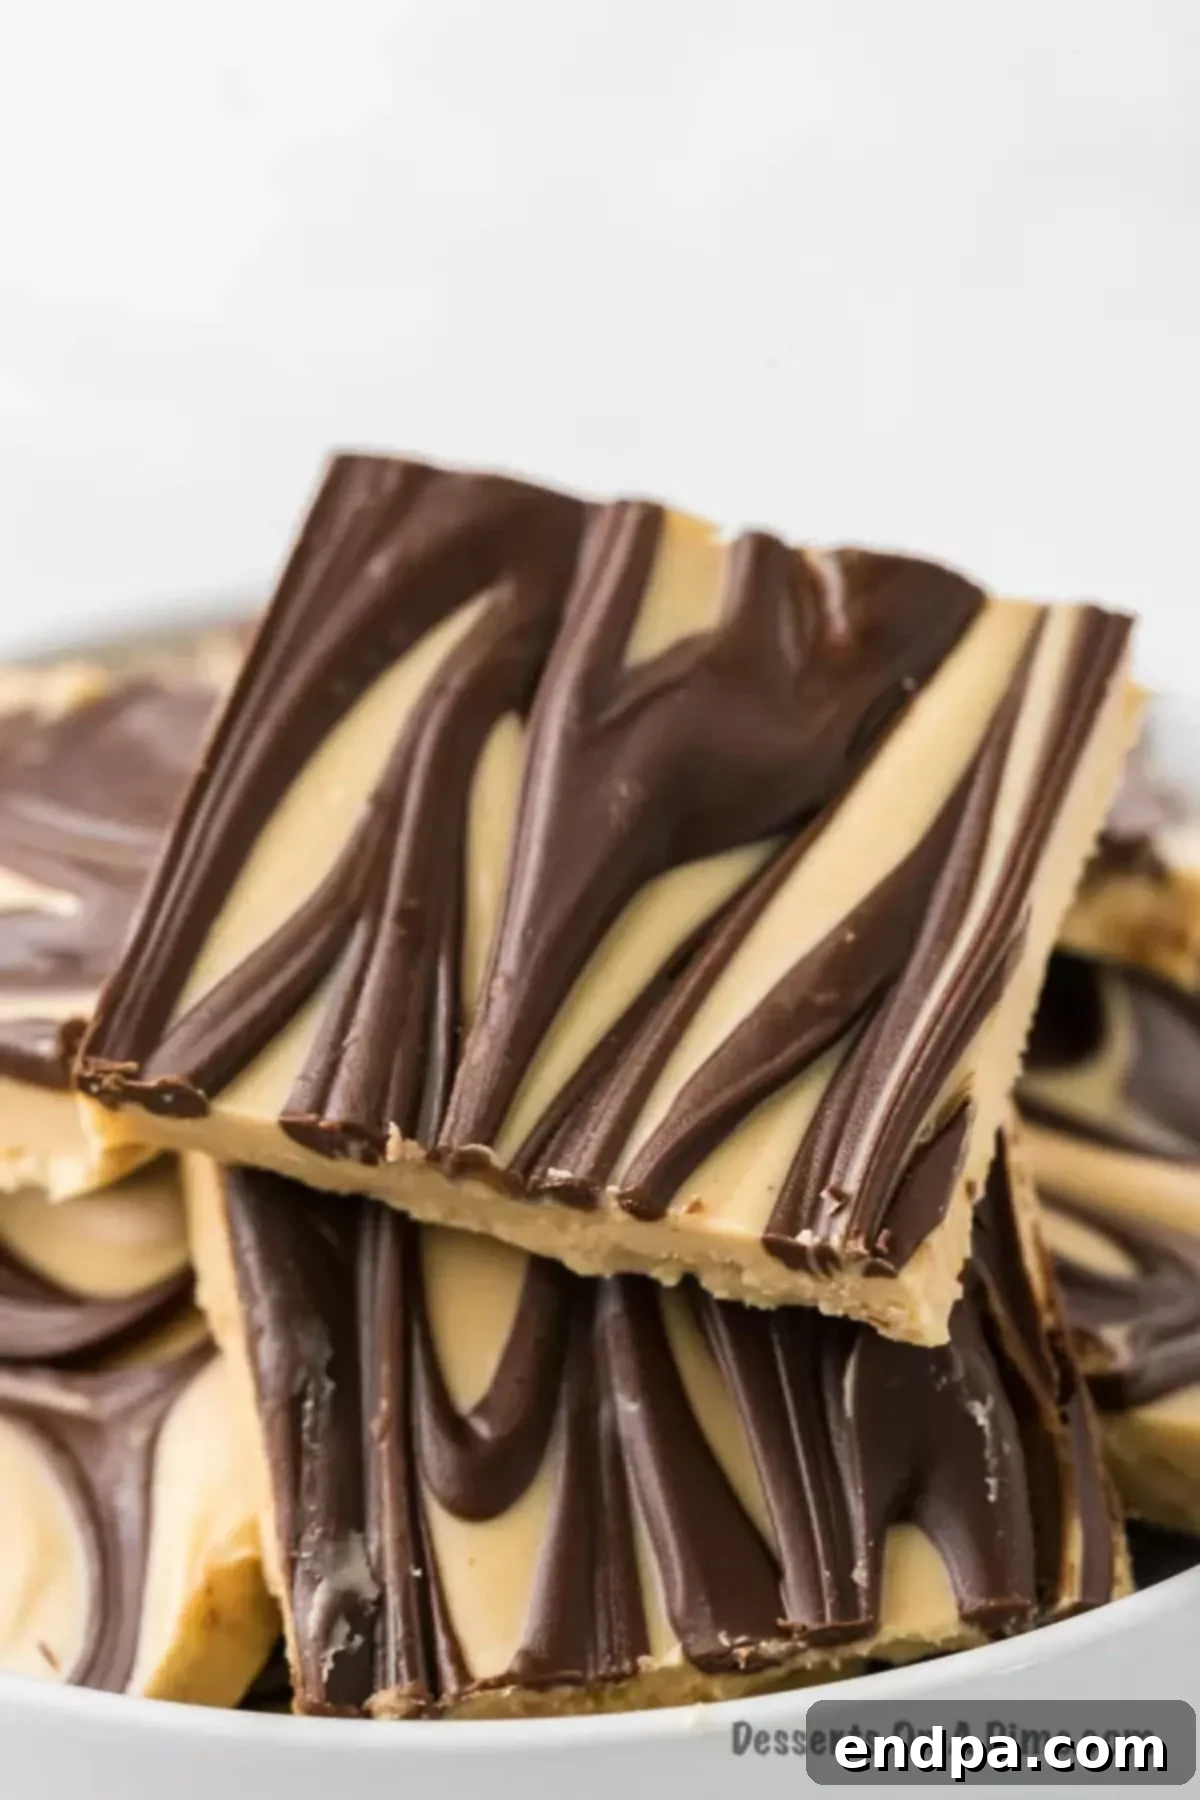
Have you ever encountered the mesmerizing beauty and incredible taste of Tiger Butter Fudge? This popular confection is a harmonious blend of creamy peanut butter, smooth vanilla chips (often referred to as white chocolate chips), and rich semi-sweet chocolate chips, all expertly melted and swirled together to create a distinctive, tiger-like striped pattern. The result is a truly remarkable dessert that captures attention with its visual appeal and delights the palate with its luxurious flavor.
Beyond its stunning aesthetics, Tiger Butter Fudge is known for its intensely rich and decadent profile. Each bite delivers a perfect balance of sweet, savory, and chocolatey goodness, making it an utterly satisfying treat. The beautiful swirls aren’t just for show; they ensure that every piece contains a delightful mix of all three core flavors. This recipe is a personal favorite, cherished for its simplicity and the sheer joy it brings, and I’m confident it will become one of your go-to dessert recipes too.
Why You’ll Love This Easy Recipe
There are countless reasons why Tiger Butter Fudge has captured the hearts of dessert lovers everywhere, and this particular recipe makes it incredibly accessible:
- Effortlessly Simple: With just three primary ingredients and a no-bake method, this fudge eliminates complexity, making it perfect for novice bakers and seasoned pros alike.
- Quick to Prepare: From melting to swirling, the active preparation time is minimal, allowing you to whip up a batch in under 15 minutes. The longest part is simply waiting for it to set!
- Visually Stunning: The striking marbled effect of the chocolate and peanut butter creates a “tiger stripe” appearance that’s naturally gorgeous, making it an impressive gift or party centerpiece.
- Irresistible Flavor Combination: The classic pairing of rich chocolate and creamy peanut butter is a universally loved duo, ensuring this fudge is a crowd-pleaser every time.
- Perfect for Any Occasion: Whether it’s a holiday gathering, a potluck, a bake sale, or just a sweet craving at home, this fudge is always a welcome treat.
- Customizable: Easily adapt the flavors and textures to your liking, from different types of chocolate to crunchy peanut butter, making it uniquely yours.
This recipe truly embodies the spirit of easy, delicious homemade treats that impress with minimal effort. It’s a guaranteed win for anyone looking for a rich, satisfying, and beautiful dessert.
Simple Ingredients for Decadent Fudge
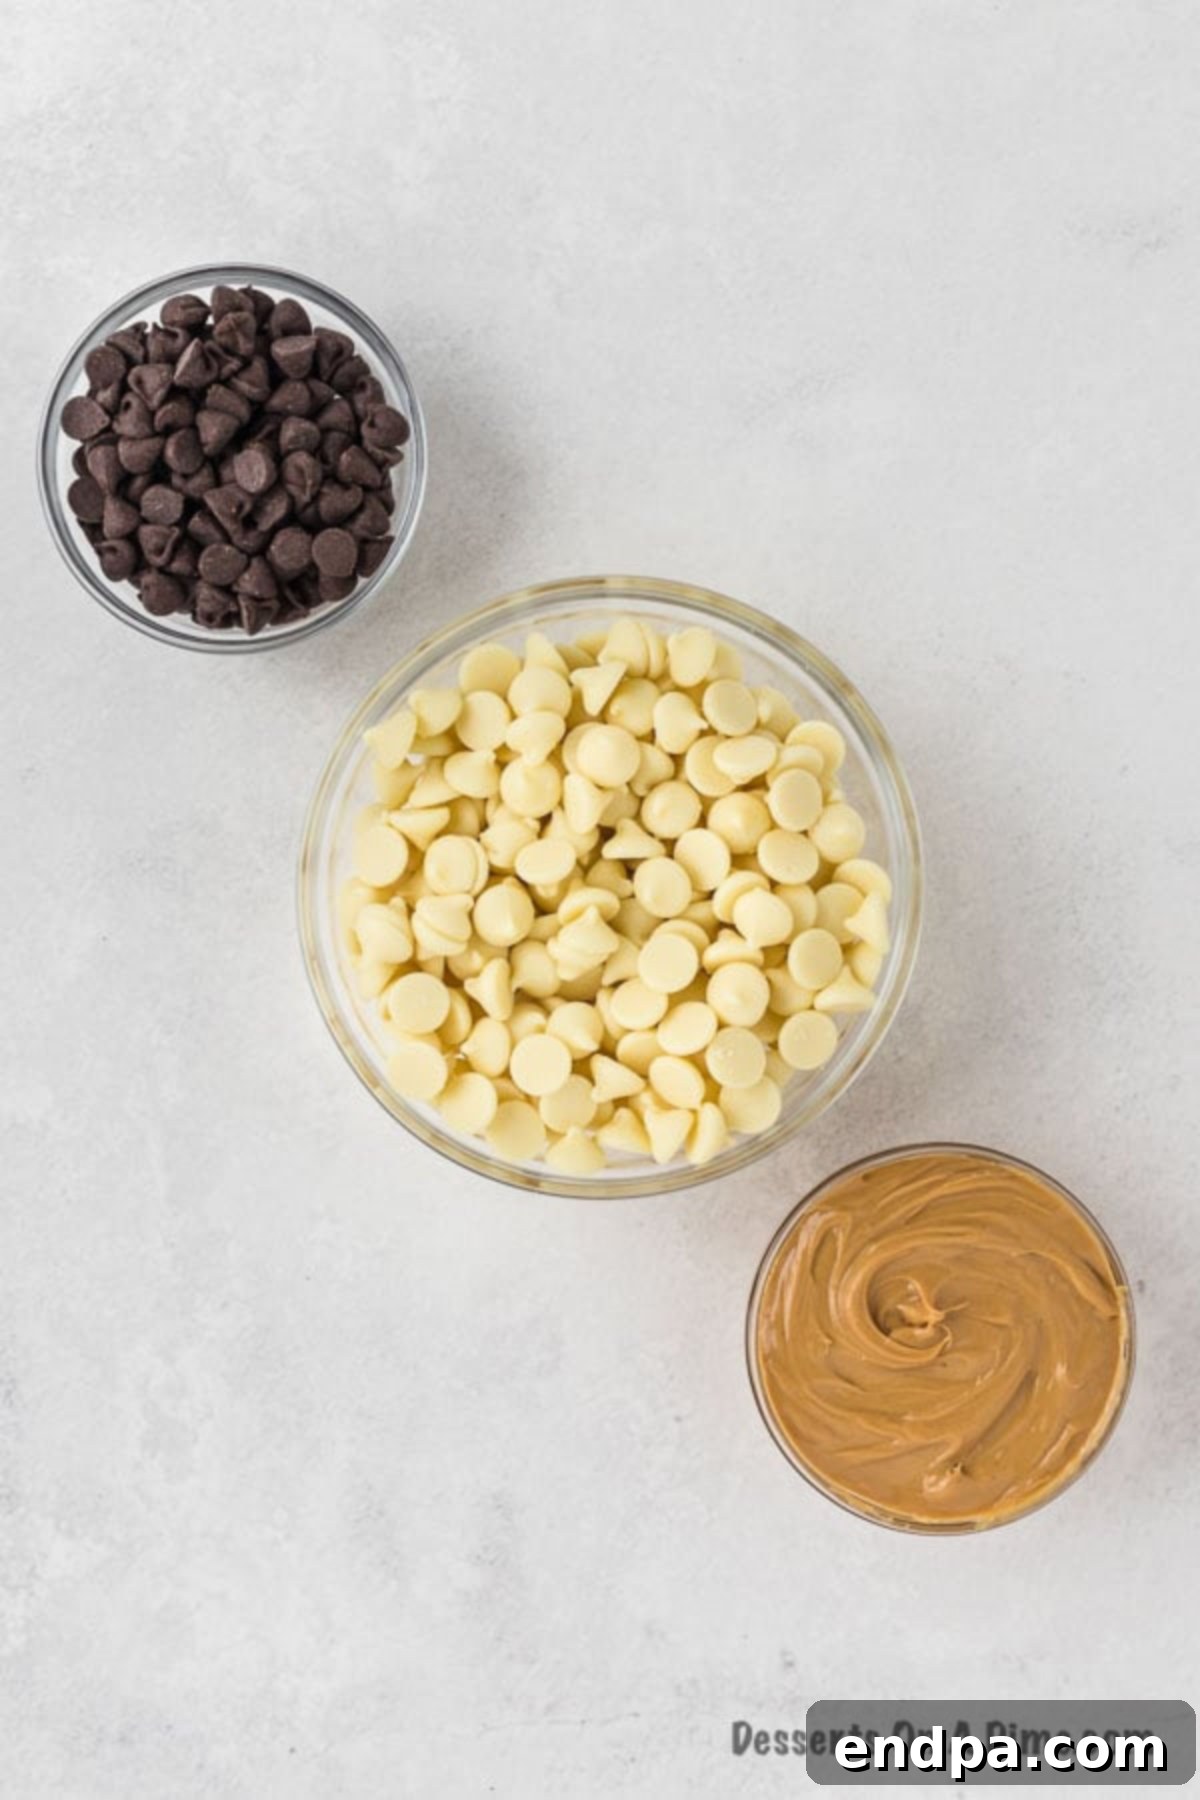
The beauty of this Tiger Butter Fudge lies in its simplicity. You only need a few key ingredients to create this incredibly rich and flavorful confection. The quality of these ingredients will directly impact the final taste and texture, so opt for your favorite brands for the best results:
- Vanilla Chips (or White Chocolate Chips): An 11-ounce bag of vanilla-flavored chips provides the sweet, creamy base for our peanut butter layer. These melt smoothly and combine beautifully with the peanut butter.
- Creamy Peanut Butter: Approximately 1/2 cup of creamy peanut butter is essential for that signature nutty flavor and smooth texture. Classic processed peanut butter works best here as natural peanut butter can sometimes separate and affect the consistency.
- Semi-Sweet Chocolate Chips: About 1/2 cup of semi-sweet chocolate chips adds the deep, rich chocolate contrast to the lighter peanut butter swirls. You can adjust the chocolate intensity by choosing different varieties.
These three simple ingredients come together to form a magical dessert that is far greater than the sum of its parts. For precise measurements and the full, detailed recipe, please refer to the recipe card located further down the page.
Creative Variations to Try:
While the classic Tiger Butter Fudge is undeniably perfect, there are many ways to customize this recipe to suit your personal preferences or dietary needs. Don’t hesitate to get creative with these delicious variations:
- Experiment with Chocolate Types:
- White Chocolate Chips: For a milder, sweeter contrast to the peanut butter, use white chocolate chips instead of vanilla chips in the peanut butter base, or use them as the drizzling element for a different visual.
- Milk Chocolate Chips: If you prefer a less intense chocolate flavor, swap semi-sweet for milk chocolate chips. This will result in an even sweeter, creamier fudge.
- Dark Chocolate Chips: For those who love a robust, slightly bitter chocolate note, dark chocolate chips will add a sophisticated depth that beautifully complements the peanut butter.
- Chocolate Swirl Base: Reverse the colors! Use melted chocolate as the base and drizzle with melted vanilla chips mixed with peanut butter for an inverted tiger pattern.
- Peanut Butter Alternatives:
- Crunchy Peanut Butter: If you enjoy a bit of texture in your fudge, crunchy peanut butter is an excellent choice. The small peanut pieces will add a satisfying bite.
- Other Nut Butters: Explore options like almond butter, cashew butter, or even sunflower seed butter for a different flavor profile. Note that natural nut butters might have a different consistency and require slight adjustments to ensure a smooth blend.
- Add-ins and Toppings:
- Chopped Nuts: Sprinkle finely chopped peanuts, pecans, or walnuts over the top of the fudge before it sets for extra crunch.
- Mini Marshmallows: Fold in a handful of mini marshmallows into the peanut butter mixture for a Rocky Road-inspired twist.
- Pretzels: Crush some pretzels and sprinkle them over the fudge for a delightful salty-sweet crunch.
- Sprinkles: For a festive touch, add colorful sprinkles, especially for holiday themes or birthdays.
- Sea Salt Flakes: A light sprinkle of flaky sea salt on top can enhance the chocolate and peanut butter flavors beautifully and cut through the sweetness.
These variations allow you to tailor the Tiger Butter Fudge to countless tastes and occasions, ensuring this recipe remains a versatile favorite in your kitchen.
Step-by-Step Instructions: Crafting Your Fudge
Creating this stunning Tiger Butter Fudge is remarkably straightforward. Follow these simple steps to achieve a perfectly swirled, melt-in-your-mouth treat:
- Step 1: Prepare Your Pan. Begin by lining a 9×13 inch glass baking pan with parchment paper or foil. Ensure the paper extends over the edges, creating “handles” that will make it incredibly easy to remove the set fudge later. This crucial step prevents sticking and simplifies cutting.
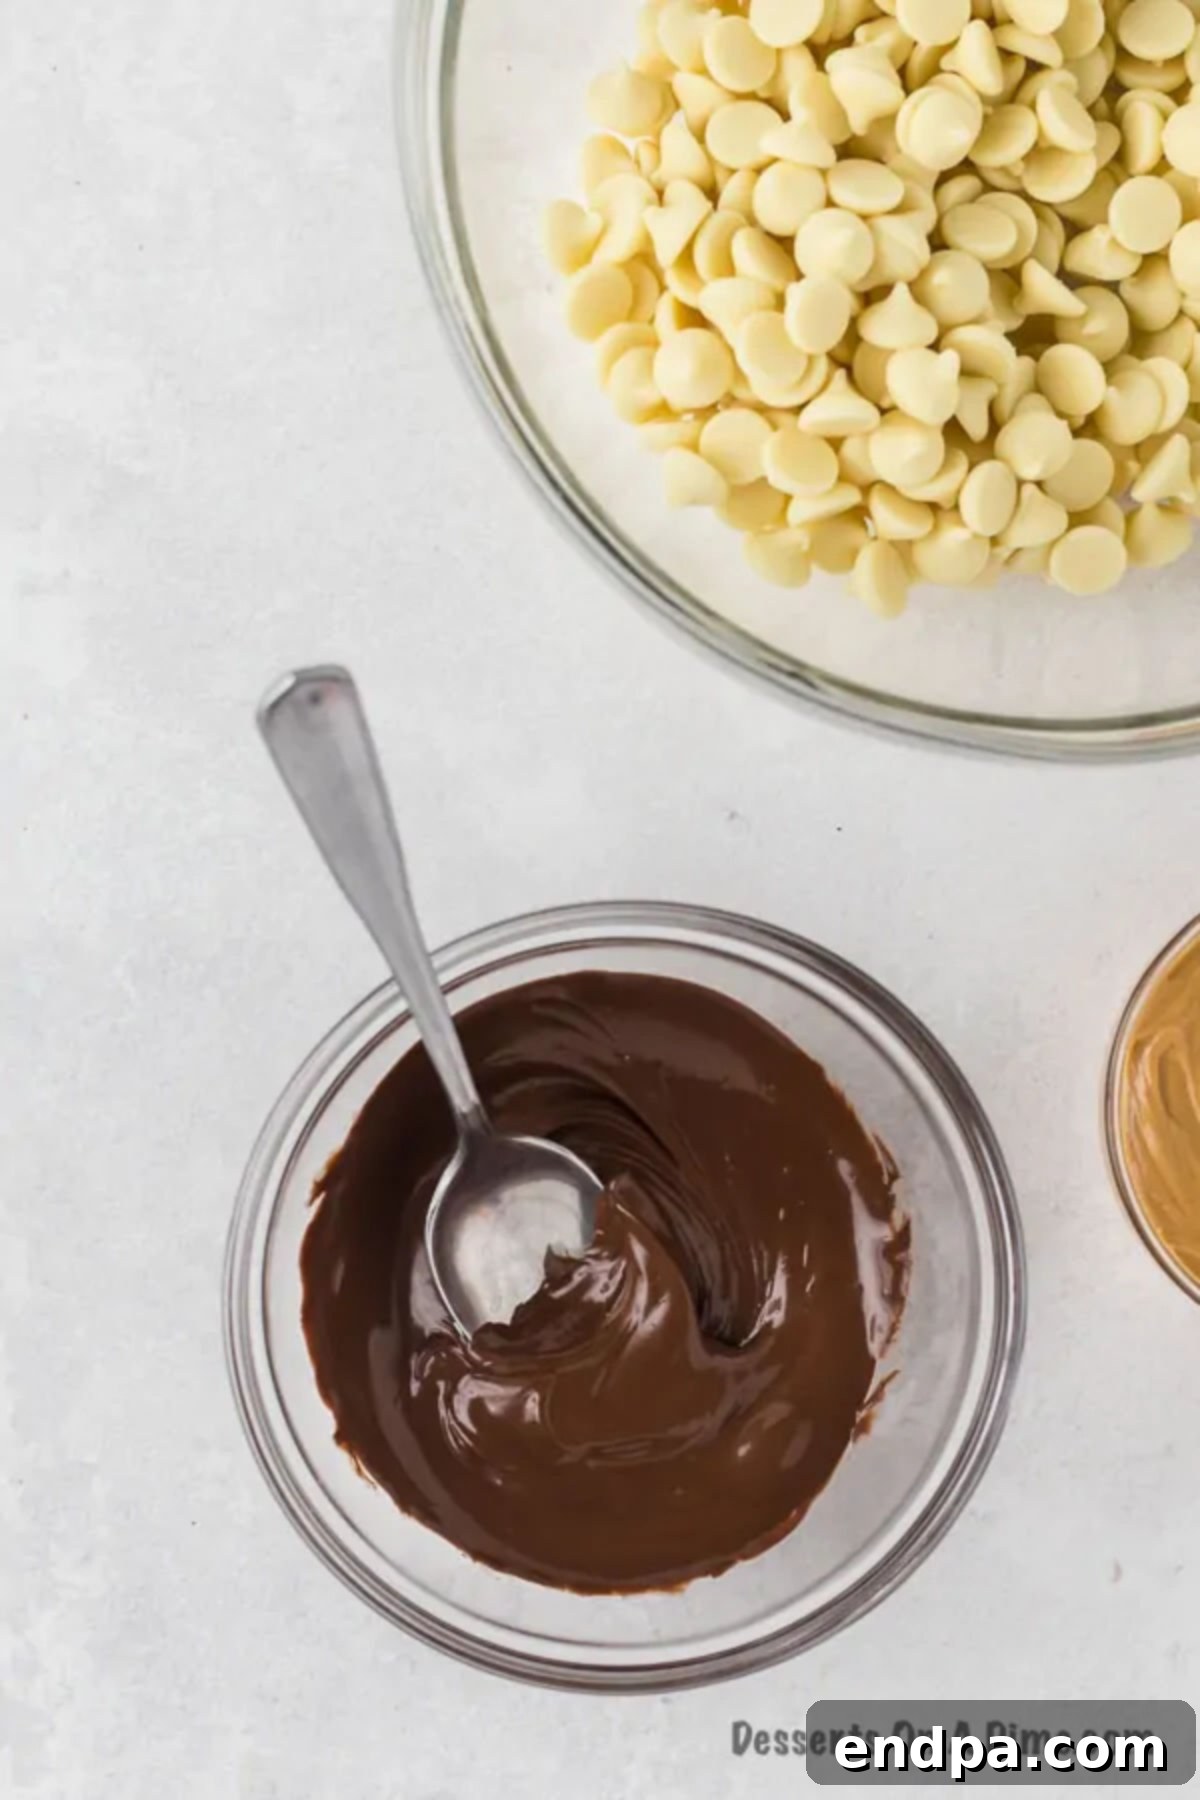
Step 2: Melt the Chocolate. Place the semi-sweet chocolate chips into a small, microwave-safe glass bowl. Microwave on high for 1 minute, then remove and stir. Continue microwaving in 30-second intervals, stirring thoroughly after each, until the chocolate is completely melted and beautifully smooth. Be careful not to overheat. Once smooth, set this bowl aside for later use.
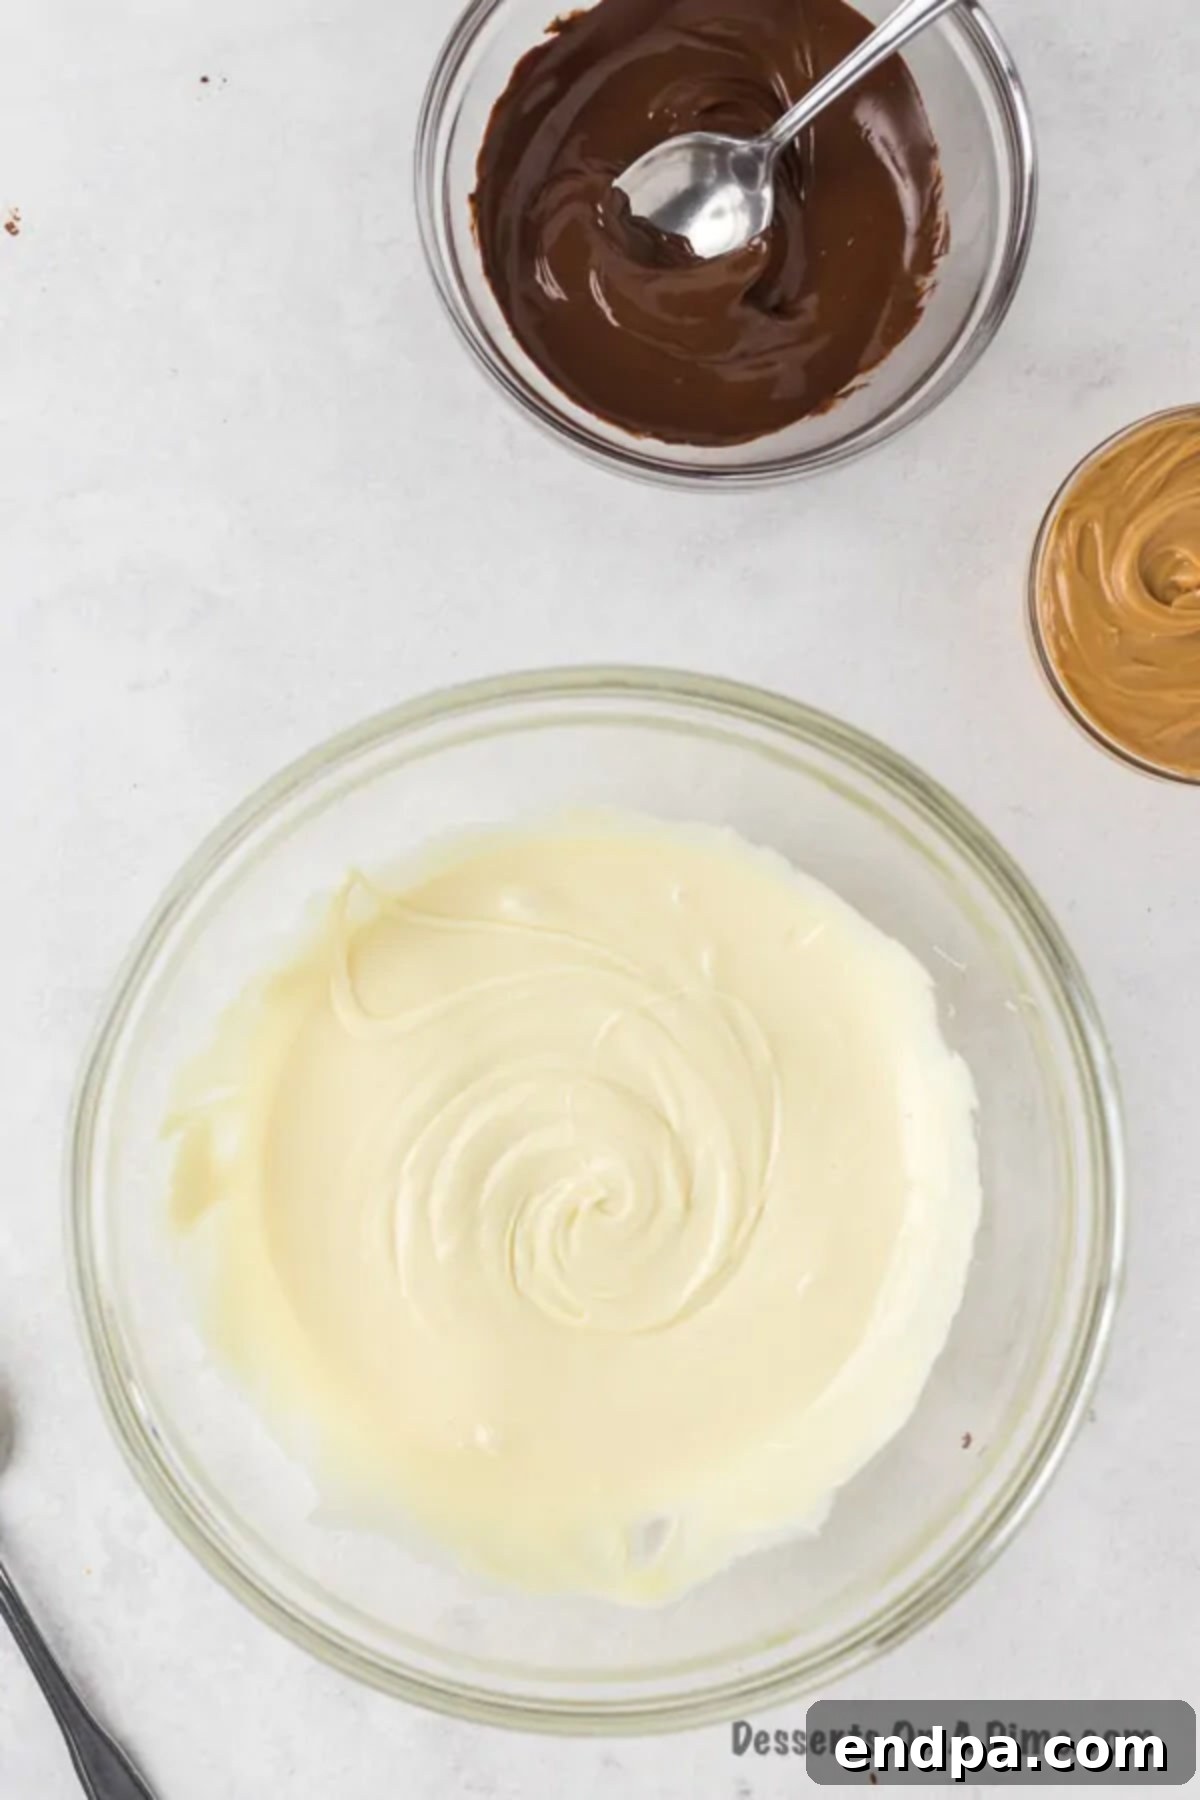
Step 3: Melt the Vanilla Chips. In a separate, medium-sized microwave-safe glass bowl, pour the vanilla chips. Microwave these in 1-minute intervals, stirring gently and thoroughly after each, until they are fully melted and smooth. This step requires patience to avoid scorching the chips, which can happen easily with white chocolate or vanilla chips.
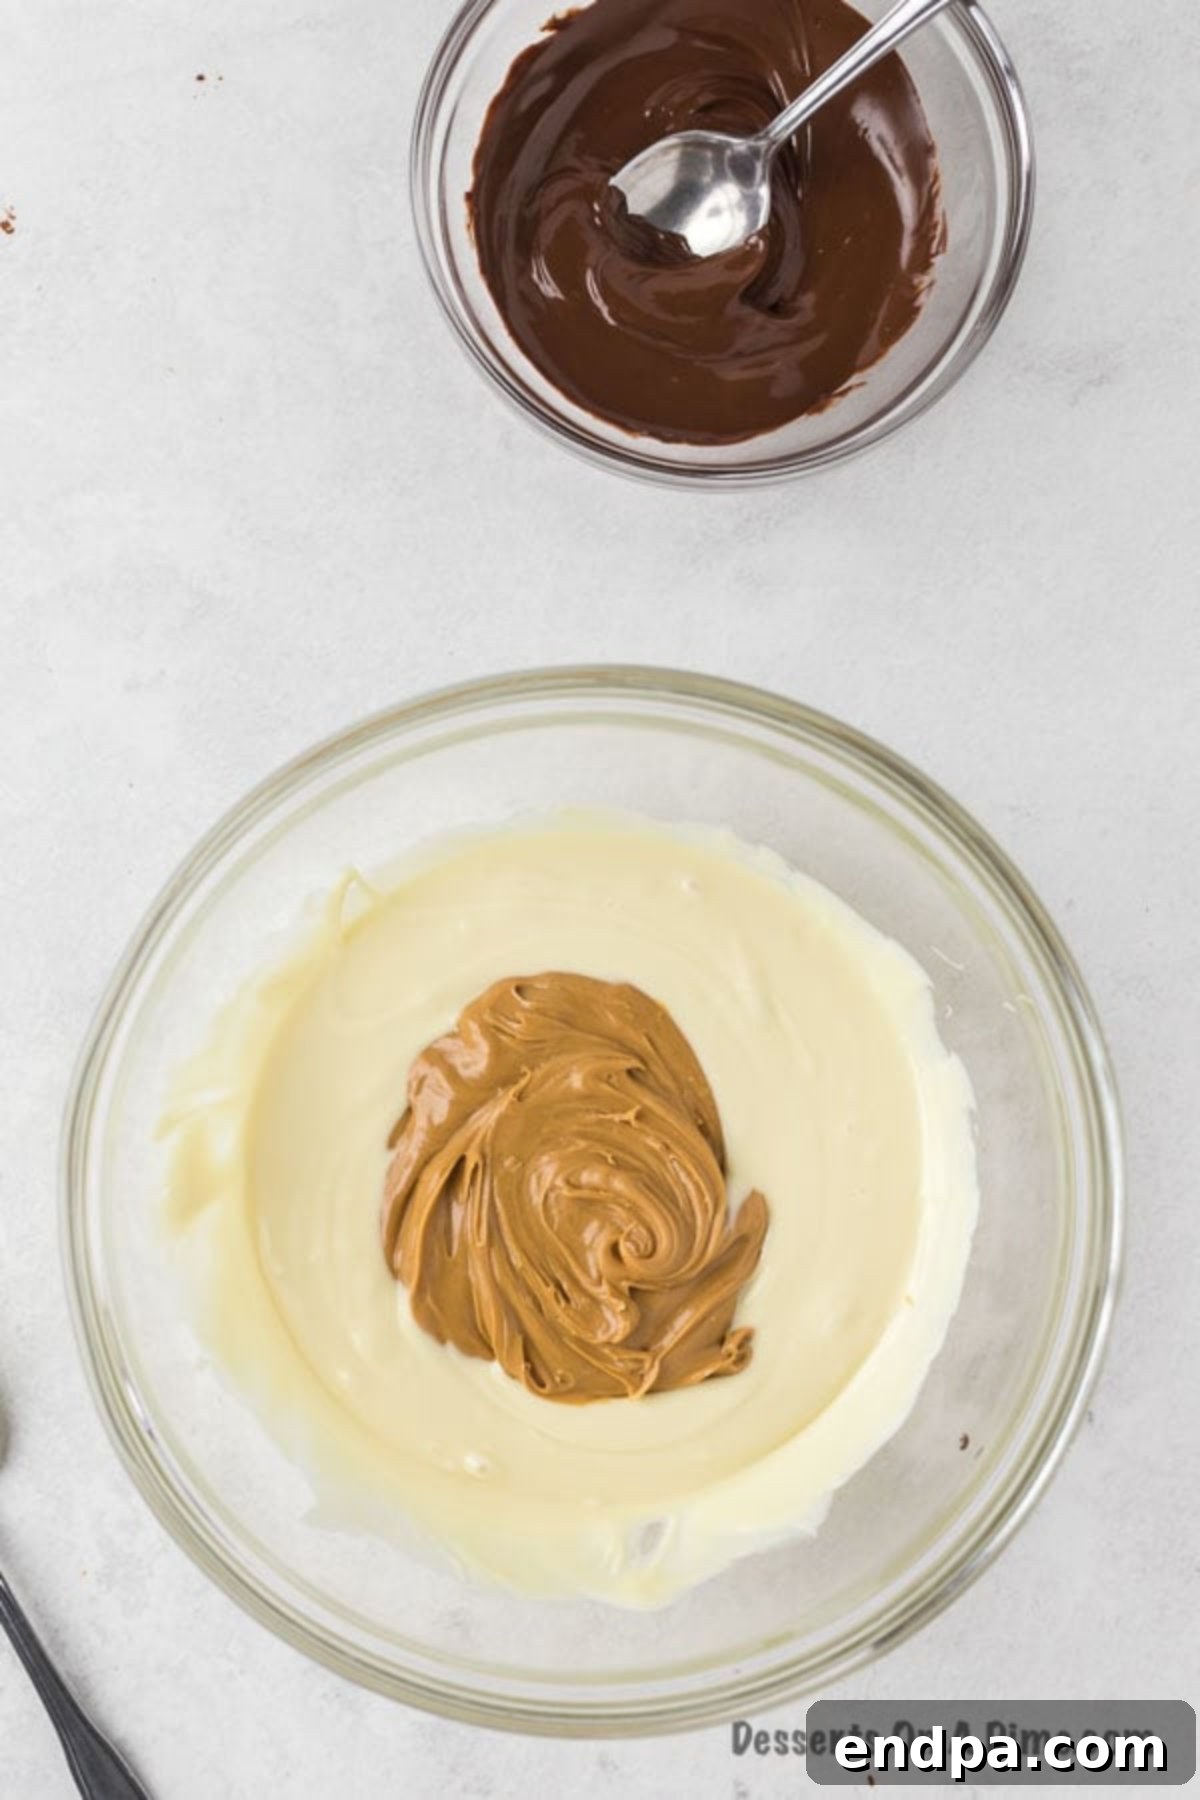
Step 4: Combine Vanilla Chips and Peanut Butter. Once the vanilla chips are perfectly smooth, add the creamy peanut butter to the bowl. Stir diligently until the white chocolate and peanut butter are completely combined, creating a homogeneous, silky-smooth mixture. This forms the delicious base layer of your fudge.
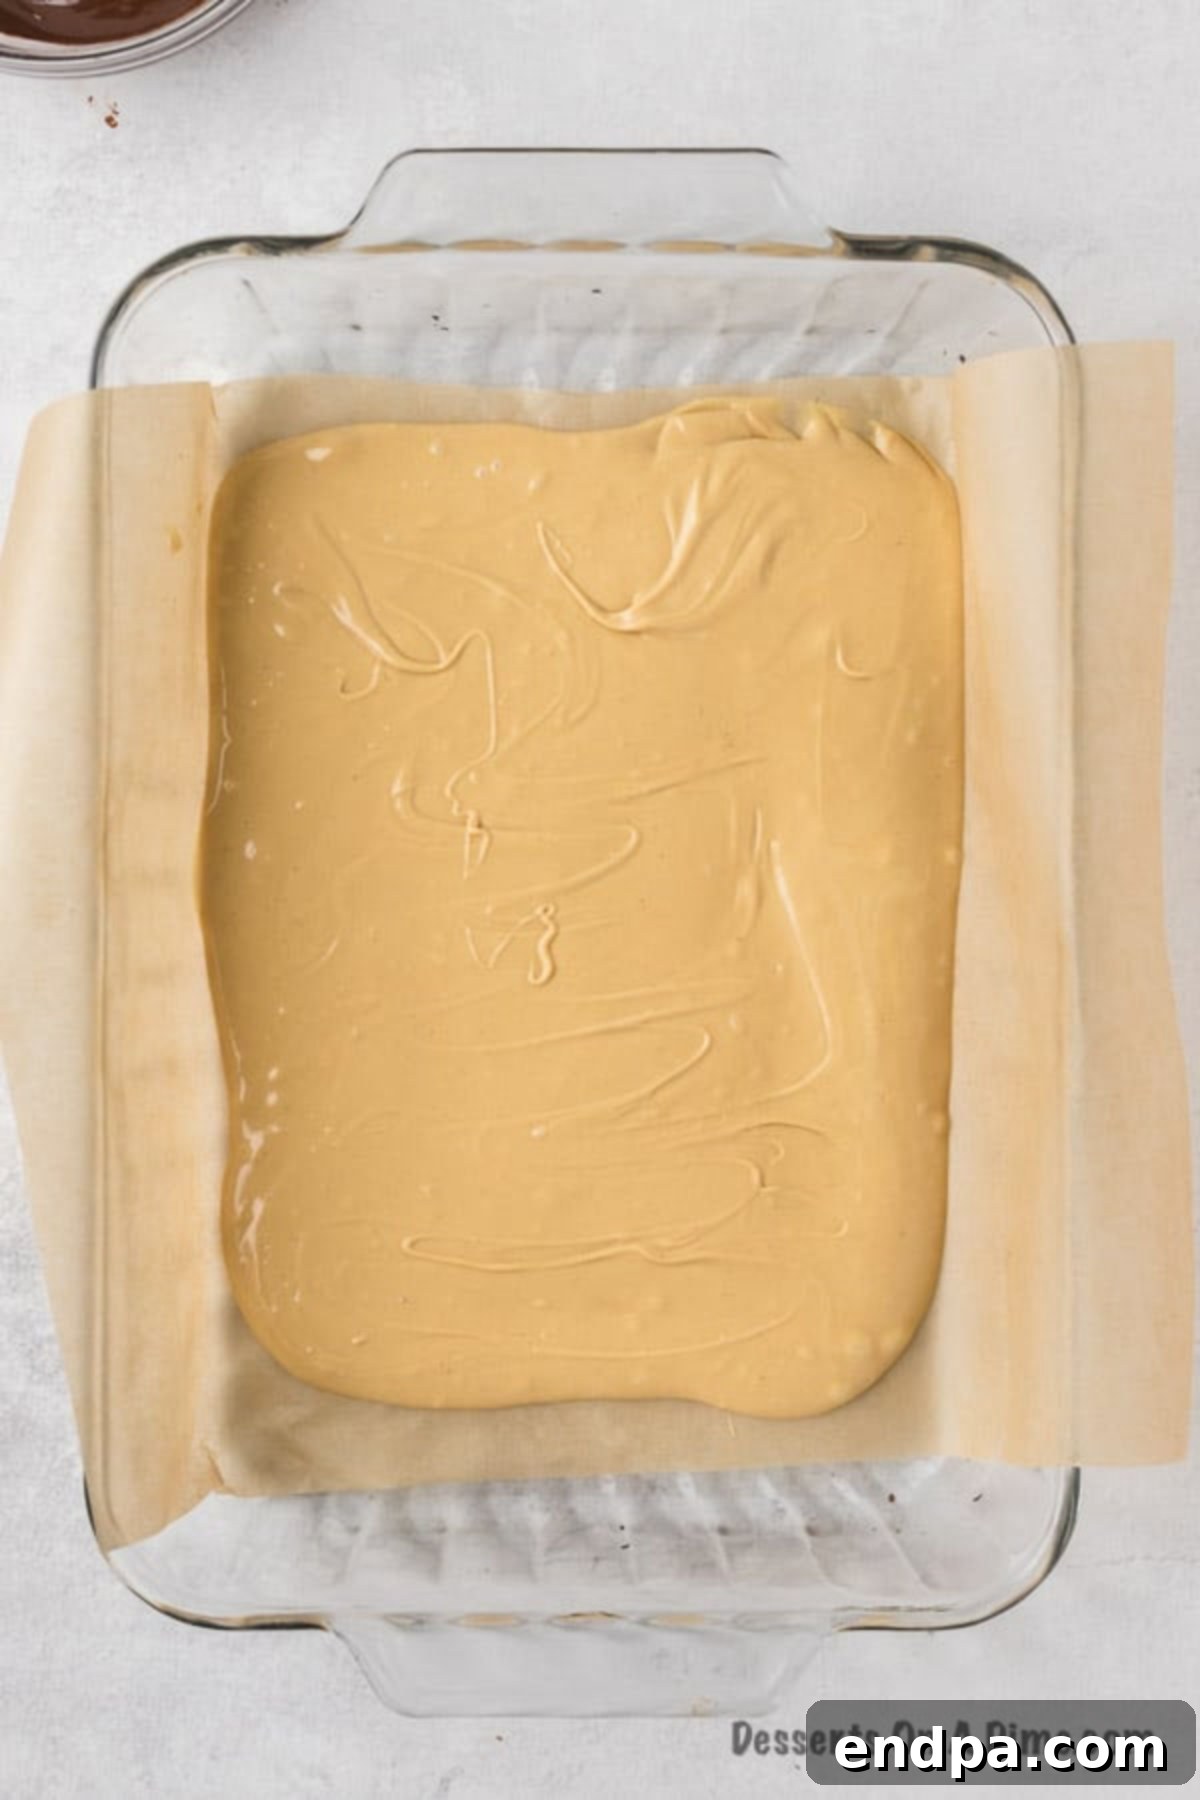
Step 5: Create the Base Layer. Carefully pour the entire vanilla-peanut butter mixture into your prepared 9×13 inch baking pan. Use a spatula to gently spread it out evenly, covering as much of the bottom of the pan as possible. Don’t worry if it doesn’t reach the very edges; this is perfectly normal for this type of fudge and contributes to its homemade charm.
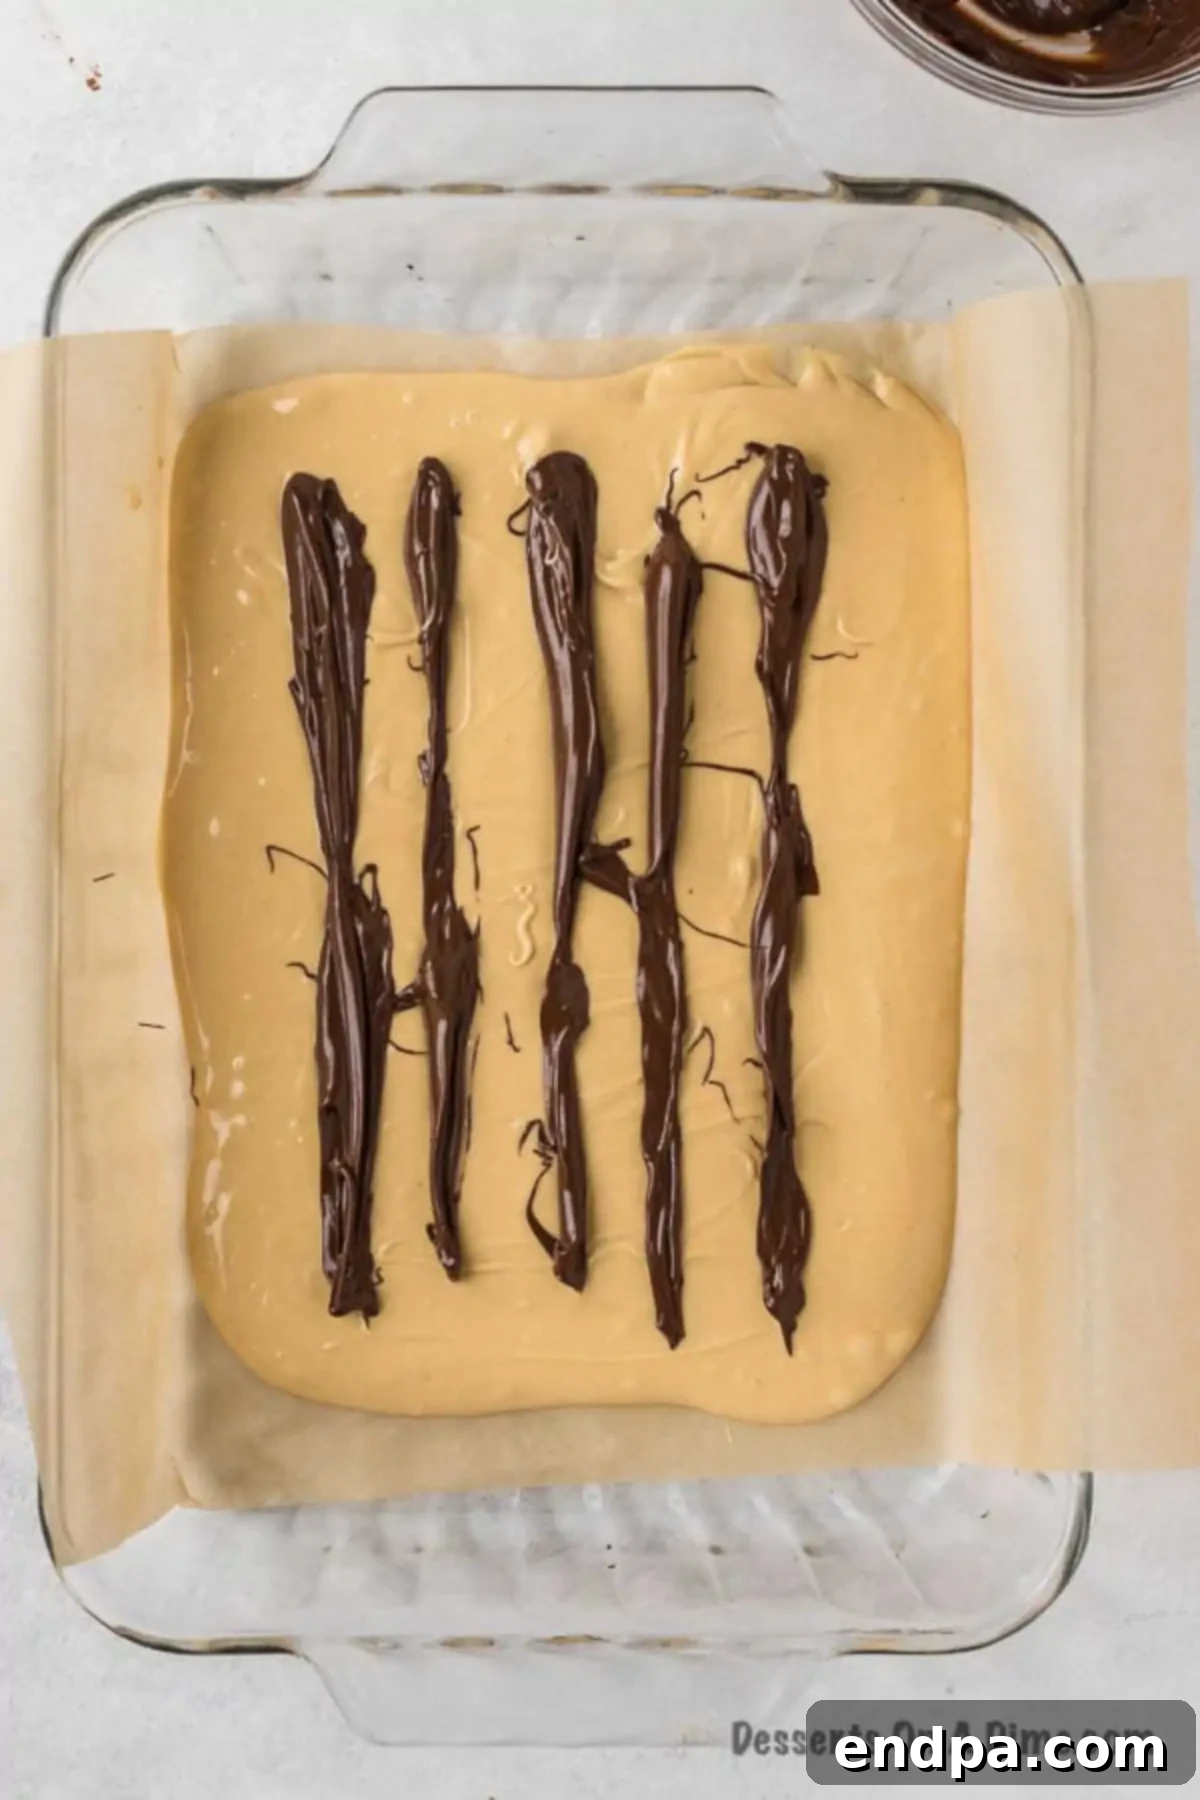
Step 6: Drizzle with Chocolate. After the vanilla-peanut butter mixture has settled slightly in the pan, retrieve your bowl of melted semi-sweet chocolate. Begin to pour or drizzle the melted chocolate over the peanut butter base in parallel lines, moving back and forth across the pan. Aim for even spacing to create a good foundation for your swirls.
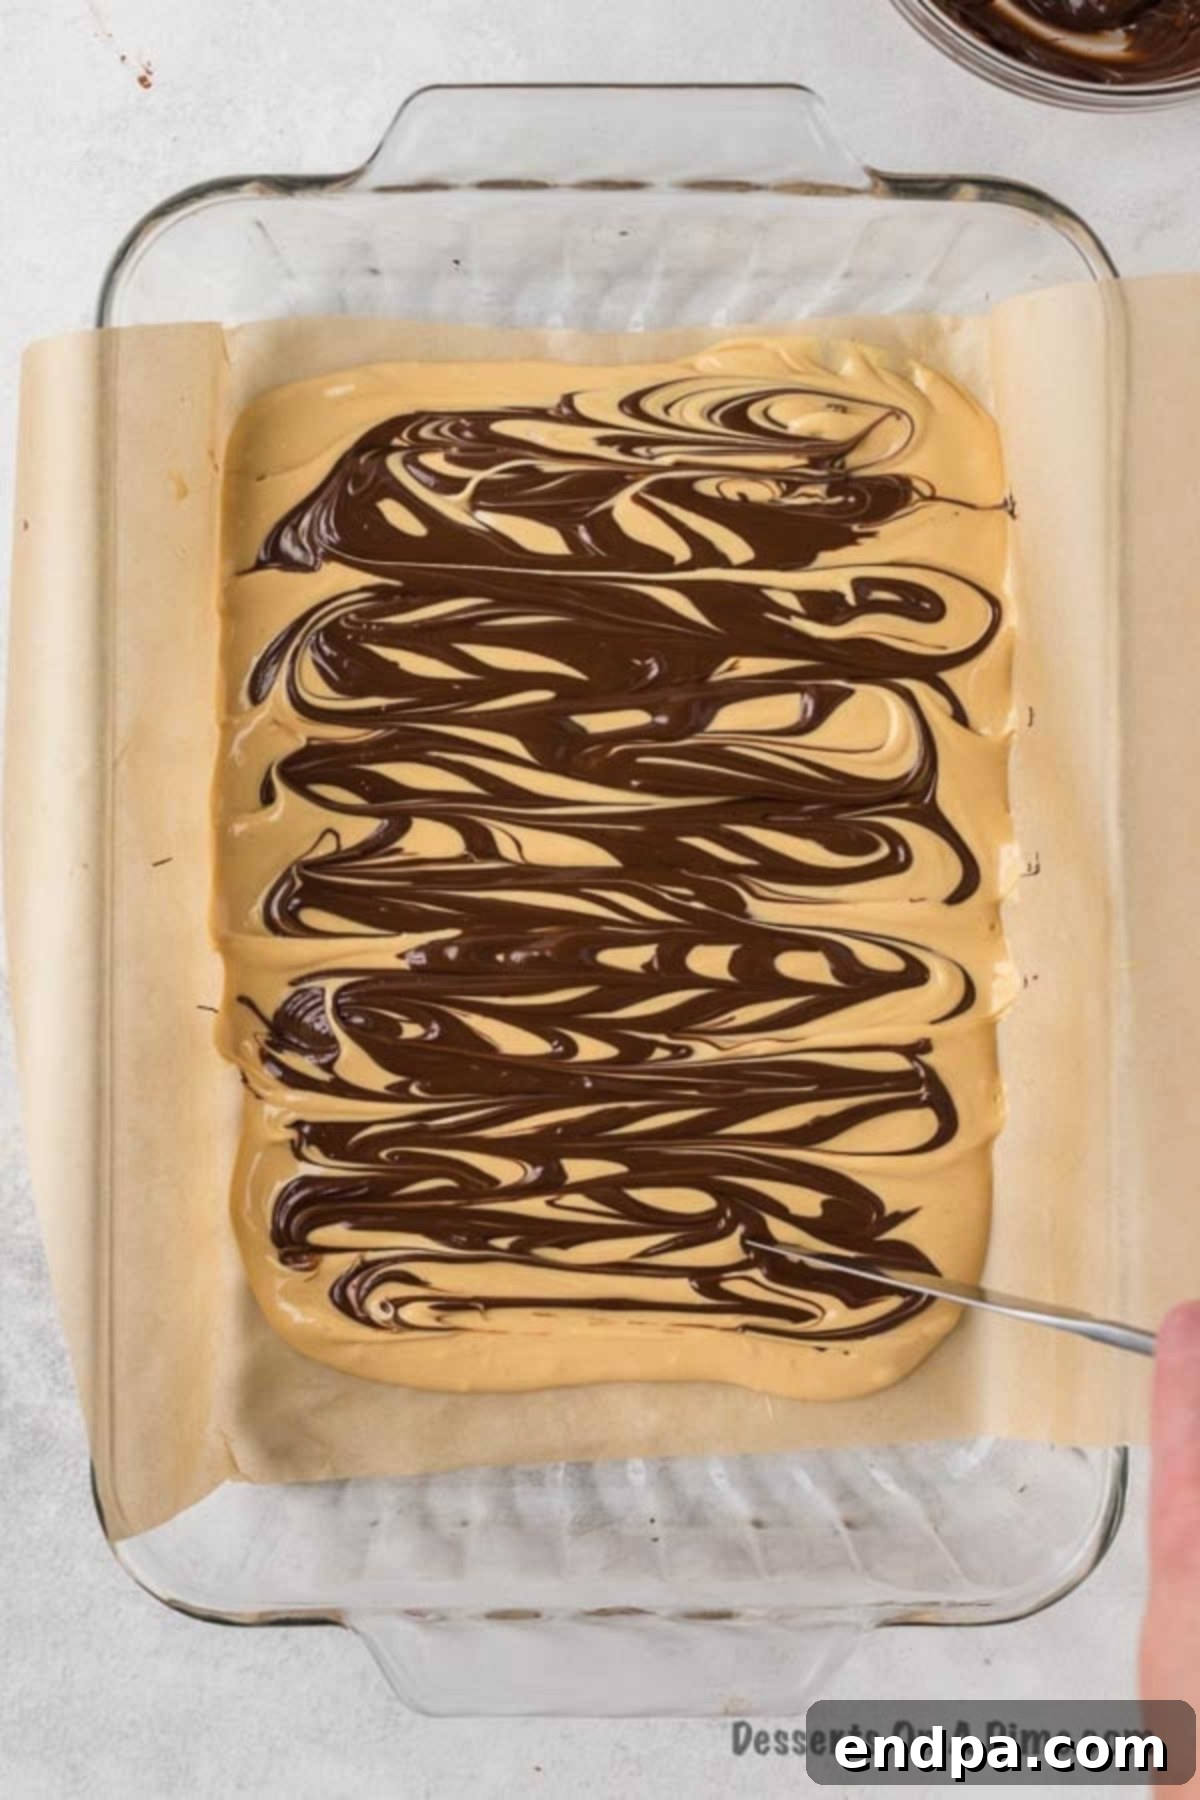
Step 7: Create the Signature Swirls. This is where the “tiger” effect comes to life! Take a long, sharp knife or a skewer. Run it through the chocolate lines in the opposite direction, creating a beautiful marbled pattern. You can swirl as much or as little as you desire to achieve your preferred “tiger stripe” look. The more you swirl, the more integrated the colors will become, while less swirling will create more distinct lines.
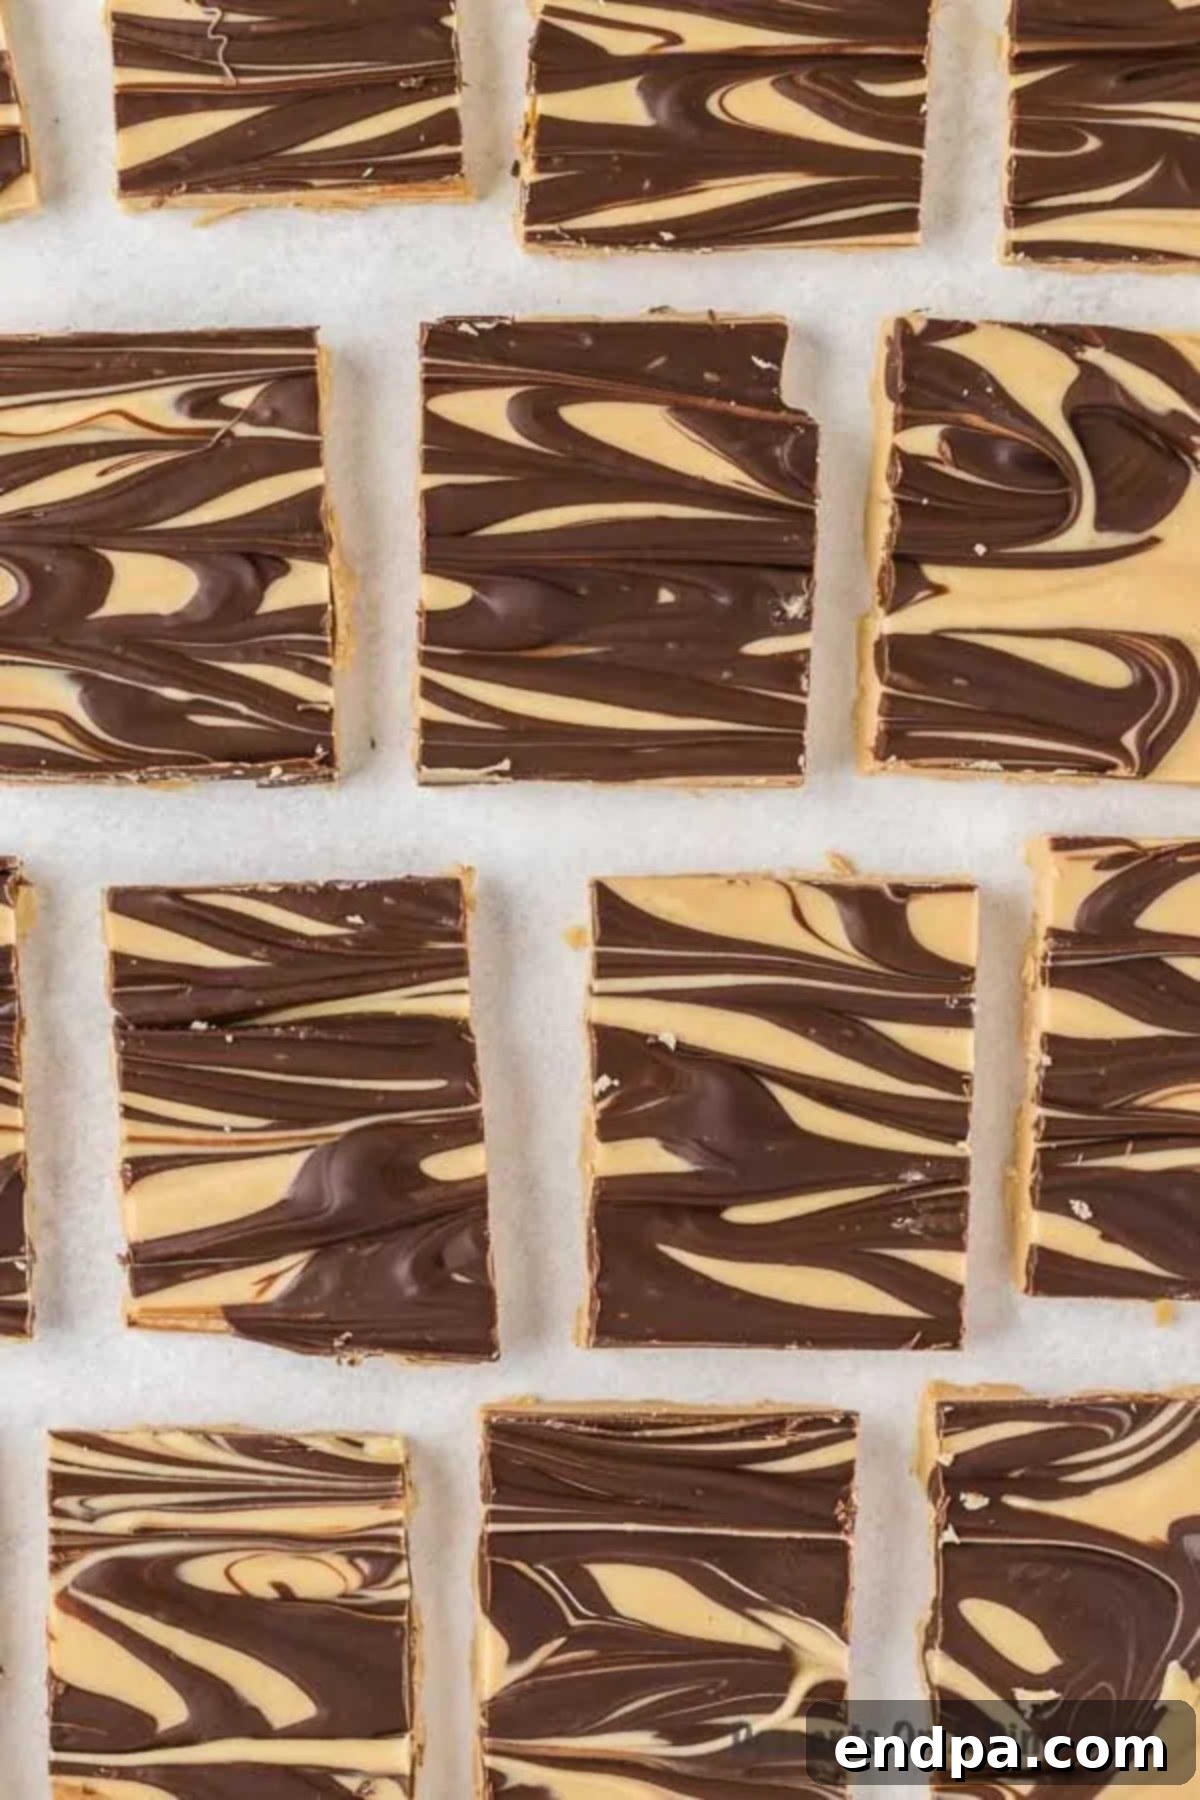
- Step 8: Cool and Cut. Allow the fudge to cool completely and set. This can be done at room temperature for several hours (ideally 3-4 hours) or in the refrigerator for about 1-2 hours for faster setting. Once firm, use the parchment paper or foil “handles” to carefully lift the entire slab of fudge from the pan. Place it on a sturdy cutting board and, using a sharp knife, cut it into small, evenly sized squares.
Expert Recipe Tips for Success:
Achieving perfect Tiger Butter Fudge every time is simple with a few helpful hints. These tips will ensure your fudge is not only delicious but also visually appealing and easy to handle:
- The Art of the Tiger Swirls: The marbled “tiger stripes” are what make this fudge so special. To achieve the best effect, after drizzling your chocolate, use a long, sharp knife, a wooden skewer, or even a toothpick for finer lines. Gently drag it through the mixtures, moving in a direction perpendicular to your chocolate lines. Aim for distinct, yet blended swirls rather than completely mixing the colors. Don’t overmix; a few deliberate passes are usually enough to create distinct swirls without blending the colors entirely into a single color. This step is also a fun activity for kids to help with, as it’s exciting to watch the patterns emerge!
- Proper Cooling for Perfect Setting: For the ideal firm, yet creamy texture, allow your fudge ample time to cool and set. While room temperature cooling for several hours works perfectly, placing the fudge in the refrigerator for 1 to 2 hours can significantly speed up the process. Ensure it is completely firm to the touch before attempting to cut it; otherwise, you might end up with sticky, uneven pieces. A well-set fudge holds its shape beautifully.
- Effortless Cutting with Parchment Paper: Lining your baking pan with parchment paper (or foil) that extends over the edges is a game-changer. Once the fudge is completely set, simply use these overhangs to lift the entire block out of the pan. This prevents any struggle with sticking and allows you to place the fudge on a flat cutting board, making it much easier to slice into neat, uniform squares. For cleaner cuts, warm your knife under hot water and wipe it dry between slices. This helps the knife glide through the fudge without dragging.
- Don’t Overheat Chocolate: When melting chocolate, whether in the microwave or a double boiler, always do so slowly and stir frequently. Overheated chocolate can “seize” (become thick, grainy, and unusable) or burn, ruining the smooth texture of your fudge. Use low heat or short microwave bursts.
- Use Quality Ingredients: Since this recipe uses only three ingredients, the quality of each makes a noticeable difference. Opt for good quality chocolate chips and creamy peanut butter for the best flavor and texture. Avoid natural peanut butter that separates easily, as it can make the fudge oily.
- Room Temperature Ingredients: For smoother blending, especially when combining peanut butter with melted chips, ensure your peanut butter is at room temperature. Cold peanut butter can cause the melted chips to seize or thicken too quickly.
By following these simple tips, you’ll consistently create Tiger Butter Fudge that is both beautiful and incredibly delicious, sure to impress everyone who tries it.
Mastering the Melt: Best Ways to Melt Chocolate
Melting chocolate is a fundamental step in many dessert recipes, and doing it correctly ensures a smooth, glossy finish. For this Tiger Butter Fudge, we highly recommend using the microwave for its speed and convenience, but a double boiler method is also a reliable alternative. Here’s how to achieve perfectly melted chocolate every time:
Microwave Method (Recommended for Speed and Ease):
This is generally the quickest and easiest way to melt chocolate chips for fudge. Place your semi-sweet chocolate chips (or vanilla chips for the peanut butter base) in a small, microwave-safe glass bowl. The key to success here is to melt in short intervals and stir diligently:
- Start by microwaving the chips for 60 seconds on high power.
- Remove the bowl from the microwave and stir the chocolate thoroughly with a rubber spatula, even if it doesn’t look fully melted. The chocolate pieces will retain their shape but will be warm and soft. Residual heat will continue to melt the chips as you stir.
- Return the bowl to the microwave and continue heating in shorter intervals, typically 20-30 seconds at a time.
- After each interval, remove and stir well. It’s crucial not to just look at the chocolate; stirring distributes the heat evenly and helps it melt uniformly without scorching. Chocolate can retain its shape even when completely melted, so stirring is your best indicator.
- Stop microwaving as soon as the chocolate is smooth and there are no lumps remaining. Overheating can cause chocolate to seize (become thick, clumpy, and grainy) or even burn, imparting a bitter taste and rendering it unusable for your fudge. Patience and vigilance are key!
Double Boiler Method (Alternative for More Control):
If you prefer a more controlled melting process, are melting a larger quantity, or don’t have a microwave, a double boiler is an excellent option:
- Fill a saucepan with about an inch or two of water and bring it to a gentle simmer over medium-low heat. The water should not boil vigorously.
- Place a heat-safe glass or metal bowl (such as a mixing bowl) over the saucepan, ensuring the bottom of the bowl does not touch the simmering water. The steam from the simmering water will gently and indirectly heat the bowl and its contents.
- Add your chocolate chips to the top bowl. Stir continuously with a rubber spatula or spoon until the chocolate is completely melted and smooth. The gentle, indirect heat helps prevent scorching.
- Remove the bowl from the heat as soon as the chocolate is melted to prevent overheating. Be extremely careful not to get any water or steam condensation into the chocolate, as even a tiny drop can cause it to seize.
Regardless of the method you choose, the goal is a perfectly smooth, fluid chocolate that will blend seamlessly into your fudge, creating those beautiful, distinct swirls. Patience and consistent stirring are your best tools for successful chocolate melting.
How to Store Homemade Fudge:
Proper storage is essential to keep your Tiger Butter Fudge fresh, flavorful, and at its best texture. Follow these guidelines to ensure your homemade treat lasts as long as possible:
- At Room Temperature: Once the fudge has fully set and been cut into squares, it can be stored at room temperature for up to a week. Place the fudge in an airtight container to prevent it from drying out or absorbing other odors from your kitchen. For best results and to prevent sticking, separate layers of fudge with parchment paper within the container. Keep the container in a cool, dry place away from direct sunlight or any heat sources, which could cause the fudge to melt or soften prematurely.
- In the Refrigerator: For extended freshness, or if your kitchen is particularly warm, refrigerating the fudge is a great option. Stored in an airtight container, your Tiger Butter Fudge will remain fresh for up to two to three weeks. Again, always use parchment paper between layers to prevent them from fusing together. When serving, allow refrigerated fudge to come to room temperature for a few minutes (about 10-15 minutes) before enjoying. This allows it to soften slightly, restoring its creamy texture and enhancing its flavor, as fudge can be quite firm and less flavorful when directly cold.
With correct storage practices, you can enjoy the delightful taste of your homemade fudge for an extended period, ensuring every piece is as delicious and perfectly textured as the first, whether you’re savoring it yourself or sharing with loved ones.
Can You Freeze Fudge?
Absolutely! Freezing is an excellent way to extend the shelf life of your Tiger Butter Fudge, allowing you to prepare it well in advance for holidays or special events, or simply to enjoy portions over several months. You can safely freeze this fudge for up to 1 month, and potentially even longer (up to 3 months) if properly sealed and protected from freezer burn. Here’s how to do it effectively:
- Prepare for Freezing: First, ensure your fudge is completely cooled and firmly set. Once it has reached this stage, cut it into individual, desired-sized squares. This makes it easier to manage and portion out later.
- Prevent Sticking: The trick to successful freezing, especially for sticky confections like fudge, is to prevent the pieces from sticking together. A great method is to arrange the fudge squares in a single layer on a baking sheet lined with parchment paper. Freeze them for about an hour, or until they are firm enough to handle without sticking. Alternatively, if you’re layering them directly into a container, place a small piece of parchment paper between each individual layer of fudge. This creates a barrier that makes it incredibly easy to grab a single piece for snacking without having to thaw the entire batch.
- Airtight Storage: Once the fudge pieces are firm and separated (if you pre-froze them), transfer them to a heavy-duty, freezer-safe bag or a rigid, airtight freezer-safe container. If using freezer bags, press out as much air as possible before sealing to prevent freezer burn, which can affect the fudge’s texture and flavor. Label the container with the date for easy tracking.
- Thawing and Serving: When you’re ready to enjoy your frozen fudge, simply remove the desired amount from the freezer. You can let it thaw at room temperature for about 15-30 minutes, or enjoy it slightly chilled if you prefer a firmer texture. Freezing doesn’t compromise the delicious flavor or creamy texture of this fudge, making it a fantastic make-ahead dessert option that tastes just as good as fresh.
Having frozen fudge on hand is incredibly convenient, whether for an unexpected guest, a quick sweet snack, or just to savor a homemade treat without the immediate effort of preparation.
More Easy Fudge Recipes to Explore:
If you’ve fallen in love with the simplicity and deliciousness of this Tiger Butter Fudge, you’ll be thrilled to discover a world of other easy fudge recipes waiting to be made. These delightful confections are perfect for any occasion and offer a variety of flavors to satisfy every craving:
- Vanilla Fudge Recipe: A classic, creamy vanilla fudge that serves as a perfect base for customization or a standalone sweet treat. Its smooth, rich vanilla flavor is universally appealing.
- Oreo Fudge Recipe: Indulge in layers of rich chocolate fudge generously studded with crunchy Oreo cookie pieces – a cookie lover’s dream come true in fudge form!
- Peanut Butter Chocolate Chip Fudge: For those who can’t get enough of the peanut butter and chocolate pairing, this recipe intensifies the flavors with extra chocolate chips for an even richer experience.
- Peppermint Fudge Recipe: A festive and refreshing fudge, ideal for the holiday season, bursting with cool peppermint flavor and often adorned with candy cane pieces.
- Rocky Road Candy: While not strictly fudge, this delightful candy offers a similar no-bake ease, combining soft marshmallows, crunchy nuts, and rich chocolate in a chewy, satisfying bite.
- Homemade Chocolate Fudge Recipe: A timeless and deeply satisfying chocolate fudge, simple to make and always a favorite for its pure, intense chocolate flavor and smooth texture.
Each of these recipes promises a delightful experience, proving that homemade fudge doesn’t have to be complicated to be absolutely delicious. Enjoy exploring new flavors and techniques!
We absolutely cherish hearing from our community! If you try this fantastic Tiger Butter Fudge recipe, please take a moment to leave us a star review and share your experience. Your feedback helps us grow and inspires others to create delicious memories in their own kitchens.
Pin
Tiger Butter Fudge Recipe
10 minutes
1 hour
1 hour
10 minutes
24
American
Dessert
119
Carrie Barnard
Ingredients
-
1 bag vanilla chips (11 oz) -
½ cup creamy peanut butter -
½ cup semi-sweet chocolate chips
Instructions
- Line a 9×13 inch glass pan with parchment paper or foil, ensuring some overhang to use as handles.
- Place semi-sweet chocolate chips in a small, microwave-safe glass bowl. Microwave for 1 minute, then stir. Continue microwaving in 30-second intervals, stirring after each, until smooth. Set aside.
- Pour vanilla chips into a separate medium-sized glass bowl. Microwave for 1 minute, then stir gently until smooth. Add peanut butter and stir until well combined and smooth.
- Pour the vanilla-peanut butter mixture into the prepared pan and spread evenly. Don’t worry if it doesn’t reach the very edges. Once settled, take the melted semi-sweet chocolate and drizzle it over the vanilla-peanut butter mixture in parallel lines.
- Using a long knife or skewer, run it through the chocolate lines in the opposite direction to create a beautiful swirl or marbled pattern. Swirl as much or as little as you desire for your preferred look.
- Allow the fudge to cool and set completely, either on the countertop at room temperature for several hours or in the refrigerator for 1-2 hours.
- Once firm, use the parchment paper or foil handles to remove the fudge from the pan. Place on a cutting board and slice into small squares. Store in an airtight container.
Nutrition Facts
Carbohydrates 11g,
Protein 2g,
Fat 9g,
Saturated Fat 4g,
Trans Fat 1g,
Cholesterol 1mg,
Sodium 27mg,
Potassium 94mg,
Fiber 1g,
Sugar 9g,
Vitamin A 2IU,
Calcium 8mg,
Iron 1mg
Pin This Now to Remember It Later
Pin Recipe
