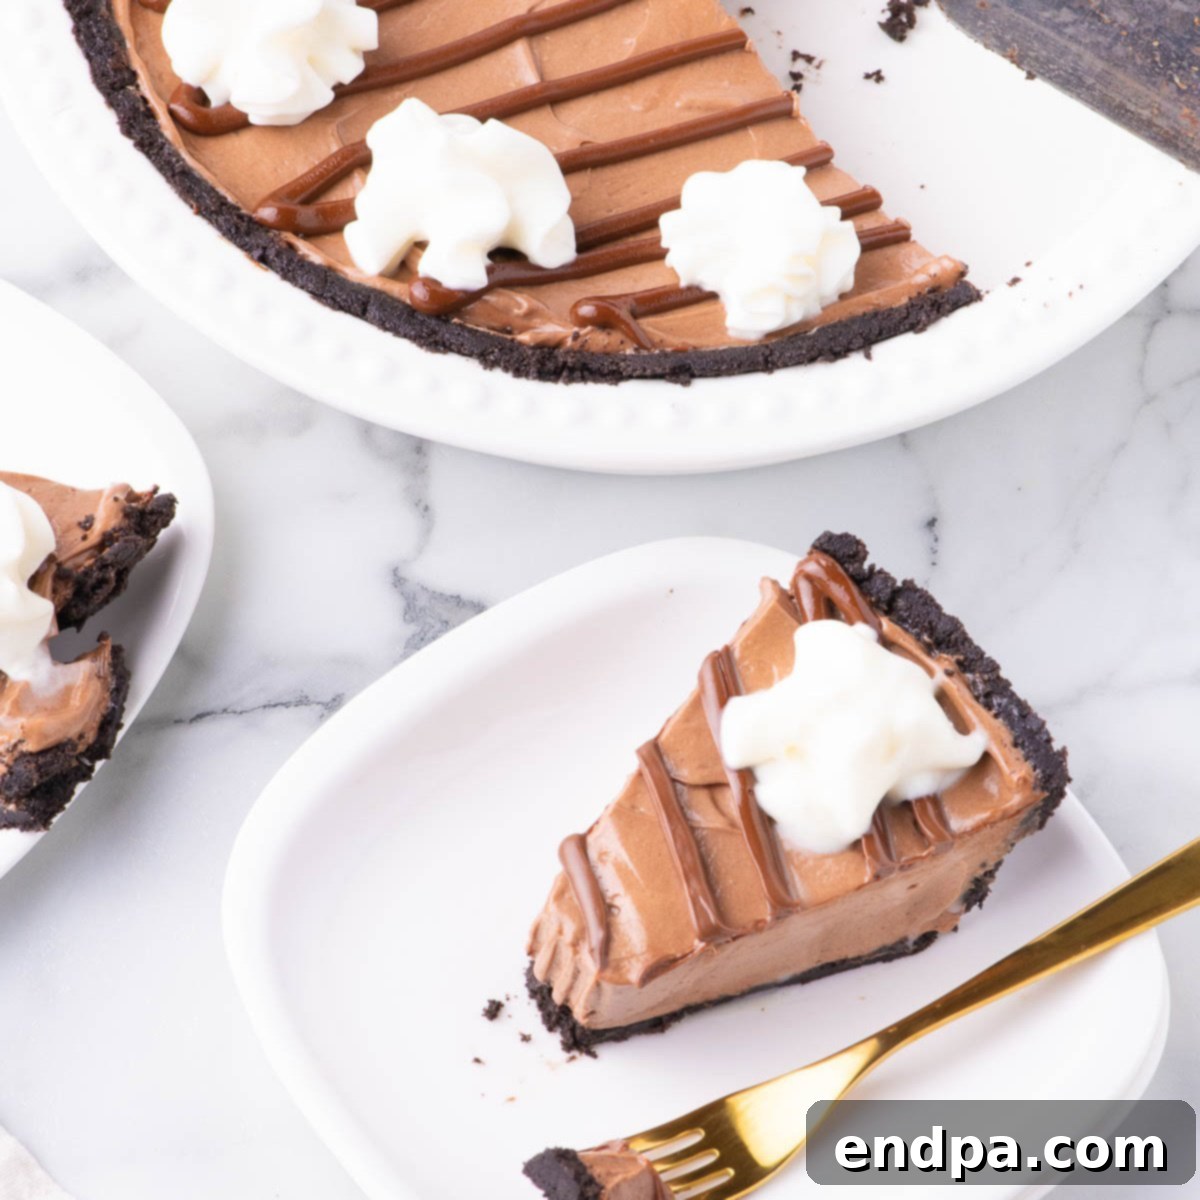
Welcome to the ultimate guide for creating an absolutely irresistible dessert that requires no baking at all! This detailed recipe for No Bake Nutella Cheesecake promises a luxurious, rich, and utterly delightful experience. Imagine a perfectly crunchy cookie crust cradling an unbelievably smooth and creamy filling, bursting with the beloved flavor of chocolate hazelnut spread. This easy-to-make treat is not just a dessert; it’s a celebration in every single bite, making it an essential addition to any Nutella lover’s repertoire.
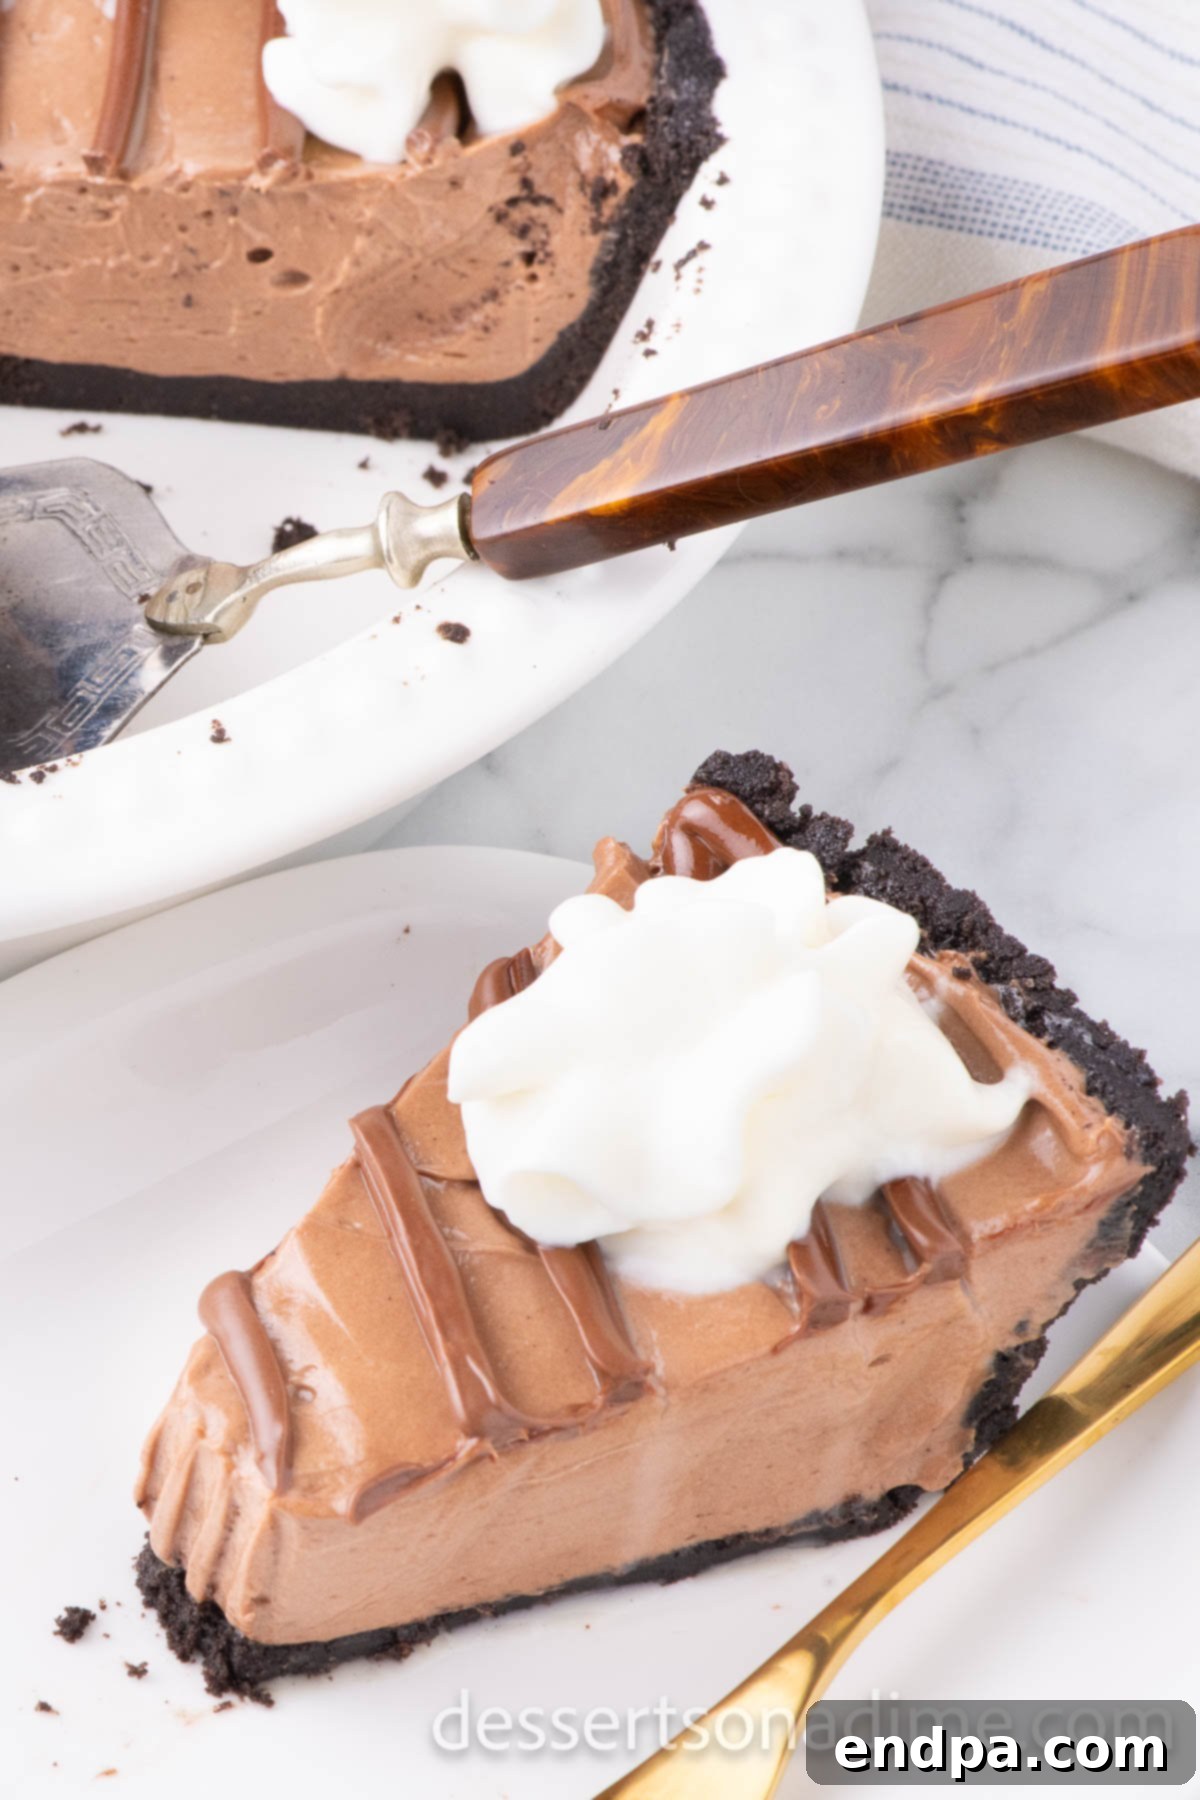
If you’re searching for a dessert that delivers on both flavor and simplicity, look no further. Our No Bake Nutella Cheesecake stands out as a true crowd-pleaser. It bypasses the oven entirely, making it ideal for hot summer days or when you simply crave a hassle-free yet spectacular treat. From its delightful Oreo cookie base to the decadently rich and smooth hazelnut-infused cream cheese filling, this dessert is engineered for maximum satisfaction without any fuss. It’s a guaranteed hit at parties, family gatherings, or simply as a well-deserved indulgence.
For those who adore the captivating taste of chocolate hazelnut spread, we have more delightful recipes for you to explore. Be sure to check out our Nutella Bars and Nutella Pie for even more incredible ways to enjoy your favorite spread. These recipes offer diverse textures and experiences, each highlighting the unique versatility of Nutella in sweet creations.
Table of Contents
- Why You’ll Love This Recipe
- Essential Ingredients
- For the Irresistible Crust
- For the Creamy Cheesecake Filling
- For the Perfect Topping
- Recommended Equipment
- Step-by-Step Guide to No-Bake Nutella Cheesecake
- Storage and Freezing Instructions
- Expert Tips for a Perfect Cheesecake
- Delicious Topping and Garnish Ideas
- Variations to Customize Your Cheesecake
- Frequently Asked Questions
- More Nutella-Inspired Desserts
- No Bake Nutella Cheesecake Recipe Card
Why You’ll Love This Recipe
There are countless reasons why this No Bake Nutella Cheesecake will quickly become a cherished favorite in your recipe collection. Firstly, its sheer simplicity is unmatched. The “no-bake” aspect means you won’t need to turn on your oven, making it perfect for any time of year, especially when you want to avoid heating up your kitchen. Secondly, the flavor profile is simply divine. It’s the harmonious marriage of tangy cream cheese with the sweet, nutty, and chocolatey notes of Nutella, all built upon a sturdy, crumbly cookie crust. This combination creates a dessert that is incredibly satisfying yet surprisingly light in texture.
Beyond its ease and exquisite taste, this cheesecake is also incredibly versatile. It can be prepared in advance, freeing up your time for entertaining or simply enjoying a relaxing evening. The rich, velvety texture and deep chocolate-hazelnut flavor make it feel incredibly gourmet, despite the minimal effort required. It’s a dessert that impresses without the stress, ensuring you can enjoy every moment of its creation and, most importantly, every blissful spoonful.
Essential Ingredients
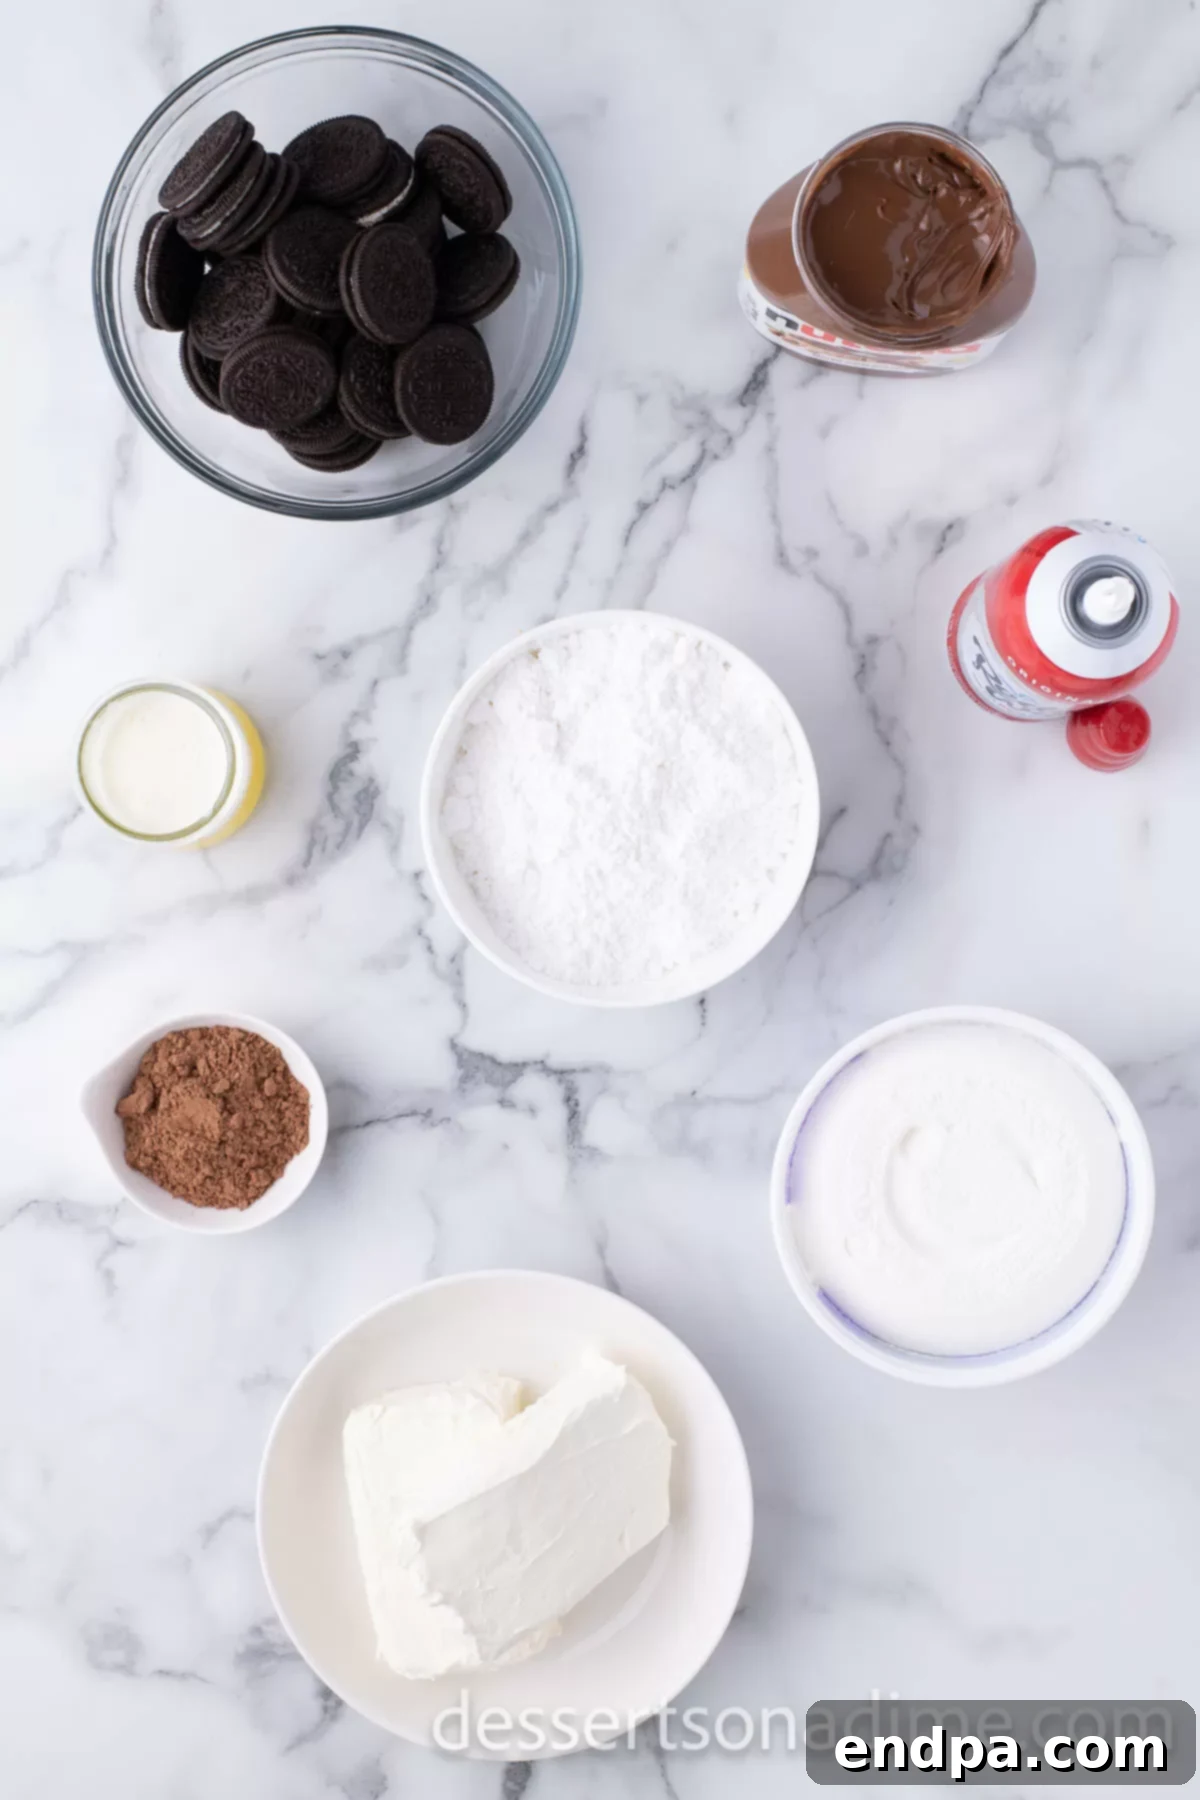
Crafting this phenomenal No Bake Nutella Cheesecake requires just a handful of simple ingredients, each playing a crucial role in achieving its perfect texture and flavor. Quality ingredients make a noticeable difference in the final product, so choose wisely!
For the Irresistible Crust
- Oreo Cookies: We recommend using regular Oreo cookies, not the double-stuffed variety. The standard cream-to-cookie ratio provides the best balance for a firm yet crumbly crust when combined with butter. You’ll use the entire cookie, including the cream filling, for a rich, chocolatey base.
- Unsalted Butter: Real unsalted butter is key for the crust. Melting it and combining it with the crushed cookies helps bind them together, creating a stable foundation for your cheesecake. Unsalted butter allows you to control the overall saltiness of the dessert.
For the Creamy Cheesecake Filling
- Cream Cheese: Opt for full-fat block cream cheese, softened at room temperature. This is crucial for achieving a smooth, lump-free filling with the perfect rich and tangy cheesecake texture. Avoid using whipped or spreadable cream cheese, as their consistency differs.
- Chocolate Hazelnut Spread (Nutella): Nutella is our brand of choice for its consistent quality and delightful flavor profile. It provides the signature hazelnut-chocolate taste that makes this cheesecake so special. Ensure it’s at room temperature for easy mixing.
- Cocoa Powder: A touch of unsweetened cocoa powder, such as Hershey’s, deepens the chocolate flavor in the filling, complementing the Nutella beautifully without making it overly sweet.
- Powdered Sugar: Also known as confectioners’ sugar, this ingredient sweetens the filling and helps achieve its silky-smooth consistency. Sifting the powdered sugar before use is essential to prevent any lumps, ensuring a truly smooth cheesecake.
- Whipped Topping: A container of whipped topping (like Cool Whip) or freshly Homemade Whipped Cream adds a light, airy texture to the dense cream cheese mixture. It makes the filling wonderfully fluffy and cuts through the richness, balancing the overall dessert.
For the Perfect Topping
- Chocolate Hazelnut Spread: You’ll want an extra portion of Nutella specifically for drizzling on top. Warming it slightly makes it perfectly pourable, adding an extra layer of hazelnut-chocolate goodness and a beautiful glossy finish.
- Whipped Cream: An optional but highly recommended addition for serving. Dollops of fresh whipped cream provide a lovely contrast in flavor and texture, offering a light, creamy counterpoint to the rich cheesecake.
Recommended Equipment
This no-bake recipe is quite forgiving, but having the right tools on hand will make the process even smoother and more enjoyable. You won’t need any specialized baking equipment, just a few common kitchen items:
- Food Processor: This is the quickest and easiest way to crush the Oreo cookies into fine crumbs for your crust. If you don’t have one, a sturdy Ziploc bag and a rolling pin will work just as well, albeit with a bit more effort.
- 9-Inch Pie Plate or Springform Pan: A standard 9-inch pie plate is perfect for this recipe. Alternatively, a 9-inch springform pan is an excellent choice if you prefer a cheesecake with perfectly smooth, tall sides that can be easily removed from the pan for a more professional presentation.
- Mixing Bowls: You’ll need at least two medium to large mixing bowls – one for combining the crust ingredients and another for the cheesecake filling.
- Electric Mixer (Stand or Handheld): An electric mixer is highly recommended for blending the cream cheese and Nutella into a smooth, airy consistency. A stand mixer makes the process effortless, but a handheld electric mixer is perfectly adequate.
- Rubber Spatula: Essential for gently folding in the whipped topping and scraping down the sides of your mixing bowls to ensure everything is well combined.
- Measuring Cups and Spoons: For accurately portioning all your ingredients.
- Plastic Wrap: Crucial for covering the cheesecake while it chills, preventing it from absorbing any refrigerator odors and helping it set properly.
Step-by-Step Guide to No-Bake Nutella Cheesecake
Follow these straightforward steps to create your luscious No Bake Nutella Cheesecake. Each stage is designed to be simple and efficient, ensuring a perfect dessert every time.
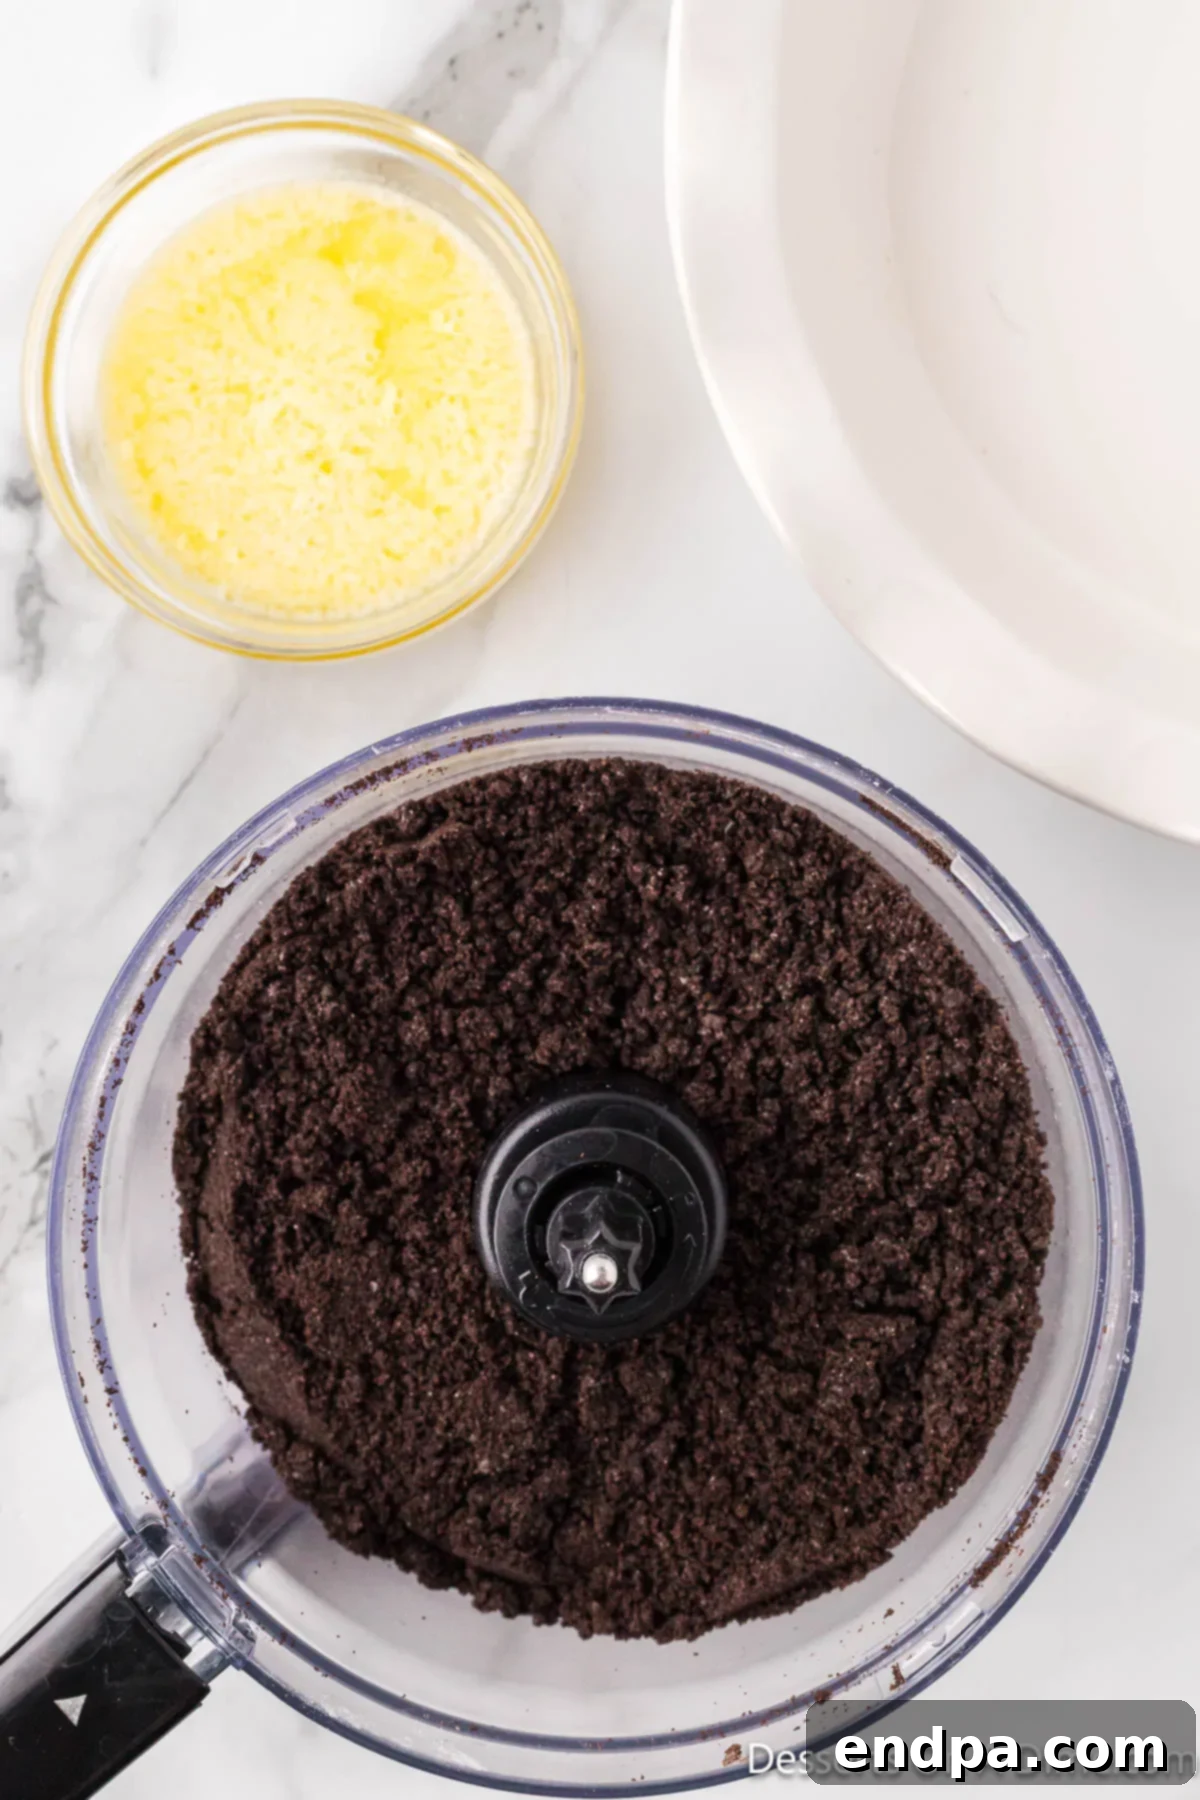
Step 1: Prepare the Oreo Cookie Crumbs. Begin by crushing your Oreo cookies. Place the entire cookies (including the cream filling) into a food processor and pulse until fine crumbs are formed. If you don’t have a food processor, place the cookies in a large Ziploc bag, seal it, and use a rolling pin or the bottom of a heavy pan to crush them into fine crumbs. Aim for a sand-like consistency.
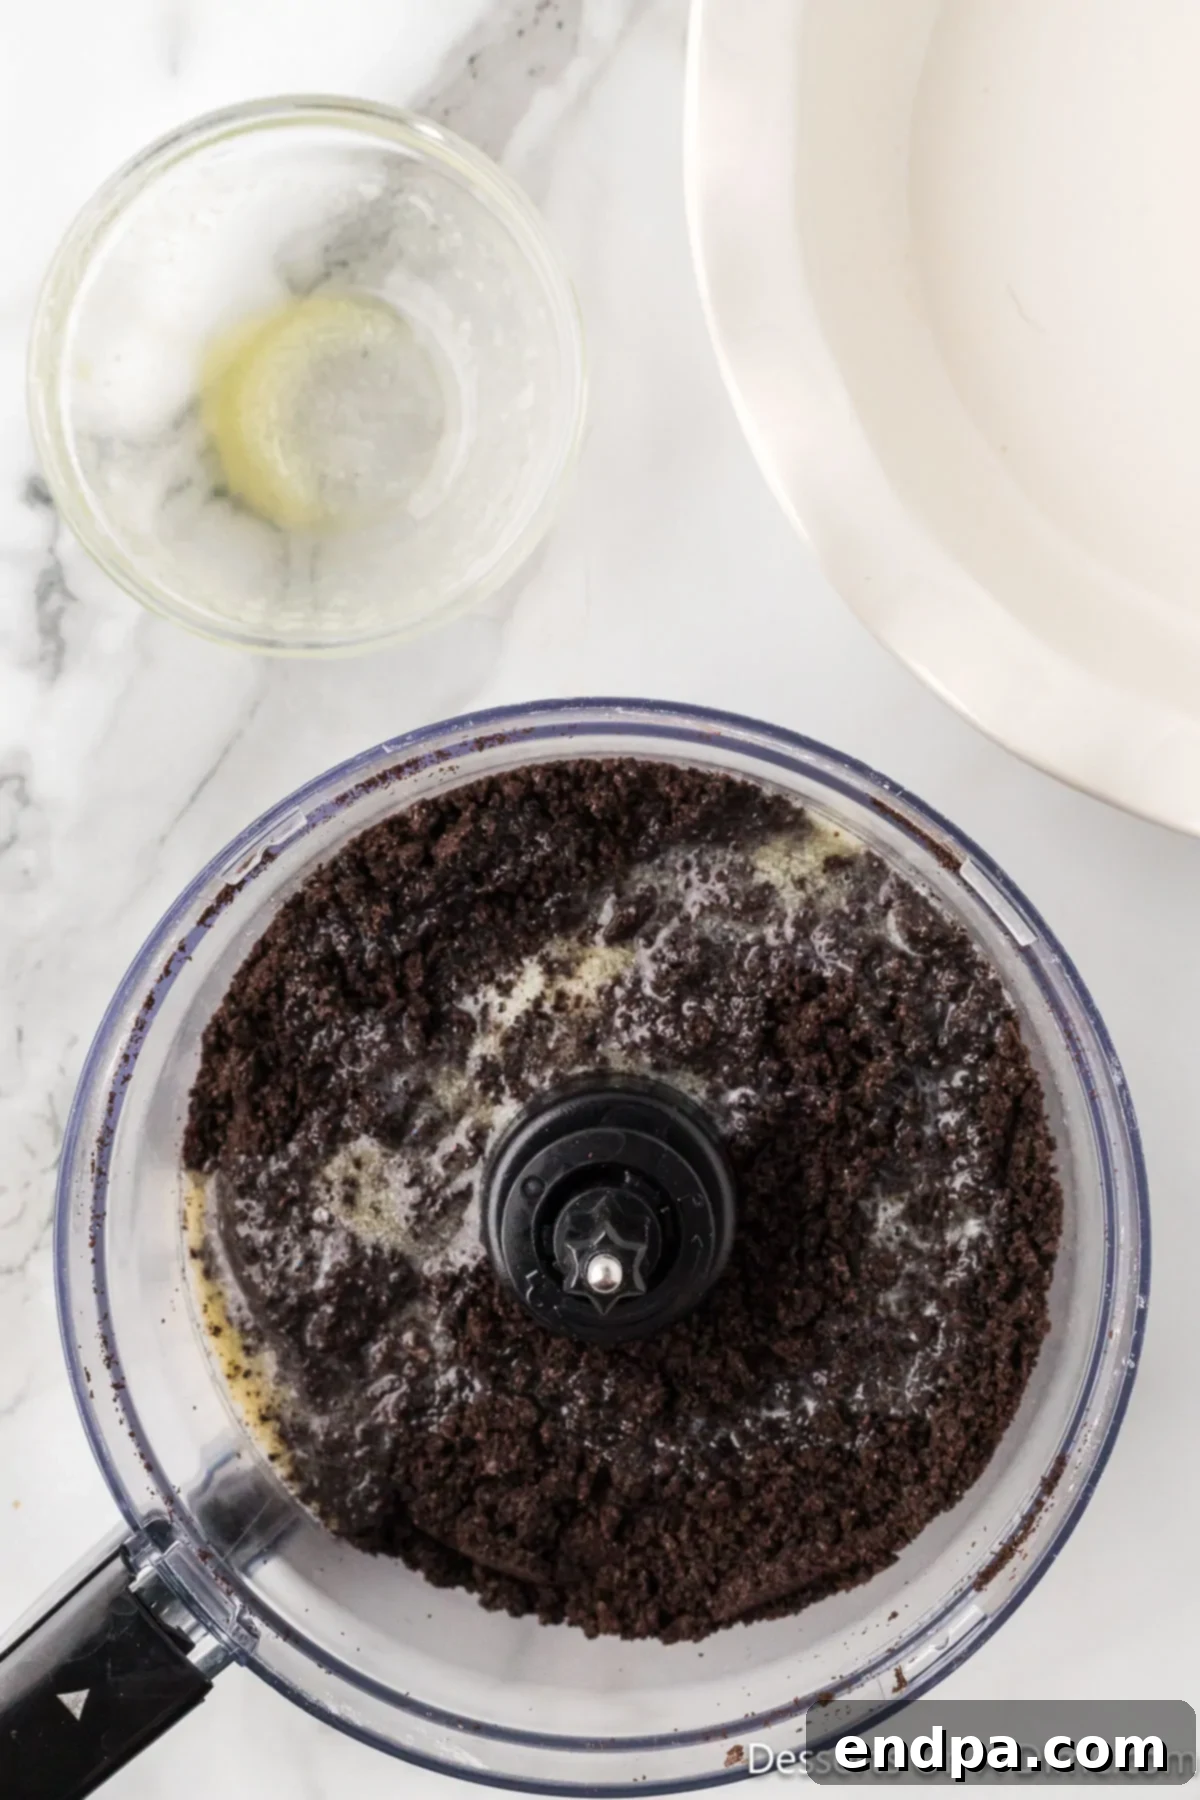
Step 2: Combine Crumbs with Melted Butter. In a medium-sized mixing bowl, combine the finely crushed Oreo crumbs with the melted unsalted butter. Use a fork or your hands to mix thoroughly until all the crumbs are moistened and resemble wet sand. This ensures the crust will hold together beautifully.
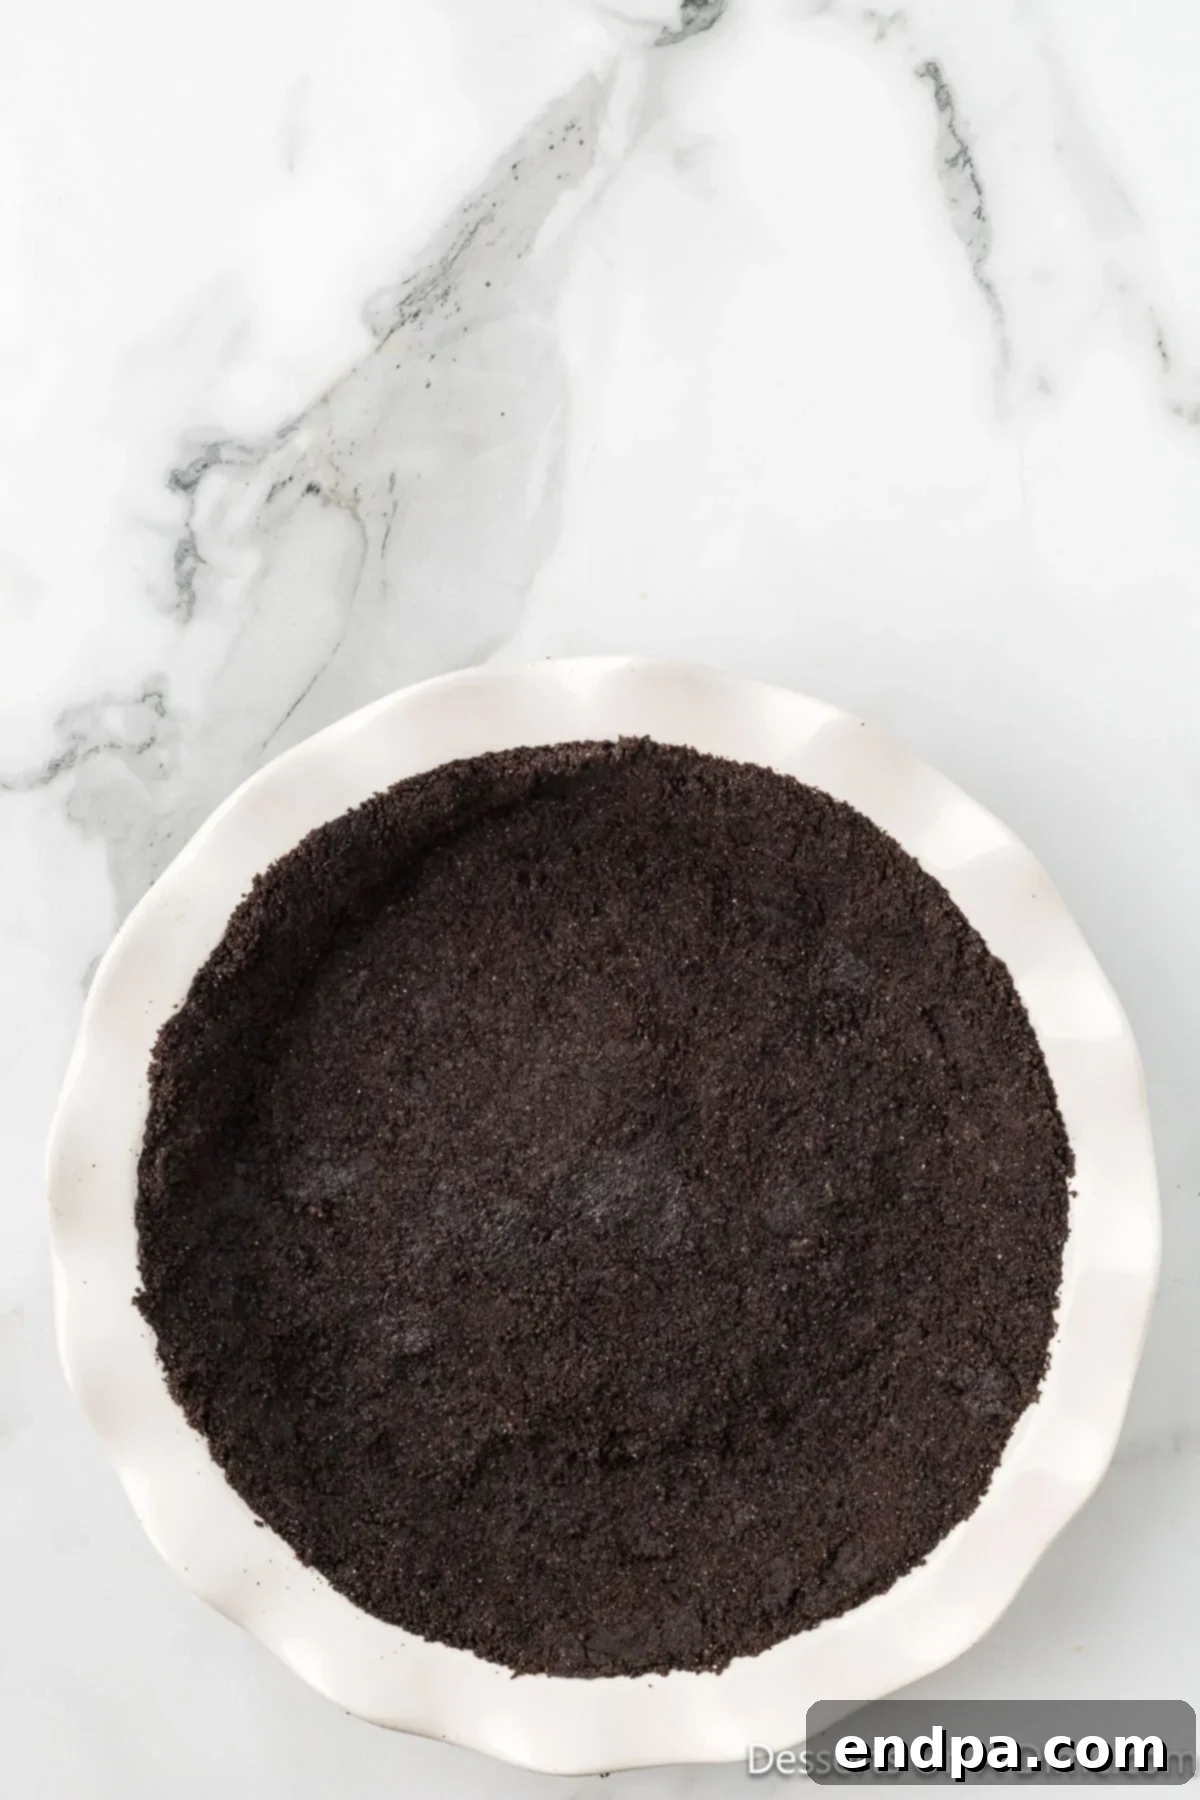
Step 3: Form the Cheesecake Crust. Transfer the buttered cookie crumb mixture into a 9-inch pie plate. Using the back of a spoon or the bottom of a flat-bottomed glass, firmly press the mixture evenly across the bottom and slightly up the sides of the pie plate. Pressing it firmly is key to a stable crust. Once formed, place the crust in the refrigerator to chill while you prepare the filling. This initial chilling helps it set and prevents it from crumbling when sliced.
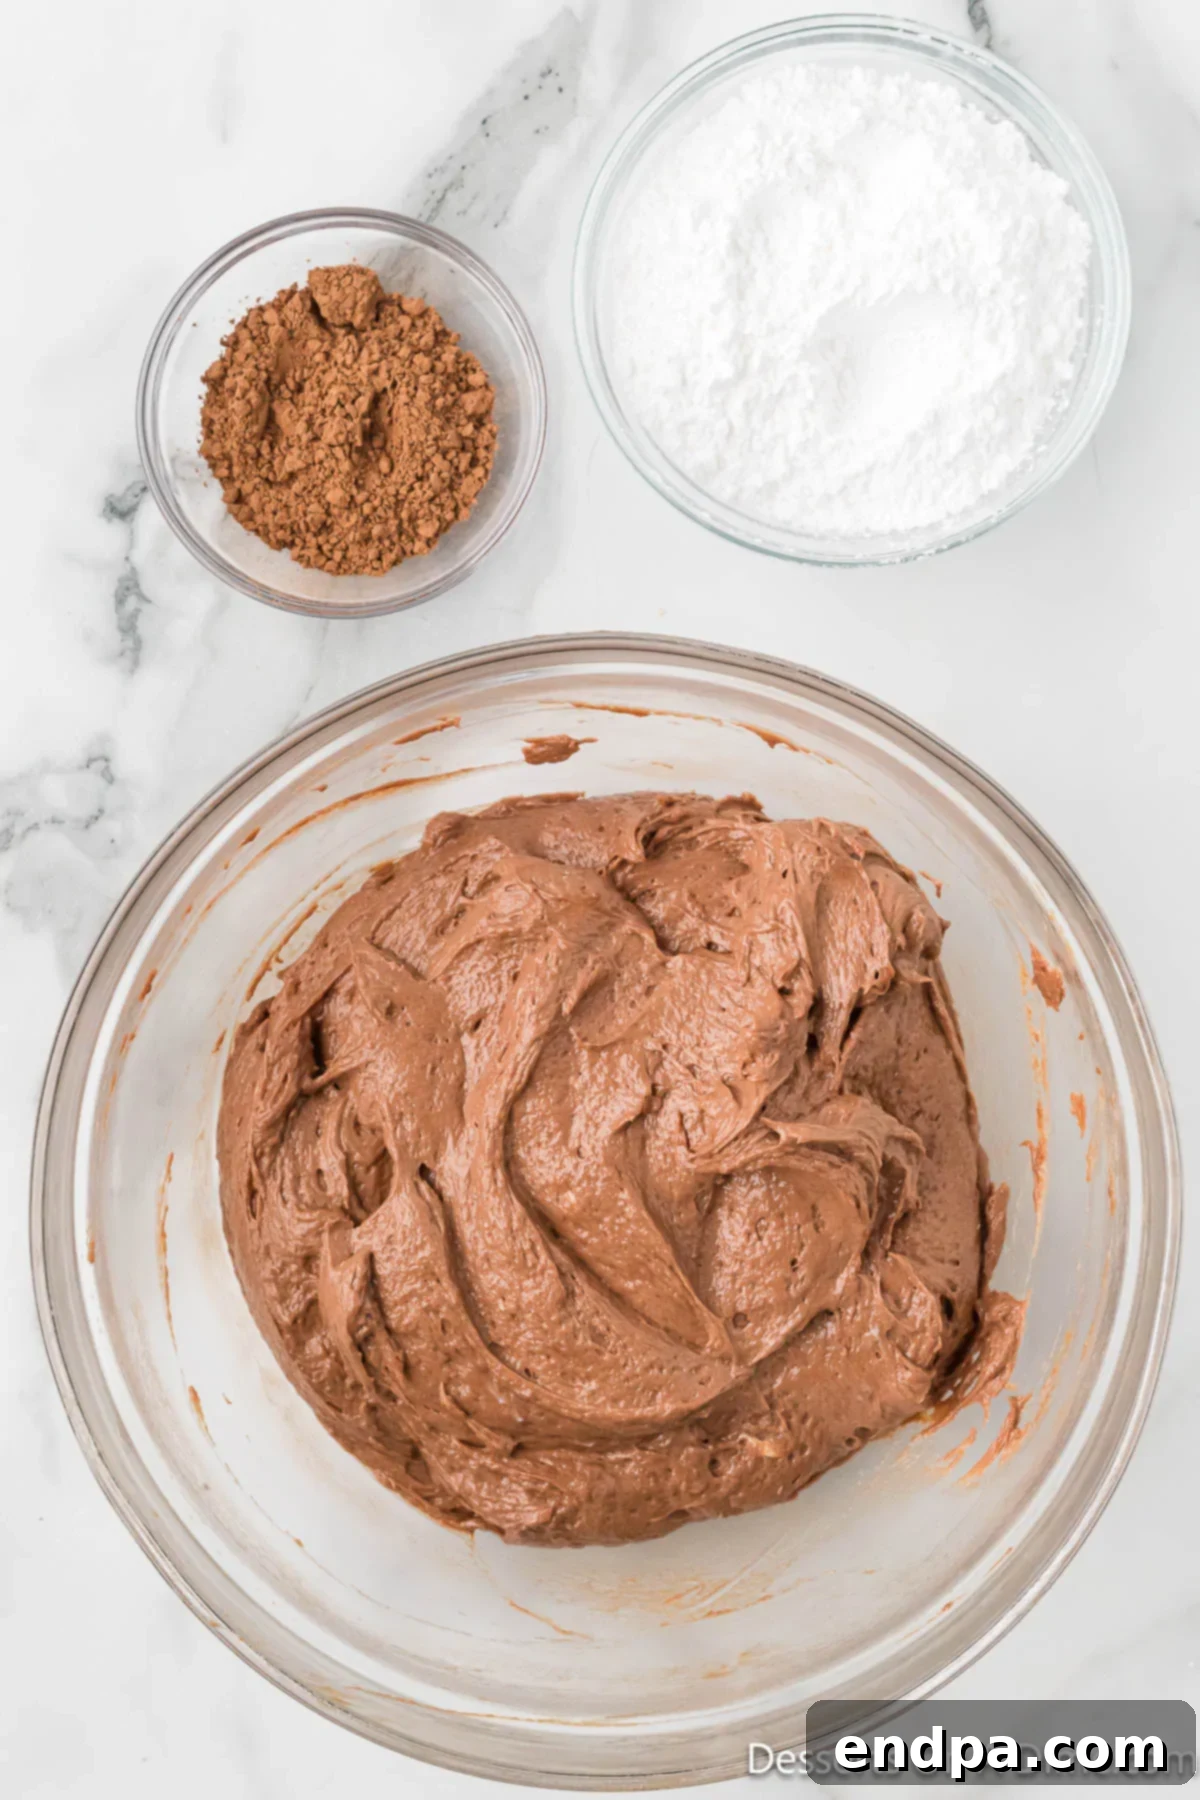
Step 4: Prepare the Cream Cheese and Nutella Base. In a large mixing bowl, using either a stand mixer with the paddle attachment or a handheld electric mixer, beat together the softened cream cheese and the chocolate hazelnut spread. Beat on medium speed until the mixture is completely smooth, creamy, and well combined, ensuring there are no lumps of cream cheese remaining.
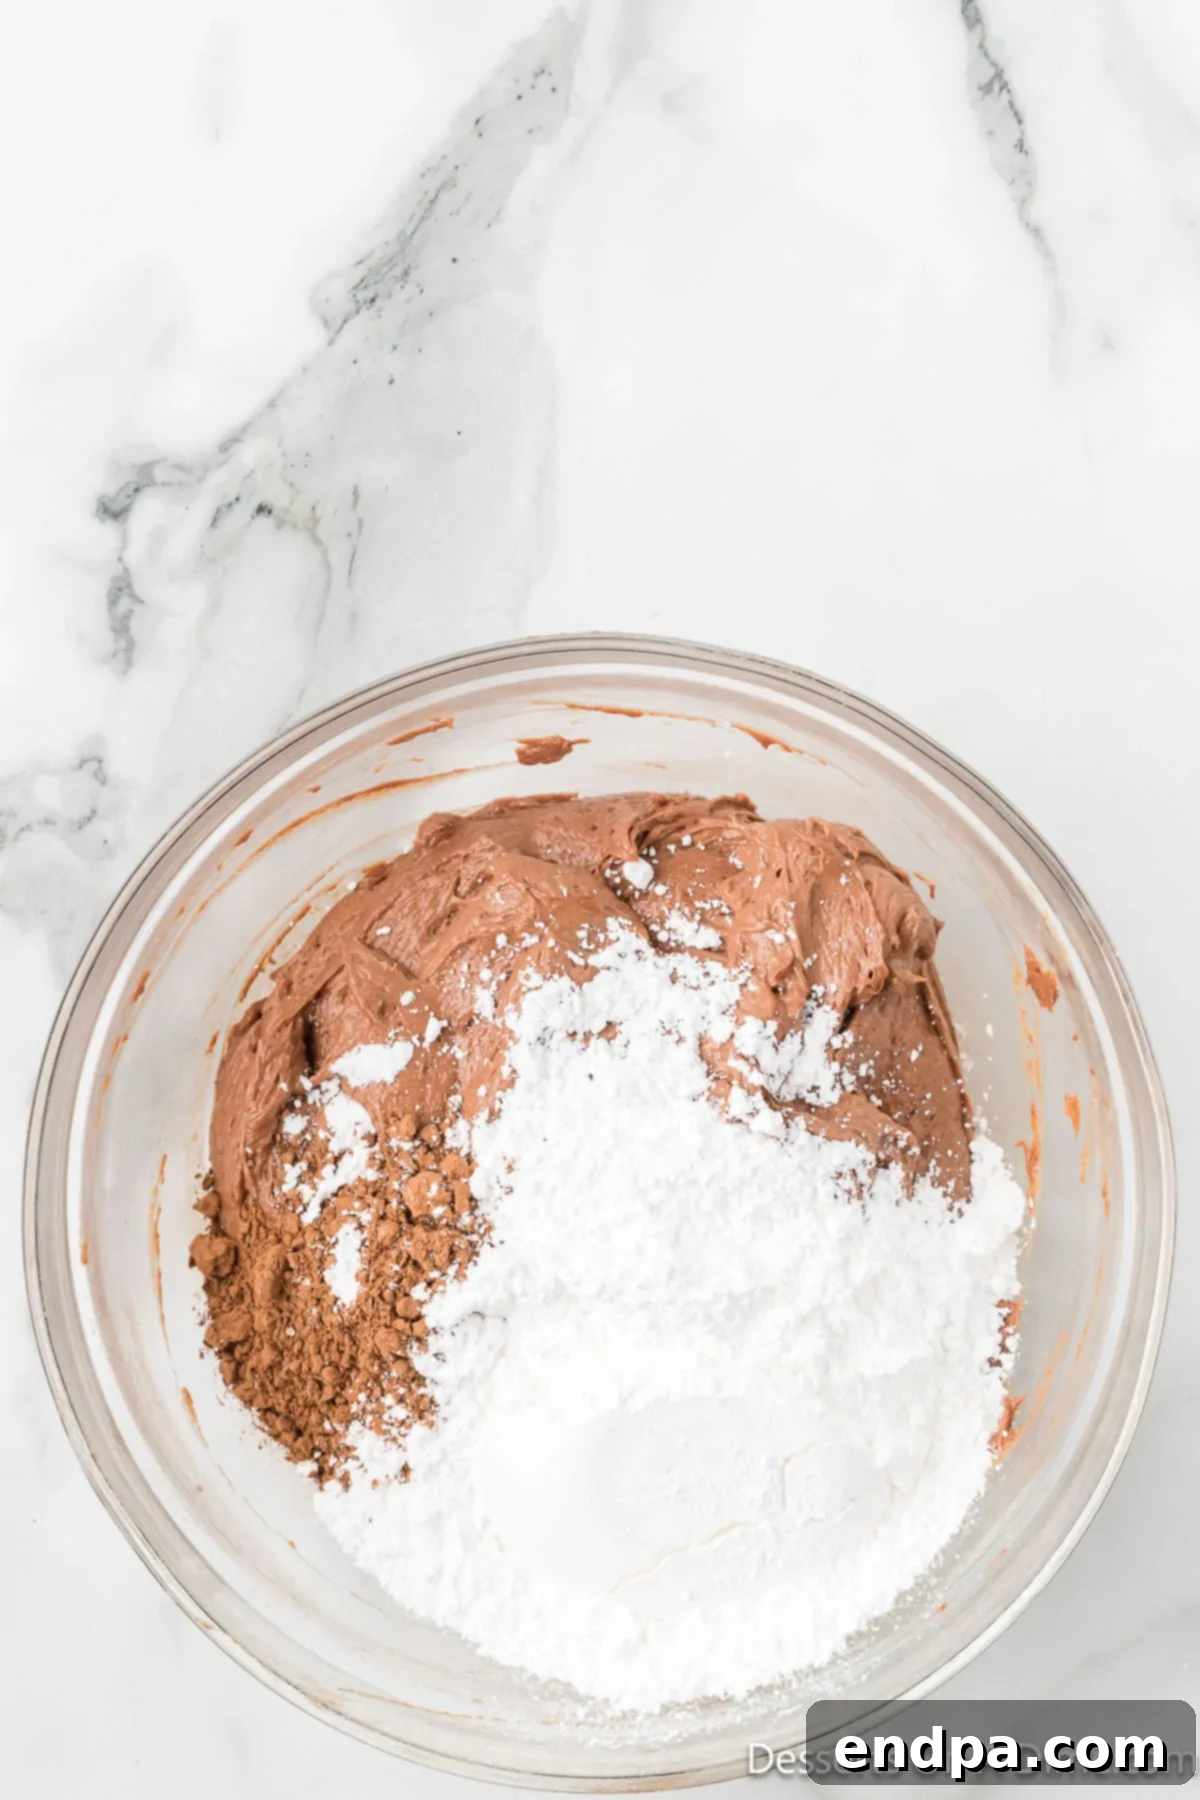
Step 5: Incorporate Cocoa Powder and Powdered Sugar. Add the cocoa powder and sifted powdered sugar to the cream cheese and Nutella mixture. Continue to beat with your electric mixer on low speed initially, then increase to medium, until these dry ingredients are fully incorporated and the filling is smooth and uniform in color and texture. Scrape down the sides of the bowl as needed.
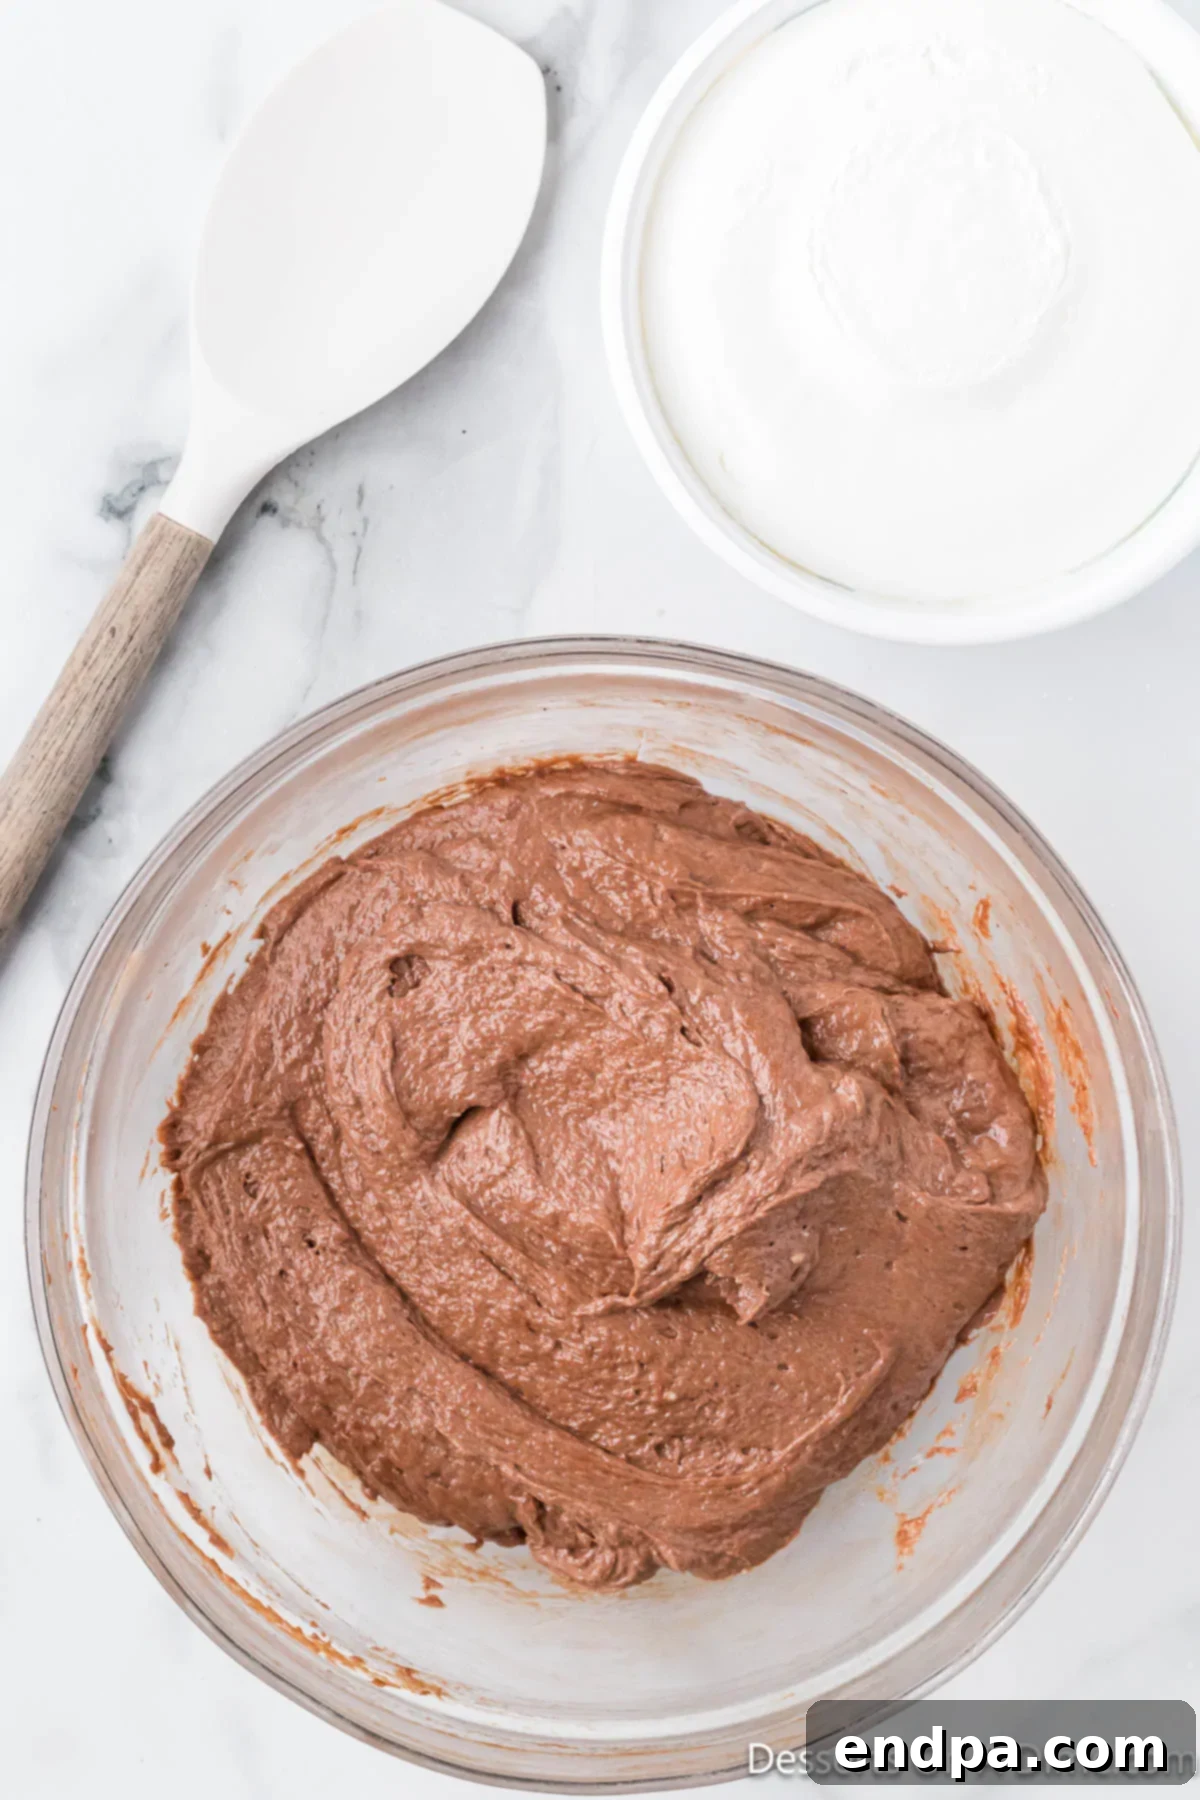
Step 6: Gently Fold in Whipped Topping. Remove the bowl from the mixer. Using a rubber spatula, gently fold in the whipped topping by hand. Use a light, lifting motion until the whipped topping is just combined with the cheesecake mixture. Be careful not to overmix, as this can deflate the whipped topping and reduce the airy texture of your cheesecake filling. Mixing by hand ensures a delicate finish.
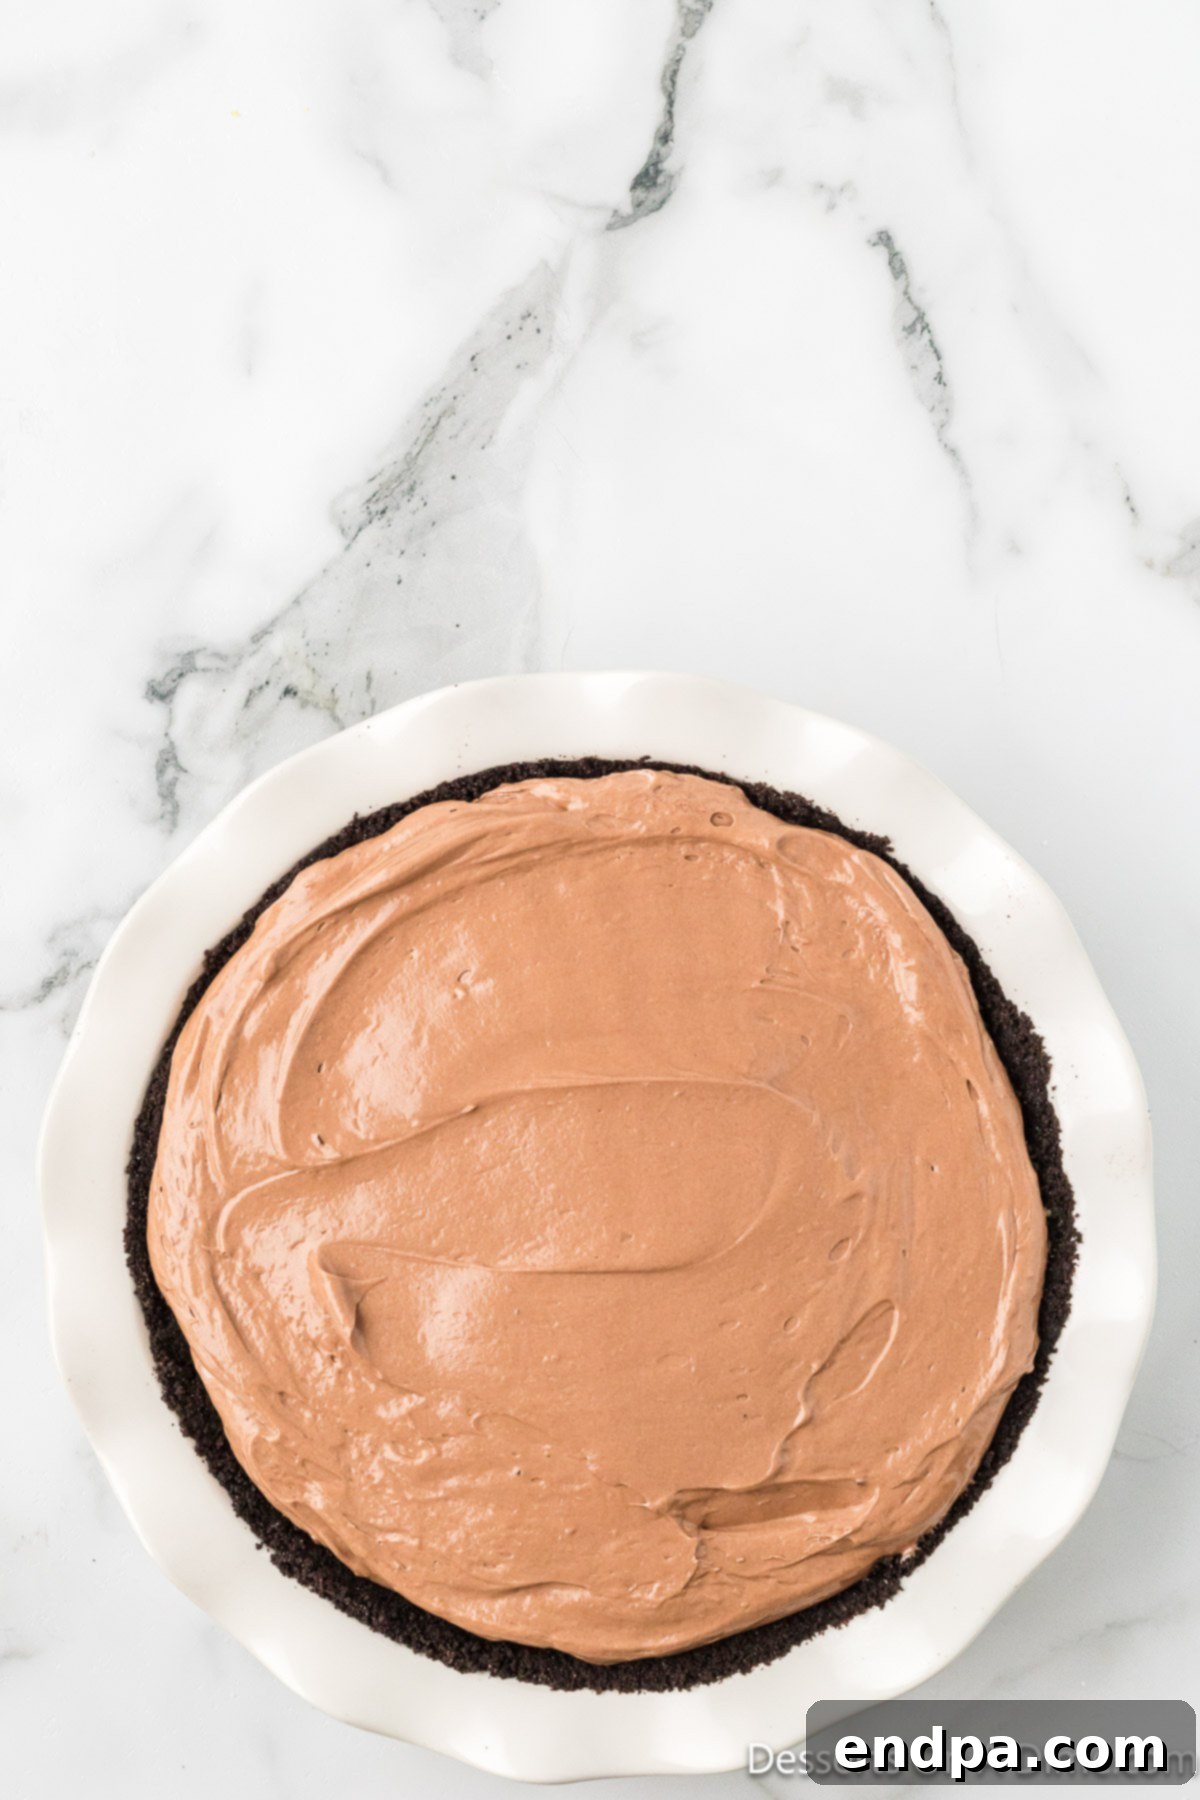
Step 7: Fill the Crust and Chill. Retrieve your chilled Oreo crust from the refrigerator. Carefully spoon or pour the prepared Nutella cheesecake filling into the crust. Use the back of your spatula or an offset spatula to spread the filling evenly across the crust, creating a smooth top. Cover the pie plate tightly with plastic wrap and return it to the refrigerator. Allow the cheesecake to chill for a minimum of 4 hours, or ideally, overnight. This crucial chilling time allows the cheesecake to set completely, making it firm and easy to slice.
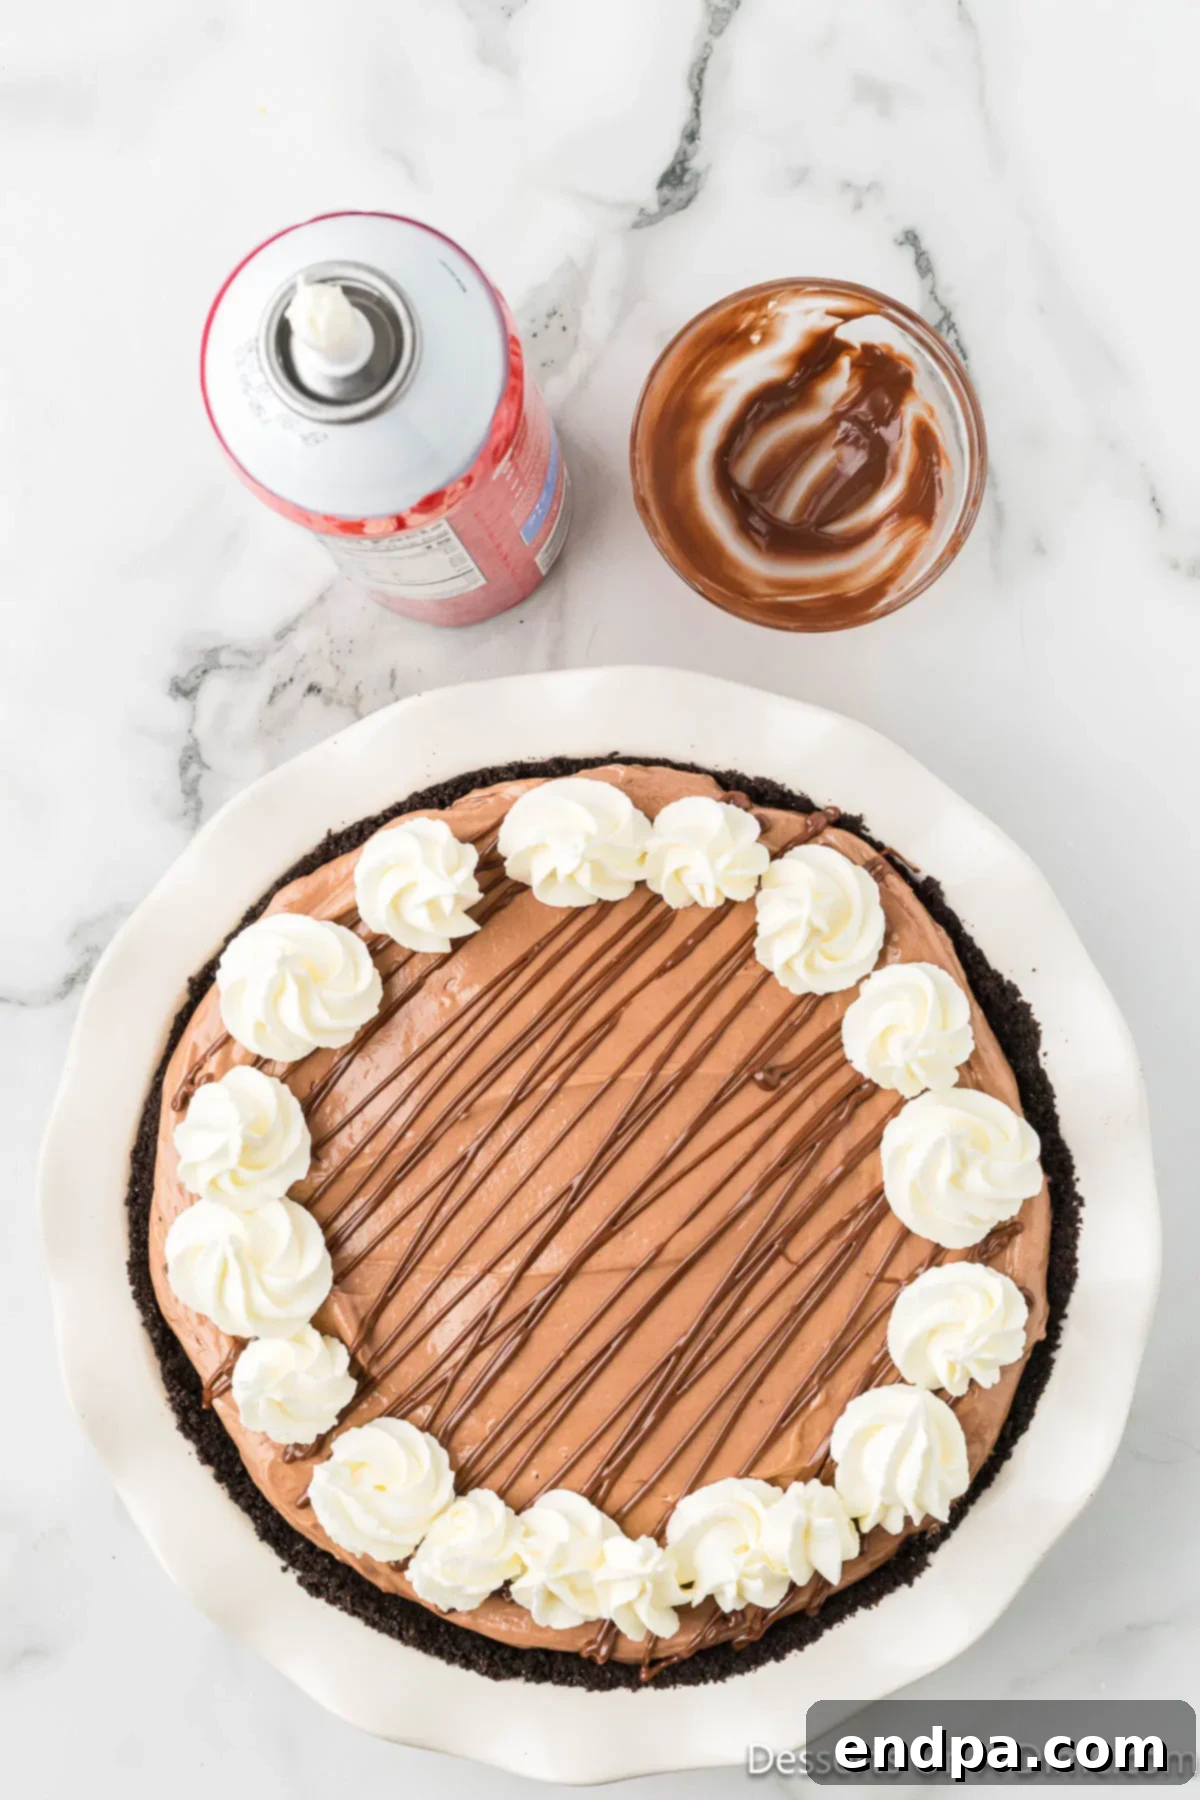
Step 8: Garnish and Serve. Once the cheesecake is fully set, it’s time for the final touches. Gently warm the extra 1/2 cup of Nutella in the microwave for about 15-30 seconds, stirring until it’s smooth and pourable. Drizzle the melted Nutella elegantly over the top of the chilled cheesecake. For an extra flourish, pipe or dollop whipped cream around the edge of the cheesecake. Now, it’s ready to slice into generous portions and enjoy!
Storage and Freezing Instructions
One of the many advantages of this No Bake Nutella Cheesecake is how well it stores, making it an excellent dessert to prepare ahead of time for special occasions or to enjoy throughout the week.
Refrigeration: Any leftover cheesecake should be stored covered tightly with plastic wrap in the refrigerator. It will maintain its delicious flavor and texture for up to 6 to 7 days. Storing it covered is important to prevent it from drying out or absorbing other odors from the fridge. This makes it perfect for meal prepping your desserts or having a sweet treat readily available.
Freezing: This cheesecake also freezes beautifully, extending its shelf life significantly. To freeze, ensure the cheesecake is completely chilled and firm. It’s best to freeze the plain cheesecake without any decorative toppings. Wrap the entire cheesecake (or individual slices) tightly first in plastic wrap, ensuring no air can get in. Then, wrap it again in aluminum foil for an extra layer of protection against freezer burn. Place the double-wrapped cheesecake into an airtight freezer-safe container or a heavy-duty freezer bag.
You can freeze the cheesecake for up to 6 weeks. When you’re ready to enjoy it, simply transfer the frozen cheesecake to the refrigerator and allow it to thaw overnight. Once thawed, you can slice it as normal and then add your desired garnishes like whipped cream, fresh berries, or a fresh drizzle of Nutella. Freezing is a fantastic option for holiday planning or when you want to save a portion for later.
Expert Tips for a Perfect Cheesecake
Achieving a flawless No Bake Nutella Cheesecake is simple when you keep a few expert tips in mind. These small details can make a big difference in the texture, flavor, and overall success of your dessert.
- Room Temperature Cream Cheese is Non-Negotiable: This is perhaps the most important tip! Ensure your cream cheese is thoroughly softened at room temperature before you begin mixing. Cold cream cheese will result in a lumpy filling that is impossible to smooth out, no matter how much you beat it. Softened cream cheese blends effortlessly, creating that signature silky-smooth cheesecake texture.
- Use Block Cream Cheese, Not Spread: Always use full-fat block cream cheese for this recipe. Whipped or spreadable cream cheese contains more air and water, and often stabilizers, which can alter the consistency and setting ability of your cheesecake, leading to a runny or less stable filling.
- Choosing Your Pan: While we successfully use a regular 9-inch pie dish, a springform pan is an excellent alternative. A springform pan allows you to easily release the sides, giving your cheesecake a clean, bakery-style presentation. If using a springform pan, you might want to consider lining the bottom with parchment paper for extra ease of removal.
- Patience for Chilling: The cheesecake filling needs ample time to set. Resist the urge to slice it before it has chilled for at least 4 hours. Ideally, chilling it overnight will give you the firmest, cleanest slices. If you cut it too soon, the filling will be too soft and messy, affecting both its appearance and texture.
- Crust Customization: While the Oreo crust is incredibly delicious, feel free to experiment! A classic graham cracker crust can be used as a substitute if you prefer a different flavor profile or have dietary considerations. The ratio of crumbs to butter would remain similar.
- Even Crust Compression: For a sturdy, even crust, use the bottom of a flat-bottomed drinking glass or a measuring cup to press the cookie crumbs firmly into the pie plate. This technique ensures a smooth, compact base that won’t fall apart when you serve the cheesecake.
- Don’t Overmix the Whipped Topping: When folding in the whipped topping, do so gently and by hand. Overmixing with an electric mixer can cause the whipped topping to deflate, resulting in a less airy and dense cheesecake filling. Fold just until no streaks remain.
Delicious Topping and Garnish Ideas
While this No Bake Nutella Cheesecake is fantastic on its own, adding toppings can elevate it from delicious to absolutely spectacular. Here are some creative and delectable ideas to crown your creation:
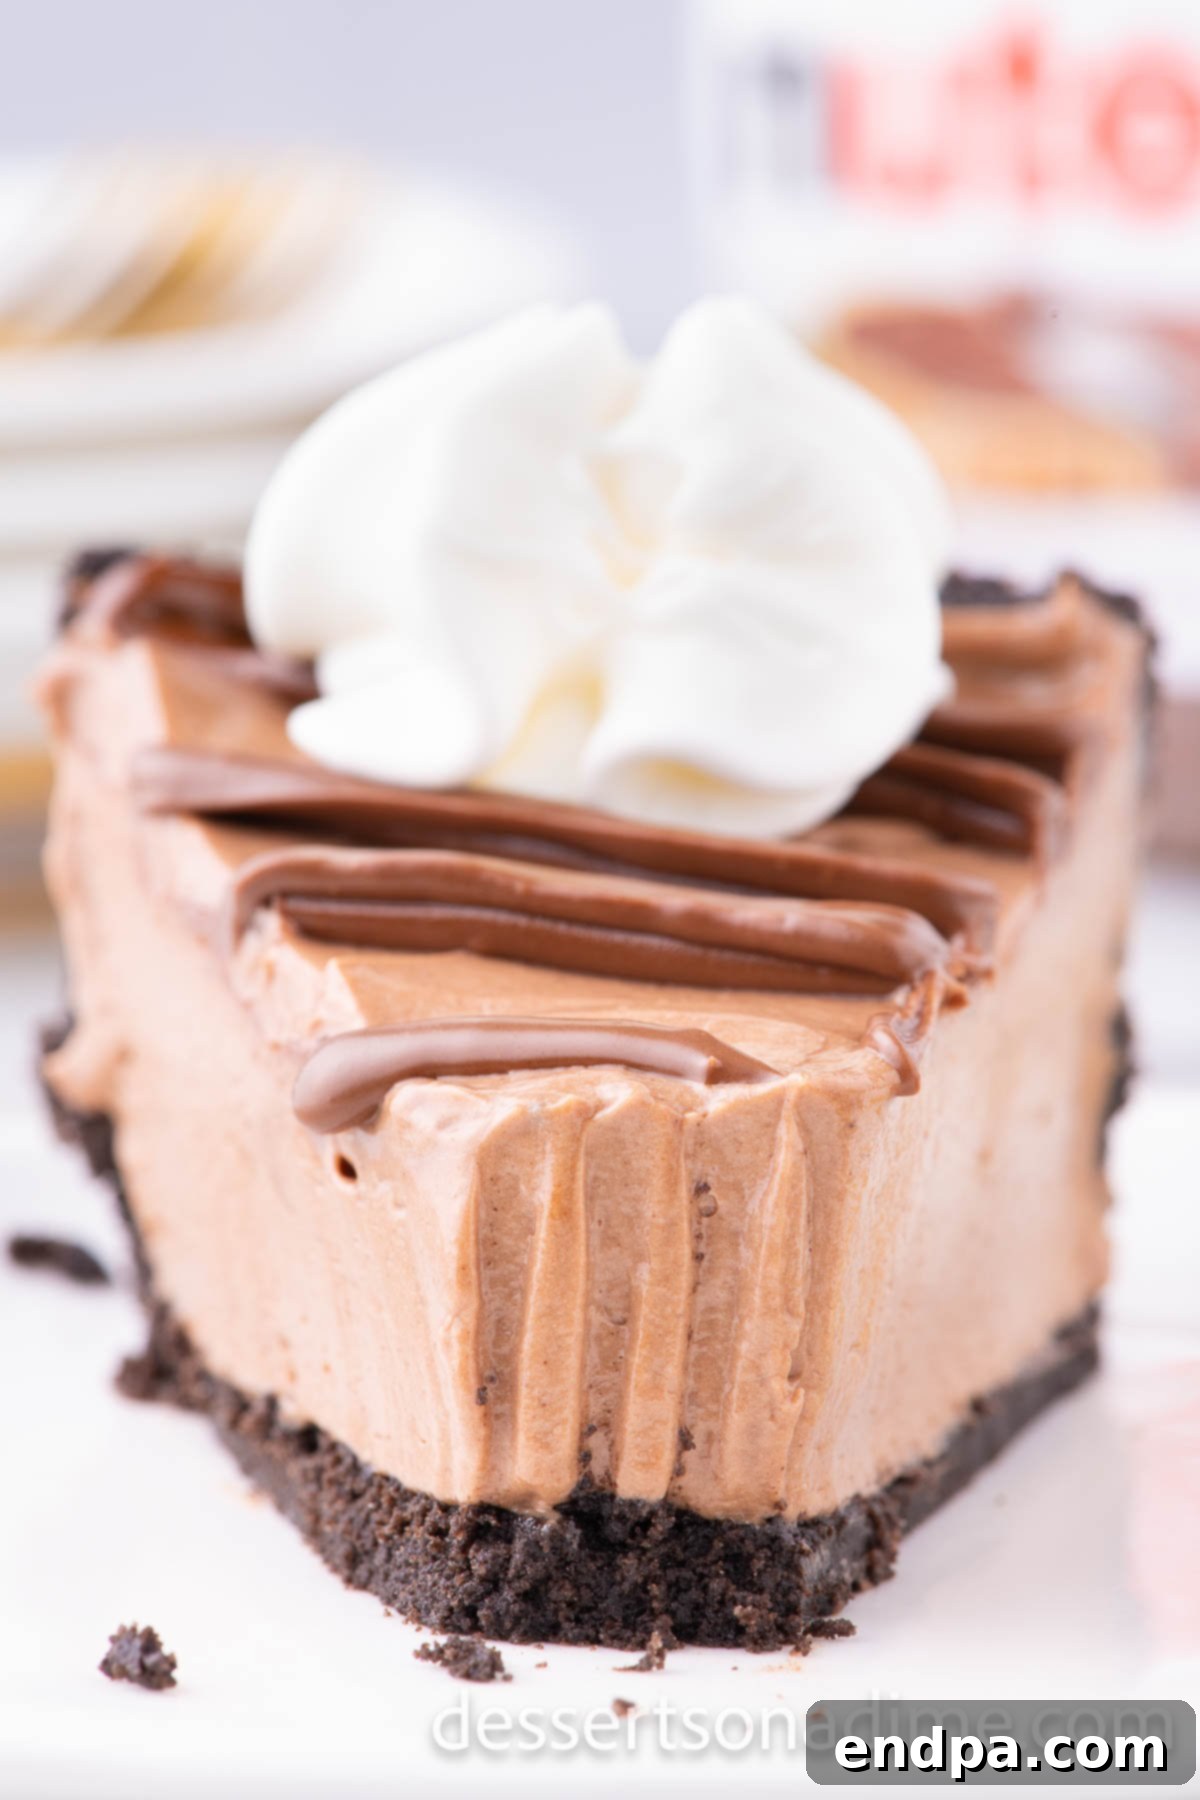
- Extra Whipped Cream: A generous dollop of fresh whipped cream or whipped topping is a classic choice. Its light, airy texture and delicate sweetness perfectly complement the rich, dense cheesecake, creating a beautiful contrast.
- Warm Nutella Drizzle: For an intense hazelnut-chocolate experience, gently warm some extra Nutella and drizzle it generously over each slice or the entire cheesecake. The warm, gooey spread adds another layer of indulgence.
- Chocolate Curls or Shavings: Garnish with delicate chocolate curls or coarser chocolate shavings. This not only adds an elegant touch but also provides an extra hint of rich chocolate flavor and a pleasing textural element.
- Dusting of Powdered Sugar: A simple dusting of powdered sugar over the top of the cheesecake creates a beautiful visual contrast against the dark filling. It’s an easy way to add a sophisticated finish.
- Chocolate Sauce Drizzle: For an even more intense chocolate flavor, a drizzle of chocolate fudge or hot fudge sauce can be a decadent addition. Caramel sauce also pairs wonderfully with the hazelnut notes.
- Fresh Berries: Bright, fresh berries like raspberries, strawberries, or blueberries add a burst of tartness and freshness that beautifully cuts through the richness of the cheesecake. They also lend a vibrant pop of color, making the dessert visually stunning.
- Crushed or Whole Candy: For the ultimate indulgence, consider sprinkling crushed Ferrero Rocher candies over the top. The combination of chocolate, hazelnut, and wafer adds an exciting crunch and an extra layer of gourmet flavor. Alternatively, place whole Ferrero Rocher candies elegantly on each slice.
- Toasted Hazelnuts: Lightly toasted and chopped hazelnuts can enhance the nutty flavor profile and add a delightful crunch.
Important Note: If you plan to make and store your cheesecake for later, it’s best to add any fresh toppings (like whipped cream or berries) just before serving to ensure they look and taste their best.
Variations to Customize Your Cheesecake
While the classic No Bake Nutella Cheesecake is perfect as is, you can easily customize it to suit your taste preferences or to try something new. Here are a few exciting variations:
- Different Crusts:
- Graham Cracker Crust: For a more traditional cheesecake flavor, swap out the Oreo cookies for crushed graham crackers. Mix them with melted butter just like the Oreos.
- Vanilla Wafer Crust: Crushed vanilla wafers mixed with butter offer a subtle, sweet base that complements the Nutella beautifully.
- Biscoff Cookie Crust: If you love speculoos cookies, a Biscoff crust adds a unique, spiced caramel note that pairs surprisingly well with Nutella.
- Flavor Swaps for the Filling:
- Peanut Butter Swirl: Swirl in some melted peanut butter into a portion of the Nutella filling for a chocolate-peanut butter hazelnut hybrid.
- Espresso Kick: Dissolve 1-2 teaspoons of instant espresso powder in a tablespoon of hot water and mix it into the cream cheese and Nutella filling to enhance the chocolate notes with a subtle coffee flavor.
- Mint Chocolate: Add a few drops of mint extract to the filling for a refreshing mint-chocolate experience.
- Layered Cheesecake: Instead of one uniform filling, consider creating layers. You could make half of the filling plain vanilla cream cheese and layer it with the Nutella filling for a visually appealing and multi-flavored dessert.
- Individual Servings: Instead of a pie plate, press the cookie crust into individual ramekins or muffin tins lined with paper liners. This creates adorable mini no-bake cheesecakes perfect for portion control or party appetizers.
Frequently Asked Questions
We’ve gathered some common questions about making this No Bake Nutella Cheesecake to help ensure your dessert-making experience is as smooth as possible.
- Can I use light cream cheese?
While you can use light cream cheese, we highly recommend using full-fat cream cheese blocks for the best texture and flavor. Light cream cheese often has more water content and stabilizers, which can result in a less firm and less rich cheesecake. If you do use light cream cheese, be aware that the final texture might be slightly softer.
- What if I don’t have a food processor for the crust?
No problem at all! Place the Oreo cookies in a sturdy Ziploc bag, remove as much air as possible, and seal it. Then, use a rolling pin or a heavy pan to crush the cookies into fine crumbs. It might take a little more effort, but it works perfectly.
- How can I ensure my cheesecake sets firmly?
The key to a firm no-bake cheesecake is adequate chilling time and using room temperature, full-fat cream cheese. Ensure you chill the cheesecake for at least 4 hours, or preferably overnight. Also, make sure your cream cheese is completely softened before mixing to avoid lumps, which can hinder proper setting.
- Can I make this cheesecake dairy-free or gluten-free?
Yes, with a few substitutions! For a dairy-free version, use dairy-free cream cheese alternatives, dairy-free chocolate hazelnut spread (check labels carefully), vegan butter, and a plant-based whipped topping. For gluten-free, use gluten-free Oreo-style cookies for the crust or a gluten-free graham cracker crust. Always check ingredient labels to ensure they meet your dietary needs.
- My Nutella is too thick to drizzle, what should I do?
Nutella can become quite firm, especially if stored in a cool place. To make it easily drizzled, simply warm it gently. You can do this by placing the jar in a bowl of warm water for a few minutes, or microwave a portion in a microwave-safe bowl in 15-second intervals, stirring until it reaches a smooth, pourable consistency.
More Nutella-Inspired Desserts
If you find yourself with an extra jar of chocolate hazelnut spread (or if this cheesecake simply ignites a deeper Nutella craving!), here are more delectable recipes that put Nutella center stage:
- Nutella Cupcakes
- Nutella Stuffed Cookies Recipe
- Easy Nutella Mug Cake
- Nutella Dip
- Nutella Frosting
This easy No Bake Nutella Cheesecake truly is a showstopper – effortlessly elegant and profoundly delicious. It’s the perfect dessert for any occasion, promising smiles and satisfied sighs. Give it a try today and let us know your thoughts in the comments below!
No Bake Nutella Cheesecake Recipe Card
No Bake Nutella Cheesecake
Rating: 5 out of 5 stars from 2 votes
Summary: Create a luxurious dessert with this No Bake Nutella Cheesecake recipe. Featuring a cookie crust and indulgent filling, this easy-to-make treat is a must-try for any Nutella lover.
- Prep Time:
- 20 minutes
- Refrigerate Time:
- 4 hours
- Total Time:
- 4 hours 20 minutes
- Servings:
- 10
- Cuisine:
- American
- Course:
- Dessert
- Author:
- Carrie Barnard
Ingredients
For the Crust:
- 25 Oreo Cookies (regular, not double stuffed)
- 5 tbsp unsalted butter, melted
For the Cheesecake Filling:
- 2 pkgs Cream Cheese (8 ounces each), softened at room temperature
- 1 jar Chocolate Hazelnut Spread (13 ounces, e.g., Nutella)
- 2 Tablespoons Cocoa Powder
- 1 cup Powdered Sugar, sifted
- 1 container Whipped Topping (8 ounces, e.g., Cool Whip or homemade whipped cream)
For the Topping:
- 1/2 cup Chocolate Hazelnut Spread (for drizzling)
- Whipped Cream (for serving, optional)
Instructions
For the Oreo Crust:
- Crush the Oreo cookies in a food processor until fine crumbs are formed. Alternatively, place them in a Ziploc bag and bash with a rolling pin.
- In a bowl, mix the crushed cookies with the melted unsalted butter until well combined.
- Press the mixture evenly into the bottom and slightly up the sides of a 9-inch pie plate. Use the bottom of a glass cup to ensure it’s firm and smooth.
- Place the prepared crust in the refrigerator to chill while you prepare the filling.
For the Cheesecake Filling:
- In a large mixing bowl, beat together the softened cream cheese and chocolate hazelnut spread with a stand or handheld electric mixer until the mixture is completely smooth and creamy.
- Add the cocoa powder and sifted powdered sugar. Continue to mix until fully combined and the filling is smooth.
- Gently fold in the whipped topping by hand with a rubber spatula until just combined. Be careful not to overmix.
- Pour the cheesecake filling into the chilled Oreo crust, spreading it evenly.
- Cover the pie plate with plastic wrap and refrigerate for at least 4 hours, or ideally overnight, to allow it to set completely.
For Serving:
- Just before serving, gently warm the extra 1/2 cup of chocolate hazelnut spread in the microwave (15-30 seconds) until it’s smooth and pourable. Drizzle it over the top of the chilled cheesecake.
- Decorate the edge of the cheesecake with dollops of whipped cream, if desired.
- Slice, serve, and enjoy your luxurious No Bake Nutella Cheesecake!
Recipe Notes
Store any leftover cheesecake covered in the refrigerator for up to 6-7 days. For freezing, wrap the plain cheesecake tightly in plastic wrap and then foil, and freeze for up to 6 weeks. Thaw overnight in the fridge before serving and adding toppings.
Nutrition Facts
Calories: 529 kcal, Carbohydrates: 51g, Protein: 6g, Fat: 35g, Saturated Fat: 21g, Polyunsaturated Fat: 2g, Monounsaturated Fat: 9g, Trans Fat: 0.2g, Cholesterol: 61mg, Sodium: 283mg, Potassium: 232mg, Fiber: 2g, Sugar: 39g, Vitamin A: 802 IU, Calcium: 86mg, Iron: 5mg
