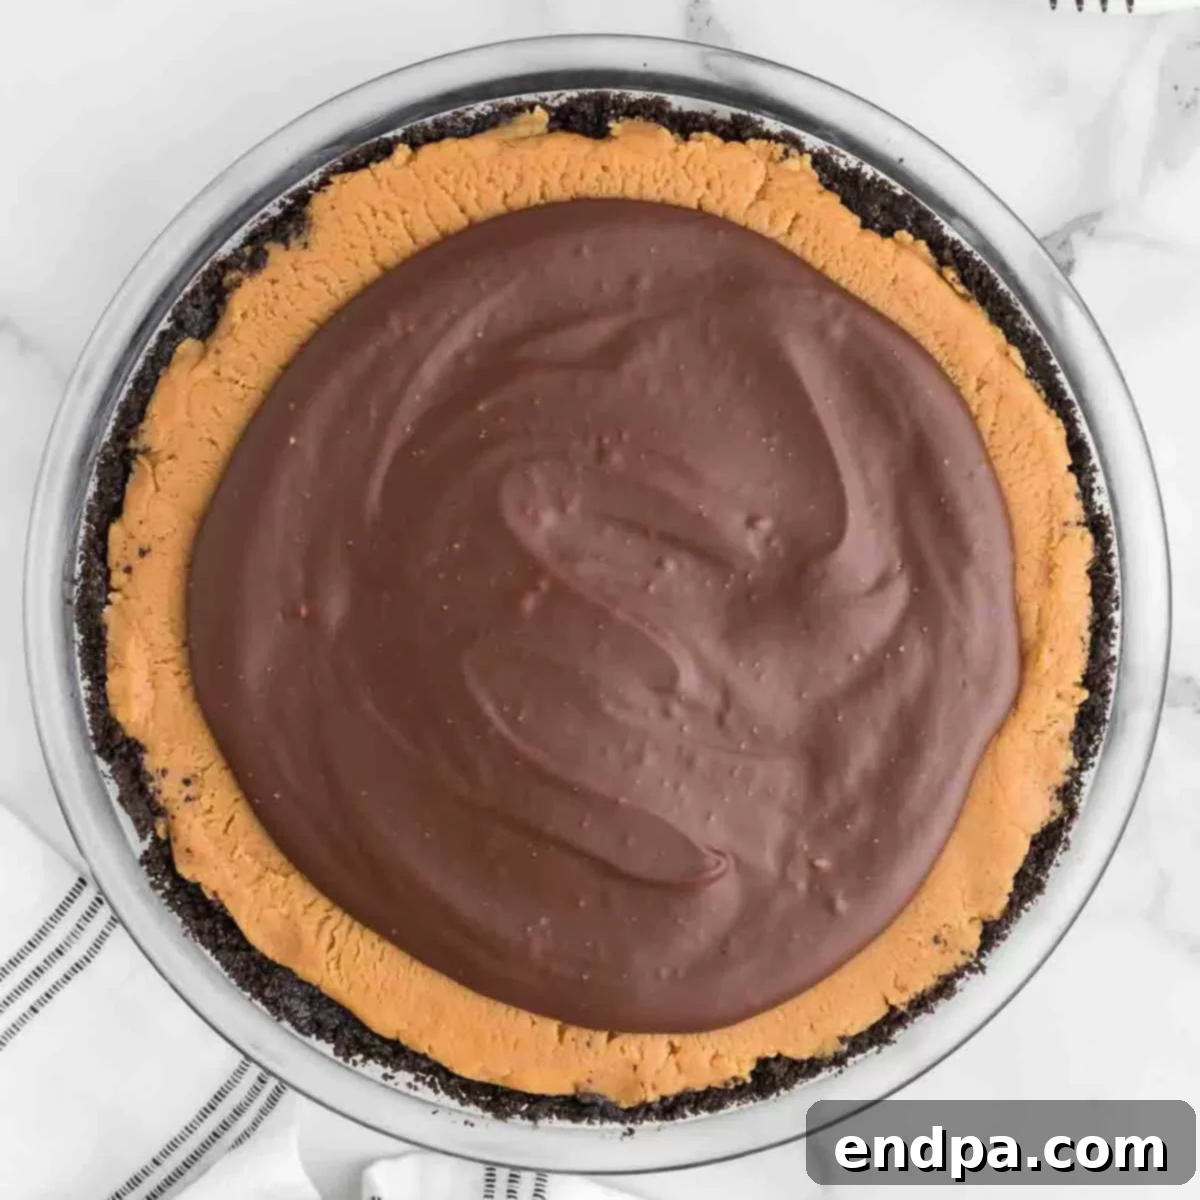
Buckeye Pie is an incredibly easy, no-bake dessert that brilliantly brings together the irresistible combination of creamy peanut butter and rich chocolate. If you’re a devoted fan of the classic Buckeye candies, this pie is an absolute must-try, offering all those beloved flavors in a convenient, utterly delicious, and sliceable form.
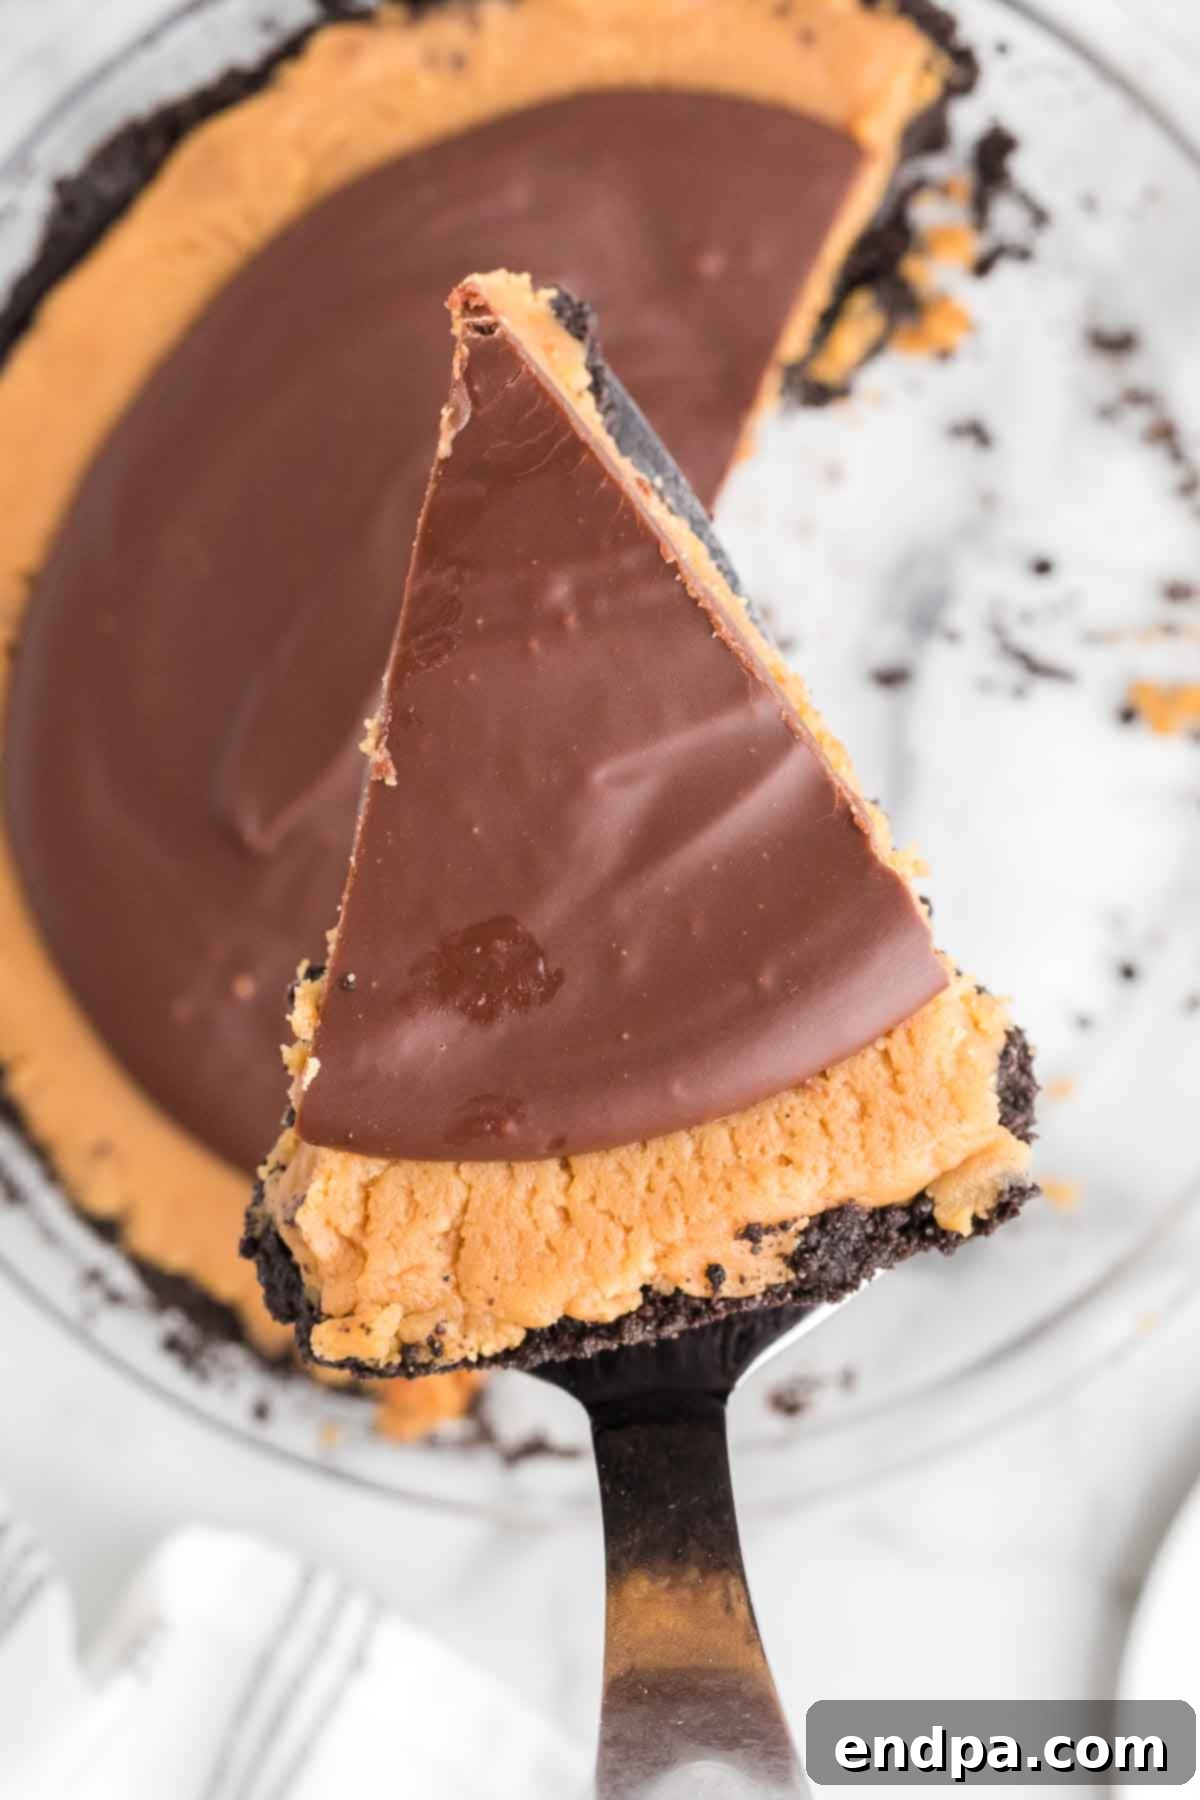
As a busy mother of eight, I’ve discovered that time spent in the kitchen crafting desserts isn’t just about feeding hungry mouths; it’s a cherished family activity. My children absolutely love to get involved, from the excitement of crushing cookies for the crust to the satisfying task of smoothing out the creamy filling. And of course, the highlight for everyone is always savoring the final, delectable creation. This Buckeye Pie recipe has become a treasured family favorite, celebrated for both its simplicity and its phenomenal, universally loved taste.
Pie recipes hold a truly special place in my heart, especially when it comes to celebrating holidays and significant family gatherings. This Buckeye Pie, in particular, is not only remarkably delicious but also boasts a stunning visual appeal that effortlessly makes it a show-stopping centerpiece on any dessert table. Each and every bite delivers a perfect symphony of textures and flavors, from the crunchy base to the smooth, rich layers above. Perhaps the most appealing aspect is how effortlessly it comes together, requiring absolutely no oven time, which makes it a fantastic choice for any skill level.
For those who simply can’t get enough of the classic peanut butter and chocolate pairing, I invite you to explore more delightful “Buckeye” inspired treats. Dive into our Buckeye Brownie Bites, discover the satisfying chewiness of our Buckeye Bars, and savor the scrumptious goodness of our Buckeye Brownie Cookies. These recipes offer even more fantastic ways to enjoy this iconic flavor combination, ensuring there’s a Buckeye treat for every craving.
What’s in this post: Easy No-Bake Buckeye Pie Recipe
- What Exactly Is a Buckeye Pie?
- Why You’ll Adore This No-Bake Buckeye Pie Recipe
- Essential Ingredients for Your Buckeye Pie
- Creative Variations to Customize Your Buckeye Pie
- Step-by-Step: How To Make The Perfect Buckeye Pie
- Expert Recipe Tips for a Flawless Buckeye Pie
- Frequently Asked Questions About Buckeye Pie
- More Irresistible No-Bake Pie Recipes
- Buckeye Pie Recipe Card
What Exactly Is a Buckeye Pie? A Delicious Twist on a Classic Candy
For those unfamiliar, a “Buckeye” refers to a distinctive type of candy immensely popular in Ohio, named specifically after the poisonous nut of the buckeye tree, which it closely resembles. The traditional candy features a creamy, rich peanut butter ball that is meticulously dipped only partially into melted chocolate, intentionally leaving a small, tell-tale circle of the golden peanut butter exposed. This clever design gives it the characteristic appearance of a buckeye nut.
Our Buckeye Pie masterfully captures all the beloved essence and signature flavors of these iconic Buckeye Balls, skillfully translating them into an easy-to-slice, layered dessert that’s perfect for any gathering. While the texture of the pie naturally differs from the bite-sized candy, the harmonious flavor profile is undeniably the same: a profound, satisfying blend of sweet, smooth peanut butter and deep, decadent chocolate, creating a truly irresistible treat. It’s a nostalgic flavor experience reimagined in an exciting new format.
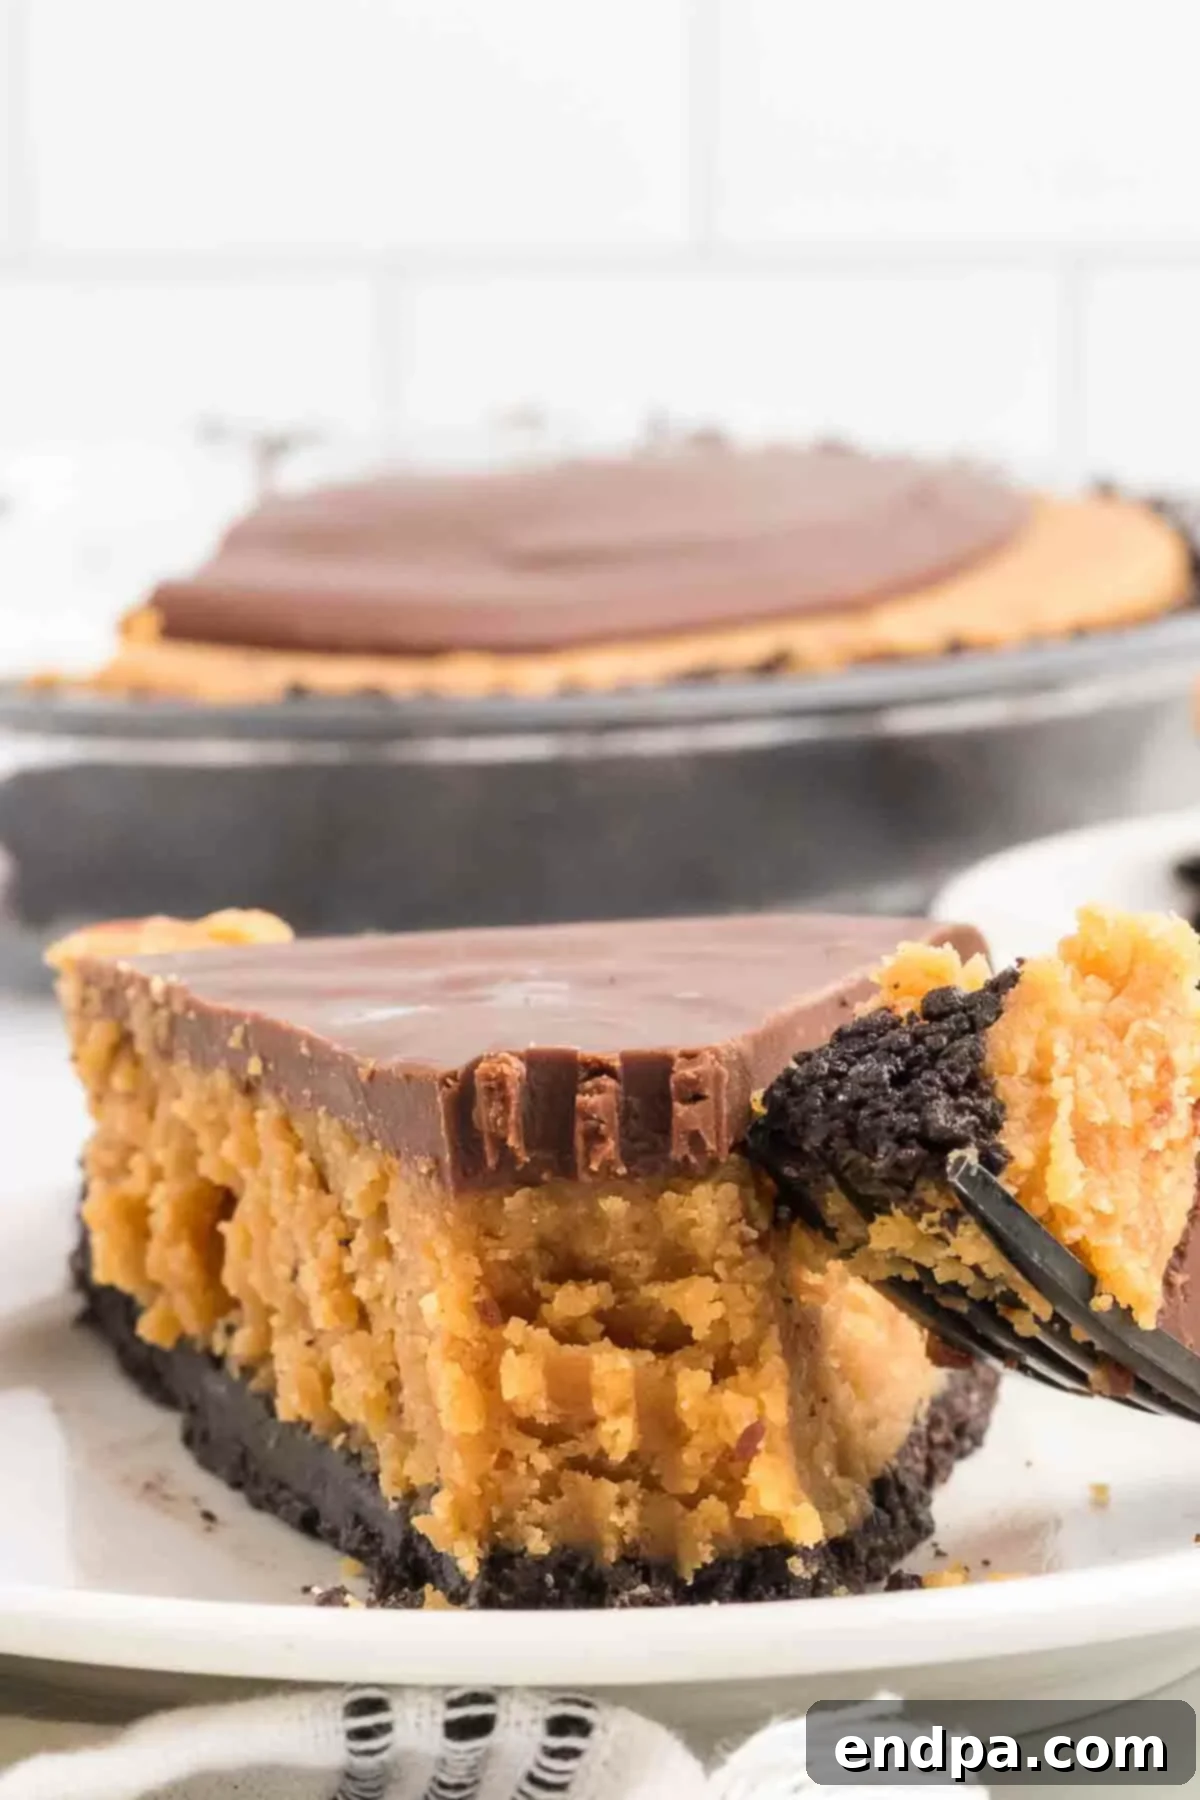
This irresistible Buckeye Pie is thoughtfully constructed on three simple yet sensationally flavorful layers. It begins with a crisp, intensely chocolatey Oreo cookie crust, providing a sturdy and delicious foundation. This is followed by a velvety-smooth peanut butter filling, meticulously crafted to evoke the luscious interior of the classic buckeye candy. Finally, the pie is crowned with a luscious, pourable chocolate ganache topping. The distinctive “buckeye” look is achieved by carefully spreading the chocolate topping so that a prominent rim of the golden peanut butter filling remains elegantly visible around the edge, mirroring the traditional candy. This meticulous attention to detail not only makes the pie visually stunning but also ensures that every single forkful delivers that signature two-tone flavor experience, a delightful combination that tantalizes the taste buds.
Why You’ll Adore This No-Bake Buckeye Pie Recipe
This Buckeye Pie isn’t just another dessert; it’s a testament to how effortless indulgence can be. Here are compelling reasons why this recipe will quickly become a cherished favorite in your household:
- Effortlessly Delicious: The magic of this recipe lies in its simplicity – absolutely no baking required! This pie comes together quickly and easily, making it an ideal choice for both novice bakers seeking a rewarding project and seasoned pros looking for a stress-free yet impressive dessert.
- A Timeless Flavor Combination: The classic pairing of creamy peanut butter and rich chocolate is universally loved and a guaranteed crowd-pleaser. It’s a nostalgic duo that satisfies even the most discerning sweet tooth, bringing joy with every spoonful.
- Perfect for Any Occasion: Whether you’re planning a casual weeknight treat, a festive holiday spread, or a celebratory gathering, Buckeye Pie fits seamlessly into any event. Its beautifully distinct layers and inviting aroma make it an attractive and much-anticipated addition to any dessert table.
- Make-Ahead Friendly: One of the greatest advantages of this no-bake pie is its requirement for ample chill time. This makes it an excellent candidate for preparing a day or even two in advance, allowing you to focus on other tasks and enjoy a less rushed experience on the day of your event.
- A Delightful Family Activity: This recipe is wonderfully kid-friendly! Little helpers can easily assist with various steps, from crushing the Oreo cookies to mixing the creamy filling and even adding decorative touches to the top. It transforms baking into a fun and engaging family activity, creating cherished memories alongside a delicious dessert.
- Rich and Satisfying: Despite its ease, this pie delivers a profoundly rich and satisfying dessert experience. The contrast between the crunchy crust, smooth filling, and firm ganache is simply irresistible, ensuring a truly indulgent treat.
Essential Ingredients for Your Buckeye Pie
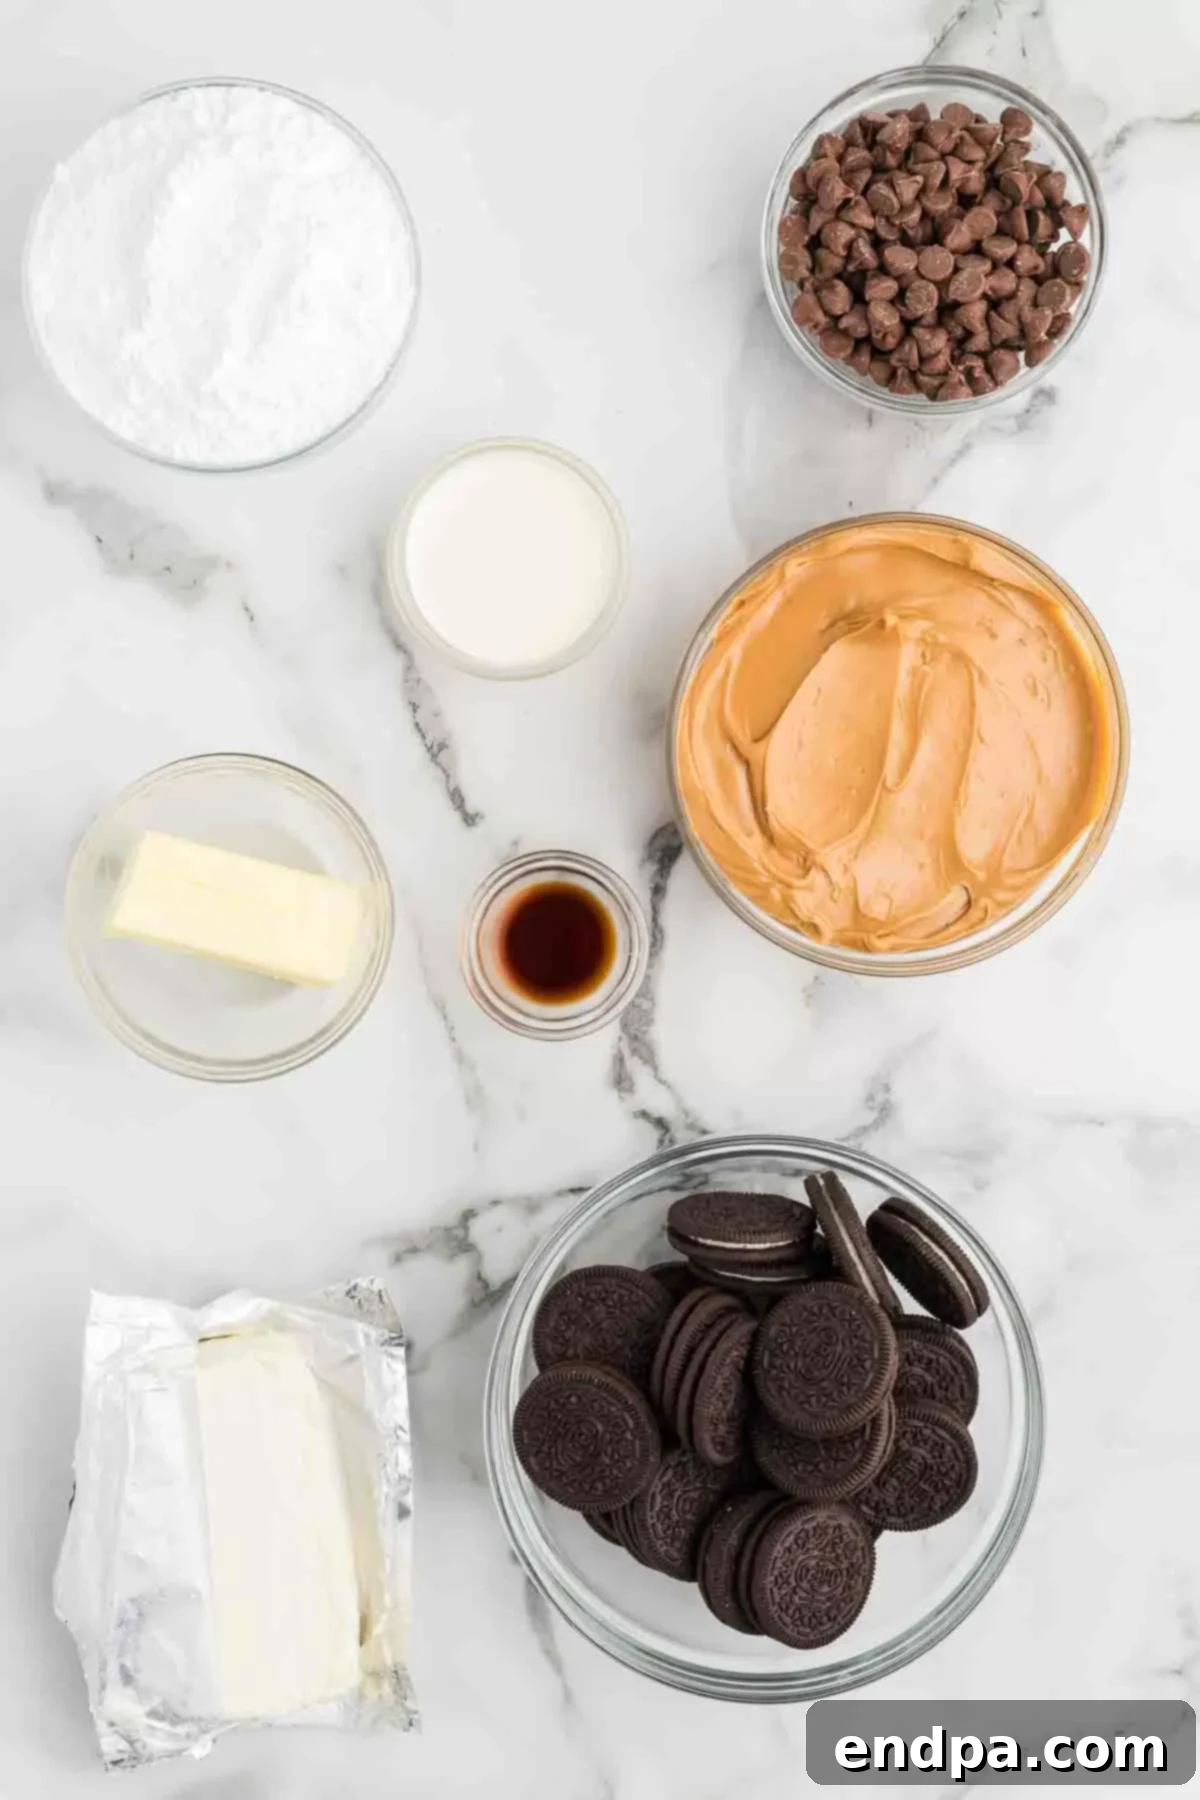
Creating an extraordinary Buckeye Pie starts with selecting the right ingredients. Each component plays a vital role in achieving the perfect balance of flavor and texture. Here’s a closer look at what you’ll need:
For the Rich Oreo Cookie Crust
- Oreo Cookies: We utilize whole Oreos, cream filling and all, for this recipe. When crushed into fine crumbs, they form a wonderfully rich, dark chocolatey base that holds together beautifully. The cream filling contributes essential moisture and a hint of sweetness that perfectly complements the melted butter.
- Unsalted Butter, melted: This crucial ingredient acts as the binding agent for the cookie crumbs, creating a firm, flavorful, and delightfully crunchy crust. Using unsalted butter is recommended as it allows you to precisely control the overall saltiness of your pie, ensuring a perfectly balanced taste that isn’t overly salty.
For the Creamy Peanut Butter Filling
- Cream Cheese (full-fat), softened at room temperature: The absolute secret to achieving a luxuriously smooth, light, and creamy filling is properly softened, full-fat cream cheese. It blends effortlessly, preventing any unwanted lumps and creating that irresistible velvety texture that melts in your mouth. Full-fat cream cheese is essential for optimal consistency and a rich, satisfying flavor.
- Creamy Peanut Butter: The undeniable star of this pie! Choose a good quality, creamy peanut butter (brands like Jif or Skippy work best). It’s crucial to avoid natural peanut butter varieties that separate with oil, as they can significantly alter the texture and stability of your filling. This ensures that classic, rich, nutty flavor that pairs so perfectly with chocolate. A 16 oz jar is typically the ideal amount for this recipe.
- Powdered Sugar (Confectioners’ Sugar): This finely milled sugar sweetens the filling without introducing any gritty texture, ensuring a smooth mouthfeel. Beyond its sweetening role, powdered sugar also plays a critical part in thickening the filling, giving it the perfect consistency to hold its shape beautifully when the pie is sliced.
- Vanilla Extract: A small splash of pure vanilla extract works wonders to enhance all the other flavors within the filling. It adds a subtle warmth, an aromatic depth, and a touch of complexity that elevates the overall taste of the peanut butter layer. Do not skip this essential ingredient!
For the Decadent Chocolate Ganache Topping
- Milk Chocolate Chips: For the most luscious and indulgent ganache, opt for high-quality milk chocolate chips. These will melt smoothly and create a creamy, wonderfully sweet topping that is both rich and satisfying. The quality of your chocolate will directly impact the final taste and luxuriousness of your ganache.
- Heavy Whipping Cream: This rich, high-fat cream is absolutely essential for creating a silky, glossy, and perfectly pourable chocolate ganache that sets beautifully. When heated and combined with the melted chocolate, it emulsifies, resulting in a smooth, irresistible chocolate layer that crowns your pie with elegance.
For the complete ingredient list with precise measurements and any additional notes, please refer to the detailed recipe card conveniently located at the bottom of this post.
Creative Variations to Customize Your Buckeye Pie
While the classic Buckeye Pie is a masterpiece of flavor on its own, don’t hesitate to unleash your inner pastry chef and get creative! This recipe is incredibly versatile, allowing for numerous delicious variations to make this dessert uniquely yours, or to simply enjoy a new twist. Here are some fantastic ideas to inspire you:
- Crust Adventures: Experiment with Your Base!
- Chocolate Graham Crackers: For a slightly different chocolate flavor profile and a lighter texture, easily substitute crushed chocolate graham crackers for the Oreos.
- Pretzel Crust: For a delightful sweet and salty contrast that truly tantalizes the taste buds, consider a crushed pretzel crust. Simply mix crushed pretzels with melted butter and a small amount of sugar.
- Vanilla Wafer Crust: A crushed vanilla wafer crust can offer a buttery, subtly sweet base that provides a wonderful complement to the robust flavors of peanut butter and chocolate.
- Store-Bought Crust: When time is of the essence, a pre-made chocolate or graham cracker crust from your local grocery store works absolutely perfectly and saves you a significant step in the preparation process.
- Topping Temptations: Elevate Your Ganache!
- Extra Chocolaty Drizzles: For an elegant visual and a complementary flavor, drizzle your finished chocolate ganache with melted white chocolate or even a darker chocolate before it fully sets.
- Candy Crush Delights: Generously sprinkle crushed candy bars (such as Reese’s Peanut Butter Cups, Snickers, or mini M&M’s) over the chocolate ganache while it’s still warm and soft, ensuring they adhere beautifully.
- Colorful Sprinkles: Add a festive touch with colorful sprinkles, perfect for birthdays, holidays, or any celebratory occasion.
- Nutty Crunch Factor: Introduce a pleasant textural contrast by sprinkling finely chopped peanuts, pecans, or walnuts over the chocolate topping.
- Flaky Sea Salt: A delicate sprinkle of flaky sea salt on top of the chocolate ganache can miraculously enhance both the chocolate and peanut butter flavors, creating a gourmet touch.
- Mini Peanut Butter Cups: Arrange mini peanut butter cups decoratively around the edge of the chocolate topping for an extra dose of deliciousness and an incredibly appealing look.
- Peanut Butter Perks: Creative Filling Enhancements!
- Crunchy Peanut Butter: If you love a bit of texture in your filling, you can certainly use crunchy peanut butter. Be aware, however, that this will alter the classically smooth buckeye texture.
- Chocolate Swirl Effect: For a beautiful marbled appearance, swirl a small amount of melted chocolate (about 1/4 cup) into the peanut butter filling just before pouring it into the crust.
Step-by-Step: How To Make The Perfect Buckeye Pie
Creating this stunning no-bake Buckeye Pie is simpler than you might imagine. With a few key steps and a little patience for chilling, you’ll have a dessert that looks and tastes like it came from a professional bakery. Follow these detailed instructions for a perfect result every time!
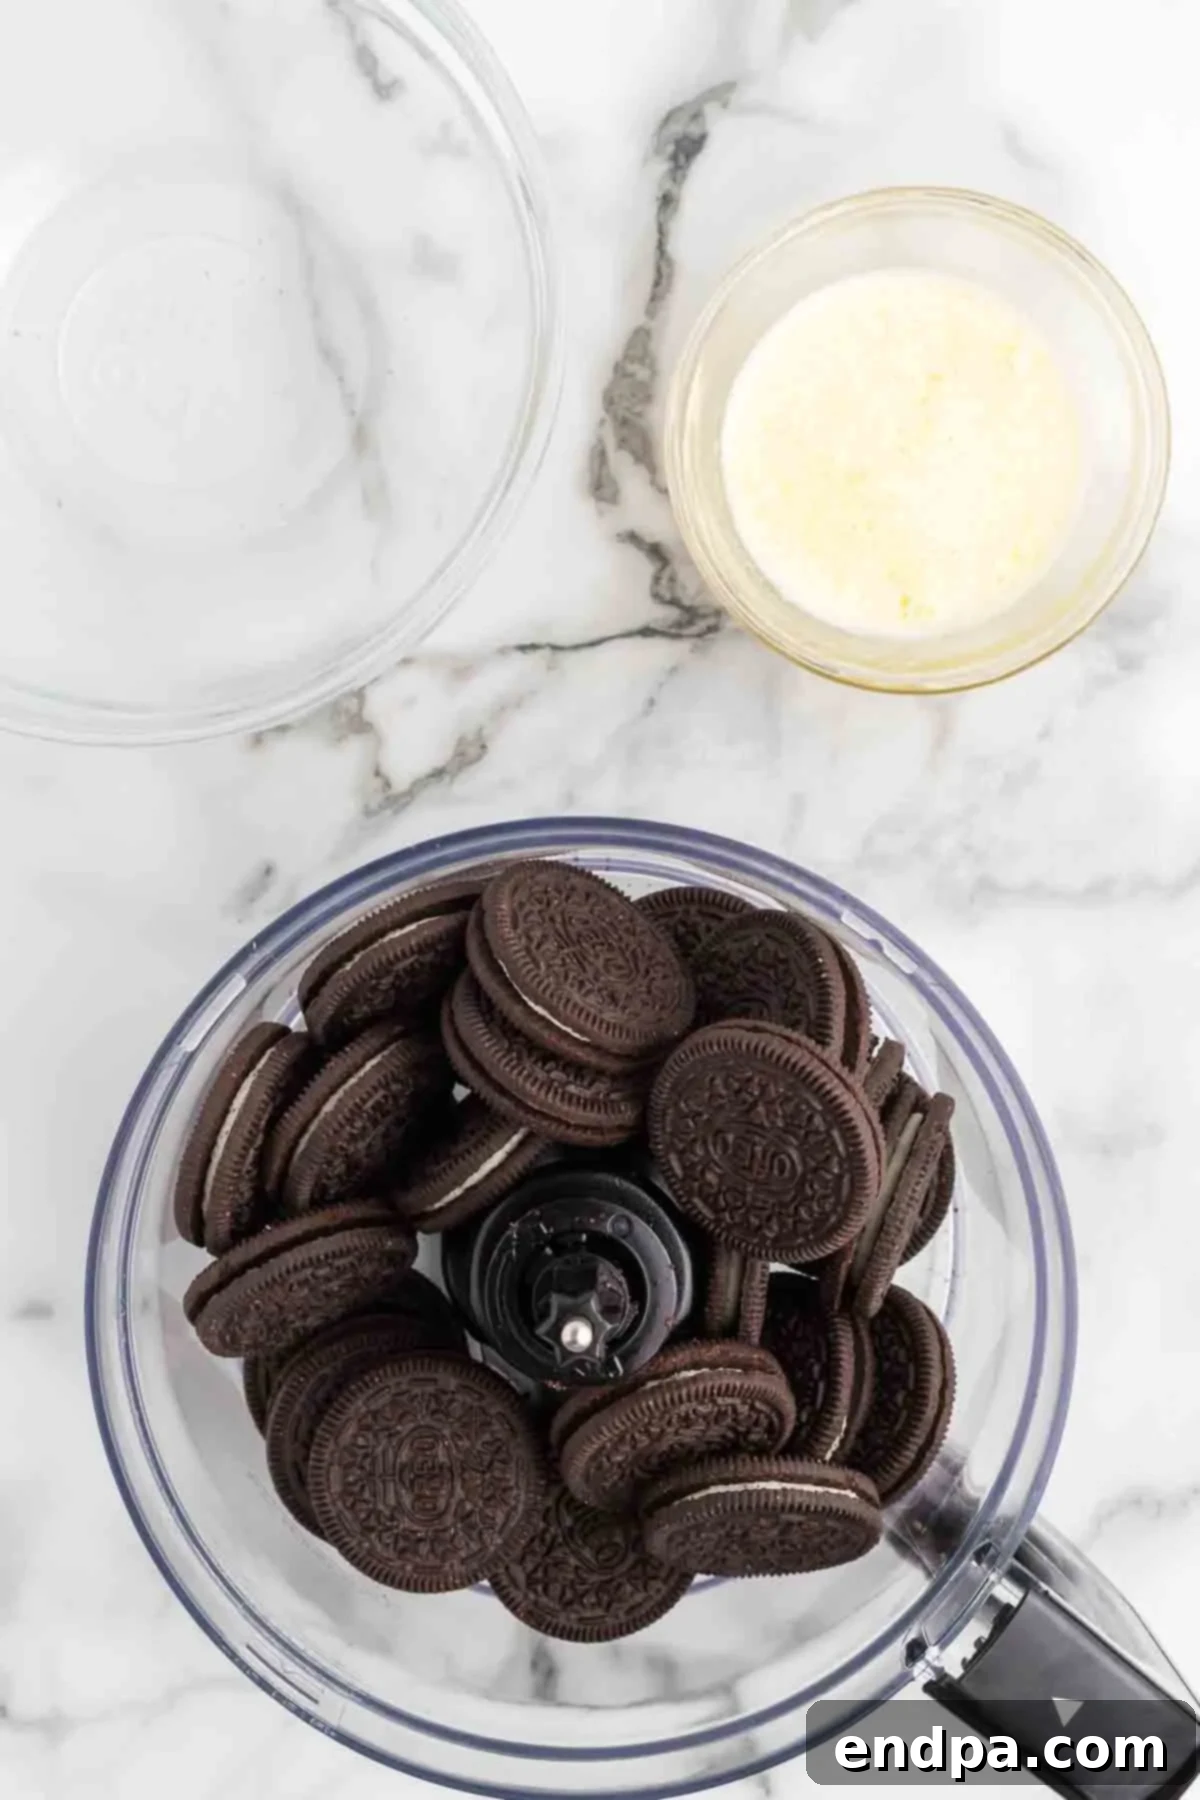
Step 1: Prepare the Oreo Crust. Begin by crushing your Oreo cookies into very fine crumbs. The easiest and most efficient way to achieve a consistent texture is by using a food processor. Simply pulse the cookies until they resemble fine sand. If you don’t have a food processor, place the cookies in a large, sturdy Ziploc bag, seal it securely (removing as much air as possible), and use a rolling pin or the bottom of a heavy pan to bash them until they are finely crushed. The finer the crumbs, the more compact and stable your pie crust will be.
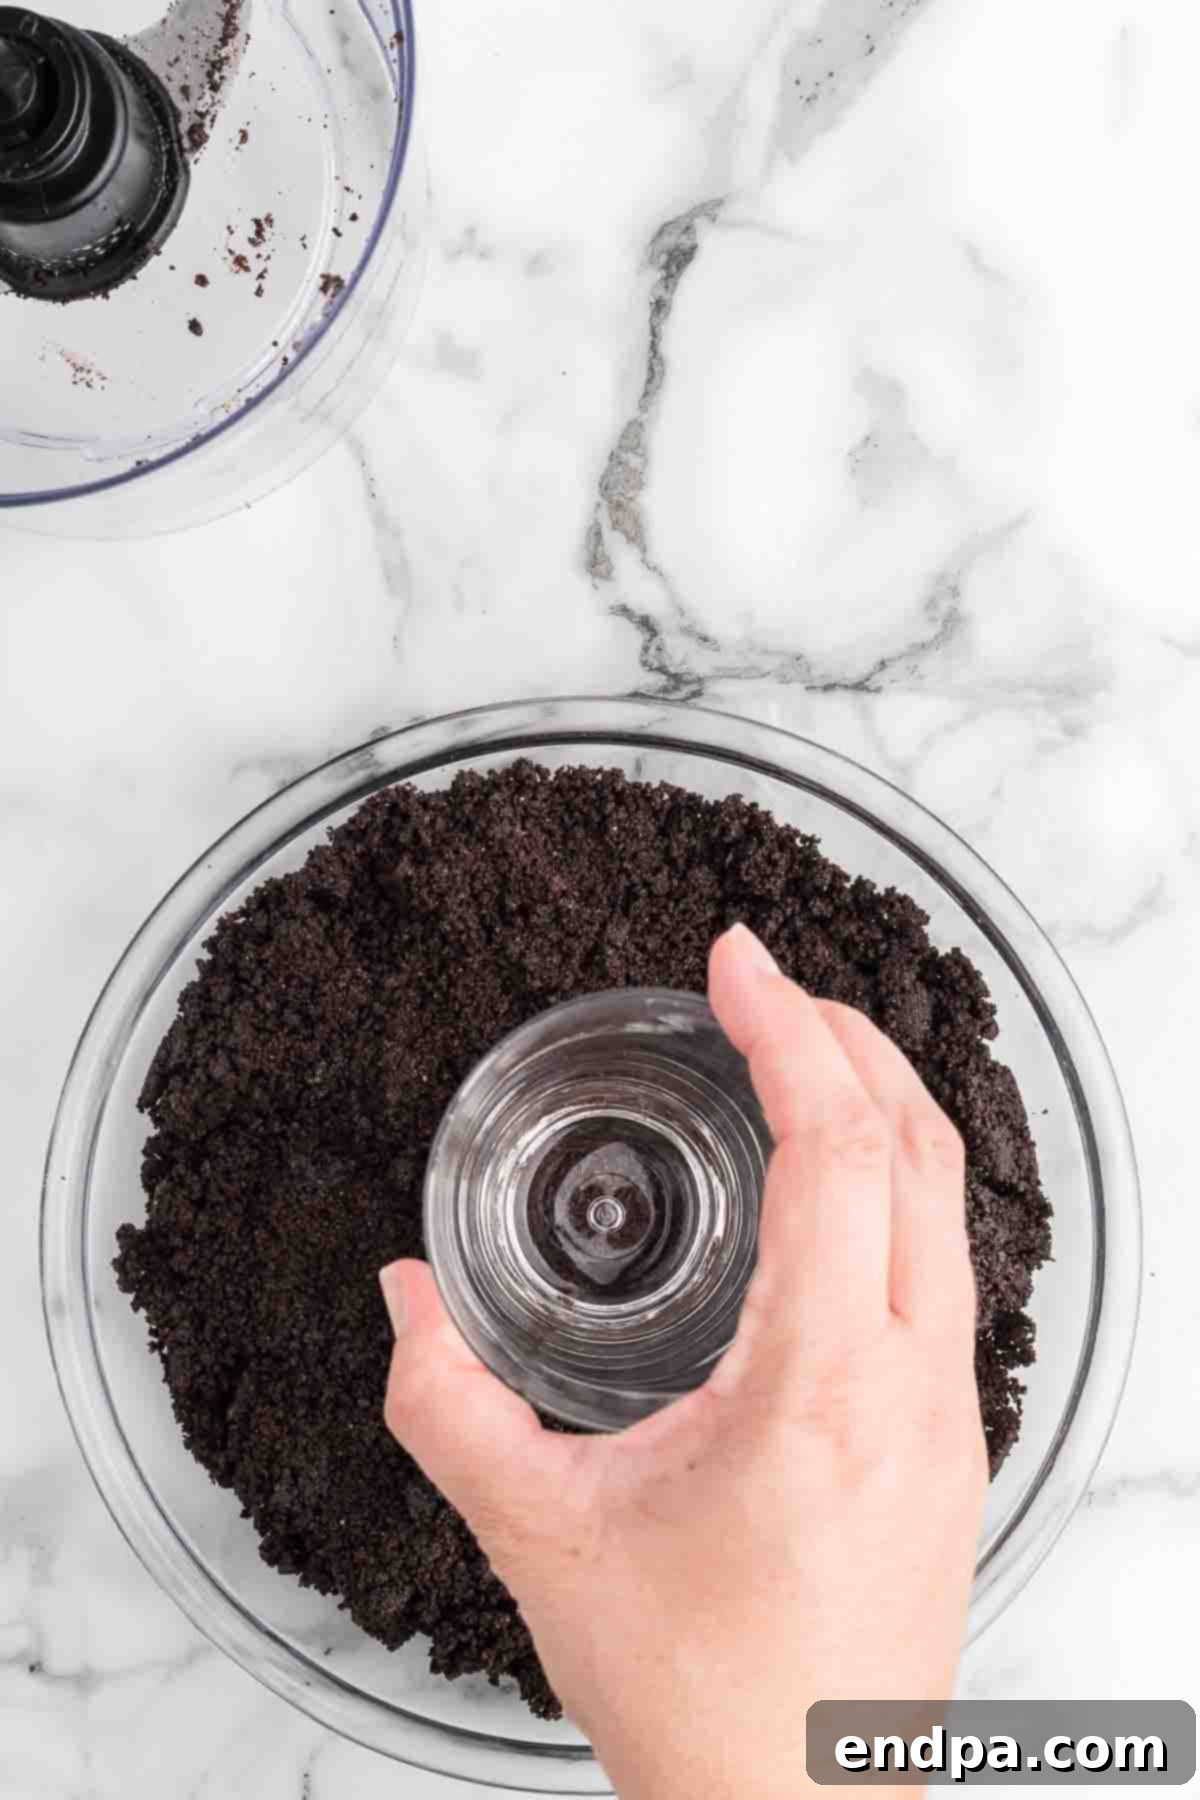
Step 2: Form and Chill the Crust. In a medium-sized mixing bowl, combine the finely crushed Oreo crumbs with the melted unsalted butter. Mix these ingredients thoroughly until all the crumbs are evenly moistened and have the consistency of wet sand. Transfer this mixture to a 9-inch pie plate. Using the bottom of a flat-bottomed glass, a measuring cup, or your fingers, press the mixture firmly and evenly into the bottom and up the sides of the pie plate. This compaction is essential for a crust that holds its shape. Once formed, place the prepared crust in the refrigerator to chill and firm up while you proceed with preparing the filling.
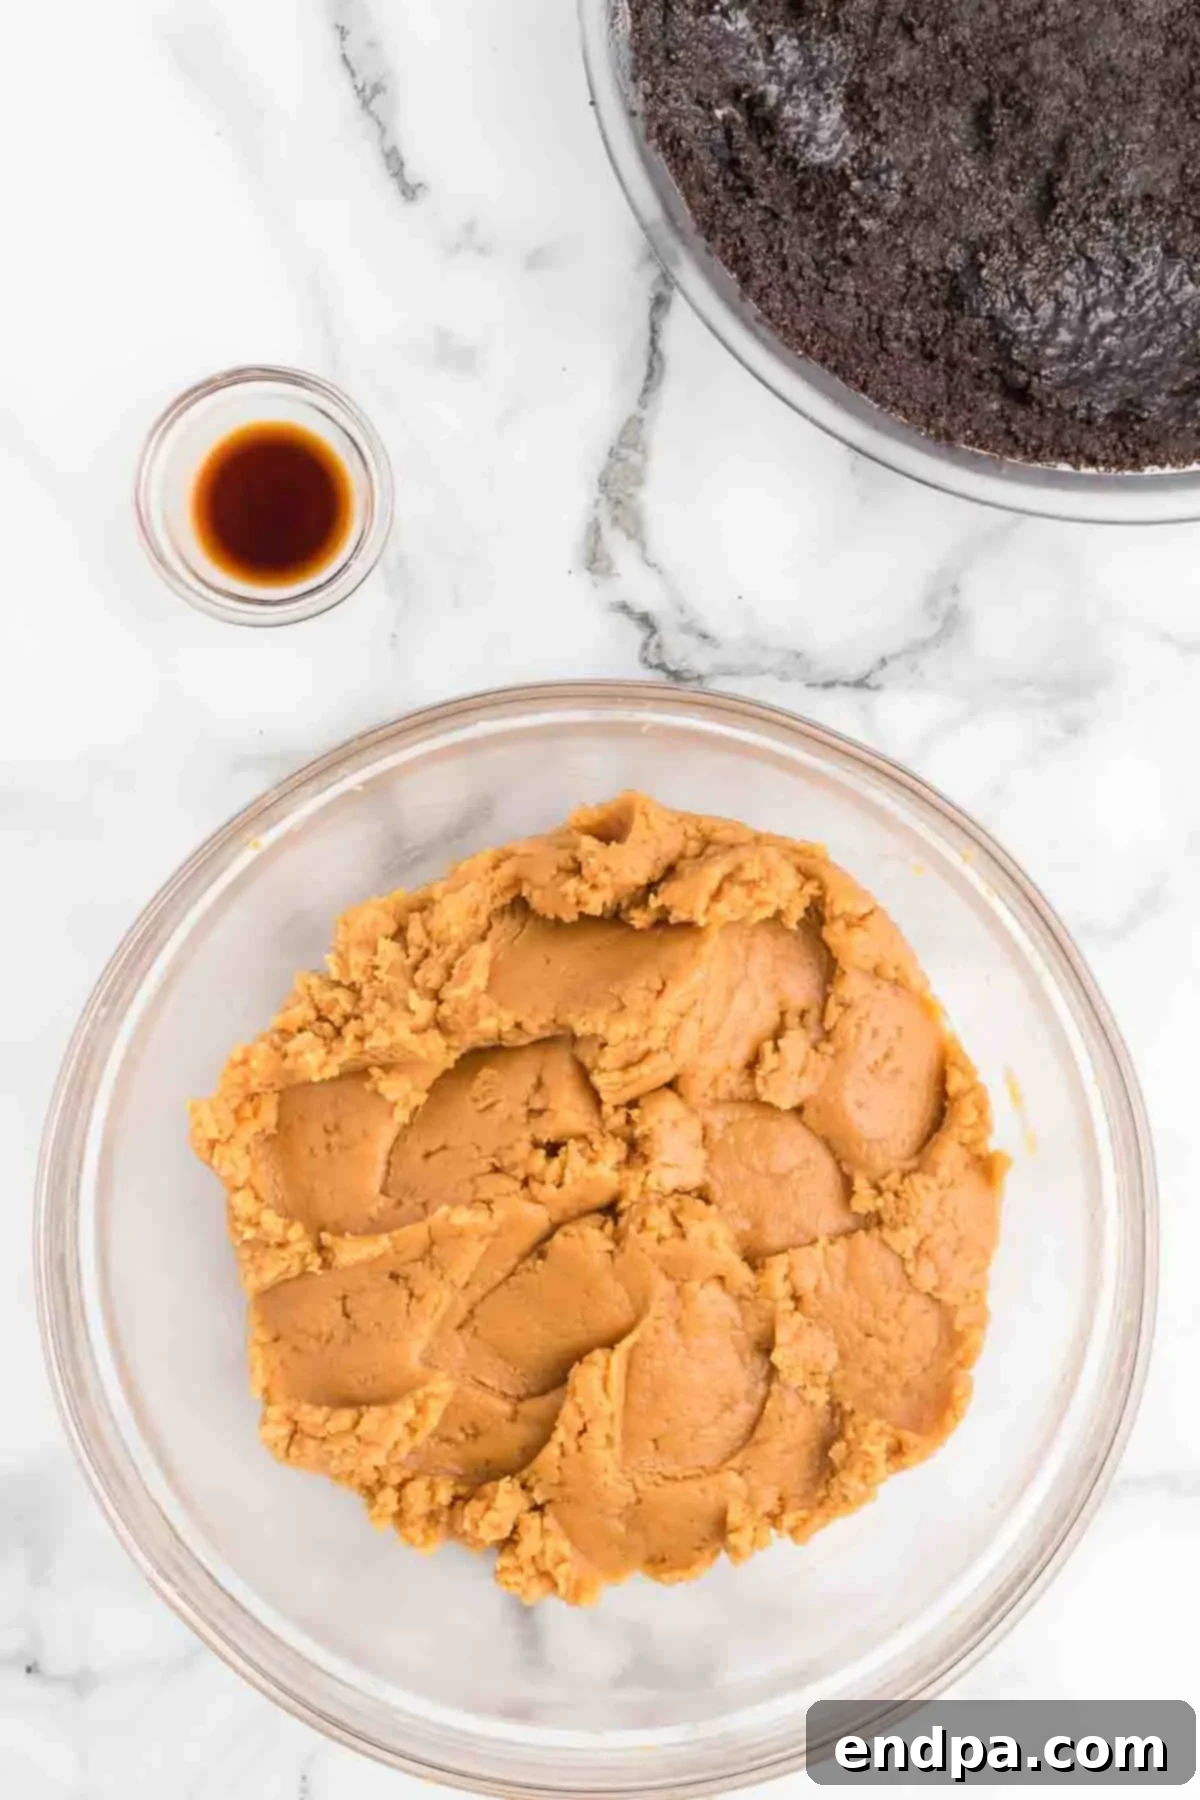
Step 3: Prepare the Peanut Butter Filling. In a large mixing bowl, using an electric mixer, beat the softened cream cheese until it is light, fluffy, and completely creamy, ensuring there are absolutely no lumps. Add the creamy peanut butter to the bowl and continue to beat until both ingredients are thoroughly combined and the mixture is smooth. Gradually, and slowly, add the powdered sugar, one cup at a time, mixing well after each addition until it is fully incorporated and the filling becomes thick, luscious, and holds its shape. Finally, mix in the vanilla extract until just combined. Be careful not to overmix the filling at this stage, as it can incorporate too much air.
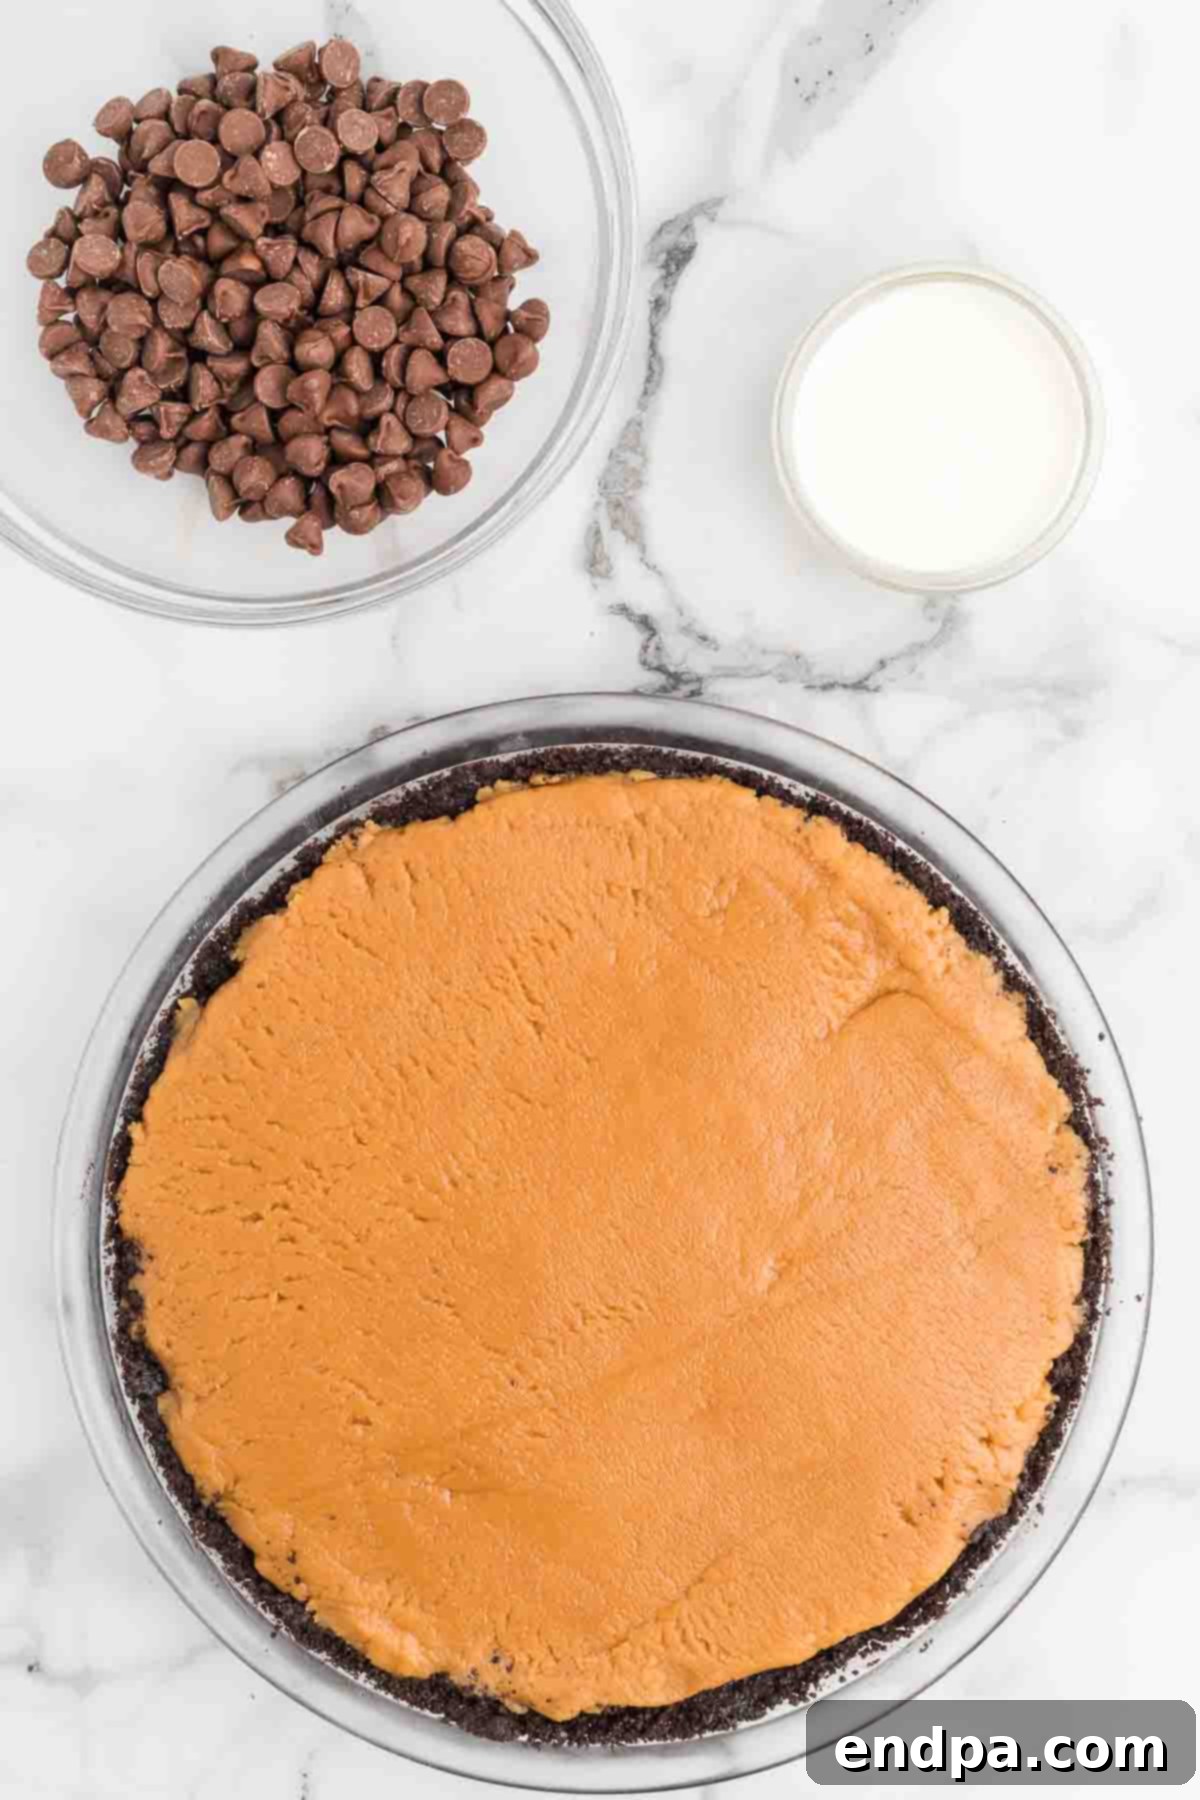
Step 4: Assemble the Peanut Butter Layer. Once the peanut butter filling is prepared, carefully spoon it into the chilled Oreo cookie crust. Use an offset spatula or the back of a spoon to gently smooth the filling out into an even layer, ensuring it extends all the way to the edges of the crust. Strive for a surface that is as flat and uniform as possible, as this will serve as the base for your chocolate topping. Return the pie to the refrigerator to keep it cool while you prepare the decadent chocolate ganache.
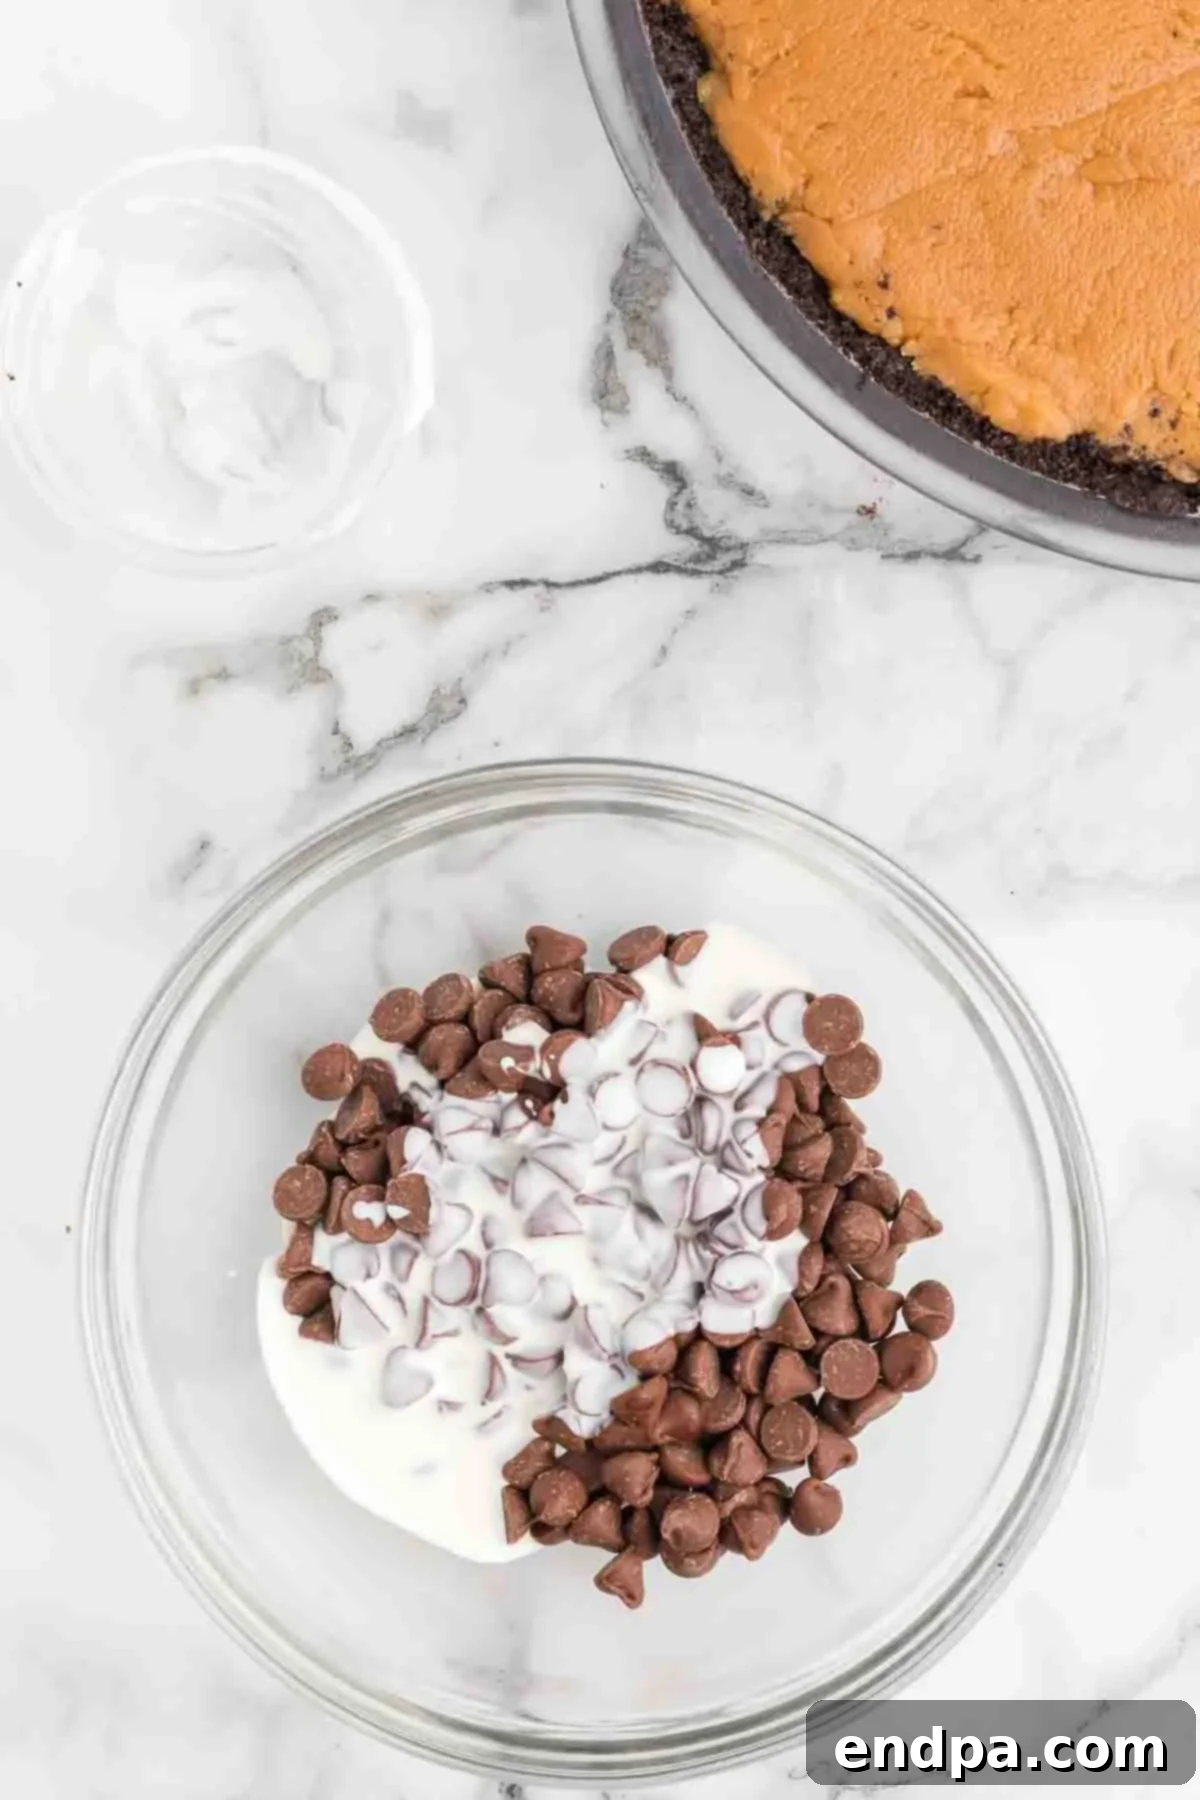
Step 5: Make the Chocolate Ganache. In a medium microwave-safe bowl, combine your selected milk chocolate chips and the heavy whipping cream. Microwave this mixture in short 30-second intervals. After each interval, remove the bowl and stir the contents thoroughly with a spoon. Continue this process until the chocolate is completely melted, smooth, glossy, and perfectly combined with the cream. It is crucial to be cautious and avoid overheating the chocolate, as it can burn very quickly and become unusable. Alternatively, you can opt to melt the chocolate and cream over a double boiler for a more controlled and gentle melting process.
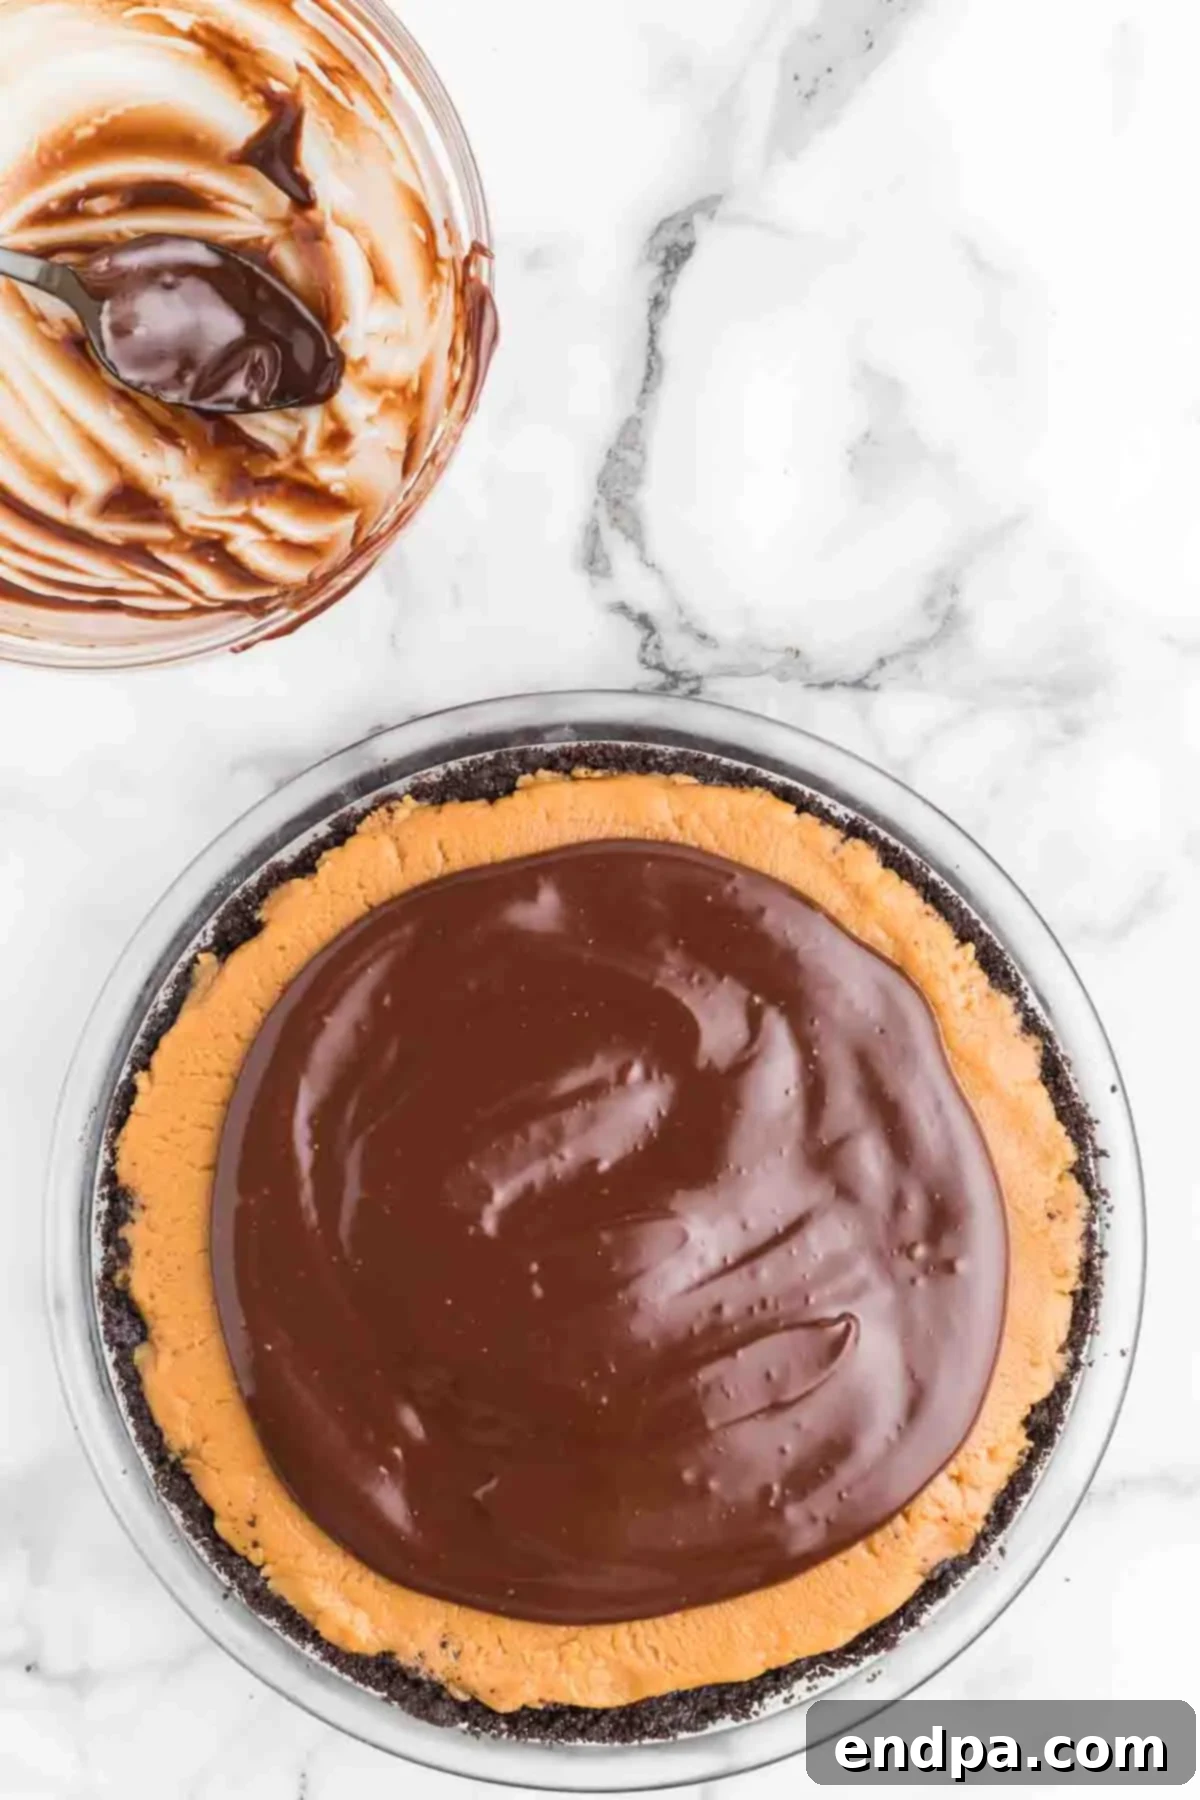
Step 6: Add the Chocolate Topping and Chill. Allow the chocolate ganache to cool for a few minutes until it’s still easily pourable but no longer hot to the touch. Carefully spoon the ganache into the very center of the peanut butter filling. Gently and slowly spread the chocolate outwards in a circular motion, ensuring you leave a distinct, visible border of the golden peanut butter layer exposed around the edges. This thoughtful step creates the signature “buckeye” look that makes this pie so recognizable and appealing. Once the chocolate topping is evenly spread, immediately transfer the pie to the refrigerator. It needs to chill for a minimum of 6 hours, but for the very best results, allowing it to set overnight is highly recommended. This crucial chilling time ensures all the layers are fully set and firm, making for clean, beautiful slices. Then, the pie is ready to be sliced, served, and thoroughly enjoyed!
Expert Recipe Tips for a Flawless Buckeye Pie
Achieving a perfect Buckeye Pie that’s as delicious as it is beautiful is surprisingly straightforward, especially when you keep these expert tips in mind. They’ll help you navigate each step with confidence and ensure your dessert is a resounding success:
- Embrace the Buckeye Signature Look: When you’re carefully pouring and spreading the chocolate ganache over the peanut butter layer, consciously ensure that you leave a visible border of the golden peanut butter filling exposed around the perimeter. This iconic design is what gives your pie its traditional “buckeye” appearance, making it instantly recognizable and even more appealing.
- The Importance of Full-Fat Cream Cheese: Always, without exception, opt for full-fat cream cheese for this recipe. Reduced-fat versions contain a higher water content and less fat, which can unfortunately lead to a less creamy, potentially runnier filling that won’t set as beautifully or maintain its structure as well as desired.
- Room Temperature Ingredients are Non-Negotiable: It is absolutely crucial that your cream cheese (and the butter for the crust, if not melted) is properly softened to room temperature before you begin mixing. This seemingly small detail is vital for achieving a smooth, wonderfully lump-free peanut butter filling that blends effortlessly. Attempting to mix cold ingredients will result in a clumpy, uneven texture.
- Choose the Right Peanut Butter: For optimal results and the classic smooth buckeye filling, stick to regular creamy peanut butter (such as Jif or Skippy). Avoid using all-natural peanut butter varieties that typically separate with a layer of oil on top. These natural options have a different consistency and can cause the filling to separate or not mix thoroughly with the cream cheese, leading to a less stable and less desirable texture.
- Gentle Chocolate Melting is Key: When you’re melting your chocolate chips and heavy cream for the ganache, employ a gentle approach. Use short microwave intervals (no more than 30 seconds at a time) and stir thoroughly after each. Chocolate can scorch or burn very quickly if overheated, which will irreparably ruin its smooth texture and rich flavor. Low and slow is always the safest and most effective method here.
- Patience is a Virtue – Respect the Chill Time: This is arguably the single most important tip for a successful Buckeye Pie! The pie absolutely needs to be refrigerated for a minimum of 6 hours. However, for the best, cleanest slices and fully set, firm layers, allowing it to chill overnight is highly recommended. Rushing this crucial step will inevitably result in a messy, difficult-to-slice pie with unset layers.
- Achieve Perfect Slices: For impeccably clean and easier cutting, allow your thoroughly chilled pie to sit at room temperature for approximately 15 minutes before you attempt to slice it. This brief warming period slightly softens the chocolate ganache, making it much easier to cut through cleanly. For the tidiest presentation, use a very sharp knife that has been dipped in hot water and wiped clean between each slice.
- Crushing Cookies Without a Food Processor: If you don’t own a food processor, fret not! Simply place your Oreo cookies in a sturdy freezer bag (like a heavy-duty Ziploc bag) and seal it tightly, expelling as much air as possible. Then, use a rolling pin, the flat side of a meat mallet, or even the bottom of a heavy skillet to firmly smash the cookies until they are reduced to fine, uniform crumbs.
- Invest in Quality Chocolate: Since the rich chocolate ganache forms such a prominent and delightful flavor layer in this pie, opting for good quality milk chocolate chips will genuinely elevate the overall taste of your dessert. You will undoubtedly notice the difference in the richness, smoothness, and luxuriousness of the topping.
- Consider a Springform Pan for Presentation: For a truly stunning and professional presentation, especially if your goal is to remove the entire pie from the pan before slicing, consider using a 9-inch springform pan for your crust. This makes for effortless release and a beautiful display.
Frequently Asked Questions About Buckeye Pie
Here are some common questions about making and storing your Buckeye Pie to ensure you have all the information you need for success:
To maintain the freshness and deliciousness of your Buckeye Pie, ensure it is properly covered. You can wrap the entire pie tightly with plastic wrap, or if you prefer, transfer individual slices to an airtight container. Stored this way, it will remain wonderfully fresh and enjoyable in the refrigerator for up to 5 days. For optimal freshness and to prevent the absorption of other refrigerator odors, a dedicated pie storage container is an excellent option.
Absolutely! This Buckeye Pie is not only perfect for preparing ahead of time but actually benefits greatly from it. This characteristic makes it an ideal dessert choice for reducing stress, especially when you’re entertaining guests or managing a busy holiday season. Since the pie requires a significant chilling period to fully set and firm up, I highly recommend preparing it the night before you plan to serve it. This ensures it’s perfectly solid, easy to slice, and at its peak deliciousness when it’s time to enjoy.
Yes, for extended storage, this delightful dessert freezes beautifully. To freeze, wrap the entire pie (or individual slices) meticulously in several layers of plastic wrap, followed by an additional protective layer of aluminum foil. Then, place it in a freezer-safe container or a heavy-duty freezer bag to prevent freezer burn. It will maintain its quality and delicious flavor for 1 to 2 months. When you’re ready to enjoy it, simply thaw the pie in the refrigerator for several hours or preferably overnight until it has softened to the desired consistency.
More Irresistible No-Bake Pie Recipes You’ll Love
If you thoroughly enjoyed the simplicity and incredible flavor of this Buckeye Pie, you’re in for a treat! We’ve gathered some of our other favorite easy no-bake delights that are sure to satisfy your sweet cravings with minimal effort:
- Decadent No-Bake Nutella Pie: A rich, creamy pie perfect for hazelnut chocolate lovers.
- Easy No-Bake Salted Caramel Pie: A delightful blend of sweet and salty, surprisingly simple to make.
- Classic No-Bake Oreo Pie Recipe: An all-time favorite that celebrates the beloved Oreo cookie in every bite.
- Simple No-Bake Hershey Pie: Pure chocolate bliss in a super easy, no-bake format.
- Creamy Oreo Pudding Pie Recipe: Layers of creamy pudding and crushed Oreos make for a dreamy, simple dessert.
We truly appreciate your feedback! If you try this delightful Buckeye Pie Recipe, please consider leaving a comment below to share your experience and rating. Your insights help our community of bakers, and we love hearing from you. Happy baking!
Buckeye Pie
4.85 from 148 votes
This easy no-bake Buckeye Pie perfectly blends creamy peanut butter and rich chocolate in a decadent dessert. A must-try for buckeye candy lovers, it’s simple to make and impressive to serve!
Prep Time: 20 mins
Chill Time: 6 hrs
Total Time: 6 hrs 20 mins
Servings: 8
Cuisine: American
Course: Dessert
Calories: 901 kcal
Author: Carrie Barnard
Ingredients
FOR THE CRUST:
- 25 Oreo Cookies
- 5 Tablespoons Unsalted Butter, melted
FOR THE PIE FILLING & TOPPING:
- 8 oz Cream Cheese, softened at room temperature
- 1 jar Creamy Peanut Butter (16 oz)
- 2 cups Powdered Sugar
- 1 tsp Vanilla Extract
- 5 oz Milk Chocolate Chips
- 3 Tablespoons Heavy Whipping Cream
Instructions
FOR THE CRUST:
- Crush the Oreo cookies in a food processor or place them in a Ziploc bag and bash with a rolling pin until fine crumbs are formed.
- Mix the crushed cookies with melted butter until well combined.
- Press the mixture firmly into the bottom and up the sides of a 9-inch pie plate. A flat-bottomed glass cup works well for this.
- Place the crust in the fridge to chill while you prepare the filling.
FOR THE PIE FILLING & TOPPING:
- Beat the softened cream cheese in a large mixing bowl until creamy and smooth.
- Mix in the creamy peanut butter until thoroughly combined. Then, slowly add the powdered sugar, 1 cup at a time, mixing until fully incorporated and lump-free.
- Stir in the vanilla extract until just combined. Pour the peanut butter mixture into the chilled pie crust and smooth it out into an even layer.
- In a medium microwave-safe bowl, combine the milk chocolate chips and heavy whipping cream. Microwave in 30-second intervals, stirring after each until the chocolate is completely melted and smooth.
- Spoon the melted chocolate ganache into the center of the pie, then carefully smooth it out into a circle, leaving a visible border of the peanut butter layer around the edges.
- Refrigerate the pie for at least 6 hours (or preferably overnight) to allow all layers to set completely. Once chilled, the pie is ready to slice, serve, and enjoy!
Recipe Notes
- For the traditional buckeye look, leave a visible border of the peanut butter layer around the edges of the chocolate ganache topping.
- Store any leftovers, covered tightly, in the refrigerator for up to 5 days.
- Always use full-fat cream cheese, and ensure it’s softened to room temperature to prevent lumps in your pie filling.
- Avoid using all-natural peanut butter for this recipe, as its tendency to separate can affect the consistency and stability of the filling.
Nutrition Facts (per serving)
Calories: 901 kcal, Carbohydrates: 83g, Protein: 18g, Fat: 59g, Saturated Fat: 22g, Polyunsaturated Fat: 9g, Monounsaturated Fat: 23g, Trans Fat: 0.3g, Cholesterol: 56mg, Sodium: 493mg, Potassium: 454mg, Fiber: 4g, Sugar: 63g, Vitamin A: 723IU, Vitamin C: 0.1mg, Calcium: 90mg, Iron: 6mg
Pin This Recipe Now to Remember It Later!
Pin Recipe
