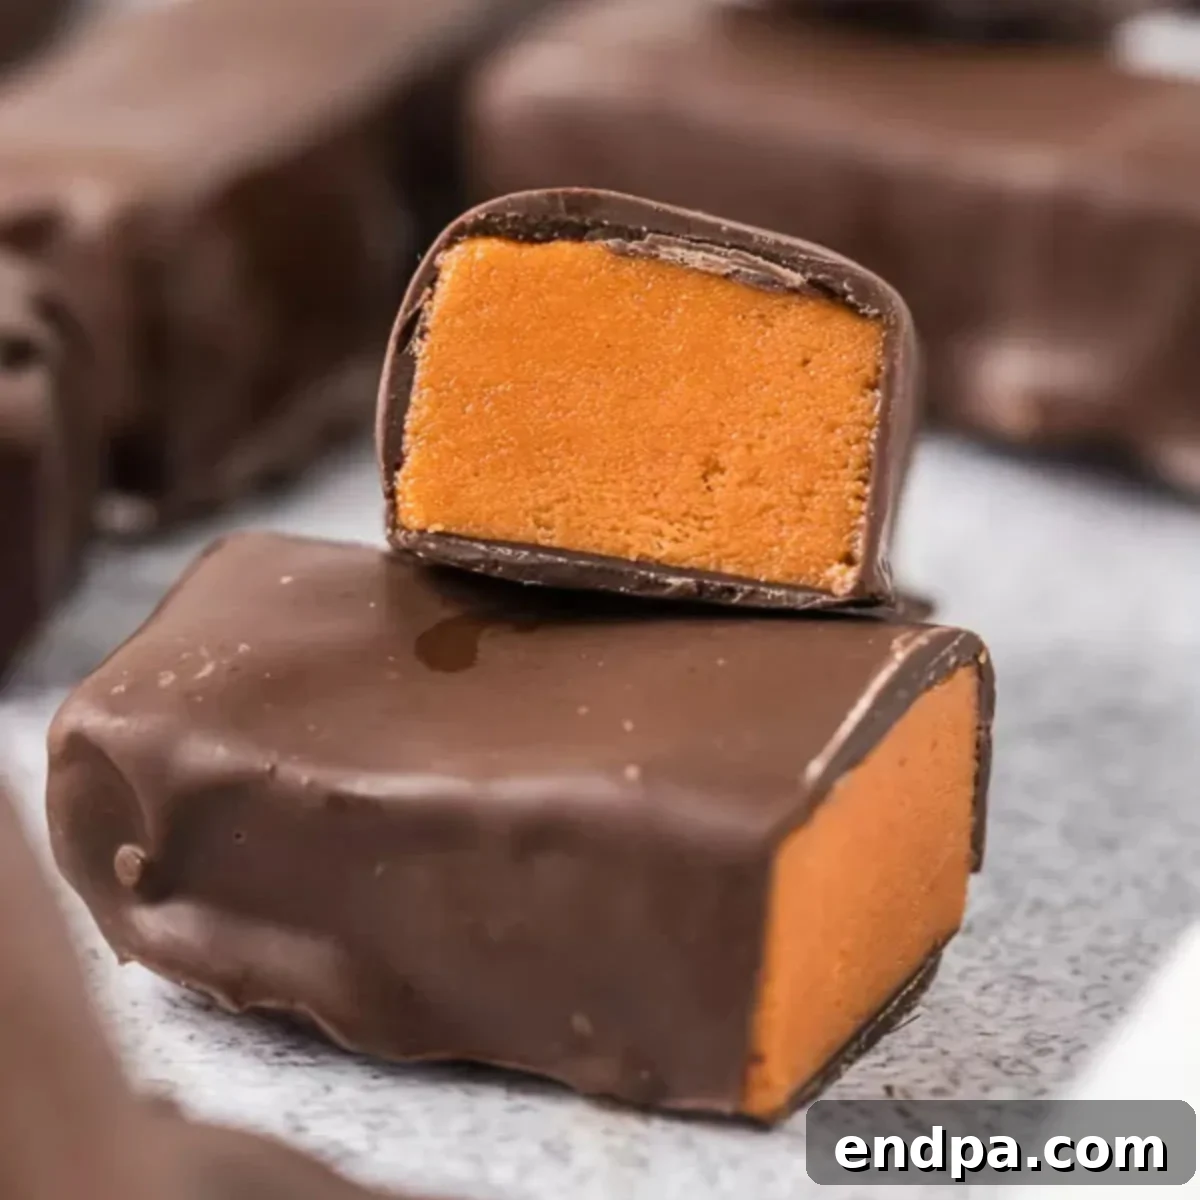
Craving that distinctive crunch and rich flavor of a Butterfinger candy bar? Look no further! This ultimate guide reveals how to make unbelievably easy homemade Butterfingers right in your kitchen. With a minimalist approach requiring only three simple ingredients, you can recreate this iconic treat that’s both decadently rich and delightfully satisfying. Forget complex candy thermometers or lengthy baking processes – this recipe is designed for anyone to master, promising a real treat for your sweet tooth and a fun project for the whole family.
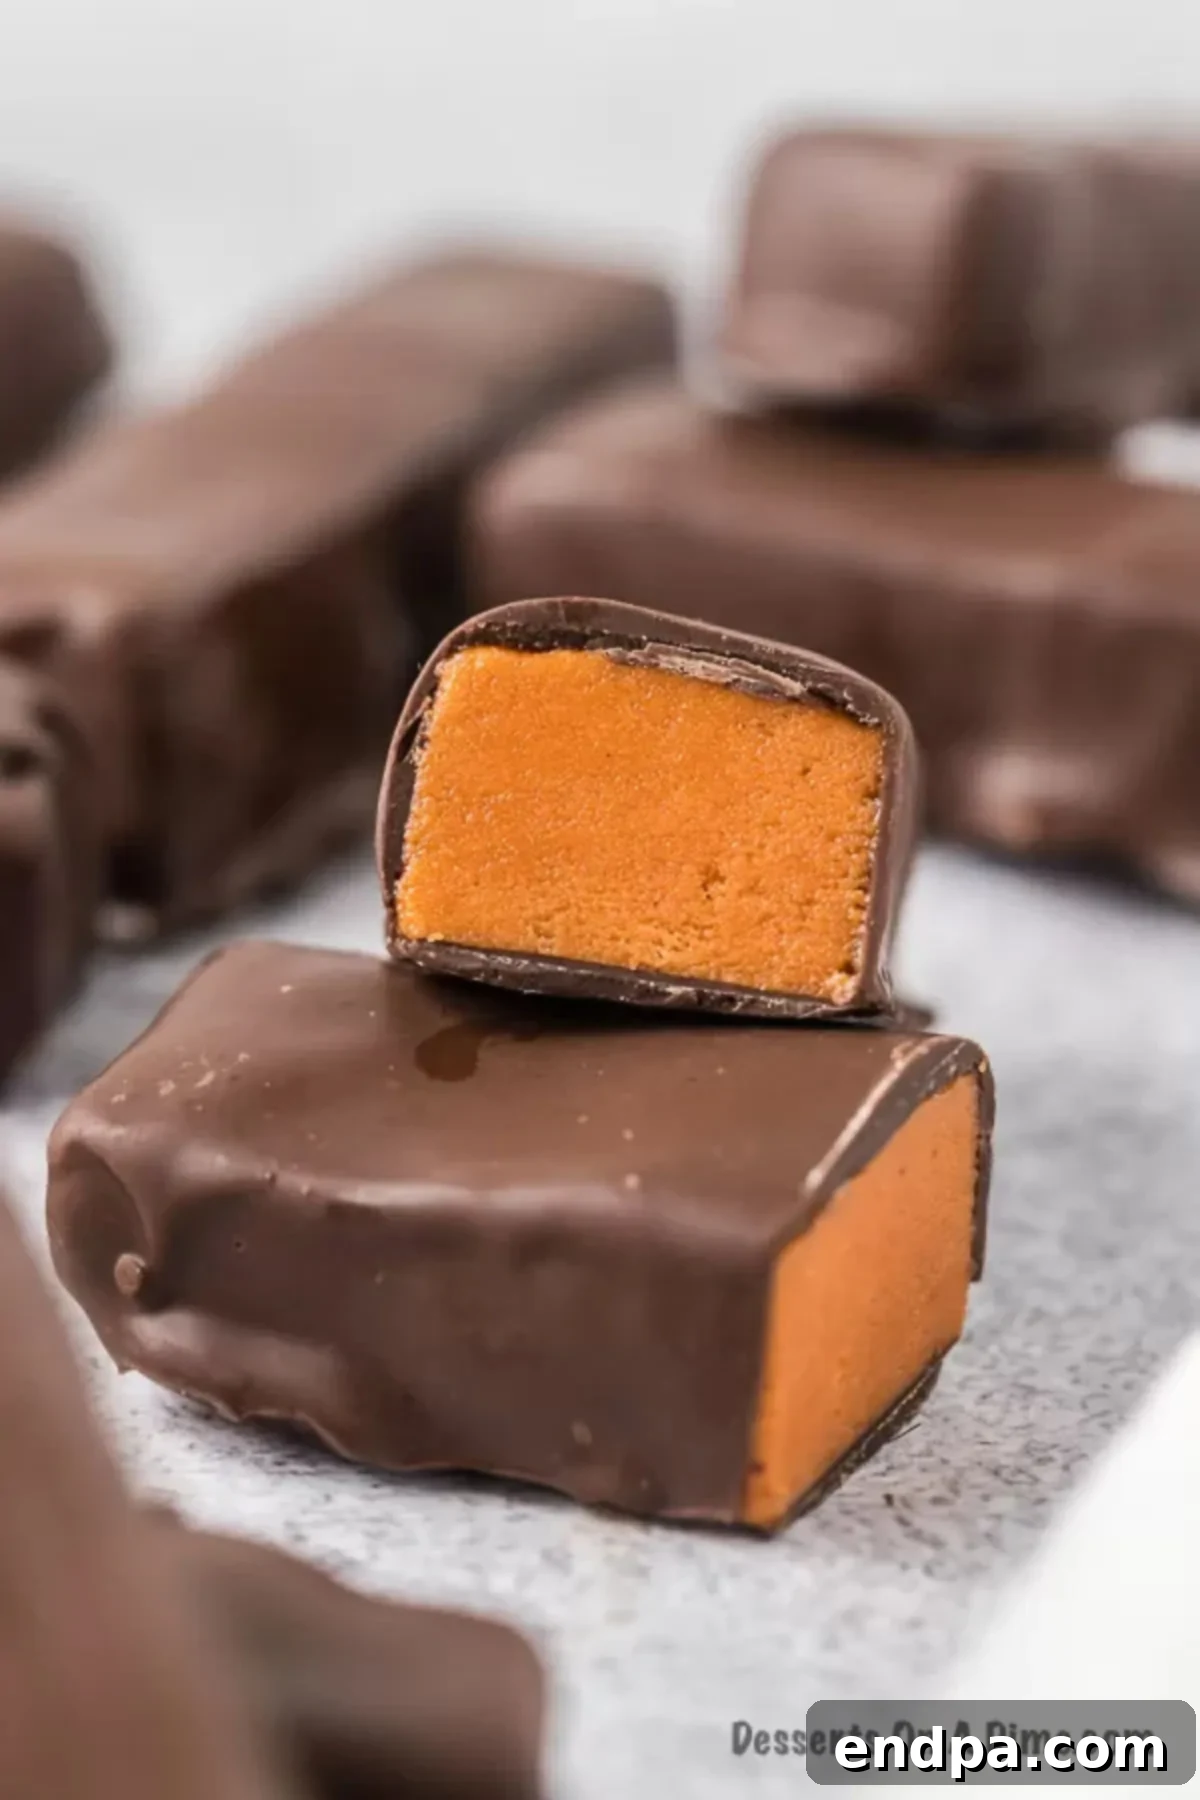
Diving into the world of homemade candy bars is an incredibly rewarding experience, and this Butterfinger recipe is particularly enjoyable for its simplicity and the sheer joy it brings. We’ve been crafting delightful candy creations for years, and witnessing the excitement on everyone’s faces, especially the kids, when their favorite candy bars come to life is truly special. This recipe also offers a brilliant solution for any leftover Halloween candy corn you might have, transforming it into something spectacular and unexpectedly delicious. The best part? There’s absolutely no need for specialized equipment like a candy thermometer or even an oven, making it accessible for even novice candy makers and perfect for a quick project.
These homemade Butterfingers are not just a stand-alone treat; they are also a fantastic addition to other desserts, elevating them with their signature crunch and flavor. Imagine pairing these crispy, chocolatey bars with a creamy Butterfinger Cake, incorporating them into chewy Butterfinger Cookies, blending them into a luscious Homemade Butterfinger Ice Cream, or shaping them into delightful Butterfinger Balls for parties. The versatility is endless, allowing you to infuse that irresistible Butterfinger magic into a variety of sweet creations! If you enjoy making your own confections, be sure to also try our Homemade Twix Bars Recipe for another guaranteed hit, or whip up some Milky Way Cookies if you’re a fan of those classic caramel and nougat delights.
Table of Contents
- What Exactly are Butterfingers?
- Essential Ingredients for Homemade Butterfingers
- Equipment You’ll Need
- Why You’ll Absolutely Love This Homemade Butterfinger Recipe
- Exciting Variations to Try
- Step-by-Step Guide: How to Make Homemade Butterfingers
- Proper Storage for Your Butterfingers
- How Long Do Homemade Butterfingers Last?
- Freezing Homemade Butterfingers
- Expert Recipe Tips for Success
- Frequently Asked Questions (FAQ)
- Explore More Easy Candy Recipes
What Exactly are Butterfingers?
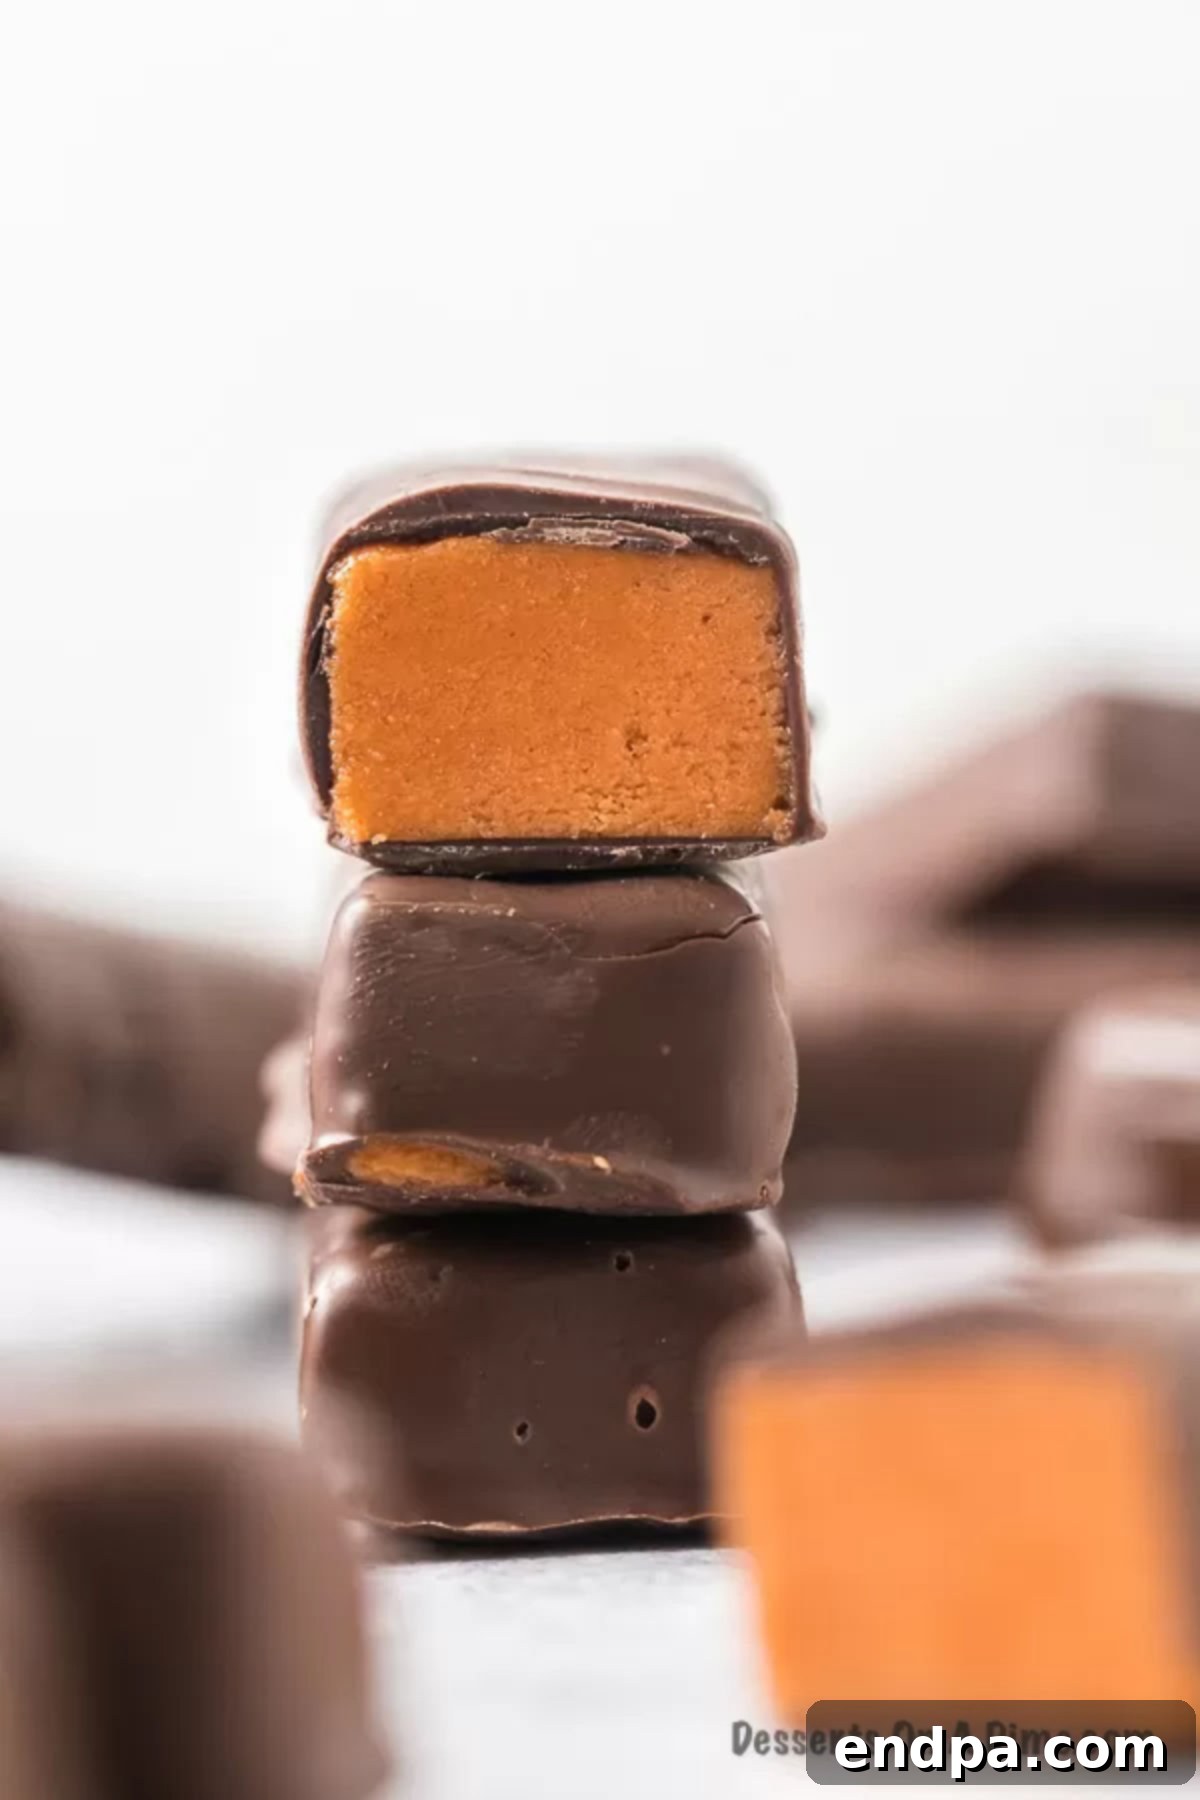
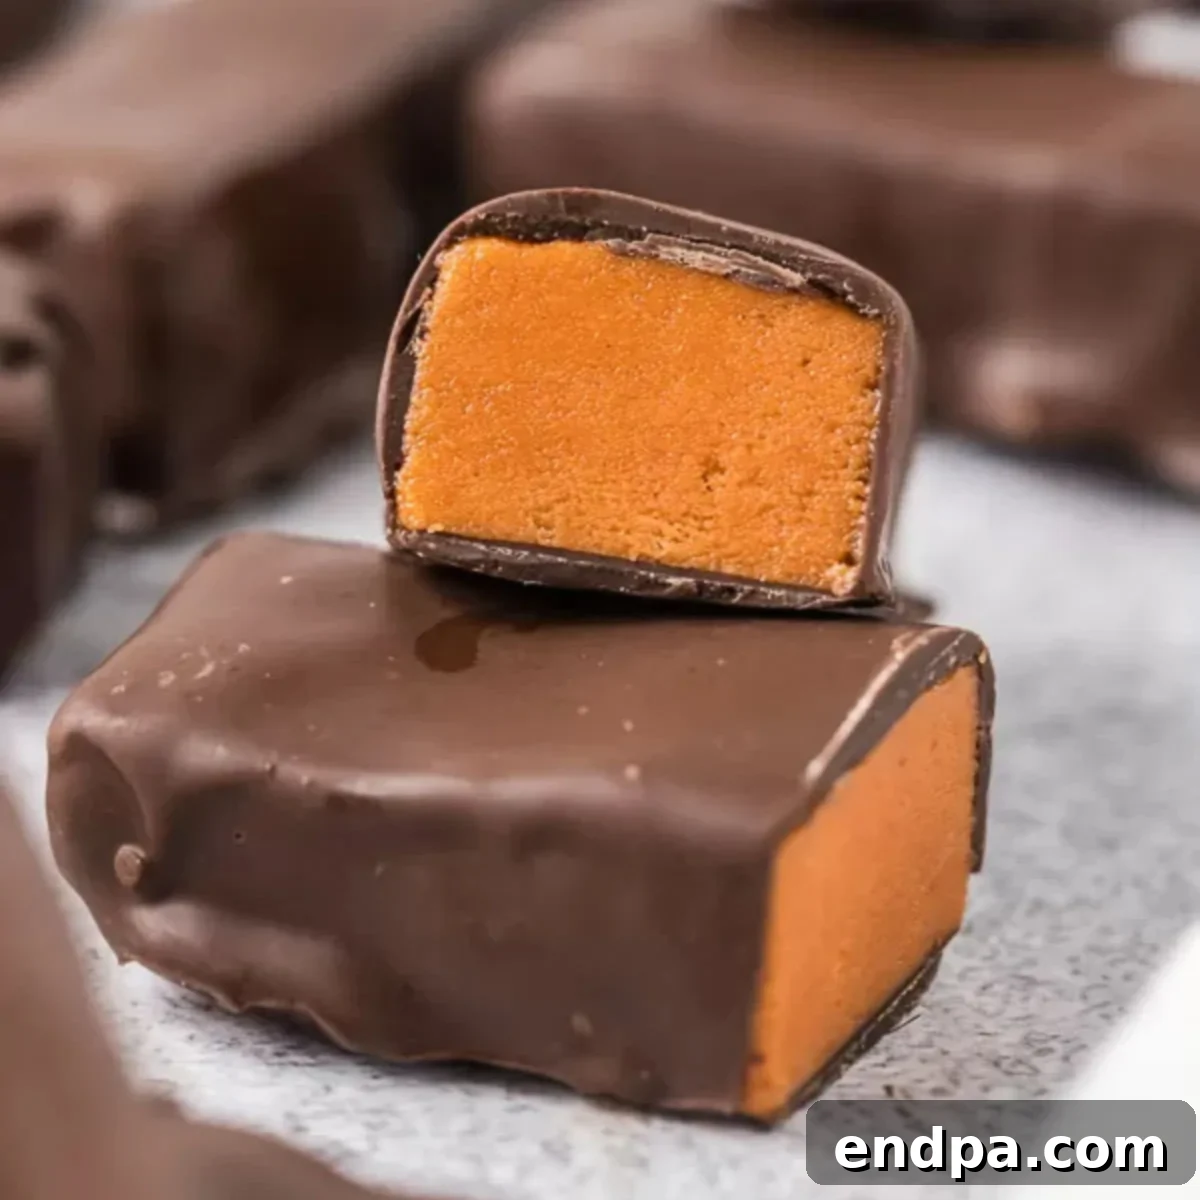
The Butterfinger candy bar is a timeless American classic, instantly recognizable by its signature flaky, crunchy peanut butter center generously enrobed in a rich, smooth chocolate coating. It’s a truly decadent treat that stands out from other candy bars due to its unique texture – a delicate, almost brittle crunch that gives way to a creamy, roasted peanut butter flavor. This distinct combination creates an addictive sweet and salty experience that has captivated generations of candy lovers. Our homemade version perfectly captures this essence, offering a fresh and delightful take on the original.
The magic behind the surprisingly simple filling lies in the ingenious combination of creamy peanut butter with melted candy corn. While the idea of candy corn as a primary ingredient for a peanut butter candy might raise an eyebrow, trust the process! When these two humble ingredients are gently melted and blended, the candy corn undergoes a remarkable transformation. It loses its individual, sugary flavor and instead contributes to an incredibly airy, crispy, and wonderfully flaky texture that remarkably mimics the commercial Butterfinger’s interior. This clever method allows you to achieve that signature crunch without any specialized equipment, complex sugar work, or baking, making it an incredibly rewarding and straightforward recipe.
Essential Ingredients for Homemade Butterfingers
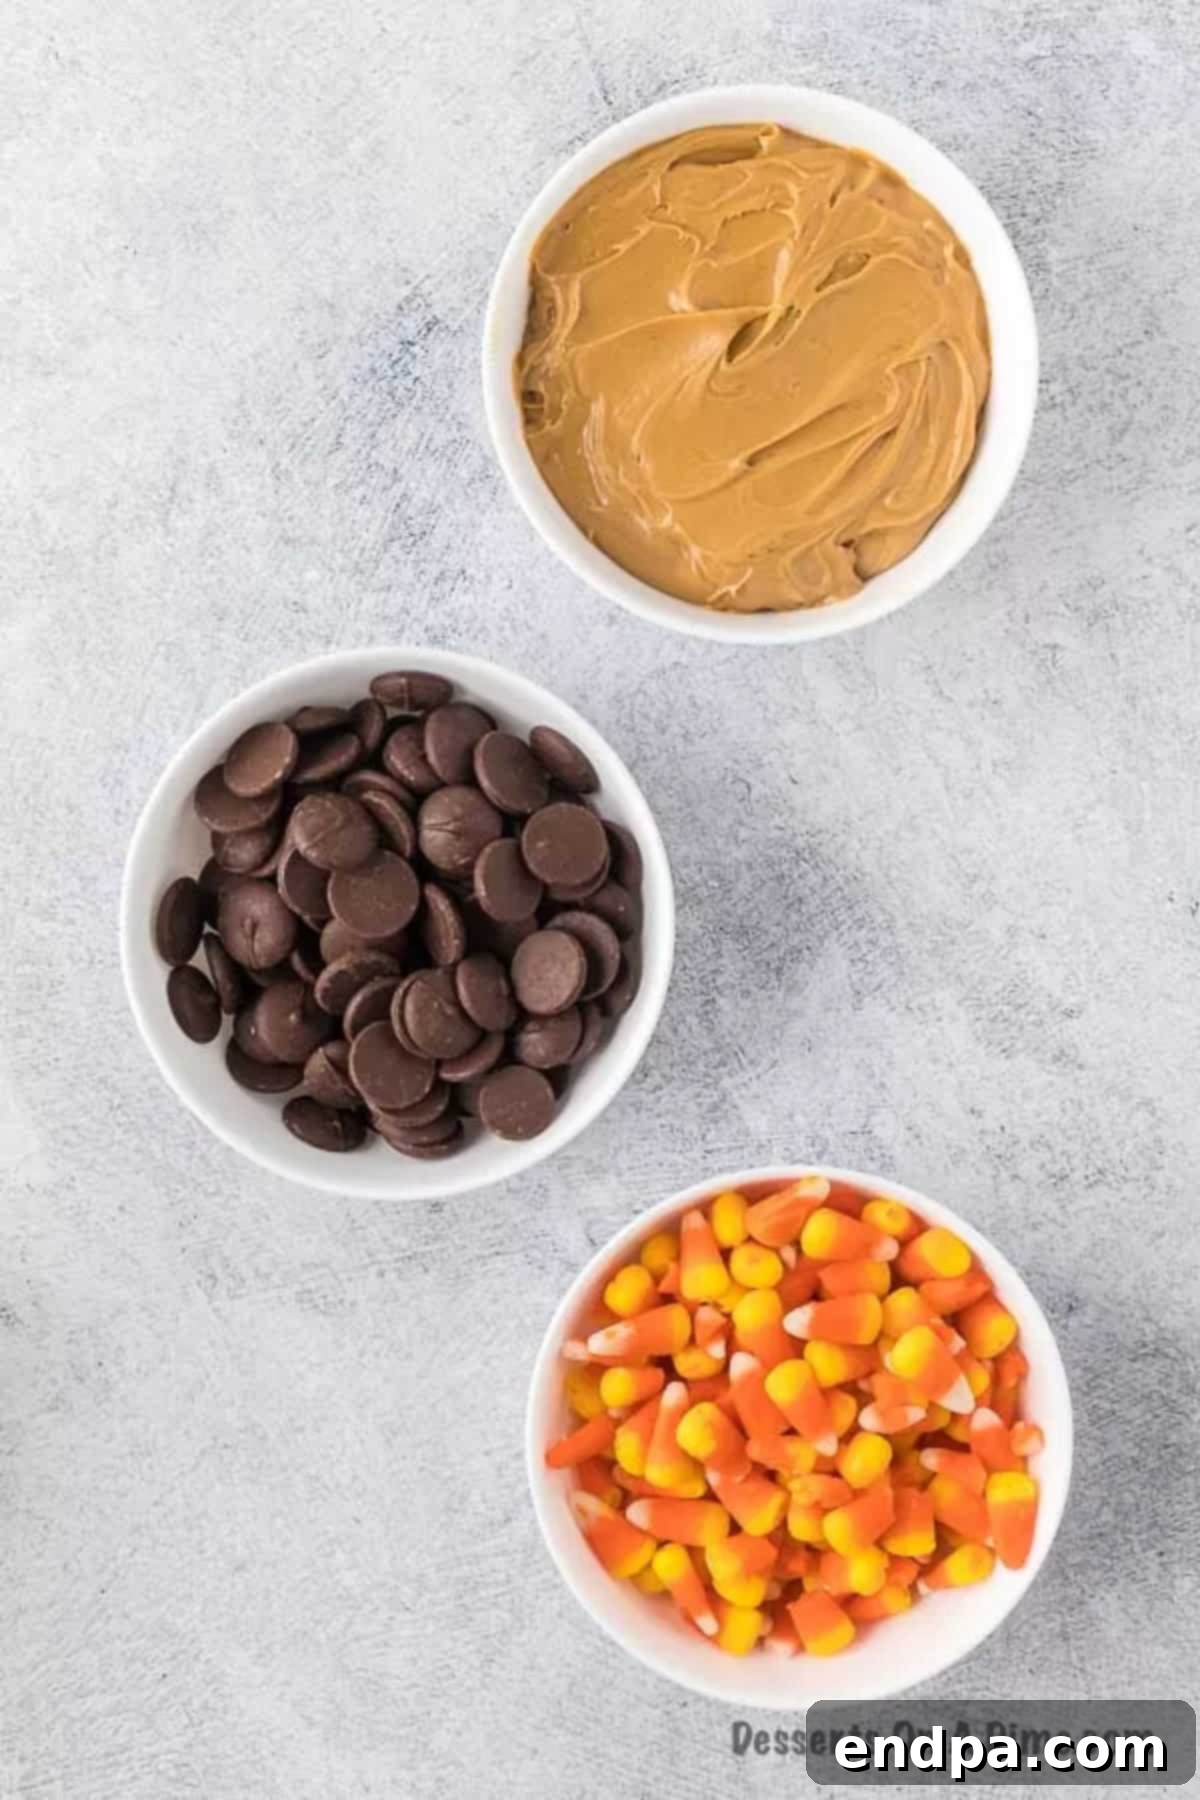
The true brilliance of this recipe shines in its remarkable simplicity, utilizing just three core ingredients to create something extraordinary. Each component plays a crucial and distinct role in achieving the signature Butterfinger taste and texture:
- Candy Corn: This might initially seem like an unusual or even questionable ingredient, but it is undeniably the secret weapon for creating that iconic flaky, crunchy, and slightly brittle texture that defines a Butterfinger. When melted and thoroughly combined with peanut butter, candy corn undergoes a fascinating metamorphosis, losing its distinct waxy flavor and instead providing the perfect structural base. For optimal results and an authentic Butterfinger taste, it is crucial to stick to traditional, plain candy corn rather than any flavored varieties, as the goal here is purely textural, not a specific candy corn flavor.
- Creamy Peanut Butter: The smooth, creamy variety of peanut butter is absolutely ideal for this recipe, as its consistent texture helps to create a uniform and well-integrated filling. While crunchy peanut butter can be used (and offers a delightful variation, as discussed below), creamy peanut butter ensures a smoother and more cohesive integration with the melted candy corn. This leads to a more classic and authentic Butterfinger-like core. We highly recommend using a conventional, processed creamy peanut butter for its stable consistency and balanced sweetness, as natural peanut butter (which often separates oil) can sometimes result in a different, less predictable texture.
- Chocolate Candy Melts: These convenient melts are specifically formulated for easy melting and provide a wonderfully smooth, glossy, and professional-looking finish without the intricate process of tempering, which is often required for regular chocolate. Candy melts provide a stable and appealing coating that sets quickly and beautifully, making the dipping process incredibly simple and foolproof. You have the flexibility to opt for milk, dark, or semi-sweet chocolate candy melts depending on your personal preference for the outer coating’s sweetness and intensity. Choosing high-quality candy melts will significantly enhance the overall flavor and visual appeal of your homemade Butterfingers, making them truly irresistible.
You can find the exact quantities and detailed nutrition information within the comprehensive recipe card located further down the page.
Equipment You’ll Need
Before you begin creating your delightful homemade Butterfingers, gathering all your necessary tools will make the entire process even smoother and more enjoyable. Here’s a list of the basic kitchen equipment you’ll need:
- 8×8 Inch Baking Dish: This size is essential for shaping your peanut butter and candy corn mixture into an even slab, which will then be cut into bars.
- Aluminum Foil or Parchment Paper: Crucial for lining the baking dish. This step ensures effortless removal of the hardened mixture and makes for a super easy clean-up afterward.
- Microwave-Safe Bowl: You’ll need at least one, possibly two (one for candy corn, one for chocolate), for safely melting your ingredients.
- Wooden Spoon or Sturdy Spatula: Indispensable for stirring the melted candy corn, thoroughly mixing it with the peanut butter, and then spreading the combined mixture evenly.
- Sharp Knife or Pizza Cutter: A sharp tool is key for cleanly and precisely slicing the hardened peanut butter mixture into uniform bars. This prevents crumbling and gives your candy a professional look.
- Two Forks: These are your best friends for dipping the bars into the melted chocolate. Using two forks allows you to fully submerge the bar and then gently tap off any excess chocolate, ensuring a smooth coating.
- Baking Sheet: Lined with fresh parchment paper, this will be the resting place for your chocolate-coated bars as they set.
Why You’ll Absolutely Love This Homemade Butterfinger Recipe
There are countless reasons why this homemade Butterfinger recipe is not just a treat to eat, but also a joy to make, deserving a permanent spot in your dessert repertoire:
- Incredibly Simple & Quick: With just three essential ingredients and a completely no-bake process, this stands out as one of the easiest and fastest candy recipes you’ll ever encounter. Perfect for impromptu cravings!
- Kid-Friendly & Fun: This is a fantastic recipe to involve children in the kitchen. The simple, hands-on steps are engaging, and they’ll love the magic of creating their very own candy bars from scratch.
- No Special Equipment Required: Forget about fancy gadgets! You won’t need a candy thermometer, stand mixer, or any specialized tools, just basic kitchen essentials you likely already own.
- Authentic Taste & Texture: Despite its remarkable simplicity, this recipe masterfully delivers a flavor profile and that iconic crispy, flaky texture that is uncannily similar to the classic, store-bought Butterfinger candy bar.
- Perfect for Leftover Candy Corn: It serves as an ingenious and delicious way to repurpose any surplus candy corn lingering after Halloween or other fall celebrations, transforming it into something truly special.
- Highly Customizable: This recipe is a blank canvas for your creativity! Easily adapt it with various chocolate coatings (white, milk, dark), experiment with toppings (sea salt, sprinkles), or cut the bars into different sizes to suit any occasion.
- Excellent for Gifting: Homemade Butterfingers make incredibly thoughtful, unique, and utterly delicious gifts for holidays, birthdays, or simply as a sweet gesture for friends, teachers, or family members.
Exciting Variations to Try
While the classic homemade Butterfinger is undeniably a showstopper, don’t hesitate to get creative and personalize your candy bars with these delightful variations. They offer new flavor dimensions and visual appeals:
- White Chocolate Butterfingers: For a deliciously different flavor profile and a striking aesthetic, consider dipping your cooled bars in melted white chocolate candy melts instead of the traditional milk or dark chocolate. The creamy sweetness of white chocolate offers a wonderful, sophisticated contrast to the crunchy peanut butter core, creating a visually appealing and equally delectable treat that’s sure to impress.
- Crunchy Peanut Butter Boost: If you’re a devout fan of extra texture and a bolder peanut flavor, you can absolutely substitute crunchy peanut butter in place of the creamy variety. Be aware that this will result in a filling that is less uniformly smooth and has a more pronounced, rustic crunch. This variation is particularly fantastic for those who appreciate an even more intense textural experience in their candy.
- Bite-Sized Butterfinger Treats: Instead of cutting the hardened mixture into conventional bars, slice them into smaller, charming bite-sized squares or nuggets. These mini Butterfingers are absolutely perfect for elegant party platters, adding to a festive dessert buffet, or simply for convenient portion control for everyday snacking. They’re also incredibly easy to share and make delightful additions to homemade goodie bags or dessert boxes.
- A Gourmet Touch of Sea Salt: After you’ve dipped your bars in chocolate but before the chocolate fully sets, sprinkle a tiny pinch of flaky sea salt (like Maldon) on top. The subtle saltiness perfectly balances the inherent sweetness of the candy bar, enhancing both the chocolate and rich peanut butter flavors with a sophisticated, gourmet touch that elevates the entire experience.
- Festive & Fun Decorations: Transform your homemade Butterfingers into a celebration-ready treat by adding colorful sprinkles or other edible decorations. This is where your creativity can truly shine!
- For Christmas, use festive red and green sprinkles, or perhaps a delicate drizzle of contrasting white chocolate.
- For Easter, opt for cheerful pastel-colored sprinkles or a light, artistic drizzle of colored candy melts.
- You can even match any birthday party theme by incorporating sprinkles in the celebrant’s favorite colors or a mix to match the decor. The possibilities for personalizing these treats are truly endless and fun!
Step-by-Step Guide: How to Make Homemade Butterfingers
Making these delectable homemade Butterfingers is a surprisingly straightforward process that yields incredibly rewarding results. Follow these simple, detailed steps for perfect, crispy, chocolatey bars every time:
- Step 1: Prepare Your Pan. Begin by thoroughly lining an 8×8 inch baking dish with either aluminum foil or parchment paper. It’s important to ensure you leave a generous overhang on all sides – these will act as convenient “handles,” allowing you to effortlessly lift the entire hardened peanut butter mixture out of the pan later. This crucial step not only makes clean-up a breeze but also prevents any sticking. If your parchment paper has a tendency to curl or doesn’t lay flat, you can cleverly use binder clips on the edges of the pan to hold it securely in place.
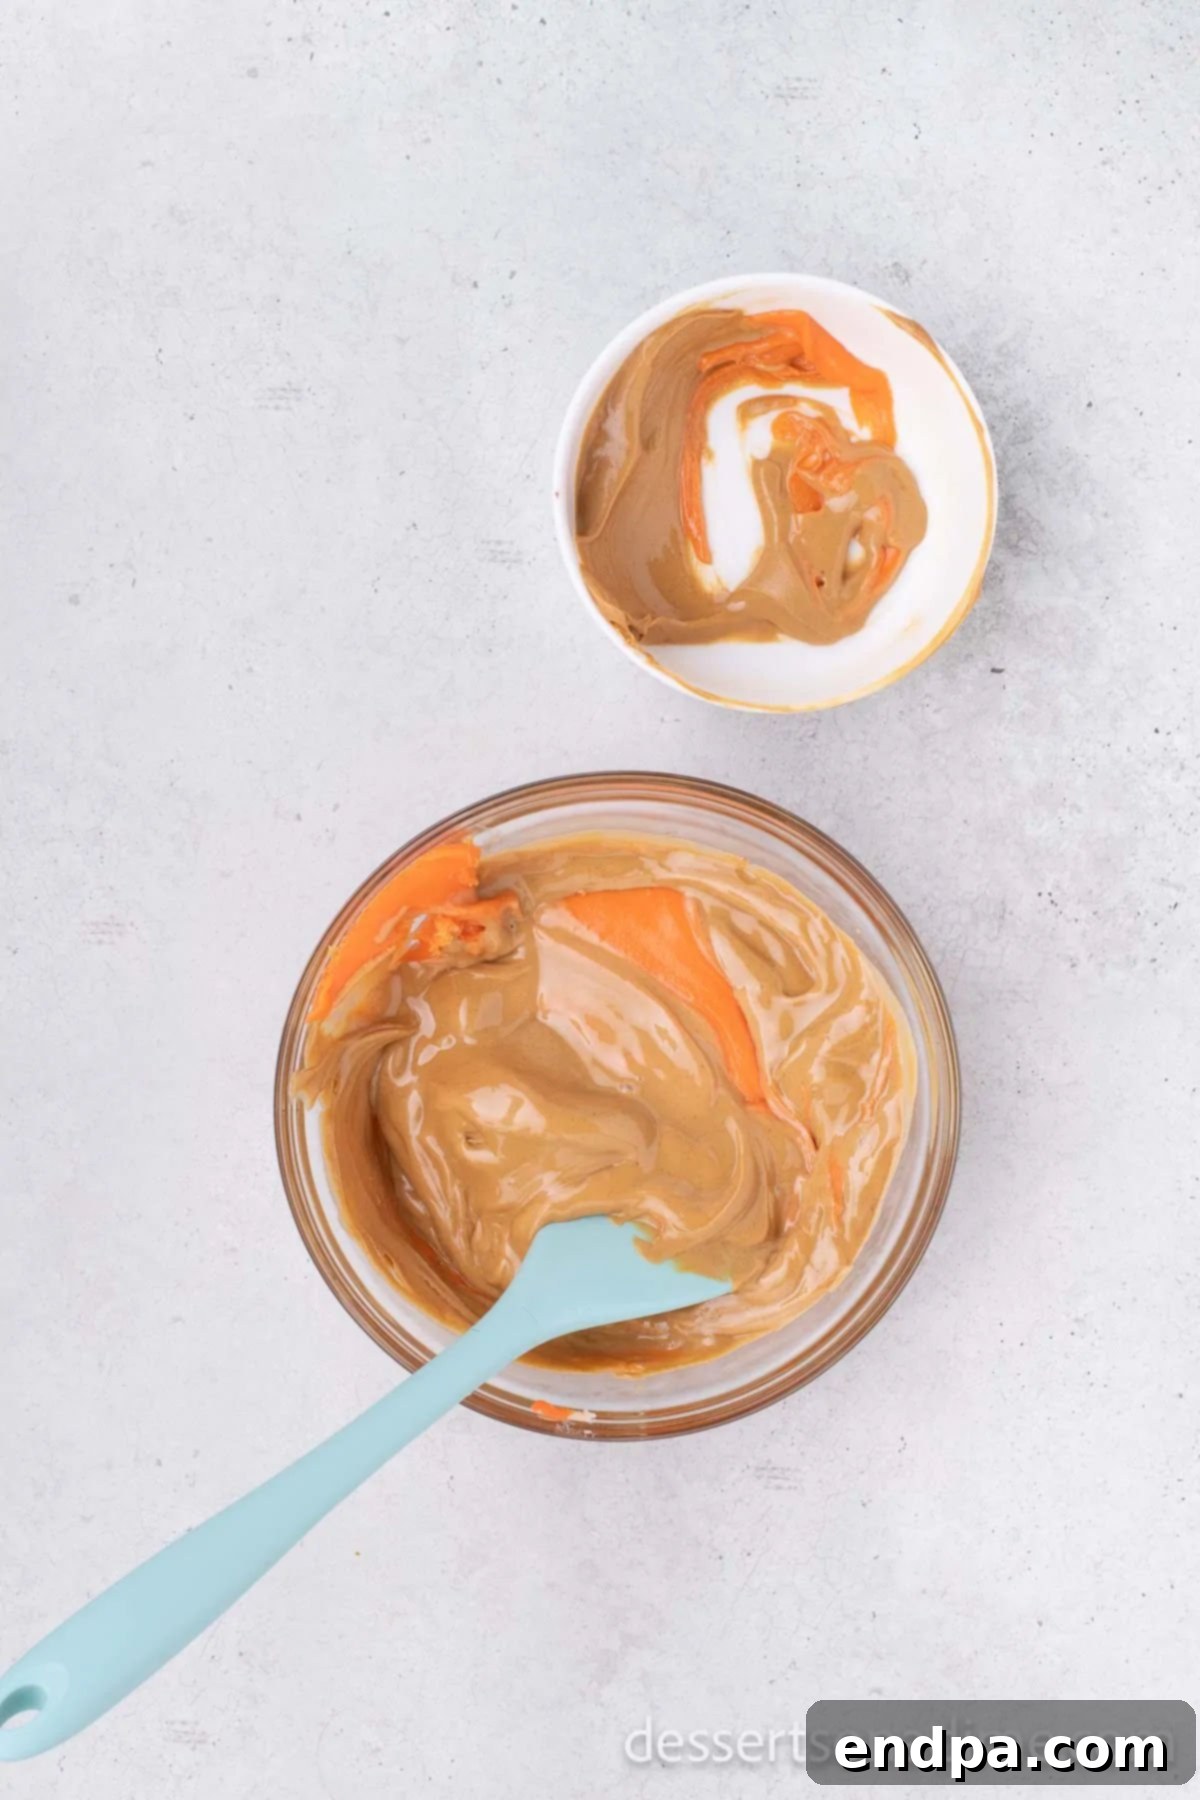
Step 2: Melt and Mix the Core. Carefully place the candy corn into a large, microwave-safe bowl. Heat the candy corn in short, controlled 30-second intervals, making sure to stir thoroughly with a sturdy wooden spoon or heat-resistant spatula after each interval. Continue this process diligently until the candy corn is completely melted and has achieved a smooth, pourable consistency. It’s crucial not to overheat the candy corn, as this can cause it to seize up and become hard or grainy. Immediately after melting, add the creamy peanut butter to the melted candy corn and stir vigorously until the mixture is perfectly well combined and uniform in color and texture. If, after initial mixing, the peanut butter doesn’t fully incorporate or the mixture remains too stiff, you can return it to the microwave for another brief 15-20 seconds to warm it up further, then stir until completely smooth.
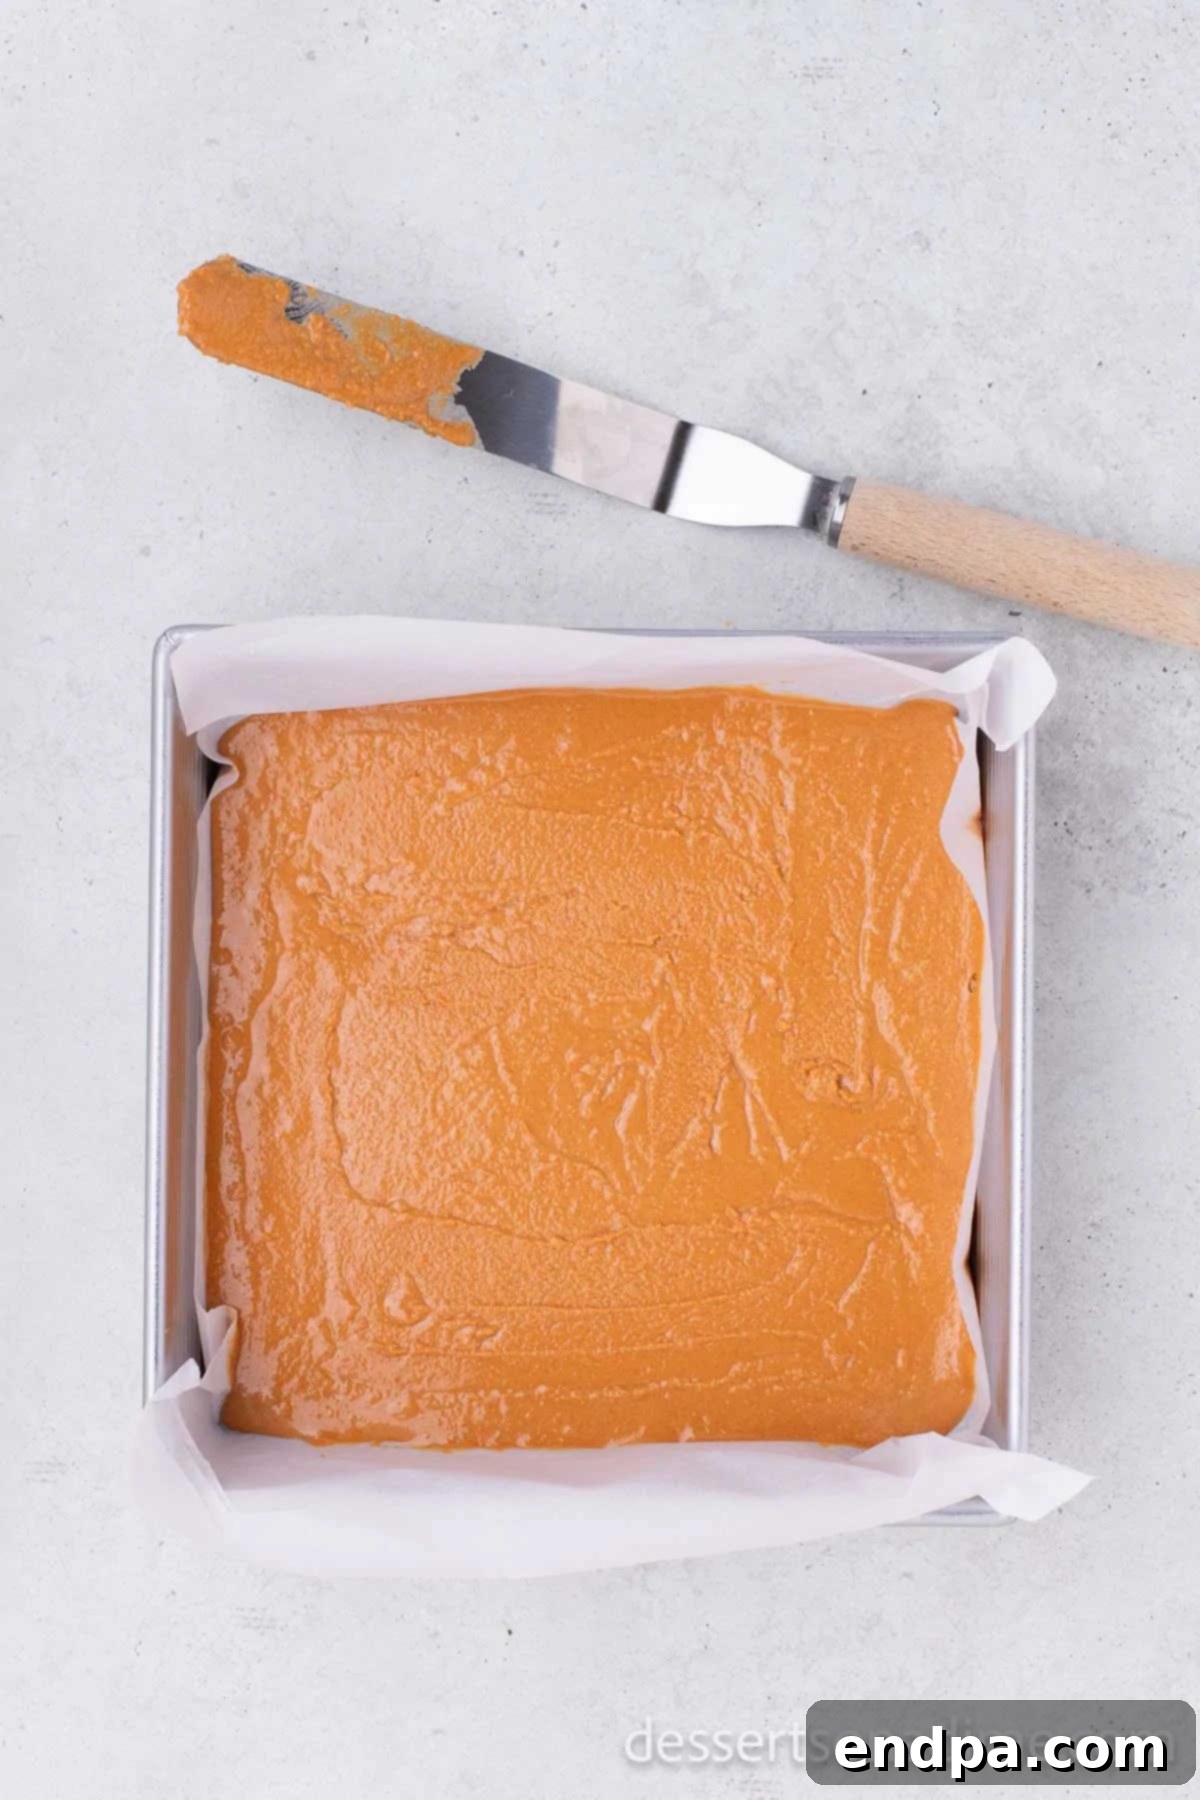
Step 3: Spread and Set. Promptly pour the warm, combined candy corn and peanut butter mixture evenly into your prepared 8×8 inch pan. Use a clean spatula to spread it smoothly and ensure an even thickness across the entire surface of the pan. Achieving this consistency is absolutely key for creating uniform bars later on. Allow the mixture to cool completely and harden. This setting process can take anywhere from 1 to 2 hours if left at room temperature, or you can expedite the hardening by placing it in the refrigerator for approximately 30-60 minutes.
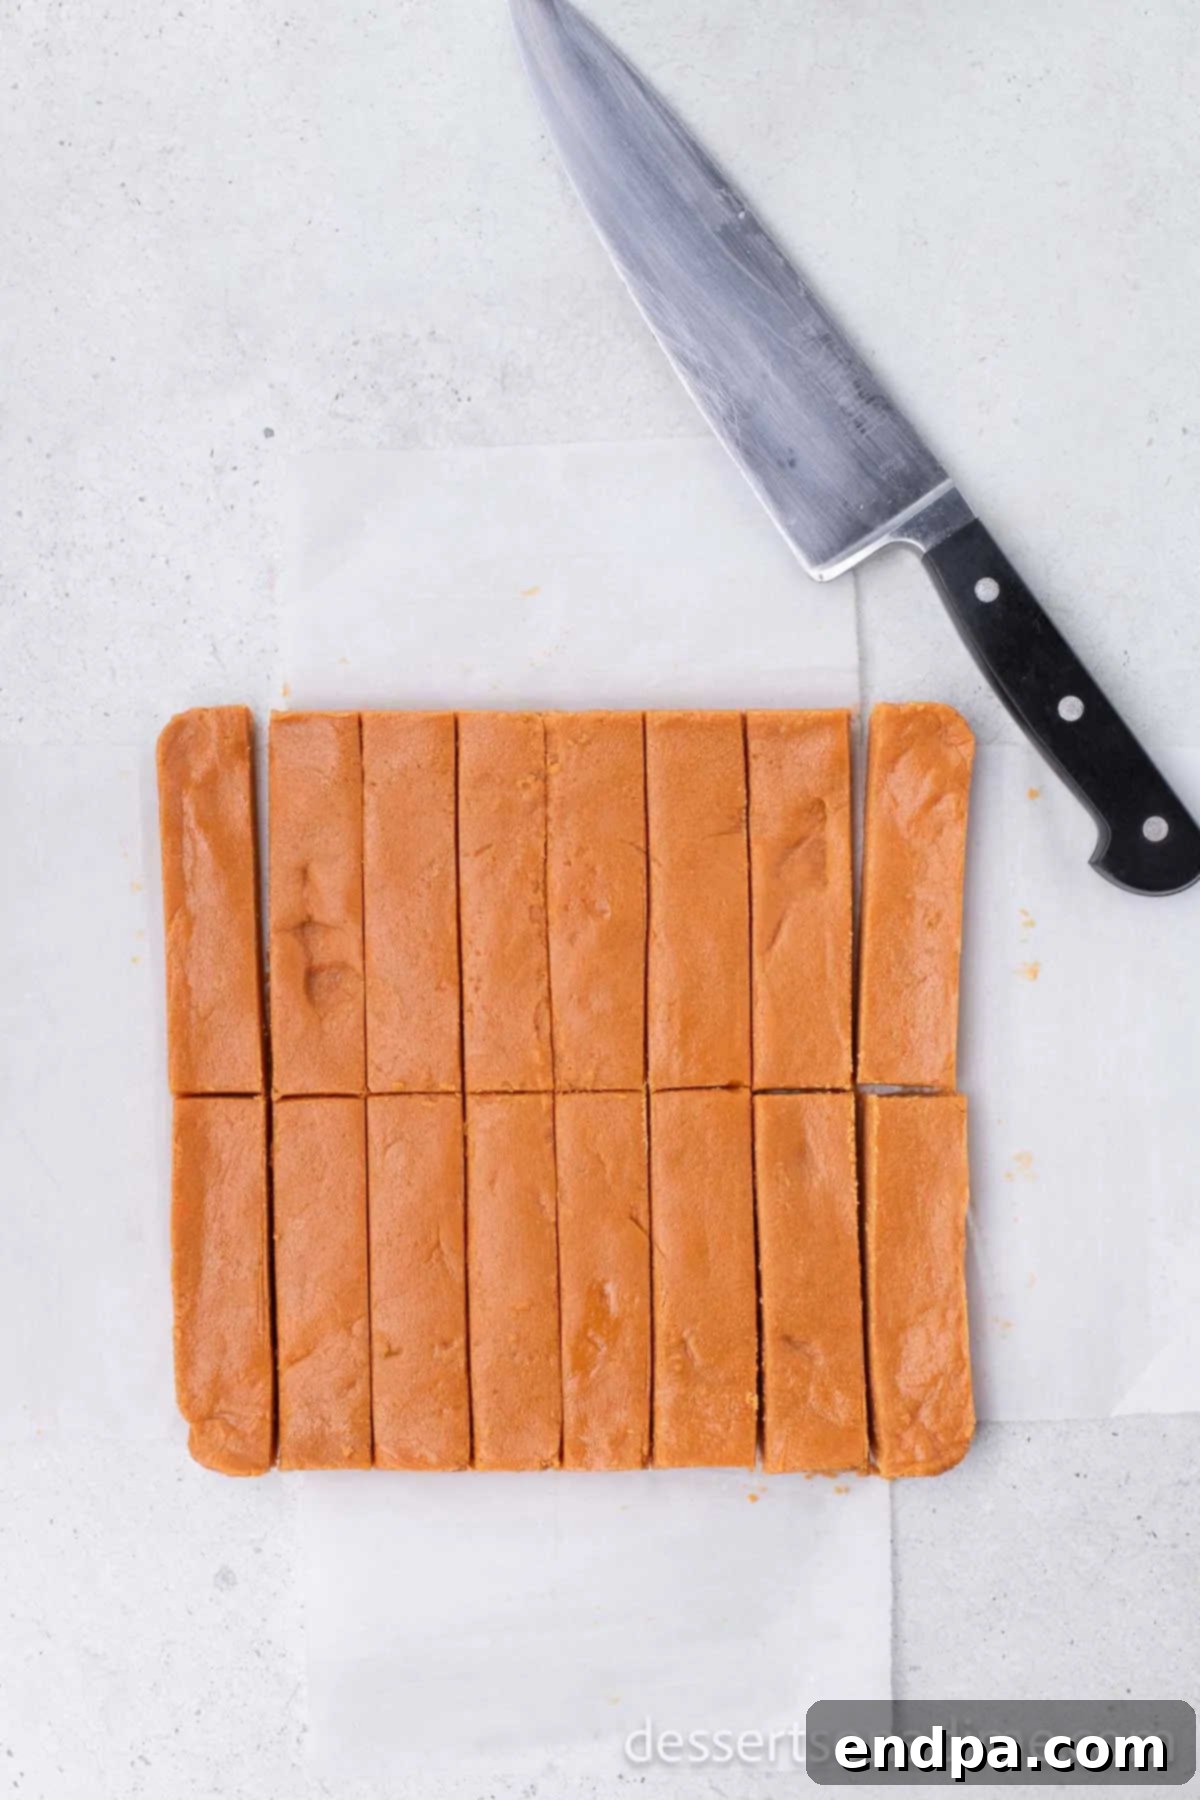
Step 4: Slice into Bars. Once the peanut butter and candy corn mixture is completely firm and fully hardened, carefully lift it out of the baking pan using the aluminum foil or parchment paper overhangs. Transfer the entire slab onto a clean cutting board. Use a very sharp knife or a pizza cutter to precisely slice the slab into approximately 16 individual bars. Aim for consistent sizes for the best possible presentation and even portions. A clean, sharp cut is essential here to prevent any crumbling and to give your homemade candy bars a professional and appealing look.
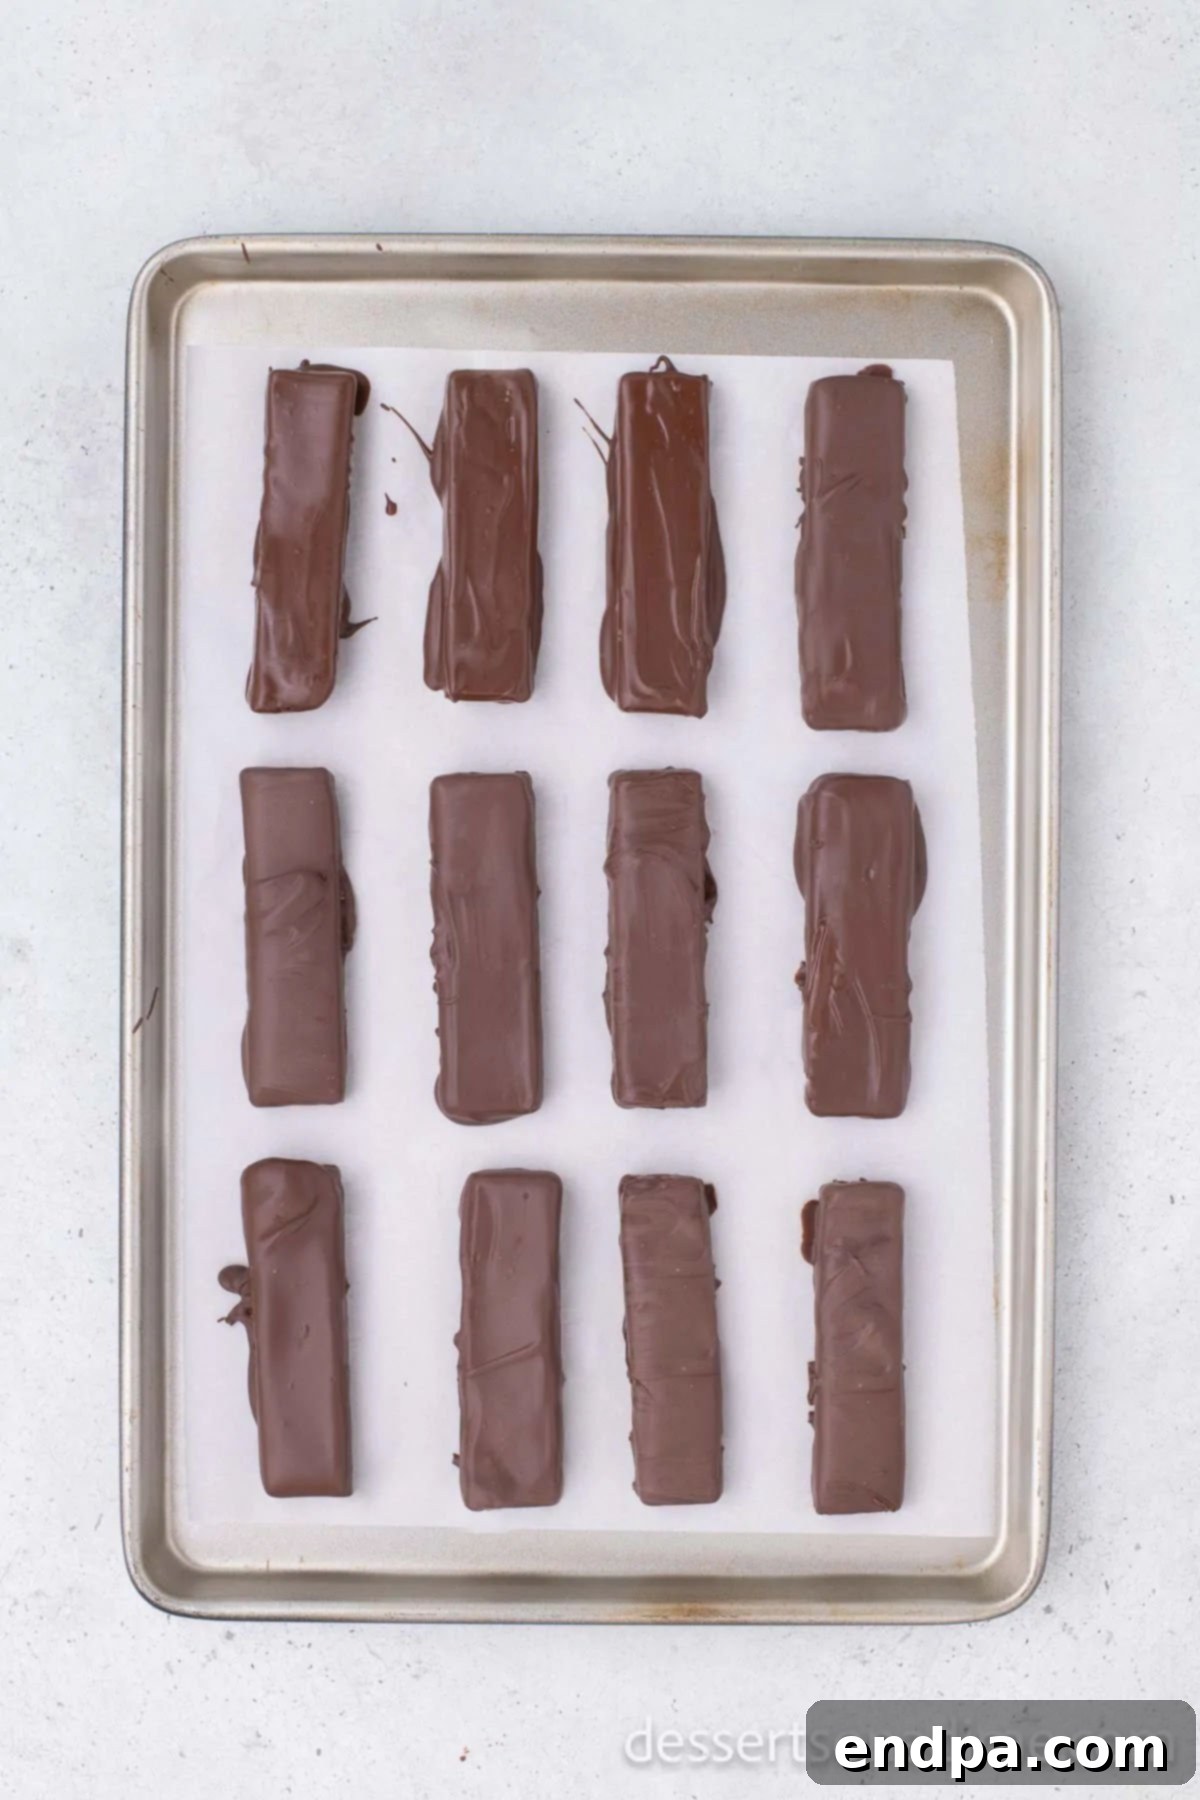
Step 5: Coat in Chocolate. In a separate microwave-safe bowl, melt your chosen chocolate candy melts. Heat them in short 30-second intervals, stirring thoroughly after each one, until the chocolate is perfectly smooth and fully melted. Be careful not to overheat, as this can cause the chocolate to seize. Using two forks (this technique allows for better control and drainage), carefully dip each individual peanut butter bar into the melted chocolate, ensuring it’s completely coated on all sides. Gently tap the forks on the side of the bowl to remove any excess chocolate, allowing it to drip back into the bowl. Transfer the chocolate-coated bars to a baking sheet that you have lined with fresh parchment paper. Let them set at room temperature for 1 to 2 hours, or chill them in the refrigerator for 20-30 minutes for a quicker set, especially if you prefer a crispier and firmer chocolate coating.
Proper Storage for Your Butterfingers
How you store your delicious homemade Butterfingers can significantly influence their texture and shelf life. For those who prefer a chewier, slightly softer candy bar experience, storing them at room temperature is ideal. If, however, you favor a crispier, firmer bar with a more satisfying snap, storing them in the refrigerator is the way to go.
Regardless of your preferred texture, it is absolutely essential to store your Butterfingers in an airtight container. This crucial step prevents them from drying out, absorbing unwanted odors from other foods in your pantry or fridge, and becoming stale. For added protection and to prevent the bars from sticking together, consider placing small pieces of parchment paper or wax paper between layers of bars within your container. Ensure the container is sealed tightly to maintain their freshness and delightful flavor.
How Long Do Homemade Butterfingers Last?
When stored correctly using the methods described above, your homemade Butterfingers can be enjoyed for a good period, allowing you to savor them over several days or weeks:
- At room temperature, when kept in a well-sealed airtight container, your homemade Butterfingers will remain fresh and delightfully delicious for approximately 5 to 6 days. This storage method will result in a slightly chewier texture.
- If stored in the refrigerator, also within an airtight container, their shelf life extends significantly, lasting up to 2 weeks. The cooler temperature in the fridge not only preserves them longer but also helps to maintain and enhance their signature crispiness.
Honestly, in our personal experience, these incredibly delicious treats rarely last that long! Their irresistible taste and satisfying texture mean that everyone tends to eat them up pretty quickly, a true testament to how universally loved and addicting they are.
Freezing Homemade Butterfingers
Yes, you absolutely can freeze homemade Butterfingers to enjoy them over an extended period! Freezing is an excellent option if you’re looking to make a large batch in advance, prepare for future gatherings, or simply want to have a stash of these delightful treats on hand whenever a craving strikes.
- Preparation for Freezing: Once your chocolate coating has fully set and hardened at room temperature or in the refrigerator, arrange the individual Butterfingers in a single layer on a parchment-lined baking sheet. Place the baking sheet in the freezer for about 30 minutes, or until the bars are solid. This “flash freezing” step is crucial as it prevents the bars from sticking together when stored in bulk.
- Packaging for Longevity: After flash freezing, carefully transfer the solid bars into an airtight freezer-safe container or a heavy-duty freezer bag. For added protection against freezer burn and to ensure easy separation, you can place small pieces of parchment paper or wax paper between layers of bars within the container or bag. Squeeze out as much air as possible if using a bag.
- Storage Duration: Properly packaged homemade Butterfingers can be stored in the freezer for an impressive duration of up to 2-3 months without any significant loss in quality, taste, or texture.
- Thawing Instructions: When you’re ready to indulge, simply remove the desired number of bars from the freezer. Allow them to thaw at room temperature for approximately 15-30 minutes for a quick treat, or you can transfer them to the refrigerator for an hour or so if you prefer them chilled. They will be just as delicious and satisfying as when they were freshly made!
Expert Recipe Tips for Success
Achieving perfect homemade Butterfingers is surprisingly easy, but a few expert tips and tricks can truly elevate your results, ensuring they are consistently crunchy, chocolatey, and utterly irresistible:
- Choosing Your Candy Corn Wisely: Always opt for traditional, plain candy corn for this recipe. Many brands now offer various fun and seasonal flavors, but these can subtly alter the distinct Butterfinger taste and interfere with the desired neutral base. The classic, original version is absolutely crucial for creating that authentic, neutral, and wonderfully crispy texture. A smart tip: keep an eye out for clearance sales after the Fall season; it’s a perfect opportunity to stock up on candy corn for future Butterfinger batches!
- Quality Chocolate Makes a Difference: Since this recipe features so few ingredients, the quality of your chocolate coating truly makes a noticeable difference in the final product. Using good quality chocolate candy melts will consistently result in a richer, smoother, and more flavorful outer layer with a beautiful snap. While candy melts are highly recommended for their ease of use, you can certainly substitute high-quality chocolate chips. If you opt for chocolate chips, you might find it beneficial to add a teaspoon of coconut oil or vegetable shortening to help thin the melted chocolate and achieve a smoother, more manageable dipping consistency, as regular chocolate can be thicker and sometimes requires tempering for a perfect, stable sheen.
- Precision Cutting for Perfect Bars: For clean, professional-looking bars that hold their shape beautifully, a very sharp knife or a dedicated pizza cutter is your best friend. A sharp blade will slice through the hardened peanut butter mixture with remarkable ease, preventing frustrating crumbling and ensuring you get uniformly sized, attractive pieces. For even smoother cuts, some find it helpful to warm their knife under hot water and dry it before each slice.
- Never Overheat the Candy Corn: When melting the candy corn, it is imperative to heat it in short, controlled 30-second bursts and stir diligently after each interval. Overheating the candy corn can cause it to become excessively hard, grainy, or even develop an undesirable caramelized flavor, which will unfortunately compromise the delicate texture and taste of your homemade Butterfingers. Gentle heat and patient stirring are key.
- Patience is Key for Proper Setting: Allow ample time for the peanut butter and candy corn mixture to cool down and harden completely before you even attempt to cut and dip it. Rushing this crucial step will inevitably result in a sticky, messy experience and poorly formed, crumbly bars. Exercising patience during the setting phase is consistently rewarded with perfectly structured, easy-to-handle candy that looks and tastes fantastic.
- Alternative Melting Method (Double Boiler): If you prefer not to use a microwave, or simply desire more control over the melting process, both the candy corn and chocolate can be melted effectively using a double boiler setup on the stovetop. This method provides a gentle, indirect, and even heat that significantly helps prevent scorching. To do this, place a heat-proof bowl (glass or metal) over a saucepan containing about an inch or two of simmering water, ensuring that the bottom of the bowl does not touch the water. Stir frequently until your ingredients are perfectly melted and smooth.
Frequently Asked Questions (FAQ)
- Can I use crunchy peanut butter in this recipe?
- Yes, you certainly can! Using crunchy peanut butter will result in a homemade Butterfinger filling with a more pronounced, rustic crunch and an intensified peanut flavor. However, the creamy version tends to yield a smoother, flakier, and arguably more authentic Butterfinger-like texture. Feel free to experiment based on your personal preference for crunch!
- What if I don’t have candy melts? Can I use regular chocolate chips?
- You can use regular chocolate chips, but candy melts are highly recommended for their ease of use and ability to provide a smooth, stable, and glossy finish without tempering. If you opt for regular chocolate chips, you might find it beneficial to add a teaspoon of coconut oil or vegetable shortening to help thin the melted chocolate, making it easier for dipping. Without tempering, regular chocolate can sometimes be prone to seizing, blooming (developing white streaks), or melting too easily at room temperature.
- My candy corn mixture isn’t melting smoothly or became hard. What went wrong?
- This issue usually arises if the candy corn was overheated during the melting process or if any trace amount of moisture was introduced. Ensure you heat the candy corn in very short intervals and stir diligently each time. If it becomes hard or develops a grainy texture, unfortunately, it’s quite challenging to salvage, and it’s generally best to start with a fresh batch to ensure optimal results.
- Can I make these homemade Butterfingers vegan or allergy-friendly?
- Making them vegan requires finding vegan-friendly candy corn (as many traditional brands contain gelatin) and using vegan chocolate melts. For those with peanut allergies, sunflower seed butter (often sold as SunButter) can be a good substitute for peanut butter. However, it’s important to note that the flavor and the final texture will differ noticeably from traditional Butterfingers.
- Can I add other mix-ins to the peanut butter mixture for extra flavor or texture?
- Absolutely! This is a great way to customize your bars. For additional crunch and a savory contrast, consider stirring in a small amount of finely crushed pretzels, puffed rice cereal, or even finely chopped nuts (if not avoiding nut allergens) into the peanut butter-candy corn mixture just before spreading it into the pan. Experiment to find your favorite combinations!
Explore More Easy Candy Recipes
If you thoroughly enjoyed making these delightful homemade Butterfingers, you’ll surely love expanding your candy-making repertoire with these other simple and equally delicious candy recipes. They are perfect for satisfying sweet cravings or sharing with loved ones:
- Homemade Peanut Brittle Recipe: A classic crunchy, buttery, and nutty confection that’s surprisingly easy to make.
- 2 Ingredient Chocolate Bark: The ultimate quick and customizable treat, perfect for any occasion.
- Saltine Cracker Toffee: An incredibly addictive “Christmas Crack” recipe that combines salty crackers with sweet toffee and chocolate.
- Crockpot Chocolate Peanut Clusters: An effortless, slow-cooker candy recipe that’s ideal for gifting or last-minute sweet cravings.
- Divinity Candy: A fluffy, melt-in-your-mouth Southern classic made with egg whites, sugar, and nuts.
We sincerely hope you thoroughly enjoy making and indulging in this fantastic Homemade Butterfinger Candy recipe. It’s a delightful testament to how a few simple ingredients, combined with a little creativity, can create something truly magical, satisfying, and reminiscent of a beloved classic. We’d absolutely love to hear about your experience and see your creations! Please take a moment to leave a comment and share your thoughts, tips, or any variations you tried once you make this irresistible recipe. Happy candy making!
Pin
Homemade Butterfingers
Ingredients
- 2 cups Candy Corn
- 1 ½ cups Creamy Peanut Butter
- 2 cups Chocolate Candy Melts
Instructions
- Line an 8×8 baking pan with foil or parchment paper, leaving an overhang on the sides for easy lifting.
- Place the candy corn in a microwave-safe dish. Heat in 30-second intervals, stirring between each interval until the candy corn is fully melted and smooth.
- Immediately stir in the creamy peanut butter until well combined. If the peanut butter doesn’t melt completely, microwave for another 15-20 seconds and stir again.
- Spread the mixture evenly into the prepared 8×8 inch pan. Let it cool completely and re-harden at room temperature (1-2 hours) or in the refrigerator (30-60 minutes).
- Once hardened, lift the mixture out of the pan and use a sharp knife or pizza cutter to slice it into approximately 16 bars.
- Melt the chocolate candy melts in the microwave in 30-second intervals, stirring between each interval until fully melted and smooth.
- Dip each candy bar into the melted chocolate until fully coated. Use two forks to gently remove excess chocolate.
- Place the coated candy bars on a parchment-lined baking sheet and let them set at room temperature (1-2 hours) or in the refrigerator (20-30 minutes).
- Serve and enjoy your delicious homemade Butterfingers!
Nutrition Facts
Carbohydrates 32g,
Protein 6g,
Fat 16g,
Saturated Fat 6g,
Polyunsaturated Fat 3g,
Monounsaturated Fat 6g,
Sodium 182mg,
Potassium 157mg,
Fiber 1g,
Sugar 28g,
Calcium 10mg,
Iron 1mg
Pin This Now to Remember It Later
Pin Recipe
