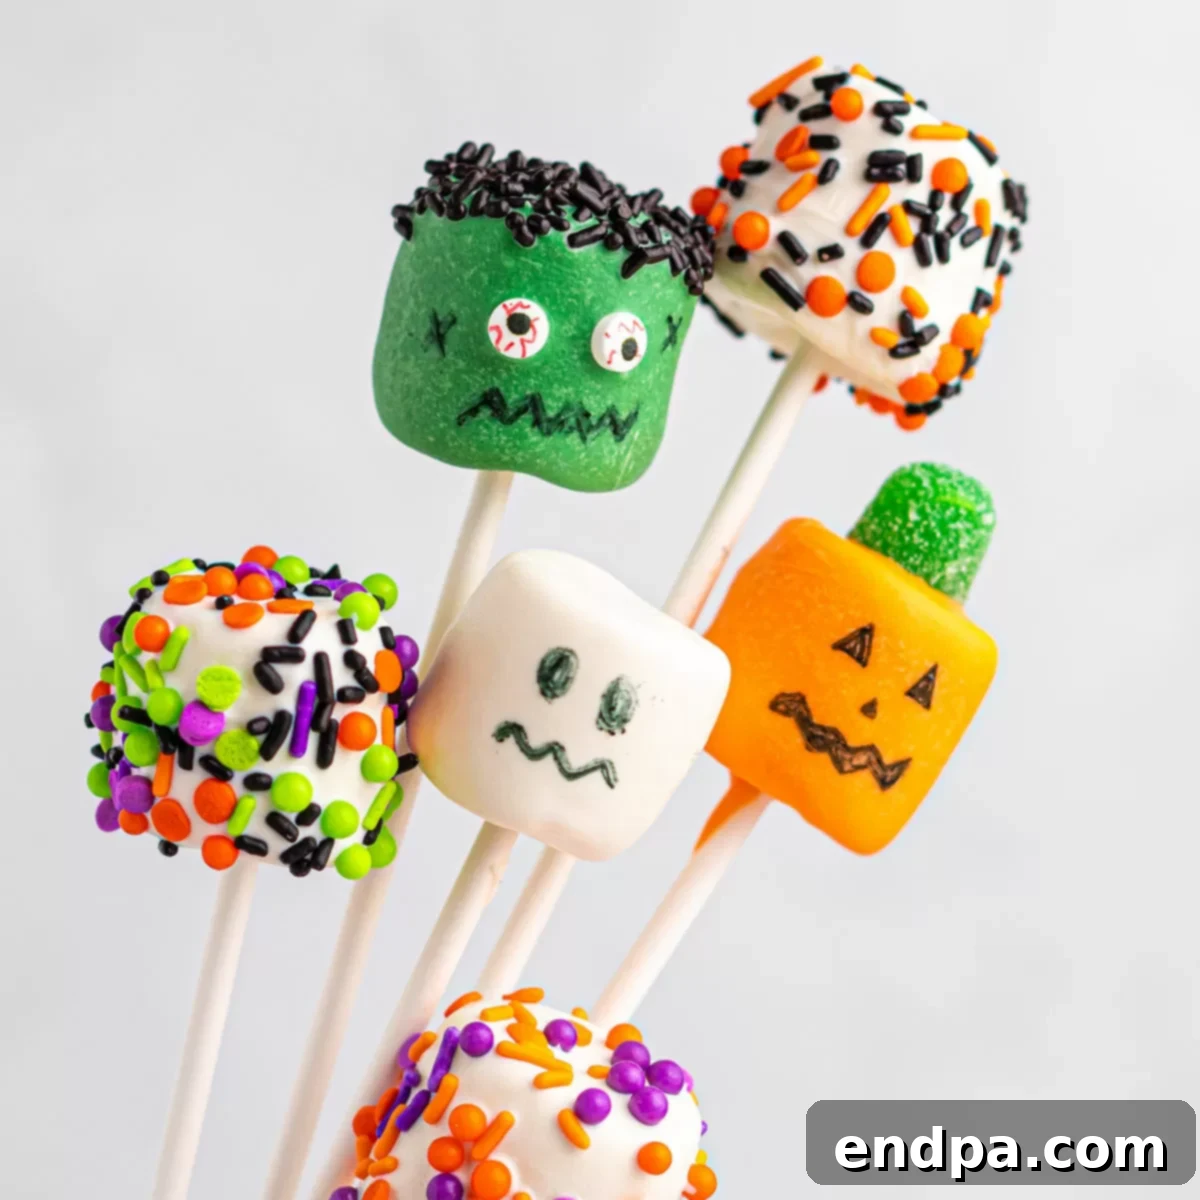
Halloween Marshmallow Pops: Spooky Sweet Treats for the Whole Family
As autumn leaves begin to fall and a crisp chill fills the air, the excitement of Halloween builds. What better way to celebrate this delightfully spooky season than with incredibly easy-to-make and utterly adorable Halloween Marshmallow Pops? These chocolate-dipped marshmallows, adorned with festive sprinkles and charming edible decorations, are not just a cute holiday treat; they’re a magical experience to create and devour. Imagine soft, fluffy marshmallows transformed into whimsical ghosts, grinning jack-o’-lanterns, or even mischievous Frankenstein monsters, all ready to delight guests at your next Halloween gathering.
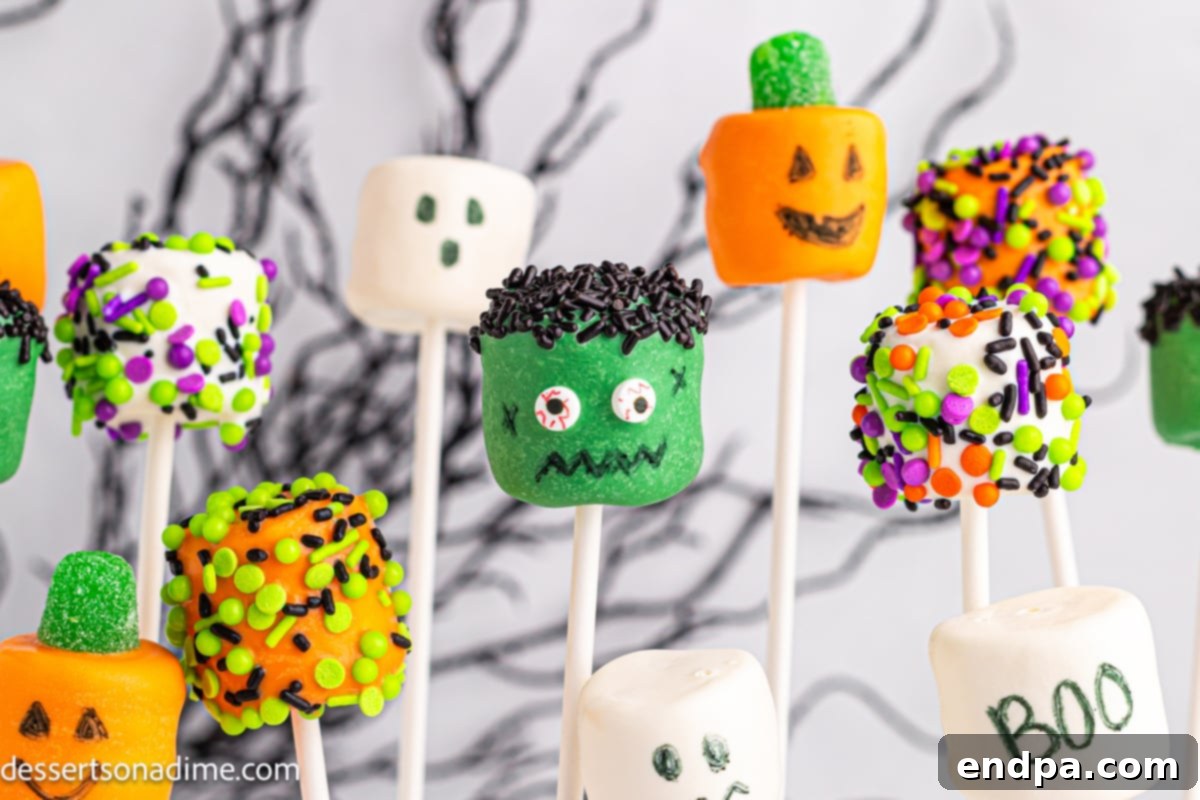
These delightful marshmallow pops are the epitome of simple elegance and festive fun. They require absolutely no baking, making them a perfect last-minute addition to your Halloween party menu or a joyful kitchen activity for kids of all ages. The beauty of this recipe lies in its simplicity and endless customization options. Whether you’re aiming for spooky, silly, or sweet, you can easily adapt these treats to fit any theme or color scheme. Serve them upright in a Styrofoam block for an impressive display, or arrange them artfully on a Halloween-themed dessert board alongside other frightfully good snacks.
Prepare to impress your Halloween party guests and create lasting memories with these charming marshmallow treats. They pair wonderfully with other festive desserts like Quick and Easy Halloween Treats, vibrant Jack-O-Lantern Cupcakes, and eerie Spider Web Cupcakes for a truly spectacular dessert table. Get ready to dip, decorate, and dive into the spirit of Halloween!
Table of Contents
- Why This Recipe Works
- Ingredients
- Variations
- Step By Step Instructions
- Expert Tips
- Storage
- More Fun Halloween Treats
Why This Recipe Works
This recipe for Halloween Marshmallow Pops isn’t just a treat; it’s a triumph of simplicity and seasonal charm. Here’s why it’s destined to become a staple in your annual Halloween preparations:
- Quick and Easy: Forget complicated baking schedules or lengthy ingredient lists. With just a few basic items and about 15 minutes of hands-on time, you can whip up a batch of these festive treats. It’s the ultimate no-fuss dessert solution for busy hosts or spontaneous spooky celebrations.
- Kid-Friendly Fun: This is more than a recipe; it’s an invitation to get creative. Kids will absolutely love helping to dip marshmallows, choose sprinkles, and attach candy eyes, transforming ordinary treats into their own unique monsters. It’s a fantastic activity for classroom parties, family Halloween nights, or a rainy autumn afternoon.
- Infinitely Customizable: The base recipe is a blank canvas for your Halloween imagination. Easily switch up the candy melt colors to match any theme – think purple for witches’ brew, or shimmering gold for enchanted pumpkins. Experiment with a variety of Halloween sprinkles, edible glitter, or even mini chocolate chips to create endless character possibilities.
- Make-Ahead Marvel: Planning a party can be stressful, but these marshmallow pops offer a convenient solution. They can be prepared a day or two in advance, allowing you to focus on other party details closer to the event. Simply store them properly, and they’ll be ready to impress when it’s time to serve.
- Crowd-Pleasing Perfection: Who can resist the delightful combination of soft, pillowy marshmallows, sweet, creamy chocolate or candy coating, and a satisfying crunch from sprinkles? This treat appeals to all ages and tastes, guaranteeing smiles and satisfied sweet cravings at any gathering.
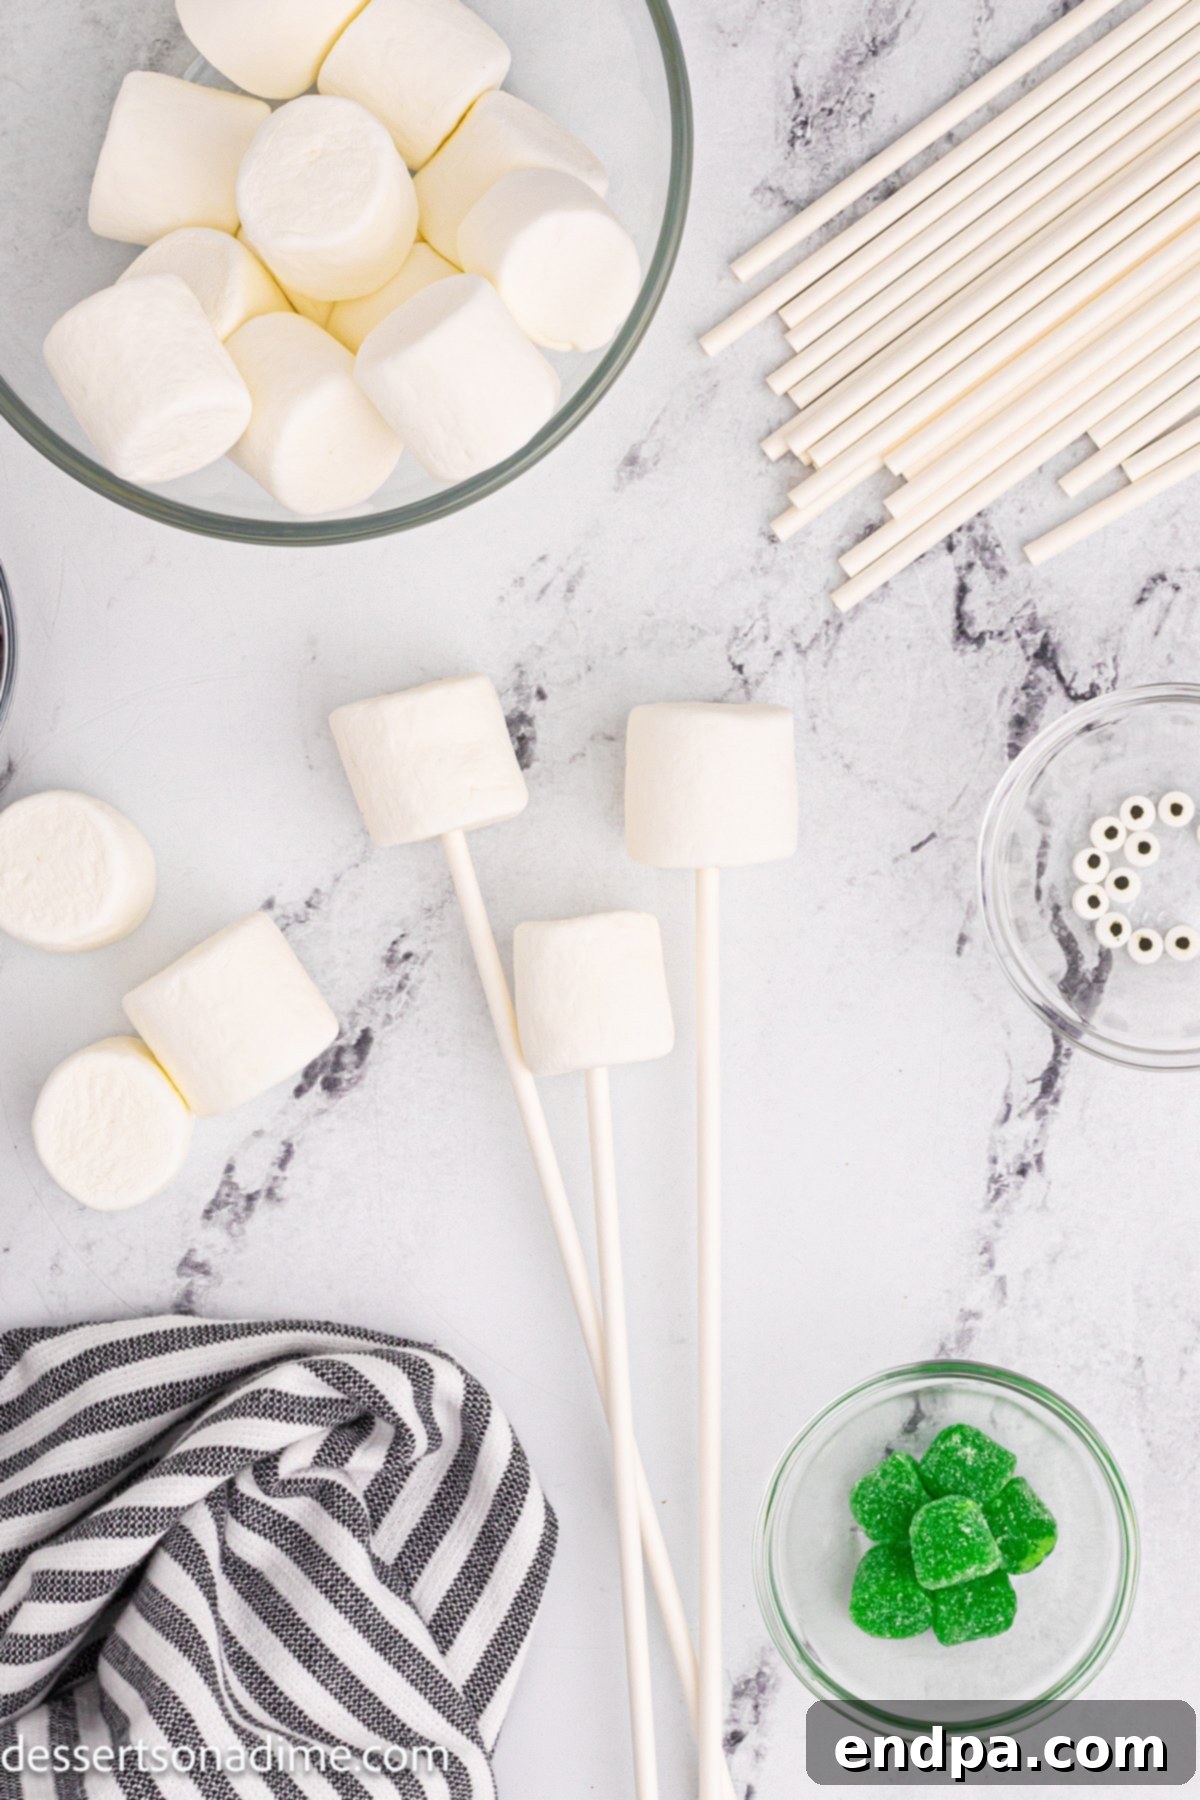
Ingredients
Crafting these adorable Halloween Marshmallow Pops requires just a handful of straightforward ingredients. Each component plays a vital role in creating a treat that’s as delicious as it is visually appealing:
- Jumbo Marshmallows: These are the fluffy foundation of our spooky creations. Their generous size provides a substantial canvas for dipping and decorating, making them easy to handle, especially for little hands.
- Green Candy Melts: Essential for bringing Frankenstein’s monster to life, these vibrant melts offer a smooth, quick-setting coating that’s perfect for a ghoulish green hue.
- Orange Candy Melts: Ideal for crafting cheerful jack-o’-lanterns, these candy melts provide a classic Halloween color and a sweet, vanilla-like flavor.
- White Candy Melts: Versatile and classic, white candy melts are perfect for creating ghostly apparitions, eerie mummies, or skeletal designs. They also serve as a great base for adding other colors.
- Black Sprinkles (Jimmies): These long, thin sprinkles add a crucial element of texture and visual contrast. Use them to create Frankenstein’s hair, spooky outlines, or simply as a dark, festive accent.
- Green Gumdrops: Small and chewy, green gumdrops are perfect for adding character details like the iconic “bolts” on Frankenstein’s neck or a stem for your pumpkin marshmallows.
- Edible Candy Eyes: The ultimate touch for bringing your Halloween marshmallows to life! These googly eyes instantly add personality and a playful, spooky charm to any character you create.
- Black Edible Food Marker: A fine-tipped edible marker is indispensable for drawing detailed faces – crooked smiles for jack-o’-lanterns, stitched mouths for Frankenstein, or simple wide eyes for ghosts.
- Lollipop Sticks: These sturdy sticks are crucial for transforming ordinary marshmallows into delightful “pops,” making them easy to dip, display, and enjoy without getting sticky fingers.
Variations
The beauty of Halloween Marshmallow Pops lies in their incredible adaptability. Don’t be afraid to experiment with different coatings, decorations, and presentation styles to make each batch unique:
- Classic Chocolate Covered Marshmallows: If candy melts aren’t your preference, substitute them with your favorite melted chocolate chips. Milk chocolate, semi-sweet, or even dark chocolate will create a rich, indulgent coating. For a lighter touch, use melted white chocolate. You can even tint white chocolate with food coloring designed for oil-based products (like gel food coloring) to achieve vibrant hues for different characters.
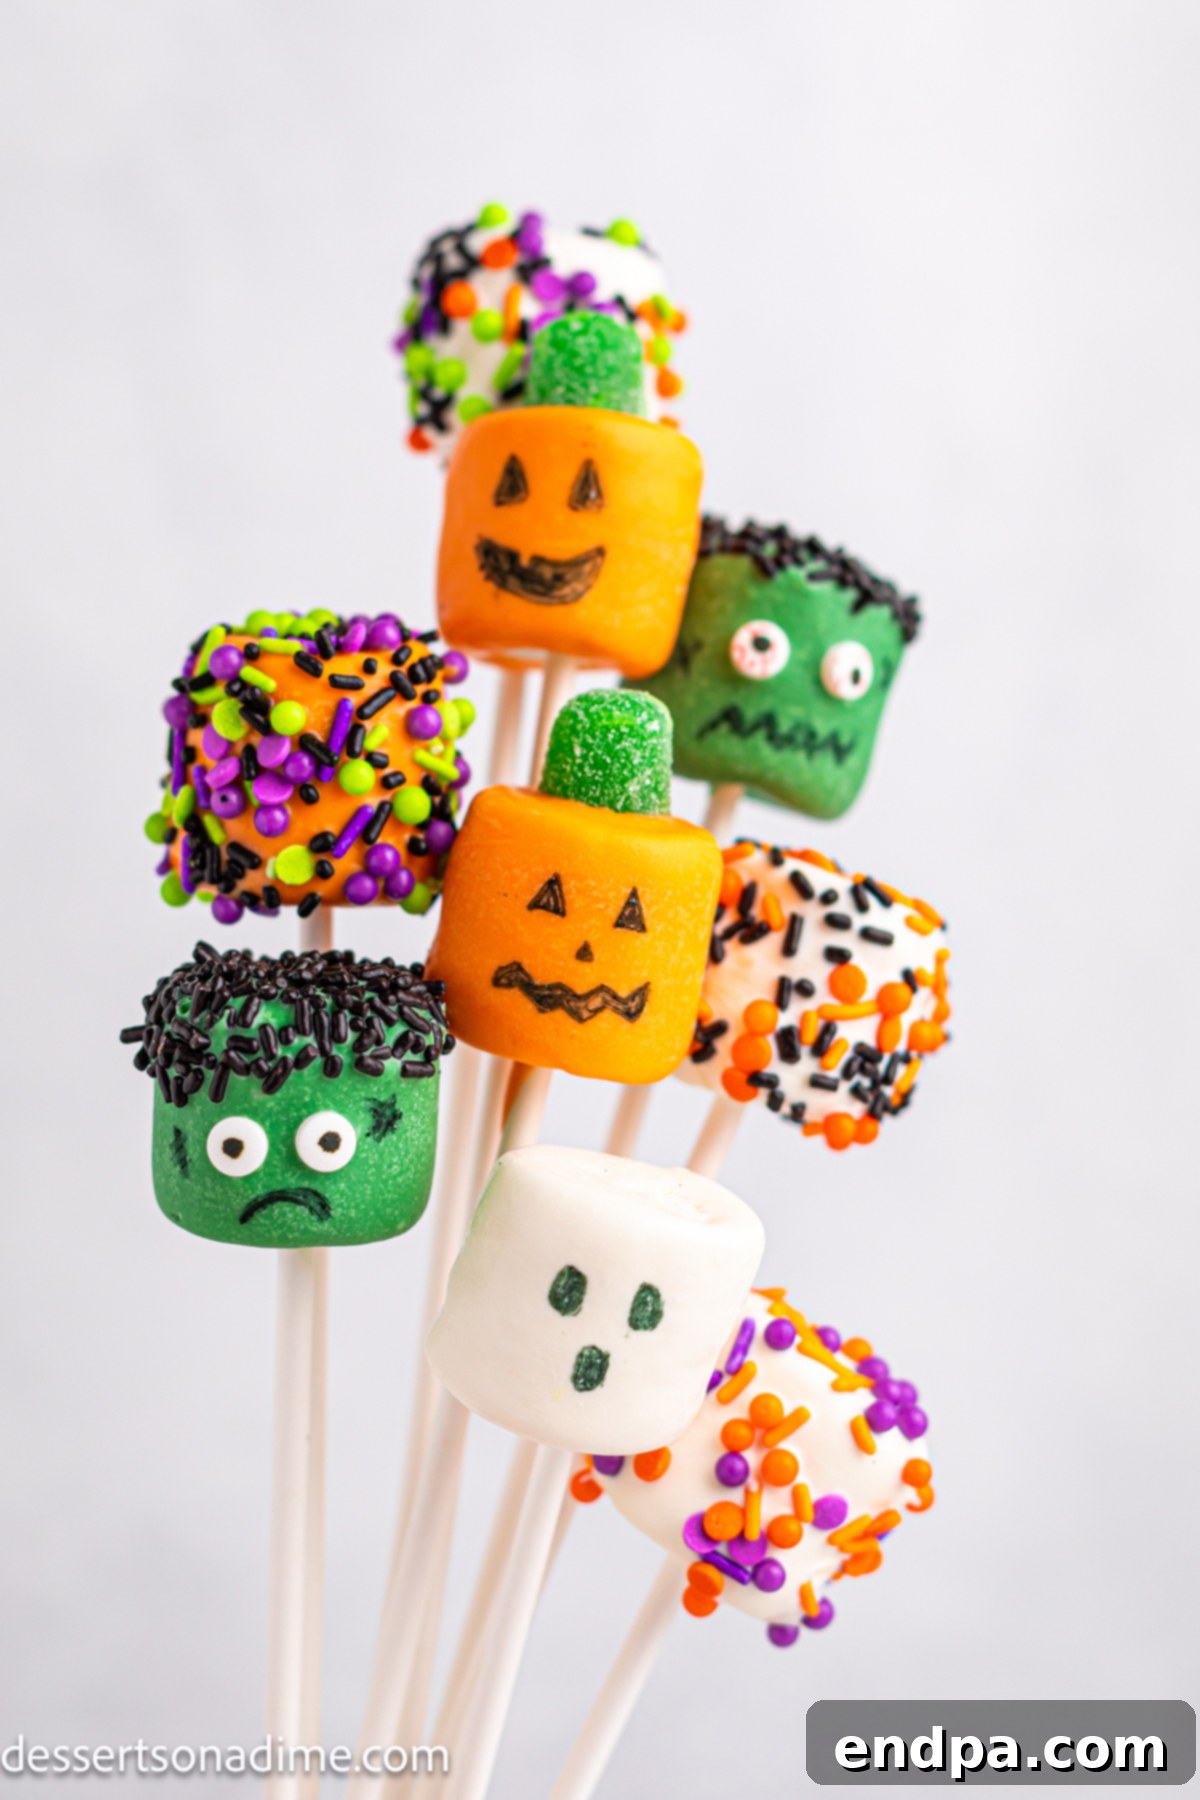
- Sparkling Sprinkle Extravaganza: Instead of elaborate faces, simply dip the marshmallow in your chosen melted candy and then roll it generously in a variety of Halloween-themed sprinkles. Explore different types of sprinkles: classic jimmies, nonpareils, confetti sprinkles, or even shaped sprinkles like bats, pumpkins, or ghosts. Mixing purple, orange, green, and black sprinkles creates a festive, colorful effect.
- Seasonal Candy Coating: This concept isn’t limited to Halloween! Change the candy melt colors and sprinkles to suit any holiday or season. Think red and green for Christmas, pastels for Easter, or pink and red for Valentine’s Day. It’s a versatile treat for year-round celebrations.
- “Build Your Own Monster” Station: Set up bowls of melted candy melts, various sprinkles, mini chocolate chips (for warts or ears), small candies, and edible markers. Let kids’ imaginations run wild as they create their own unique spooky creatures. This interactive approach adds an extra layer of fun to any party.
- Festive Straws Instead of Sticks: For an eco-friendly and stylish twist, consider using decorative paper straws instead of traditional lollipop sticks. Choose straws with Halloween patterns or colors to enhance the overall look of your marshmallow pops.
- Mummy Marshmallows: Achieve a spooky mummy effect by dipping marshmallows in white candy melts. Once the first layer sets slightly, drizzle more white candy melt over the marshmallow in a zig-zag pattern to create bandage-like wraps. Attach candy eyes before the drizzle fully sets for a truly captivating mummy.
- Spider Web Delights: Dip marshmallows in white or orange candy melts. While the coating is still wet, draw concentric circles with a black edible food marker (or melted black candy melts in a piping bag). Then, use a toothpick to drag lines from the center outwards, creating a realistic spider web design. Top with a small plastic spider ring for extra spookiness!
Step By Step Instructions
Creating these festive Halloween Marshmallow Pops is a fun and straightforward process. Follow these easy steps to bring your spooky sweet treats to life:
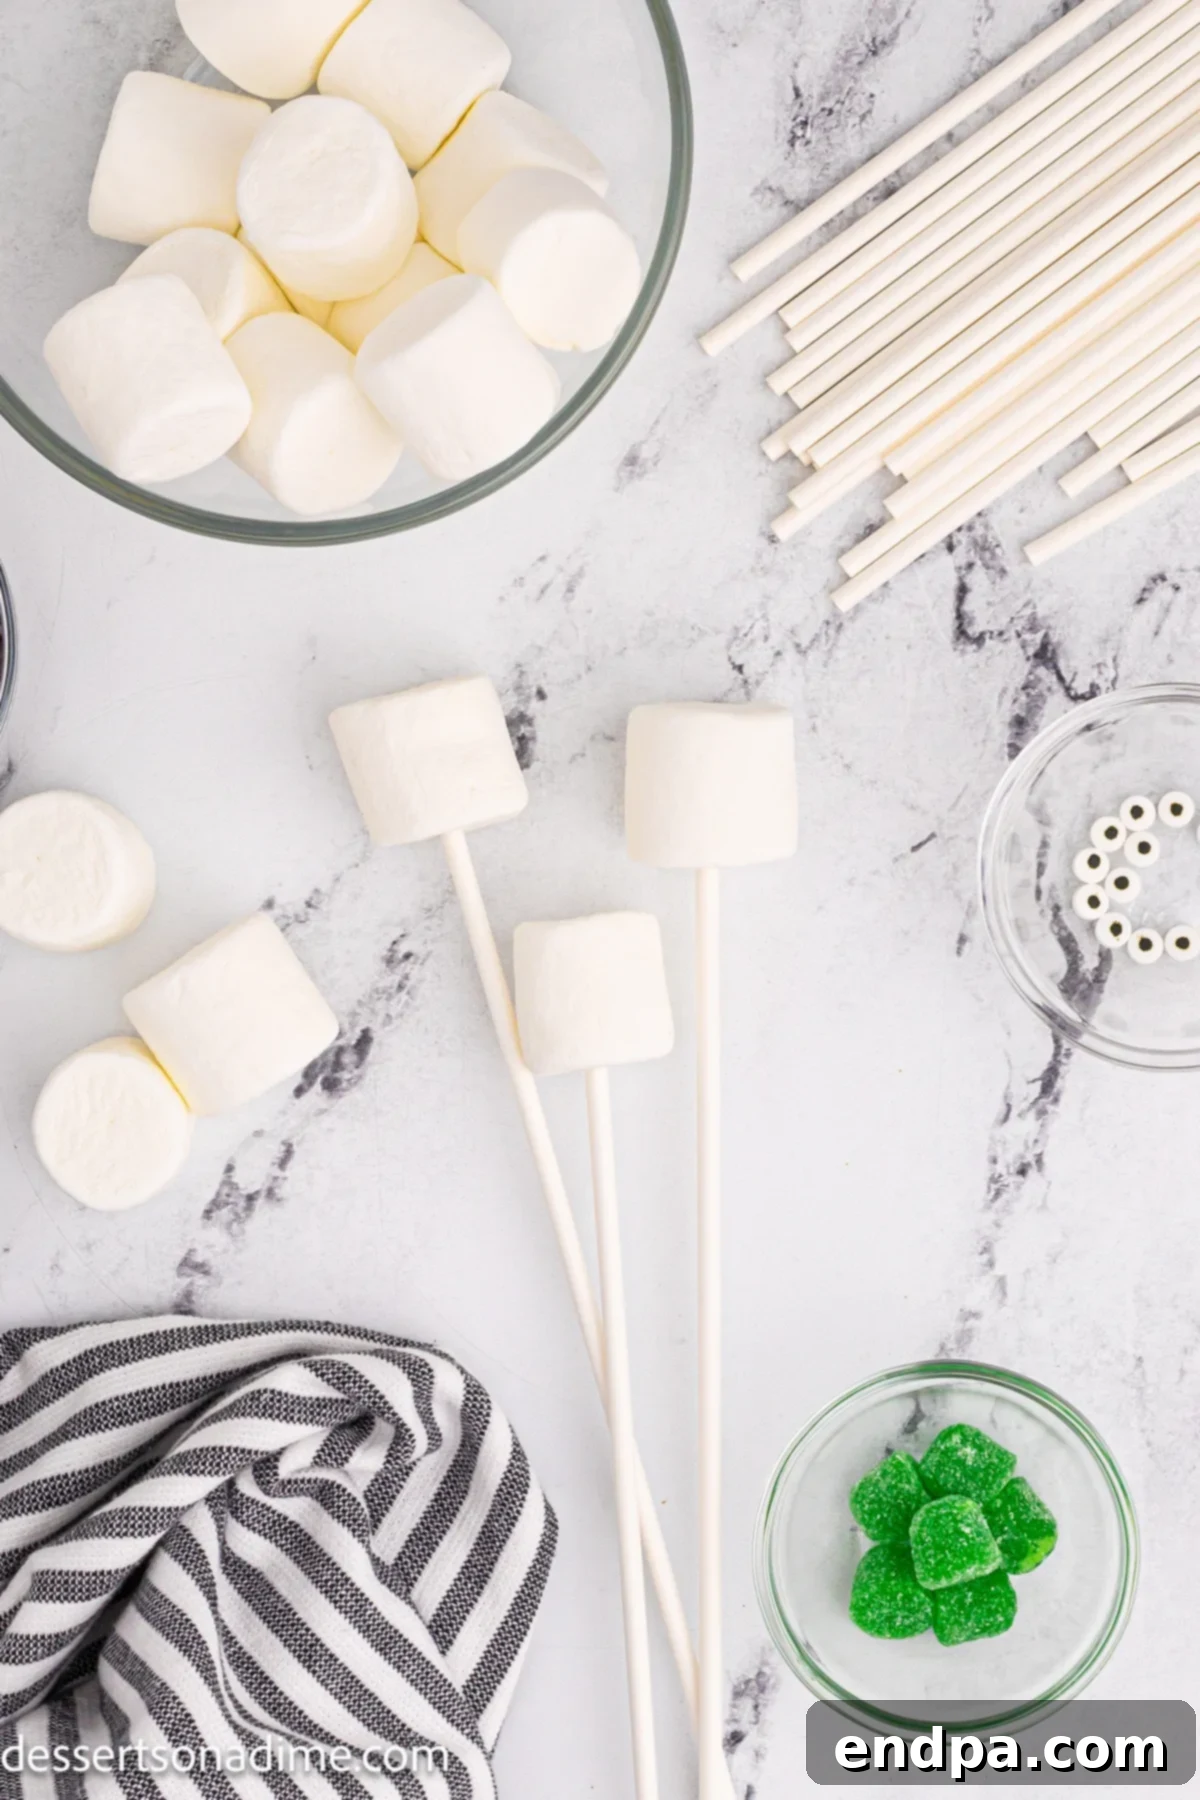
Step 1. Prepare Your Marshmallows: Gently insert a lollipop stick into the center of the base of each jumbo marshmallow. Ensure the stick is secure but doesn’t poke through the top. Lay out all your ingredients and decorations for easy access.
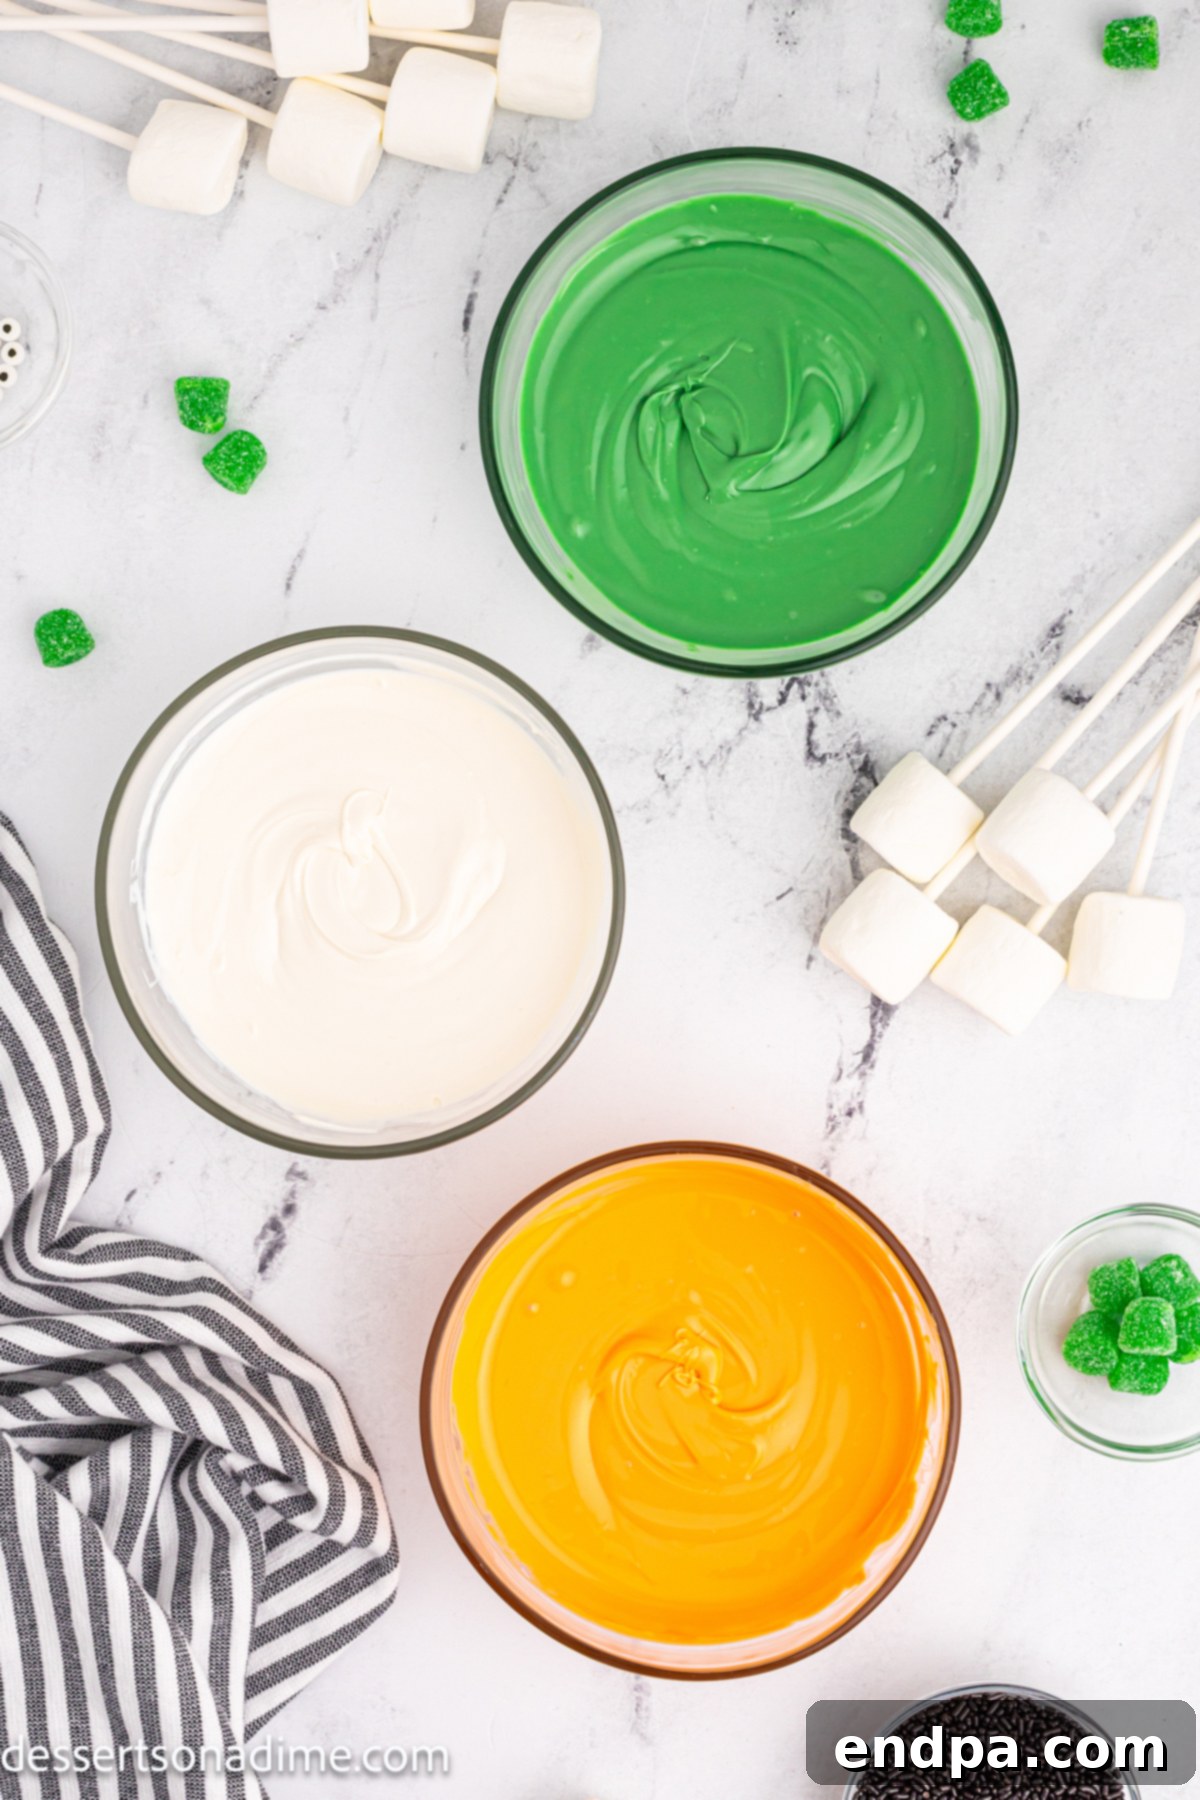
Step 2. Melt the Candy Melts: Place each color of candy melts (green, orange, white) into separate microwave-safe bowls. Heat them in the microwave in 30-second intervals, stirring thoroughly with a rubber spatula or spoon after each interval. Continue until the candy melts are completely smooth and free of lumps. Work with one color at a time to prevent premature hardening.
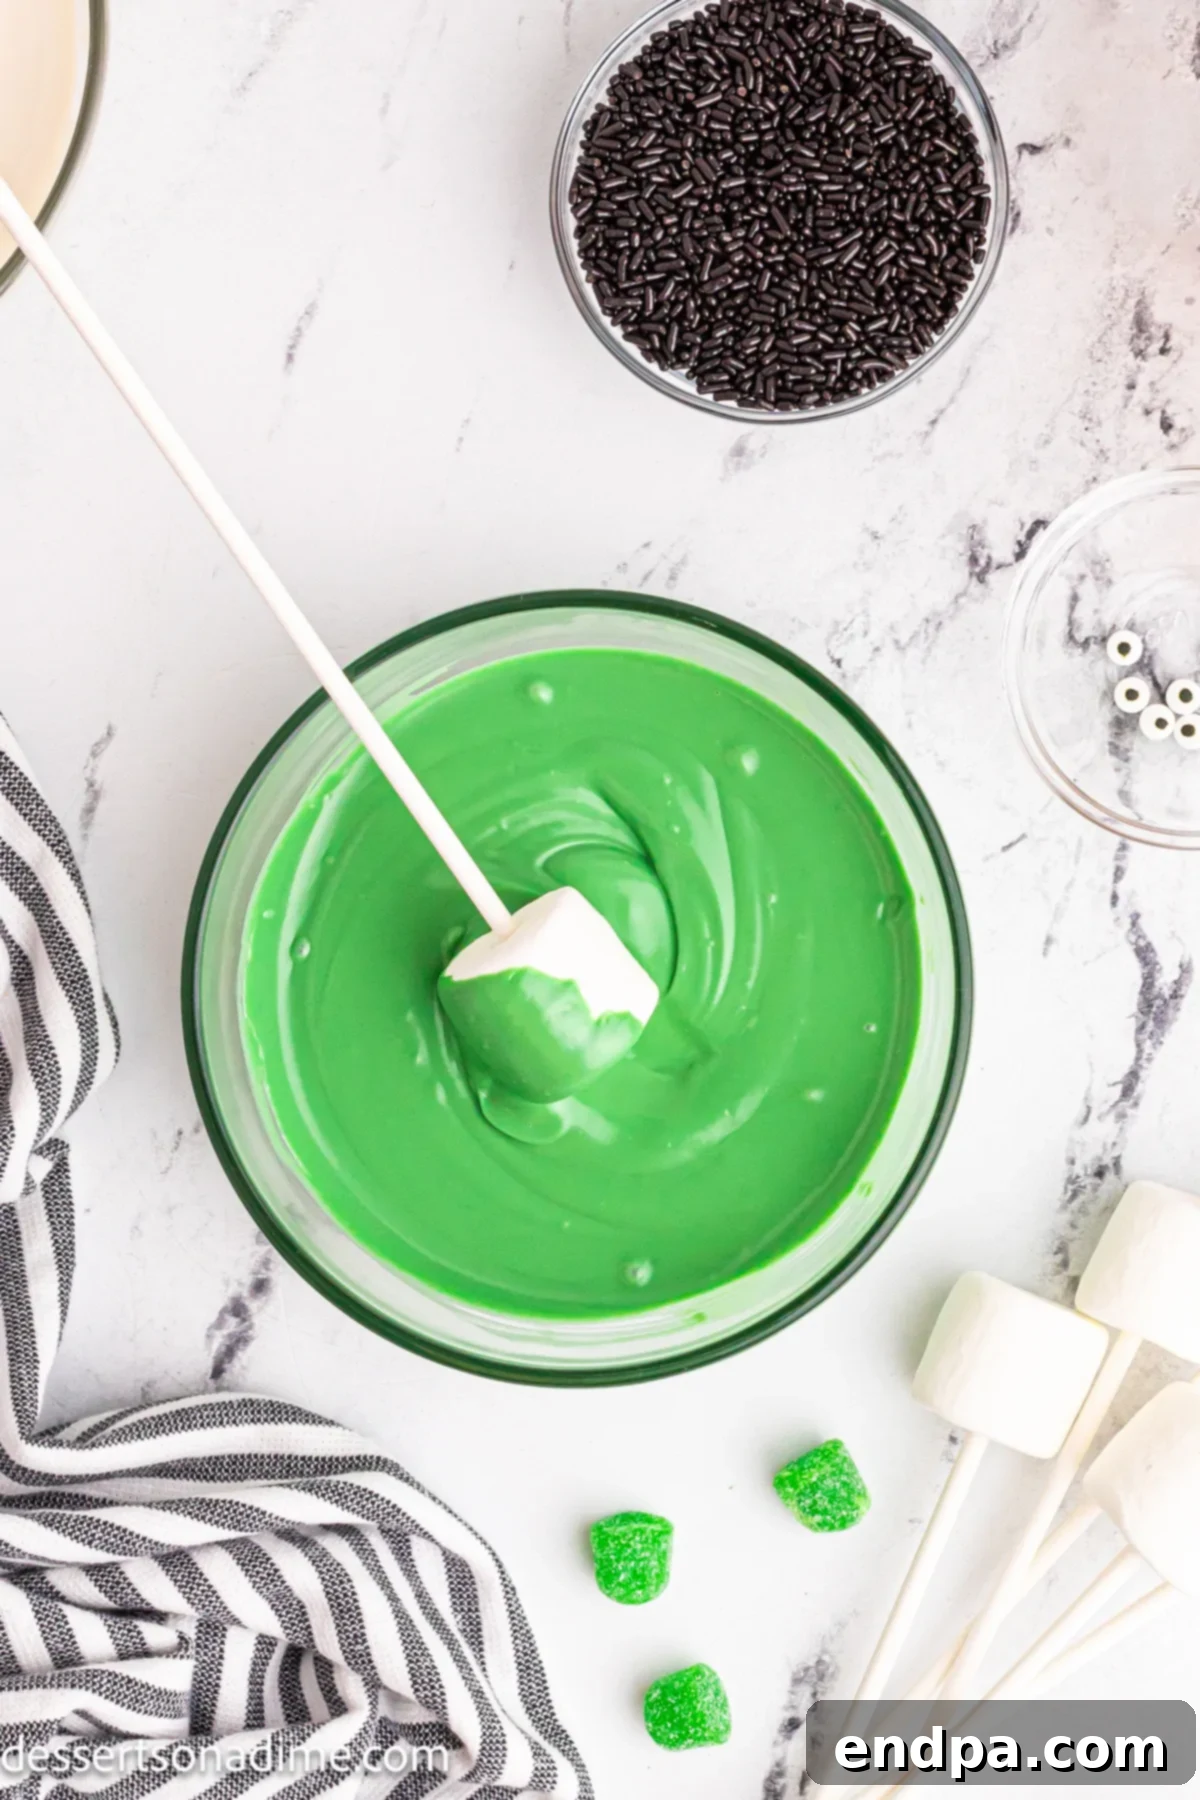
Step 3. Dip in Green Candy Melts: Take 6 of the marshmallows on sticks and carefully dip them into the melted green candy melts. Ensure they are fully coated, then gently tap the stick against the edge of the bowl to remove any excess coating for a smooth finish.
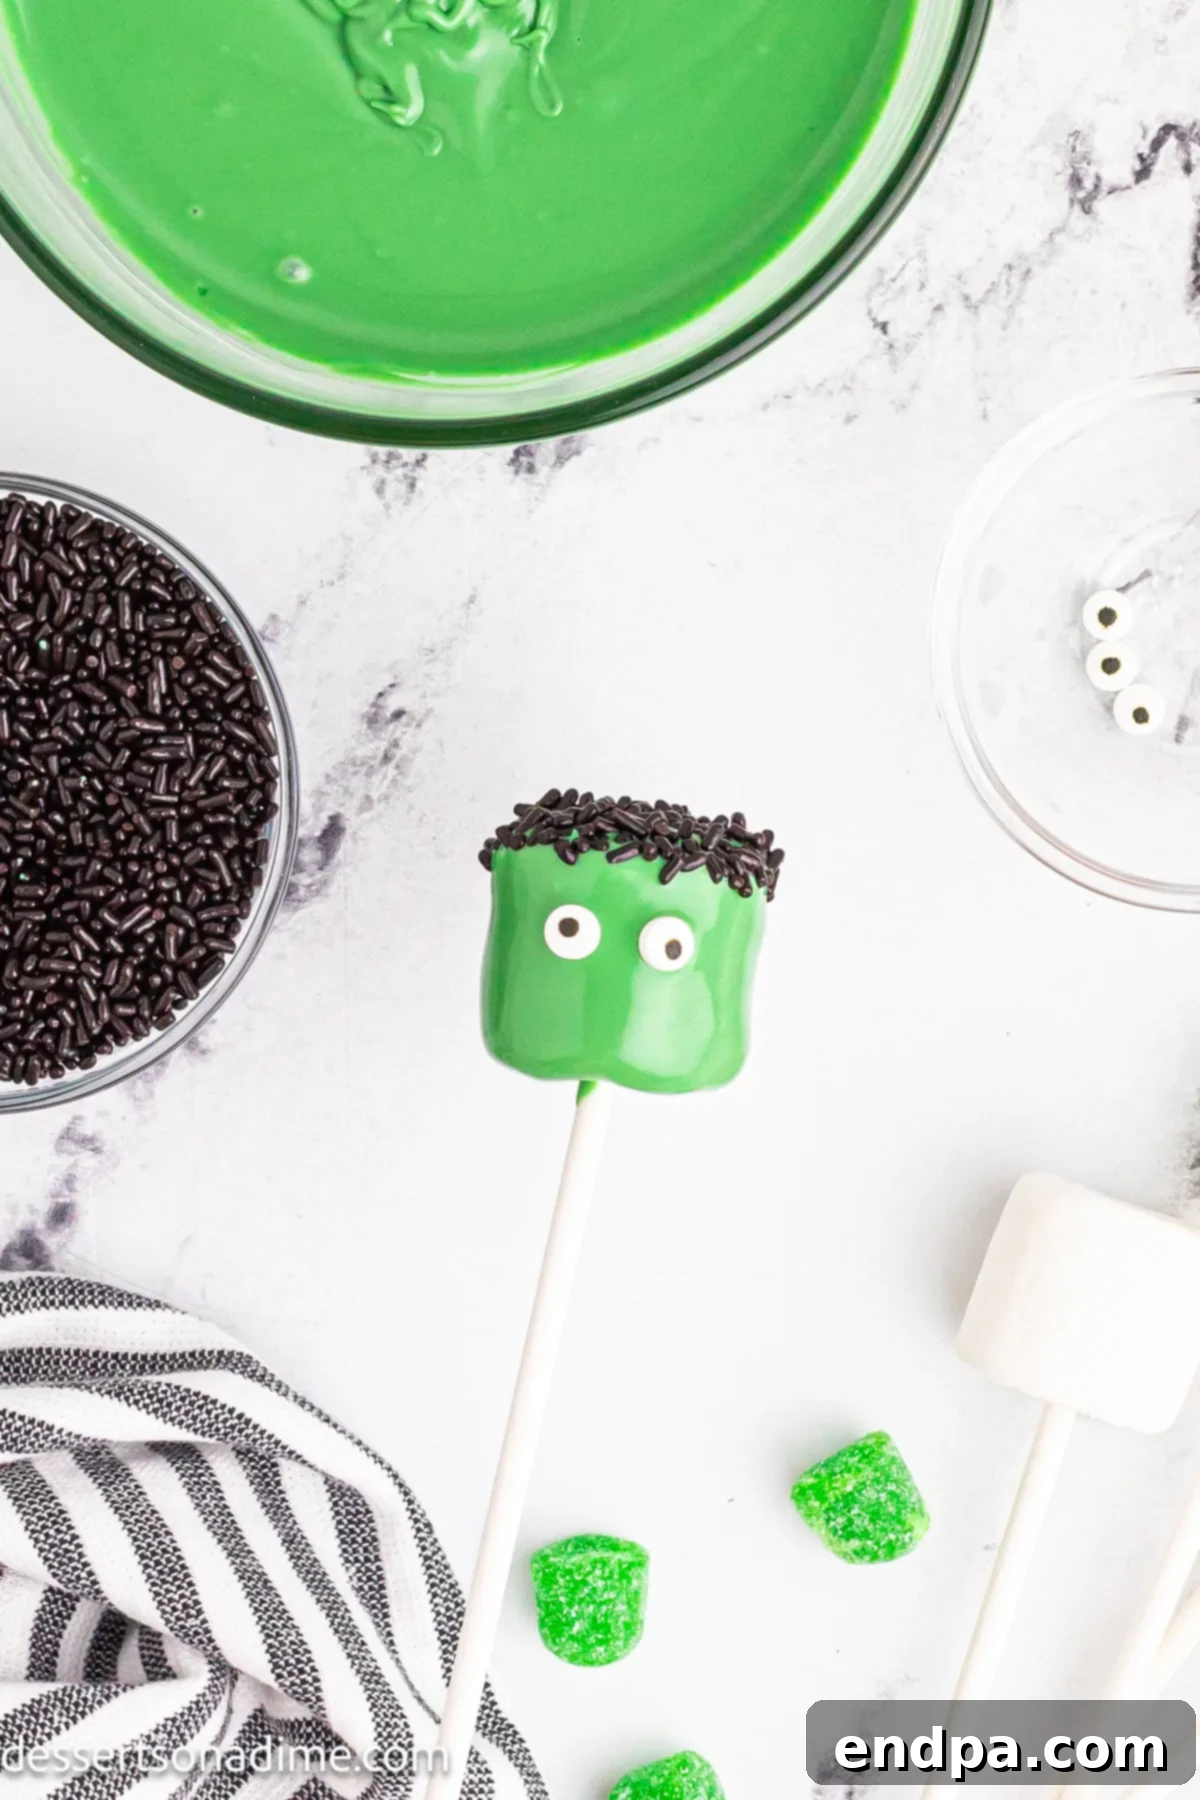
Step 4. Decorate Frankenstein: Immediately after dipping, sprinkle the top of the green marshmallows with black jimmies to create Frankenstein’s “hair.” Then, quickly press two candy eyes onto the front before the candy coating sets. Place each decorated marshmallow into a Styrofoam block to stand upright and dry. You can also use a parchment-lined baking sheet if you don’t have Styrofoam.
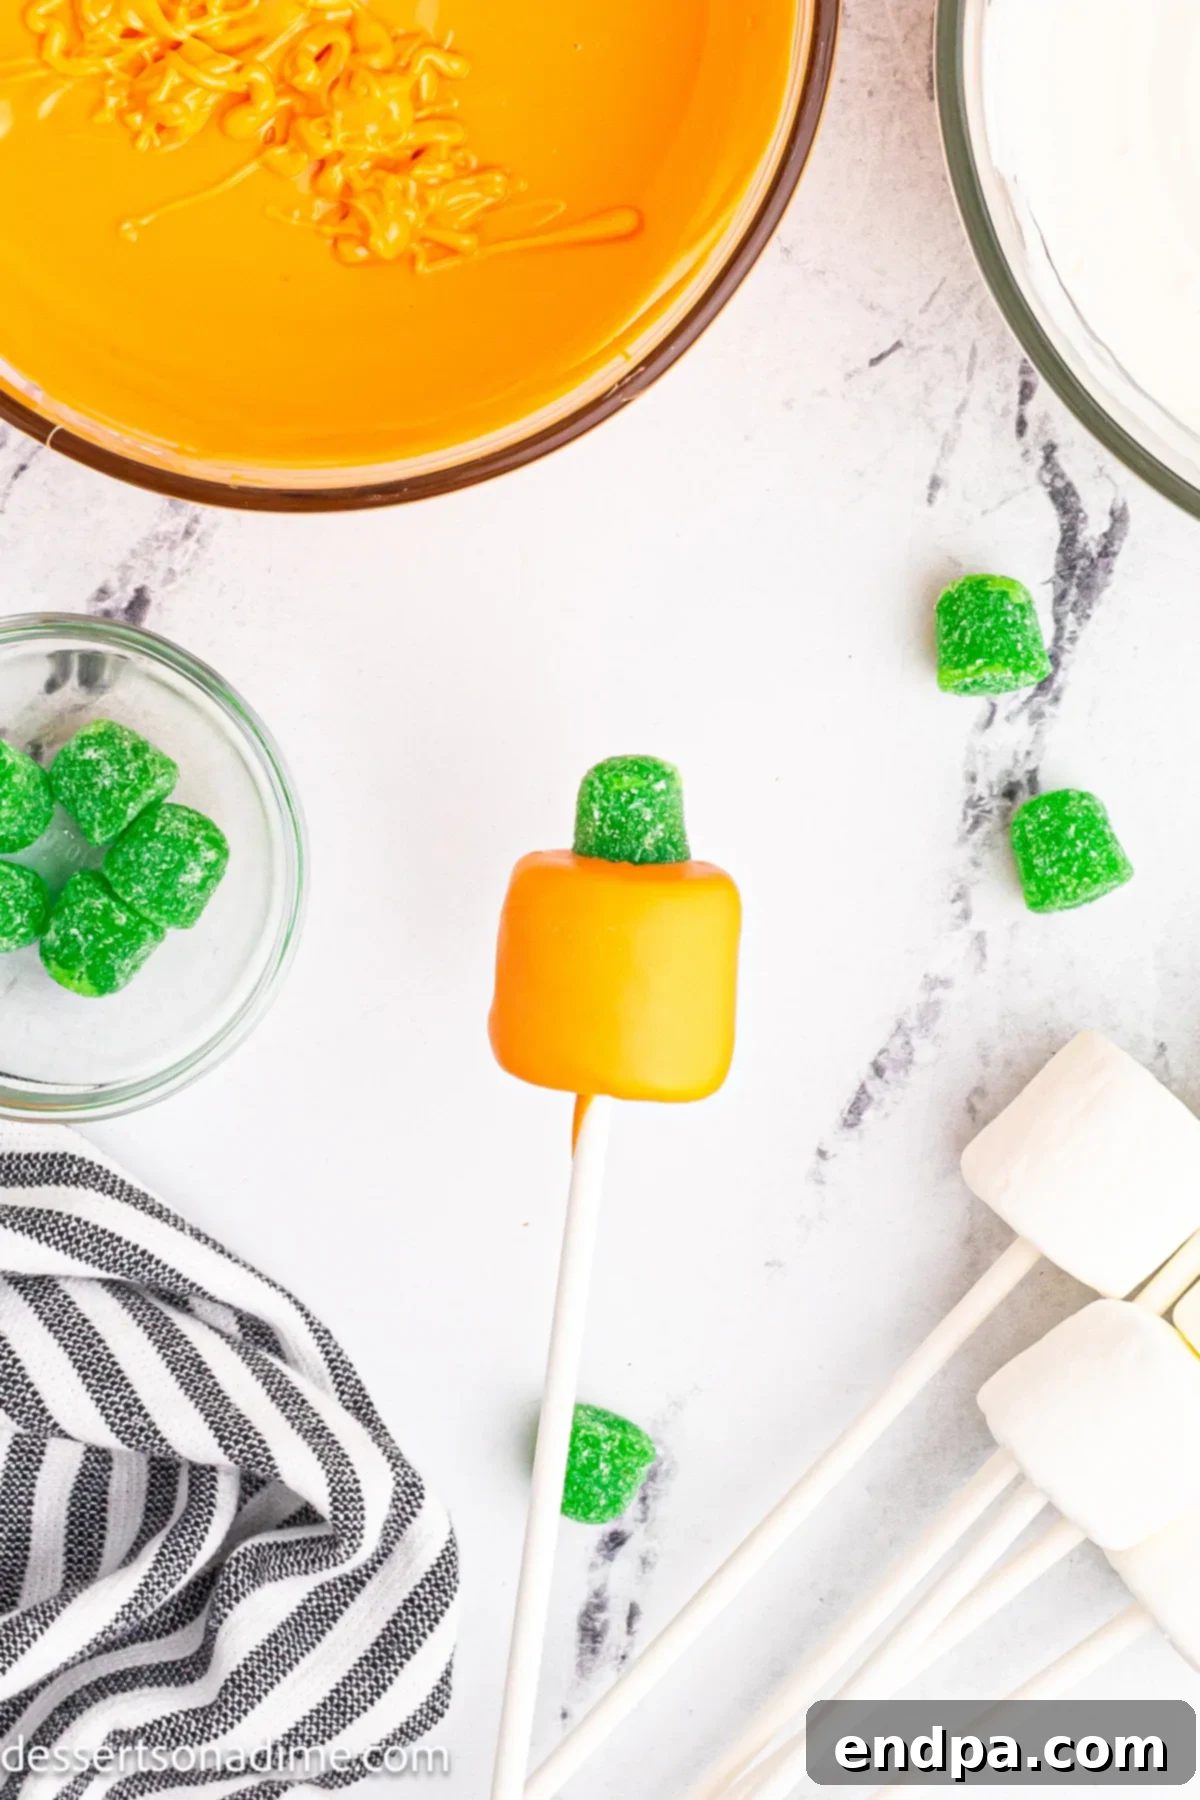
Step 5. Dip and Decorate Jack-O’-Lanterns: In a separate bowl, coat another 6 marshmallows in the melted orange candy melts, allowing any excess to drip off. Place these in a Styrofoam block to set. While the orange coating is still wet, top each one with a green gumdrop to resemble a pumpkin stem.
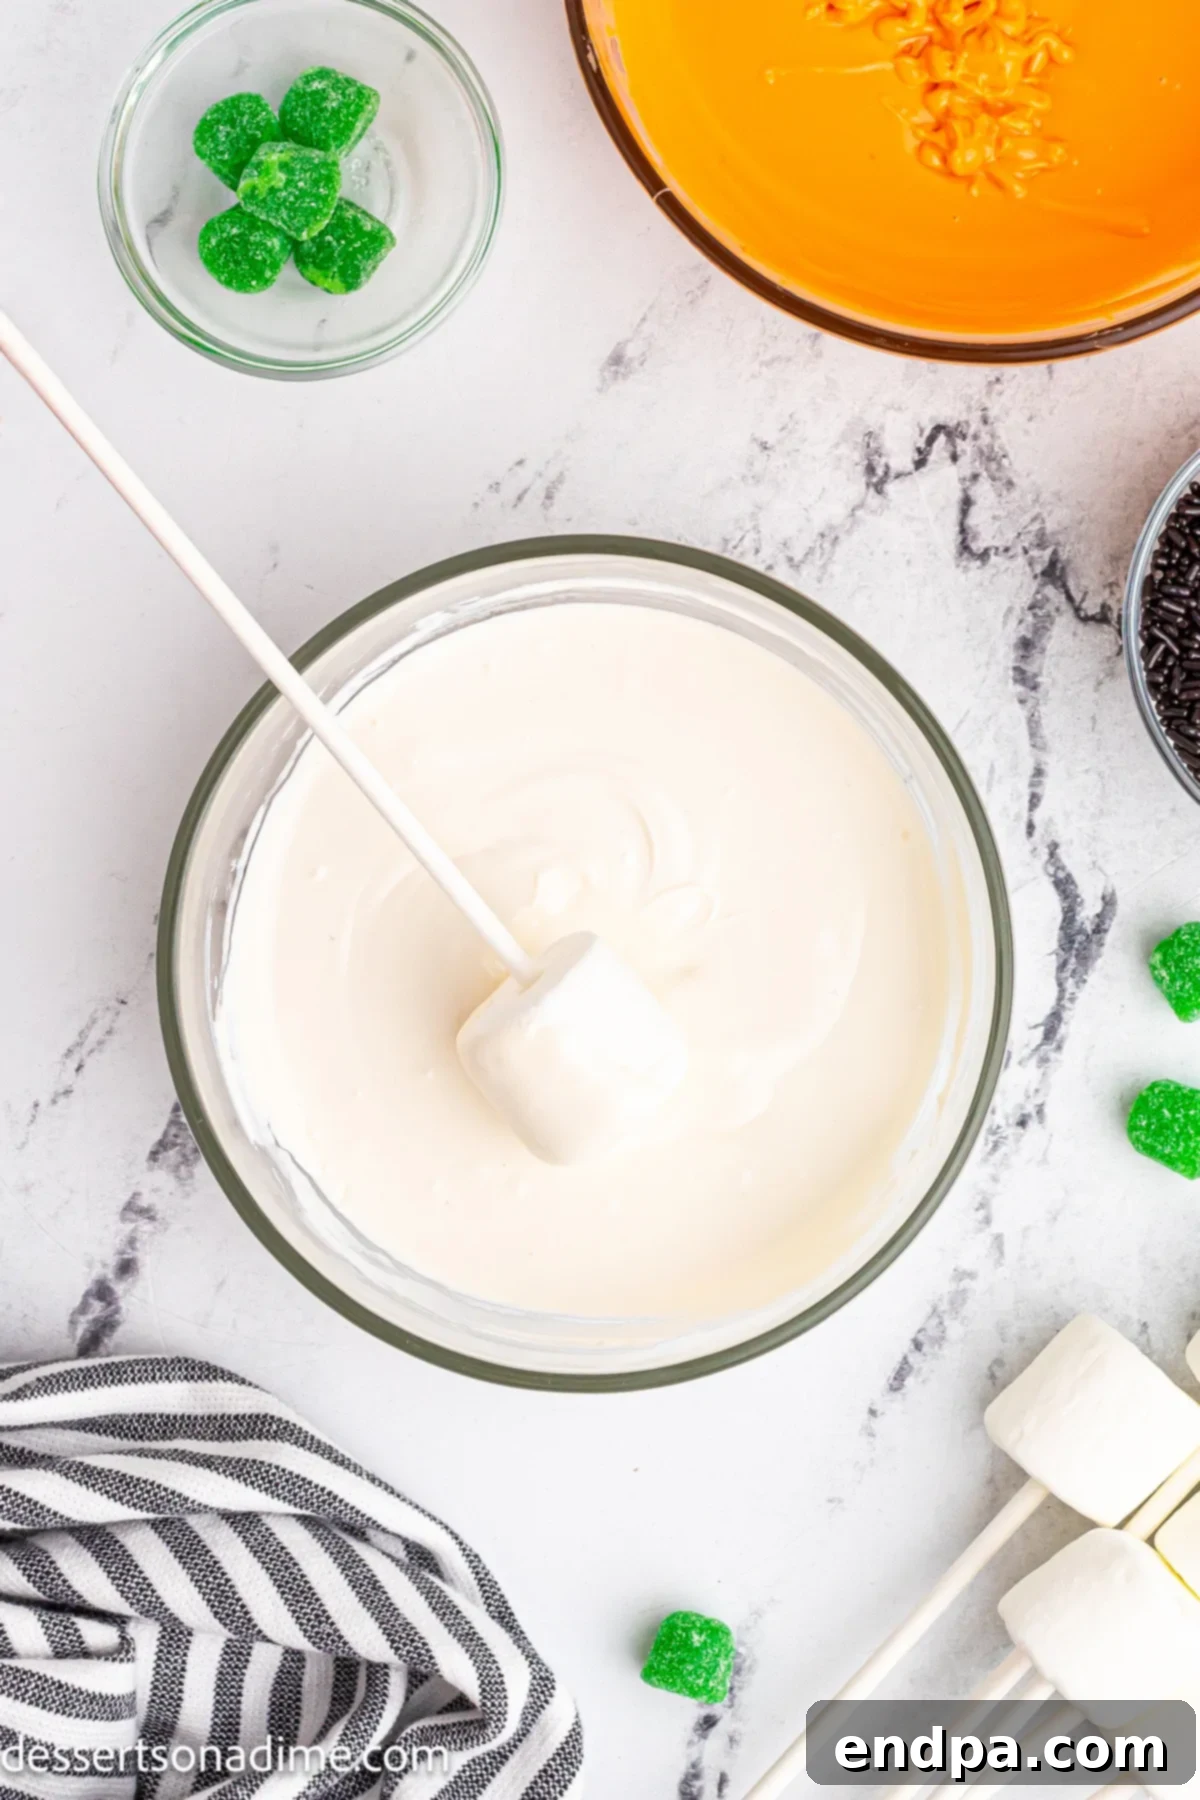
Step 6. Dip the Ghostly Marshmallows: Dip the remaining marshmallows into the melted white candy melts. Let any excess drip off, then place them into the Styrofoam block to set. These will become your spooky ghosts.
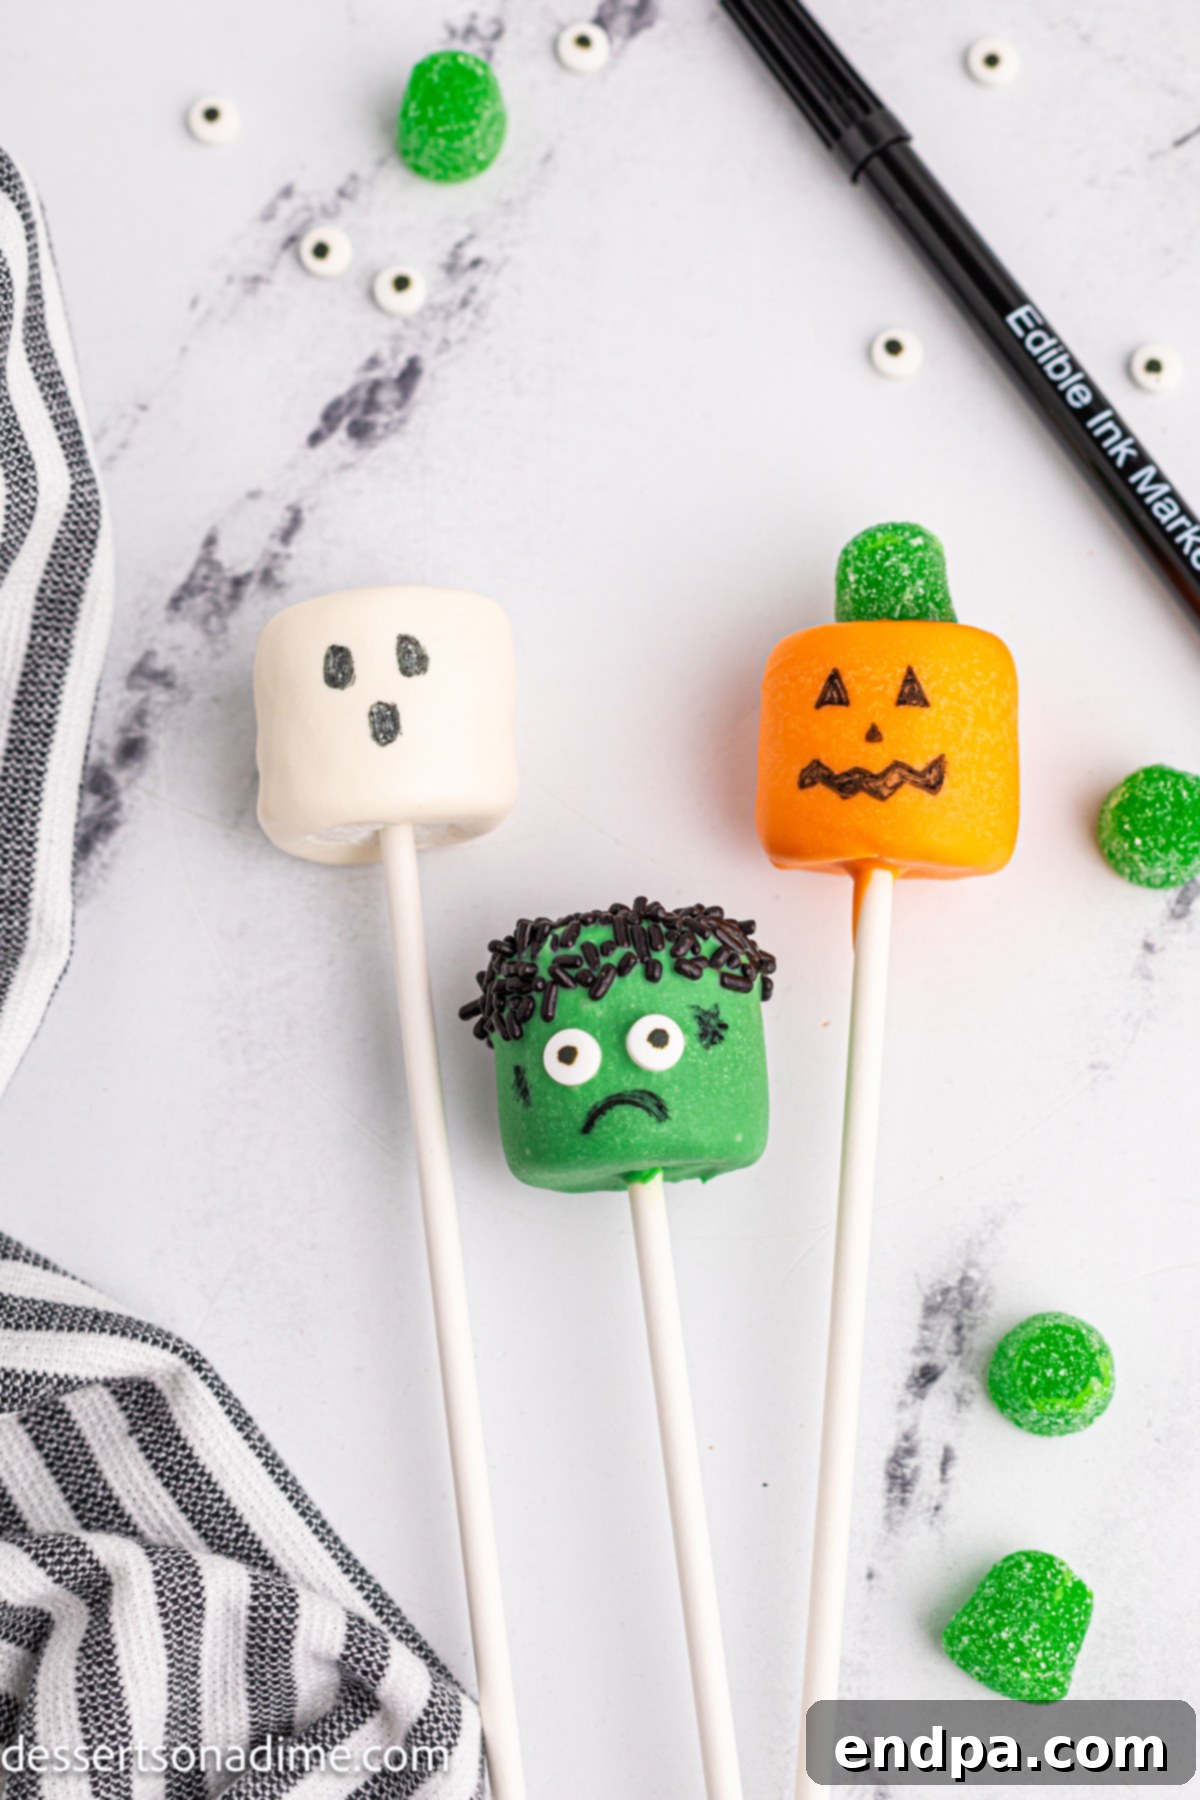
Step 7. Draw the Faces: Once all the candy melts have completely dried and hardened (this may take about 10-15 minutes at room temperature, or quicker in the fridge), it’s time for the artistic touch. Use your black edible food marker to draw unique faces on each marshmallow pop. Give Frankenstein a stitched mouth, create triangular eyes and a crooked smile for the jack-o’-lanterns, and simple oval eyes for the ghosts.
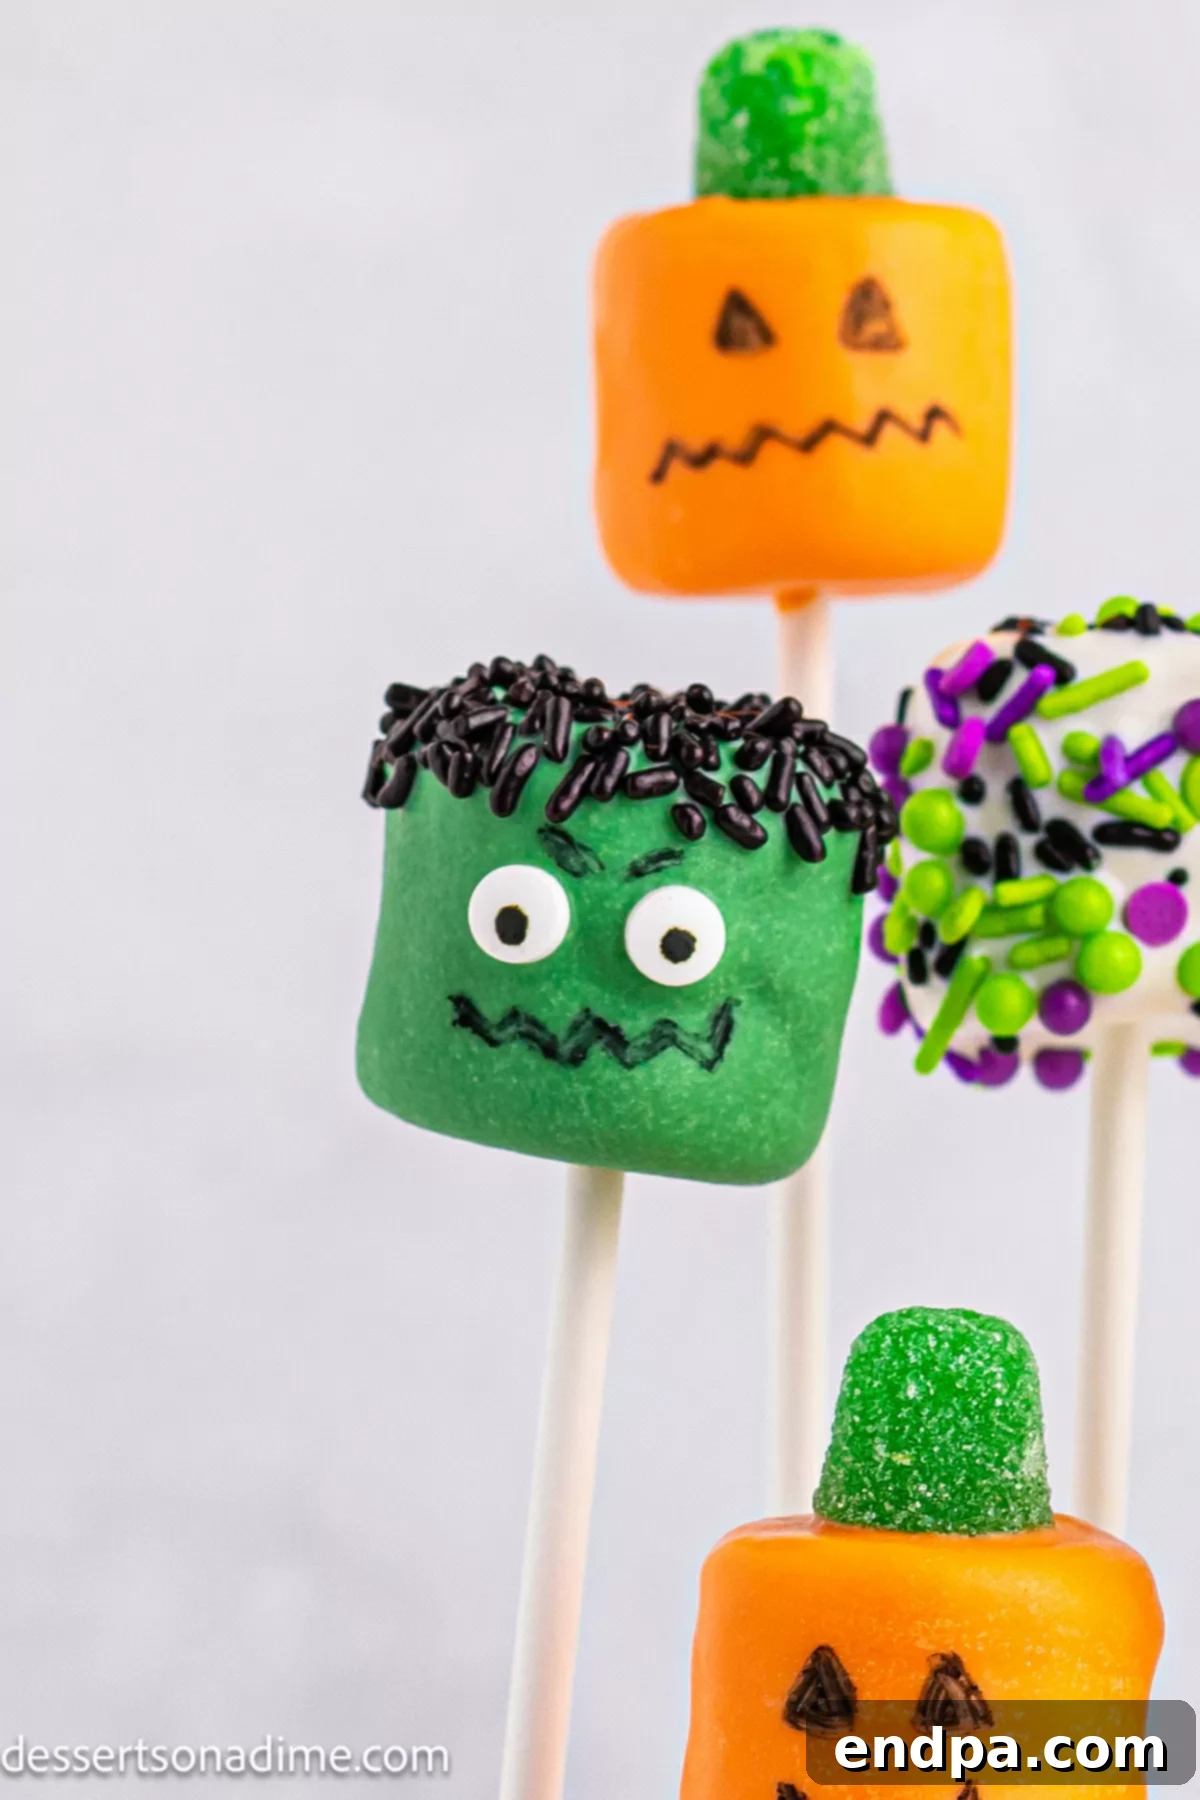
Step 8. Allow to Fully Set and Serve: Ensure the edible pen ink has completely dried on the marshmallow faces. This usually only takes a few minutes. Once dry, your Halloween Marshmallow Pops are ready to be served and enjoyed! If you don’t have a Styrofoam block for drying, a baking sheet lined with parchment paper works just as well – simply lay the marshmallow pops flat.
Expert Tips for Perfect Halloween Marshmallow Pops
Achieving perfectly dipped and decorated marshmallow pops is easy with a few insider tricks. Keep these expert tips in mind for the best results:
- Melt Candy Melts Slowly and Carefully: The key to smooth, workable candy melts is gentle heating. Microwave in short bursts (20-30 seconds), stirring diligently between each interval. Overheating can cause the candy melts to seize, become clumpy, or burn, making them unusable. If they seem too thick, you can add a tiny bit of coconut oil or vegetable shortening (about ½ teaspoon per bag) to thin them slightly.
- Choose a Deep, Narrow Bowl for Dipping: Using a container that is deeper than it is wide ensures you have enough melted candy to fully submerge the marshmallow without needing a huge quantity. This makes dipping cleaner and more efficient. A mug or a tall measuring cup works perfectly.
- Remove Excess Coating for a Professional Finish: After dipping, gently tap the marshmallow stick against the rim of your bowl. This helps to shake off any excess candy coating, preventing drips and ensuring a smooth, even layer on your marshmallow pop. A clean finish enhances the overall look.
- Work Quickly When Decorating: Candy melts and chocolate harden relatively fast, especially if your kitchen is cool. Have all your sprinkles, candy eyes, and other decorations ready and within arm’s reach. Apply them immediately after dipping the marshmallow, while the coating is still wet and sticky, to ensure they adhere properly.
- Allow for Proper Setting Time: Patience is key! Place your dipped and decorated marshmallows on a parchment-lined baking sheet or into a Styrofoam block and allow them to set completely. This typically takes 10-20 minutes at room temperature, or you can speed up the process by placing them in the refrigerator for 5-10 minutes. Fully set coatings prevent smudges and make handling easier.
- Wrap Individually for Gifting or Favors: Once your marshmallow pops are completely dry and set, wrap each one individually in small cellophane bags. Secure them with a festive ribbon, twist tie, or even a personalized tag. This makes them ideal for party favors, thoughtful gifts, or easy-to-distribute treats for trick-or-treaters (if individually packaged with appropriate labels).
- Unleash Your Creativity: This recipe is a fantastic starting point for endless imagination. Mix and match candy melt colors (consider purple or black!), combine different sprinkle types, or get inventive with edible food markers. You can create a whole cast of characters: traditional ghosts, grinning pumpkins, quirky Frankenstein monsters, creepy mummies, or even adorable monsters with multiple eyes. The only limit is your imagination!
Storage Guidelines for Halloween Marshmallow Pops
Proper storage ensures your Halloween Marshmallow Pops stay fresh, delicious, and looking their best for your spooky celebrations:
- Room Temperature: For optimal texture and flavor, store your finished Halloween Marshmallow Pops in an airtight container at room temperature. Place parchment paper between layers to prevent sticking. They will remain fresh and delightful for up to 1 week. Always keep them in a cool, dry place, away from direct heat sources or sunlight, which could cause the candy coating to melt or become sticky.
- Refrigeration: While not strictly necessary, you can store these treats in the refrigerator if your home environment is particularly warm or humid. However, allowing them to come to room temperature for about 15-20 minutes before serving will ensure the marshmallows are soft and chewy, providing the best possible texture. Be aware that condensation can sometimes form when chilled items return to room temperature, which might affect the appearance slightly.
- Freezing: Freezing is generally not recommended for marshmallow pops. Marshmallows tend to become quite sticky and develop an undesirable chewy texture once thawed, affecting the overall enjoyment of the treat. It’s best to enjoy them fresh or within the recommended room temperature storage window.
- Make-Ahead Friendly: These marshmallow pops are fantastic for preparing in advance. You can make them 2-3 days before your party or event. Store them as described above, ensuring they are in an airtight container with layers separated by parchment paper. This allows you to tackle your party prep in stages and avoid last-minute stress.
More Fun Halloween Treats to Explore
If you loved making these Halloween Marshmallow Pops, you’re in for a treat! The spooky season offers endless possibilities for creative and delicious desserts. Here are some more fantastic Halloween-themed recipes to complete your dessert table and delight your guests:
- Halloween Cake Pops
- Easy Halloween Donuts
- Halloween Popcorn
- Monster Cupcakes
- Halloween Monster Eyeballs
- Easy Halloween Treats
These Halloween Marshmallow Pops are more than just a sweet snack; they are a gateway to festive fun and creativity. Whether you’re making them with kids, for a party, or just to get into the Halloween spirit, their ease and charm are sure to be a hit. So go ahead, dip, decorate, and let the spooky celebrations begin!
Halloween Marshmallows Recipe Card
Prep Time: 10 mins
Total Time: 10 mins
Servings: 18
Cuisine: American
Course: Dessert
Calories: 164 kcal
Author: Carrie Barnard
Ingredients
- 18 Jumbo Marshmallows
- 1 bag Green Candy Melts
- 1 bag Orange Candy Melts
- 1 bag White Candy Melts
- 1/2 cup Black Sprinkles (Jimmies)
- 6 Green Gumdrops
- 12 Candy Eyes
- 1 Black Edible Food Marker
- Lollipop Sticks
Instructions
- Place a lollipop stick into the base of each jumbo marshmallow.
- Melt each color of the candy melts in separate microwave-safe bowls. Heat in 30-second intervals, stirring after each interval, until fully melted and smooth.
- Dip 6 of the marshmallows into the melted green candy melts, allowing excess to drip off.
- Immediately dip the top of these marshmallows in the black sprinkles. Place in a Styrofoam block to set and add 2 candy eyes to each before the candy sets.
- Dip another 6 marshmallows into the melted orange candy melts. Place in a Styrofoam block to set and top each with a green gumdrop while the coating is still wet.
- Dip the remaining marshmallows into the melted white candy melts. Place in a Styrofoam block to set.
- Once all the marshmallows are completely dried and firm, use the black edible food marker to draw faces. Create Frankenstein’s mouth on the green marshmallows, a carved smile on the orange jack-o’-lanterns, and simple spooky eyes on the white ghosts.
- Allow the edible pen ink to dry for a few minutes. Once dry, your Halloween Marshmallow Pops are ready to serve and enjoy!
Recipe Notes
Store leftover Halloween Marshmallow Pops in an airtight container or zip-top bag at room temperature for up to 1 week. Separate layers with parchment paper to prevent sticking.
Nutrition Facts (per serving)
Calories: 164kcal, Carbohydrates: 33g, Protein: 0.5g, Fat: 4g, Saturated Fat: 3g, Polyunsaturated Fat: 0.01g, Monounsaturated Fat: 0.02g, Sodium: 34mg, Potassium: 1mg, Fiber: 0.03g, Sugar: 27g, Calcium: 1mg, Iron: 0.1mg
