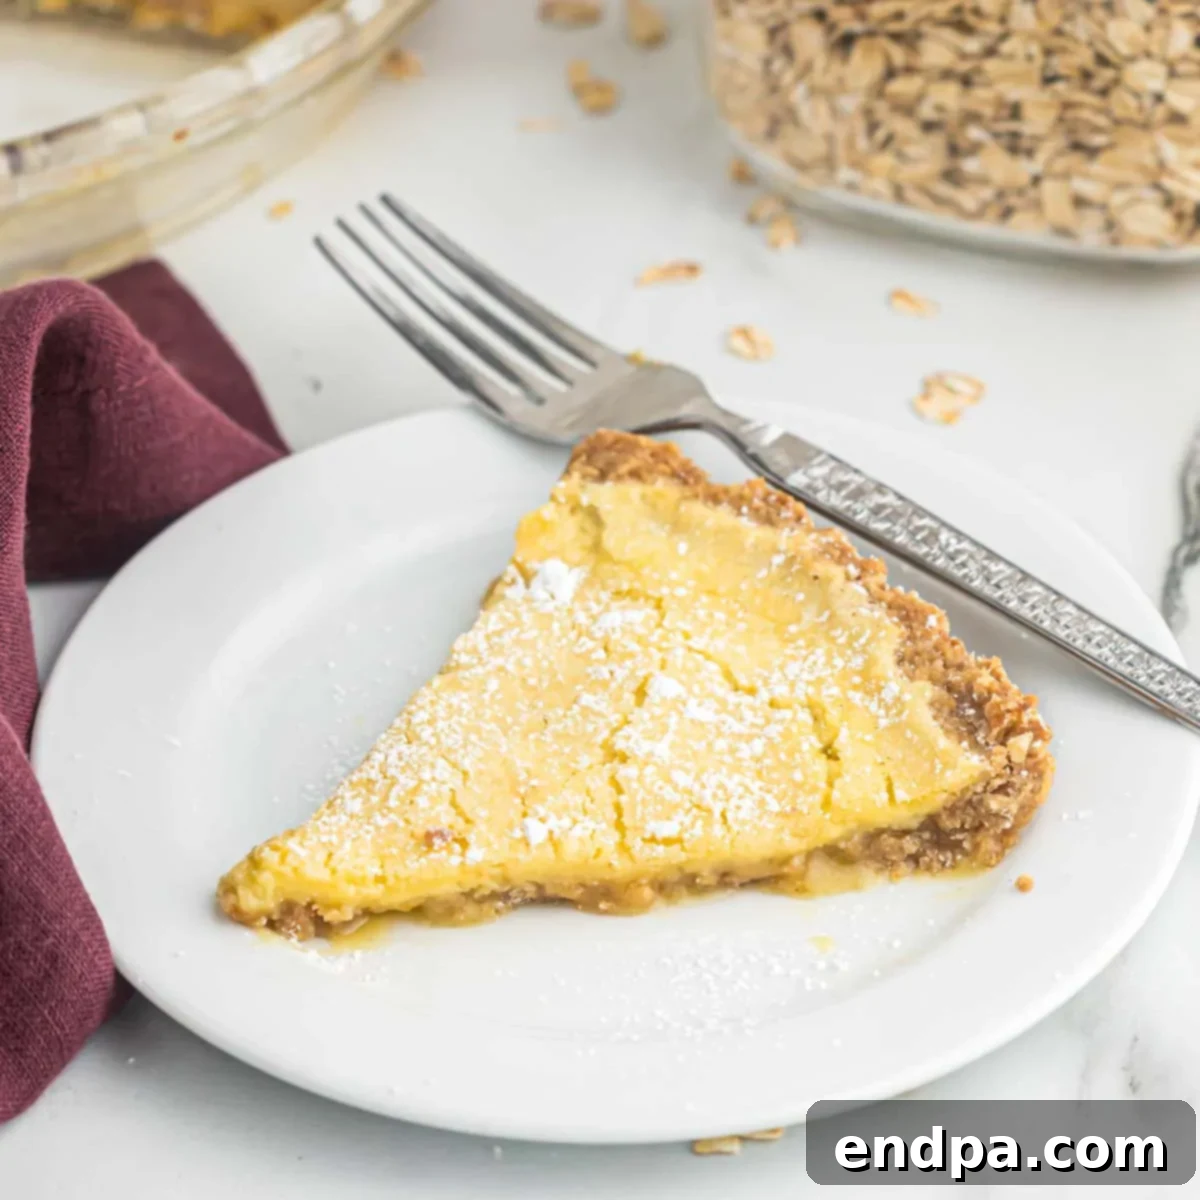
Prepare to be enchanted by the Ultimate Crack Pie Recipe, a dessert so irresistibly delicious it has earned its legendary name. Featuring a buttery, gooey filling nestled in a crisp, oatmeal cookie crust, this decadent treat is guaranteed to be the star of any gathering. Every bite offers a perfect balance of sweet, salty, and rich flavors, making it impossible to stop at just one slice.
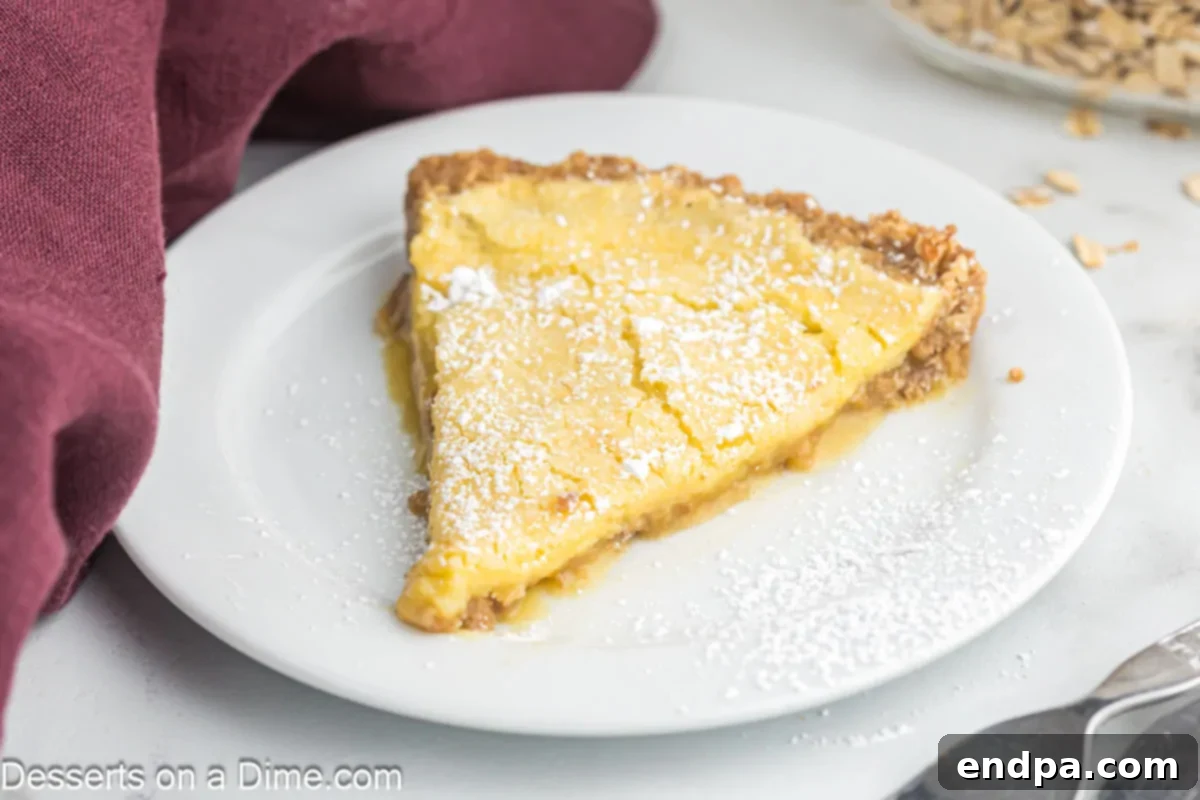
Crack Pie, famously known as Milk Bar Pie or Momofuku Milk Bar Pie from Christina Tosi’s renowned bakery, is more than just a dessert; it’s an experience. Its unique, caramelized filling and rustic, chewy crust create a symphony of textures and tastes that set it apart from traditional pies. This recipe is meticulously crafted to bring the magic of this iconic dessert right into your kitchen, providing simple, foolproof steps and expert tips to ensure a spectacular result every time. Whether for a special occasion, a holiday feast, or simply to satisfy a serious sweet craving, this pie promises to be a beloved addition to your repertoire.
If you’re a fan of rich, comforting desserts, you might also enjoy our Butterscotch Cinnamon Pie and our delightful Crack Cake recipe.
What’s in this post: Master the Crack Pie Recipe
- Why This Crack Pie Will Become Your Favorite
- Key Ingredients for the Perfect Pie
- Step-by-Step Baking Guide
- Expert Tips for Success
- Serving Suggestions & Topping Ideas
- Frequently Asked Questions About Crack Pie
- Explore More Easy Pie Recipes
- Full Crack Pie Recipe Card
Why This Crack Pie Will Become Your Favorite
- Unforgettable Decadence: This pie delivers a rich, gooey, and intensely buttery filling contrasted beautifully with a crisp, golden, and chewy crust. It’s a texture and flavor explosion in every mouthful that truly satisfies.
- Bakery-Quality at Home: Forget expensive bakery visits. This recipe empowers you to recreate the famous, addictive Milk Bar Pie right in your own kitchen. Impress your guests and yourself with a dessert that tastes professionally made.
- Simple, Accessible Ingredients: Despite its gourmet reputation, Crack Pie is made with straightforward, everyday pantry staples. You won’t need to hunt for exotic items, making this a surprisingly approachable yet impressive dessert.
- The Ultimate Crowd-Pleaser: Whether it’s a holiday gathering, a dinner party, or a casual family meal, this pie is always a hit. Its unique charm and irresistible flavor make it a conversation starter, ensuring everyone asks for the recipe and a second slice.
- A Truly Unique Flavor Profile: The blend of toasted oats in the crust with the sweet, salty, and slightly caramelized filling creates a distinctive taste that stands out from other desserts. It’s a modern classic that’s both comforting and exciting.
Key Ingredients for the Perfect Pie
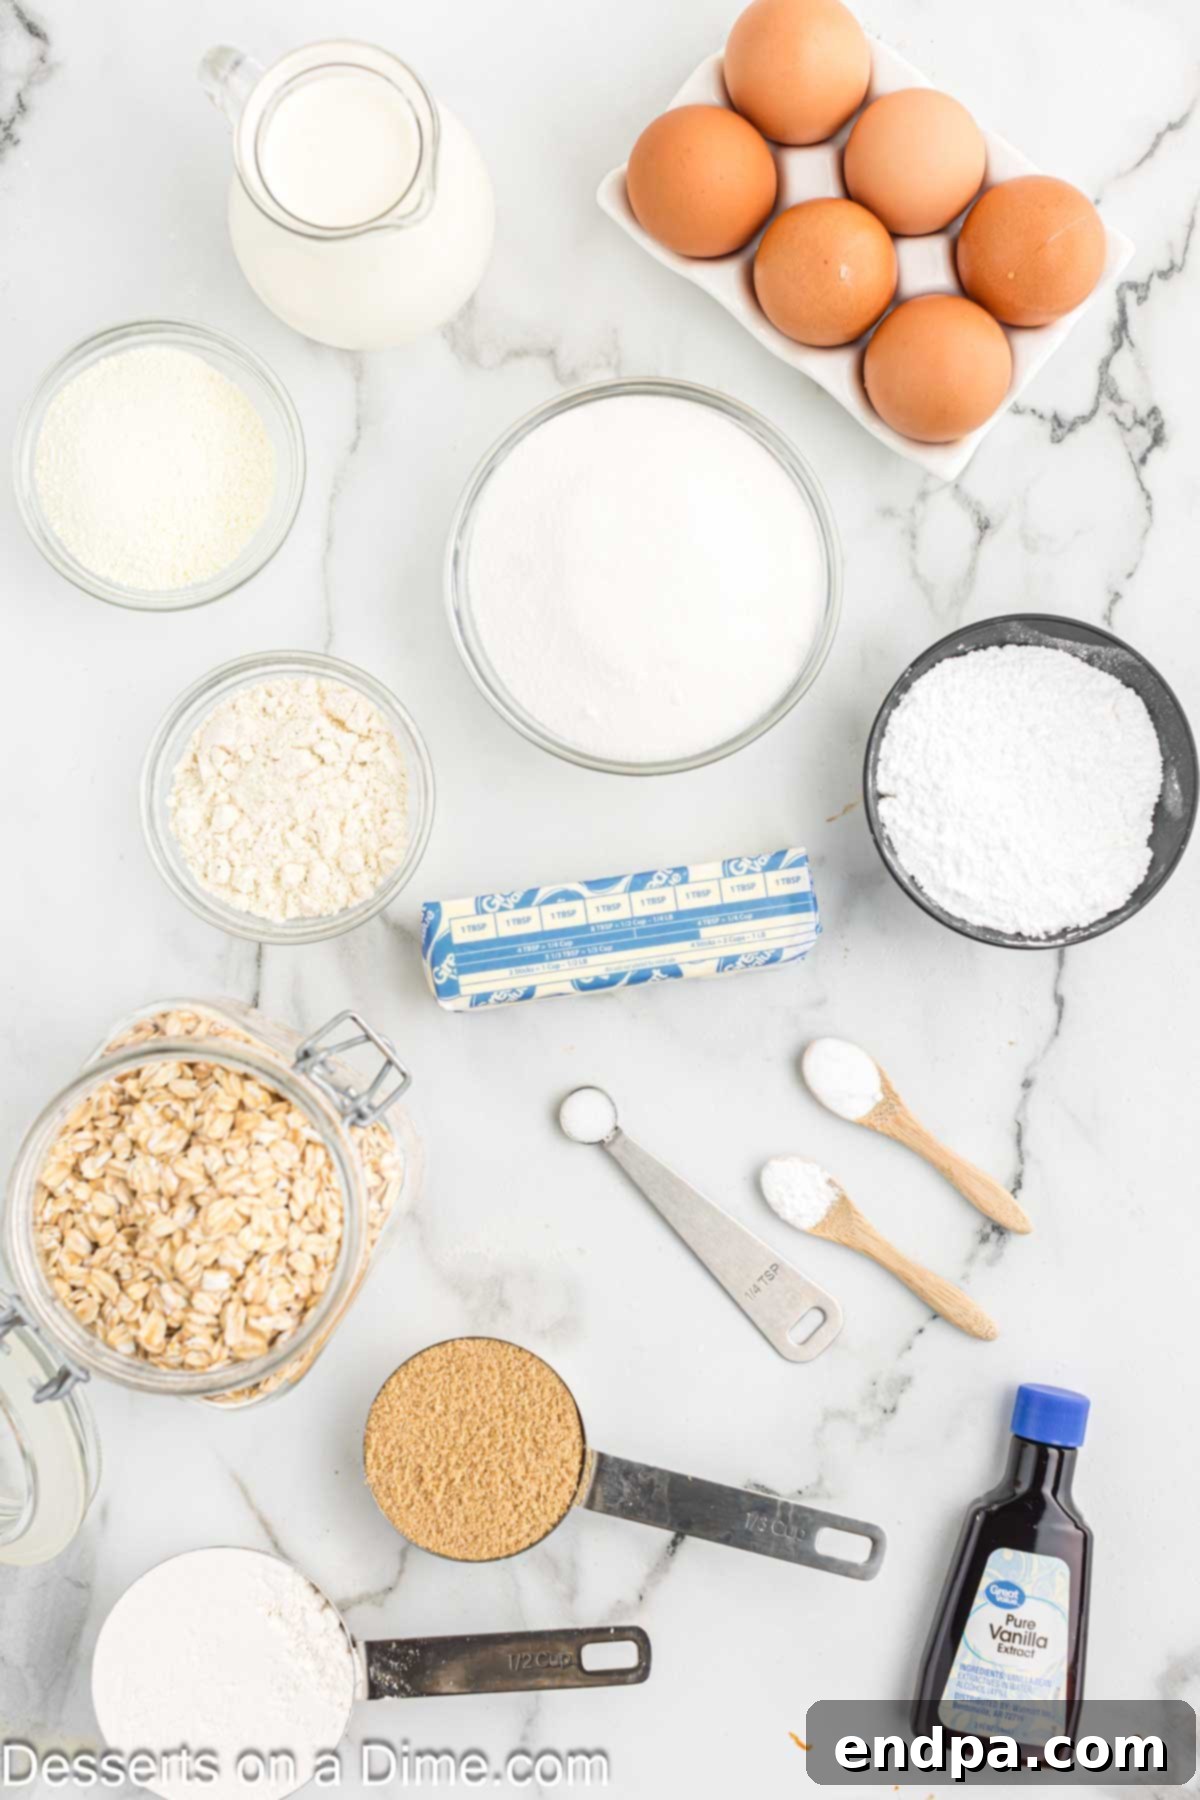
Crafting the perfect Crack Pie relies on a thoughtful combination of ingredients for both the unique oat cookie crust and the signature gooey filling. Each component plays a vital role in achieving that legendary flavor and texture.
For the Oat Cookie Base
- Unsalted Butter: The foundation of richness, creating a tender and deeply buttery cookie.
- Light Brown Sugar: Infuses a molasses-rich sweetness and contributes to the cookie’s chewy texture.
- Granulated Sugar: Balances the sweetness and helps achieve a crisp edge.
- Large Egg Yolk: Acts as a binder, adding richness and contributing to the cookie’s tender crumb.
- All-Purpose Flour: Provides essential structure to the cookie without making it heavy.
- Old-Fashioned Rolled Oats: The star of the crust, offering a delightful chewiness and nutty flavor that defines Milk Bar Pie.
- Salt: A crucial flavor enhancer, it balances the sweetness and brings out the depth of the other ingredients.
- Baking Powder: Ensures a slight lift, contributing to a lighter texture in the cookie.
- Baking Soda: Works in conjunction with the brown sugar’s acidity to create a perfectly tender and spreadable cookie.
For the Pie Crust Assembly
- The Baked Oat Cookie (from above): This forms the flavorful, chewy base that cradles the decadent filling.
- Brown Sugar: Adds an extra layer of caramel sweetness and helps bind the crushed cookie.
- Salt: Enhances the overall flavor profile of the crust, providing a subtle contrast to the sweetness.
- Melted Butter: Binds the crushed cookie mixture together, creating a rich, pressable crust that bakes up perfectly tender.
For the Signature Pie Filling
- Granulated Sugar: Provides the primary sweetness and contributes to the signature gooey texture of the filling.
- Brown Sugar: Essential for its deep, molasses-rich flavor and caramel-like notes, which are hallmarks of Crack Pie.
- Dry Milk Powder: A secret ingredient that intensifies the creamy flavor and ensures an incredibly smooth, luxurious texture.
- Corn Powder (Cornstarch): The thickening agent that gives the filling its unique, slightly firm yet wonderfully gooey consistency.
- Salt: Absolutely vital for cutting through the richness and elevating all the other flavors, creating that addictive sweet-salty balance.
- Melted Unsalted Butter: Adds profound richness and a silky, smooth mouthfeel to the filling.
- Heavy Whipping Cream: Contributes to the filling’s luscious creaminess and decadent texture.
- Vanilla Extract: Introduces a warm, aromatic note that complements the caramel and buttery flavors beautifully.
- Large Egg Yolks: Provide crucial structure, richness, and contribute to the custard-like, incredibly smooth texture of the filling.
For Serving
- Confectioner’s Sugar: A final dusting for an elegant presentation and a subtle touch of extra sweetness.
You can find the detailed measurements for all these ingredients in the comprehensive recipe card located at the end of this post.
Step-by-Step Baking Guide: Crafting Your Crack Pie
Follow these easy instructions to create your own irresistible Crack Pie. Precision is key, but don’t worry—we’ll guide you through each stage!
- Step 1 – Prepare for Baking: Preheat your oven to 350 degrees F (175°C). Line a baking sheet with parchment paper to prevent sticking and ensure easy cleanup.
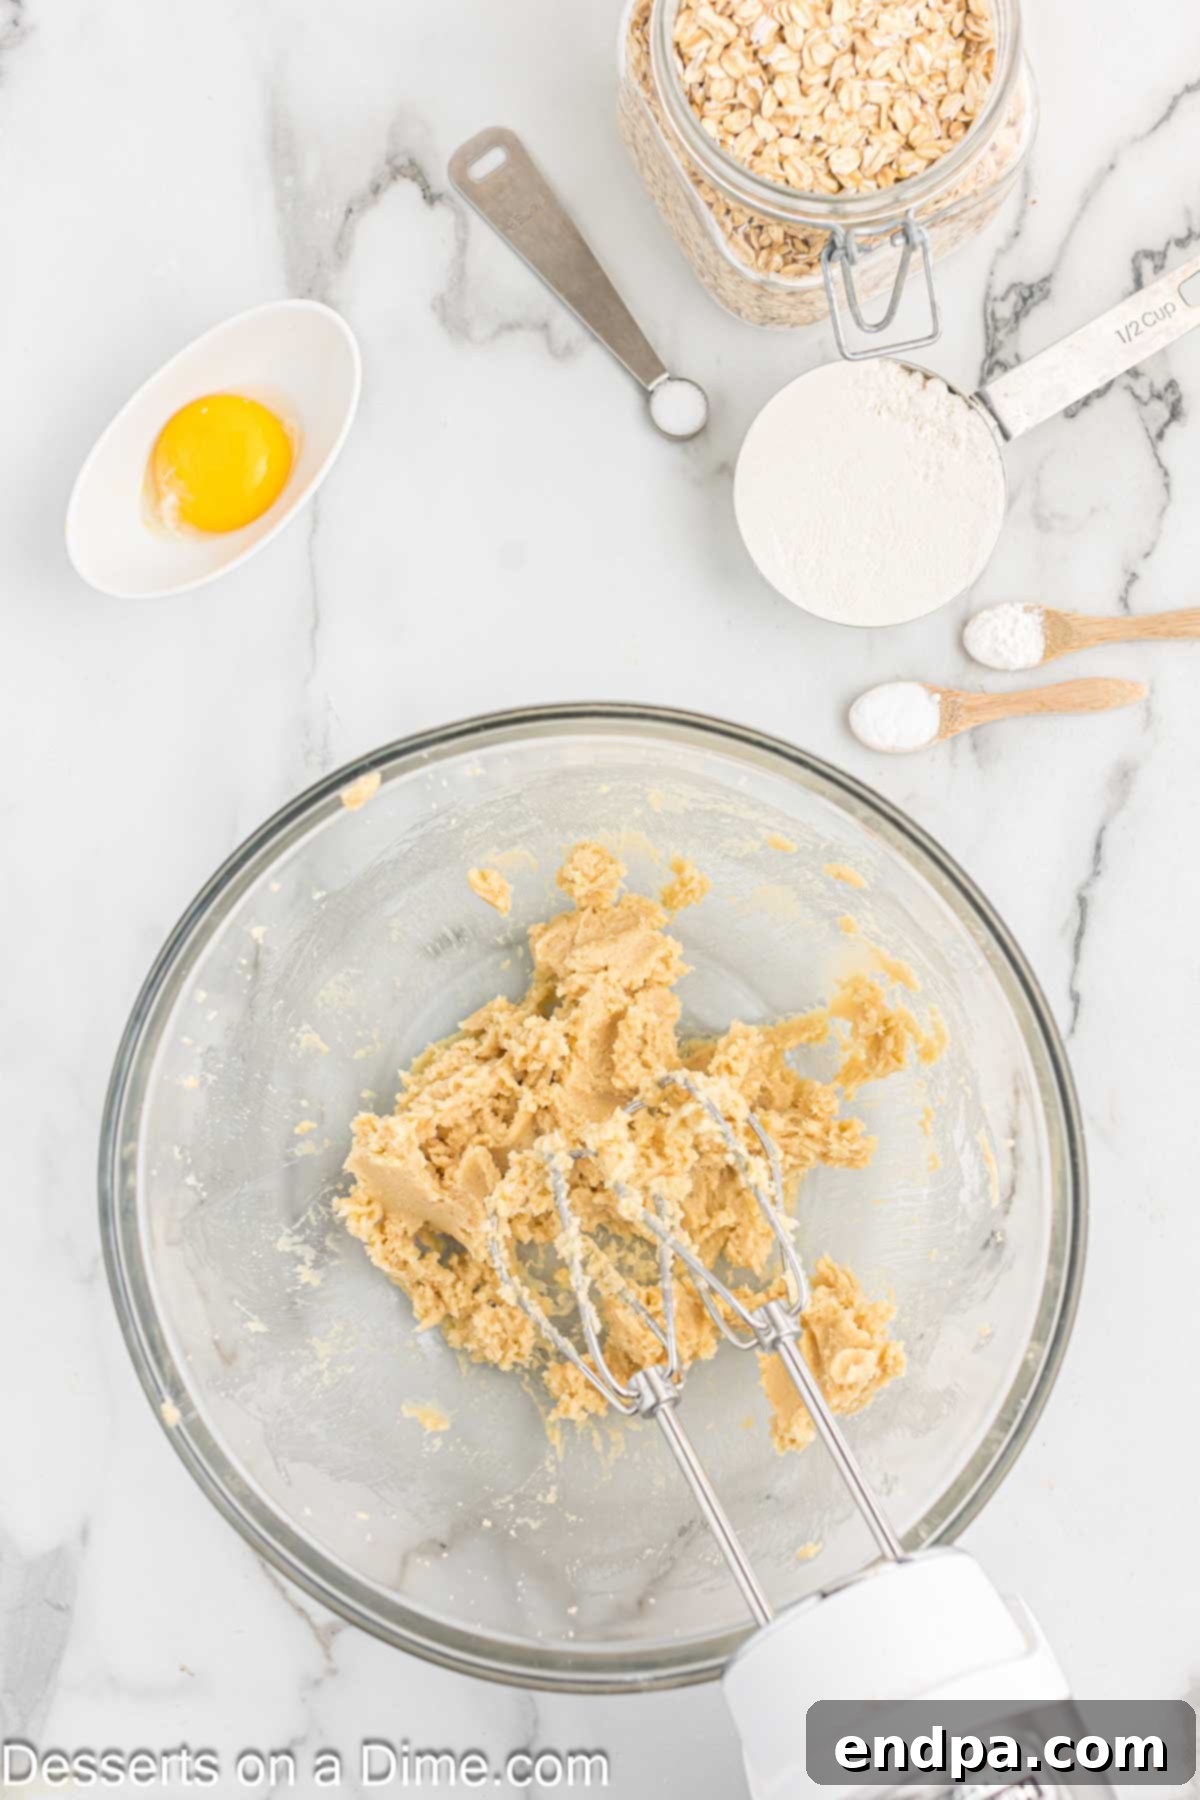
Step 2 – Cream Butter and Sugar: In the bowl of a stand mixer fitted with a paddle attachment, combine the unsalted butter and 3 tablespoons of granulated sugar. Beat on medium speed until the mixture is light, fluffy, and pale in color, typically for 2-3 minutes.
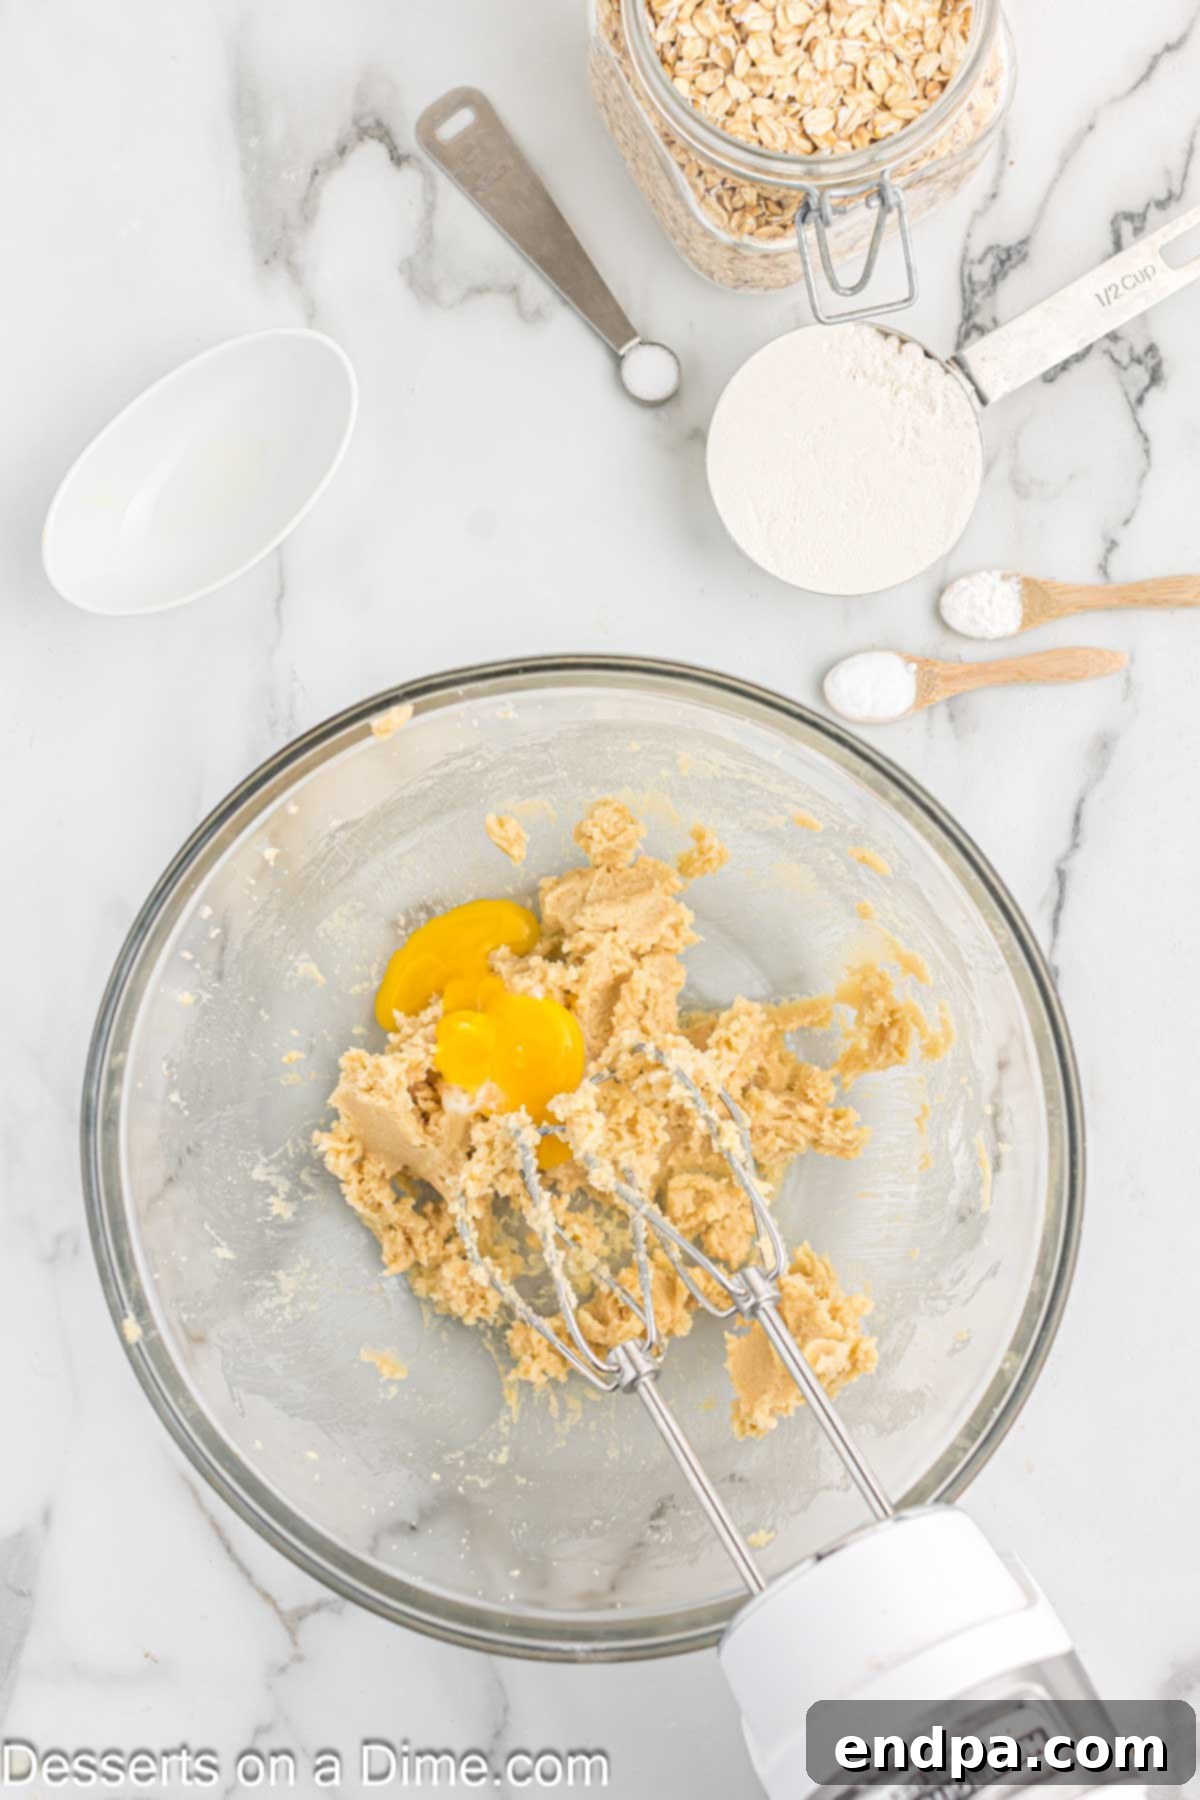
Step 3 – Incorporate Egg Yolk: Stop the mixer and scrape down the sides of the bowl with a spatula to ensure everything is well combined. Add the large egg yolk and mix again on medium speed until it is fully incorporated into the butter and sugar mixture, creating a smooth batter.
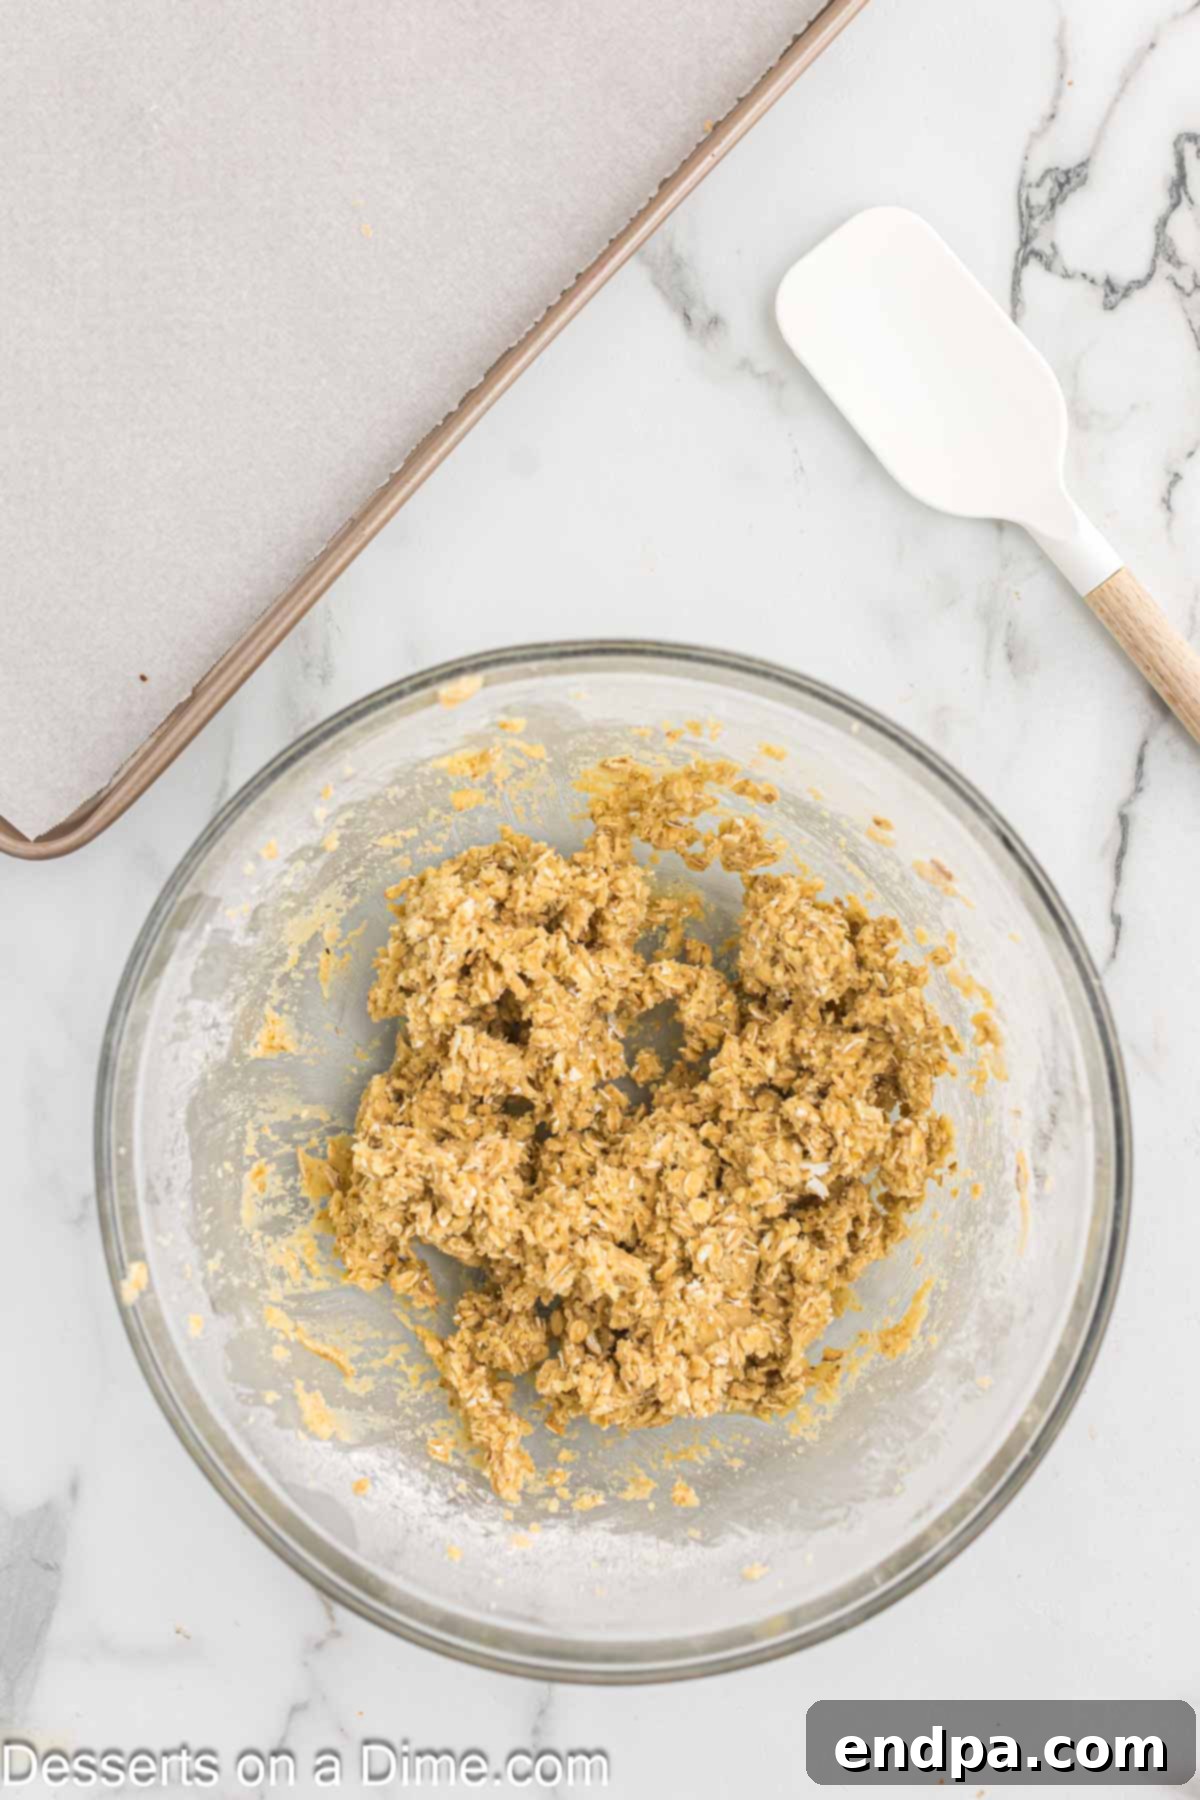
Step 4 – Mix in Dry Ingredients: Now, add the all-purpose flour, old-fashioned rolled oats, baking powder, baking soda, and salt to the bowl. Mix on low speed, gradually increasing to medium, until all the dry ingredients are just combined with the wet mixture, forming a cohesive cookie dough. Be careful not to overmix, which can lead to a tough cookie.
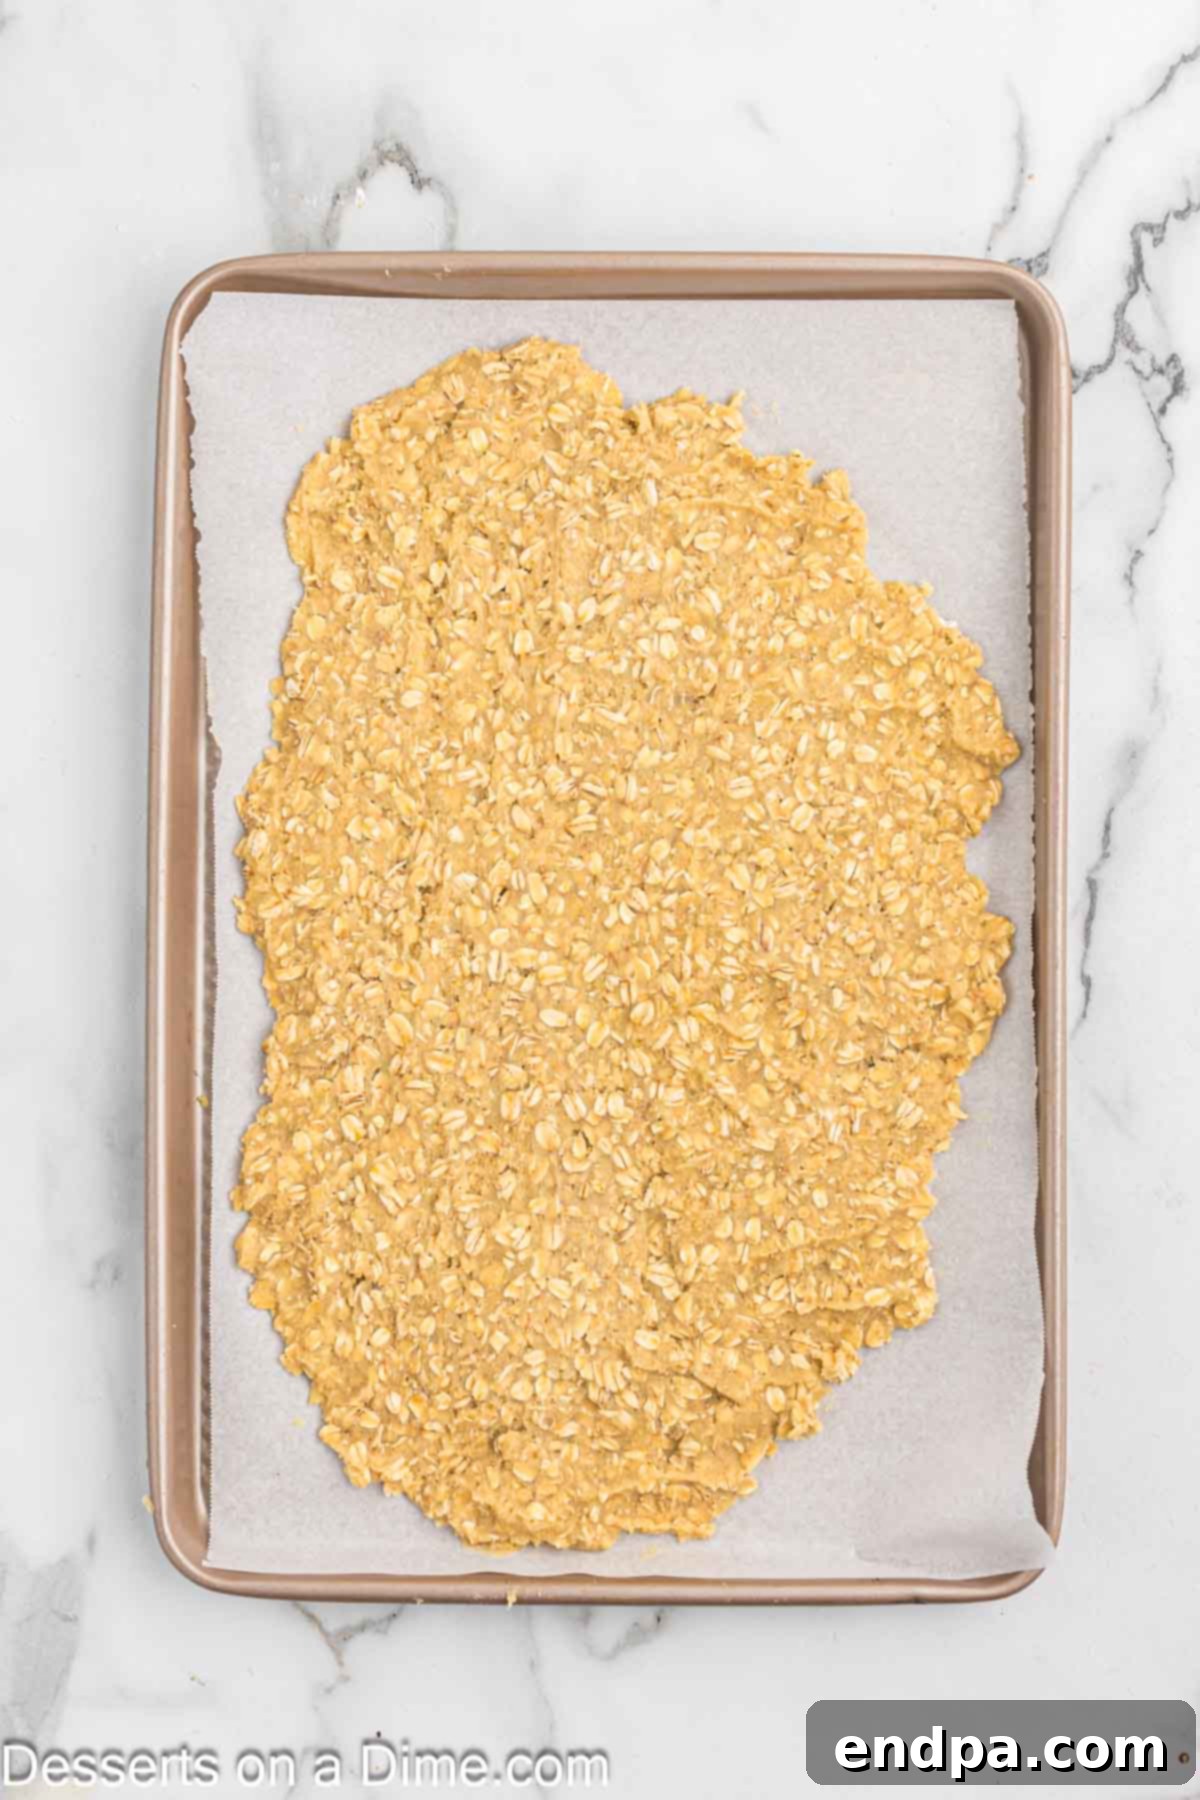
Step 5 – Spread the Oat Cookie Dough: Transfer the prepared oat cookie dough to the center of your parchment-lined baking sheet. Using a spatula or the palms of your hands, gently spread the dough out until it forms a uniform layer, approximately 1/4 inch thick. Don’t worry if it doesn’t cover the entire pan; the goal is an even thickness.
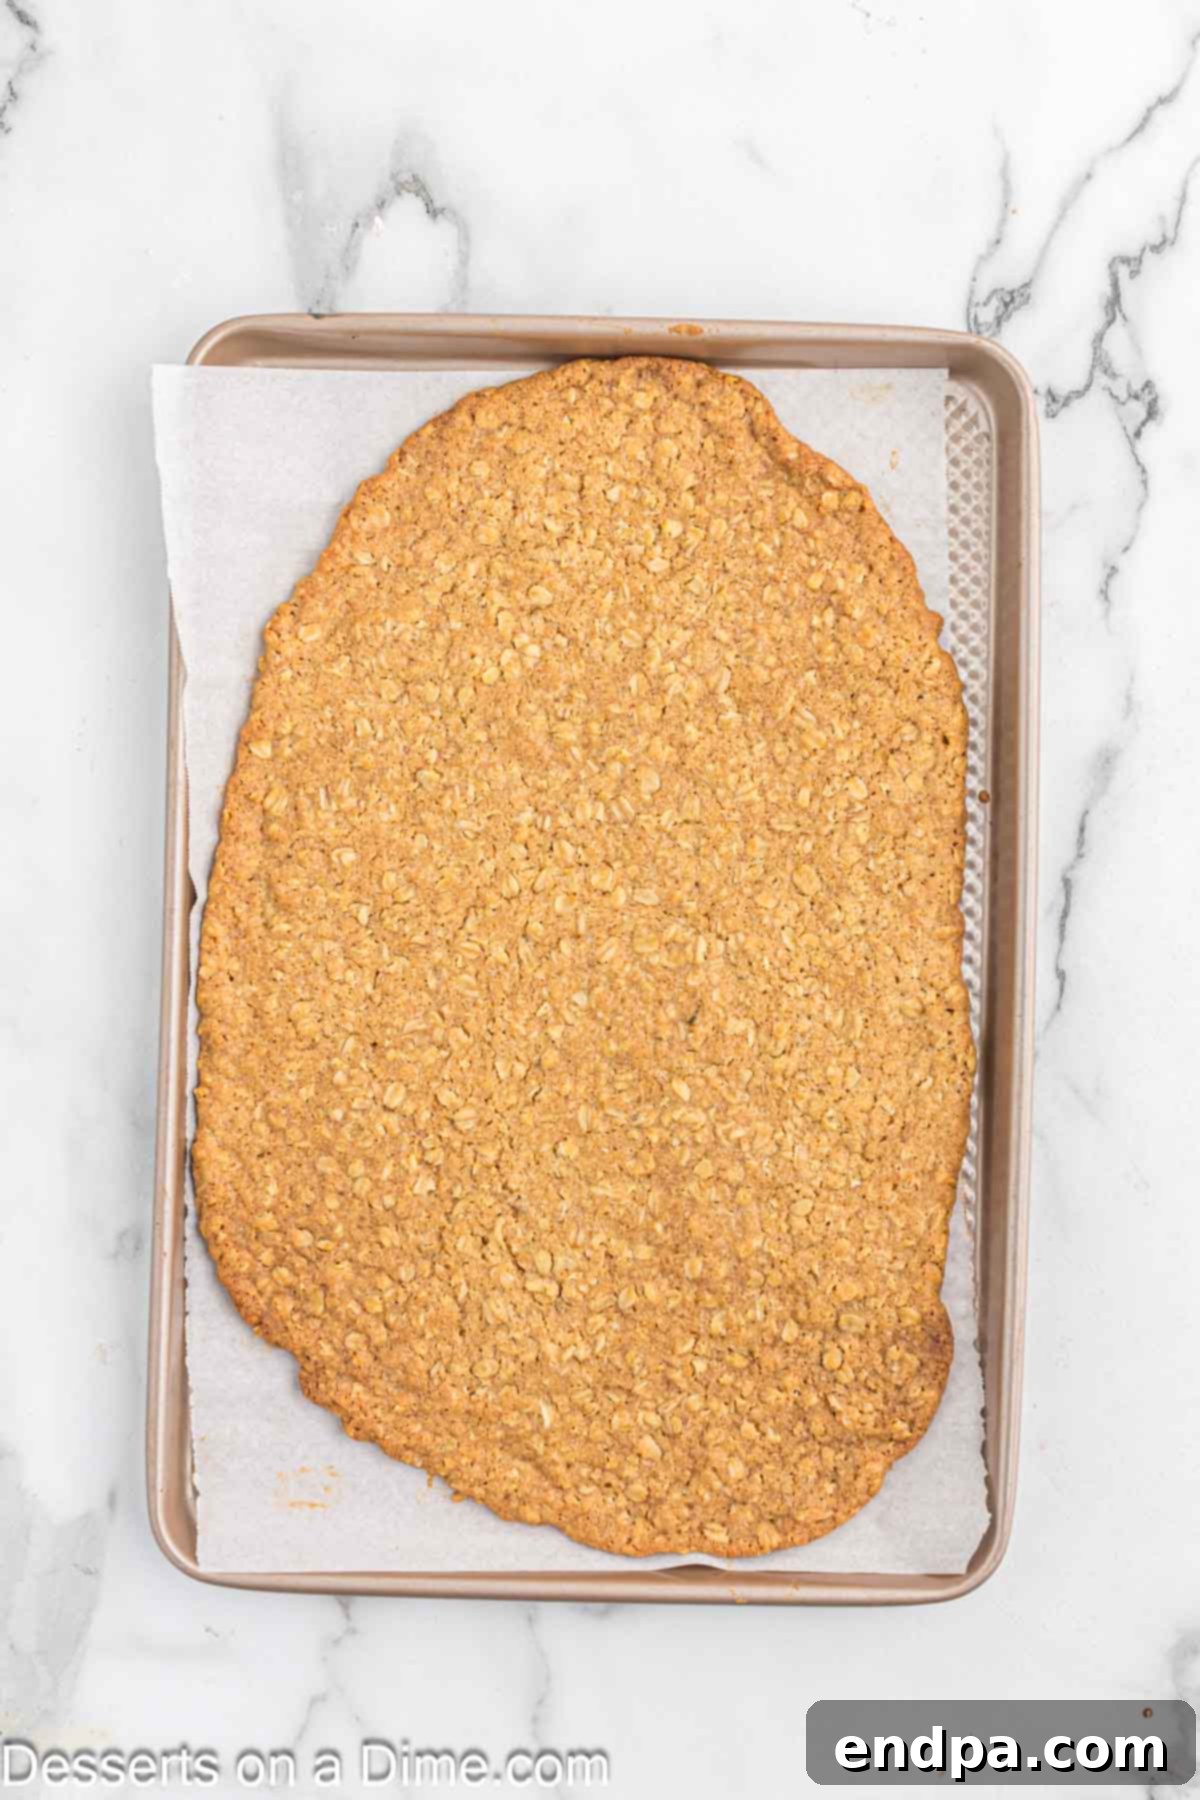
Step 6 – Bake and Cool the Cookie: Place the baking sheet with the cookie dough into the preheated oven. Bake for 15 minutes, or until the edges are nicely set and lightly golden brown. The center might still appear slightly soft. Once baked, remove the cookie from the oven and let it cool completely on the baking sheet before proceeding. This cooling step is crucial for the crust’s texture.
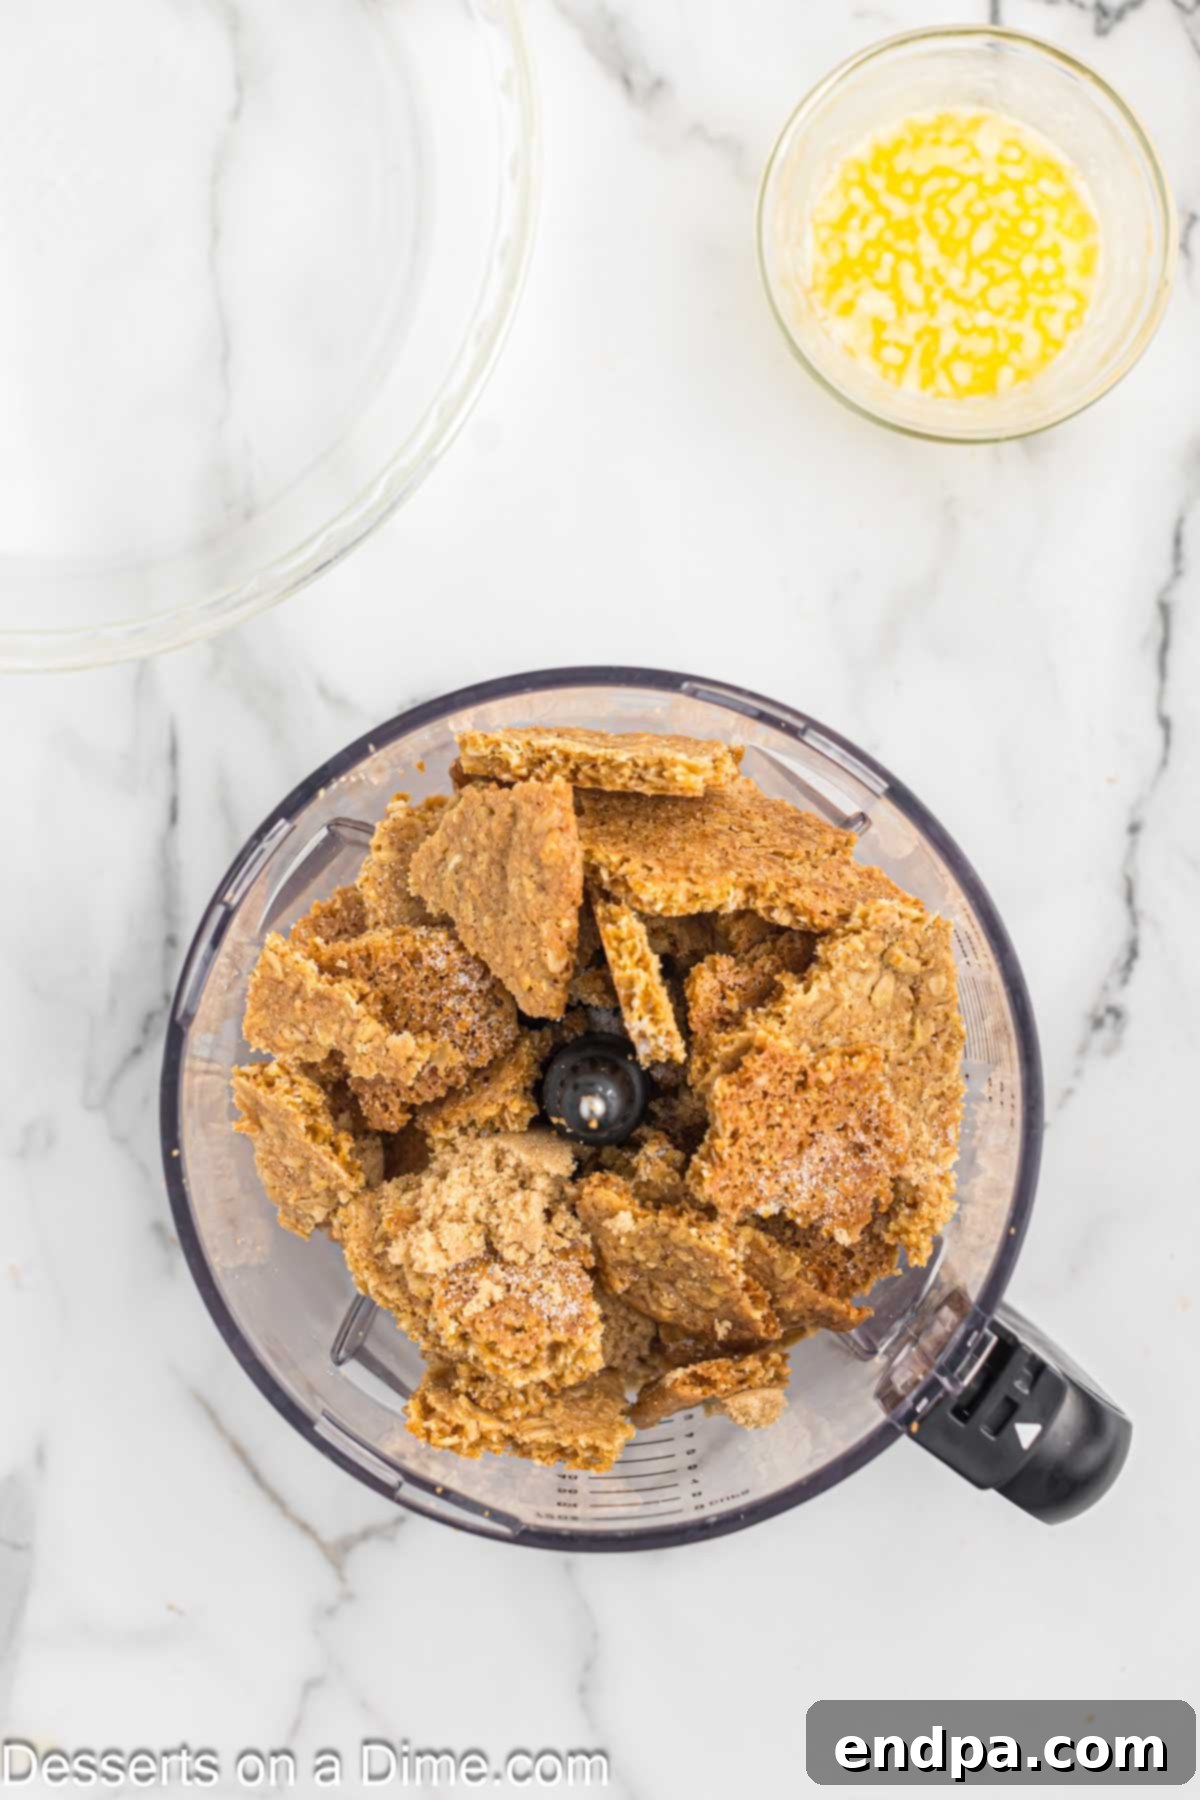
Step 7 – Prepare the Crust Mixture: Once the oat cookie is completely cooled, break it into pieces and transfer it to a food processor. Add the brown sugar and salt. Pulse the mixture until it forms fine, uniform crumbs. If you don’t have a food processor, you can easily crumble the cookie by hand and then mix in the brown sugar and salt in a bowl. Transfer the crumb mixture to a large mixing bowl.
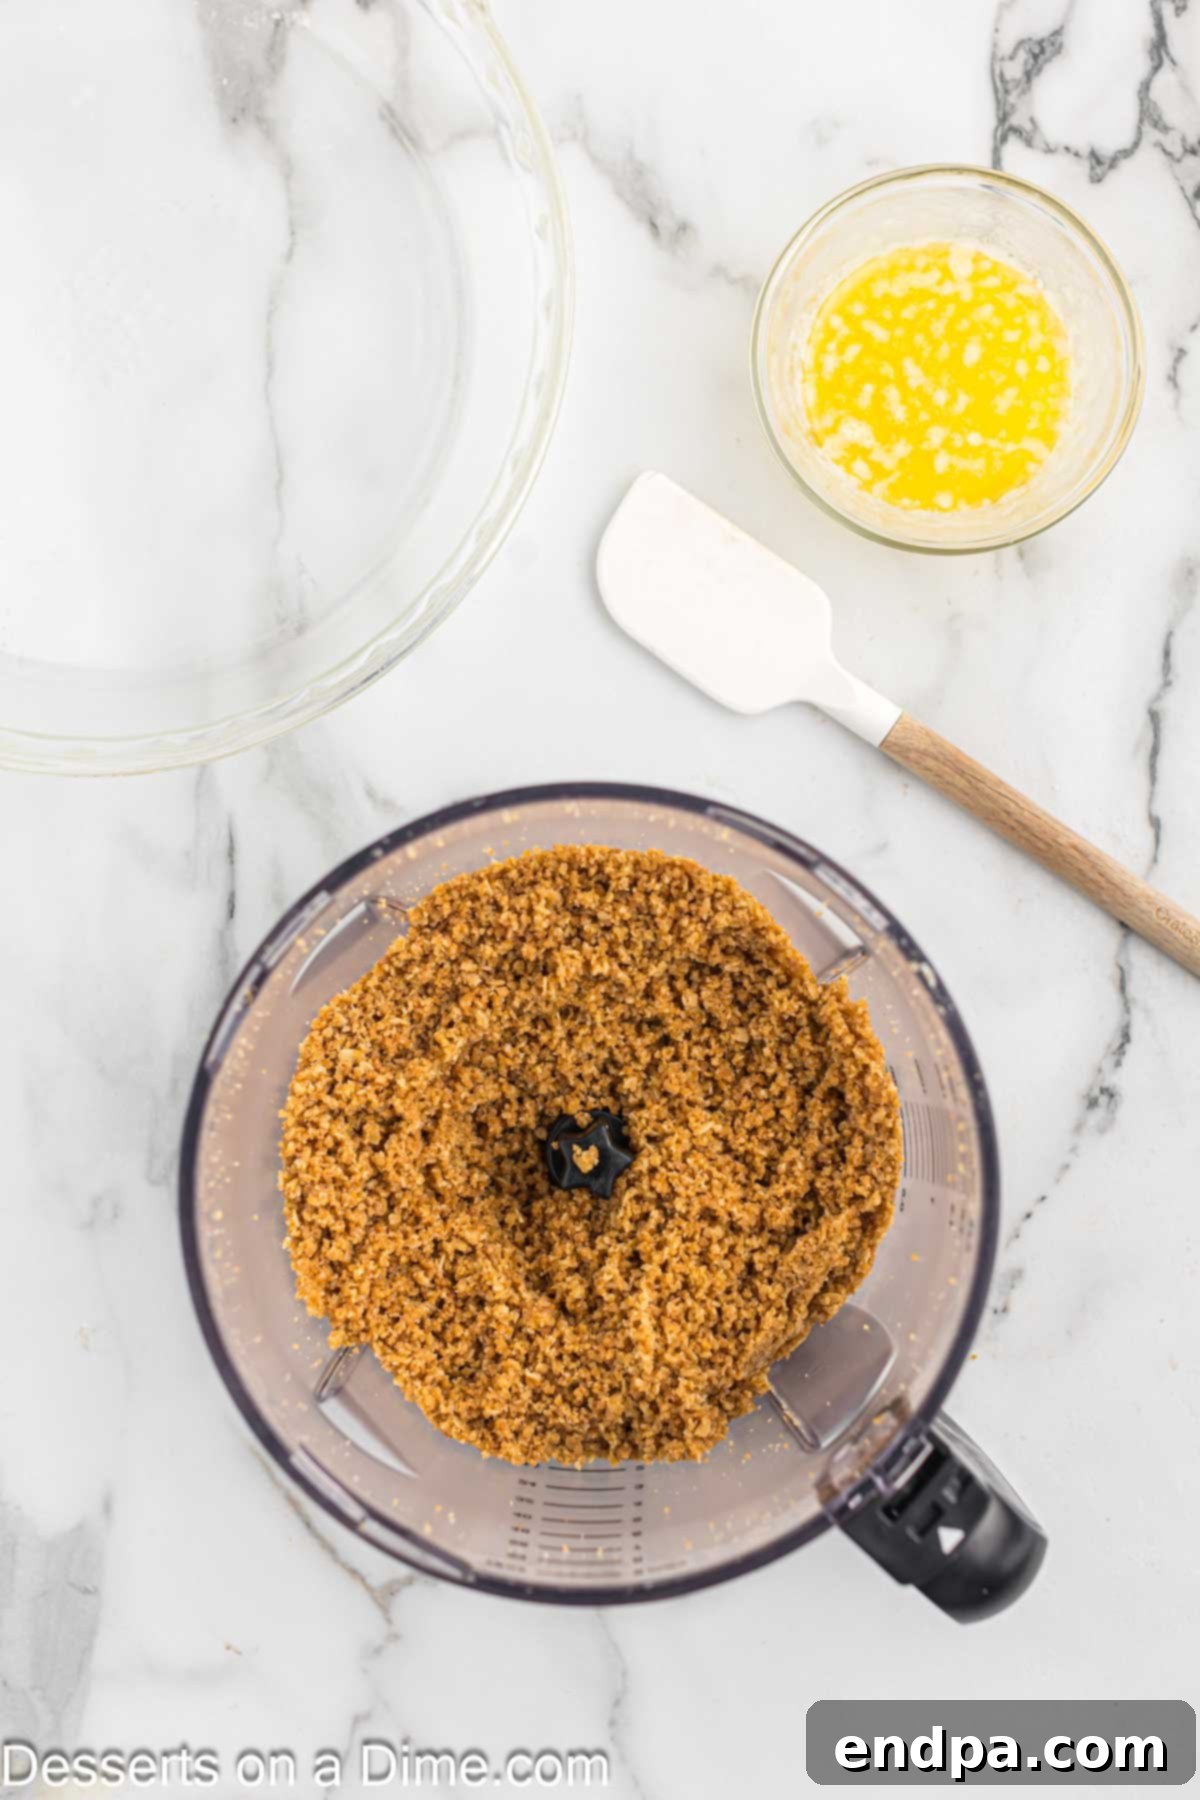
Step 8 – Add Melted Butter to Crust: Pour the melted butter over the cookie crumb mixture in the mixing bowl. This will bind the crust together and add essential richness. Ensure the butter is fully melted for even distribution.
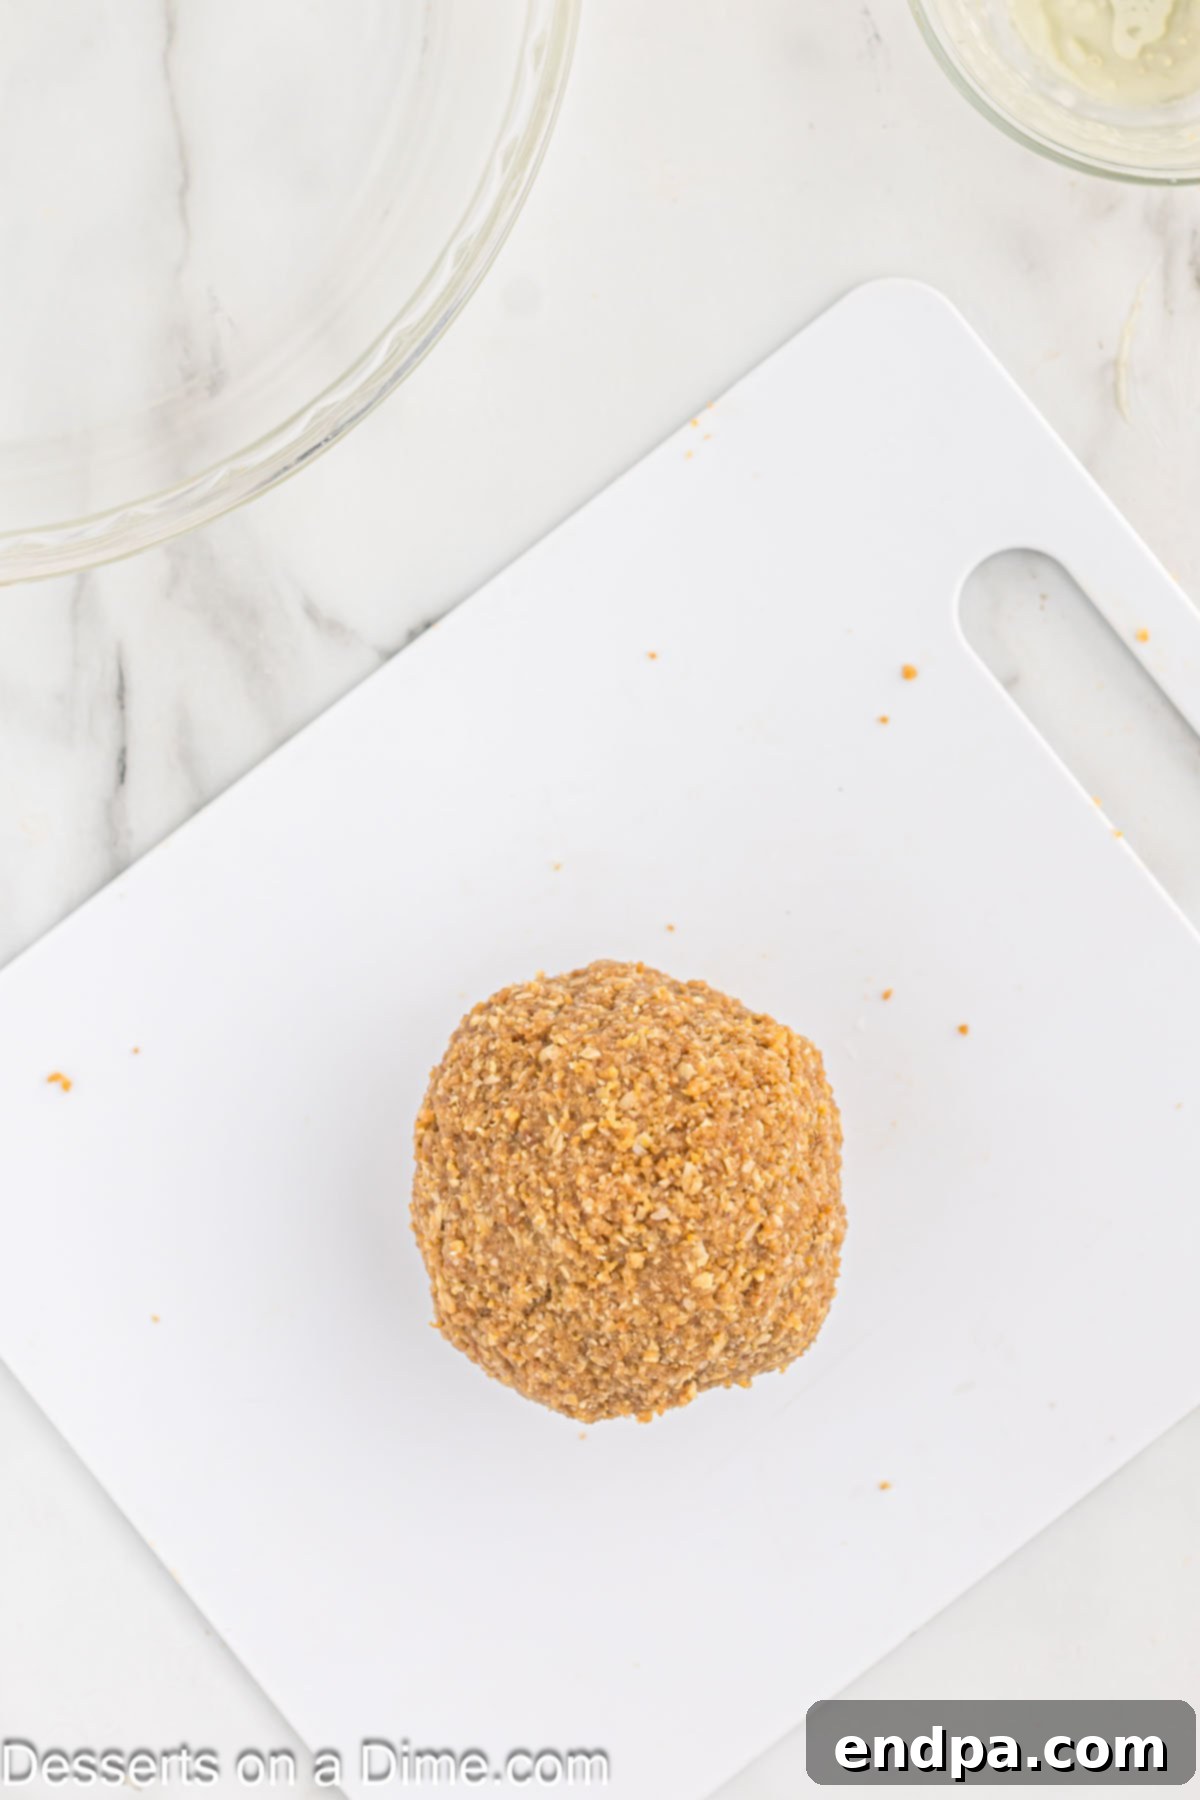
Step 9 – Form the Crust Base: Using your hands, knead the melted butter into the cookie crumbs until the mixture is thoroughly moistened and can easily be pressed together to form a cohesive ball. If the mixture seems too dry or doesn’t hold its shape, add more melted butter, one tablespoon at a time, until the desired consistency is achieved. This ensures a firm and buttery crust.
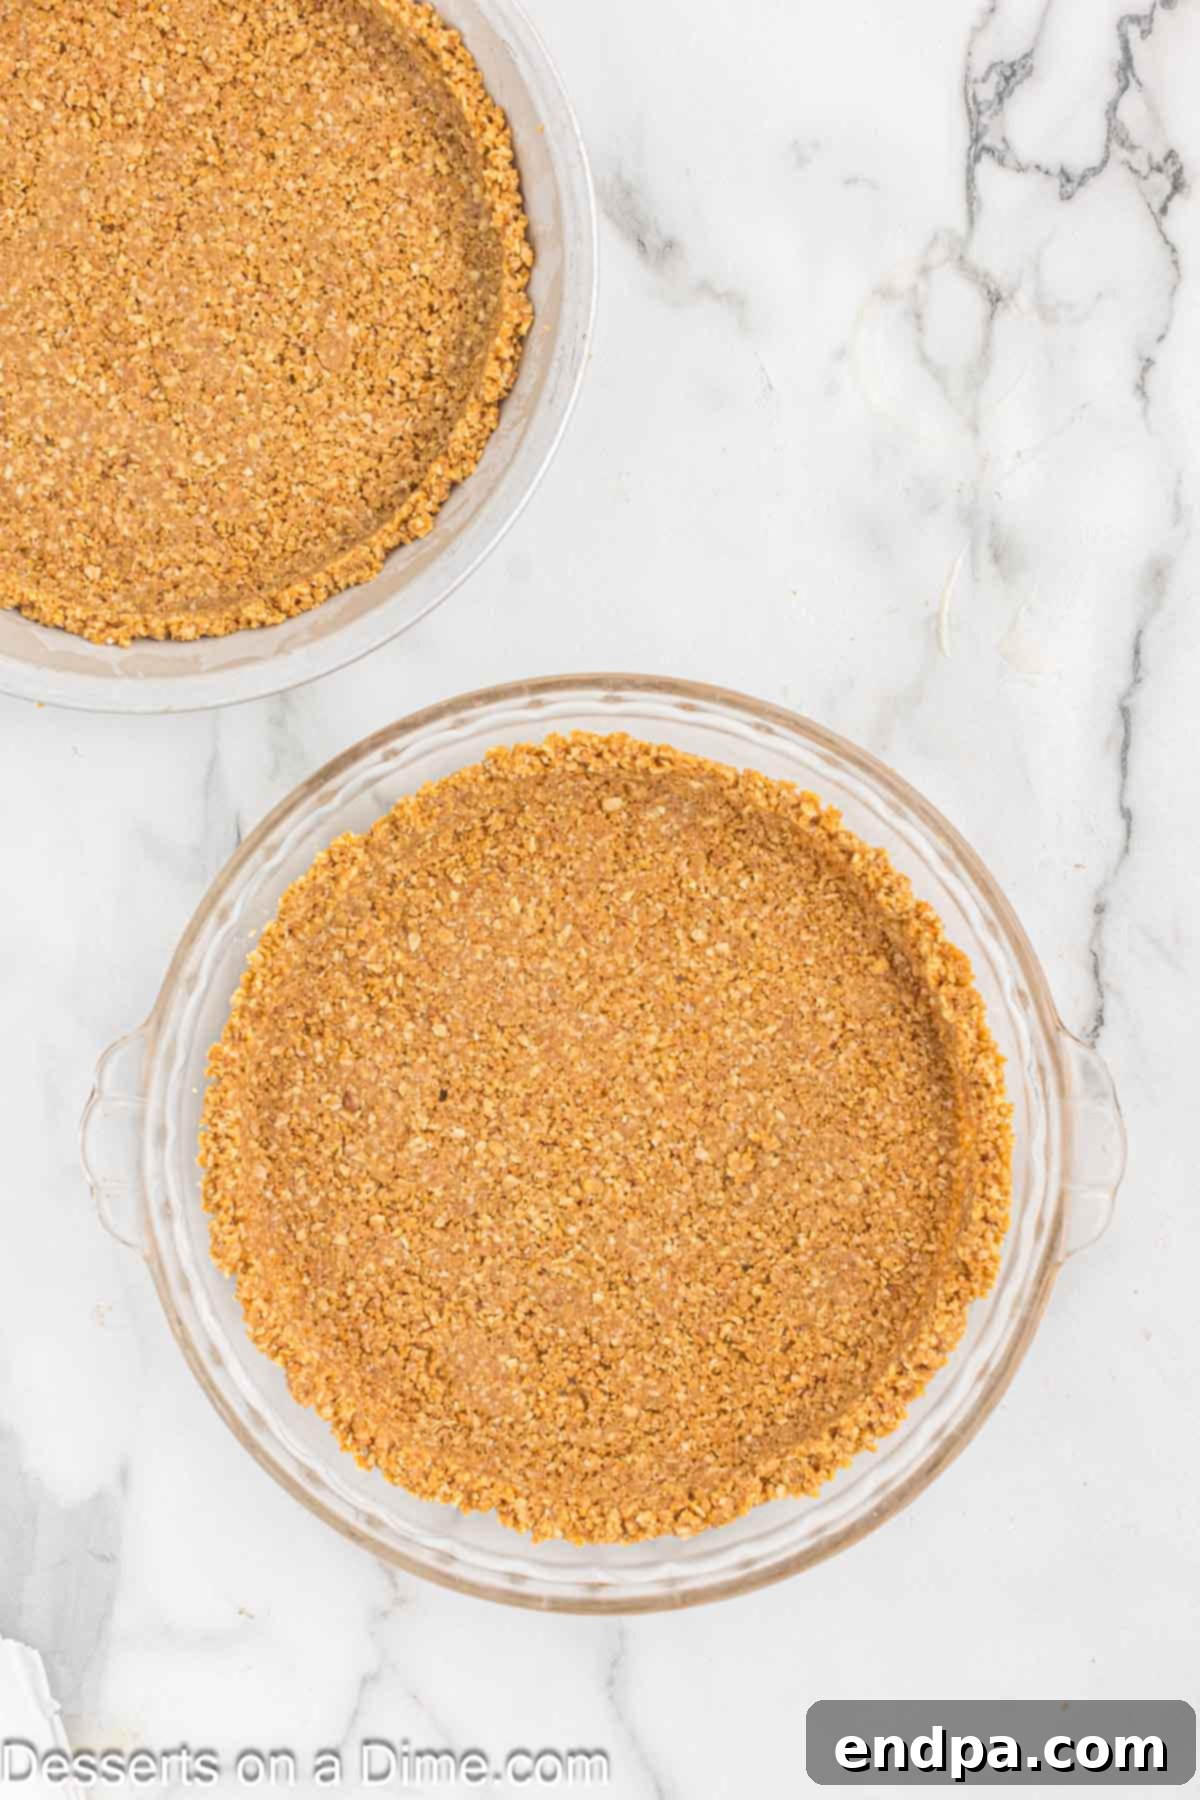
Step 10 – Press into Pie Tins: Divide the prepared oat cookie crust mixture evenly between two 10-inch pie tins. Using your fingers or the bottom of a flat glass, firmly press the mixture into the bottom and up the sides of each pie tin, creating a compact and even crust. Place the filled pie crusts on baking sheets for easier handling and even baking.
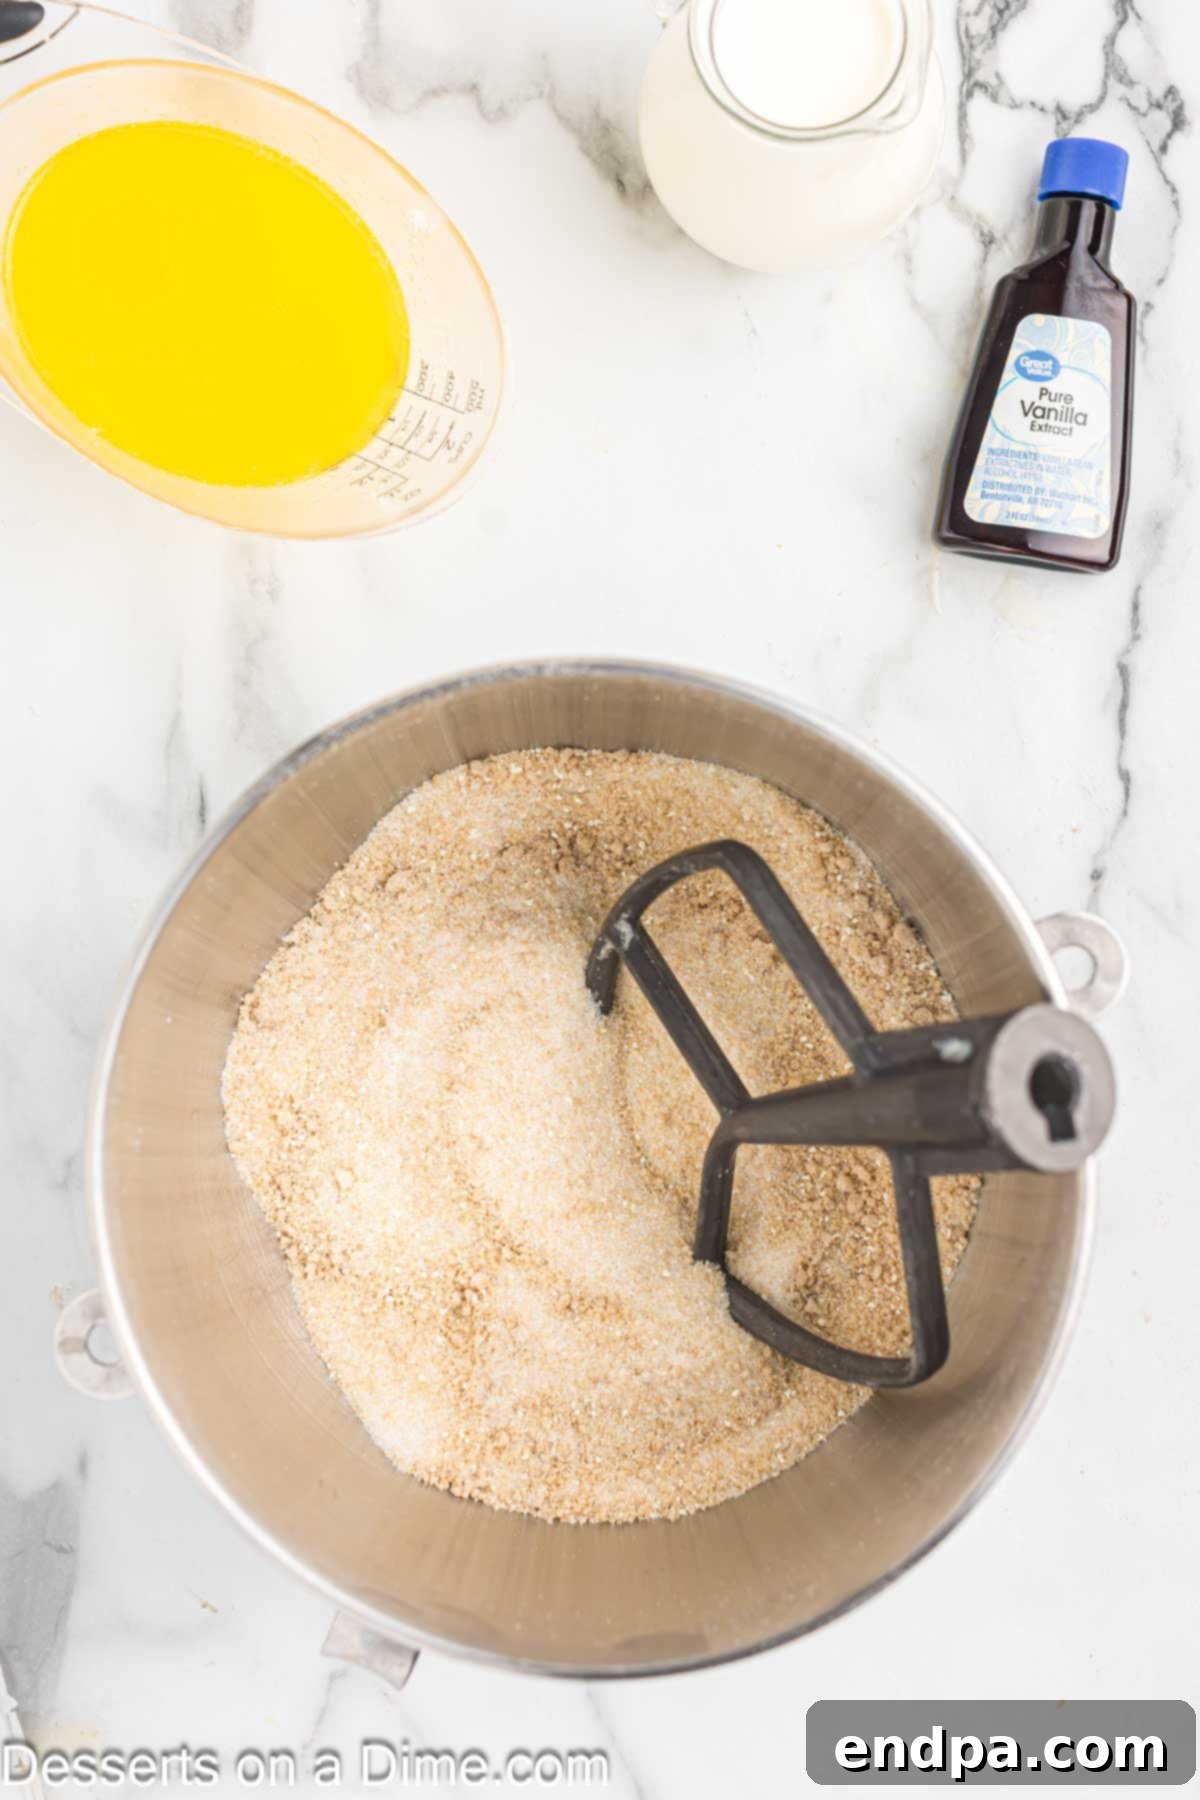
Step 11 – Combine Dry Filling Ingredients: In the large bowl of your stand mixer, fitted with the paddle attachment, combine the granulated sugar, brown sugar, dry milk powder, corn powder, and salt. Mix these dry ingredients on low speed until they are thoroughly blended and no lumps remain.
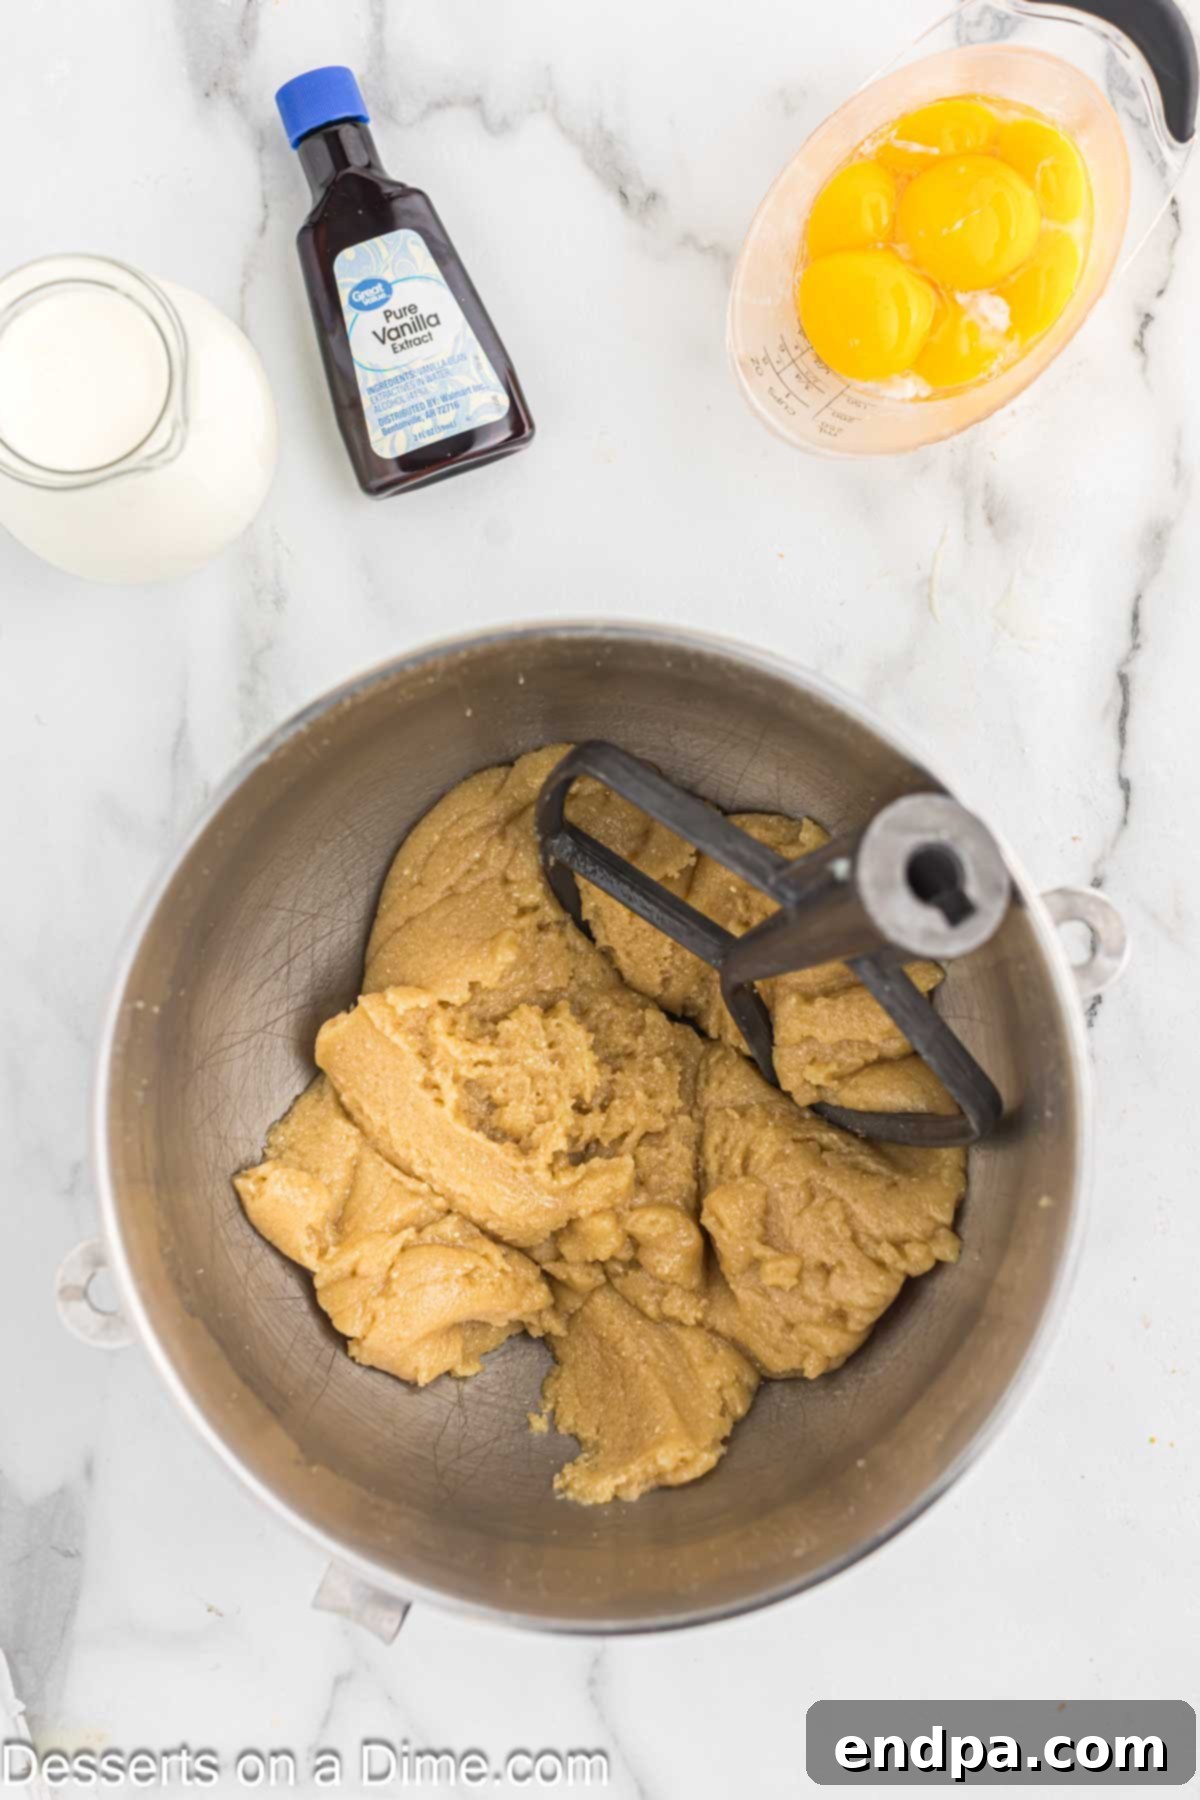
Step 12 – Add Melted Butter to Filling: Gradually pour the melted unsalted butter into the dry ingredient mixture. Mix on low to medium speed for 2-3 minutes until all the dry ingredients are moistened and a thick, paste-like consistency forms. This step is crucial for the filling’s texture.
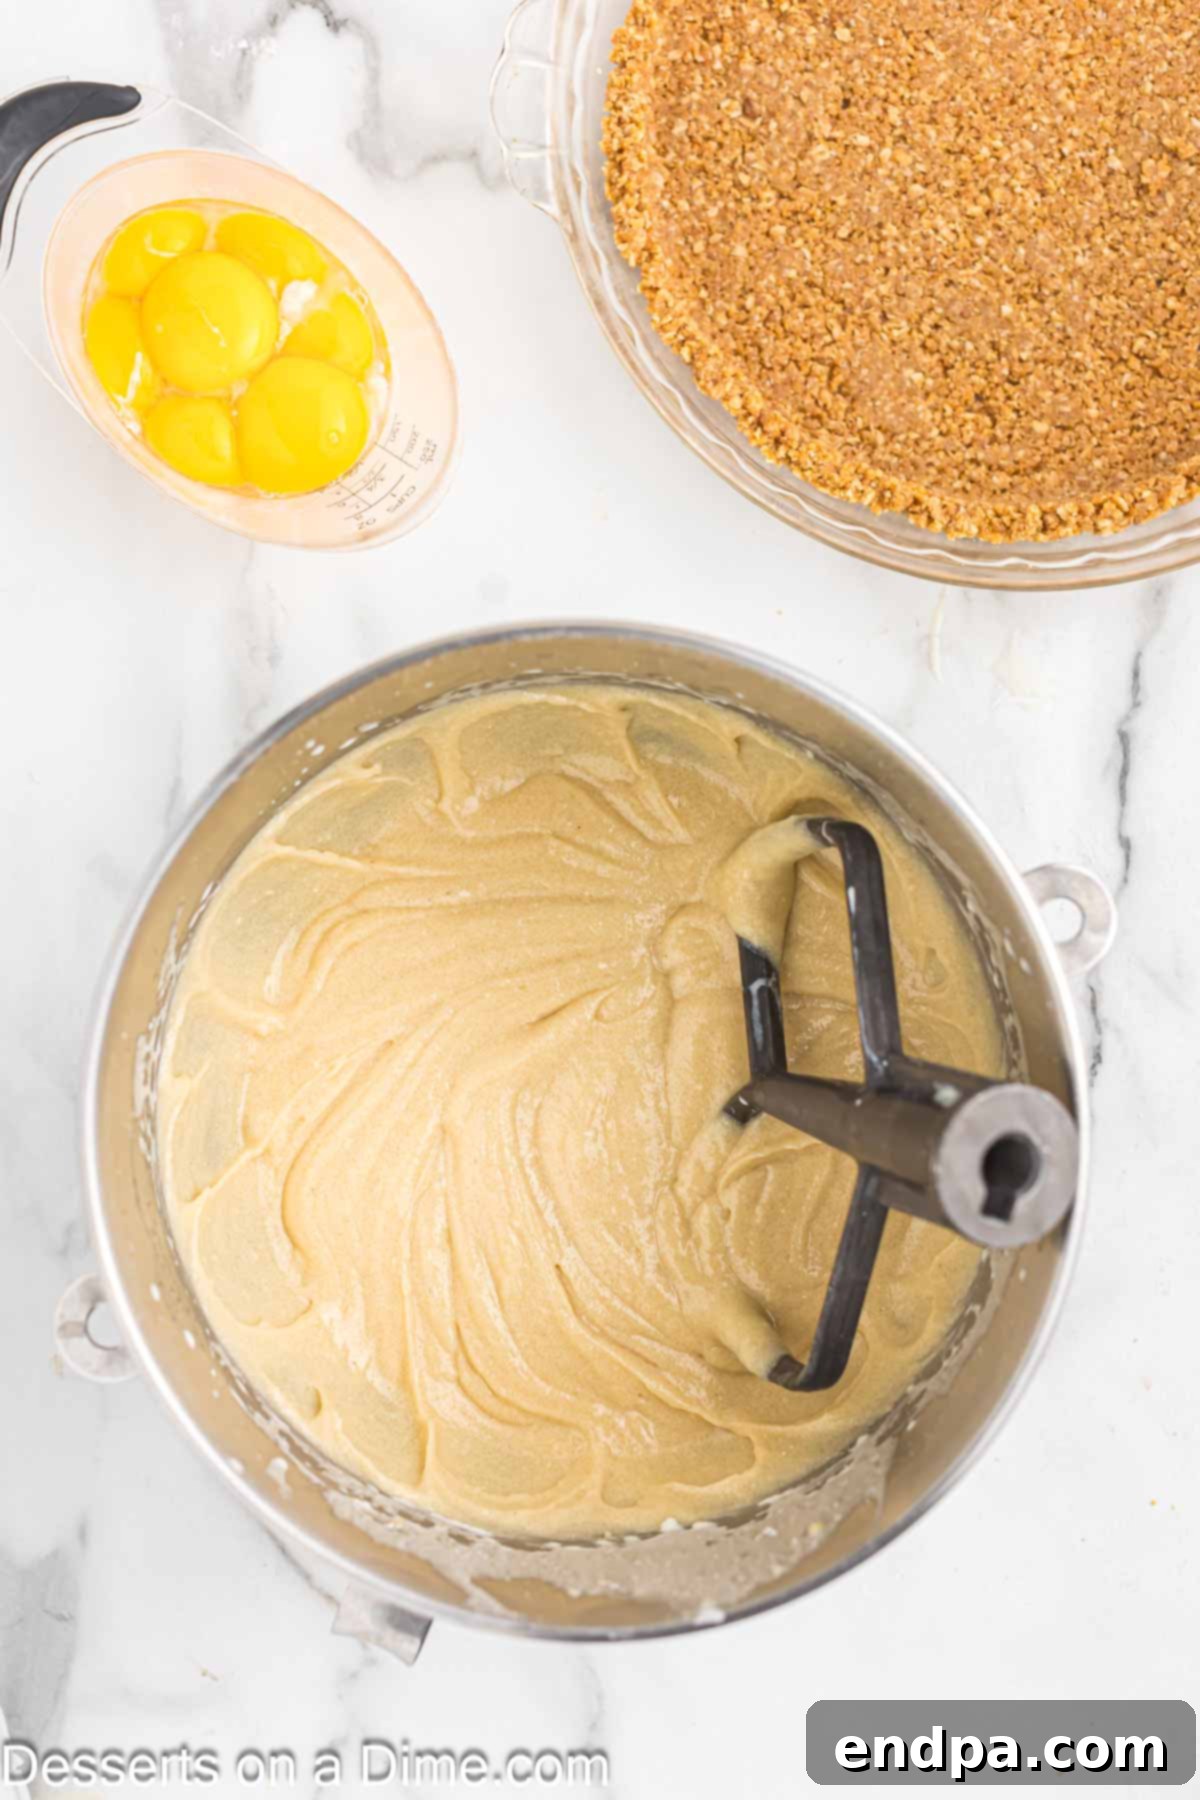
Step 13 – Incorporate Cream and Vanilla: Add the heavy whipping cream and vanilla extract to the mixer bowl. Mix on low speed until just combined, then increase to medium-high speed for a brief moment to ensure everything is thoroughly incorporated but not over-beaten. The mixture will start to look creamier.
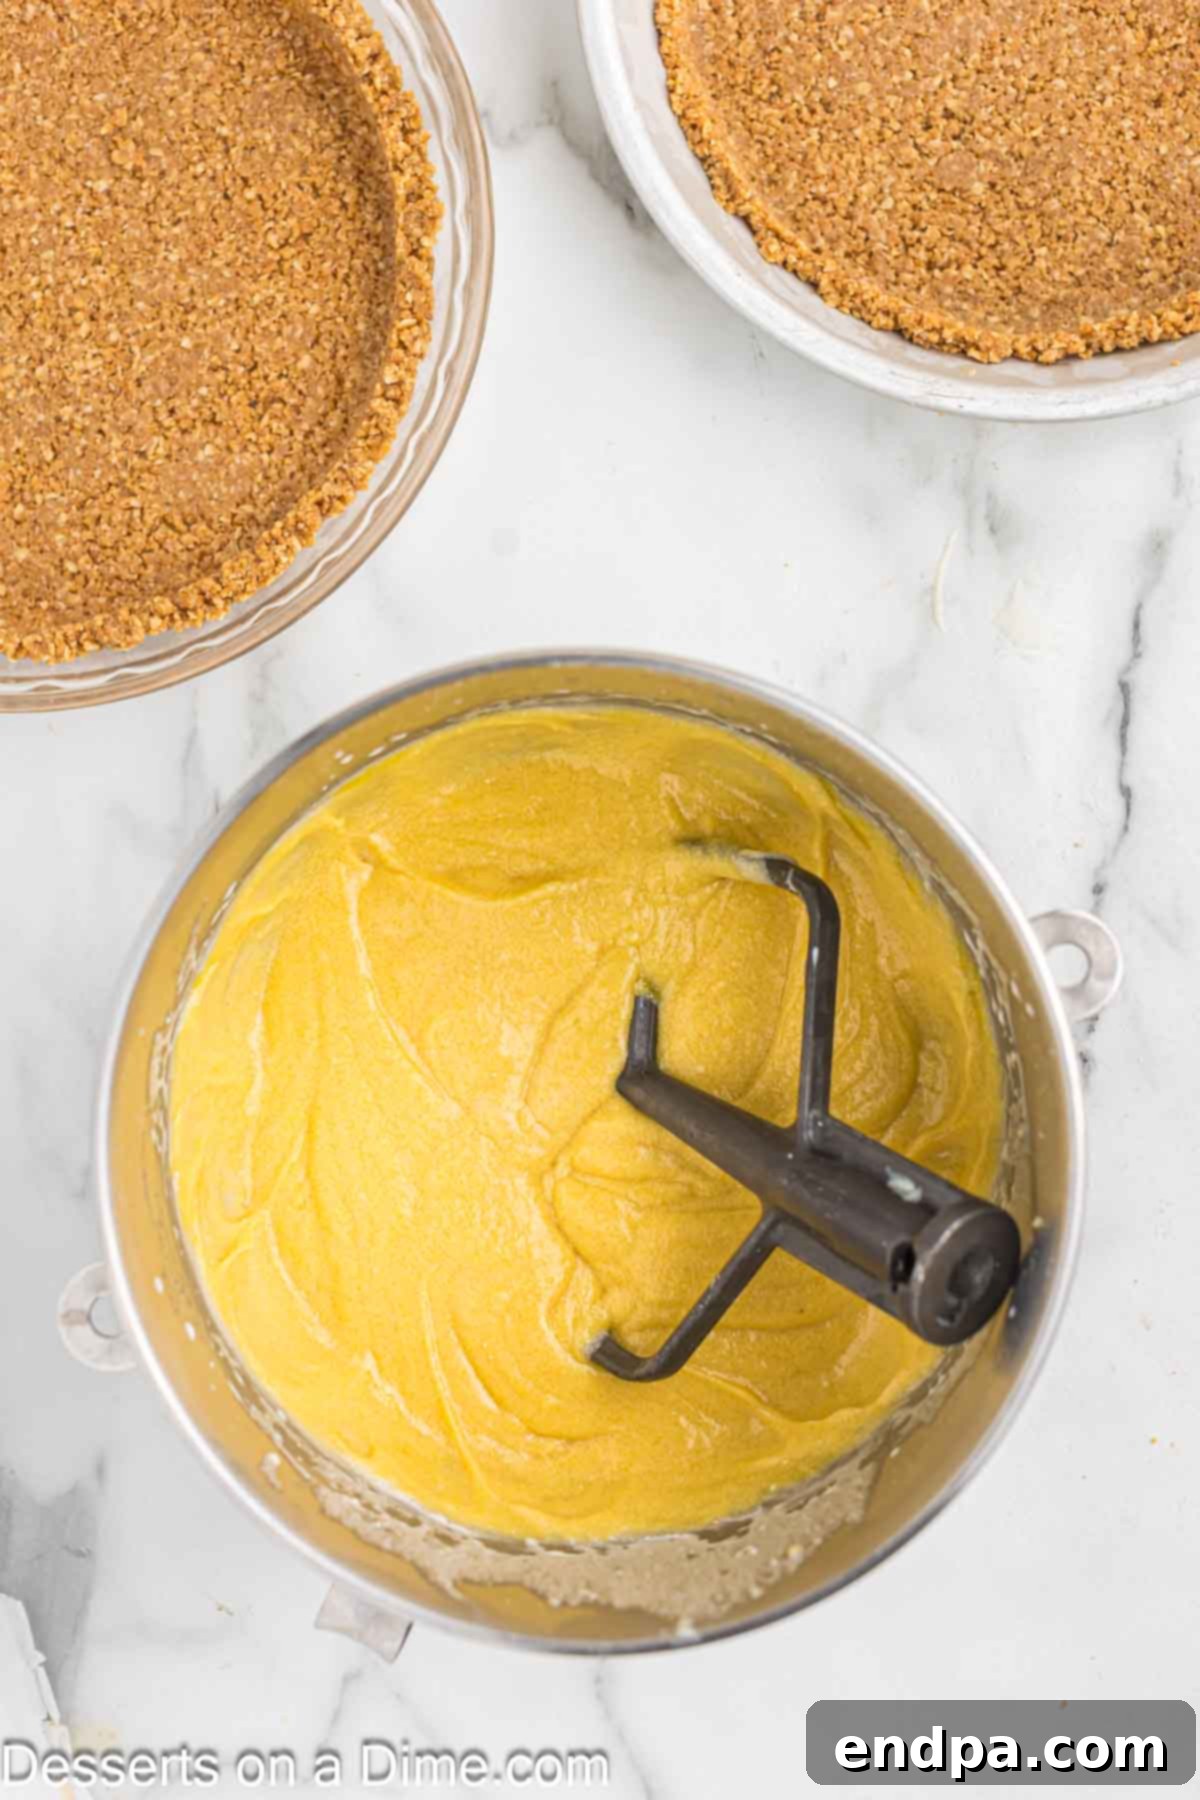
Step 14 – Add Egg Yolks: Use a spatula to scrape down the sides of the bowl, ensuring no dry spots remain. Add the large egg yolks to the mixture. Mix on low speed until they are just combined and the filling is uniform in color. Be very careful not to overmix at this stage, as it can affect the final texture of the pie.
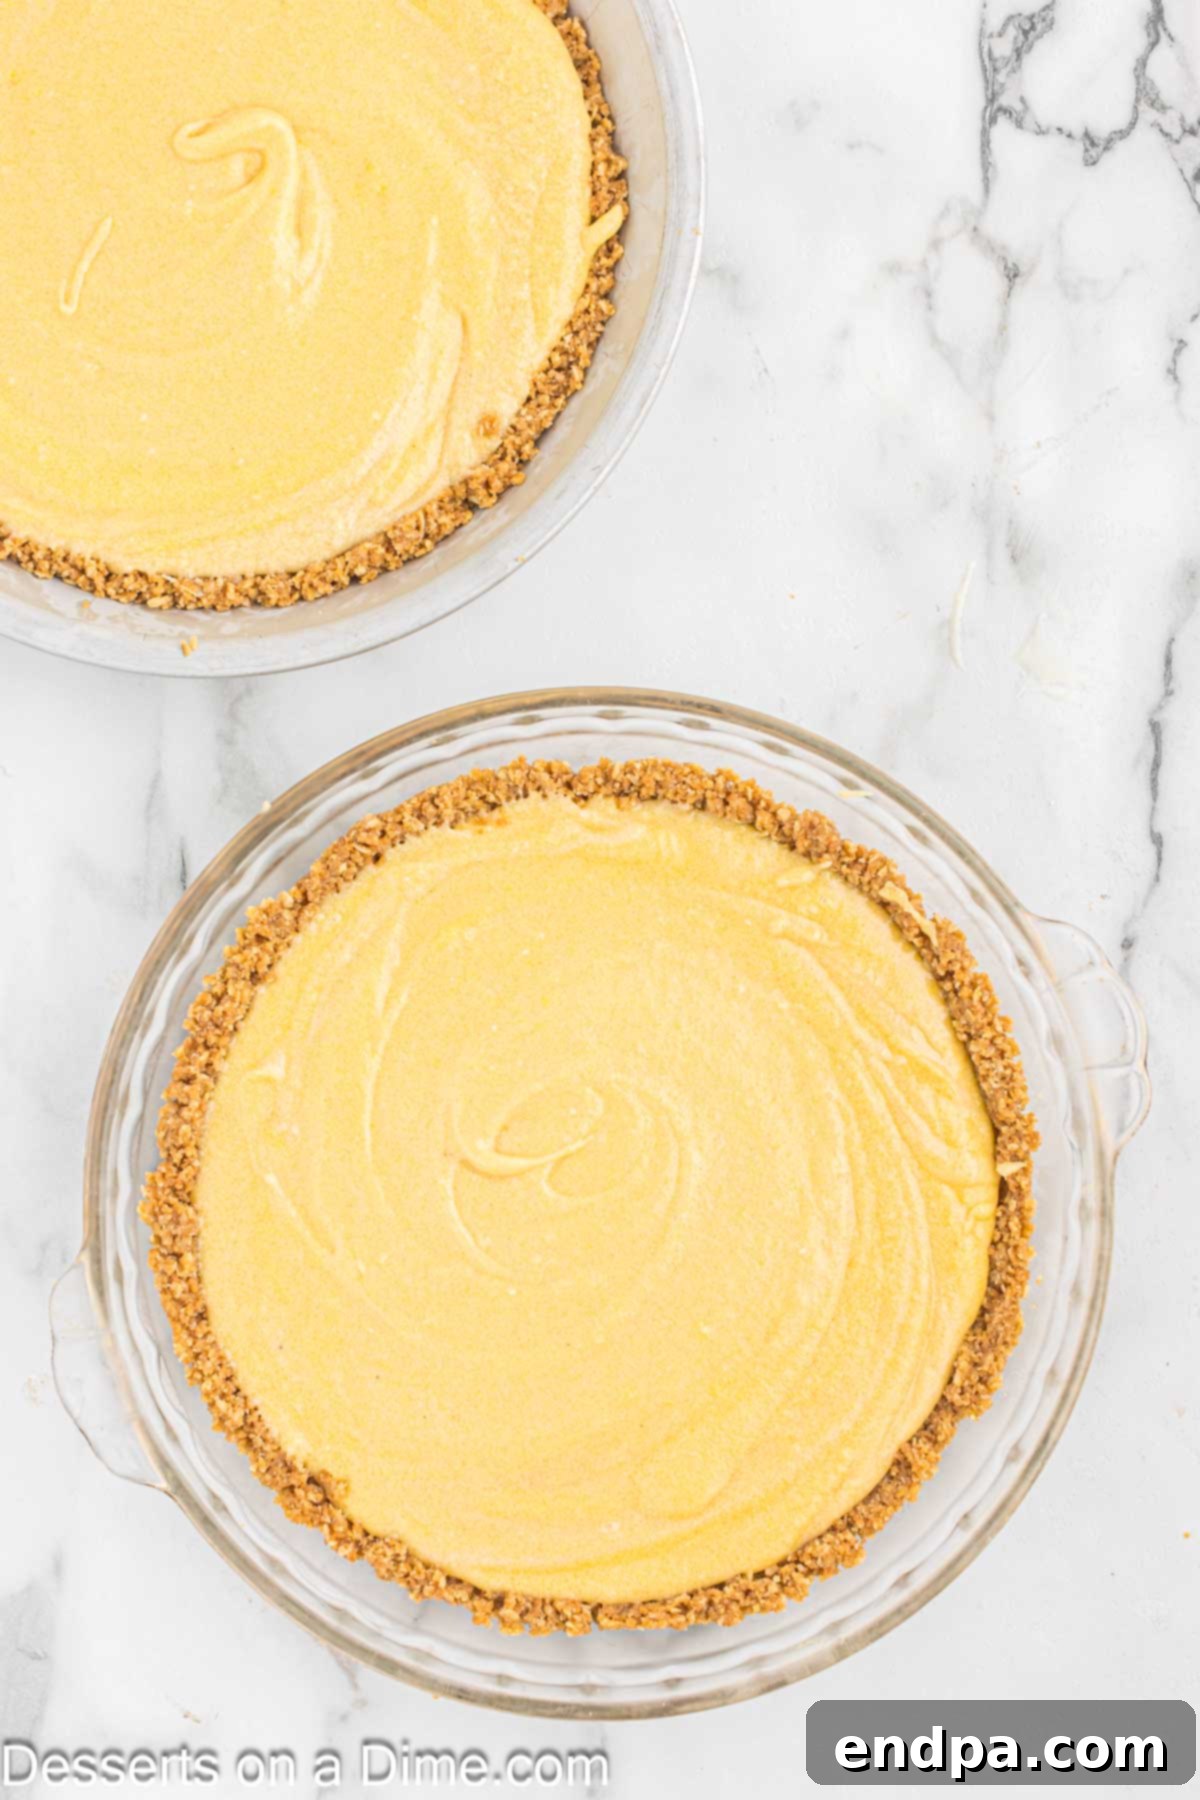
Step 15 – Fill the Pie Crusts: Carefully divide the prepared pie filling evenly between the two oat cookie crusts. Fill each crust approximately two-thirds of the way full. Gently spread the filling to create an even layer, but avoid overworking it. Your pies are now ready for their initial bake!
- Step 16 – Initial Bake: Place the pie plates (still on their baking sheets) onto the center rack of your preheated oven. Bake for 15 minutes. At this point, the tops of the pies should be golden brown around the edges, but the center should still be noticeably jiggly when gently shaken.
- Step 17 – Adjust Oven Temperature: Open the oven door slightly to allow some heat to escape. Reduce the oven temperature to 325 degrees F (160°C). Keep the oven door ajar during this time, allowing the oven to gradually adjust to the new, lower temperature while the pies remain inside. This gentle cooling prevents cracking.
- Step 18 – Continue Baking: Once the oven reaches 325 degrees F, close the oven door. Continue baking the pies for an additional 5-10 minutes. The pies are ready when the outside edges appear set, but the very center still has a slight jiggle. This slight jiggle indicates the perfect gooey texture once chilled.
- Step 19 – Cool and Freeze: Carefully remove the baked pies from the oven and transfer them to a wire rack. Allow them to cool completely to room temperature. This step can take a few hours. Once fully cooled, move the pies to the freezer and freeze them for at least 3 hours, or preferably overnight. Freezing is critical for achieving the iconic Crack Pie texture and making it easy to slice.
- Step 20 – Refrigerate Before Serving: Approximately one hour before you plan to serve, transfer the frozen pies from the freezer to the refrigerator. This allows them to defrost slightly, making them easier to cut and bringing them to the ideal serving temperature where the filling is perfectly gooey but still firm.
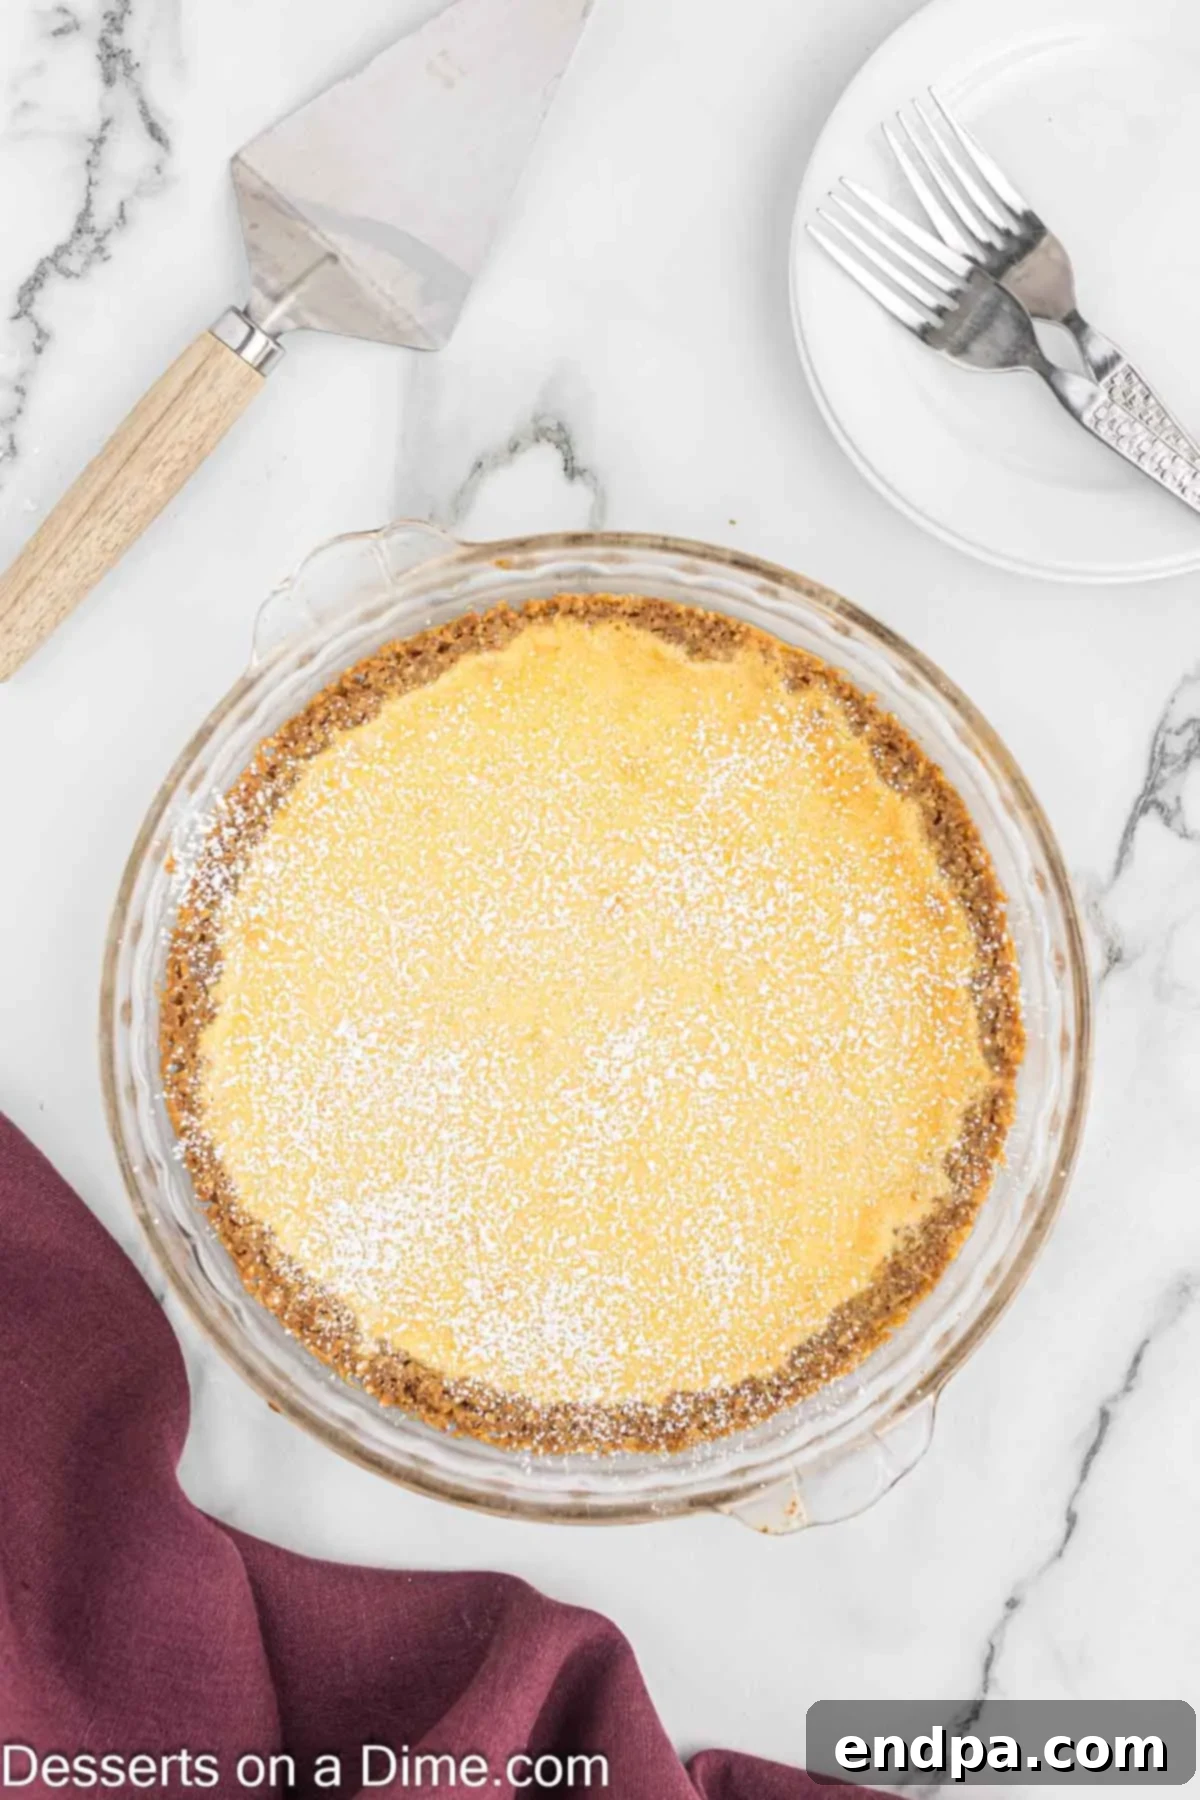
- Step 21 – Garnish and Enjoy: Just before serving, dust the top of each pie generously with confectioner’s sugar. This adds a beautiful finish and a final touch of sweetness. Slice into wedges and savor every blissful bite of your homemade Crack Pie!
Expert Tips for Perfect Crack Pie Every Time
Achieving the legendary status of Crack Pie at home is easier with these insightful tips:
- Stick to Egg Yolks Only: This recipe is meticulously crafted to utilize only egg yolks. The yolks contribute significantly to the filling’s rich, dense, and ultra-creamy texture. Introducing egg whites would alter the consistency, making it less gooey and potentially more cake-like.
- Don’t Skip the Freeze: Freezing the pie for at least 3 hours (or overnight) is absolutely essential. This step isn’t optional; it allows the gooey filling to fully set, making the pie sliceable and delivering that signature dense, chewy, and melt-in-your-mouth texture that Crack Pie is famous for.
- Select the Right Pie Plate: For optimal results and even cooking, use a 10-inch pie tin or a glass pie plate. The size ensures the correct filling-to-crust ratio and allows the pie to bake and set uniformly, preventing an undercooked center or burnt edges.
- Temperature Matters for Ingredients: While some recipes call for room temperature ingredients, for this pie, ensure your butter and other dairy components are at the *right* temperature as specified in the instructions (e.g., melted butter). This consistency is crucial for smooth mixing and a uniform filling.
- Serving Temperature Enhances Flavor: While Crack Pie is delightful chilled directly from the refrigerator, allowing it to sit at room temperature for about 10-15 minutes before serving can slightly soften the filling, enhancing its gooeyness and intensifying its rich, caramel-like flavors.
- Measure with Precision: Baking is a science, and this recipe, with its specific ratios for that unique texture, benefits greatly from accurate measurements. Use a kitchen scale for dry ingredients like flour and oats if possible for the best consistency.
- Avoid Overmixing the Filling: Once the egg yolks are added, mix only until just combined. Overmixing can incorporate too much air, which can lead to a less dense and less gooey filling, potentially affecting its signature “crack” texture.
Serving Suggestions & Topping Ideas
Crack Pie is incredibly rich and flavorful on its own, truly needing minimal adornment. However, if you wish to elevate the experience, here are a couple of classic ideas:
- Simple Powdered Sugar: A light dusting of confectioner’s sugar provides a beautiful visual contrast and a delicate touch of sweetness that doesn’t overpower the pie’s intrinsic richness.
- Vanilla Ice Cream: A scoop of high-quality vanilla ice cream offers a wonderful creamy, cool counterpoint to the warm, gooey, and intensely sweet pie. The contrast in temperatures and textures is divine.
Given the pie’s inherent decadence, we recommend keeping additional toppings simple to let the pie’s complex flavors shine.
Frequently Asked Questions About Crack Pie
After baking and the initial freezing period, Crack Pie should always be stored in the refrigerator. Cover it tightly with plastic wrap or aluminum foil to prevent it from drying out or absorbing other odors. When stored properly, it will maintain its delicious flavor and texture for up to 5 days.
Absolutely! Freezing is a crucial step in this recipe, but you can also freeze the finished pie for long-term storage. Once baked and completely cooled, wrap the pie tightly in several layers of plastic wrap, then an additional layer of aluminum foil. This will protect it from freezer burn. It can be stored in the freezer for up to 3 months. When you’re ready to enjoy it, simply thaw the pie overnight in the refrigerator before slicing and serving. Dust with confectioner’s sugar just before serving.
Yes, due to its rich, custard-like filling containing dairy and egg yolks, Crack Pie must be refrigerated. It will maintain its optimal texture and freshness when kept chilled. Leaving it at room temperature for extended periods is not recommended for food safety and quality.
Explore More Easy Pie Recipes
If you’ve enjoyed mastering the Crack Pie, you’re in for a treat with these other delightful and easy-to-make pie recipes:
- Refreshing Sprite Pie Recipe
- Decadent Easy Chocolate Pecan Pie Recipe
- Classic Arkansas Possum Pie Recipe
- Irresistible No-Bake Salted Caramel Pie
- Light & Fruity Strawberry Jello Pie Recipe
- Timeless Pecan Pie
We absolutely love hearing from our community! If you make this legendary Milk Bar Crack Pie Recipe, please don’t hesitate to leave us a comment or a star review. Your feedback helps us grow and inspires other home bakers!
Crack Pie (Milk Bar Pie) Recipe
Rating: 4.90 from 28 votes
Crack Pie features a luscious, ooey-gooey filling baked into a unique, chewy oatmeal cookie crust, often topped with a delicate dusting of powdered sugar. This iconic dessert, popularized by Milk Bar, is absolutely divine and famously addictive!
25 mins
40 mins
4 hrs
5 hrs 5 mins
8 slices
American
Dessert
889 kcal
Carrie Barnard
Ingredients
FOR THE OAT COOKIE:
- 1/2 cup Unsalted Butter
- 1/3 cup Brown Sugar
- 3 Tbsp Granulated Sugar
- 1 Large Egg Yolk
- 1/2 cup All-Purpose Flour
- 1 cup Old-Fashioned Rolled Oats
- 1/4 tsp Salt
- 1/8 tsp Baking Powder
- 1/8 tsp Baking Soda
FOR THE CRUST:
- The Baked Oat Cookie recipe above
- 1 Tbsp Brown Sugar
- 1/4 tsp Salt
- 1/4 cup Unsalted Butter melted
FOR THE PIE FILLING:
- 1 1/2 cup Granulated Sugar
- 3/4 cup Brown Sugar
- 1/4 cup Dry Milk Powder
- 1/4 cup Corn Powder (Cornstarch)
- 1 1/2 tsp Salt
- 1 cup Unsalted Butter melted
- 3/4 cup Heavy Whipping Cream
- 1/2 tsp Vanilla Extract
- 8 Large Egg Yolks
FOR SERVING:
- ½ cup Confectioner’s Sugar
Instructions
FOR THE OAT COOKIE:
- Preheat the oven to 350°F (175°C) and line a baking sheet with parchment paper.
- In the bowl of a stand mixer, cream together 1/2 cup unsalted butter and 3 Tbsp granulated sugar until light and fluffy.
- Scrape down the sides of the bowl, add the large egg yolk, and mix until well combined.
- Add the 1/2 cup all-purpose flour, 1 cup old-fashioned rolled oats, 1/4 tsp salt, 1/8 tsp baking powder, and 1/8 tsp baking soda.
- Cream until just combined, approximately 1 minute. Do not overmix.
- Transfer the cookie dough to the center of the baking sheet. Use a spatula or your hands to spread it out to approximately 1/4 inch thick. (The dough may not cover the entire pan).
- Bake for 15 minutes, or until the edges are set and lightly golden.
- Remove from oven and cool the oat cookie completely on the baking sheet.
FOR THE CRUST:
- Preheat the oven to 350°F (175°C) and position an oven rack in the center.
- Once the oat cookie is cooled, place it, along with 1 Tbsp brown sugar and 1/4 tsp salt, into a food processor. Pulse until the mixture forms fine crumbs. (Alternatively, break the cookie by hand and mix ingredients in a bowl.) Transfer the mixture to a mixing bowl.
- Stir in 1/4 cup melted butter. Knead with your hands until the mixture is moist enough to form a cohesive ball. (If too dry, gradually add more melted butter, 1 Tbsp at a time).
- Divide the crust mixture evenly between two 10-inch pie tins. Use your fingers to firmly press the mixture into the bottom and up the sides of each pie tin.
- Place the pie crusts on baking sheets for stability.
FOR THE FILLING & BAKING:
- In a large stand mixer bowl with a paddle attachment, combine 1 1/2 cup granulated sugar, 3/4 cup brown sugar, 1/4 cup dry milk powder, 1/4 cup corn powder, and 1 1/2 tsp salt on low speed.
- Pour in 1 cup melted unsalted butter. Mix for 2-3 minutes until the dry ingredients are fully moistened and resemble a thick paste.
- Add 3/4 cup heavy whipping cream and 1/2 tsp vanilla extract. Mix on low speed until just combined, then briefly on medium-high to ensure smoothness.
- Scrape down the sides of the bowl. Add the 8 large egg yolks. Mix on low speed until just combined. Avoid overmixing.
- Divide the filling evenly between the two prepared pie crusts, filling each approximately two-thirds full.
- Bake on the center rack for 15 minutes. The tops should be golden brown, but the center should still be jiggly.
- Open the oven door and reduce the oven temperature to 325°F (160°C). Allow the oven to adjust with the door slightly ajar and the pies remaining inside.
- Once the oven reaches 325°F, close the door and bake for another 5-10 minutes, until the outer edges are set but the very center still has a slight jiggle.
- Remove the pies from the oven and transfer them to a wire rack to cool completely to room temperature. This will take several hours.
- Once cooled, transfer the pies to the freezer and freeze for at least 3 hours, or preferably overnight, for the best texture and easy slicing.
- One hour before serving, move the pies from the freezer to the refrigerator to defrost slightly.
- Just before serving, dust the top of each pie generously with confectioner’s sugar and enjoy!
Recipe Notes
* This recipe specifically calls for egg yolks only. Ensure no egg whites are included, as they will significantly alter the pie’s desired texture and richness.
* Freezing the pie is crucial for achieving the authentic Crack Pie texture and flavor. Do not skip this step; it allows the filling to set perfectly for that dense, gooey experience.
* For best results, use a 10-inch pie tin or glass pie plate. This size ensures proper cooking and setting of the filling and provides the ideal crust-to-filling ratio.
Nutrition Facts
Calories: 889kcal
,
Carbohydrates: 96g
,
Protein: 8g
,
Fat: 55g
,
Saturated Fat: 33g
,
Polyunsaturated Fat: 3g
,
Monounsaturated Fat: 15g
,
Trans Fat: 2g
,
Cholesterol: 351mg
,
Sodium: 703mg
,
Potassium: 215mg
,
Fiber: 1g
,
Sugar: 83g
,
Vitamin A: 1948IU
,
Vitamin C: 1mg
,
Calcium: 140mg
,
Iron: 2mg
Pin This Now to Remember It Later
Pin Recipe
