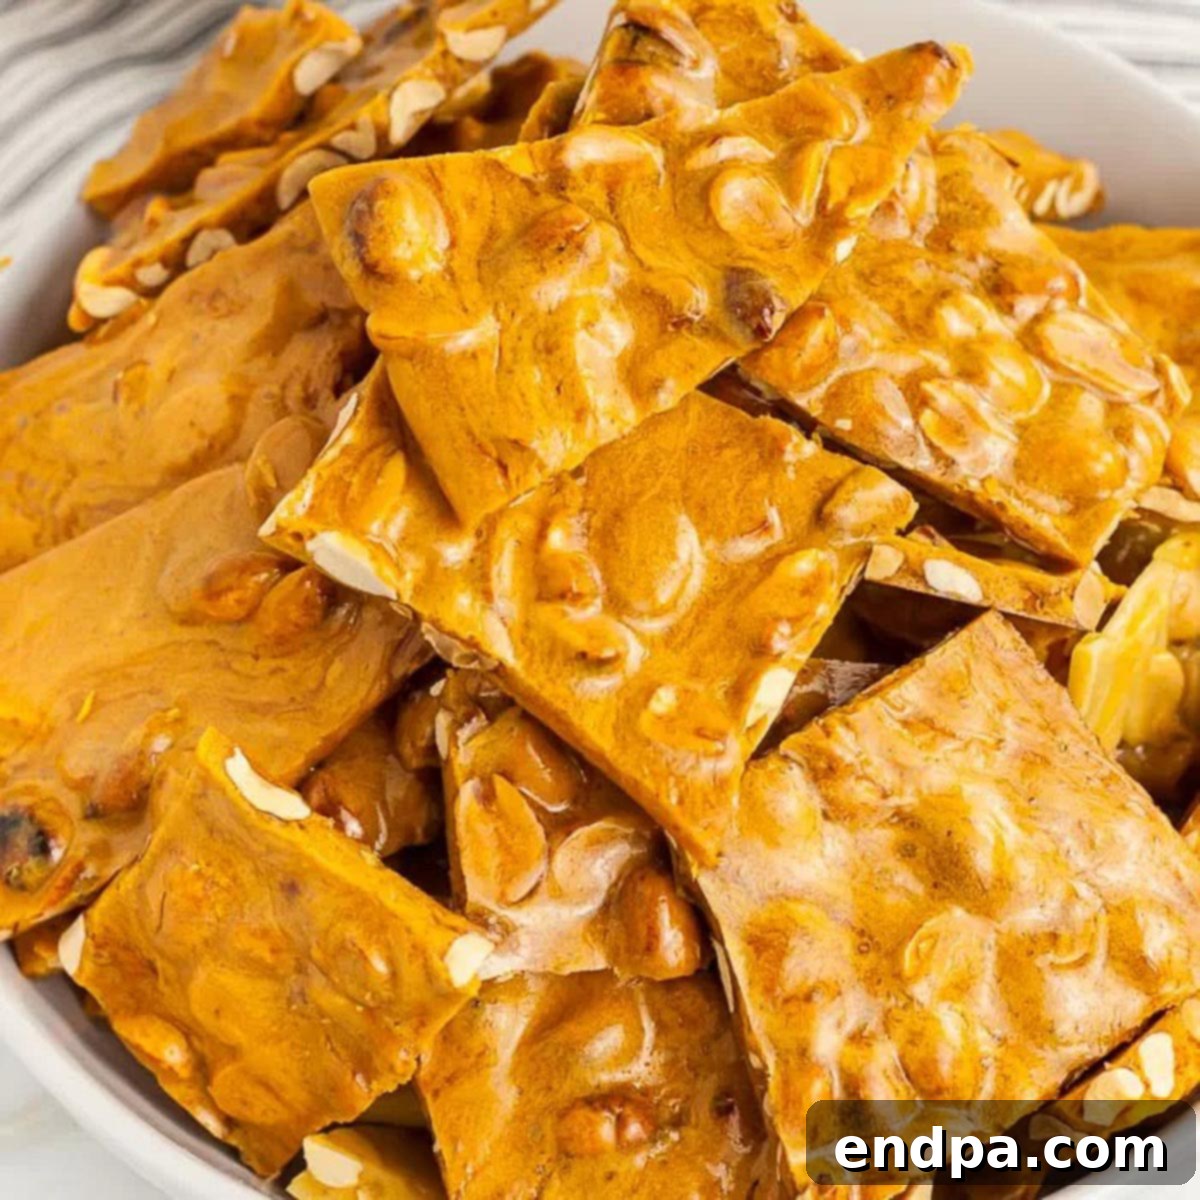
Unlock the secret to crafting perfect, irresistible peanut brittle right in your own kitchen with this simple and easy-to-follow **Homemade Peanut Brittle Recipe**. Every single bite of this classic confection delivers a delightful crunch, followed by a harmonious blend of sweet and salty flavors that truly captivates the palate. It’s a timeless treat that promises to bring joy to everyone who tastes it, whether shared with loved ones or savored as a personal indulgence.
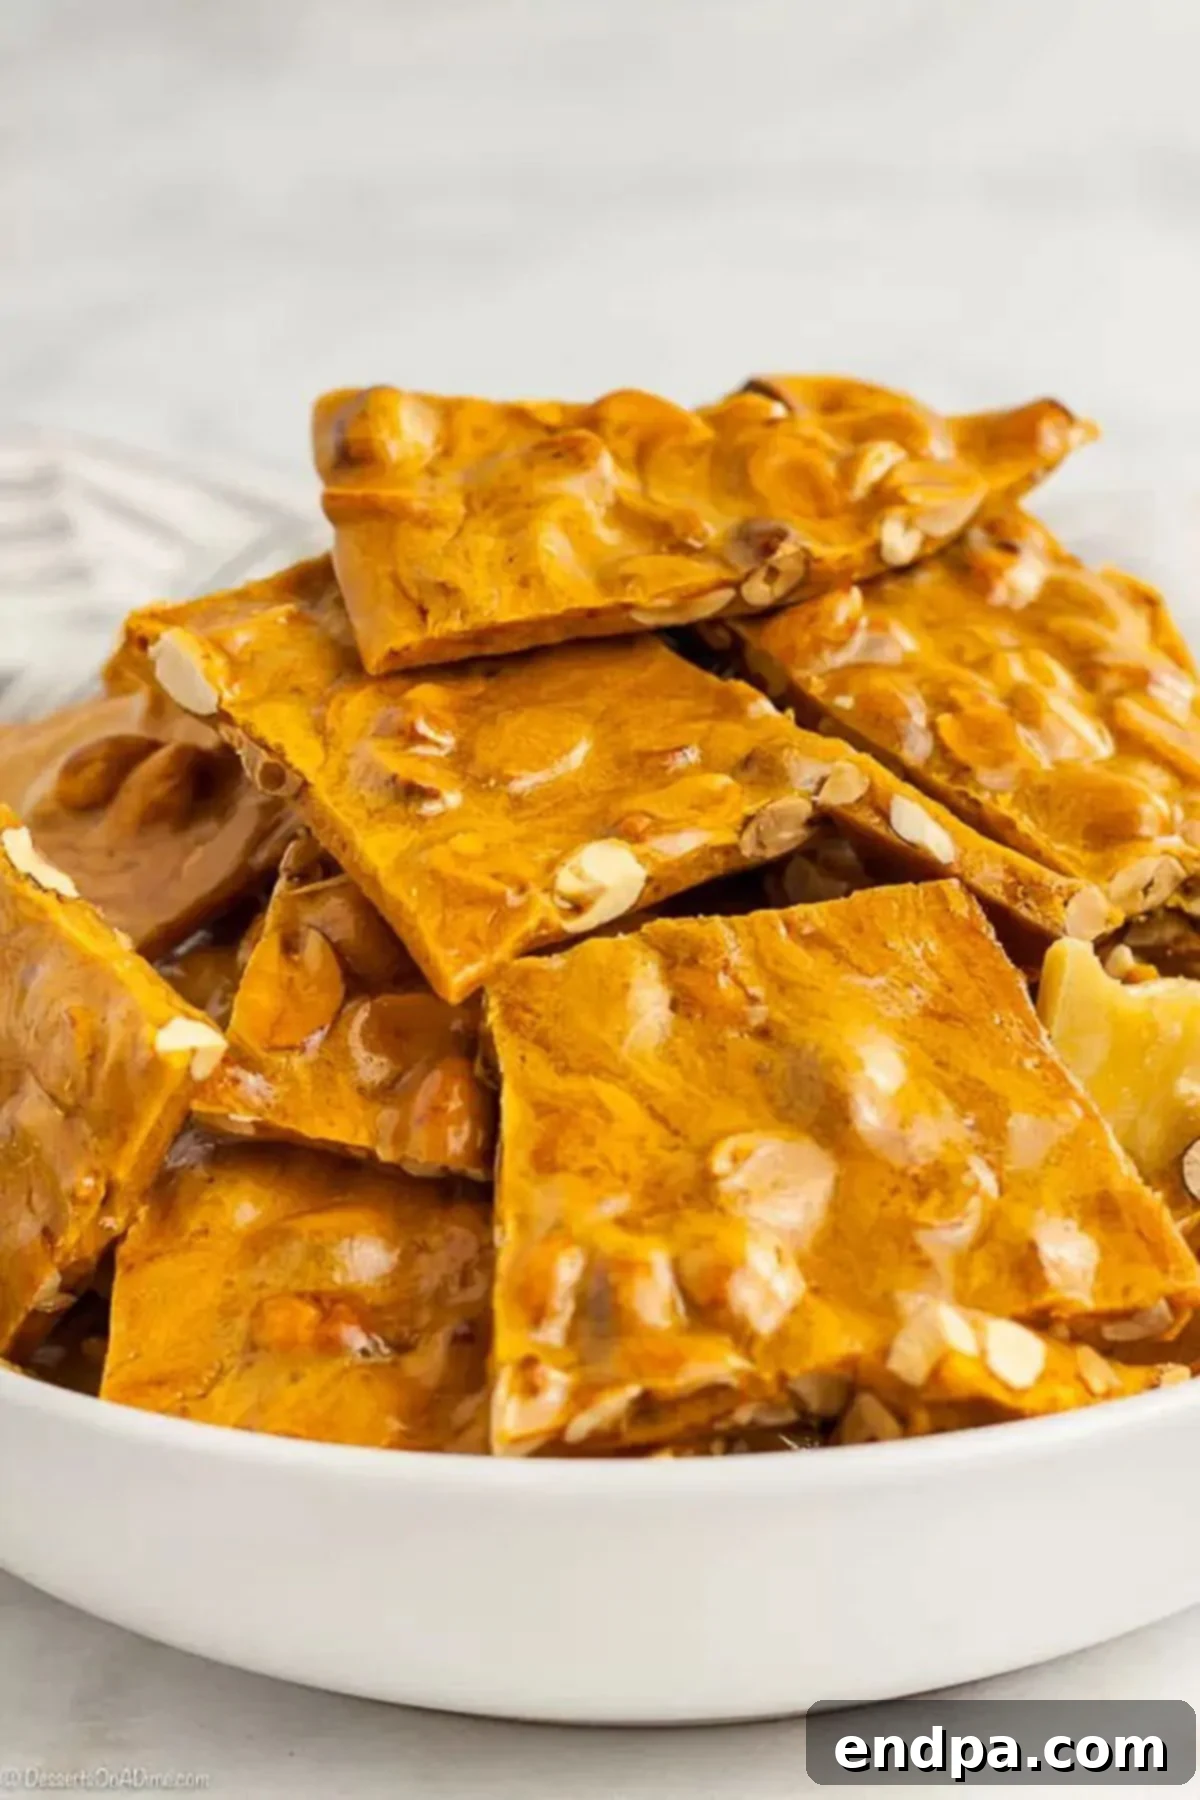
If you have a fondness for peanut brittle, you’re in for a real treat. Imagine being able to whip up a batch of this beloved candy whenever a craving strikes, or for any special occasion. For years, I found myself constantly purchasing peanut brittle, until a thought sparked: “Why not try making it myself?” The experience of creating this easy candy recipe from scratch was incredibly rewarding, and to my surprise, it turned out to be far simpler than I ever imagined. The end result was so satisfying that it quickly became a staple in our home.
Today, making homemade peanut brittle is a cherished family tradition. The anticipation and excitement build as we gather to create this delectable confection, and it’s always met with rave reviews. While this recipe focuses on the classic stovetop method for achieving that perfect, crisp texture, for those truly pressed for time, you can also explore options like Microwave Peanut Brittle, which offers an even quicker route to this beloved treat. Our stovetop recipe, however, offers superior control and consistency, making it the preferred method for the ultimate brittle experience.
Table of contents
- Why We Love This Recipe
- Essential Ingredients for Perfect Brittle
- Creative Variations and Additions
- Step-by-Step: How to Make Homemade Peanut Brittle
- Proper Storage for Lasting Freshness
- Frequently Asked Questions About Peanut Brittle
- Expert Tips for Brittle Success
- More Delightful Homemade Candy Recipes
Why We Love This Recipe: A Sweet and Salty Tradition
There are countless reasons why this homemade peanut brittle recipe has earned a permanent spot in our hearts and kitchens. Beyond its incredible flavor, it’s a versatile and economical treat that brings a smile to every face. We particularly adore making large batches to share as thoughtful gifts with friends and family during the holidays or simply as a token of appreciation. It’s always a resounding hit, instantly elevating any gift basket or gathering.
The magic of peanut brittle lies in its exquisite balance: the deep, caramelized sweetness perfectly complemented by the savory crunch of roasted peanuts and a touch of salt. This delightful contrast creates an addictive flavor profile that keeps everyone coming back for more. Furthermore, crafting this stovetop peanut brittle at home not only provides a superior taste experience but also offers significant savings compared to store-bought versions. You gain complete control over the quality of ingredients, ensuring a wholesome and delicious treat without any artificial additives. It’s more than just a recipe; it’s an opportunity to create cherished memories and spread joy, one brittle piece at a time.
Essential Ingredients for Perfect Brittle
Creating outstanding peanut brittle relies on a few simple, yet crucial, ingredients. Each component plays a vital role in achieving that signature crisp texture and rich flavor. You’ll find that quality ingredients make all the difference in the final outcome of your homemade treat.
- Sugar: White granulated sugar forms the foundational sweetness and caramelization of the brittle. It melts down to create the hardened candy base.
- Corn Syrup: Light corn syrup is indispensable in this recipe. It helps prevent sugar crystallization, ensuring a smooth, clear, and perfectly brittle texture instead of a grainy one.
- Peanuts: Roasted peanuts are preferred as they impart a deeper, more robust flavor and a satisfying crunch that defines peanut brittle. You can use salted or unsalted, adjusting the added salt accordingly.
- Butter: Real butter adds a wonderful richness and depth of flavor to the brittle, contributing to its smooth consistency and helping it release from the pan.
- Baking Soda: This is the secret ingredient for brittle’s airy, delicate crunch. When added at the end, it reacts with the hot sugar mixture, releasing carbon dioxide bubbles that make the brittle light and crisp, rather than rock-hard. For more on this, explore Best Baking Soda Substitutes.
- Water: A small amount of water helps dissolve the sugar and corn syrup evenly, facilitating the cooking process before it evaporates, leaving behind the concentrated sugar mixture.
The precise measurements for these ingredients are provided in the comprehensive recipe card located at the bottom of this page, ensuring you have everything you need for success.
Creative Variations and Additions to Elevate Your Brittle
While classic peanut brittle is undeniably delicious, this recipe offers a fantastic canvas for culinary creativity. Don’t hesitate to experiment with different additions and variations to customize your brittle and discover new favorite flavor combinations.
- Experiment with Different Nuts: While roasted peanuts are traditional, don’t limit yourself! Try swapping them out or combining them with other nuts. Sliced almonds create a delicate almond brittle, macadamia nuts offer a buttery crunch, cashews provide a softer texture, or chopped pecans can lend a rich, earthy flavor. Ensure all nuts are roasted for the best flavor.
- Incorporate Dried Fruit: For a chewy contrast to the brittle’s crunch, consider stirring in some dried fruit. Raisins add a classic sweetness, while dried cranberries introduce a tart and vibrant note that beautifully cuts through the richness of the candy. Add them towards the end of the cooking process to prevent them from burning.
- Indulge with Chocolate Chips: Take your peanut brittle to the next level of decadence by mixing in chocolate chips after the brittle has been poured onto the baking sheet but before it fully cools. The residual heat will slightly melt the chocolate, creating delicious pockets of creamy goodness as it hardens. Dark, milk, or white chocolate chips all work wonderfully.
- Drizzle with Honey or Caramel: Once your peanut brittle has completely cooled and broken into pieces, a light drizzle of honey or a homemade caramel sauce can add an extra layer of sweetness and sticky richness. This creates a gourmet touch that is sure to impress.
Step-by-Step: How to Make Homemade Peanut Brittle
Making peanut brittle from scratch is a rewarding process that, when followed carefully, yields spectacular results. Precision and timing are key to achieving the perfect texture. Let’s walk through each step to ensure your brittle turns out wonderfully crisp and delicious.
- Step 1: Prepare Your Baking Surface. Begin by thoroughly greasing a large cookie sheet with raised sides. You can use butter, shortening, or cooking spray. Alternatively, for even easier cleanup, line the sheet with parchment paper or a silicone baking mat. Having your pan ready is critical, as the brittle mixture must be poured immediately once it reaches the correct temperature. Set this prepared sheet aside, right next to your stovetop, to minimize frantic movement later.
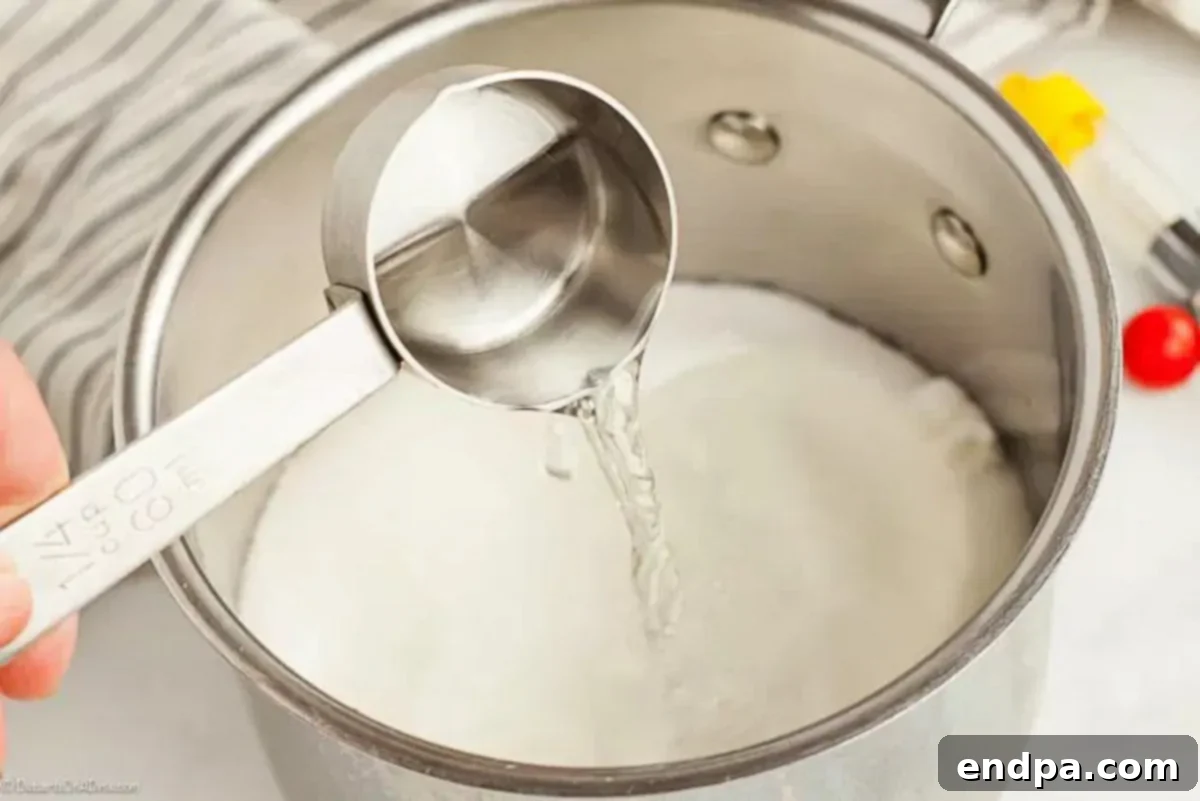
Step 2: Combine and Boil the Sugar Mixture. In a sturdy 2-quart saucepan, combine the granulated sugar, light corn syrup, salt, and water. Place the saucepan over medium heat on your stovetop. Bring the mixture to a rolling boil, allowing it to cook uncovered. Stir occasionally, just enough to ensure the sugar fully dissolves and doesn’t stick to the bottom of the pan. Continue boiling until the mixture starts to take on a beautiful golden-brown color, indicating the sugars are beginning to caramelize.
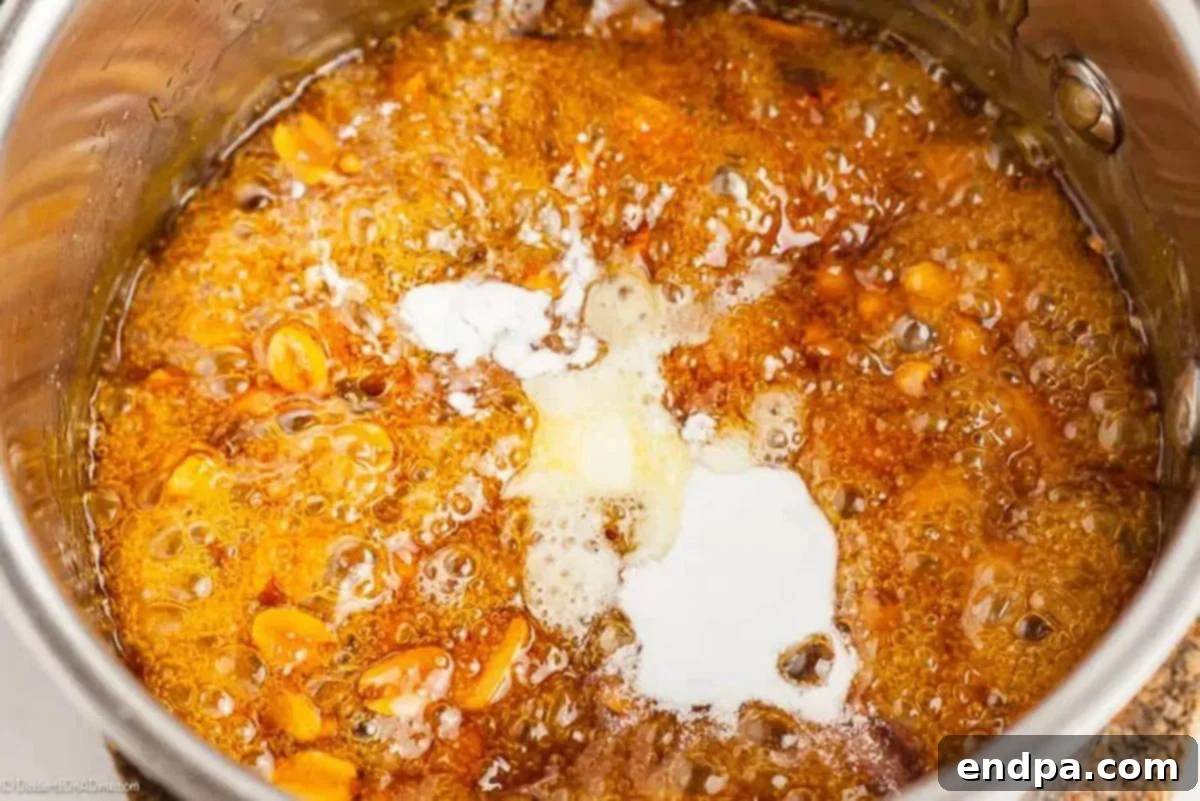
Step 3: Stir in the Peanuts. Once the sugar mixture has reached a clear, golden-brown stage and all the sugar is dissolved, it’s time to add the star ingredient: the peanuts. Gently stir in the roasted peanuts. Ensure they are thoroughly coated by the glistening sugar syrup. This step is crucial for distributing the peanuts evenly throughout the brittle, ensuring every piece has that perfect nutty crunch.
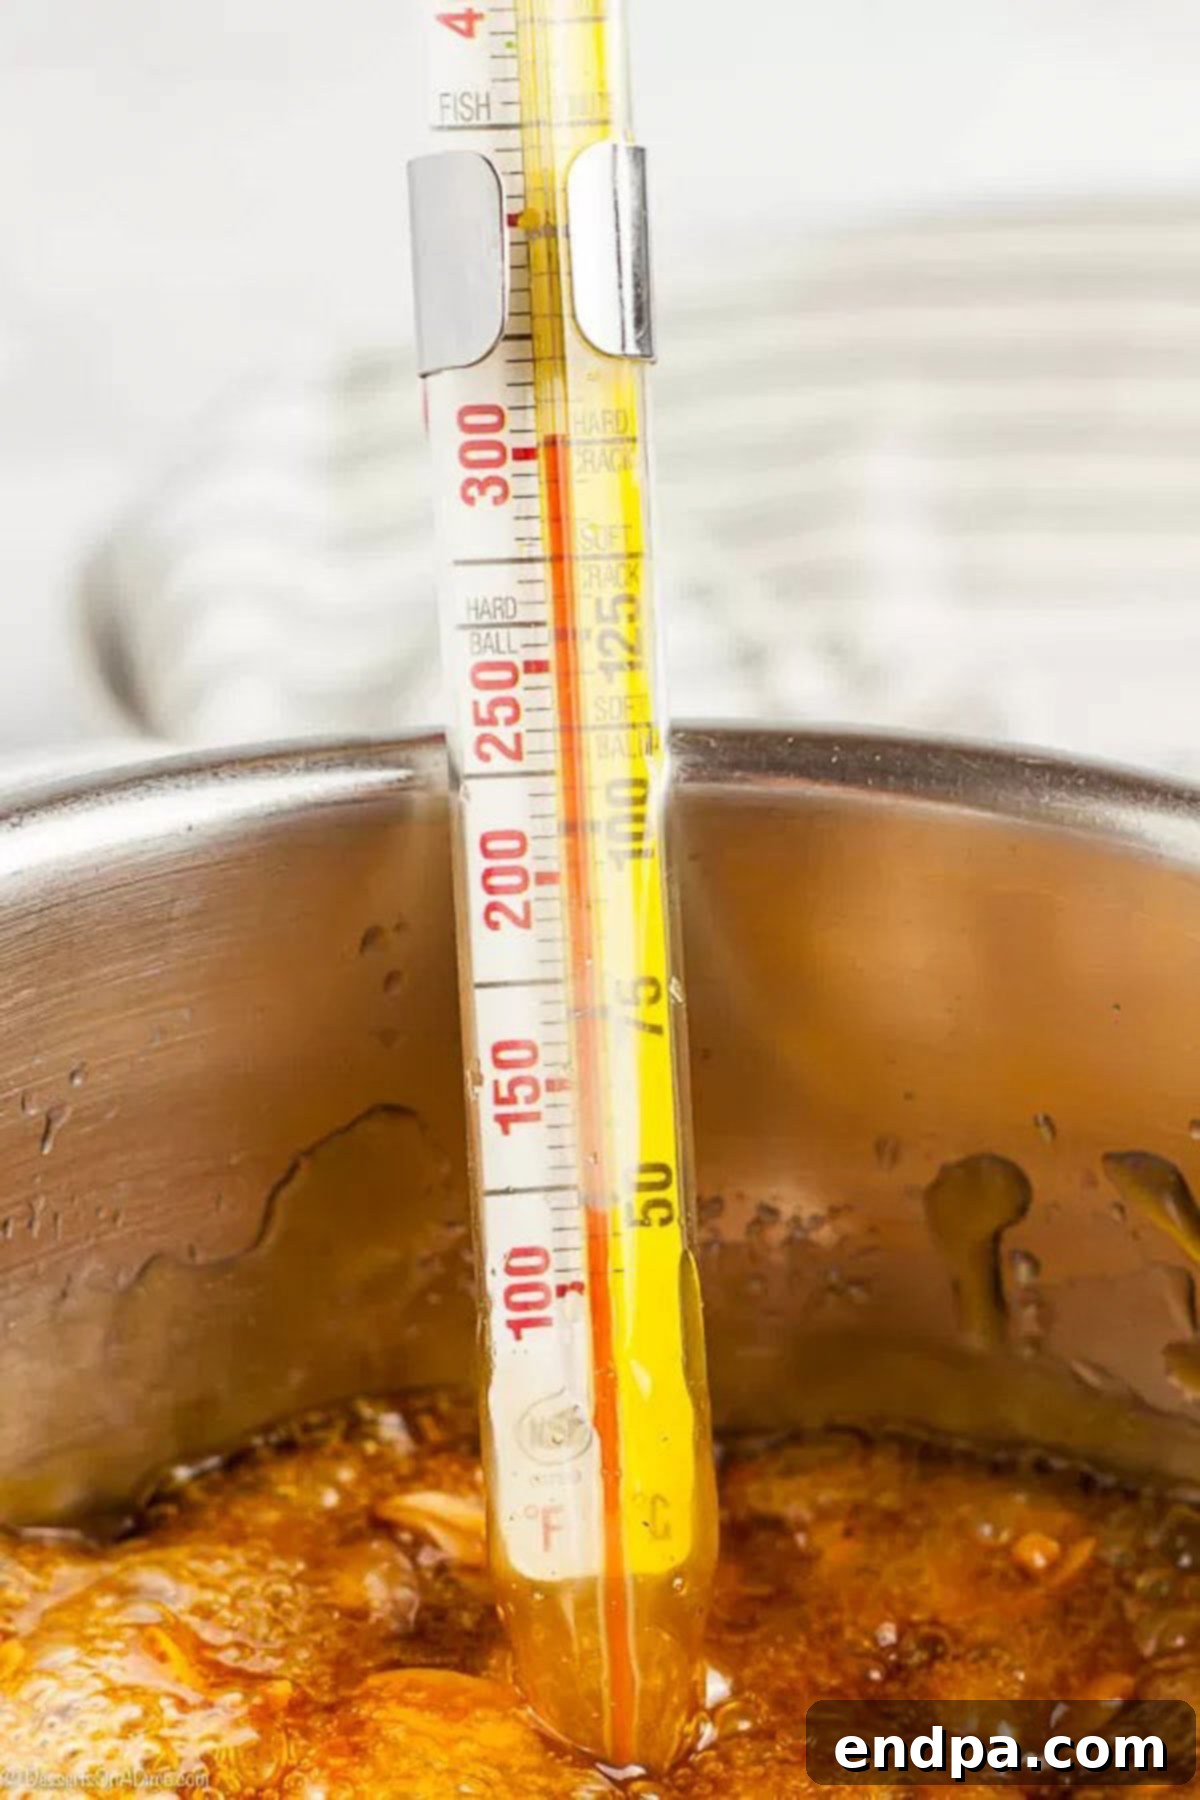
Step 4: Cook to Perfection with a Candy Thermometer. This is perhaps the most critical stage. Securely attach a candy thermometer to the side of your saucepan, ensuring the tip is submerged in the mixture but not touching the bottom of the pan. Continue cooking the mixture, stirring frequently to prevent scorching, until the thermometer precisely reads 300 degrees Fahrenheit (149 degrees Celsius). This is the “hard crack” stage, essential for brittle to achieve its characteristic snap. Immediately remove the saucepan from the heat, then quickly stir in the butter and baking soda until fully incorporated. The mixture will foam up, a clear sign the baking soda is working its magic.
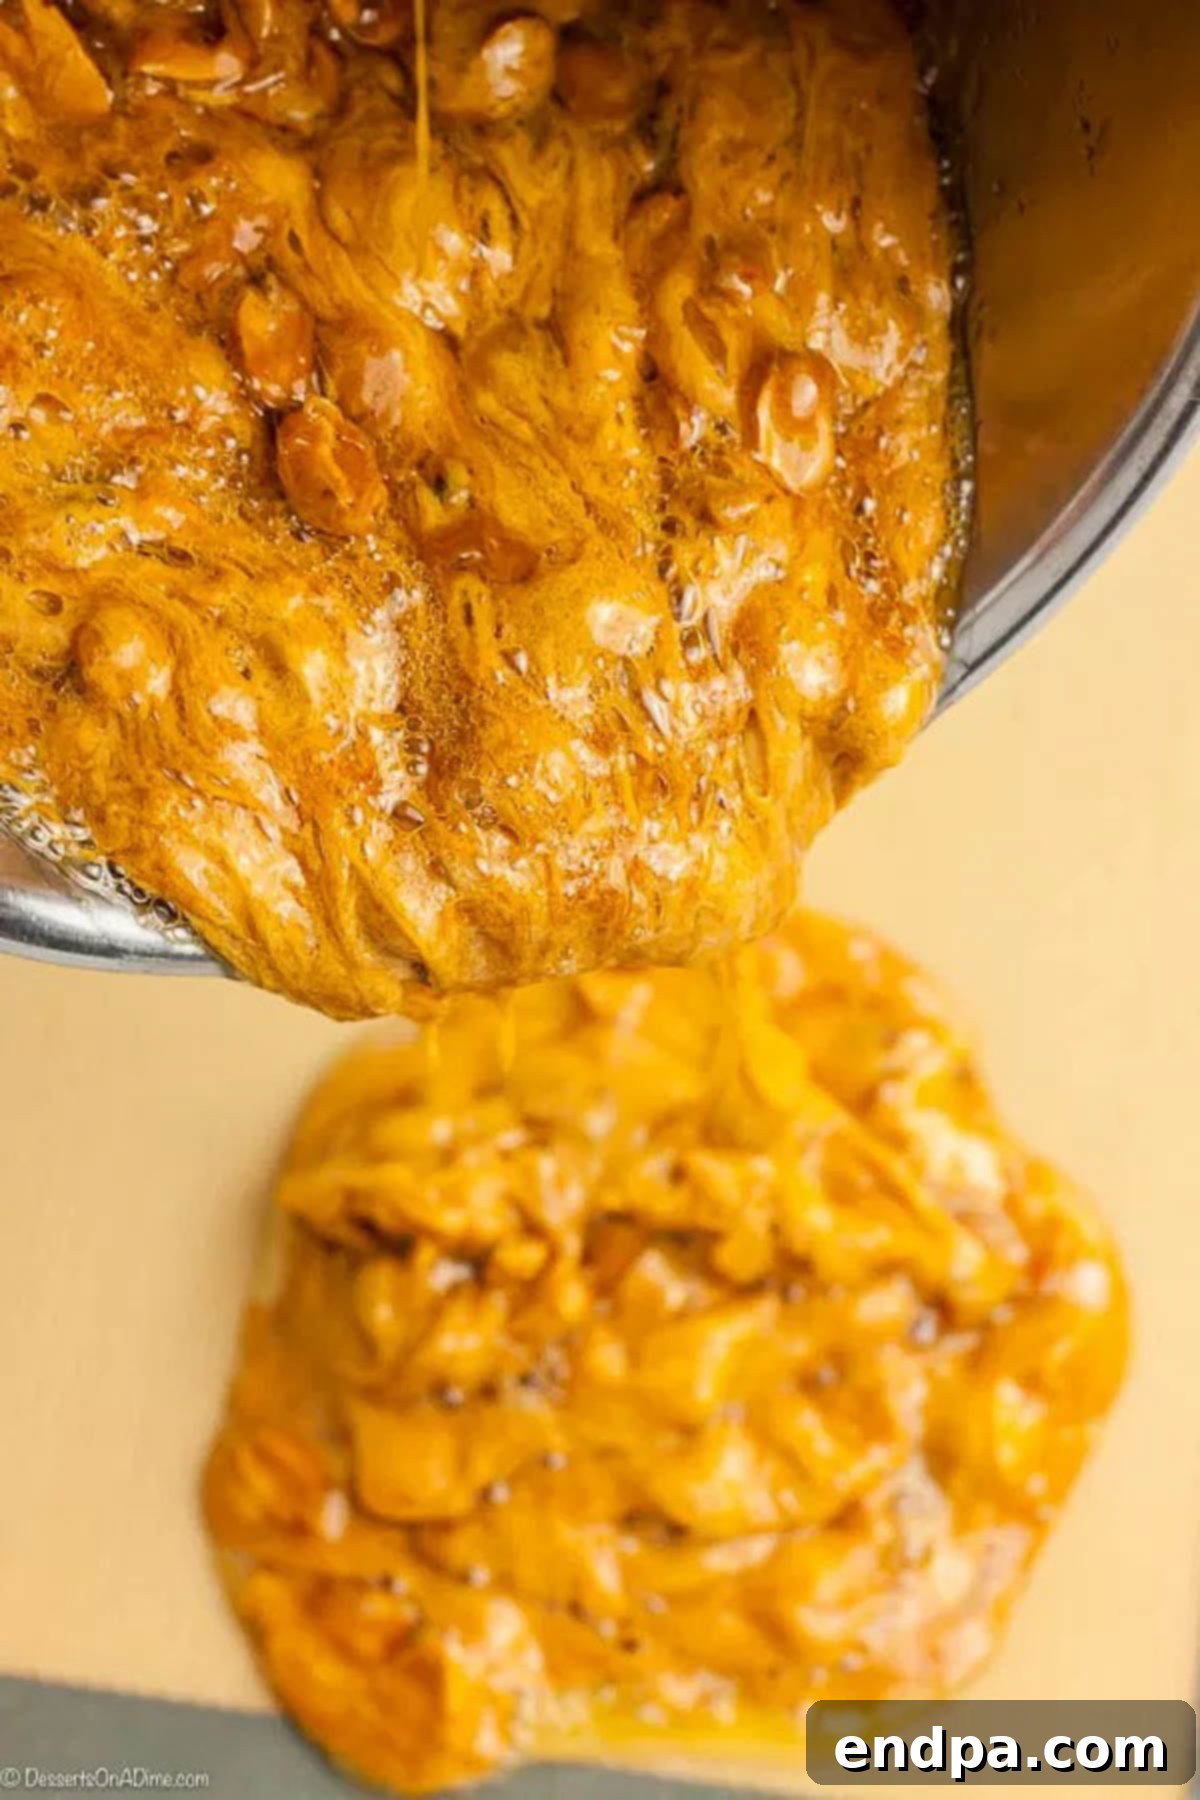
Step 5: Spread and Cool. Without delay, pour the hot brittle mixture onto your prepared cookie sheet. The mixture will be very hot and fluid. To spread it into an even, thin layer, gently tilt and move the pan back and forth, allowing gravity to assist in the spreading. Work quickly, but carefully, as the mixture cools and hardens rapidly. Once spread, allow the brittle to cool completely at room temperature. This can take an hour or two. Once fully cooled and hardened, break the brittle into desired pieces using your hands, the back of a spoon, or even a meat mallet for larger quantities. Ensure it’s completely cold before breaking to avoid sticky pieces.
Proper Storage for Lasting Freshness
To ensure your homemade peanut brittle remains perfectly crisp and delicious for as long as possible, proper storage is essential. The key is to protect it from humidity, which can quickly turn brittle soft and sticky.
Always store peanut brittle in an airtight container at room temperature. A cookie tin or a plastic food storage container with a tight-fitting lid works perfectly. Avoid placing it in the refrigerator, as the moisture and cold temperature can cause it to become soft and lose its signature crunch over time. The cool, dry environment of a pantry or countertop is ideal for maintaining its quality.
For longer storage, peanut brittle can be frozen. Place individual pieces or layers separated by parchment paper in a freezer-safe bag or airtight container. It will keep well in the freezer for up to 3 months. Thaw at room temperature before serving for the best texture.
Frequently Asked Questions About Peanut Brittle
When stored correctly in an airtight container at room temperature, homemade peanut brittle typically retains its crispness and flavor for up to 2 months. However, in our experience, it rarely lasts that long! The delicious taste of this amazing homemade peanut brittle means it’s usually devoured much quicker by eager hands. It’s crucial not to refrigerate peanut brittle, as the moisture in the fridge can cause it to absorb humidity, leading to a loss of its satisfying crunch and a softened texture over time. Room temperature storage is always the best option for maintaining its quality.
The most common reason for soft or chewy peanut brittle is insufficient cooking time. The sugar mixture must reach a very specific temperature to achieve the “hard crack” stage, which is 300 degrees Fahrenheit (149 degrees Celsius). It is absolutely essential to use a reliable candy thermometer and monitor the temperature closely throughout the cooking process. If the mixture doesn’t reach this critical temperature, the sugar crystals won’t form the necessary rigid structure, resulting in a brittle that remains soft or pliable.
The undisputed secret to achieving that signature light, airy, and crisp texture in peanut brittle is baking soda. When baking soda is stirred into the hot sugar mixture at the very end of the cooking process, it undergoes a chemical reaction. This reaction rapidly releases tiny carbon dioxide bubbles throughout the viscous candy, effectively aerating it. As the brittle cools and hardens, these trapped air bubbles create a delicate, porous structure, making the brittle delightfully snappy rather than dense and hard. For this reason, you should never skip the baking soda, and there is no direct substitute for it in this recipe to achieve the same effect.
Baking soda plays a transformative role in peanut brittle, directly influencing its characteristic delicate texture. When combined with the hot, acidic sugar syrup, baking soda (sodium bicarbonate) decomposes and releases carbon dioxide gas. This gas creates numerous tiny air bubbles throughout the mixture. These bubbles are what give peanut brittle its distinctive “fluffy” appearance and wonderfully fragile, melt-in-your-mouth crunch. Without baking soda, the brittle would be much denser and harder, lacking the aeration that makes it so unique and enjoyable. It’s this precise interaction between baking soda and the sugar syrup that makes peanut brittle so delicate and perfectly crisp.
Expert Tips for Brittle Success
Achieving perfect homemade peanut brittle is easier than you think, especially with these insider tips. Following these guidelines will help you navigate the process with confidence and yield a consistently delightful result.
- Choose the Right Baking Sheet: Always use a baking sheet that has raised sides. This is crucial to contain the hot, liquid brittle mixture when you pour it out. A standard flat cookie sheet will not work, as the mixture will spread right off the edges, creating a significant mess and wasted product. Look for a jelly roll pan or a similar sheet with at least a 1-inch rim.
- Invest in a Reliable Candy Thermometer: This tool is non-negotiable for brittle making. Precise temperature control is the single most important factor in achieving the correct hard-crack consistency. Guessing or relying on visual cues alone can lead to brittle that is either too soft and chewy or burnt and overly hard. Ensure your thermometer is calibrated correctly for accuracy.
- Be Prepared and Work Quickly: The brittle-making process, especially the final pouring and spreading, requires speed. Have your greased or lined baking sheet positioned directly next to your stovetop before you begin cooking. Once the mixture reaches 300°F and the baking soda is stirred in, you need to pour it onto the sheet immediately. The candy cools and hardens very rapidly, so there’s no time to waste. Always exercise extreme caution, as the hot candy mixture can cause severe burns.
- Line Your Baking Sheet for Easy Cleanup: For the ultimate convenience in cleanup, I highly recommend lining your baking sheet with parchment paper or a silicone baking mat. This not only prevents the brittle from sticking but also makes removing and breaking the cooled candy incredibly simple, saving you precious time and effort.
- Respect the Cooking Time: While the hands-on prep is quick, the cooking time for the sugar syrup can take around 25-30 minutes. Do not try to rush this process by increasing the heat excessively. Cooking too fast can lead to uneven caramelization, scorching, or a brittle that doesn’t set properly. Patience is a virtue here; ensure the candy reaches the precise temperature gradually.
- Control the Thickness for Optimal Texture: If you desire a fluffier, slightly less dense peanut brittle, avoid spreading it out too thinly. A thicker layer allows for more of the airy texture created by the baking soda. Conversely, if the brittle is spread excessively thin, it can become extremely hard and difficult to chew. Experiment with thickness to find your preferred balance of crispness and tenderness.
- Perfect Holiday Candy for Gifting: Homemade Peanut Brittle is a fantastic and much-appreciated gift, especially during the holiday season. It looks beautiful when broken into uneven, glistening shards. Simply wrap pieces in clear cellophane bags, tie them with a festive ribbon, and present them to neighbors, friends, or family. It’s a personal touch that shows you care.
More Delightful Homemade Candy Recipes
If you’ve enjoyed the process of making homemade peanut brittle, you’ll love exploring other classic candy recipes that are just as rewarding to create. Expand your confectionery repertoire with these fantastic options:
- Cool Whip Candy: A surprisingly simple and airy treat that melts in your mouth.
- How to Make Rock Candy: A fun and educational project that results in beautiful crystalline sugar sticks.
- Old Fashioned Divinity Candy Recipe: A classic Southern confection known for its delicate, nougat-like texture.
- Butter Mints Recipe: Sweet, buttery, and incredibly easy to make, perfect for any occasion.
We hope you truly enjoy making and sharing this **Homemade Peanut Brittle Recipe**! Once you’ve had a chance to whip up a batch, please consider leaving a star rating and a comment below. Your feedback always brightens our day and helps others discover these wonderful homemade treats!
Print Recipe
Homemade Peanut Brittle Recipe
Ingredients
- 1 cup white sugar
- 1/2 cup light corn syrup
- 1/4 teaspoon salt
- 1/4 cup water
- 1 cup peanuts
- 2 tablespoons butter
- 1 teaspoon baking soda
Instructions
- Grease a large cookie sheet (with sides) or line with parchment paper/silicone mat. Set aside.
- In a 2-quart saucepan, over medium heat, combine sugar, corn syrup, salt, and water. Bring to a boil, stirring occasionally until sugar is completely dissolved.
- Stir in the peanuts. Attach a candy thermometer to the side of the pan, ensuring it’s submerged in the mixture without touching the bottom, and continue cooking.
- Stir frequently to prevent scorching, and cook until the temperature precisely reaches 300 degrees F (149 degrees C).
- Immediately remove the saucepan from heat. Quickly stir in the butter and baking soda until fully combined. The mixture will foam up.
- Immediately pour the hot mixture onto the prepared cookie sheet. Gently tilt and move the pan back and forth to spread it into an even, thin layer.
- Allow the brittle to cool completely at room temperature until fully hardened. Once cold, break it apart into desired pieces using your hands or the back of a spoon.
Nutrition Facts
Pin This Now to Remember It Later
Pin Recipe
