Irresistible Chocolate Covered Twinkies: Your Ultimate Guide to a Nostalgic No-Bake Treat
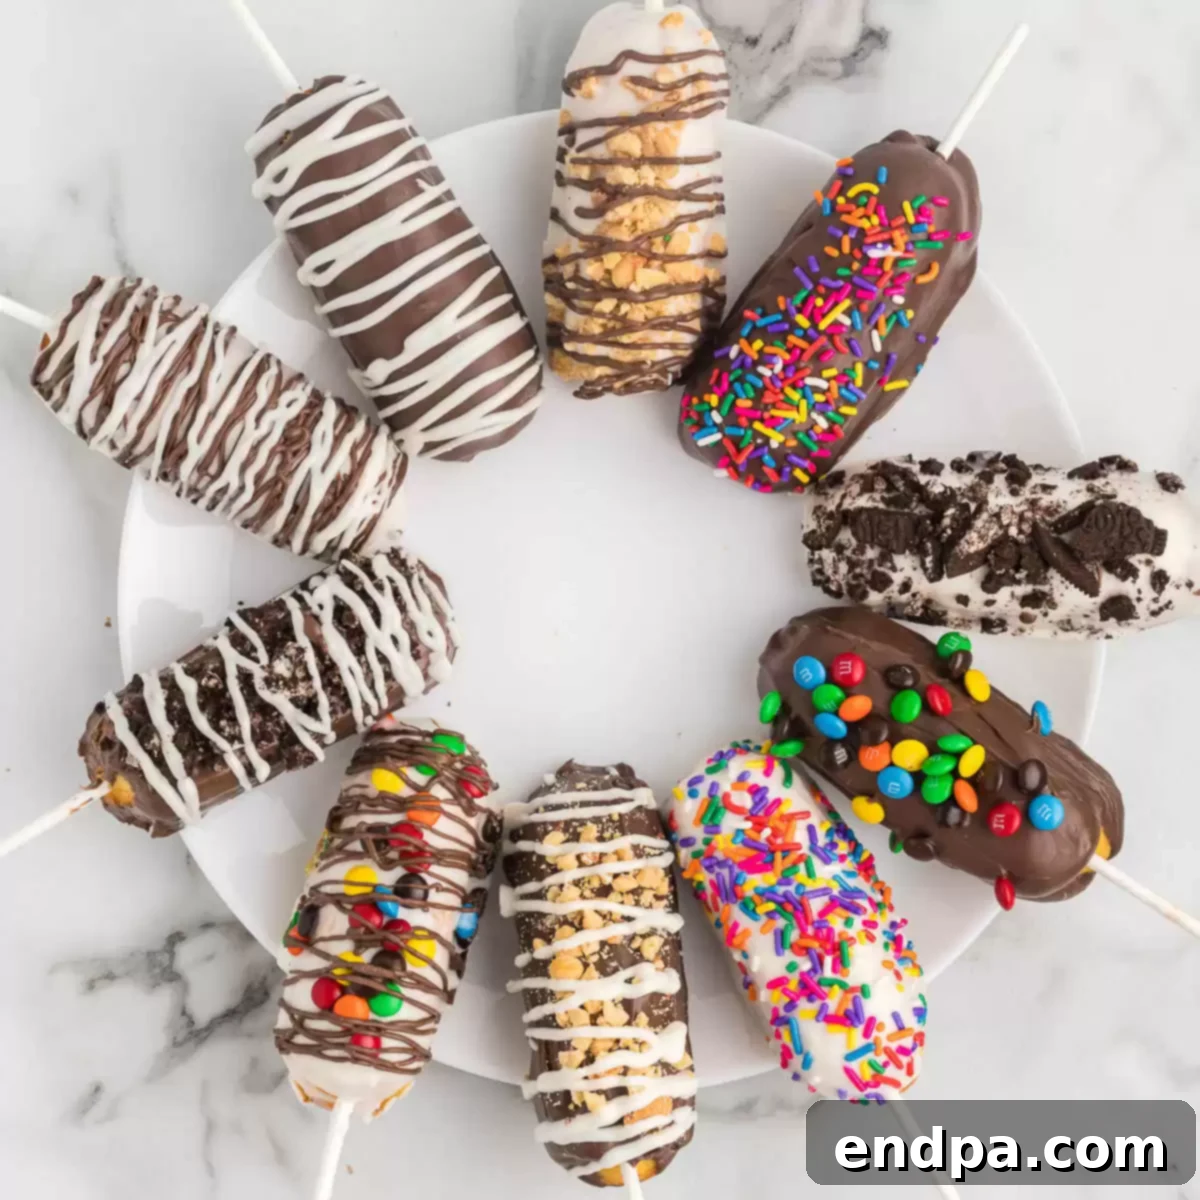
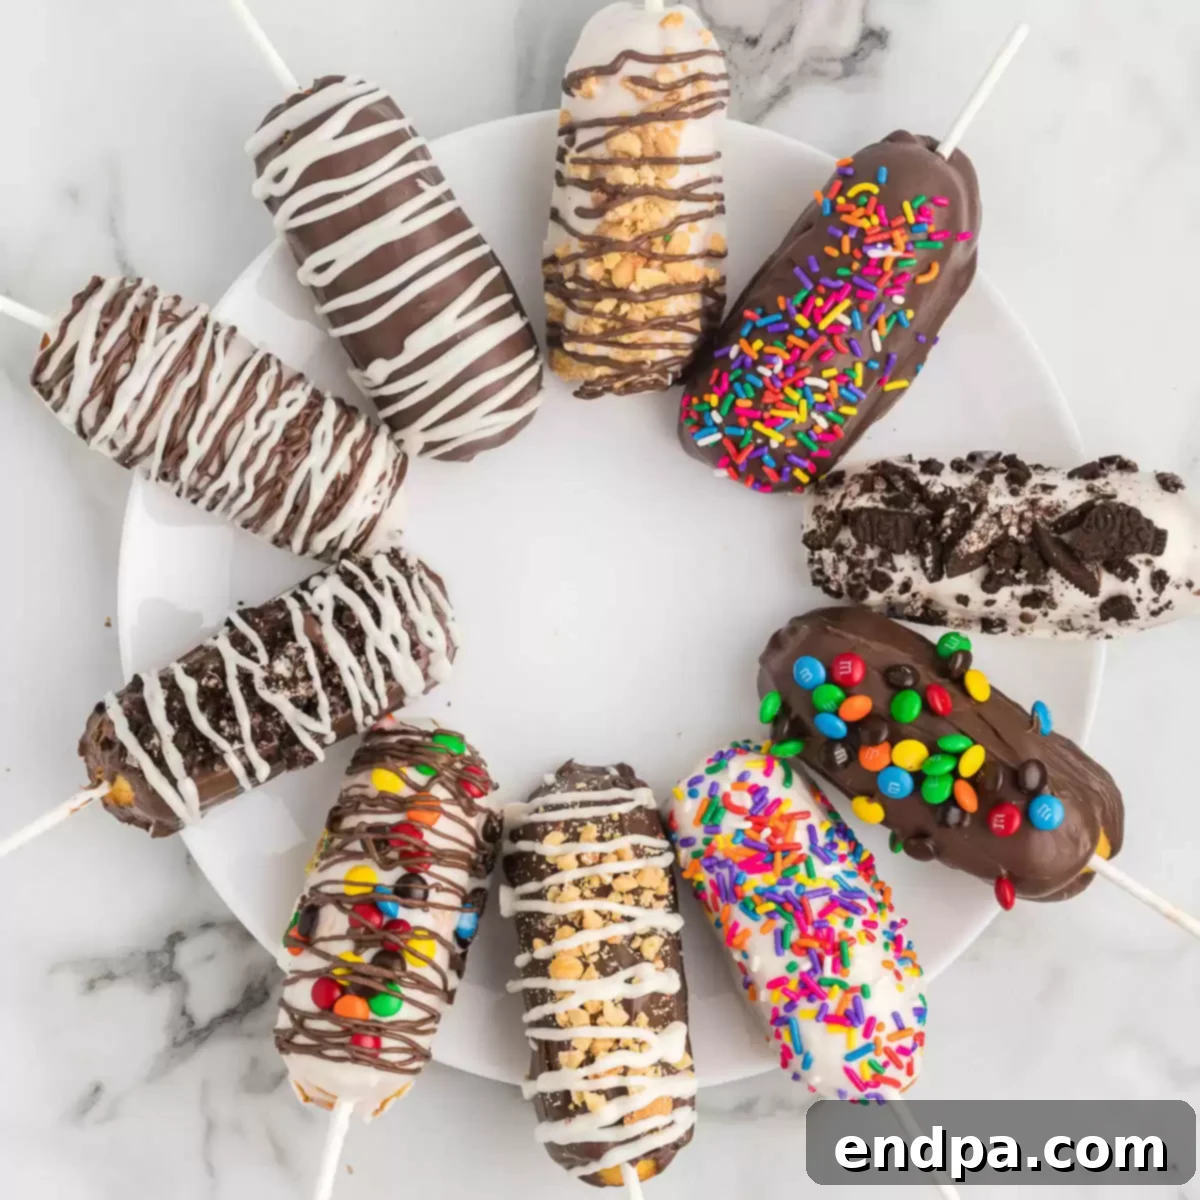
Dive into a world of sweet indulgence with Chocolate Covered Twinkies, the ultimate easy, no-bake treat that transforms a classic snack cake into a gourmet-like delight. Imagine the iconic golden sponge cake, filled with its creamy white center, enveloped in a rich, smooth layer of melted chocolate, and then adorned with your favorite festive sprinkles or a decadent chocolate drizzle. This simple yet sophisticated dessert is a guaranteed hit for any occasion – from lively parties and holiday gatherings to a fun, memorable treat that the entire family will cherish.
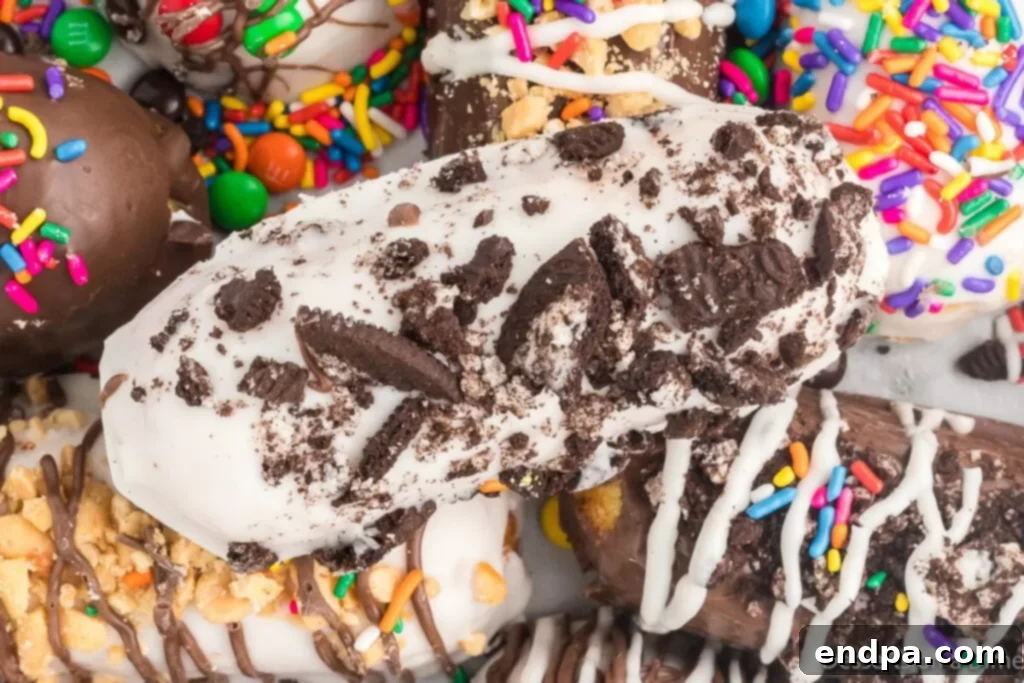
These delightful Chocolate Covered Twinkies elevate a beloved childhood favorite to new culinary heights. The addition of a luscious chocolate coating introduces a perfect symphony of sweetness and texture, creating a dessert that feels both familiar and exciting. More than just a simple snack, this recipe requires minimal effort and only a handful of common ingredients, making it an accessible project for bakers of all skill levels. It’s an ideal choice for creating a show-stopping dessert without the fuss of baking.
Whether you’re planning a birthday bash, a seasonal celebration, or simply craving something special for a quiet evening at home, Chocolate Covered Twinkies are designed to satisfy every sweet tooth. Their customizable nature allows for endless creativity, making each batch uniquely yours. Personalize them with an array of vibrant toppings, intricate drizzles, or even different types of chocolate to match any theme or preference. If you enjoy experimenting with classic treats, you might also love exploring recipes like Air Fryer Twinkies or Deep Fried Twinkies, and for more dessert inspiration, check out 31 Easy Texas Desserts.
Why You’ll Adore This Recipe
Chocolate Covered Twinkies are more than just a dessert; they are an experience, cherished by anyone who tries them. Here’s why this recipe stands out as a true crowd-pleaser and a personal favorite:
- Nostalgic Flavor with a Twist: This recipe beautifully marries the iconic, sweet, and creamy center of a classic Twinkie with the luxurious richness of a chocolate coating. It evokes fond memories of childhood while offering a sophisticated upgrade, making it a delight for all generations.
- Effortlessly Easy to Make: Forget complicated baking schedules or lengthy prep times. This no-bake recipe simplifies dessert making, requiring just a few straightforward steps and minimal kitchen tools. It’s perfect for busy individuals or anyone looking for a quick yet impressive treat.
- Infinitely Customizable: The beauty of Chocolate Covered Twinkies lies in their adaptability. They serve as a perfect canvas for your culinary imagination. Whether you prefer vibrant sprinkles, crunchy nuts, or elaborate drizzles, you can easily tailor them to suit any taste, theme, or holiday.
- Versatile for Any Occasion: From casual family dessert nights to elegant holiday parties, these Twinkies fit right in. Their charming appearance and delightful taste make them a fantastic addition to dessert tables, potlucks, birthday celebrations, or as a thoughtful homemade gift.
- Universally Loved by All Ages: Kids adore the fun factor and sweetness, while adults appreciate the nostalgic charm and decadent chocolate. This dessert truly transcends age barriers, guaranteeing smiles from everyone who takes a bite.
- No-Bake Brilliance: The fact that these are a no-bake treat means you save time and energy, especially during warmer months or when oven space is limited. It’s a quick fix for a dessert craving without heating up your kitchen.
The Magic Ingredients
Creating these delightful chocolate-covered treats requires only a handful of simple ingredients. Each component plays a crucial role in delivering that perfect balance of flavor and texture. Here’s what you’ll need to get started:
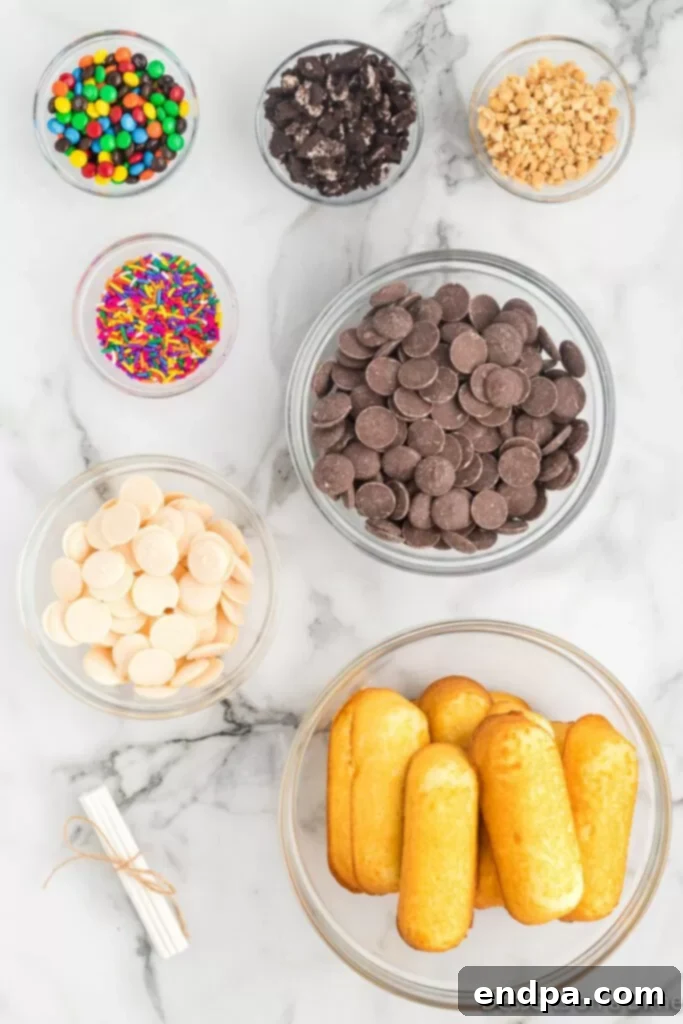
- Hostess Twinkies: The star of our show! Unwrap these classic golden sponge cakes, known for their distinctive shape and creamy filling. For best results and easier dipping, ensure they are fresh but firm.
- Chocolate Melting Wafers: These are specifically designed for smooth melting and hardening, providing a professional-looking, glossy coating. Options include milk chocolate, semi-sweet, or dark chocolate wafers, depending on your preferred intensity of chocolate flavor. They are superior to regular chocolate chips for dipping as they contain less cocoa butter, which prevents them from seizing and makes them easier to work with.
- White Chocolate Melting Wafers: Incorporating white chocolate adds another layer of flavor and creates a beautiful visual contrast, especially when used for drizzling. Like the chocolate wafers, these melt smoothly and set nicely, making them ideal for decorative finishes.
- Lollipop Sticks: Essential for ease of handling. These provide a sturdy grip, allowing you to effortlessly dip each Twinkie into the melted chocolate without getting your fingers messy. They also make for an elegant presentation once the treats are ready.
- Toppings: This is where the fun begins! A variety of toppings can transform your Twinkies. Consider classic rainbow sprinkles for a festive look, finely crushed candy (like peppermint, Heath bars, or M&M’s) for added crunch, or chopped nuts (almonds, pecans, peanuts) for a sophisticated texture and flavor. The possibilities are truly endless!
The complete ingredient quantities for this delicious recipe can be found in the detailed recipe card at the bottom of this page.
Creative Variations to Explore
While the classic Chocolate Covered Twinkie is a delight in itself, these treats offer a fantastic canvas for creative customization. Don’t be afraid to experiment with different coatings, flavors, and presentations to make them uniquely yours:
- Colorful Candy Coating: Beyond traditional chocolate, candy melts come in an impressive spectrum of colors. Use vibrant shades to perfectly match your party theme, holiday (e.g., red and green for Christmas, pastels for Easter), or favorite sports team. This not only adds visual appeal but also a slightly different flavor profile.
- Alternative Chocolate Chips: If melting wafers aren’t readily available, or if you prefer a different kind of chocolate, high-quality milk, dark, or semi-sweet chocolate chips can be used. Just be aware that chocolate chips may require a bit more careful melting (perhaps with a touch of coconut oil or shortening) to achieve a smooth, dippable consistency.
- Artistic Drizzle: Elevate the aesthetic of your Twinkies by drizzling contrasting colors of chocolate over the main coating. For example, dark chocolate Twinkies can be beautifully finished with a white chocolate drizzle, or vice-versa. You can also use colored candy melts for a truly festive look.
- Themed Sticks: Enhance the presentation by using colorful or themed lollipop sticks. For a Halloween party, use orange or black sticks; for a baby shower, opt for blue or pink. These small details can significantly boost the visual appeal and match your event’s decor.
- Flavor Infusions: Consider adding a few drops of food-grade extracts to your melted chocolate for an extra burst of flavor. Peppermint extract for a festive treat, almond extract for a nutty twist, or even a hint of orange or raspberry can create a unique tasting experience.
- Compound Coatings: Experiment with peanut butter chips, butterscotch chips, or other flavored baking chips for a non-chocolate coating. This opens up a whole new world of flavor combinations that still complement the sweet Twinkie center.
Step-by-Step Guide to Perfection
Making Chocolate Covered Twinkies is surprisingly simple, requiring just a few easy steps. Follow these instructions closely for a flawless and delicious result:
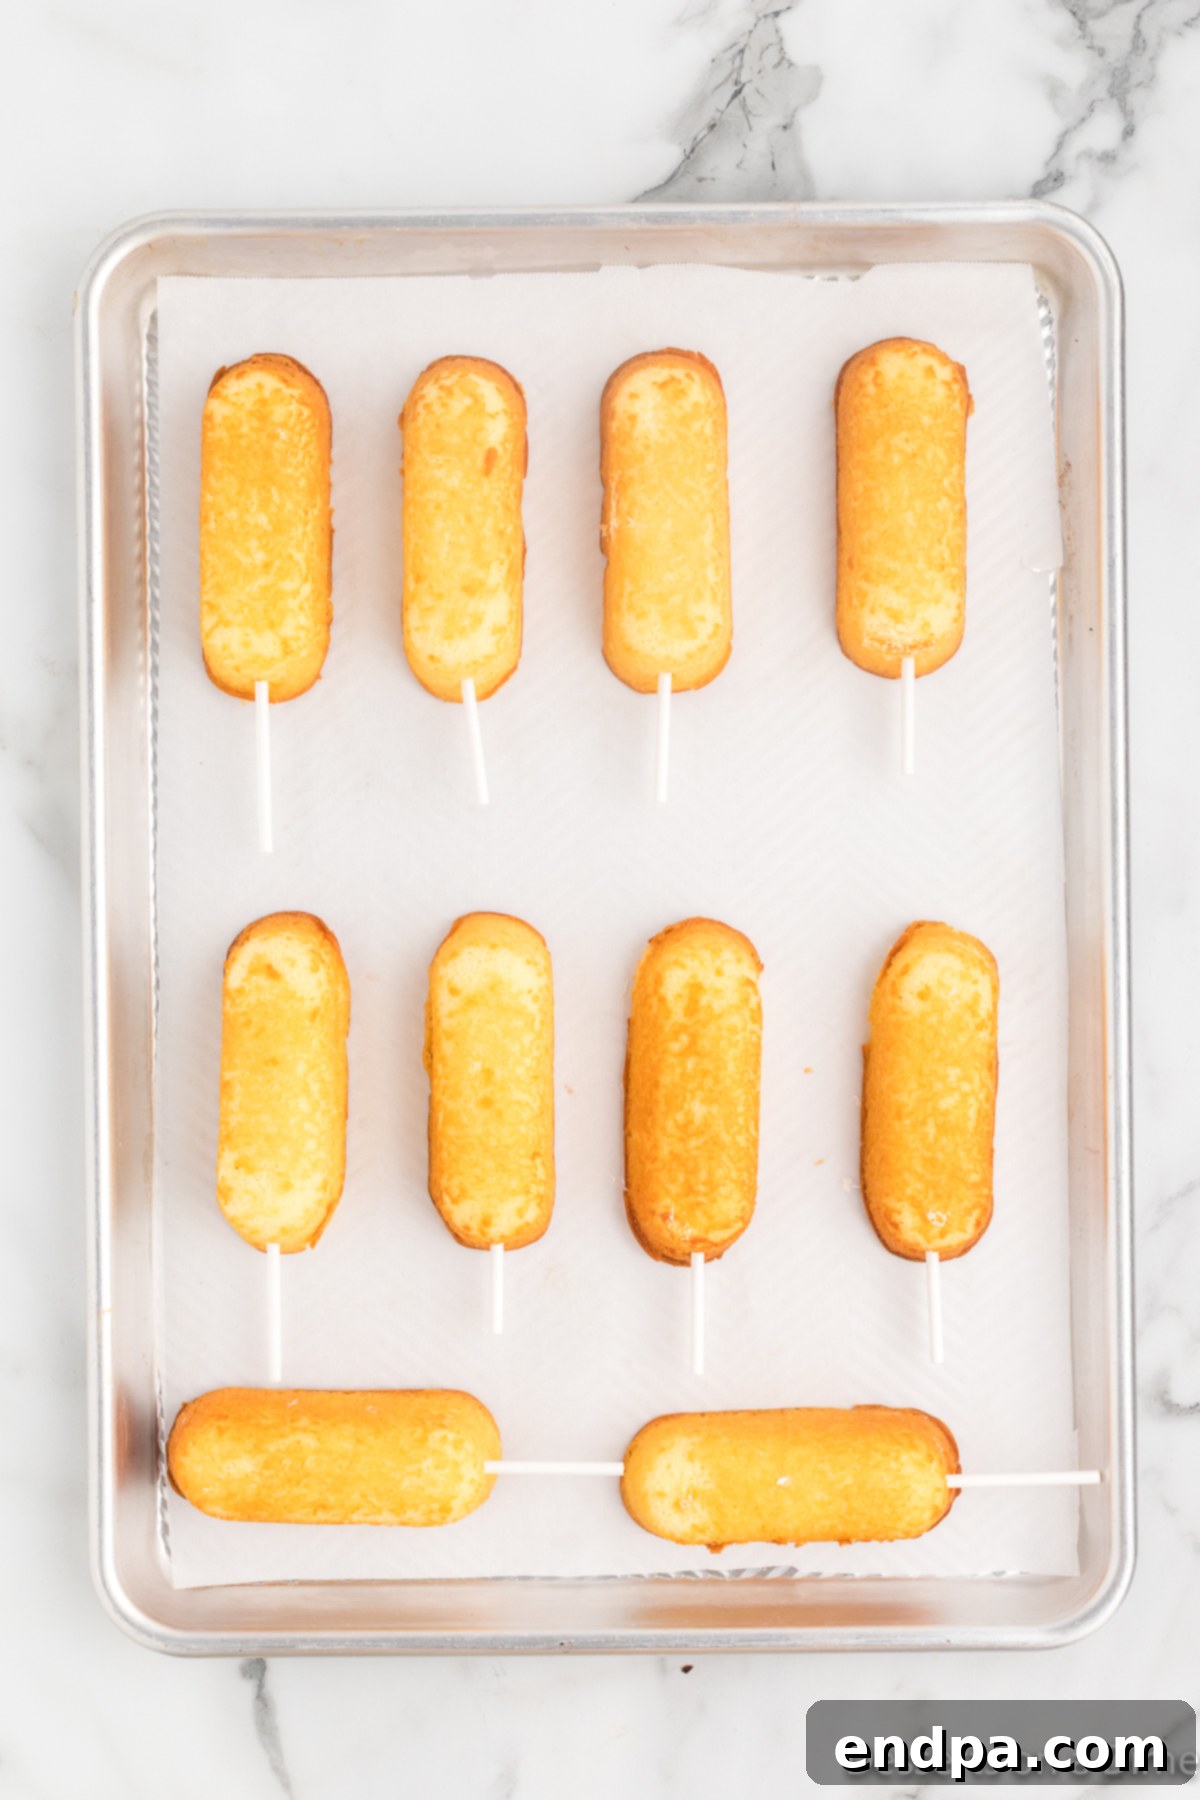
Step 1 – Prepare and Chill the Twinkies: Begin by carefully unwrapping each Hostess Twinkie. Gently insert a lollipop stick into one end of each Twinkie, pushing it about halfway through to provide a stable handle for dipping. Arrange the skewered Twinkies on a baking sheet lined with parchment paper or wax paper. This step is crucial for allowing the chocolate to set beautifully and preventing the Twinkie from falling apart during dipping. Freeze the Twinkies for at least 3 hours, or until thoroughly firm. This chill time prevents the Twinkies from crumbling and helps the chocolate coating set quickly and smoothly.
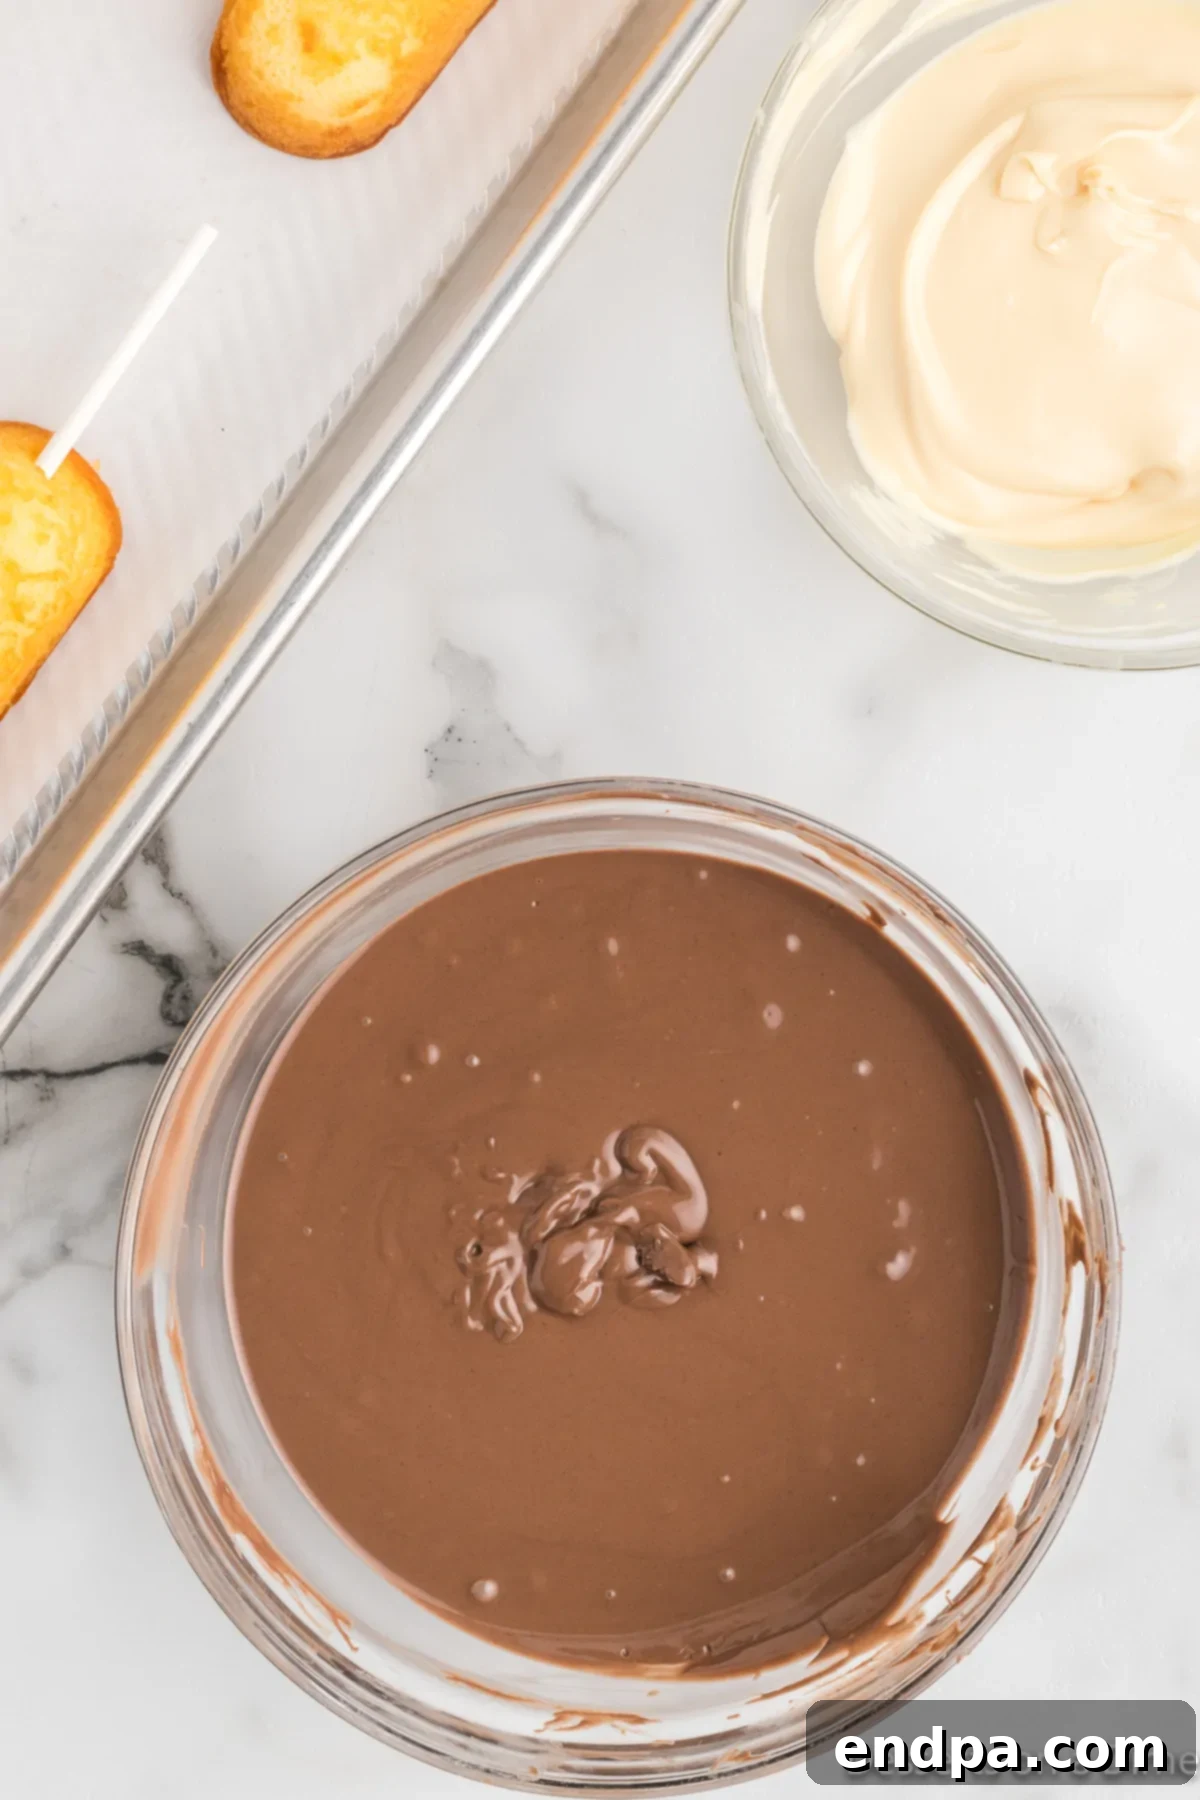
Step 2 – Melt the Chocolate Wafers: Following the package instructions for your chosen chocolate melting wafers, melt them until completely smooth and free of lumps. You can do this in a microwave (heating in 30-second intervals, stirring well after each, until melted) or using a double boiler on the stovetop. Be careful not to overheat the chocolate, as this can cause it to seize and become unusable. If using two different types of chocolate for dipping and drizzling, melt them in separate bowls.
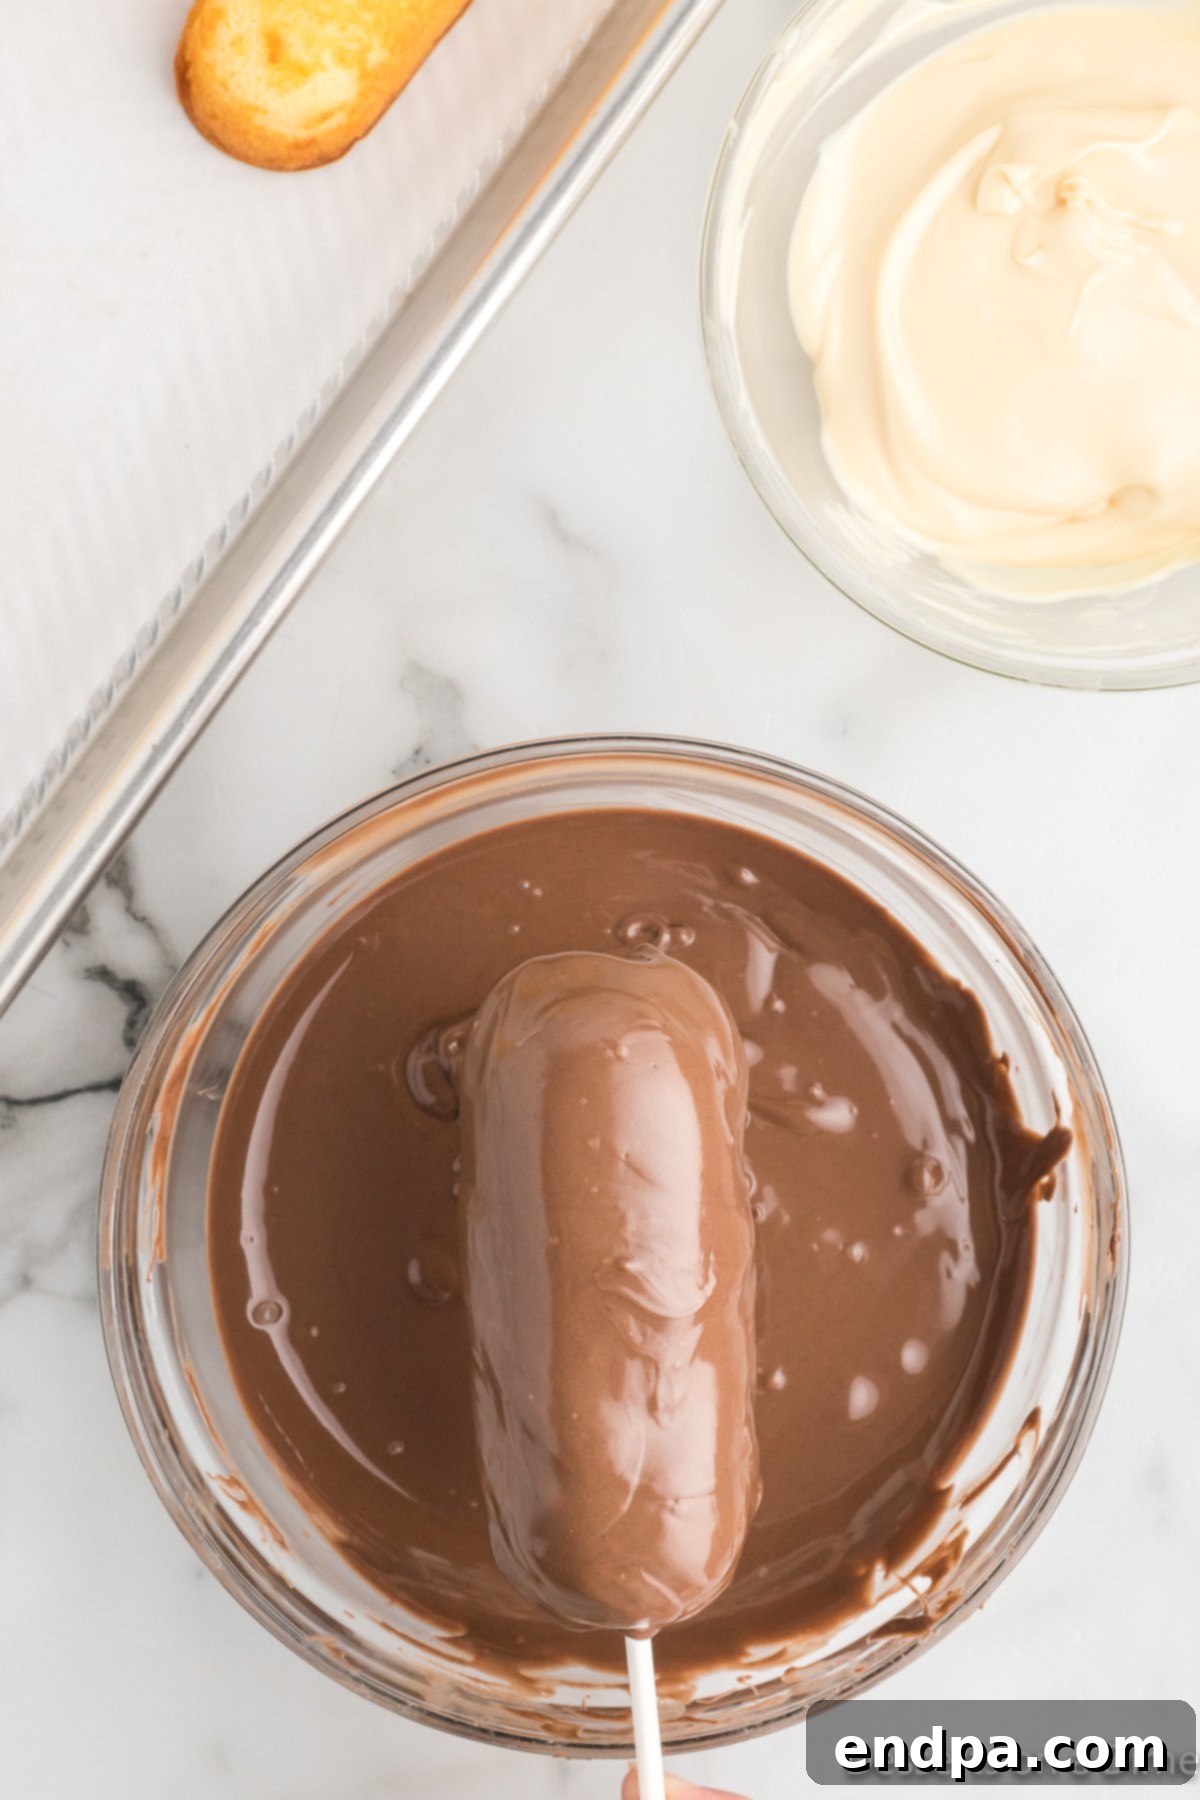
Step 3 – Coat the Twinkies in Chocolate: Once the Twinkies are thoroughly frozen and the chocolate is perfectly melted, remove the Twinkies from the freezer. Hold each Twinkie by its lollipop stick and carefully dip it into the melted chocolate, ensuring it is fully coated. Alternatively, for a thicker or more controlled coating, you can use a spoon to pour the melted chocolate over the Twinkie. Gently tap the stick against the edge of the bowl to allow any excess chocolate to drip back, leaving a smooth, even coating.
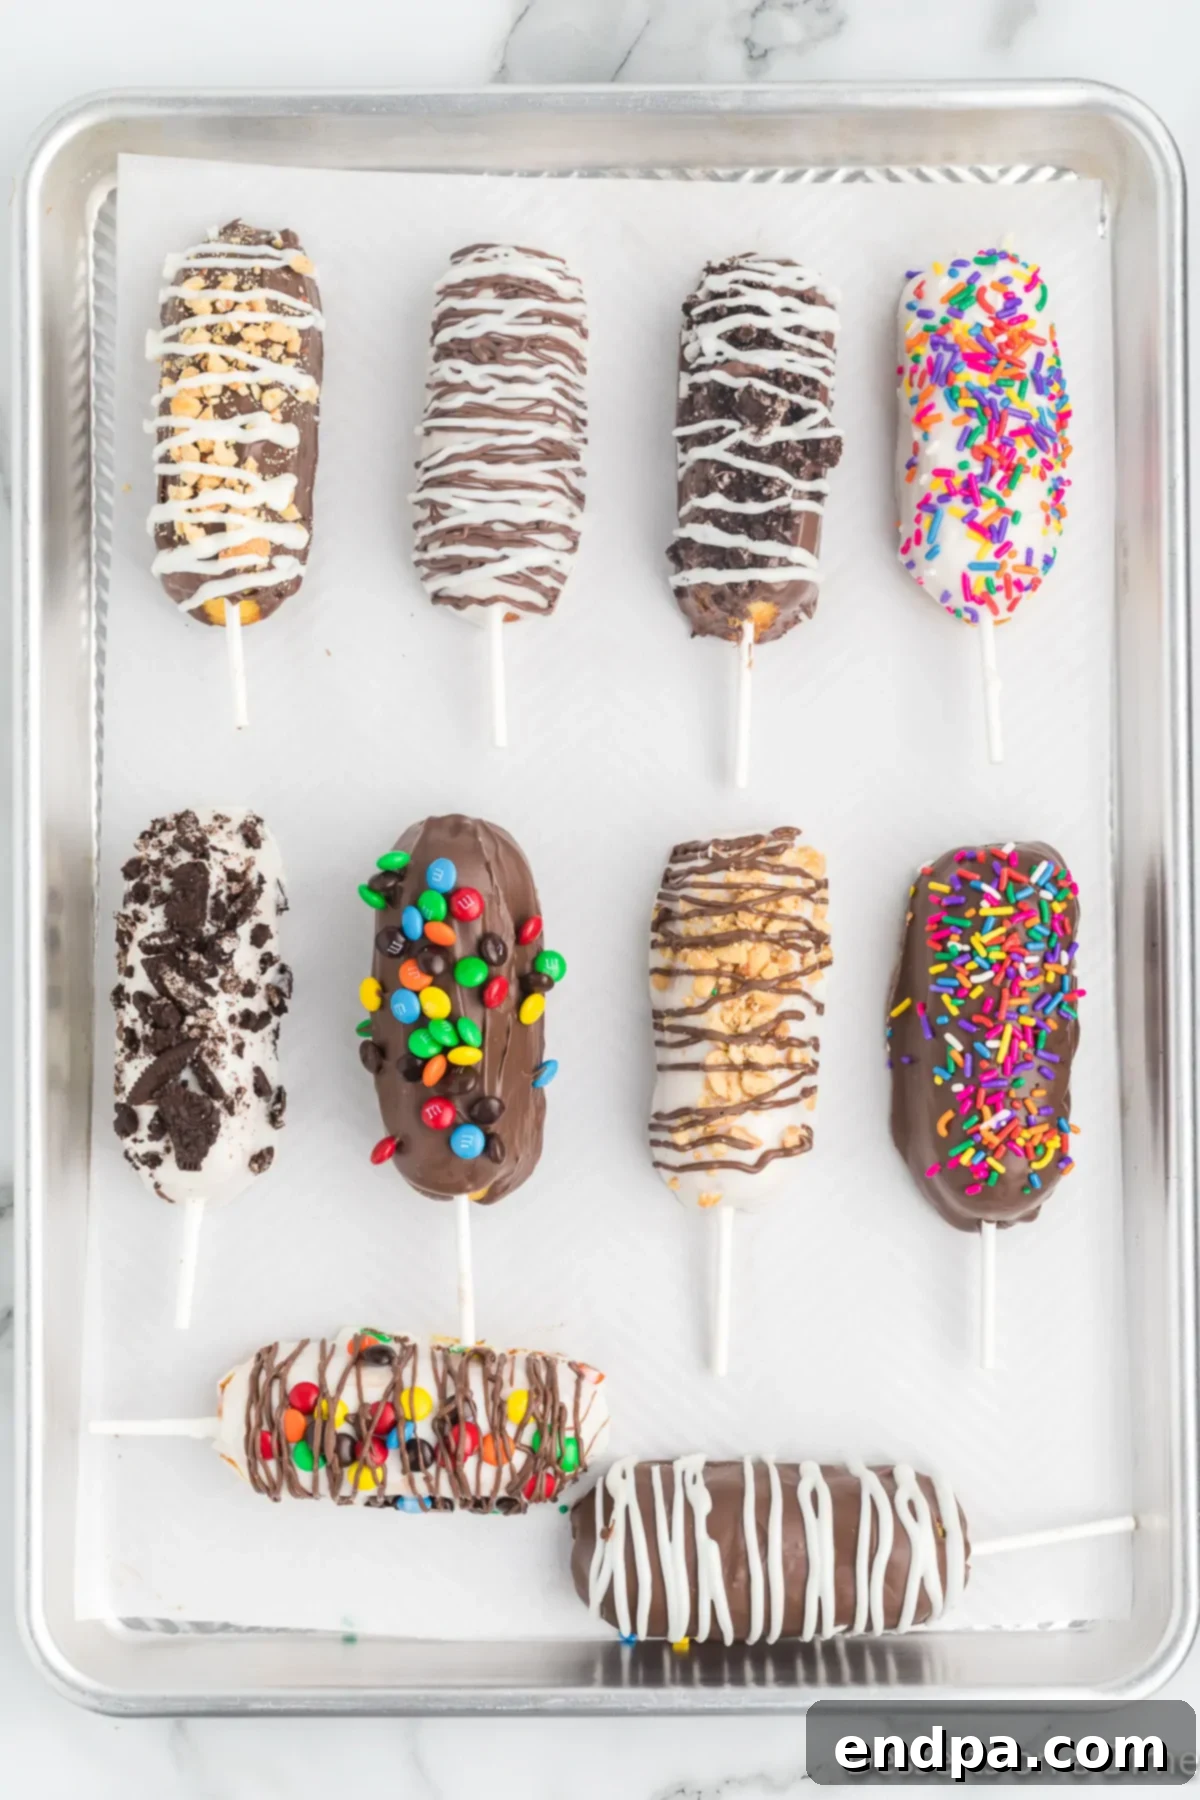
Step 4 – Add Toppings and Allow to Harden: Immediately after coating, place the chocolate-dipped Twinkie back onto the parchment-lined baking sheet. This is the moment to get creative with your toppings! While the chocolate is still wet, generously sprinkle your chosen toppings – whether it’s colorful sprinkles, crushed candies, or chopped nuts – over the entire surface. If you’re drizzling with a contrasting chocolate, do so now. Allow the coated Twinkies to sit at room temperature or, for faster setting, refrigerate them until the chocolate coating is completely firm. Once hardened, they are ready to be served and enjoyed!
Unleash Your Creativity: Topping Inspirations
The fun doesn’t stop at dipping! Toppings are what truly make Chocolate Covered Twinkies shine, adding both visual appeal and exciting textures. Here are some fantastic ideas to spark your creativity:
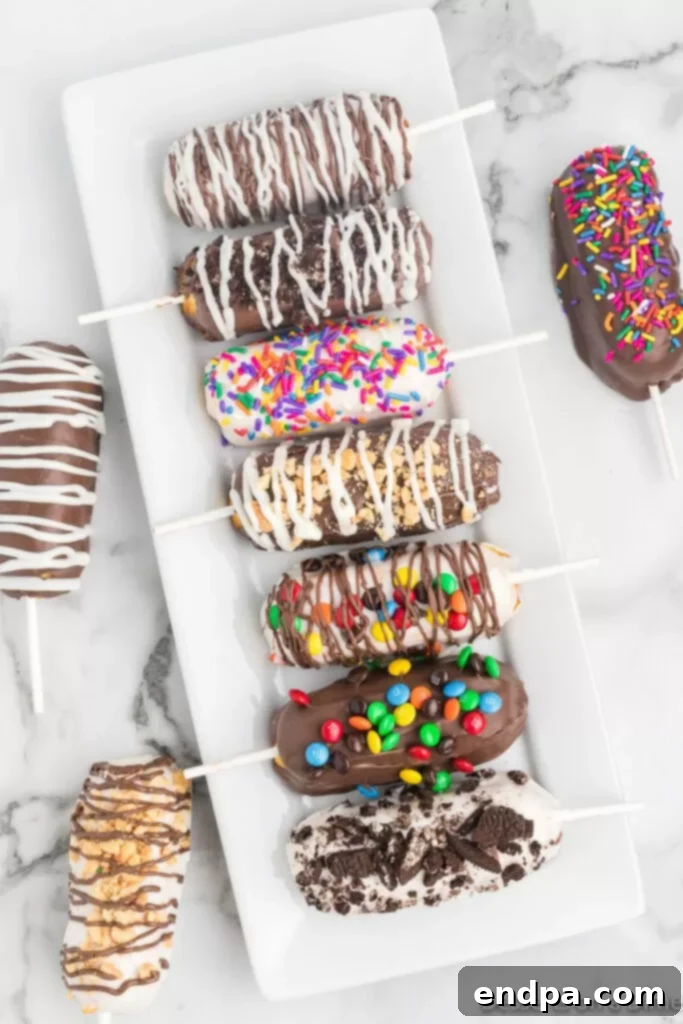
- Classic Sprinkles: Always a crowd-pleaser! Use rainbow sprinkles for a vibrant, celebratory look, or opt for themed sprinkles (e.g., specific colors for holidays, tiny hearts for Valentine’s Day) to match any occasion. They add a delightful crunch and burst of color.
- Crushed Candy: For a delightful texture and flavor contrast, crush up your favorite candies. Think peppermint bits for a winter treat, toffee bits for buttery sweetness, or crushed candy canes during the holidays. Even crushed cookies, like Oreos or graham crackers, work wonderfully.
- Mini M&M’s: These small, colorful chocolate candies add a familiar crunch and a pop of color. They’re especially popular with children and bring a playful vibe to the treats.
- Chopped Nuts: For a more sophisticated touch and a satisfying crunch, sprinkle finely chopped nuts like almonds, pecans, walnuts, or peanuts. Toasting the nuts beforehand can enhance their flavor profile.
- Decadent Drizzled Chocolate: After the main chocolate coating has slightly set, use a fork or a piping bag with a tiny hole to drizzle contrasting colors of melted chocolate (white, dark, or colored candy melts) over the Twinkies. This creates an elegant, artistic finish.
- Shredded Coconut: For a tropical twist, lightly toast shredded coconut before sprinkling it over the wet chocolate. It adds a lovely texture and a distinct, sweet flavor.
- Edible Glitter or Dust: For special occasions like New Year’s Eve or an elegant party, a dusting of edible glitter or shimmering pearl dust can make your Twinkies sparkle and look incredibly glamorous.
- Flaky Sea Salt: A pinch of flaky sea salt sprinkled over dark chocolate-covered Twinkies creates a sophisticated sweet-and-salty combination that is incredibly addictive and a favorite among gourmands.
- Mini Chocolate Chips: If you want more chocolate on your chocolate, mini chocolate chips are a subtle yet effective topping, adding more texture without overpowering the main flavor.
Expert Tips for Flawless Twinkies
Achieving perfectly coated Chocolate Covered Twinkies is easy with a few insider tricks. These pro tips will help ensure your treats look professional and taste incredible every time:
- Crucial Freezing Step: Never skip freezing the Twinkies! After unwrapping them and inserting the lollipop sticks, place them on a parchment-lined baking sheet and freeze for at least 3 hours. This firming process is vital as it prevents the Twinkies from crumbling when dipped and allows the warm chocolate to set almost instantly upon contact, creating a smooth, even coating without drips or smudges.
- Mastering Chocolate Melting: Whether you use a microwave or a double boiler, melt your candy wafers or chocolate chips gently. For the microwave, heat in short 30-second bursts, stirring thoroughly after each interval, until just melted and smooth. Overheating can cause chocolate to seize and become thick or grainy. If using a double boiler, ensure no water gets into the chocolate, as this will also cause it to seize.
- Efficient Dipping Technique: When dipping, hold the Twinkie by its stick and submerge it completely in the melted chocolate. Gently lift it out and lightly tap the stick against the rim of the bowl. This helps remove excess chocolate, preventing pooling at the bottom and ensuring a cleaner, thinner coat. Work quickly, as the cold Twinkie will cause the chocolate to set rapidly.
- Immediate Topping Application: Once a Twinkie is dipped and excess chocolate is removed, immediately apply your desired toppings. The chocolate sets very quickly on the frozen Twinkie, so you’ll only have a small window of opportunity to get those sprinkles, nuts, or drizzles to adhere properly.
- Perfect Serving Temperature: Allow the chocolate coating to harden completely before serving. You can let them set at room temperature or place them in the refrigerator for about 15-20 minutes for a quicker set. Serving them with the chocolate fully hardened ensures the best texture and a clean eating experience.
- Rewarming Thickened Chocolate: If your melted chocolate starts to thicken or cool down during the dipping process, gently rewarm it in short bursts in the microwave or over the double boiler. Stir well until it returns to a smooth, dippable consistency. This is especially important if you’re making a large batch.
- Parchment Paper is Your Friend: Always use parchment paper or wax paper on your baking sheet. This non-stick surface ensures that once the chocolate has set, your Twinkies can be easily lifted off without sticking, preserving their perfect appearance.
- Clean as You Go: Have a damp cloth ready to wipe any chocolate drips off the lollipop sticks or the edges of your working area. This keeps the process neat and tidy.
Storage Solutions
Proper storage ensures your Chocolate Covered Twinkies remain fresh and delicious for as long as possible. Here’s how to keep them at their best:
Room Temperature:
For short-term storage, place your chocolate-covered Twinkies in an airtight container. They will stay fresh and delicious at room temperature for up to 3 days. Ensure they are kept in a cool, dry place away from direct sunlight or heat, which could cause the chocolate to melt or become sticky.
Refrigeration:
If you live in a warm climate or prefer a firmer chocolate coating, refrigerate the Twinkies in an airtight container. This will prevent the chocolate from softening or melting. For optimal taste and texture, allow them to come back to room temperature for about 15-30 minutes before serving. This softens the Twinkie sponge and allows the chocolate flavors to fully develop.
Freezing:
Chocolate Covered Twinkies can be frozen for longer storage. First, arrange the coated Twinkies in a single layer on a baking sheet and freeze until solid. Once frozen, transfer them to a freezer-safe airtight container or a heavy-duty freezer bag, separating layers with parchment paper to prevent sticking. They can be stored in the freezer for up to 1 month. Thaw them in the refrigerator overnight or at room temperature for a few hours before serving.
More Decadent Chocolate Treats
If you’ve fallen in love with these Chocolate Covered Twinkies, you’re in for a treat! The world of chocolate-dipped desserts is vast and exciting. Explore these other easy and delicious chocolate-covered recipes that are sure to impress:
- Football Chocolate Covered Pretzels Recipe
- Easy Chocolate Covered Strawberries Recipe
- Chocolate Covered Peanut Butter Balls Recipe
- Chocolate Covered Ritz Crackers
- Chocolate Covered Pretzel Rods
We encourage you to try this incredibly fun and easy Chocolate Covered Twinkies recipe. We’d love to hear about your experience and see your creative toppings!
Chocolate Covered Twinkies Recipe
Chocolate Covered Twinkies takes your Twinkies to the next level. They are dipped in chocolate and topped with fun sprinkles.
3 hrs 15 mins
3 hrs 15 mins
10
American
Dessert
535
Carrie Barnard
Ingredients
- 10 Twinkies
- 16 ounces Chocolate Melting Wafers
- 8 ounces White Chocolate Melting Wafers
- 10 Lollipop Sticks
- Toppings: Sprinkles Crushed Candy, M&M, nuts, etc
Instructions
- Unwrap each of the Twinkies and insert a lollipop stick into the end of each Twinkie.
- Place on a baking sheet lined with parchment paper or waxed paper and freeze for 3 hours.
- Melt the melting wafers based on the package instructions (microwave in 30-second intervals, stirring, or use a double boiler).
- Remove the Twinkies from the freezer and coat them in the melted chocolate. You can dip them into the chocolate or use a spoon to coat the Twinkies with the chocolate.
- Let any excess chocolate drip back into the bowl by gently tapping the stick.
- Place the coated Twinkies back on the baking sheet and immediately top with the toppings of your choice.
- Let sit until the chocolate hardens completely (at room temperature or in the fridge), then they are ready to serve and enjoy!
Nutrition Facts
Calories 535kcal,
Carbohydrates 71g,
Protein 12g,
Fat 23g,
Saturated Fat 9g,
Polyunsaturated Fat 4g,
Monounsaturated Fat 8g,
Trans Fat 0.02g,
Cholesterol 170mg,
Sodium 487mg,
Potassium 262mg,
Fiber 2g,
Sugar 46g,
Vitamin A 272IU,
Vitamin C 0.2mg,
Calcium 140mg,
Iron 3mg
