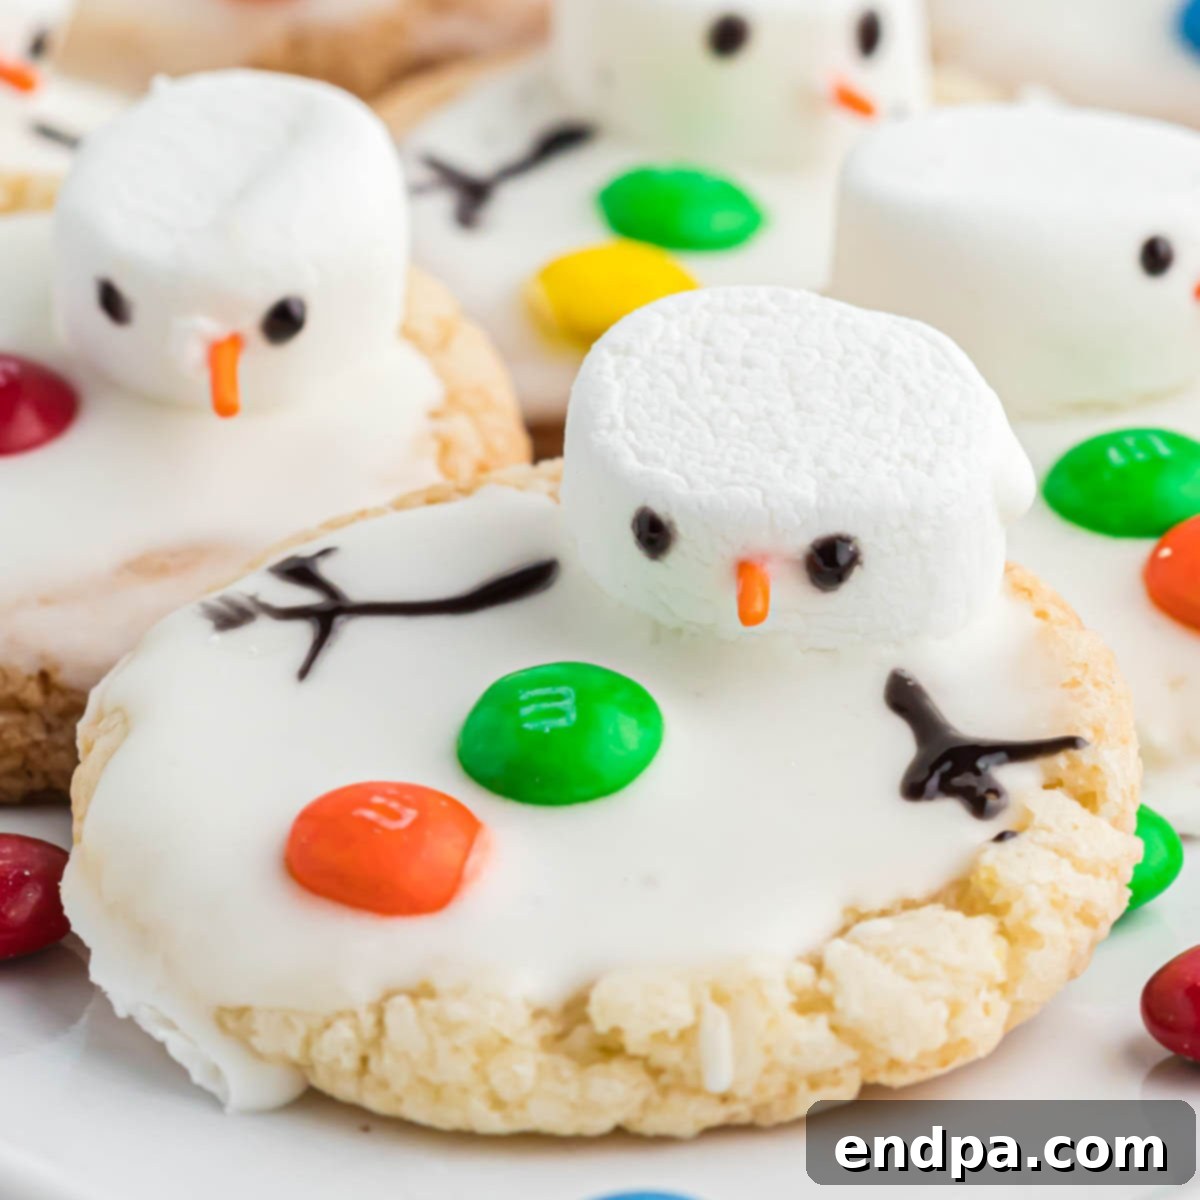
Delightful Melted Snowman Cookies: An Easy & Whimsical Winter Treat
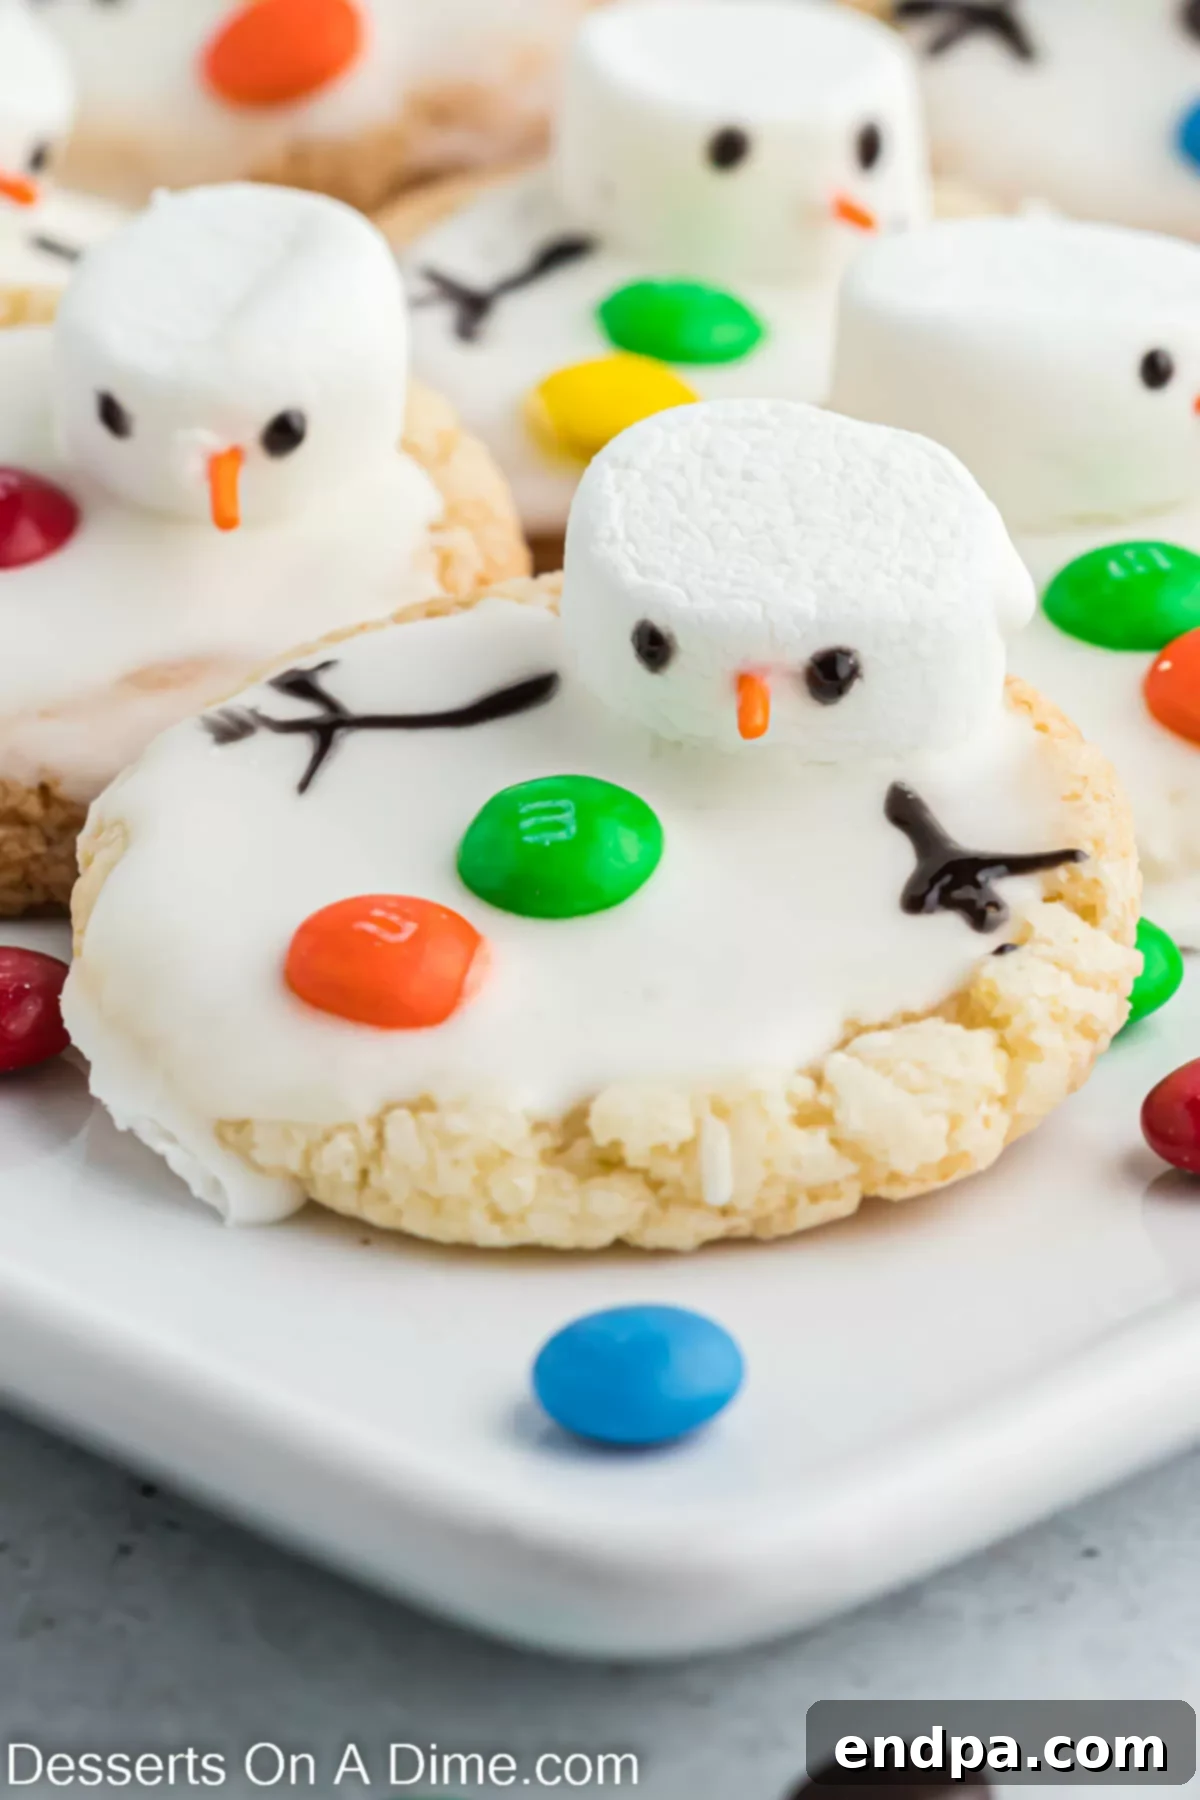
Embrace the cozy charm of winter with our irresistibly cute and easy-to-make Melted Snowman Cookies recipe! These whimsical treats are a guaranteed hit for any holiday gathering, winter party, or simply a fun afternoon activity with the kids. Imagine soft, buttery sugar cookies topped with a delightful “puddle” of white royal icing, a perfectly placed marshmallow head, and charming candy decorations that bring these little melted snowmen to life. They’re not just a feast for the eyes; their delicious flavor will warm your heart and delight your taste buds.
What makes these easy snowman cookies truly special is their playful appearance. Each cookie captures the comical essence of a snowman that has gently succumbed to the warmth, leaving behind a cute, slightly askew marshmallow head and a puddle of “snow.” This unique design makes them stand out from traditional Christmas cookies and adds a touch of humor to your festive dessert spread. Plus, we’ve designed this recipe to be incredibly simple, utilizing readily available ingredients and straightforward decorating techniques, ensuring a stress-free baking experience even for novice bakers.
Whether you’re looking for an adorable dessert to impress at a holiday party, a fun baking project for a snowy day, or a delightful treat to share with loved ones, these festive winter cookies are absolutely perfect. Kids of all ages will shriek with delight at the sight of these darling little snowmen, and adults will appreciate their homemade charm and delicious taste. Get ready to create some magical memories in the kitchen with these incredible melted snowman sugar cookies!
Thinking of a snowman-themed party? These cookies would be an absolute centerpiece! We also love to create a whole winter wonderland of treats, including Snowman Oreo Balls, Melted Snowman Bark, Snowman Chocolate Covered Oreos, and classic Snowman Sugar Cookies. There’s no limit to the festive fun you can have with these adorable winter characters.
Table of Contents
- Why We Love This Recipe
- Ingredients for Melted Snowman Cookies
- For the Cookies
- Royal Icing
- Variations and Creative Ideas
- How to Make Melted Snowman Cookies: Step-by-Step Guide
- Storage Tips for Snowman Cookies
- FAQs About Melted Snowman Cookies
- Pro Baking and Decorating Tips
- More Decorated Cookie Recipes
Why We Love This Recipe: Fun, Festive & Delicious
There are countless reasons why these Melted Snowman Cookies have become a cherished tradition in our kitchen, and we’re sure they will in yours too! Everyone falls in love with this cookie recipe because it strikes the perfect balance between adorable aesthetics and incredible taste. The sight of these charming, slightly disheveled snowmen instantly evokes a sense of winter joy and festive cheer.
These cookies aren’t just for looking at; they are delightfully soft and sweet, offering a comforting bite that perfectly complements their playful appearance. They are the ultimate treat for classroom parties, holiday potlucks, or any special occasion throughout the winter season. Yet, despite their impressive look, they are surprisingly easy to make, making them an ideal candidate for a cozy family movie night activity. Imagine snuggling up with a warm blanket, a cup of hot cocoa, and these delightful cookies while watching classics like Frosty the Snowman! It truly enhances the holiday magic.
The versatility of these cookies also adds to their appeal. They can be customized to match any theme or color scheme, and the simple decorating process means that even young children can participate, fostering wonderful family memories. This recipe is one we return to year after year, and the anticipation of making and decorating these fun cookies is always a highlight for the kids. Make sure to save this recipe; it’s a keeper that will bring smiles and deliciousness to your winter celebrations for years to come.
Ingredients for Melted Snowman Cookies
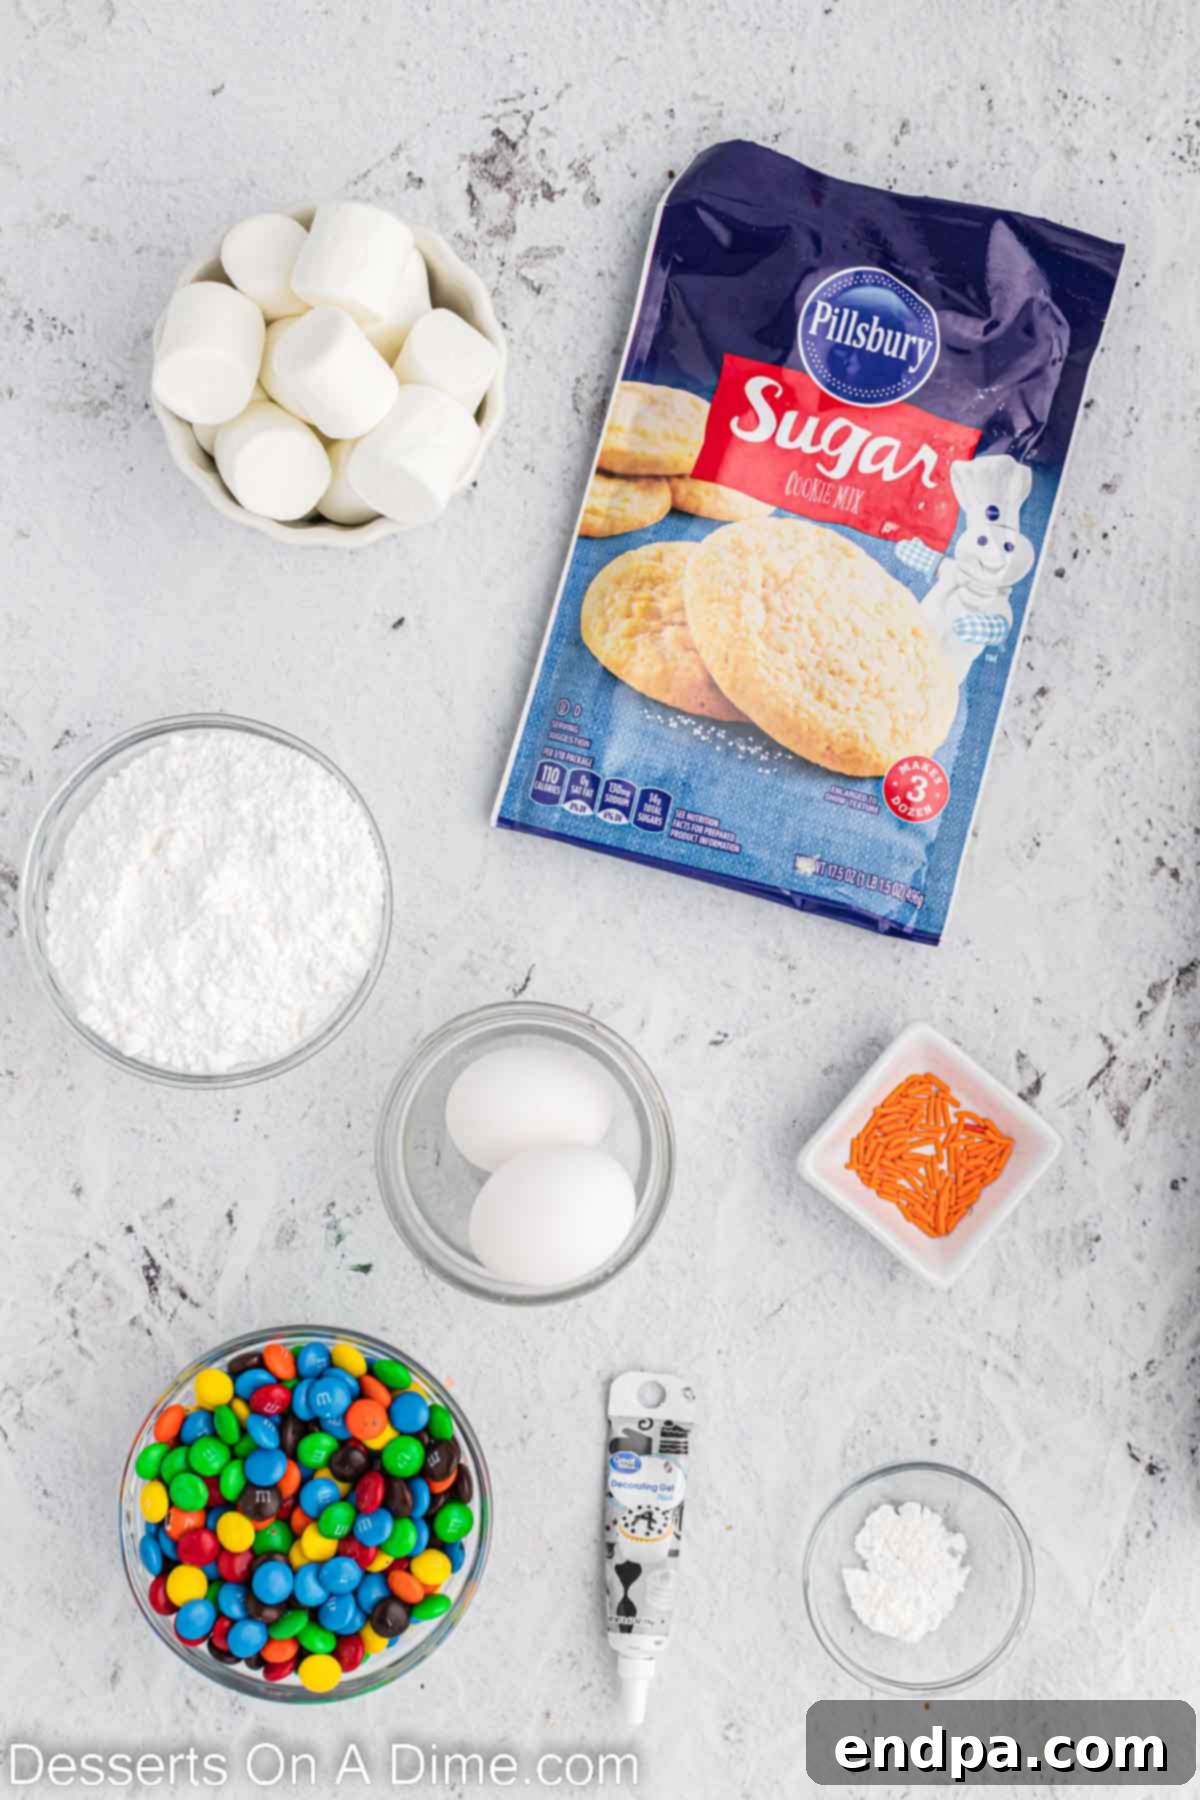
Creating these charming melted snowman cookies requires a few simple ingredients, many of which you likely already have in your pantry. We’ve opted for a straightforward approach, utilizing a sugar cookie mix to simplify the baking process, but feel free to use your favorite homemade recipe if you prefer. Here’s what you’ll need to gather:
For the Cookies
- Sugar Cookie Mix: A standard package of sugar cookie mix (such as Pillsbury, Betty Crocker, or your preferred brand) is a fantastic shortcut. This significantly cuts down on prep time without compromising on flavor or texture. Remember to also have the additional ingredients required by the package instructions, typically butter, an egg, and a splash of vanilla extract, ready to go.
- Large Marshmallows: These are crucial for forming the snowman’s “head.” You’ll need to cut each large marshmallow in half to get the right melted effect.
- Orange Sprinkles: Long, thin orange sprinkles (often called “jimmies”) are perfect for crafting those iconic carrot noses. Their vibrant color adds a lovely pop against the white marshmallow.
- M&Ms: Regular, plain M&M’s candies are ideal for the snowman’s buttons. Their round shape and bright colors make them pop. You can choose classic colors or seasonal variations.
- Black Decorating Gel: This makes drawing the snowman’s eyes, mouth, and stick arms incredibly easy. The gel consistency ensures smooth lines and quick application.
Royal Icing
Royal icing provides that beautiful, smooth, and drippy “melted snow” effect, and also serves as the adhesive for your marshmallow snowmen.
- Egg Whites: These are the base for traditional royal icing, giving it its crisp texture and brilliant white color. You can separate them from the yolks, or for extra convenience and food safety, use pasteurized liquid egg whites. The egg yolks can be saved for other recipes.
- Powdered Sugar: Also known as confectioners’ sugar, this provides the sweetness and structure for the icing. Sifting the powdered sugar is highly recommended to prevent lumps and ensure a perfectly smooth, professional-looking finish.
- Cream of Tartar: This is a key ingredient that helps stabilize the egg whites, giving the royal icing strength and a beautiful sheen. It also helps achieve the desired consistency and prevents the icing from becoming too brittle. Do not skip this!
You can find the complete list of exact measurements and quantities for all ingredients in the recipe card at the bottom of the page.
Variations and Creative Ideas
One of the joys of baking is the freedom to get creative, and these melted snowman cookies offer plenty of opportunities for customization! Here are some delightful variations to make these cookies uniquely yours or adapt them to different dietary needs or preferences:
- Sugar Cookie Base: While we love the convenience of a store-bought mix, feel free to use your favorite sugar cookie recipe from scratch. A 3-ingredient sugar cookie recipe is a super simple homemade option. For those with dietary restrictions, many gluten-free sugar cookie mixes or recipes are available and work wonderfully for this application. You can even use pre-baked, store-bought sugar cookies to save even more time, making this an assembly-only project!
- M&M’s and Candy Buttons: Don’t limit yourself to classic M&M’s! You can use seasonal M&M’s (e.g., red and green for Christmas, pastel for spring) to change the color scheme. Reese’s Pieces candy offers a peanut butter flavor twist and different colors. Mini chocolate chips or small sprinkles can also be used for buttons, or even tiny edible pearls for an elegant touch.
- Royal Icing Flavor & Color: The royal icing is a blank canvas for flavor. Consider adding a few drops of extract like almond, lemon, peppermint, or even a clear vanilla extract for a classic taste without altering the pure white color. If you’re feeling adventurous, you could lightly tint a portion of your royal icing with gel food coloring for a subtle pastel “puddle” beneath your snowman, though we love the classic white snow look.
- Creative Decorations: Let your imagination run wild!
- Scarves: Use pull-and-peel licorice or thin strips of fruit leather to create colorful scarves around the marshmallow “neck.”
- Buttons: Besides M&M’s, mini chocolate chips, sprinkles, or tiny colored candies can be used for buttons.
- Arms: Instead of black decorating gel for stick arms, you can use thin pieces of licorice or pretzel sticks for a more rustic, edible touch.
- Hats: Tiny chocolate wafers or mini Reese’s peanut butter cups can be inverted and placed on top of the marshmallow for a cute “hat.”
- Rosy Cheeks: A tiny dot of pink food coloring mixed with a drop of clear alcohol (like vodka) or lemon extract, applied with a fine brush, can create adorable rosy cheeks.
Experiment with different candies and edible embellishments to give each snowman a unique personality!
How to Make Melted Snowman Cookies: Step-by-Step Guide
Creating these adorable melted snowman cookies is a fun and rewarding process. Follow these simple steps to bring your whimsical winter treats to life!
Step 1 – Prepare and Bake the Sugar Cookies
Begin by preparing your sugar cookie dough according to the package instructions (if using a mix) or your chosen recipe. In a large mixing bowl, combine the ingredients until a cohesive dough forms. If your recipe requires chilling, ensure you allow sufficient time. Roll out the dough to your desired thickness (typically about ¼ inch) on a lightly floured surface. Using a round cookie cutter (or even the rim of a glass), cut out circular shapes. Place these cookie cut-outs on an ungreased baking sheet lined with parchment paper. Parchment paper is essential here as it prevents sticking and ensures even baking. Bake in the preheated oven as directed, typically until the edges are lightly golden. Once baked, carefully transfer the cookies to a wire cooling rack and allow them to cool completely. This step is crucial; attempting to decorate warm cookies will cause your icing to melt and spread unevenly.
Step 2 – Prepare the Royal Icing
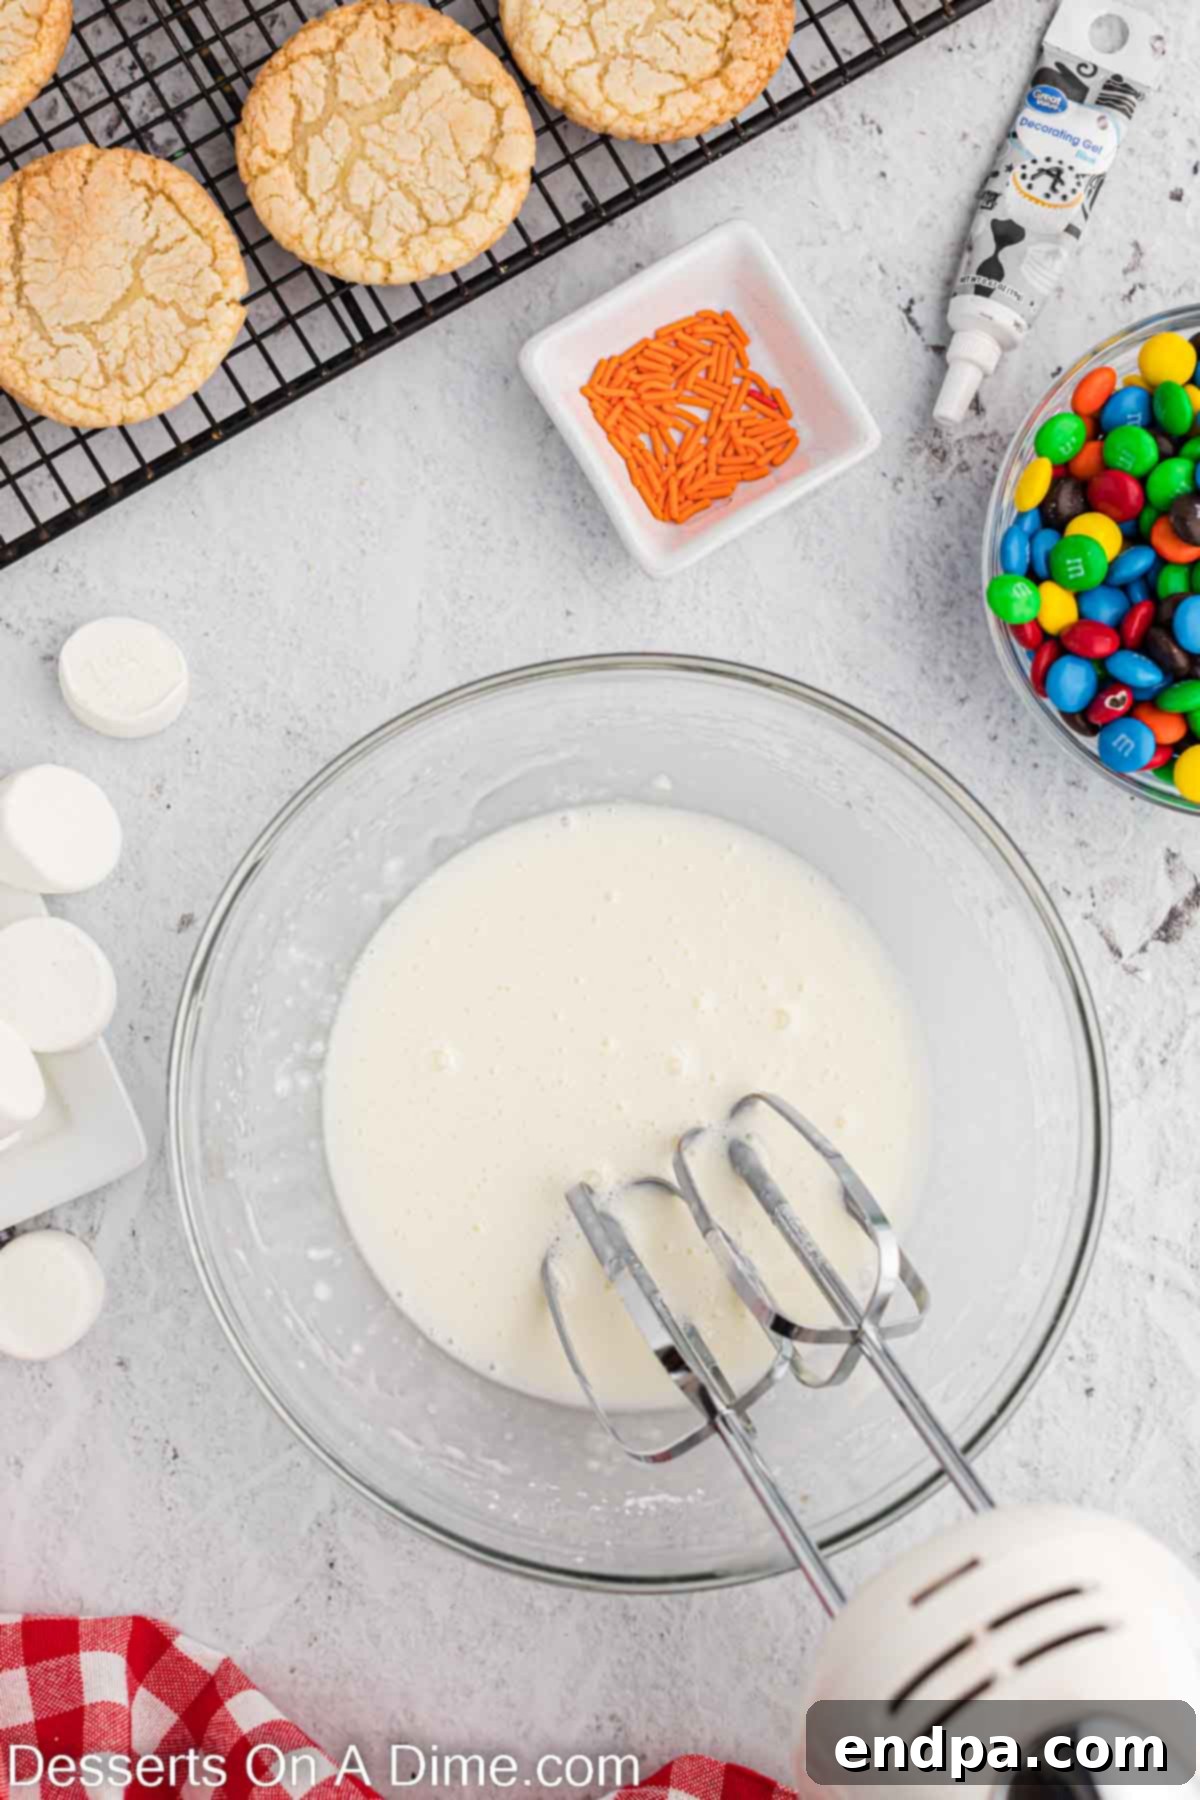
In a medium-sized mixing bowl, combine the egg whites, powdered sugar, and cream of tartar. Using an electric mixer, beat the ingredients on medium-high speed until the icing reaches a “10-second consistency.” This means that when you lift your spoon or whisk and drizzle some icing back into the bowl, the lines disappear within approximately 10 seconds. This consistency is perfect for both outlining and flooding, allowing the icing to spread just enough to look like melted snow without running off the cookie entirely. Transfer the prepared royal icing into a piping bag (or a sturdy zip-top bag with the corner snipped off) fitted with a small, round tip. A small opening is key for control.
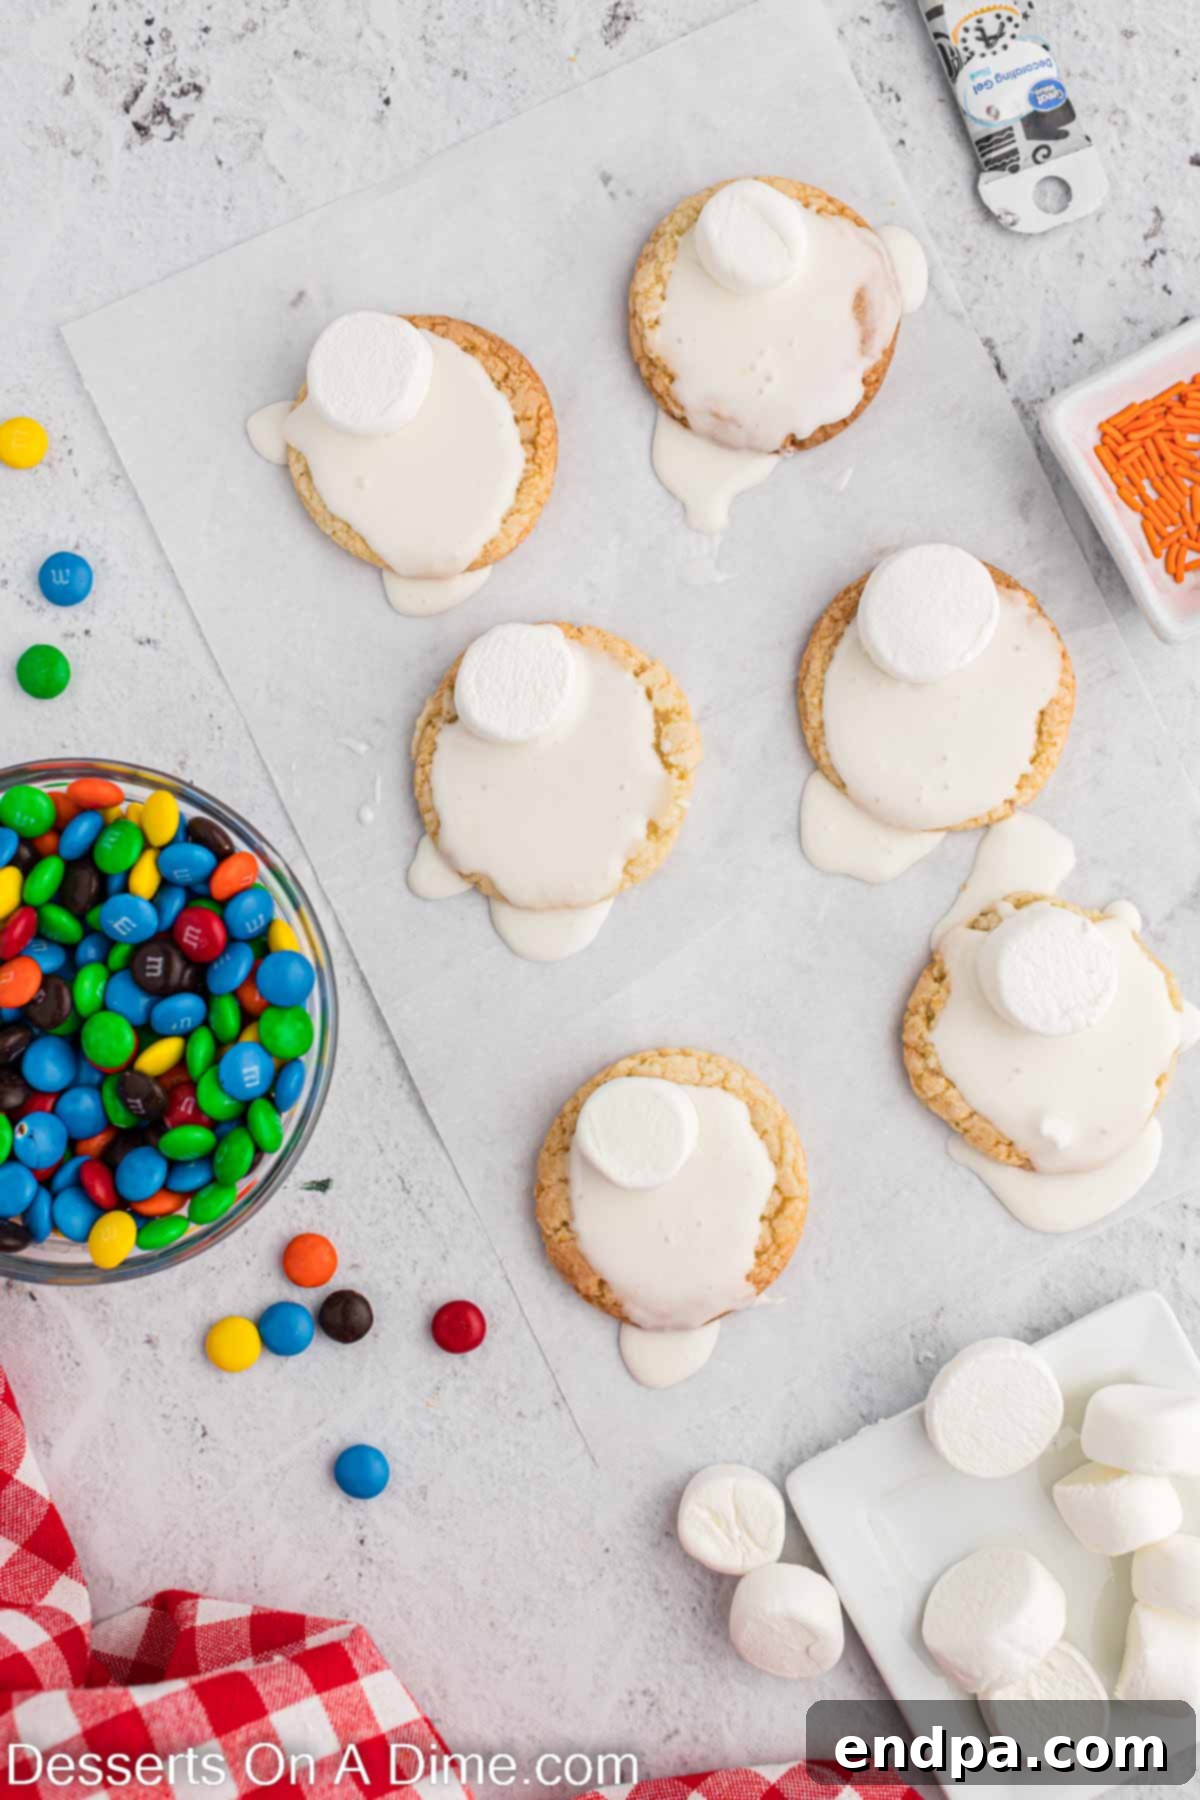
Step 3 – Frost the Cookies with “Melted Snow”
Once your cookies are completely cool, it’s time for the fun part! Place the cooled cookies on sheets of parchment paper (this makes cleanup incredibly easy if icing drips). Using your piping bag, liberally frost each cookie with the royal icing. Don’t be afraid to let the icing drip over the sides of the cookies – this is exactly what creates the illusion of a melted snow puddle! You can gently nudge the icing with a small offset spatula or the back of a spoon to encourage the desired drippy effect. Work relatively quickly for the next step, as royal icing begins to set.
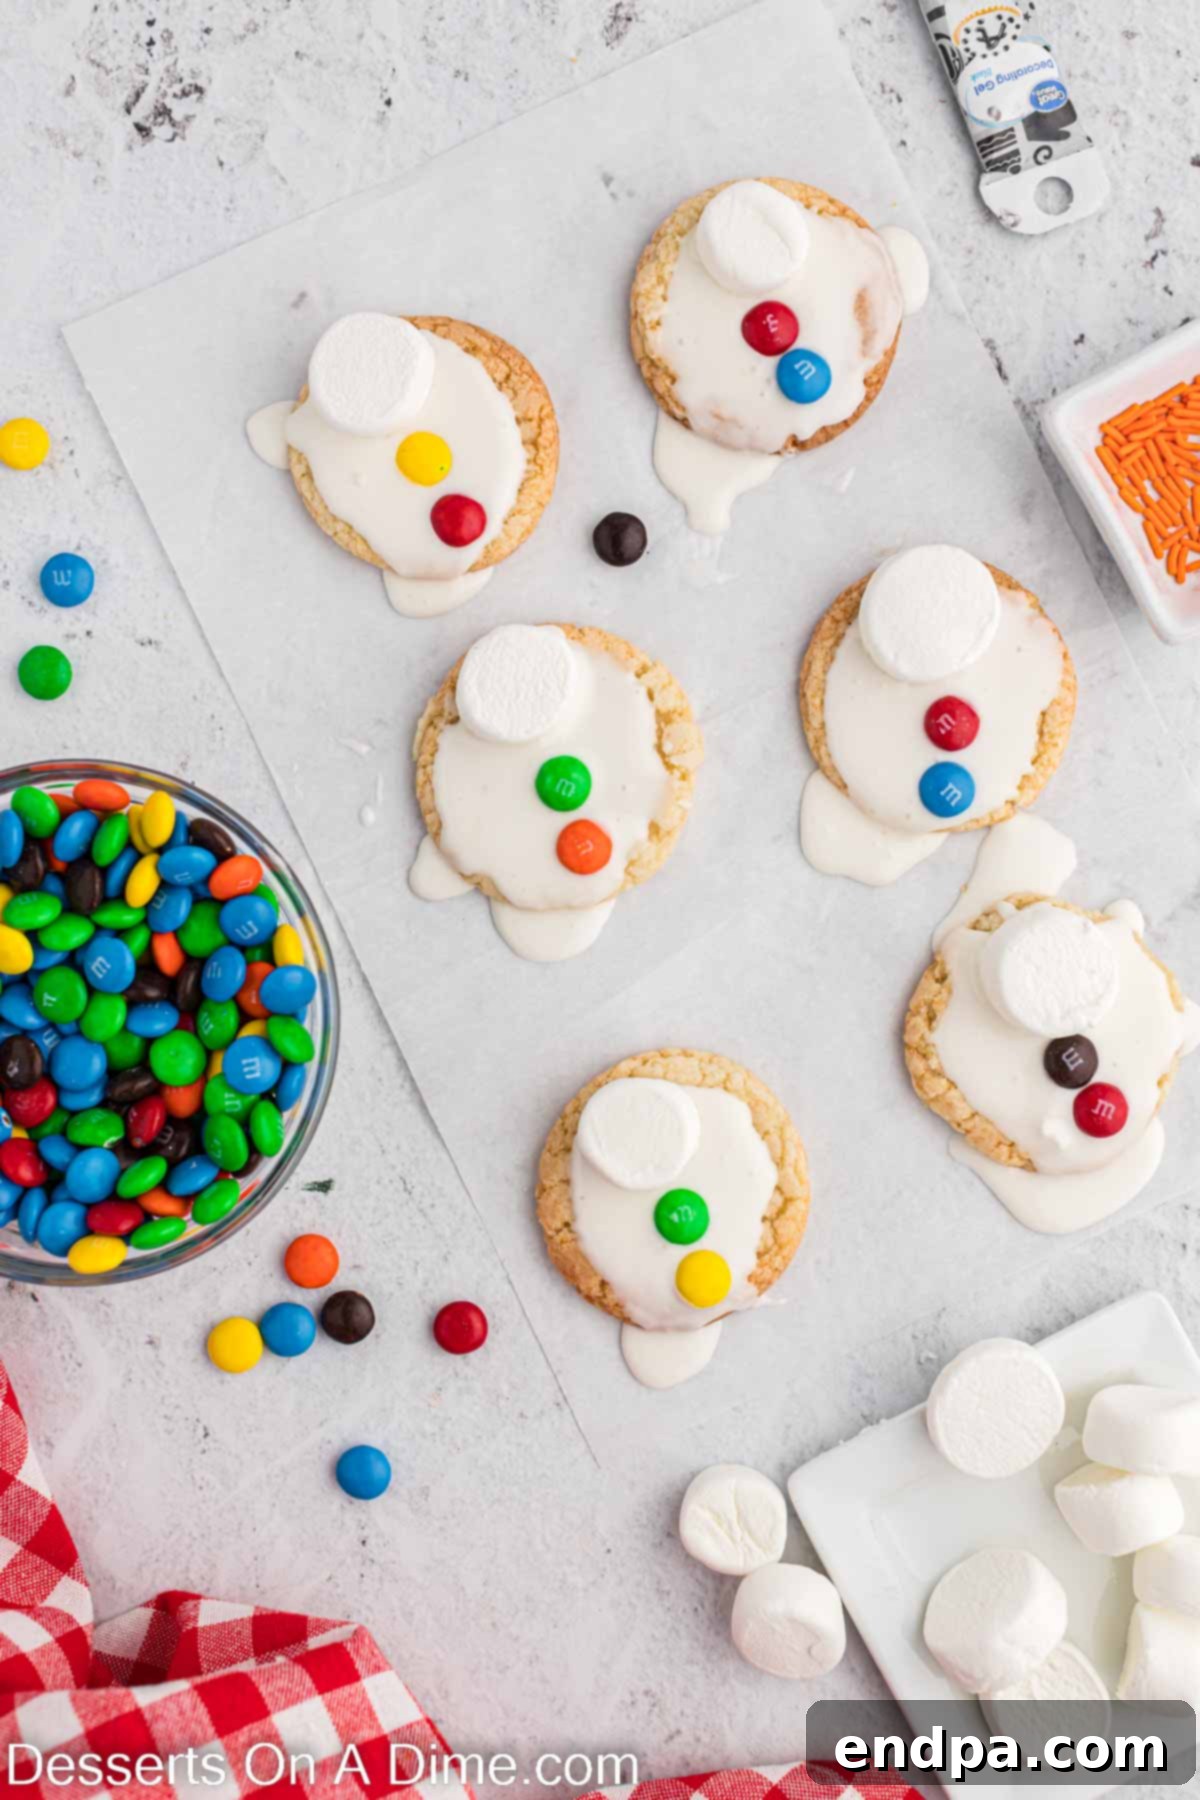
Step 4 – Add the Marshmallow Head and Candy Buttons
Immediately after frosting each cookie (before the icing sets), take a large marshmallow that has been cut in half. Gently place one half onto the upper portion of the frosted cookie, towards the back. The fresh royal icing will act as an adhesive, securing the marshmallow in place. Next, arrange a few M&M’s in the front, below the marshmallow, to resemble the snowman’s buttons. You can use two or three M&M’s per cookie, depending on their size and your preference. The key is to add these decorations while the royal icing is still wet so they stick properly.
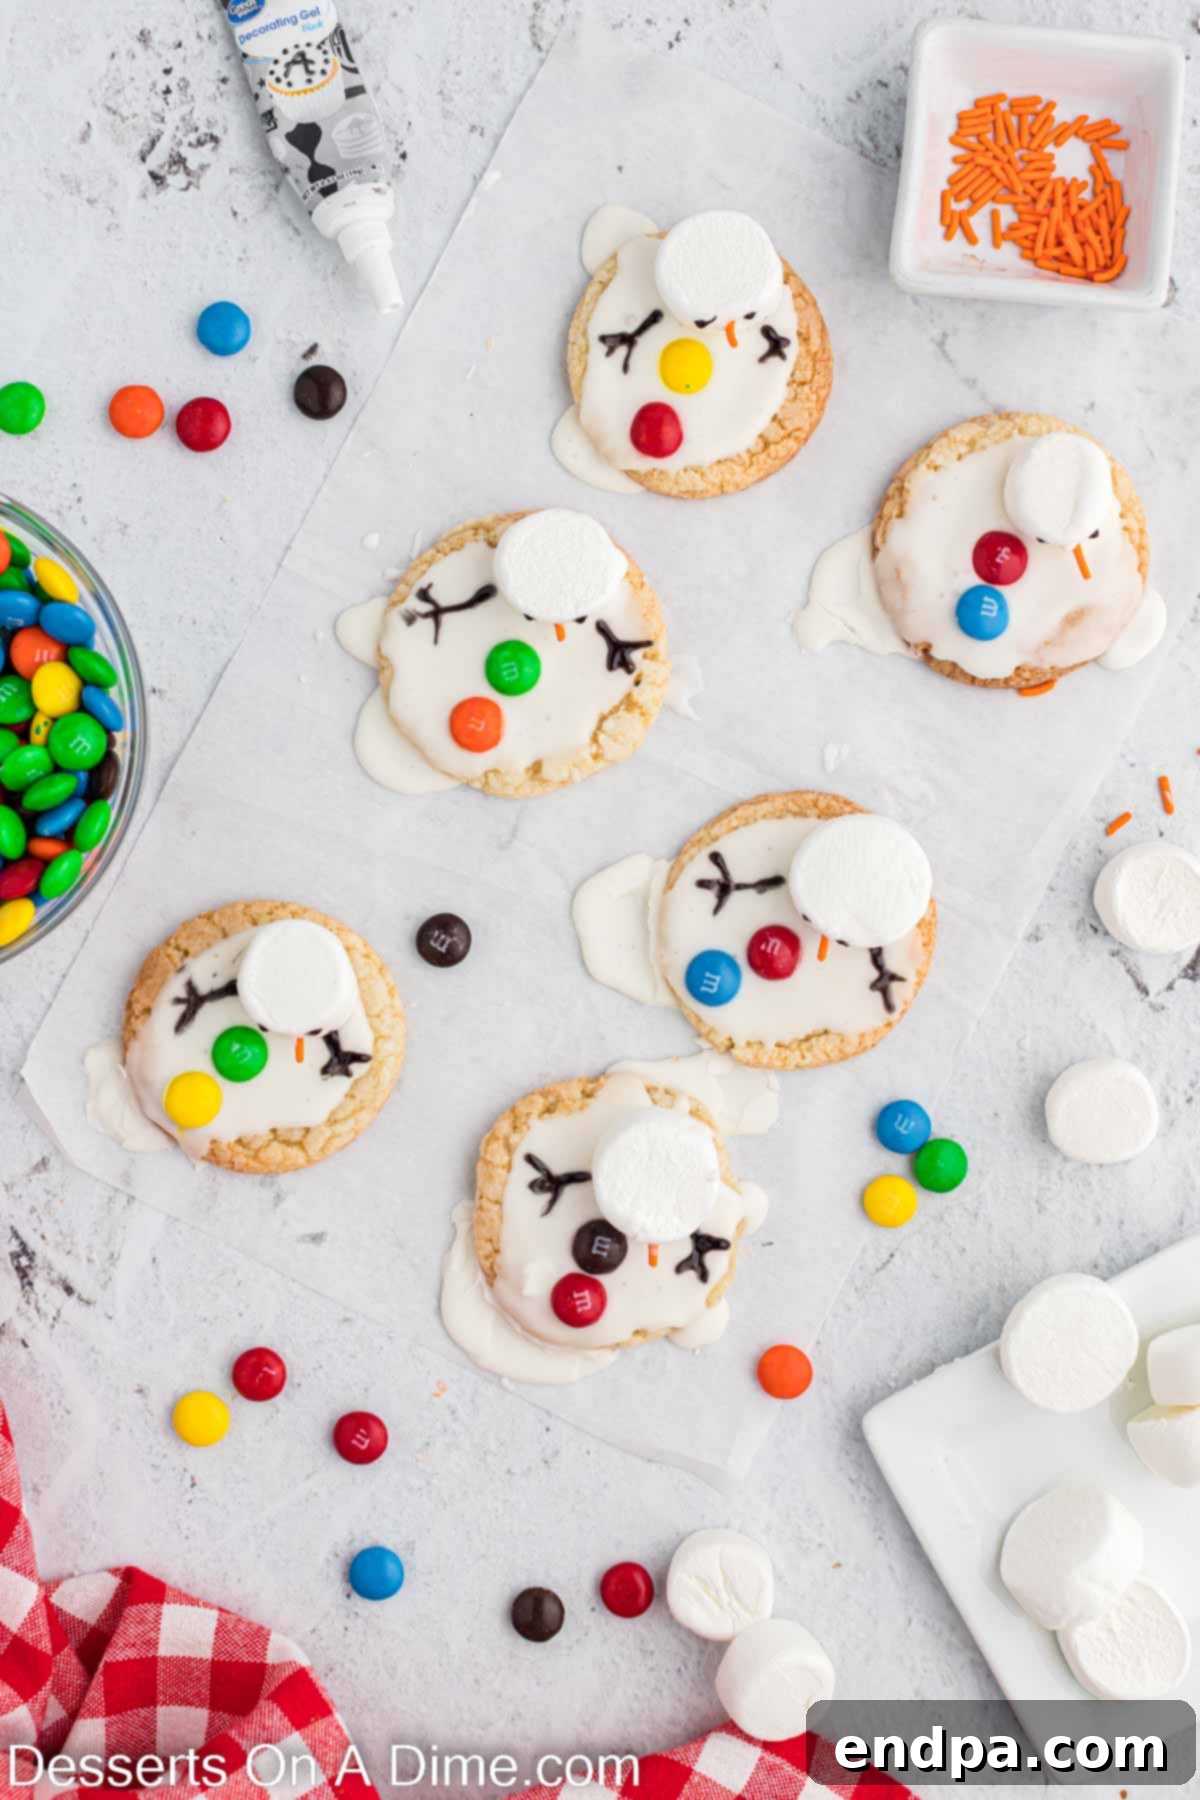
Step 5 – Detail the Snowman’s Face and Arms
Allow the royal icing to dry completely and harden. This usually takes about 20-30 minutes, or longer in humid conditions. Once the icing is set, it’s time to add the finishing touches. Use the black decorating gel to carefully pipe on the snowman’s eyes and a dotted mouth onto the marshmallow head. You can also draw thin, stick-like arms coming from the sides of the marshmallow onto the white icing. For the nose, take one of the long orange sprinkles and use a tiny dab of any leftover white royal icing (or a dot of fresh icing) to attach it to the center of the marshmallow, creating a cute carrot nose. Once all the gel and icing details are complete, allow them to fully set before handling or storing the cookies. Now, your adorable melted snowman cookies are ready to serve and enjoy!
Storage Tips for Snowman Cookies
To ensure your delightful Melted Snowman Cookies remain fresh and delicious, proper storage is key. Following these tips will help maintain their texture and prevent the decorations from being damaged.
- Airtight Container: Always store your leftover Melted Snowman Sugar Cookies in an airtight container at room temperature. This prevents them from drying out and keeps them soft. They will remain fresh for up to 1 week.
- Prevent Sticking: To protect the intricate decorations and prevent the cookies from sticking together, place a sheet of wax paper or parchment paper between each layer of cookies in the container. This simple step makes a big difference in preserving their appearance.
- Cool Completely: Before storing, it is absolutely essential that the cookies, including the royal icing and any decorating gel, are completely cool and set. If you attempt to store them before the icing has fully hardened, they will inevitably stick to each other and the container, ruining the beautiful snowman designs. The royal icing should be firm to the touch, and the black decorating gel should not be tacky.
- Freezing for Longer Storage: If you want to prepare these festive cookies far in advance or simply need them to last longer, freezing is an excellent option.
- Place the completely cooled and hardened cookies in a single layer on a baking sheet and freeze for about 30 minutes, or until solid. This “flash freezing” helps prevent them from sticking together once they are stacked.
- Once flash-frozen, transfer the cookies to a freezer-safe airtight container or a heavy-duty freezer bag. Again, use wax paper between layers to prevent sticking.
- Frozen Melted Snowman Cookies can be stored for up to 2 to 3 months.
- To thaw, simply remove the cookies from the freezer and let them come to room temperature in their container to prevent condensation from forming on the icing. This method is a fantastic way to prepare for holiday parties and save valuable time during busy seasons, ensuring you always have a charming treat on hand.
FAQs About Melted Snowman Cookies
Here are some frequently asked questions to help you master this delightful melted snowman cookie recipe and ensure your baking success.
These charming cookies will stay fresh and delicious for about 5-7 days when stored properly in an airtight container at room temperature. However, for longer preservation, you can definitely freeze them! To freeze, place the fully decorated and hardened cookies in a single layer on a baking sheet in the freezer for about an hour. Once firm, transfer them to a freezer-safe container, separating layers with wax paper. They can be frozen for up to 2 to 3 months. This is a brilliant strategy for holiday party prep, allowing you to get ahead of schedule and reduce stress during busy times. Just thaw them at room temperature before serving.
Decorating these easy sugar cookies is surprisingly simple and incredibly fun, even though they look incredibly impressive! The process starts with a base coat of smooth white royal icing, which forms the “puddle” of melted snow and gives the cookies a beautiful, glossy sheen. Each cookie is then topped with a marshmallow half, artfully placed to appear as the snowman’s head. The snowman’s face, including eyes and a mouth, is easily piped on with black decorating gel. Small M&M candies serve as the snowman’s cheerful buttons, and a long orange sprinkle becomes the iconic carrot nose, attached with a tiny dab of royal icing. This recipe is highly adaptable, allowing you to use various other types of candy, sprinkles, or edible embellishments for personalization, making each sweet treat unique and fun to make.
While royal icing is recommended for its quick setting time and firm finish, which helps keep the marshmallow and decorations in place, you can technically use a stiff buttercream frosting. However, buttercream will not set as hard as royal icing, which means the cookies will be more delicate to store and transport. The “melted puddle” effect might also be less defined, and decorations might shift more easily. If using buttercream, ensure it’s a very firm consistency and allow it ample time to set slightly before handling.
You’ll need a few basic baking and decorating tools:
- Mixing bowls (large and medium)
- Electric mixer (handheld or stand mixer) for the icing
- Round cookie cutter (or a glass rim)
- Baking sheets
- Parchment paper (for baking and decorating)
- Wire cooling rack
- Piping bag (or a sturdy resealable plastic bag) with a small round tip (optional, but helpful for icing control)
- Small sharp knife for cutting marshmallows
- Small offset spatula or spoon for spreading icing
Most of these are common kitchen items, making this recipe accessible to all!
Pro Baking and Decorating Tips
Achieving perfect melted snowman cookies is easier with a few expert tricks up your sleeve. These pro tips will help you create a batch of cookies that are not only delicious but also visually stunning:
- Royal Icing Consistency: The “10-second consistency” is ideal for both outlining and flooding the cookies, creating a smooth, even surface that mimics melted snow. To achieve this, slowly add powdered sugar (or a tiny bit of water) to your royal icing mixture until a line drawn through the icing disappears within approximately 10 seconds. If it’s too thick, add water a tiny drop at a time; if too thin, add more sifted powdered sugar.
- Work Quickly While Decorating: Royal icing begins to set relatively fast, especially if your kitchen is dry. It’s crucial to add the marshmallow halves and candy buttons (M&M’s) immediately after frosting each cookie. If the icing starts to harden, your decorations won’t adhere properly. Consider decorating one cookie at a time, frosting it and then adding the marshmallow and buttons before moving to the next.
- Cut Marshmallows Perfectly: Don’t forget to cut your large marshmallows in half! This step is essential for creating the “melted” look, allowing the marshmallow “head” to appear nestled in the puddle of white icing rather than sitting too high. Use kitchen shears or a sharp knife lightly dusted with powdered sugar to prevent sticking when cutting marshmallows.
- Cool Cookies Completely: Patience is a virtue in baking, especially when it comes to decorating. Ensure your sugar cookies are entirely cooled to room temperature before applying any royal icing. Decorating warm cookies will cause the icing to melt, spread too much, and potentially ruin your design.
- Sift Powdered Sugar: For the smoothest, lump-free royal icing, always sift your powdered sugar before mixing. This simple step prevents frustrating clogs in your piping bag and ensures a professional finish.
- Use Gel Food Coloring: If you decide to experiment with colored icing (for scarves or other details), opt for gel food coloring over liquid. Gel colors are more concentrated, produce vibrant hues, and won’t thin out your icing consistency.
- Parchment Paper is Your Best Friend: When decorating, place your cookies on sheets of parchment paper. Any excess icing drips or mistakes will fall onto the paper, making cleanup a breeze.
- Practice Makes Perfect: If you’re new to piping, don’t be intimidated! You can practice drawing faces and stick arms on a piece of parchment paper before going straight to the cookies. The beauty of these melted snowmen is that their slightly imperfect, whimsical nature is part of their charm!
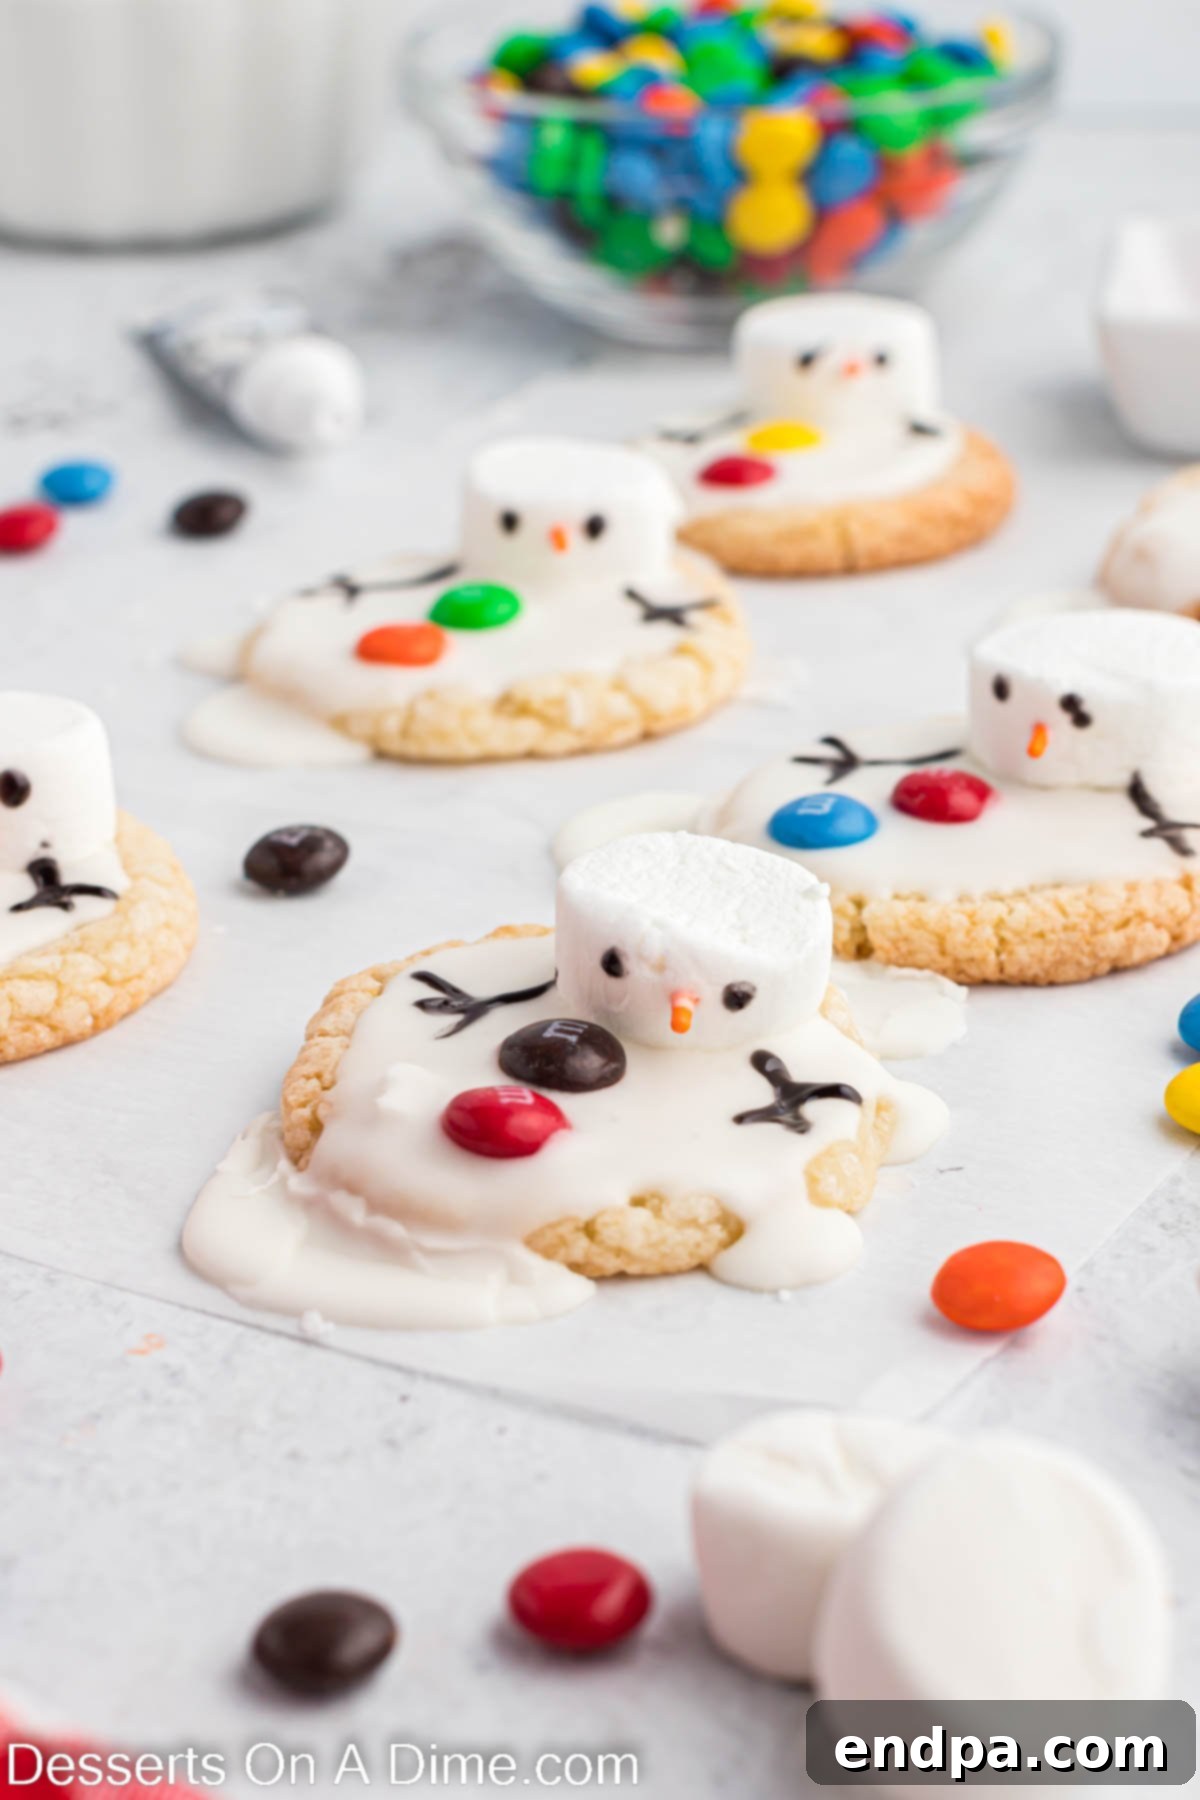
More Decorated Cookie Recipes
If you loved making these whimsical melted snowman cookies, you’ll surely enjoy exploring more of our fun and festive decorated cookie recipes:
- Classic Christmas Cut Out Sugar Cookies: A timeless holiday favorite that’s perfect for detailed decorating.
- Easy Christmas Tree Sugar Cookies: Simple yet stunning cookies shaped and decorated like festive evergreen trees.
- Thanksgiving Sugar Cookies Recipe: Adorable, autumn-themed cookies perfect for your holiday feast.
We truly hope you enjoy making this fun recipe for Christmas cookies and winter celebrations. It’s such a blast to create and share. Please feel free to leave a comment below and share your thoughts or any creative twists you added! We love hearing from you and seeing your wonderful creations!
Melted Snowman Cookies Recipe
This whimsical treat for melting snowmen will be a hit. Delight your family and friends with these adorable and delicious Melted Snowman Cookies, perfect for any winter gathering or holiday celebration!
15
10
20
45
24
American
Dessert
157
Carrie Barnard
Ingredients
FOR THE COOKIES:
- 1 pkg Sugar Cookie Mix
- *Ingredients to make the cookie based on the package instructions (e.g., butter, egg)
- 12 Large Marshmallows, cut in half
- Long Orange Sprinkles
- 1 Cup M&Ms
- Black Decorating Gel
FOR THE ROYAL ICING:
- 2 Egg Whites
- 1 Cup Powdered Sugar (sifted)
- 1/2 teaspoon Cream of Tartar
Instructions
- Prepare the cookies based on the package instructions for round sugar cookies. Allow the cookies to cool completely on a wire rack before decorating.
- In a mixing bowl, beat together the royal icing ingredients (egg whites, powdered sugar, cream of tartar) until it reaches a “10-second consistency” – meaning a line drawn through the icing disappears in about 10 seconds. Fill a piping bag with the icing and cut off a small tip.
- Frost each of the cooled cookies with the royal icing, allowing some of the icing to drip over the sides to create the melted snow effect. Work on parchment paper for easy cleanup.
- Immediately, while the icing is still wet, place one half of a large marshmallow onto the back portion of each cookie. Then, add M&M’s to the front of the cookie to resemble the snowman’s buttons.
- Allow the royal icing to dry completely and harden (this can take 20-30 minutes, or longer depending on humidity). Once set, use the black decorating gel to pipe on the snowman’s face (eyes and mouth) and stick arms. Use a tiny dab of leftover white icing to attach an orange sprinkle onto the marshmallow for the snowman’s nose.
- Let the decorating gel fully set before handling. Once everything is dry and firm, the cookies are ready to serve and enjoy!
Recipe Notes
Store leftover cookies in an airtight container at room temperature for up to 1 week. Place wax paper between layers to prevent sticking.
Any sugar cookie recipe or store-bought sugar cookies can be used as the base for this recipe. Just choose what’s easiest for you!
Nutrition Facts
Carbohydrates 31g,
Protein 1g,
Fat 3g,
Saturated Fat 1g,
Polyunsaturated Fat 0.01g,
Monounsaturated Fat 0.01g,
Trans Fat 0.02g,
Cholesterol 1mg,
Sodium 72mg,
Potassium 15mg,
Fiber 0.2g,
Sugar 22g,
Vitamin A 19IU,
Vitamin C 0.1mg,
Calcium 10mg,
Iron 0.2mg
