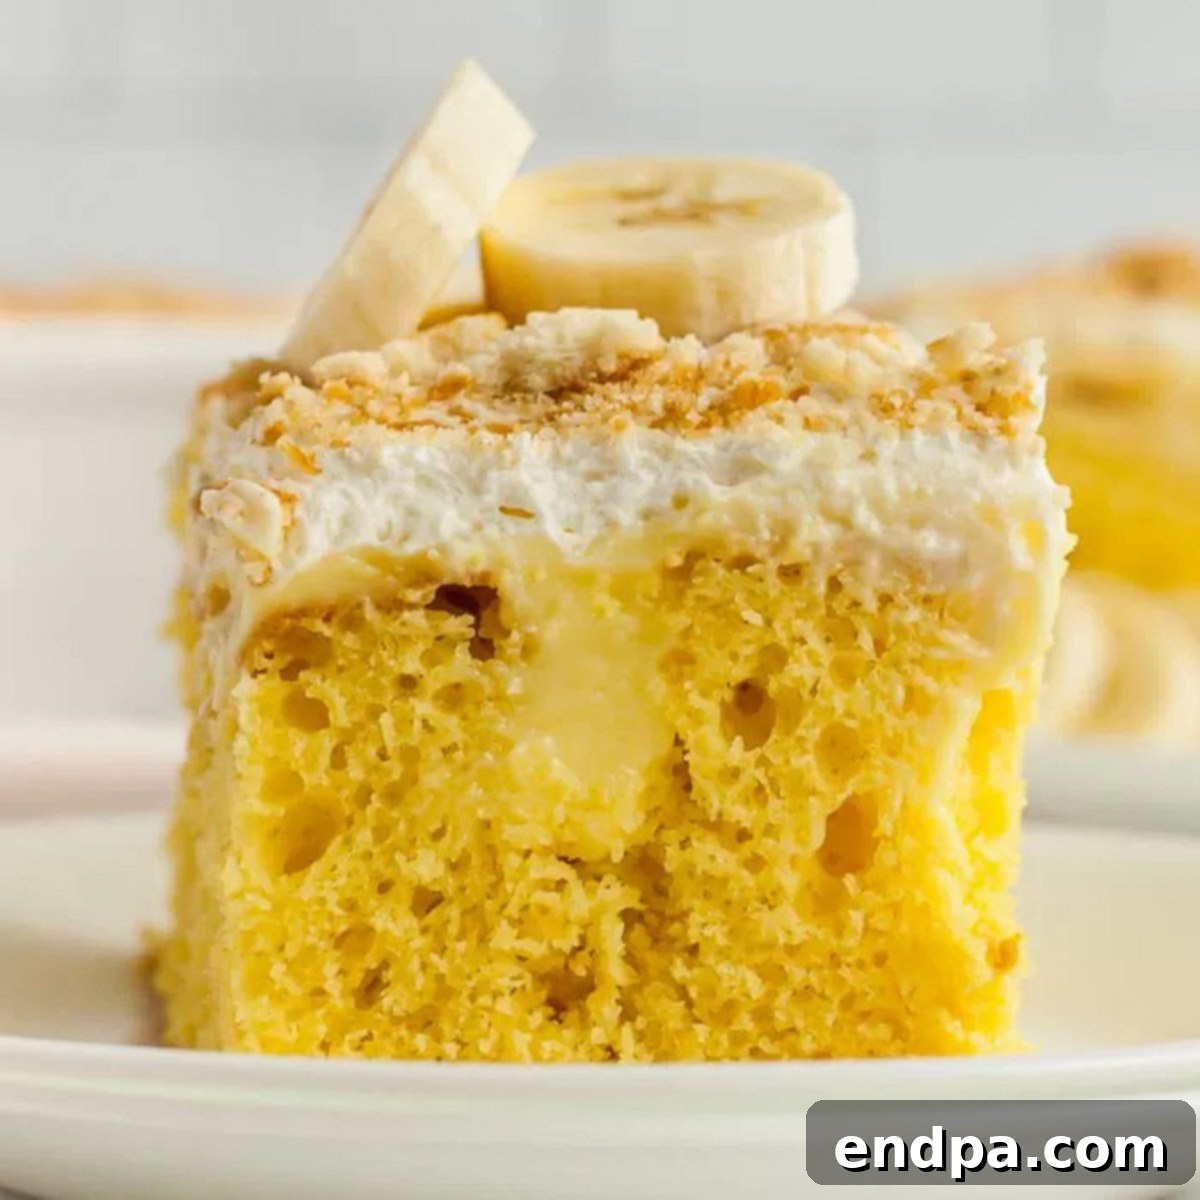
Experience the comforting taste of classic banana pudding transformed into an incredibly moist and easy-to-make cake! This Banana Pudding Poke Cake recipe takes everything you adore about the beloved dessert and bakes it into a delicious, convenient cake form. It’s widely celebrated as the easiest pudding poke cake, generously loaded with creamy pudding, fresh bananas, and crunchy vanilla wafers, culminating in a tasty dessert that will undoubtedly become a staple in your recipe collection. Prepare to make this delightful treat again and again for its simplicity and irresistible flavor profile.
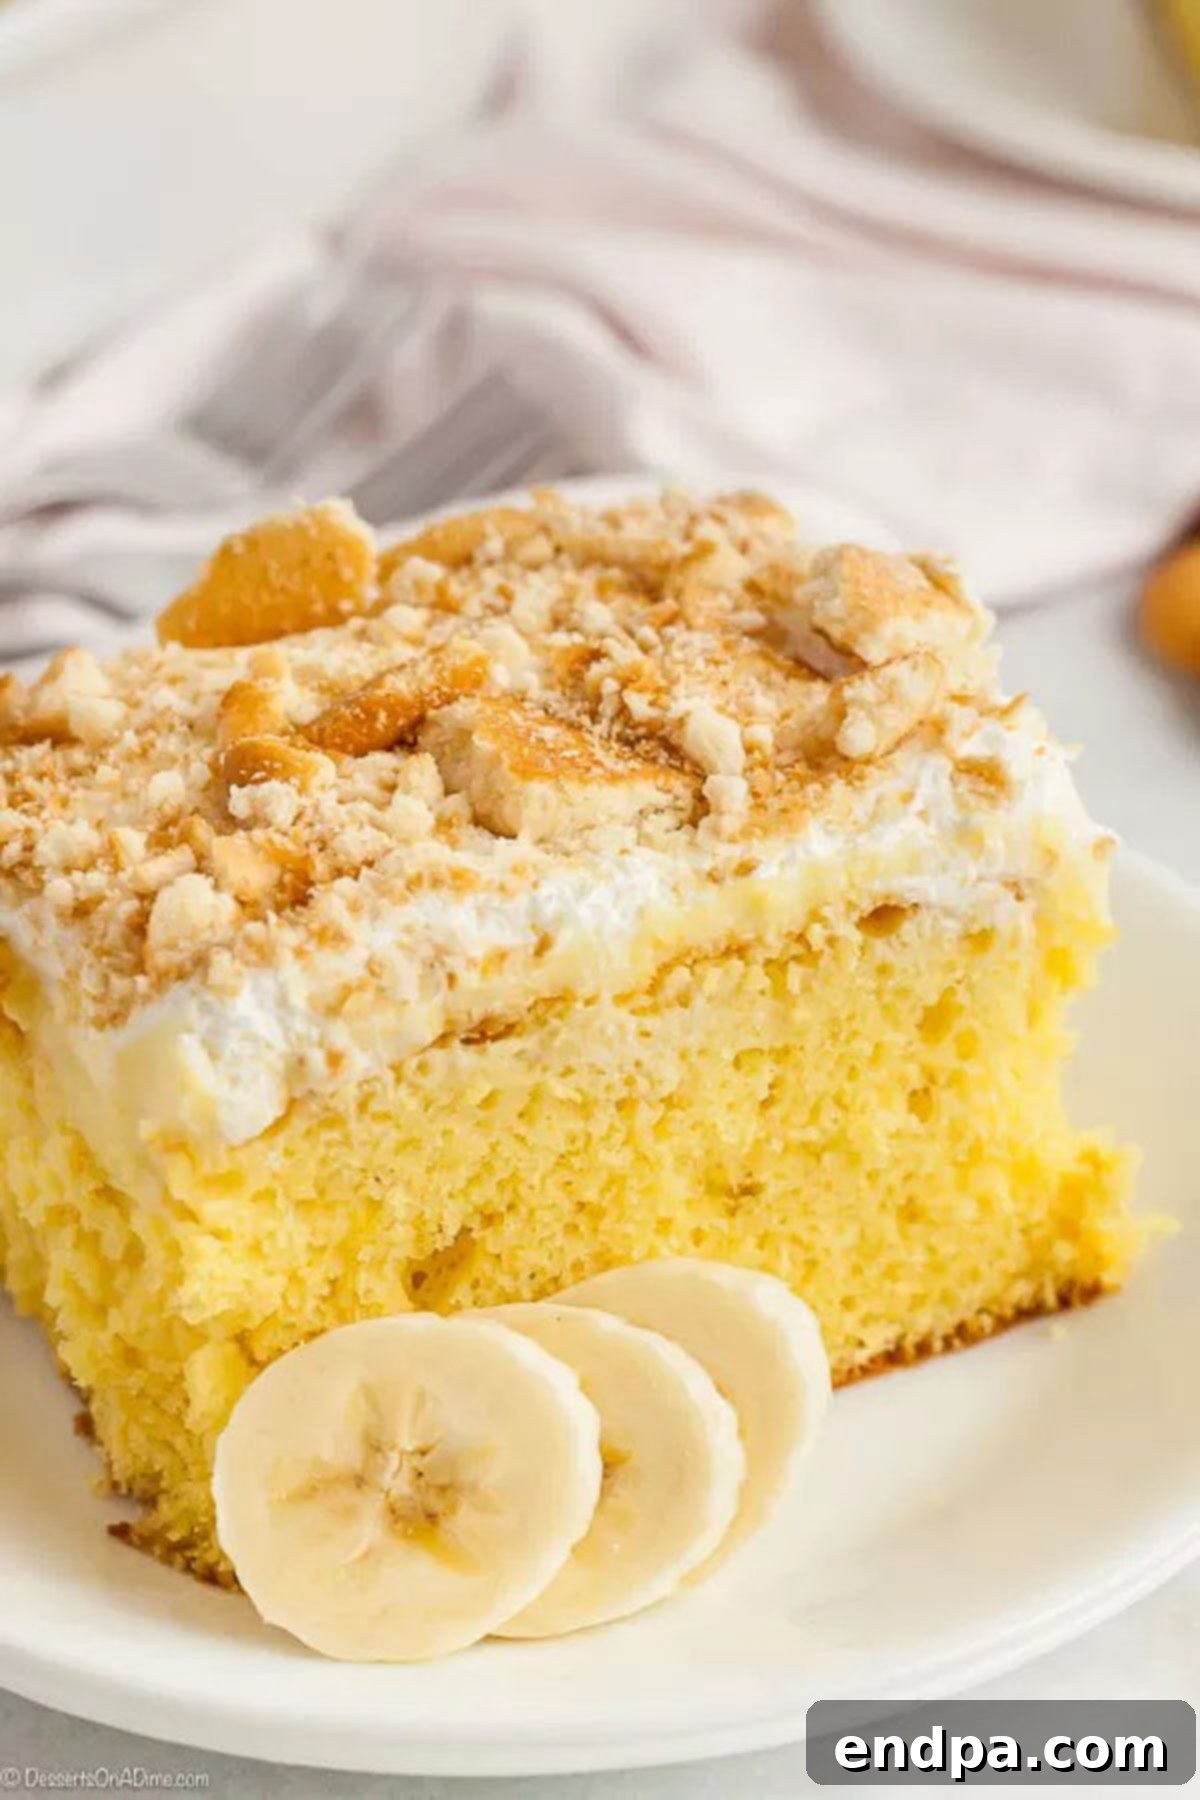
The Banana Pudding Poke Cake stands out as a remarkably straightforward cake recipe, making it ideal for both novice bakers and seasoned pros seeking a quick yet impressive dessert. Its secret lies in the instant banana pudding mix, which not only infuses the cake with an incredible depth of banana flavor but also ensures an unparalleled moistness in every bite. This recipe consistently ranks among The Best Poke Cake Recipes, rivalling even classics like the Boston Cream Poke Cake. I personally love how effortlessly I can whip up this dessert for my family, requiring minimal time and a handful of readily available ingredients. For those who crave an even more intense banana experience, you might also enjoy exploring our Banana Pudding Cookies.
Table of Contents
- What is a Poke Cake?
- Why You’ll Love This Recipe
- Equipment Needed
- Ingredients for Banana Pudding Poke Cake
- Variations and Customizations
- How to Make Banana Pudding Poke Cake
- How to Serve
- Expert Tips for Success
- Frequently Asked Questions
- More Poke Cake Recipes
- Try These Banana Recipes
What is a Poke Cake? Unveiling the Magic Behind the Moisture
At its heart, a poke cake is a delightful dessert that involves baking a standard cake, then, while it’s still warm, strategically poking holes across its surface. These holes act as tiny reservoirs, allowing a liquid filling—in this case, a rich and creamy banana pudding mixture—to deeply saturate the cake layers. This unique technique ensures that every single bite is infused with flavor and an unparalleled moistness that traditional cakes often struggle to achieve. The pudding seeps into every nook and cranny, transforming a simple cake mix into a dessert that tastes far more complex and decadent than its preparation suggests.
Beyond the delicious outcome, there’s an element of fun in making a poke cake! The act of poking the holes, especially with the handle of a wooden spoon, is surprisingly satisfying and can be a fantastic way to involve children in the kitchen. They love being able to help create the “pudding layer” by making the perfect pathways for the delicious filling. It’s an interactive baking experience that results in an absolutely amazing dessert, perfect for any occasion.
Why You’ll Love This Banana Pudding Poke Cake Recipe
This Banana Pudding Poke Cake isn’t just another dessert; it’s a culinary triumph for its simplicity and spectacular results. Here’s why it will quickly become a cherished recipe in your household:
- Effortless Preparation: Starting with a box cake mix significantly cuts down on prep time, making this an ideal recipe for busy weeknights or last-minute gatherings.
- Unbelievable Moisture: The ‘poke’ technique is a game-changer, ensuring that the cake remains incredibly moist and tender, thanks to the pudding soaking into every part.
- Classic Flavor Profile: It captures the beloved taste of traditional banana pudding with its creamy banana flavor and sweet vanilla wafer crunch, all in a convenient cake form.
- Crowd-Pleaser: This cake is universally loved by both kids and adults. Its familiar flavors and delightful texture make it a guaranteed hit at any potluck, party, or family dinner.
- Customizable: While perfect as is, the recipe offers fantastic opportunities for variations, allowing you to tailor it to your preferences or whatever ingredients you have on hand.
- Make-Ahead Friendly: In fact, this cake often tastes even better the next day after the pudding has had ample time to fully absorb and meld with the cake.
Essential Equipment for Your Poke Cake
You won’t need any specialized gadgets to create this fantastic cake. Most of these items are likely already in your kitchen:
- 9×13 inch baking pan: The standard size for most sheet cakes and perfect for poke cakes.
- Mixing bowls: One for the cake batter and another for the pudding mixture.
- Electric mixer (optional, but recommended): For quickly preparing the cake batter, though a whisk works too.
- Whisk: Essential for smoothing out the pudding mix.
- Wooden spoon: Specifically, the handle of a wooden spoon is ideal for poking the perfect-sized holes.
- Non-stick cooking spray: To ensure your cake releases cleanly from the pan.
- Plastic wrap or airtight container: For chilling and storing the cake.
Simple Ingredients, Incredible Flavor
One of the best aspects of this recipe is its reliance on readily available and simple ingredients, proving that extraordinary desserts don’t require obscure items. Each component plays a crucial role in building the layers of flavor and texture that make this cake so special.
- Yellow box cake mix: This is our foundation for convenience and consistent results. While yellow is traditional for banana pudding, a white or vanilla cake mix would also work beautifully, allowing the banana pudding flavor to shine.
- Ingredients needed to make cake: eggs, oil & water: These are the standard additions to most box cake mixes, following the package directions to create a moist and fluffy cake base.
- Instant banana pudding: The star of the show! Using two 3.4 oz packages ensures a rich, creamy, and intensely banana-flavored layer. The “instant” variety is key here, as it sets quickly and easily. If you’re feeling ambitious and prefer a homemade touch, you could substitute our Homemade Vanilla Pudding, adjusting for banana extract or pureed bananas to achieve the desired flavor.
- Milk: Used to prepare the instant pudding, providing the necessary liquid for it to thicken into that perfect creamy consistency. Whole milk often yields a richer pudding, but any milk will work.
- Frozen whipped topping (COOL WHIP) thawed: This creates a light, airy, and creamy topping that balances the sweetness of the cake and pudding. Ensure it’s fully thawed for easy spreading.
- Vanilla wafers: These iconic cookies are a must for authentic banana pudding flavor and texture. Crushed wafers provide a delightful crunch and visual appeal on top, while a few whole ones can be used for garnish. For an extra special touch, consider making your own with our Vanilla Wafer Cookies Recipe.
Variations and Customizations for Your Perfect Poke Cake
While the classic Banana Pudding Poke Cake is absolutely divine as written, this recipe is incredibly versatile and offers numerous opportunities for creative twists. Don’t hesitate to experiment with these ideas to suit your taste or occasion:
- Pudding Flavor Swap: If banana isn’t your sole craving, try using Instant Vanilla Pudding mix for a more subtle banana accent (when combined with fresh bananas) or a completely different flavor. Chocolate, butterscotch, or even coconut pudding could create exciting new profiles.
- Cake Mix Alternatives: While yellow cake mix is traditional, a vanilla cake mix provides a clean canvas. For a richer flavor, a butter cake mix works wonderfully. You could even venture into spice cake for a warm, comforting twist, or a white cake for a lighter texture.
- Add Fresh Bananas (Inside the Cake!): For an even more authentic banana pudding experience, layer thinly sliced fresh bananas over the pudding before adding the whipped topping. This adds another dimension of fresh fruit flavor and texture. Just remember to use our tip below about preventing browning.
- Enhanced Toppings: Beyond crushed vanilla wafers, consider adding a drizzle of caramel sauce, a sprinkle of toasted coconut, chopped pecans, or even mini chocolate chips for extra indulgence. A dusting of cinnamon can also add a subtle warmth.
- Different Cookies: Instead of vanilla wafers, try crushed Biscoff cookies, graham crackers, shortbread, or even chocolate cookies for a fun flavor contrast.
- Boozy Kick (Adults Only!): For a grown-up version, a splash of rum or banana liqueur can be mixed into the pudding (reduce milk slightly if adding a significant amount of liquid) or drizzled over the baked cake before adding the pudding.
- Cream Cheese Layer: For a richer, tangier element, whip together softened cream cheese, powdered sugar, and a touch of vanilla, then spread this over the cooled pudding layer before adding the whipped topping.
How to Make Banana Pudding Poke Cake: Step-by-Step Perfection
Creating this delicious poke cake is a straightforward process that yields impressive results. Follow these detailed steps to ensure your cake is moist, flavorful, and absolutely irresistible.
- Step 1: Prepare Your Pan and Oven. Begin by preheating your oven to the temperature specified on your yellow cake mix box. Generously spray a 9×13 inch baking pan with non-stick cooking spray, ensuring all corners and sides are covered to prevent sticking.
- Step 2: Bake the Cake. Prepare the yellow cake mix according to the package directions specifically for a 9×13 inch cake. This typically involves combining the mix with eggs, oil, and water. Pour the smooth batter evenly into your prepared pan. Bake for the duration indicated on the cake mix box, or until a toothpick inserted into the center of the cake comes out clean, indicating it’s fully cooked.
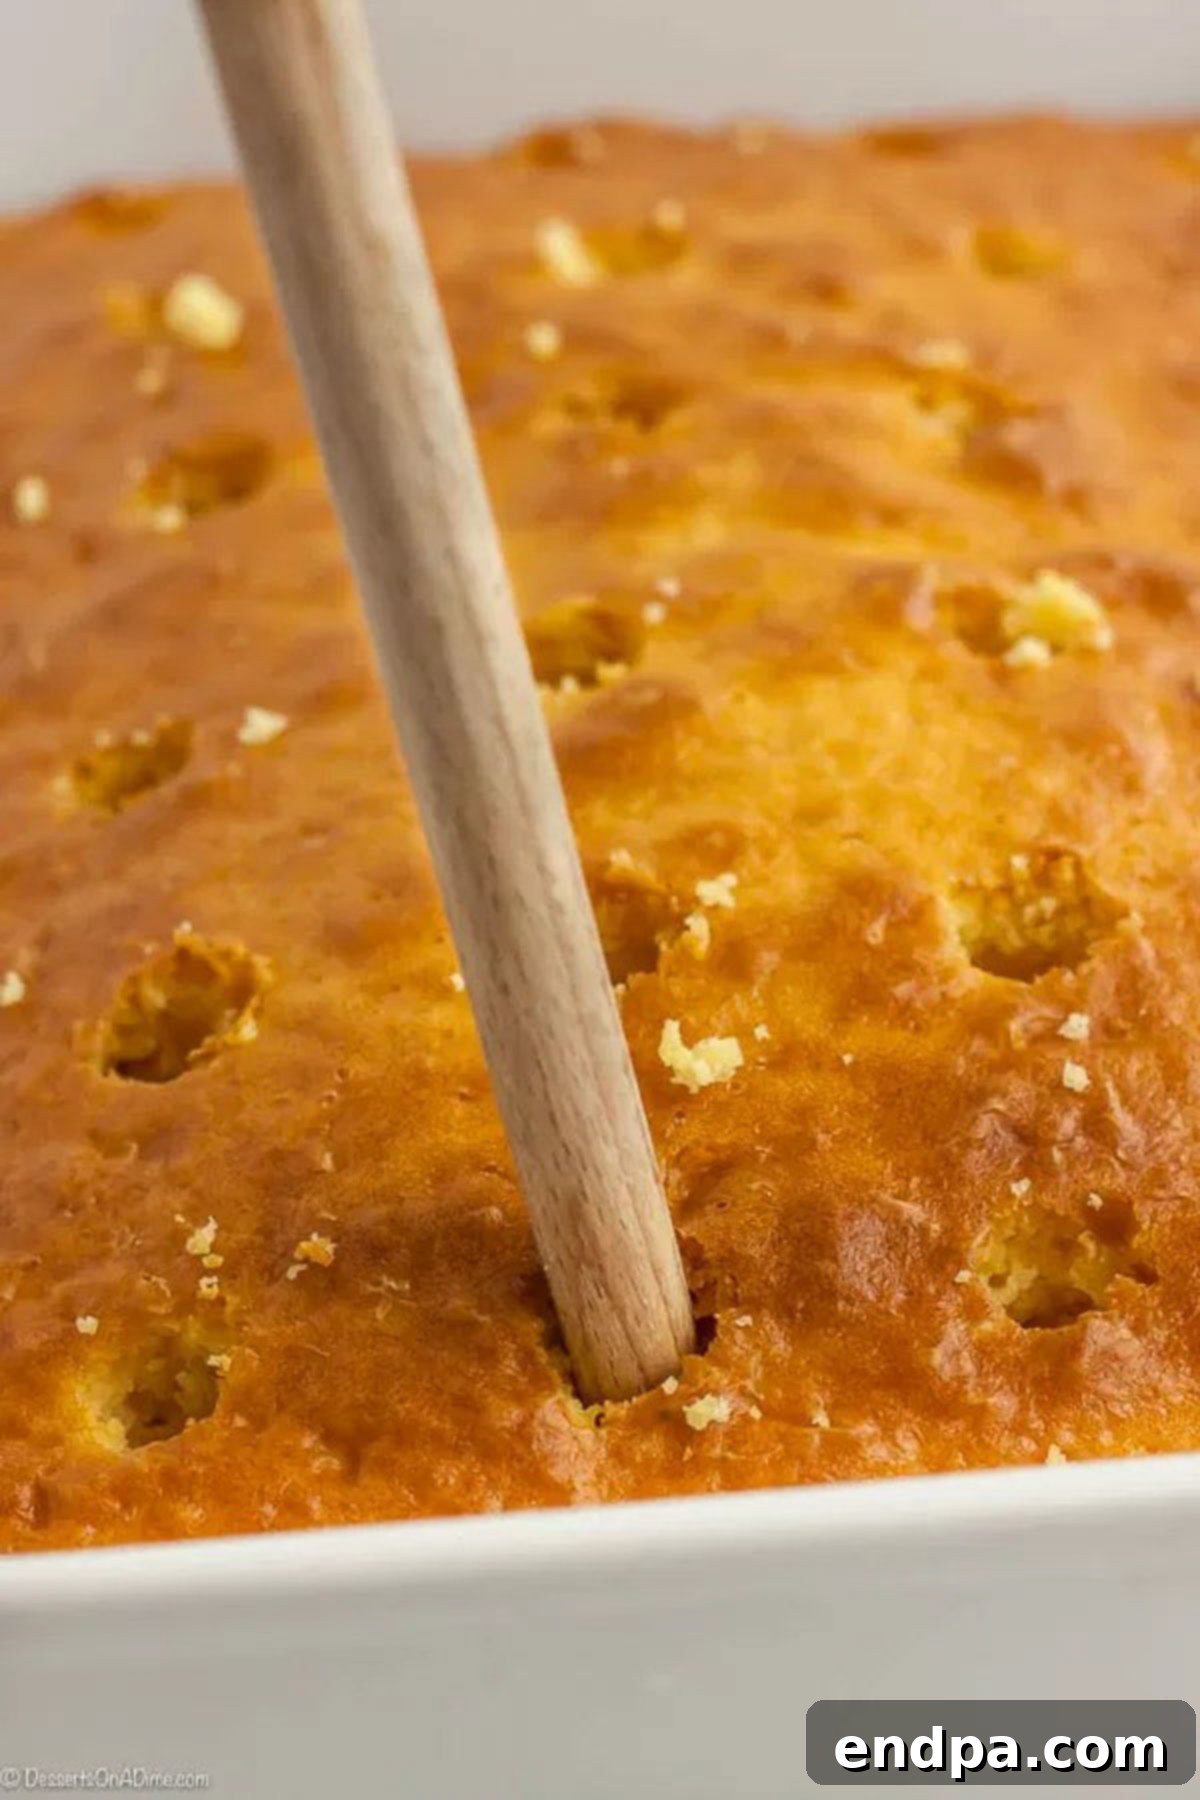
Step 3: Poke Those Holes! Once the cake is out of the oven, allow it to cool for only about 5-10 minutes. It should still be warm. Using the handle of a wooden spoon (or a similar round-ended utensil, like a dowel or even a thick straw), begin poking holes all over the surface of the cake. Aim for holes that are large enough, roughly 1/2 to 1 inch apart, and deep enough to reach almost to the bottom of the pan without piercing through. These generous holes are crucial for the pudding to properly saturate the cake and ensure maximum moistness and flavor distribution.
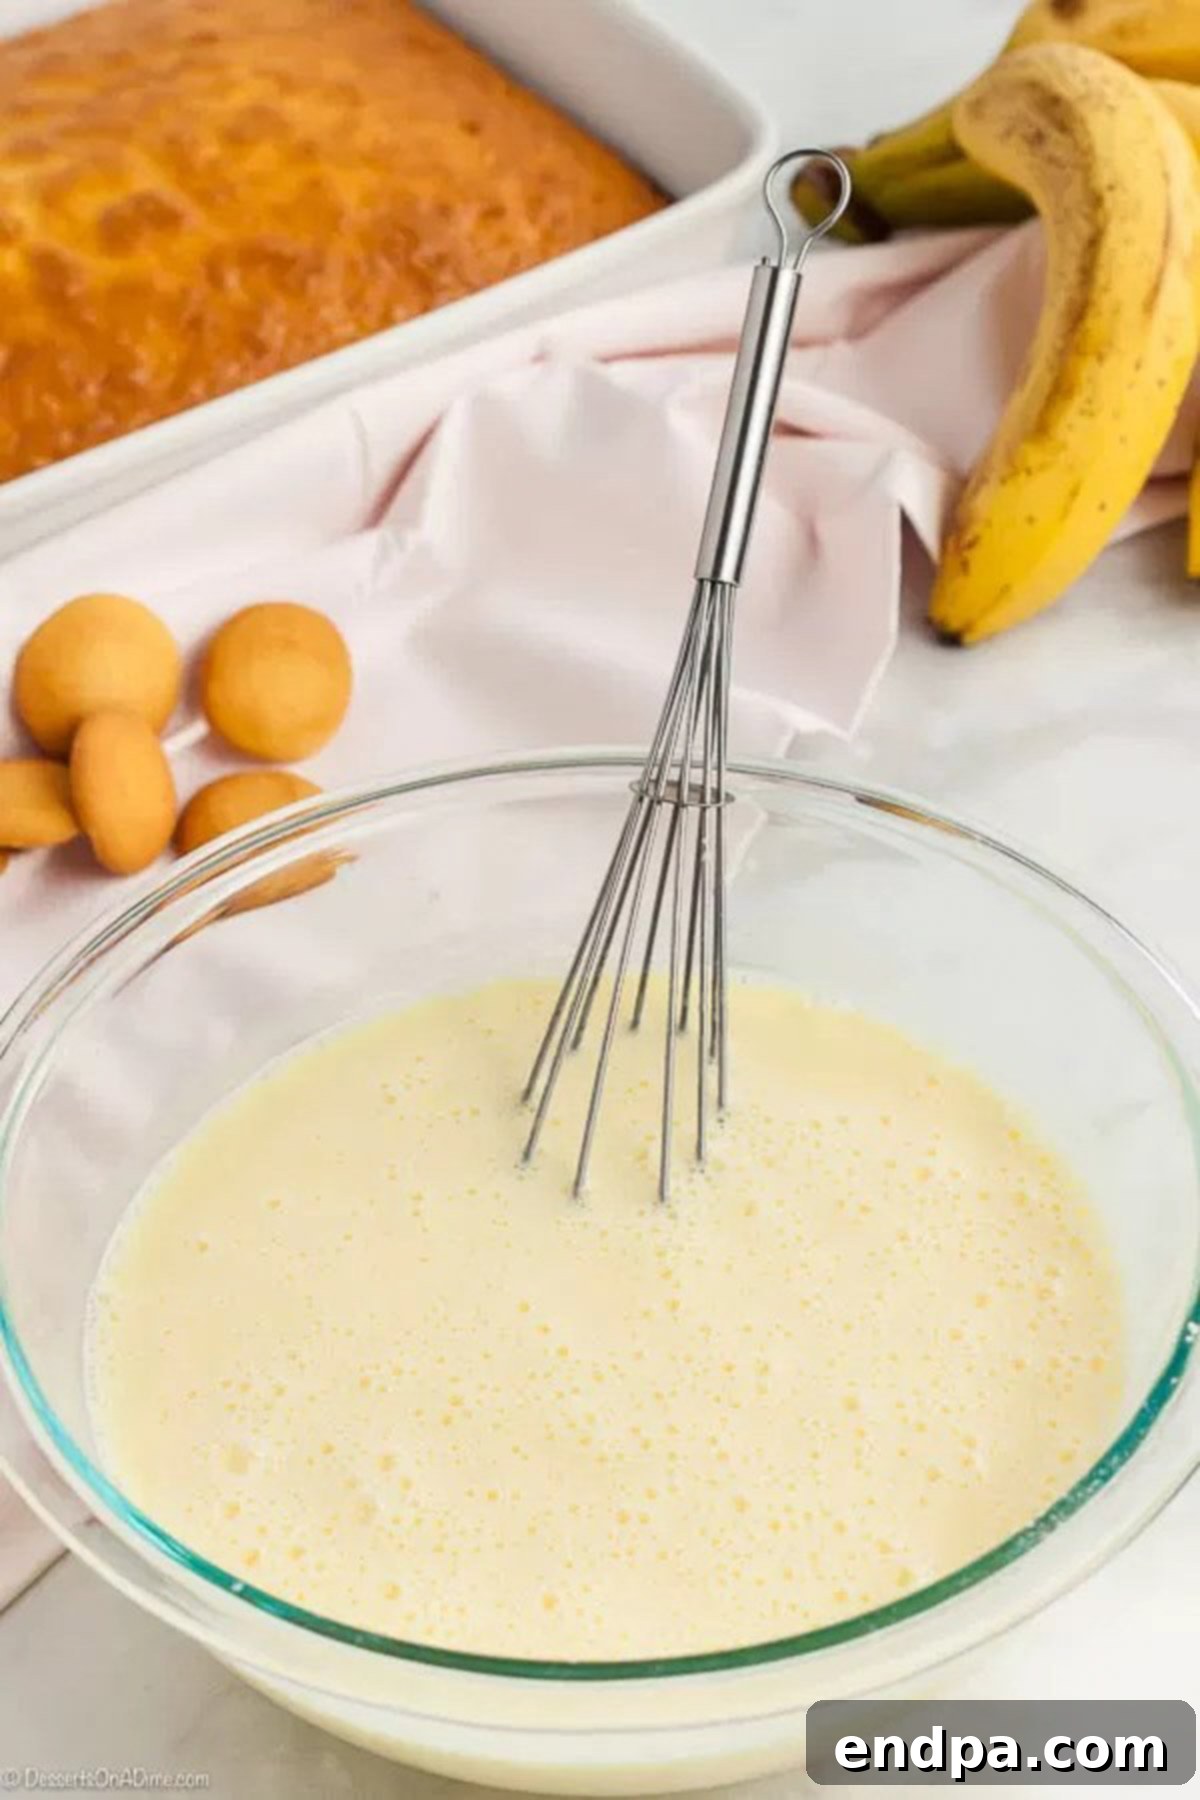
Step 4: Prepare the Pudding. While the cake is slightly cooling and you’re poking holes, prepare your instant banana pudding. In a medium-sized bowl, whisk together both packages of instant banana pudding mix with the specified amount of milk (typically 4 cups). Whisk vigorously for about 2-3 minutes, ensuring all lumps are gone and the mixture begins to thicken. It’s important to work relatively quickly, as instant pudding sets quite fast.
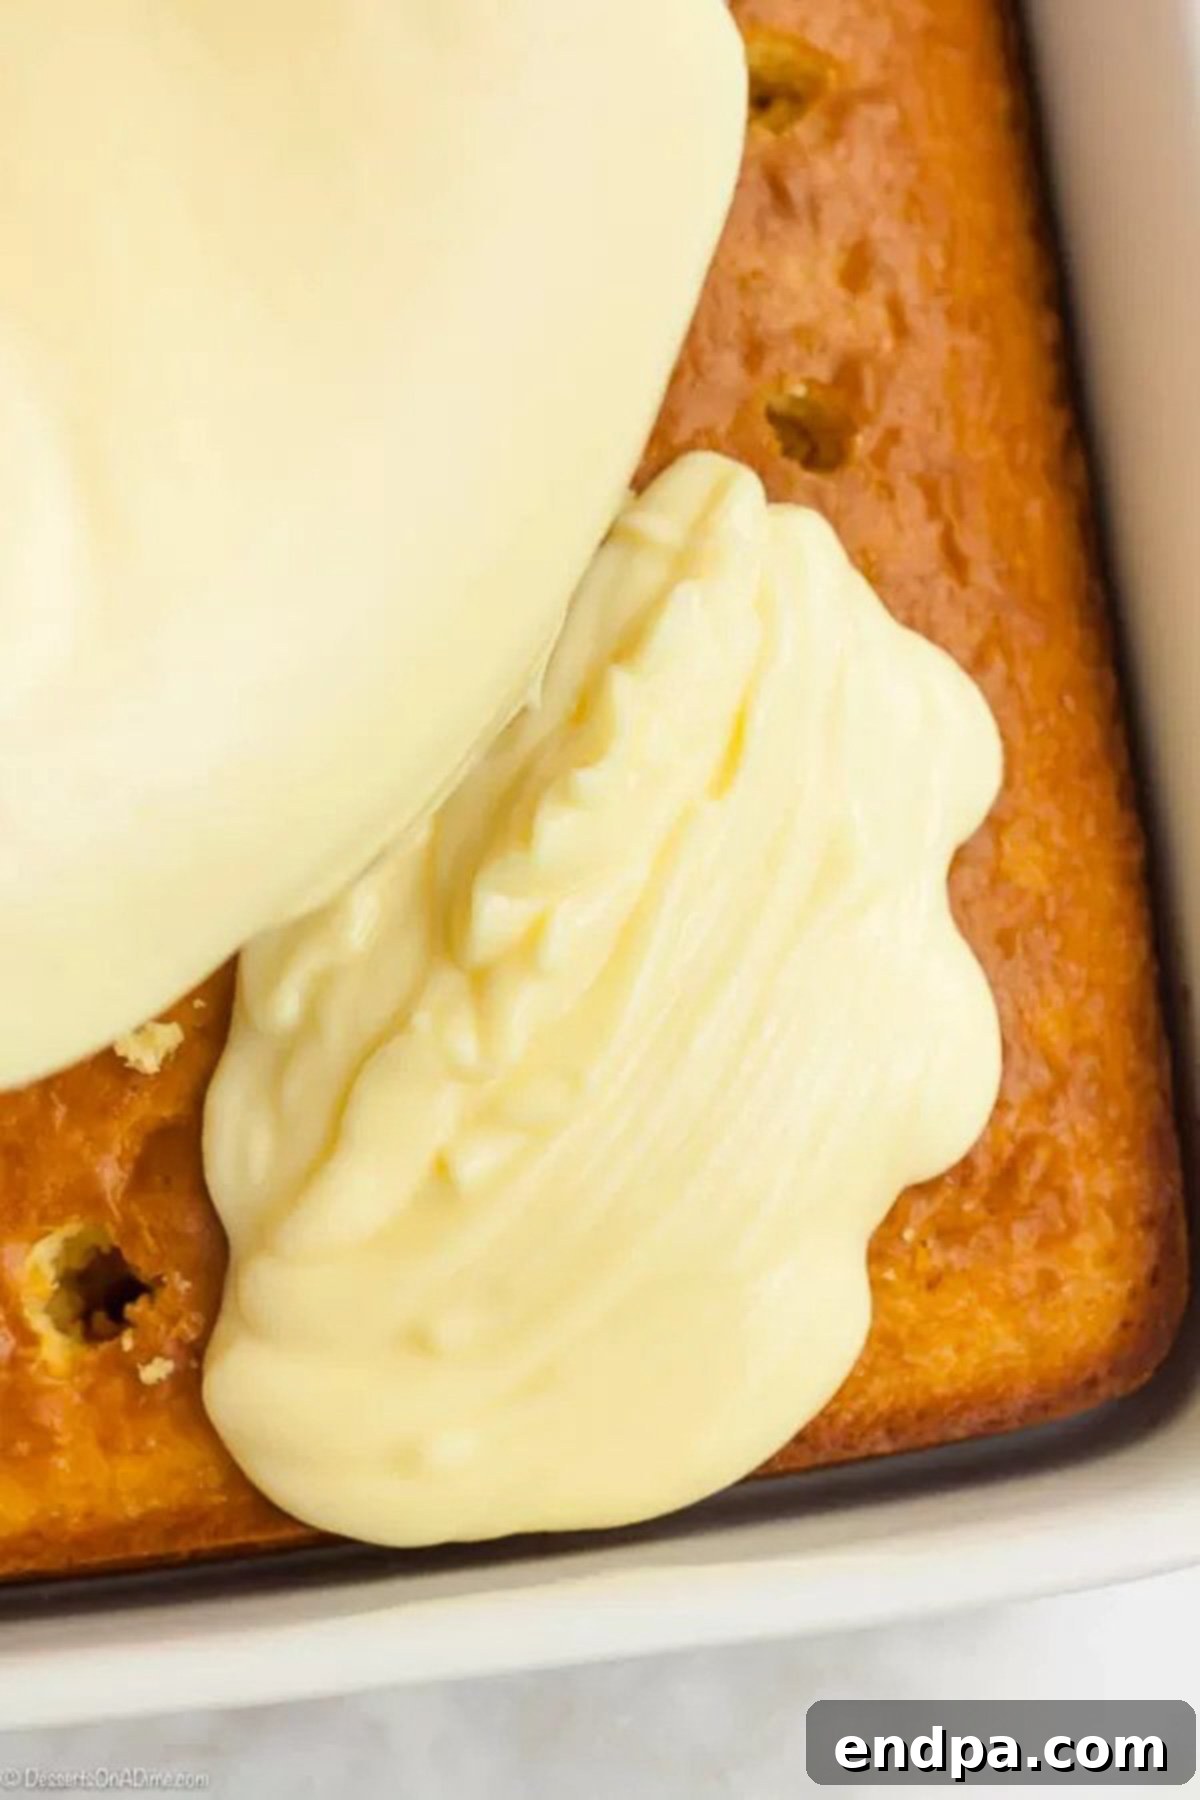
Step 5: Pour and Spread the Pudding. Immediately after mixing, pour the thickened banana pudding mixture evenly over the warm, poked cake. Using the back of a spoon or an offset spatula, gently spread the pudding to cover the entire cake surface, lightly pushing the pudding down into all the holes. The residual warmth from the cake will help the pudding seep more effectively into the holes, creating that signature moist texture.
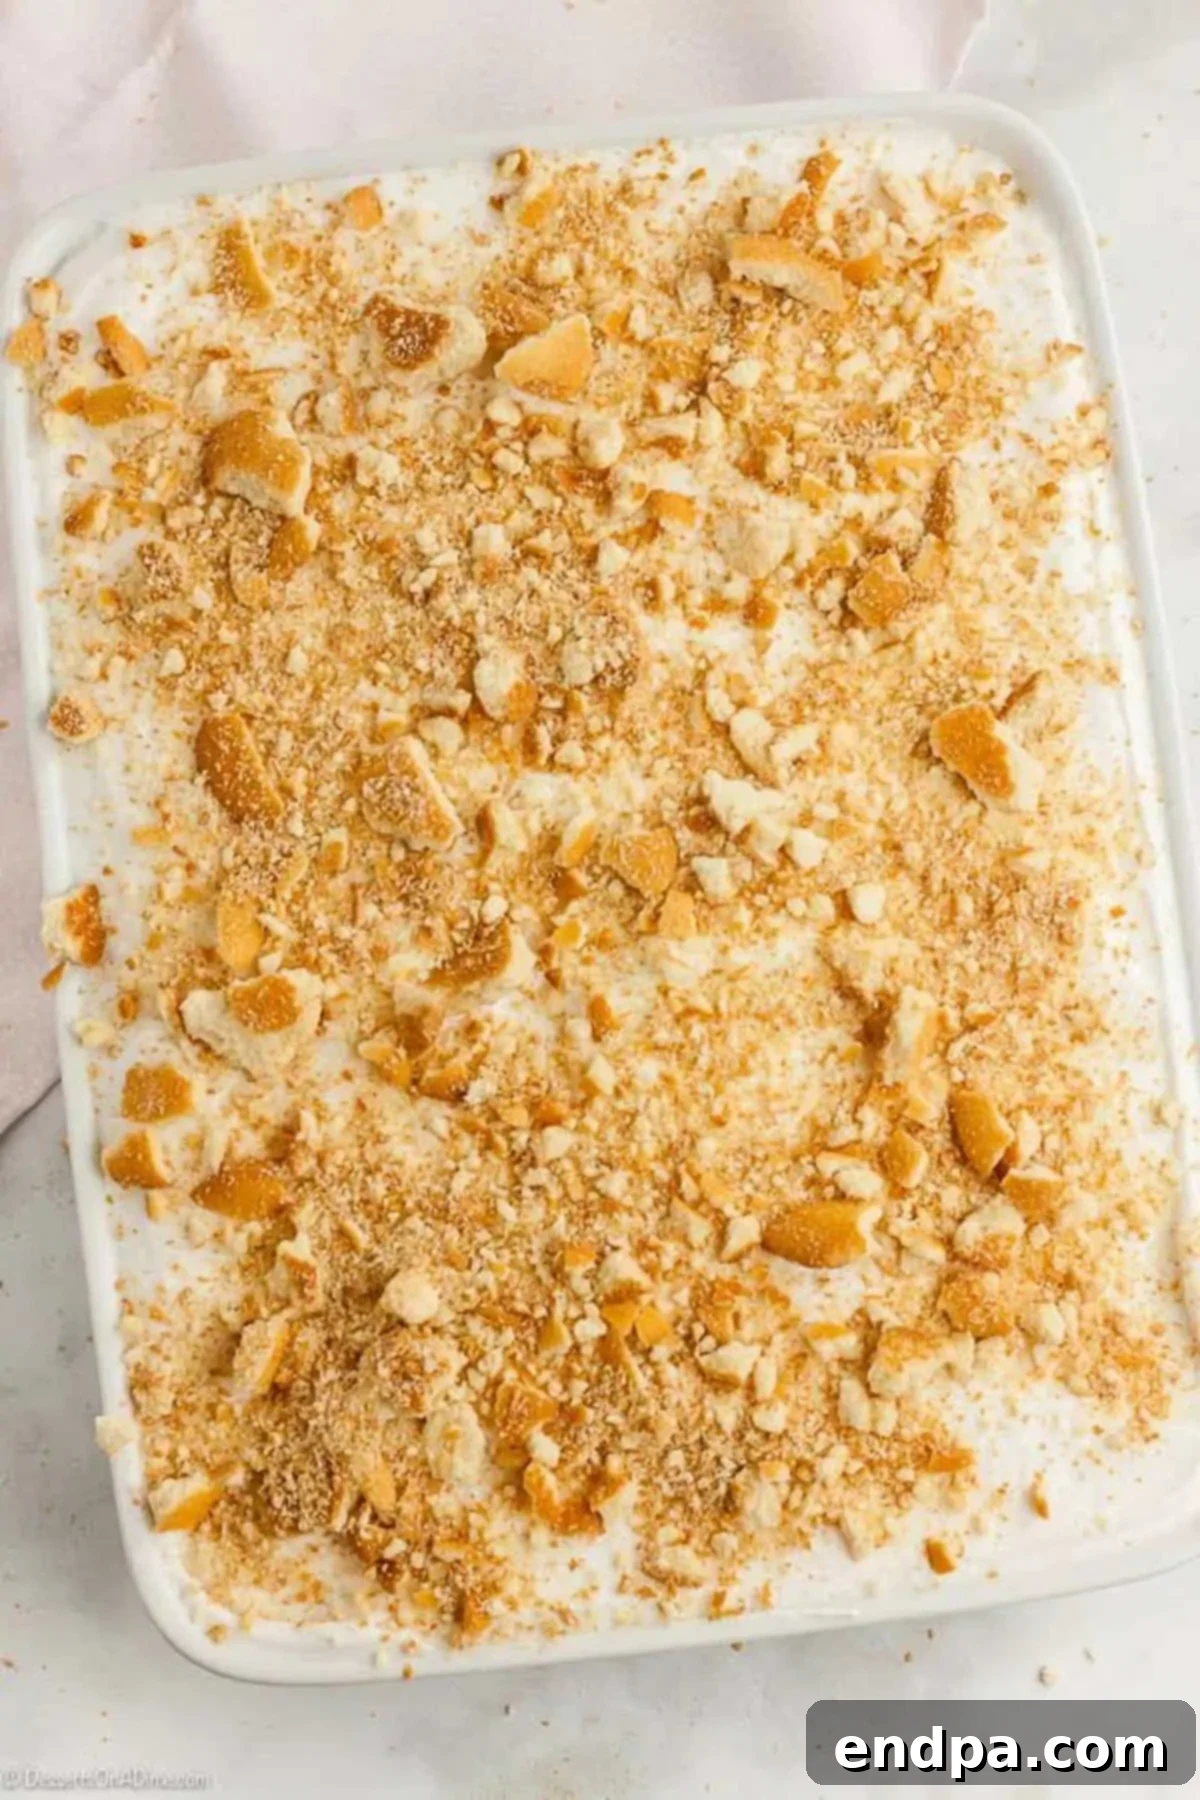
Step 6: Chill and Top. Now for the crucial chilling phase! Place the cake into the refrigerator to set and cool completely. This process will take at least 2 hours, but for the best results, chilling for 4 hours or even overnight is highly recommended. Once the cake and pudding layer are thoroughly chilled and set, spread the thawed whipped topping evenly over the pudding layer. To finish, crush the vanilla wafers (some larger pieces add a nice crunch!) and generously sprinkle them over the top of the cake just before serving. Cover the cake with plastic wrap until it’s time to indulge.
How to Serve Your Delicious Banana Pudding Poke Cake
This Banana Pudding Poke Cake is best served chilled, enhancing its refreshing qualities and firm texture. Keep the cake refrigerated right up until you’re ready to present it to your eager guests or family. The cold temperature also helps the whipped topping maintain its airy consistency.
When serving, I love to elevate the presentation and intensify that delightful banana flavor by topping each slice with a few fresh banana slices. Slice the bananas right before serving to keep them from browning. For an added touch of elegance and crunch, you can also place whole vanilla wafers on top, or even a dollop of freshly made whipped cream instead of the frozen variety.
This cake is incredibly versatile and pairs wonderfully with a cup of coffee, a glass of cold milk, or even a scoop of vanilla ice cream for an extra decadent treat. It’s the perfect finale to any meal, whether it’s a casual family dinner or a festive celebration.
Expert Tips for a Flawless Banana Pudding Poke Cake
Achieving poke cake perfection is easier than you think, especially with a few insider tips. These pointers will help ensure your Banana Pudding Poke Cake is consistently moist, flavorful, and a true showstopper:
- Timing is Key for Pudding Absorption: When adding the pudding layer, it’s essential that the cake has cooled for only a few minutes, meaning it should still be warm to the touch, but not piping hot. The residual heat from the cake acts as a catalyst, helping the pudding liquid seep more effectively and deeply into all the poked holes, resulting in a supremely moist texture. If the cake is too cold, the pudding won’t absorb as well.
- Work Quickly with the Pudding: Instant pudding thickens very rapidly once mixed with milk. To ensure even distribution and prevent it from becoming too stiff to spread, have your poked cake ready and waiting before you even start whisking the pudding. Mix the pudding thoroughly until smooth, then immediately pour and spread it over the cake, gently pushing it into the holes. This speed will guarantee optimal penetration.
- Chill Thoroughly for Best Texture: This cake is undeniably at its best when thoroughly chilled. After adding the pudding, place the cake in the refrigerator for a minimum of 2 hours, but ideally 4 hours or even overnight. This extended chilling time allows the pudding to fully set and meld with the cake, enhancing its flavor and creating that signature moist, dense yet tender texture. Serve it cold for the most refreshing experience, and try to limit its time at room temperature to no more than 10-15 minutes before serving.
- Don’t Overmix the Cake Batter: When preparing the box cake mix, follow the package instructions closely regarding mixing time. Overmixing can develop the gluten too much, leading to a tougher, drier cake. Mix just until the ingredients are combined and smooth.
- Ensure Whipped Topping is Properly Thawed: For a smooth, even topping, make sure your frozen whipped topping (like Cool Whip) is completely thawed in the refrigerator before spreading. If it’s still partially frozen, it will be lumpy and difficult to spread.
- Deep, Even Holes: Use the handle of a wooden spoon or a similar round, blunt object to poke holes that are roughly 1/2 to 1 inch apart and go almost all the way to the bottom of the cake. Avoid piercing through the bottom of the pan. Uniformly sized and spaced holes ensure even pudding distribution.
Frequently Asked Questions About Banana Pudding Poke Cake
How can I prevent fresh bananas from browning on my cake?
Fresh banana slices tend to brown quickly when exposed to air, which can detract from the cake’s appearance. The simplest solution is to slice your bananas and arrange them on top of the cake right before you plan to serve it. If you need to prepare them slightly in advance, you can lightly spray or brush the banana slices with a small amount of lemon juice, lime juice, or even lemon-lime soda. The acidity helps to slow down the oxidation process, keeping them looking fresh for a bit longer. However, for the best look, last-minute slicing is always preferred.
Can I put fresh banana slices directly into the cake layers?
While the instant banana pudding provides a ton of banana flavor, you absolutely can add fresh banana slices within the cake for a more traditional banana pudding experience! If you choose to do this, layer thinly sliced bananas over the pudding layer before you add the whipped topping. This adds extra texture and a burst of fresh banana taste. However, be mindful that these bananas will also be prone to browning. To mitigate this, I highly recommend spraying the sliced bananas with lemon juice or a similar acidic solution before placing them on the cake to prevent premature discoloration. Adding them at this stage will give the cake an even stronger banana presence.
What is the best tool for poking holes in a poke cake?
For optimal results, I find that the end of a wooden spoon handle works exceptionally well for poking holes in a poke cake. Its round shape creates a sufficiently large and deep hole, which is crucial for allowing the pudding to thoroughly drip down and saturate the cake. While skewers or toothpicks might seem like good options, they typically create holes that are too small, hindering the pudding’s ability to fully penetrate the cake. The larger holes made by a spoon handle ensure maximum moistness and flavor infusion for this banana poke cake.
Does the pudding really make the cake moist?
Yes, absolutely! The pudding layer is the magical component that imbues this cake with its signature moist and tender texture. As the warm pudding is poured over the freshly baked cake, it seeps into all the poked holes, infusing the cake with extra moisture and rich flavor. It’s essential to ensure the pudding is spread as evenly as possible and gently pushed into all the holes. Additionally, the subsequent refrigeration period allows the pudding to fully set and marry with the cake, locking in that incredible moistness. This superior moisture is truly one of my favorite aspects of any poke cake, and I’m confident you’ll adore this easy and ultra-moist pudding poke cake.
Do poke cakes need to be refrigerated?
Yes, it is crucial to refrigerate poke cakes. Since this recipe contains dairy-based pudding and whipped topping, it must be kept cold to ensure food safety and maintain its optimal texture. Refrigeration allows the pudding to set properly within the cake, creating a firm yet moist dessert. Always keep the cake in the refrigerator until you are ready to serve it. This simple step is vital for enjoying the best version of this easy-to-make dessert.
How long can I store this cake in the refrigerator?
When properly covered, this Banana Pudding Poke Cake will stay fresh and delicious in the refrigerator for up to 4-5 days. To ensure its longevity and prevent it from drying out or absorbing other food odors, make sure to cover it tightly with plastic wrap. Alternatively, baking it in a pan that comes with a fitted lid is an excellent option for convenient and effective storage.
Can I prepare this recipe in advance for an event?
This cake is an ideal make-ahead dessert, perfect for busy hosts! You can prepare the cake and pour over the pudding layer 1-2 days before serving. Cover it tightly and refrigerate. The beauty of poke cakes is that the flavors deepen and the cake becomes even more moist as the pudding continues to soak in during refrigeration. I highly recommend waiting to add the whipped topping and crushed vanilla wafers until just before serving. This ensures the whipped topping remains fresh and airy, and the wafers retain their delightful crunch, providing the best possible texture contrast for your guests.
Can I freeze this cake?
Yes, this Banana Pudding Poke Cake can be frozen quite successfully! To do so, first ensure the cake is completely chilled in the refrigerator so that the whipped topping is firm. Then, wrap the cake securely in plastic wrap, followed by a layer of aluminum foil. This double-layer protection helps prevent freezer burn. You can freeze the cake for up to 1 month. When you’re ready to enjoy it, simply defrost the cake at room temperature for several hours or overnight in the refrigerator. Once thawed, it’s ready to slice and enjoy, making it a fantastic option for meal prepping desserts or saving leftovers.
Can I use other flavors of cake and pudding with this recipe?
Absolutely! This recipe is incredibly versatile and encourages experimentation with different flavor combinations. You can easily swap out the yellow cake mix for a vanilla, chocolate, or even a spice cake mix. Similarly, instant pudding comes in a wide array of flavors like vanilla, chocolate, butterscotch, and coconut, all of which would create delicious variations. Feel free to mix and match to discover your new favorite poke cake combination. For instance, a chocolate cake with banana pudding is a classic pairing, or a vanilla cake with vanilla pudding offers a different take if you prefer less intense banana flavor. Use what you have on hand and unleash your creativity!
More Irresistible Poke Cake Recipes to Explore
If you’ve fallen in love with the moist, flavorful magic of poke cakes, there’s a whole world of delightful variations waiting for you! These recipes follow the same easy poke cake principle, delivering incredible flavor with minimal effort:
- Cinnamon Roll Poke Cake Recipe: A warm, comforting twist on a breakfast classic.
- Red Velvet Poke Cake Recipe: The beloved red velvet flavor, made extra moist with a creamy filling.
- Boston Cream Poke Cake Recipe: All the delights of a Boston cream pie in a simpler cake form.
- Margarita Poke Cake: A zesty, refreshing option perfect for summer gatherings.
- For even more inspiration, check out The Best Poke Cake Recipes for a comprehensive list of creative ideas.
Don’t Stop There! Explore More Banana-Inspired Recipes
If the delightful flavor of banana has captured your heart with this poke cake, you’ll be thrilled to discover a treasure trove of other amazing banana desserts. From classic puddings to creative cakes, these recipes celebrate the sweet, comforting taste of bananas:
- Easy Banana Cake Recipe: A simple yet satisfying cake bursting with banana flavor.
- Banana Split Cake Recipe: All the components of your favorite sundae in a convenient cake.
- Homemade Banana Pudding Recipe: The classic, creamy dessert made from scratch.
- Bananas Foster Recipe: An elegant, caramelized banana dessert perfect for special occasions.
- Dive deeper into the world of banana goodness with The Best Banana Dessert Recipes for endless sweet inspiration.
We hope you try this recipe and fall in love with this tasty dessert. Please leave a comment and star rating once you do!
Banana Pudding Poke Cake
10 mins
25 mins
2 hrs
2 hrs
35 mins
12
American
Dessert
323
Carrie Barnard
Ingredients
- 1 box yellow cake mix
- ingredients needed to make cake: eggs, oil & water
- 2 3.4 oz packages instant banana pudding
- 4 cups milk
- 1 8 oz tub frozen whipped topping (COOL WHIP) thawed
- 20 vanilla wafers crushed plus a few whole ones for garnish
Instructions
- Preheat oven to the temperature specified on your yellow cake mix box. Spray a 9×13 inch baking pan with non-stick spray. Prepare the cake mix according to package directions for a 9×13 cake. Pour the batter into the prepared pan and bake based on the directions on the box, until a toothpick inserted into the center comes out clean.
- Once the cake comes out of the oven, allow it to cool for just a couple of minutes (about 5-10 minutes, it should still be warm).
- Next, with the handle of a wooden spoon, begin poking holes all over the cake. You want the holes to be big enough and deep enough to reach almost to the bottom of the cake, allowing plenty of room for the pudding to seep in.
- In a bowl, whisk together the two packages of instant pudding mix with 4 cups of cold milk. Stir vigorously until all lumps are gone and the mixture begins to thicken, about 2-3 minutes.
- Immediately pour the prepared pudding over the warm, poked cake.
- Spread the pudding evenly over the cake layer, and using the back of the spoon, gently push the pudding down into all the holes.
- Place the cake into the refrigerator to set and cool completely. This will take at least 2 hours, but for best results, chill for 4 hours or even overnight.
- Once your cake has completely cooled and the pudding is set, spread the thawed whipped topping evenly over the pudding layer.
- Crush the vanilla wafers into varying sizes; it’s nice to have a mix of fine crumbs and larger pieces for texture.
- Generously spread the crushed wafers onto the top of the cake just before serving. Cover with plastic wrap and keep refrigerated until ready to enjoy.
Nutrition Facts
Calories
323kcal
,
Carbohydrates
64g
,
Protein
5g
,
Fat
6g
,
Saturated Fat
3g
,
Cholesterol
8mg
,
Sodium
485mg
,
Potassium
136mg
,
Fiber
1g
,
Sugar
26g
,
Vitamin A
132IU
,
Calcium
184mg
,
Iron
1mg
Pin this recipe now to save it for later!
Click to Pin Recipe on Pinterest
