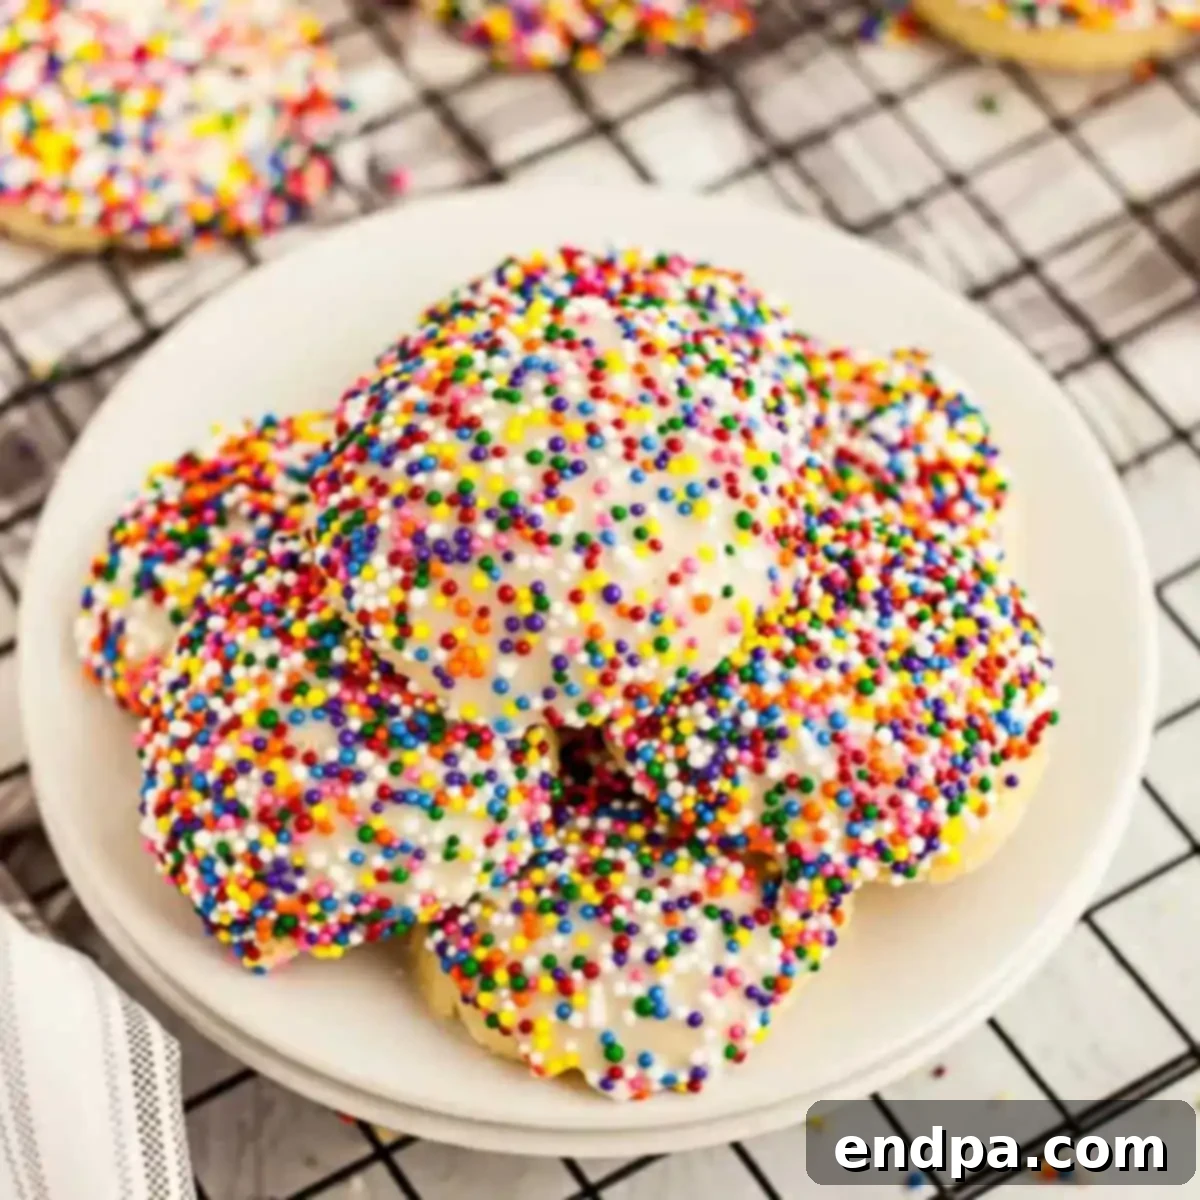
Indulge in the timeless charm of homemade **Italian Cookies**, a delightful recipe that promises a melt-in-your-mouth experience with every buttery, delicious bite. Adorned with a luscious glaze and vibrant sprinkles, these cookies are not just a dessert; they are a celebration, bringing festive cheer and decadent flavor to any occasion. Forget the bakery queues and high prices; crafting these traditional Italian treats at home is surprisingly simple and incredibly rewarding.

There’s an undeniable allure to classic Italian cookies. Their tender texture, rich flavor, and elegant presentation make them a staple at family gatherings, holidays, and special events. While local bakeries often tempt with their exquisite displays, the satisfaction of baking a batch of authentic Italian cookies from scratch is unmatched. This easy-to-follow recipe yields fantastic results, producing cookies that are every bit as delightful as those from a professional pastry shop, but with the added warmth of a homemade touch. If you enjoy baking, you might also love exploring recipes for Italian Easter Cookies during springtime or even a rich Cannoli Cake for a truly Italian dessert experience.
Table of Contents
- Why You’ll Adore This Italian Cookie Recipe
- Essential Ingredients for Perfect Italian Cookies
- For the Cookies
- For the Glaze
- Creative Variations to Elevate Your Italian Cookies
- Step-by-Step Guide to Making Italian Wedding Cookies
- Pro Tips for Baking Success
- Storage Solutions for Freshness
- Can You Freeze Italian Wedding Cookies?
- Frequently Asked Questions
- Explore More Easy Cookie Recipes
Why You’ll Adore This Italian Cookie Recipe
These Italian cookies are more than just a sweet treat; they’re an experience. Each cookie boasts an irresistibly buttery and tender texture that truly melts in your mouth, leaving a delightful and decadent aftertaste. The magic doesn’t stop there; the delicate glaze takes these cookies to an entirely new level, adding a subtle sweetness and a beautiful sheen that makes them utterly irresistible. Your family and friends will undoubtedly be clamoring for more, a testament to their exceptional flavor and perfect consistency.
What makes this recipe truly special is its remarkable versatility. It’s approachable enough for a casual weekday baking project, yet elegant enough to grace the dessert tables of special occasions like holidays, bridal showers, baby showers, or birthday parties. The simple act of decorating them with sprinkles transforms them into a festive treat, easily customizable to fit any theme or celebration. They embody the essence of comfort and joy, making them a beloved staple in any home baker’s repertoire.
Essential Ingredients for Perfect Italian Cookies
Crafting the perfect batch of Italian cookies starts with selecting high-quality ingredients. Each component plays a crucial role in achieving that coveted buttery flavor and delicate texture. Here’s a detailed look at what you’ll need and why:
For the Cookies
- Eggs: Always use large eggs at room temperature. Room temperature eggs emulsify better with butter and sugar, creating a smoother, more uniform dough and a lighter, airier cookie texture.
- Butter: Opt for unsalted, real butter. Butter is the heart of these cookies, contributing significantly to their rich flavor and tender crumb. Ensure it is softened but not melted, allowing it to cream beautifully with the sugar.
- Granulated Sugar: This provides the primary sweetness and helps in creating a tender texture. While other sugars exist, granulated sugar is essential for the classic Italian cookie base.
- Almond Extract or Vanilla Extract: The choice between almond and vanilla extract is a delightful one, allowing you to customize the flavor profile. Almond extract lends a distinct, slightly nutty aroma that is very traditional in many Italian pastries, while pure vanilla extract offers a universally loved, warm, and sweet fragrance. Feel free to use whichever you prefer or even a combination for a unique twist.
- All-Purpose Flour: The foundation of your cookie dough. Precision in measuring flour is key for the right texture. Spoon the flour into your measuring cup and level it off with a straight edge rather than scooping directly from the bag. This method prevents compacting the flour, which can lead to dry, dense cookies.
- Baking Powder: A leavening agent that helps the cookies rise slightly, contributing to their soft, pillowy texture.
- Salt: Just a pinch of salt enhances all the other flavors, balancing the sweetness and bringing out the richness of the butter.
For the Glaze
- Powdered Sugar: Also known as confectioners’ sugar, this fine sugar creates a smooth, lump-free glaze. Sifting it before mixing is highly recommended to ensure a perfectly silky consistency.
- Cream or Milk: Either heavy cream or whole milk will work beautifully. Cream will yield a richer, slightly thicker glaze, while milk provides a lighter option. Use what you have on hand, ensuring it’s slightly warmed to help the sugar dissolve smoothly.
- Almond Extract or Vanilla Extract: Just like with the cookies, a dash of extract in the glaze elevates its flavor. Use the same extract as in the cookies for a cohesive taste, or try a different one for a layered flavor.
- Colorful Sprinkles: These are essential for the festive appearance of Italian cookies. Choose any colors you love to match the occasion, adding a vibrant and playful touch.
A detailed, complete list of precise ingredient measurements can be found in the recipe card at the bottom of this page. Gather your ingredients, and let’s begin baking!
Creative Variations to Elevate Your Italian Cookies
One of the joys of baking Italian cookies is how easily they can be customized to suit different tastes and occasions. Here are some fantastic variations to inspire your creativity:
- Infuse with Diverse Flavorings: While almond and vanilla extracts are classics, don’t hesitate to experiment with other essences. For a truly authentic Italian experience, try using anise extract, which imparts a subtle licorice-like flavor that is traditional in many regional Italian cookies. Lemon zest or orange zest can add a bright, citrusy note, perfect for spring or summer gatherings. A touch of espresso powder can deepen the flavor for coffee lovers, creating a sophisticated twist. Remember, a little goes a long way with extracts, so start small and adjust to your preference.
- Add a Nutty Crunch: If you appreciate texture contrast, incorporating nuts into the dough is a wonderful idea. Add 1 to 2 cups of finely chopped nuts such as almonds, walnuts, or pistachios to the cookie dough mixture. Almonds will enhance the flavor if you’re using almond extract, while walnuts offer a robust, earthy taste. Toasting the nuts lightly before adding them can further intensify their flavor. This variation adds a delightful crunch and a deeper, more complex flavor profile.
- Seasonal and Themed Sprinkles: Sprinkles are your canvas! Tailor your cookie decorations to match any holiday or event throughout the year. For a festive Christmas cookie platter, use vibrant red and green sprinkles. Pastel hues are perfect for Spring or Easter celebrations, evoking freshness and new beginnings. Think pink or blue sprinkles for baby showers and gender reveal parties, or mix and match school colors for graduation events. The possibilities are truly endless, making these cookies a blast to personalize for any special moment.
- Alternative Toppings and Glazes: Beyond traditional sprinkles, consider other toppings. A dusting of powdered sugar, a drizzle of melted chocolate (dark, milk, or white), or even finely chopped candied fruit can add a unique touch. For the glaze, you could experiment with a citrus glaze by adding a tablespoon of lemon or orange juice for a tangy kick, or a chocolate glaze made with melted chocolate and cream for a richer finish.
Step-by-Step Guide to Making Italian Wedding Cookies
Creating these delightful Italian cookies is a straightforward process, but paying attention to each step ensures a perfect outcome. Follow these instructions carefully for a batch of beautifully baked and glazed treats.
- Step 1: Prepare Your Oven and Baking Sheets. Begin by preheating your oven to 350°F (175°C). While the oven heats up, line your baking sheets with parchment paper or silicone baking mats. This crucial step prevents sticking and ensures even baking, making cleanup a breeze.
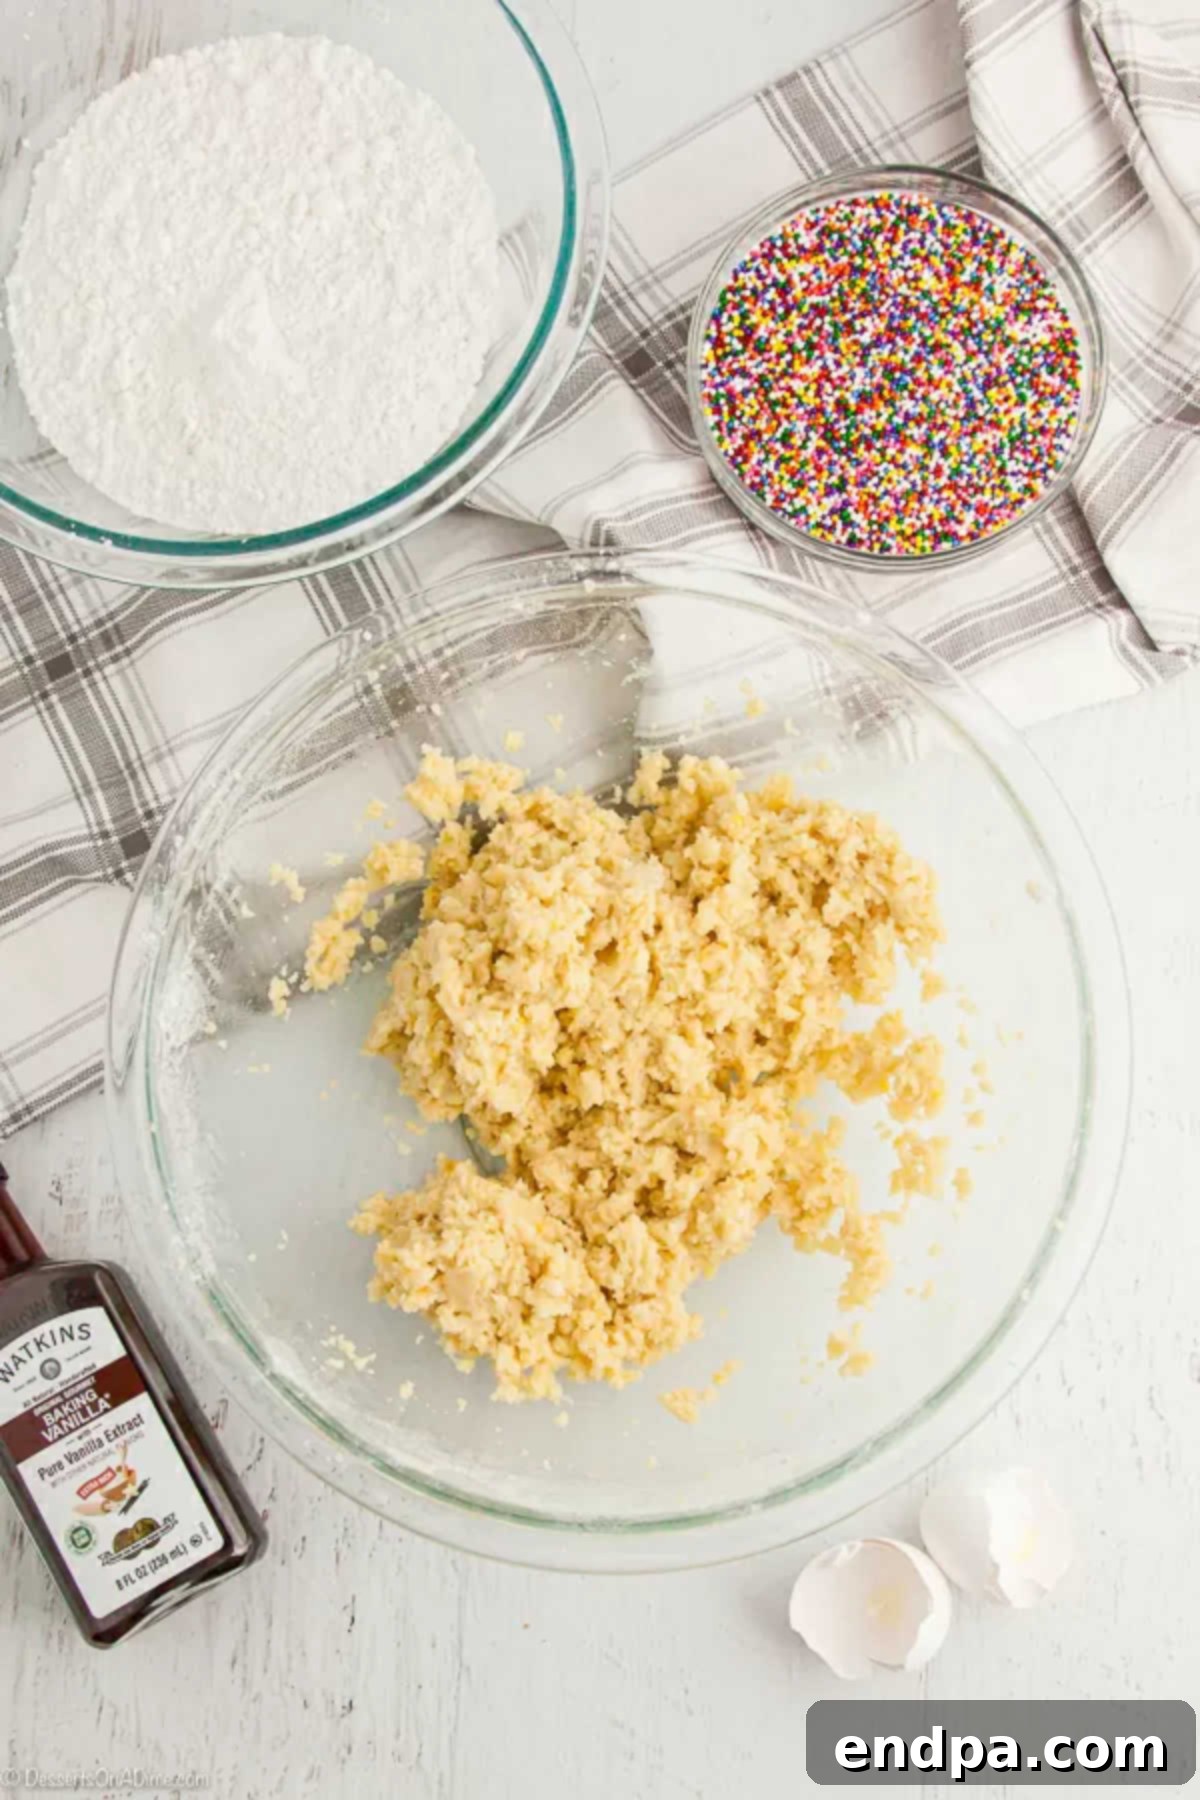
Step 2: Combine the Wet and Dry Ingredients. In a large mixing bowl, using an electric mixer, cream together the softened butter and granulated sugar until light and fluffy. This can take 2-3 minutes. Next, beat in the room temperature eggs one at a time, ensuring each is fully incorporated before adding the next. Stir in your chosen extract (almond or vanilla). In a separate bowl, whisk together the all-purpose flour, baking powder, and salt. Gradually add the dry ingredients to the wet ingredients, mixing on low speed until just combined. Be careful not to overmix; overmixing can develop the gluten in the flour, leading to tough cookies.
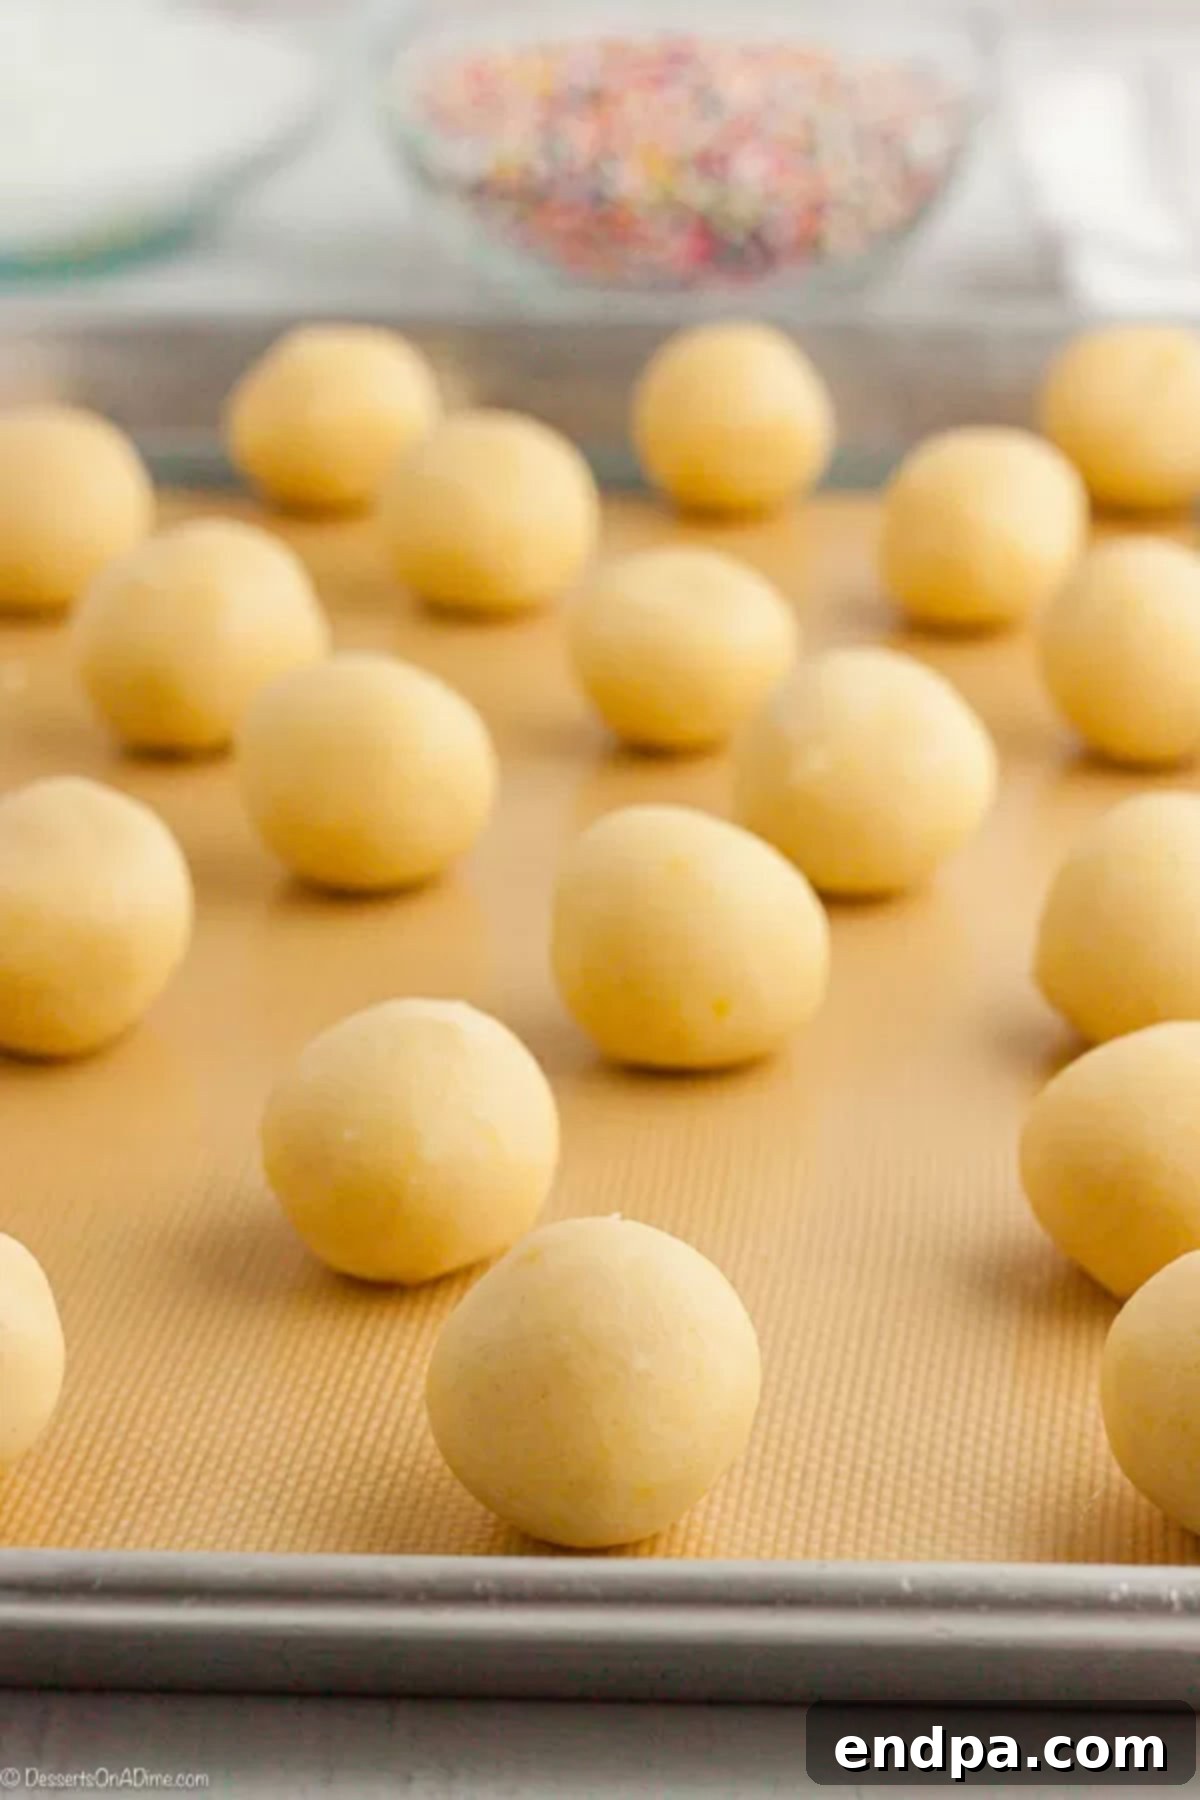
Step 3: Shape and Chill the Cookie Dough. Once your dough is ready, roll it by tablespoonfuls into small, uniform balls. A cookie scoop can be incredibly helpful for achieving consistent sizes. Place these dough balls onto your prepared baking sheets, leaving a little space between each. Now for a crucial step: chilling. Place the baking sheets with the dough balls in the refrigerator for at least one hour. This chilling period prevents the cookies from spreading too much in the oven, ensuring they maintain their shape and develop a tender texture. If you’re pressed for time, you can speed up the process by freezing them for 15 to 20 minutes instead. After chilling, bake the cookies for approximately 9 minutes, or until the tops are set and the bottoms are lightly golden. The tops should still remain relatively pale. Remove from the oven and allow them to cool completely on a wire rack before glazing.
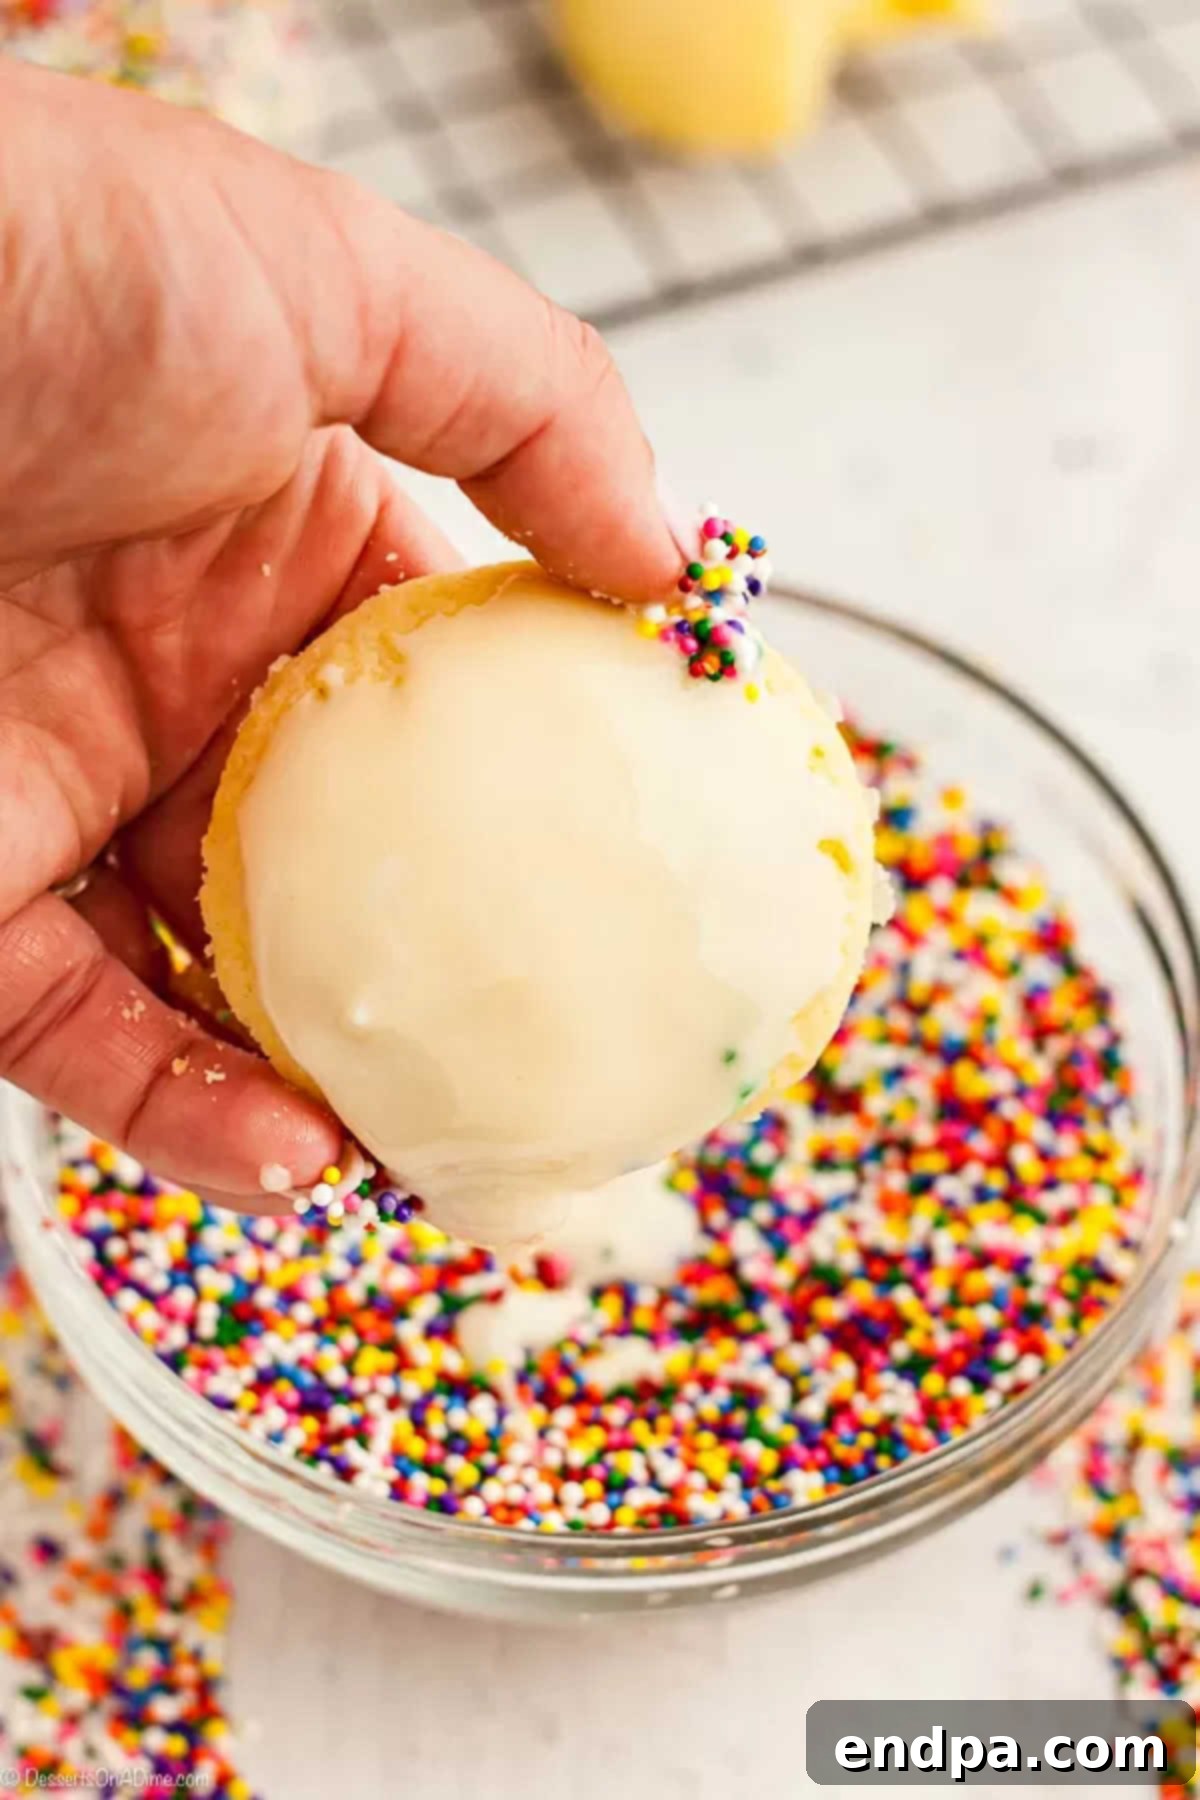
Step 4: Prepare the Decadent Glaze. While the cookies are cooling, prepare your delicious glaze. In a small bowl, combine the sifted powdered sugar with your chosen extract (almond or vanilla). Gradually whisk in the warmed cream or milk, a tablespoon at a time, until you achieve a smooth, slightly thick but pourable consistency. The goal is a glaze that is thin enough to coat the cookies evenly but thick enough to adhere without dripping excessively. Adjust with more powdered sugar for a thicker glaze or more liquid for a thinner one.
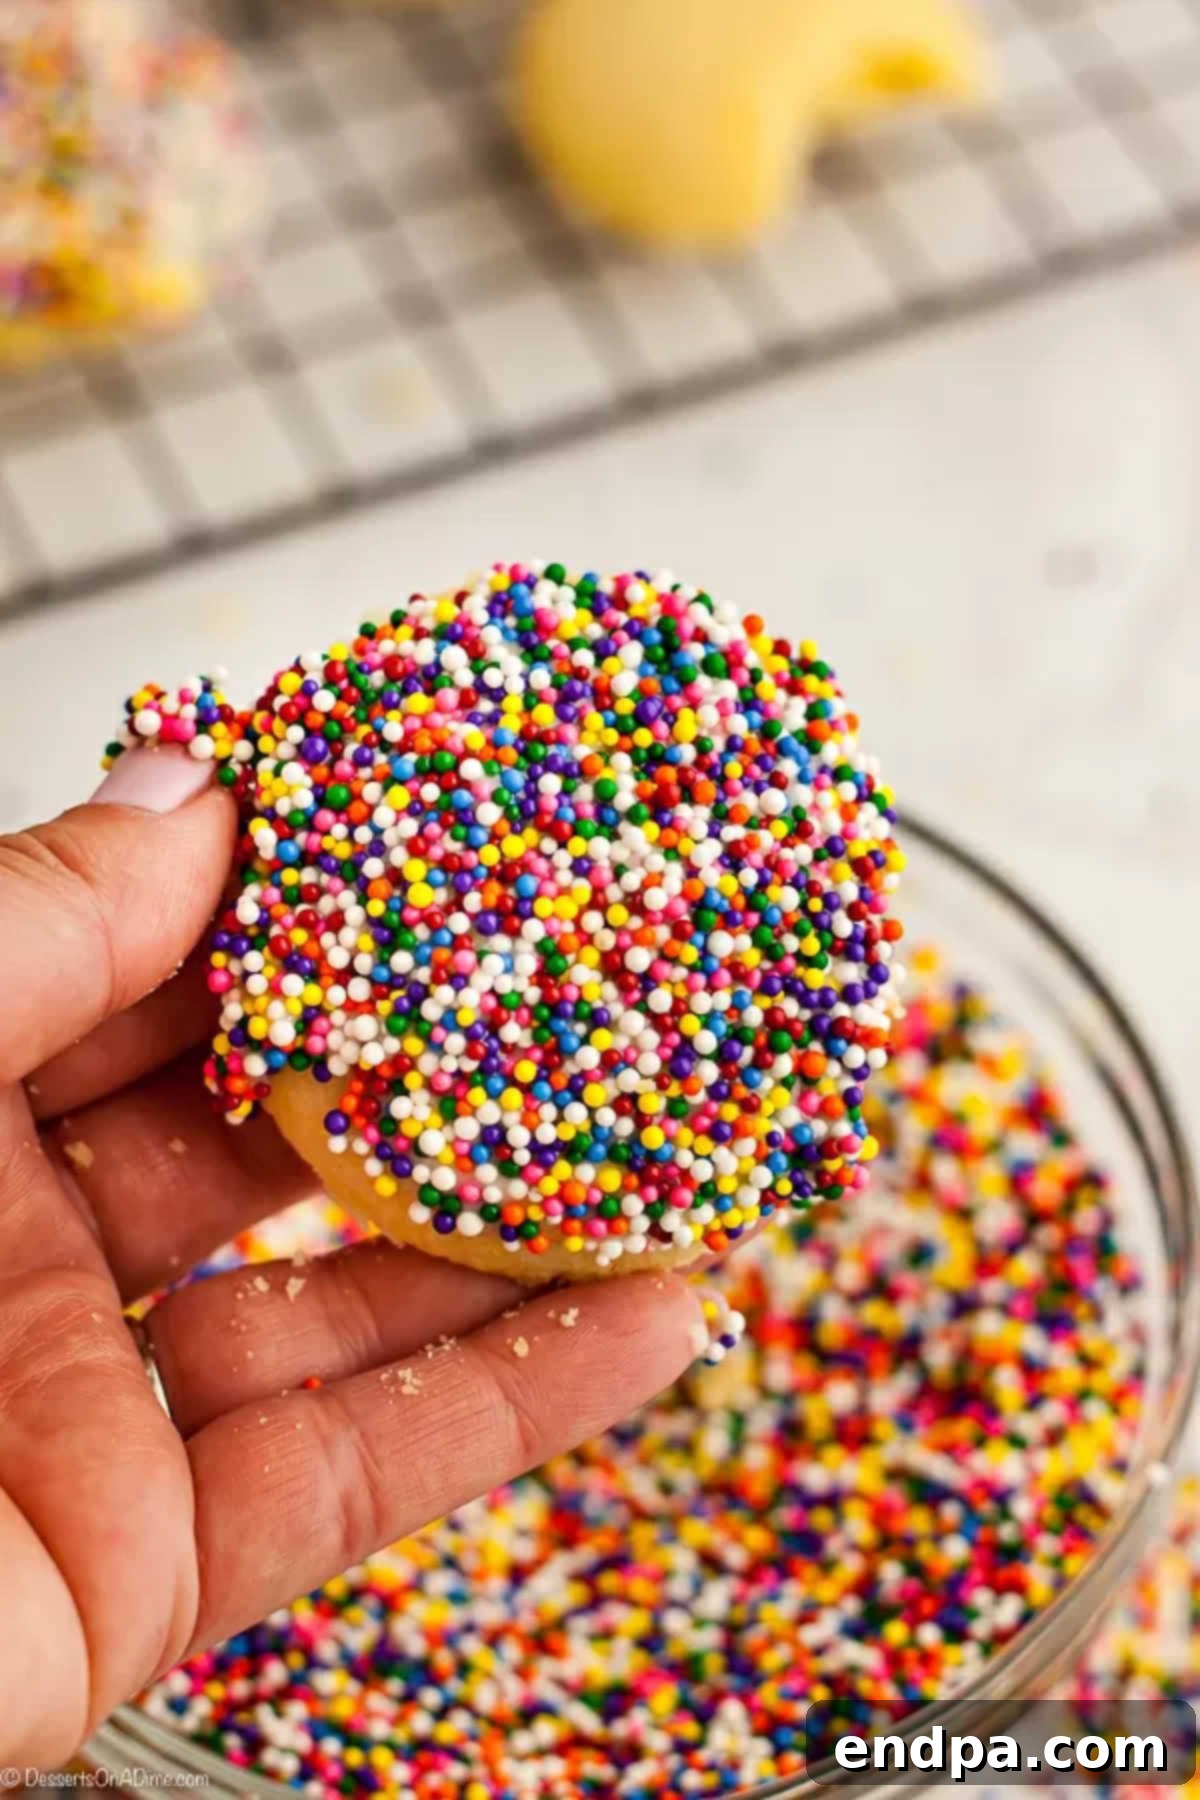
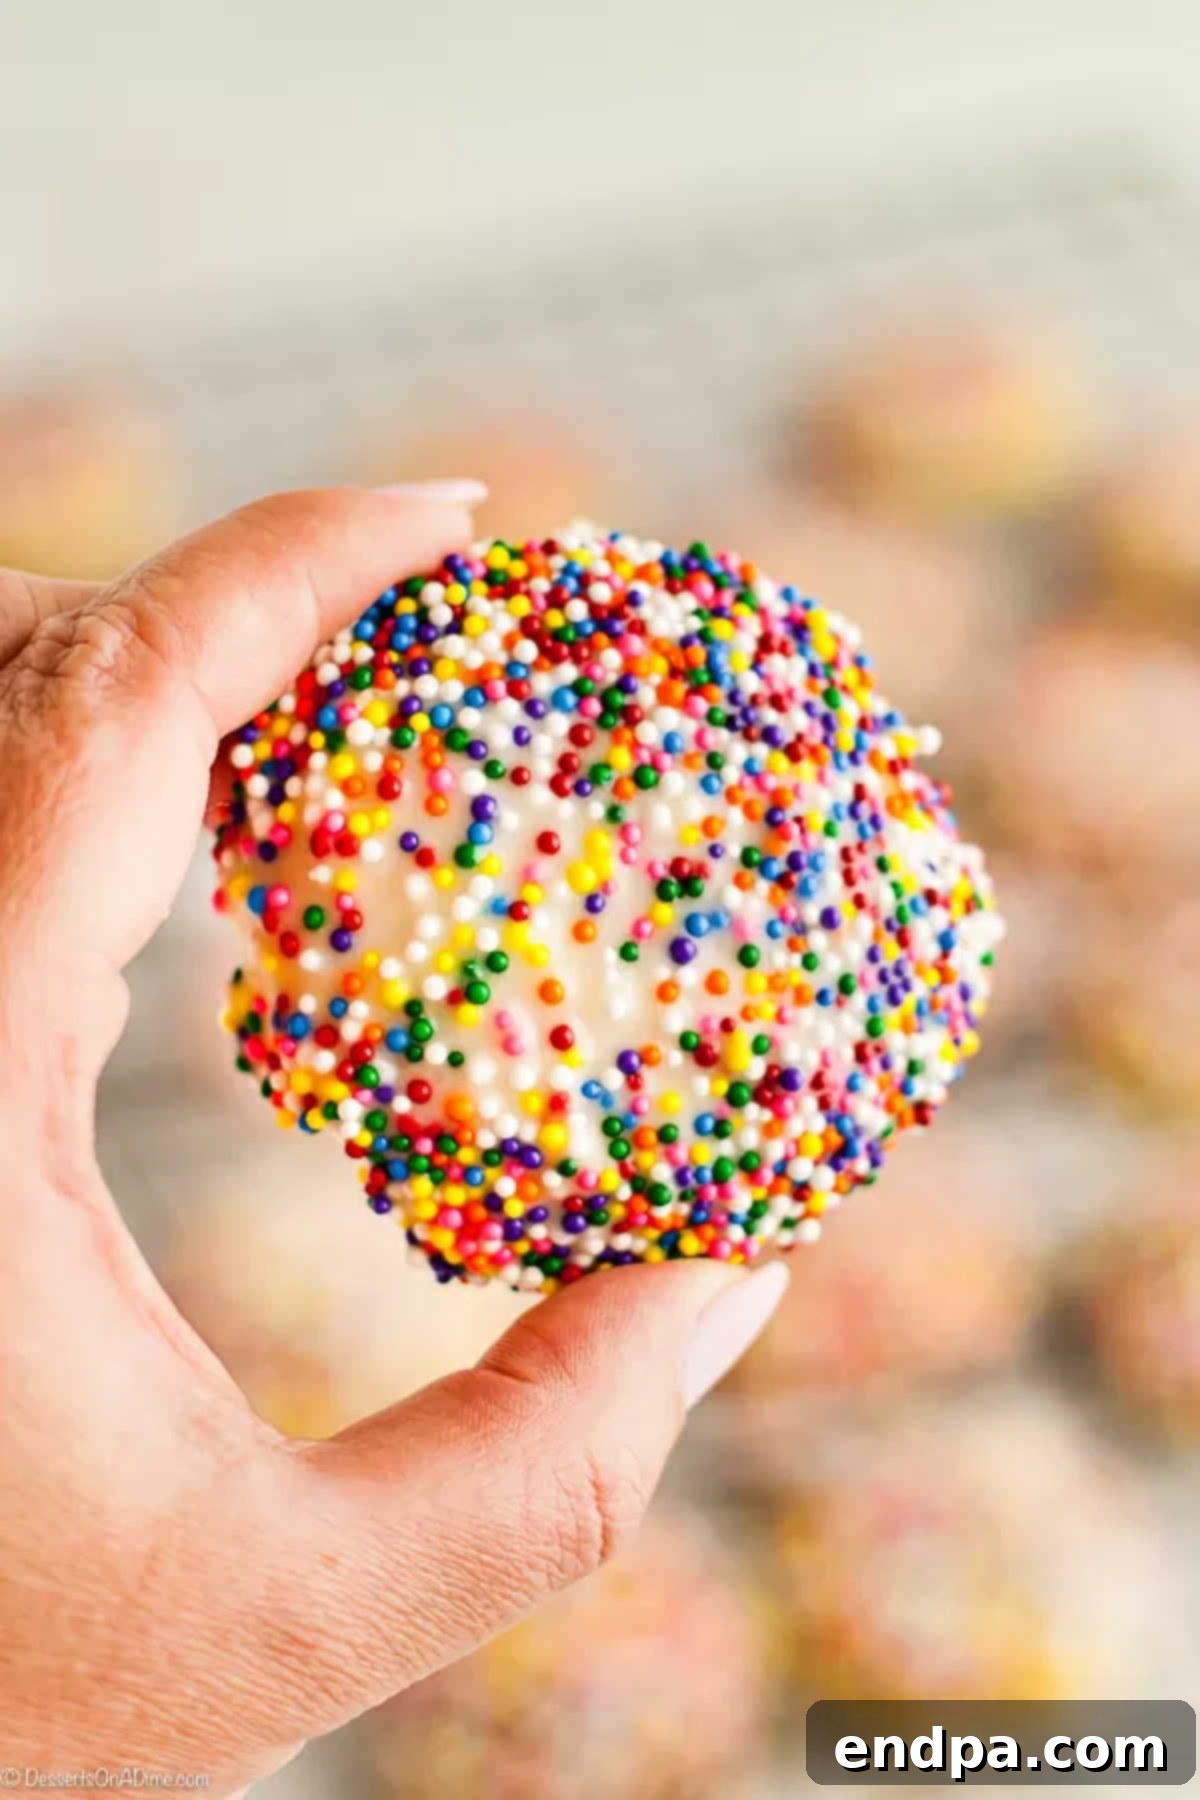
Step 5: Glaze and Decorate Your Cookies. This is where the magic happens! Once the cookies are completely cool, dip the tops of each cookie into the prepared glaze. Allow any excess glaze to drip off briefly. Immediately after dipping, top with your colorful sprinkles. Gently roll the glazed top in a shallow dish of sprinkles or sprinkle them over the cookie. The glaze will begin to set quickly, so it’s important to add the sprinkles right away to ensure they stick. Place the decorated cookies back on the wire rack to allow the glaze to fully set before serving. This step truly makes the cookies extra special and visually appealing!
Pro Tips for Baking Success
Achieving bakery-quality Italian cookies at home is within reach with these expert tips:
- Embrace the Cookie Scoop: For perfectly uniform cookies, a cookie scoop is your best friend. It not only speeds up the process of forming the dough balls but also ensures that all your cookies are the same size. This guarantees even baking and a beautiful, consistent presentation. Consider having a few different sizes for various occasions – a smaller scoop for delicate treats, and a larger one for a more substantial cookie.
- Line Your Baking Sheets: Always line your baking pans with parchment paper or silicone baking liners. This simple step prevents the cookies from sticking, promotes even heat distribution, and makes cleanup incredibly easy. Avoid greasing the pans directly, as this can sometimes cause the cookies to spread more than desired.
- Master Glaze Consistency: The perfect glaze should be smooth, pourable, and coat the back of a spoon without being too thick or too thin. If your glaze is too thick, add a few more drops of warm milk or cream, stirring until smooth. If it’s too thin, whisk in a tablespoon or two of additional sifted powdered sugar. Small adjustments make a big difference in achieving that ideal, elegant finish.
- The Importance of Chilling: Do not skip the chilling step! Chilling the dough balls for at least an hour (or 15-20 minutes in the freezer) is crucial. Cold dough spreads less in the oven, resulting in thicker, chewier cookies that hold their shape better. This also allows the butter to firm up, preventing excessive melting and ensuring a delicate crumb.
- Don’t Overmix the Dough: When combining the wet and dry ingredients, mix just until the flour streaks disappear. Overmixing develops gluten, which can lead to tough, dry cookies rather than the tender, soft texture you desire for Italian cookies.
- Measure Flour Accurately: As mentioned, spoon and level your flour. Even a small amount of extra flour can drastically change the cookie’s texture, making it dry and crumbly.
- Bake Until Just Set: Keep a close eye on your cookies in the oven. Italian cookies should be lightly browned only on the bottom, with the tops remaining pale and just set. Overbaking will dry them out and compromise their delicate texture.
- Cool Completely Before Glazing: It’s essential that your cookies are fully cooled before you apply the glaze. Applying glaze to warm cookies will cause it to melt and run off, creating a messy rather than elegant finish.
Storage Solutions for Freshness
Proper storage is key to keeping your Italian cookies fresh and delicious for as long as possible. Fortunately, these cookies are quite resilient:
Once the glaze has fully set, transfer the cookies to an airtight container. They do not require refrigeration and can be safely stored at room temperature. Placing a piece of parchment paper between layers of cookies can help prevent them from sticking together, especially if they are heavily glazed or decorated.
Stored in an airtight container at room temperature, these delightful cookies will maintain their optimal freshness, flavor, and texture for about 3 days. While they might still be edible after this period, their quality will begin to diminish.
Can You Freeze Italian Wedding Cookies?
Absolutely! Italian wedding cookies are excellent candidates for freezing, making them perfect for preparing ahead of time for special occasions, holidays, or simply to have a stash of homemade treats on hand. Freezing them can help you manage your baking schedule efficiently.
For best results when freezing, I recommend a two-step approach: First, arrange the baked and cooled cookies (preferably before glazing and decorating) in a single layer on a cookie sheet. Place the cookie sheet in the freezer for about 1-2 hours, or until the cookies are firm. This step, known as flash-freezing, prevents the cookies from sticking to each other once they are stored together.
Once flash-frozen, transfer the cookies to a freezer-safe airtight container or a heavy-duty freezer bag. Squeeze out as much air as possible from the bag to prevent freezer burn. They will keep beautifully in the freezer for approximately 3 months without compromising flavor or texture. This extended shelf life makes them incredibly convenient for advanced meal prep or holiday baking.
When you’re ready to enjoy them, simply take out the desired number of cookies and let them thaw at room temperature. If you chose to freeze them undecorated, make sure they are completely thawed before applying the glaze and sprinkles. This way, you can enjoy freshly decorated cookies anytime, with minimal effort.
Frequently Asked Questions
- What makes Italian cookies unique? Italian cookies are often distinguished by their tender, sometimes crumbly texture, and their signature glazes, often flavored with almond or anise, and adorned with colorful sprinkles. They tend to be less overtly sweet than American cookies, focusing more on rich butter flavor and delicate crumb.
- Can I use a different type of flour? While all-purpose flour is recommended for its balanced gluten content, you could experiment with a pastry flour for an even more tender cookie. However, avoid bread flour, as its high protein content will make the cookies tough. Always adjust liquid as needed.
- Why are my cookies spreading too much? Excessive spreading is usually due to butter being too soft, dough not being chilled enough, or an oven that isn’t preheated to the correct temperature. Ensure your butter is softened but still cool to the touch, always chill your dough, and use an oven thermometer to verify oven temperature.
- How can I make the glaze more vibrant? For a more vibrant glaze, you can add a tiny drop of food coloring. This is especially fun when matching sprinkles to a specific party theme or holiday.
- Can I prepare the dough in advance? Yes! The cookie dough can be made ahead of time and stored in an airtight container in the refrigerator for up to 2-3 days. Just make sure to bring it back to a slightly softer consistency before rolling and shaping, or let the shaped balls chill as per the recipe.
Explore More Easy Cookie Recipes
If you’ve enjoyed making these delightful Italian cookies, you’ll love exploring other simple and delicious cookie recipes. Expand your baking repertoire with these crowd-pleasing options:
- Classic Butter Cookies Recipe: Simple, elegant, and perfectly buttery – a true staple.
- Funfetti Cake Mix Cookies Recipe: Quick, colorful, and incredibly easy thanks to a cake mix shortcut.
- Delicate Russian Tea Cakes: Melt-in-your-mouth snowball cookies, perfect for holidays.
- Cake Mix Chocolate Chip Cookies: A clever twist on a favorite, using cake mix for convenience.
- Rich Red Velvet Cookies Recipe: Decadent and vibrant, a beautiful cookie for any occasion.
- Light Lemon Cool Whip Cookies: Zesty, soft, and refreshingly light, ideal for a spring treat.
We encourage you to try this fantastic Italian cookie recipe. You’ll be amazed at how effortless and incredibly delicious these cookies are to make. Once you’ve baked your batch, please leave a comment below and share your star recipe rating – we love hearing about your culinary successes!
Italian Cookies Recipe
30
9
39
24
Italian
Dessert
126
Carrie Barnard
Ingredients
For the Cookies:
- 2 large eggs (room temperature)
- 6 Tbsp softened unsalted butter
- 1/2 cup granulated sugar
- 1 tsp almond extract or vanilla extract
- 2 cups all-purpose flour (spooned and leveled)
- 2 tsp baking powder
- 1/4 teaspoon salt
For the Glaze:
- 2 cups powdered sugar (sifted)
- 1 tsp almond extract or vanilla extract
- 3-4 Tbsp warm cream or milk
- Colorful sprinkles, for decoration
Instructions
- 1. Prepare the Dough: In a large mixing bowl, cream together the softened butter and granulated sugar until light and fluffy. Beat in the room temperature eggs one at a time, then stir in your chosen extract. In a separate bowl, whisk together the flour, baking powder, and salt. Gradually add the dry ingredients to the wet, mixing on low speed until just combined. Be careful not to overmix.
- 2. Shape and Chill: Roll the dough by tablespoonfuls into uniform balls. Place the dough balls onto baking sheets lined with parchment paper. Chill the dough for at least one hour in the refrigerator, or freeze for 15-20 minutes for a quicker chill. This step is crucial for maintaining the cookie’s shape.
- 3. Bake the Cookies: Preheat oven to 350°F (175°C). Bake the chilled cookies for about 9 minutes, or until the tops are set and the bottoms are lightly browned. The tops should remain pale. Remove cookies to wire racks and allow them to cool completely before glazing.
- 4. Make the Glaze: In a small bowl, combine the sifted powdered sugar with your chosen extract. Gradually whisk in enough warm cream or milk (3-4 Tbsp) until the glaze is smooth and has a thin, creamy consistency that coats a spoon.
- 5. Glaze and Decorate: Once the cookies are completely cool, dip the tops of each cookie into the prepared glaze. Allow any excess to drip off. Immediately after dipping, top with colorful sprinkles. Place the decorated cookies back on the wire rack to allow the glaze to set fully before serving.
Nutrition Facts
Carbohydrates 22g,
Protein 2g,
Fat 3g,
Saturated Fat 2g,
Cholesterol 21mg,
Sodium 56mg,
Potassium 52mg,
Fiber 1g,
Sugar 14g,
Vitamin A 110IU,
Calcium 21mg,
Iron 1mg
Pin This Now to Remember It Later
Pin Recipe
