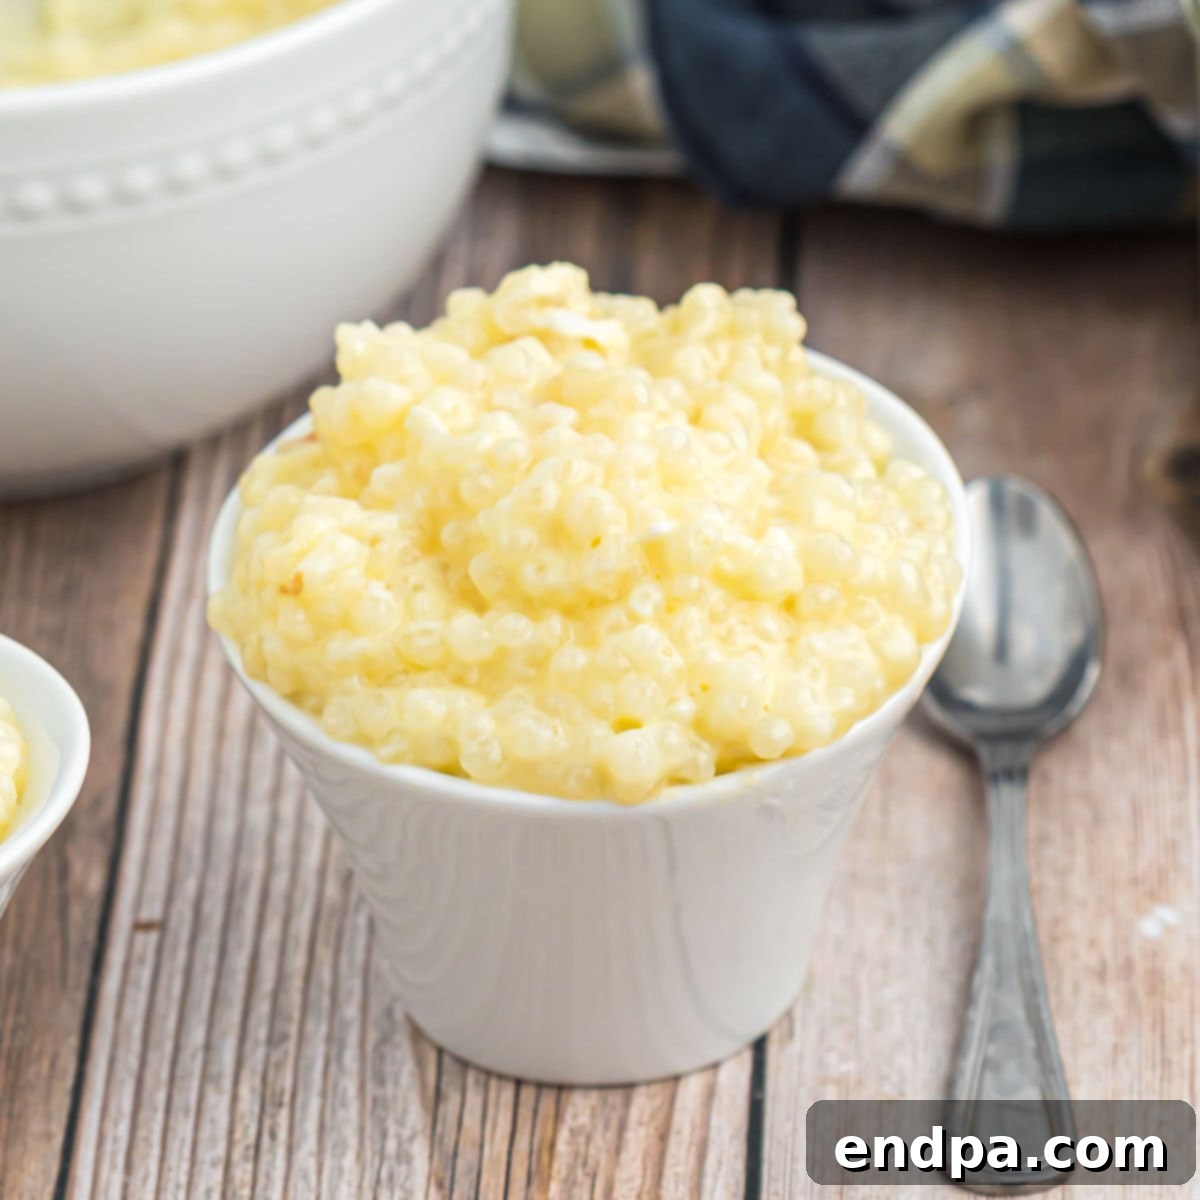
Indulge in the timeless charm of homemade Tapioca Pudding—a classic dessert that effortlessly combines creamy texture, comforting warmth, and a delicate sweetness. Crafted with simple, wholesome ingredients, this perfectly smooth and rich pudding brings a wave of nostalgia with every spoonful. Forget store-bought versions; our recipe promises a truly authentic and incredibly delicious experience you’ll want to recreate again and again.
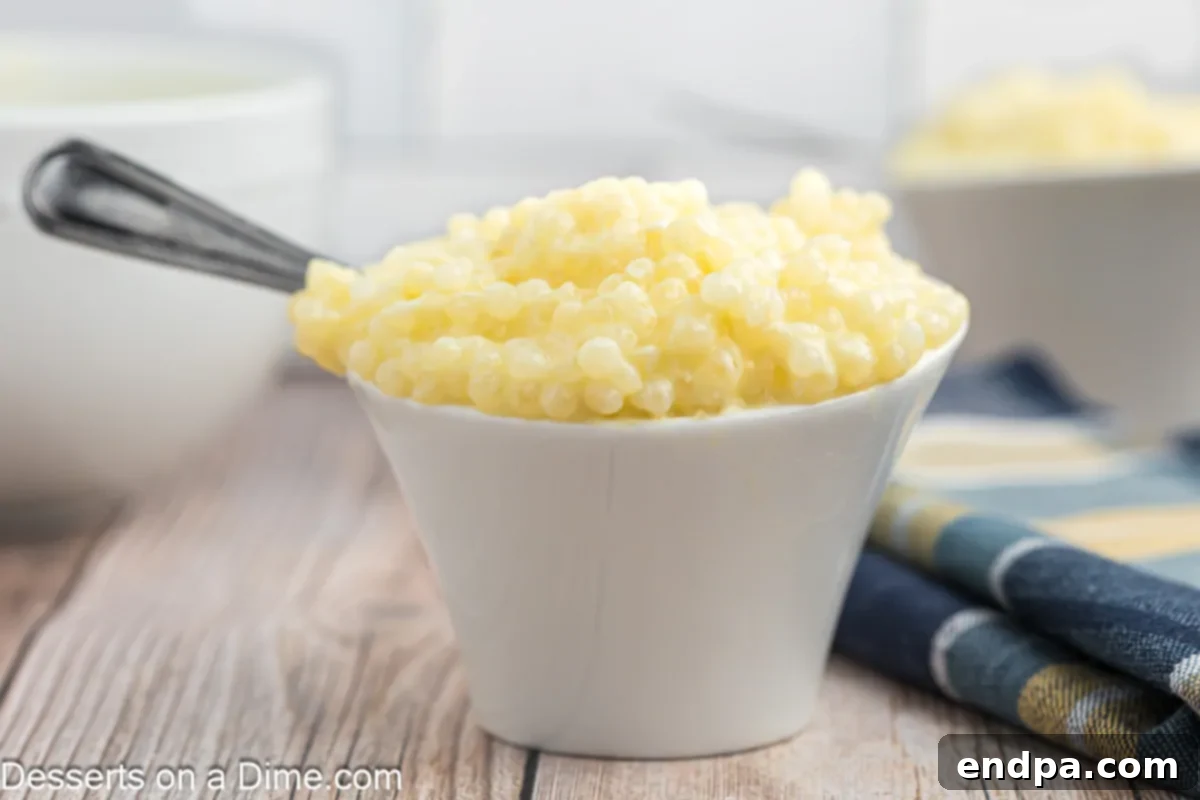
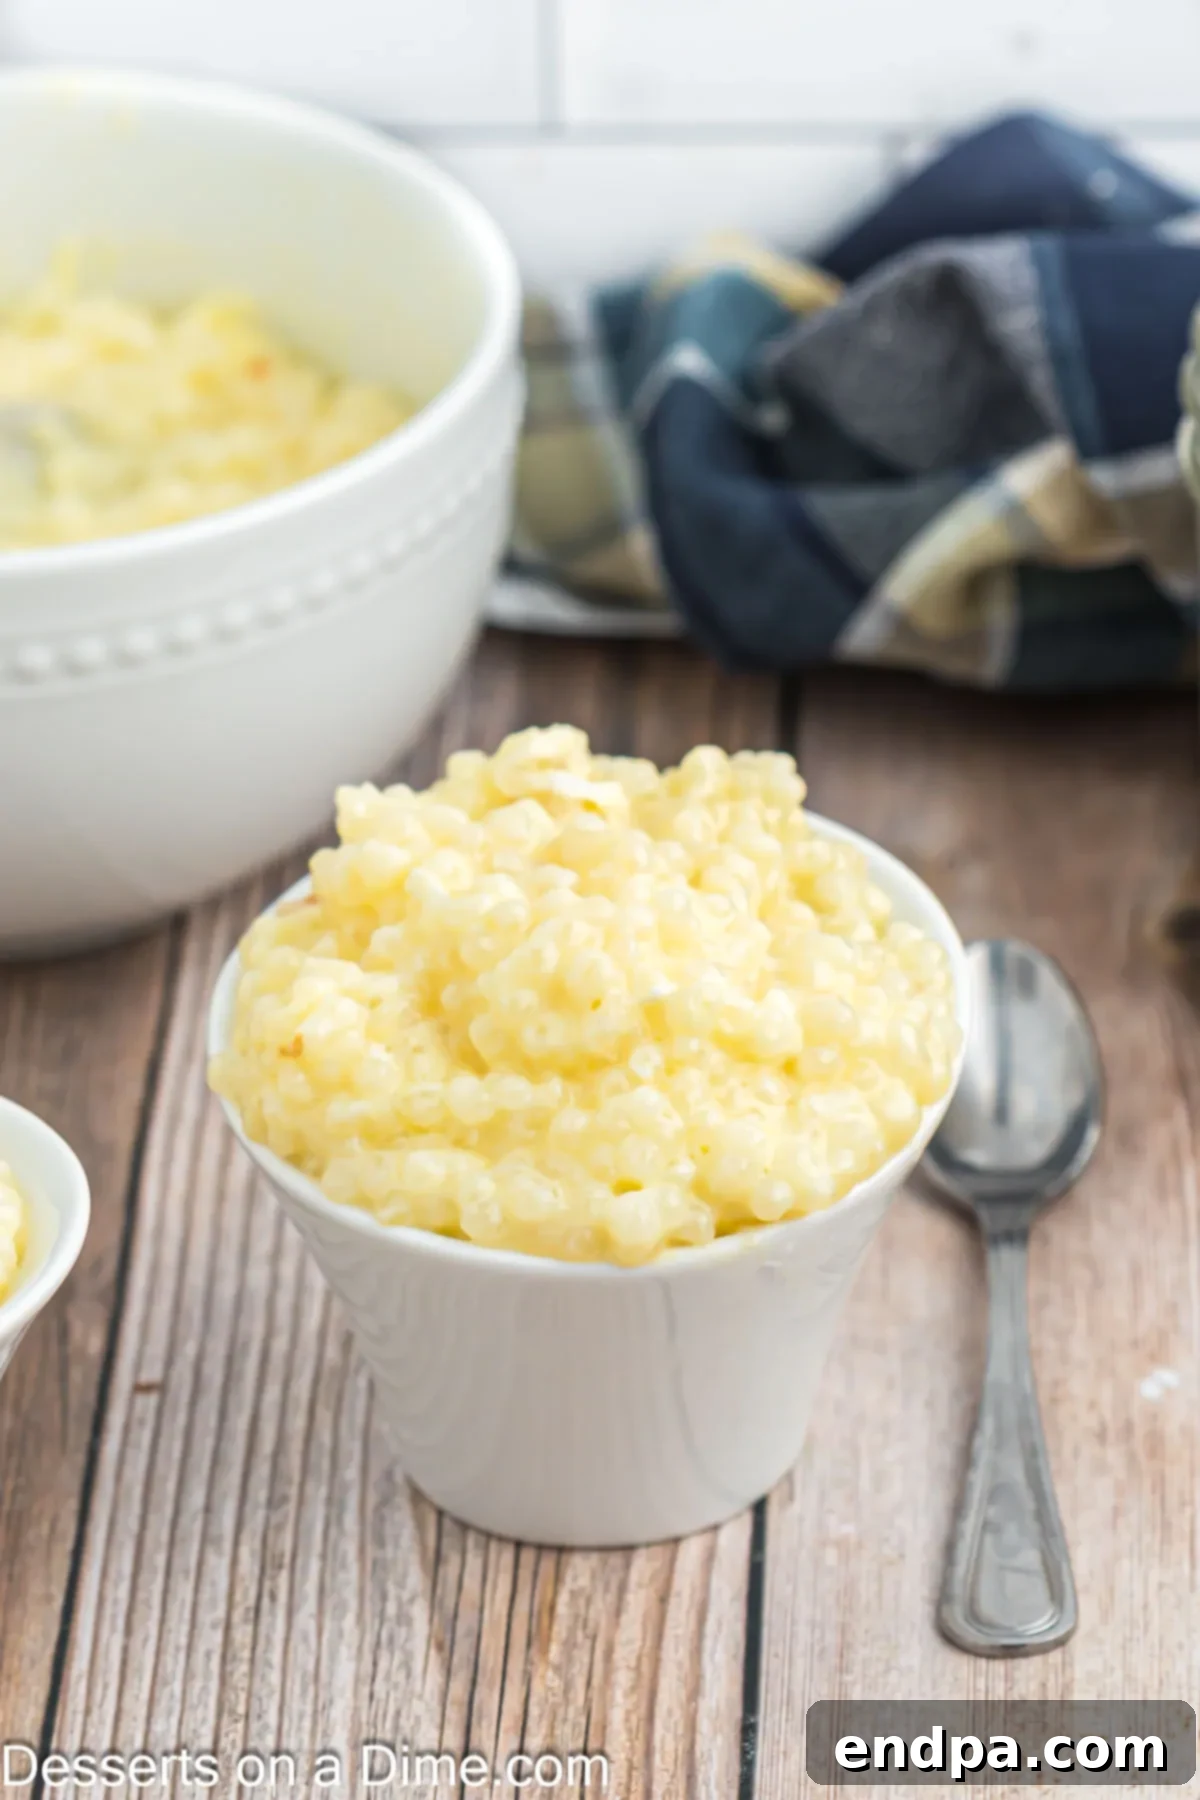
Tapioca pudding stands as a testament to the beauty of simplicity in dessert making. Its distinctive chewy tapioca pearls, enveloped in a luscious, rich milk base, and sweetened to perfection, create a uniquely comforting treat. Whether you prefer it gently warm on a cool evening or perfectly chilled on a hot day, this versatile pudding is a delightful addition to any meal or occasion. It’s a dessert that transcends generations, loved by children and adults alike for its unique mouthfeel and comforting flavor profile.
Making tapioca pudding from scratch is a rewarding experience that elevates it far beyond any pre-packaged alternative. The depth of flavor, the customizability, and the sheer satisfaction of creating such a beloved dessert in your own kitchen are unparalleled. Our homemade recipe captures that authentic, “just like mom used to make” taste that evokes cherished memories. Once you experience the superior taste and texture of homemade, you’ll understand why it’s truly the best way to go.
If you enjoy crafting your own pudding recipes, then this traditional tapioca pudding is a must-try. Beyond tapioca, our family also adores other homemade pudding variations, such as Creamy Cheesecake Pudding, seasonal Pumpkin Pudding, and the rich Peanut Butter Pudding. Each offers a unique spin on this comforting dessert category, but tapioca holds a special place for its distinct textural appeal.
What You’ll Find in This Guide: Homemade Tapioca Pudding
- What is Tapioca Pudding?
- Why Choose Homemade Tapioca Pudding?
- Key Ingredients for Tapioca Pudding
- Delicious Tapioca Pudding Variations
- Step-by-Step: How to Make Tapioca Pudding
- Expert Tips for Perfect Tapioca Pudding
- Serving Suggestions
- Storage Best Practices
- Common Questions About Tapioca Pudding (FAQ)
- More Easy Pudding Recipes to Explore
- Classic Tapioca Pudding Recipe Card
What is Tapioca Pudding?
At its heart, tapioca pudding is a beloved dessert characterized by its unique, slightly chewy pearls suspended in a sweet, creamy custard. The star ingredient, tapioca, is a starch extracted from the cassava root, a tuberous plant native to South America. After extraction, the starch is processed into various forms, with small tapioca pearls being the most common for puddings.
These tiny, translucent spheres are what give tapioca pudding its signature texture – a delightful contrast to the smooth, rich base. When cooked, the pearls swell and become soft and gelatinous, offering a subtle chewiness that distinguishes tapioca pudding from other creamy desserts like rice pudding or custard. This unique mouthfeel, combined with its gentle sweetness and milky goodness, makes it a truly distinctive and comforting treat enjoyed by many across different cultures.
Historically, tapioca was introduced to many parts of the world through trade and colonization, particularly in Asia, Africa, and the Caribbean, where cassava is a staple crop. Its use in desserts like pudding became popular due to its thickening properties and pleasant texture, making it an economical and delicious ingredient for sweet treats.
Why Choose Homemade Tapioca Pudding?
While convenience often leads us to store-bought options, there are compelling reasons to choose the homemade route for tapioca pudding. The difference in taste, texture, and overall quality is truly remarkable, making the effort worthwhile.
- Unmatched Freshness and Flavor: Homemade tapioca pudding boasts a depth of flavor that commercial versions simply can’t replicate. You control the quality of ingredients, ensuring fresh milk, real vanilla, and perfectly plump tapioca pearls for a superior taste experience.
- Perfect Texture Control: Achieve your desired consistency – whether you prefer a thicker, more spoonable pudding or a slightly looser, creamier one. You can adjust cooking times and milk ratios to get that ideal balance of smooth custard and chewy pearls.
- No Artificial Additives: Store-bought puddings often contain artificial flavors, preservatives, and excessive sugars. By making it yourself, you avoid these unwanted additives, serving a healthier and more natural dessert to your family.
- Customization Options: Homemade opens up a world of possibilities for personalization. Easily incorporate your favorite spices, fruits, or extracts, or experiment with dairy-free alternatives. The variations section below offers numerous ideas to inspire your culinary creativity.
- Nostalgic Comfort: For many, tapioca pudding is a cherished childhood memory. Recreating this classic at home brings back those comforting feelings and allows you to pass down a beloved culinary tradition to new generations.
- Economical Choice: Making pudding from scratch is often more cost-effective than repeatedly buying pre-made versions, especially when you consider the quality you’re getting.
Key Ingredients for Your Tapioca Pudding
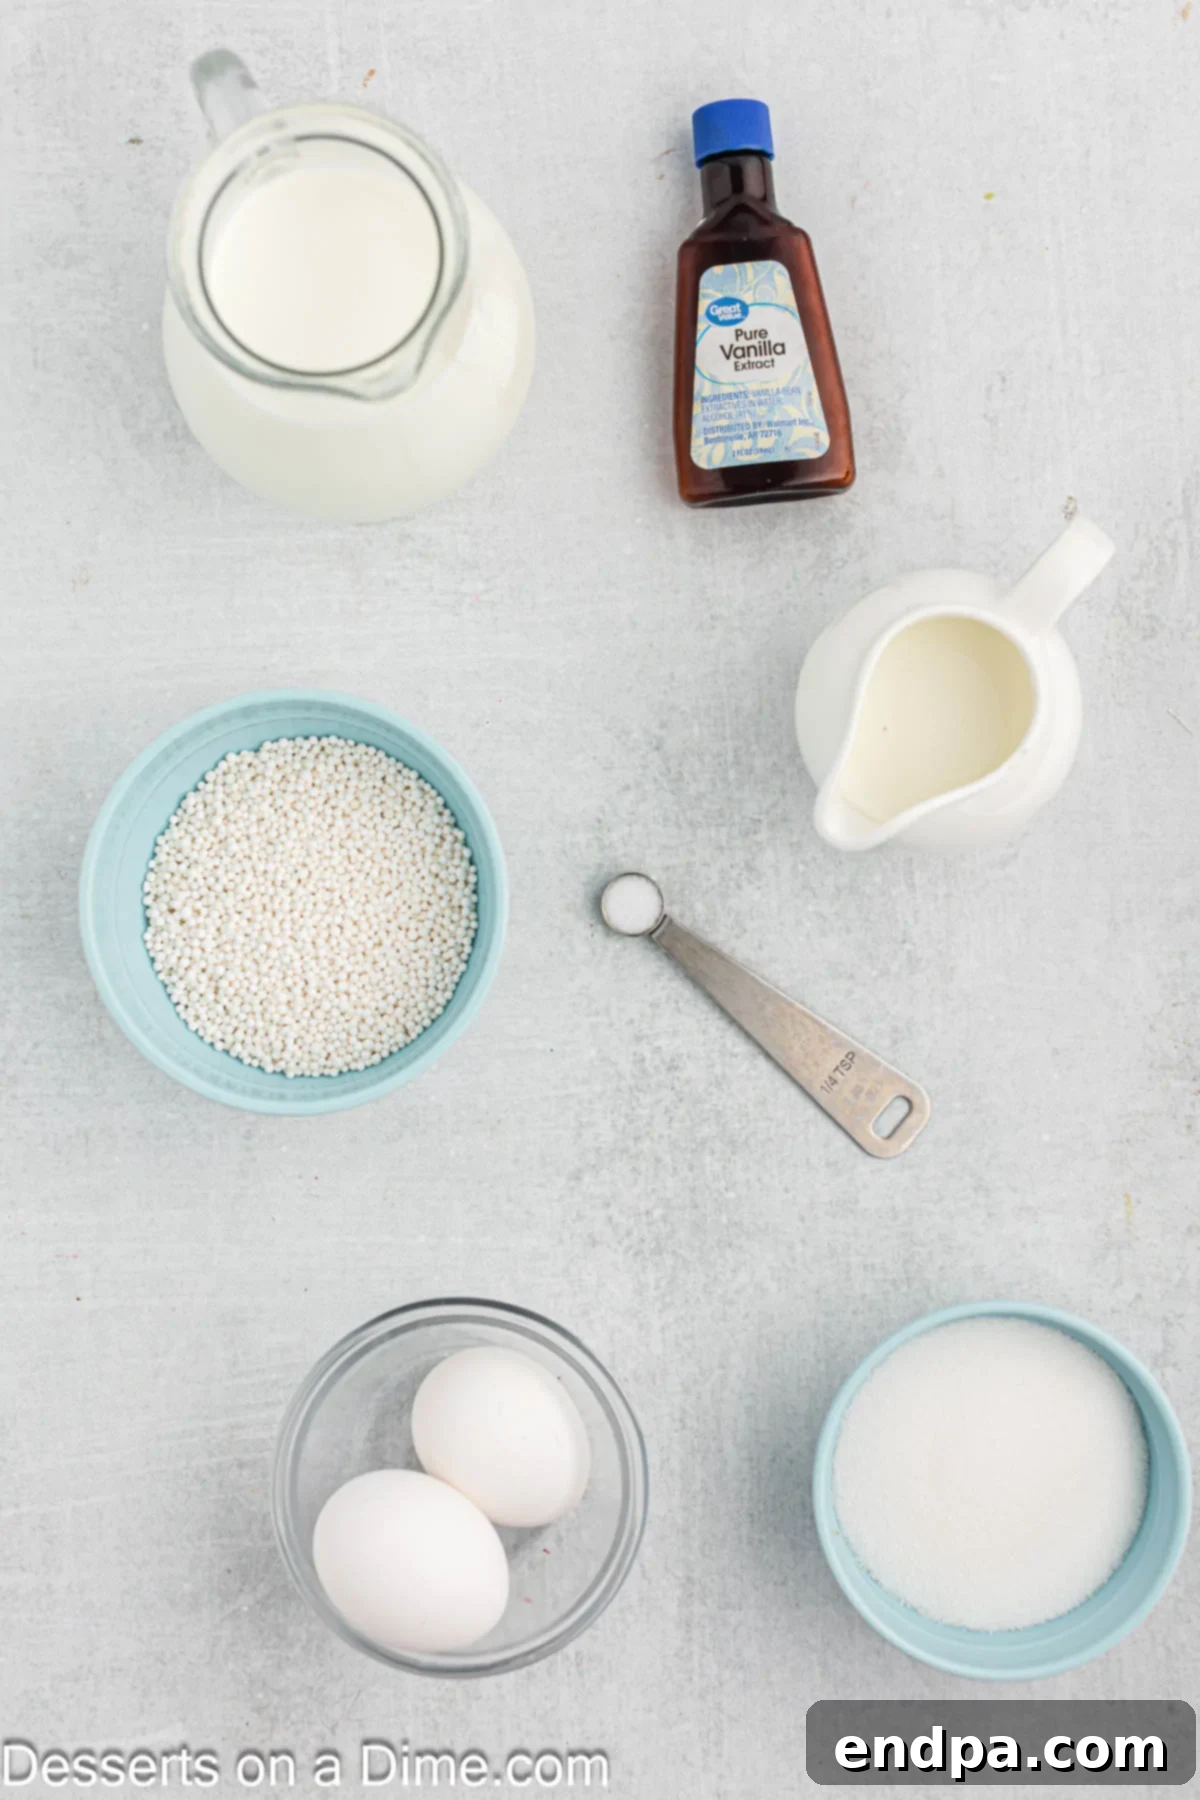
Crafting the perfect tapioca pudding requires just a handful of straightforward ingredients, each playing a crucial role in achieving that signature creamy texture and delightful flavor:
- Small Tapioca Pearls (not instant tapioca): These are non-negotiable for authentic tapioca pudding. They are key to the distinctive chewy and gelatinous texture that makes this pudding so unique. Instant tapioca will yield a different, often less satisfying, result.
- Whole Milk: The foundation of our creamy pudding. Whole milk provides the essential richness and lusciousness for a truly satisfying base. Its higher fat content contributes significantly to the pudding’s velvety consistency.
- Half and Half: To elevate the pudding’s luxurious feel even further, half and half is added. This ingredient enhances the smoothness and adds an extra layer of body and creaminess, making each bite utterly decadent.
- Large Eggs (beaten): Eggs are vital for thickening the pudding and lending it a silky, custard-like finish. They provide structure and richness, ensuring the pudding sets beautifully without being overly dense. Beating them first ensures smooth incorporation.
- Granulated Sugar: Our primary sweetener, granulated sugar, perfectly balances the richness of the dairy and highlights the subtle flavor of the tapioca. You can adjust the amount slightly to suit your preference for sweetness.
- Vanilla Extract: A classic flavor enhancer, vanilla extract infuses the pudding with warmth and a beautiful aroma. It ties all the ingredients together, creating a well-rounded and inviting taste. For best results, use pure vanilla extract.
- Pinch of Salt: Often overlooked, a small amount of salt enhances all the other flavors, bringing out the sweetness and richness of the pudding without making it taste salty.
You can find the precise measurements for each ingredient, along with detailed instructions, in the comprehensive recipe card located at the bottom of this post.
Delightful Tapioca Pudding Variations
One of the joys of homemade tapioca pudding is its adaptability. While the classic recipe is divine, don’t hesitate to experiment with these variations to suit your taste or occasion:
- Dairy-Free Delight: For those with dietary restrictions or seeking a different flavor profile, swap out the whole milk and half and half for full-fat coconut milk or coconut cream. Almond milk can also be used, though it might result in a slightly thinner consistency. The coconut versions offer a tropical twist.
- Rich Chocolate Tapioca: Transform your pudding into a cocoa dream. Stir in 2-3 tablespoons of unsweetened cocoa powder (or melted chocolate for extra richness) while the pudding is still warm. Adjust sugar if needed, as cocoa can be bitter.
- Fruity Additions: Introduce texture and natural sweetness with dried fruits. Raisins, dried cranberries, chopped dried apricots, or even finely diced dates can be stirred in during the last few minutes of cooking or after chilling. For fresh fruit, add it just before serving to maintain its texture.
- Exciting Toppings: Elevate presentation and flavor with creative garnishes. A sprinkle of ground cinnamon, a dusting of nutmeg, toasted coconut flakes, a dollop of whipped cream, or fresh berries add both visual appeal and complementary tastes.
- Warm Spiced Version: Infuse your pudding with cozy, aromatic spices. A pinch of ground nutmeg, cardamom, or even a tiny dash of allspice can add a comforting layer of flavor, perfect for cooler months.
- Indulgent Caramel Swirl: For a decadent treat, drizzle warm caramel sauce over individual servings of the pudding just before enjoying. A sprinkle of sea salt with the caramel can provide a wonderful sweet and savory contrast.
- Citrus Zest Burst: Add a bright, refreshing note by stirring in a teaspoon of fresh orange or lemon zest once the pudding is removed from the heat.
Step-by-Step: How To Make Creamy Tapioca Pudding
Making homemade tapioca pudding is a straightforward process, but it requires patience and attention to detail, especially when it comes to tempering the eggs. Follow these steps for a consistently perfect batch:
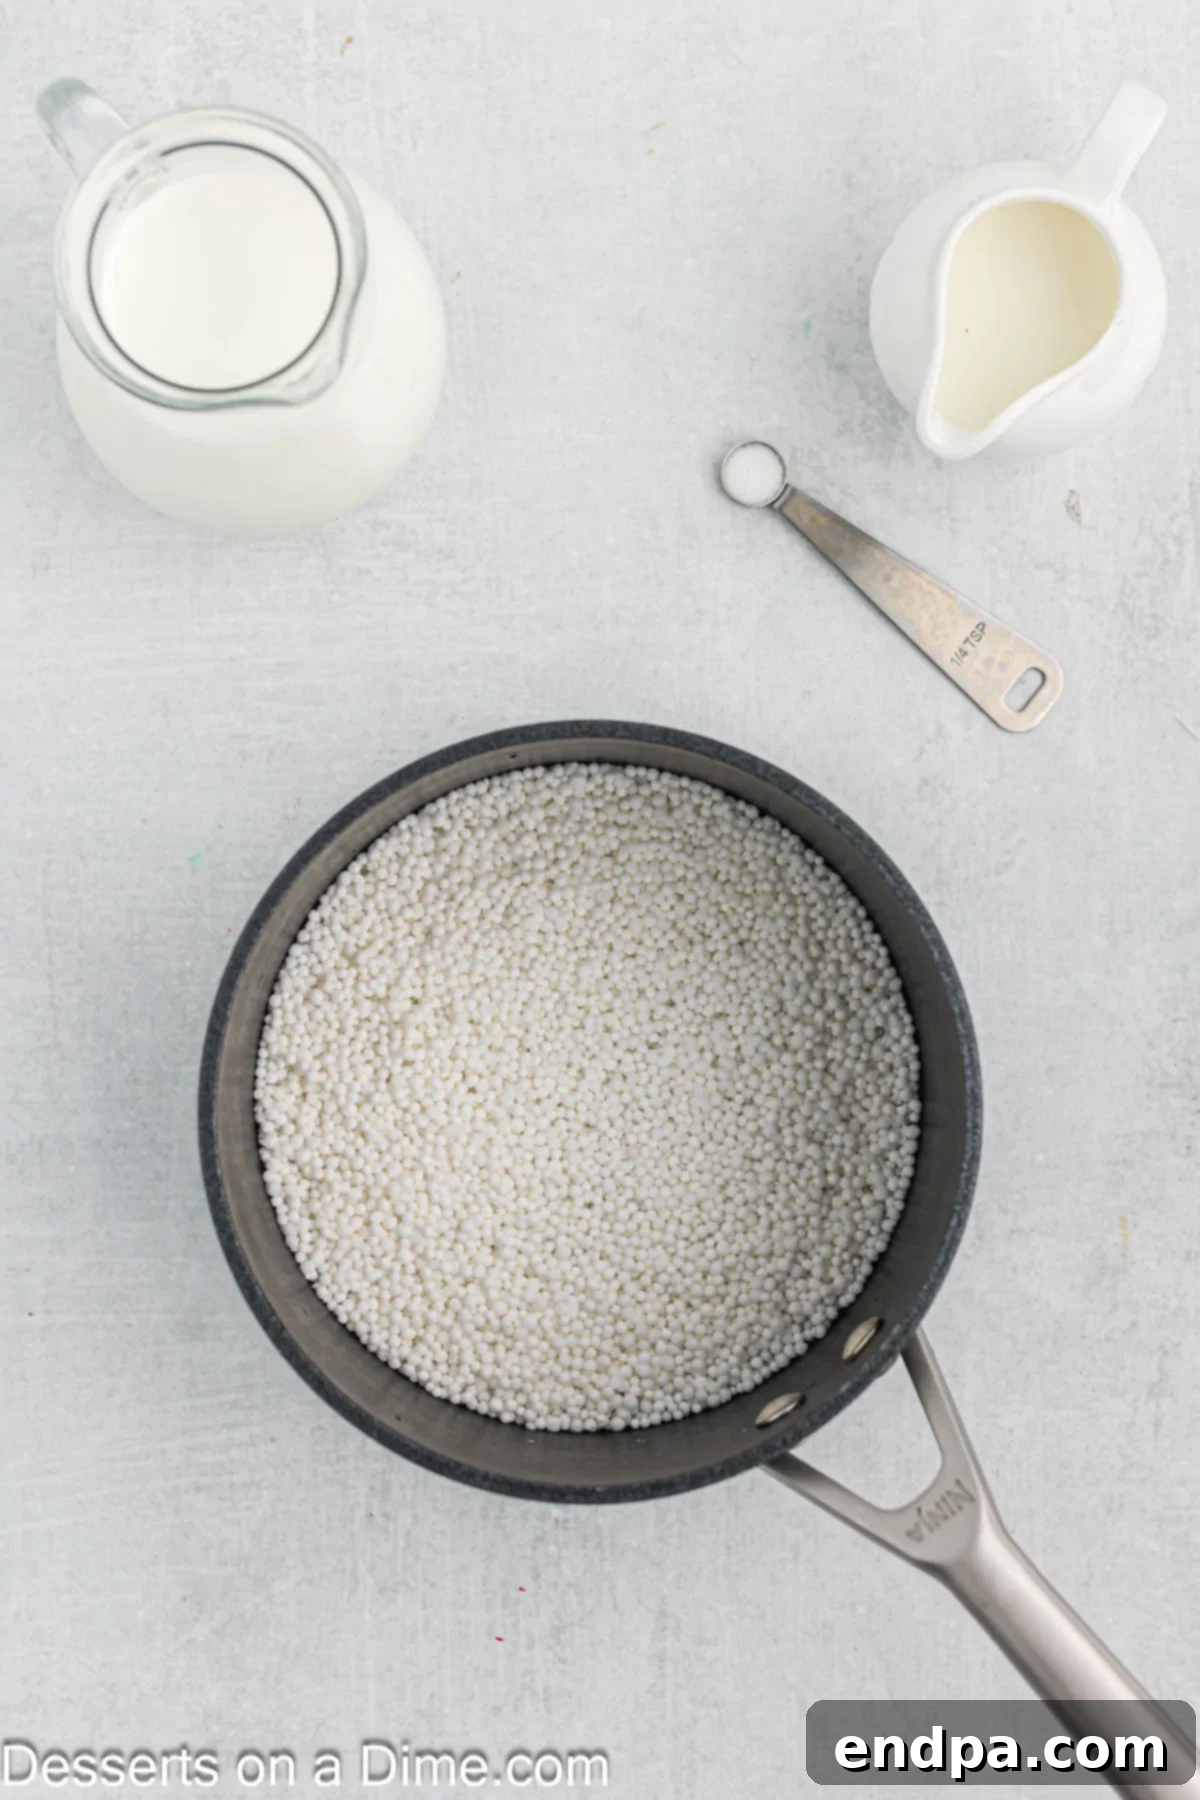
Step 1: Soak the Tapioca Pearls. Begin by placing the small tapioca pearls in a medium-sized saucepan. Pour 1 cup of cold water over them, ensuring they are fully submerged. Allow the pearls to soak for a minimum of 20 minutes, or up to 45 minutes, until they have absorbed most of the water and appear plump and soft to the touch. This crucial step ensures the pearls cook evenly and achieve their characteristic chewiness.
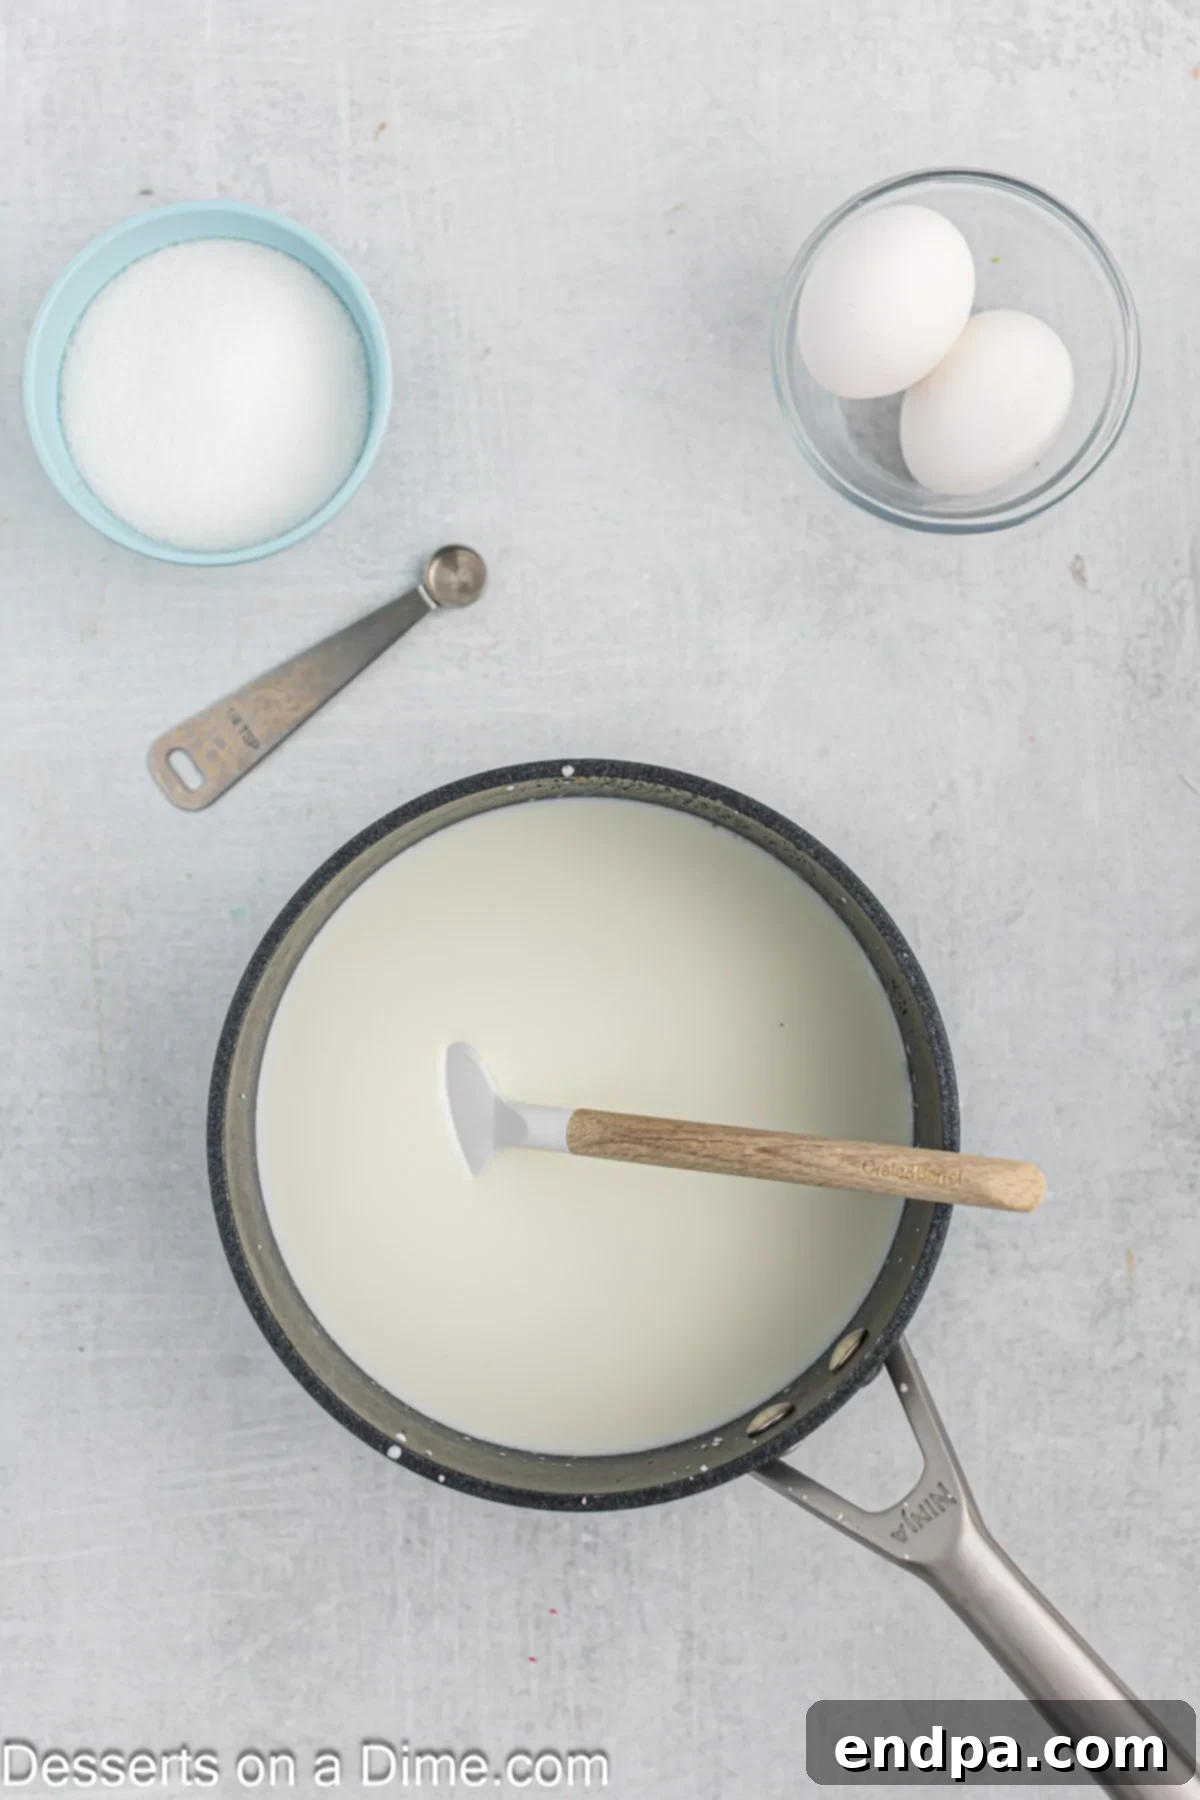
Step 2: Add Dairy and Heat. Carefully drain any remaining unabsorbed water from the saucepan. Into the plumped tapioca pearls, stir in the whole milk, half and half, and a pinch of salt. Place the saucepan over medium-low heat and bring the mixture to a very gentle simmer, ensuring it does not come to a rolling boil. Stir frequently to prevent the milk from scorching on the bottom of the pan and to ensure even heating of the tapioca pearls.
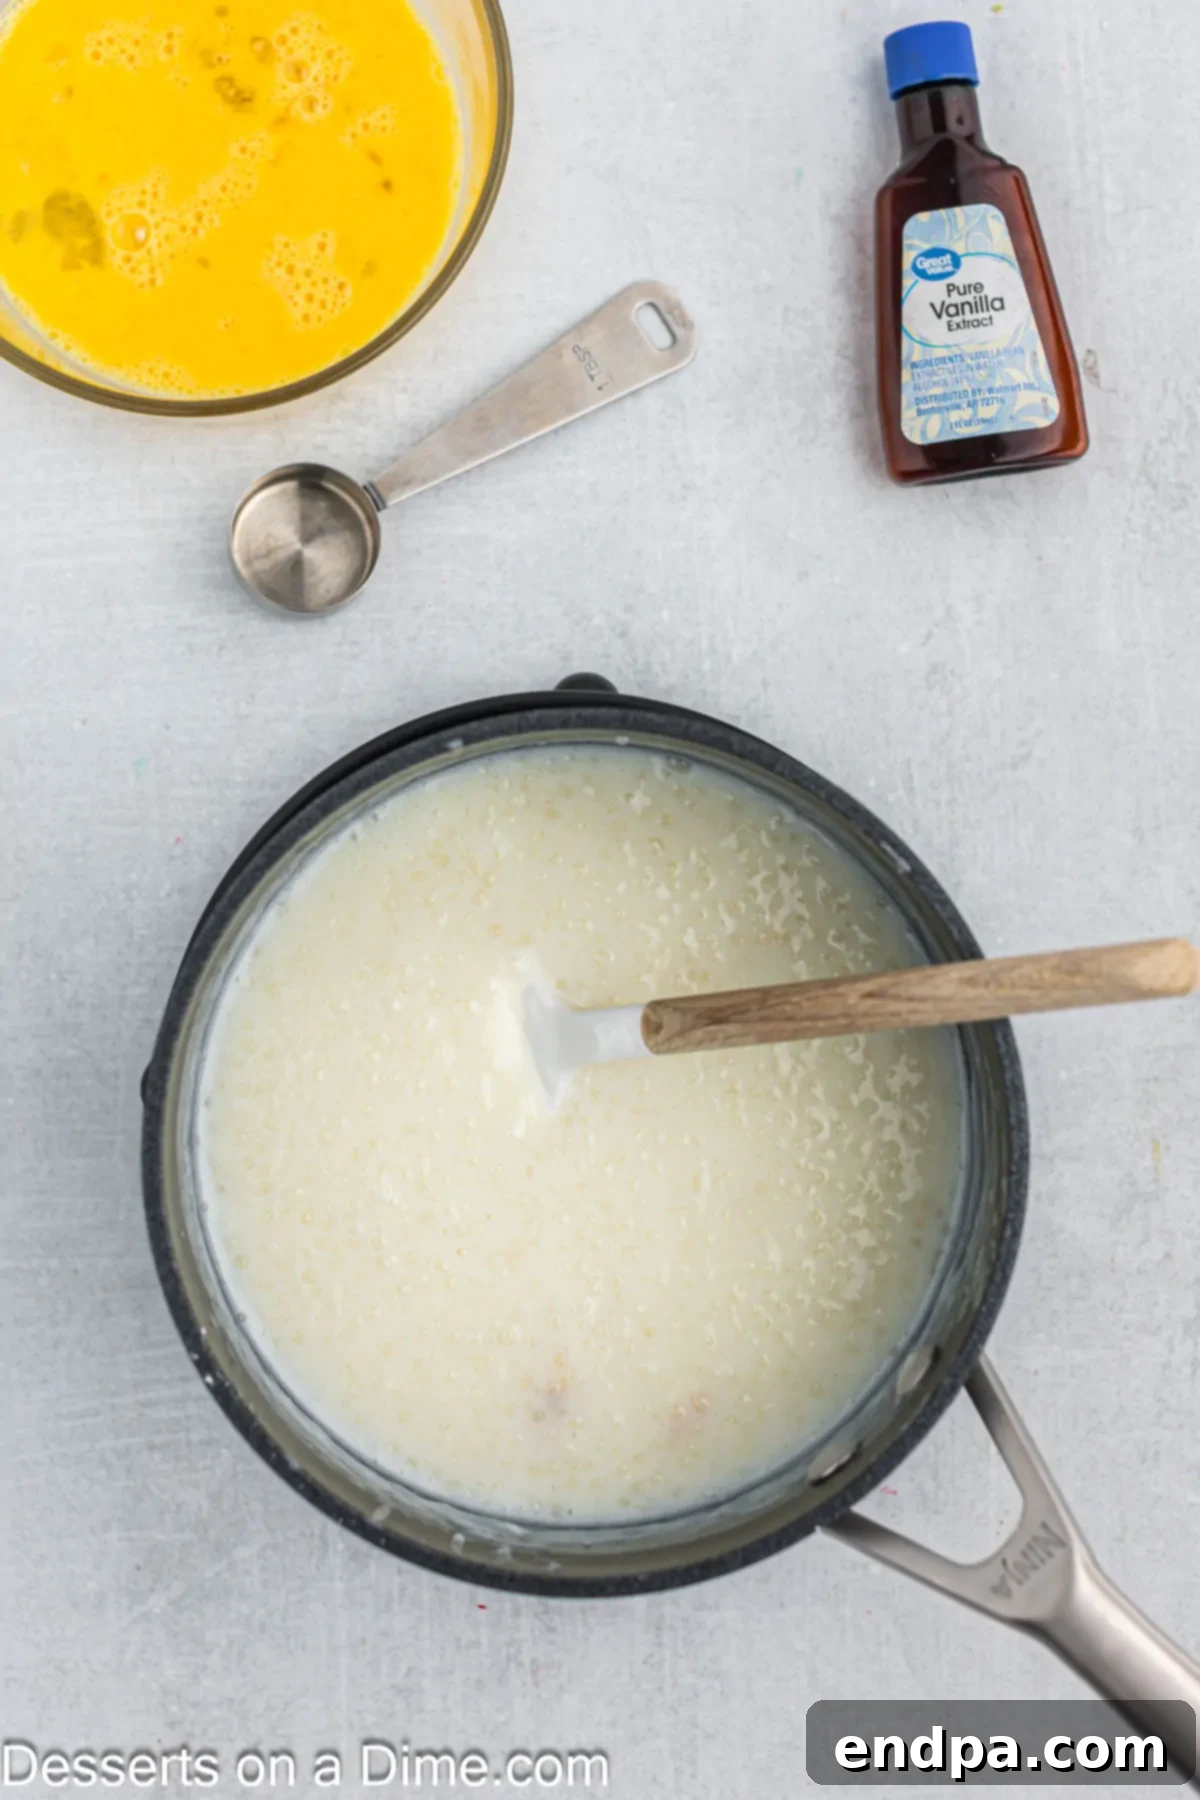
Step 3: Sweeten and Simmer. Once the mixture is gently simmering, stir in the granulated sugar. Continue to cook on a low simmer for another 5-7 minutes, stirring constantly. During this time, the tapioca pearls will continue to plump up, become more translucent, and the pudding mixture will begin to thicken slightly. Keep a close eye on the heat to prevent boiling over or scorching.
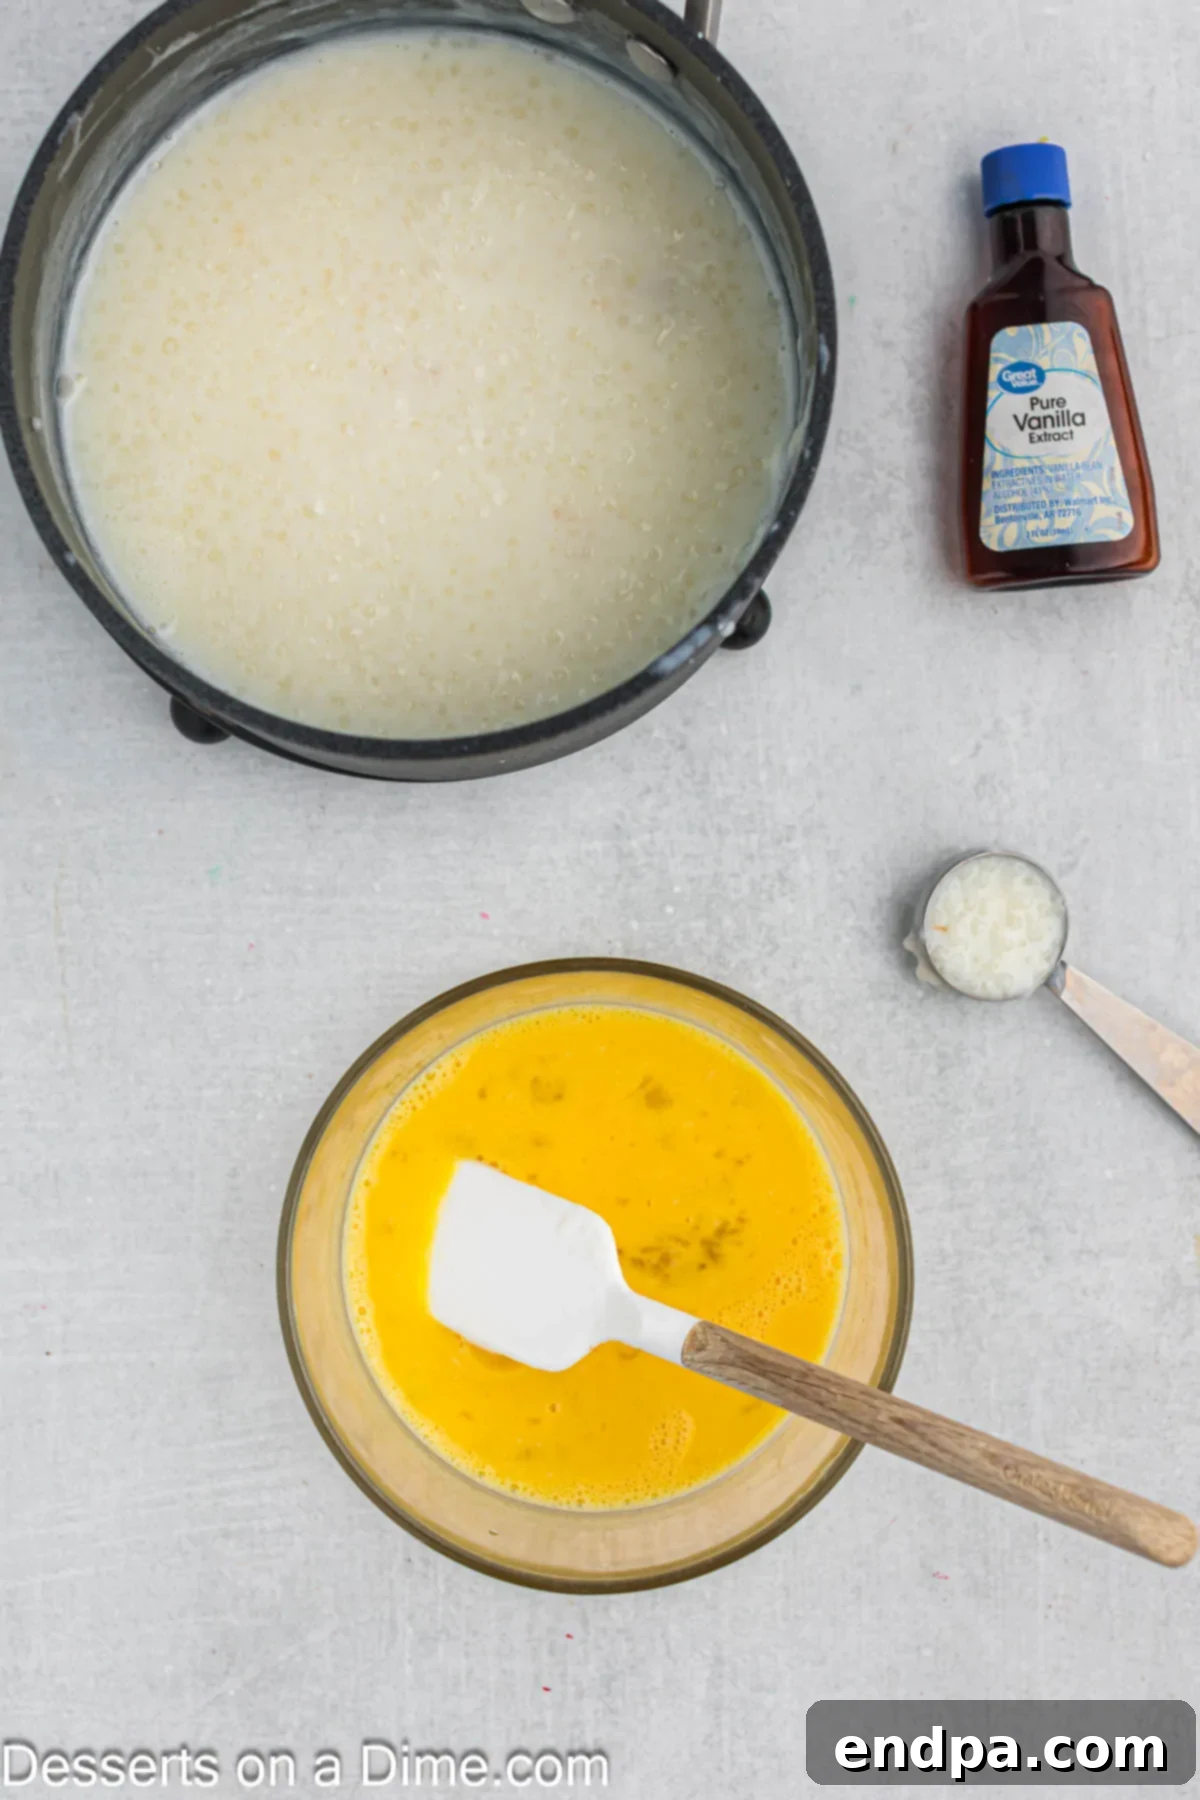
Step 4: Prepare and Temper the Eggs. Remove the saucepan from the heat temporarily. In a separate, medium-sized bowl, lightly beat the large eggs until the yolks and whites are just combined. This next step, known as tempering, is crucial to prevent the eggs from scrambling. Slowly drizzle about 2-3 tablespoons of the hot tapioca mixture into the beaten eggs, whisking continuously. Repeat this process 2-3 more times. This gradually raises the temperature of the eggs without cooking them instantly.
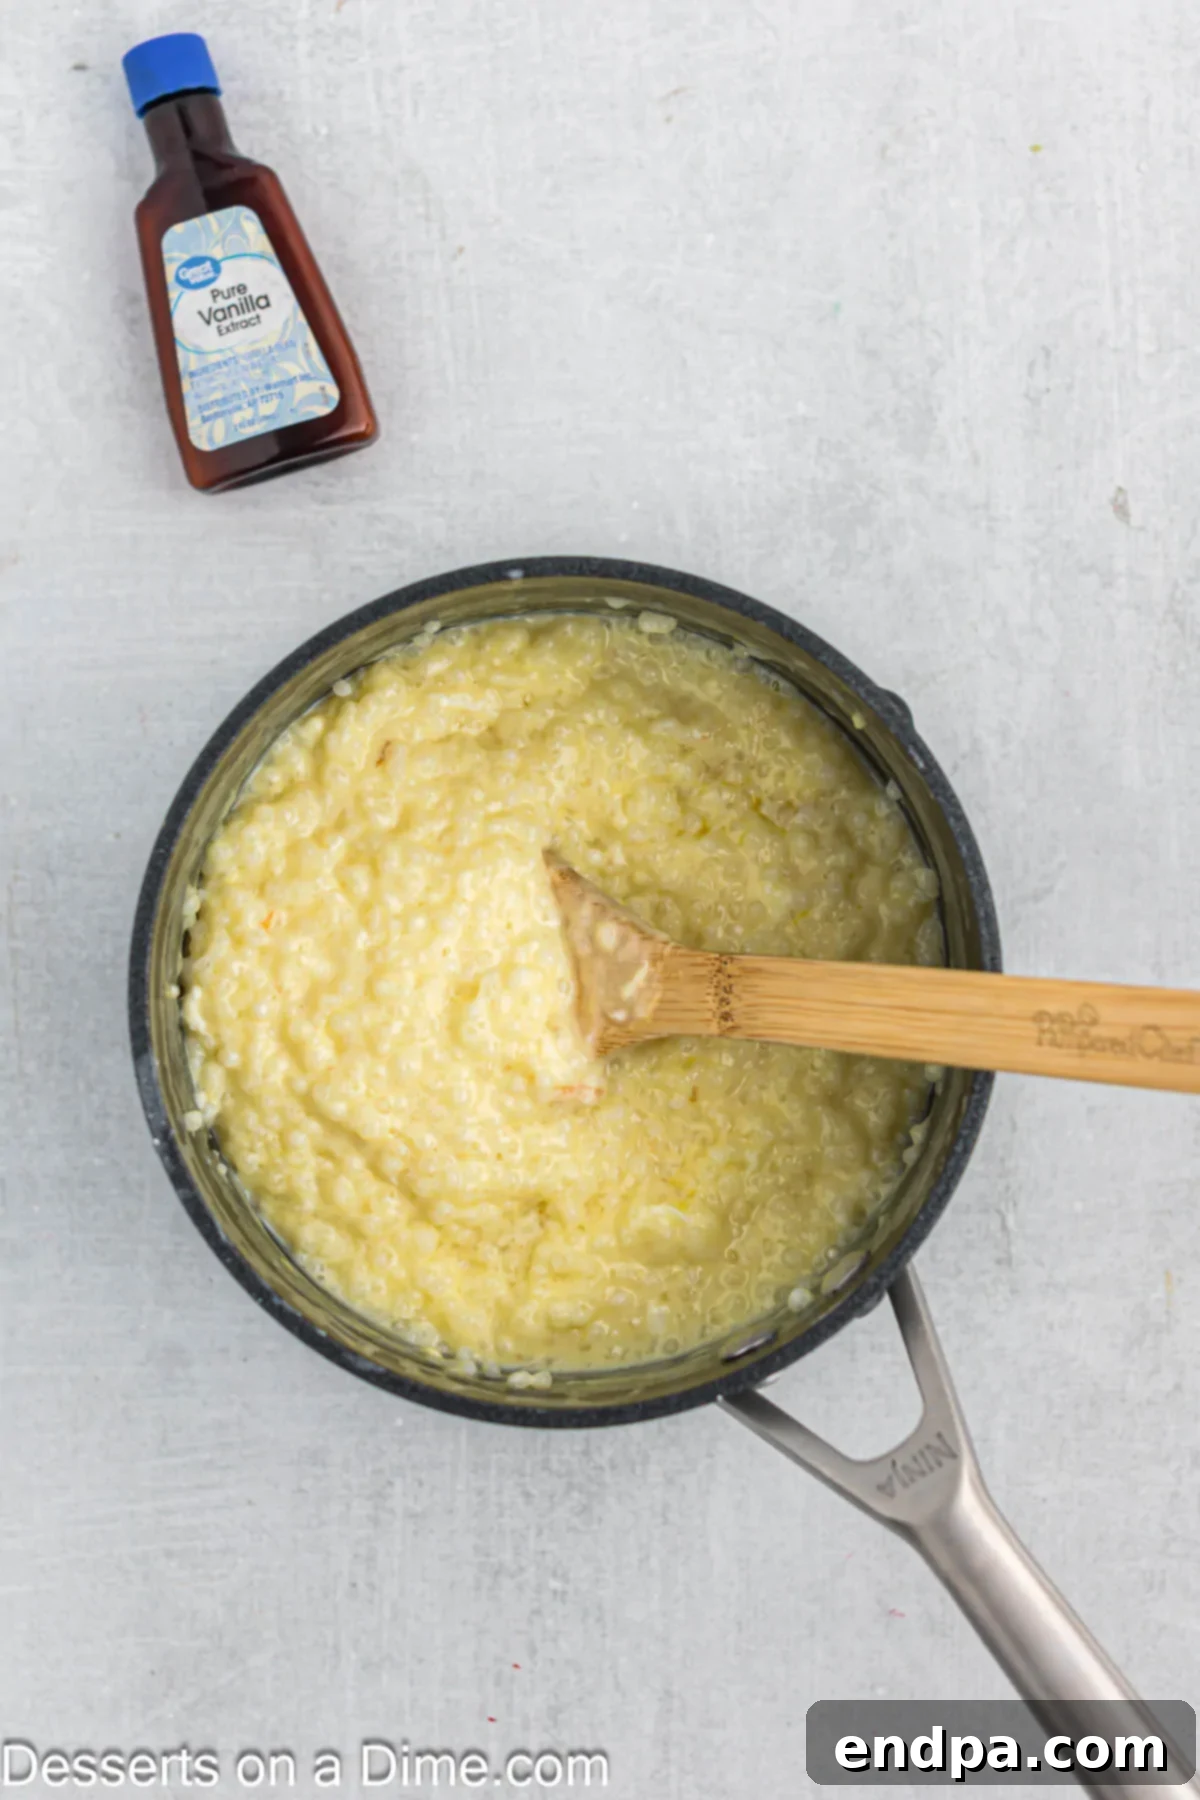
Step 5: Thicken the Pudding. Once the eggs are tempered, slowly pour the egg mixture back into the saucepan with the remaining tapioca mixture, whisking constantly to ensure it fully combines and doesn’t clump. Return the pan to medium-low heat. Continue to stir and cook (do not allow it to boil) for another 5-10 minutes, or until the pudding visibly thickens and can generously coat the back of a wooden spoon. This indicates the eggs have cooked and contributed to the pudding’s creamy consistency.
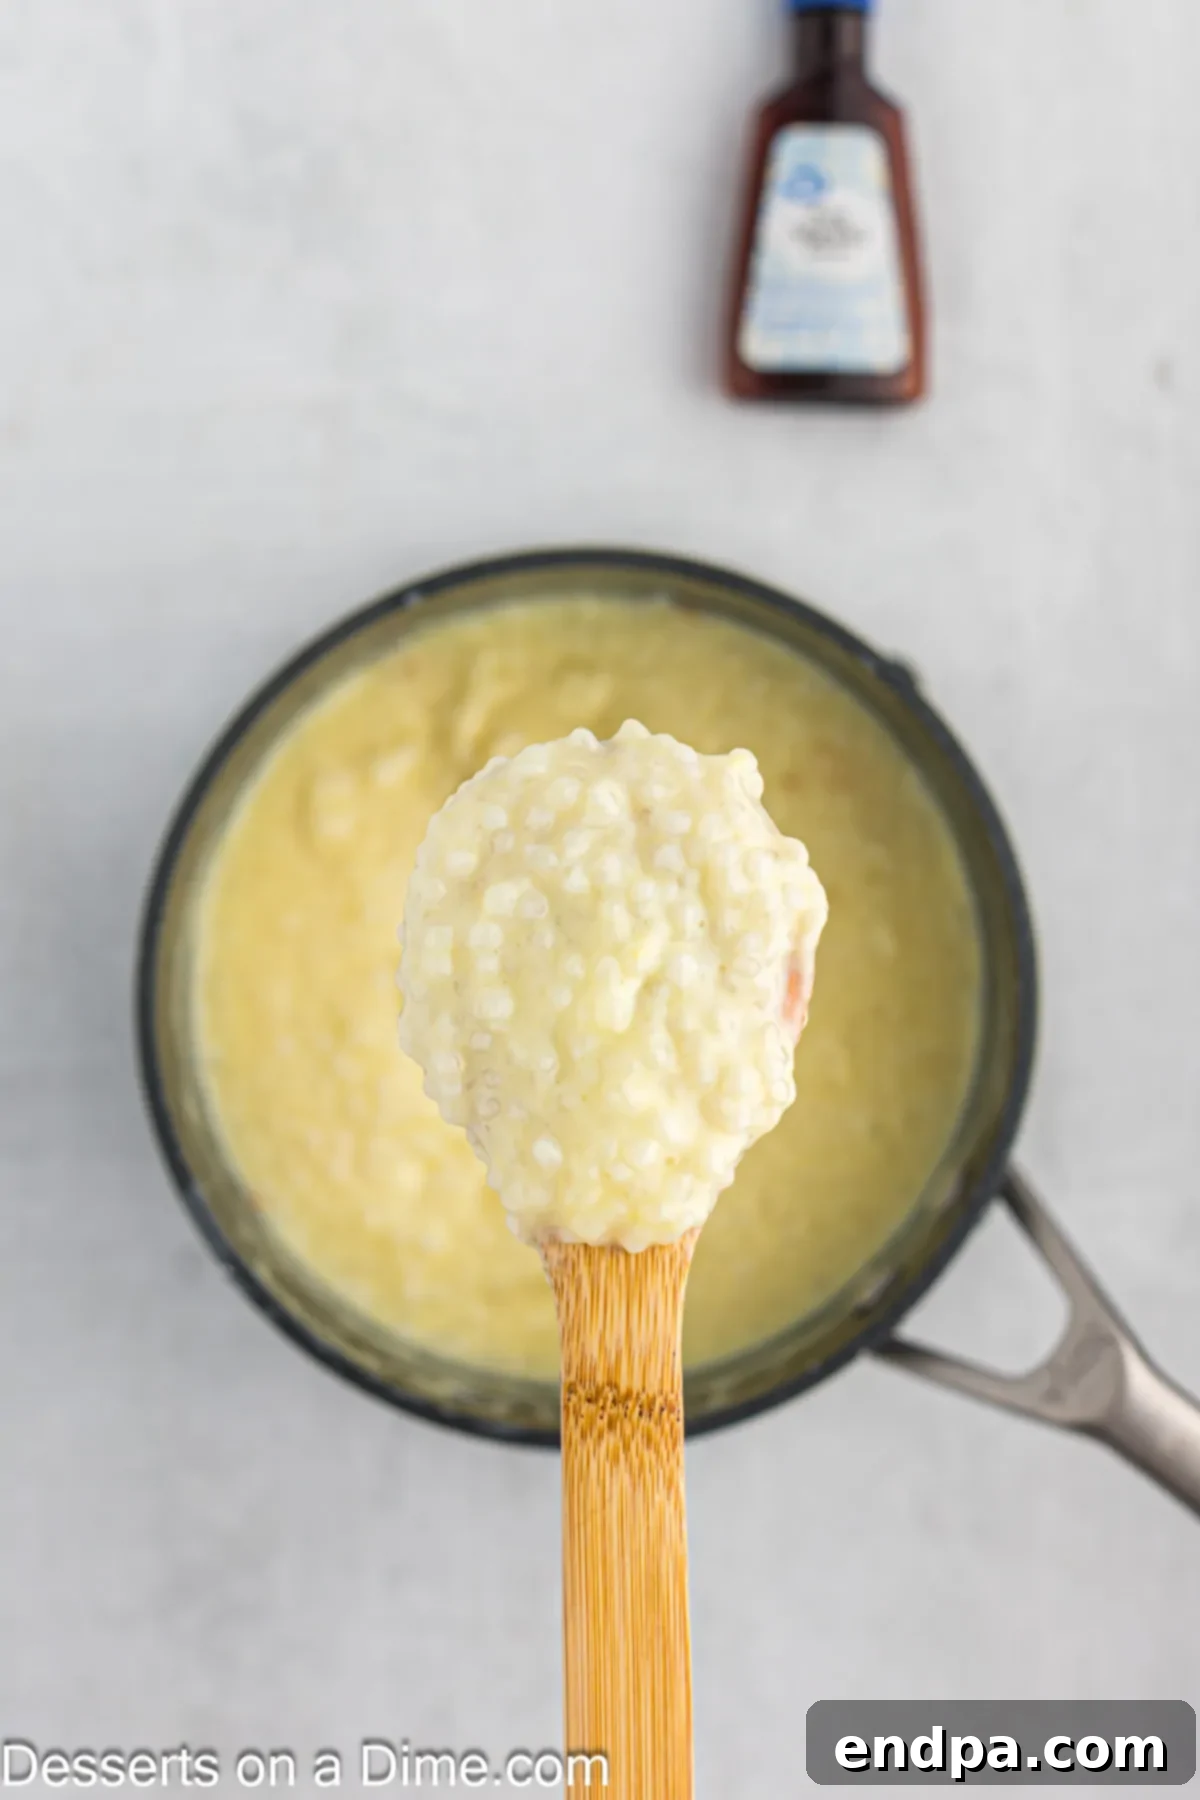
Step 6: Add Vanilla and Cool. Remove the pan from the heat immediately after it has thickened to your liking. Let the pudding rest off the heat for 10-15 minutes. During this brief resting period, it will continue to thicken slightly. After resting, stir in the vanilla extract. It’s best to add vanilla at the end to preserve its delicate flavor and aroma. Continue to stir the pudding periodically as it cools to prevent a “skin” from forming on the surface. Once cooled to room temperature, cover with plastic wrap (pressing it directly onto the surface) and chill thoroughly before serving. Enjoy!
Expert Tips for Perfect Tapioca Pudding
Achieving a perfectly creamy, lump-free tapioca pudding with that ideal chewy bite is simple with a few insider tricks:
- Consistent Stirring is Key: From the moment the milk is added until the pudding cools, stir frequently. This prevents the milk from scorching on the bottom of the pan and ensures the tapioca pearls don’t stick. Regular stirring during cooling also prevents a thick skin from forming on top, keeping the texture smooth throughout.
- Temper Eggs Carefully: This is arguably the most critical step. When adding beaten eggs to a hot mixture, always temper them. Slowly whisk a small amount of the hot tapioca mixture into the eggs first, then gradually add the warmed egg mixture back into the saucepan. This gradual temperature increase prevents the eggs from scrambling, ensuring a silky-smooth, custard-like consistency.
- Opt for Whole Milk: For the richest, creamiest, and most luxurious tapioca pudding, whole milk is highly recommended. Its fat content is crucial for achieving the desired thick, velvety texture without the pudding becoming runny or watery.
- “Low and Slow” Cooking: Patience is a virtue when making pudding. Keep the heat on low to medium-low and avoid a rapid boil. Gentle simmering allows the tapioca pearls to plump evenly and the custard to thicken gradually, preventing scorching and ensuring a smooth finish.
- Allow Adequate Cooling Time: While delicious warm, tapioca pudding truly shines when it’s had sufficient time to cool and chill. As it cools, the pudding will continue to thicken to its ideal consistency. Covering it directly with plastic wrap during chilling will prevent a skin from forming.
- Add Flavorings Last: For the best and most vibrant flavor, stir in delicate extracts like vanilla after the pudding has been removed from the heat. High heat can cause volatile flavor compounds to dissipate, lessening their impact.
- Don’t Substitute Instant Tapioca: Small pearl tapioca is specifically called for in this recipe for its unique texture. Instant tapioca is pre-cooked and will dissolve, resulting in a completely different, often undesirable, consistency.
- Taste and Adjust: Always taste your pudding once it’s finished cooking and cooling. You can add a little more sugar if you prefer a sweeter pudding, or a tiny pinch of salt to brighten the flavors.
Creative Serving Suggestions for Tapioca Pudding
Tapioca pudding is wonderfully versatile, equally delightful served simply or dressed up for a special occasion. Here are a few ideas to inspire your next dessert:
- Classic Comfort: Serve it warm directly from the stovetop for a comforting, cozy treat, especially on a chilly day. Or, chill it thoroughly and serve it cold for a refreshing dessert. Both are equally delicious!
- Fresh Fruit Medley: Garnish individual servings with a medley of fresh berries (strawberries, blueberries, raspberries), sliced bananas, or diced mango. The tartness of the fruit provides a lovely contrast to the creamy pudding.
- Whipped Cream and Cinnamon: A dollop of freshly whipped cream and a light dusting of ground cinnamon or nutmeg adds an extra layer of indulgence and classic flavor.
- Toasted Coconut: Sprinkle some lightly toasted coconut flakes on top for added texture and a subtle nutty flavor that pairs beautifully with the creamy pudding.
- Caramel or Chocolate Drizzle: For an extra-decadent touch, drizzle with a warm caramel sauce, chocolate syrup, or even a homemade berry coulis.
- Mini Dessert Cups: Portion the pudding into small ramekins or decorative dessert glasses for elegant individual servings, perfect for dinner parties or gatherings.
- Nutty Crunch: A sprinkle of chopped toasted nuts, like pecans, almonds, or walnuts, can add a satisfying crunch and richness.
- Layered Parfait: Create a delightful parfait by layering tapioca pudding with granola, yogurt, and fresh fruit in a tall glass for a breakfast or brunch option.
Storage Best Practices for Tapioca Pudding
Proper storage is essential to keep your homemade tapioca pudding fresh and delicious for as long as possible:
- Refrigeration is Key: Any leftover tapioca pudding should be stored in an airtight container and refrigerated promptly. It will maintain its quality and freshness for up to 4-5 days.
- Preventing a Skin: To avoid the formation of a thick skin on the surface of the pudding (which can occur as it cools), place a piece of plastic wrap directly onto the surface of the pudding before sealing the container. This creates a barrier against the air.
- Reheating (Optional): Tapioca pudding is delightful served chilled straight from the refrigerator. However, if you prefer it warm, gently reheat it on the stovetop over very low heat, stirring constantly. If it has thickened too much in the fridge, you can add a splash of milk or half and half while reheating to achieve your desired consistency. Avoid boiling when reheating.
- Freezing is Not Recommended: Freezing tapioca pudding is generally not advised. The delicate texture of the tapioca pearls can become rubbery or separated once thawed, and the creamy base may also separate, compromising the overall quality and enjoyment of the dessert.
Common Questions About Tapioca Pudding (FAQ)
Here are answers to some frequently asked questions about making and enjoying tapioca pudding:
Q: What’s the difference between small pearl tapioca and instant tapioca?
A: Small pearl tapioca requires soaking and a longer cooking time, resulting in distinct, chewy pearls. Instant tapioca is pre-cooked and finely granulated, designed to thicken quickly but often dissolves completely, yielding a different texture unsuitable for this classic recipe.
Q: My tapioca pudding didn’t thicken. What went wrong?
A: Common reasons for runny pudding include not cooking it long enough at a gentle simmer, not tempering the eggs properly (which means they didn’t thicken the custard), or using low-fat milk, which has less thickening power. Ensure you maintain a steady, low simmer and stir continuously until it coats the back of a spoon.
Q: How do I prevent a skin from forming on top of my pudding?
A: To avoid a skin, press a sheet of plastic wrap directly onto the surface of the pudding while it cools, both at room temperature and once transferred to the refrigerator. This blocks air circulation and keeps the surface moist and smooth.
Q: Can I make tapioca pudding ahead of time?
A: Absolutely! Tapioca pudding is an excellent make-ahead dessert. It needs time to chill and thicken properly, so preparing it a few hours or even a day in advance is ideal. Store it in the refrigerator as described in the storage section.
Q: Can I use a different type of milk?
A: While whole milk and half & half provide the best richness and texture, you can experiment. For dairy-free, use full-fat coconut milk or a creamy almond milk. Keep in mind that lower-fat milks may result in a thinner pudding. Adjust consistency if needed.
Q: Why does my pudding taste grainy?
A: Graininess can occur if the tapioca pearls weren’t soaked long enough or if the pudding wasn’t cooked gently enough to allow the starch to fully gelatinize and dissolve. Ensure proper soaking and a patient, low simmer.
Q: Can I add spices to my tapioca pudding?
A: Yes! Spices like cinnamon, nutmeg, cardamom, or even a hint of ginger can be added during the simmering stage with the milk and sugar for a warm, aromatic variation. Start with a small amount and adjust to taste.
More Easy Pudding Recipes to Explore
If you’ve fallen in love with the ease and comfort of homemade pudding, here are a few more delightful recipes to add to your repertoire:
- Classic Homemade Chocolate Pudding
- Light and Fluffy Banana Pudding Fluff
- Versatile Vanilla Pudding Desserts
- Indulgent Dark Chocolate Pudding
- Refreshing Orange Pudding
We truly hope you enjoy making this creamy, dreamy Tapioca Pudding! If you tried this classic recipe, please consider leaving a comment and a star rating below. Your feedback means the world to us and helps other home cooks discover this wonderful dessert. We’d love to hear how it turned out and any delightful variations you experimented with!
Classic Tapioca Pudding Recipe
This Tapioca Pudding recipe creates a rich and creamy dessert made with pantry staples. It features small pearl tapiocas for that signature chewy texture that everyone loves. This classic recipe delivers a comforting and satisfying treat.
Prep Time: 45 mins (including soak time)
Cook Time: 15-20 mins (approx. 5-7 mins simmer, 5-10 mins thicken)
Total Time: 60-65 mins
Servings: 6
Cuisine: American
Course: Dessert
Calories: 208 kcal per serving (estimated)
Author: Carrie Barnard
Ingredients
- 1/2 cup Small Tapioca Pearls (ensure they are *not* instant tapioca)
- 1 cup Water (for soaking)
- 2 cups Whole Milk
- 1/2 cup Half and Half
- 1/4 teaspoon Salt
- 2 Large Eggs (beaten)
- 1/2 cup Granulated Sugar
- 1 teaspoon Vanilla Extract
Instructions
- Soak Tapioca: Place the small tapioca pearls in a medium saucepan. Cover them with 1 cup of cold water. Let them soak for 20-45 minutes until the tapioca pearls have absorbed most of the water and appear plump.
- Drain Excess Water: Carefully drain any excess unabsorbed water from the saucepan.
- Add Dairy & Simmer: Stir in the whole milk, half and half, and salt. Place the saucepan over medium-low heat and bring the mixture to a very low boil, stirring constantly to prevent scorching.
- Sweeten & Thicken: Stir in the granulated sugar. Continue to cook on a low simmer for 5-7 minutes, stirring frequently. The pearls will continue to plump, and the mixture will begin to thicken slightly.
- Remove from Heat: Take the saucepan off the heat temporarily.
- Temper Eggs: In a separate bowl, lightly beat the 2 large eggs. Slowly add 2-3 tablespoons of the hot tapioca mixture into the beaten eggs, whisking constantly. Repeat this tempering process 2-3 more times to gradually warm the eggs without scrambling them.
- Combine & Cook: Slowly pour the tempered egg mixture back into the saucepan with the remaining tapioca mixture, whisking continuously. Return the pan to medium-low heat. Stir and heat (do not boil) until the mixture has thickened considerably and can coat the back of a wooden spoon.
- Cool & Flavor: Remove the pan from the heat. Let the pudding sit for 10-15 minutes to cool slightly and thicken further. Then, stir in the vanilla extract.
- Final Chill: Continue to stir the pudding occasionally as it cools to room temperature to prevent a skin from forming on top. Once cooled, cover the pudding directly with plastic wrap (pressing it onto the surface) and chill thoroughly in the refrigerator until ready to serve. Enjoy your delicious homemade tapioca pudding!
Recipe Notes
This versatile pudding is delightful served either warm or chilled. Both options offer a unique and delicious experience.
Store any leftovers in an airtight container in the refrigerator for up to 5 days, ensuring the plastic wrap is pressed directly onto the surface to prevent a skin from forming.
Nutrition Facts (Estimated per serving)
- Calories: 208 kcal
- Carbohydrates: 33g
- Protein: 5g
- Fat: 6g
- Saturated Fat: 3g
- Polyunsaturated Fat: 0.5g
- Monounsaturated Fat: 2g
- Trans Fat: 0.01g
- Cholesterol: 71mg
- Sodium: 163mg
- Potassium: 172mg
- Fiber: 0.1g
- Sugar: 22g
- Vitamin A: 282IU
- Vitamin C: 0.2mg
- Calcium: 134mg
- Iron: 0.5mg
