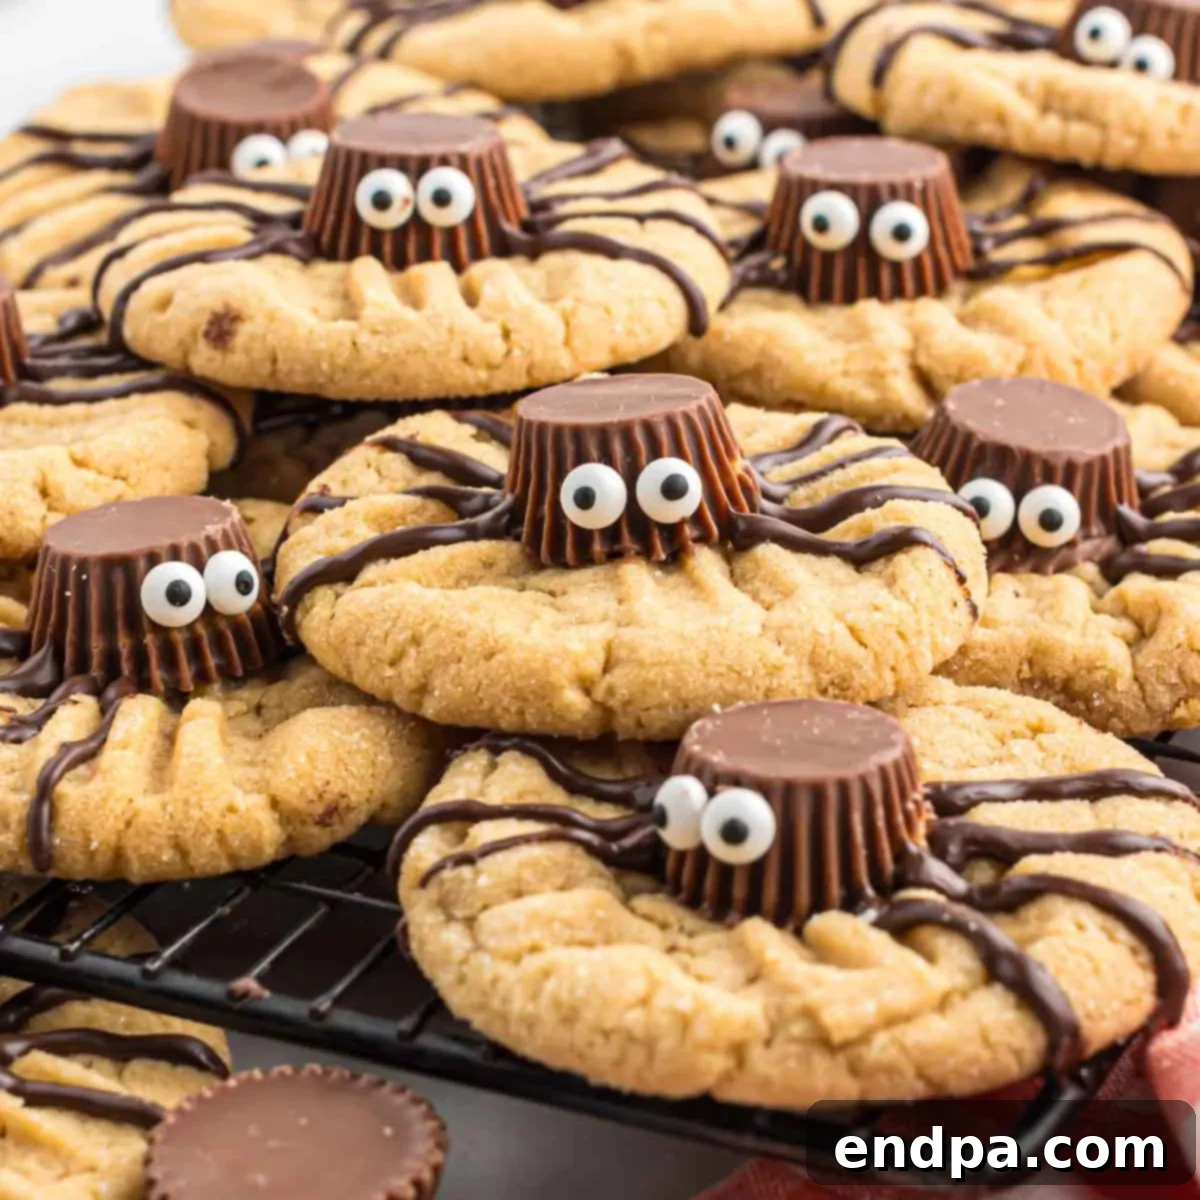
Get ready for a wickedly delicious and incredibly easy treat this Halloween! Our Easy Halloween Spider Cookies Recipe combines the timeless comfort of homemade peanut butter cookies with the irresistible magic of peanut butter cups and playful candy eyes. The result? A fun, spooky, and utterly adorable dessert that kids will absolutely adore helping to create and, of course, devour!
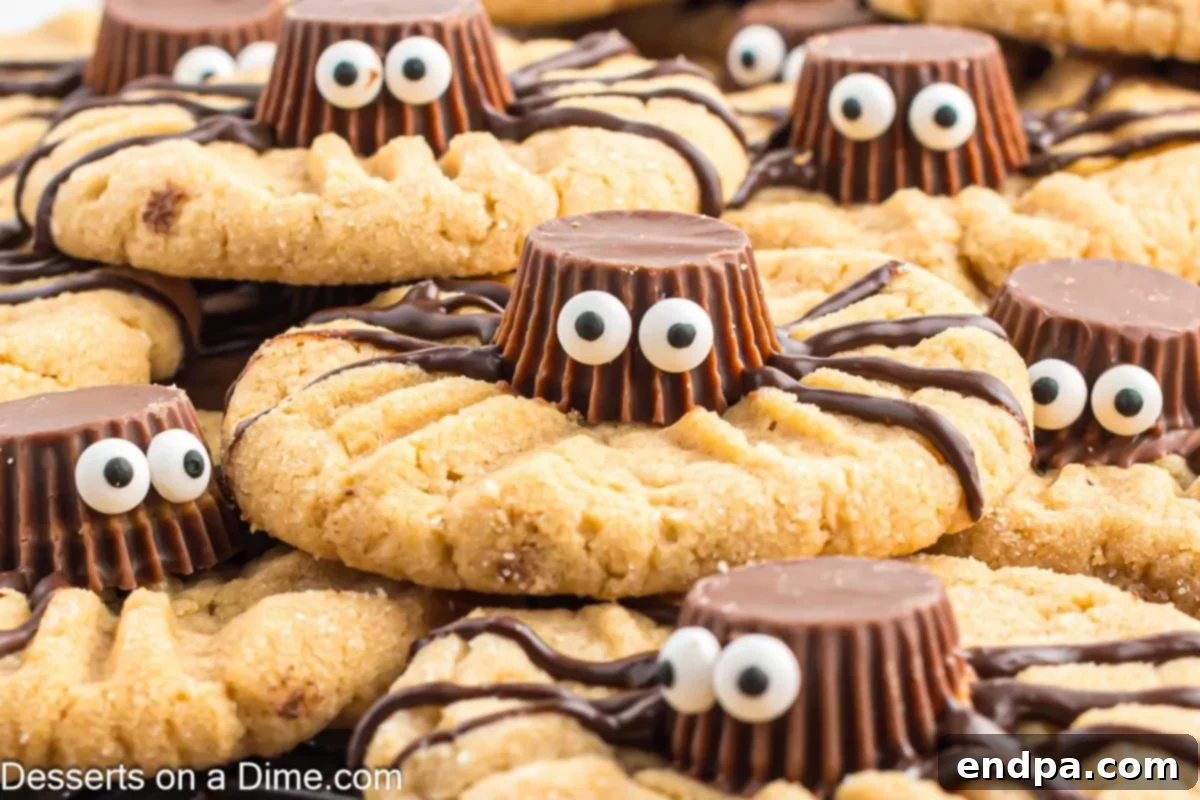
Halloween Spider Cookies are more than just a dessert; they’re a delightful experience that brings joy and a touch of friendly spookiness to any autumn gathering. This recipe stands out for its straightforward approach, using readily available ingredients and simple decorating techniques. We start with a rich, chewy peanut butter cookie as the foundation, then transform it into a whimsical spider with the addition of a miniature peanut butter cup body and whimsical candy eyes. It’s a creative project that’s perfect for little hands to assist with, making it a fantastic family activity for the Halloween season.
Whether you’re planning a full-blown Halloween bash, looking for a special classroom treat, or simply want to enjoy a festive baking day at home, these spider cookies fit the bill perfectly. Their charming appearance, coupled with the classic flavor combination of peanut butter and chocolate, guarantees they’ll be a hit with both children and adults. Say goodbye to complicated recipes and hello to a truly enjoyable, edible craft that’s as cute as it is delicious.
No Halloween party is complete without a spread of fun and inventive desserts. Beyond these adorable spider cookies, you might want to explore other festive options. We highly recommend our Witch Hat Cookies for another magical touch to your treat table. They are equally easy to make and add a different silhouette to your spooky collection.
If you’re still on the hunt for more party treats that embrace the spirit of Halloween, look no further! Consider whipping up a batch of Spider Brownies for a rich, fudgy option, or delight your guests with the vibrant Frankenstein Rice Krispie Treats. And for another take on our arachnid friends, our Oreo Spider Cookies offer a no-bake alternative. Don’t forget to include some classic Halloween Sugar Cookies for versatile decorating, the addictively crunchy Halloween Puppy Chow Recipe, and charming Halloween Cake Pop Recipes to round out your festive dessert bar.
Table of Contents: Easy Halloween Spider Cookies Recipe
- Why You’ll Love These Spooky Spider Cookies
- Essential Ingredients for Spider Cookies
- Kitchen Equipment You’ll Need
- Step-By-Step Instructions to Create Your Spider Cookies
- Pro Tips for Perfect Peanut Butter Spider Cookies
- Delicious Variations to Try
- Storing Your Halloween Spider Cookies
- More Spooktacular Halloween Treat Ideas
- Halloween Spider Cookies Recipe Card
Why You’ll Love These Spooky Spider Cookies
These Halloween Spider Cookies aren’t just a seasonal treat; they’re a perennial favorite for many reasons:
- Effortlessly Simple and Quick: You don’t need to be a pastry chef to create these impressive cookies. Using basic pantry staples and a few clever decorating shortcuts, this recipe comes together in under an hour, making it perfect for busy schedules or spontaneous baking sessions.
- Incredibly Festive and Fun: The combination of rich peanut butter cookies, classic chocolate peanut butter cups, and whimsical candy eyes instantly evokes the playful spirit of Halloween. Each cookie transforms into an adorable, spooky spider that’s sure to bring smiles and maybe a few delightful shivers!
- Perfectly Kid-Friendly: This recipe is designed for maximum fun, especially for children. From shaping the cookie dough balls to pressing in the peanut butter cup bodies and adding the googly eyes, there are plenty of simple steps where kids can actively participate in the decoration process. It’s a fantastic way to engage them in the kitchen and create lasting holiday memories.
- The Ultimate Halloween Party Addition: Whether it’s a school party, a neighborhood gathering, or a family movie night, these spider cookies are an absolute showstopper. They’re not only delicious but also serve as a charming decorative element on any dessert table, making your Halloween celebration extra special. They also make wonderful, homemade gifts for friends and teachers.
- Wonderfully Customizable: While the classic peanut butter and chocolate combination is a winner, this recipe offers plenty of room for creativity. You can easily swap out peanut butter cups for other mini chocolate candies, experiment with different cookie dough bases (like chocolate chip or sugar cookies), or even use colored melting wafers for vibrant spider legs. Let your imagination run wild!
Essential Ingredients for Spider Cookies
Crafting these delightful Halloween Spider Cookies begins with a selection of simple, quality ingredients. Each component plays a crucial role in both the flavor and appearance of our creepy-crawly treats:
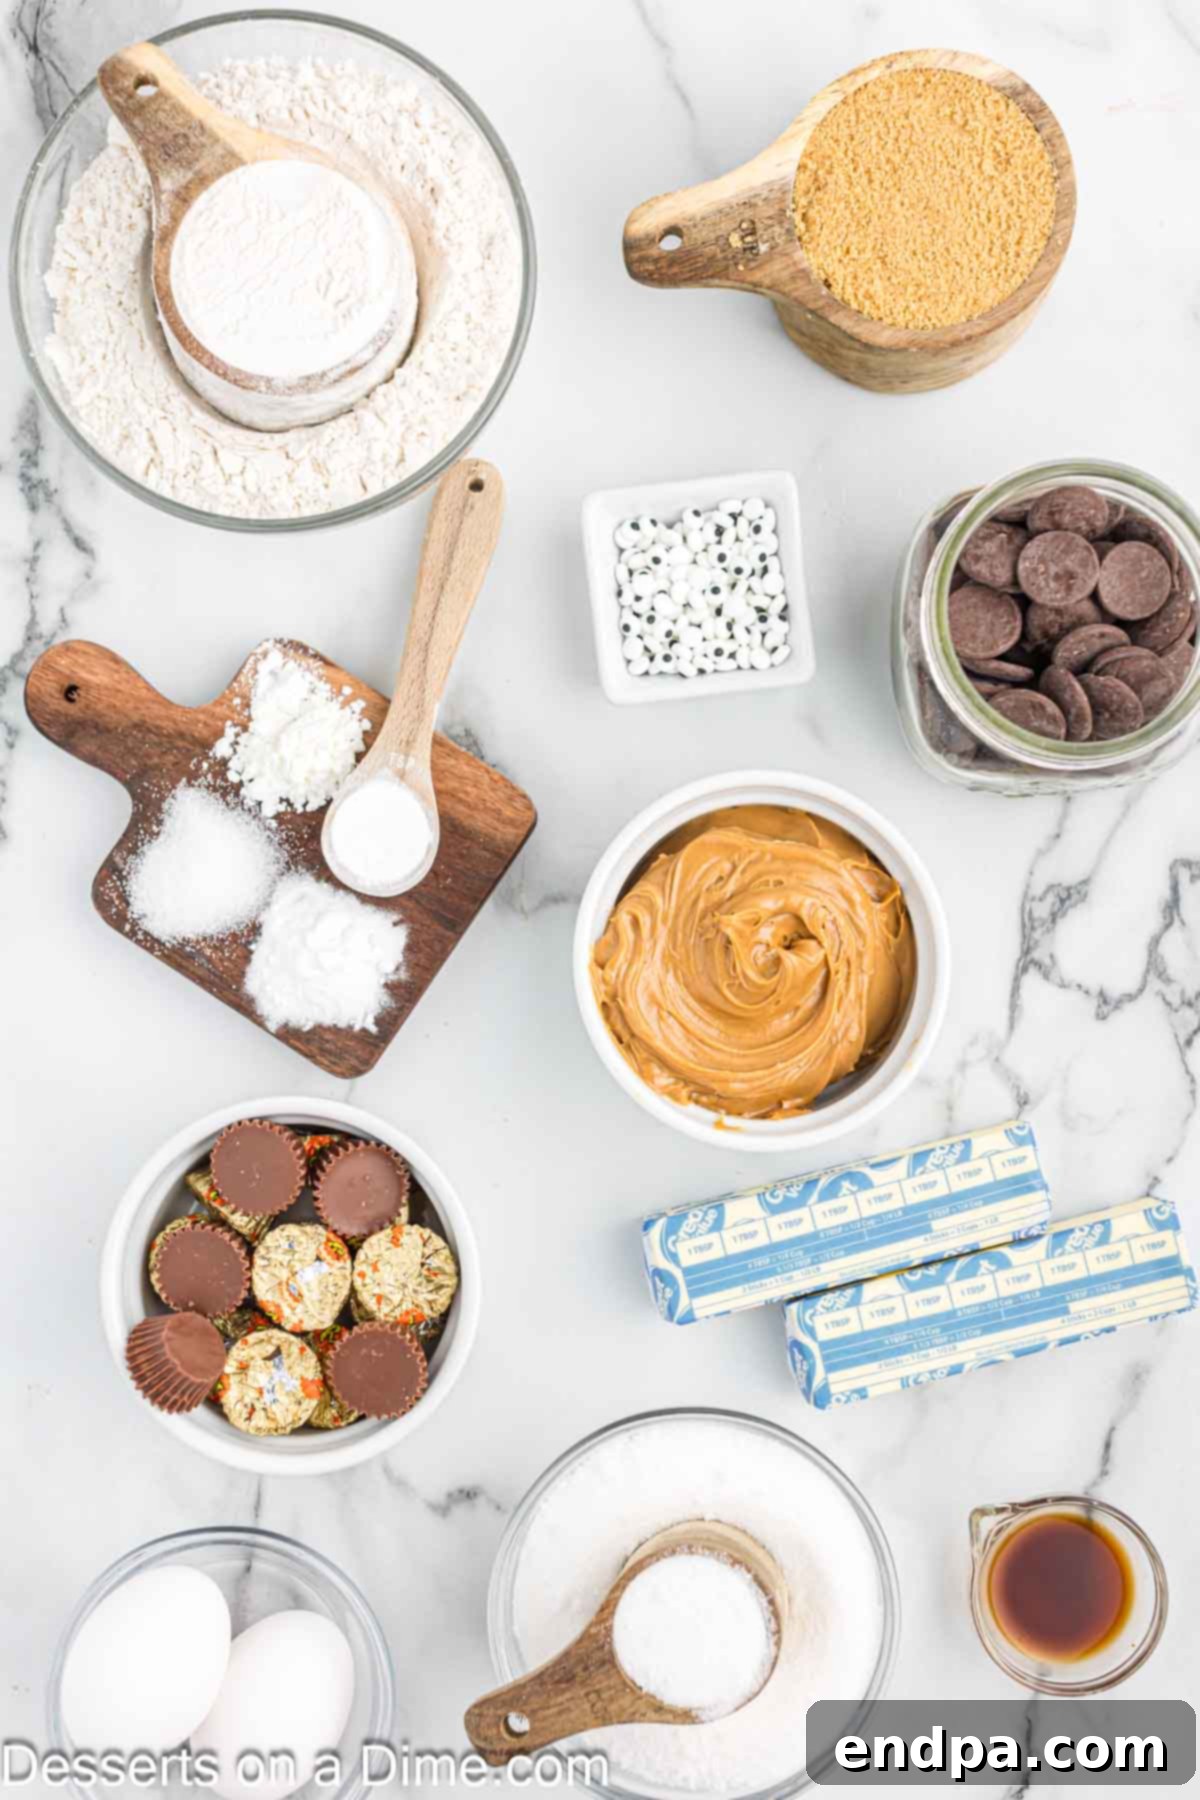
- All-Purpose Flour: The foundational dry ingredient. For best results, spoon the flour into your measuring cup and level it off rather than scooping directly from the bag. This prevents over-measuring and ensures a tender cookie texture.
- Granulated Sugar & Brown Sugar: A blend of both sugars contributes to the cookies’ characteristic chewiness and depth of flavor. Granulated sugar provides crispness, while brown sugar adds moisture and a subtle caramel note. If you ever run out, try our Homemade Brown Sugar Recipe!
- Butter: Softened at room temperature, butter is essential for achieving a light and fluffy creamed mixture with the sugars. This creates air pockets, leading to perfectly textured cookies.
- Creamy Peanut Butter: The star of our cookie base! Choose a creamy variety for smooth dough consistency and rich, classic peanut butter flavor. Avoid natural peanut butters where the oil separates, as they can alter the dough’s texture.
- Eggs: Room temperature eggs incorporate more evenly into the batter, helping to create a cohesive and well-emulsified dough. They add structure and richness.
- Baking Powder & Baking Soda: These leavening agents work together to give the cookies their ideal rise and spread, resulting in soft, slightly puffed cookies.
- Cornstarch: A secret ingredient for extra tender and soft cookies! Cornstarch helps to reduce gluten development, making the cookies melt-in-your-mouth soft.
- Salt: A pinch of salt balances the sweetness and enhances all the other flavors, especially the peanut butter.
- Vanilla Extract: A splash of good quality vanilla extract adds warmth and aromatic depth to the cookies, complementing the peanut butter beautifully.
- Reese’s Miniature Peanut Butter Cups: These are the perfect shape and size for our spider bodies. Chilling them before use is a pro tip that helps them maintain their shape when pressed into the warm cookies. You’ll need about 36 for this recipe.
- Candy Eyes: These are what bring our spiders to life! They’re readily available in baking aisles or online and make decorating simple and fun for kids.
- Chocolate Melting Wafers: Ideal for creating smooth, pipeable spider legs and for adhering the candy eyes. They melt beautifully and set quickly. If you don’t have wafers, semi-sweet chocolate chips can be substituted, though they may require a touch of shortening to achieve a similar smooth consistency for piping.
The complete list of quantities for these ingredients can be found on the detailed recipe card towards the bottom of this article. Make sure to gather everything before you begin for a seamless baking experience!
Kitchen Equipment You’ll Need
To make these spooky spider cookies, you’ll need a few basic kitchen tools. Having these ready will ensure a smooth and enjoyable baking process:
- Mixing Bowls: At least two, one for dry ingredients and one for wet.
- Electric Mixer: A stand mixer or a hand-held mixer is highly recommended for creaming butter and sugar efficiently.
- Measuring Cups and Spoons: For accurate ingredient measurements.
- Rubber Spatula: For scraping down the sides of the bowl and folding ingredients.
- Cookie Scoop: Essential for portioning dough evenly, ensuring uniform cookie size and baking.
- Baking Sheets: Large, ungreased baking sheets for baking the cookies.
- Parchment Paper or Silicone Baking Mats (Optional but Recommended): For easy release and cleanup, though the recipe calls for an ungreased sheet.
- Wire Cooling Rack: For cooling the baked cookies.
- Piping Bag or Ziplock Bag: For piping the chocolate spider legs and attaching the eyes.
- Microwave-Safe Bowl: For melting the chocolate wafers.
Step-By-Step Instructions to Create Your Spider Cookies
Follow these detailed steps to bring your easy Halloween Spider Cookies to life. We’ve broken down each stage to ensure a successful and enjoyable baking experience.
- Step 1. Prepare Oven: Begin by preheating your oven to 350 degrees Fahrenheit (175 degrees Celsius). This ensures the oven is at the correct temperature for even baking once your cookies are ready to go in.
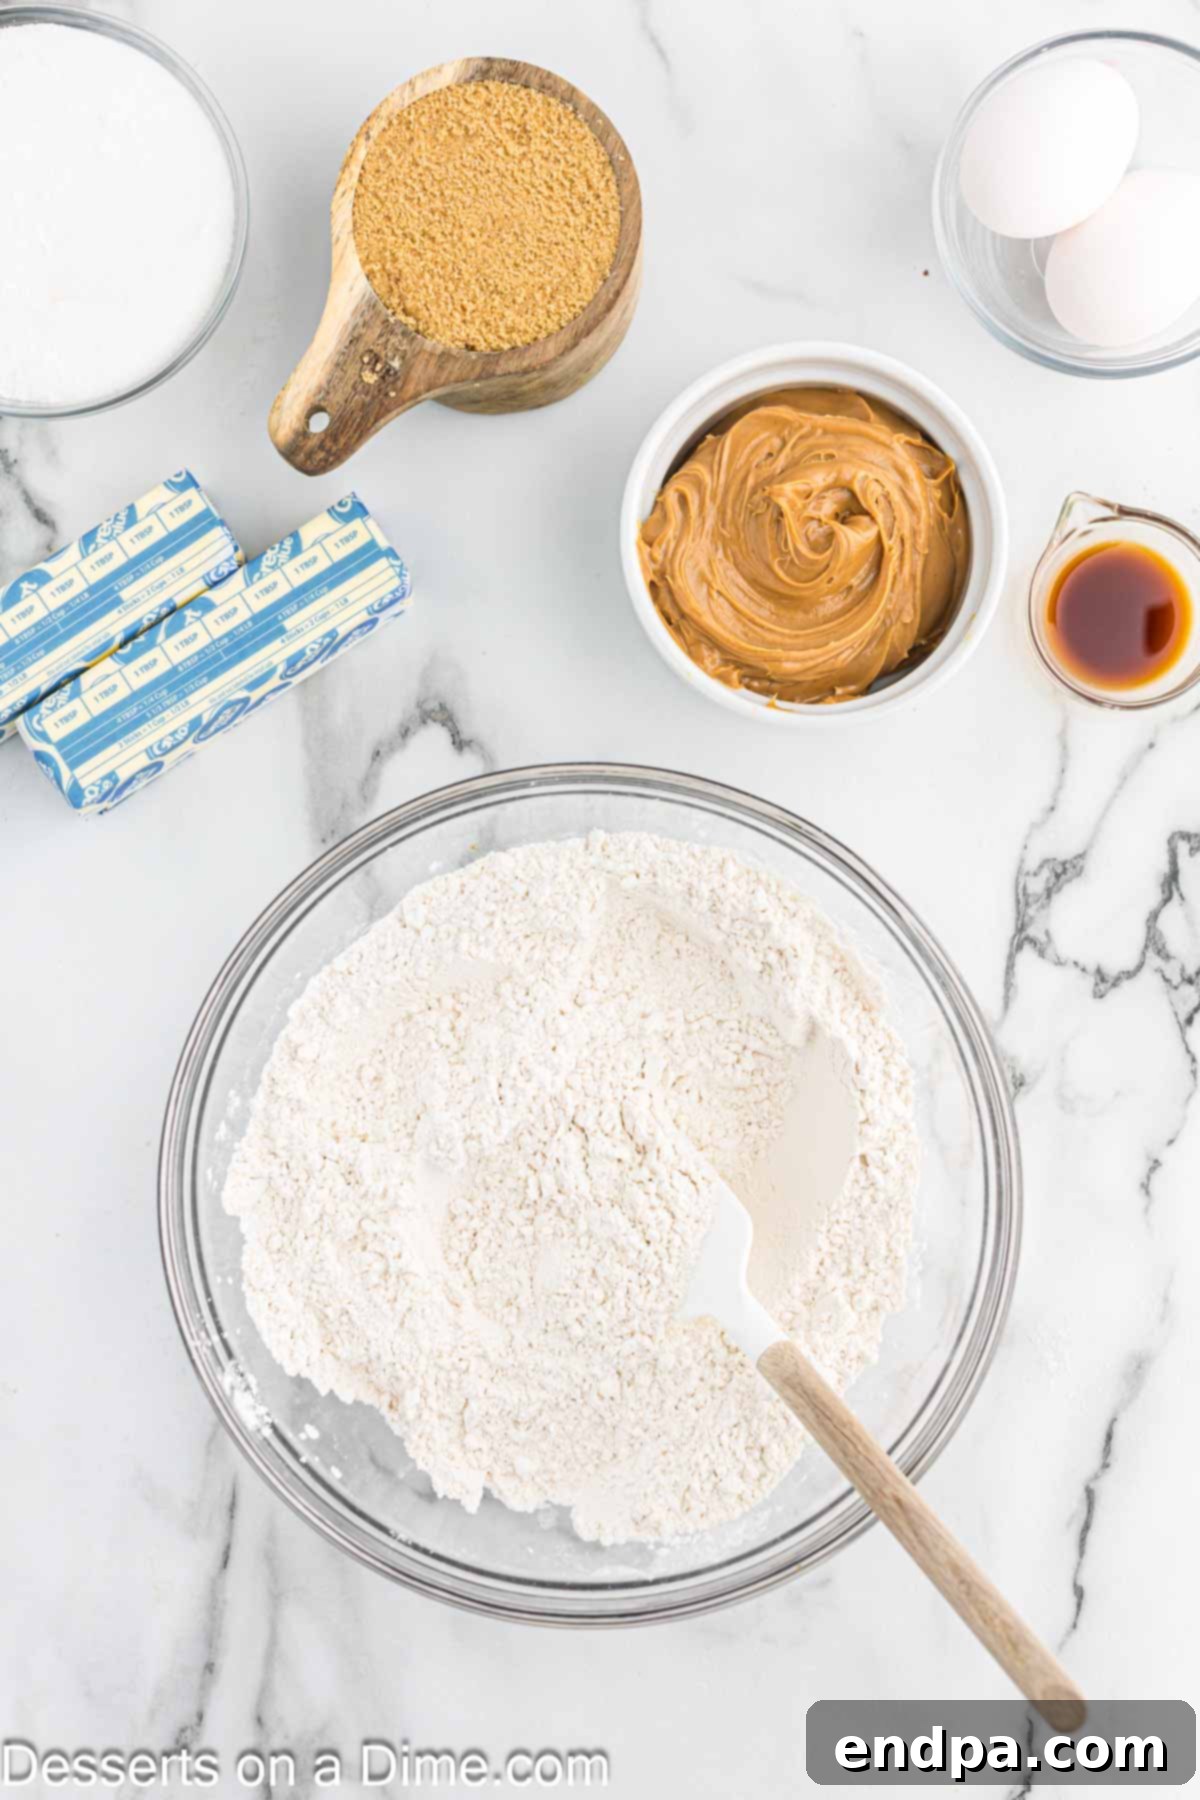
Step 2. Combine Dry Ingredients: In a medium mixing bowl, whisk together the all-purpose flour, baking powder, baking soda, cornstarch, and salt. Make sure these dry ingredients are thoroughly combined to ensure an even distribution throughout the cookie dough. Set aside.
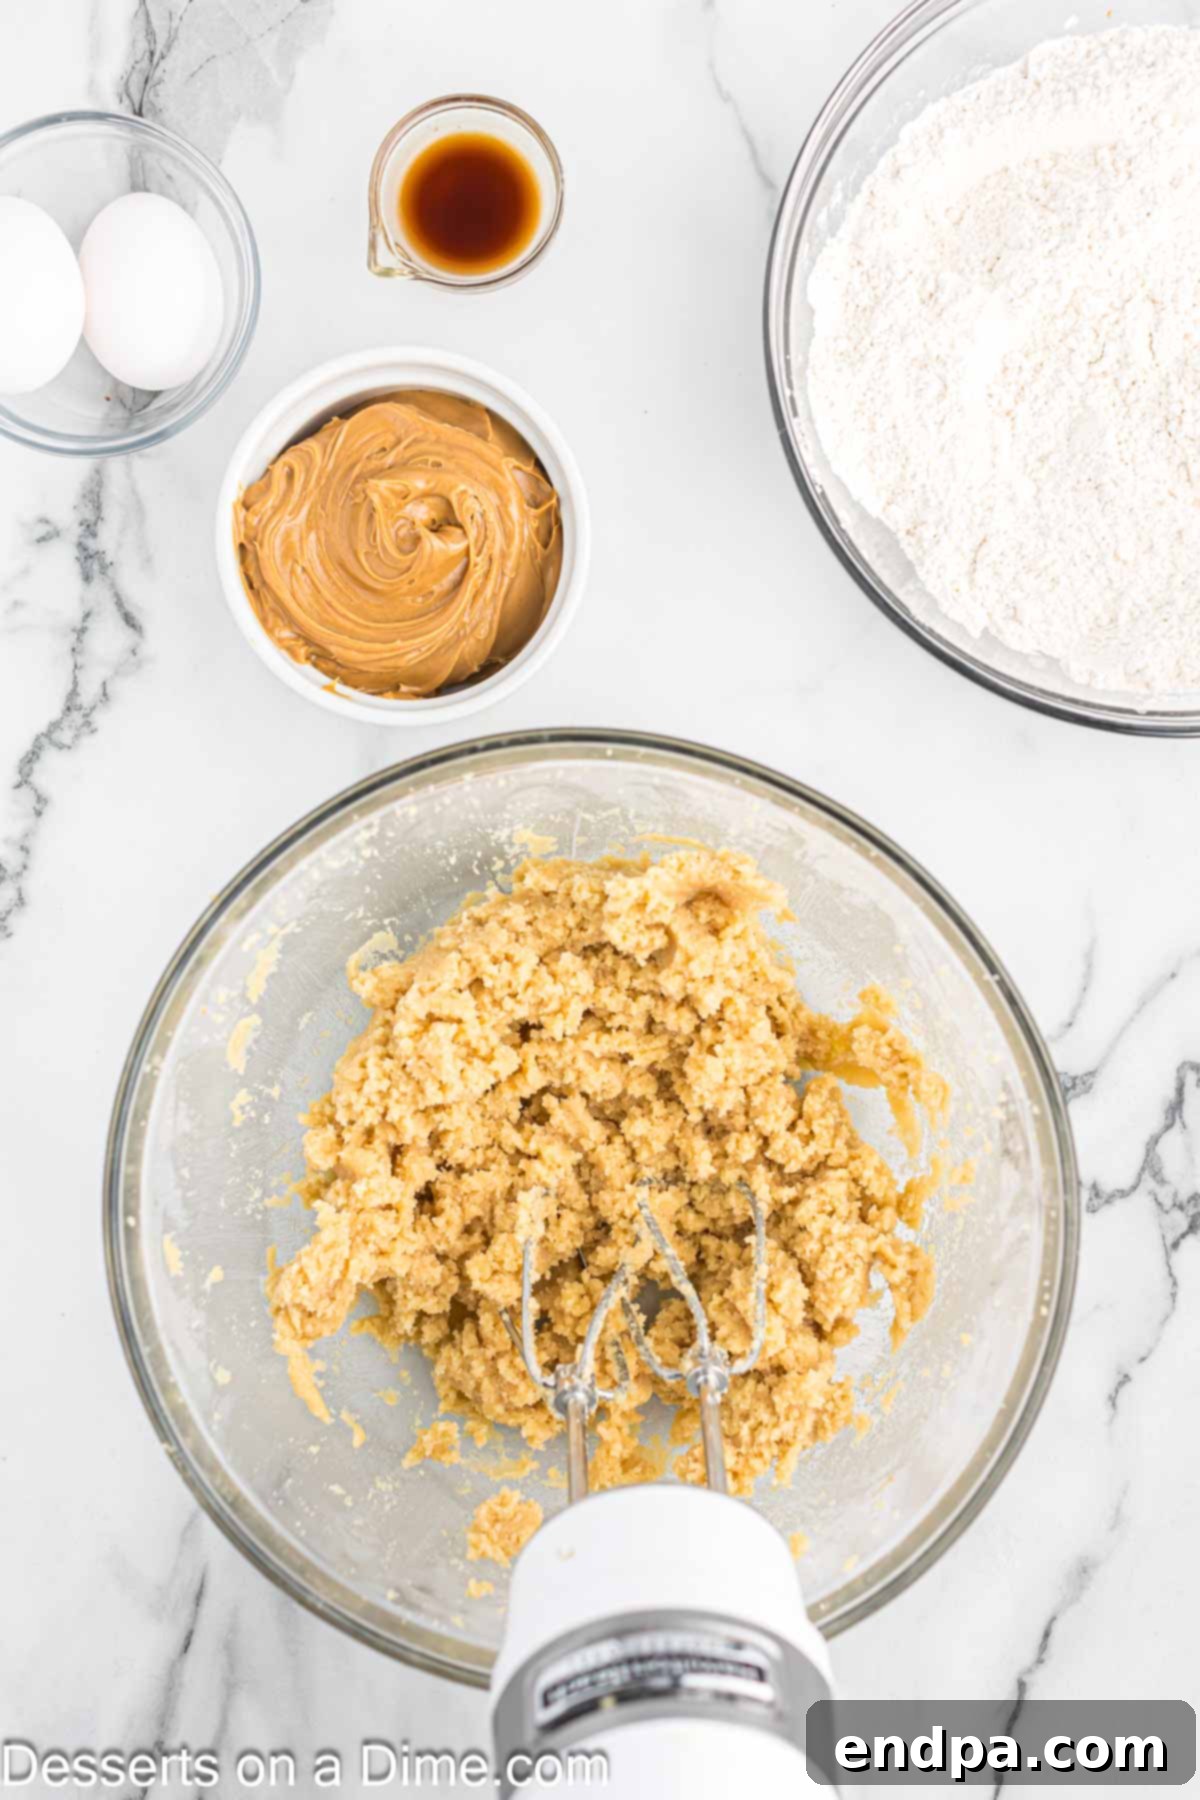
Step 3. Cream Butter and Sugars: In a separate large mixing bowl, using either a stand mixer fitted with the paddle attachment or a hand-held mixer, combine the softened butter with both the granulated sugar and brown sugar. Beat on medium speed until the mixture becomes light, fluffy, and pale in color, usually about 2-3 minutes. Scrape down the sides of the bowl as needed to ensure everything is well combined.
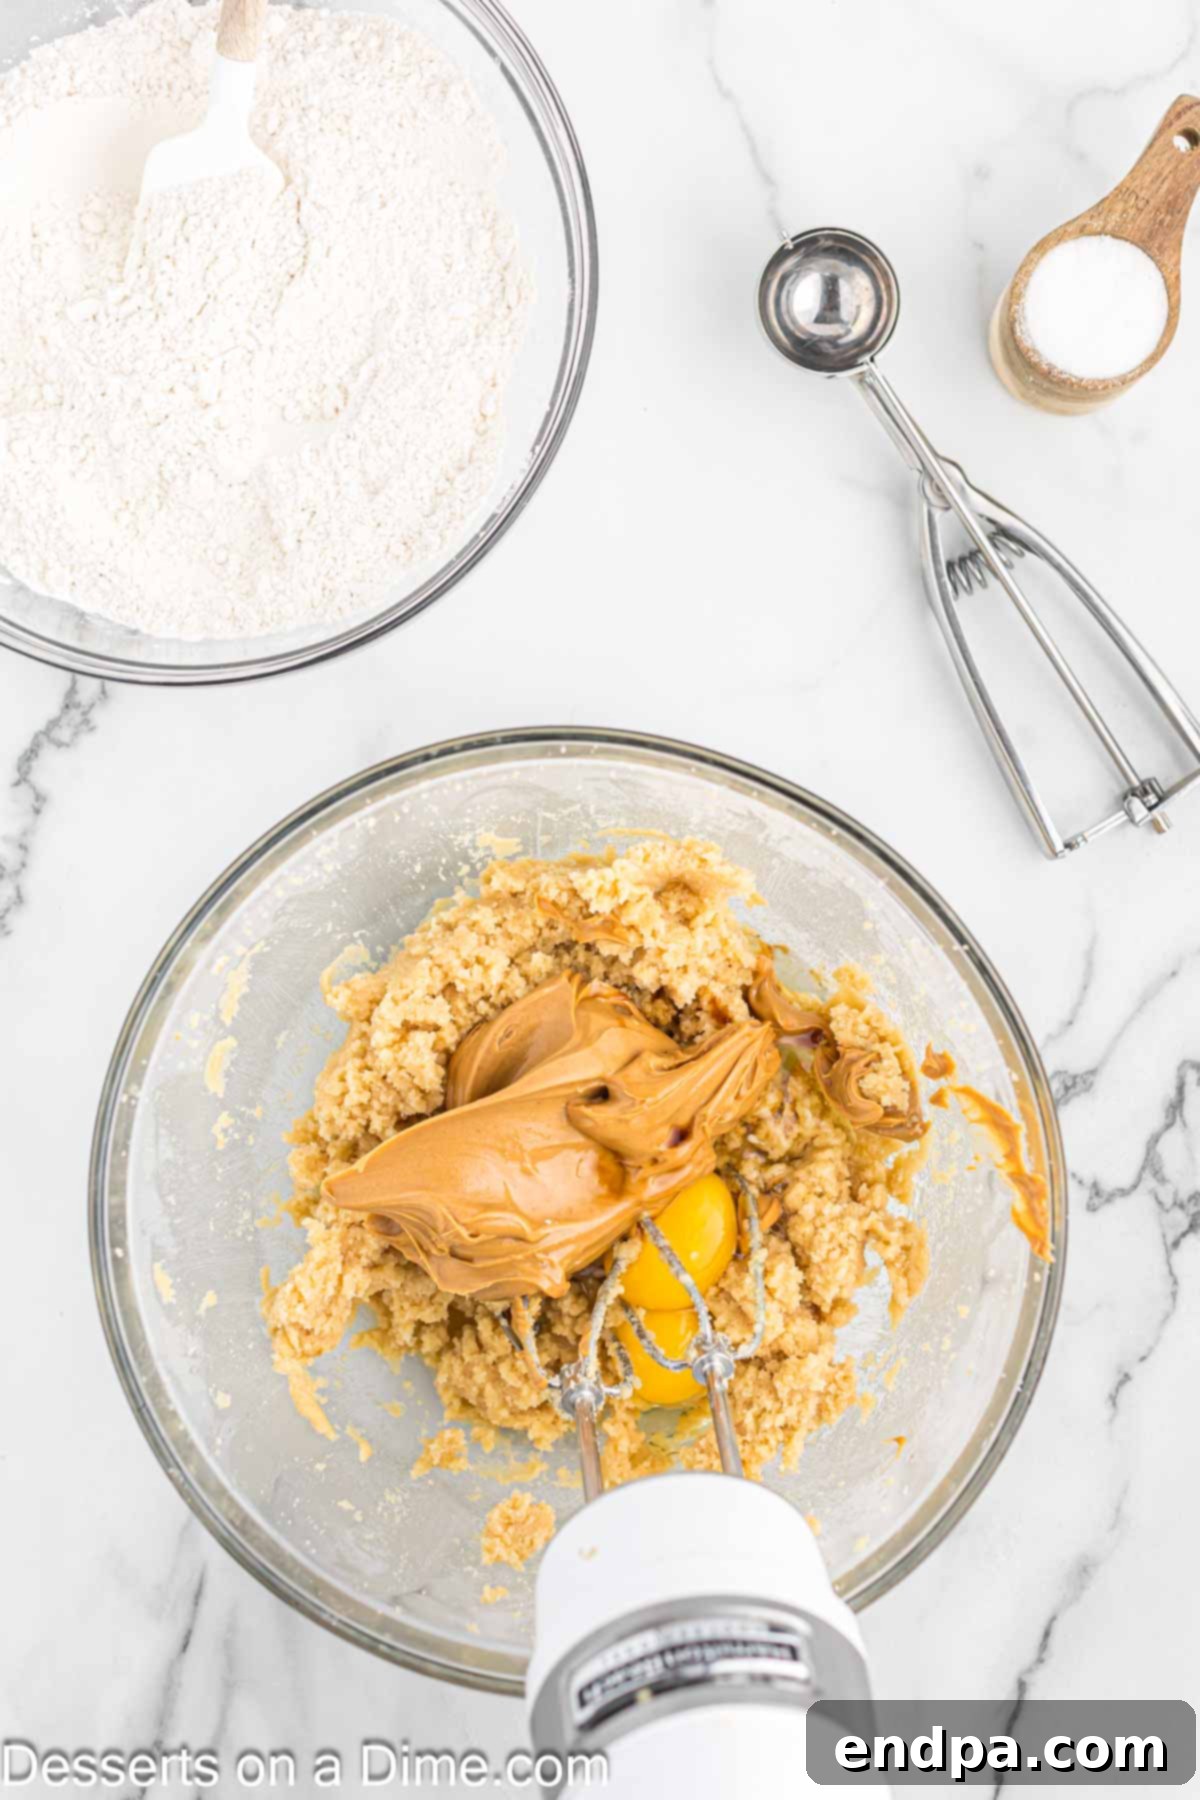
Step 4. Add Wet Ingredients: To the creamed butter and sugar mixture, add the creamy peanut butter, room temperature eggs, and vanilla extract. Beat again on medium speed.
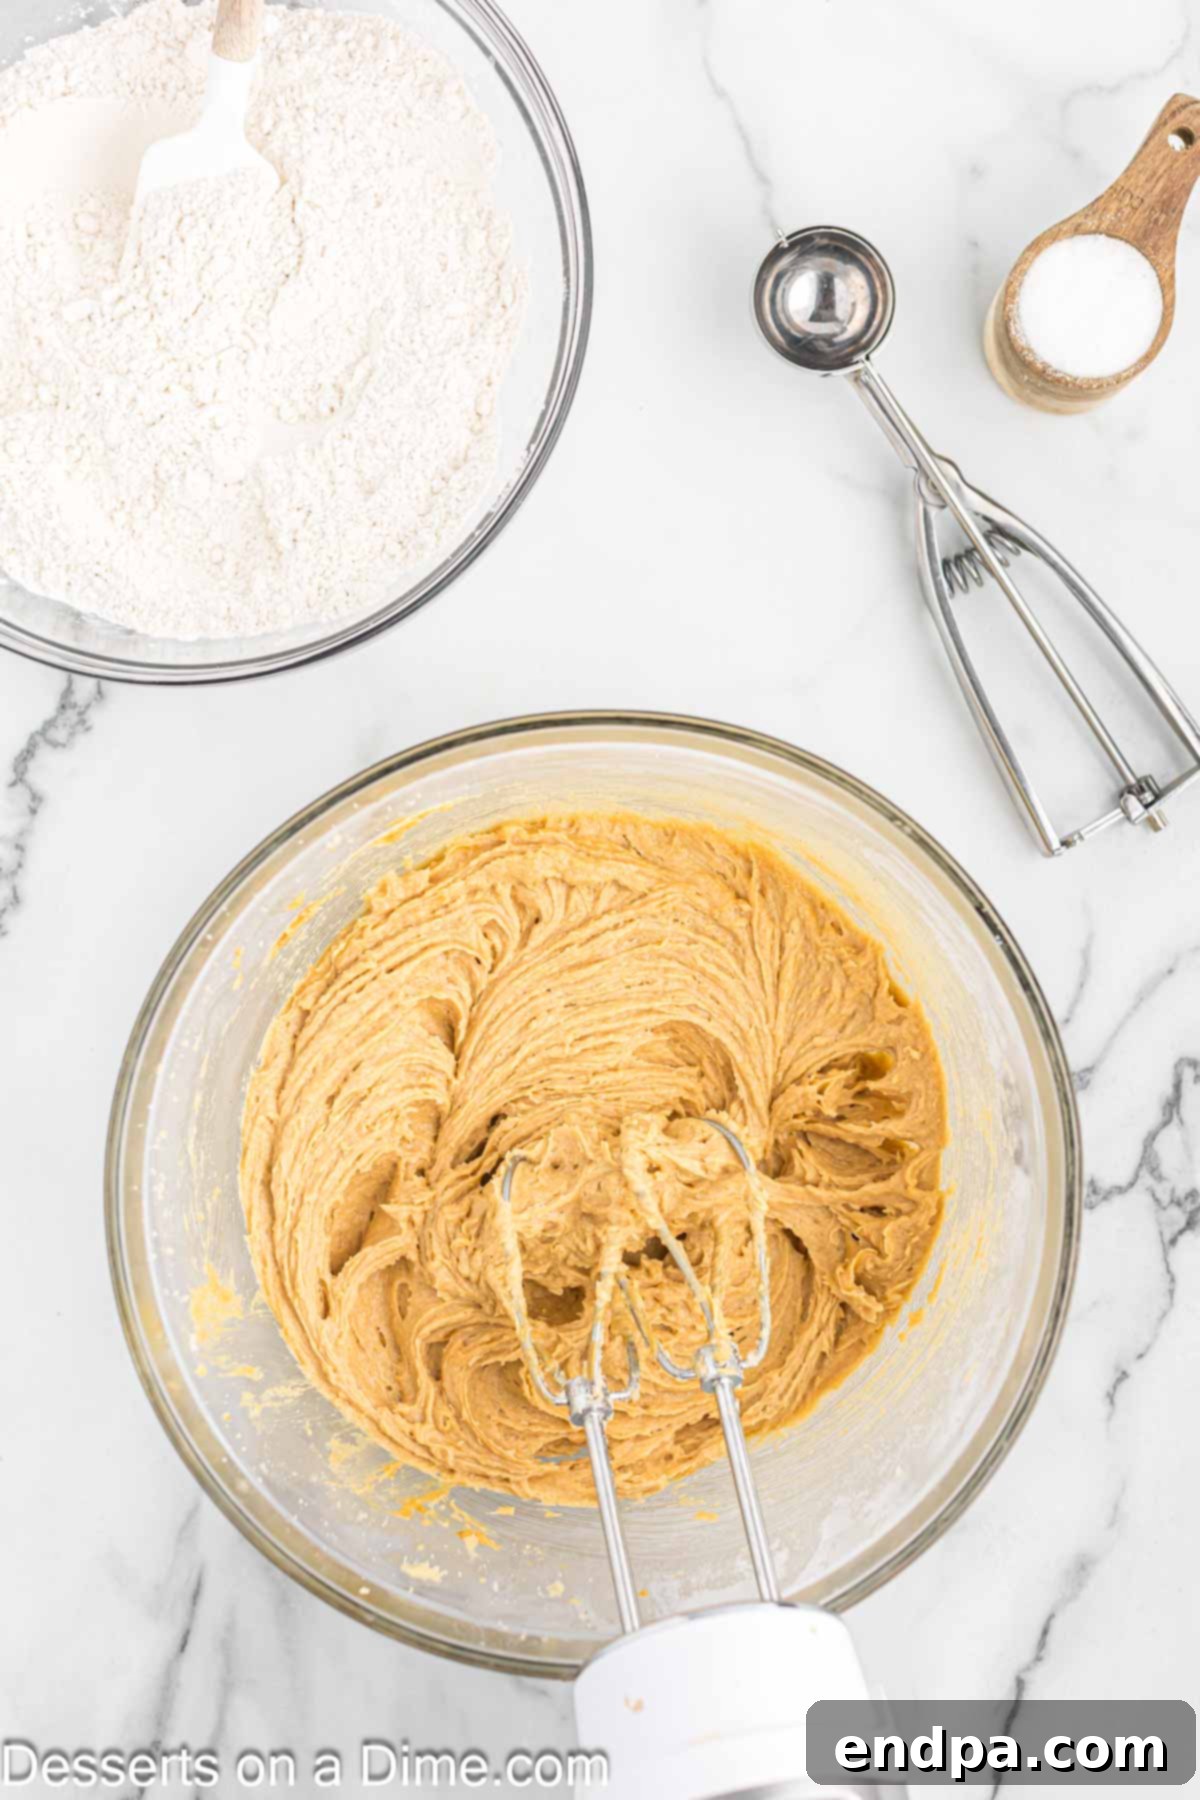
Step 5. Mix Until Combined: Continue mixing until these wet ingredients are thoroughly combined and the mixture is smooth and cohesive. Don’t overmix at this stage, just ensure everything is incorporated.
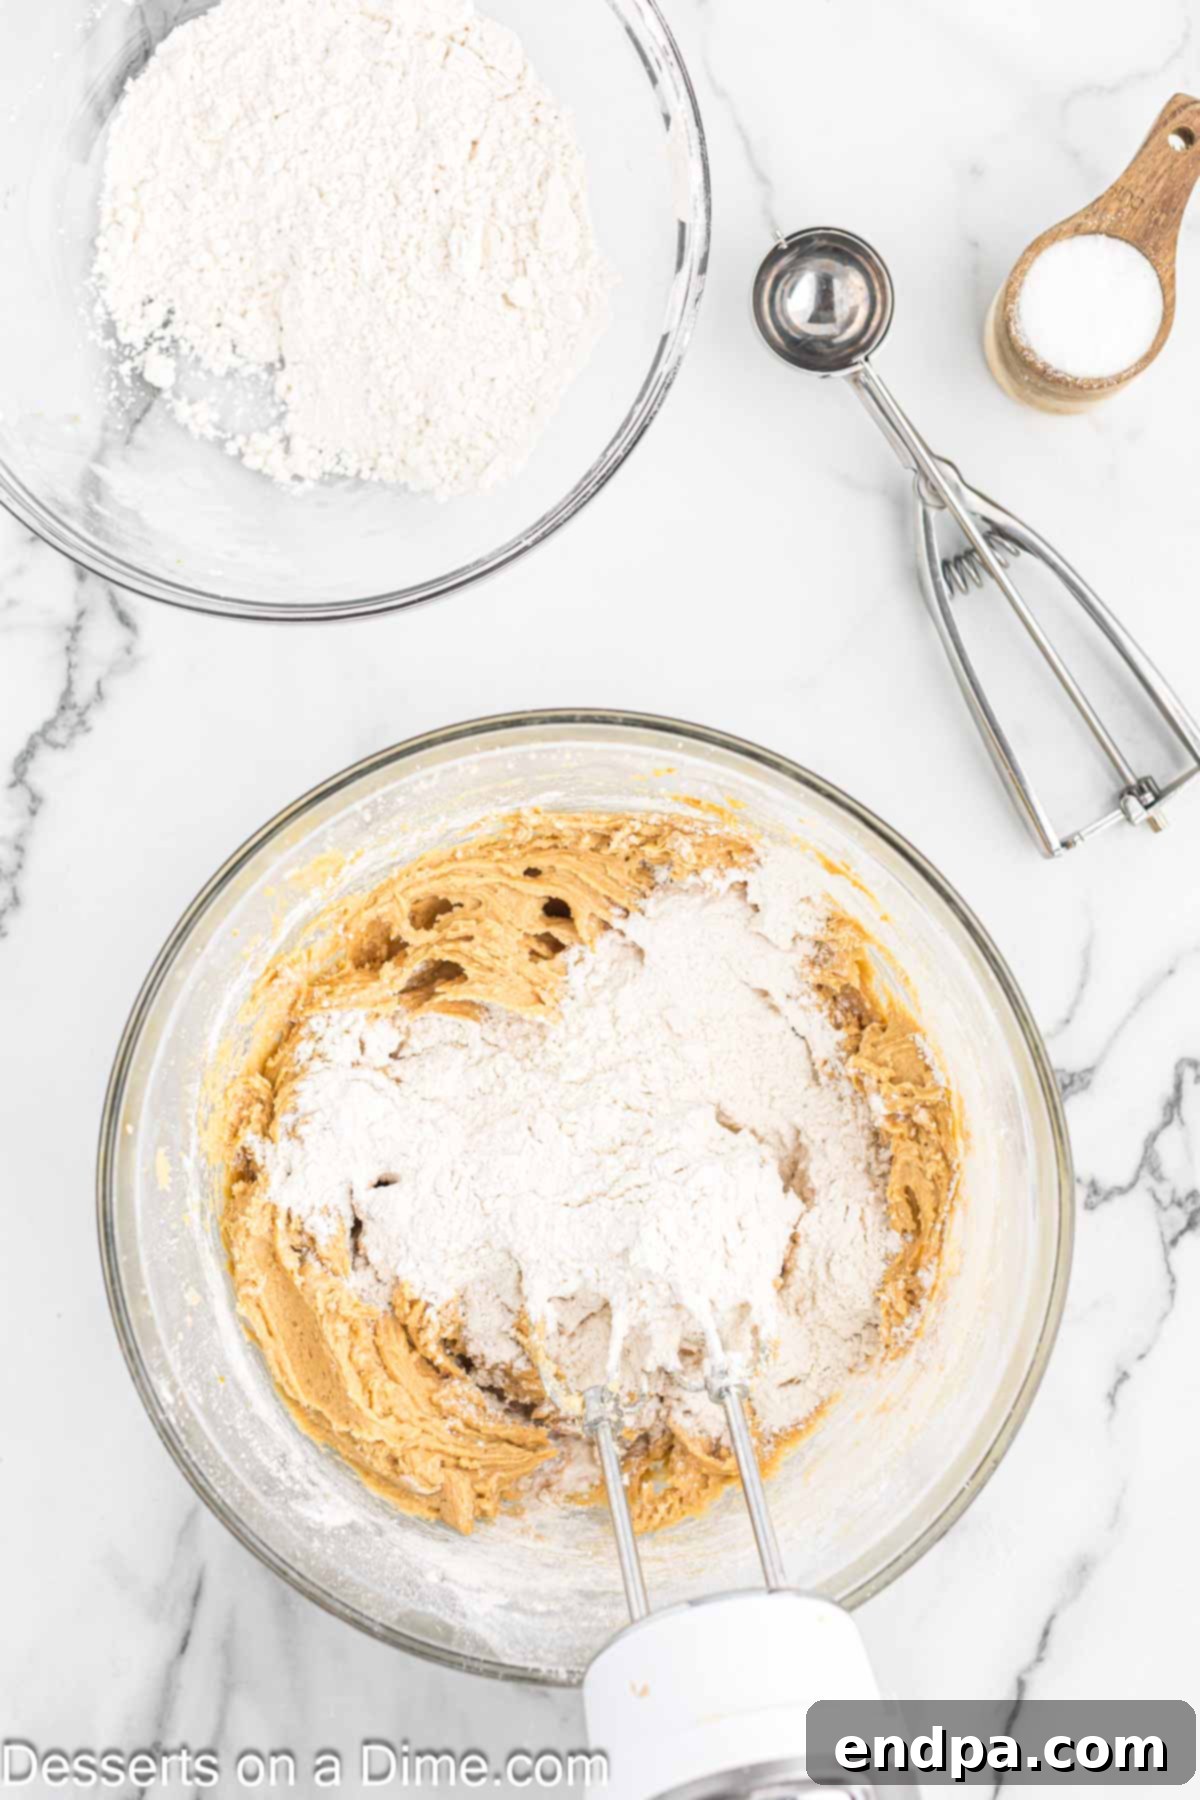
Step 6. Gradually Add Dry Ingredients: Reduce the mixer speed to low. Gradually add the dry ingredient mixture (from Step 2) into the wet mixture. Add about a third at a time, allowing it to mostly incorporate before adding the next batch.
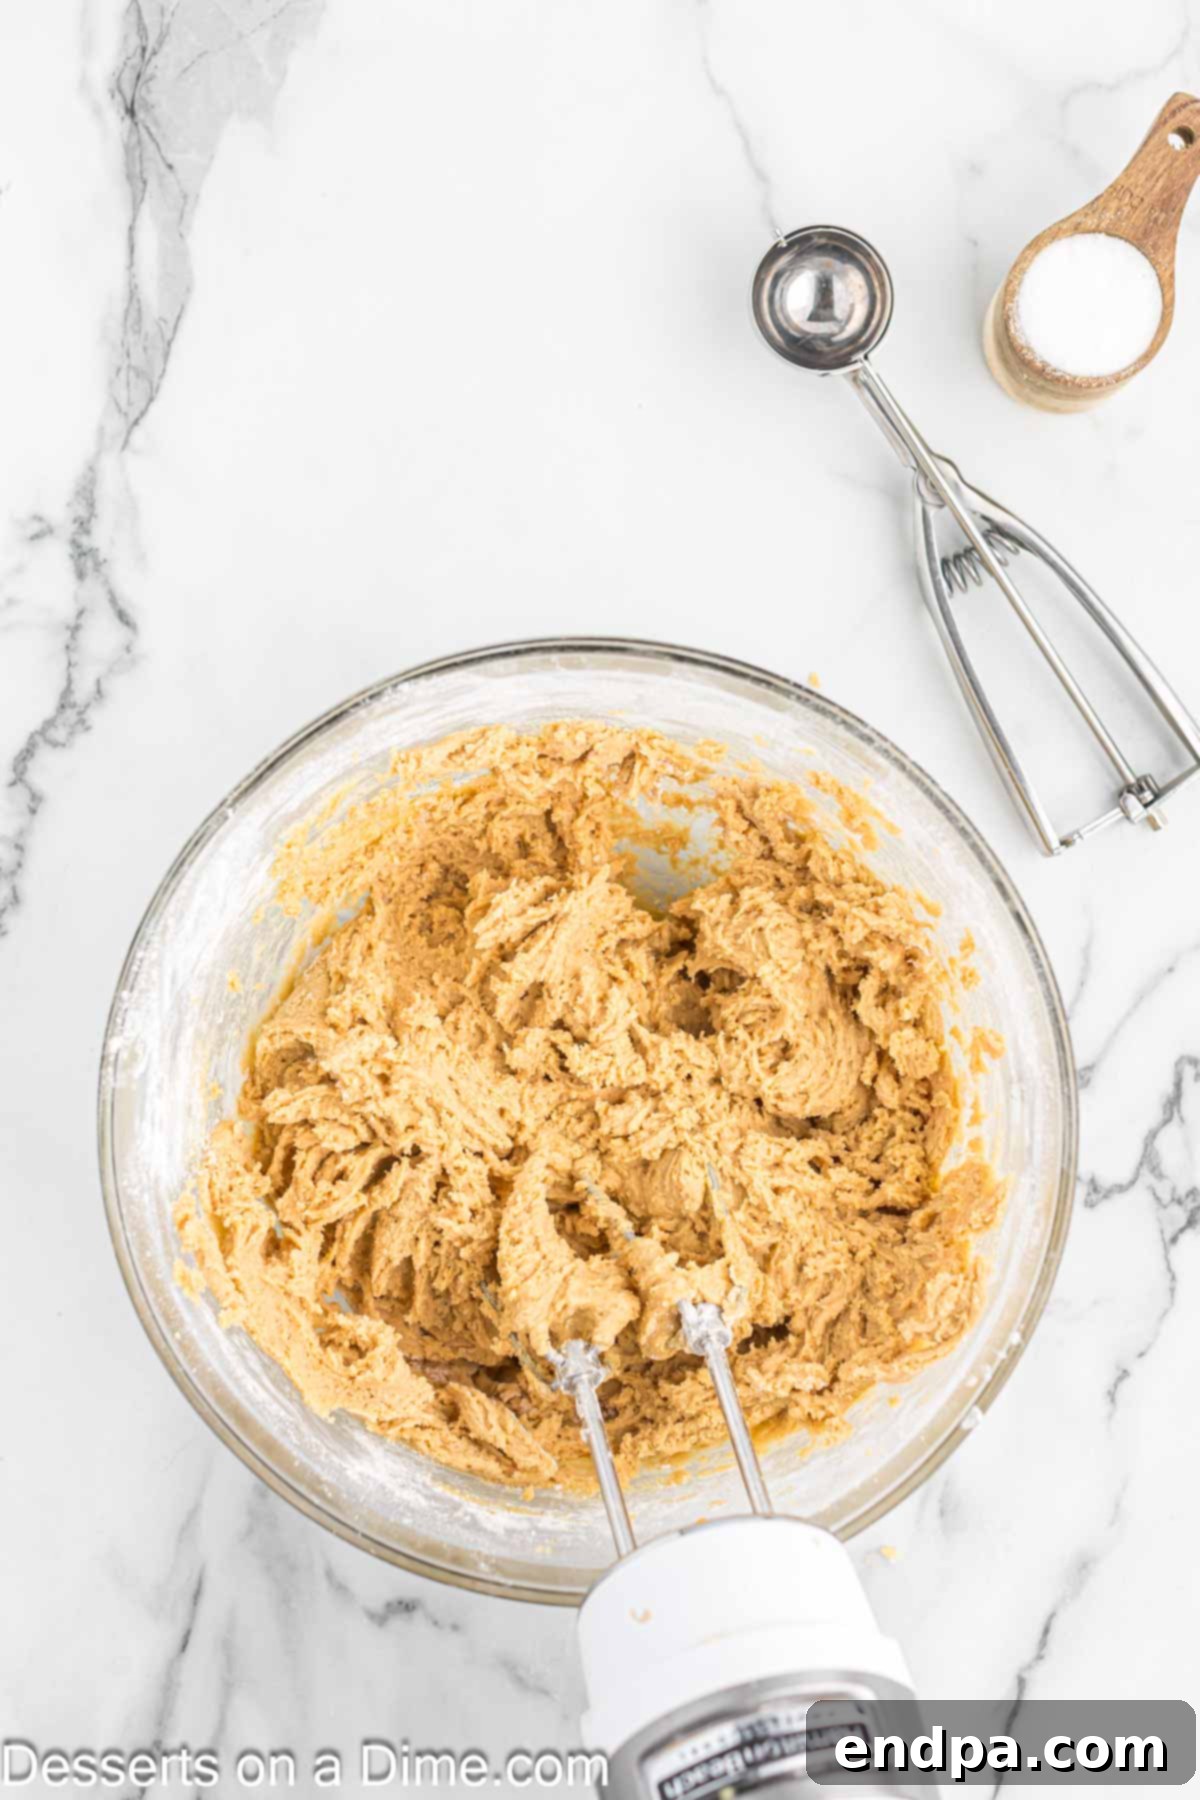
Step 7. Blend Just Until Combined: Continue mixing on low speed only until the dry ingredients are just blended into the wet ingredients and no streaks of flour remain. Be careful not to overmix, as this can lead to tough cookies. The dough should be soft and manageable.
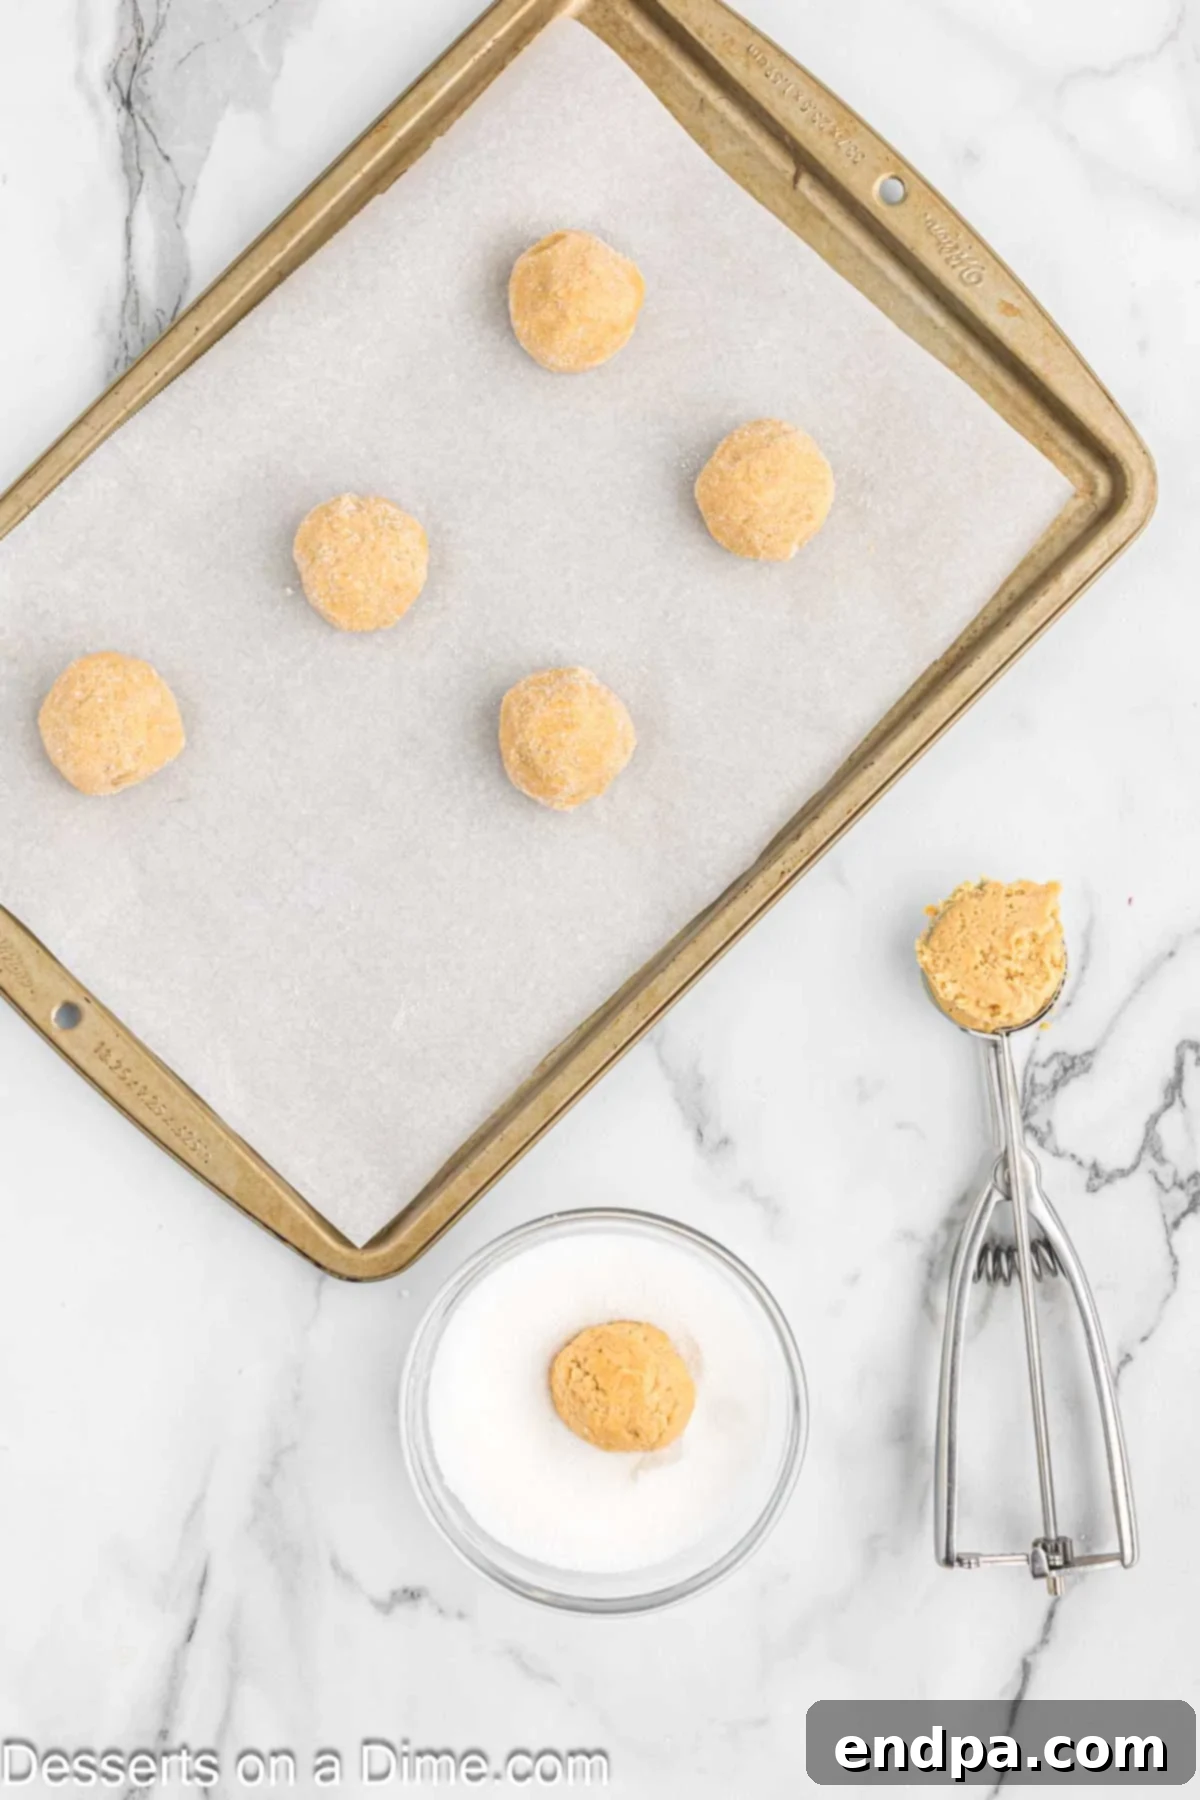
Step 8. Form Cookie Balls: Use a cookie scoop (about 1.5 tablespoons) to form the dough into uniform round balls. For an extra touch and classic peanut butter cookie appearance, gently roll each dough ball in a small bowl of granulated sugar. Place the sugared dough balls onto an ungreased baking sheet, leaving about 2 inches between each cookie.
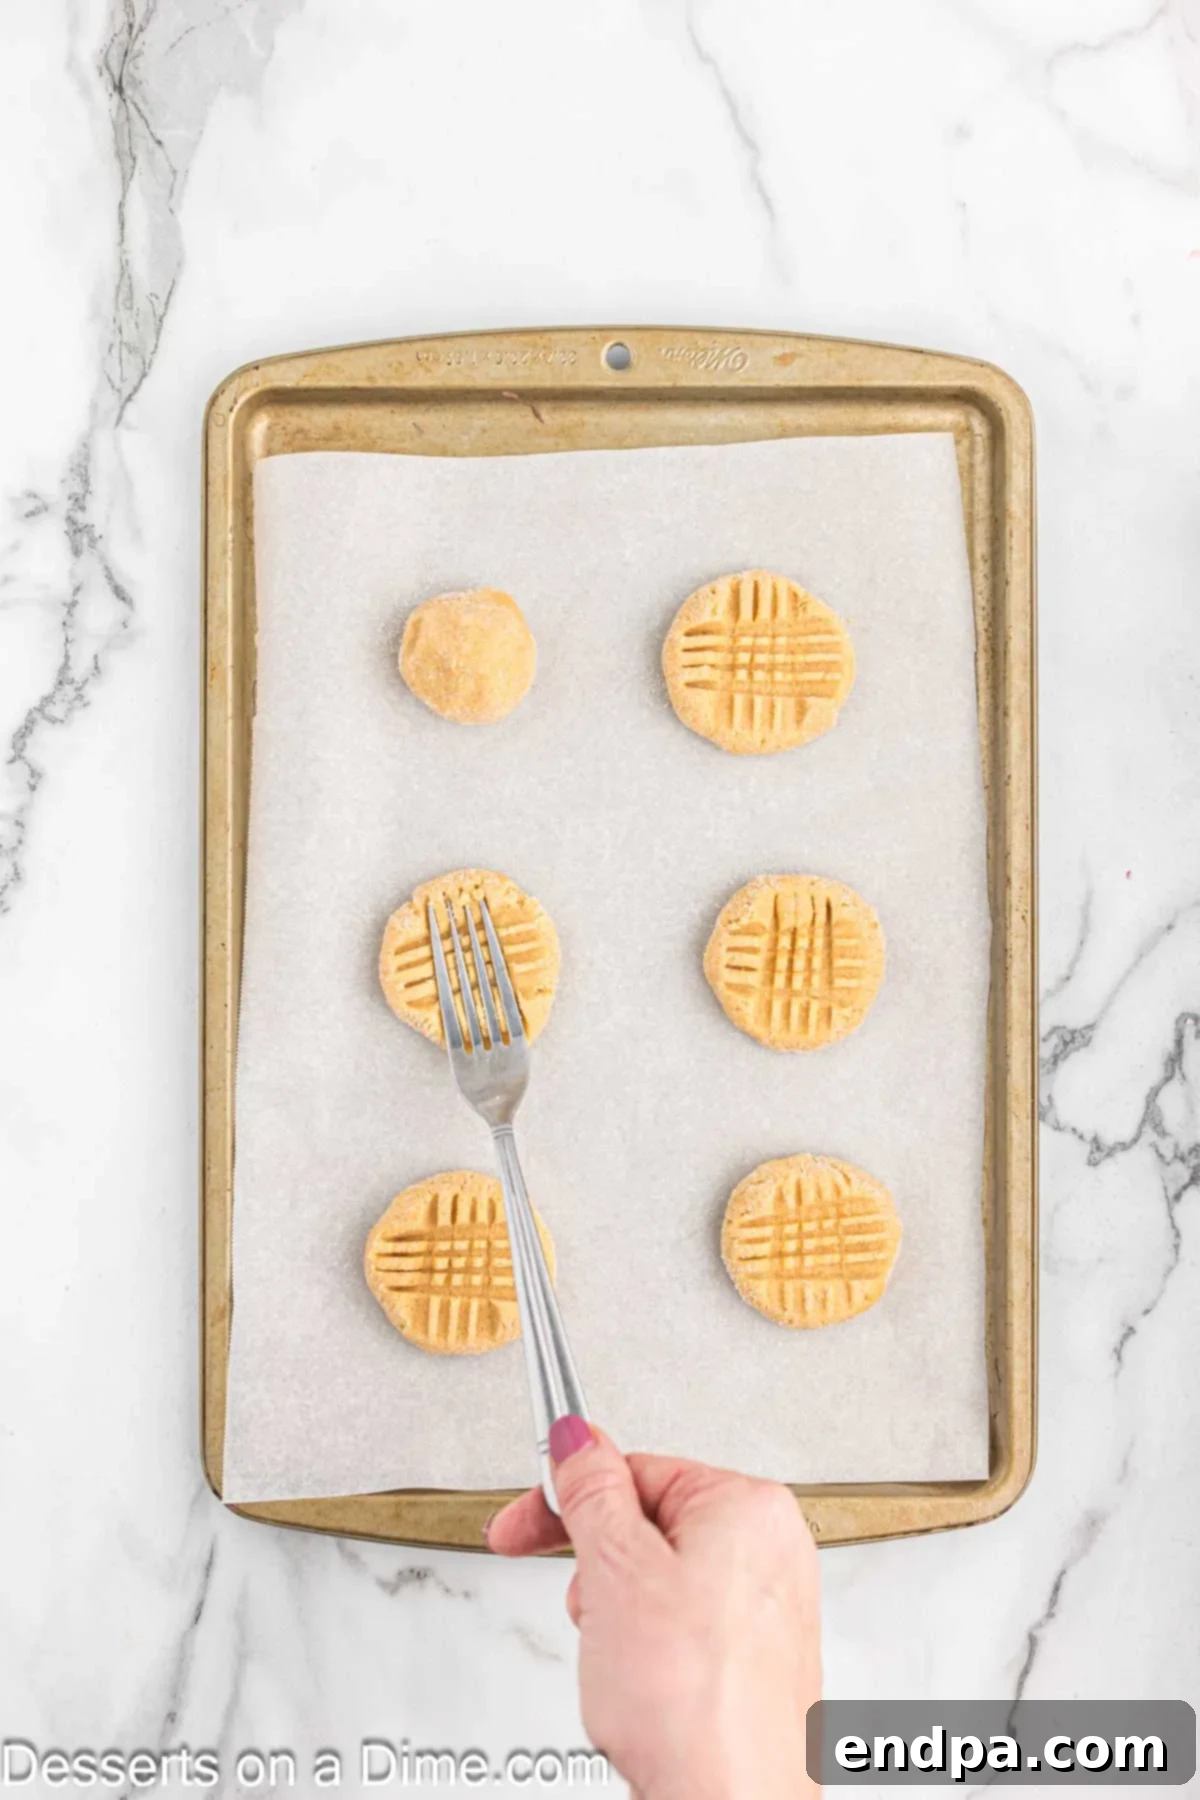
Step 9. Create Criss-Cross Pattern: Take a fork and gently flatten each dough ball, pressing down to create the traditional criss-cross pattern characteristic of peanut butter cookies. This helps the cookies bake evenly and adds a lovely texture.
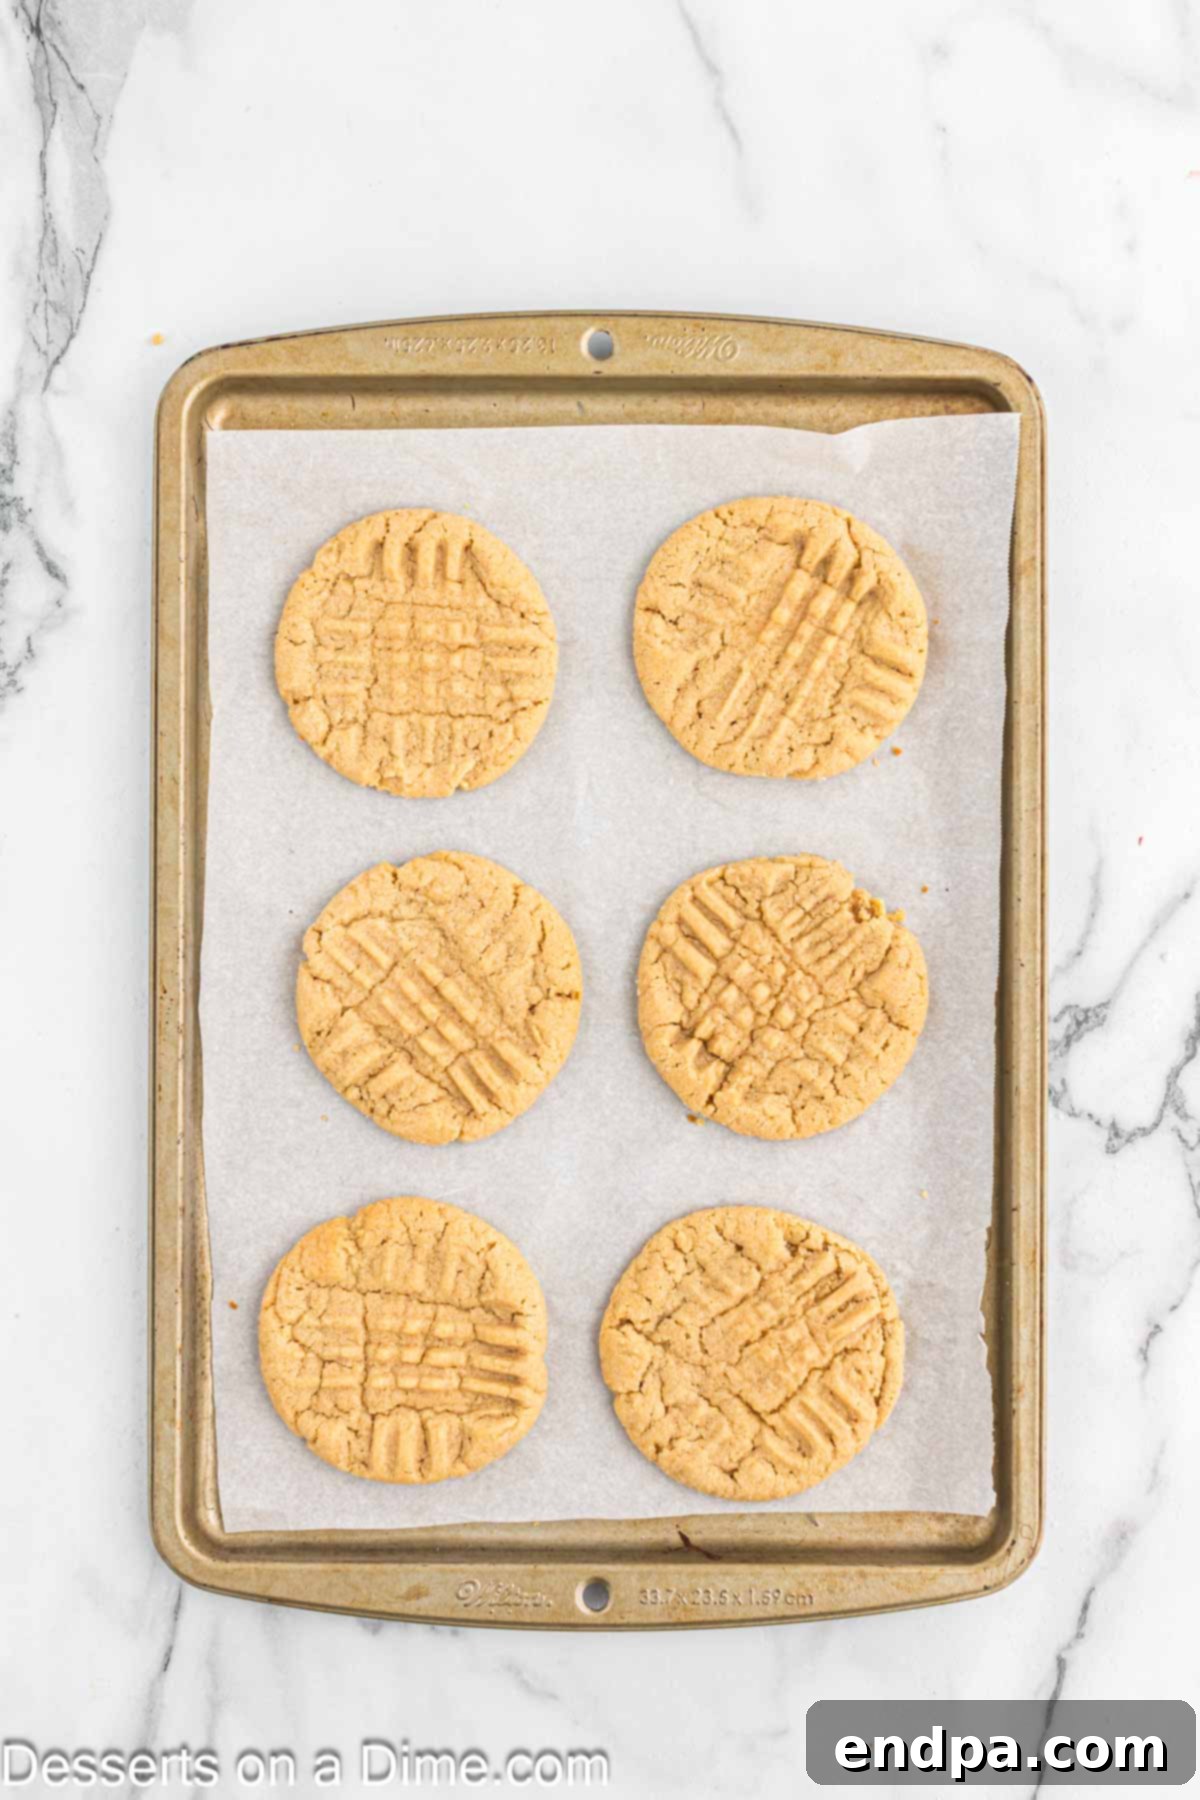
Step 10. Bake and Cool: Bake the cookies in the preheated oven for 10-12 minutes, or until the edges are lightly golden brown. The centers may still look a bit soft, but they will set as they cool. Remove from the oven and let the cookies cool on the baking sheet for 5 minutes. This is a crucial step as they continue to cook slightly from residual heat. After 5 minutes, carefully transfer them to a wire rack to cool completely before decorating.
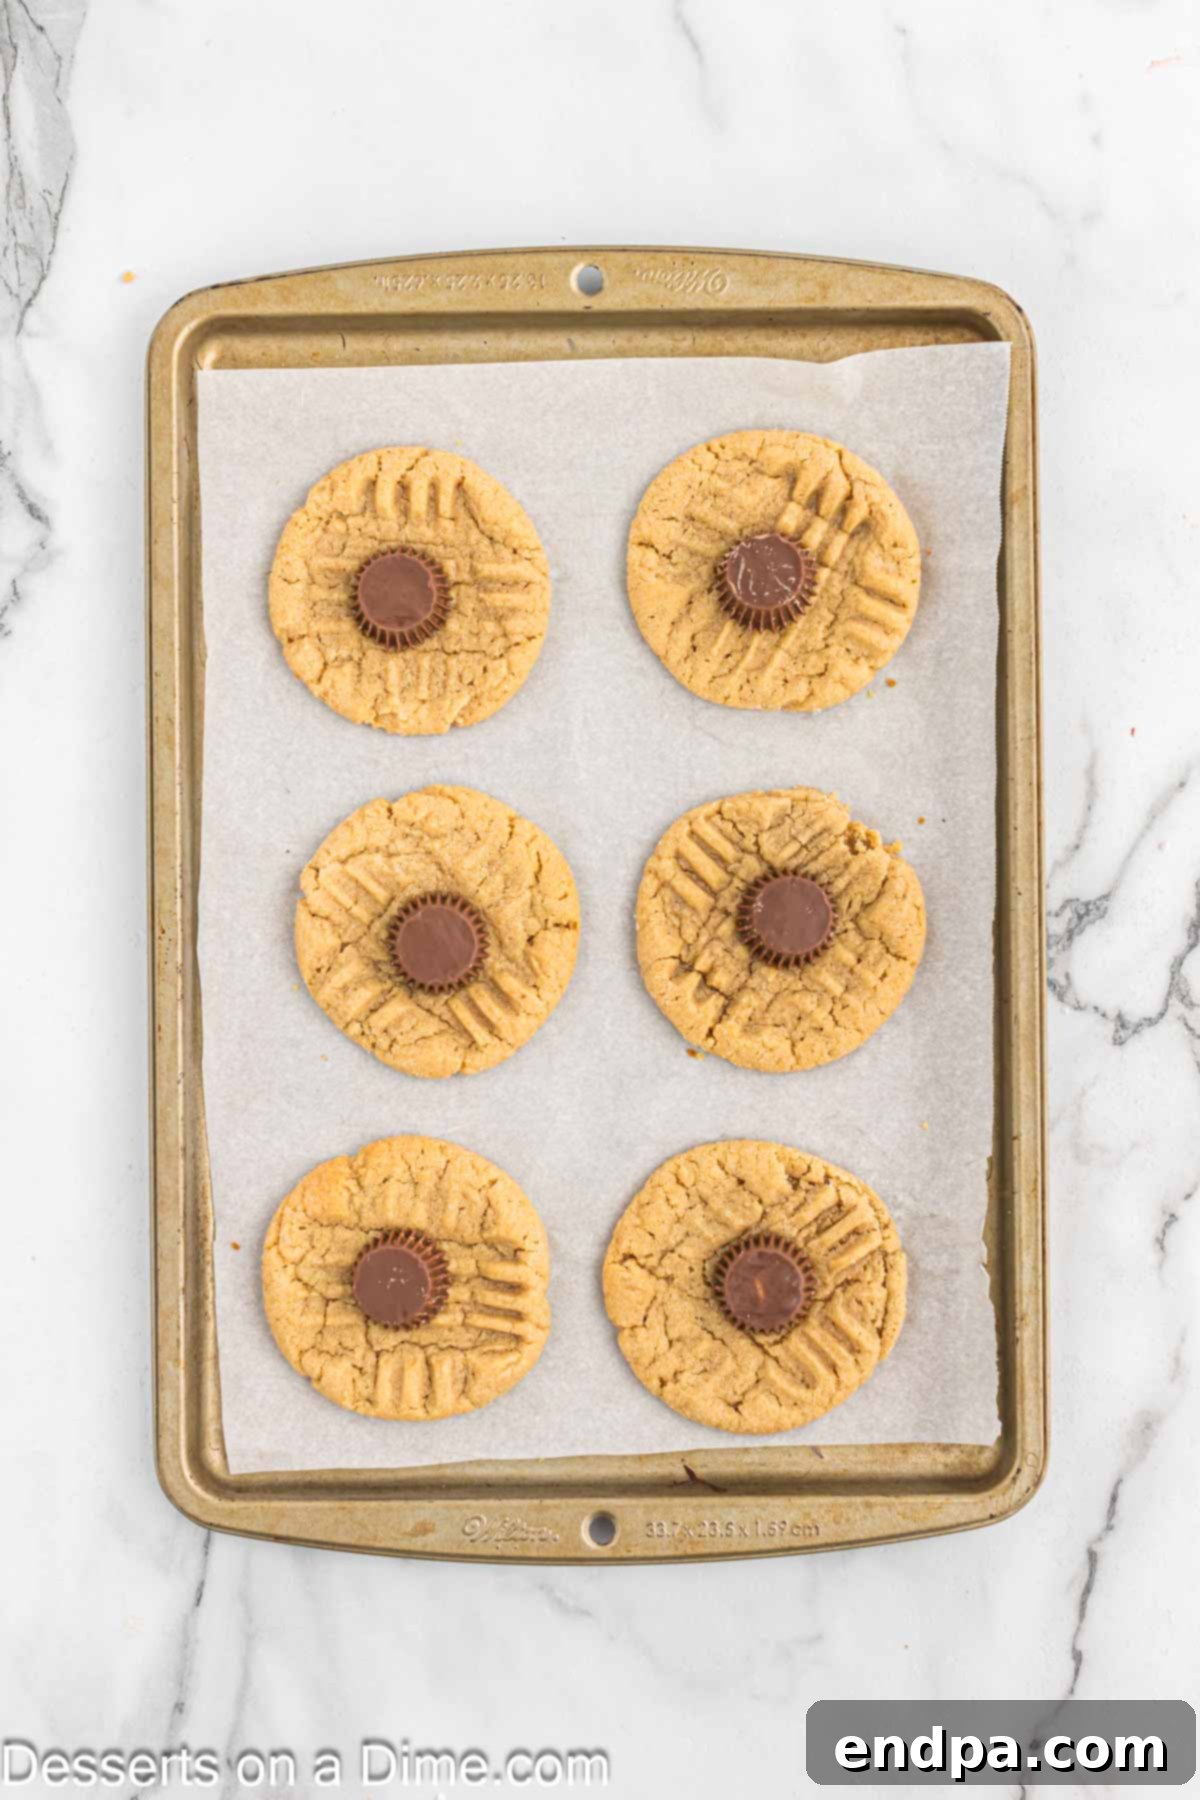
Step 11. Add Spider Bodies: While the cookies are still warm but cool enough to handle, unwrap your chilled Reese’s Miniature Peanut Butter Cups. Gently press one peanut butter cup, upside down, into the center of each cookie. The warmth of the cookie will slightly soften the chocolate, helping it adhere. If the cookies have cooled too much, you can use a tiny dab of melted chocolate (from the wafers) to ‘glue’ the peanut butter cup in place.
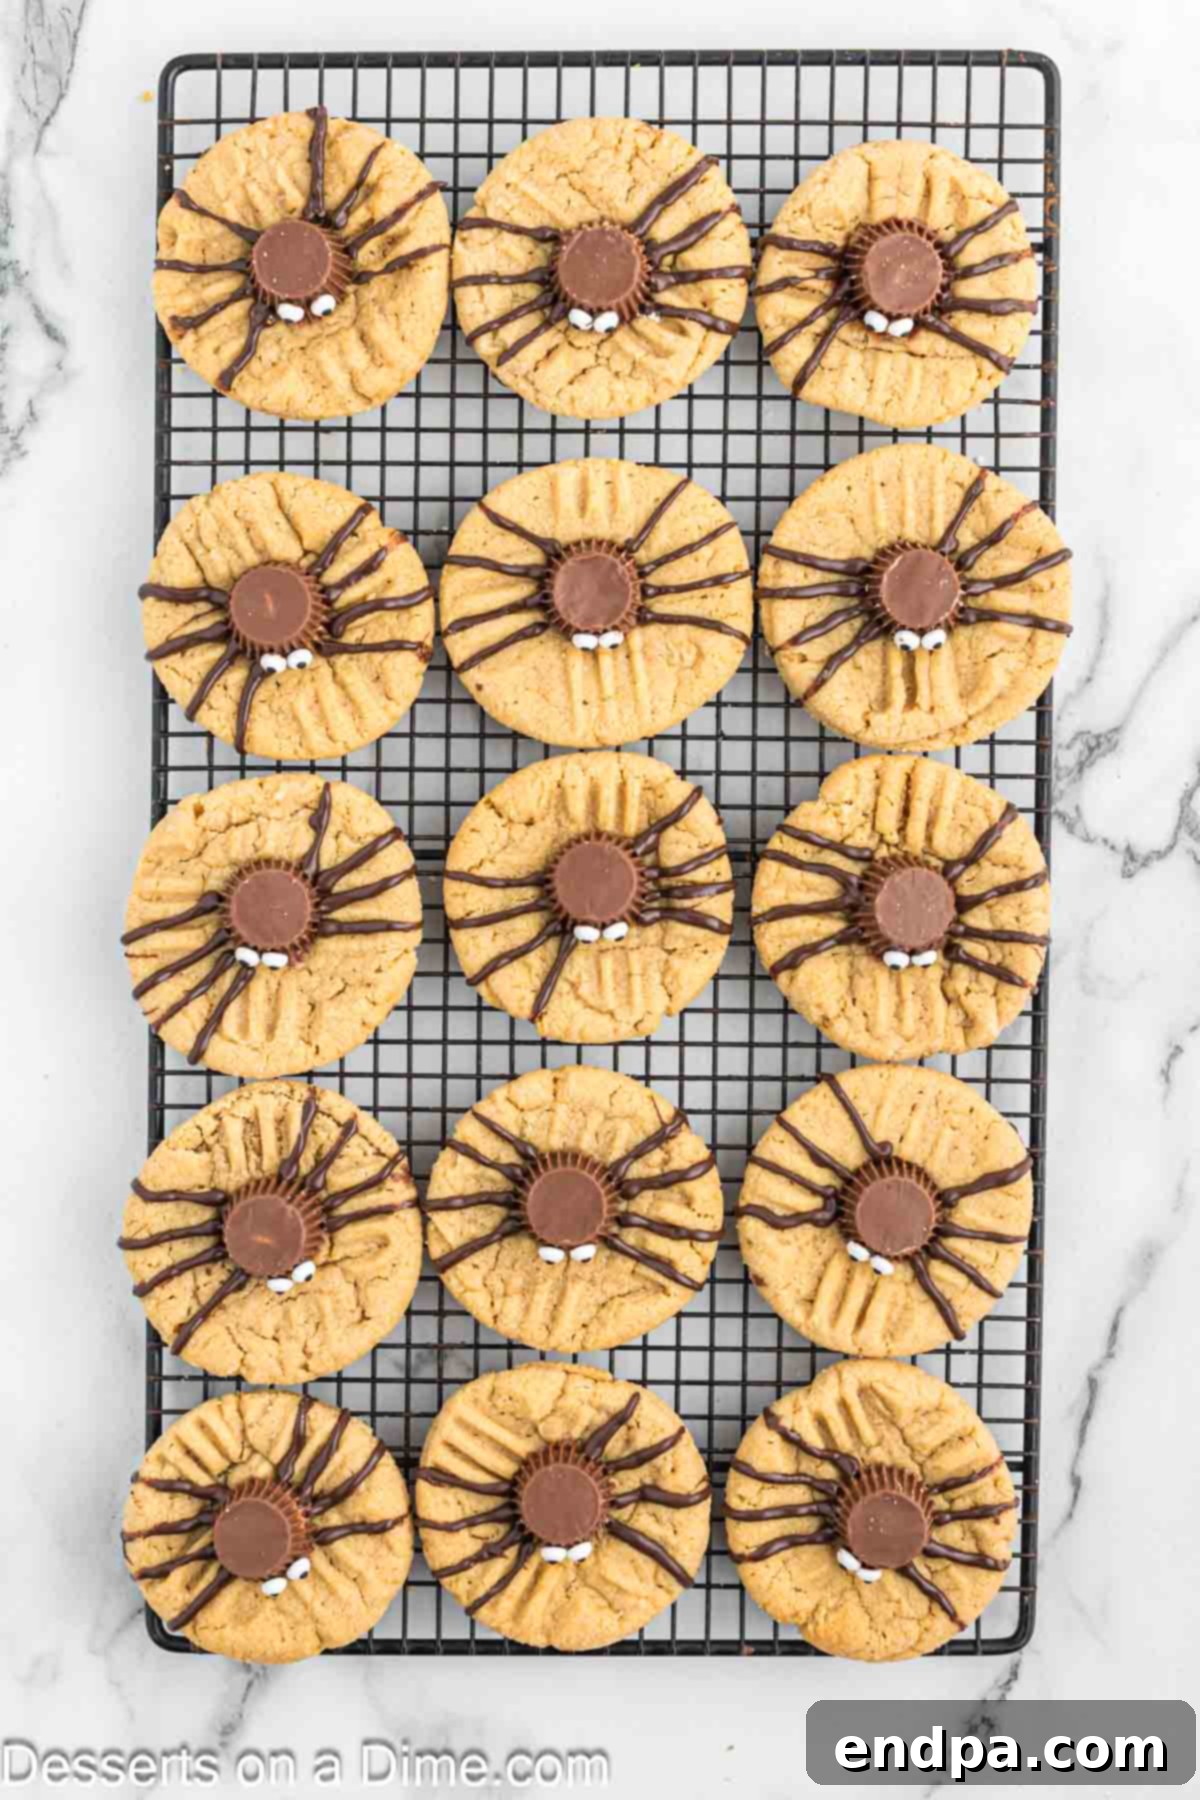
Step 12. Pipe Spider Legs: Melt your chocolate wafers in a microwave-safe bowl. Heat in 30-second intervals, stirring well after each, until smooth and fully melted. Transfer the melted chocolate to a piping bag (or a small ziplock bag with a tiny corner snipped off). Allow the chocolate to cool for about 5 minutes until it’s slightly thickened but still fluid enough to pipe. Carefully pipe four thin chocolate lines on both sides of the Reese’s Peanut Butter Cup, extending onto the cookie, to create the spider’s eight legs.
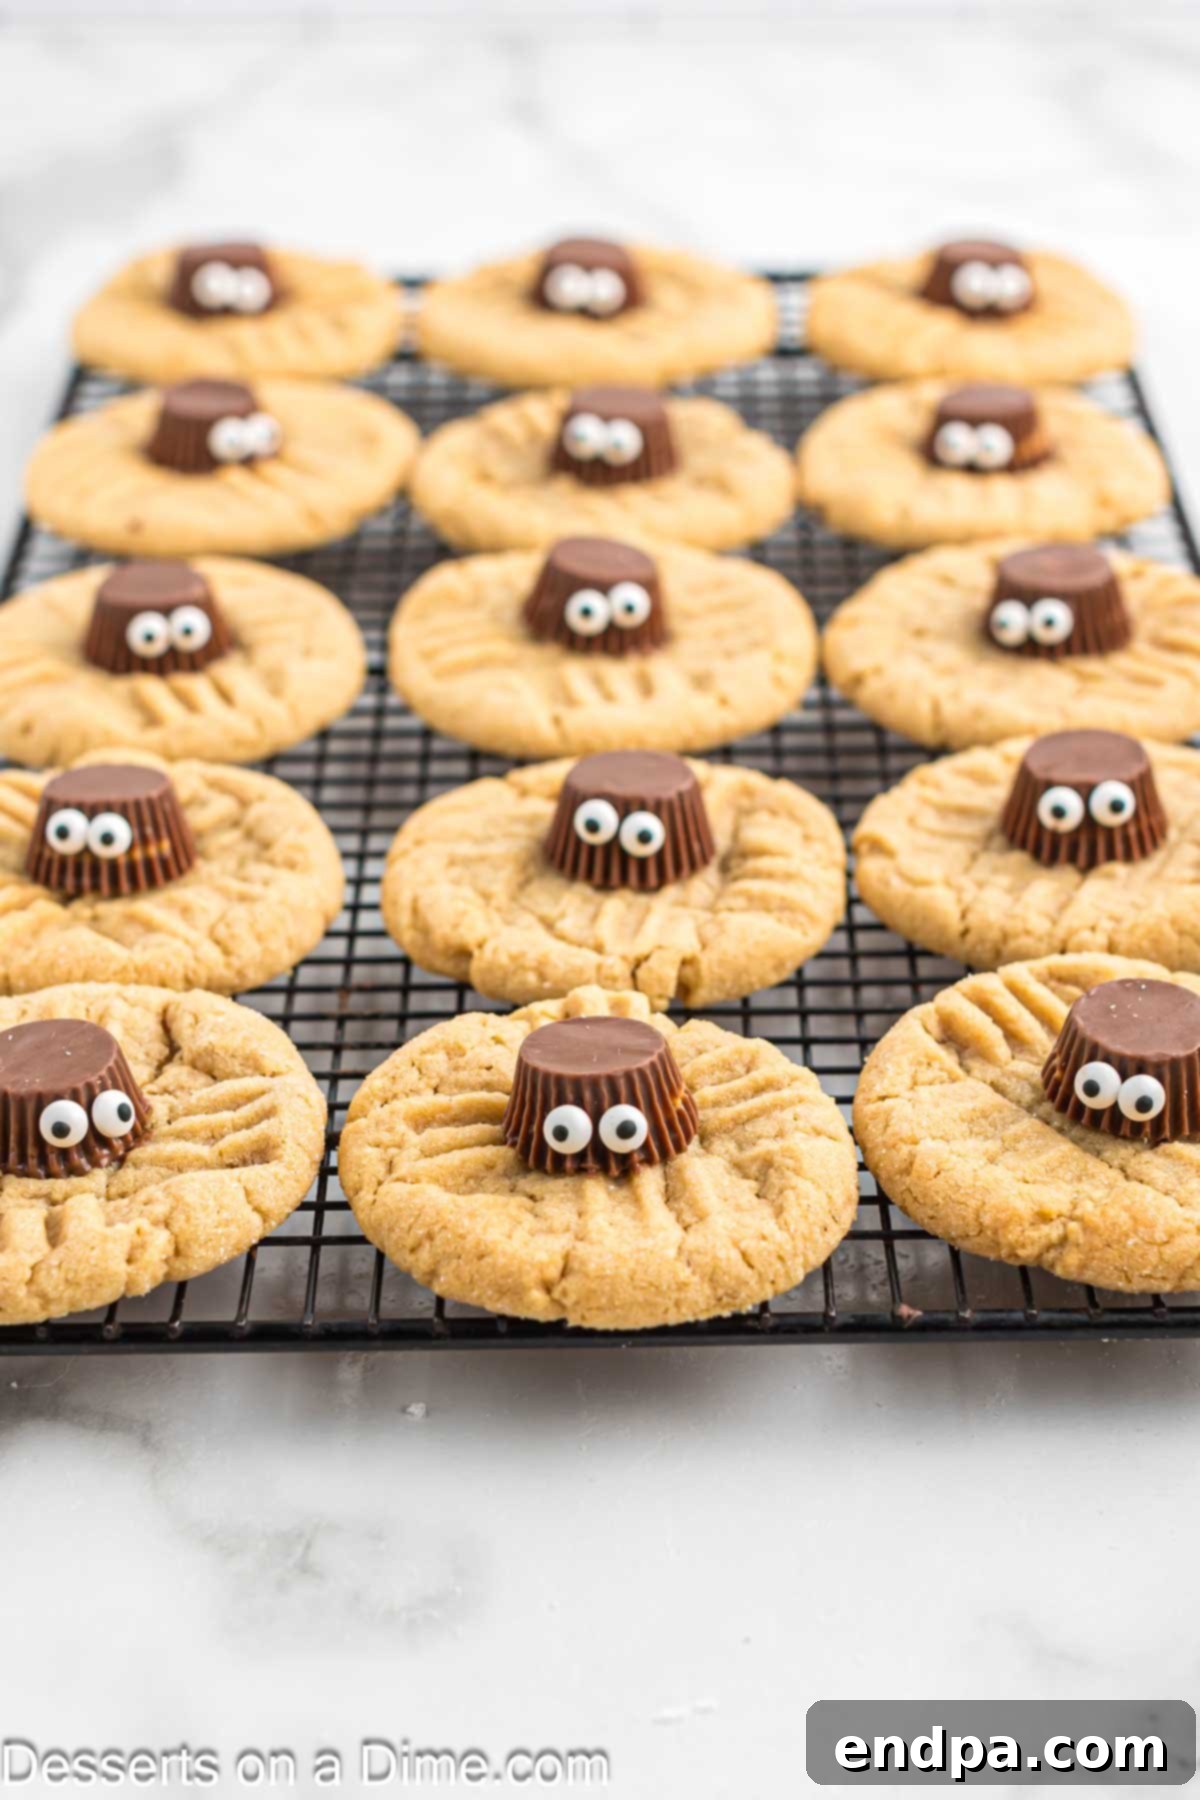
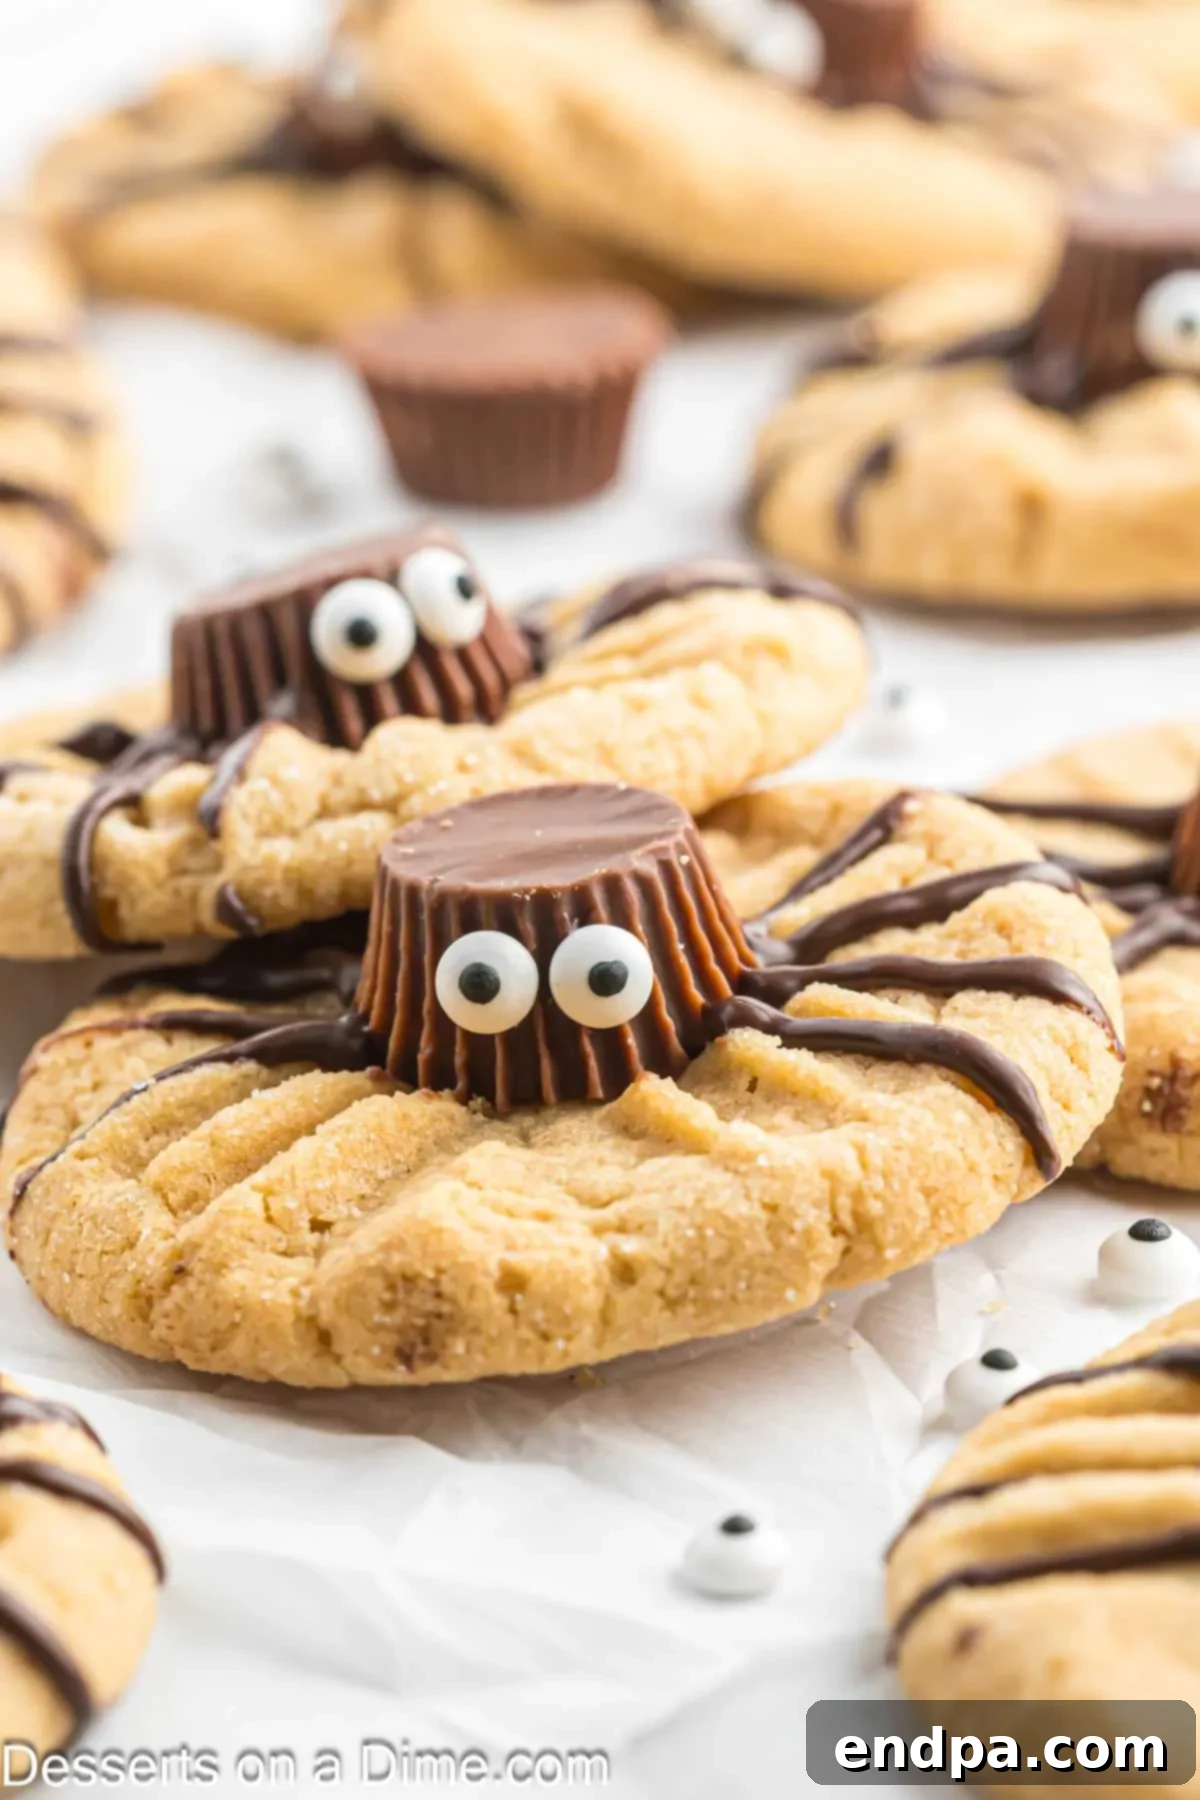
Step 13. Add Candy Eyes: To give your spiders their charmingly spooky gaze, dab a small amount of melted chocolate onto the front of each peanut butter cup. Immediately press two candy eyes onto the chocolate. Repeat for all cookies. Allow the chocolate to fully set at room temperature or in the refrigerator for a few minutes before serving. Once set, your adorable Halloween Spider Cookies are ready to be enjoyed!
Pro Tips for Perfect Peanut Butter Spider Cookies
Achieving the best results with your Halloween Spider Cookies is easy with a few expert tricks up your sleeve. These tips will help ensure your cookies are not only delicious but also perfectly spooky and stable:
- Consistent Cookie Scoop Use: Using a uniform cookie scoop is key to ensuring all your cookies are the same size. This leads to even baking, meaning no burnt edges or raw centers. Consistency in size also makes for a more appealing presentation.
- Creating a Subtle Divot: When placing your peanut butter cup, if the cookie isn’t perfectly soft, you can gently make a small indentation or “divot” in the center of the baked cookie using the back of a spoon. This provides a stable base for the peanut butter cup, preventing it from rolling off and ensuring it sits snugly in place.
- Mastering the Piping Bag: For neat and precise spider legs, a piping bag is your best friend. If you don’t have one, a sturdy ziplock bag with a tiny corner snipped off works just as well. Practice on a piece of parchment paper first to get the feel for the pressure and flow. This allows you to create thin, defined lines for realistic-looking spider legs.
- Chill Those Peanut Butter Cups: This is a game-changer! Freezing or chilling the Reese’s Miniature Peanut Butter Cups for at least 30 minutes before decorating makes them much firmer and easier to handle. They’ll hold their shape better when pressed into the warm cookies and won’t melt as quickly while you’re working.
- Refrigerate the Cookie Dough: If your dough is too soft or sticky, which can happen with warm kitchen temperatures, refrigerating it for at least an hour can make a significant difference. Chilled dough is much easier to scoop and roll, resulting in less spread during baking and perfectly shaped cookies.
- Avoid Overbaking at All Costs: Peanut butter cookies are best when they’re soft and chewy. Bake them just until the edges are lightly golden, even if the centers seem slightly underbaked. Remember, cookies continue to cook for a few minutes on the hot baking sheet after they’re removed from the oven, so taking them out slightly early ensures they stay wonderfully tender.
- Time-Saving Premade Cookie Options: For an ultra-fast and convenient way to prepare these spider cookies, consider using pre-made cookies. You can purchase plain peanut butter cookies from the store or use refrigerated peanut butter cookie dough. This drastically cuts down on prep time, allowing you to jump straight to the fun decorating part!
- Using Different Chocolate for Legs: While chocolate melting wafers are excellent, you can experiment with other types of chocolate. Dark chocolate chips or even white chocolate (dyed black with food coloring) can create different effects. Just ensure whatever chocolate you choose melts smoothly for easy piping.
Delicious Variations to Try
While the classic peanut butter and chocolate spider cookies are undeniably delicious, don’t hesitate to get creative with these variations to suit different tastes or dietary needs:
- Chocolate Cookie Spiders: Instead of a peanut butter cookie base, use a chocolate cookie recipe. Top with mini peanut butter cups or even chocolate truffles for an extra rich treat.
- Different “Bodies”: If Reese’s Cups aren’t your preference, try other small round candies like Rolos, Hershey’s Kisses, or even homemade chocolate ganache balls for the spider bodies.
- Colorful Legs: Use colored candy melts (like orange or green) instead of chocolate for the spider legs to match your Halloween theme even more!
- No-Bake Option: For a quick assembly, use store-bought cookies like Nutter Butters or even plain chocolate wafers as your base. Just melt chocolate and assemble.
- Nut-Free Version: If you need a nut-free option, use a sugar cookie or chocolate chip cookie base and swap peanut butter cups for a nut-free chocolate candy or a simple chocolate ganache.
Storing Your Halloween Spider Cookies
Proper storage ensures your Halloween Spider Cookies stay fresh and delicious for as long as possible, allowing you to enjoy them well beyond your party! Here’s how to keep them in prime condition:
- Room Temperature Storage: Once the chocolate has fully set, store your decorated spider cookies in an airtight container at room temperature. They will remain fresh and tasty for up to 5 days. To prevent any chocolate melting or stickiness, keep them away from direct sunlight or warm environments.
- Refrigerator Storage: For extended freshness, especially in warmer climates or if you’ve used any fillings that prefer cooler temperatures, you can refrigerate the cookies. Place them in a sealed airtight container and they will last for up to 1 week. For the best texture, allow the cookies to come to room temperature for about 15-30 minutes before serving.
- Freezer Storage: If you’re planning to make these ahead of time or have leftovers, these cookies freeze beautifully. Once fully decorated and the chocolate is completely set, arrange the cookies in a single layer on a baking sheet and flash freeze for about 30 minutes until solid. Then, transfer them to a freezer-safe airtight container or a heavy-duty freezer bag, layering with parchment paper if stacking. They will keep well for up to 2 months. To serve, thaw them at room temperature for a few hours before decorating (if freezing undecorated) or enjoying.
More Spooktacular Halloween Treat Ideas
The fun doesn’t have to stop with these spider cookies! If you’re looking to expand your repertoire of easy and festive Halloween treats, here are some other fantastic ideas that are perfect for parties, school events, or just a cozy family night:
- Oreo Spider Cookies: A no-bake classic! These use everyone’s favorite sandwich cookies as a base, adorned with chocolate legs and candy eyes for a quick and fun treat.
- Halloween Sugar Cookies: The ultimate canvas for creativity! Bake simple sugar cookies and then let your imagination run wild with orange, black, and purple icing, sprinkles, and spooky shapes.
- Halloween Dirt Cups: Layers of chocolate pudding, crushed Oreo “dirt,” and gummy worms or candy tombstones make these a fun, edible graveyard.
- Jack O’ Lantern Chocolate Covered Oreos: Dip Oreos in orange melting chocolate and decorate with black icing to create cute pumpkin faces. They’re simple, delicious, and visually striking.
- Easy Spider Cupcakes: Turn regular cupcakes into adorable arachnids with chocolate frosting, pretzel stick legs, and candy eyes. A perfect bite-sized spooky treat.
- 55 Delicious Halloween Cupcakes: Need more cupcake inspiration? This collection offers a wide variety of flavors and decorating ideas, from ghosts and goblins to witches and monsters, ensuring there’s a cupcake for every taste and skill level.
Don’t wait for the last minute! Get into the Halloween spirit and make these spooktacular spider cookies today. Your family and friends will love these adorable, creepy-crawly treats. We’d love to hear how your baking adventure turned out, so please leave a comment and a star rating to share your experience!
Halloween Spider Cookies Recipe
Halloween Spider Cookies are so easy and tasty for Halloween. Delicious peanut butter cookies transform into a cookie spider with the help of Reese’s cups and googly eyes. This recipe yields approximately 36 cookies.
Prep Time: 20 minutes
Cook Time: 10 minutes
Cool Time: 5 minutes
Total Time: 35 minutes
Servings: 36 cookies
Cuisine: American
Course: Dessert
Calories: 209 kcal per serving
Author: Carrie Barnard
Ingredients
- 2 1/2 cups All-Purpose Flour
- 1 1/4 cups granulated sugar
- 1 cup brown sugar
- 1 cup butter, softened
- 1 cup Creamy Peanut Butter
- 1 tsp baking powder
- 1 tsp baking soda
- 1 tsp cornstarch
- 1 tsp salt
- 1 tsp Vanilla Extract
- 2 Large Eggs
- 36 Reese’s Miniature Peanut Butter Cups, chilled
- Candy Eyes (approximately 72)
- 10 Ounce Chocolate Melting Wafers
Instructions
- Preheat the oven to 350 degrees F (175 C).
- In a mixing bowl, combine the dry ingredients: flour, baking powder, baking soda, cornstarch, and salt. Whisk well to ensure they are evenly distributed.
- In a separate large mixing bowl, using an electric mixer, cream together the softened butter and both sugars until light and fluffy (about 2-3 minutes).
- Add the peanut butter, eggs, and vanilla extract to the creamed mixture. Mix until these wet ingredients are thoroughly combined and smooth.
- Reduce the mixer speed to low. Gradually add the dry ingredients to the wet mixture, mixing only until they are just incorporated. Do not overmix.
- Using a cookie scoop, form the dough into round balls. Gently roll each dough ball in granulated sugar (optional, for classic appearance) and place them about 2 inches apart on an ungreased baking sheet.
- Use a fork to flatten each dough ball, creating the traditional criss-cross pattern.
- Bake for 10-12 minutes, or until the edges are lightly golden brown. The centers may still look soft.
- Remove cookies from the oven and let them cool on the baking sheet for 5 minutes. Then, transfer to a wire rack to cool completely before decorating.
- While the cookies are still warm (but cool enough to handle), unwrap the miniature peanut butter cups. Gently press one peanut butter cup, upside down, into the center of each cookie.
- Melt the chocolate wafers in a microwave-safe bowl, heating in 30-second intervals and stirring until smooth. Transfer the melted chocolate to a piping bag (or a ziplock bag with a tiny corner cut off). Let it cool for 5 minutes to thicken slightly for easier piping.
- Pipe four chocolate lines on each side of the peanut butter cups to form the spider’s legs, extending onto the cookie base.
- Dab a small amount of melted chocolate on the front of each peanut butter cup and carefully attach two candy eyes for the spider’s face.
- Allow the chocolate to fully set at room temperature or in the refrigerator before serving. Enjoy your spooky spider cookies!
Nutrition Facts (per serving)
- Calories: 209 kcal
- Carbohydrates: 25g
- Protein: 4g
- Fat: 11g
- Saturated Fat: 5g
- Cholesterol: 23mg
- Sodium: 208mg
- Potassium: 107mg
- Fiber: 1g
- Sugar: 17g
- Vitamin A: 175 IU
- Calcium: 24mg
- Iron: 1mg
