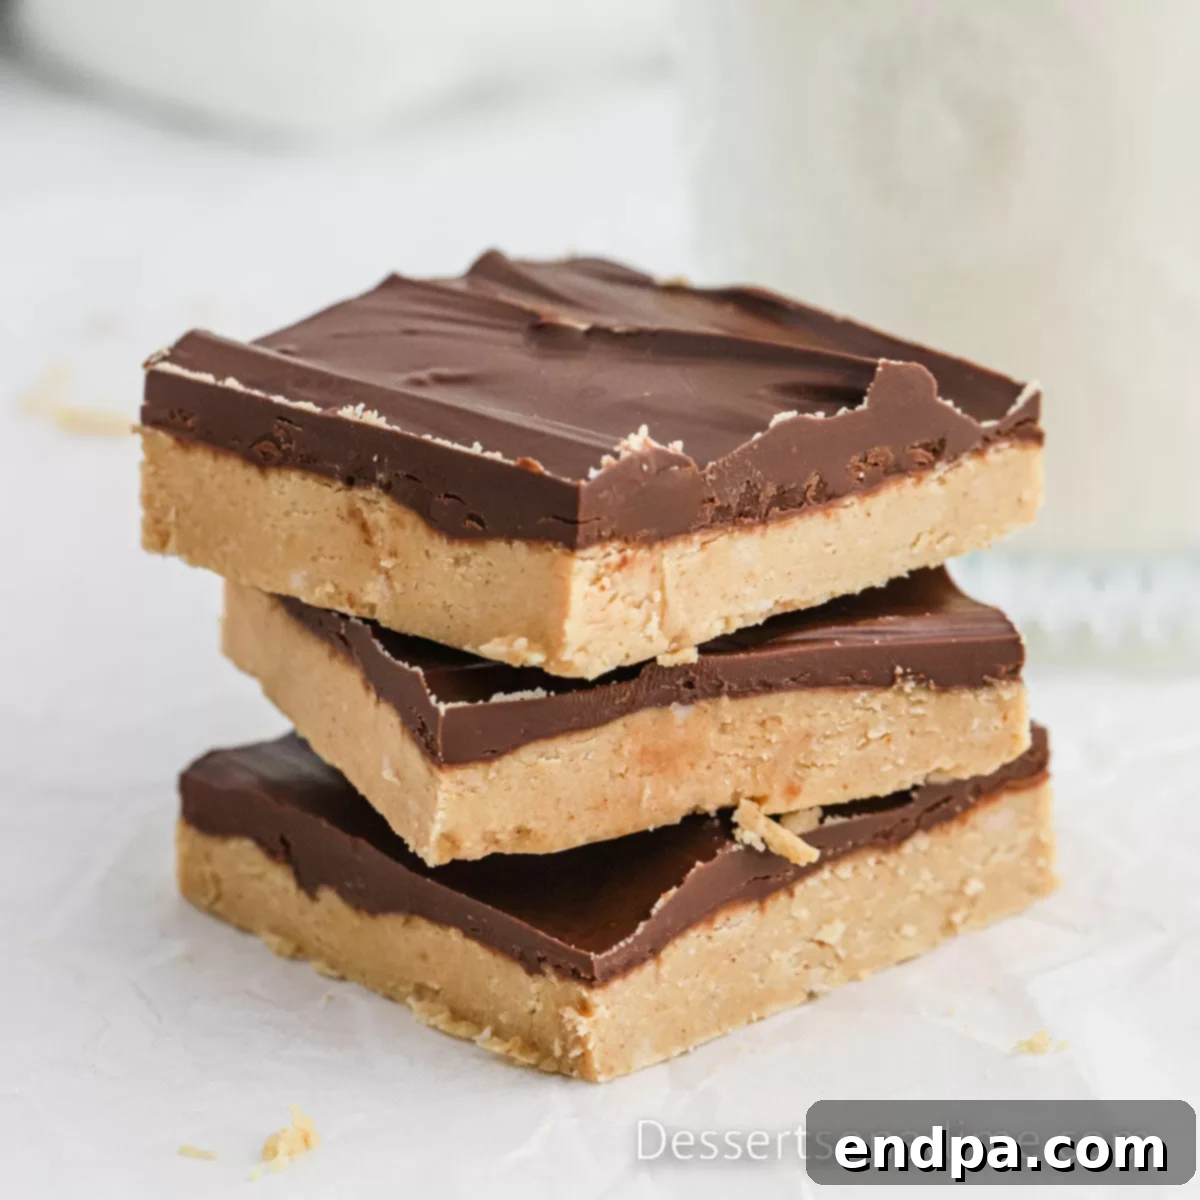
Easy No-Bake Buckeye Bars: The Ultimate Peanut Butter Chocolate Dessert
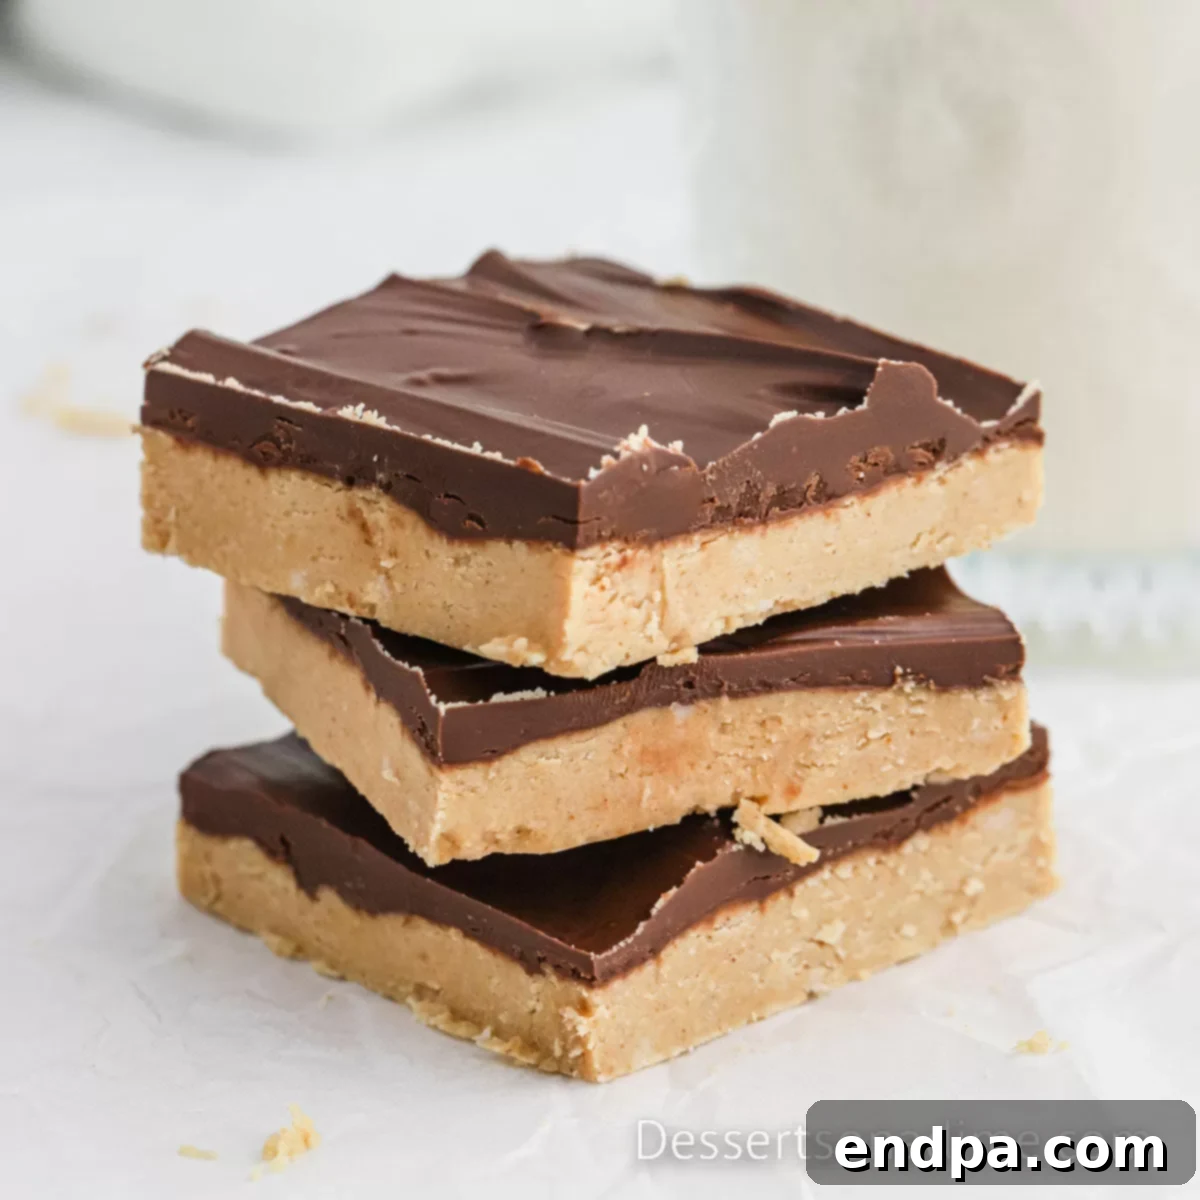
Prepare to fall in love with these incredibly simple and utterly delicious No-Bake Buckeye Bars! Featuring a velvety smooth peanut butter layer generously topped with a decadent, rich chocolate coating, these bars are the quintessential fuss-free dessert. They offer all the beloved flavors of classic Buckeye candy but in an easy-to-slice bar form, perfect for sharing. With only 6 simple ingredients and no oven required, this recipe is a speedy and delightful treat that will become a staple in your dessert rotation.
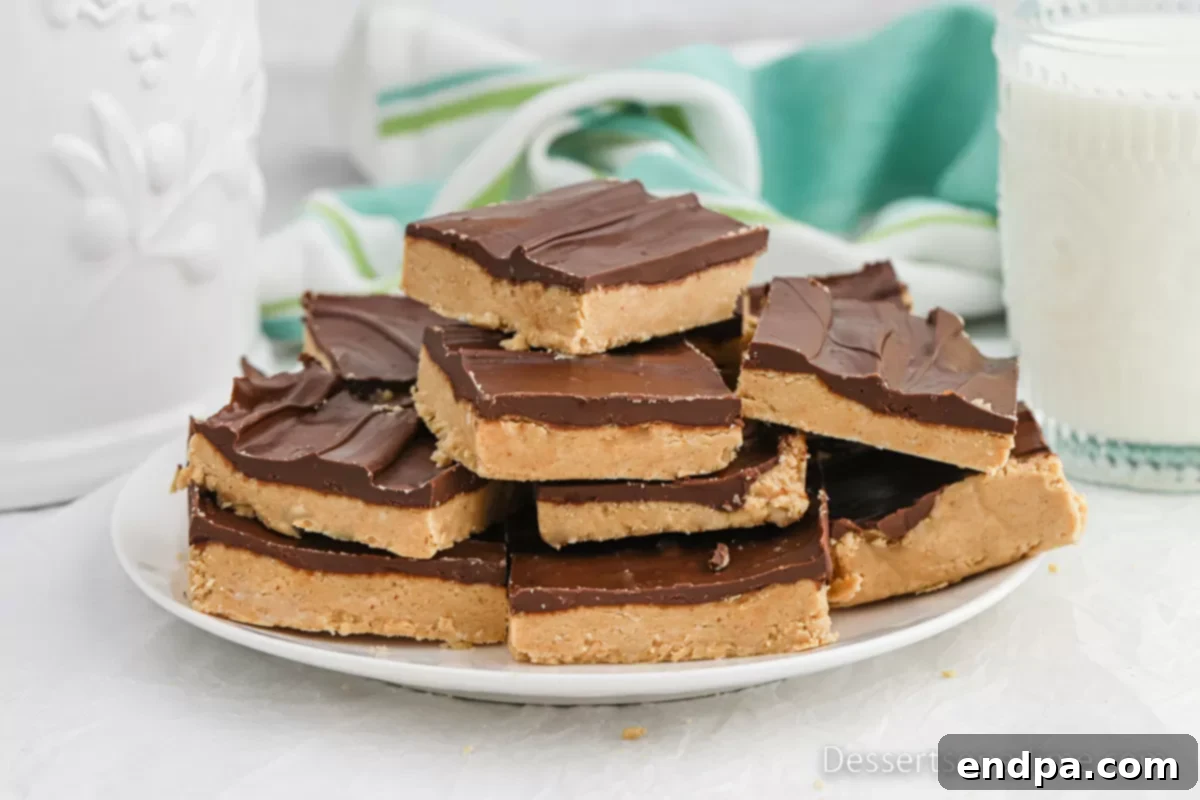
There’s something truly magical about the combination of creamy peanut butter and luscious chocolate. It’s a pairing that has captivated taste buds for generations, and these Buckeye Bars celebrate it in all its glory. Inspired by the traditional Buckeye peanut butter balls, these bars streamline the process, transforming a beloved confection into an effortlessly elegant dessert that’s ready to enjoy in no time. Whether you’re a long-time fan of homemade sweets or new to the world of no-bake treats, this recipe promises pure satisfaction.
Beyond their incredible taste, the convenience of No-Bake Buckeye Bars is unmatched. Forget heating up your kitchen, especially on a warm day, or waiting for anything to cool. These bars come together quickly using common pantry staples, making them an ideal choice for last-minute gatherings, holiday parties, or simply satisfying that sudden sweet craving. They are wonderfully versatile, easy to transport, and guaranteed to be a hit with anyone who appreciates the timeless appeal of chocolate and peanut butter. If you enjoy rich Chocolate Peanut Butter Cups or any other Peanut Butter Desserts, this recipe is an absolute must-try!
Table of Contents
- The Story Behind the Buckeye Name
- Why You’ll Adore This No-Bake Buckeye Bar Recipe
- Gather Your Ingredients for Buckeye Bars
- Delicious Variations to Make It Your Own
- Step-by-Step Guide to Making Perfect Buckeye Bars
- Storage Tips to Keep Your Buckeye Bars Fresh
- Pro Tips for Buckeye Bar Perfection
- Frequently Asked Questions: Buckeye Bars
- More Irresistible Buckeye Recipes
- Printable Buckeye Bars Recipe Card
The Story Behind the Buckeye Name
Have you ever wondered where the unique name “Buckeye Bars” comes from? This delightful confection is deeply rooted in the state of Ohio, often referred to as “The Buckeye State.” The name is a direct reference to the nut of the Ohio Buckeye tree, which has a distinct dark brown color with a lighter tan spot, resembling a deer’s eye. The traditional Buckeye candy, which these bars are inspired by, consists of a peanut butter ball partially dipped in chocolate, leaving a small circle of peanut butter visible, much like the buckeye nut itself. While this dessert is a celebrated regional specialty in Ohio, its irresistible combination of flavors has gained popularity nationwide, with similar no-bake peanut butter and chocolate treats often simply known as peanut butter bars in other parts of the country. This rich cultural connection adds a charming layer to an already fantastic treat.
Why You’ll Adore This No-Bake Buckeye Bar Recipe
This Buckeye Bars recipe isn’t just easy; it’s a revelation for anyone seeking a quick, delicious, and universally loved dessert. Here are even more reasons why this recipe is bound to become a permanent fixture in your culinary repertoire:
- Effortless No-Bake Convenience: Skip the oven and the stress! These bars require absolutely no baking, making them ideal for hot summer days, busy schedules, or simply when you’re looking for a dessert that comes together in a flash. It’s truly a grab-and-go kind of recipe, perfect for all skill levels.
- Timeless Flavor Fusion: The classic pairing of creamy peanut butter and rich chocolate is simply unbeatable. Every bite delivers that perfect balance of sweet and savory, a flavor profile cherished by almost everyone, regardless of age. It’s a nostalgic taste that brings smiles and satisfaction.
- Minimal, Accessible Ingredients: You won’t need a specialty grocery run for this one. The recipe relies on just 6 basic ingredients that are likely already stocked in your pantry and refrigerator, saving you time and money. Simplicity in ingredients translates to pure, unadulterated flavor.
- Perfect for Every Occasion: From casual family desserts to impressive potluck contributions, holiday platters, birthday celebrations, or even just a sweet pick-me-up during the week, these bars fit seamlessly into any event. They are easy to prepare in advance and transport beautifully.
- Remarkably Freezer-Friendly: Planning ahead? These bars are excellent for making in larger batches and freezing. Enjoy a quick treat whenever a craving strikes, or pull them out for unexpected guests. They maintain their delicious texture and flavor for months, making them a fantastic make-ahead option.
- Kid-Friendly Fun: The simple steps make this a fantastic recipe to involve children in the kitchen. Measuring, mixing (especially with an electric mixer!), and pressing the peanut butter layer can be fun, engaging activities for little helpers, fostering a love for cooking from a young age.
- Highly Customizable: While perfect as is, this recipe is a blank canvas for customization. Easily adapt it with different types of chocolate, added mix-ins, or alternative nut butters to suit dietary needs or personal preferences, ensuring endless enjoyment.
Gather Your Ingredients for Buckeye Bars
This recipe prides itself on its simplicity, requiring just a handful of common ingredients to create an extraordinary treat. Each component plays a vital role in achieving that perfect Buckeye Bar texture and flavor:
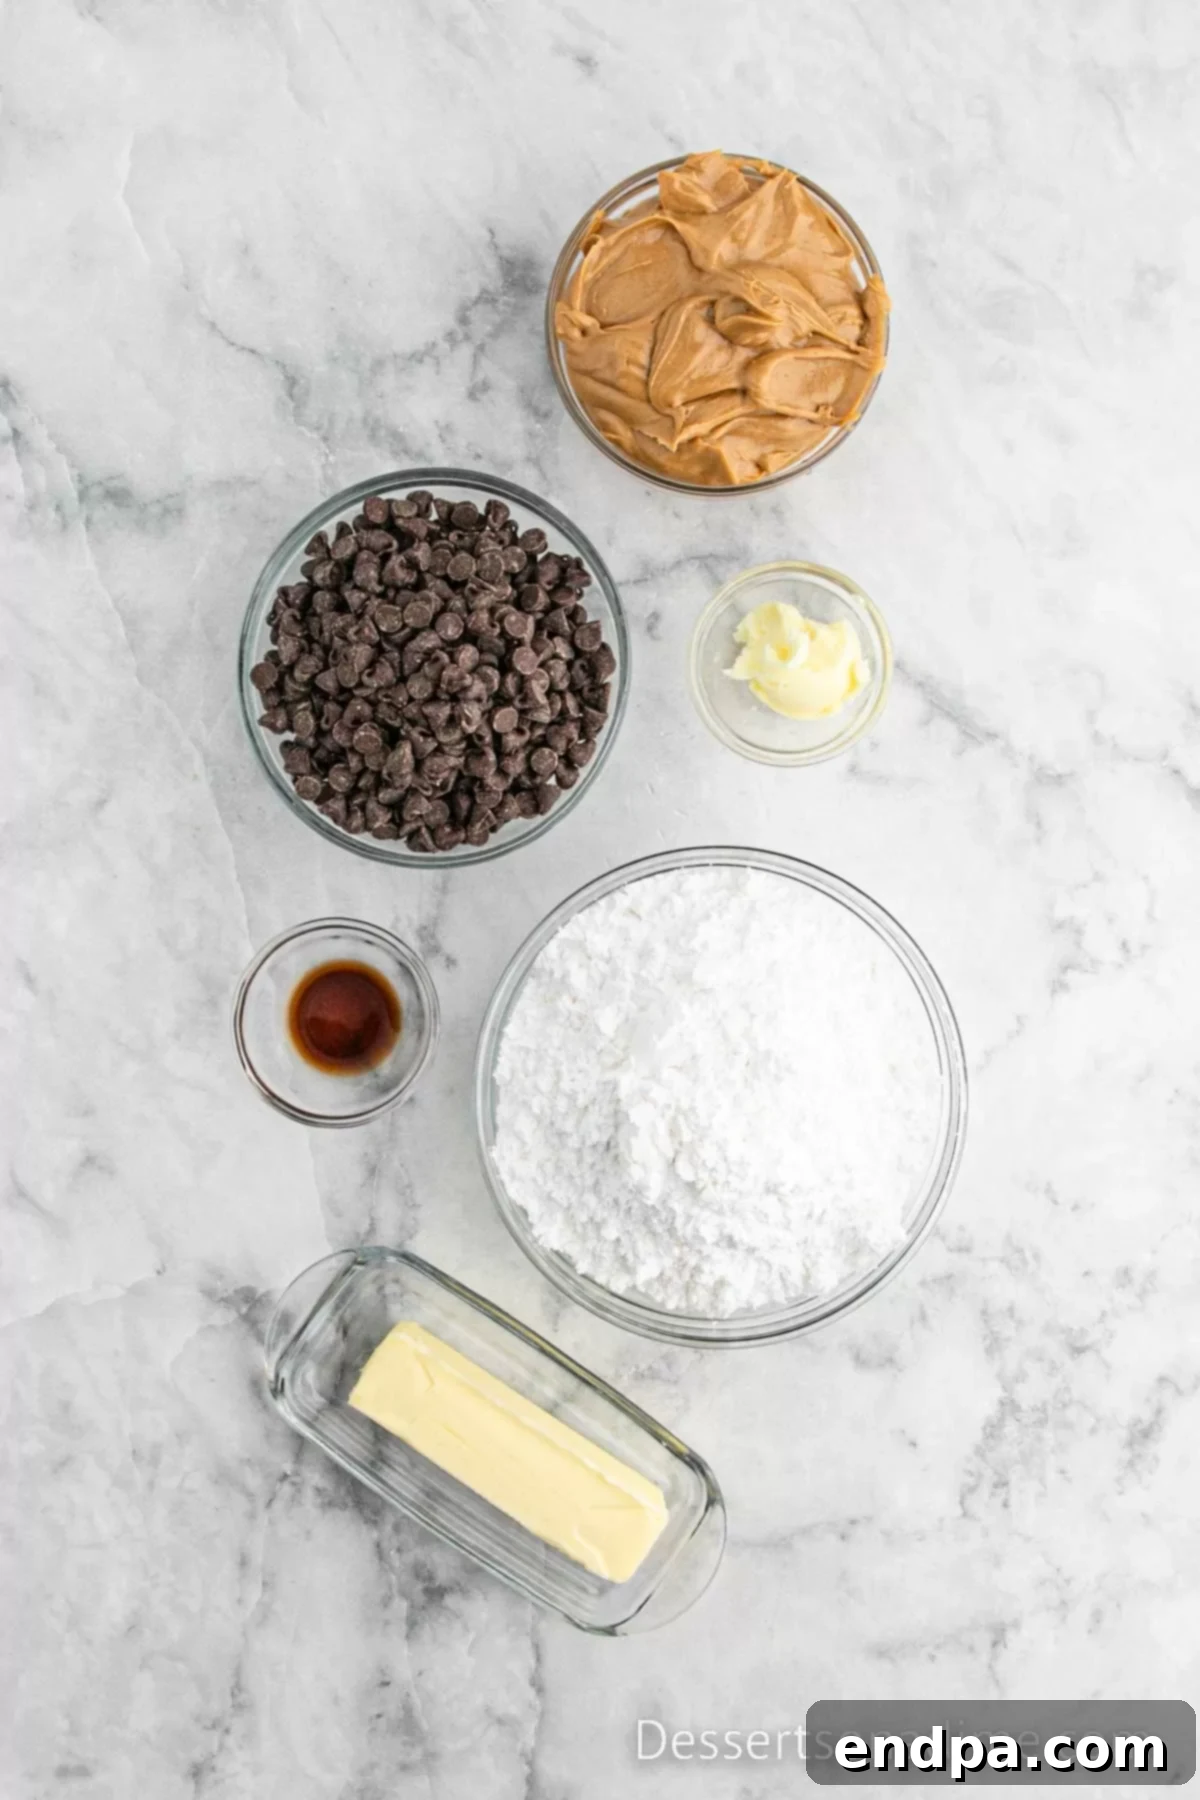
- Salted Butter (softened): The foundation of our creamy peanut butter layer. Using softened butter is absolutely crucial as it allows for easy creaming with the sugar and peanut butter, resulting in a smooth, cohesive mixture. The hint of salt in salted butter perfectly balances the sweetness of the sugar and chocolate, enhancing all the flavors. If using unsalted butter, you might want to add a tiny pinch of fine salt to the peanut butter mixture.
- Confectioners’ Sugar (Powdered Sugar): This fine sugar is what gives the peanut butter layer its incredibly smooth, melt-in-your-mouth consistency, distinguishing it from a gritty, granulated sugar base. It dissolves effortlessly into the butter and peanut butter, creating a wonderfully soft and sweet foundation for your bars.
- Creamy Peanut Butter: The star of the show! Creamy peanut butter provides that iconic, rich, and slightly savory flavor that defines Buckeye treats. Its smooth texture is essential for creating a uniform, pliable base that presses easily into the pan. We recommend a classic, processed creamy peanut butter (like Jif or Skippy) for consistent results, as natural peanut butter can sometimes separate and alter the texture (more on this in the FAQ).
- Vanilla Extract: A splash of vanilla extract elevates the flavor profile of the peanut butter layer, adding a warm, aromatic depth that complements the peanut butter and chocolate beautifully. It’s a subtle but significant enhancement that ties all the flavors together.
- Chocolate Chips: These melt down to form the glossy, irresistible chocolate topping. You can choose your favorite type – milk chocolate for a sweeter bar, semi-sweet for a balanced flavor, or dark chocolate for a richer, more intense chocolate experience. Make sure to use good quality chocolate chips for the best melting and flavor.
- Shortening: A small amount of shortening is added to the melted chocolate chips to ensure a smooth, shiny, and easily spreadable chocolate layer. It helps the chocolate set nicely and prevents it from becoming too brittle or cracking when sliced, giving your bars a professional finish.
With these six simple ingredients, you’re just a few steps away from creating a truly unforgettable dessert that tastes much more complex than its easy preparation suggests.
Delicious Variations to Make It Your Own
While the classic Buckeye Bar recipe is perfect as is, it’s also wonderfully adaptable! Feel free to experiment with these variations to customize your bars and discover new favorites:
- Double the Chocolate Decadence: For true chocolate lovers, doubling the amount of chocolate chips (and shortening proportionally) will create an even thicker, more luxurious chocolate topping. Keep in mind that a thicker layer may require a bit more time to set completely. This extra indulgence makes the bars feel even more gourmet!
- Add a Satisfying Crunch with Rice Krispies: Introduce an exciting textural contrast by folding 2 to 3 cups of Rice Krispies (or similar crispy rice cereal) into the peanut butter mixture. This adds a delightful crispness that balances the smooth, creamy layers, reminiscent of a chocolate-covered crispy treat.
- Graham Cracker Crust-like Texture: For a subtle change in flavor and a slightly firmer texture, mix 1 to 1 ½ cups of finely crushed graham cracker crumbs into the peanut butter base. This adds a hint of honey and a pleasant chewiness, almost like a no-bake cheesecake crust. Adjust the amount until you achieve your desired consistency.
- Explore Different Chocolate Varieties: Don’t limit yourself to milk chocolate!
- Semi-Sweet Chocolate Chips: Using semi-sweet chocolate will reduce the overall sweetness of the bars, offering a more balanced and sophisticated flavor profile that appeals to many.
- Dark Chocolate Chips: For a deeply rich and less sweet dessert, opt for dark chocolate chips. This creates a wonderful bittersweet contrast with the sweet peanut butter layer, perfect for those who enjoy intense chocolate flavors.
- White Chocolate: For a different aesthetic and sweeter profile, consider a white chocolate topping. Be sure to melt white chocolate very carefully as it can seize easily.
- Crunchy Peanut Butter for Texture: If you love a little texture in your peanut butter, simply swap out creamy peanut butter for crunchy peanut butter. The small bits of peanuts will add a fantastic bite to the soft base.
- Allergy-Friendly Alternatives: For those with peanut allergies, you can often substitute with sunflower seed butter (like SunButter) or soy nut butter. Be aware that the flavor and texture might be slightly different, and always check labels to ensure they are certified peanut-free if allergies are a concern. Almond butter or cashew butter can also be delicious alternatives for those without nut allergies.
- Sprinkle on Toppings: Before the chocolate sets, sprinkle on some flaky sea salt for a gourmet touch, chopped nuts, mini chocolate chips, or even colorful sprinkles for a festive look.
These variations allow you to tailor your Buckeye Bars to your exact preferences, ensuring that every batch is a delightful adventure!
Step-by-Step Guide to Making Perfect Buckeye Bars
Creating these sensational no-bake bars is incredibly straightforward. Follow these detailed instructions for a smooth and enjoyable process:
- Step 1: Prepare Your Pan. Begin by lining a 9×13 inch baking pan with aluminum foil or parchment paper. Ensure there’s an overhang on the sides – this will create “handles” that make it incredibly easy to lift the entire slab of bars out of the pan once they’re set. Lightly grease the foil or parchment paper for extra insurance against sticking. Set the prepared pan aside.
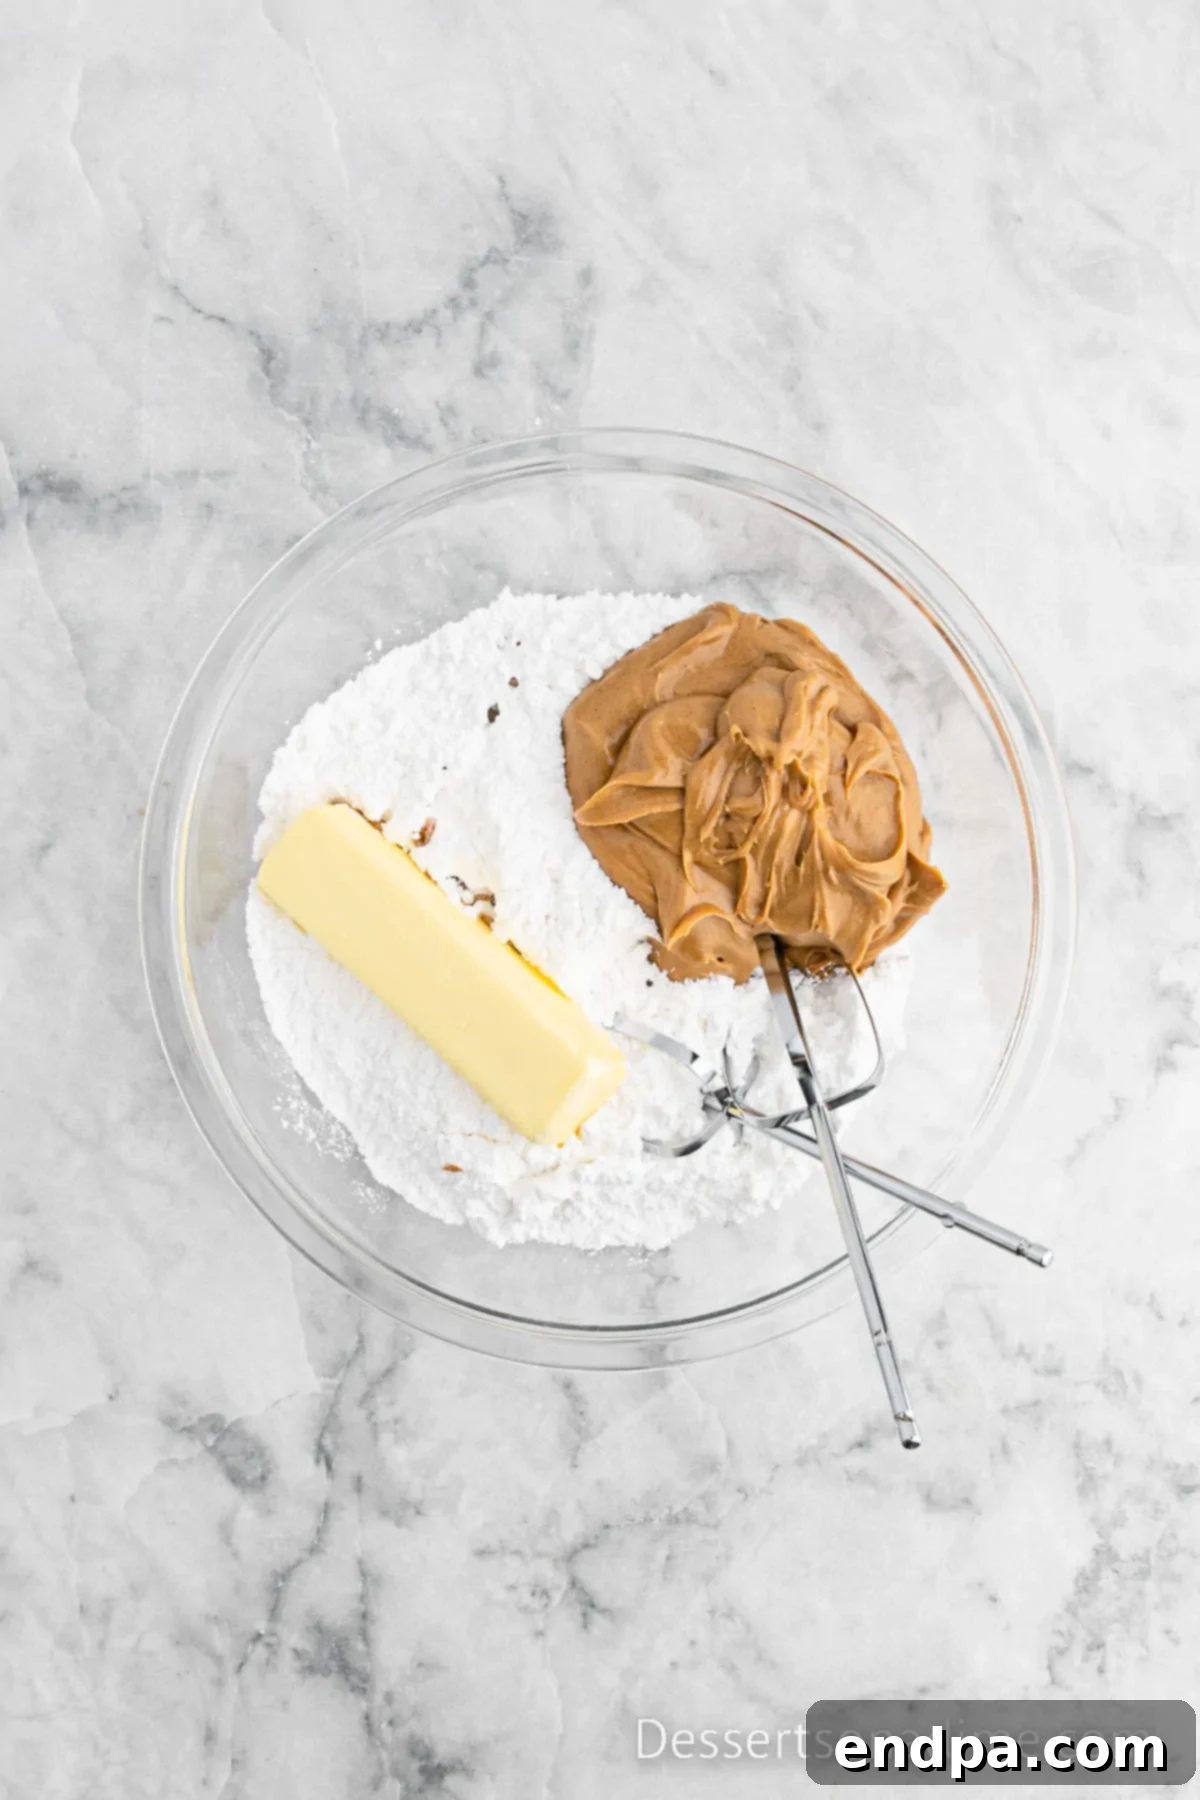
Step 2: Craft the Peanut Butter Layer. In a large mixing bowl, combine the softened salted butter, confectioners’ sugar, creamy peanut butter, and vanilla extract. Using an electric mixer (either a handheld mixer or the paddle attachment of a stand mixer), beat the ingredients together on medium speed until well combined. The mixture will be quite thick and might appear a bit crumbly at first, but it should come together into a soft, uniform dough-like consistency as you continue to mix. Scrape down the sides of the bowl as needed to ensure everything is incorporated.
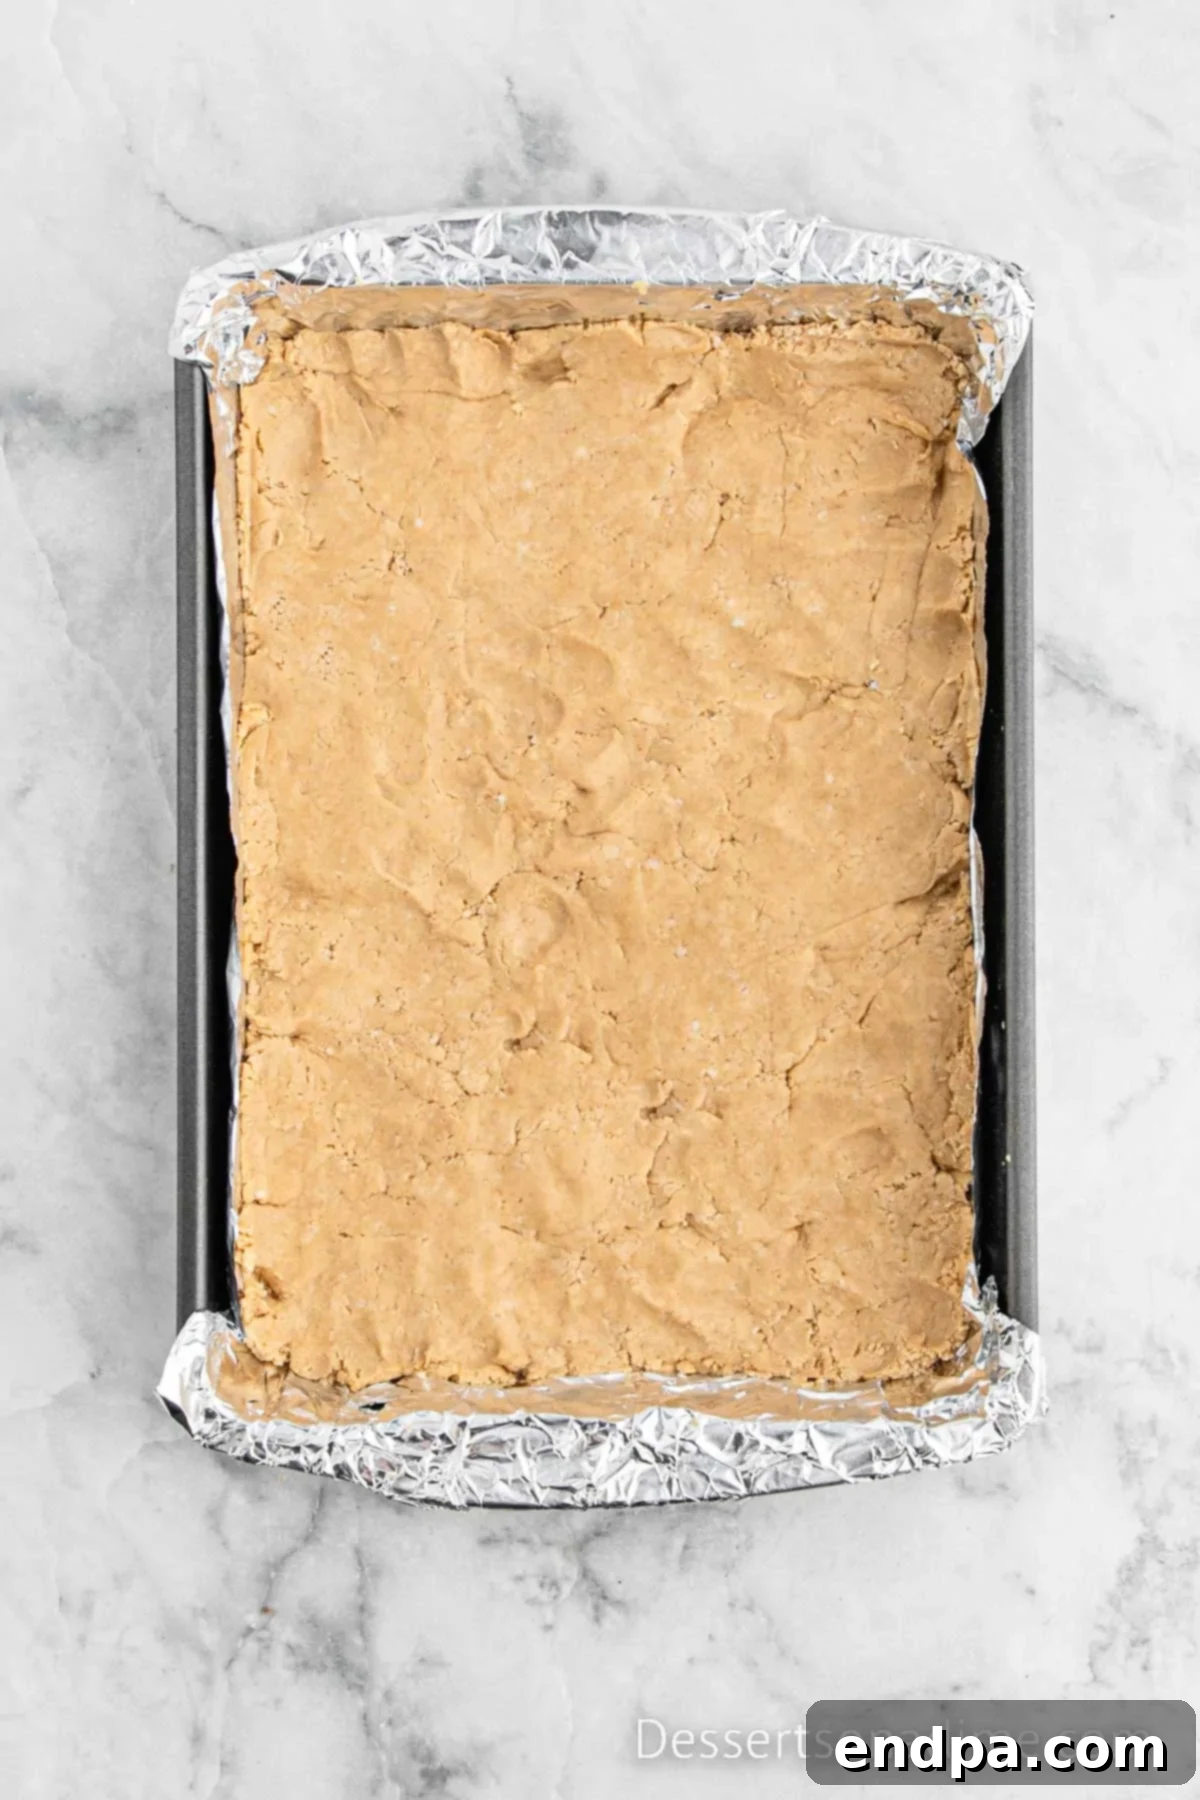
Step 3: Press into the Pan. Transfer the thick peanut butter mixture into the prepared 9×13 inch baking dish. Using your hands, a spatula, or the bottom of a glass, press the mixture down firmly and evenly into the bottom of the pan. Aim for a compact and level layer across the entire surface. This solid base is key for well-structured bars. Ensure there are no gaps or loose spots.
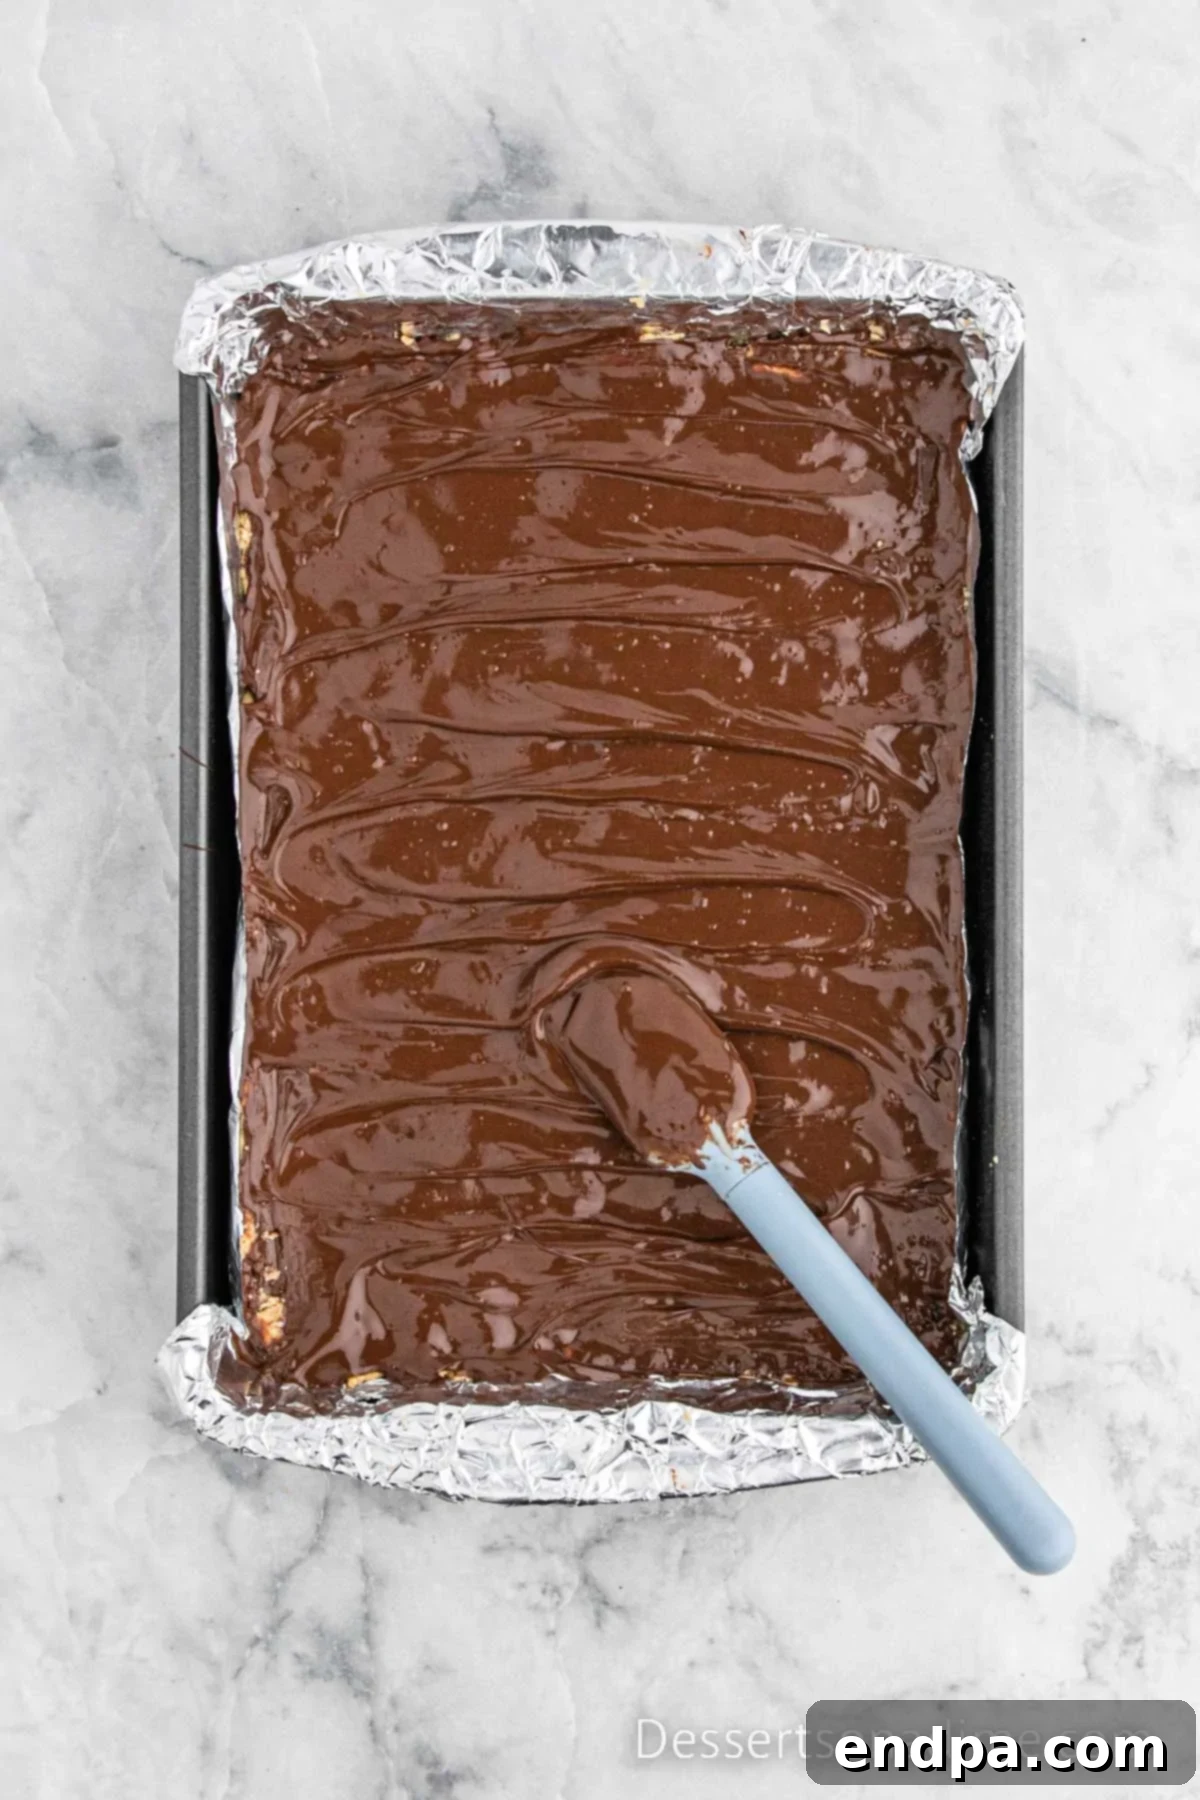
Step 4: Melt and Spread the Chocolate Topping. In a microwave-safe bowl, combine your chocolate chips and shortening. Heat in 30-second intervals, stirring thoroughly after each interval, until the chocolate is completely melted and smooth. Be careful not to overheat the chocolate, as this can cause it to seize. Once glossy and fluid, immediately pour the melted chocolate mixture over the pressed peanut butter layer in the pan. Use an offset spatula or the back of a spoon to spread the chocolate evenly across the entire surface, ensuring it reaches all the edges for a perfect finish.
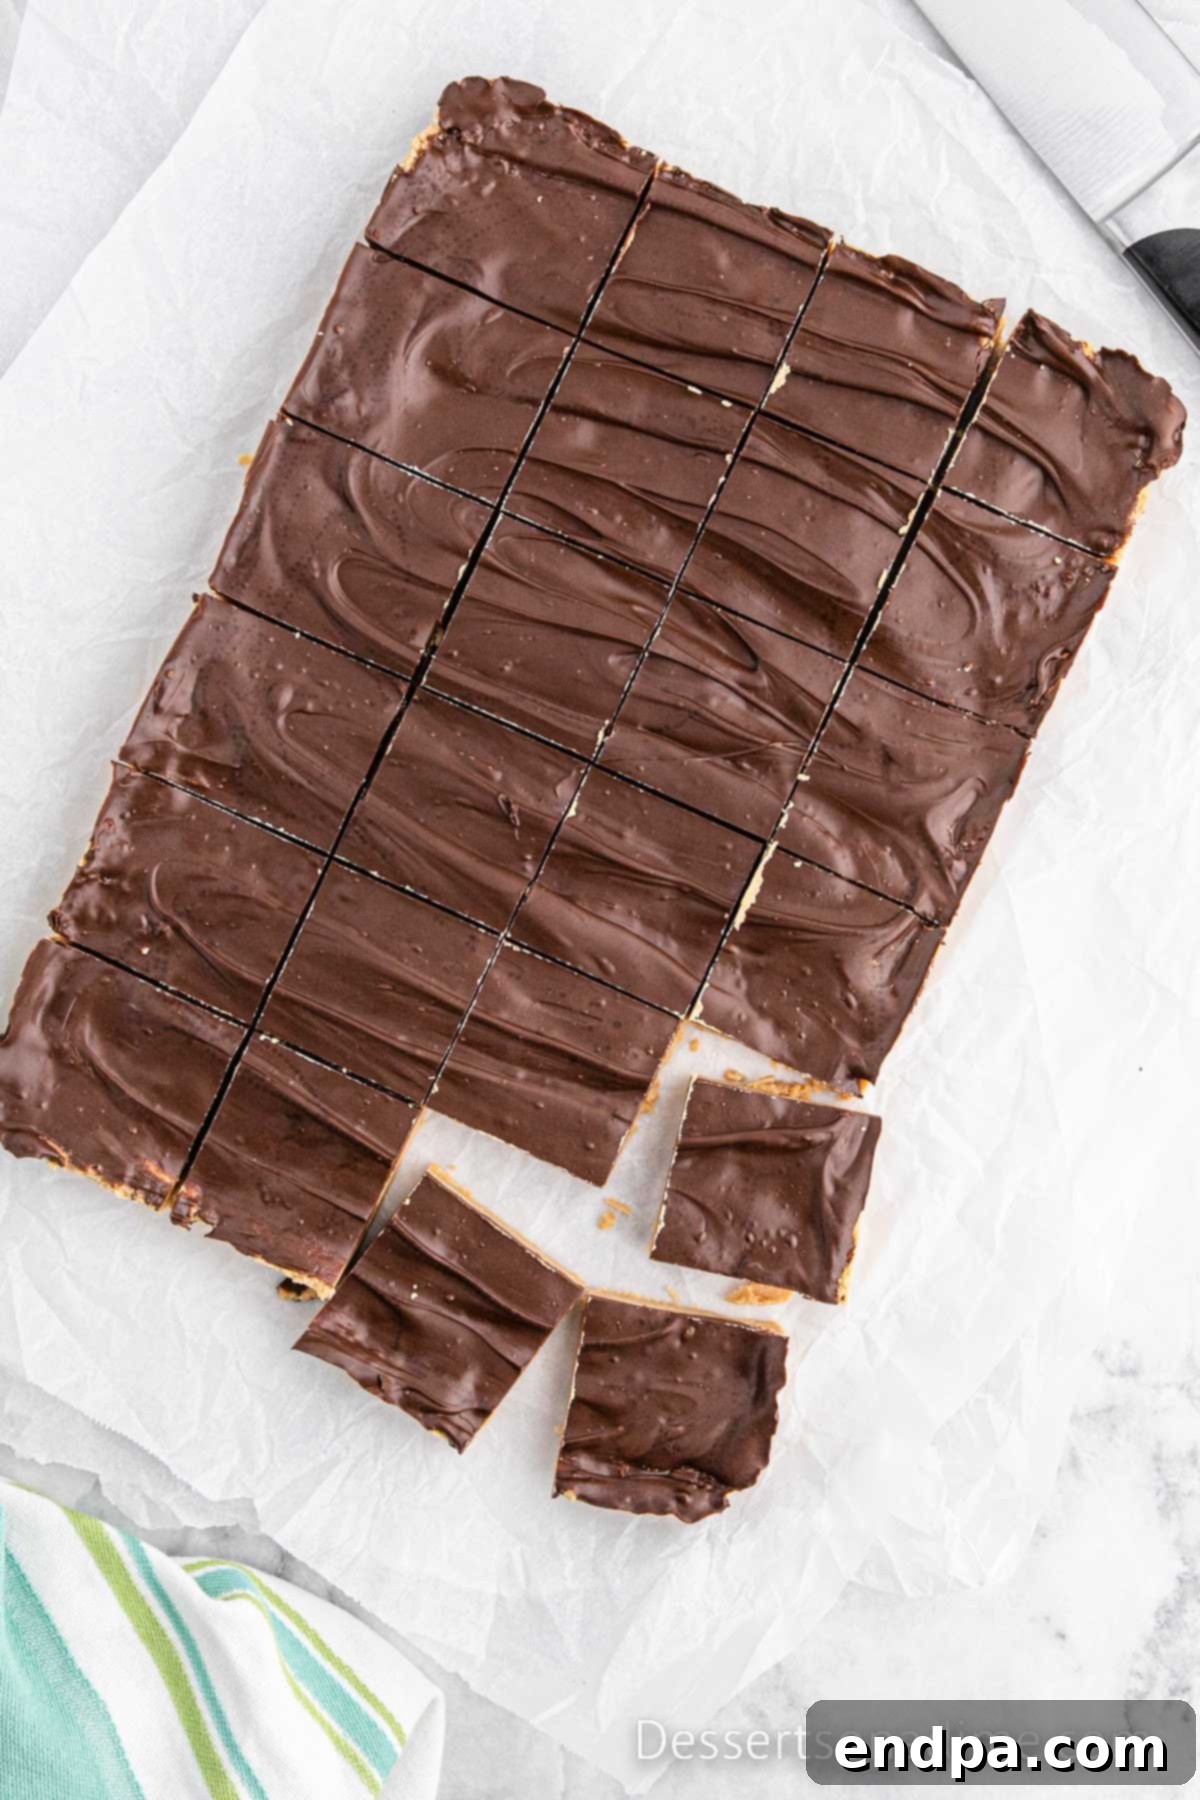
Step 5: Chill and Serve. Allow the bars to set. You can either let them sit at room temperature for several hours (especially in a cool kitchen) or, for faster setting, place them in the refrigerator for at least 1-2 hours. Once the chocolate is completely firm, use the foil or parchment overhangs to carefully lift the entire slab of bars out of the pan onto a cutting board. Use a sharp knife to cut the slab into desired squares or rectangles. For the cleanest cuts, wipe your knife clean between slices. Your delicious Buckeye Bars are now ready to serve and enjoy!
Storage Tips to Keep Your Buckeye Bars Fresh
Proper storage is key to maintaining the irresistible texture and flavor of your Buckeye Bars. Here’s how to ensure they stay fresh and delicious for as long as possible:
Refrigerator Storage
- Container: Always store your Buckeye Bars in an airtight container to prevent them from absorbing odors from other foods in the refrigerator and to keep them from drying out.
- Duration: When properly stored in the refrigerator, these bars will maintain their quality for up to 1 week.
- Texture: Chilling the bars not only helps them set beautifully but also keeps them wonderfully firm and easy to handle and cut. Many people prefer the slightly firmer, chilled texture of these bars.
Freezer Storage
- Preparation: To freeze, first cut the bars into individual servings. Place them in a single layer on a parchment-lined baking sheet and freeze until firm (about 30-60 minutes). This step prevents them from sticking together.
- Packaging: Once frozen solid, transfer the bars to a freezer-safe, airtight container or heavy-duty freezer bag. For best results and to prevent freezer burn, you can place small pieces of parchment paper between layers of bars.
- Duration: Buckeye Bars can be frozen for up to 4 months, making them a fantastic make-ahead dessert for parties or a convenient treat to have on hand.
- Thawing: When you’re ready to enjoy them, simply transfer the desired number of bars from the freezer to the refrigerator and allow them to thaw overnight. For a quicker thaw, you can leave them at room temperature for about 30 minutes, though thawing in the fridge is usually best for maintaining texture.
Expert Tips for Buckeye Bar Perfection
Even though this recipe is incredibly simple, a few expert tips can elevate your Buckeye Bars from delicious to absolutely divine:
- Master the Butter Softness: Ensure your salted butter is truly softened to room temperature, but not melted. This is vital for achieving a smooth, lump-free peanut butter mixture that’s easy to beat and press. If it’s too cold, it won’t combine properly; if it’s too warm, the mixture might be too oily.
- Chill Thoroughly Before Cutting: Patience is a virtue here! Refrigerate the bars until the chocolate layer is completely firm and set. This could take 1-2 hours. Trying to cut them too soon will result in messy, cracked chocolate and squishy peanut butter layers. A well-chilled bar will slice cleanly and neatly every time.
- Handle Chocolate with Care: When melting chocolate in the microwave, always use short intervals (30 seconds at a time) and stir well after each heating. Chocolate can burn quickly, and once burned, it’s unusable. Alternatively, a double boiler method offers more gentle and controlled melting. Avoid getting any water into the chocolate, as this can cause it to seize.
- The Parchment Paper Advantage: Lining your baking pan with parchment paper, leaving an overhang on the sides, is a game-changer. It allows you to easily lift the entire chilled slab of bars out of the pan, making cutting a breeze and ensuring every bar maintains its perfect shape without sticking.
- Achieve Clean Cuts: For professional-looking slices, use a long, sharp knife. For even cleaner cuts, run the knife under hot water, wipe it dry, and then make a slice. Repeat this process for each cut. This technique helps the warm blade glide through the chocolate and peanut butter layers without dragging.
- Press Evenly: When pressing the peanut butter mixture into the pan, aim for consistent thickness across the entire surface. An uneven layer can lead to bars that are too thin in some areas and too thick in others, affecting both texture and presentation. Using the flat bottom of a glass or a clean, lightly greased spatula can help.
- Don’t Skimp on Quality Ingredients: With only six ingredients, the quality of each really shines through. Use your favorite creamy peanut butter, good quality chocolate chips, and fresh butter and vanilla for the best possible flavor.
- Add a Pinch of Sea Salt: For an irresistible gourmet touch, sprinkle a tiny amount of flaky sea salt (like Maldon) over the wet chocolate topping immediately after spreading. The salt crystals provide a delightful textural contrast and perfectly enhance the sweet and savory notes of the chocolate and peanut butter.
By following these tips, you’ll consistently create Buckeye Bars that are not only delicious but also beautifully presented, impressing everyone who tries them.
Frequently Asked Questions: Buckeye Bars
Yes, this Buckeye Bars recipe is naturally gluten-free as written, provided you use gluten-free ingredients. However, it’s crucial to be cautious with any add-ins or variations you choose, as they might alter the gluten-free status of the bars. For instance, some brands of confectioners’ sugar contain corn starch which is typically gluten-free, but always check the label for “gluten-free” certification if you have strict dietary requirements. Also, if you add ingredients like crushed cookies, ensure those are gluten-free too. Always double-check all ingredient labels as a precaution.
Cracking in the chocolate topping often occurs if the bars are too cold or if the chocolate layer is too thick and brittle. To prevent cracking, try this method: Chill the bars in the refrigerator until the chocolate is mostly firm but still has a slight give (not rock hard). At this point, remove them from the fridge and let them sit at room temperature for about 10-15 minutes before cutting. This slight warming helps the chocolate become less brittle. Additionally, using a very sharp knife that has been warmed under hot water (and dried thoroughly) can help make clean cuts. Cut slowly and deliberately. If you find the chocolate still cracking, slightly increase the amount of shortening in your chocolate topping next time, as this can improve its flexibility.
Absolutely! This recipe is easily halved. Simply reduce all ingredient quantities by half. When halving the recipe, you should use a smaller baking dish, typically a 9×9 inch square pan. The preparation steps remain the same, just ensure your layers are evenly distributed in the smaller pan for best results.
We generally do not recommend using natural peanut butter in this specific recipe. Natural peanut butter, especially the “stir” varieties, tends to have a higher oil content that separates easily. This excess oil can lead to a peanut butter mixture that is too oily, crumbly, and difficult to bind together, and it may separate from the chocolate layer. It simply won’t achieve the same creamy, firm, and cohesive texture that traditional Buckeye Bars are known for. For the best and most consistent results, stick with a classic, processed creamy peanut butter.
If your peanut butter mixture seems too dry and crumbly, it might be due to slightly less moist peanut butter or too much confectioners’ sugar. You can try adding an extra tablespoon of softened butter or a tiny bit more creamy peanut butter, one teaspoon at a time, until it reaches a pliable consistency. If it’s too oily, which can happen with certain brands of peanut butter or if your butter was too warm, try adding a little more confectioners’ sugar (a tablespoon at a time) to absorb the excess oil and firm it up.
Yes, absolutely! While milk chocolate is often preferred for a classic sweet flavor, you can certainly experiment. Semi-sweet chocolate chips will provide a richer, less sweet topping, while dark chocolate chips will offer a more intense, bittersweet contrast to the sweet peanut butter. White chocolate can also be used for a unique twist, but be extra careful when melting it as it tends to seize more easily than other chocolates.
More Irresistible Buckeye Recipes
If you’ve fallen in love with the classic peanut butter and chocolate combination, be sure to explore these other delightful Buckeye-inspired treats:
- Creamy Buckeye Dip
- Easy Buckeye Pie
- Buckeye Brownie Crumble Cookie
Once you’ve whipped up this fantastic Buckeye Bars recipe, we’d love to hear from you! Come back and leave a star rating and comment to share your experience and tips with other dessert enthusiasts. Happy baking (or rather, no-baking)!
Printable Buckeye Bars Recipe Card
Buckeye Bars
Buckeye Bars are an incredibly easy no-bake dessert featuring a rich peanut butter base topped with a smooth chocolate layer. Made with just 6 ingredients, they’re perfect for any occasion and melt in your mouth!
15 mins
0 mins
2 hours (minimum chilling)
2 hours 15 mins (includes chilling)
24 bars
American
Dessert
279 kcal per serving
Carrie Barnard
Ingredients
- 1/2 cup salted butter (softened)
- 3 1/2 cups confectioners’ sugar
- 1 1/2 cups creamy peanut butter
- 1 teaspoon vanilla extract
- 2 cups chocolate chips (milk, semi-sweet, or dark)
- 1 tablespoon shortening
Instructions
- Prepare the Pan: Line a 9×13 inch baking pan with aluminum foil or parchment paper, leaving an overhang on all sides for easy lifting. Lightly grease the lining. Set aside.
- Mix Peanut Butter Layer: In a large bowl, combine softened salted butter, confectioners’ sugar, creamy peanut butter, and vanilla extract. Beat with an electric mixer (handheld or stand mixer with paddle attachment) until thoroughly combined into a thick, uniform mixture.
- Press the Base: Transfer the peanut butter mixture to the prepared baking pan. Using your hands or the bottom of a glass, press it down firmly and evenly across the bottom of the pan to create a compact, level layer.
- Melt Chocolate Topping: In a microwave-safe bowl, combine chocolate chips and shortening. Heat in 30-second intervals, stirring well after each, until completely melted and smooth. Be careful not to overheat.
- Spread Chocolate: Pour the melted chocolate mixture evenly over the peanut butter layer. Use an offset spatula or the back of a spoon to spread it to all edges for a smooth, consistent top.
- Chill to Set: Allow the bars to set. This can be done at room temperature for several hours or in the refrigerator for at least 1-2 hours until the chocolate is firm.
- Cut and Serve: Once fully set, use the foil/parchment overhangs to lift the bars onto a cutting board. With a sharp, warm knife, cut into squares or rectangles. Wipe the knife between cuts for clean edges. Serve and enjoy!
Recipe Notes
Store leftover Buckeye Bars in an airtight container in the refrigerator for up to 1 week, or freeze for up to 4 months for longer storage.
Nutrition Facts
Per Serving (1 bar, approx.): Calories: 279kcal | Carbohydrates: 31g | Protein: 4g | Fat: 16g | Saturated Fat: 6g | Polyunsaturated Fat: 2g | Monounsaturated Fat: 5g | Trans Fat: 0.3g | Cholesterol: 12mg | Sodium: 110mg | Potassium: 93mg | Fiber: 1g | Sugar: 28g | Vitamin A: 152IU | Vitamin C: 0.1mg | Calcium: 27mg | Iron: 0.5mg
Pin This Now to Remember It Later
Pin Recipe
