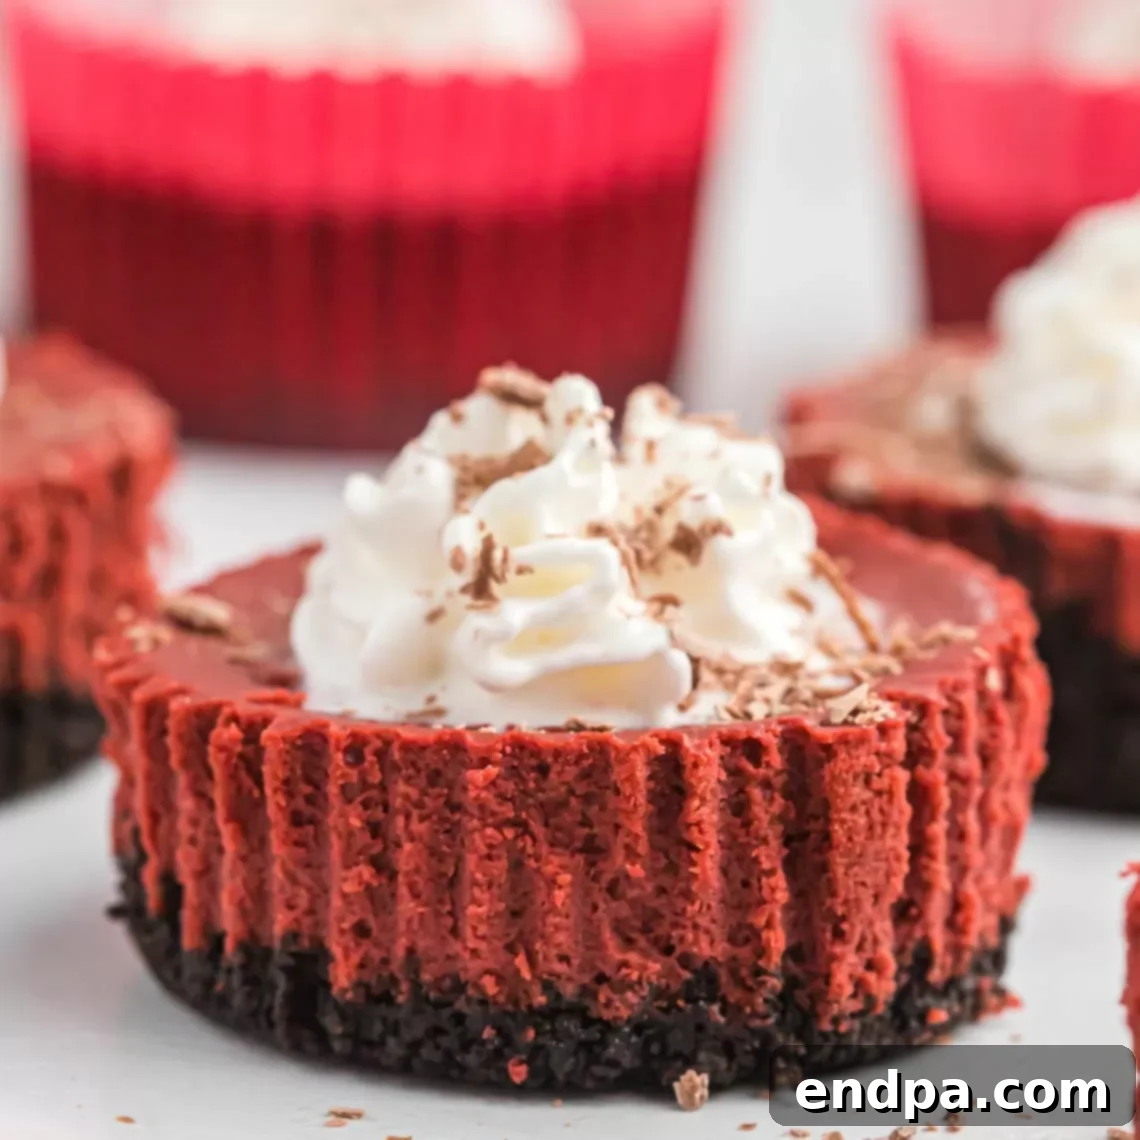
Mini Red Velvet Cheesecake is the quintessential bite-sized dessert, offering a luxurious experience in every morsel. These delectable cheesecake bites combine the iconic flavors of red velvet cake with the creamy richness of classic cheesecake, creating a treat that’s both elegant and incredibly satisfying. Perfect for any special occasion or simply to indulge a craving, this recipe promises to impress with its vibrant color and irresistible taste.
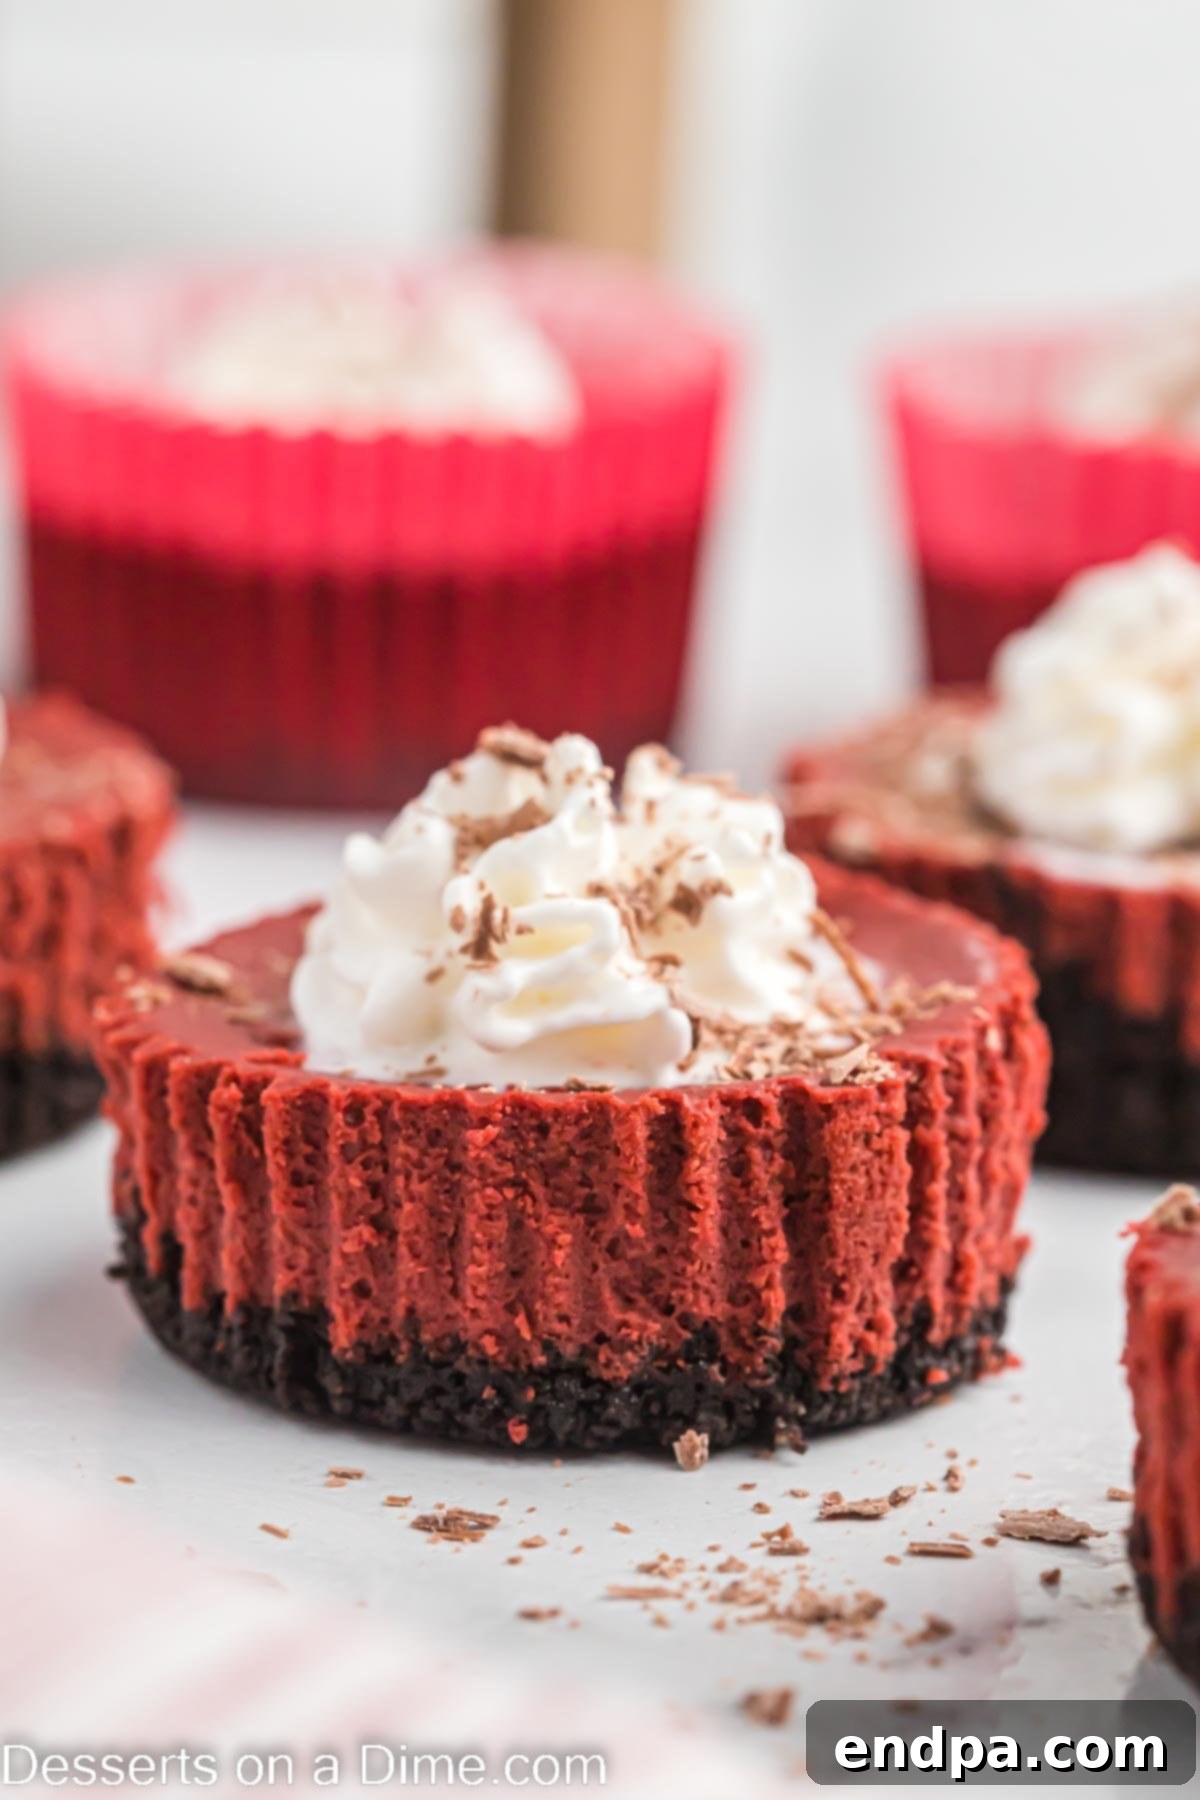
Whether you’re planning a romantic Valentine’s Day surprise, a festive holiday gathering, or just seeking a delightful dessert for a casual get-together, this Mini Red Velvet Cheesecake Recipe is an absolute winner. It masterfully marries two beloved desserts into one unforgettable experience. Each individual cheesecake delivers an explosion of classic Red Velvet flavor, perfectly complemented by the smooth, tangy essence of Cheesecake. Serving these individual portions eliminates the hassle of slicing, making them ideal for parties and effortless entertaining. They stand out among the Best Red Velvet Desserts, offering convenience without compromising on flavor or presentation.
The beauty of these mini cheesecakes lies in their individual servings, making them the ultimate grab-and-go dessert. Guests can easily pick up a treat from the dessert table, without the need for additional plates or cutting. This aspect is particularly advantageous for busy hosts who want to offer a stunning dessert spread with minimal effort. Imagine pairing these delightful bites with a scoop of Red Velvet Ice Cream for an even more decadent experience. If you enjoy other red velvet delights, you might also love the classic Whoopie Pie Recipe, charming Red Velvet Cake Pops, or the fun and addictive Red Velvet Puppy Chow.
Table of Contents
- Why You’ll Adore This Recipe
- The Perfect Crust
- Creamy Cheesecake Filling
- Exquisite Topping
- Creative Substitutions and Additions
- Mastering Mini Red Velvet Cheesecake
- Optimal Storage Solutions
- Can You Prepare Them Ahead?
- Essential Pro Tips for Success
- More Irresistible Red Velvet Desserts
- More Delightful Cheesecake Recipes
Why You’ll Adore This Recipe
This Mini Red Velvet Cheesecake recipe is truly a gem for any baker, regardless of experience level. Its versatility makes it suitable for a wide range of occasions, from elegant holiday celebrations like Christmas and Valentine’s Day to joyful birthdays and casual weeknight desserts. The simplicity of the preparation means you don’t need any specialized baking skills or expensive gadgets to achieve professional-looking results. Anyone can follow these straightforward steps and create a batch of perfectly delicious mini cheesecakes every time.
Beyond its ease of preparation, this dessert offers an undeniable wow factor. Serving these beautifully portioned cheesecakes will undoubtedly make you feel like a gourmet chef, yet the recipe remains incredibly budget-friendly. Your guests will be amazed by the rich flavor and sophisticated presentation, never guessing how simple and economical it was to create such an impressive treat. It’s the ideal solution when you need a dessert that tastes extraordinary but doesn’t demand hours in the kitchen.
Key Ingredients for Culinary Success
The Indulgent Crust
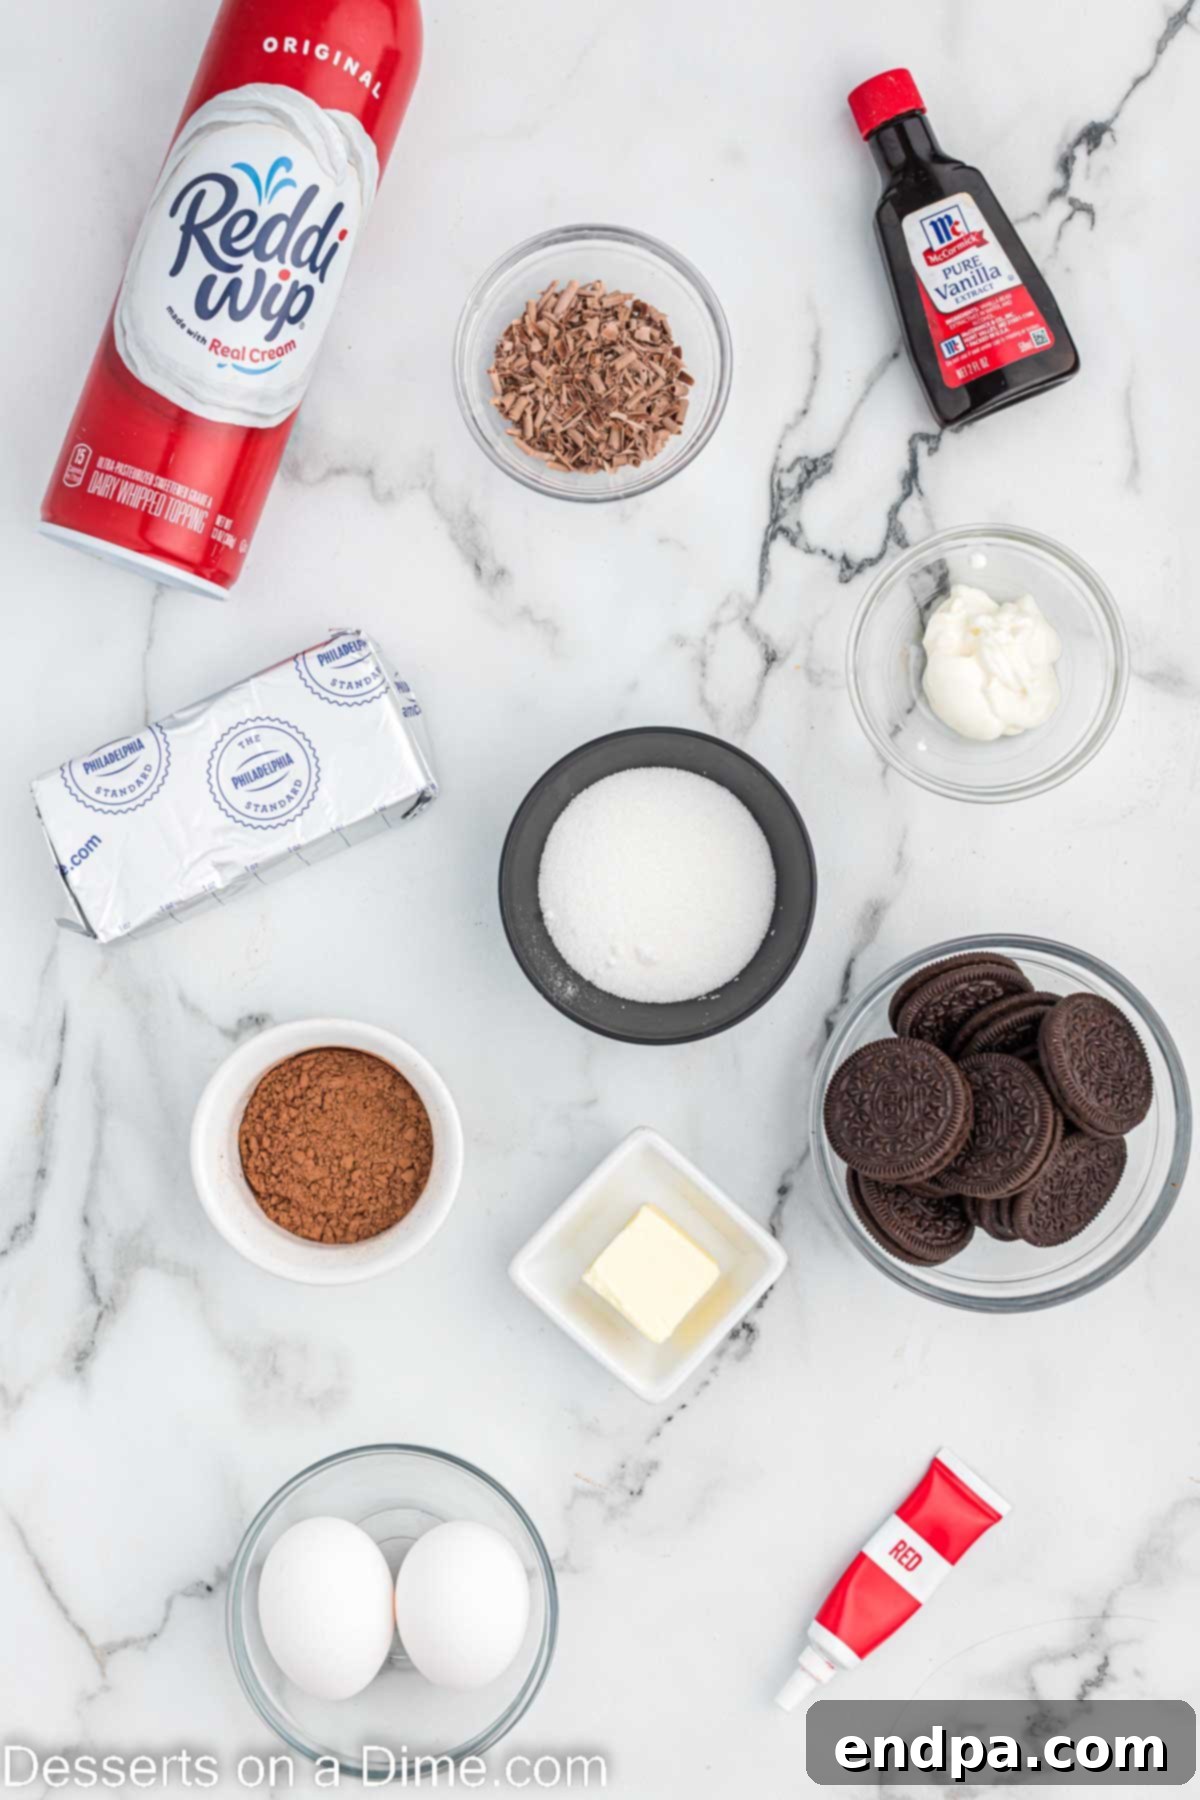
- Chocolate Sandwich Cookies: For the perfect red velvet experience, we recommend using regular Oreo cookies. Their classic chocolate flavor provides an excellent contrast to the tangy cheesecake. Avoid using double-stuffed varieties as the extra cream can alter the crust’s texture and make it less stable.
- Unsalted Butter: Always opt for real unsalted butter. It binds the cookie crumbs together beautifully, creating a rich, firm base that holds its shape. Melting it gently ensures it incorporates evenly with the crushed cookies.
The Velvety Cheesecake Filling
- Cream Cheese: Softened cream cheese at room temperature is crucial for a smooth, lump-free cheesecake batter. This ensures all ingredients blend seamlessly, creating that signature silky texture.
- Sour Cream: Full-fat sour cream is highly recommended here. It adds a delightful tanginess and moisture to the cheesecake, contributing to its rich flavor and incredibly creamy consistency.
- Granulated Sugar: Essential for balancing the tang of the cream cheese and the slight bitterness of the cocoa, sugar provides the perfect sweetness for a well-rounded flavor profile.
- Unsweetened Cocoa Powder: A high-quality unsweetened cocoa powder, such as Hershey’s, is key to developing the subtle chocolate notes characteristic of red velvet. It reacts with the acidic ingredients to create depth and enhance the red hue.
- Pure Vanilla Extract: Using pure vanilla extract, rather than imitation, will elevate the cheesecake’s flavor significantly. Its aromatic warmth beautifully complements both the chocolate and cream cheese.
- Large Eggs: Eggs act as a binder and add structure to the cheesecake. Incorporating them one at a time ensures they are fully mixed without over-aerating the batter, which can lead to cracks.
- Red Food Coloring: This is what gives red velvet its iconic, vibrant crimson color. While optional, it’s essential for achieving the visual appeal that defines a red velvet dessert. You can adjust the amount to achieve your desired shade.
The Finishing Touch: Topping
- Whipped Cream: For ultimate convenience, Reddi-Wip is a great choice for serving. For a homemade touch, freshly whipped cream adds a luxurious cloud-like texture.
- Chocolate Shavings: These are optional but highly recommended. Chocolate shavings add a sophisticated flourish and an extra hint of chocolate flavor, making each cheesecake bite look and taste even more special.
A complete, detailed list of ingredients, including precise measurements, can be found in the recipe section further down the page.
Creative Substitutions and Additions
One of the joys of baking is the freedom to customize, and this Mini Red Velvet Cheesecake recipe is wonderfully adaptable. Here are some ideas to make it your own:
- Cream Cheese Frosting: For an even more indulgent experience, consider topping each cheesecake bite with a dollop of homemade cream cheese frosting. The classic pairing of red velvet and cream cheese frosting is always a hit and adds an extra layer of decadence.
- Food Coloring Variations: If you prefer a more natural look or simply wish to experiment, you can easily omit the red food coloring. The cheesecakes will still boast a delicious, rich chocolate-cream cheese flavor, albeit with a brown hue. For a subtle red, you might try using beet powder, though it can slightly alter the taste.
- Mini Chocolate Chips: Stir a handful of mini chocolate chips directly into the cheesecake mixture before baking. This adds delightful pockets of extra chocolate and a pleasing textural contrast. White chocolate chips would also be a fantastic addition.
- Crust Alternatives: While traditional Oreo cookies provide a fantastic base, don’t hesitate to get creative with your crust. Other excellent choices include: graham cracker crumbs for a classic cheesecake base, vanilla wafers for a lighter flavor, shortbread cookies for a buttery foundation, or even crushed ginger snaps for a spicy twist.
- Topping Enhancements: Beyond chocolate shavings, there are many ways to adorn your mini cheesecakes. Consider a sprinkle of mini chocolate chips or white chocolate chips, or colorful sprinkles for a festive look. Pink and red sprinkles would be especially charming for Valentine’s Day, adding a playful touch. Fresh berries, such as raspberries or strawberries, can also provide a beautiful garnish and a burst of fresh flavor.
Mastering Mini Red Velvet Cheesecake: Step-by-Step Guide
Crafting these mini red velvet cheesecakes is a straightforward and rewarding process. Follow these detailed steps to achieve perfect results:
- Step 1. Prepare Your Workspace: Begin by preheating your oven to 350 degrees F (175 degrees C). This ensures the oven is at the correct temperature when your cheesecakes are ready to bake. Line a standard 12-cup muffin pan with paper cupcake liners. These liners are essential for easy removal and serving, and they also help maintain the individual shape of each cheesecake.
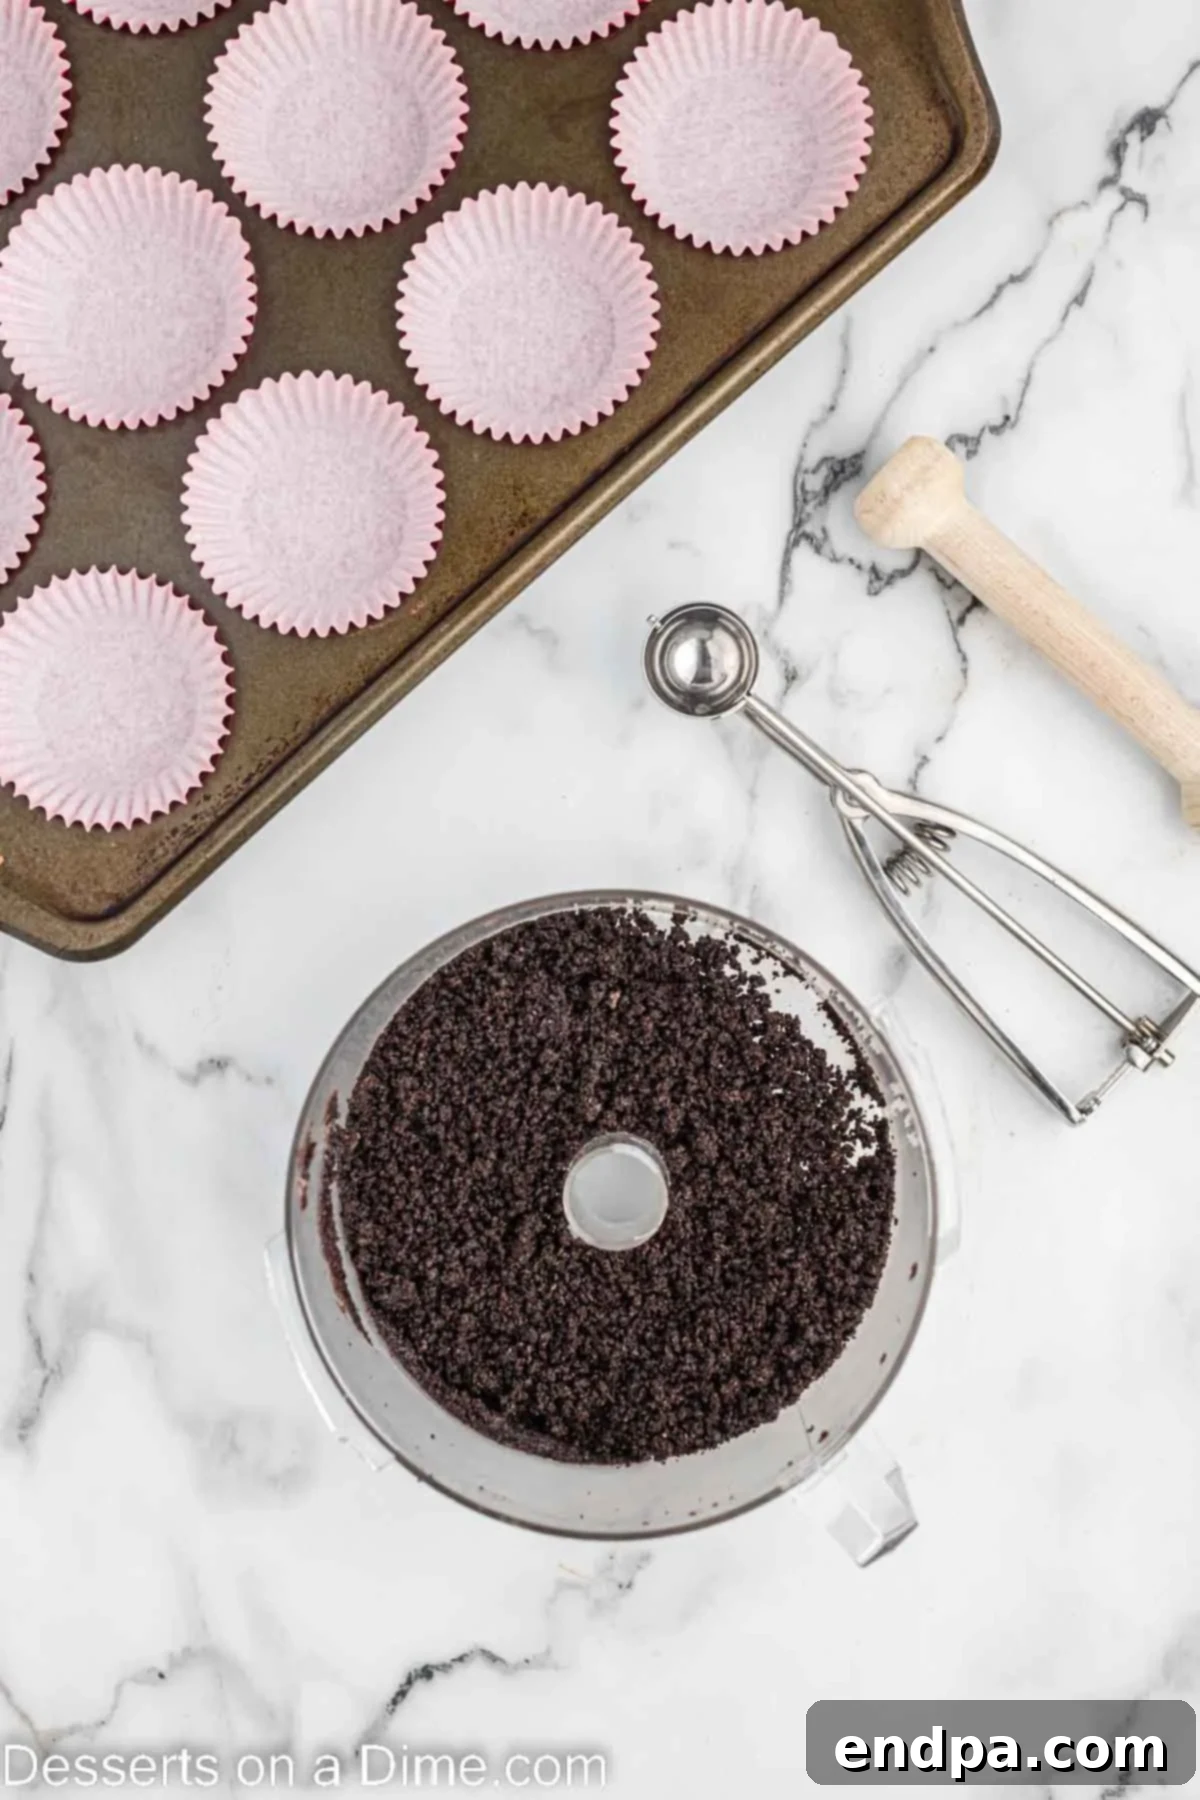
Step 2. Craft the Perfect Crust: Place your chosen chocolate sandwich cookies (Oreos) into a food processor. Pulse until the cookies are finely crushed into small, even crumbs. Once the cookies are processed, add the melted unsalted butter to the food processor. Blend again until the butter is fully incorporated with the cookie crumbs, creating a mixture that resembles wet sand. This ensures a cohesive and flavorful crust.
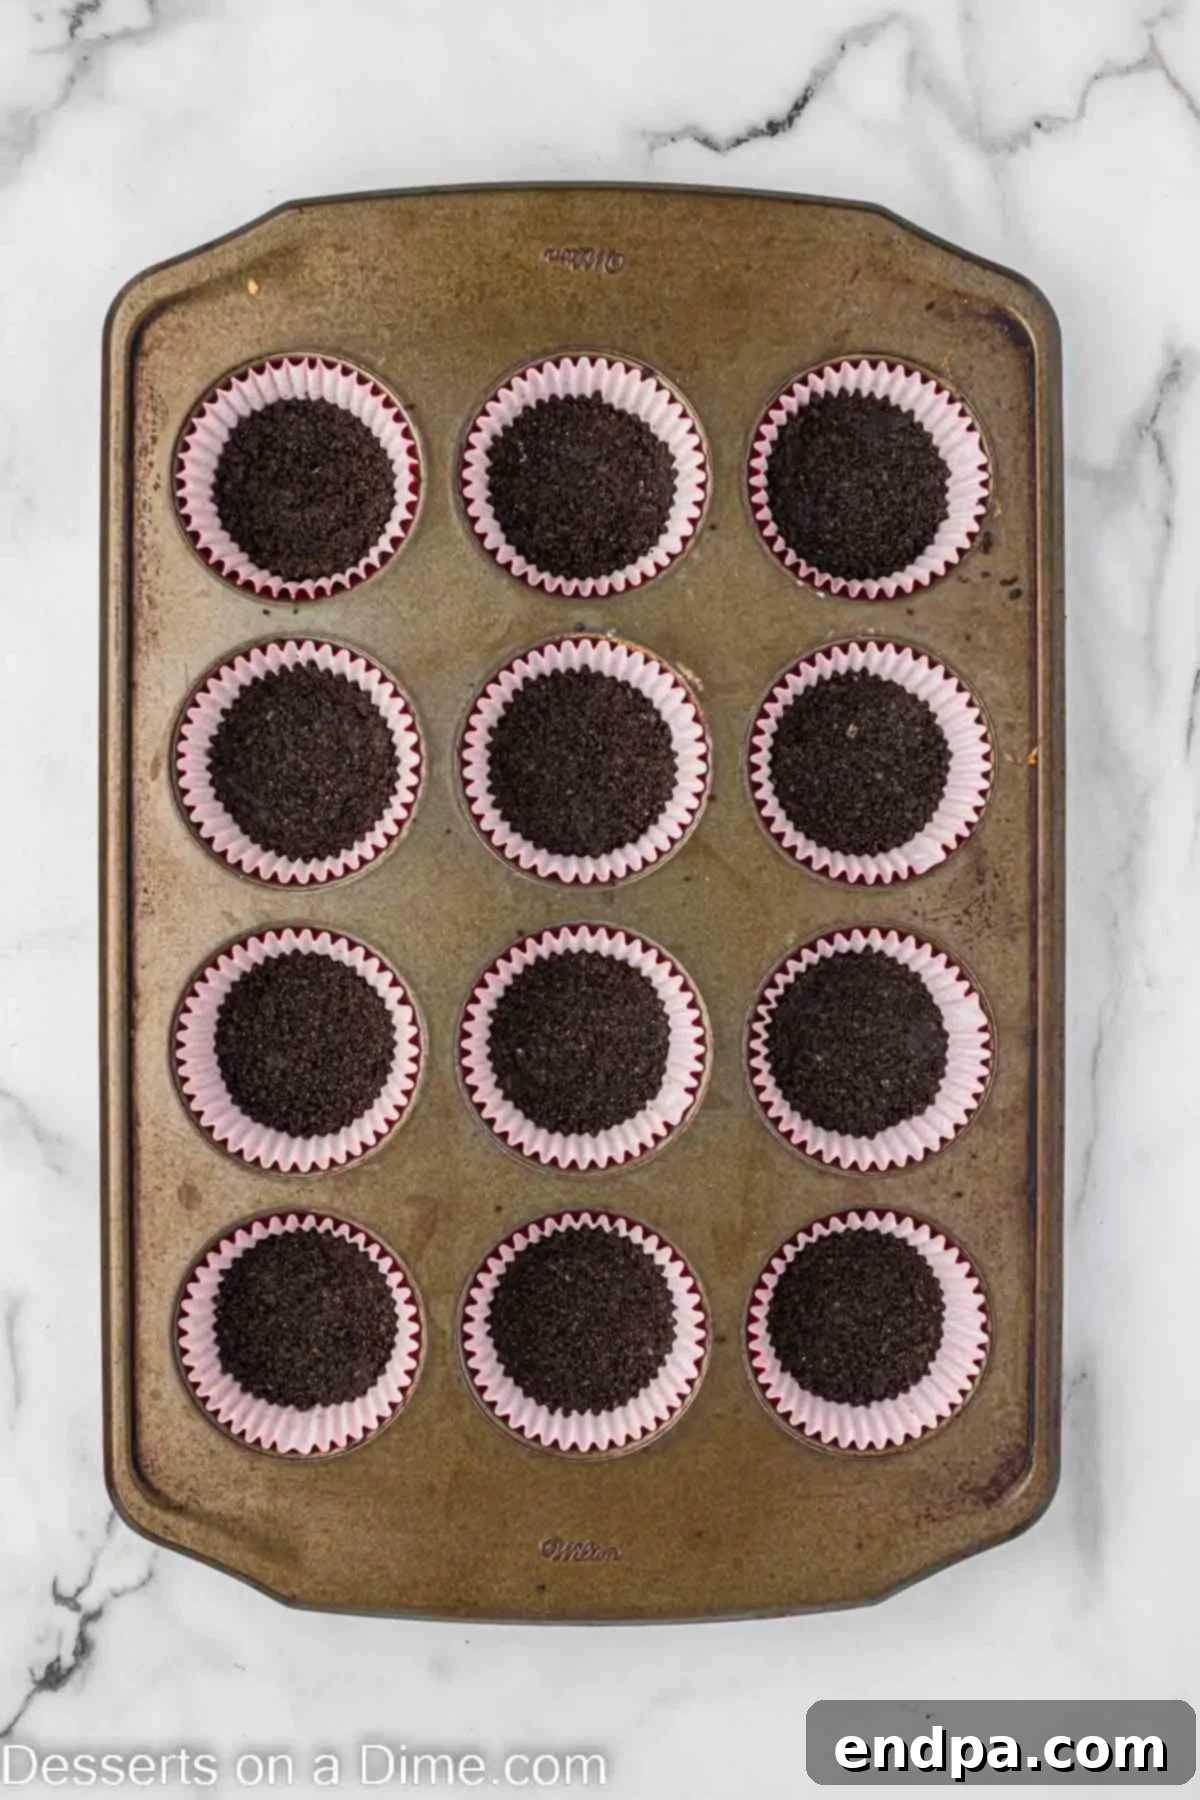
Step 3. Form and Pre-Bake the Crusts: Using a small cookie scoop or a spoon, evenly distribute a small amount of the cookie crumb mixture into the bottom of each prepared cupcake liner. Use the back of a spoon or a flat-bottomed glass to firmly press down on the crumbs, forming a compact and even crust at the bottom of each liner. This step is crucial for preventing the crust from crumbling after baking. Transfer the muffin pan to the preheated oven and bake for 5 minutes. This brief baking time helps to set the crust, making it more stable and less likely to become soggy once the filling is added.
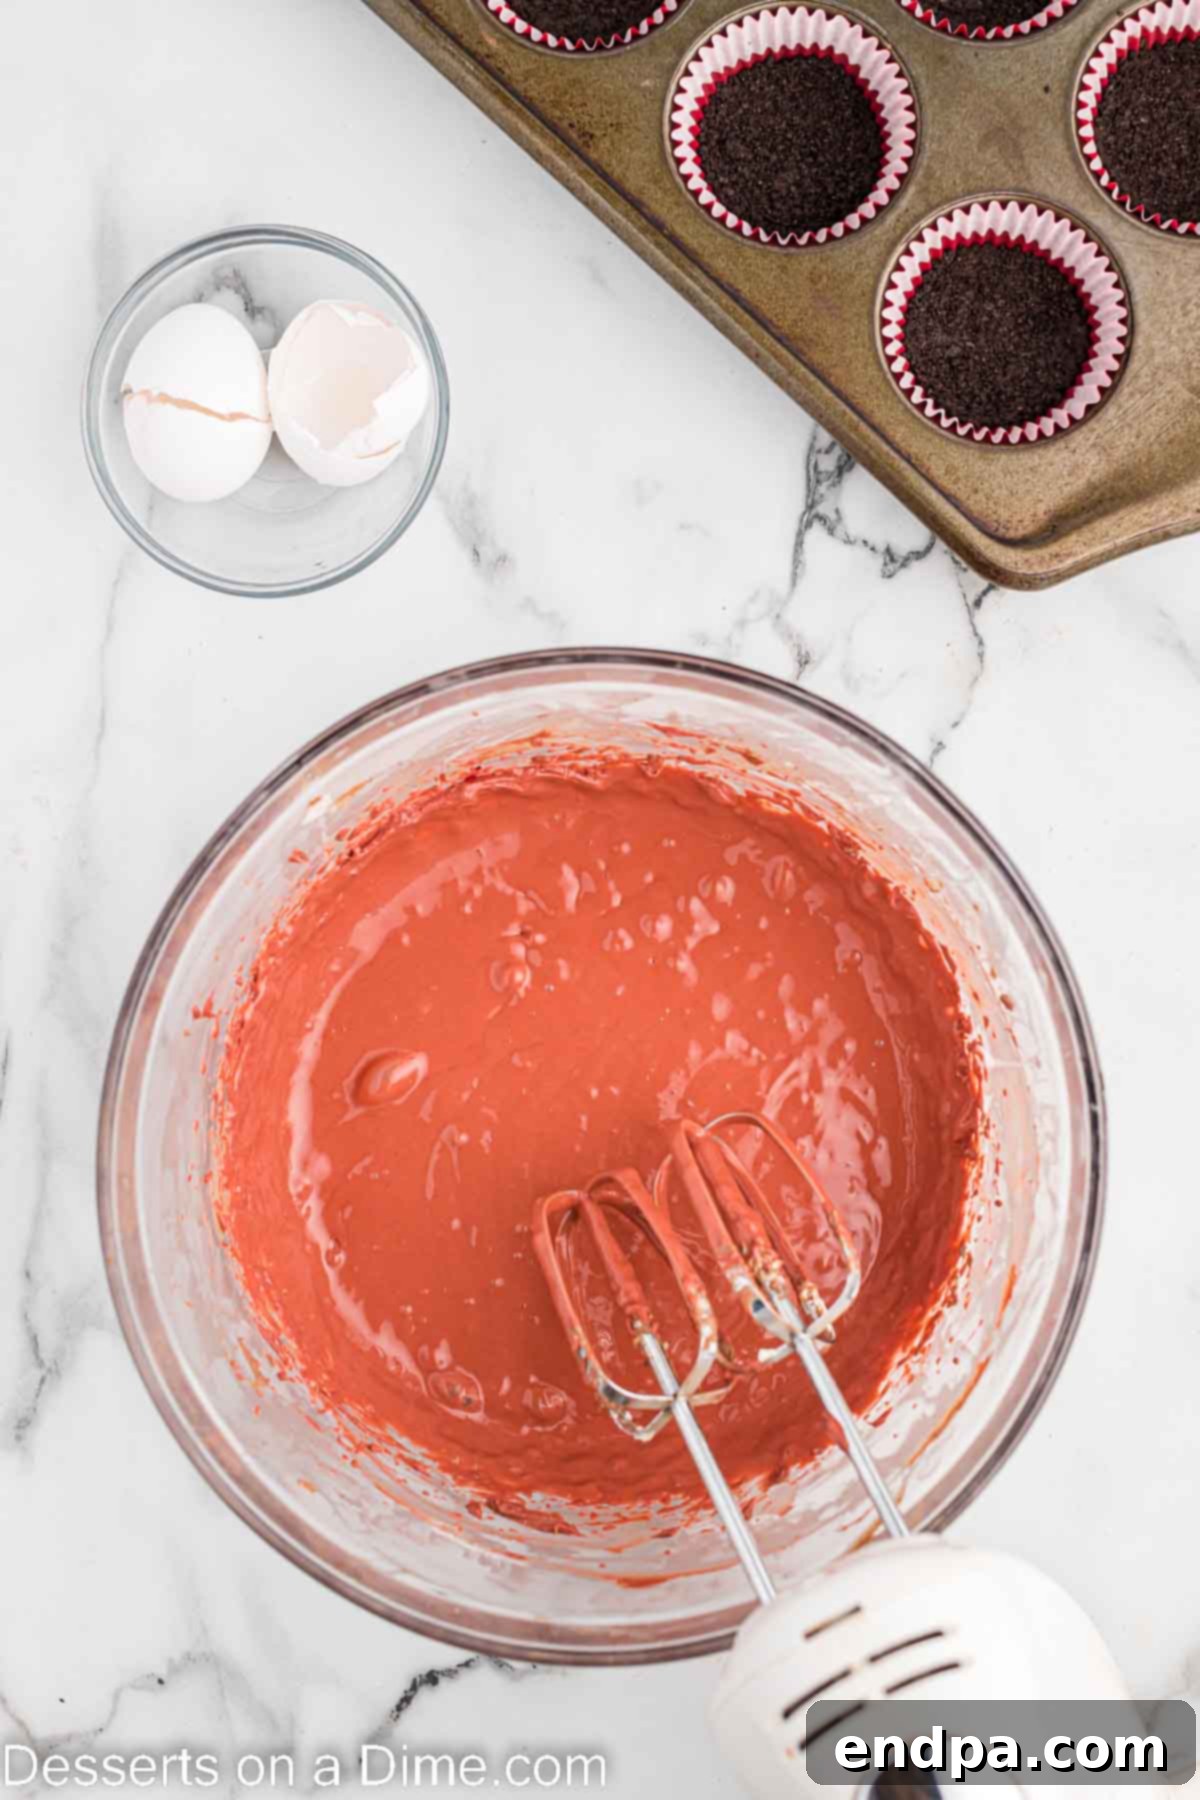
Step 4. Prepare the Cheesecake Filling: In a large mixing bowl, combine the softened cream cheese and sour cream. Using an electric mixer, beat these ingredients on medium speed until the mixture is completely smooth and free of lumps, typically 2-3 minutes. This ensures a silky base for your cheesecake. Next, gradually add the granulated sugar, unsweetened cocoa powder, and pure vanilla extract. Continue mixing until all ingredients are well combined and the batter is smooth. Finally, beat in the large eggs, one at a time, mixing just until each egg is incorporated. Overmixing the eggs can incorporate too much air, which can cause cracks in the cheesecake during baking. Add the red food coloring at this stage, mixing until you achieve your desired vibrant red hue.
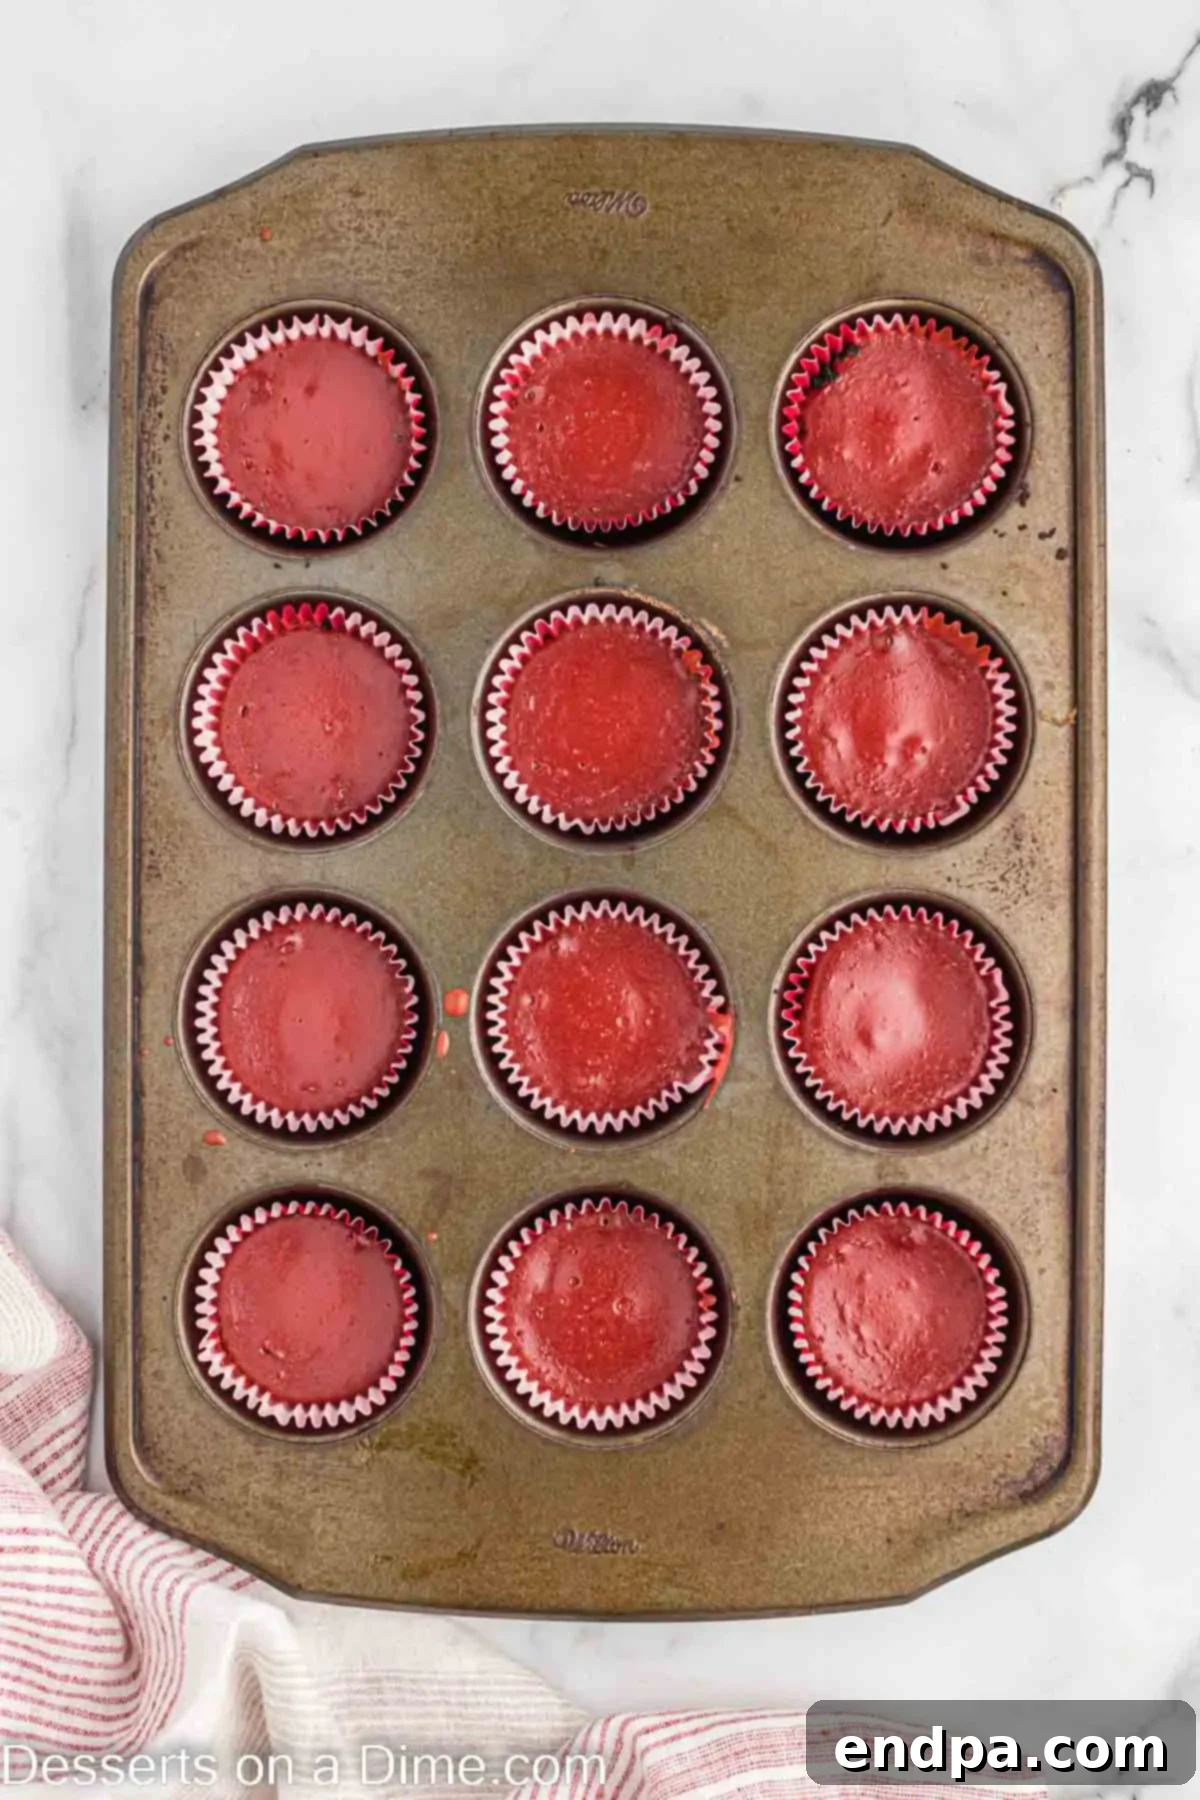
Step 5. Fill the Cheesecake Cups: Carefully spoon the red velvet cheesecake batter on top of the pre-baked Oreo crusts in each cupcake liner. Aim for a little more than 2 tablespoons of batter per cup, filling each liner approximately two-thirds full. Distributing the batter evenly ensures that all cheesecakes bake uniformly and look consistent.
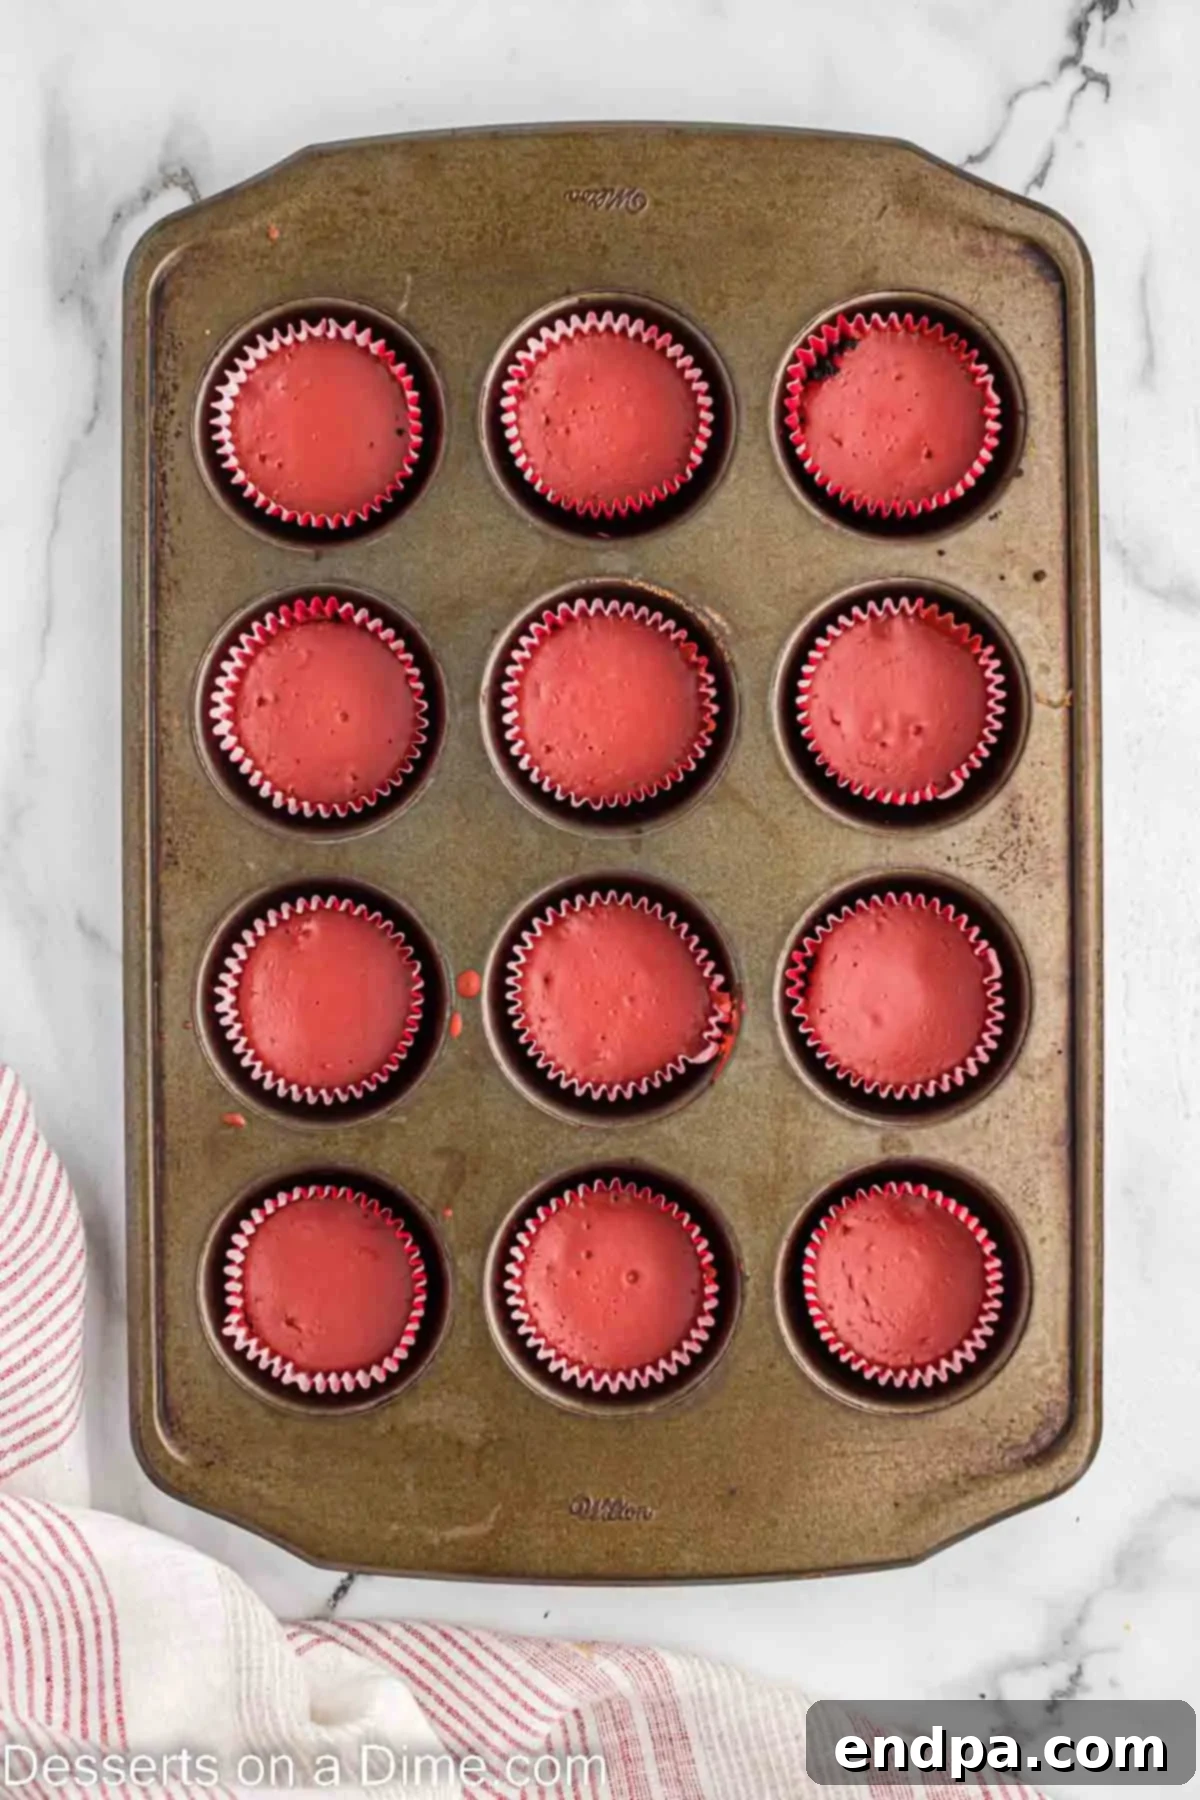
Step 6. Bake to Perfection: Place the muffin pan back into the preheated oven and bake for 14-16 minutes. The key is to bake until the center of each cheesecake is only slightly jiggly when gently shaken. It’s crucial not to overbake cheesecakes, as this can lead to a dry, cracked texture. The cheesecakes will continue to set as they cool. Keep an eye on them, as oven temperatures can vary.
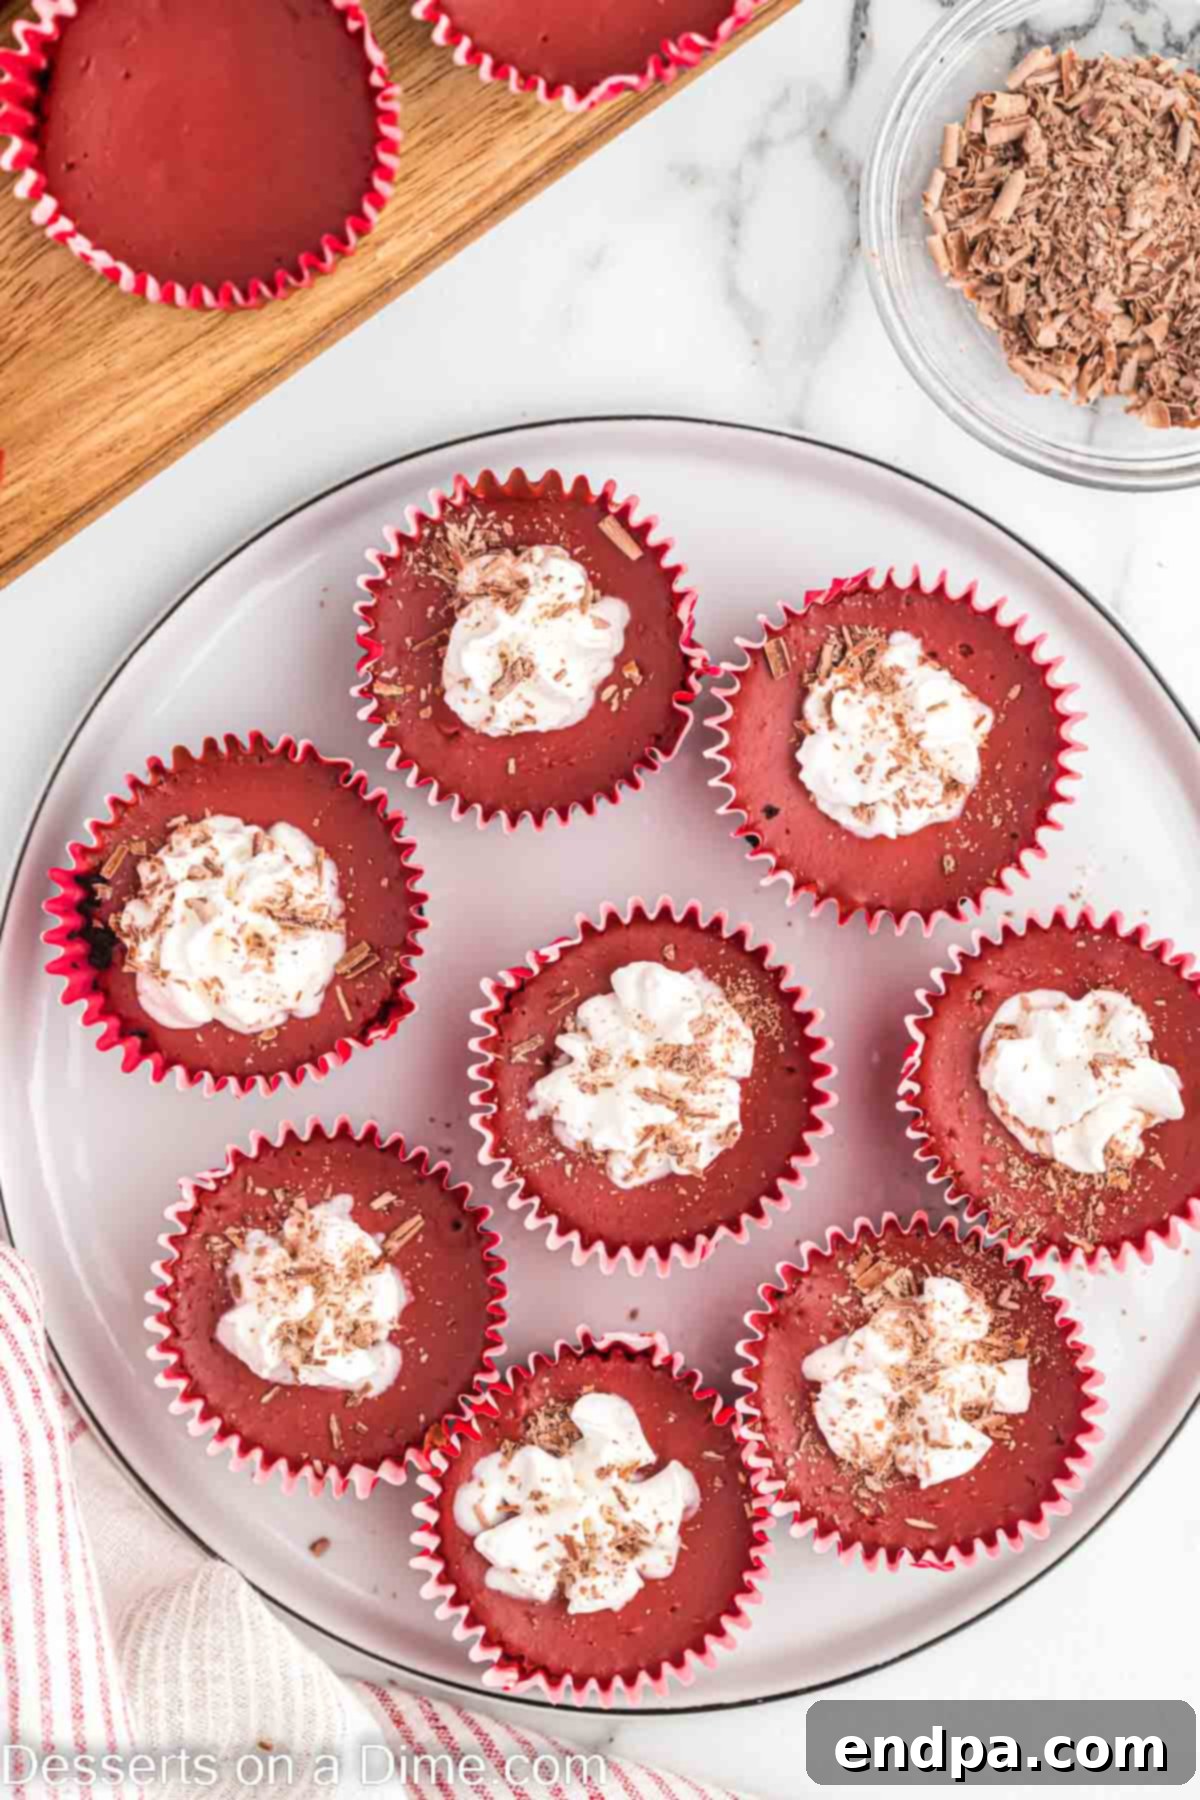
Step 7. Chill and Garnish: Once baked, remove the mini cheesecakes from the oven and allow them to cool completely to room temperature in the muffin pan, which usually takes about 1 hour. This slow cooling prevents cracking. After cooling, transfer the cheesecakes (still in their liners) to the refrigerator to chill for a minimum of 2 hours. Chilling is vital for the cheesecakes to fully set and firm up, ensuring a perfect creamy texture. When you’re ready to serve, carefully remove each cheesecake from its liner, top with a generous dollop of whipped cream, and finish with delicate chocolate shavings. Serve immediately and savor every delicious bite!
Optimal Storage Solutions
Proper storage is essential to keep your Mini Red Velvet Cheesecakes fresh and delicious. Store any leftover cheesecakes in an airtight container in the refrigerator for up to 5 days. To prevent the whipped topping from deflating or becoming watery, we highly recommend waiting to add it until just before serving if you are making these in advance for a party or event.
For extended storage, these mini cheesecakes freeze beautifully for up to 2 months. To freeze, ensure the cheesecakes are completely cooled to room temperature. Omit the whipped topping and chocolate shavings before freezing. Place the cheesecake bites in a single layer in an airtight freezer-safe container, or wrap them individually in plastic wrap and then store them in a container. When you’re ready to enjoy them, simply transfer the frozen cheesecakes to the refrigerator and allow them to thaw overnight. Once thawed, you can add your desired toppings and serve.
Can You Prepare Them Ahead?
Absolutely! This recipe is incredibly convenient for meal prepping or party planning, as these mini cheesecakes can be prepared well in advance. You can make them up to 4 days ahead of time, allowing you to focus on other tasks closer to your event. Simply follow all the baking and chilling steps, then store the cheesecakes in an airtight container in the refrigerator.
When the time comes to serve, retrieve them from the fridge, and then add your fresh whipped topping and delicate chocolate shavings. This make-ahead capability ensures you can enjoy a stress-free dessert presentation that tastes as fresh as if it were just made.
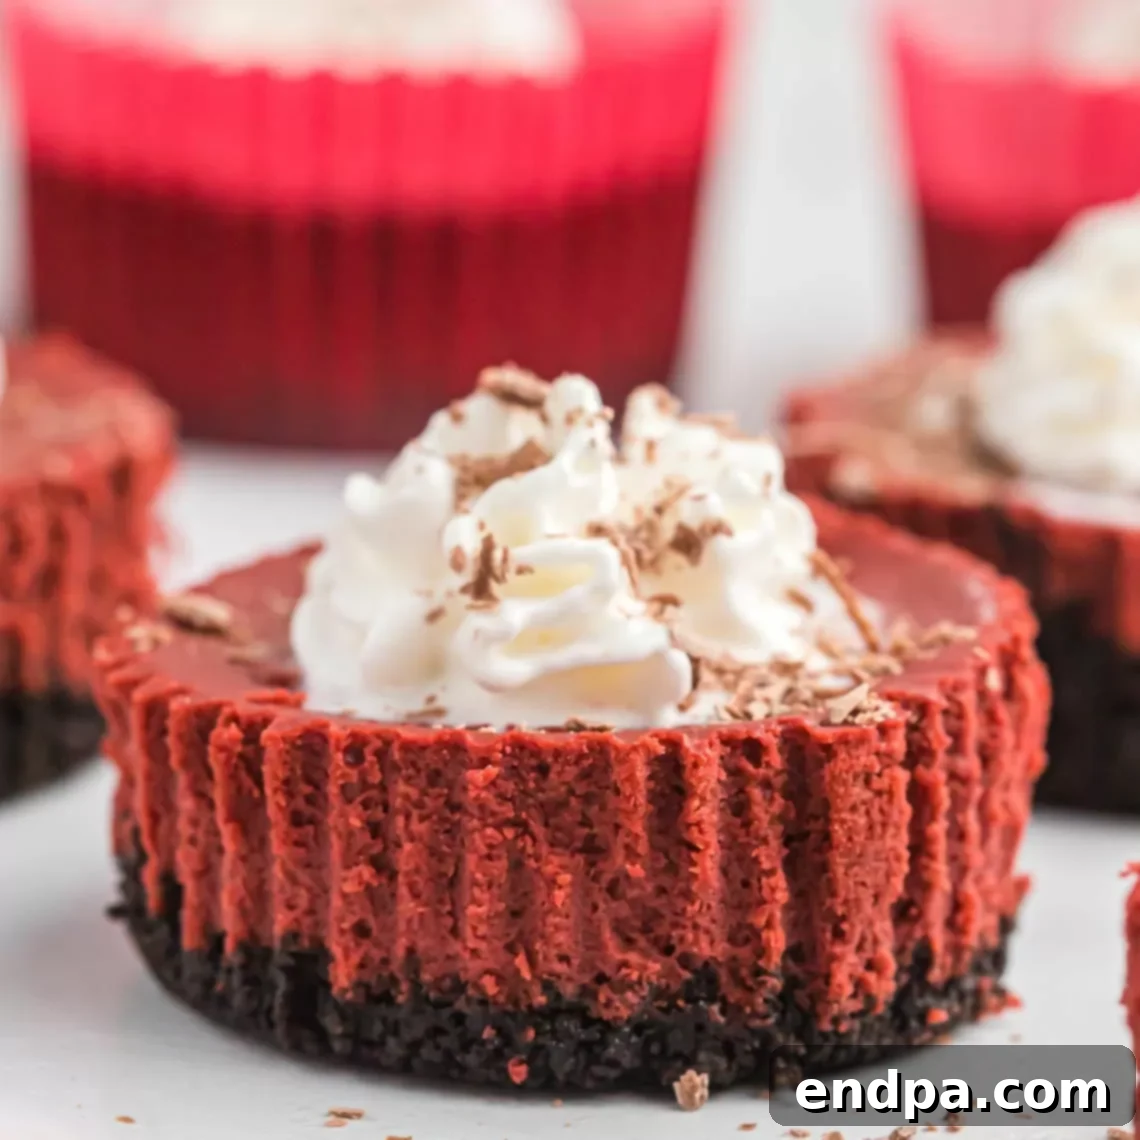
Essential Pro Tips for Cheesecake Success
Achieving the perfect mini red velvet cheesecakes is easy with a few expert tips:
- Room Temperature Ingredients are Non-Negotiable: This is arguably the most crucial tip for any cheesecake recipe. Ensure your cream cheese, sour cream, and eggs are at room temperature before you begin mixing. Cold ingredients will not blend smoothly, resulting in a lumpy batter. Room temperature ingredients emulsify beautifully, yielding a perfectly smooth, velvety cheesecake texture.
- Do Not Overbake: Overbaking is the arch-nemesis of cheesecake. Oven temperatures can fluctuate significantly, so keep a close eye on your cheesecakes. They are done when the edges are set, but the center still has a slight jiggle. The residual heat will continue to cook them as they cool. Overbaked cheesecake will be dry, dense, and prone to cracking.
- Effortless Chocolate Shavings: To quickly and easily create elegant chocolate shavings, simply use a vegetable peeler on a block of your favorite chocolate. Glide the peeler along the edge of the chocolate bar for delicate curls that instantly elevate the presentation of your cheesecakes.
- Experiment with a Mini Muffin Pan: If you’re aiming for even tinier, bite-sized treats, a mini muffin pan is an excellent alternative. Remember to adjust your baking time significantly, as smaller cheesecakes will cook much faster than standard-sized ones. Monitor them closely and remove from the oven when the center is just barely set.
- Chill Completely Before Topping: Patience is a virtue when it comes to cheesecake! Ensure your mini cheesecakes are entirely cooled to room temperature, and then thoroughly chilled in the refrigerator, before adding any whipped cream or other toppings. Applying toppings to warm or even slightly cool cheesecakes will cause the whipped cream to melt and slide off, ruining your presentation.
- Stick to Regular Oreo Cookies for the Crust: While tempting, avoid using double-stuffed Oreo cookies for the crust. The excessive amount of cream filling in the double-stuffed variety can throw off the butter-to-crumb ratio, resulting in a crust that is too soft, greasy, or crumbly, and doesn’t set properly. Regular Oreos provide the perfect balance for a firm, delicious base.
- Gentle Mixing is Key for Filling: When beating the cream cheese mixture, mix just until smooth. Once you add the eggs, mix only until they are just incorporated. Overmixing introduces too much air into the batter, which expands during baking and then collapses as the cheesecake cools, leading to unsightly cracks on the surface.
More Irresistible Red Velvet Desserts
If you’ve fallen in love with the classic flavors of red velvet, there’s a whole world of delightful red velvet treats waiting to be explored:
- Cheesecake Factory Red Velvet Cheesecake: Recreate the iconic dessert from this beloved restaurant right in your own kitchen.
- Red Velvet Cupcake Recipe: Perfect for individual servings, these classic cupcakes are moist, flavorful, and topped with luscious cream cheese frosting.
- Red Velvet Sheet Cake Recipe: An excellent choice for feeding a crowd, this sheet cake delivers all the red velvet goodness with ease.
- Red Velvet Cake Balls: Bite-sized, rich, and often dipped in chocolate, these are a fantastic no-bake option.
- Red Velvet Mug Cake Recipe: Craving red velvet instantly? This single-serving mug cake is quick, easy, and satisfying.
- Red Velvet Funnel Cake: A unique twist on a fairground favorite, perfect for a fun and festive dessert.
More Delightful Cheesecake Recipes
Can’t get enough of creamy, dreamy cheesecake? Here are a few more recipes to add to your repertoire:
- Chocolate Chip Cookie Cheesecake Recipe: A playful fusion of two classic desserts, featuring a cookie crust and a decadent chocolate chip cheesecake filling.
- Easy No Bake Cheesecake Recipe: For those days when you need a quick and delicious dessert without turning on the oven, this recipe is a lifesaver.
- No Bake Blueberry Cheesecake Recipe: A refreshing and fruity option, perfect for summer gatherings or when you want a lighter cheesecake experience.
Give this fantastic recipe for Mini Red Velvet Cheesecakes a try. It’s truly fabulous and guarantees a crowd-pleasing dessert. Once you’ve made them, we’d love to hear your thoughts and see your star rating!
Pin
Mini Red Velvet Cheesecake
Average Rating: 4.63 from 8 votes
Ingredients
FOR THE CRUST:
- 10 Chocolate Sandwich Cookies Oreos
- 2 Tablespoons Unsalted Butter
FOR THE CHEESECAKE:
- 8 ounces cream cheese softened
- 1 Tablespoon Sour Cream
- 1/3 cup sugar
- 3 Tablespoons Unsweetened Cocoa Powder
- 1 teaspoon vanilla extract
- 2 Large Eggs
- Red Food Coloring
FOR TOPPING:
- Whipped Cream Reddi-Whip
- Chocolate Shavings
Instructions
- Preheat the oven to 350 degrees F (175 C). Place 12 paper cupcake liners in a standard muffin pan.
- Place the Oreo cookies in a food processor and blend until the cookies are small, fine pieces. Add the melted butter and blend until thoroughly combined. Place a small cookie scoop (about 1 tablespoon) of the crumb mixture into each cupcake liner. Press down firmly with a flat object, like the bottom of a glass or a spoon, to form an even and compact crust. Bake the crusts for 5 minutes.
- In a medium mixing bowl, using an electric mixer, beat the softened cream cheese and sour cream until the mixture is completely smooth and creamy, which should take approximately 2-3 minutes. Ensure there are no lumps remaining.
- Add the cocoa powder, sugar, and vanilla extract to the cream cheese mixture. Continue to mix until the batter is smooth and all ingredients are fully incorporated. Next, beat in the large eggs, one at a time, mixing just until each egg yolk disappears into the batter. Be careful not to overmix at this stage. Add the red food coloring and mix until your desired red color is achieved.
- Spoon a little more than 2 tablespoons of the cheesecake batter into each cupcake liner, placing it directly on top of the pre-baked Oreo crusts. Fill each cup about two-thirds full.
- Bake for 14-16 minutes, or until the edges of the cheesecakes are set and the center still has a slight, gentle jiggle. It is crucial not to overbake, as this will lead to a dry texture and potential cracking.
- Once baked, remove the muffin pan from the oven and allow the mini cheesecakes to cool completely to room temperature (this usually takes about 1 hour). After cooling, transfer the cheesecakes (still in their liners) to the refrigerator and chill for at least 2 hours. This chilling period is essential for them to firm up and develop their rich, creamy texture.
- When you are ready to serve, gently remove each mini cheesecake from its liner. Top each one generously with whipped cream and garnish with delicate chocolate shavings. Enjoy your perfectly portioned, delicious red velvet cheesecakes!
Recipe Notes
Always ensure all cheesecake ingredients, especially cream cheese and eggs, are at room temperature before mixing. This ensures a smooth, lump-free batter and a superior final texture, preventing cracks in your finished cheesecakes.
Nutrition Facts
Calories: 167kcal
Carbohydrates: 15g
Protein: 3g
Fat: 11g
Saturated Fat: 6g
Polyunsaturated Fat: 1g
Monounsaturated Fat: 3g
Trans Fat: 0.1g
Cholesterol: 52mg
Sodium: 109mg
Potassium: 80mg
Fiber: 1g
Sugar: 10g
Vitamin A: 358IU
Vitamin C: 0.01mg
Calcium: 28mg
Iron: 2mg
Pin This Now to Remember It Later
Pin Recipe
