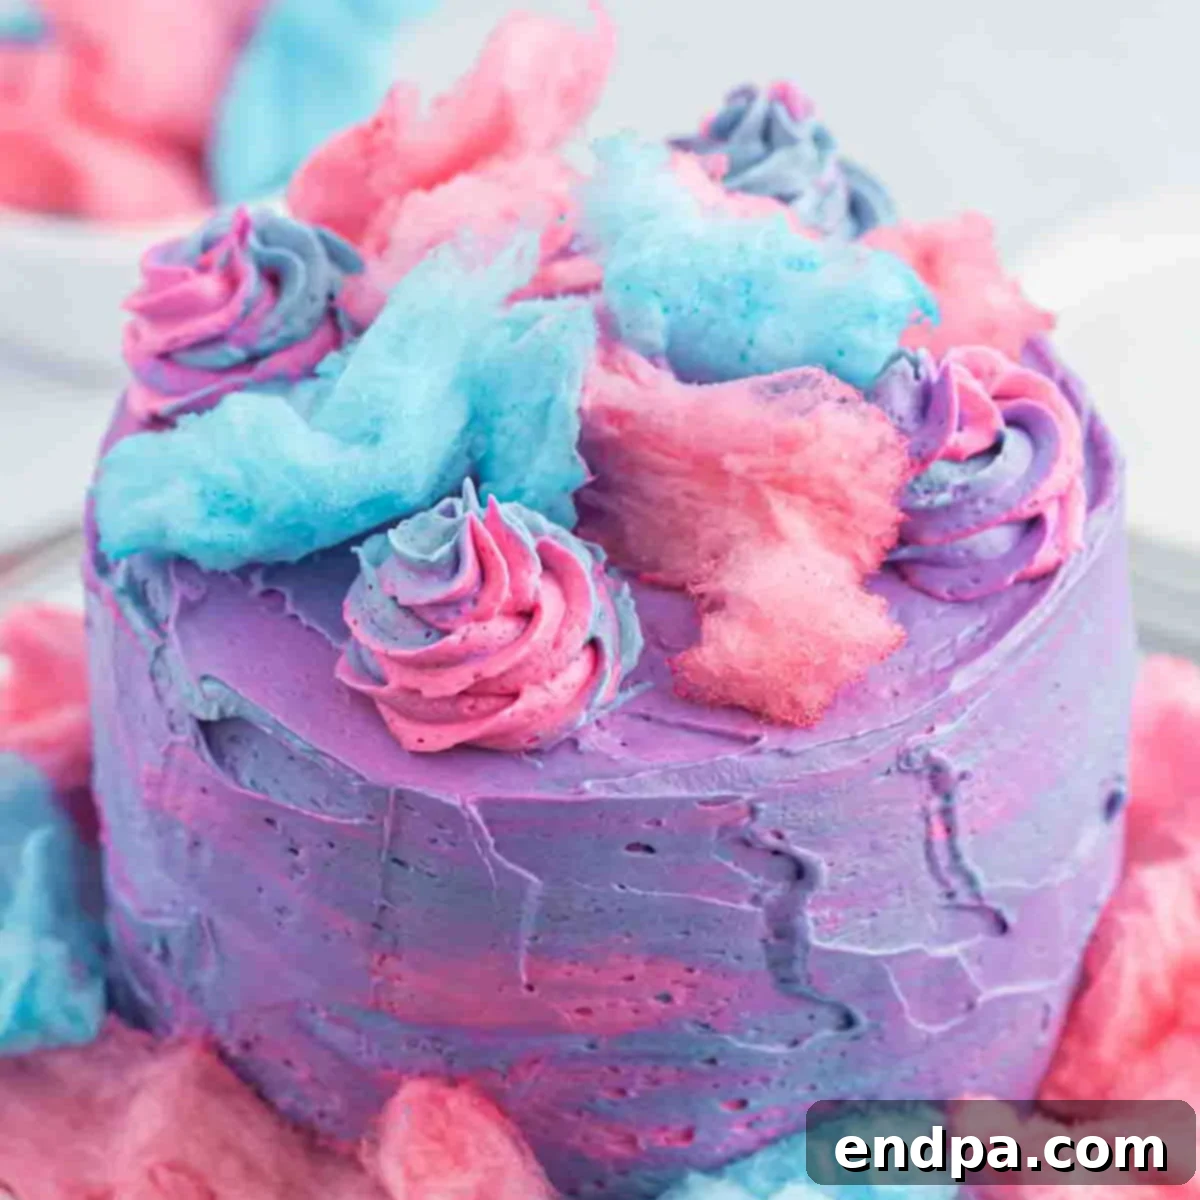
Experience the Magic of Cotton Candy Cake: A Whimsical Dessert for Every Celebration
Step into a world of vibrant hues and enchanting flavors with our spectacular Cotton Candy Cake. This dessert isn’t just a treat; it’s a celebration in itself, brimming with fun, bright colors and an absolutely amazing taste that evokes nostalgic sweetness. Whether you’re planning a dazzling birthday party, a baby shower, a gender reveal, or simply want to add a touch of whimsy to any special occasion, this cake is guaranteed to be the showstopper. Topped with delicate wisps of real cotton candy, it promises an unforgettable visual and culinary experience that will delight guests of all ages.
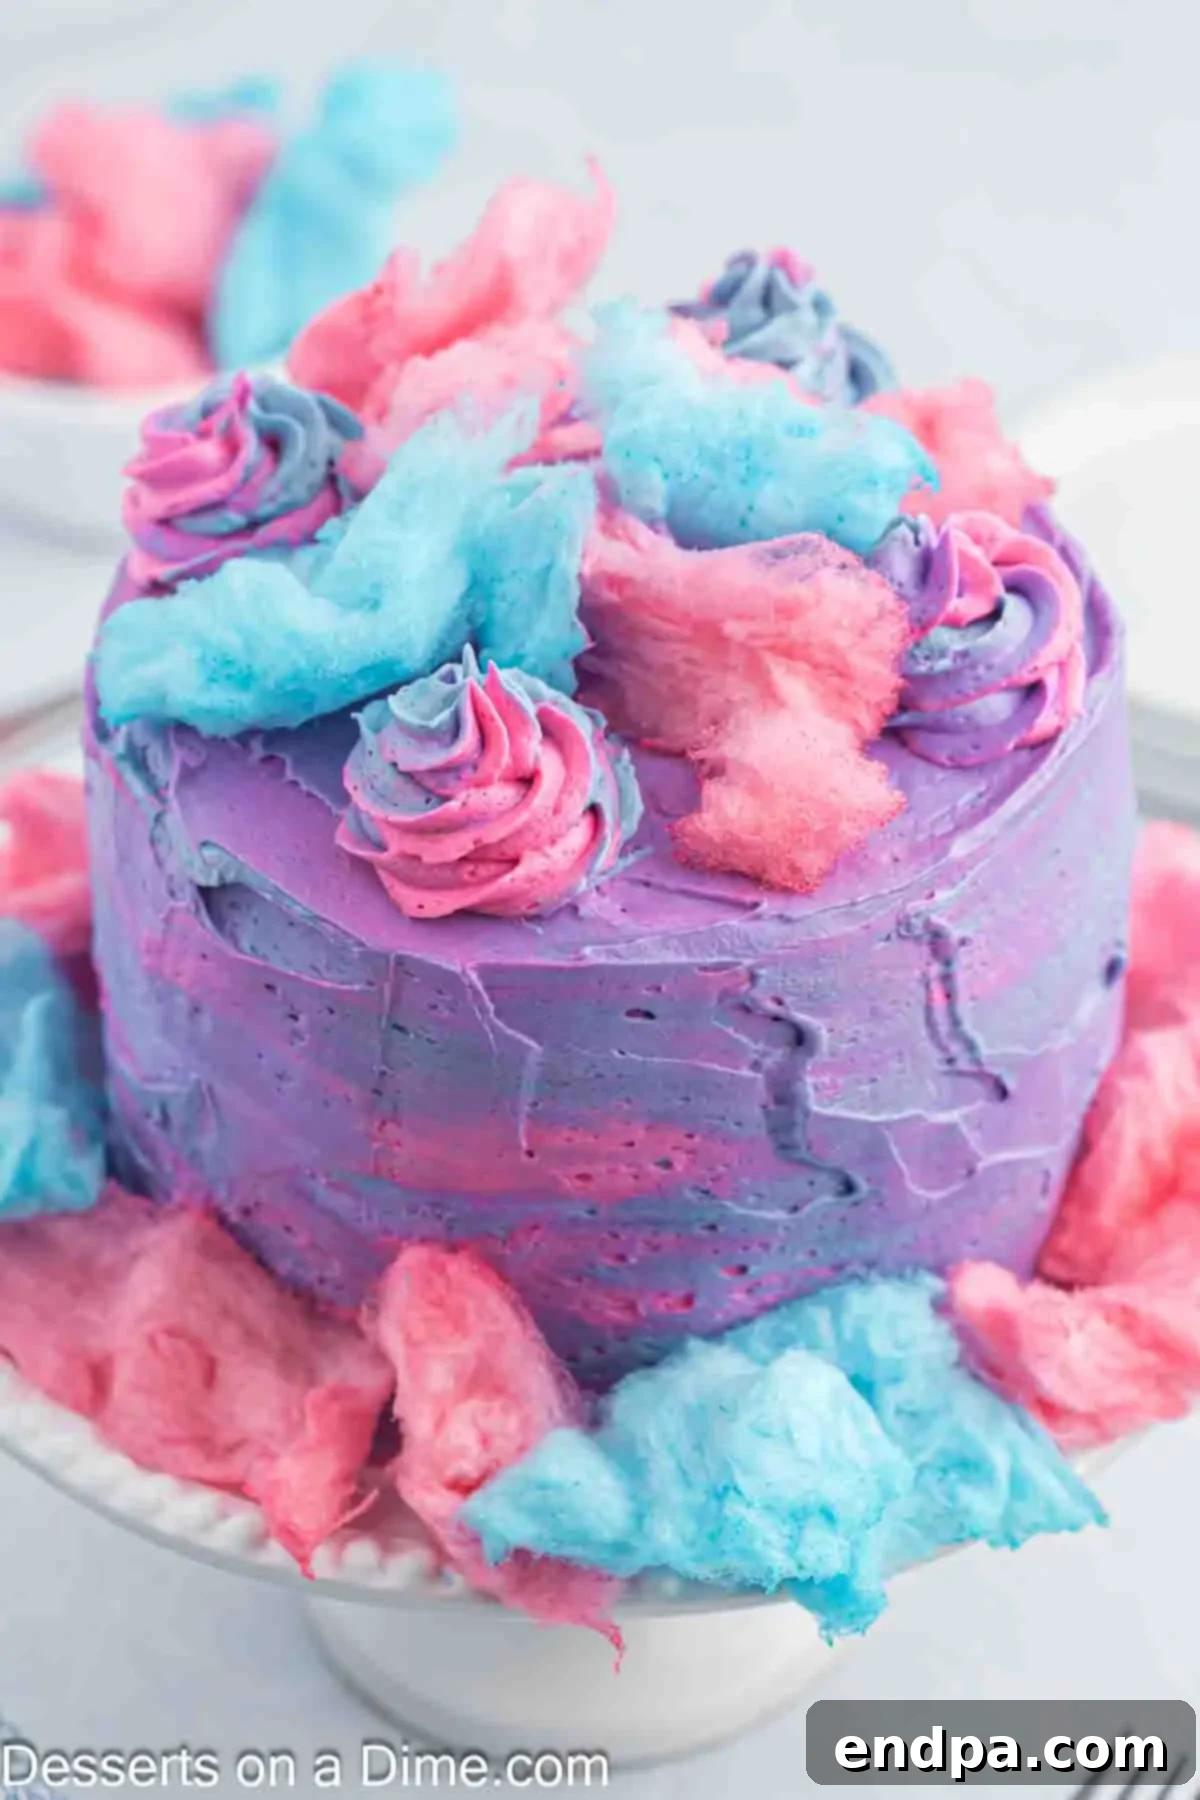
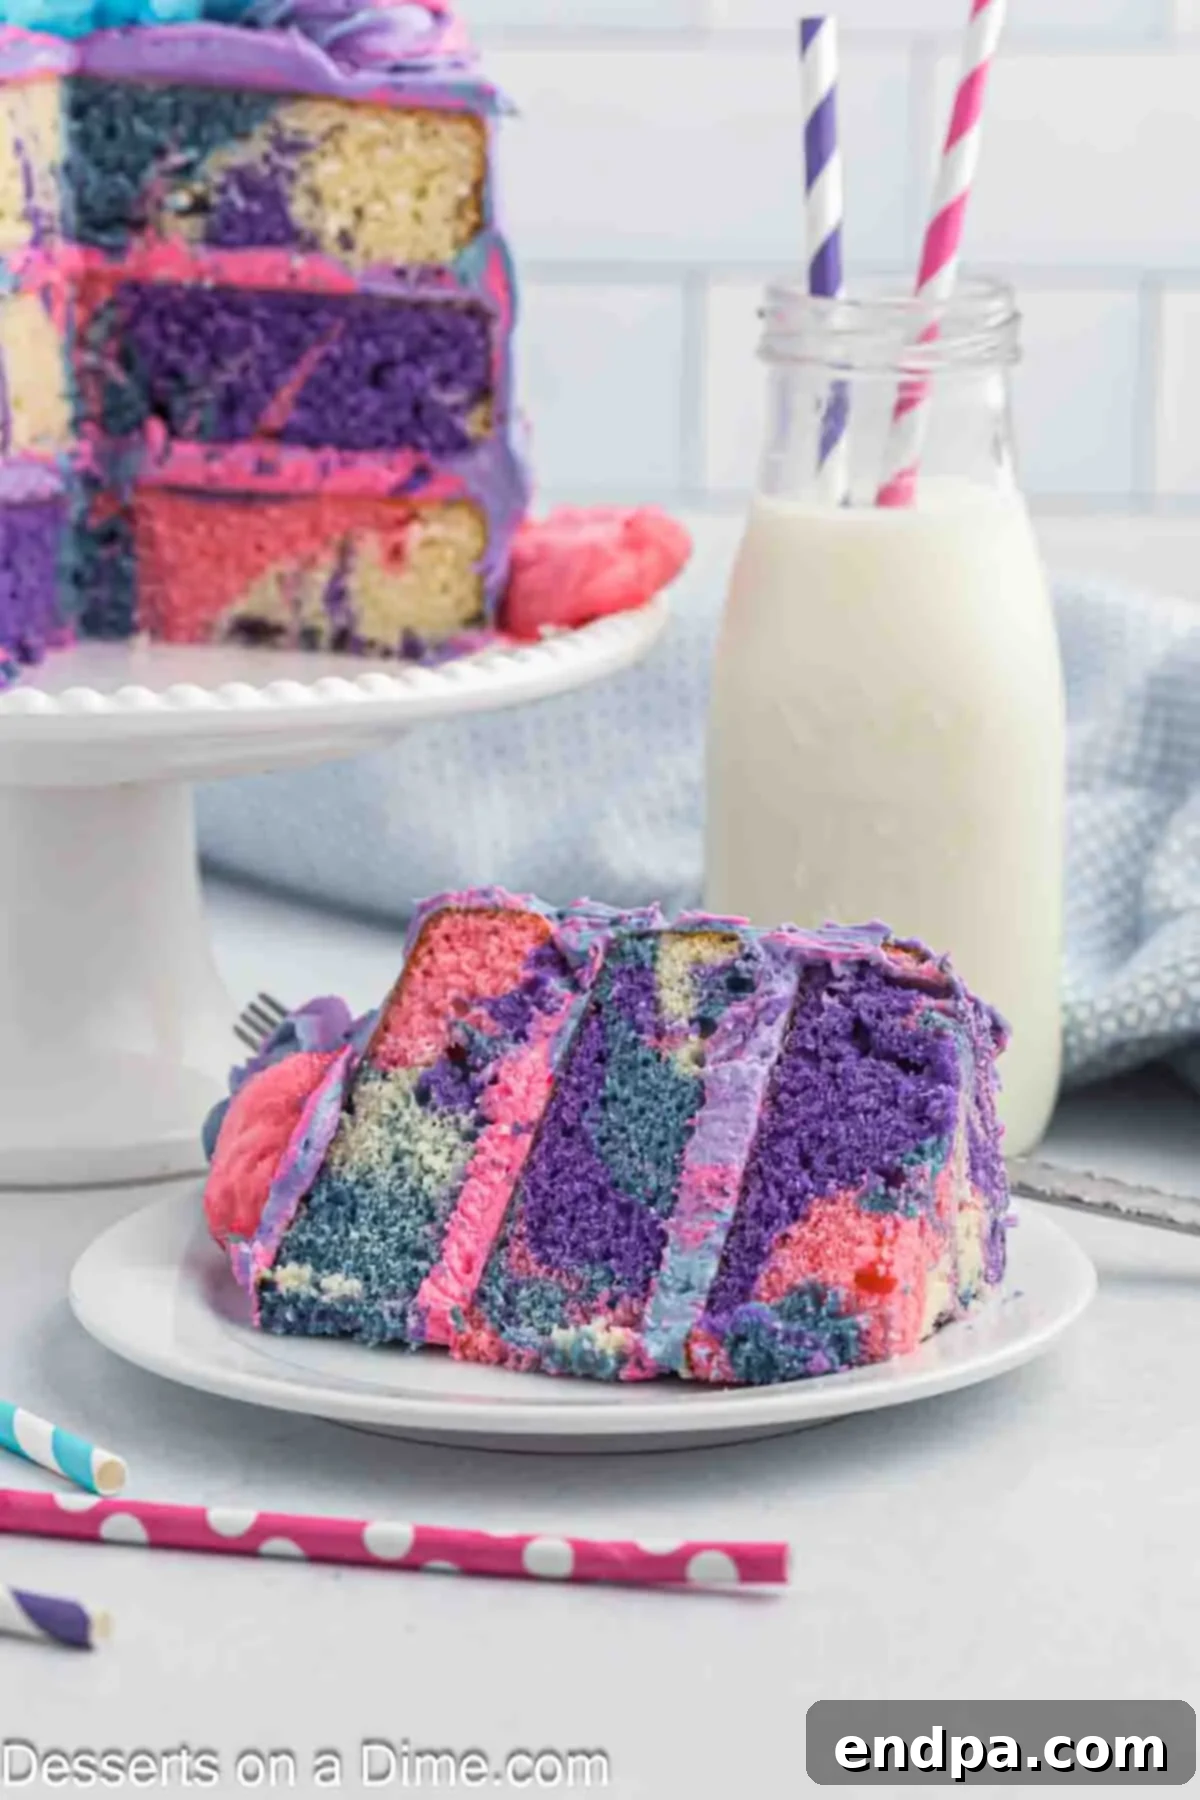
Your family and friends, especially the little ones, are going to absolutely adore this layered cotton candy cake recipe. It’s the quintessential confection to satisfy any sweet tooth, offering a unique flavor profile that stands out from traditional desserts. Each slice reveals beautifully marbled cake layers, generously frosted with a rich, dreamy buttercream. The stunning presentation alone makes it one of the most beloved Cotton Candy Desserts we’ve ever created. This isn’t just baking; it’s crafting a masterpiece!
If you’re as smitten with the delightful taste of cotton candy as we are, you’ll also love exploring our other enchanting treats like Cotton Candy Popcorn, perfect for movie nights, and our creamy Cotton Candy Ice Cream, ideal for a hot summer’s day. These recipes capture the same magical essence, bringing joy with every bite.
Table of contents
- Why You’ll Adore This Cotton Candy Cake
- Essential Ingredients for Your Magical Cake
- For the Cake Layers
- For the Irresistible Buttercream Frosting
- For the Perfect Toppings
- Creative Variation Ideas to Customize Your Cake
- Step-by-Step Guide: How to Bake and Assemble Your Cotton Candy Cake
- Expert Baking Tips for a Flawless Cake
- Frequently Asked Questions About Cotton Candy Cake
Why You’ll Adore This Cotton Candy Cake
This recipe is an absolute dream for anyone looking to celebrate someone special with a truly unique and memorable dessert. The Cotton Candy Cake might look incredibly fancy and intricate, but with our easy-to-follow tutorial, it’s surprisingly simple to create in your own kitchen. It’s a delightful blend of elegance and playful charm, making it accessible for bakers of all skill levels.
The cake itself boasts a wonderfully soft and tender crumb, offering an amazing texture that melts in your mouth. Beyond its delightful chewiness, the ability to infuse it with different colors allows you to unleash your creativity and design a cake that’s perfectly tailored to your event or recipient. Imagine customizing the layers with shades that match a party theme or your loved one’s favorite colors!
What truly makes us passionate about crafting this cake are its fun, vibrant colors and contrasting textures. The bright pink, soothing blue, and regal purple hues create a mesmerizing swirl, perfectly complementing the fluffy, cloud-like cotton candy topping. This dazzling combination is precisely what you need to transform an ordinary day into something extraordinary, bringing smiles and gasps of delight to everyone who sees and tastes it. It’s more than just a cake; it’s an edible work of art that promises joy and wonder.
Essential Ingredients for Your Magical Cake
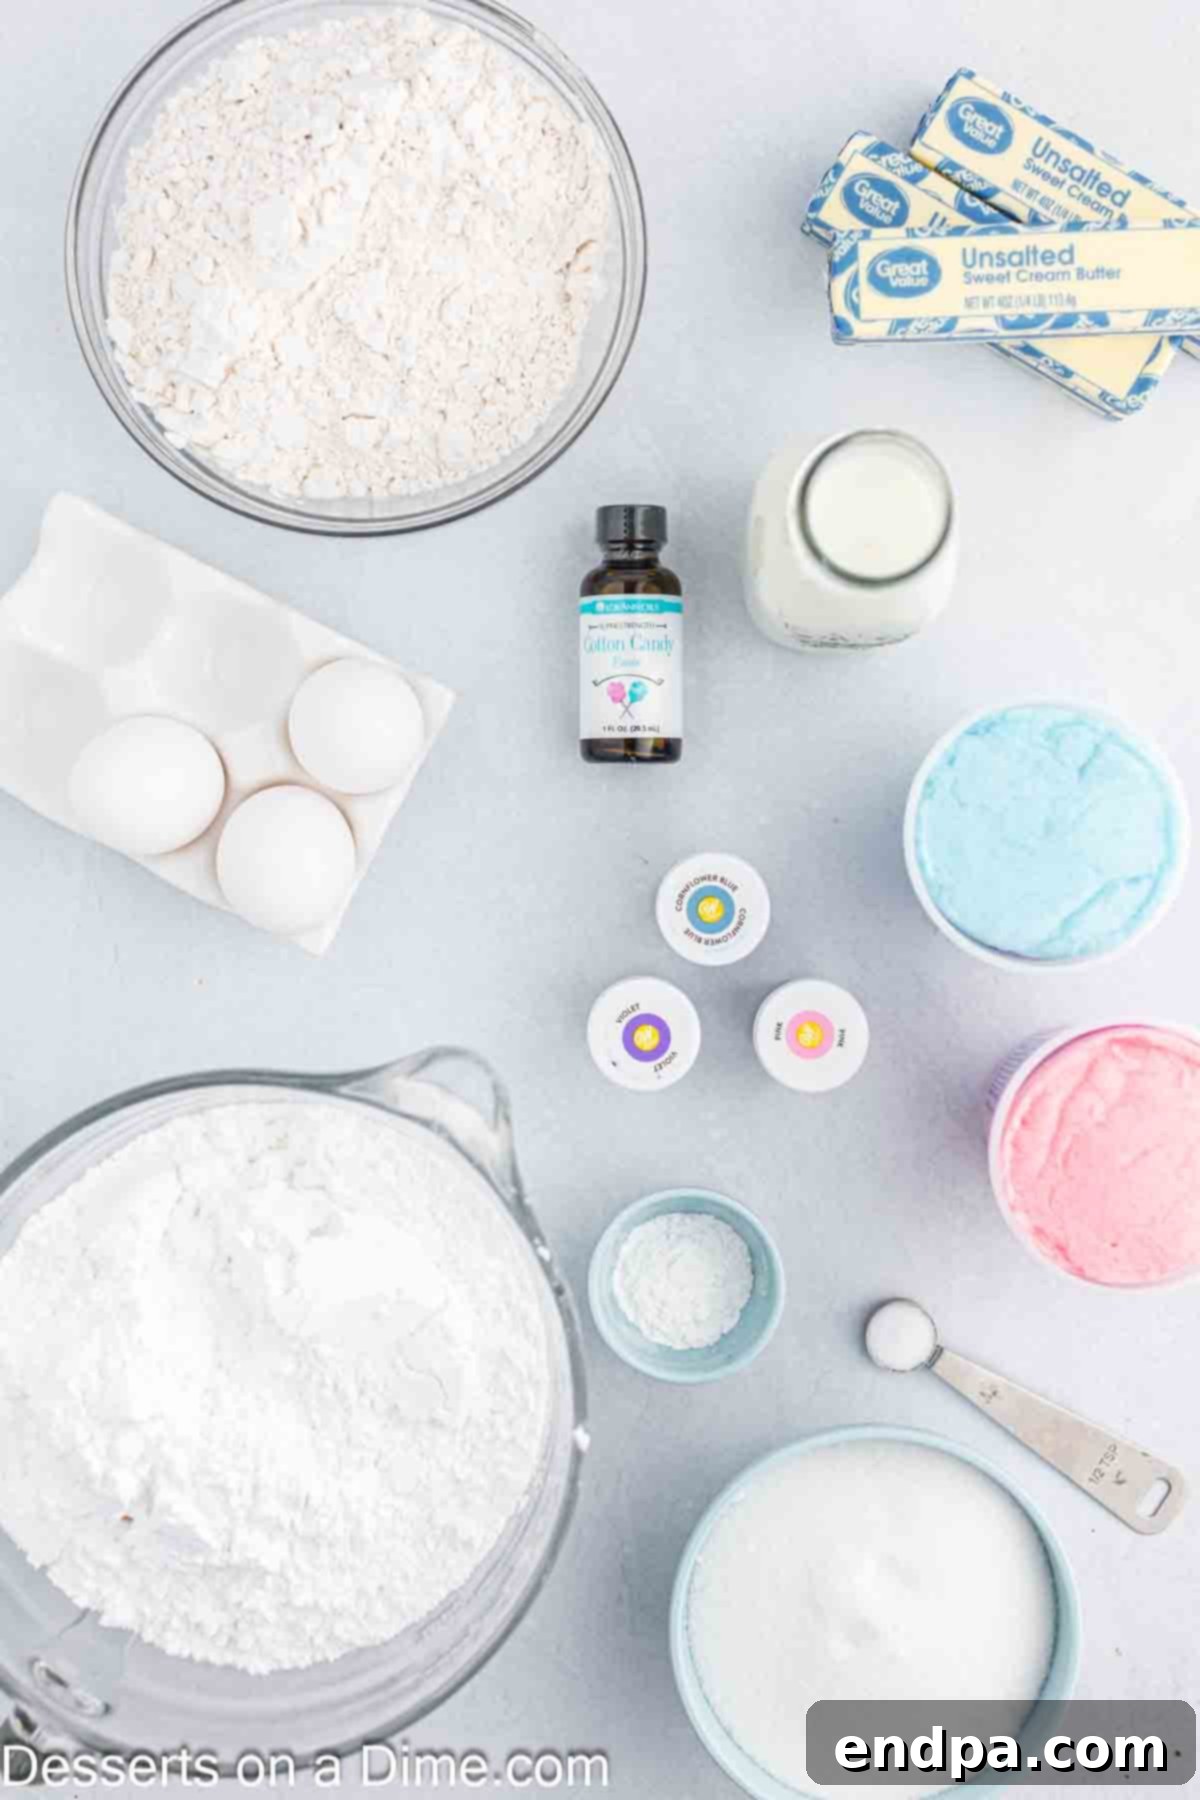
Crafting this enchanting Cotton Candy Cake begins with a selection of high-quality ingredients, each playing a vital role in achieving its perfect flavor, texture, and vibrant appearance. Below is a detailed breakdown of what you’ll need for both the cake and its delicious buttercream frosting, along with some helpful notes.
For the Cake Layers
- All-Purpose Flour: For the most precise measurement, always spoon the flour gently into your measuring cup and then level it off with a straight edge. There’s no need to use specialty cake flour for this recipe; all-purpose works beautifully to create a tender crumb.
- Unsalted Butter: Ensure your butter is softened to room temperature. This is crucial for properly creaming it with sugar, which incorporates air and creates a light, fluffy cake texture. Using unsalted butter allows you to control the exact amount of salt in your recipe.
- Granulated Sugar: Plain white granulated sugar provides the primary sweetness and contributes to the cake’s structure and moisture.
- Large Eggs: Like butter, your large eggs should be at room temperature. Room temperature eggs emulsify better with the butter and sugar mixture, resulting in a smoother batter and a more uniform cake.
- Cotton Candy Flavoring: This is the secret ingredient that infuses your cake with its signature, whimsical taste. Don’t skip it! It provides that authentic carnival-inspired sweetness.
- Milk: Bring your milk to room temperature before incorporating it into the batter. This helps prevent the batter from curdling and ensures a smooth, well-mixed consistency.
- Gel Food Coloring: We highly recommend using gel food coloring over liquid varieties for its vibrant, concentrated pigments. We used stunning Pink, Blue, and Purple gel food coloring to achieve those beautiful marbled layers.
- Baking Powder: A leavening agent that helps the cake rise, creating a light and airy texture.
- Salt: Essential for balancing the sweetness and enhancing all the other flavors in the cake.
For the Irresistible Buttercream Frosting
- Unsalted Butter: Softened to room temperature, just like for the cake. It’s the base for a rich and creamy buttercream.
- Powdered Sugar: Also known as confectioners’ sugar. Sifting the powdered sugar is an important step to remove any lumps, guaranteeing a silky-smooth, flawless frosting.
- Milk: We prefer using whole milk for its richness, which contributes to a creamier frosting. You can adjust the amount slightly to achieve your desired consistency.
- Cotton Candy Flavoring: Adding this to the frosting, as well as the cake, ensures a consistent and intensely delicious cotton candy flavor throughout the entire dessert.
- Gel Food Coloring: Use the same vibrant colors—Pink, Blue, and Purple—as you used in the cake batter to create a harmonious and visually stunning layered frosting effect.
For the Perfect Toppings
- Pink, Blue, and Purple Cotton Candy: This fluffy, melt-in-your-mouth topping is not only essential for flavor but also makes the cake look absolutely gorgeous and truly magnificent. Ensure you add it just before serving for the best texture and appearance.
You can find the complete ingredient list with precise measurements in the comprehensive recipe card located at the bottom of this page.
Creative Variation Ideas to Customize Your Cake
While our classic Cotton Candy Cake recipe is truly magical, there are countless ways to customize it and make it uniquely yours. Don’t be afraid to experiment with these fun variation ideas to suit different occasions, tastes, or simply to express your creativity!
- Change the Cake Base: While we adore making our cakes from scratch for the freshest flavor and texture, feel absolutely free to use a good quality white cake mix or vanilla cake mix as a convenient alternative. The cake will still be incredibly fun and festive, and the cotton candy flavoring and vibrant colors will shine through beautifully. For an even richer flavor, consider using a French vanilla or butter cake mix.
- Add a Pop of Sprinkles: Sprinkles are a fantastic way to introduce extra texture and a burst of color! Before baking, fold in some colorful jimmie sprinkles or nonpareils into the cake batter for a delightful surprise inside. You can also generously sprinkle them over the frosted cake or between layers for added visual appeal and crunch. Opt for iridescent, pastel, or even glitter sprinkles to enhance the whimsical theme.
- Experiment with Food Coloring: The beauty of this cake lies in its visual flexibility. You can easily switch up the colors of your gel food coloring and the cotton candy for the topping. Think seasonal themes: reds and greens for holidays, oranges and blacks for Halloween, or even ombré shades of a single color for an elegant touch. Two colors for a gender reveal? Absolutely perfect!
- Transform into Cupcakes: This recipe is incredibly versatile and can be adapted to make adorable Cotton Candy Cupcakes. Simply divide the colored batter among cupcake liners and reduce the baking time to approximately 18-22 minutes, or until a toothpick comes out clean. Frost them with the same colorful buttercream and top with miniature cotton candy puffs for individual delights.
- Different Flavor Extracts: If cotton candy flavoring isn’t readily available or you want to try something new, consider alternative extracts. Bubblegum extract offers a similar playful sweetness, while strawberry or raspberry extracts can complement the pink hues beautifully. Even a hint of almond or vanilla can create a lovely base flavor that pairs well with the colorful frosting.
- Incorporate a Filling: For an extra layer of indulgence, add a simple filling between your cake layers. A light cream cheese frosting, a berry compote, or even a thin layer of marshmallow fluff could elevate the cake’s flavor and texture even further. Ensure any wet fillings are well-chilled to maintain cake stability.
These variations ensure that your Cotton Candy Cake can be a unique creation every time you bake it, reflecting your personal style and the spirit of your celebration.
Step-by-Step Guide: How to Bake and Assemble Your Cotton Candy Cake
Creating this stunning Cotton Candy Cake is a joyful process that’s easier than it looks. Follow these detailed steps to bake perfect, moist layers and assemble a truly show-stopping dessert.
- Step 1 – Prepare Your Oven and Pans: Begin by preheating your oven to 350 degrees Fahrenheit (175 degrees Celsius). This ensures a consistent baking temperature from the start. Next, prepare three 6-inch round cake pans by thoroughly greasing and flouring them. For an extra non-stick measure and easier removal, you can also line the bottoms of each pan with a circle of parchment paper. This prevents sticking and ensures your beautiful cake layers come out perfectly intact.
- Step 2 – Combine Dry Ingredients: In a medium-sized mixing bowl, whisk together your all-purpose flour, baking powder, and salt. Whisking ensures these ingredients are evenly distributed, which is essential for uniform rising and flavor. Set this bowl aside for later.
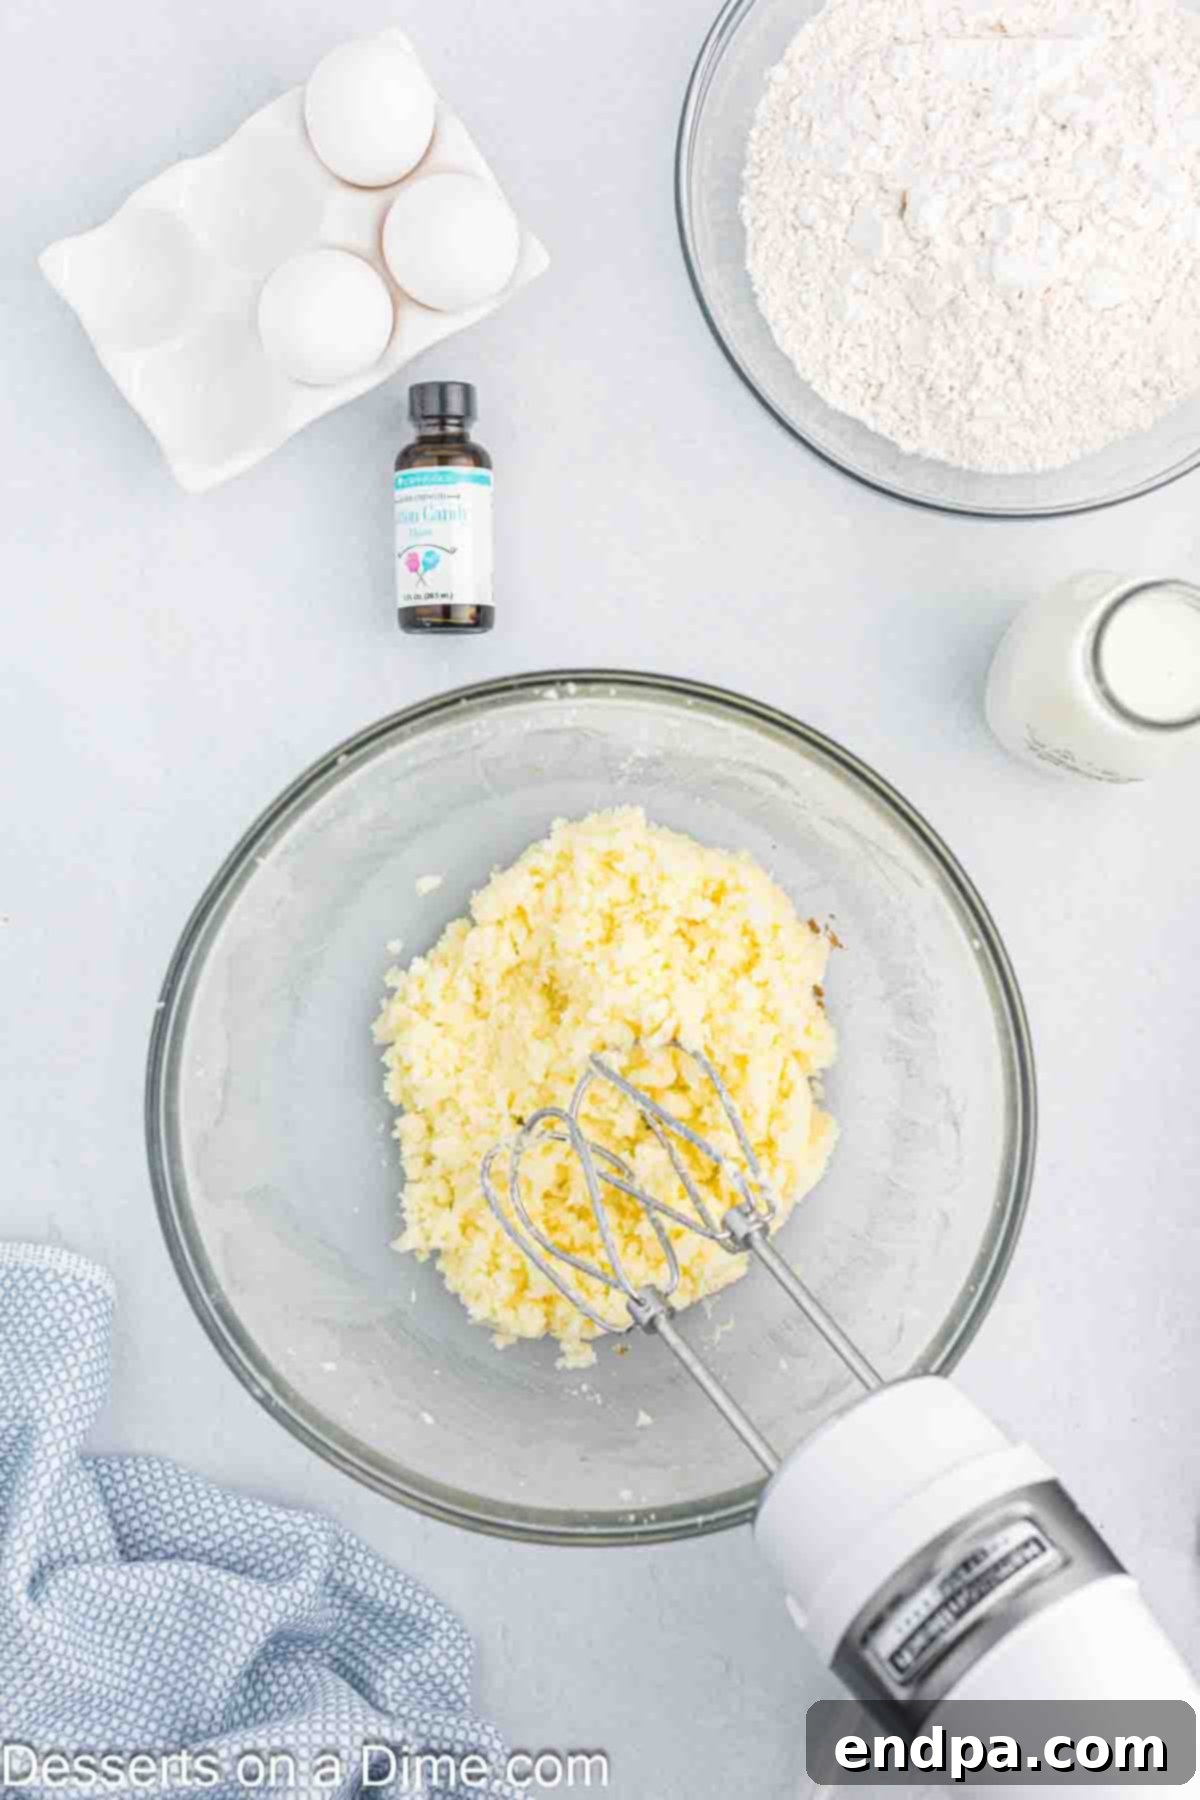
Step 3 – Cream Butter and Sugar: In a separate, large mixing bowl, using either a hand-held mixer or a stand mixer fitted with the paddle attachment, cream together the softened unsalted butter and granulated sugar. Start on low speed to combine, then increase to medium speed. Beat until the mixture is visibly lightened in color and fluffy in texture, typically taking about 3-5 minutes. This step incorporates air, which is vital for a tender cake crumb.
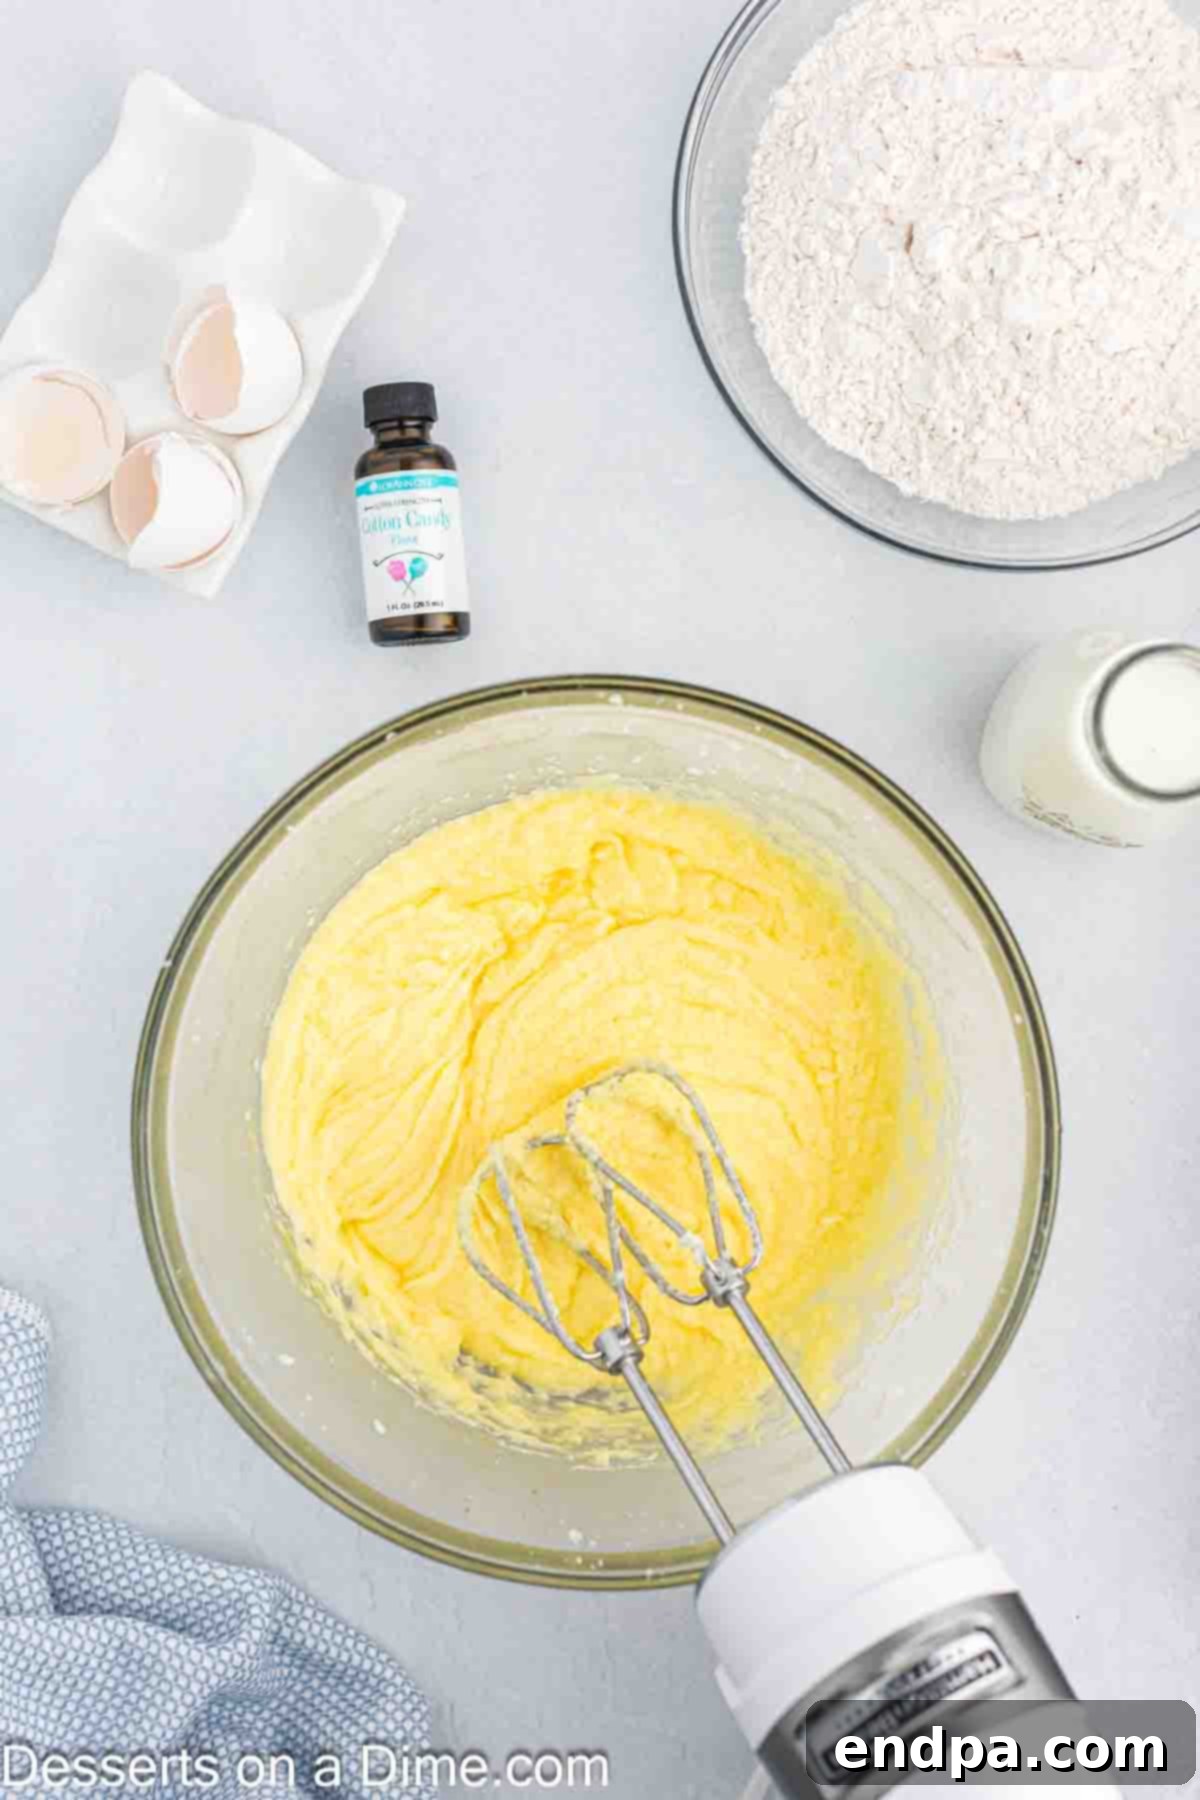
Step 4 – Incorporate Eggs and Flavoring: Add the room temperature large eggs to the creamed butter and sugar mixture, one at a time, mixing well after each addition until fully incorporated. Scrape down the sides of the bowl as needed to ensure everything is evenly combined. Finally, stir in the cotton candy flavoring until it’s thoroughly distributed throughout the mixture. This is where the magic taste begins!
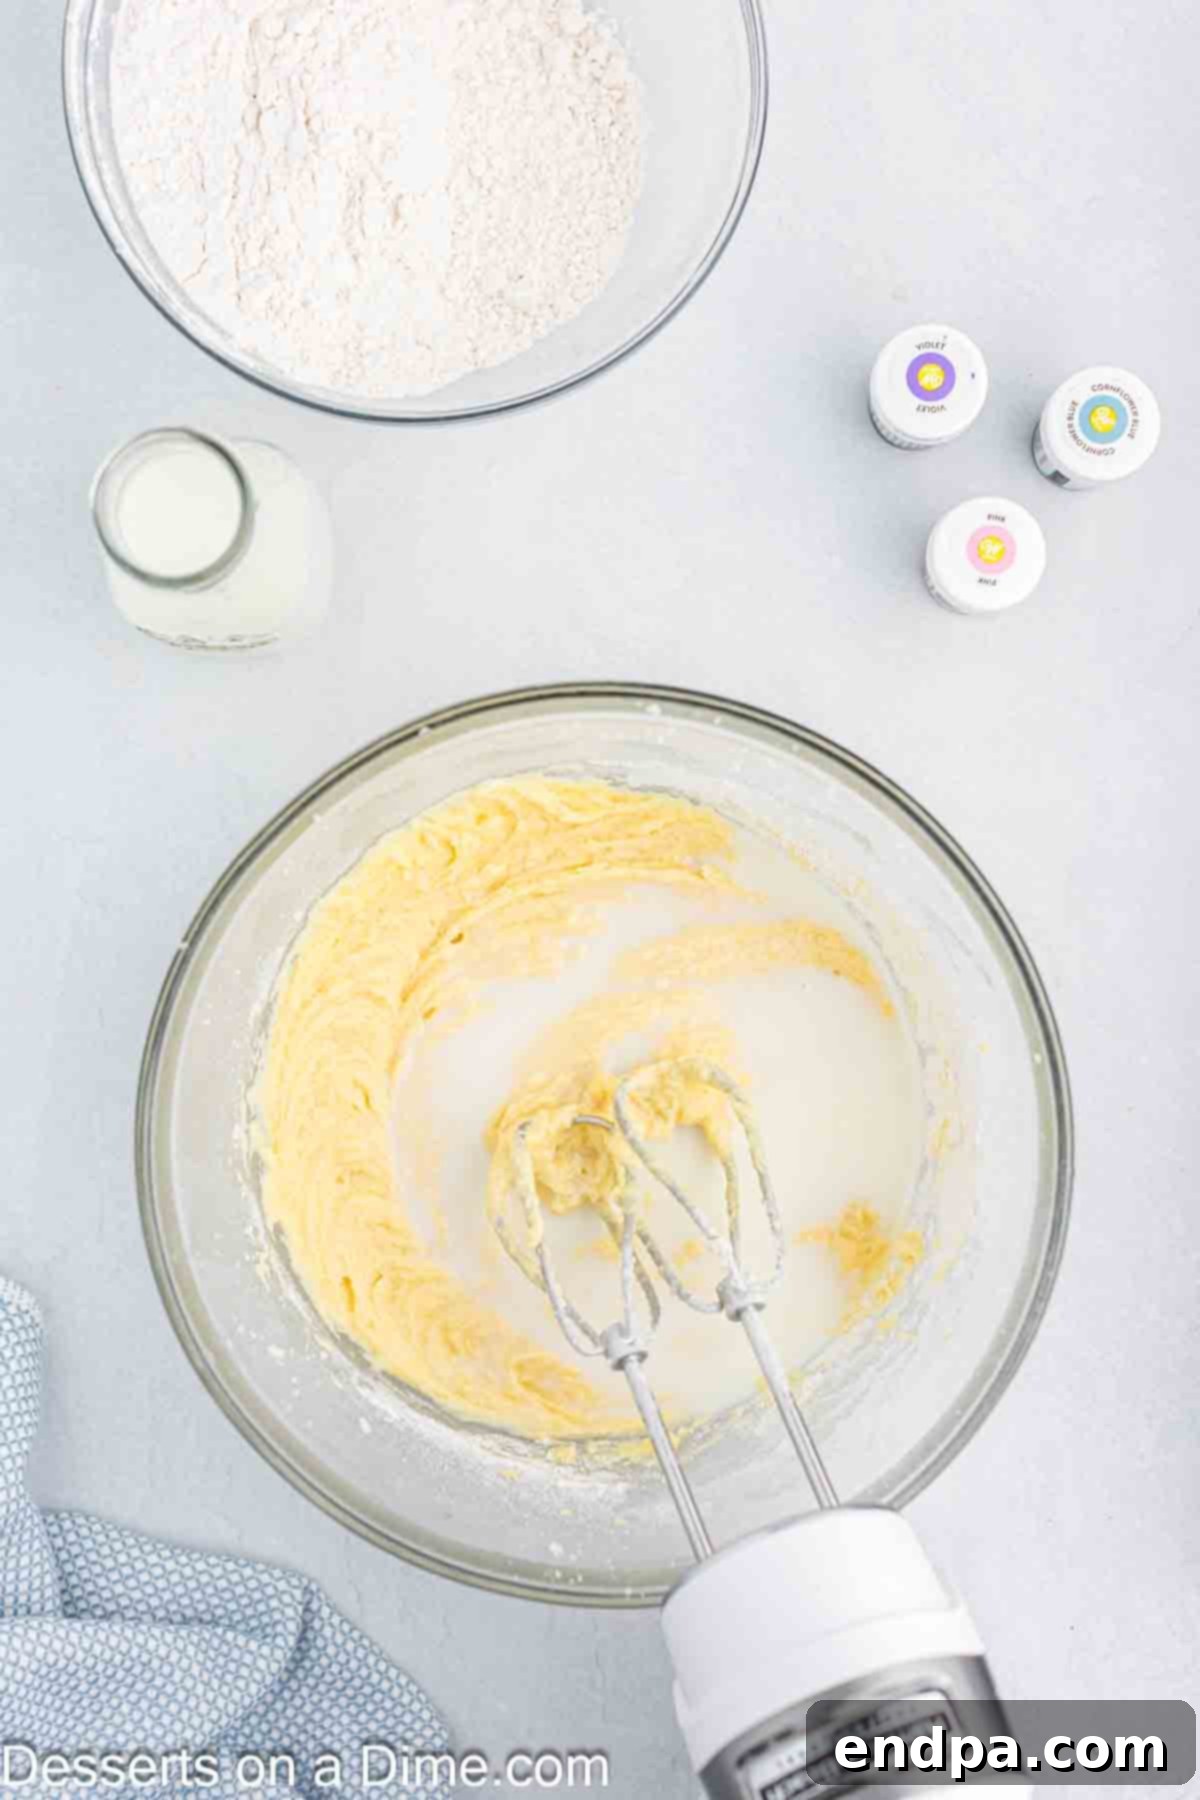
Step 5 – Alternately Add Dry and Wet Ingredients: With the mixer on low speed, slowly begin to add the reserved flour mixture and the room temperature milk to the wet ingredients. Start and end with the flour mixture, adding them in three alternating additions (flour, milk, flour, milk, flour).
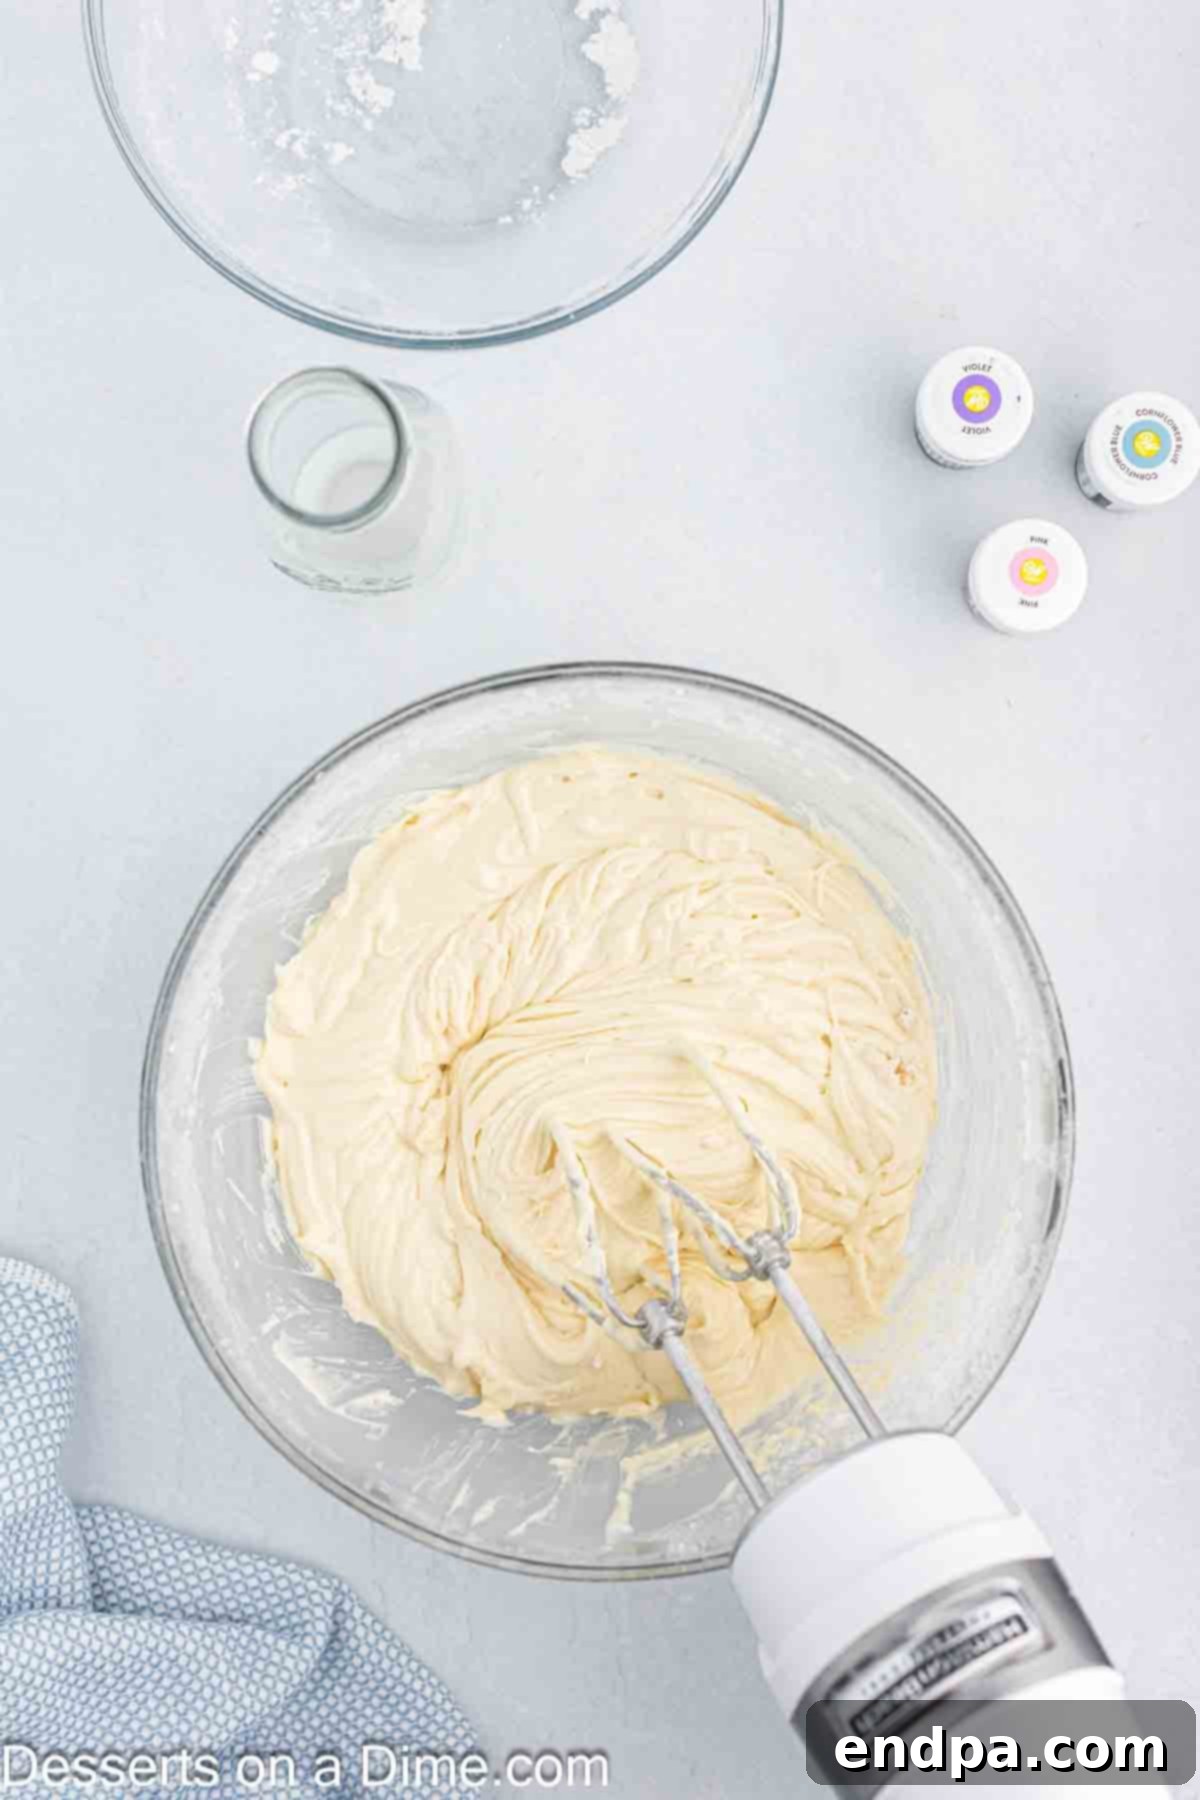
Step 6 – Mix Until Just Combined: Continue to mix the batter on low speed, alternating between the dry and wet ingredients, until both are fully incorporated. Be very careful not to overmix the batter at this stage, as overmixing can develop the gluten in the flour, resulting in a dense, tough cake instead of a soft and fluffy one. Mix just until no streaks of flour remain.
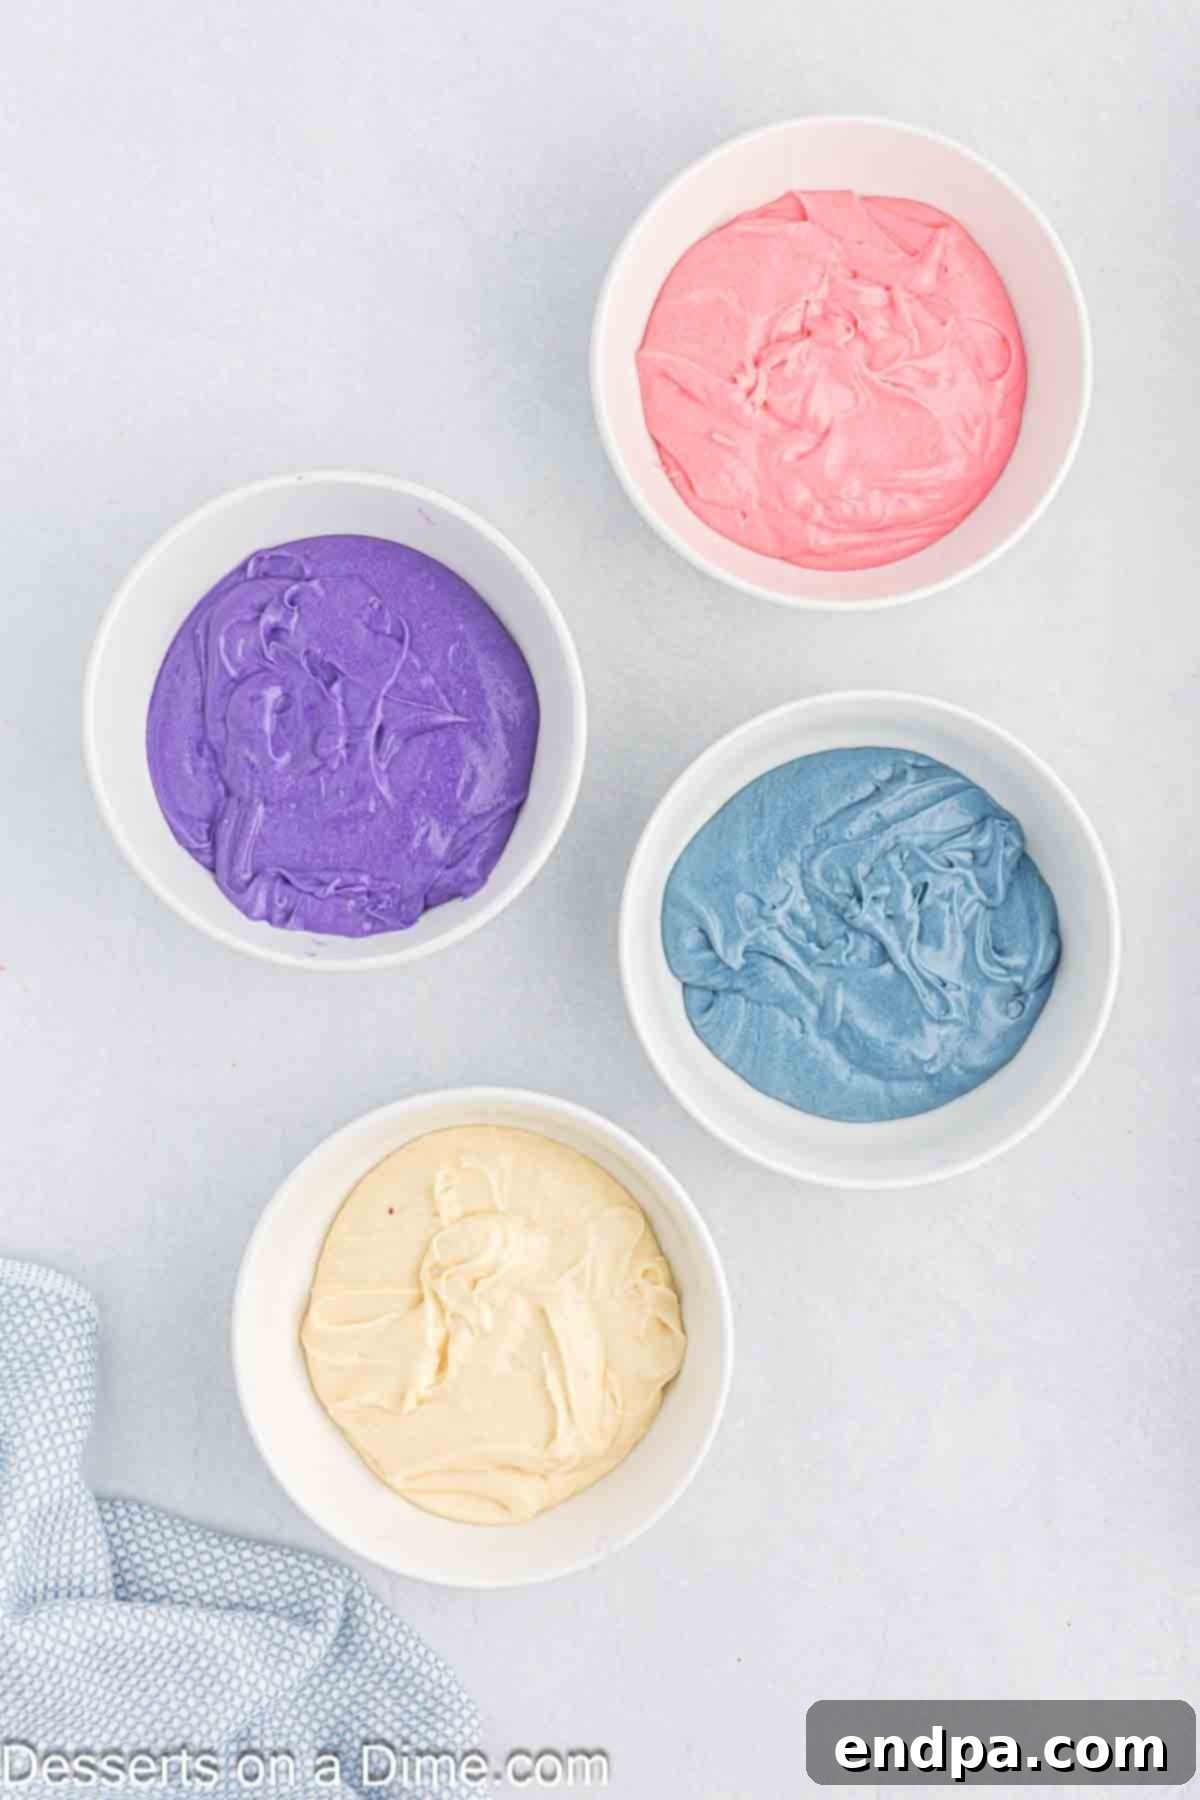
Step 7 – Divide and Color the Batter: Once your batter is ready, divide it evenly into four separate bowls. Into three of these bowls, add your chosen gel food coloring: color one bowl pink, one blue, and one purple. Leave the fourth bowl of batter plain (undyed). This will create a beautiful contrast and depth in your marbled cake layers.
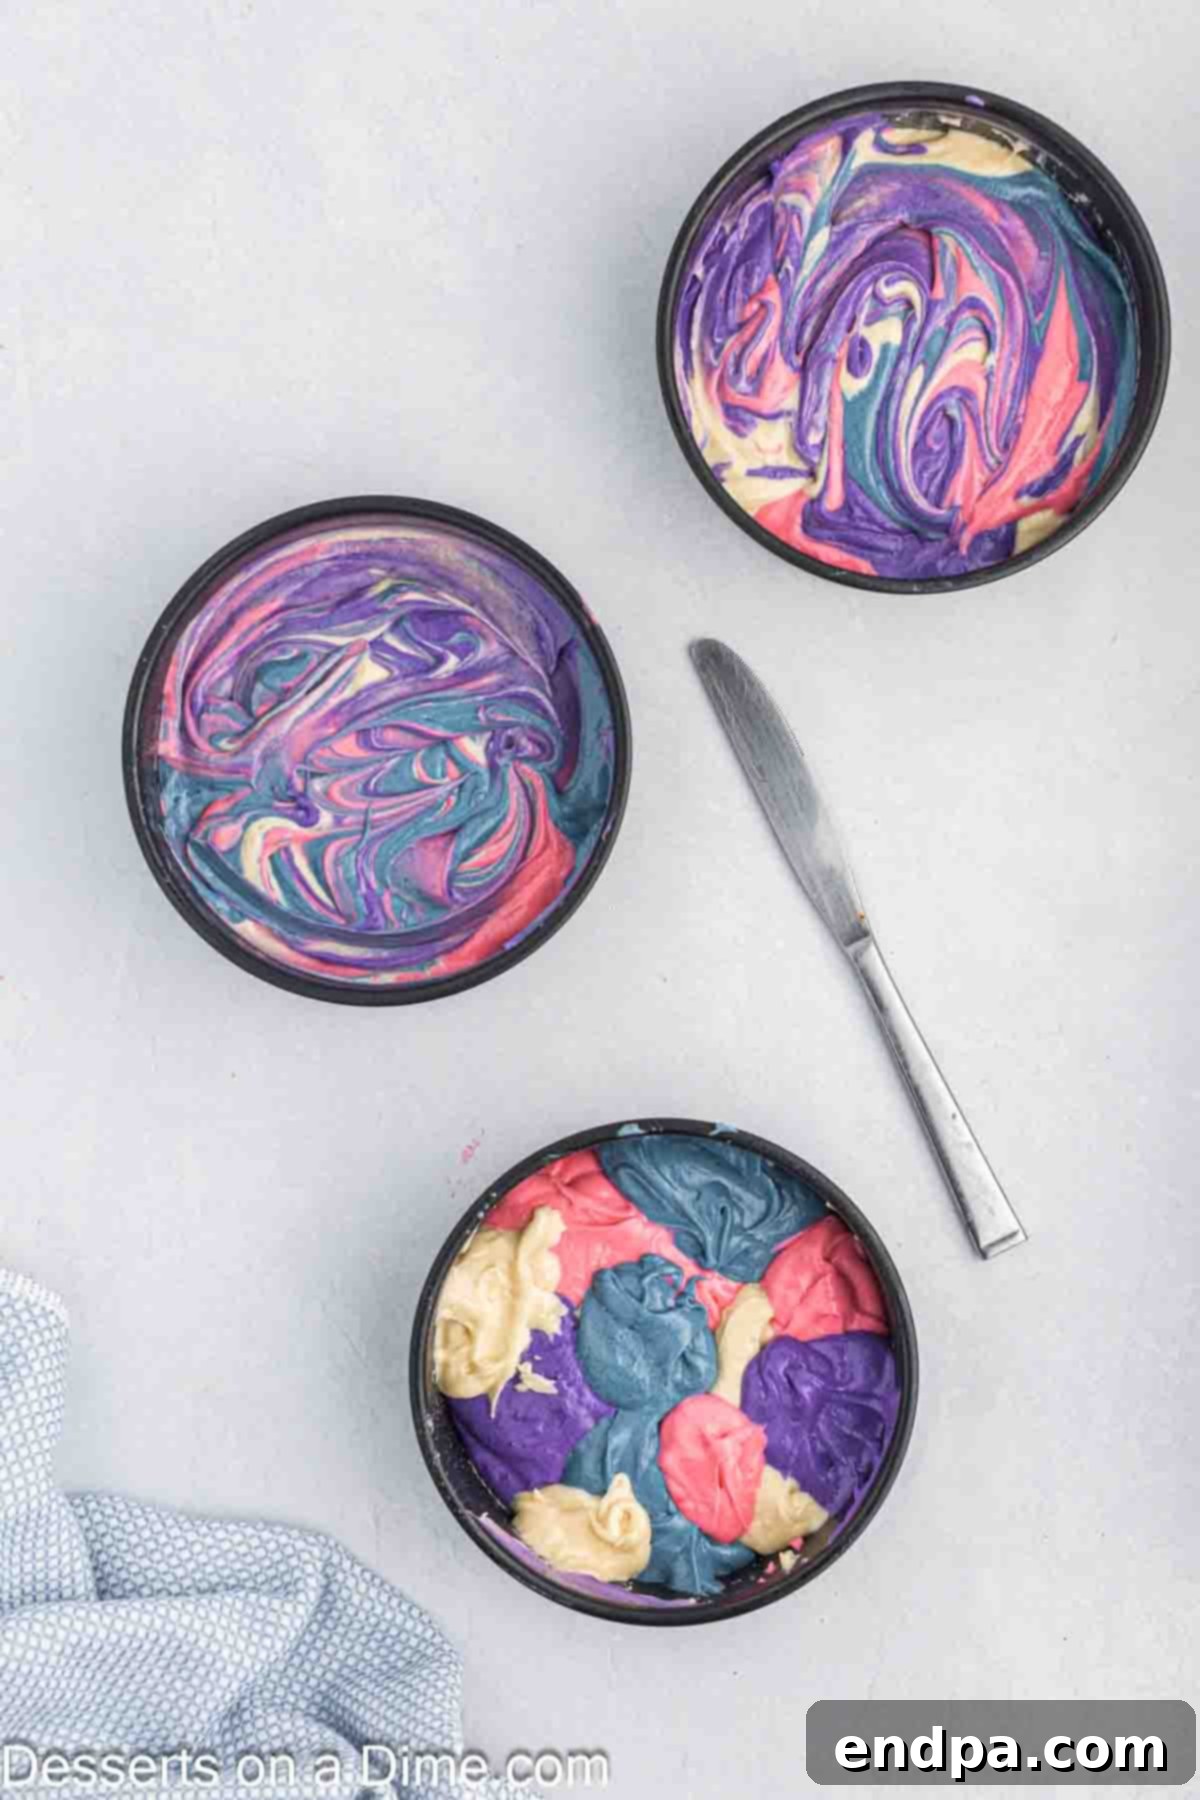
Step 8 – Fill the Baking Pans: Now, it’s time to create the stunning marbled effect. Spoon generous dollops of each colored batter (pink, blue, purple, and plain) randomly into each of the three prepared baking pans. Distribute the colors as evenly as possible among the pans, ensuring each pan receives a mix of all four batters.
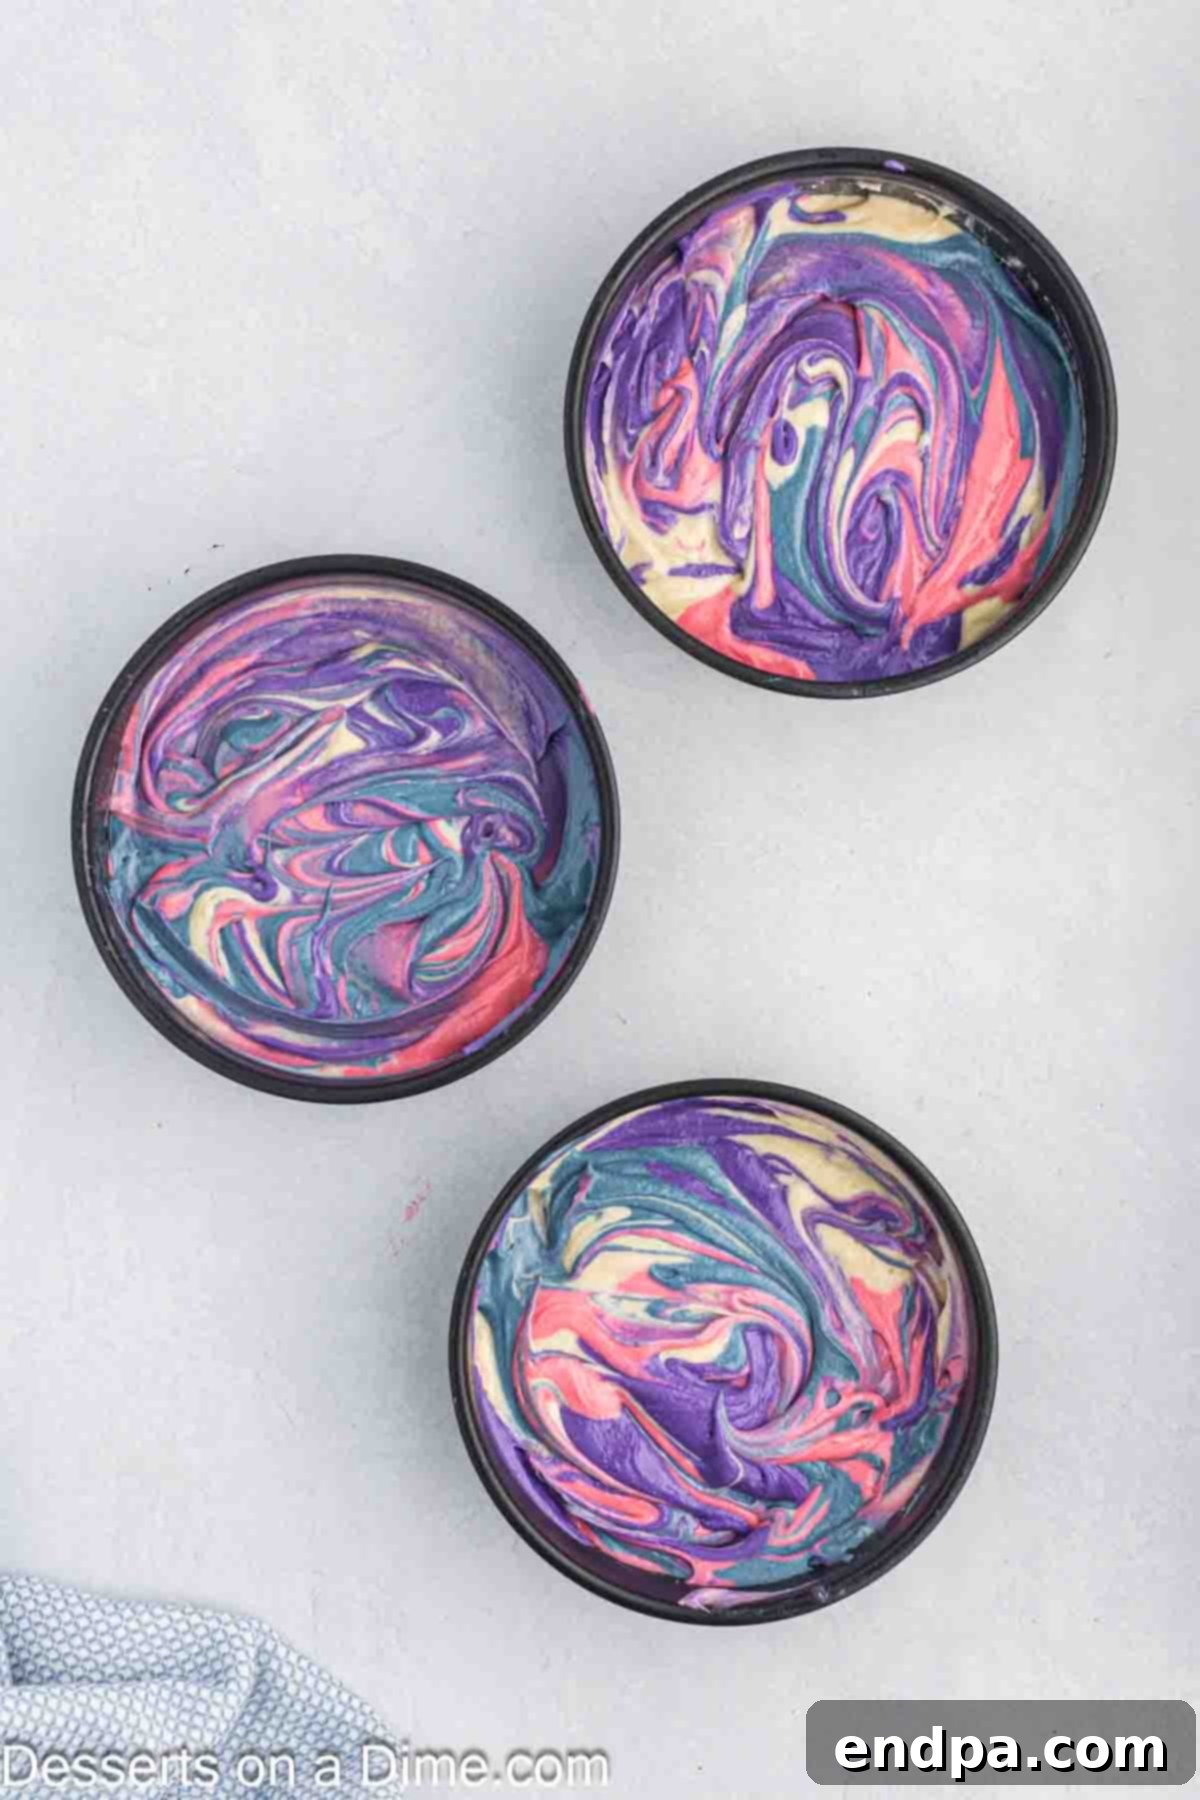
Step 9 – Swirl for the Marble Effect: Once the batter is in the pans, gently take a knife or a skewer and swirl the different colored batters together a few times. The key here is to create a beautiful marble pattern without overmixing, which would blend the colors into a muddy single shade. A few gentle swirls are all it takes to achieve that captivating look.
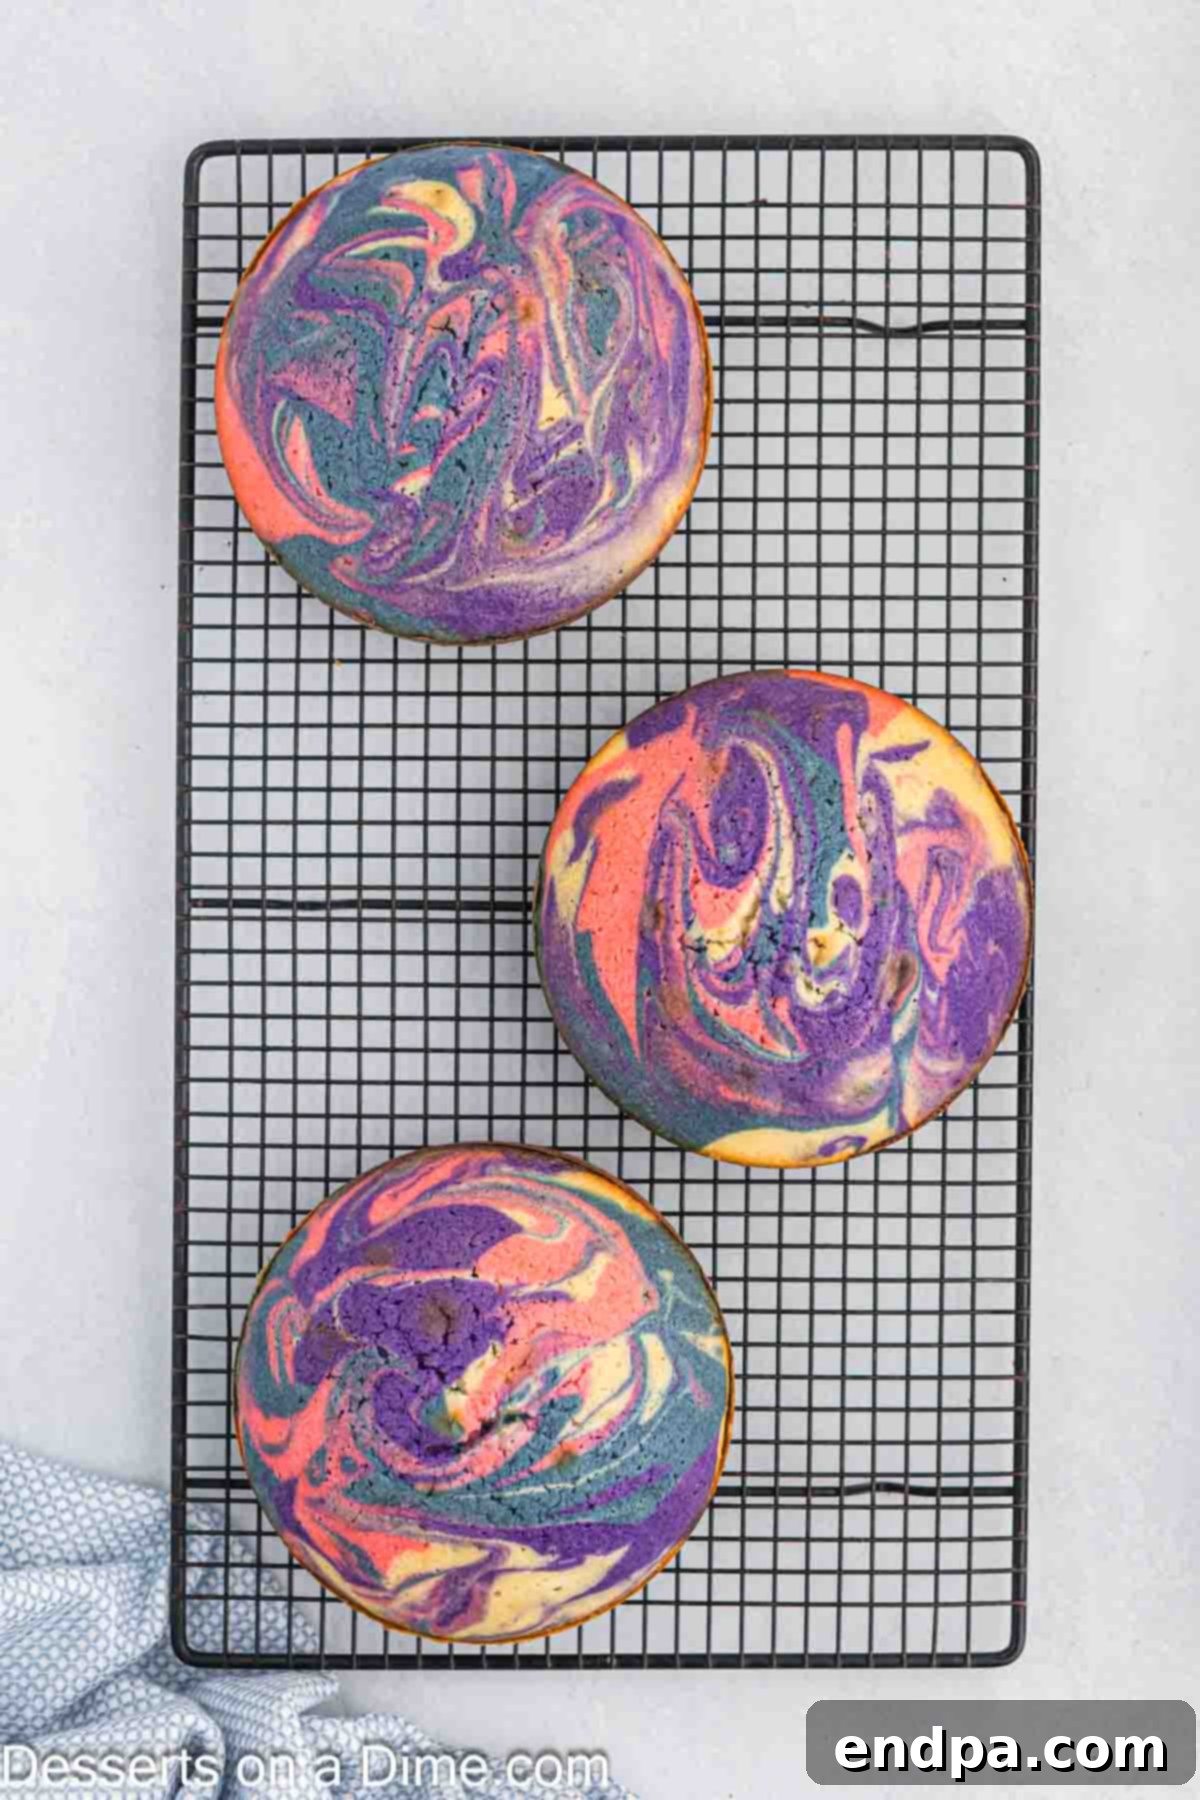
Step 10 – Bake and Cool the Cakes: Place the cake pans into your preheated oven and bake for approximately 30-35 minutes. Baking time may vary depending on your oven, so check for doneness by inserting a toothpick into the center of the cakes; if it comes out clean, they are ready. Once baked, remove the cakes from the oven and let them cool in their pans for about 10 minutes. This allows them to firm up slightly. Then, carefully invert them onto wire racks and allow them to cool completely before proceeding with frosting. This is crucial to prevent your frosting from melting and sliding off.
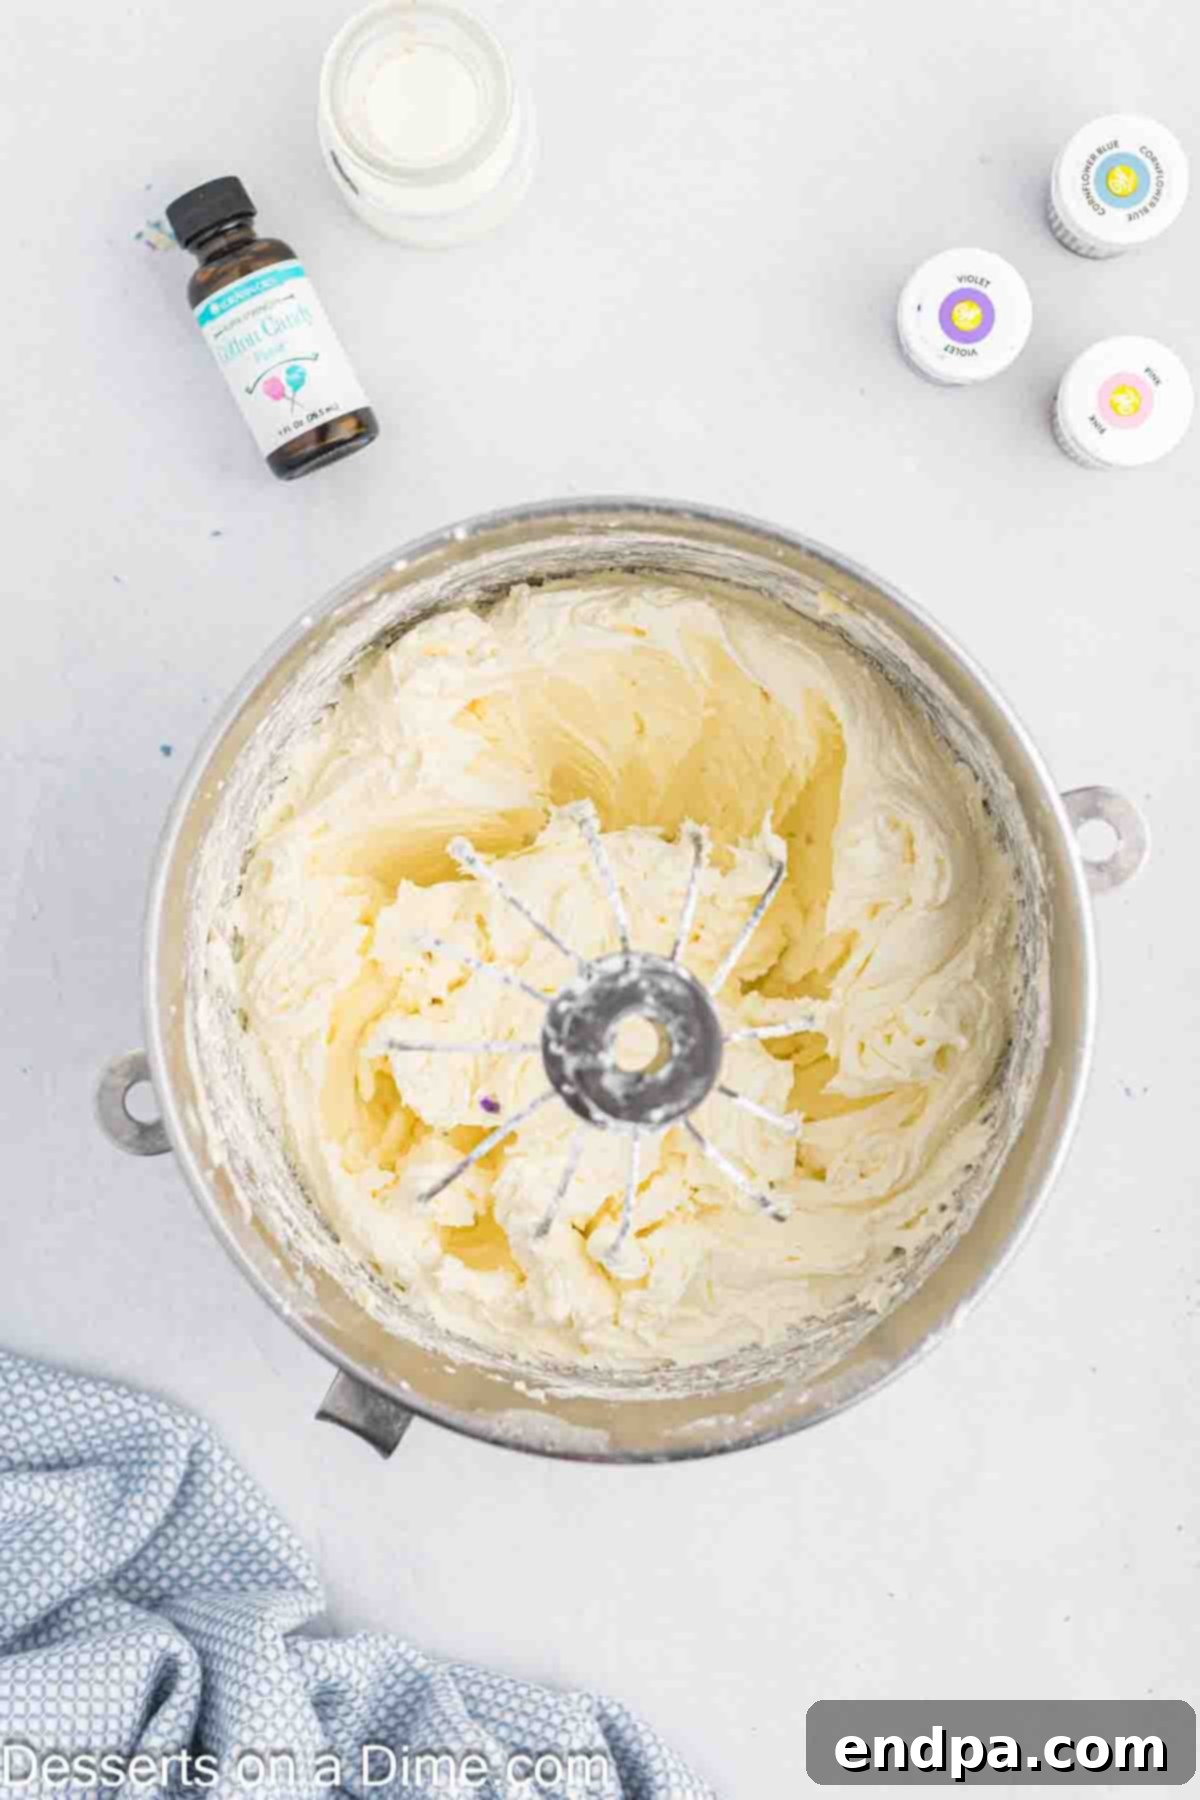
Step 11 – Prepare the Cotton Candy Buttercream: While your cake layers are cooling, begin preparing your luscious cotton candy buttercream frosting. In your stand mixer fitted with the paddle attachment, beat the softened unsalted butter on medium-high speed for about 3 minutes until it becomes light, pale, and incredibly fluffy. This aerates the butter, making for a much lighter frosting. Next, reduce the mixer speed to low and gradually add the sifted powdered sugar, a cup at a time, mixing until fully incorporated. Finally, pour in the milk and cotton candy flavoring, beating on medium speed until the frosting is smooth, creamy, and well blended. If the frosting is too thick, add a touch more milk, a teaspoon at a time; if too thin, add more powdered sugar.
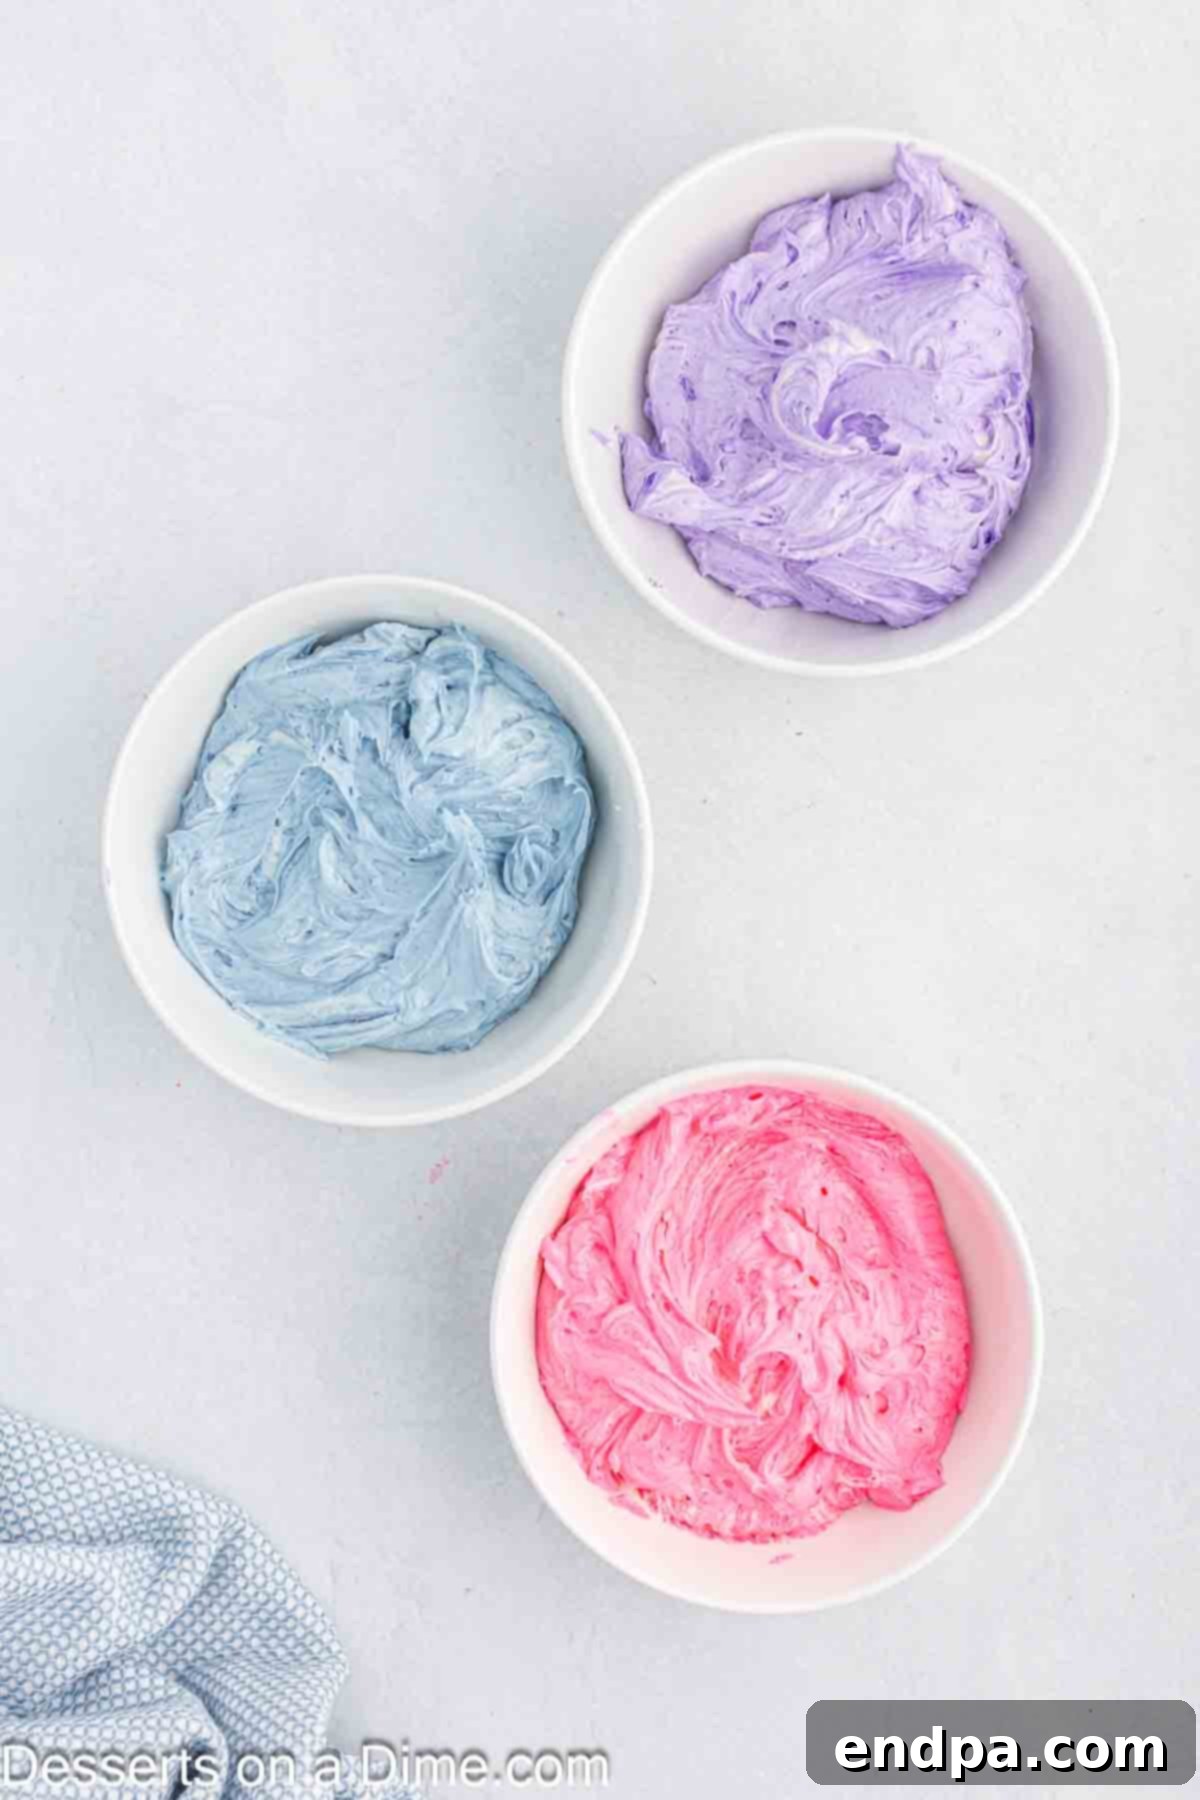
Step 12 – Color the Frosting: Divide the prepared buttercream frosting evenly into three separate bowls. Into each bowl, add a different gel food coloring: dye one bowl pink, one bowl blue, and one bowl purple. Mix each color thoroughly until you achieve vibrant, uniform shades. These colored frostings will create the dazzling exterior of your cake.
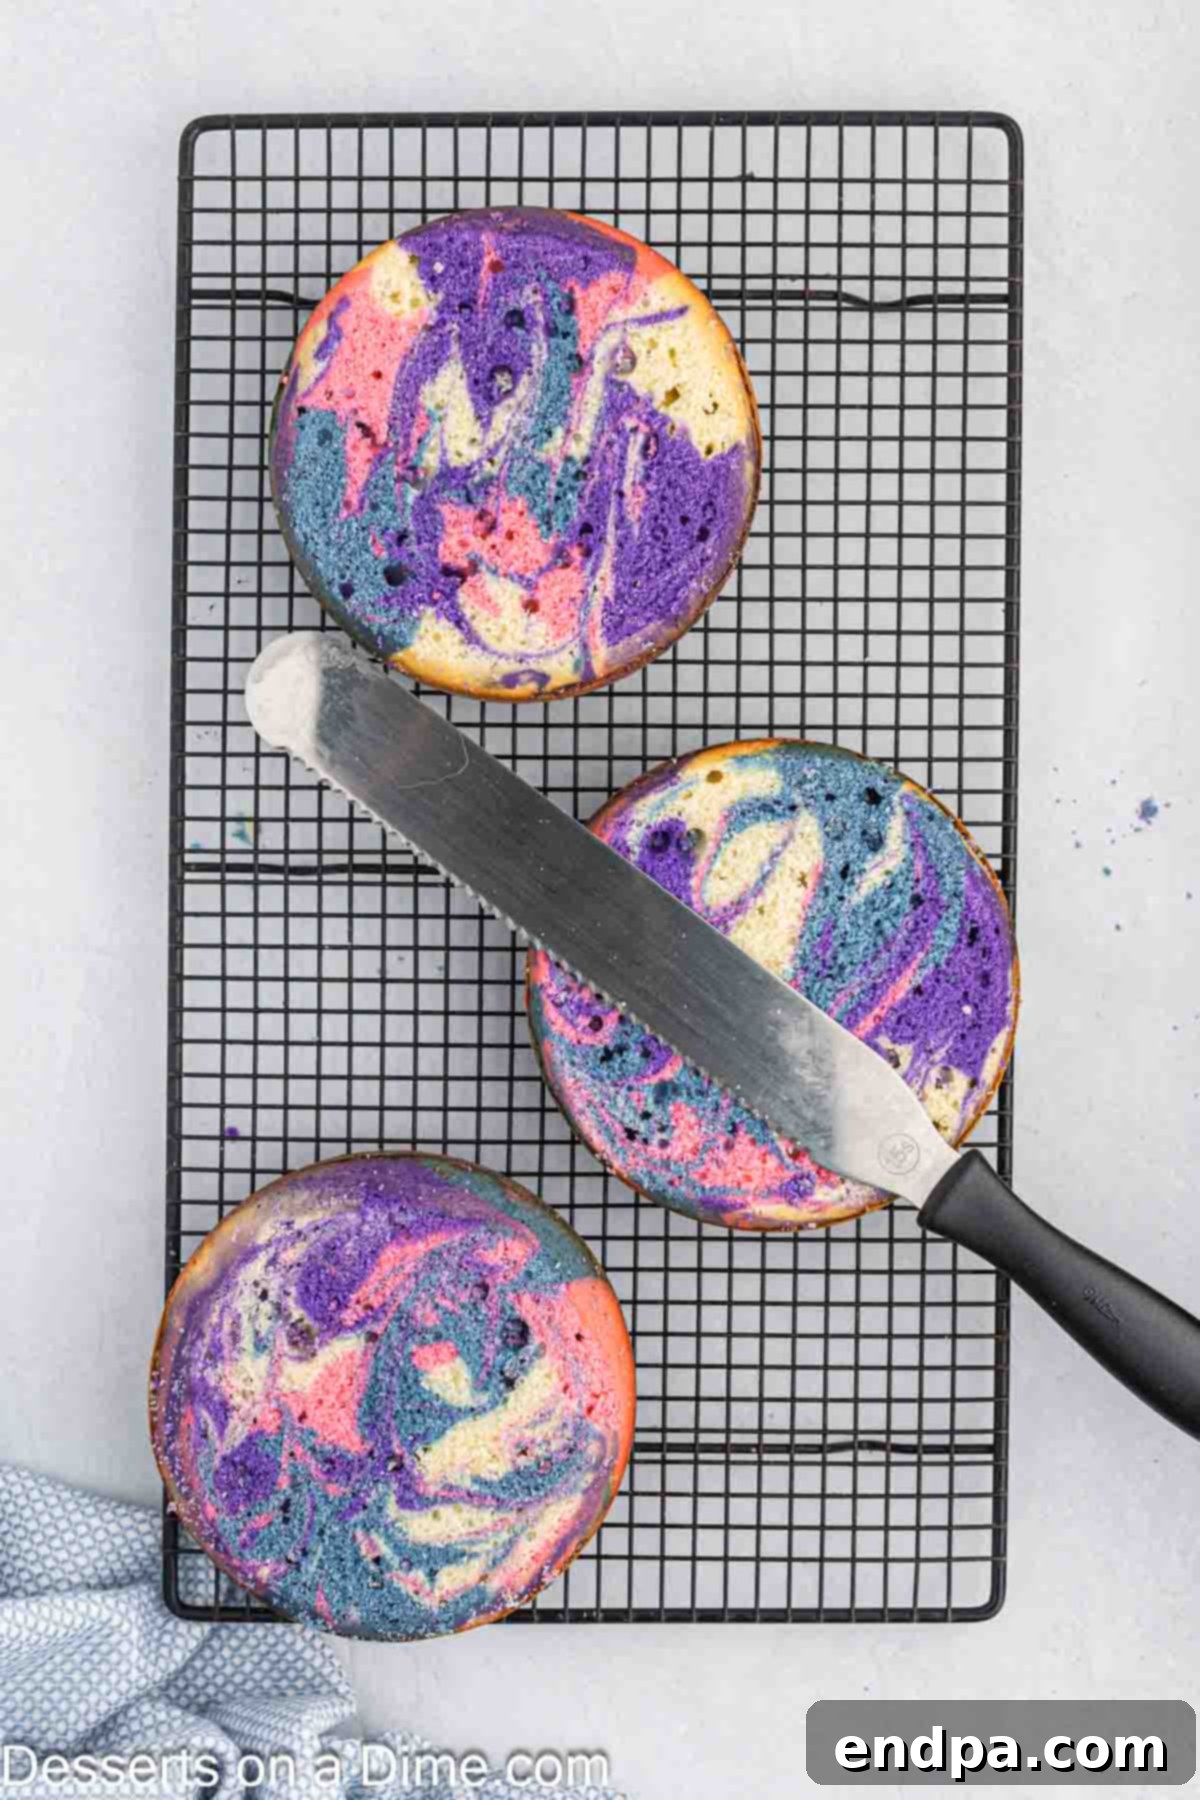
Step 13 – Level the Cake Layers: Once the cakes are completely cool, use a long, serrated knife to carefully level the top of each cake layer. Trim off any domed tops to create flat, even surfaces. This step is essential for stacking your cake layers neatly and ensuring a stable, professional-looking finished product.
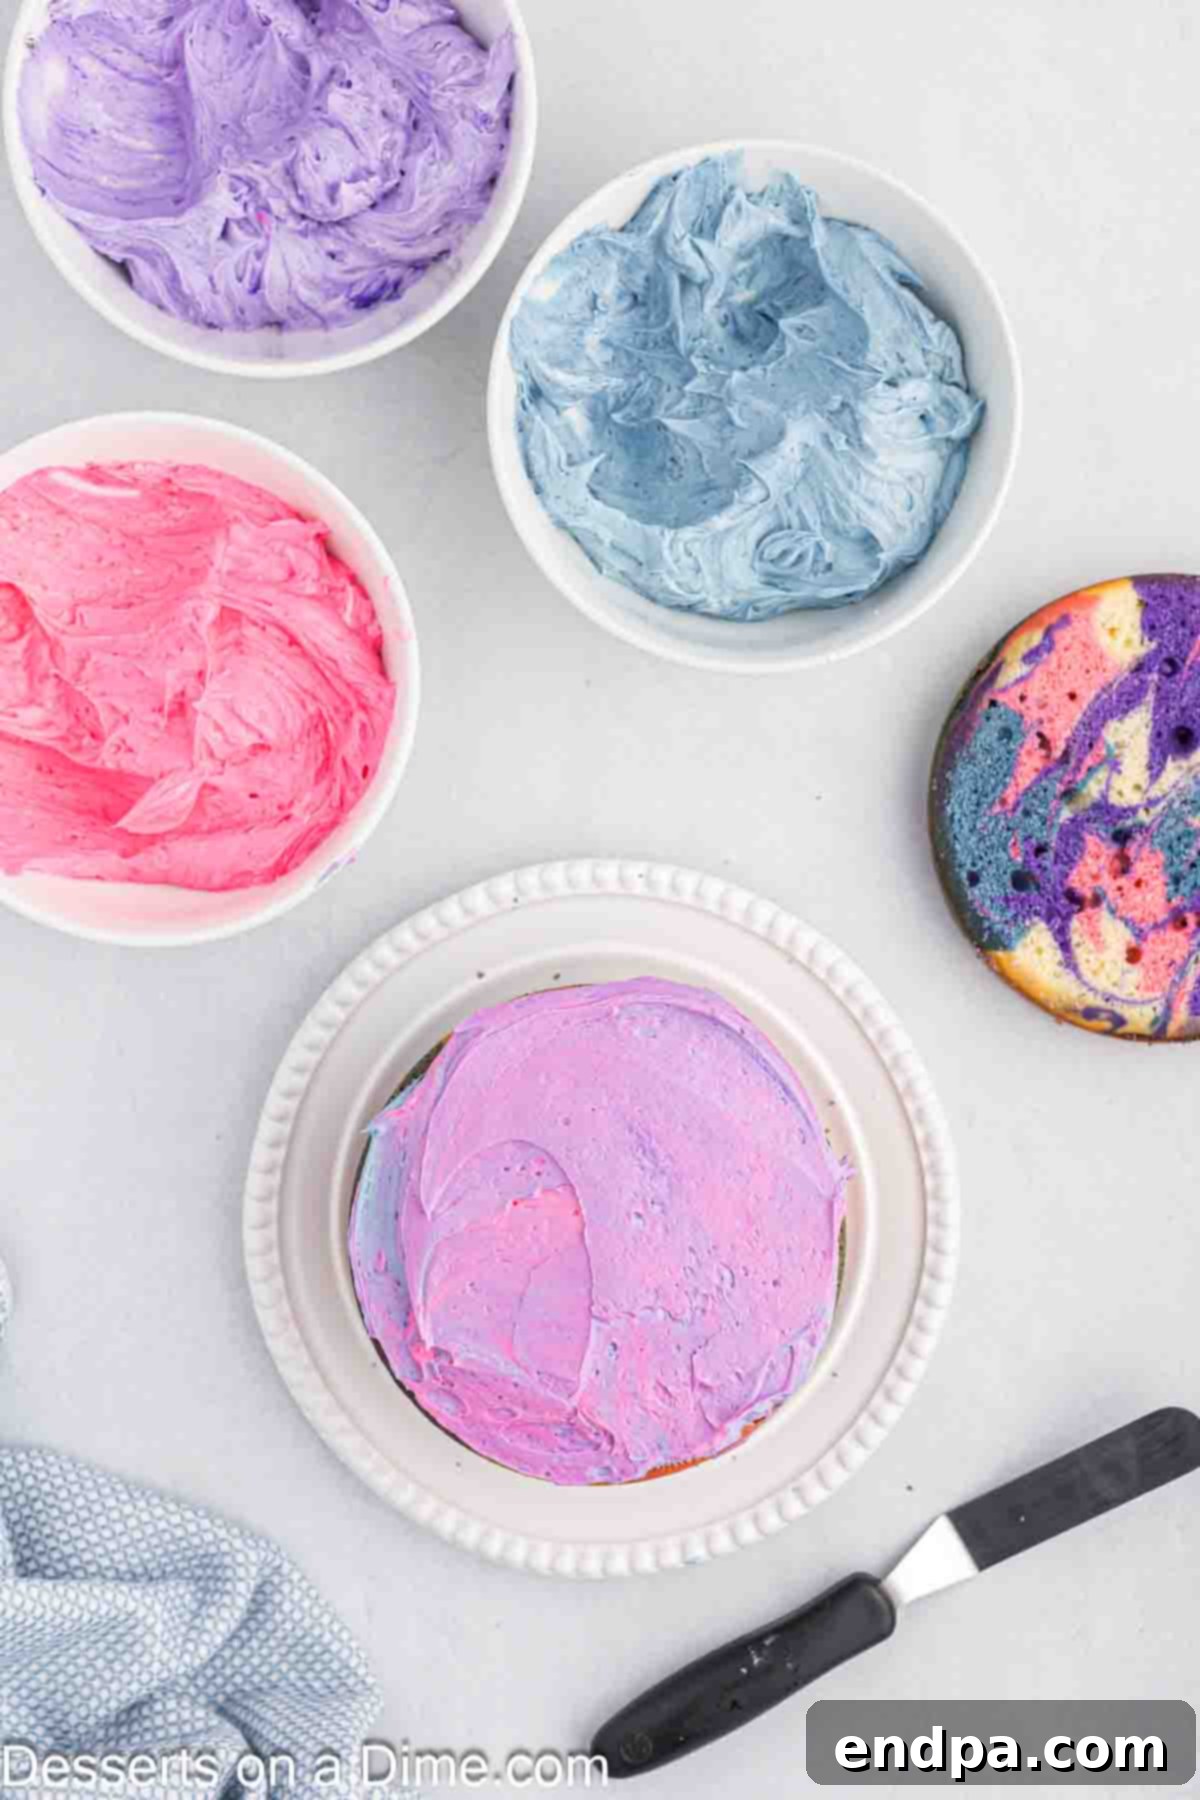
Step 14 – Stack and Crumb Coat the Cake: Place your first leveled cake layer onto a serving plate or a cake stand. Spread about ½ cup of one colored frosting evenly over the top. Gently place the second cake layer on top, pressing down lightly, and repeat with another ½ cup of a different colored frosting. Add the final cake layer. Now, apply a very thin layer of frosting all over the entire cake (top and sides). This is called a “crumb coat,” and its purpose is to trap any loose crumbs, creating a smooth, crumb-free surface for your final frosting layer. Chill the cake in the refrigerator for 15-20 minutes to set the crumb coat firmly.
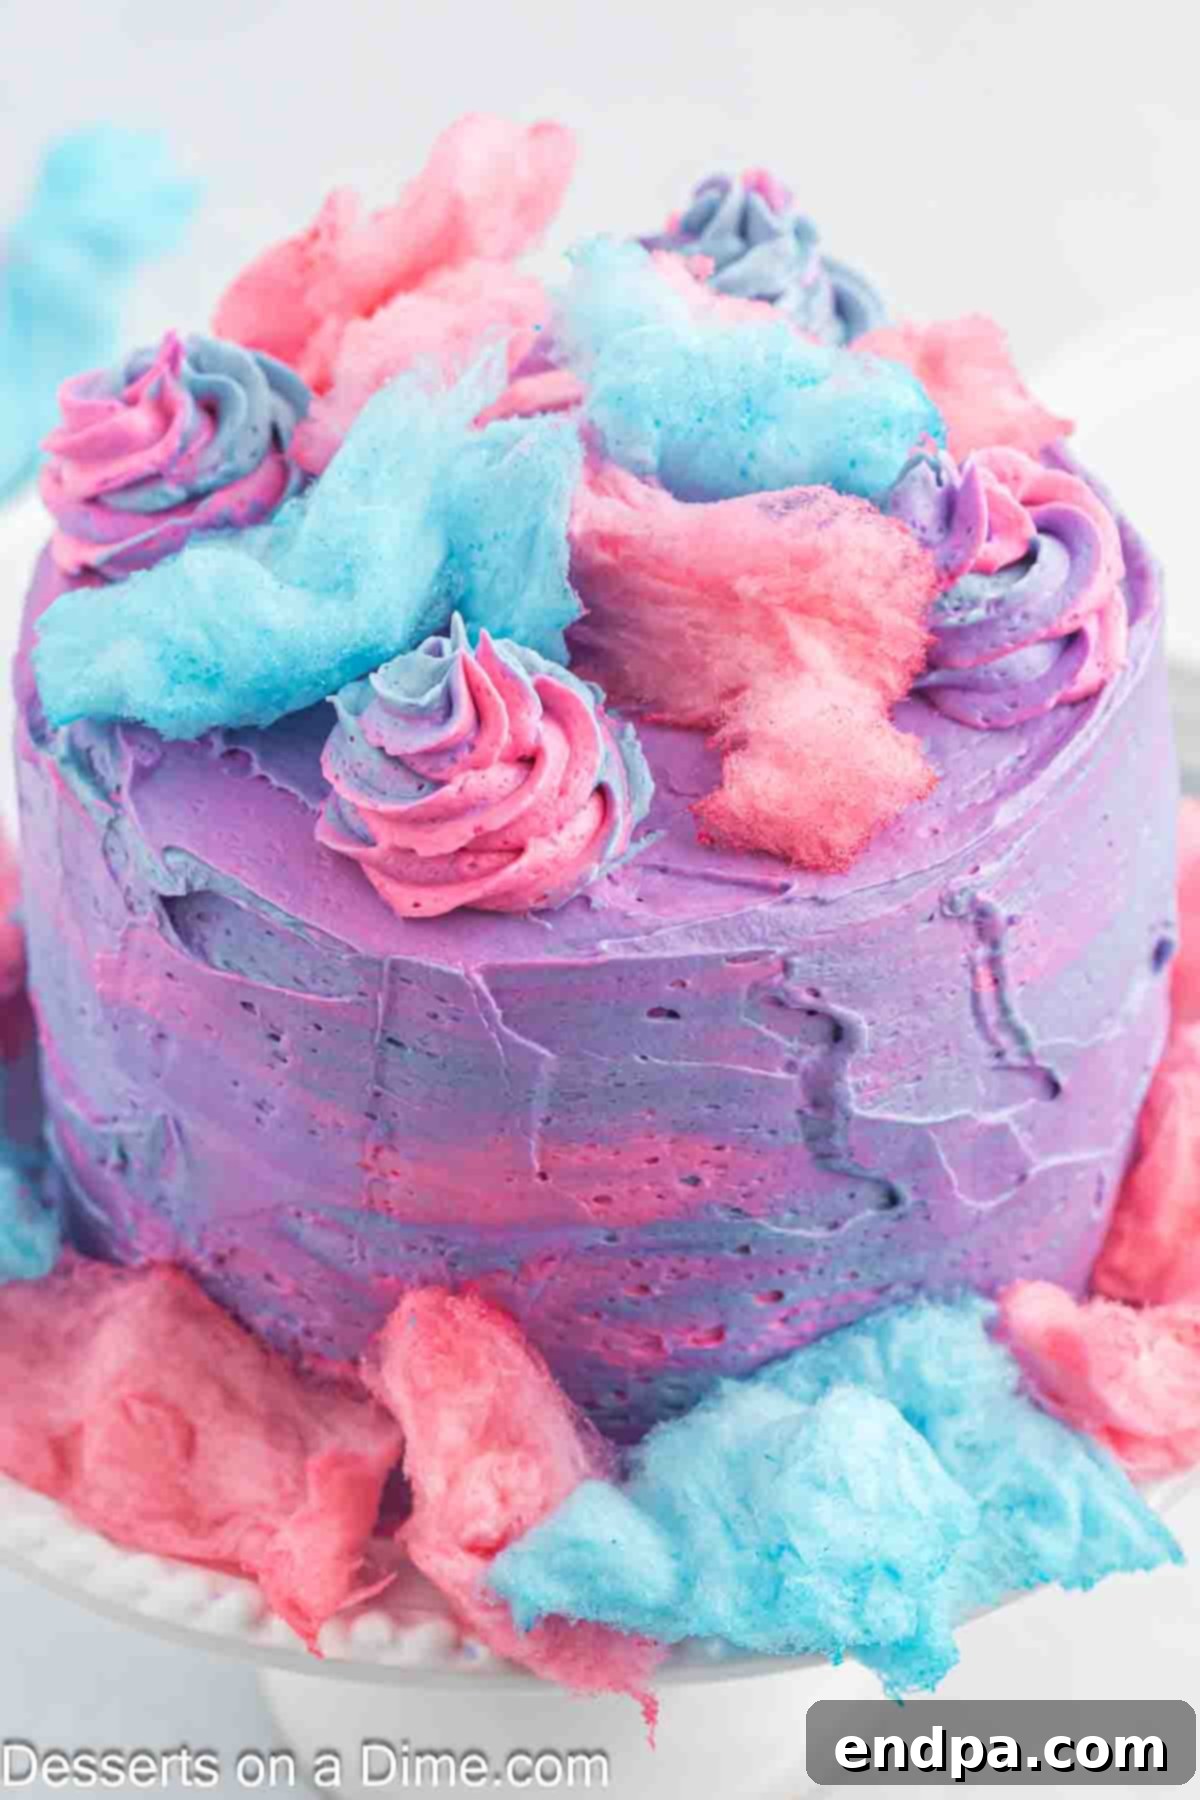
Step 15 – Apply Final Frosting and Decorate: Once the crumb coat is completely set and firm, it’s time for the final, decorative layer of frosting. Apply a generous, even layer of your colored frostings to the sides and top of the cake. You can alternate colors as you go, creating a beautiful ombré or striped effect around the cake. For the multi-colored swirls on top, prepare a large piping bag fitted with a large star tip. Carefully spoon streaks of each colored frosting along the inside walls of the piping bag. This technique will create a stunning rainbow swirl as you pipe. Pipe beautiful multi-colored swirls or rosettes around the entire top of the cake, moving from the outside edge inwards.
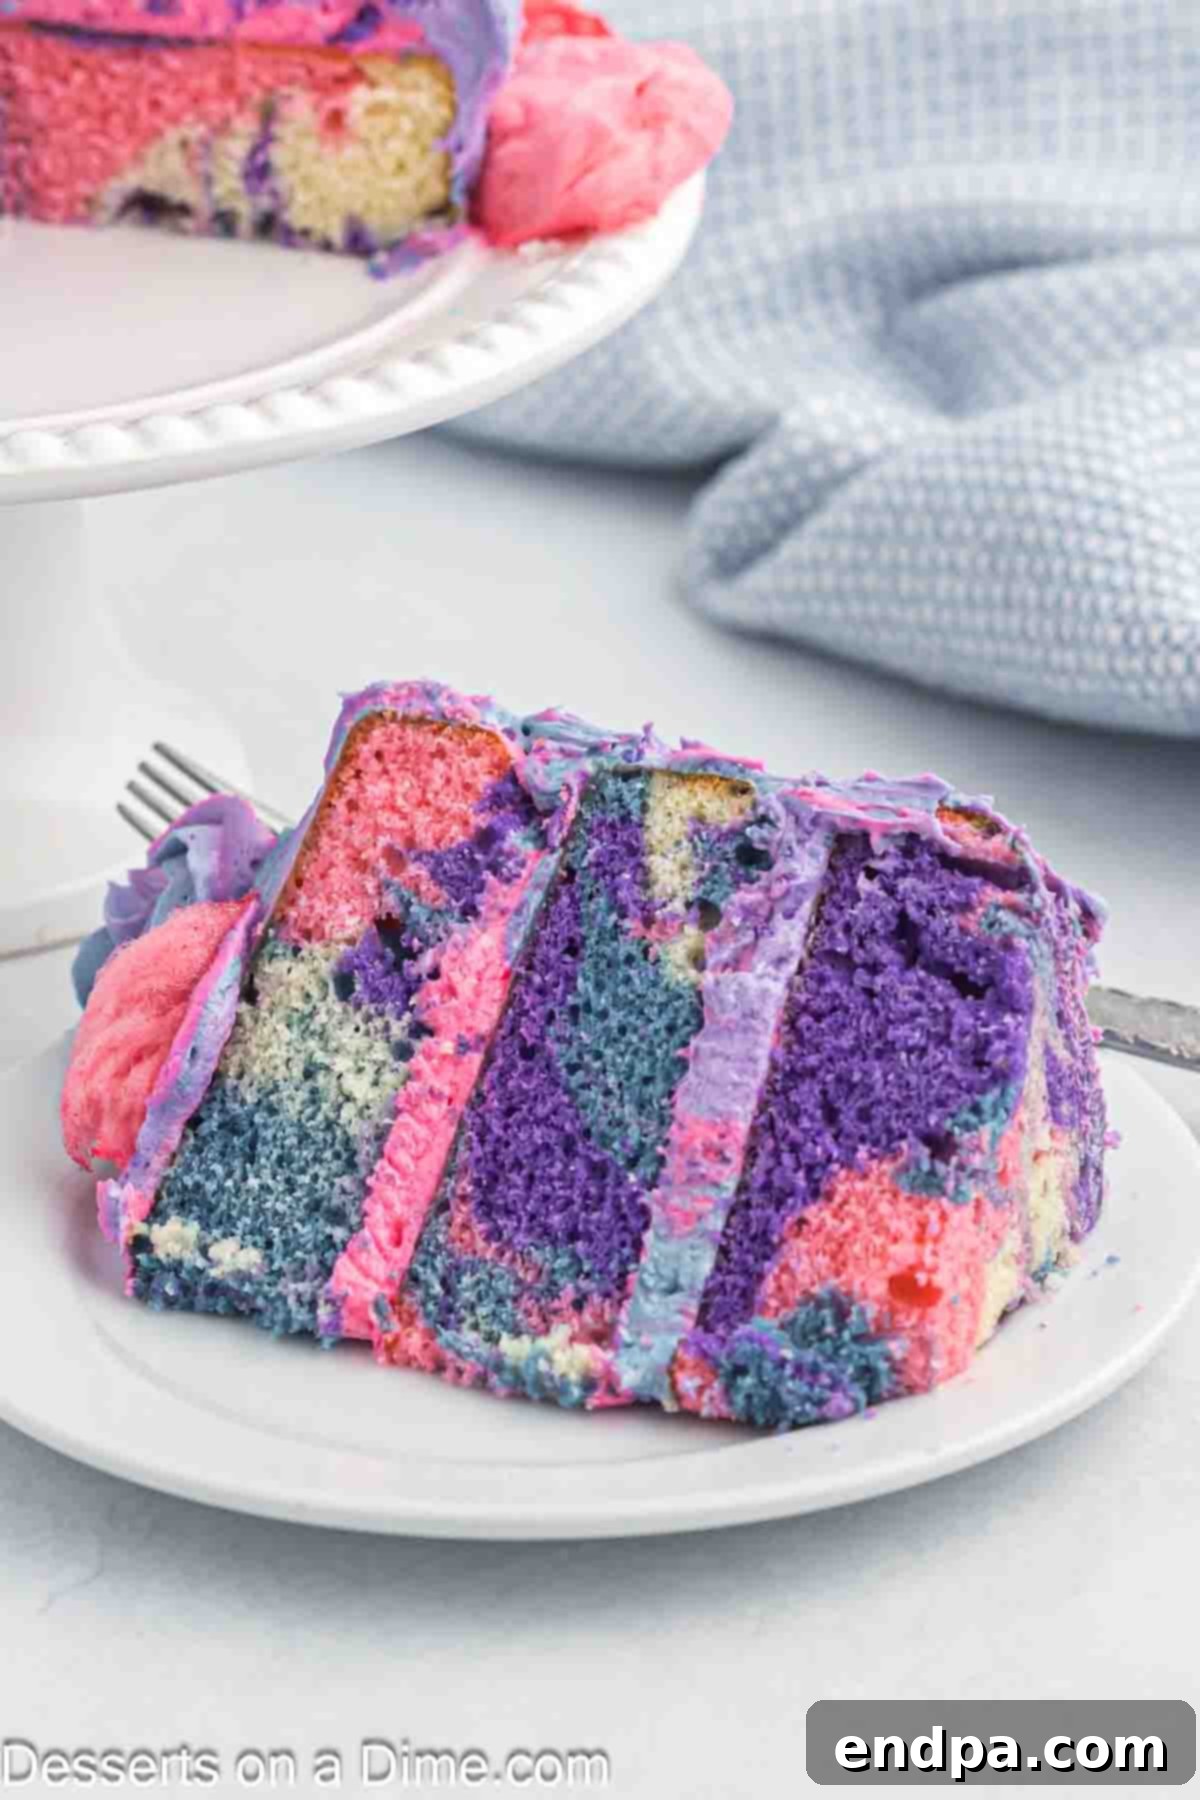
Step 16 – Garnish and Serve: Your magnificent Cotton Candy Cake is almost complete! When you are ready to serve, adorn the cake with fresh, fluffy cotton candy. Gently arrange wisps of pink, blue, and purple cotton candy all over the top and around the sides of the cake. This adds a beautiful cloud-like aesthetic and enhances the theme. Remember that cotton candy tends to dissolve quickly when exposed to air, so it’s best to add it right before presentation. Once garnished, the cake is ready to be proudly sliced, served, and enjoyed by all!
Expert Baking Tips for a Flawless Cake
Achieving a perfectly moist, colorful, and delicious Cotton Candy Cake is simple when you keep a few key baking principles in mind. These expert tips will help ensure your cake turns out beautifully every time:
- Level Your Cake Layers: If your cake layers emerge from the oven with a domed top, don’t fret! Use a long, serrated knife to carefully level off the tops. This creates flat surfaces, which are crucial for stacking layers evenly and preventing your cake from tilting. A level cake is a stable and professional-looking cake.
- Ensure Cakes Cool Completely: Patience is truly a virtue when it comes to cooling cakes. It is absolutely essential that your cake layers cool completely to room temperature before you even think about applying frosting. Attempting to frost a warm or even slightly warm cake will result in a melted, sliding mess as the buttercream will simply melt off. Plan ahead and allow ample cooling time.
- Use Room Temperature Ingredients: For both the cake batter and the frosting, using room temperature ingredients like butter, eggs, and milk makes a significant difference. Room temperature ingredients emulsify much more smoothly, leading to a homogenous batter and a silky-smooth, lump-free frosting. This smooth consistency contributes to a superior final product.
- Avoid Overmixing Ingredients: When combining the wet and dry ingredients for the cake batter, mix only until they are just combined and no streaks of flour are visible. Overmixing develops the gluten in the flour, which can lead to a tough, dense, and less tender cake. A light hand results in a soft, fluffy texture.
- Allow Cakes to Cool in Pans Initially: After baking, let your cakes cool in their pans for about 10 minutes before attempting to invert them onto a wire rack. This brief resting period allows the cake structure to set and firm up, making it much easier to remove from the pan without falling apart or sticking.
- Adjust Food Coloring to Your Preference: The amount of gel food coloring you add is entirely up to you and your desired vibrancy. You can add as much or as little as you prefer to achieve colors that are as intensely vibrant or as subtly faint as you desire. Remember, gel colors are highly concentrated, so start with small amounts and add more gradually.
- Master the Swirling Technique: To create the captivating pink, blue, purple, and white swirling colors within the cake layers, remember to spoon the different colored batters randomly into the pans. Then, use a knife or skewer to gently swirl them together just a few times. Don’t overdo it, or the colors will blend too much. The goal is distinct yet intertwined marbling.
- Freshness of Cotton Candy: When topping your cake with cotton candy, remember that it is highly sensitive to moisture and will start to dissolve quickly upon exposure to air. For the best visual impact and texture, always add the cotton candy garnish just before you are ready to serve the cake.
Frequently Asked Questions About Cotton Candy Cake
This vibrant and delicious cake is the perfect center piece for any birthday party, a whimsical baby shower, or even a charming gender reveal celebration using alternating pink and blue food coloring. To make it an even more indulgent dessert experience, serve each slice with a scoop of vanilla bean ice cream or a dollop of whipped cream on the side. The cool creaminess provides a delightful contrast to the sweet, fluffy cake, making it an ideal party cake for all occasions.
To keep your leftover Cotton Candy Cake fresh and delicious, store it covered tightly at room temperature. It will remain moist and flavorful for up to 3-4 days. If you need to store it for longer, you can refrigerate it in an airtight container for up to a week. Make sure to remove any fresh cotton candy topping before storing, as it will dissolve quickly. Add fresh cotton candy when ready to serve again.
Cotton candy flavoring is a crucial ingredient for imparting that authentic sweet taste to your cake. We typically find it at local craft stores, especially in the baking or candy-making aisles, or at specialty baking supply shops. It’s also widely available online through retailers like Amazon. This flavoring is specifically designed to give your homemade cake the perfect amount of nostalgic sweetness, making it taste just like the carnival treat.
Yes, you can absolutely prepare parts of this cake in advance! The cake layers can be baked up to 2-3 days ahead of time. Once completely cooled, wrap them individually in plastic wrap and store at room temperature, or even freeze them for up to a month. The buttercream frosting can also be made 2-3 days in advance and stored in an airtight container in the refrigerator. Just bring it to room temperature and re-whip it before frosting the cake. Assemble and add the fresh cotton candy topping on the day of serving for the best results.
For truly vibrant and distinct colors in your cake layers and frosting, we highly recommend using gel food coloring. Gel colors are concentrated and won’t thin out your batter or frosting like liquid food coloring can. Start with a small amount on a toothpick and gradually add more until you reach your desired shade. Remember to mix each color thoroughly but gently to maintain the batter’s light texture. The marbled effect will be much more striking with bold, clear colors.
More Easy Layer Cake Recipes You’ll Love
Cakes
Paula Deen Strawberry Cake: A Classic Southern Delight
Indulge in the sweet, fruity goodness of this iconic strawberry cake, perfect for spring and summer gatherings.
Cakes
Zesty Lemon Cake Recipe: Bright and Refreshing
Enjoy the bright, tangy flavors of this delightful lemon cake, a perfect balance of sweet and tart for any occasion.
Cakes
Rich Chocolate Mousse Cake: Pure Indulgence
For the ultimate chocolate lover, this luxurious mousse cake offers deep cocoa flavor and a wonderfully airy texture.
We are confident that you are going to absolutely love making and devouring this incredible Cotton Candy Cake! Its playful colors, delightful flavor, and impressive appearance make it an unforgettable treat. We’re so excited for you to try this recipe and bring a little extra magic to your next celebration. Please do come back and share your experience with us, and don’t hesitate to leave a comment below—we’d love to hear what you think!
Pin
Cotton Candy Cake
Ingredients
For the Cake:
- 2 1/2 cups All Purpose Flour
- 2 teaspoon Baking Powder
- 1/2 teaspoon Salt
- 3/4 cup Unsalted Butter softened
- 1 1/2 cups Granulated Sugar
- 3 Large Eggs room temperature
- 2 teaspoon Cotton Candy Flavoring
- 1 cup Milk room temperature
- Pink Blue and Purple Gel Food Coloring
For the Frosting:
- 2 cups Unsalted Butter softened
- 6 cups Powdered Sugar
- 3 Tablespoons Milk
- 2 teaspoon Cotton Candy Flavoring
- Pink Blue and Purple Gel Food Coloring
For Serving:
- Pink Blue and Purple Cotton Candy
Instructions
For the Cake:
- Preheat the oven to 350 degrees Fahrenheit (175°C) and grease and flour three 6-inch round cake pans. You can also place parchment paper on the bottoms of each pan for easier removal.
- In a mixing bowl, whisk together the flour, baking powder, and salt. Set aside.
- In a separate large bowl, cream together the softened butter and granulated sugar with a hand-held mixer or stand mixer until light and fluffy (approximately 3-5 minutes). Add in the room temperature eggs one at a time, mixing well after each, then add the cotton candy flavoring. Mix until combined.
- Then slowly add the flour mixture and milk to the wet ingredients, alternating between each one, starting and ending with the flour mixture, until both are fully incorporated. Mix just until no streaks of flour remain; do not overmix.
- Pour the batter evenly into 4 separate bowls. Color one bowl pink, one blue, one purple using gel food coloring, and leave the 4th bowl plain (undyed).
- Spoon dollops of each colored batter randomly into each of the 3 prepared baking pans. Gently swirl the batter together a few times with a knife or skewer to create a marble pattern (be careful not to overmix).
- Bake the cakes for 30-35 minutes, or until a toothpick inserted into the center of the cakes comes out clean.
- Cool the cakes in their pans for 10 minutes, then invert them onto wire racks to cool completely before frosting.
For the Frosting:
- While the cakes cool, beat the softened butter for the frosting in your stand mixer (or with a hand-held mixer) for approximately 3 minutes until light and fluffy.
- Reduce the mixer speed to low and gradually add the sifted powdered sugar until combined. Then, mix in the milk and cotton candy flavoring until the frosting is smooth, creamy, and well blended.
- Divide the frosting evenly into 3 bowls. Dye one bowl pink, one bowl blue, and one bowl purple using gel food coloring.
To Assemble:
- Level each of the cooled cake layers with a serrated knife to create flat tops for even stacking.
- Place one cake layer on a serving plate or cake stand. Spread about ½ cup of frosting on top. Repeat this process with the remaining 2 cake layers, alternating frosting colors if desired.
- Apply a thin layer of frosting around the top and outside of the entire cake for a “crumb coat” (this traps loose crumbs). Freeze or refrigerate the cake for 10-15 minutes to allow the crumb coat to set.
- Once the crumb coat is set, apply a thicker, final layer of frosting to the sides and top of the cakes. You can alternate between the colored frostings on the sides to get a swirled or striped effect.
- To create multi-colored swirls on top, place streaks of each colored frosting onto the sides of a piping bag fitted with a large star tip. Pipe beautiful multi-colored swirls or rosettes around the top of the cake.
- When ready to serve, gently style with fresh cotton candy on top and around the sides of the cake. Slice, serve, and enjoy your magical Cotton Candy Cake!
Recipe Notes
Nutrition Facts
Pin This Now to Remember It Later
Pin Recipe
