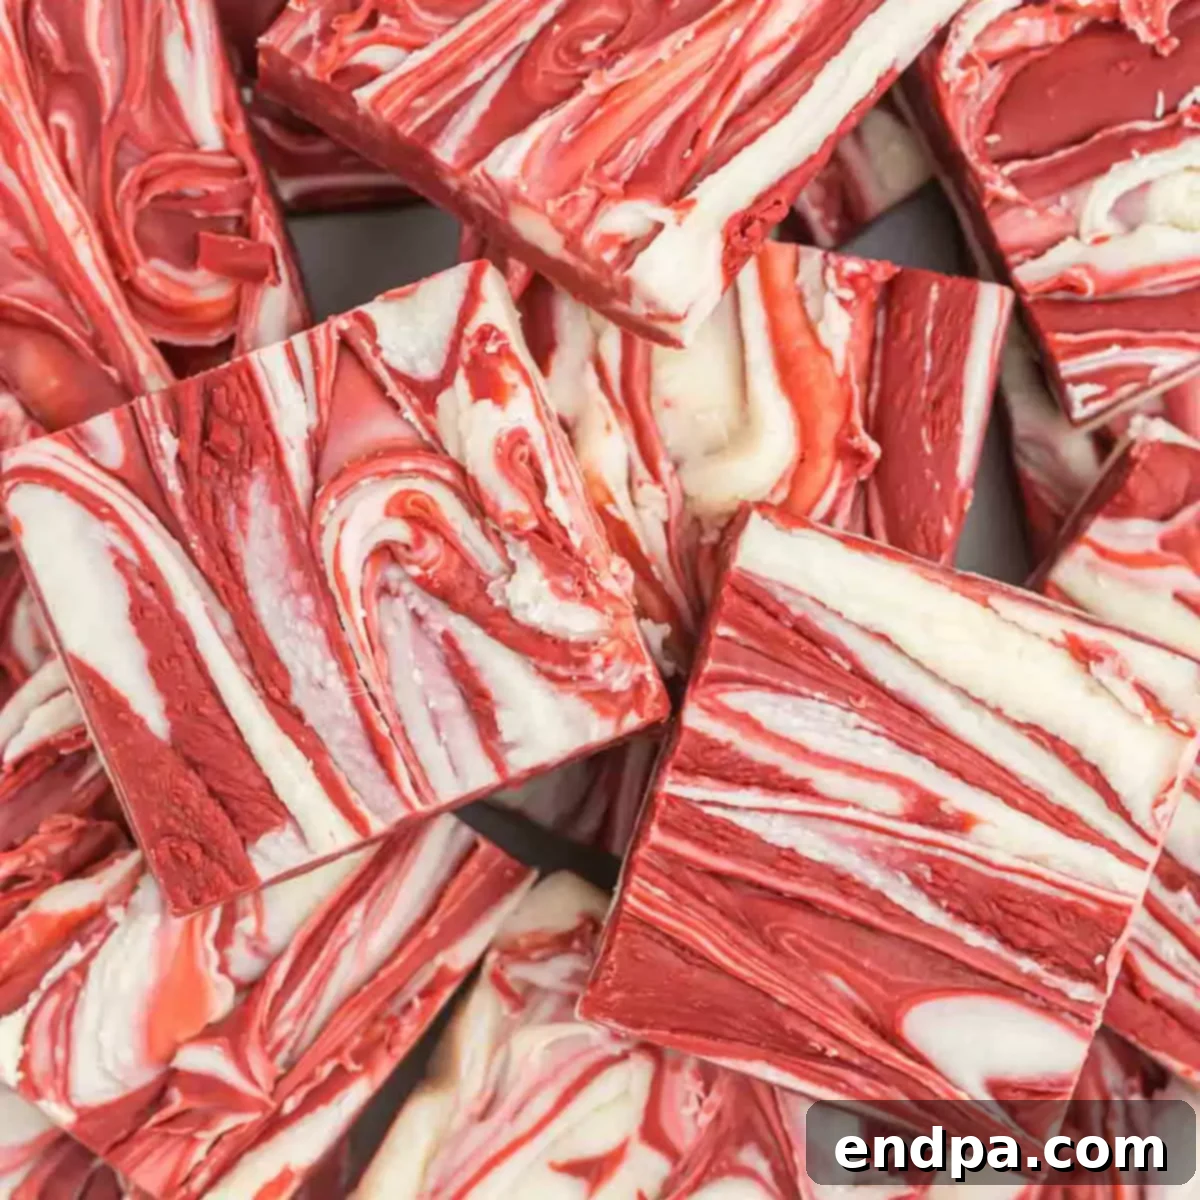
Red Velvet Fudge is a dazzling confectionery masterpiece, perfect for adding a touch of elegance and sweetness to any occasion. With its vibrant red hues swirled with creamy white, this festive treat is an absolute showstopper, making it ideal for Valentine’s Day, Christmas, or simply to brighten a regular day. This incredibly easy chocolate fudge recipe is guaranteed to tantalize your taste buds and satisfy even the most demanding sweet tooth, proving that delicious homemade desserts don’t have to be complicated.
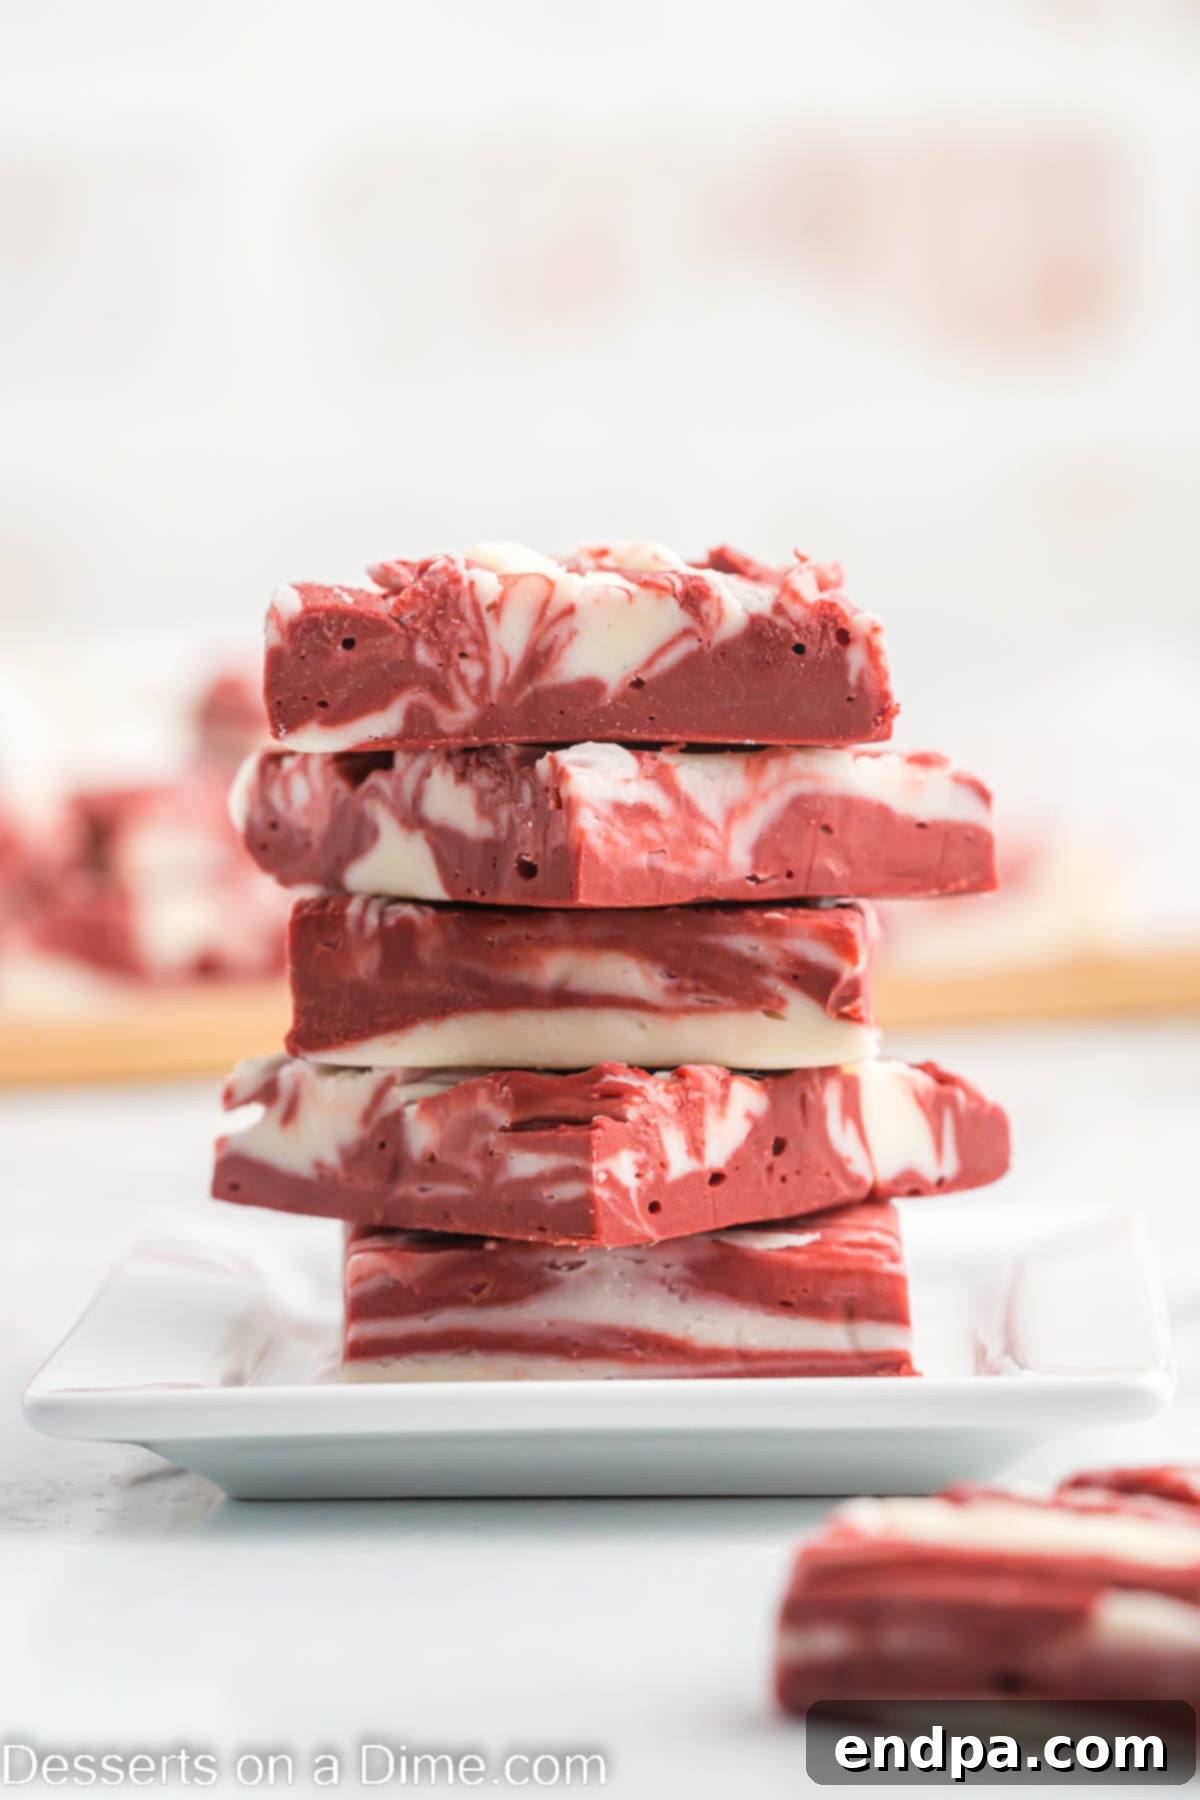
This effortless fudge recipe captures all the rich, beloved flavors of classic red velvet cake, condensed into a delightfully simple dessert. If you’re a fan of luscious fudge and adore the moist crumb and tangy cream cheese frosting of a Red Velvet Sheet Cake, then prepare to be amazed. This recipe truly offers the best of both worlds, bringing that iconic flavor profile into an incredibly accessible format. You’ll be delighted to discover that it’s primarily made in the microwave, eliminating the need for any special equipment like candy thermometers or double boilers, making it perfect for novice bakers and seasoned dessert makers alike. Having personally crafted various fudge recipes for over a decade, including favorites like Lemon Fudge, I can confidently say this Red Velvet Fudge stands out for its simplicity and irresistible charm.
Table of Contents
- Why This Recipe Works
- Essential Ingredients for Vibrant Red Velvet Fudge
- Creative Variations & Delicious Additions
- Step-by-Step Guide: How to Make Red Velvet Fudge
- Storing Your Homemade Red Velvet Fudge
- Can You Freeze Fudge? Yes!
- Expert Tips for Flawless Fudge Every Time
- Discover Other Easy Fudge Creations
Why You’ll Love This Easy Red Velvet Fudge Recipe
There are countless reasons why this particular Red Velvet Fudge recipe deserves a permanent spot in your dessert repertoire. First and foremost, its sheer simplicity is unparalleled. Utilizing a minimal number of ingredients, this recipe transforms basic pantry staples into a gourmet-looking treat without any fuss. Unlike traditional fudge recipes that can often be intimidating due to precise temperature requirements, this version cleverly bypasses the need for a candy thermometer, making it approachable for anyone, regardless of their baking experience. Once you experience how easy and delicious this comes together, it will undeniably become a cherished “keeper” recipe.
The versatility of this gorgeous red velvet fudge extends far beyond its effortless preparation. We frequently whip up batches for special occasions such as Christmas and Valentine’s Day, where its festive colors and rich flavor are always a hit. Its stunning appearance and delightful taste also make it a phenomenal choice for thoughtful homemade gifts. Imagine presenting a box of these beautiful swirled fudge squares to friends, family, or neighbors – they’re sure to be impressed! Beyond the typical holidays, the vibrant red color makes it a fantastic addition to patriotic celebrations like July 4th, especially when served alongside other themed treats such as Patriotic Crack. This fudge isn’t just a dessert; it’s a versatile celebration in every bite.
Essential Ingredients for Vibrant Red Velvet Fudge
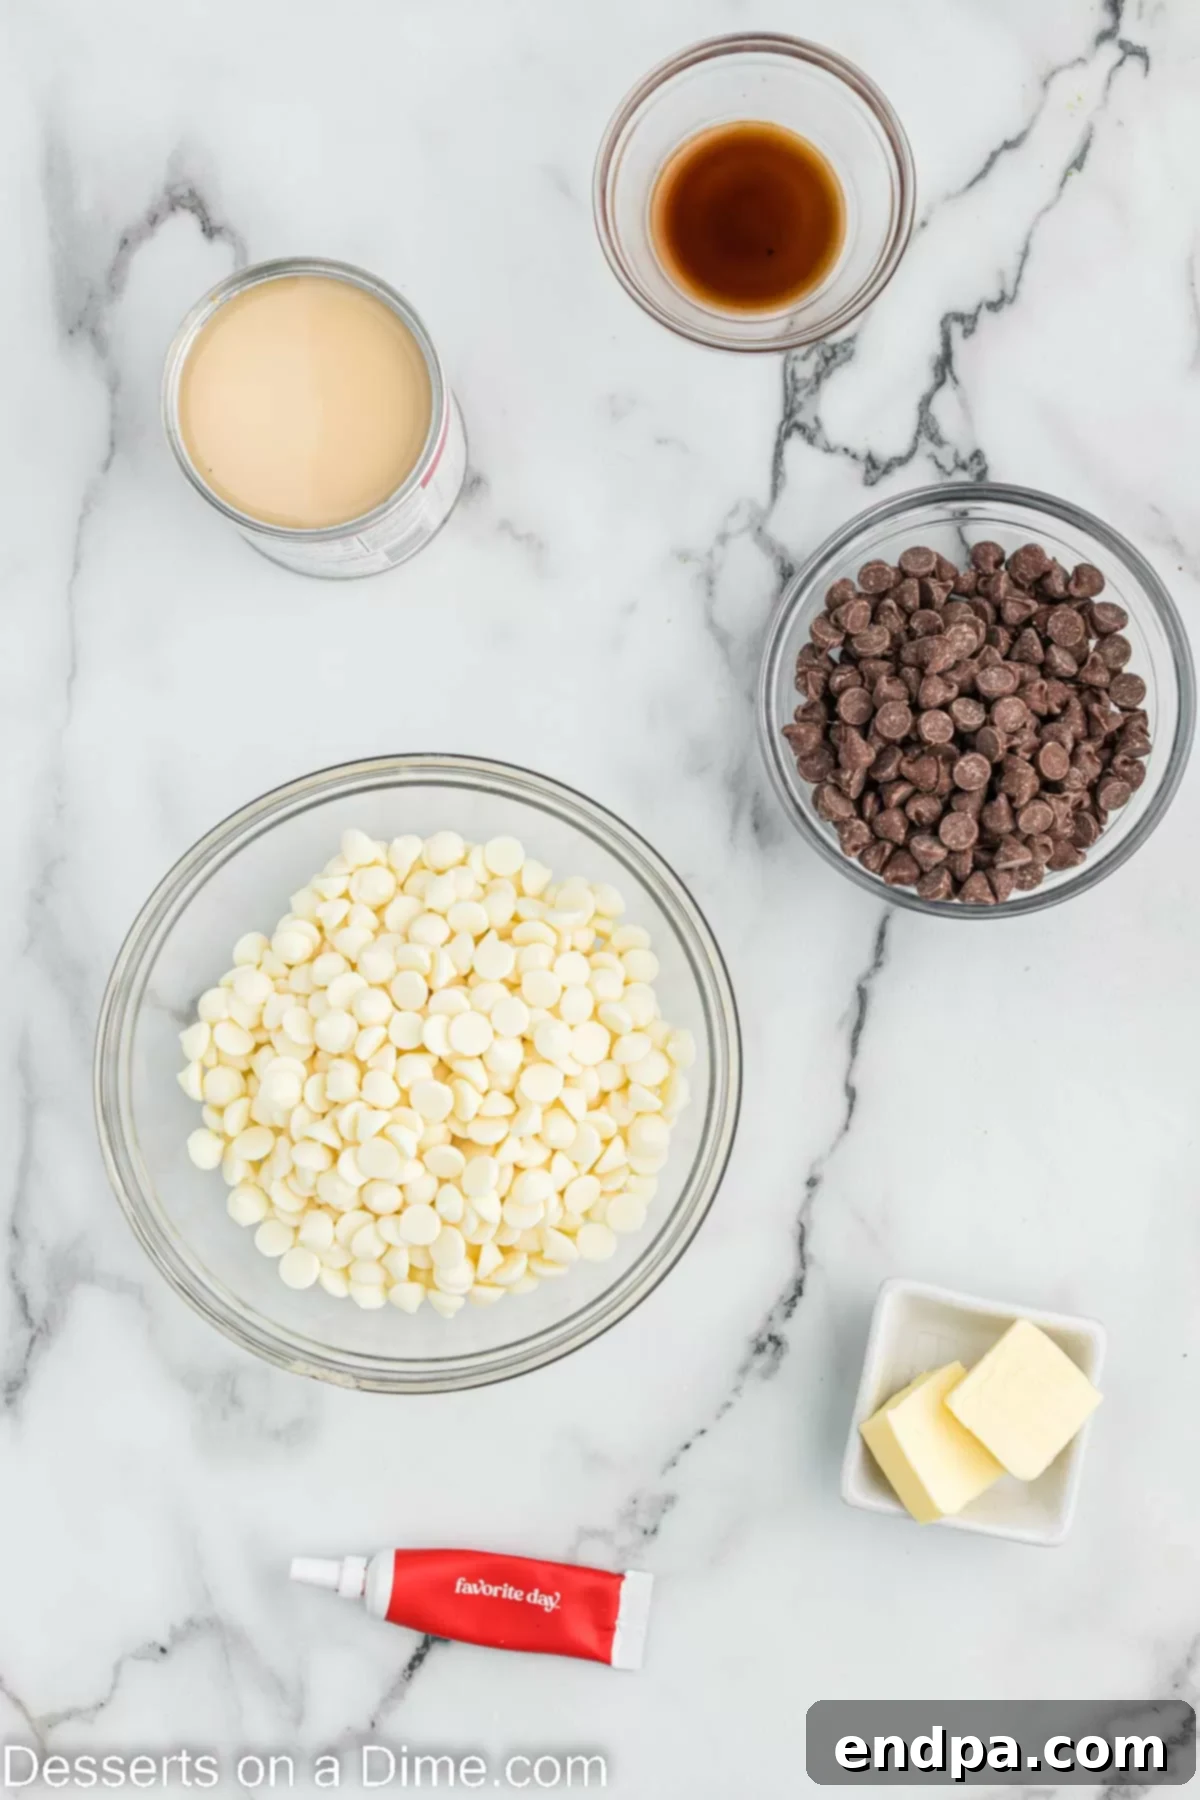
Crafting this irresistible red velvet fudge requires only a handful of common ingredients, each playing a crucial role in achieving its signature flavor and texture. The key to a truly outstanding fudge lies in selecting quality components:
- White Chocolate Chips and Milk Chocolate Chips: These are the foundation of our fudge, providing both structure and flavor. Using a good quality chocolate is paramount here, as it significantly impacts the smoothness and overall taste of the finished product. The combination of white and milk chocolate creates a balanced sweetness and depth, while also allowing the red food coloring to really shine through in the designated red velvet portion.
- Sweetened Condensed Milk: This magical ingredient is what gives the fudge its characteristic creamy texture and abundant sweetness. It’s a non-negotiable component that thickens and binds the fudge perfectly. It’s crucial not to substitute this with heavy cream or evaporated milk, as they will not yield the same consistency or sweetness required for this recipe.
- Butter: Always opt for real butter for the best flavor and texture. Butter contributes to the fudge’s richness and helps create that desirable melt-in-your-mouth quality. Unsalted butter is usually preferred in baking to control the salt content, but a tiny pinch of salt can also enhance the chocolate flavors.
- Vanilla Extract: Pure vanilla extract is highly recommended over imitation vanilla. Its warm, aromatic notes complement the chocolate beautifully, adding depth and a comforting richness to the red velvet flavor profile. A good quality vanilla can elevate the entire dessert.
- Red Gel Food Coloring: To achieve that iconic, rich red velvet hue, gel food coloring is your best friend. Gel food coloring provides a much more intense and vibrant color with less liquid compared to liquid food coloring, preventing any unwanted changes to the fudge’s consistency. Start with a few drops and add more until you reach your desired shade of red.
The precise quantities for these ingredients are provided in the comprehensive recipe card located at the bottom of this page, ensuring you have everything you need for a successful batch of red velvet fudge.
Creative Variations & Delicious Additions
While the classic Red Velvet Fudge is delightful on its own, this recipe offers plenty of room for creative customization. Feel free to experiment with these substitutions and additions to make the fudge uniquely yours:
- Chocolate Varieties: We’ve opted for a balanced blend of milk and white chocolate chips for a universally appealing sweetness. However, if you prefer a fudge with a slightly less sweet profile, consider using semi-sweet chocolate chips instead of milk chocolate. For a bolder, deeper chocolate flavor, you could even try a small amount of dark chocolate chips in the red portion, though be mindful not to overpower the red velvet essence.
- Nuts for Crunch: Introducing nuts adds a wonderful textural contrast and a hint of earthy flavor. You can either fold chopped nuts directly into the fudge mixture before chilling, or generously sprinkle them on top for a beautiful garnish. Classic options like chopped pecans or walnuts are fantastic choices. If you’re catering to different preferences, simply add nuts to one half of the fudge before it sets, leaving the other half plain.
- White Chocolate Almond Bark: As an alternative to white chocolate chips, white chocolate almond bark can be used. Keep in mind that almond bark typically contains less cocoa butter than white chocolate chips, so you might need to add 1 to 2 tablespoons of a neutral oil or shortening (like coconut oil or vegetable shortening) to achieve the desired smooth, melty consistency and prevent it from becoming too stiff.
- Food Coloring Flexibility: If you’re not keen on using food coloring or simply prefer a naturally colored fudge, feel free to omit the red gel food coloring entirely. The fudge will still taste absolutely incredible, offering a rich chocolate and vanilla flavor, just without the signature red velvet appearance. It might be a fun variation to call it “Vanilla Swirl Fudge”!
- Exciting Toppings: Elevate your fudge with a variety of delicious toppings sprinkled on top just before it fully sets. This is where you can truly let your creativity shine! Some delightful ideas include:
- Shredded coconut for a tropical twist.
- Crushed candy canes or peppermint pieces for a festive, minty kick, especially around the holidays.
- Colorful sprinkles to match any party theme or holiday.
- Mini marshmallows for a soft, chewy addition.
- Additional chocolate shavings or mini chocolate chips for extra chocolatey goodness.
- A sprinkle of sea salt flakes to beautifully enhance the chocolate flavors and add a gourmet touch.
Step-by-Step Guide: How to Make Red Velvet Fudge
Creating this stunning Red Velvet Fudge is surprisingly straightforward, thanks to the magic of the microwave. Follow these simple steps for a perfect batch every time:
- Step 1: Prepare Your Pan. Begin by lining a 9×9 inch square pan with parchment paper. Ensure the parchment paper extends up over the sides of the pan, creating “handles” that will make it incredibly easy to lift the entire block of fudge out once it has set. Set this prepared pan aside.
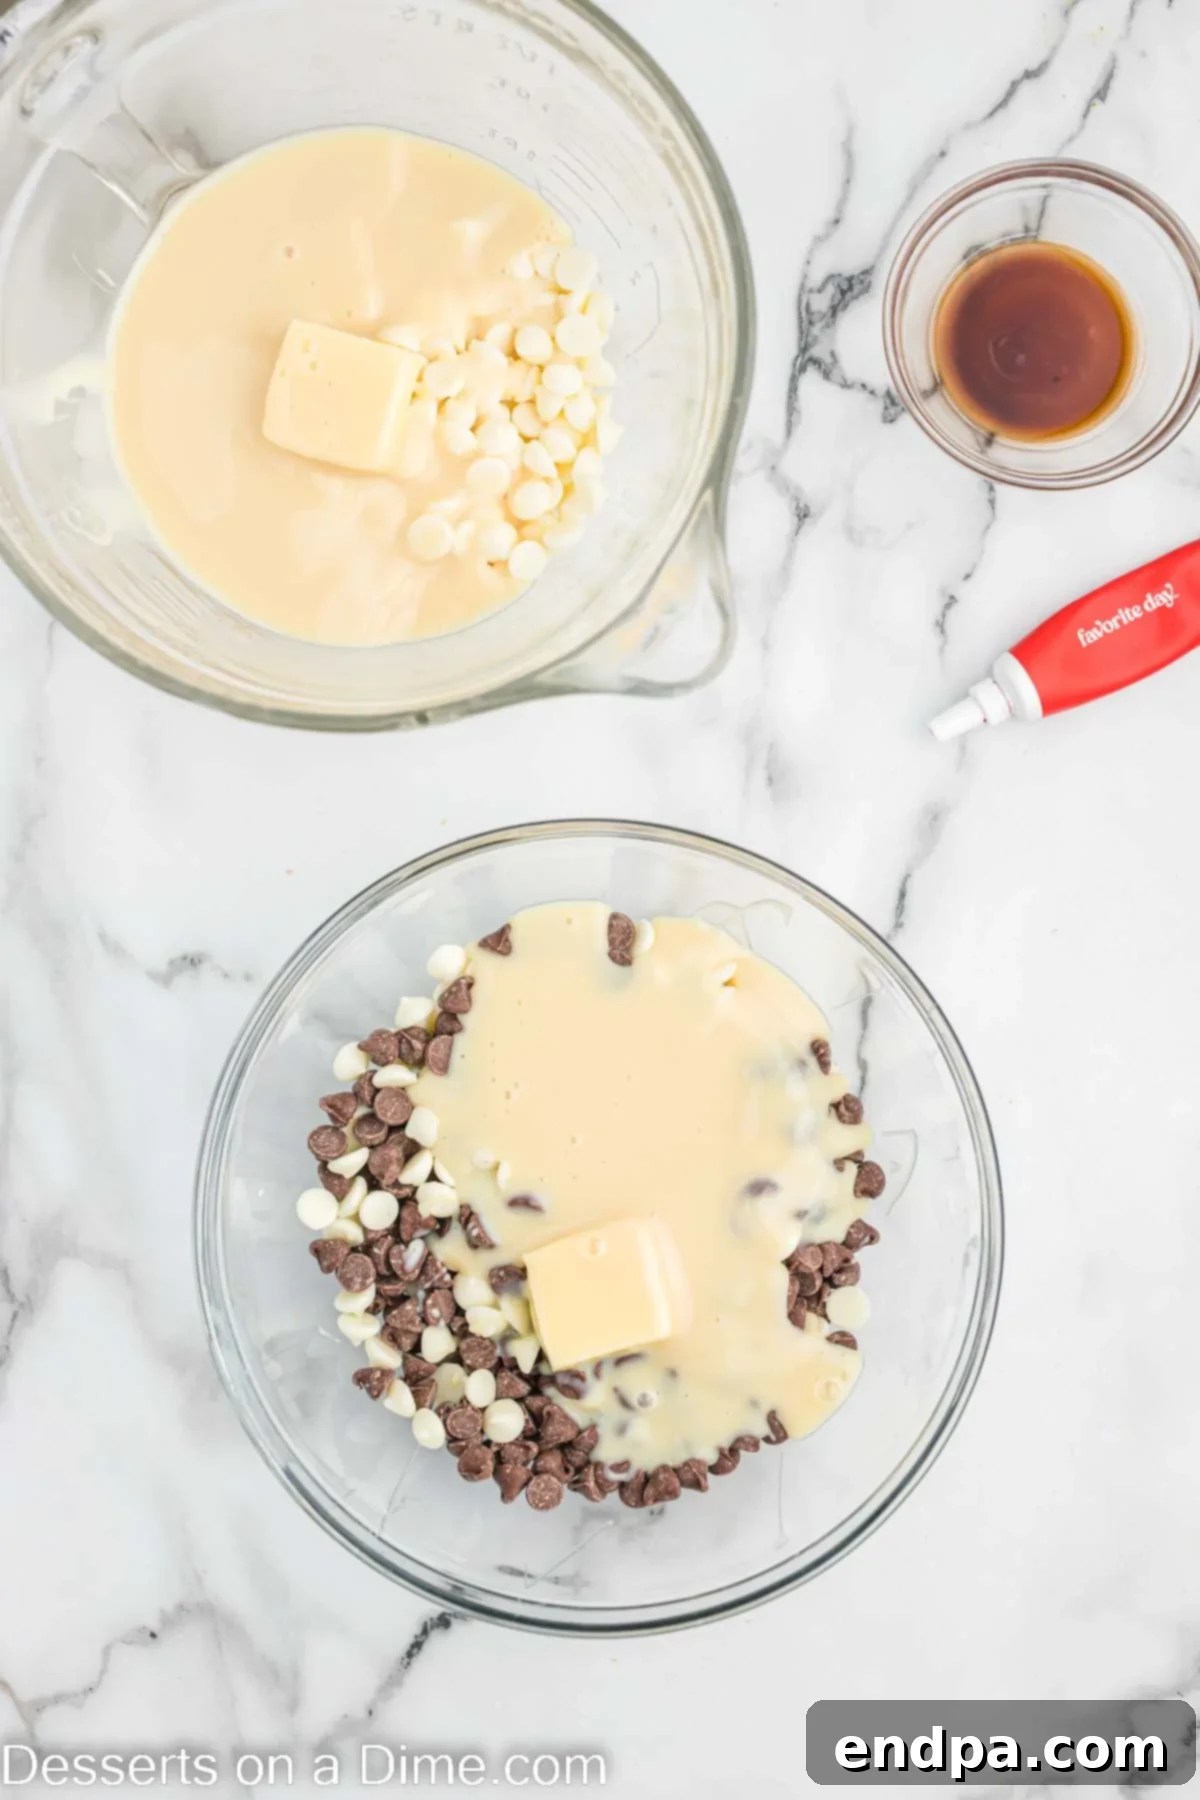
Step 2: Divide and Combine Ingredients. Gather two medium-sized, microwave-safe bowls. In the first bowl, place 9 ounces of the white chocolate chips. In the second bowl, combine the milk chocolate chips with the remaining 3 ounces of white chocolate chips. To each bowl, add 1 tablespoon of butter and half of the sweetened condensed milk. This strategic division allows us to create two distinct fudge bases – one for the vibrant red velvet and one for the creamy white swirl.
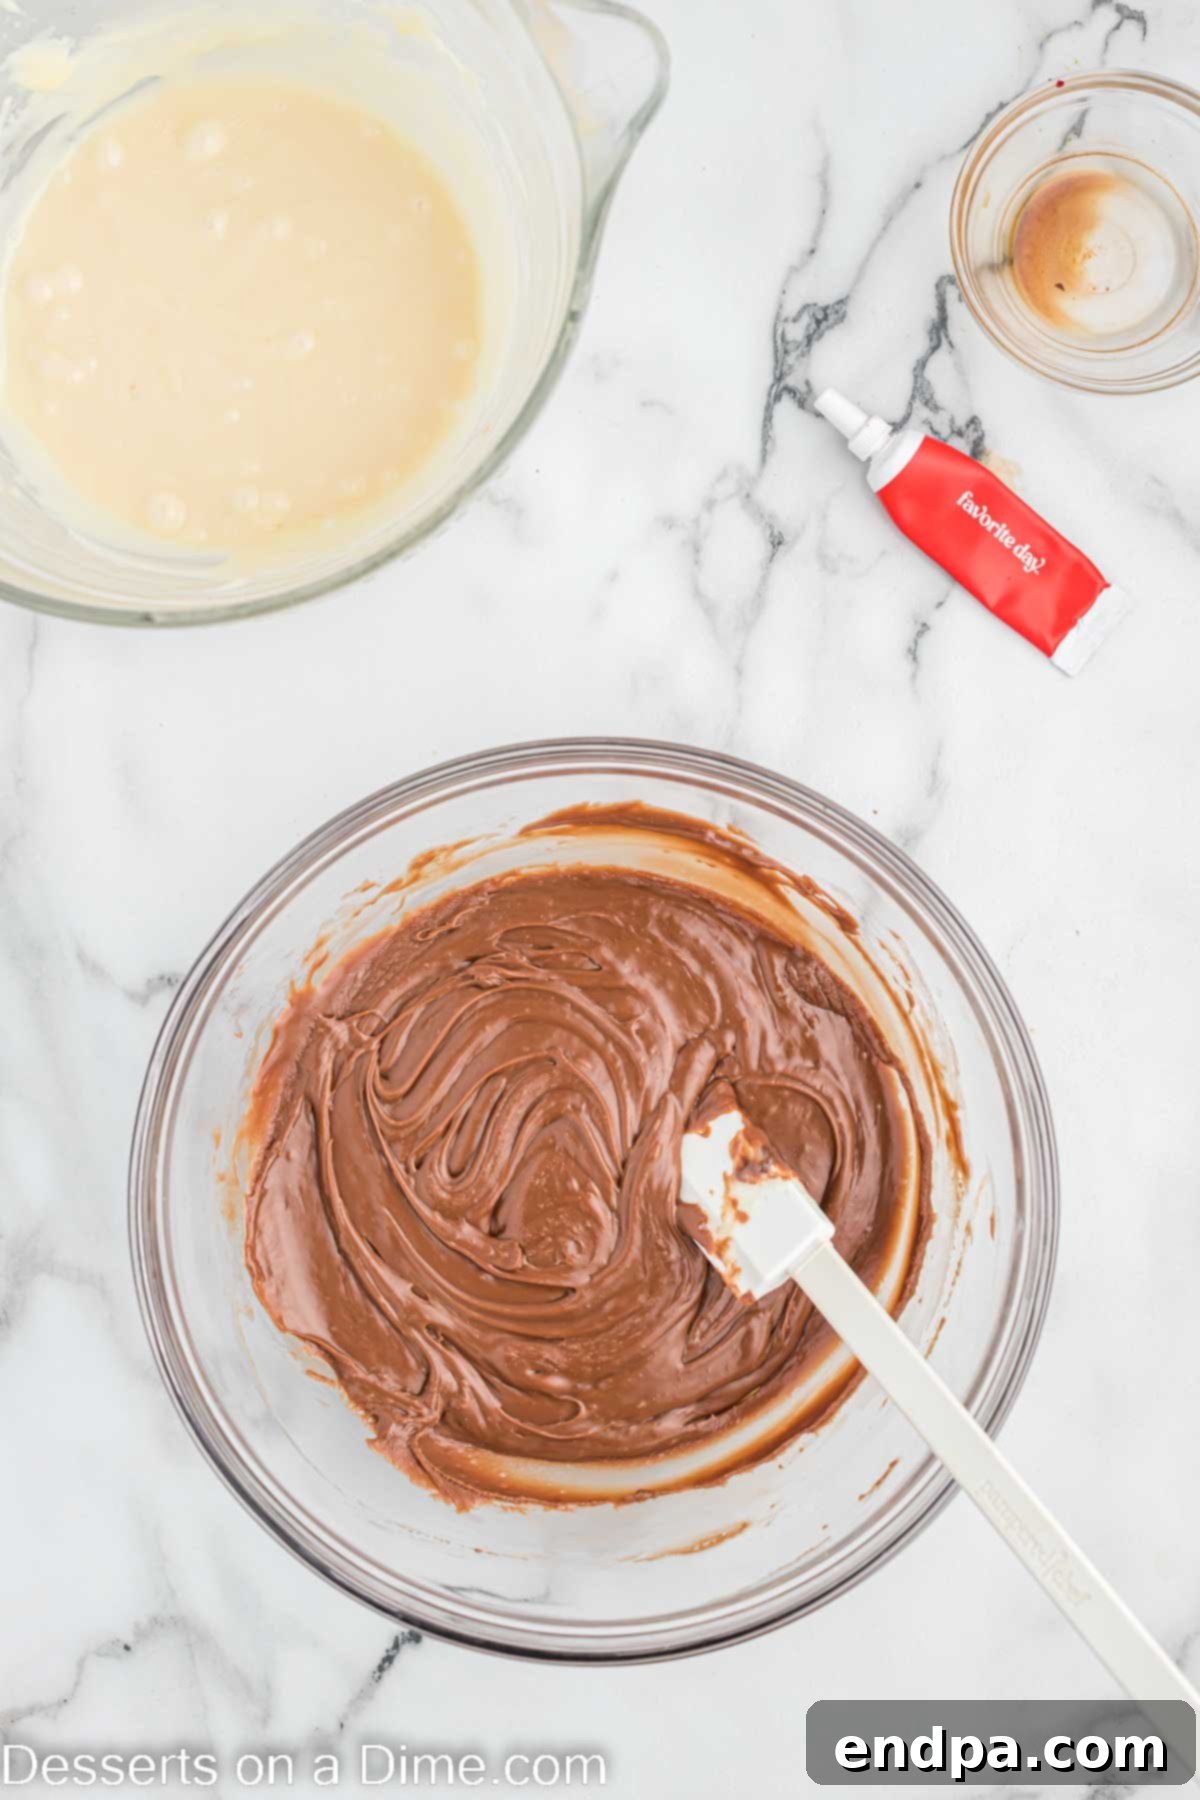
Step 3: Melt the Chocolate. Place one of the bowls in the microwave and heat on high for 30 seconds. Carefully remove the bowl and stir the mixture thoroughly. Repeat this process, microwaving in 30-second intervals and stirring well after each, until the chocolate chips are completely melted and the mixture is smooth and uniform. Take care not to overcook the chocolate, as this can cause it to seize or burn. Repeat this melting process for the second bowl of ingredients.
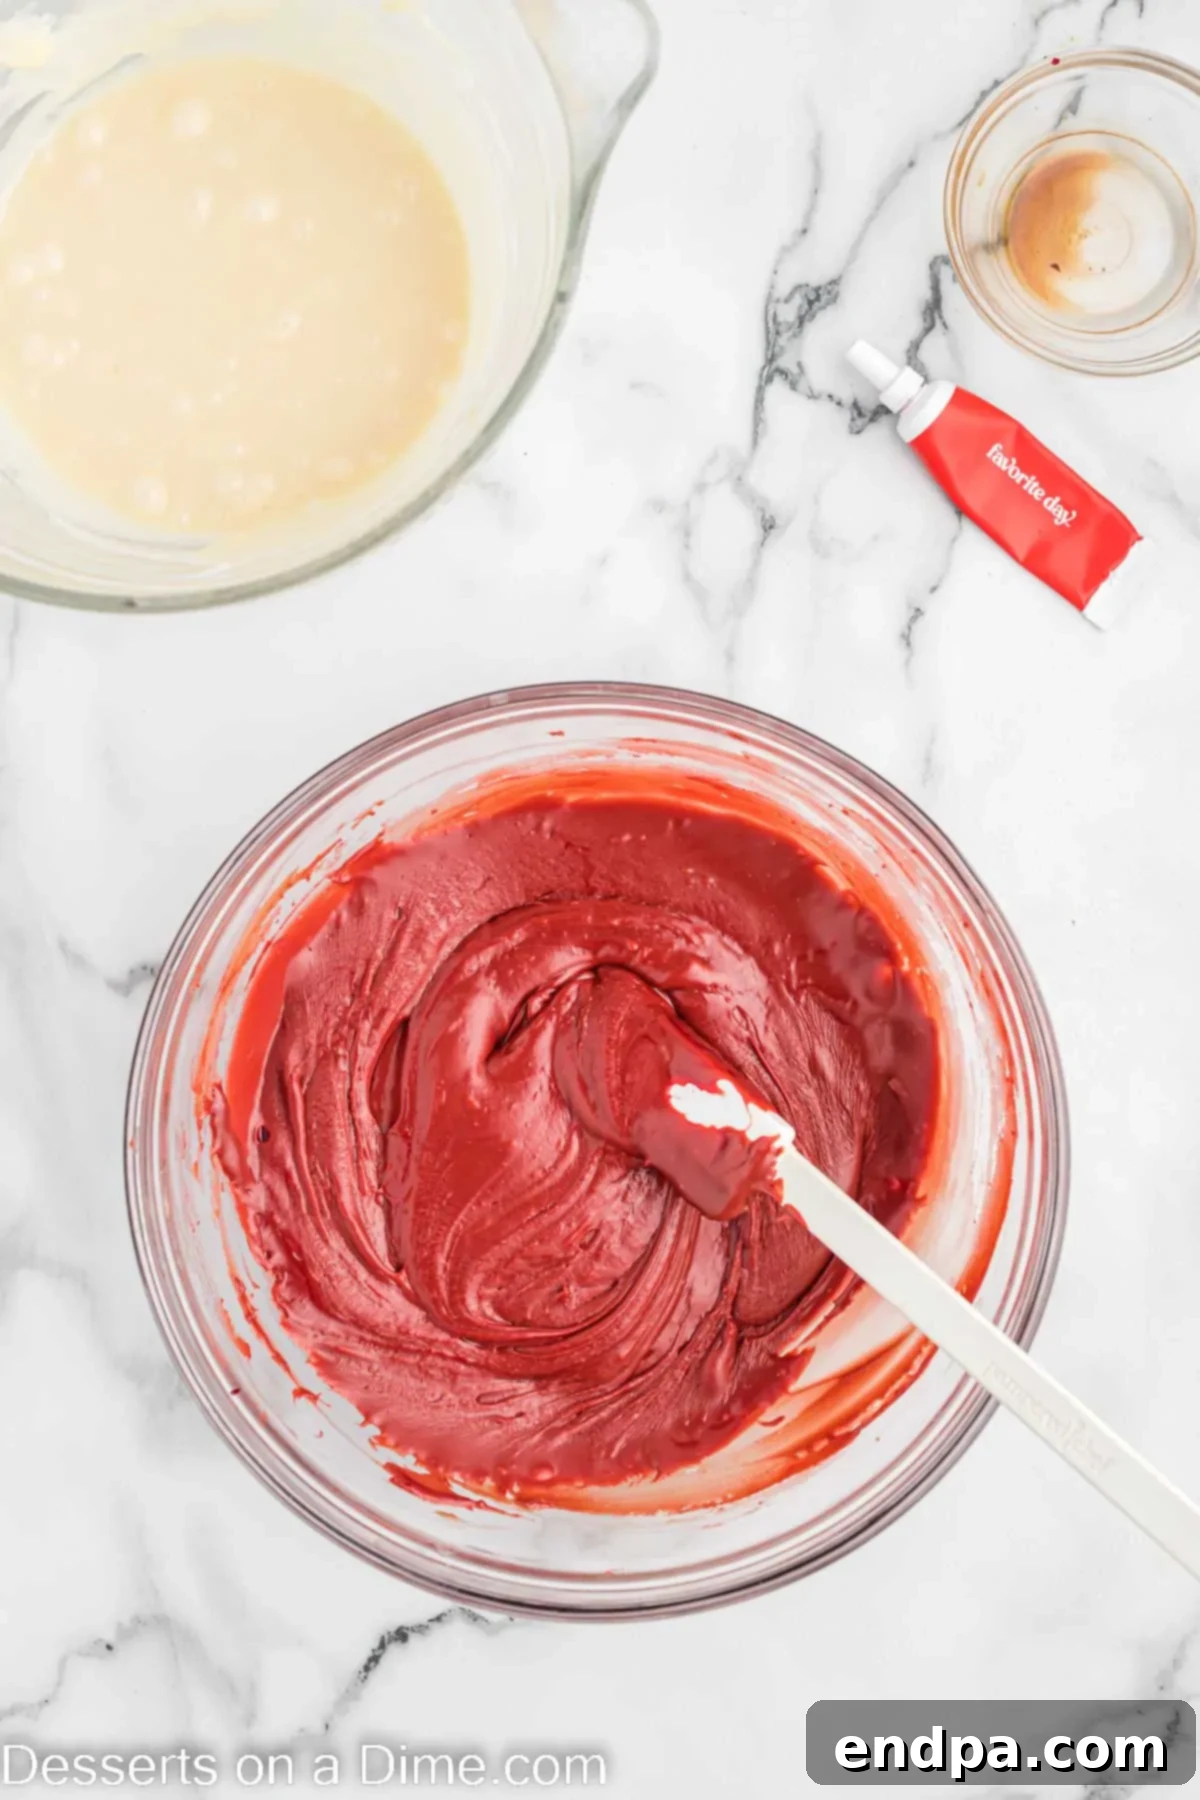
Step 4: Flavor and Color the Fudge. Once both chocolate mixtures are melted and smooth, stir 1 teaspoon of vanilla extract into each bowl. Now, it’s time to create the signature red velvet color! To the bowl containing the milk chocolate mixture (your designated red velvet base), gradually add red gel food coloring, a few drops at a time. Stir continuously until you achieve a deep, vibrant red hue. The other bowl will remain its creamy white color.
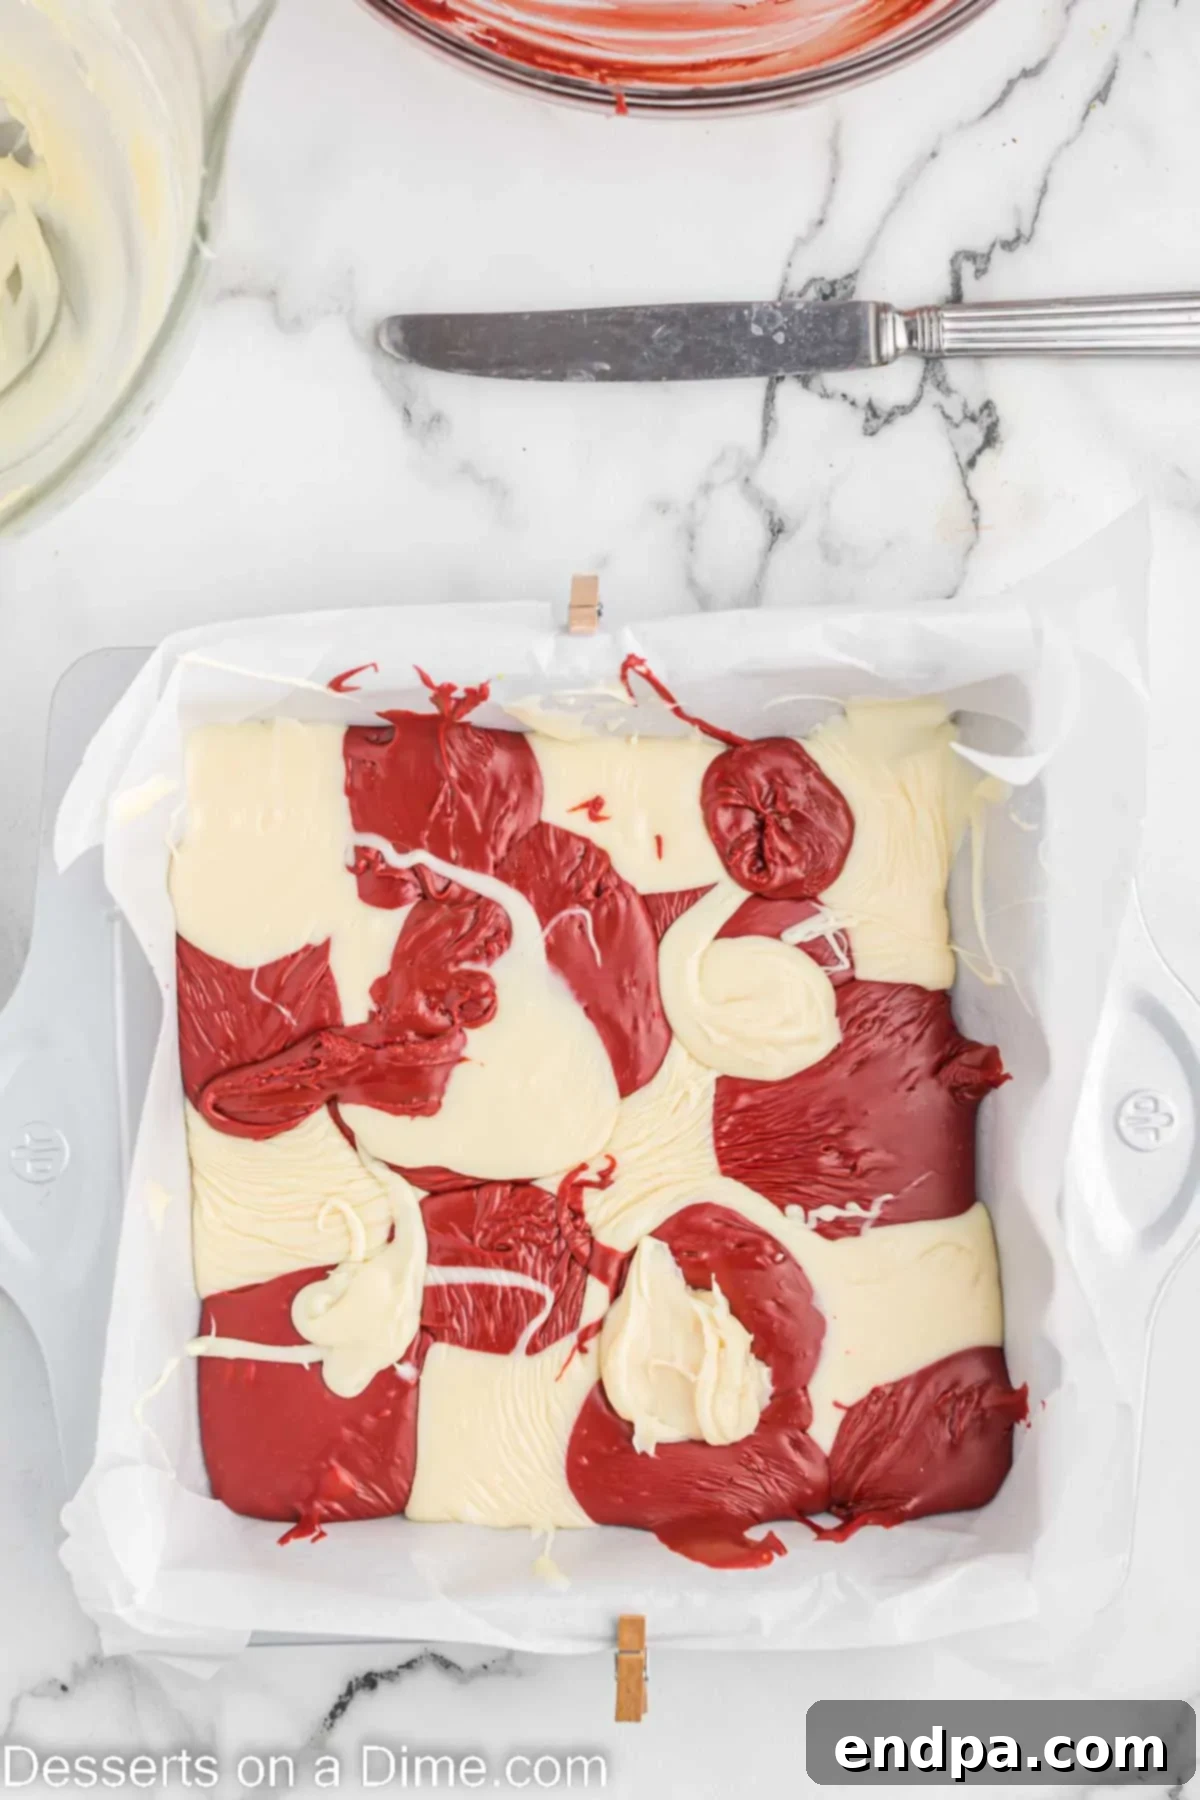
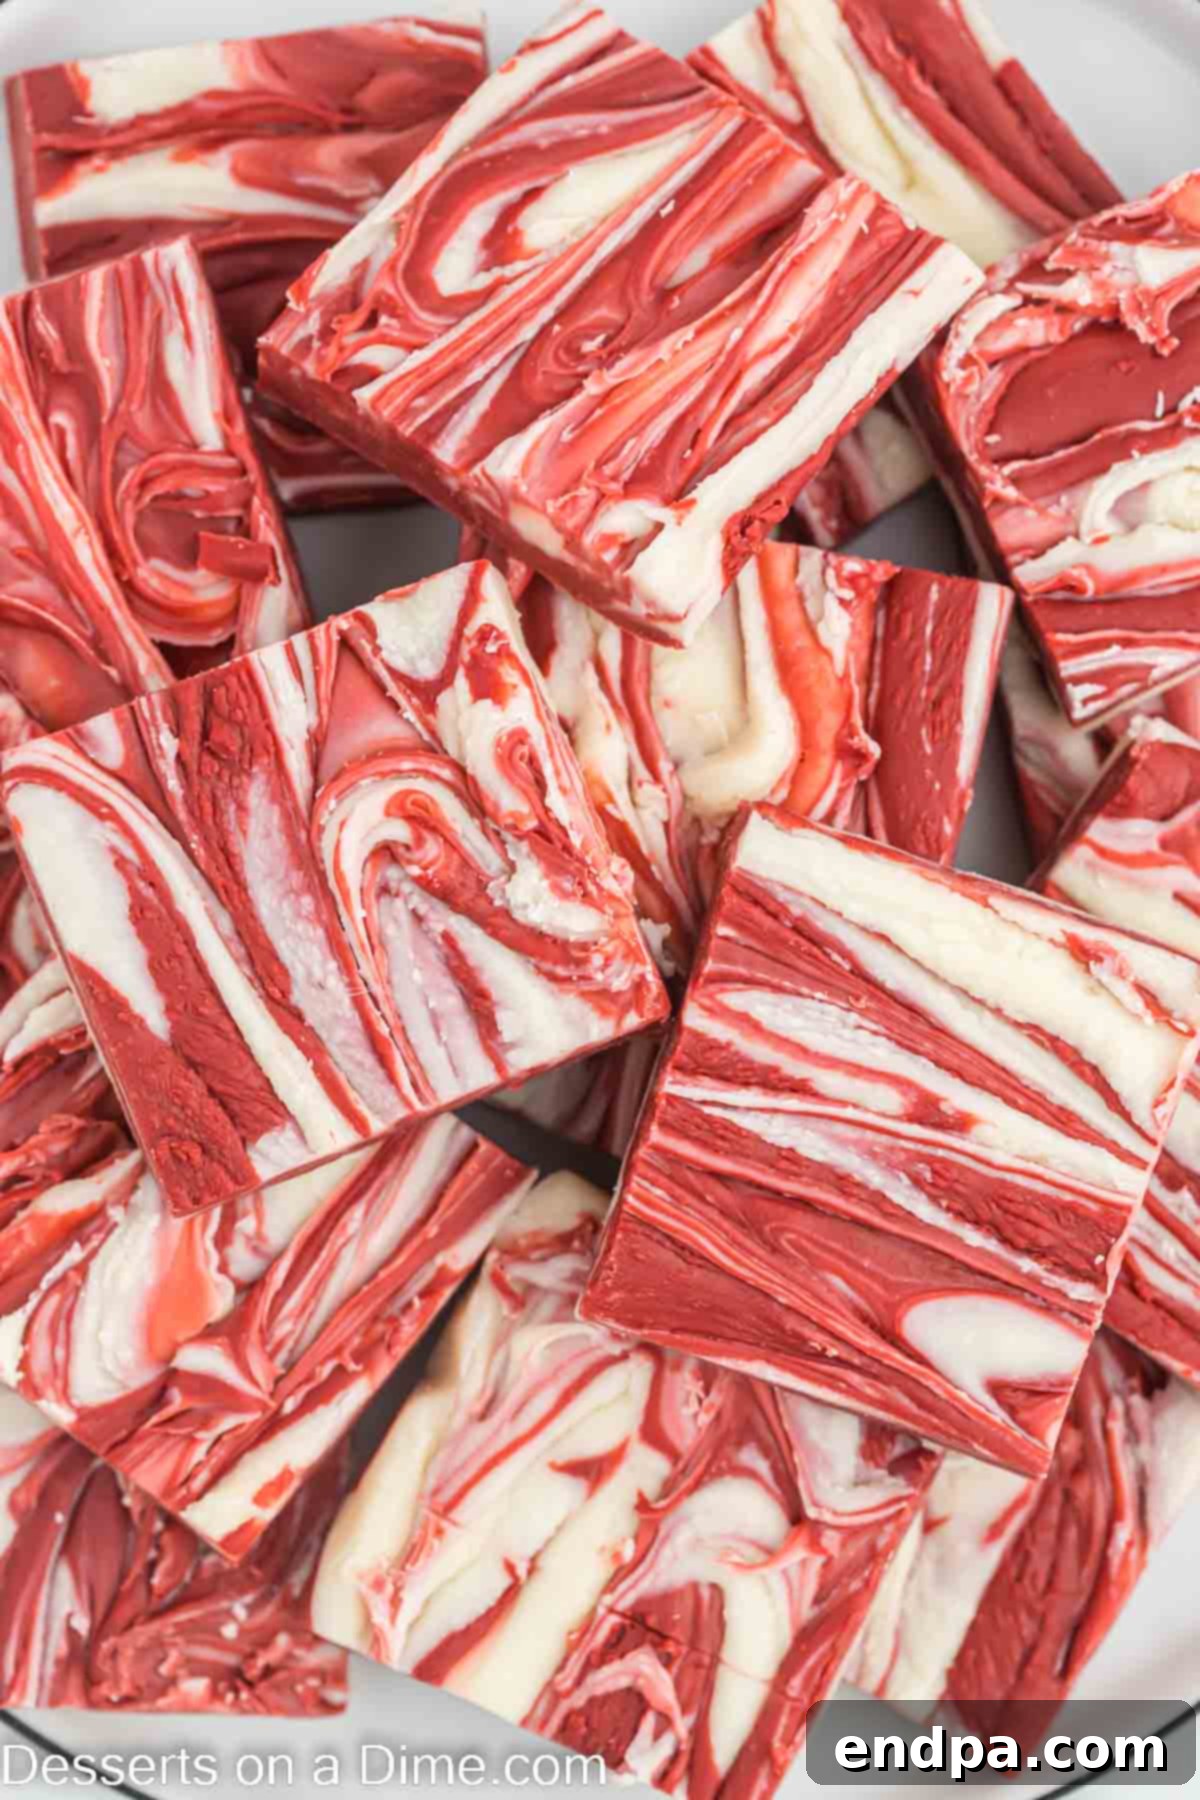
Step 5: Assemble the Swirl. With both red and white fudge mixtures prepared, begin dropping alternating spoonfuls of each into your parchment-lined pan. Distribute the dollops randomly across the pan, creating a patchwork effect. Continue this process until both mixtures have been completely used up, ensuring an even distribution for the best swirl.
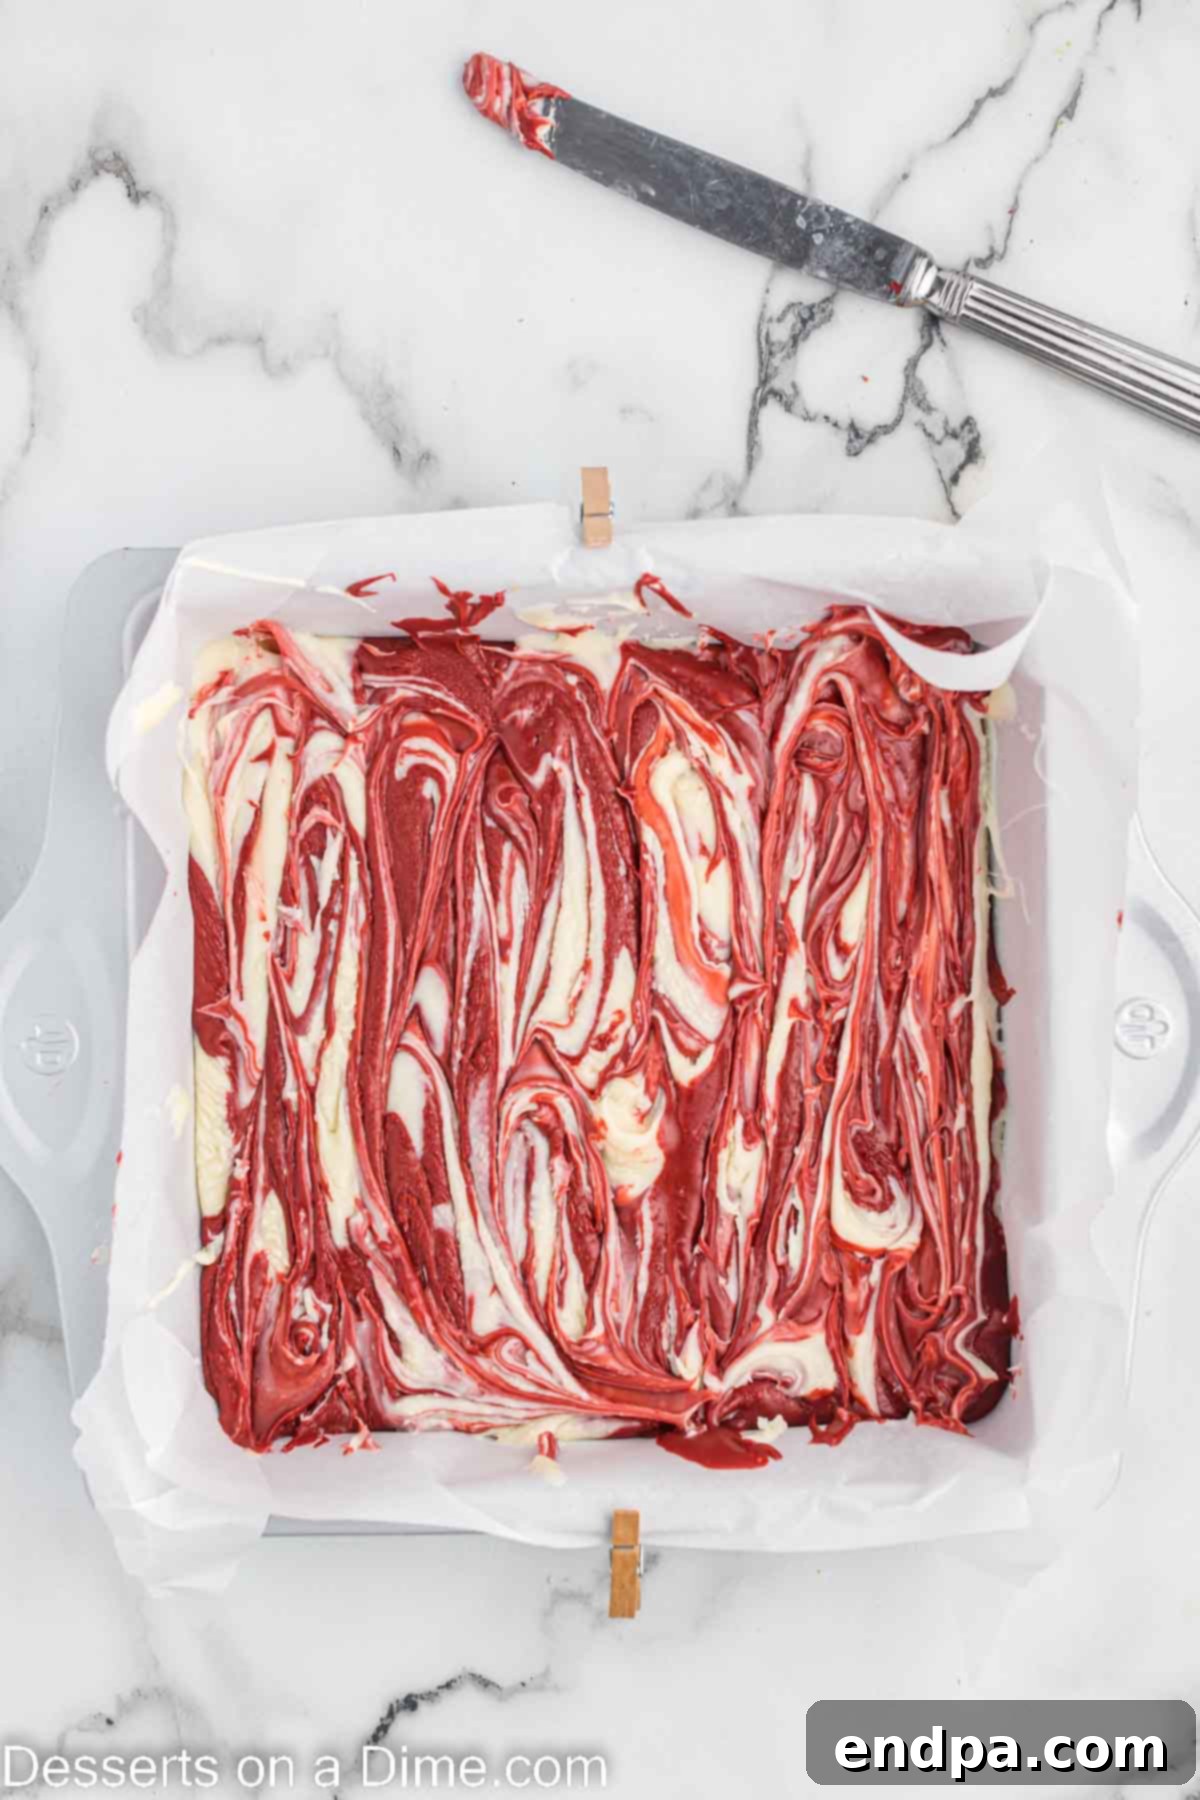
Step 6: Create the Swirl Effect and Chill. Take a thin knife or a skewer and gently swirl it through the red and white fudge mixtures in the pan. Use broad, sweeping motions to create beautiful marble patterns without over-mixing, which could cause the colors to blend too much. Once satisfied with your swirl, place the pan in the refrigerator for at least one hour, or until the fudge is completely hardened and firm to the touch.
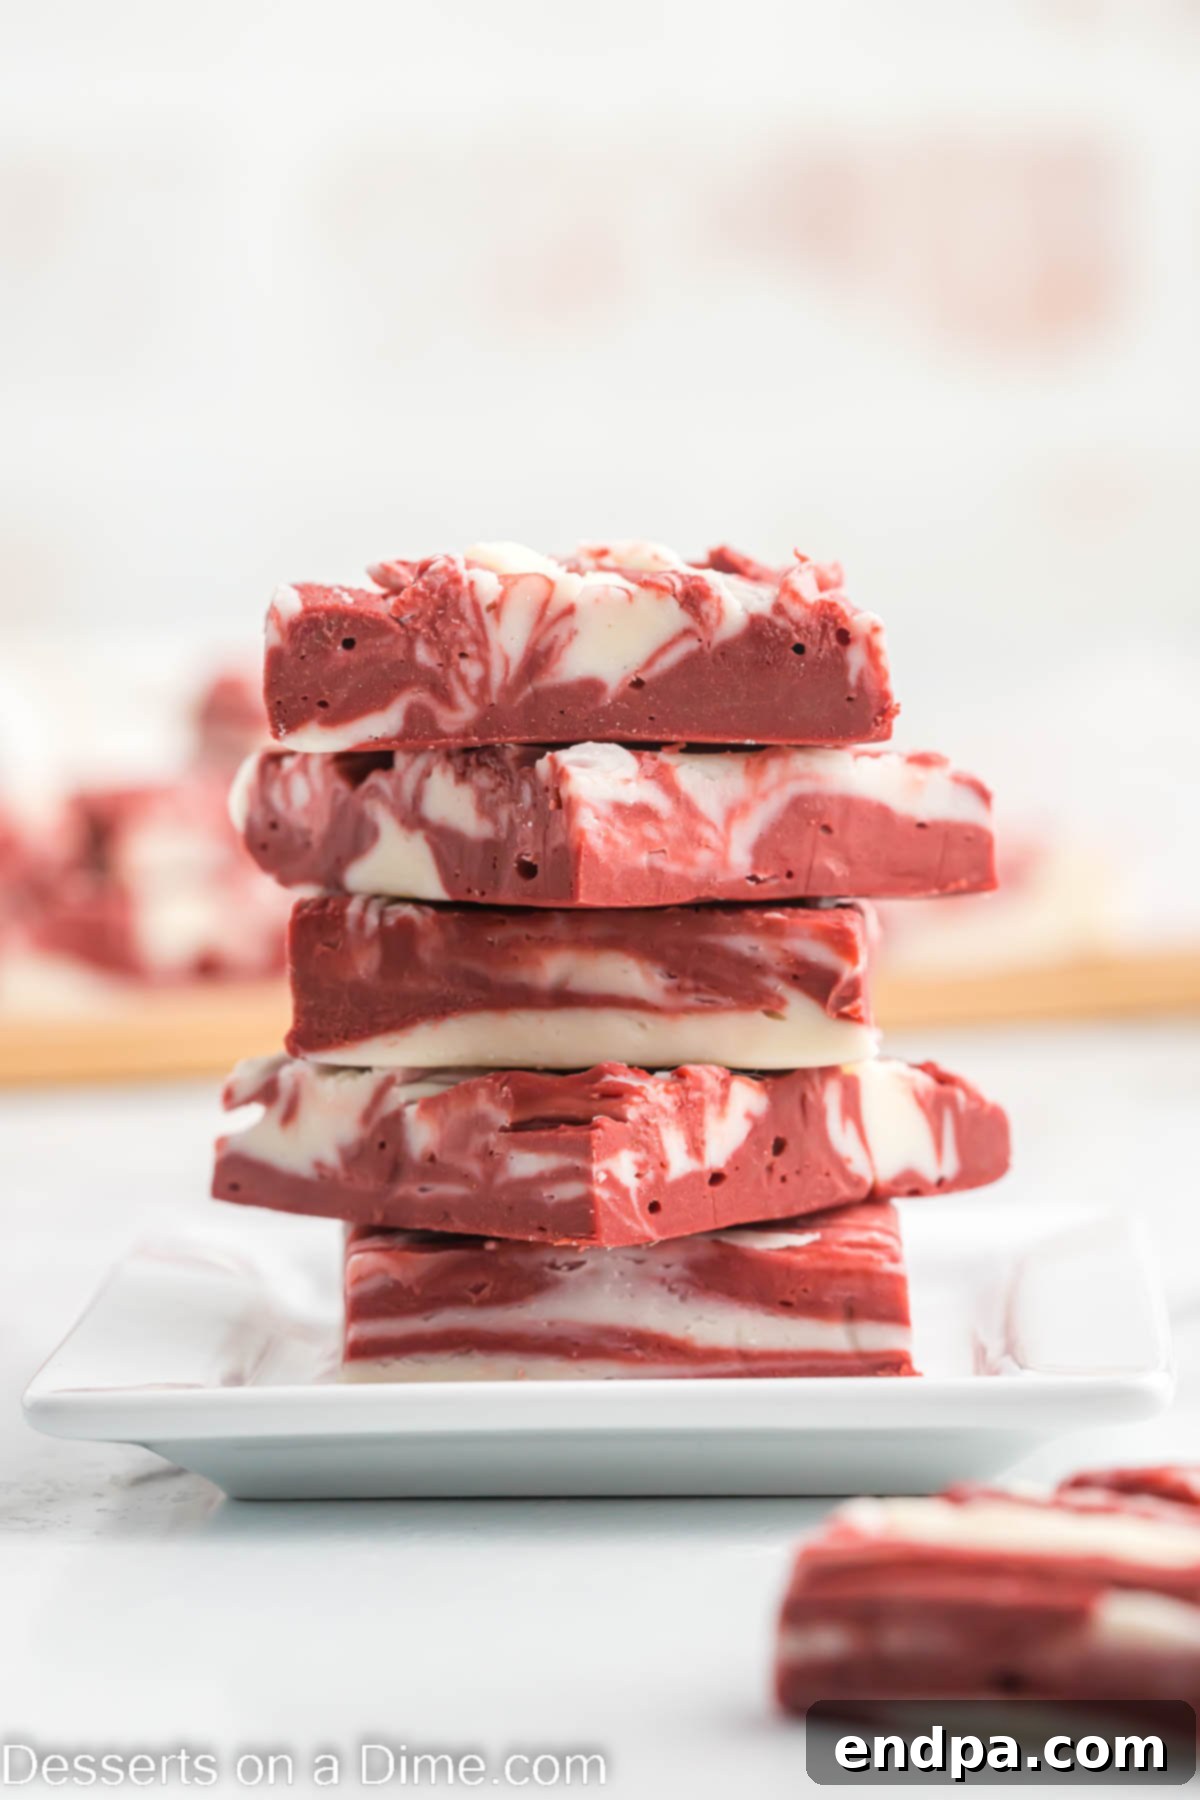
Step 7: Cut into Squares. Once the fudge is thoroughly chilled and firm, carefully lift the entire block out of the pan using the parchment paper handles. Place it on a cutting board. Using a sharp knife, cut the fudge into uniform squares or desired shapes. Clean the knife between cuts for the cleanest edges. Your stunning Red Velvet Fudge is now ready to be enjoyed!
Storing Your Homemade Red Velvet Fudge
Proper storage is essential to maintain the freshness and delightful texture of your homemade Red Velvet Fudge. To keep your fudge at its best, place any leftover pieces in an airtight container. Store this container in the refrigerator for up to 1 week. The cool temperature helps to preserve its firm consistency and prevent it from becoming too soft or sticky. When you’re ready to indulge, remove the fudge from the refrigerator and allow it to sit at room temperature for about 20-30 minutes. This brief period allows the fudge to soften slightly, bringing out its creamy texture and enhancing its rich flavors, making each bite even more enjoyable.
Can You Freeze Fudge? Yes!
Absolutely! Freezing fudge is an excellent way to extend its shelf life, allowing you to prepare desserts in advance for future events or simply to have a delicious treat on hand whenever a craving strikes. This red velvet fudge freezes beautifully. To freeze, arrange the fudge pieces in a single layer or in neat stacks within an airtight, freezer-safe container. To prevent the pieces from sticking together, especially if stacking multiple layers, separate each layer with a sheet of parchment paper. This simple step ensures that your fudge remains easy to separate once thawed.
Properly frozen, your red velvet fudge can maintain its quality for up to 3 months. When you’re ready to enjoy it, simply transfer the container from the freezer to the refrigerator and let it thaw overnight, or allow it to come to room temperature for a couple of hours for a quicker thaw. We frequently utilize this freezing method, as it offers incredible convenience for meal prepping desserts or ensuring we always have a delightful homemade snack ready to go.
Expert Tips for Flawless Fudge Every Time
Achieving perfect fudge, even with a simple microwave recipe, often comes down to a few key techniques and considerations. Here are some expert tips to ensure your Red Velvet Fudge turns out flawlessly:
- Choose the Right Pan Size (9×9 or 8×8): A 9×9 inch square pan is typically ideal for this recipe, yielding fudge squares that are neither too thick nor too thin, making them easy to handle and cut. If you have a preference for a significantly thicker, more substantial fudge, an 8×8 inch square pan can be used. Just remember that thicker fudge will require a slightly longer chilling time to set completely.
- Always Line Your Pan: This is a non-negotiable step for easy removal. Lining the entire pan with parchment paper, leaving an overhang on two sides, creates convenient “handles” that allow you to lift the entire hardened block of fudge out effortlessly. As an alternative or in addition, you can lightly spray the pan with a non-stick cooking spray before placing the parchment paper, or directly if not using parchment, though parchment is highly recommended for cleanest removal.
- Avoid Overcooking the Chocolate: When melting chocolate in the microwave, patience is key. Heat the chocolate in short bursts, specifically 30-second intervals. After each interval, remove the bowl and stir vigorously, even if the chocolate doesn’t appear fully melted. The residual heat will continue to melt the chocolate as you stir. Overcooking can lead to scorched chocolate or a thick, grainy texture, which is difficult to recover from.
- Use a Large Microwave-Safe Bowl: Ensure you are using a bowl that is generously sized and clearly marked as microwave-safe. Chocolate expands slightly when melted, and you’ll need ample room for stirring without making a mess. A bowl that’s too small can lead to spills and uneven heating.
- Consider a Double Boiler for Melting: While this recipe is designed for microwave convenience, some bakers prefer the controlled, gentle heat of a double boiler for melting chocolate. If you opt for this method, place your chocolate chips, butter, and sweetened condensed milk in a heatproof bowl set over a saucepan of simmering water (ensuring the bowl does not touch the water). Stir constantly until smooth and melted, then proceed with the recipe as directed.
- Swirl Gently for Best Marble Effect: The beautiful red and white swirl is a hallmark of this fudge. After dropping alternating spoonfuls of the colored mixtures into the pan, use a knife, skewer, or even the tip of a spoon to gently swirl the colors together. Avoid over-stirring or vigorously mixing, as this will cause the colors to fully combine, losing that distinct, attractive marble design. Less is more when it comes to swirling for visual impact.
- Chill Thoroughly Before Cutting: Patience pays off! Resist the urge to cut the fudge before it has completely hardened in the refrigerator. Allowing it to chill for the recommended time (at least an hour, or longer if needed) ensures that the fudge is firm enough to cut cleanly and evenly. This results in beautifully defined squares with crisp edges, making for a much more appealing presentation.
More Red Velvet Delights to Explore
Easy Cupcake
Best Red Velvet Cupcake Recipe
Indulge in moist, tender cupcakes with a classic tangy cream cheese frosting.
Cookies
Red Velvet Cake Mix Cookies
Whip up these easy, chewy cookies using a convenient cake mix base.
Cakes
Red Velvet Cake Balls Recipe
Bite-sized delights, perfect for parties and holiday dessert platters.
Discover Other Easy Fudge Creations
If you’ve fallen in love with the simplicity and deliciousness of this Red Velvet Fudge, you’ll be thrilled to explore our other fantastic fudge recipes. Each one is designed for ease and maximum flavor, ensuring that satisfying your sweet cravings is always a delightful experience. Try these popular variations:
- Unicorn Fudge Recipe: A whimsical and colorful treat that’s as fun to make as it is to eat, perfect for kids’ parties.
- Peanut Butter Chocolate Chip Fudge: The classic combination of peanut butter and chocolate, made simple in a creamy fudge format.
- 2 Ingredient Chocolate Peanut Butter Fudge: Unbelievably easy and incredibly delicious, this recipe proves you don’t need many ingredients for amazing flavor.
- Marshmallow Fluff Fudge: A wonderfully smooth and fluffy fudge that melts in your mouth, thanks to the addition of marshmallow fluff.
- Christmas Fudge: Festive and fun, this fudge is packed with holiday cheer and perfect for seasonal gifting.
We hope this detailed guide encourages you to give this incredibly tasty Red Velvet Fudge recipe a try. It’s a rewarding experience that yields a beautiful and delicious treat perfect for sharing or savoring yourself. Once you’ve created your own batch, please come back and share your experience by leaving a comment and a star rating for the recipe below!
Pin
Red Velvet Fudge
Ingredients
- 12 oz White Chocolate Chips divided
- 6 oz Milk Chocolate Chips divided
- 1 can sweetened condensed milk 14 oz can
- 2 Tablespoons Butter divided
- 2 teaspoons Vanilla Extract divided
- Red Gel Food Coloring
Instructions
- Line a 9×9 inch square pan with parchment paper, allowing the paper to overhang on two sides for easy removal, and set it aside.
- In a microwave-safe bowl, place 9 ounces of white chocolate chips. In a separate microwave-safe bowl, combine the milk chocolate chips and the remaining 3 ounces of white chocolate chips. To each bowl, add 1 tablespoon of butter and half of the sweetened condensed milk.
- Microwave one bowl on high for 30 seconds. Remove and stir well. Repeat for the second bowl.
- Continue to microwave each bowl in 30-second intervals, stirring thoroughly after each interval, until the chocolate chips are completely melted and smooth. Be careful not to overcook the chocolate.
- Stir 1 teaspoon of vanilla extract into each bowl. Add red gel food coloring to the bowl with the milk chocolate mixture, a little at a time, until a vibrant red color is achieved.
- Alternately drop spoonfuls of the red and white fudge mixtures into the prepared pan, creating a patchwork design, until all the mixtures have been used.
- Gently take a knife and swirl it through the fudge mixtures to create a beautiful marble pattern. Avoid over-mixing to preserve the distinct colors.
- Refrigerate the fudge for at least one hour, or until it is completely hardened.
- Lift the parchment paper out of the pan and place the fudge on a cutting board. Cut the hardened fudge into cubes.
Recipe Notes
Store any leftover fudge in an airtight container in the refrigerator for up to 1 week. For the best texture, let the fudge sit at room temperature for 20-30 minutes before enjoying.
Nutrition Facts
Pin This Now to Remember It Later
Pin Recipe
