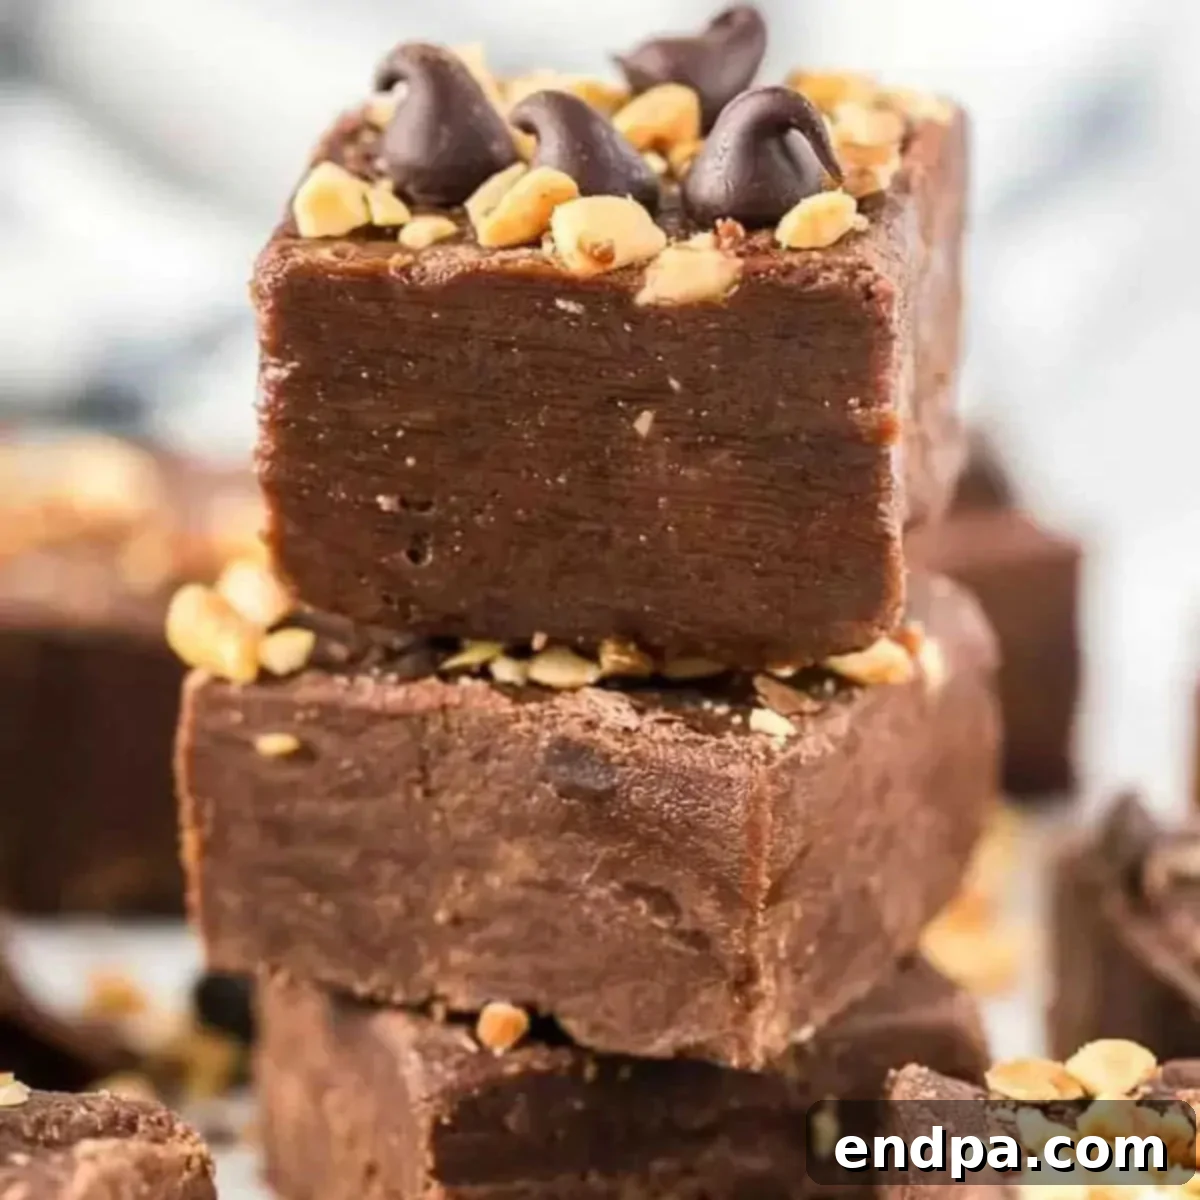
Indulge in the ultimate classic confection with this incredibly easy and unbelievably delicious Chocolate Peanut Butter Fudge. This creamy, rich, and intensely satisfying treat requires just 5 simple ingredients and absolutely no baking, making it a perfect no-fuss dessert for any occasion. Whether you’re preparing for festive holidays, hosting a lively party, or looking for a delightful homemade gift, this quick recipe is your go-to solution for a decadent delight that comes together in minutes.
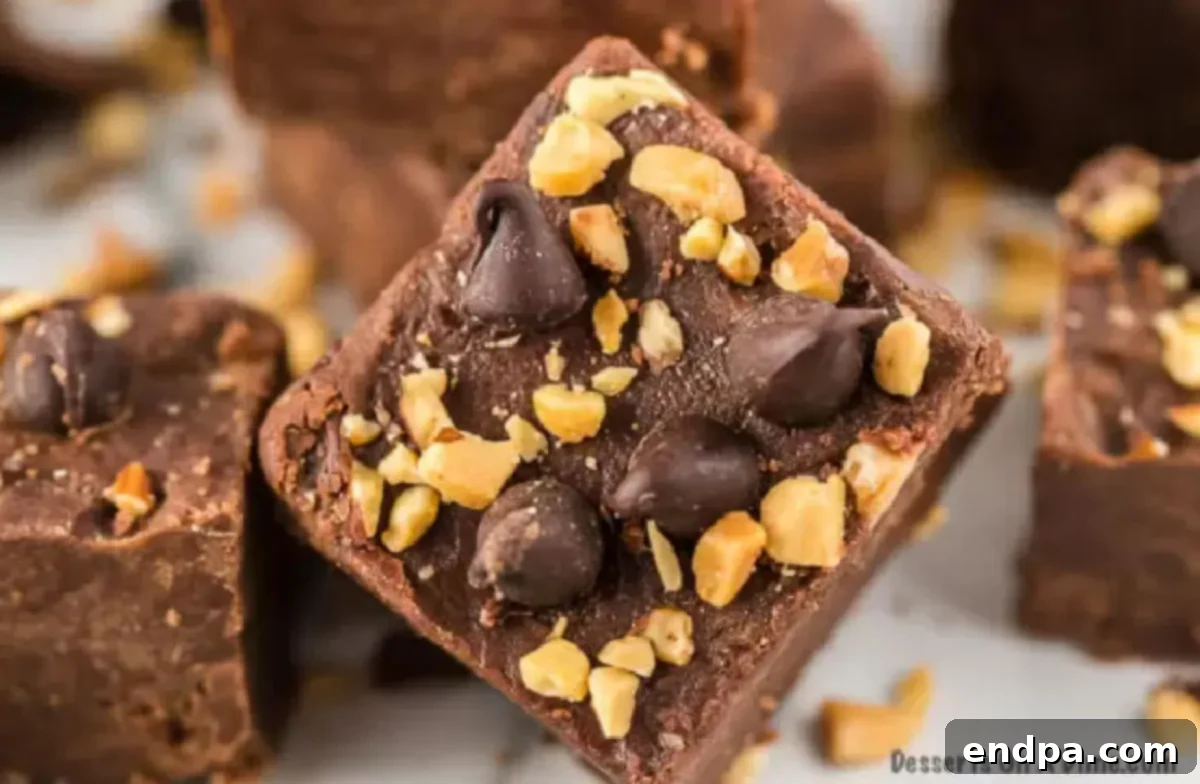
For anyone who adores the timeless combination of chocolate and peanut butter, this fudge recipe is a dream come true. It’s a wonderfully simple dessert that delivers big on flavor without requiring extensive effort or specialized kitchen gadgets. Forget about complex candy-making techniques or temperamental candy thermometers. With minimal prep time and a handful of readily available pantry staples, you can effortlessly whip up a luxurious, creamy treat that not only tastes divine but also looks like it was meticulously crafted in a gourmet candy shop.
This easy homemade fudge recipe is not only perfect for personal indulgence but also shines during special occasions. Its smooth, melt-in-your-mouth texture and rich flavor profile make it an ideal candidate for holiday dessert tables, birthday celebrations, or as a heartfelt, handcrafted gift for friends and family. The beauty of this recipe lies in its simplicity: just melt your ingredients, mix them until smooth, allow the mixture to set, and then slice into irresistible squares. It’s a foolproof method that guarantees success, whether you’re a seasoned baker or just starting your culinary journey. This quick and delightful fudge is truly a must-try for its ease, versatility, and undeniable deliciousness.
Creating homemade fudge is an enjoyable and rewarding experience. Once you’ve mastered this chocolate peanut butter rendition, you might want to explore other equally simple and satisfying fudge recipes. Be sure to try our Easy Rocky Road Fudge Recipe for a delightful mix of marshmallows and nuts, or our Easy Vanilla Fudge Recipe for a classic, sweet treat. Having made various types of fudge for over a decade, I can confidently say that these recipes are genuinely easy to follow and consistently yield fantastic results.
Table of Contents
- Why This Recipe Works
- Ingredients for Perfect Fudge
- How To Make Chocolate Peanut Butter Fudge: Step-by-Step
- Mastering the Art of Cutting Fudge
- Expert Tips for Fudge Perfection
- Creative Substitutions and Additions
- Frequently Asked Questions About Fudge
- More Decadent Chocolate Peanut Butter Desserts
Why This Recipe Works So Perfectly
This chocolate peanut butter fudge recipe stands out for several compelling reasons, making it a favorite for home cooks and dessert enthusiasts alike. Its straightforward nature and incredible results are hard to beat.
- Only 5 Ingredients – The simplicity of this recipe is unmatched. You won’t need to hunt for obscure items or spend a fortune at the grocery store. With just five common pantry staples, you can create a luxurious dessert without any complicated steps or a dauntingly long shopping list, saving you both time and effort.
- The Ultimate Chocolate + Peanut Butter Combo – This iconic flavor pairing is beloved by nearly everyone. The rich, deep notes of chocolate perfectly complement the creamy, slightly salty taste of peanut butter, creating a harmonious balance that is truly irresistible. This combination ensures a crowd-pleasing treat every single time.
- No Special Tools Needed – Say goodbye to the anxiety of using a candy thermometer or investing in specialized confectionery equipment. This recipe is designed to be effortlessly made using basic kitchen tools you likely already own. Just a microwave-safe bowl, a spatula, and a baking pan are all you need to achieve fudge perfection.
- Quick & Easy Preparation – In today’s fast-paced world, quick dessert recipes are invaluable. This fudge requires minimal hands-on time, allowing you to whip it up in minutes. After a short chilling period, it’s ready to be sliced and enjoyed, making it an ideal choice for last-minute treats or when you’re short on time but still want something special.
- Great for Gifting – Homemade gifts carry a special touch, and this fudge is no exception. Its elegant appearance and delectable taste make it a wonderful present for holidays, hostess gifts, or any special occasion. Simply slice the fudge into neat squares, arrange them in a decorative box or bag, and share the joy of your homemade creation with loved ones.
Ingredients for Perfect Chocolate Peanut Butter Fudge
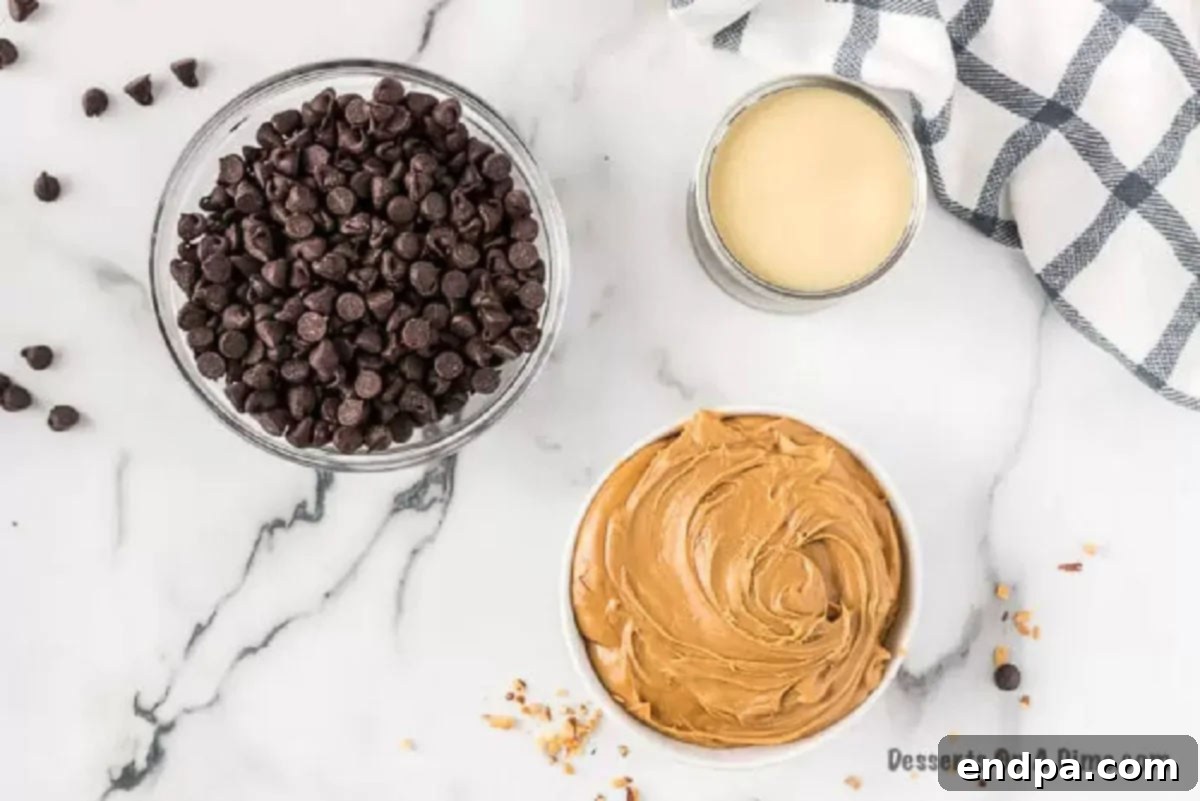
The magic of this chocolate peanut butter fudge lies in its simplicity and the quality of its few ingredients. Each component plays a vital role in achieving that perfect creamy texture and balanced flavor. Here’s what you’ll need:
- Semi-Sweet Chocolate Chips – These are the backbone of our chocolate layer, providing a rich, deep chocolate flavor that isn’t overly sweet. The semi-sweet variety beautifully balances the richness of the peanut butter and the sweetness of the condensed milk, resulting in a perfectly harmonious taste.
- Sweetened Condensed Milk – This is the secret to our fudge’s incredible creaminess and its ability to set without a candy thermometer. It contributes sweetness and a luxurious smooth texture, ensuring your fudge is soft and delectable, not crumbly or dry.
- Creamy Peanut Butter – For the smoothest, most luscious fudge, creamy peanut butter is essential. Its emulsified texture melts seamlessly into the chocolate mixture, providing that distinctive nutty flavor and velvety mouthfeel that peanut butter lovers crave.
- Peanuts (Optional) – If you enjoy a textural contrast in your fudge, chopped peanuts are a fantastic addition. They introduce a satisfying crunch and a hint of savory saltiness, which wonderfully complements the rich, sweet fudge base. These can be mixed in or sprinkled on top.
- Extra Chocolate Chips (Optional) – For an added touch of decadence and visual appeal, a sprinkle of extra chocolate chips on top of the fudge before it sets creates a beautiful finish and another layer of chocolatey goodness.
You’ll find the full, precise measurements for these ingredients in the detailed recipe card at the bottom of this article, ensuring you have everything you need for fudge-making success.
How To Make Chocolate Peanut Butter Fudge: Step-by-Step Guide
Making this incredible chocolate peanut butter fudge is an incredibly straightforward process, perfect for even novice bakers. Just follow these simple steps to create a treat that tastes like it came from a professional confectionery.
- Step 1: Melt the Chocolate Chips
Begin by placing your semi-sweet chocolate chips into a large, microwave-safe bowl. Microwave the chocolate chips in short, 30-second intervals. After each interval, be sure to remove the bowl and stir the chips thoroughly with a spatula. This prevents scorching and ensures even melting. Continue this process until the chocolate is completely smooth and free of any lumps.
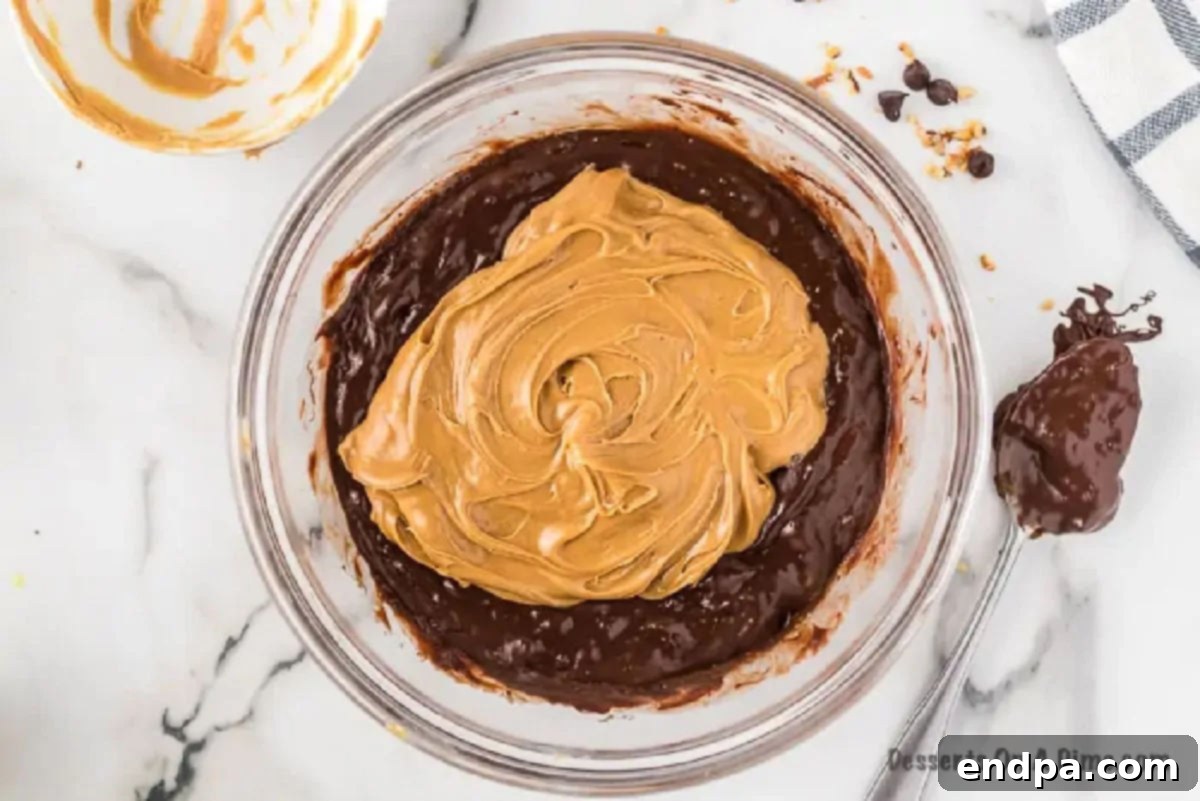
Step 2: Incorporate Sweetened Condensed Milk and Peanut Butter
Once your chocolate chips are beautifully melted and smooth, it’s time to add the sweetened condensed milk and creamy peanut butter to the bowl. Stir these ingredients vigorously and continuously until the mixture is thoroughly combined, smooth, and uniform in color and texture. The heat from the melted chocolate will help incorporate these ingredients easily, resulting in a rich and glossy fudge base.
Step 3: Prepare the Baking Dish, Add Toppings, and Set
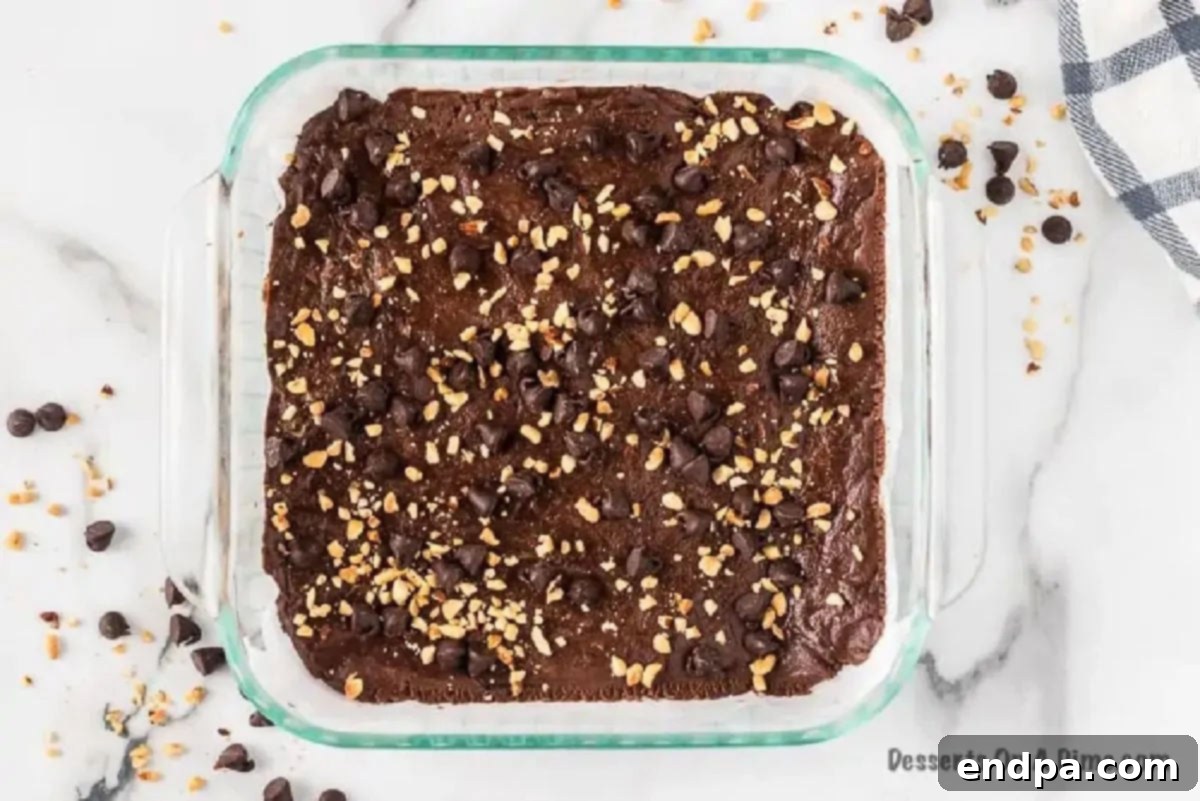
Before pouring your fudge mixture, prepare an 8×8 inch square baking pan by lining it with aluminum foil or parchment paper, leaving an overhang on the sides. This overhang will act as “handles” later, making it incredibly easy to lift the set fudge out of the pan. Pour the smooth fudge mixture evenly into the prepared pan. If desired, immediately sprinkle the top with extra chocolate chips and chopped peanuts for added texture and visual appeal. Allow the chocolate fudge to cool completely at room temperature for about 30 minutes, then transfer it to the refrigerator to chill and set for at least 1 hour, or until firm. Once fully set, lift the fudge out using the foil or parchment paper, then cut and serve. Enjoy your homemade delight!
Mastering the Art of Cutting Fudge for Perfect Squares
Achieving clean, professional-looking fudge squares is simpler than you might think, but it does require a few key techniques. Follow these recommendations to ensure your fudge slices beautifully every time, presenting a perfect treat for serving or gifting.
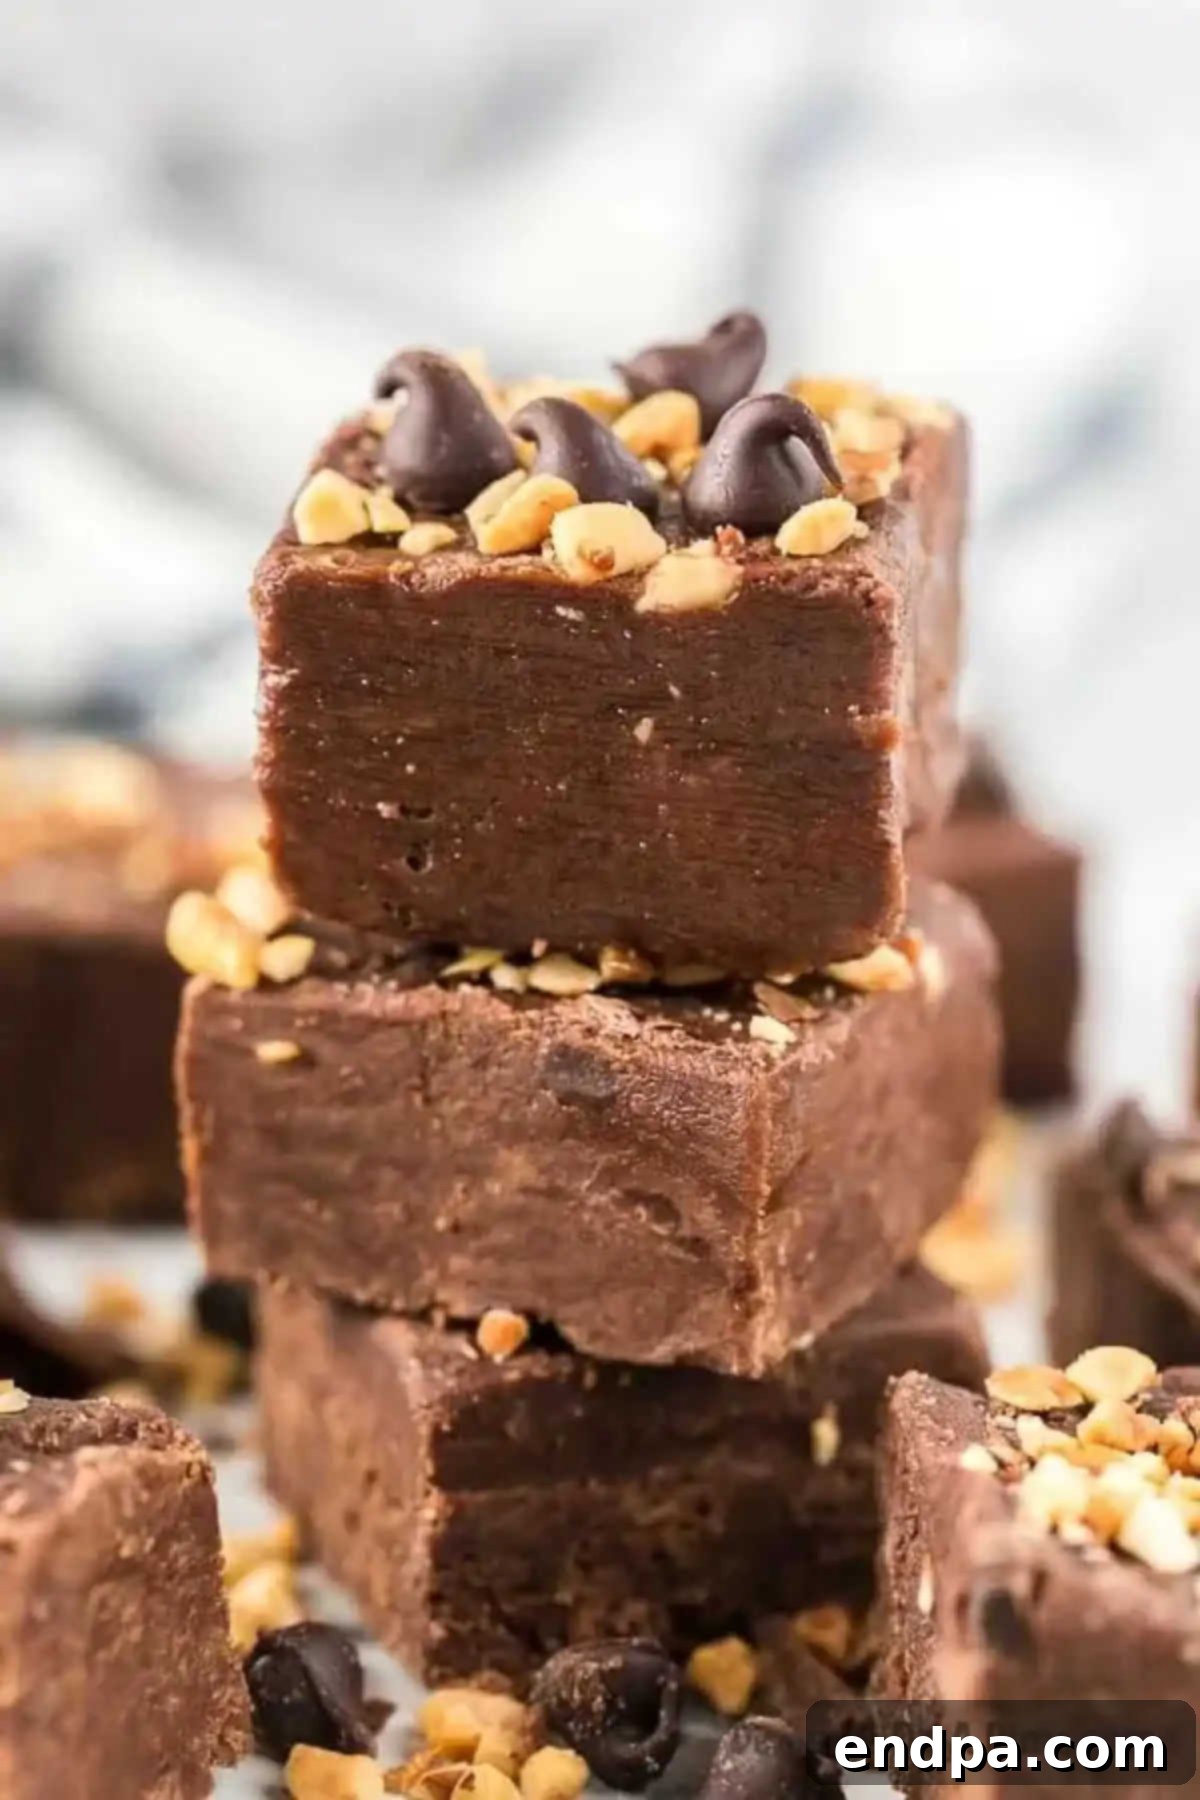
- Remove Fudge from Pan with Ease – The first step to neat cuts is to remove the entire block of fudge from its pan. If you followed the advice to line your pan with parchment paper or aluminum foil, this step will be incredibly easy. Simply use the overhang of the lining as handles to lift the firm fudge block out onto a clean cutting board.
- Utilize a Warm Knife – A warm knife is your best friend when it comes to cutting fudge, especially dense, creamy varieties. Before each cut, run your sharp knife under hot tap water for a few seconds, then thoroughly wipe it dry. The warmth from the blade will help it glide smoothly through the fudge, preventing sticking and creating crisp, clean edges for each square. Repeat this warming and wiping process for every few cuts.
- Employ a Sharp Knife for Precision – While a warm knife is crucial, a sharp knife is equally important. A dull knife will drag and tear the fudge, leading to messy edges. Use a good quality, sharp chef’s knife or a long, thin knife to ensure the cleanest possible cuts. Place the fudge block on a sturdy cutting board and, with a confident, steady hand, begin slicing the fudge into your preferred size and shape.
- Ensure Fudge is Thoroughly Chilled (Cold Fudge is Key) – This is perhaps the most critical tip. Fudge is significantly easier to cut when it is thoroughly cold and firm. Attempting to cut fudge that has warmed to room temperature will result in a soft, sticky mess that squishes rather than slices cleanly. Always ensure your fudge has chilled in the refrigerator for the recommended time (at least 1 hour, preferably longer) before attempting to cut it. A cold block of fudge will hold its shape beautifully under the knife.
Expert Tips for Fudge Perfection
To elevate your chocolate peanut butter fudge from good to absolutely outstanding, consider these expert tips. These small adjustments and considerations can make a significant difference in the final taste, texture, and presentation of your homemade treat.
- Use Good-Quality Chocolate Chips – Since this recipe boasts a minimal ingredient list, the flavor of each component truly shines through. Investing in a good quality brand of semi-sweet chocolate chips will significantly enhance the depth and richness of your fudge. The better the chocolate, the more decadent your fudge will be.
- Don’t Skip the Parchment Paper (or Foil) – This seemingly small step is a game-changer. Lining your baking pan with parchment paper or aluminum foil (with an overhang) creates a non-stick surface and provides convenient “handles” to easily lift the entire block of set fudge from the pan. This makes both removing and slicing the fudge much easier and cleaner, minimizing mess.
- Work Quickly When Mixing – Once your chocolate chips are melted and you add the sweetened condensed milk and peanut butter, it’s important to stir quickly and efficiently. The mixture will begin to firm up as it cools, so incorporating all ingredients thoroughly while still warm ensures a smooth, homogeneous fudge with no unmixed pockets.
- Add Toppings While Warm – If you plan to add optional toppings like chopped peanuts or extra chocolate chips, sprinkle them onto the fudge mixture immediately after pouring it into the prepared pan, while the fudge is still warm and pliable. This ensures that the toppings adhere properly and don’t fall off once the fudge sets.
- Chill Until Fully Set – Patience is key for perfectly set fudge. While the fudge may seem firm after an hour, allowing it to chill in the refrigerator for at least 2-3 hours (or even overnight) ensures it is completely firm throughout. This makes for easier, cleaner cutting and a better overall texture.
- Achieve Clean Slices – For neat, professional-looking squares, use a sharp knife and clean it between cuts. Dip the knife in hot water and wipe it dry before each slice. This technique prevents the fudge from sticking to the blade and creates beautifully crisp edges, enhancing presentation.
- Store Properly for Freshness – To maintain the freshness, texture, and flavor of your homemade fudge, always store it in an airtight container. This prevents the fudge from drying out, absorbing odors from the refrigerator, or becoming stale. Proper storage ensures your delicious treat lasts longer.
Creative Substitutions and Additions to Your Fudge
One of the joys of making homemade fudge is the endless possibilities for customization. This chocolate peanut butter fudge recipe is a fantastic canvas for your creativity. Feel free to experiment with these substitutions and additions to tailor the fudge to your taste or to suit a specific occasion.
- A Touch of Vanilla Extract – While not strictly necessary, a hint of pure vanilla extract (about 1 teaspoon) can truly elevate the flavor profile. The vanilla complements both the chocolate and peanut butter, adding a layer of aromatic depth that makes the fudge even more irresistible. Stir it in along with the sweetened condensed milk and peanut butter.
- Vary Your Chocolate Chips – The base recipe calls for semi-sweet chocolate chips, but don’t limit yourself! You can experiment with milk chocolate chips for a sweeter, creamier fudge, or dark chocolate chips for a more intense, slightly bitter contrast. You can even use a mix of different chocolate varieties to create a unique blend of flavors.
- Explore Other Nut Butters – While peanut butter is classic, you can easily substitute it with another creamy nut butter if you have dietary restrictions or simply want to try something new. Almond butter, cashew butter, or even sunflower seed butter can work beautifully, though they may alter the flavor profile slightly. Natural peanut butter can also be used, but ensure it’s well-stirred to prevent oil separation.
- Opt for Crunchy Peanut Butter – If you crave extra texture, swap out the creamy peanut butter for crunchy peanut butter. This will introduce delightful pockets of peanut pieces throughout the fudge, giving it a more robust and varied mouthfeel. While the fudge won’t be as uniformly smooth, the added crunch provides an exciting contrast.
- Mix in Your Favorite Candy or Add-ins – This is where the fun really begins! Transform your fudge by mixing in small candies or other delicious add-ins. Consider mini M&M’s, colorful Reese’s Pieces, tiny marshmallows for a softer bite, or even peanut butter chips for an intensified peanut butter flavor. Fold them into the fudge mixture just before pouring it into the pan.
- Decorate with Festive Sprinkles – For a vibrant and celebratory look, sprinkle the top of your fudge with colorful sprinkles, chopped nuts, or crushed candy pieces. This is a fantastic option if you prefer your additions on top rather than mixed into the fudge itself. Choose different color sprinkles to match holiday themes (like red and green for Christmas), birthday parties, or any special occasion throughout the year.
- Cut into Fun Shapes – Instead of traditional squares or bars, use cookie cutters to create unique shapes. Hearts are perfect for Valentine’s Day, stars for patriotic holidays, or even tiny Christmas trees for a festive touch. Ensure the fudge is very cold for clean cuts when using cookie cutters. This makes the fudge even more appealing, especially for children or themed events.
Frequently Asked Questions About Homemade Fudge
Here are some common questions about making and storing homemade fudge, along with helpful answers to ensure your fudge-making experience is smooth and successful.
When stored correctly, homemade fudge can maintain its freshness and deliciousness for a considerable amount of time. If you have any leftovers, simply transfer the fudge to an airtight container with a tightly fitting lid. Stored at room temperature, it will remain fresh for about a week. If you prefer a firmer fudge or live in a warm climate, storing it in the refrigerator can extend its freshness. This microwave fudge is not only a fantastic treat but also stores exceptionally well, making it perfect for enjoying over several days.
Absolutely, freezing fudge is a wonderful way to extend its shelf life and ensure you always have a delicious treat on hand. The process is straightforward and doesn’t require any special expertise. Even if you don’t consider yourself an experienced baker, you can easily freeze homemade fudge. For detailed tips and tricks on how to freeze fudge properly, you can refer to our guide: Can You Freeze Fudge. When freezing, use a freezer-safe, airtight container, and your fudge can last for up to a month, allowing you to enjoy it far beyond its typical fresh lifespan.
Proper storage is crucial for preserving the quality and flavor of your homemade fudge. For optimal freshness, store fudge in an airtight container. If stacking multiple layers of fudge, it’s highly recommended to place a sheet of wax paper or parchment paper between each layer. This prevents the pieces from sticking together and helps maintain their individual shape and texture. While refrigeration can extend its life, fudge is generally best stored at room temperature, where it will remain fresh and delightfully soft for up to 7 days. If you’re serving fudge on a cookie tray, cover the entire tray tightly with plastic wrap to prevent it from drying out.
More Decadent Chocolate Peanut Butter Desserts to Explore
If your love for the chocolate and peanut butter combination knows no bounds, you’re in luck! There are countless ways to enjoy this classic pairing in dessert form. Here are a few more irresistible recipes you might enjoy trying after mastering this fudge:
- No Bake Chocolate Peanut Butter Bars: An equally simple and delightful no-bake treat that features a rich peanut butter base topped with a luscious chocolate layer, perfect for a quick snack or dessert.
- Easy Chocolate Peanut Butter Cookies: Soft, chewy, and bursting with the iconic duo of chocolate and peanut butter, these cookies are a comforting classic that’s easy to bake and always a hit.
- 2 Ingredient Chocolate Peanut Butter Fudge: For those moments when you need an even quicker fudge fix, this ultra-simple recipe proves that sometimes less is truly more, delivering fantastic flavor with minimal effort.
We encourage you to try this incredibly easy chocolate peanut butter fudge recipe and experience the joy of making a decadent treat at home. Once you do, please leave a comment below and share your star rating – we love hearing about your culinary adventures!
Pin
Chocolate Peanut Butter Fudge Recipe
15
1
1 15
24
American
Dessert
230
Carrie Barnard
Ingredients
- 12 oz Semi-Sweet Chocolate Chips
- 14 oz Sweetened Condensed Milk
- 1 1/2 cup Creamy Peanut Butter
- Peanuts and Chocolate Chips for topping – Optional
Instructions
- Place the chocolate chips in a microwave-safe dish. Microwave the chips in 30-second intervals, stirring between each interval until they are completely melted and smooth.
- Stir in the sweetened condensed milk and creamy peanut butter until the mixture is thoroughly combined and smooth.
- Line an 8×8 inch baking dish with foil or parchment paper, leaving an overhang. Pour the fudge mixture into the prepared pan and, if desired, top with extra chocolate chips and chopped peanuts.
- Allow the fudge to cool at room temperature for about 30 minutes, then place it in the refrigerator to set completely for approximately 1 hour or until firm. Once set, lift the fudge out of the pan, cut into squares, and serve. Enjoy!
Nutrition Facts
Per serving (24 servings per recipe):
- Calories:
- 230 kcal
- Carbohydrates:
- 20g
- Protein:
- 6g
- Fat:
- 15g
- Saturated Fat:
- 6g
- Cholesterol:
- 6mg
- Sodium:
- 96mg
- Potassium:
- 246mg
- Fiber:
- 2g
- Sugar:
- 16g
- Vitamin A:
- 51 IU
- Vitamin C:
- 1mg
- Calcium:
- 63mg
- Iron:
- 1mg
Pin This Now to Remember It Later
Pin Recipe
