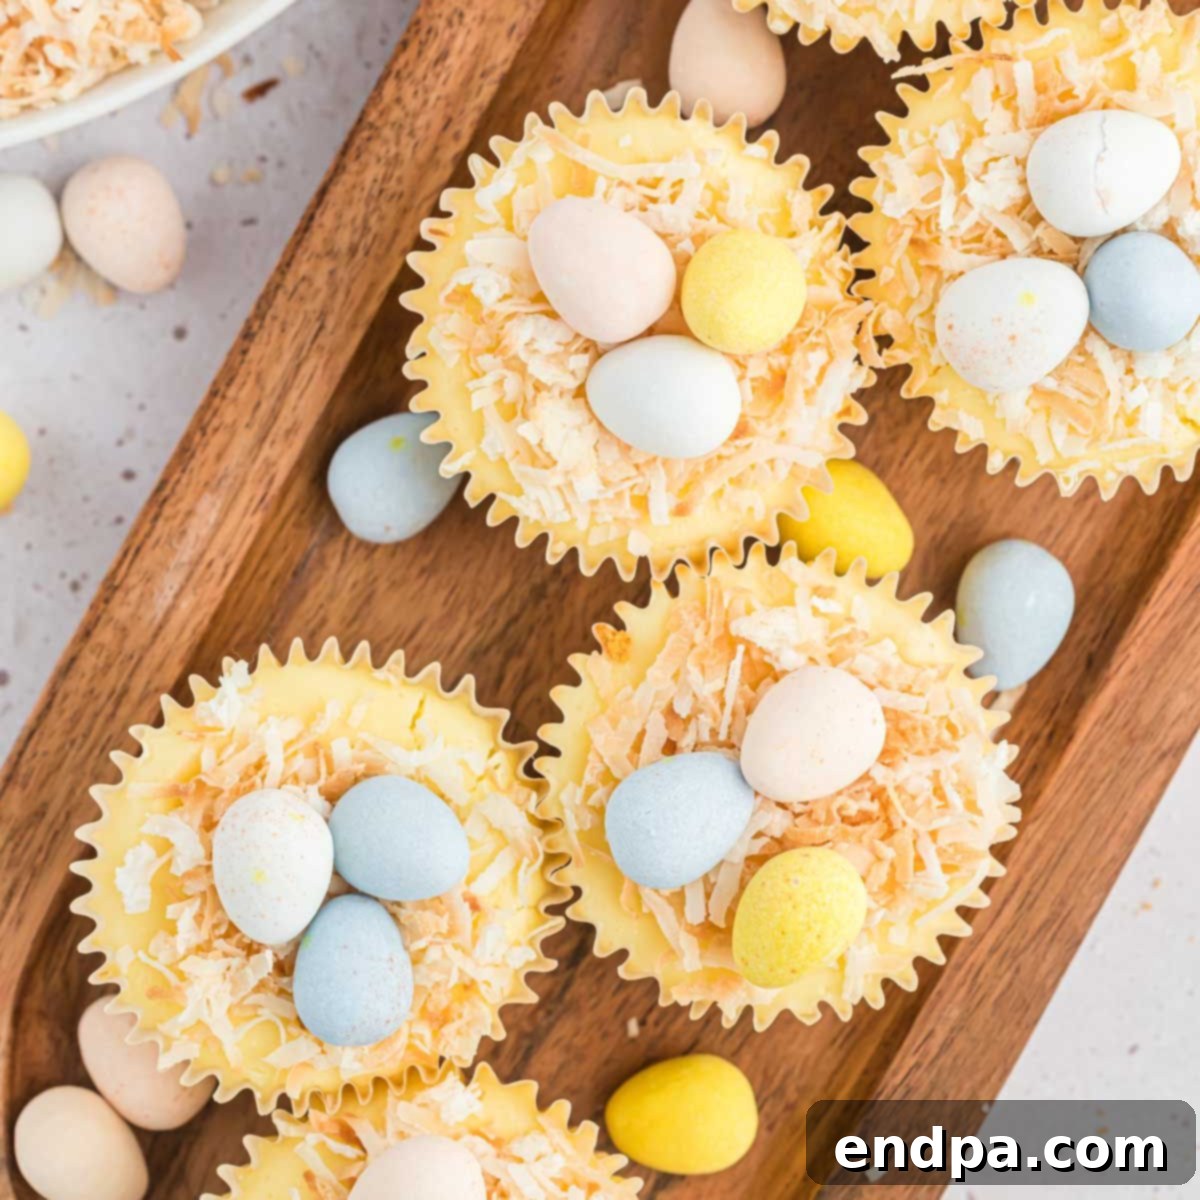
Delightful Mini Easter Cheesecakes: Your Perfect Spring Dessert Recipe
As spring awakens and Easter approaches, there’s no better way to celebrate than with a dessert that’s both charming and irresistibly delicious. Our Mini Easter Cheesecakes are the epitome of festive baking, offering a creamy, rich cheesecake filling nestled atop a perfectly crumbly graham cracker crust, all beautifully adorned with toasted shredded coconut and colorful robin eggs. These individual treats are not just a dessert; they are a celebration of the season, designed to bring joy and a touch of elegance to your Easter table or any spring gathering. Simple to make yet impressive in presentation, they promise to be a delightful end to any holiday meal.
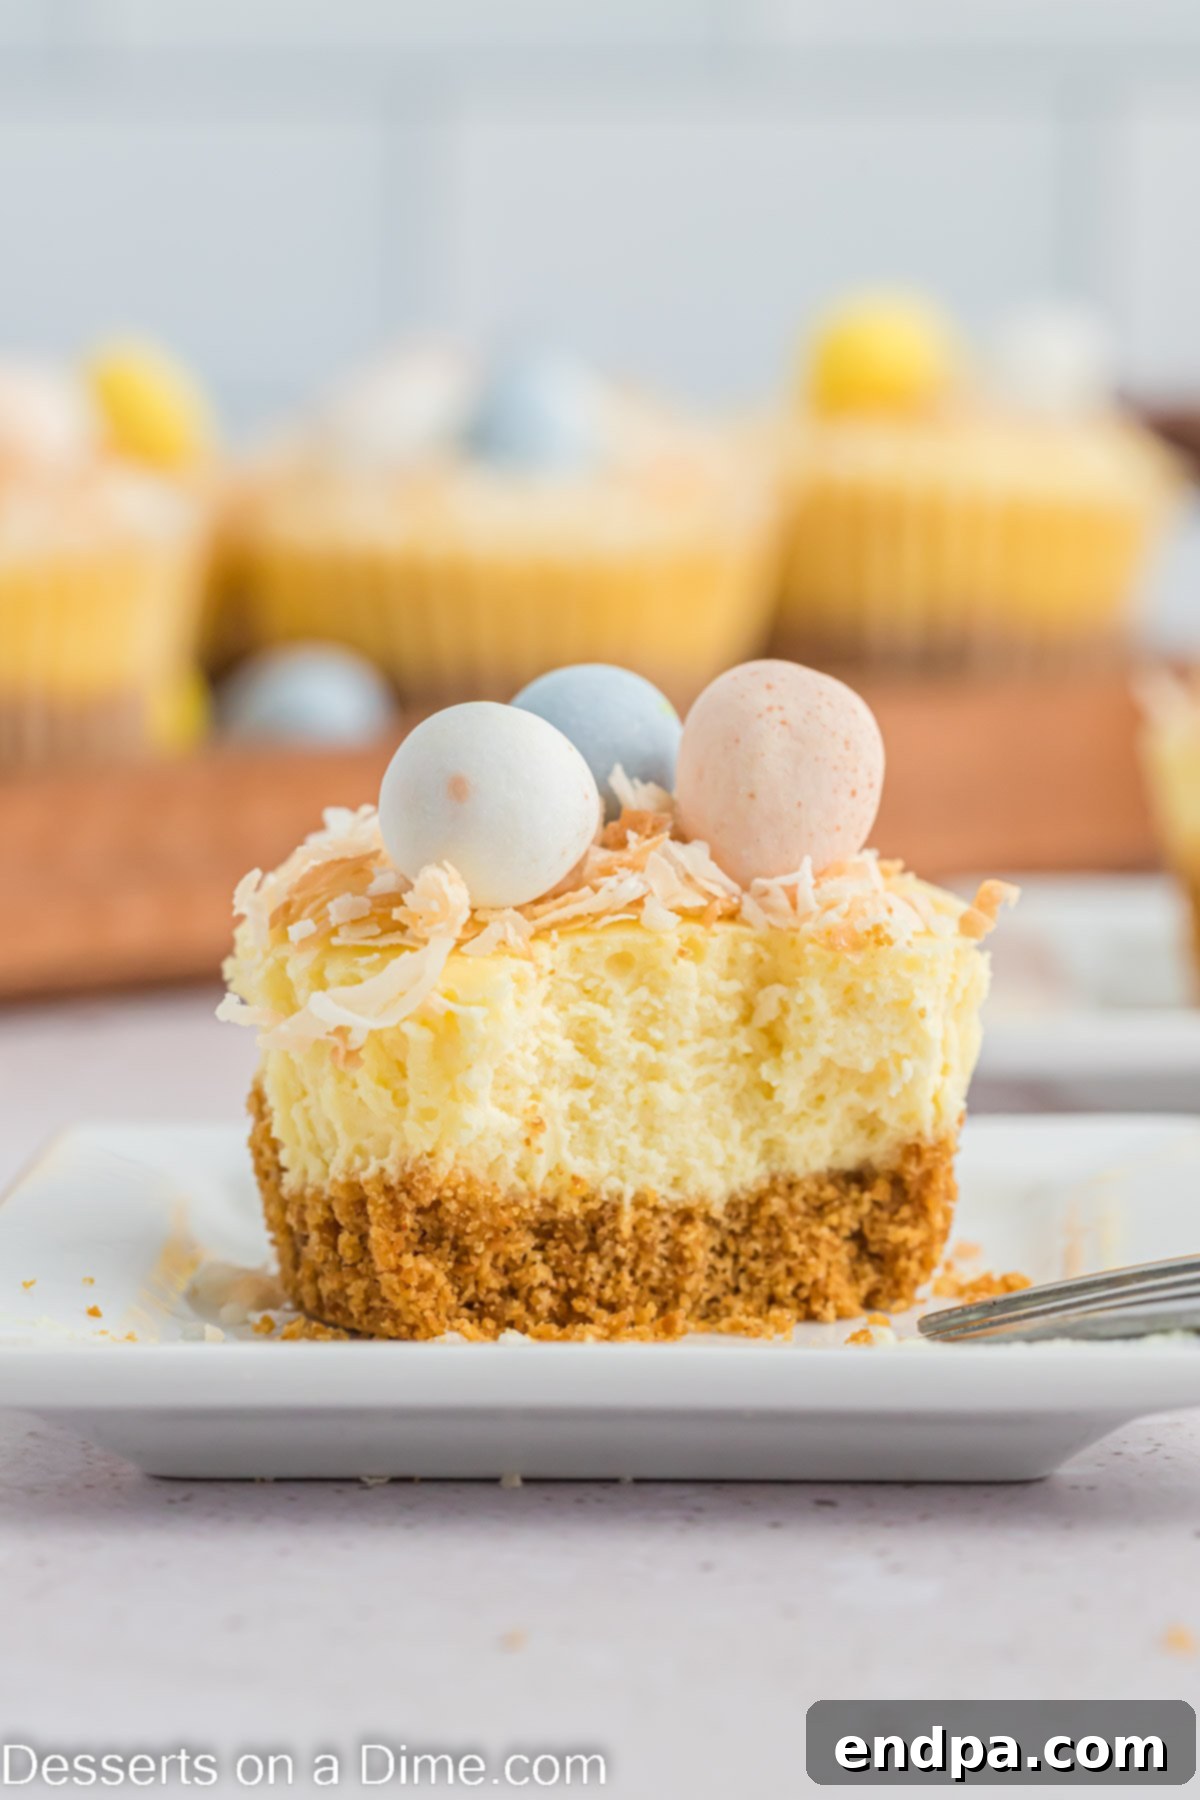
These individual cheesecake bites are renowned for their incredible flavor and the sheer ease of preparation. They consistently rank as one of my absolute favorite easy Easter desserts, perfect for home bakers of all skill levels. While cheesecake is a beloved choice for many holidays throughout the year, these mini versions are ideally sized for Easter lunch or brunch. Their portability and elegant presentation make them a stress-free addition to any spring menu. Each bite delivers a harmonious blend of creamy, sweet cheesecake, the buttery crunch of the graham cracker crust, and the festive touch of coconut and candy eggs.
Beyond being a standalone delight, these Mini Cheesecake Bites pair wonderfully with a spread of other springtime sweets. Consider serving them alongside cheerful Easter Cake Mix Cookies, vibrant Easter Egg Fruit Pizza, or rich Easter Chocolate Covered Oreos for an unforgettable holiday dessert experience. Their petite size ensures guests can enjoy a variety of treats without feeling overwhelmed.
Table of Contents
- Why You’ll Love This Mini Cheesecake Recipe
- Essential Ingredients for Perfect Mini Cheesecakes
- Creative Recipe Variations
- Step-by-Step: How to Make Mini Easter Cheesecakes
- Proper Storage for Freshness
- Expert Tips for Cheesecake Success
- Can You Make Mini Cheesecakes in Advance?
- Serving Suggestions
- Frequently Asked Questions (FAQs)
- More Irresistible Easter Desserts
Why You’ll Love This Mini Cheesecake Recipe
There are countless reasons why these mini cheesecakes are destined to become a staple in your Easter baking repertoire. First and foremost, their simplicity is unmatched. You’ll be amazed at how easily these little delights come together, requiring only a handful of common ingredients and minimal effort, making them perfect even for busy holiday preparations. Forget complicated desserts; these cheesecake bites streamline your baking process without compromising on taste or elegance.
Beyond their ease, these Easter cheesecake bites are incredibly fun and festive. Their individual size makes them perfect for portion control and ensures every guest gets their own personal treat. The vibrant decorations of toasted coconut and colorful robin eggs instantly evoke the spirit of spring and Easter, adding a joyful visual appeal to your dessert table. They are a fantastic alternative to a large, cumbersome cheesecake, offering convenience for serving and enjoyment.
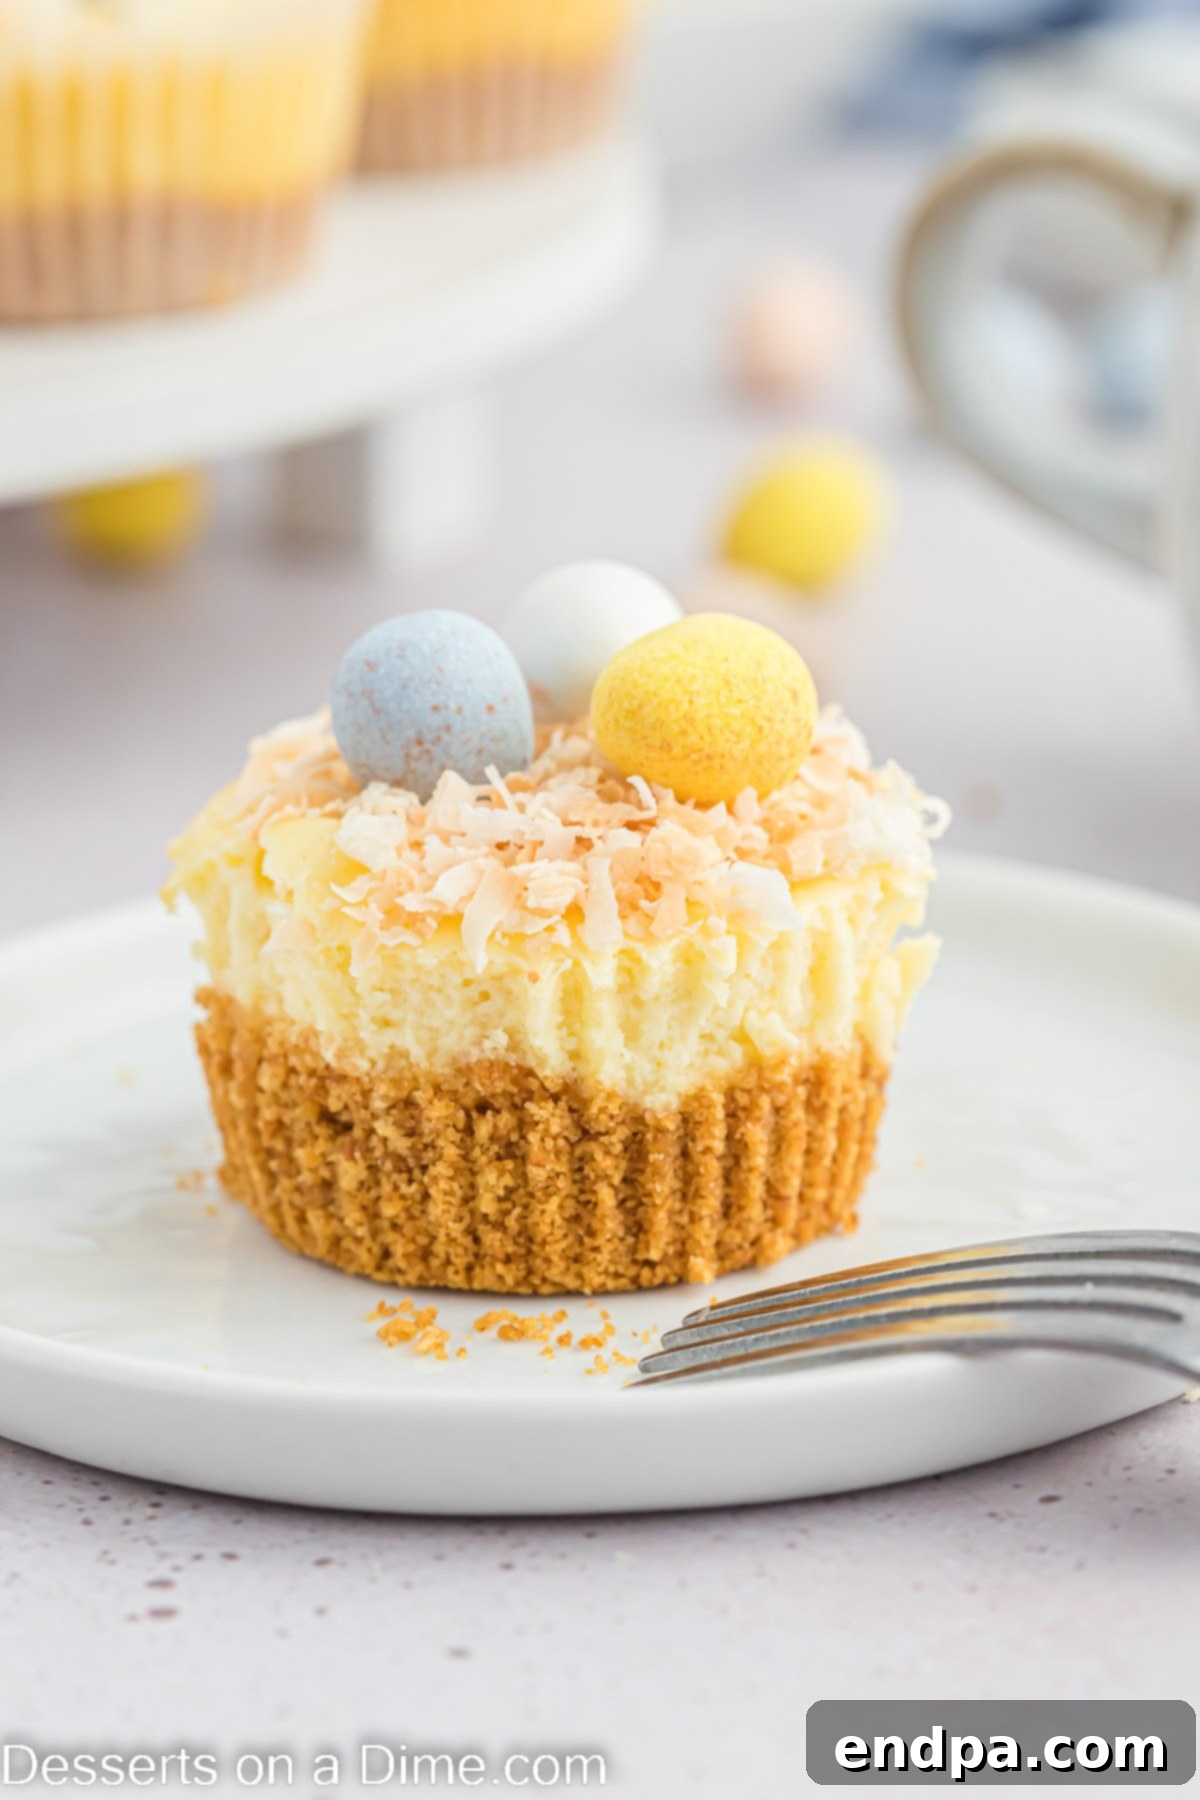
Moreover, the texture and flavor profile of these cheesecakes are truly exceptional. Each bite offers a harmonious balance of a buttery, crunchy graham cracker crust with a rich, velvety smooth cream cheese filling that melts in your mouth. The addition of vanilla extract subtly enhances the creamy notes, creating a classic cheesecake taste that everyone adores. These qualities make them an ideal dessert for gatherings where you want to impress without the stress, and they complement other Instant Pot Cheesecake Recipes wonderfully for a diverse dessert spread.
Essential Ingredients for Perfect Mini Cheesecakes
Crafting these delectable mini cheesecakes requires a straightforward list of ingredients, most of which you likely already have in your pantry or can easily find at any grocery store. The quality of these foundational components plays a crucial role in achieving that signature rich and creamy cheesecake texture. Here’s what you’ll need:
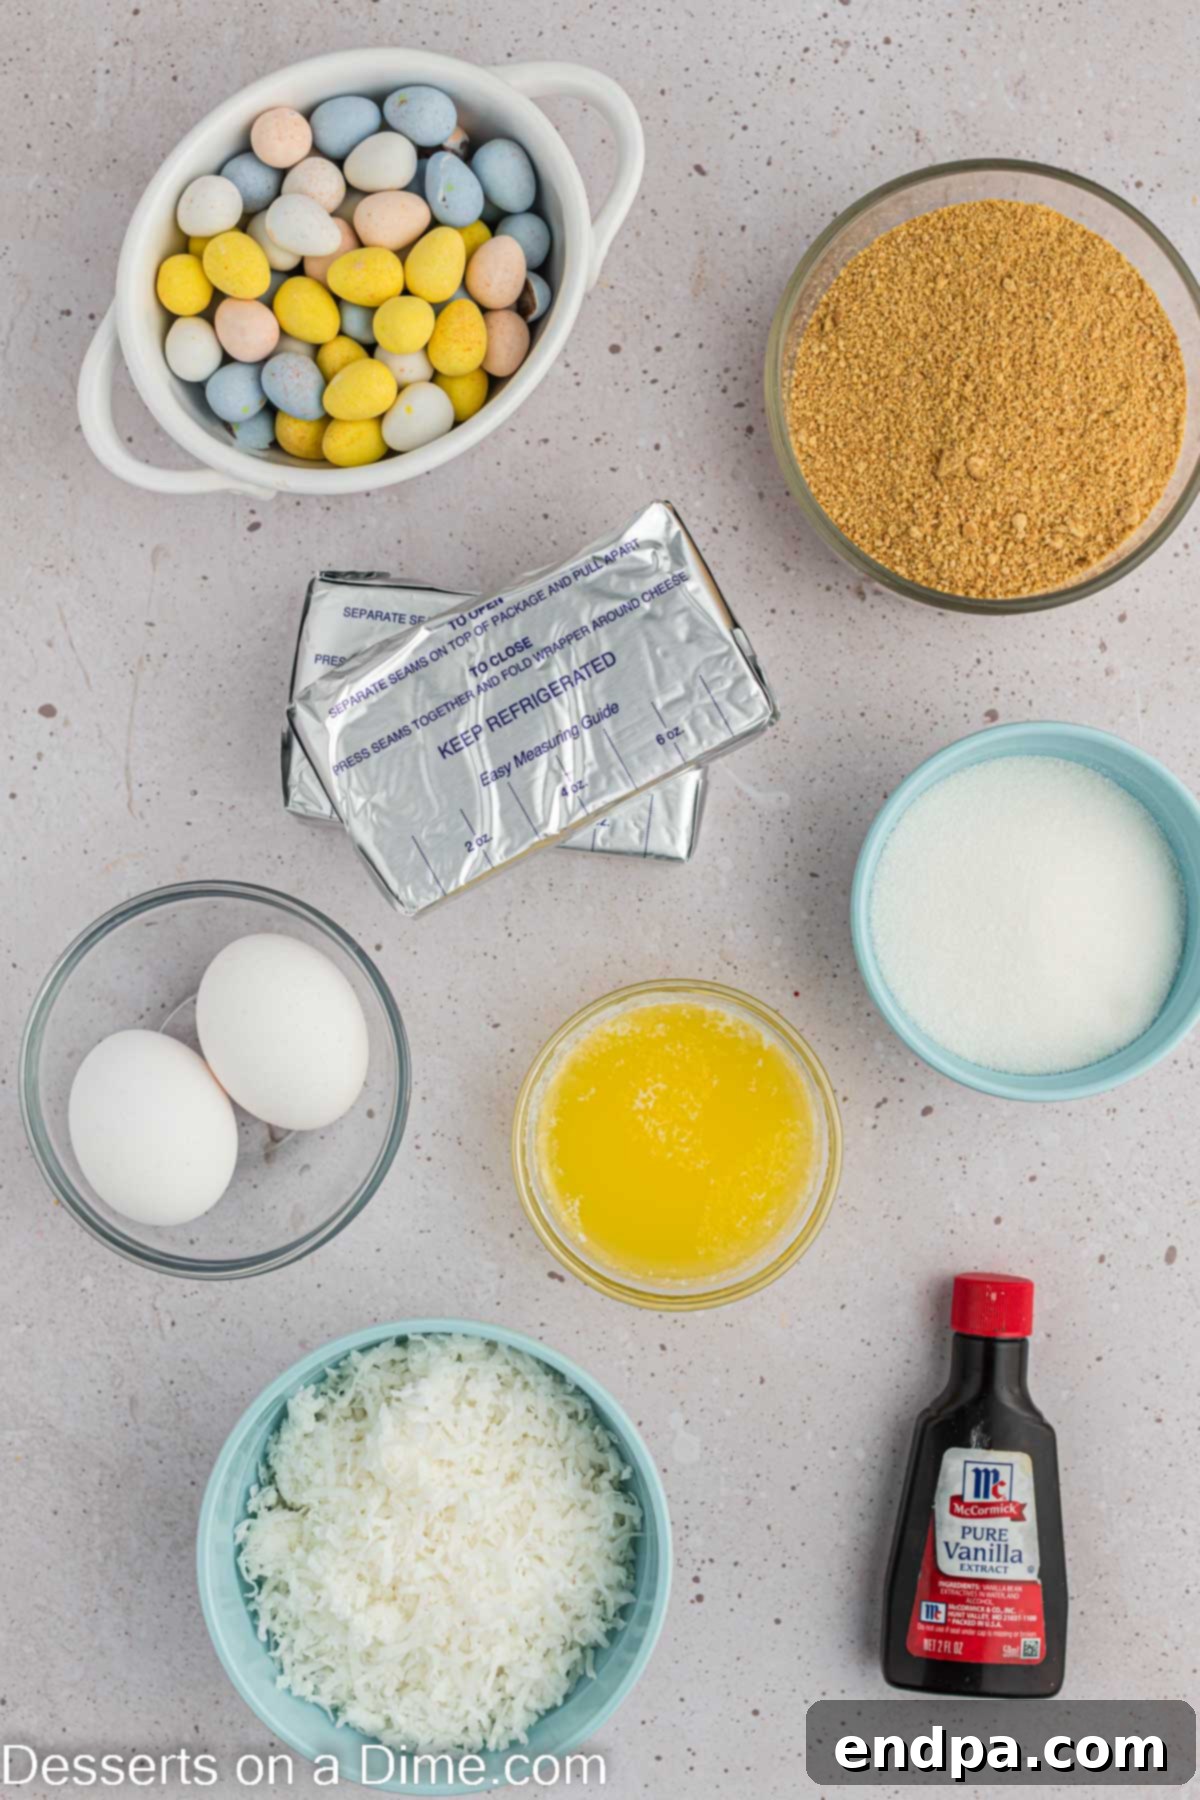
- Graham Cracker Crumbs: These form the classic, buttery base of our cheesecakes. You can buy pre-crushed crumbs for convenience or crush whole graham crackers yourself in a food processor.
- Butter (melted): Unsalted butter is preferred, as it allows you to control the overall saltiness. It binds the graham cracker crumbs together to create a firm crust.
- Cream Cheese (softened – 8 oz each): The star of the show! Always use full-fat cream cheese for the best flavor and texture. Ensure it’s fully softened to room temperature for a lump-free, silky-smooth cheesecake batter.
- Granulated Sugar: Provides the essential sweetness to balance the tanginess of the cream cheese.
- Vanilla Extract: A touch of pure vanilla extract enhances all the flavors, adding depth and warmth to the cheesecake filling.
- Large Eggs: Act as a binder and contribute to the creamy, custard-like texture of the cheesecake. Like cream cheese, ensure they are at room temperature for optimal mixing.
- Shredded Coconut: Toasted, it creates a delightful “bird’s nest” effect and adds a lovely nutty flavor and texture contrast to the creamy cheesecake.
- Robin Eggs: These iconic pastel candies are perfect for decorating, bringing a pop of color and whimsy that truly captures the Easter spirit.
Using room temperature ingredients for the cheesecake filling (cream cheese, eggs, vanilla) is a critical step that cannot be overstated. It ensures that everything combines smoothly and evenly, preventing lumps and creating that desirable velvety texture in your final product. Plan ahead by taking these items out of the refrigerator at least an hour before you begin mixing.
Creative Recipe Variations
One of the best aspects of this mini cheesecake recipe is its incredible versatility. While the classic version is undeniably delicious, you can easily customize these treats to suit your taste, theme, or whatever ingredients you have on hand. Here are some fantastic ideas to get your creative juices flowing:
- Easter Egg Candy Options: While Robin Eggs are a timeless choice for their pastel colors and speckled appearance, feel free to explore other Easter candies! Consider using mini chocolate eggs (like Cadbury Mini Eggs), colorful jelly beans, or even small chocolate bunnies or chicks for a playful touch. You could also use a mix of different candies for an even more vibrant display.
- Crust Customization: The graham cracker crust is a classic, but your options don’t stop there. Experiment with different cookies to create unique flavor profiles.
- Oreo Crust: For chocolate lovers, a crushed Oreo cookie crust (filling included or removed) makes a rich, dark base.
- Shortbread Cookie Crust: This provides a buttery, slightly less sweet foundation, perfect for letting the cheesecake filling shine.
- Nilla Wafer Crust: A vanilla wafer crust offers a lighter, sweet vanilla flavor that complements the cheesecake beautifully.
- Ginger Snap Crust: For a hint of spice, especially appealing in cooler weather, ginger snaps make a wonderfully aromatic and flavorful crust.
Simply use the same ratio of crushed cookies to melted butter as the graham cracker crust.
- Diverse Topping Ideas: Beyond the classic bird’s nest, there are endless ways to decorate your mini cheesecakes.
- Pastel Sprinkles: A quick and easy way to add a burst of color. Choose pastel jimmies, nonpareils, or sanding sugar for a truly festive look.
- Chocolate Drizzle: Melted milk, white, or dark chocolate drizzled over the top adds a touch of elegance and extra indulgence.
- Whipped Cream & Fruit: A dollop of freshly whipped cream and a few fresh berries (strawberries, raspberries, blueberries) offer a light, refreshing contrast.
- Lemon Curd: For a zesty twist, a spoonful of homemade or store-bought lemon curd on top brightens the flavor profile.
- Caramel or Chocolate Sauce: A simple drizzle of caramel or chocolate sauce can elevate the richness and add another layer of flavor.
Remember to add any liquid or fresh fruit toppings just before serving to maintain their freshness and prevent the crust from becoming soggy.
Step-by-Step: How to Make Mini Easter Cheesecake
Making these adorable mini cheesecakes is surprisingly simple, broken down into easy-to-follow steps. Precision in preparation and attention to detail will ensure beautifully set and perfectly flavored individual cheesecakes.
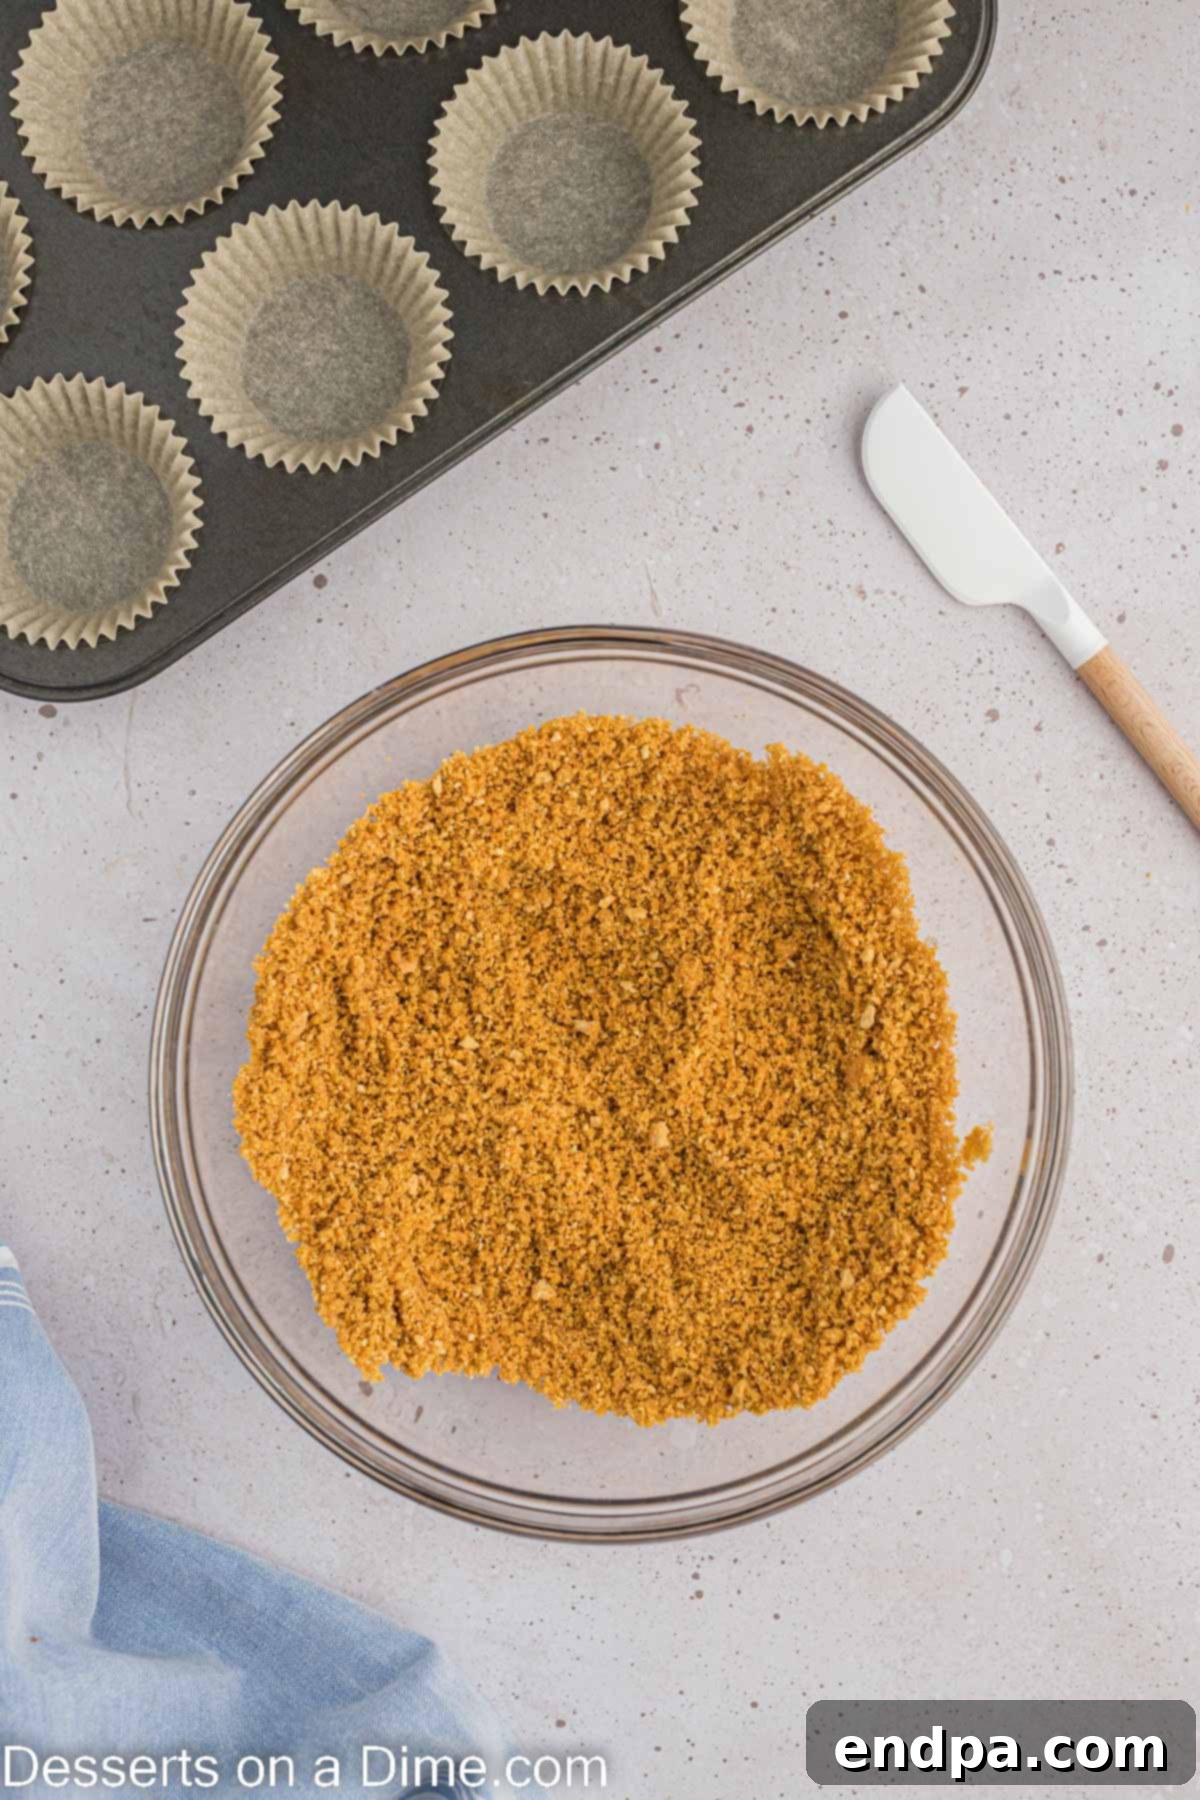
Step 1: Prepare the Crust. In a medium-sized bowl, combine the graham cracker crumbs with the melted butter. Stir thoroughly until the crumbs are evenly moistened and resemble wet sand. This ensures a cohesive crust that won’t crumble apart.
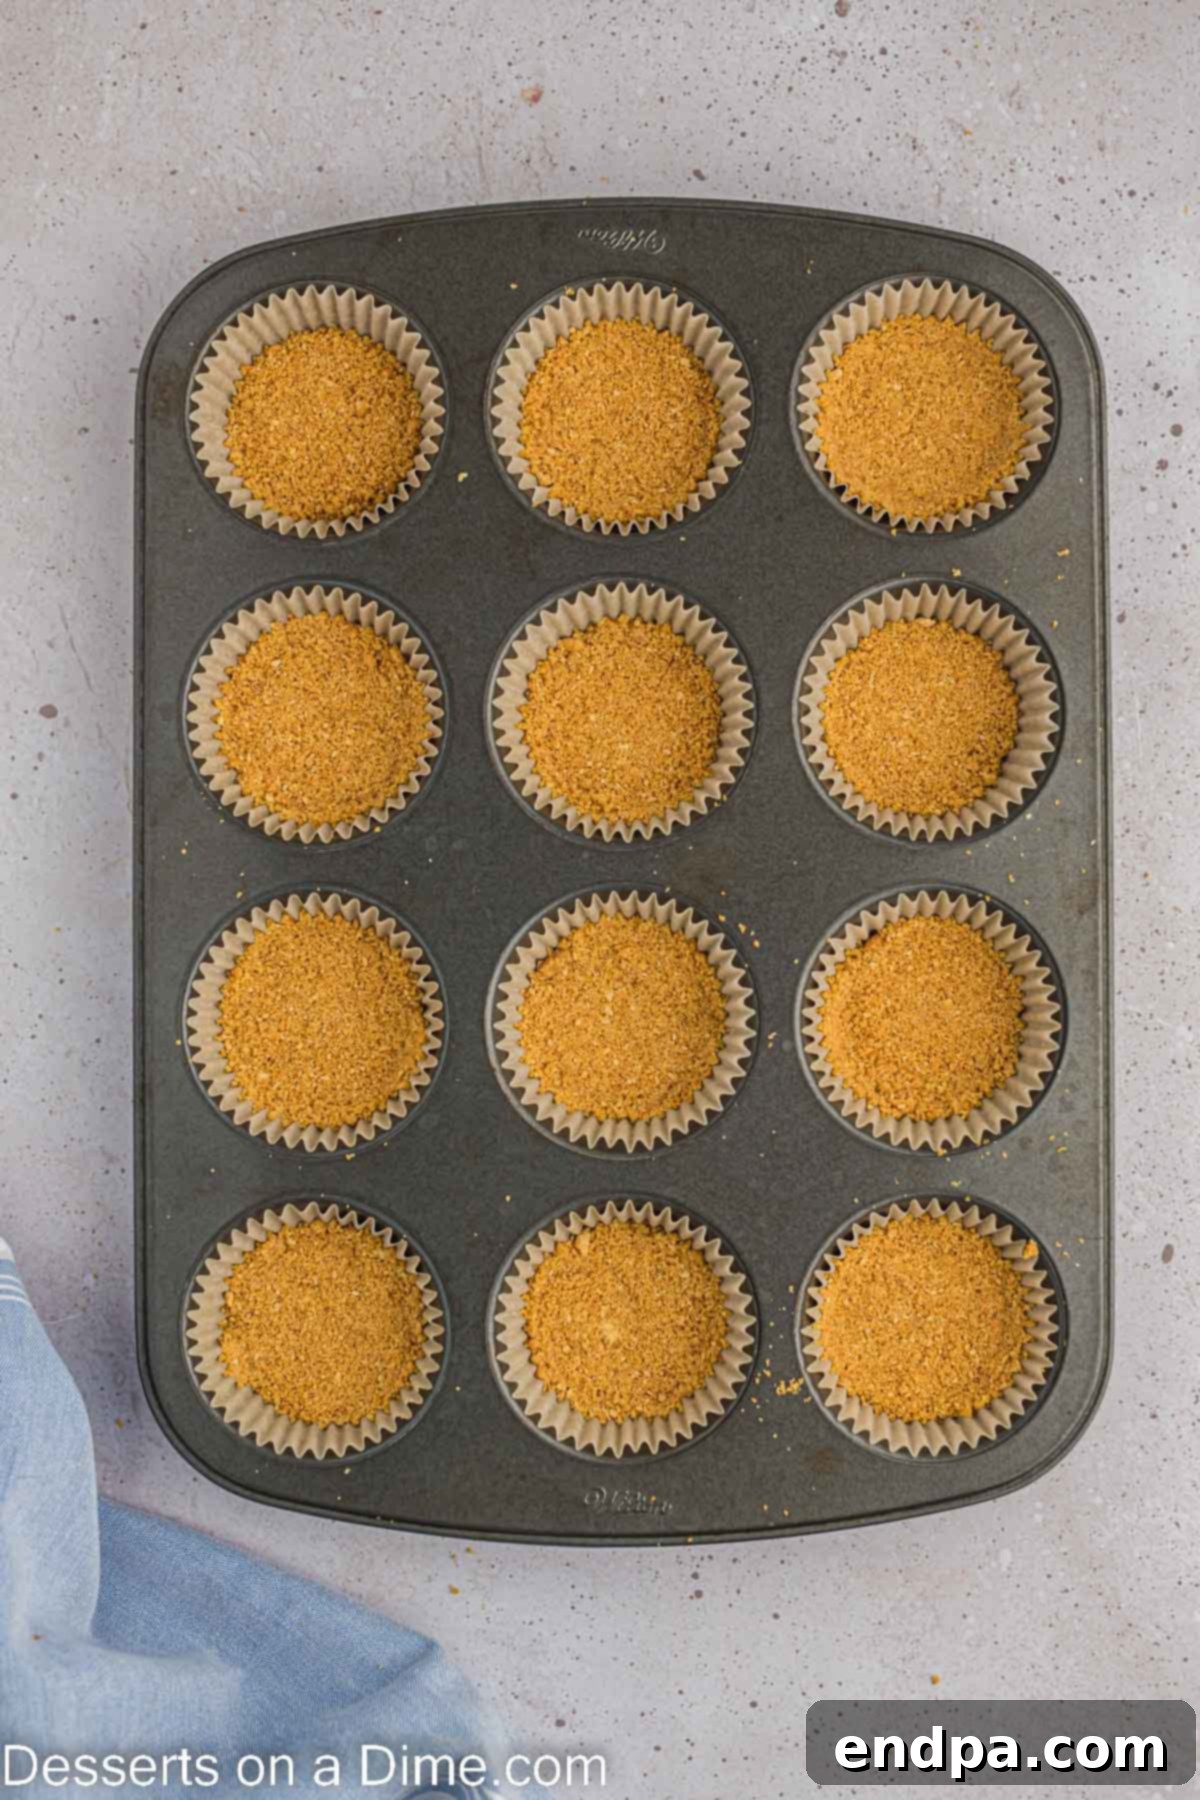
Step 2: Form the Crust Bases. Line a standard 12-cup muffin tin with paper cupcake liners. Evenly distribute approximately 1 ½ tablespoons of the graham cracker mixture into the bottom of each liner. Using the back of a spoon or a small tart tamper, firmly press the crumbs into an even layer. This creates a solid foundation for your cheesecakes. Set the pan aside.
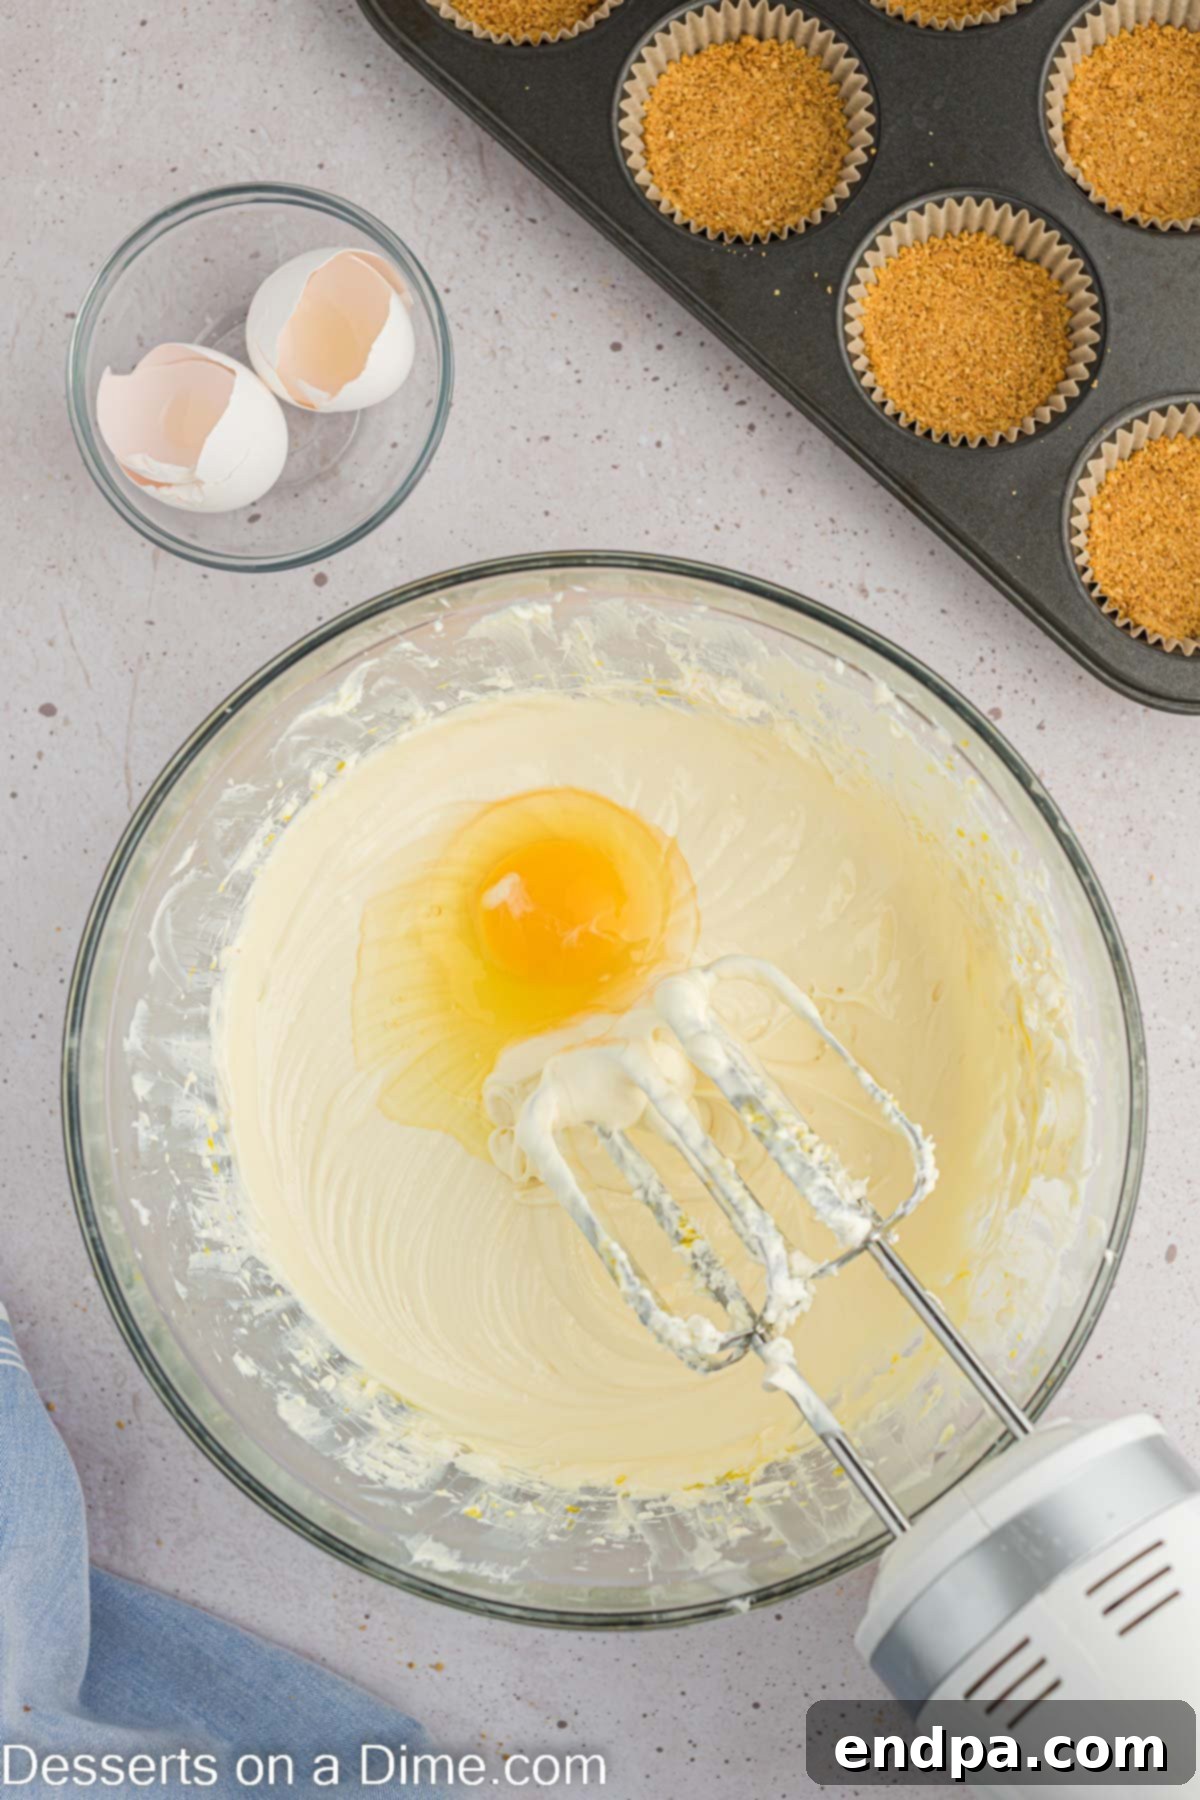
Step 3: Prepare the Cheesecake Filling. Preheat your oven to 325 degrees F (160 degrees C). In a large mixing bowl, using an electric mixer, beat the softened cream cheese, granulated sugar, and vanilla extract together until the mixture is completely smooth and creamy. Ensure there are no lumps of cream cheese. Then, add the eggs one at a time, mixing on low speed just until each egg is incorporated. Be careful not to overmix, as too much air can cause the cheesecakes to crack during baking.
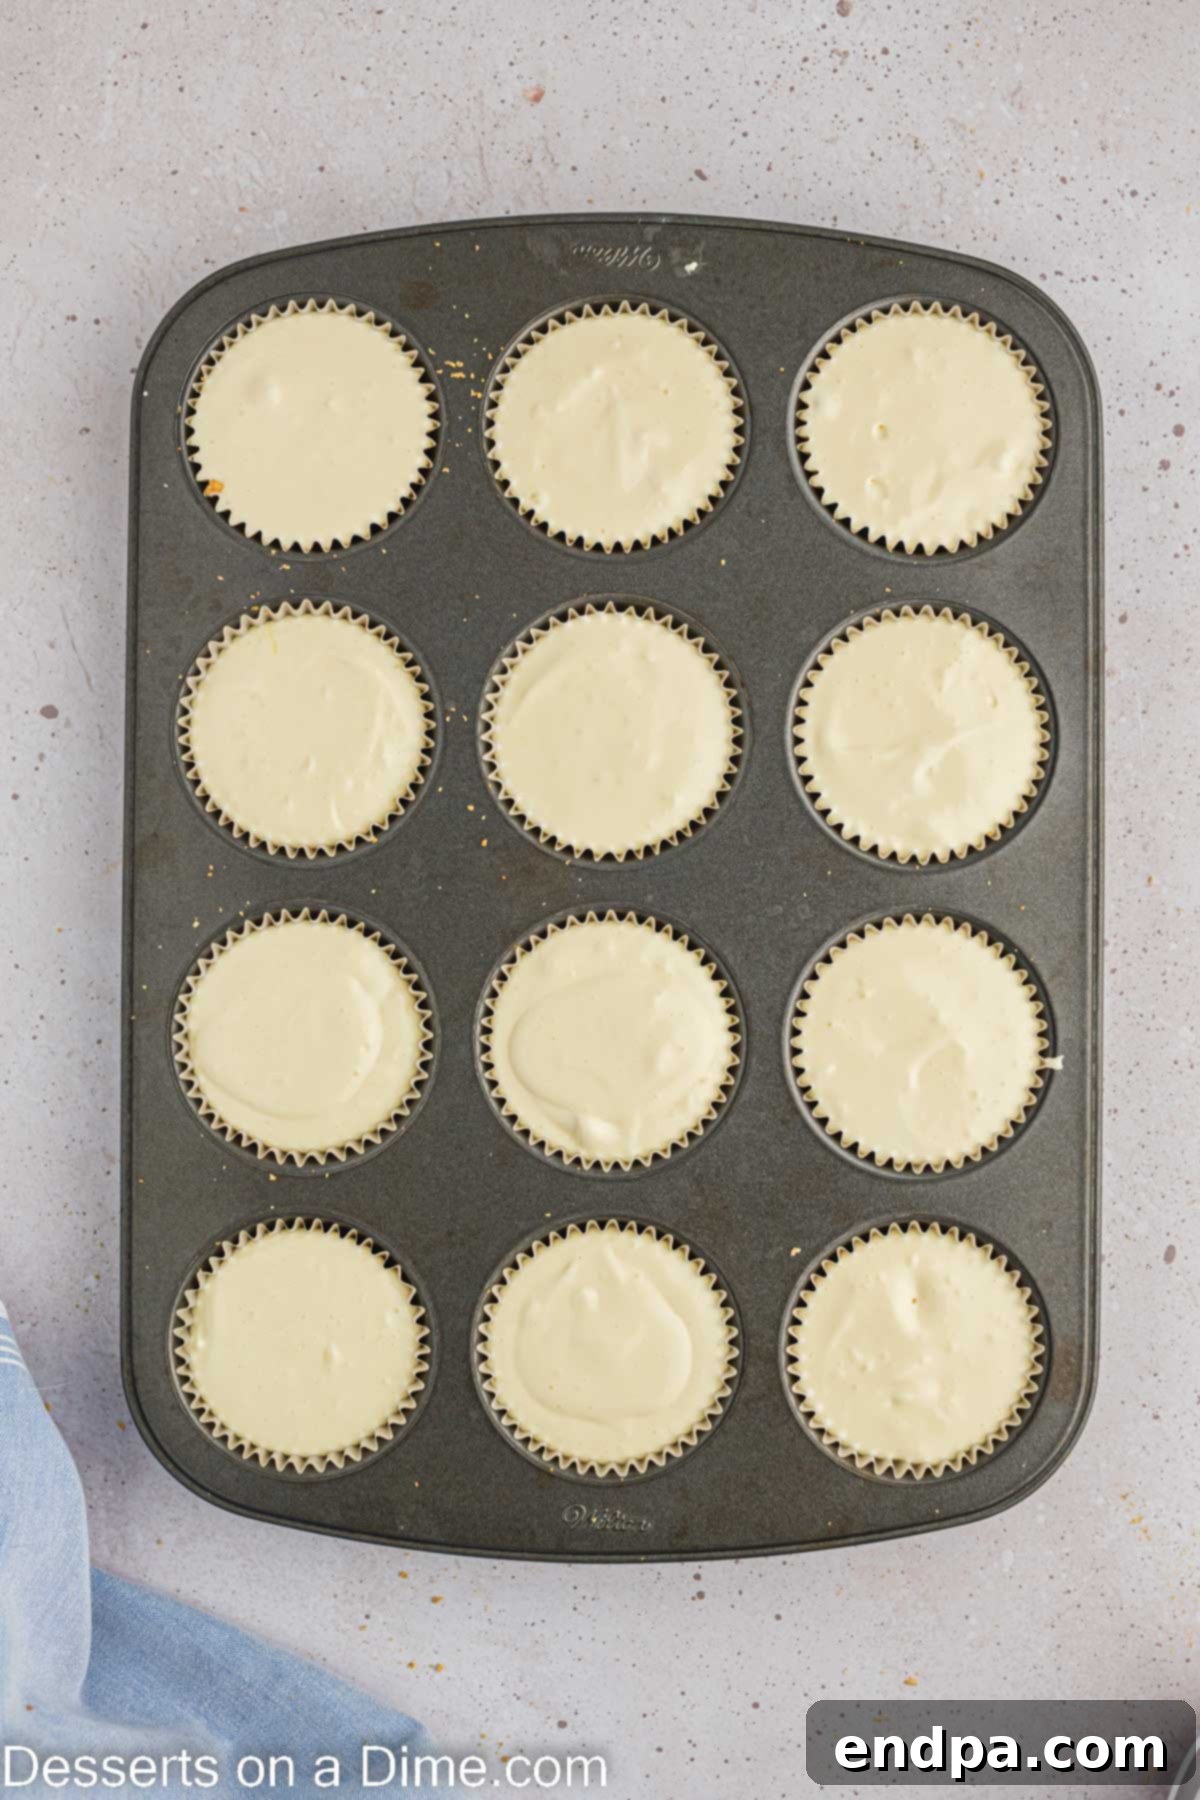
Step 4: Fill the Muffin Tins. Carefully spoon or scoop the cheesecake batter evenly over the top of the pressed graham cracker crust in each of the prepared muffin tins. Fill each liner about ¾ full, leaving a little room for expansion during baking.
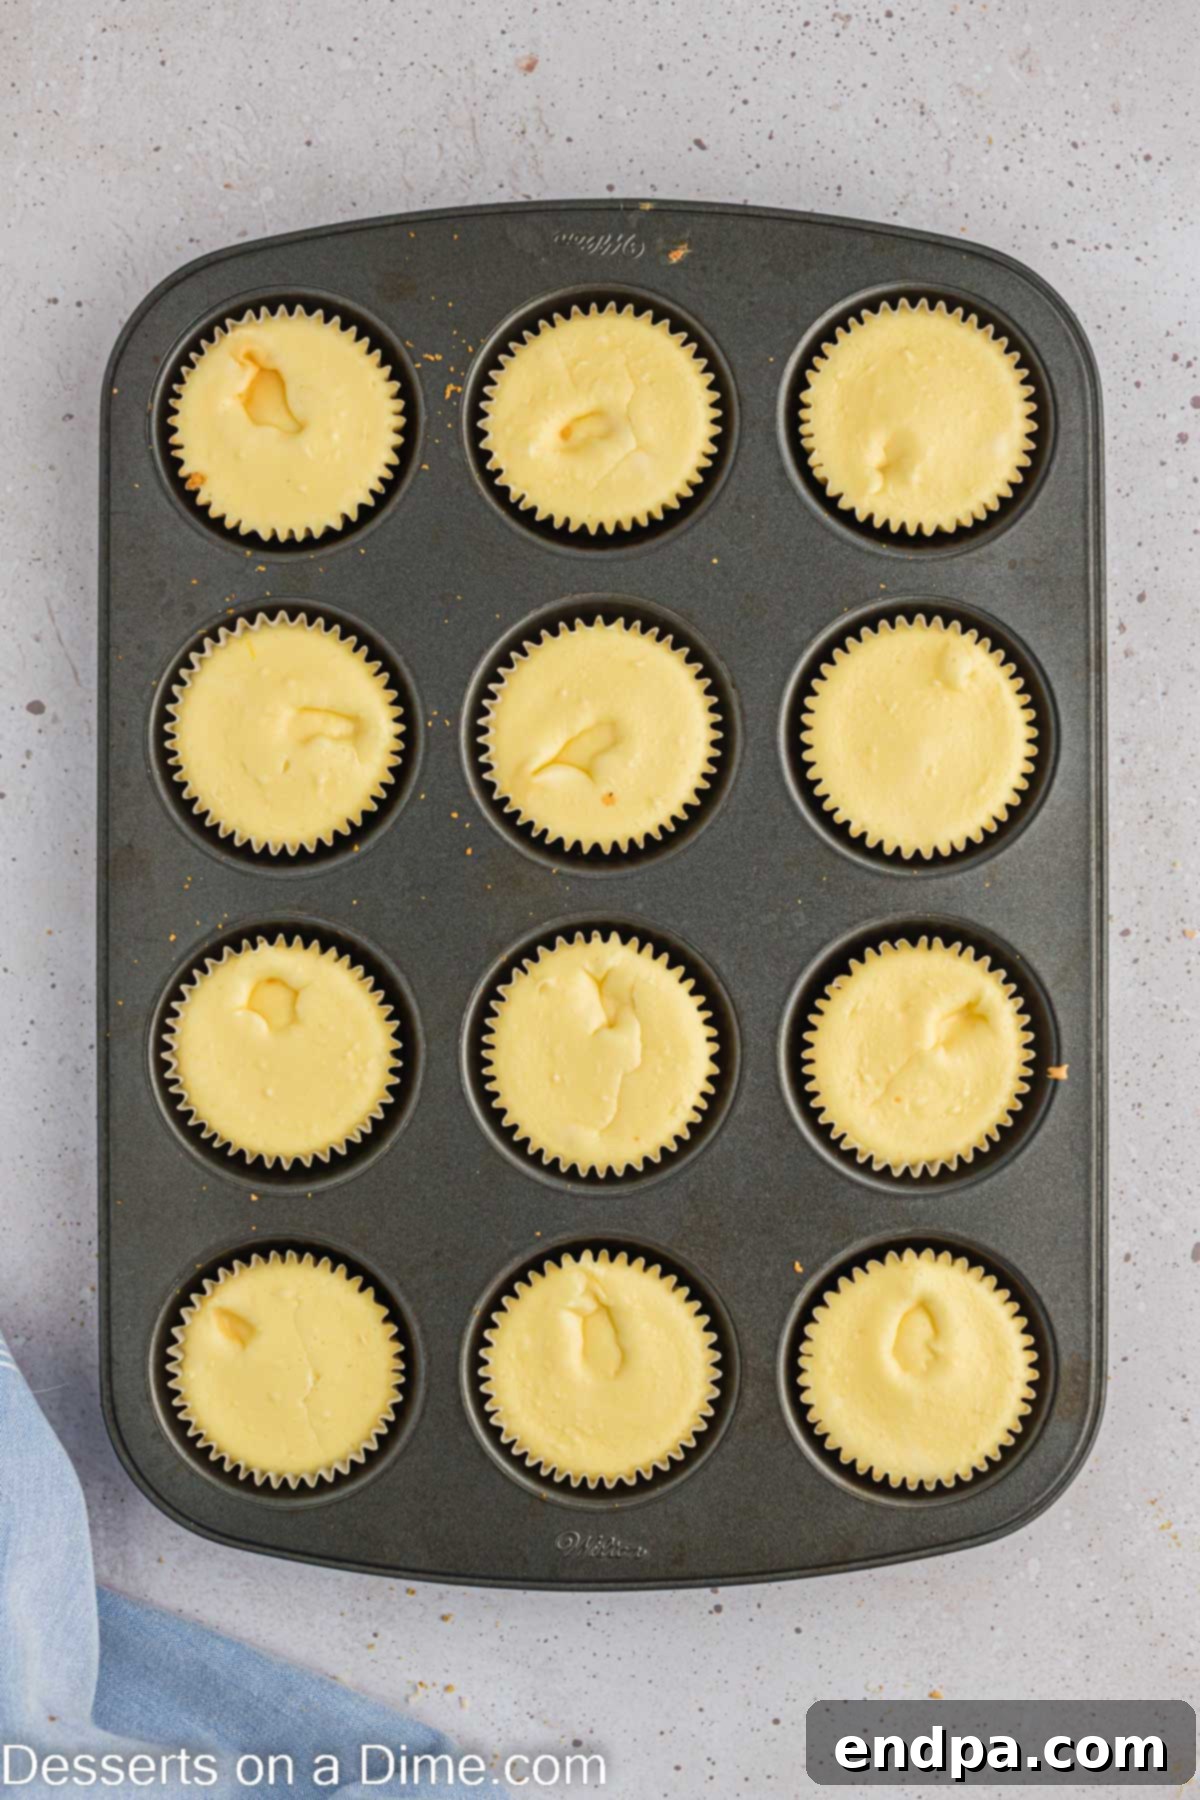
Step 5: Bake and Cool the Cheesecakes. Bake the mini cheesecakes for 15-20 minutes, or until the centers are almost set and only slightly jiggly. The edges should appear firm. Avoid overbaking. Once baked, remove the muffin tin from the oven and allow the cheesecakes to cool completely to room temperature. This slow cooling helps prevent cracks. After cooling, refrigerate them for at least 2 hours, or preferably overnight, to allow them to fully set and chill.
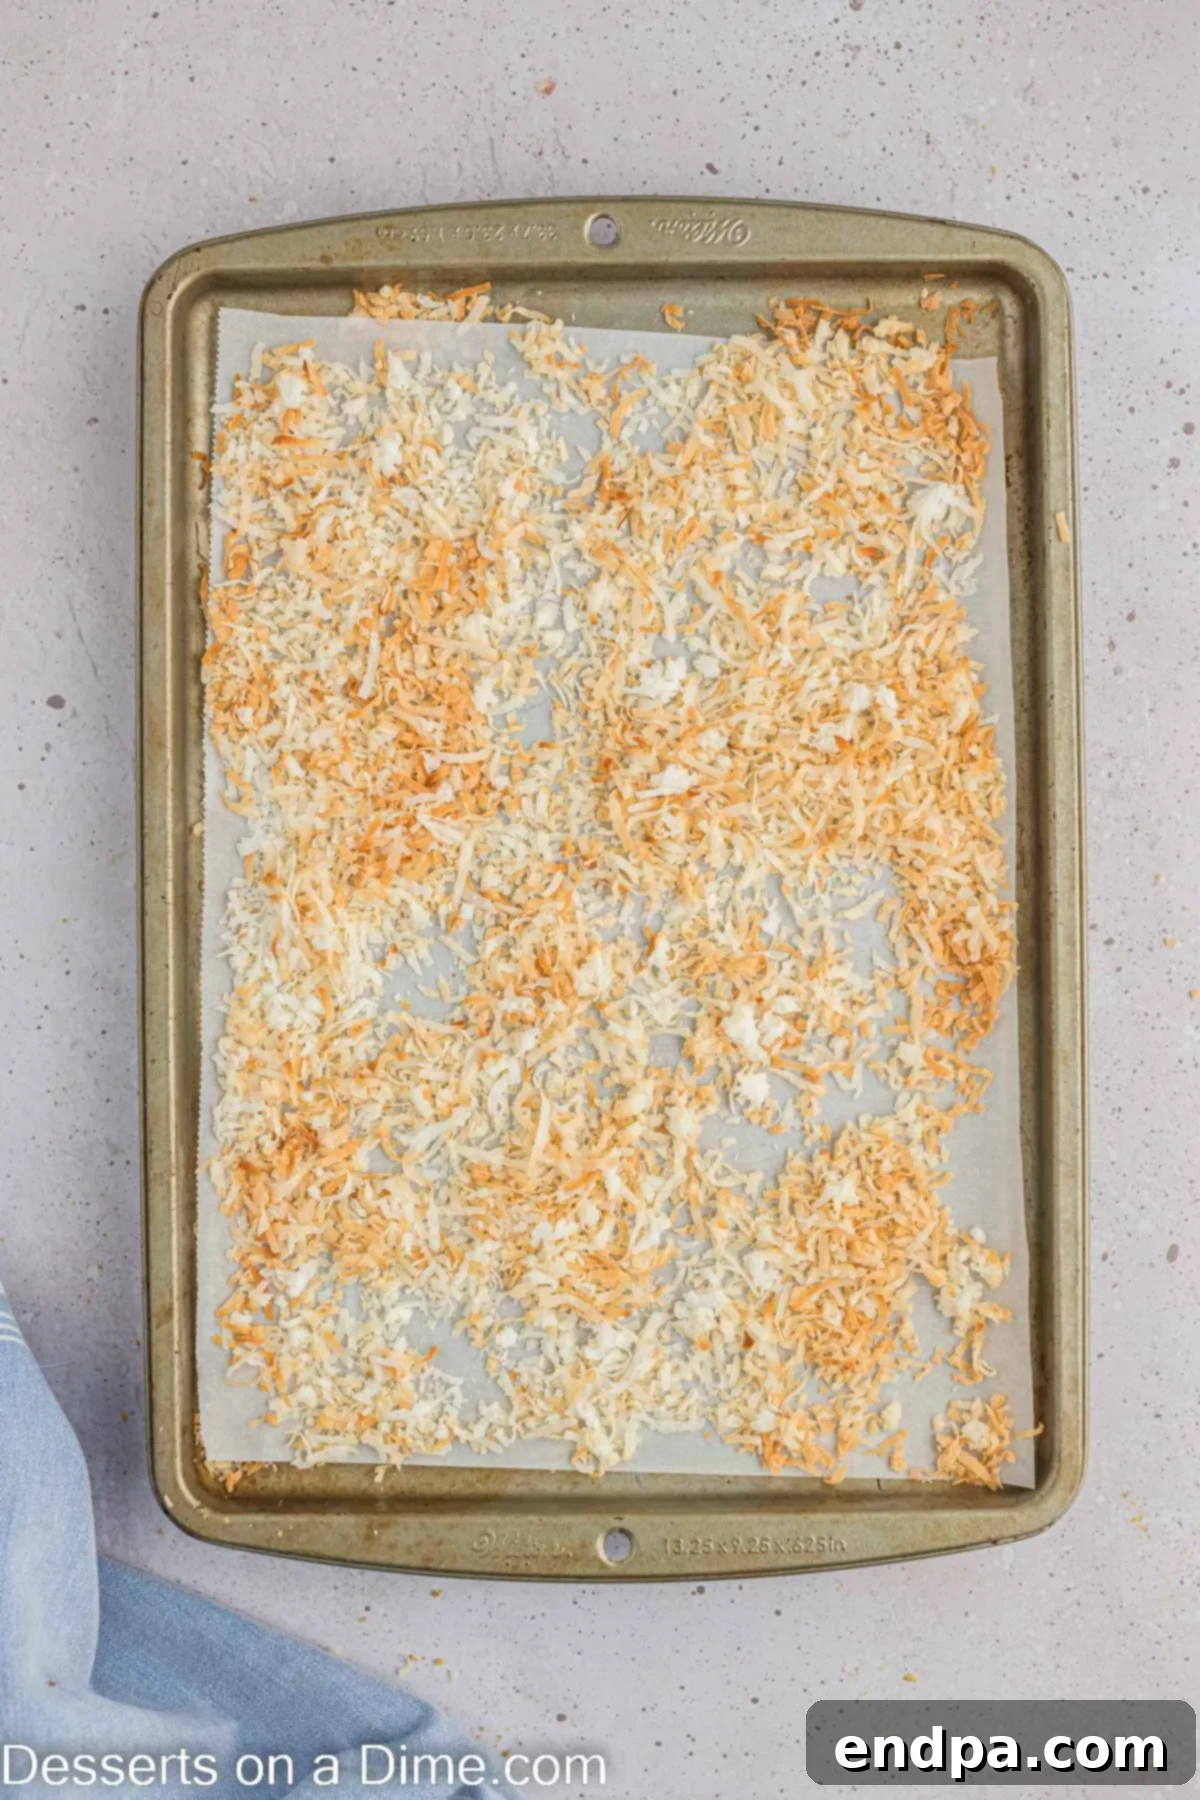
Step 6: Toast the Coconut. When you’re ready to decorate (ensure cheesecakes are fully chilled), preheat the oven to 325 degrees F (160 degrees C). Spread the shredded coconut evenly on a large baking sheet lined with parchment paper. Bake for 3-5 minutes, watching it very closely, until the coconut turns a beautiful golden brown. Coconut can toast very quickly, so vigilance is key! Remove from oven and let the toasted coconut cool completely at room temperature.
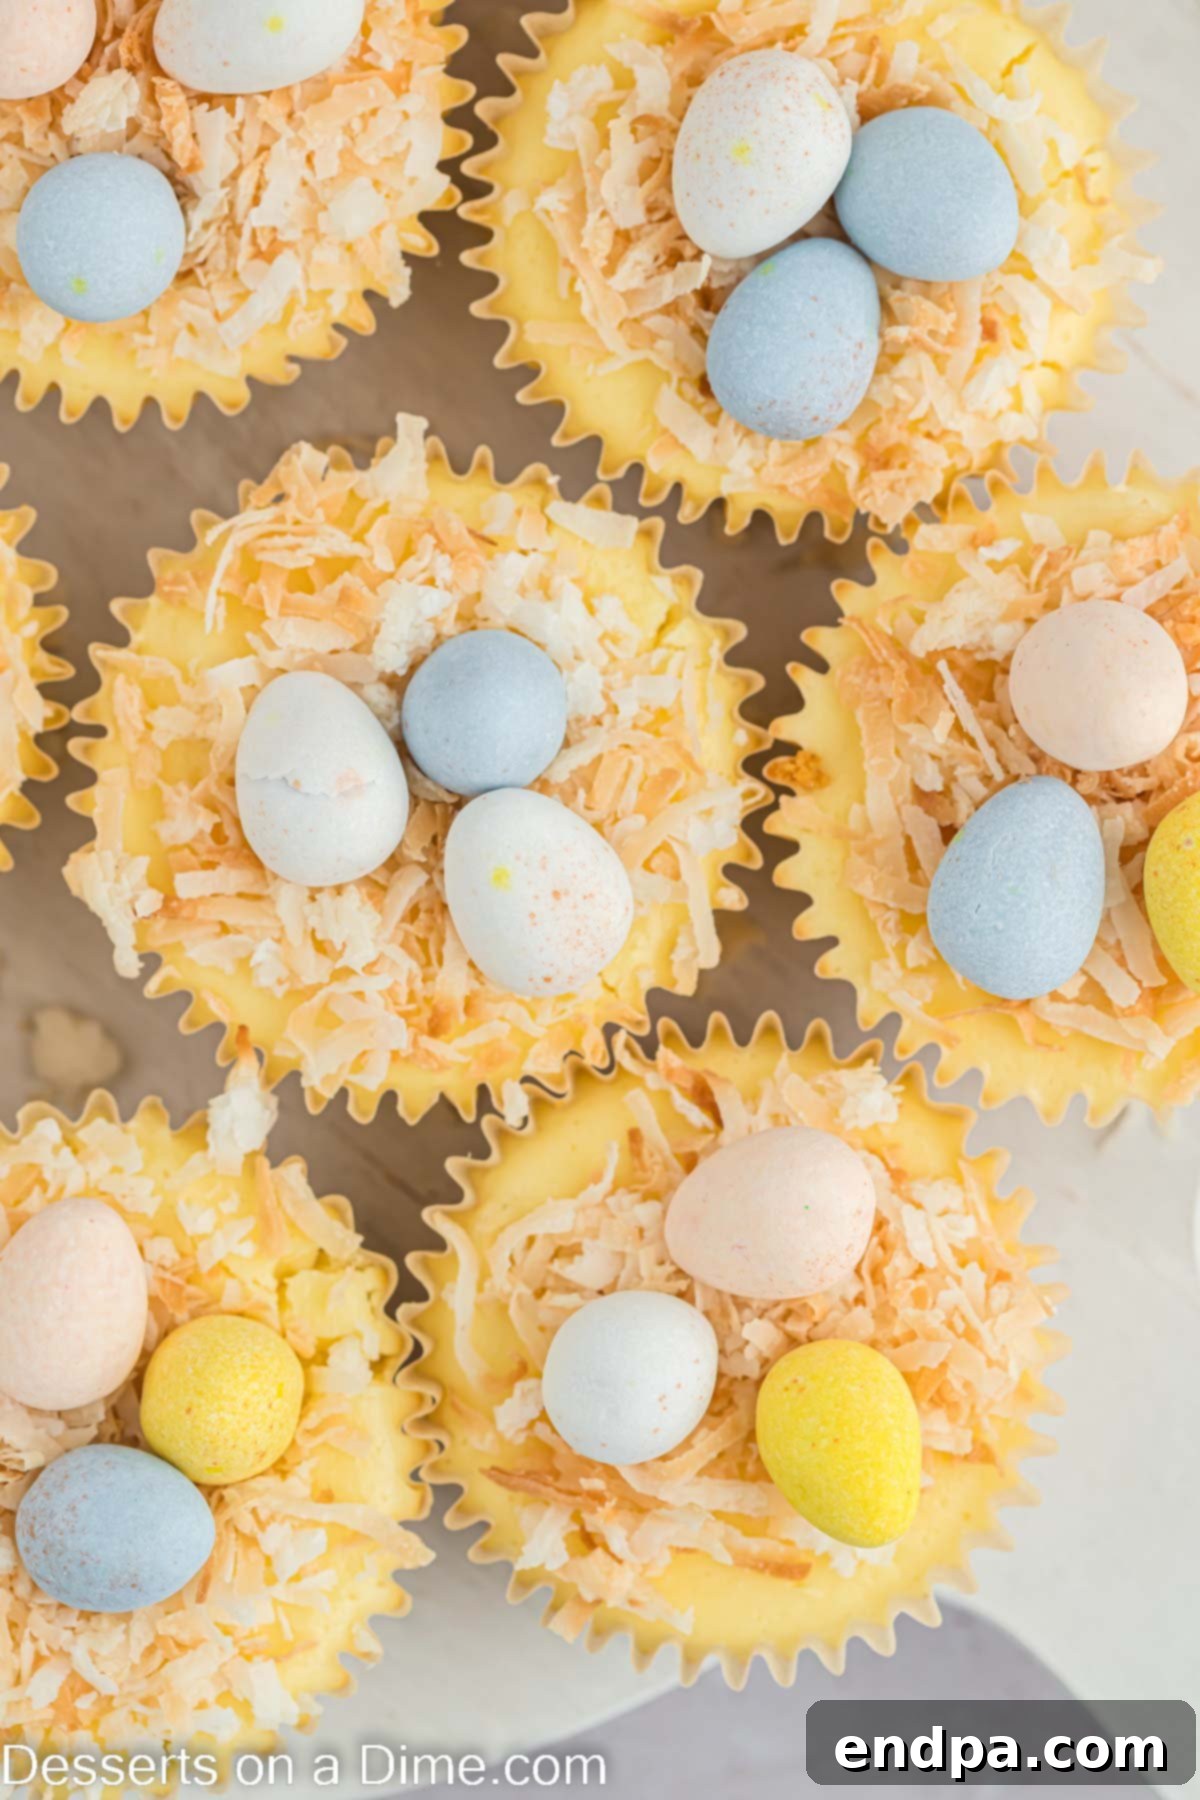
- Step 7: Decorate for Easter. Once the cheesecakes are thoroughly chilled and the coconut is cool, gently peel away the cupcake liners. Top each mini cheesecake with a small mound of the toasted shredded coconut, creating a festive “bird’s nest” effect.
- Step 8: Add the Robin Eggs. Carefully place 3-4 Robin Eggs (or your chosen Easter candy) into the center of each coconut nest.
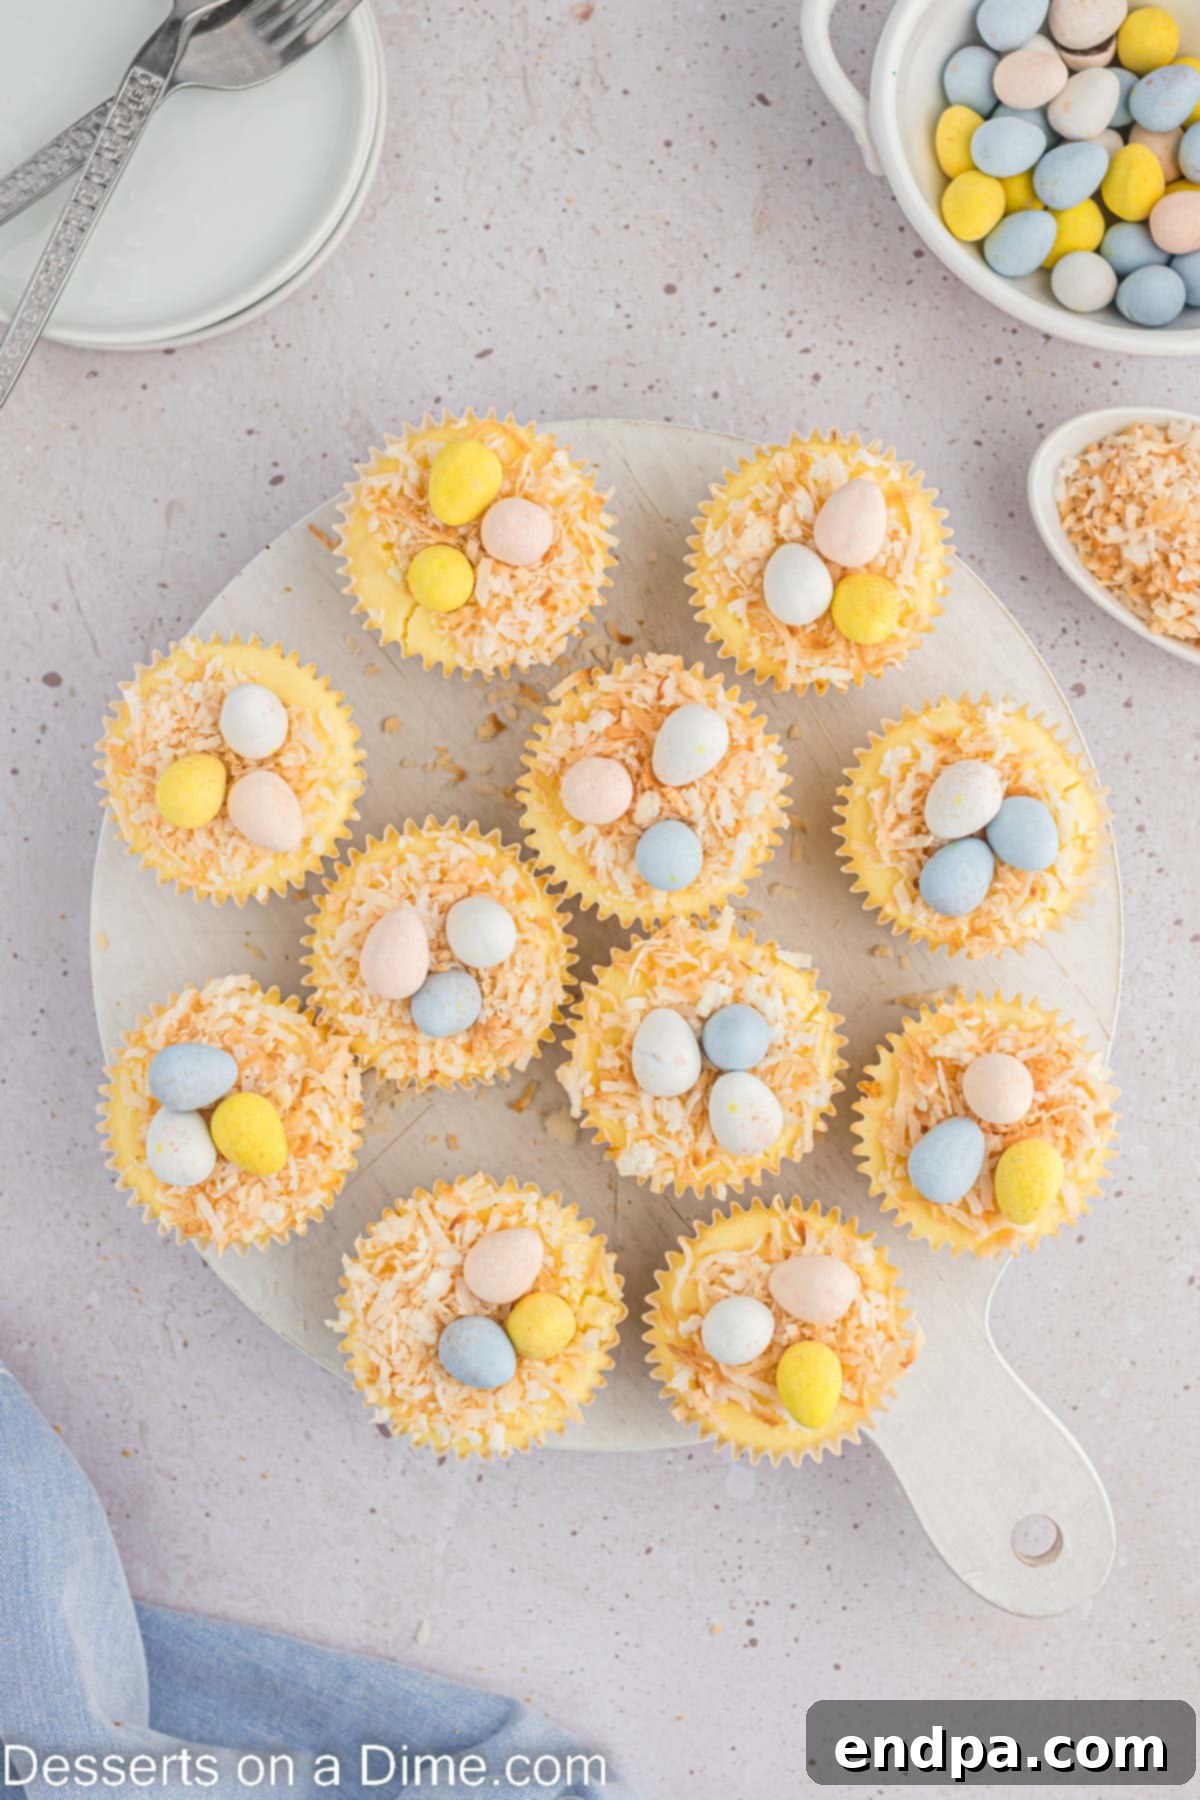
- Step 9: Serve and Enjoy! Your beautifully decorated bird’s nest cheesecakes are now ready to be presented and savored. These individual treats are perfect for a festive Easter gathering!
Proper Storage for Freshness
To keep your mini Easter cheesecakes tasting fresh and delightful, proper storage is essential. Due to their dairy content, cheesecakes must be refrigerated. Place any leftover cheesecakes in an airtight container. This will protect them from absorbing odors from other foods in the refrigerator and prevent them from drying out. When stored correctly, these mini cheesecakes will remain fresh and delicious for up to 5 days in the refrigerator.
For best results, only decorate the cheesecakes that you plan to serve immediately. Decorations like toasted coconut and candy eggs can soften or lose their crispness when stored in the refrigerator for extended periods. If you’ve decorated all of them, they are still perfectly safe to eat, but the texture of the toppings might change slightly.
If you wish to store them for longer, mini cheesecakes freeze exceptionally well. To freeze, place the undecorated cheesecakes on a baking sheet and freeze until solid (about 2-3 hours). Once frozen, transfer them to a freezer-safe airtight container or heavy-duty freezer bag, layering them with parchment paper to prevent sticking. They can be stored in the freezer for up to 1 month. Thaw them overnight in the refrigerator before decorating and serving.
Expert Tips for Cheesecake Success
Achieving perfectly creamy, crack-free mini cheesecakes is easier than you think with a few expert tips. Follow these guidelines to ensure your Easter treats are a resounding success:
- Timing Your Decorations: This is crucial for maintaining the visual appeal and texture of your toppings. Only decorate the cheesecakes you intend to serve immediately. Toasted coconut can lose its crispness and become slightly soggy when exposed to refrigeration for too long. Similarly, certain candies might soften or melt slightly. By decorating just before serving, you ensure every element is at its best.
- The Importance of Room Temperature Ingredients: For a flawlessly smooth cheesecake batter, ensure all your refrigerated ingredients—especially the cream cheese and eggs—are at room temperature. Cold cream cheese is prone to clumping, leading to a lumpy batter no matter how much you beat it. Room temperature ingredients emulsify better, creating a velvety, uniform consistency that is the hallmark of a great cheesecake. Take them out of the fridge at least 1-2 hours before you start mixing.
- Preventing Overbaking (The Jiggle Test): Overbaking is the arch-nemesis of a creamy cheesecake. It leads to a dry, crumbly texture and often causes those dreaded cracks on the surface. For mini cheesecakes, look for edges that are set but a center that still has a slight wobble or “jiggle” when you gently shake the muffin tin. They will continue to set as they cool. Remember that oven temperatures can vary significantly, so relying solely on the timer might not be enough. Trust the visual cues!
- Lining Your Muffin Tin: Always line your muffin tin with paper cupcake liners. This simple step offers multiple benefits: it makes for effortless removal of the cheesecakes without sticking, simplifies cleanup significantly, and ensures each cheesecake maintains its perfect individual shape. Don’t skip this step!
- Thorough Cooling Before Decorating: Patience is a virtue when making cheesecake. After baking, allow the mini cheesecakes to cool completely at room temperature, then transfer them to the refrigerator to chill for at least 2 hours (or ideally overnight). Decorating a warm or even slightly cool cheesecake can lead to melting toppings or a less stable structure. A fully chilled cheesecake is firm, easier to handle, and provides a stable base for your festive adornments.
- Gentle Mixing for a Smooth Batter: When combining the cream cheese, sugar, and vanilla, beat until just smooth. Once you add the eggs, mix them in one at a time on low speed, only until they are just incorporated. Overmixing introduces too much air into the batter, which can cause the cheesecake to puff up excessively in the oven and then collapse and crack as it cools.
- The Perfect Crust Press: To ensure your graham cracker crust is firm and doesn’t fall apart, use a small, flat-bottomed object (like the bottom of a shot glass or a tart tamper) to firmly press the crumb mixture into the bottom of each cupcake liner. A well-compacted crust provides a sturdy base.
Can You Make Mini Cheesecakes in Advance?
Absolutely! This recipe is wonderfully suited for make-ahead preparation, which is a huge advantage when you’re planning for a holiday like Easter. Preparing desserts in advance can significantly reduce stress on the day of your event, allowing you more time to enjoy with family and friends. You can comfortably prepare these mini cheesecakes up to 4 days in advance.
Here’s how to plan your make-ahead strategy:
- Bake and Chill: Follow all the baking steps (Steps 1-5), allowing the cheesecakes to cool completely at room temperature, then chilling them thoroughly in the refrigerator for at least 2 hours, or ideally overnight.
- Store Undecorated: Once completely chilled, transfer the undecorated mini cheesecakes (still in their liners if you prefer, or carefully removed and placed on a platter) to an airtight container. Refrigerate until you’re ready to serve. This helps maintain their optimal texture and prevents any toppings from becoming soggy.
- Last-Minute Decoration: On the day of your event, or just a few hours before serving, you can proceed with Step 6 (toasting the coconut) and Steps 7-8 (decorating with coconut nests and Robin Eggs). This ensures your decorations are fresh, crisp, and vibrant, making for a truly spectacular presentation.
This approach allows you to spread out the work, tackle some of the baking ahead of time, and then perform the fun, creative decorating at the last moment for maximum impact.
Serving Suggestions
These delightful Mini Easter Cheesecakes are versatile enough to complement a variety of occasions and pairings. Here are some ideas to make your dessert presentation truly special:
- As Part of a Dessert Platter: Arrange them alongside other spring-themed treats like fruit tarts, macarons, or small cookies to create an abundant and visually appealing dessert platter.
- With Fresh Fruit: A light side of fresh berries (strawberries, blueberries, raspberries) or sliced kiwi adds a refreshing contrast to the richness of the cheesecake.
- Coffee & Tea Pairing: Their sweet and creamy profile makes them a perfect accompaniment to a warm cup of coffee, espresso, or your favorite herbal tea.
- Brunch Highlight: While often considered an evening dessert, these mini cheesecakes are also a fantastic addition to an Easter brunch spread.
- Gift Idea: Package a few in a decorative box with a ribbon for a thoughtful homemade Easter gift for friends or neighbors.
Frequently Asked Questions (FAQs)
Here are some common questions you might have when making Mini Easter Cheesecakes:
Q: Can I use low-fat cream cheese?
A: While technically possible, we highly recommend using full-fat cream cheese for the best results. Low-fat cream cheese can alter the texture of the cheesecake, making it less creamy and more prone to cracking. The richness and tang of full-fat cream cheese are key to a classic cheesecake flavor.
Q: Why did my cheesecakes crack?
A: Cracks in cheesecake are usually caused by overbaking, overmixing the batter (introducing too much air), or sudden temperature changes during cooling. Ensure your ingredients are at room temperature, mix only until just combined, and watch for the “slight jiggle” in the center to avoid overbaking. Allowing them to cool slowly at room temperature before refrigerating also helps prevent cracks.
Q: How can I ensure my cupcake liners don’t stick to the cheesecake?
A: Using good quality paper cupcake liners is the first step. If you’re concerned, you can lightly spray the inside of the liners with non-stick cooking spray before pressing in the crust. However, with fully chilled cheesecakes, the liners typically peel away cleanly.
Q: Can I use frozen shredded coconut?
A: Yes, if your shredded coconut is frozen, simply thaw it completely before spreading it on the baking sheet to toast. Ensure it’s not wet, as this will affect toasting time and crispness.
Q: How long do these cheesecakes need to chill?
A: A minimum of 2 hours in the refrigerator is necessary for the cheesecakes to fully set and firm up. For the absolute best texture and easiest handling, chilling them overnight is ideal.
More Irresistible Easter Desserts
If you’re looking to expand your Easter dessert spread beyond these delicious mini cheesecakes, explore some of these other festive and easy recipes:
- Easter Egg Rice Krispie Treats
- Bunny Butt Cupcakes Recipe
- Easter Dirt Cups Recipe
- Easter Egg Sugar Cookies Recipe
- Easy Easter Bunny Cookies
- White Chocolate Easter Bark
We encourage you to try this easy and incredibly rewarding recipe for Mini Easter Cheesecakes today. They are sure to bring smiles and sweet moments to your holiday celebration. Please leave a comment once you do and share your experience!
Pin
Mini Easter Cheesecakes
Ingredients
- 1 cup Graham Cracker Crumbs
- 1/4 cup Butter melted
- 2 pkgs Cream Cheese softened – 8 oz each
- 1/2 cup Granulated Sugar
- 1 teaspoon Vanilla Extract
- 2 Large Eggs
- 1 cup Shredded Coconut
- 1 package Robin Eggs
Instructions
- Mix together the graham cracker crumbs and the melted butter.
- Line a 12 cup muffin tin with cupcake liners and press approximately 1 ½ tablespoon of the graham cracker mixture into the bottom of each muffin tin. Set the pan aside.
- Preheat the oven to 325 degrees F.
- In a medium size mixing bowl. Beat together the cream cheese, sugar and vanilla extract. Then add in the eggs, one at a time.
- Spoon the mixture evenly over the top of the crust into each of the muffin tins.
- Bake for 15-20 minutes or until the centers of the cheesecakes are almost set.
- Let the cheesecake cool completely at room temperature and then refrigerate them for at least 2 hours.
- For the Decorations:
- When you are ready to serve and decorate the cheesecakes, preheat the oven to 325 degrees F. Place the shredded coconut evenly on a large baking sheet that has been lined with parchment paper. Bake for 3-5 minutes until the coconut is browned. Watch it closely as the coconut will taste quickly. Let the coconut cool completely at room temperature.
- Top each of the cheesecakes with the shredded coconut and 3-4 of the Robin Eggs.
- Then the cheesecakes are ready to serve and enjoy!
Recipe Notes
Refrigerate the leftover cheesecakes in an airtight container at room temperature for up to 5 days.
Nutrition Facts
Pin This Now to Remember It Later
Pin Recipe
