The Ultimate Dirt Cups Recipe: An Irresistibly Fun & Easy Kid-Friendly Dessert
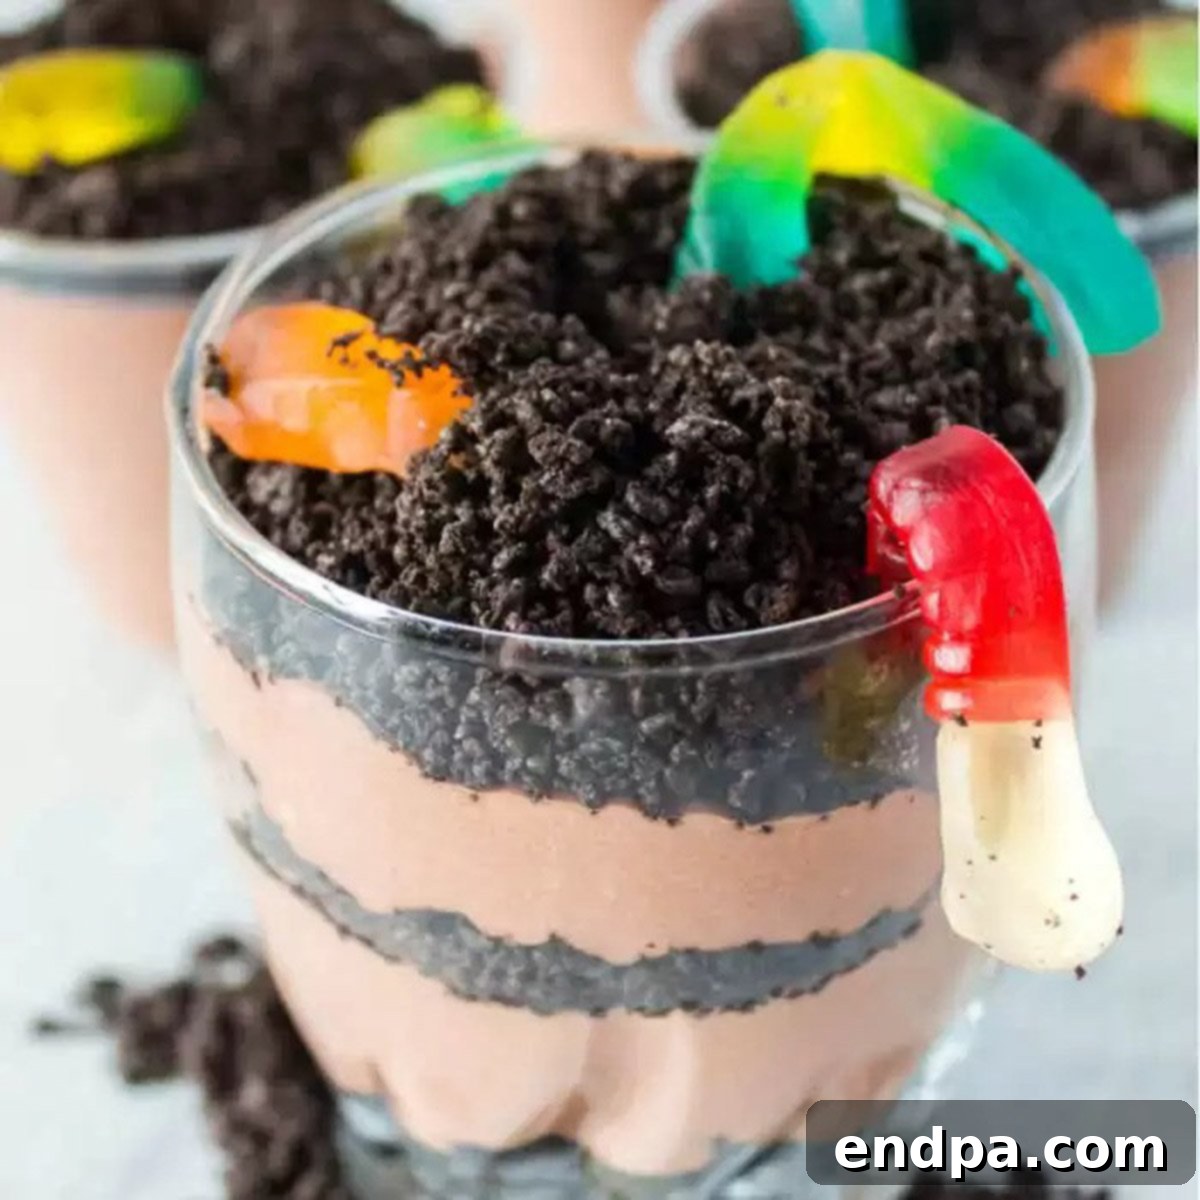
Prepare for smiles and delight with the best dirt cups recipe! This charming no-bake dessert is a whimsical treat that combines layers of rich, creamy chocolate pudding, crunchy crushed Oreo cookies, and playful gummy worms, creating a dessert that truly looks like a miniature garden patch. It’s not just a dessert; it’s an experience, perfect for sparking joy at any party, celebrating Halloween, or simply enjoying a fun, easy-to-make treat with the family.
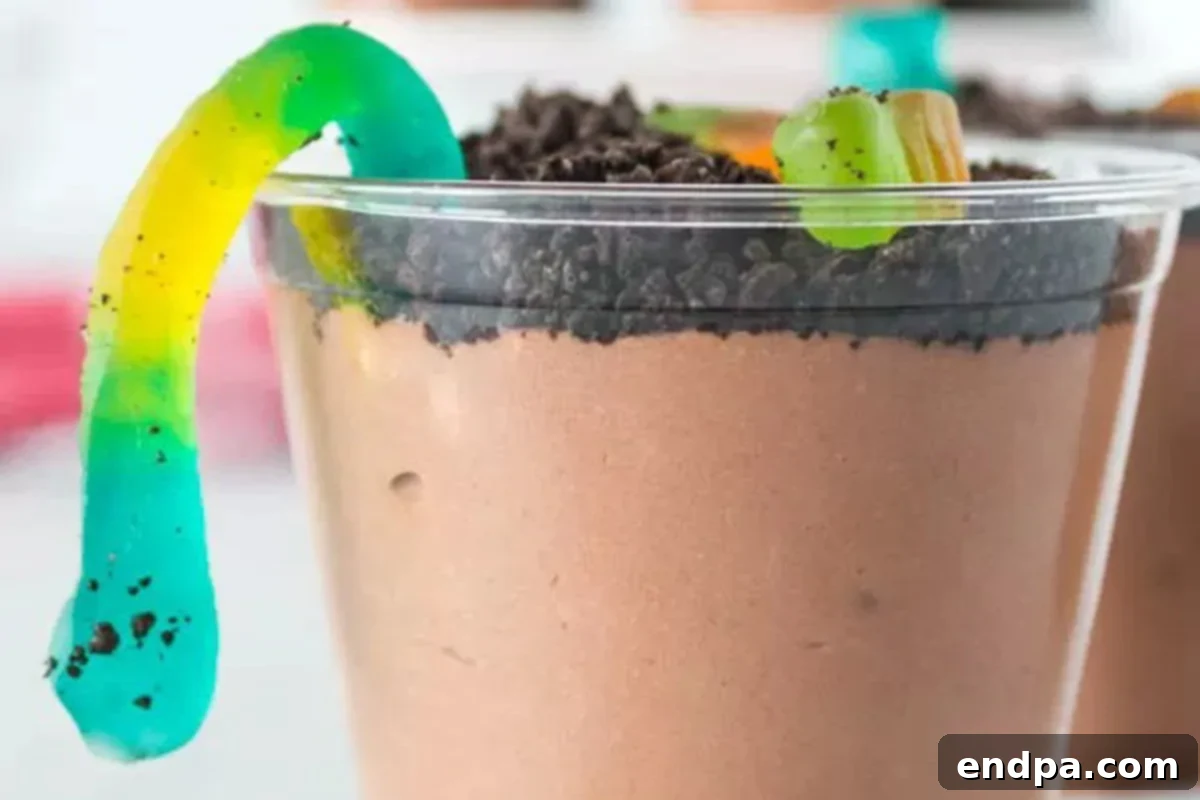
Dirt Cups have captivated hearts for decades, offering a delightful blend of textures and flavors that appeal to both children and adults. The simplicity of their preparation belies their impressive visual appeal, making them a go-to choice for busy parents and party planners. Whether you’re hosting a birthday bash, a spooky Halloween gathering, or just looking for a creative dessert to brighten an ordinary day, these pudding cups deliver fun in every spoonful.
Beyond their charming appearance, these dirt cups are incredibly versatile. They can be scaled up for large crowds or portioned into individual servings, making them ideal for school treats, picnics, or a cozy family dessert night. With minimal effort and common pantry staples, you can transform simple ingredients into a memorable dessert that tastes as good as it looks.
If you’re a fan of our classic Oreo Dirt Cake Recipe, you’ll adore this individual cup version. We also have fantastic seasonal variations like our spooky Halloween Graveyard Dirt Cups and cheerful Easter Dirt Cups. For a sunny, beach-themed twist, be sure to explore our Best Sand Pudding Cups – another delightful no-bake treat that brings summer vibes to your table.
Table of Contents
- Why We Love This Easy Dessert
- Essential Ingredients for Dirt Cups
- Creative Variations and Substitutions
- Step-by-Step Instructions to Make Dirt Cups
- Fun Topping Ideas
- Expert Pro Tips for Perfect Dirt Cups
- Storage and Make-Ahead Tips
- More Themed Dirt Cup Recipes
- More Easy No-Bake Desserts
Why We Adore This Easy Dirt Cups Recipe
There are countless reasons why these delightful dirt cups have become a cherished dessert for families and gatherings. Their irresistible charm and straightforward preparation make them a standout treat:
Kid-Friendly Fun & Engagement
Dirt Cups are an absolute hit with children, offering a unique and playful dessert experience. The iconic combination of crushed cookie “dirt” and wriggling gummy worms sparks imagination, transforming a simple sweet treat into an edible adventure. Kids love helping to assemble them, especially adding the gummy worms, making it a fun activity as well as a delicious snack.
Quick & Easy Assembly
One of the biggest advantages of this recipe is its incredible simplicity. Utilizing instant chocolate pudding mix and thawed whipped topping means minimal cooking and prep time. You can whip up a batch of these charming desserts in under 20 minutes, making them perfect for last-minute parties, busy weeknights, or when you need a crowd-pleasing treat without the fuss.
Irresistibly Creamy & Chocolatey
At the heart of every great dirt cup is its decadent chocolate flavor and smooth texture. The blend of rich chocolate pudding and light, fluffy whipped topping creates a luscious, creamy base that melts in your mouth. Paired with the distinct crunch of crushed Oreo cookies, each spoonful offers a delightful contrast that chocolate lovers will find utterly satisfying.
Visually Impressive & Thematic
The layered presentation of these dirt cups is undeniably eye-catching. Mimicking actual garden dirt, complete with “earthworms,” they are a fantastic thematic dessert for various occasions. Whether it’s a Halloween party, a garden-themed birthday, or a spring celebration, their whimsical appearance makes them a focal point and a guaranteed conversation starter.
Remarkably Versatile Dessert
This recipe offers superb flexibility in serving. While traditionally made in individual cups, dirt cups can also be prepared in larger bowls, a clear trifle dish, or even a small planter for a more dramatic effect. This adaptability makes them suitable for any gathering size, from intimate family dinners to large celebratory events, allowing for creative presentation tailored to your specific needs.
Essential Ingredients for Perfect Dirt Cups
Crafting these delectable dirt cups requires just a handful of readily available ingredients. Each component plays a vital role in creating the iconic flavor and texture that makes this dessert so beloved:
Instant Chocolate Pudding Mix
The foundation of our dirt cups, instant chocolate pudding mix (such as Jell-O brand) provides the rich, deep chocolate flavor and a wonderfully smooth, creamy texture. Opting for instant pudding ensures a quick preparation without any cooking, making this a truly no-bake marvel. A standard 3.4 oz small box is usually sufficient for a batch, but you can adjust based on your desired chocolate intensity and volume.
Cold Milk
Milk is essential for activating and thickening the instant pudding mix. Using cold milk helps the pudding set properly and quickly, resulting in that perfectly creamy consistency. While any milk will work, whole milk or 2% milk often yield a richer, more luxurious pudding compared to skim milk, adding to the overall indulgence of the dessert.
Thawed Whipped Topping (Cool Whip)
To achieve the signature light and airy texture of dirt cups, thawed whipped topping (like Cool Whip) is folded into the prepared pudding. This not only enhances the creaminess but also adds a delightful fluffiness, making the dessert feel less dense and more ethereal. Ensure it’s fully thawed before gently incorporating it for the best results.
Crushed Oreo Cookies for the “Dirt”
No dirt cup is complete without its signature “dirt” layer! Crushed Oreo cookies are the perfect choice, providing a dark, crumbly texture and an unmistakable chocolatey flavor. You can crush them finely for a soil-like appearance or leave some larger chunks for added texture and bite. Both the cookie wafers and the cream filling contribute to the deliciousness.
Playful Gummy Worms
The whimsical touch that truly defines a dirt cup! Gummy worms are threaded through the crushed cookie layer, peeking out as if they’re wriggling through the “earth.” These colorful, chewy candies add a fun visual element and a delightful textural contrast to the soft pudding and crunchy cookies, making the dessert especially appealing to children.
A detailed breakdown of quantities and specific instructions can be found in the comprehensive recipe card below.
Creative Variations and Smart Substitutions
While the classic dirt cup recipe is perfect as is, it’s also wonderfully adaptable! Don’t hesitate to get creative with these variations and substitutions to tailor the dessert to your taste or event theme:
Golden Oreo Dirt Cups
For a lighter, vanilla-flavored “dirt,” swap out the traditional chocolate Oreo cookies for Golden Oreos. Their golden color and sweet vanilla crunch offer a delightful alternative, perfect for those who prefer a less intense chocolate flavor or want to create a “sand” effect for a beach party theme.
Vanilla Pudding Delight
If chocolate isn’t your preferred pudding base, easily substitute instant vanilla pudding mix for the chocolate variety. This creates a lighter-colored, equally delicious dessert, allowing the cookie and gummy worm flavors to shine in a new way. You can even experiment with other pudding flavors like banana or butterscotch for unique twists.
Homemade Whipped Cream
For an extra touch of homemade luxury, you can substitute store-bought whipped topping with freshly made Homemade Whipped Cream. Simply whip heavy cream with a touch of sugar and vanilla extract until soft peaks form. This option offers a richer, more natural cream flavor that elevates the overall dessert experience.
Seasonal & Holiday Themes
Dirt cups are incredibly versatile for holiday customization. For Christmas, use red and green candies or crushed peppermints. For Easter, add coconut flakes (dyed green for “grass”) and mini chocolate eggs. The possibilities are endless for adapting this dessert to any festive occasion.
Different Cookie Crumbles
Beyond Oreos, consider using other crushed cookies like Graham crackers for a lighter “dirt” or chocolate chip cookies for a different texture and flavor profile. You can also mix different types of cookies for a complex “soil” base.
Dairy-Free or Vegan Options
With the increasing availability of plant-based products, you can easily make these dirt cups dairy-free or vegan. Use plant-based milk (almond, soy, oat), dairy-free instant pudding mixes, and vegan whipped toppings (often coconut-based). Ensure your cookies and gummy worms are also vegan-friendly.
Step-by-Step Instructions to Create Your Own Dirt Cups
Making these fun dirt cups is incredibly straightforward, even for novice bakers. Follow these simple steps to create a batch of delightful, kid-friendly desserts:
Step 1: Prepare the Pudding Base
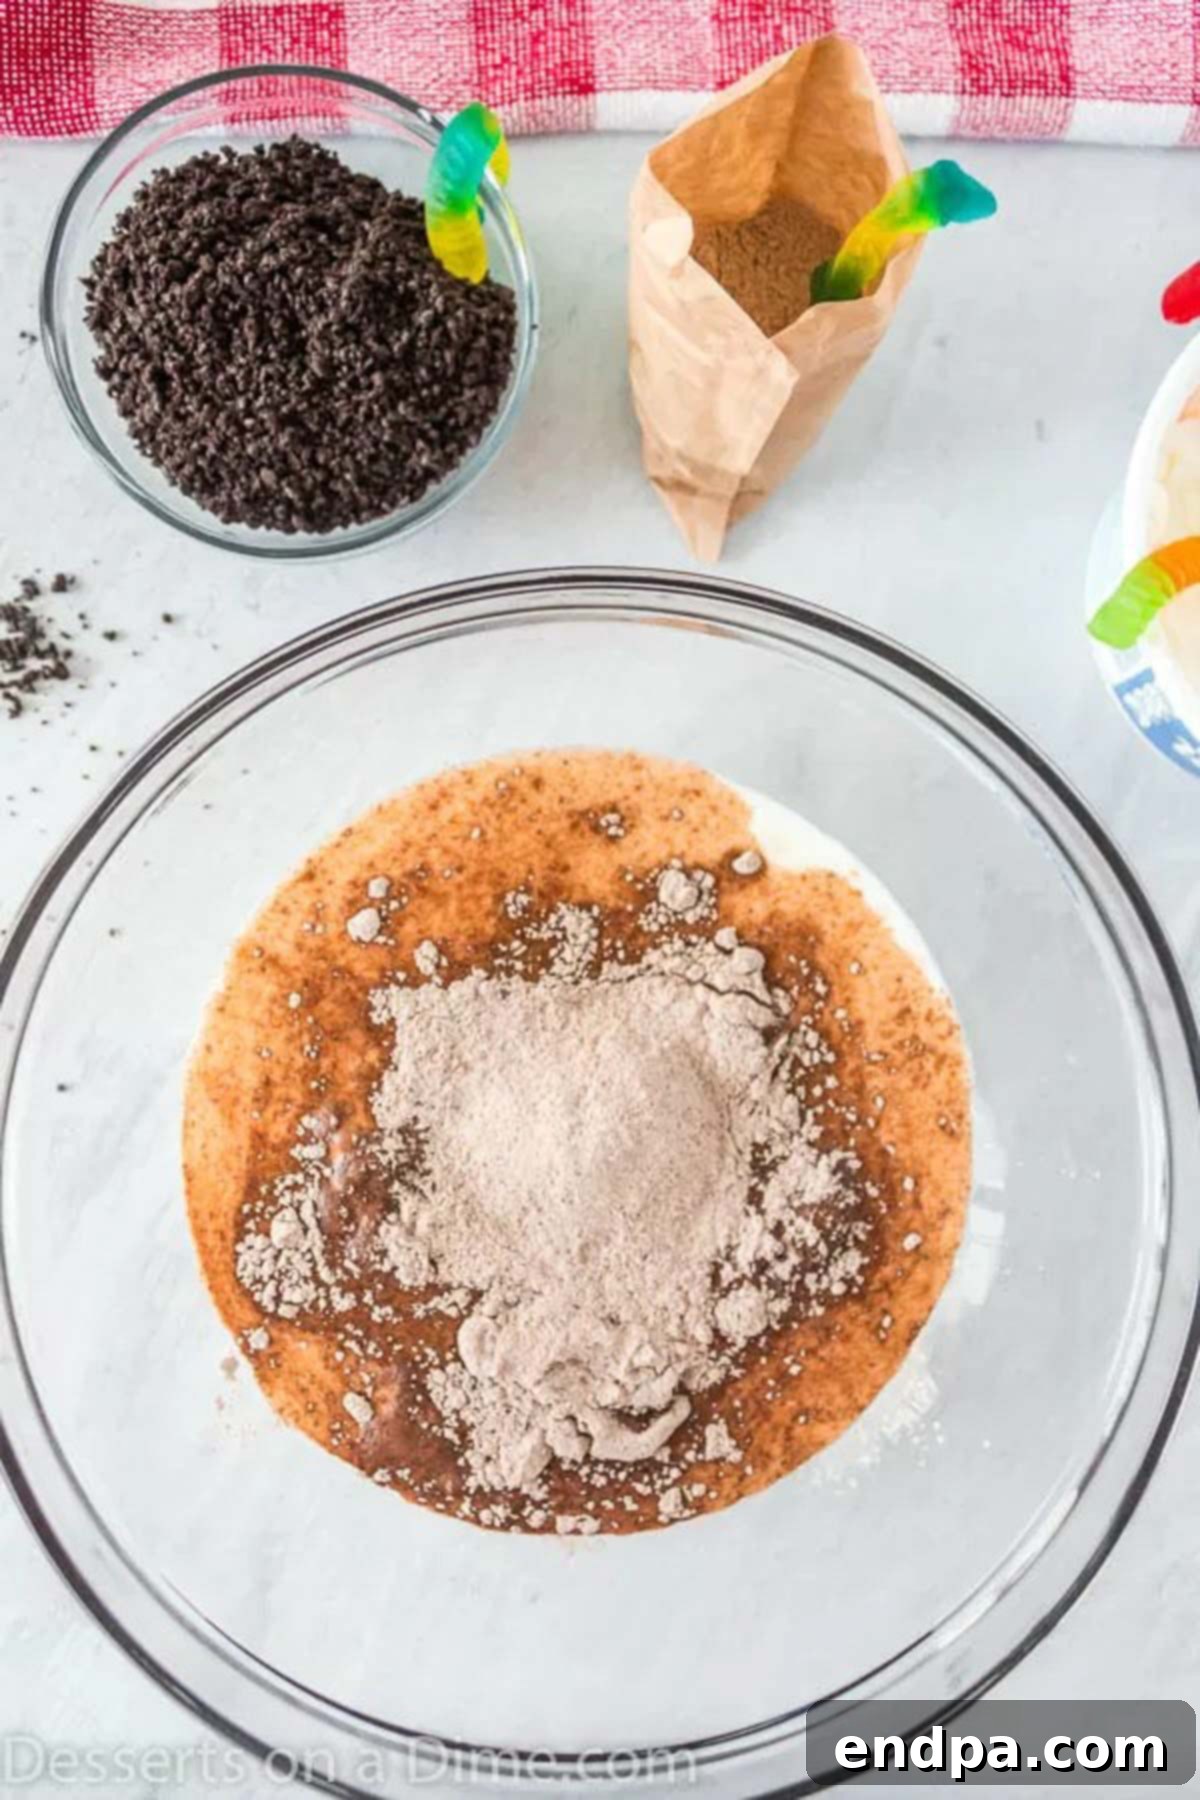
In a large mixing bowl, pour in the cold milk. Gradually add the instant chocolate pudding mix over the milk, sprinkling it evenly to prevent clumps. Using a whisk, vigorously whisk the mixture for about 2 minutes until it is well combined and begins to thicken. It should be smooth and free of any dry pudding powder.
Step 2: Chill and Combine
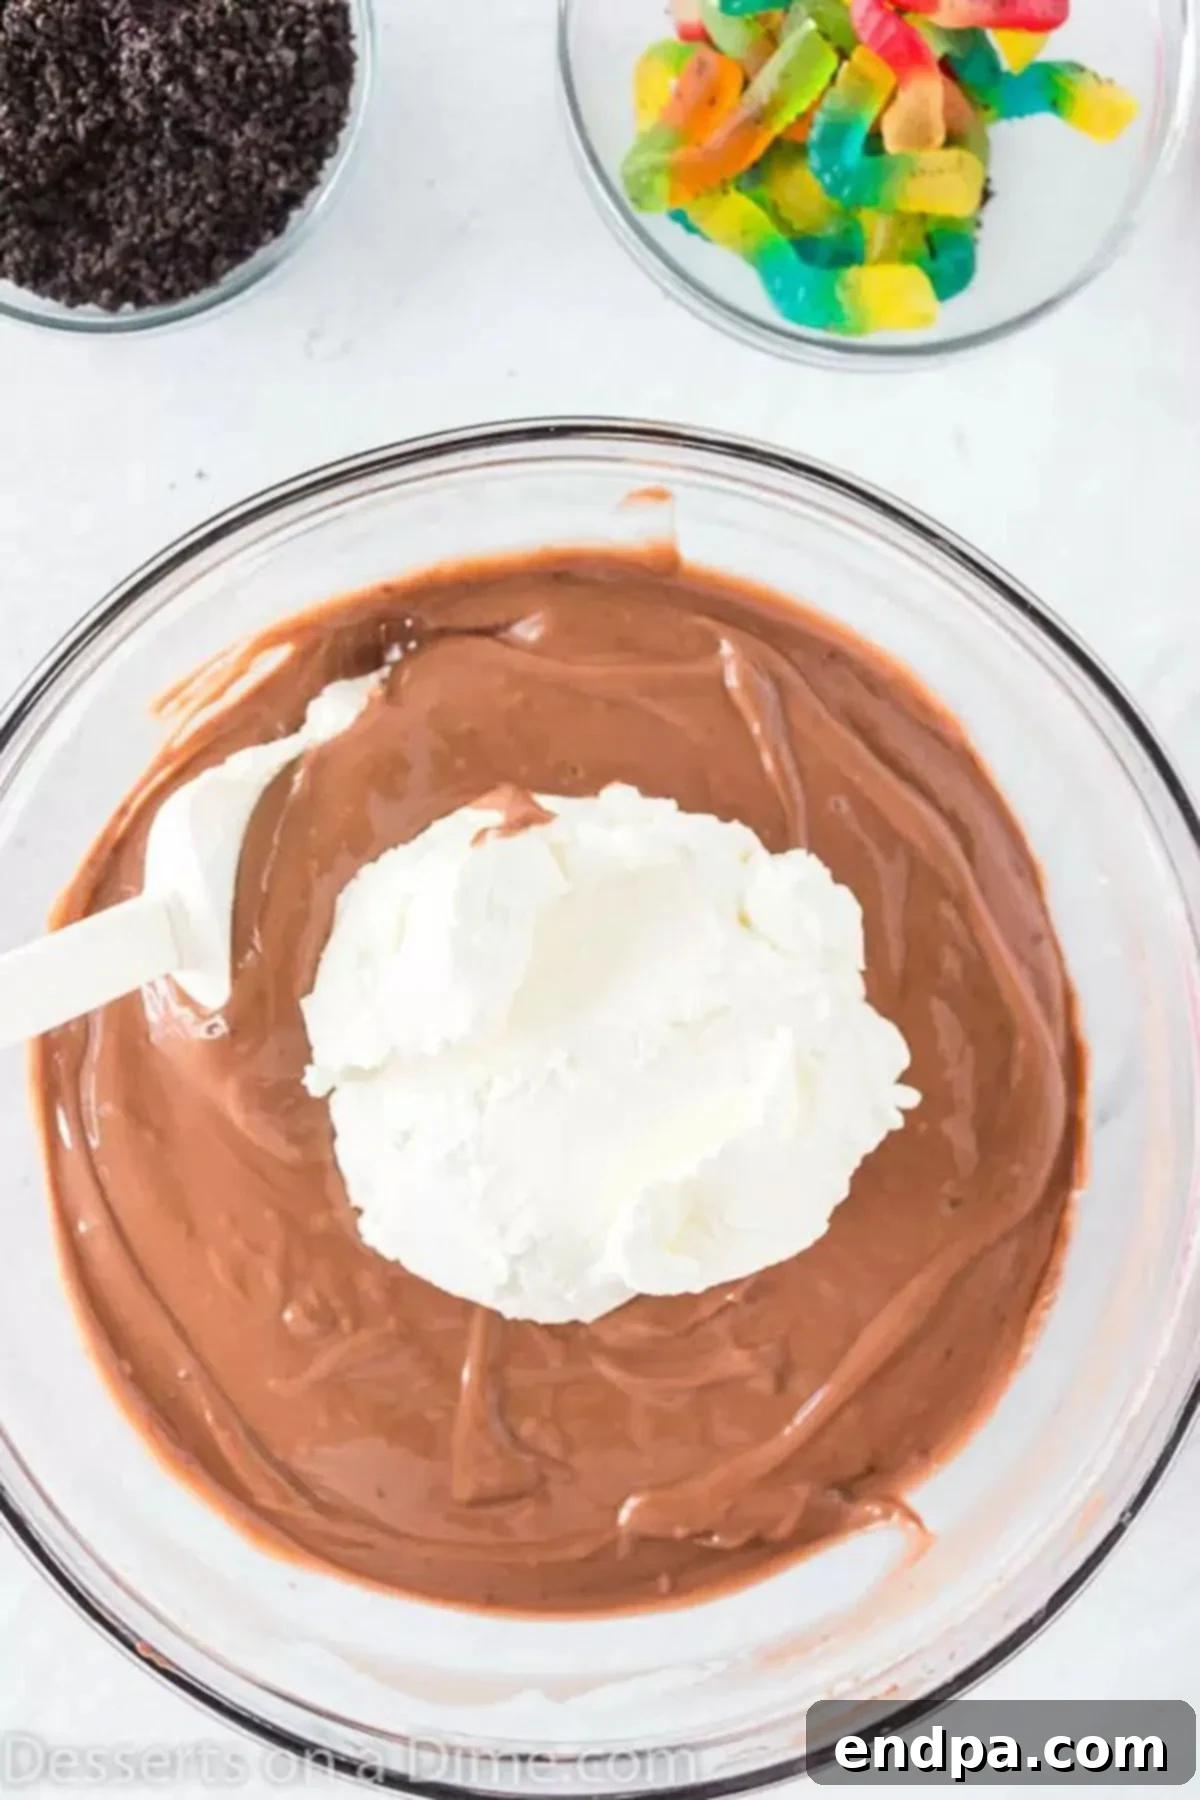
Once the pudding mixture is whisked, place the bowl in the refrigerator for approximately 10 minutes. This brief chilling period allows the pudding to set properly, achieving a firmer consistency. After it has set, gently fold in the thawed whipped topping (Cool Whip) using a spatula until both ingredients are fully incorporated and the mixture is light and fluffy. Be careful not to overmix.
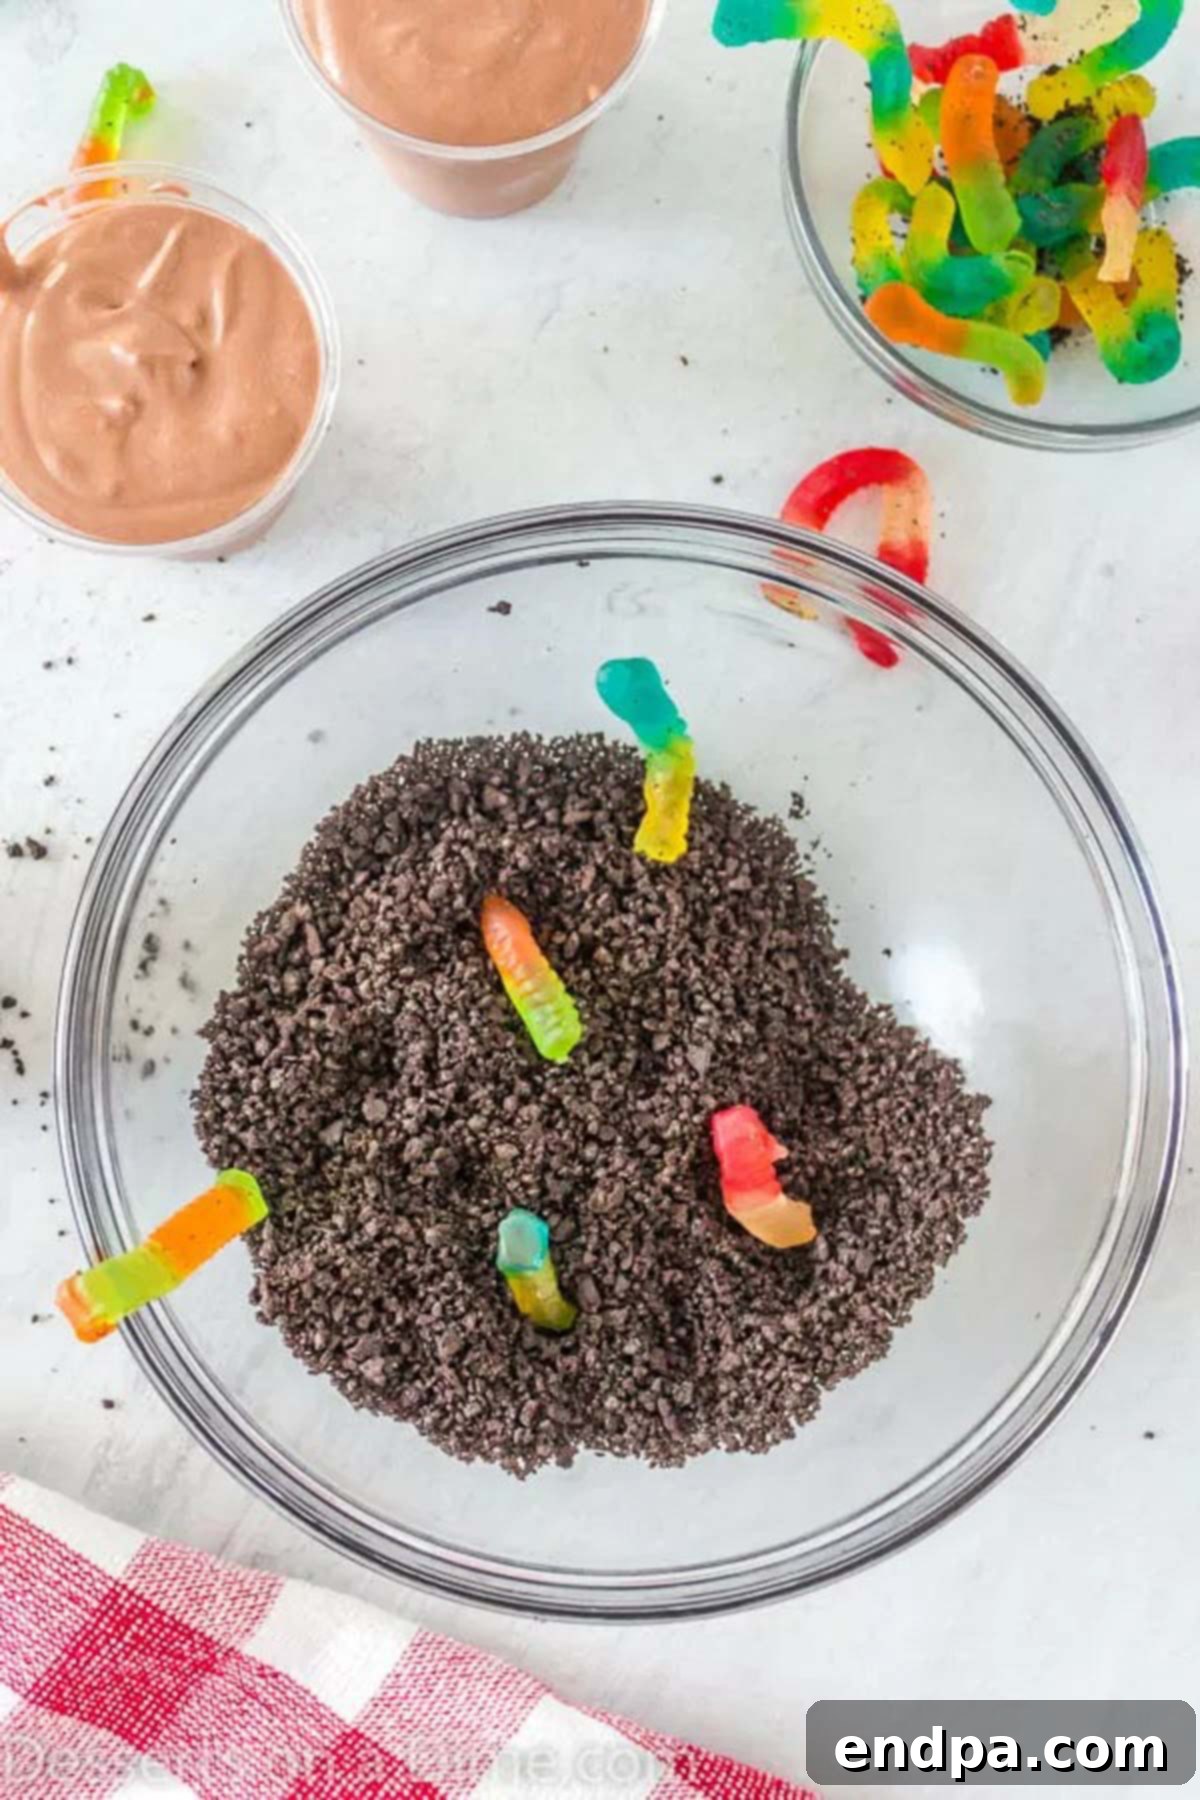
Step 3: Prepare Your “Dirt”
While the pudding chills, prepare your “dirt” layer. Place the Oreo cookies (including the cream filling) into a food processor and pulse until finely crushed, resembling dark soil. If you don’t have a food processor, you can place the cookies in a large zip-top bag and crush them using a rolling pin or the bottom of a heavy glass. Set aside a portion of the crushed cookies for layering and another for topping.
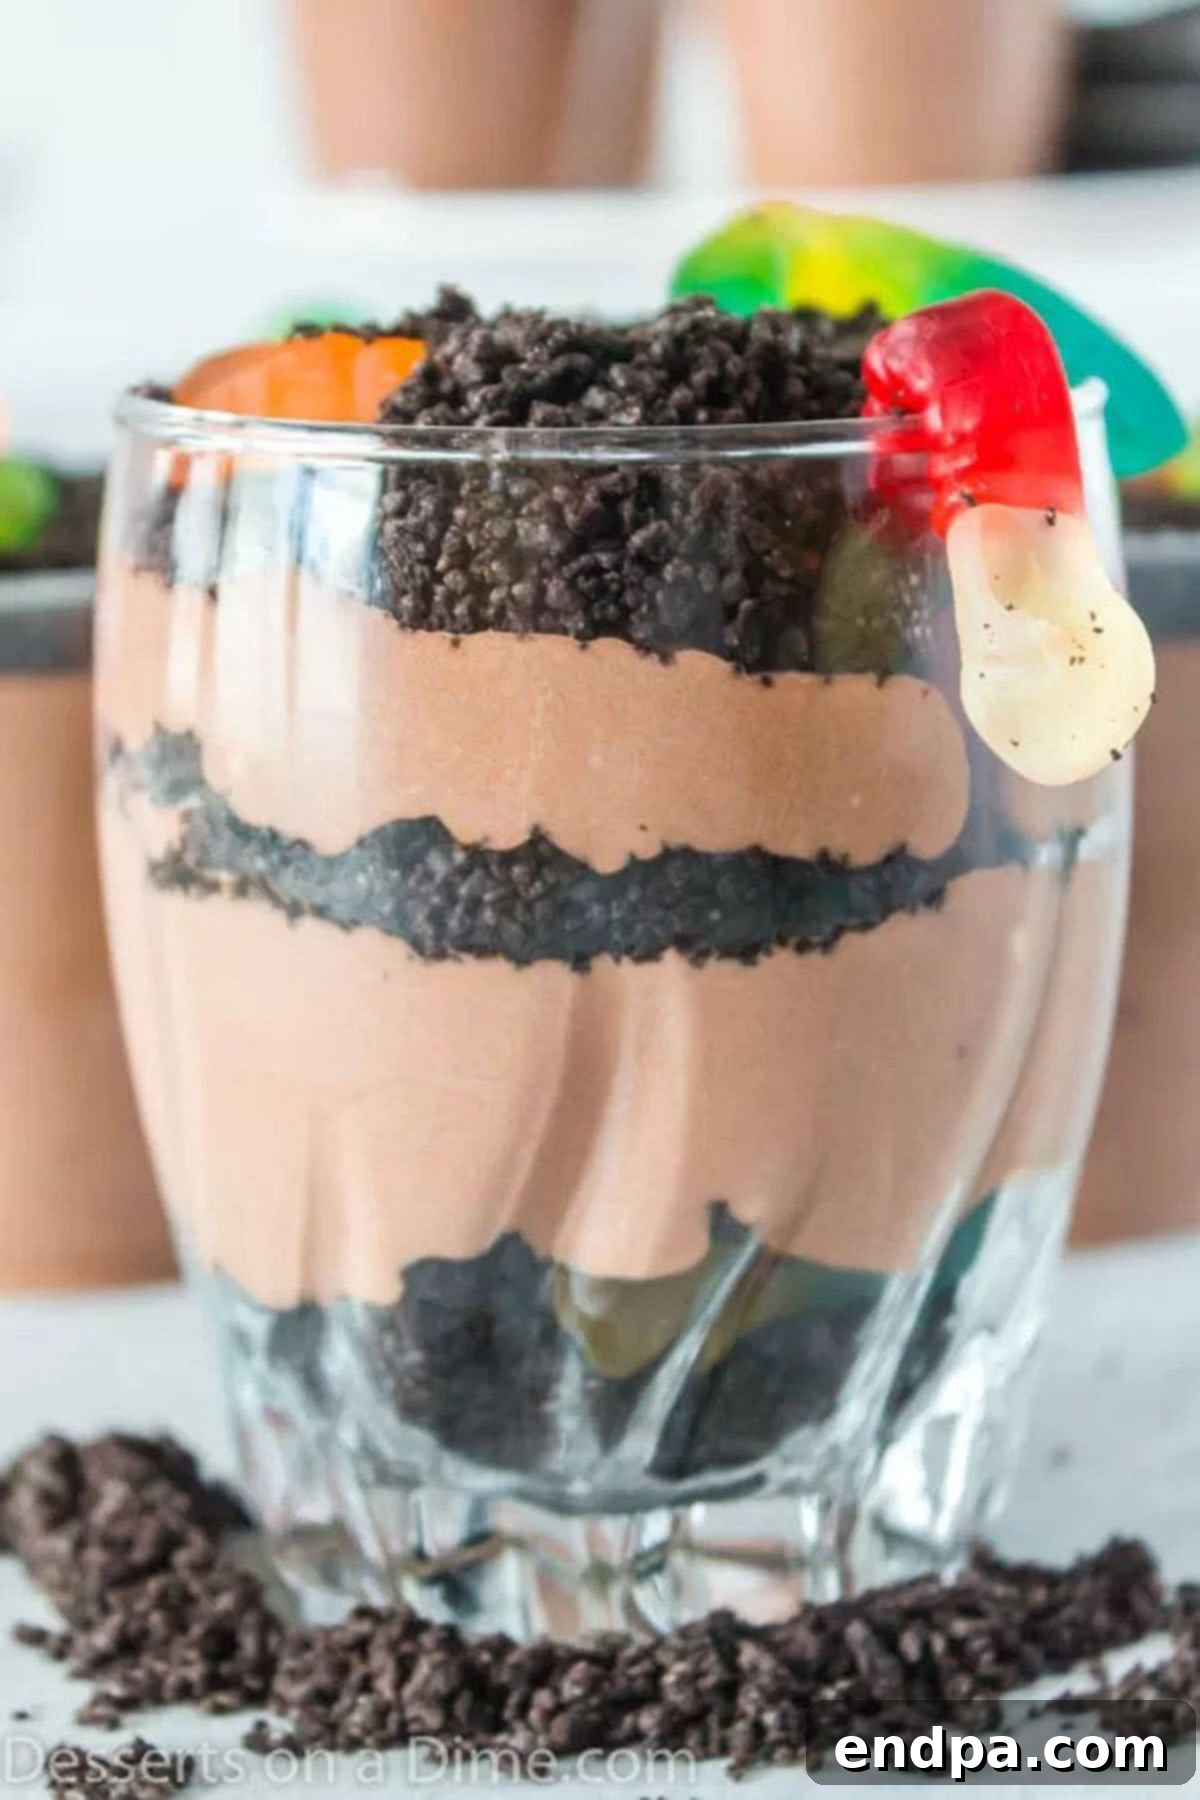
Step 4: Assemble Your Dirt Cups
Now it’s time for the fun part – assembly! Start by spooning a layer of the chocolate pudding mixture into the bottom of your chosen serving cups or glasses. Follow with a generous sprinkle of crushed Oreo cookies. Repeat these layers until your cups are nearly full, ending with a final layer of cookie “dirt” on top. For the best presentation and to allow the layers to meld, place the assembled cups in the refrigerator to chill for at least 20 minutes.
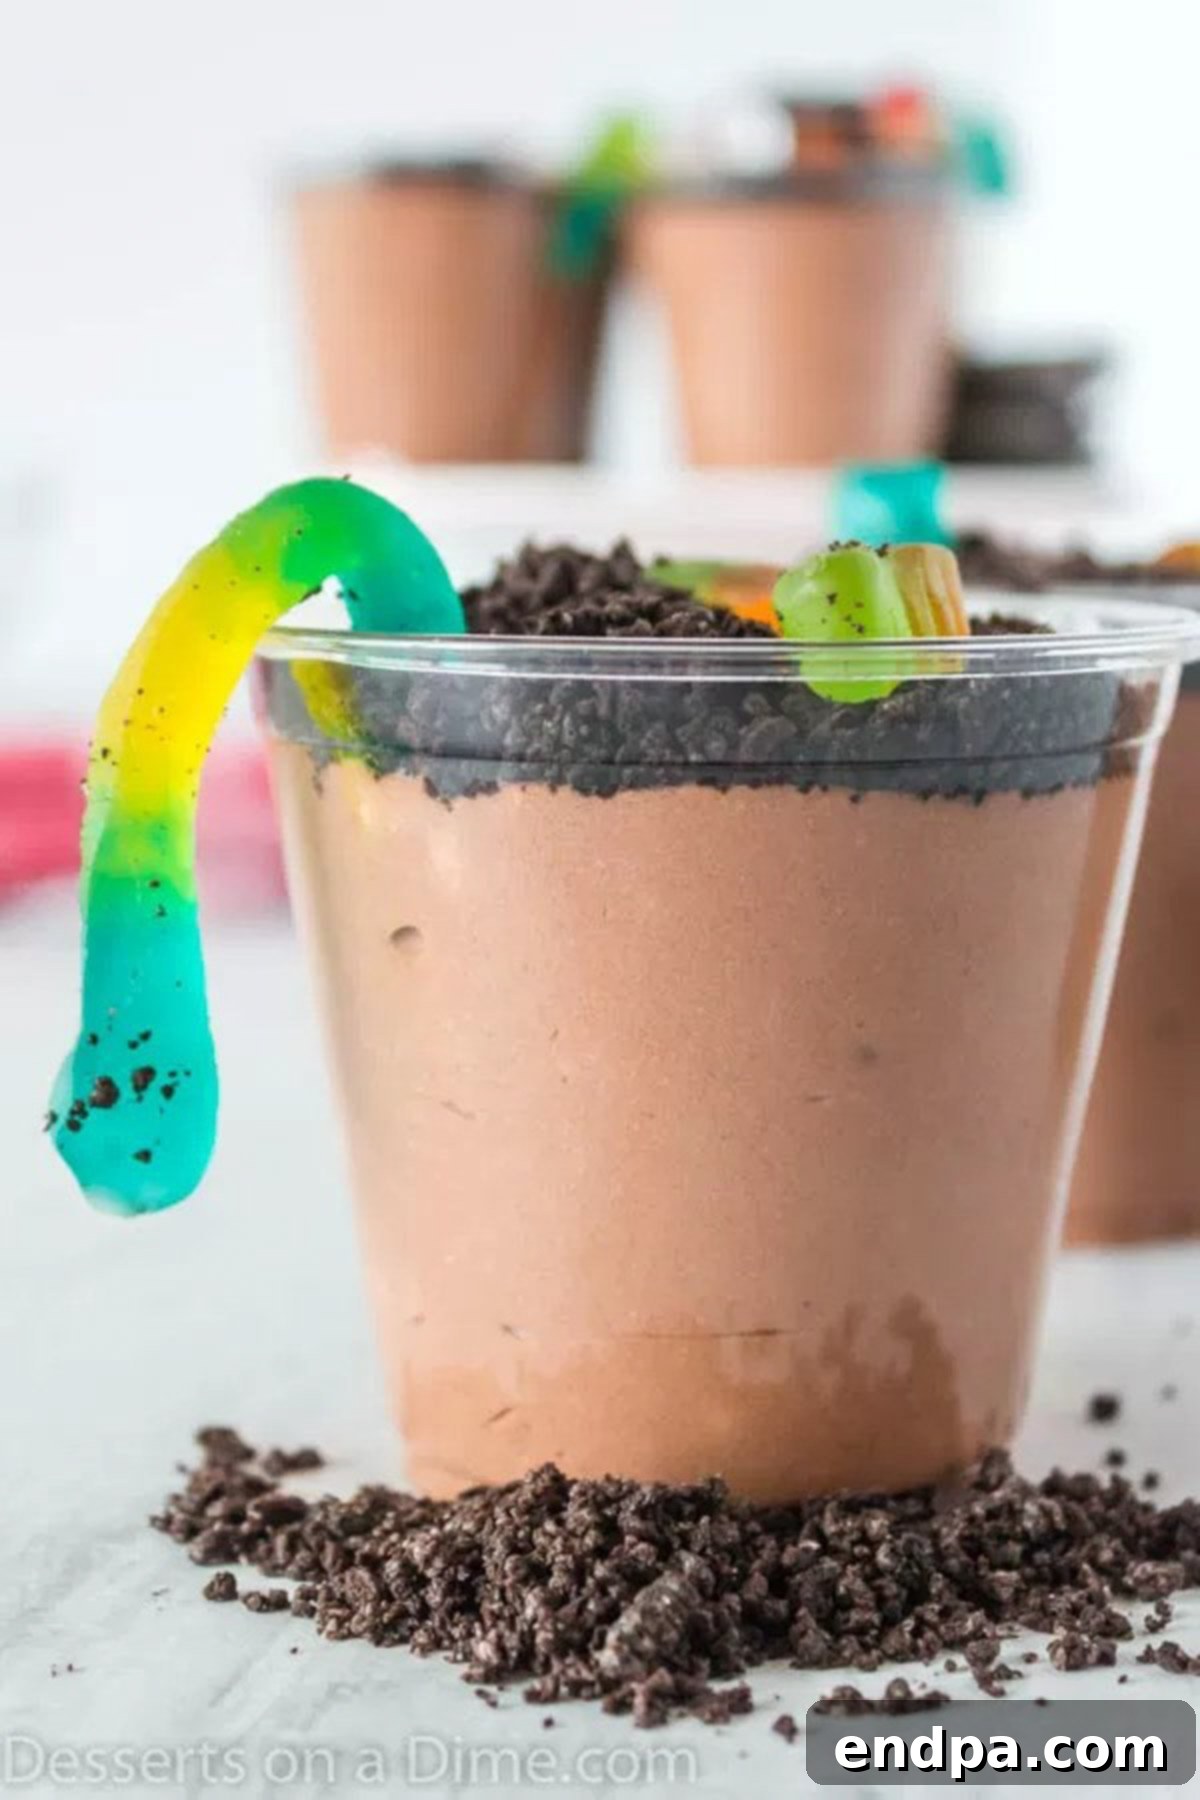
Fun Topping Ideas to Personalize Your Dirt Cups
While classic crushed Oreos and gummy worms are iconic, don’t shy away from experimenting with other toppings to add extra flair, flavor, and visual appeal to your dirt cups. Here are some fantastic ideas:
Classic Crushed Oreos
The staple “dirt” layer, crushed Oreo cookies provide that authentic dark, crumbly texture and rich chocolate flavor that makes these cups so recognizable. Ensure you have plenty for both layering and a generous top coating.
Whimsical Gummy Worms
These colorful, chewy candies are a must-have for the classic dirt cup look. Arrange them so they appear to be crawling out of the “dirt” for a truly playful and engaging presentation, especially appealing to children.
Extra Chocolate Goodness
Elevate the chocolate factor with chocolate shavings, mini chocolate chips, or even chocolate syrup drizzled on top. This adds another layer of rich flavor and a delightful textural contrast for true chocolate enthusiasts.
Bright & Festive Sprinkles
For parties or special celebrations, a sprinkle of colorful jimmies or nonpareils can instantly brighten your dirt cups. Choose colors that match your party theme for an extra personalized touch.
Mini Marshmallow Clouds
Add a soft, fluffy texture and a hint of extra sweetness with mini marshmallows. They can be gently folded into the pudding mixture or sprinkled on top for a delightful, airy contrast.
Edible Flowers or Mints
For a sophisticated or garden-themed dessert, consider adding small edible flowers or fresh mint leaves as a garnish. This gives an elegant touch that beautifully complements the “garden” aesthetic. Ensure any flowers used are specifically marked as edible.
Candy Rocks or Pebbles
Small, smooth candy-coated chocolates (like M&M’s Minis or specialized candy rocks) can mimic pebbles or stones, adding another realistic touch to your edible garden.
Cookie Crumbs & Crushed Candies
Experiment with other crushed cookies (like shortbread or chocolate chip) or even crushed candy bars for varying flavors and textures. For instance, crushed toffee bits or Butterfinger pieces would add a delightful crunch.
Expert Pro Tips for Creating the Best Dirt Cups
Achieving perfectly layered, delicious dirt cups is simple with these expert tips. Follow these recommendations to ensure your dessert is a showstopper every time:
Master the Art of Layering
For an aesthetically pleasing dirt cup, pay attention to your layers. Alternate pudding mixture and crushed cookie “dirt” carefully, creating distinct, even strata. This not only looks great but also ensures a balanced taste and texture in every spoonful. Use a spoon to gently spread the pudding layers to avoid mixing with the cookie crumbs.
Freshness is Key
While these are quick and easy, using fresh ingredients makes a noticeable difference. Ensure your milk is cold and fresh, and your whipped topping is properly thawed for the best flavor and consistency. Freshly crushed cookies also tend to have a better texture than pre-crushed varieties.
The Importance of Chilling
Don’t rush the chilling process! Allowing the assembled dirt cups to chill in the refrigerator for at least 1-2 hours (or even longer) is crucial. This time allows the pudding to fully set, the layers to firm up, and the flavors to meld beautifully, resulting in a cohesive and delightful dessert. Serving them well-chilled also enhances their refreshing quality.
Achieving Uniform “Dirt”
For that authentic “dirt” texture, crushing your cookies evenly is vital. A food processor is the quickest and most efficient tool, yielding fine, consistent crumbs. If you don’t have one, a sturdy zip-top bag and a rolling pin work wonders; just make sure to crush them thoroughly. You can also leave a few larger chunks for varied texture.
Gently Fold the Whipped Topping
When incorporating the thawed whipped topping into the pudding, use a gentle folding motion with a spatula. Avoid vigorous whisking, as this can deflate the whipped topping and result in a less airy, lighter pudding mixture. The goal is to maintain that delicate, fluffy texture.
Timing Your Decorations
To ensure your dirt cups look their best, add delicate toppings like gummy worms, sprinkles, or edible flowers just before serving. This prevents the gummy candies from hardening or becoming sticky, and keeps the sprinkles from dissolving into the pudding, maintaining their vibrant colors and fresh appearance.
Individual vs. Large Batch
While individual cups are charming, consider making a large batch in a clear trifle bowl or a decorative planter for a stunning centerpiece. If using a planter, make sure it’s new and food-safe, lining it with plastic wrap before assembly.
Sweetness Adjustment
If you prefer a less sweet dessert, you can opt for sugar-free instant pudding mix or unsweetened cocoa powder if making pudding from scratch. The sweetness from the cookies and gummy worms will still be present, providing a balanced flavor.
Storage and Make-Ahead Tips for Dirt Cups
Dirt cups are fantastic for making ahead, but proper storage is essential to keep them fresh and delicious. Here’s how to store your creations:
Refrigeration is Key
Once assembled, dirt cups should always be stored in the refrigerator. Place them in an airtight container or cover individual cups tightly with plastic wrap. When properly stored, they will remain fresh and delicious for up to 3-4 days. This makes them an excellent make-ahead dessert for parties and events.
Prevent Odor Absorption
Pudding and whipped topping can easily absorb odors from other foods in the refrigerator. To maintain their pristine taste, ensure your dirt cups are covered snugly with plastic wrap or tight-fitting lids. This barrier protects the delicate flavors and prevents any unwanted absorption.
Freezing is Not Recommended
While many desserts can be frozen, dirt cups generally do not fare well in the freezer. The delicate texture of both the whipped topping and the instant pudding can become watery, grainy, or separate upon thawing, significantly compromising the dessert’s quality. It’s best to enjoy them fresh from the fridge.
Last-Minute Topping Application
For the freshest appearance, it’s always best to add delicate decorative toppings like gummy worms, sprinkles, or edible flowers just before serving. If added too early, gummy candies can become hard or sticky, and sprinkles might dissolve or lose their vibrant color. Store these elements separately and apply them right before presentation.
Explore More Fun Dirt Cup Recipes
If you’ve fallen in love with these classic dirt cups, you’ll be thrilled to discover how easily they can be adapted for various holidays and themes. Get inspired by these other popular dirt cup variations:
- Festive Christmas Dirt Cups Recipe
- Game Day Football Dirt Cups
- 39 Easy Dessert Cup Recipes for Every Occasion
Delightful No-Bake Desserts You’ll Love
For those who appreciate quick, delicious treats without turning on the oven, explore more of our fantastic no-bake dessert ideas. Perfect for warm weather or when you’re short on time!
- No-Bake Cinnamon Cornflake Cereal Bars Recipe
- Quick & Easy No-Bake Cookies
- Simple No-Bake Cheerios Bars Recipe
- Quick and Easy Fruity Pebble Bars Recipe
- Irresistible Cookies and Cream Muddy Buddies
We hope you thoroughly enjoy creating and sharing this fun, easy, and undeniably delicious dirt cups recipe. It’s truly a classic for a reason! We’d love to hear about your experience – don’t hesitate to leave a comment and share your feedback on how much everyone loved this whimsical treat!
Dirt Cups Recipe Card
This classic, easy-to-make dessert is a true crowd-pleaser. Layers of creamy chocolate pudding, crumbly Oreo “dirt,” and playful gummy worms create a whimsical treat that’s perfect for any occasion. Simple to prepare and always a hit, these dirt cups are guaranteed to bring smiles.
Prep Time: 10 minutes
Chill Time: 30 minutes
Total Time: 40 minutes
Yields: 8 servings (9 oz cups)
Cuisine: American
Course: Dessert
Calories: 242 kcal per serving
Author: Carrie Barnard
Ingredients
For the Dirt Cups:
- 1-2 small boxes (3.4 oz each) instant chocolate pudding mix
- 2 cups cold milk (whole or 2% recommended for creaminess)
- 1 tub (8 oz) whipped topping, thawed (like Cool Whip)
For the Toppings:
- 10-12 Oreo cookies, crushed (use a food processor or a zip-top bag with a rolling pin)
- Gummy worms (an assortment of colors for visual appeal)
Instructions
- In a medium-sized mixing bowl, pour in the cold milk.
- Sprinkle the instant chocolate pudding mix over the cold milk. Whisk vigorously for about 2 minutes until the mixture is well combined and begins to thicken.
- Place the pudding mixture in the refrigerator for approximately 10 minutes to allow it to set further.
- Once the pudding has set, carefully fold in the thawed whipped topping using a spatula until the mixture is light, fluffy, and uniformly combined. Avoid overmixing.
- Begin assembling your dirt cups. Spoon a layer of the chocolate pudding and whipped topping mixture into the bottom of individual glasses or cups (about 9 oz capacity).
- Sprinkle a generous layer of crushed Oreo cookies over the pudding mixture.
- Repeat the layering process: add another layer of pudding mixture, followed by another layer of crushed Oreos. Continue until your cups are almost full, ensuring the top layer is crushed cookies.
- Place the assembled dirt cups in the refrigerator for at least 20 minutes to chill thoroughly before serving. This allows the layers to set firmly.
- Just before serving, arrange gummy worms on top of the crushed Oreo “dirt,” allowing some to peek out as if they are burrowing into the earth. Serve chilled and enjoy!
Nutrition Facts (per serving)
Calories: 242 kcal, Carbohydrates: 31g, Protein: 17g, Fat: 6g, Saturated Fat: 3g, Cholesterol: 11mg, Sodium: 149mg, Potassium: 143mg, Fiber: 1g, Sugar: 20g, Vitamin A: 148IU, Calcium: 111mg, Iron: 1mg
