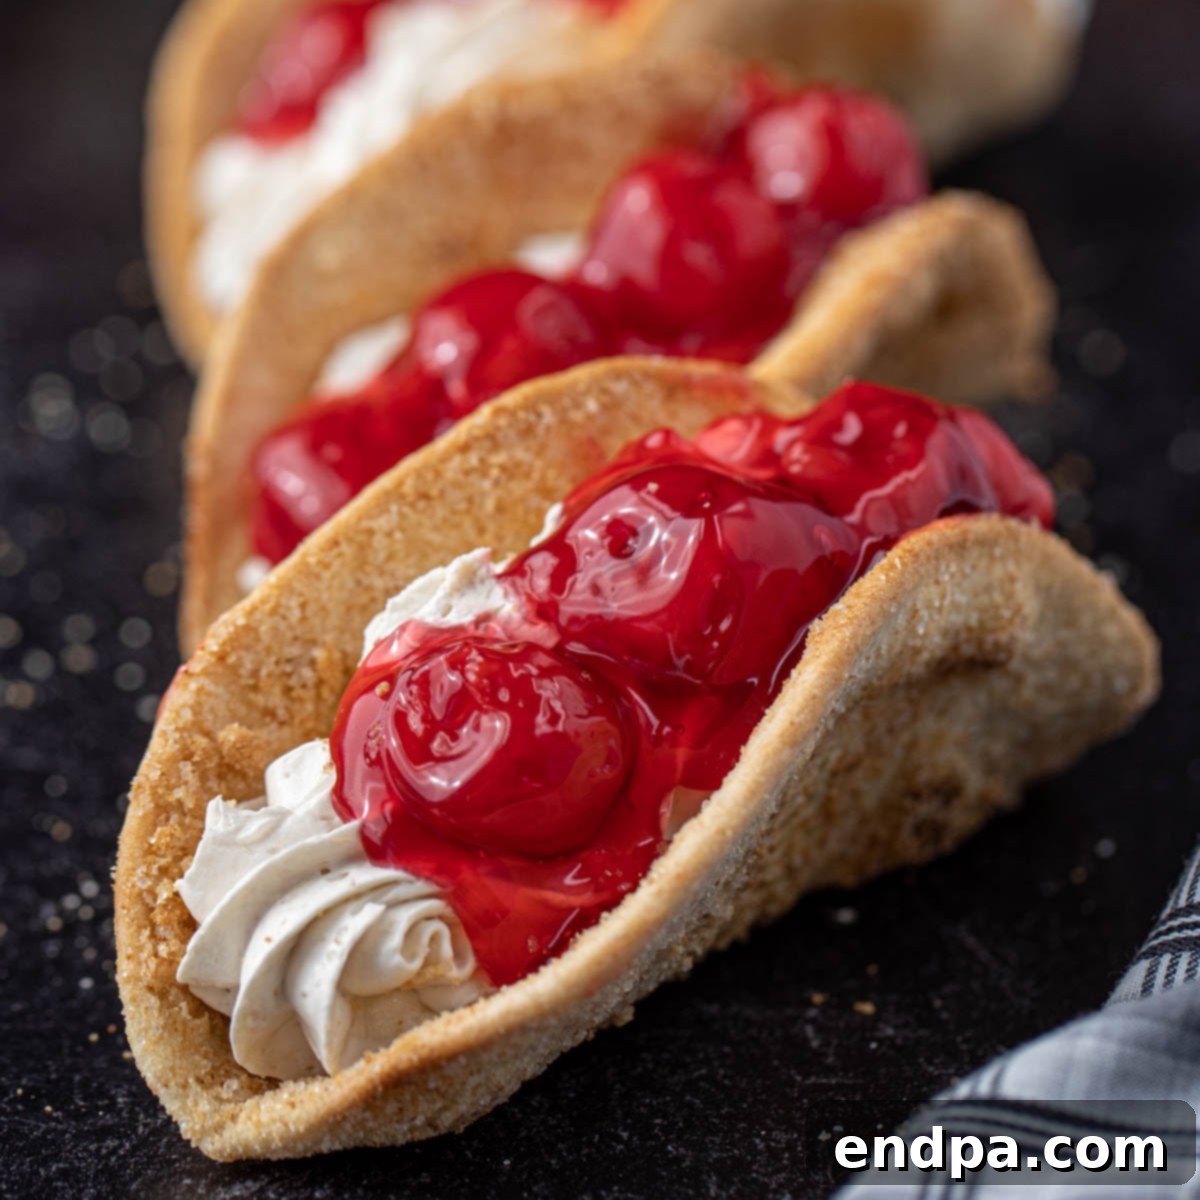
Cheesecake Tacos offer a delightful fusion of textures and flavors, combining a wonderfully crispy, sugar-coated shell with a luscious, creamy cheesecake filling. Topped with vibrant cherry pie filling, these dessert tacos are an absolute showstopper and a guaranteed crowd-pleaser for any occasion.
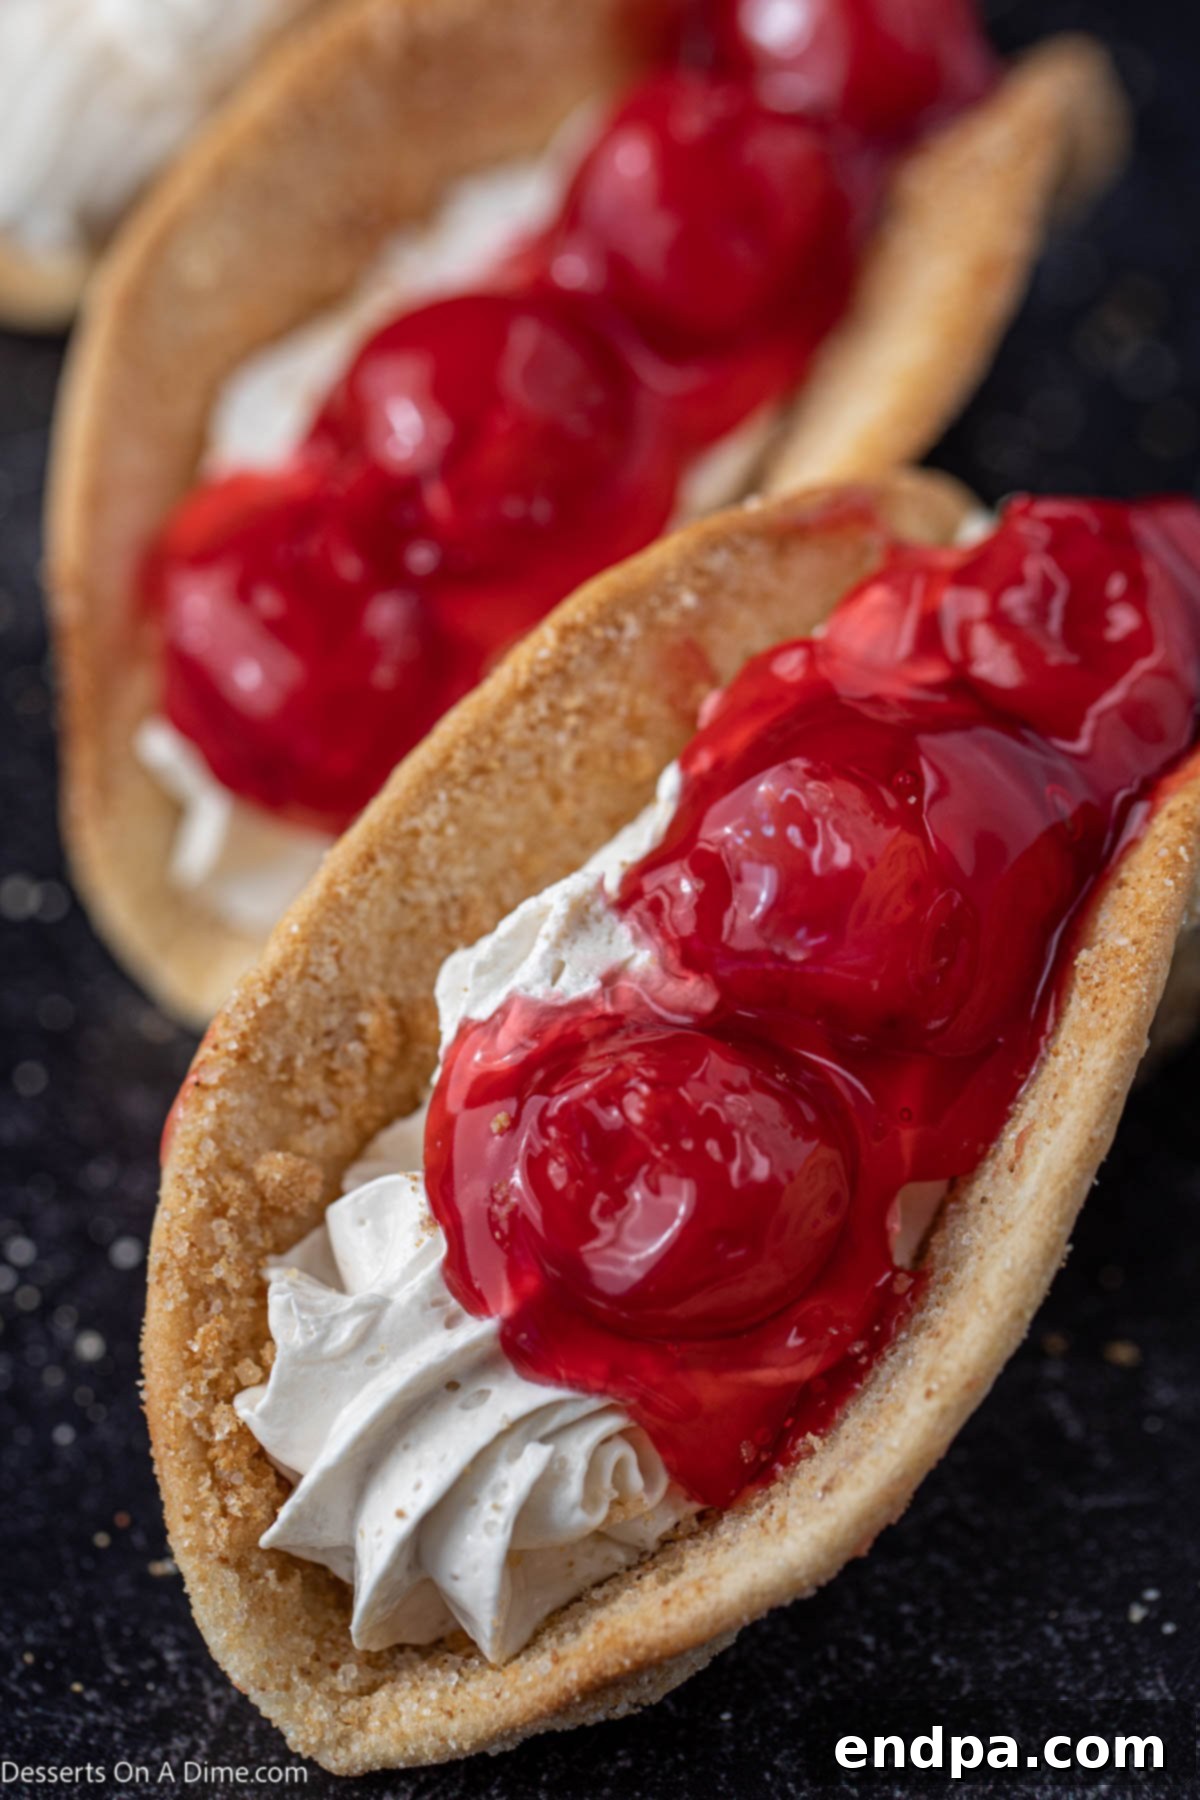
These adorable dessert tacos are not just visually appealing; their taste is utterly irresistible. The entire recipe is straightforward to follow, making it a fantastic choice for both novice and experienced bakers looking for a unique and memorable sweet treat. They bring a fun, playful twist to any gathering, from casual family dinners to festive parties, and are always a conversation starter. If you’re a devoted fan of cherry desserts and decadent cheesecakes, you’ll find these tacos incredibly satisfying. You might also adore our No Bake Cherry Cheesecake Recipe, the comforting Cherry Chip Cake Recipe, and classic Chocolate Covered Cherries. For another incredibly easy and shareable party food, be sure to try our Cherry Cheesecake Dip. And if you’re exploring other dessert taco varieties, our Pumpkin Pie Tacos are another seasonal favorite worth trying, especially for fall celebrations.
Table of Contents: Cherry Cheesecake Tacos
- Why You’ll Adore This Recipe
- Essential Ingredients
- Equipment You’ll Need
- How to Make Cheesecake Tacos
- Creative Topping Ideas
- Pro Tips for Perfect Dessert Tacos
- Storage and Make-Ahead Tips
- Frequently Asked Questions
- More Irresistible Cheesecake Desserts
- Cheesecake Tacos Recipe Card
Why You’ll Adore This Recipe
Prepare to fall head over heels for these unique cheesecake tacos! Everyone adores the rich, velvety texture and tangy sweetness of cheesecake, and presenting it in a crispy, handheld taco shell elevates the entire dessert experience to a whole new level of fun and convenience. The harmonious blend of spiced cinnamon-sugar from the warm, crunchy taco shell, the cool, creamy tang of the cheesecake filling, and the sweet-tart burst of vibrant cherry pie topping creates an unforgettable flavor profile. This delightful combination will quickly establish these as your new favorite go-to dessert for any occasion.
These dessert tacos are incredibly versatile, making them suitable for year-round enjoyment. Whether you’re planning a cozy autumn evening, a festive holiday gathering in November or December, hosting a casual summer BBQ, or welcoming a fresh new year in January, this recipe fits perfectly into any menu. Its innovative presentation is guaranteed to impress guests, making it a natural conversation starter at any event. Beyond the utterly delicious taste, the joy of assembling and customizing these tacos makes them a delightful activity for families or friends to share. For another effortless cheesecake option, you might also enjoy experimenting with our Air Fryer Cheesecake, proving that delicious desserts don’t have to be complicated.
Essential Ingredients for Cheesecake Tacos
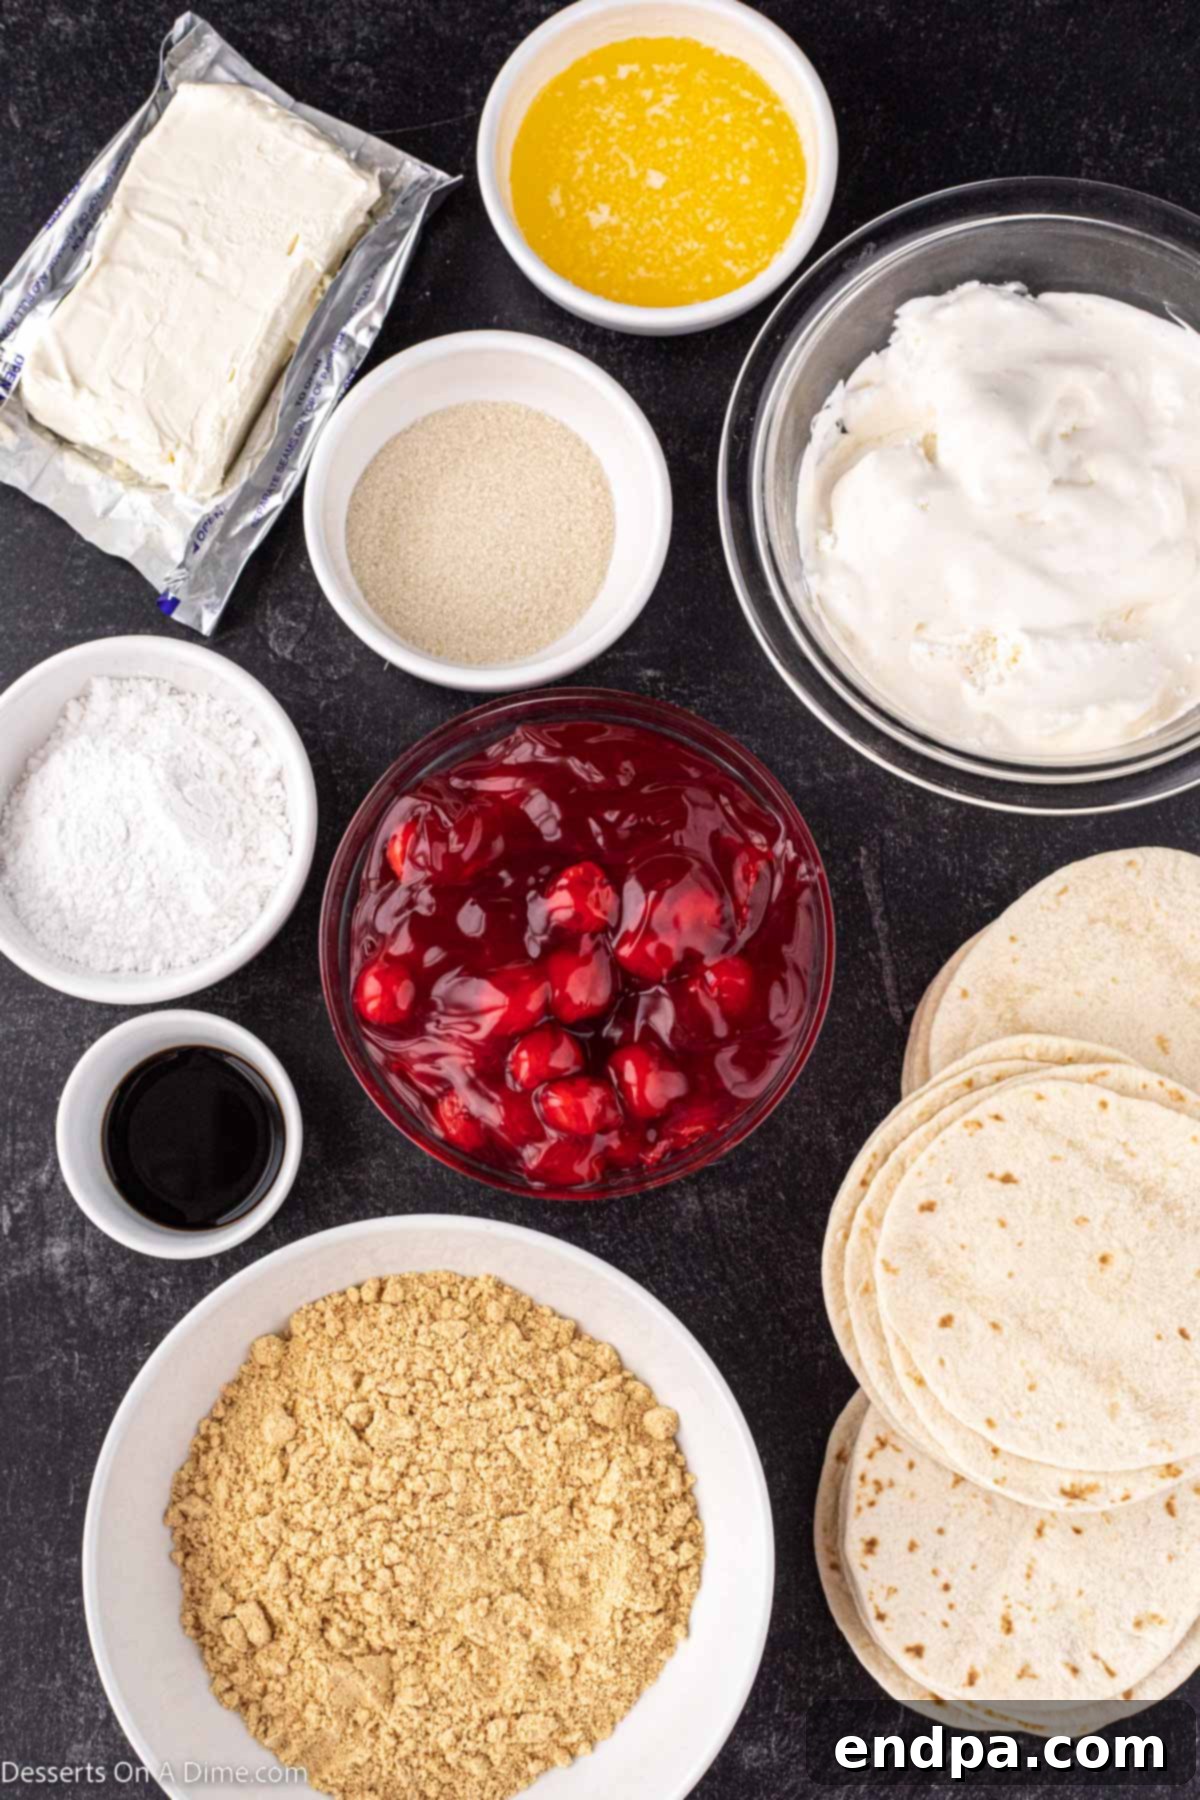
Crafting these delectable cheesecake tacos requires a few simple, readily available ingredients that you can easily find at your local grocery store. The magic truly happens when these core components come together to create a symphony of complementary flavors and delightful textures.
For the Crispy Taco Shells:
- Street Taco Size Flour Tortillas (18 count): These smaller tortillas are perfectly sized for individual dessert tacos, providing the ideal portion and a sturdy yet pliable base that crisps beautifully.
- Graham Cracker Crumbs (1 cup): The star ingredient for that quintessential cheesecake crust flavor and a delightful, sweet crunch on the exterior of your taco shells.
- Granulated Sugar (2 Tablespoons): Combines with the graham cracker crumbs to create a deliciously sweet, golden-brown coating that caramelizes slightly during baking.
- Melted Butter (⅓ cup): Essential for binding the graham cracker mixture to the tortillas and helping them achieve that wonderfully crispy texture in the oven.
For the Luscious Cheesecake Filling:
- Cream Cheese (8 ounces, softened): Absolutely crucial to ensure a smooth, lump-free filling. Make sure it’s at room temperature for effortless blending with the other ingredients.
- Powdered Sugar (⅓ cup): This finely milled sugar sweetens the filling while also contributing to its incredibly silky-smooth and uniform texture.
- Vanilla Extract (2 teaspoons): A dash of high-quality vanilla extract enhances the classic cheesecake flavor with its warm, aromatic, and comforting notes.
- Whipped Topping (8 ounces, thawed – like Cool Whip): This lightens the cream cheese mixture considerably, making the filling airy, fluffy, and wonderfully easy to pipe into the taco shells.
- Cherry Pie Filling (21 ounces): The vibrant and delicious crowning glory of these tacos! It provides a burst of fruity sweetness and a beautiful contrasting color, though it can easily be swapped for other fruit fillings or toppings based on your preference.
For precise measurements and a detailed step-by-step guide, please refer to the comprehensive recipe card located at the very end of this post.
Equipment You’ll Need
You’ll be pleased to know that making these cheesecake tacos doesn’t require any specialized, hard-to-find equipment. Just a few common kitchen tools are all you’ll need to create this impressive dessert:
- Mixing Bowls: You’ll need at least two – one for combining the dry ingredients for the shells and another, larger bowl for preparing the creamy cheesecake filling.
- Shallow Bowl: Ideal for dipping and evenly coating the tortillas in the graham cracker crumb mixture. A pie plate or a wide, shallow dish works perfectly.
- Basting Brush: Essential for applying an even layer of melted butter to your tortillas, ensuring consistent crispness and coating adherence.
- Fork: Used to lightly pierce the tortillas. This small but crucial step helps prevent unwanted air bubbles from forming as the shells bake.
- Muffin or Cupcake Pan: Flipped upside down, this ingenious kitchen hack serves as a mold, helping to shape the tortillas into perfect taco shells as they bake and cool.
- Hand Mixer or Stand Mixer: For achieving that perfectly smooth, lump-free, and fluffy cheesecake filling. A whisk can work for the filling if you have strong arms, but an electric mixer makes it much easier.
- Piping Bag or Large Ziplock Bag: While optional, using a piping bag (or a large Ziploc bag with one corner snipped off) makes filling the taco shells much neater and gives them a more professional presentation. A spoon can also be used if preferred.
- Measuring Cups and Spoons: For accurate ingredient measurements, ensuring your recipe turns out perfectly every time.
How to Make Cheesecake Tacos: A Step-by-Step Guide
Follow these simple, easy-to-understand steps to create your own batch of delightful cheesecake tacos. The process is broken down into two main parts: preparing the wonderfully crispy shells and then crafting the rich, creamy filling.
Part 1: Preparing the Crispy Taco Shells
Creating the perfect crispy, sweet shell is the essential foundation of these dessert tacos. The cinnamon-sugar coating adds an irresistible crunch and flavor that perfectly complements the smooth and creamy filling.
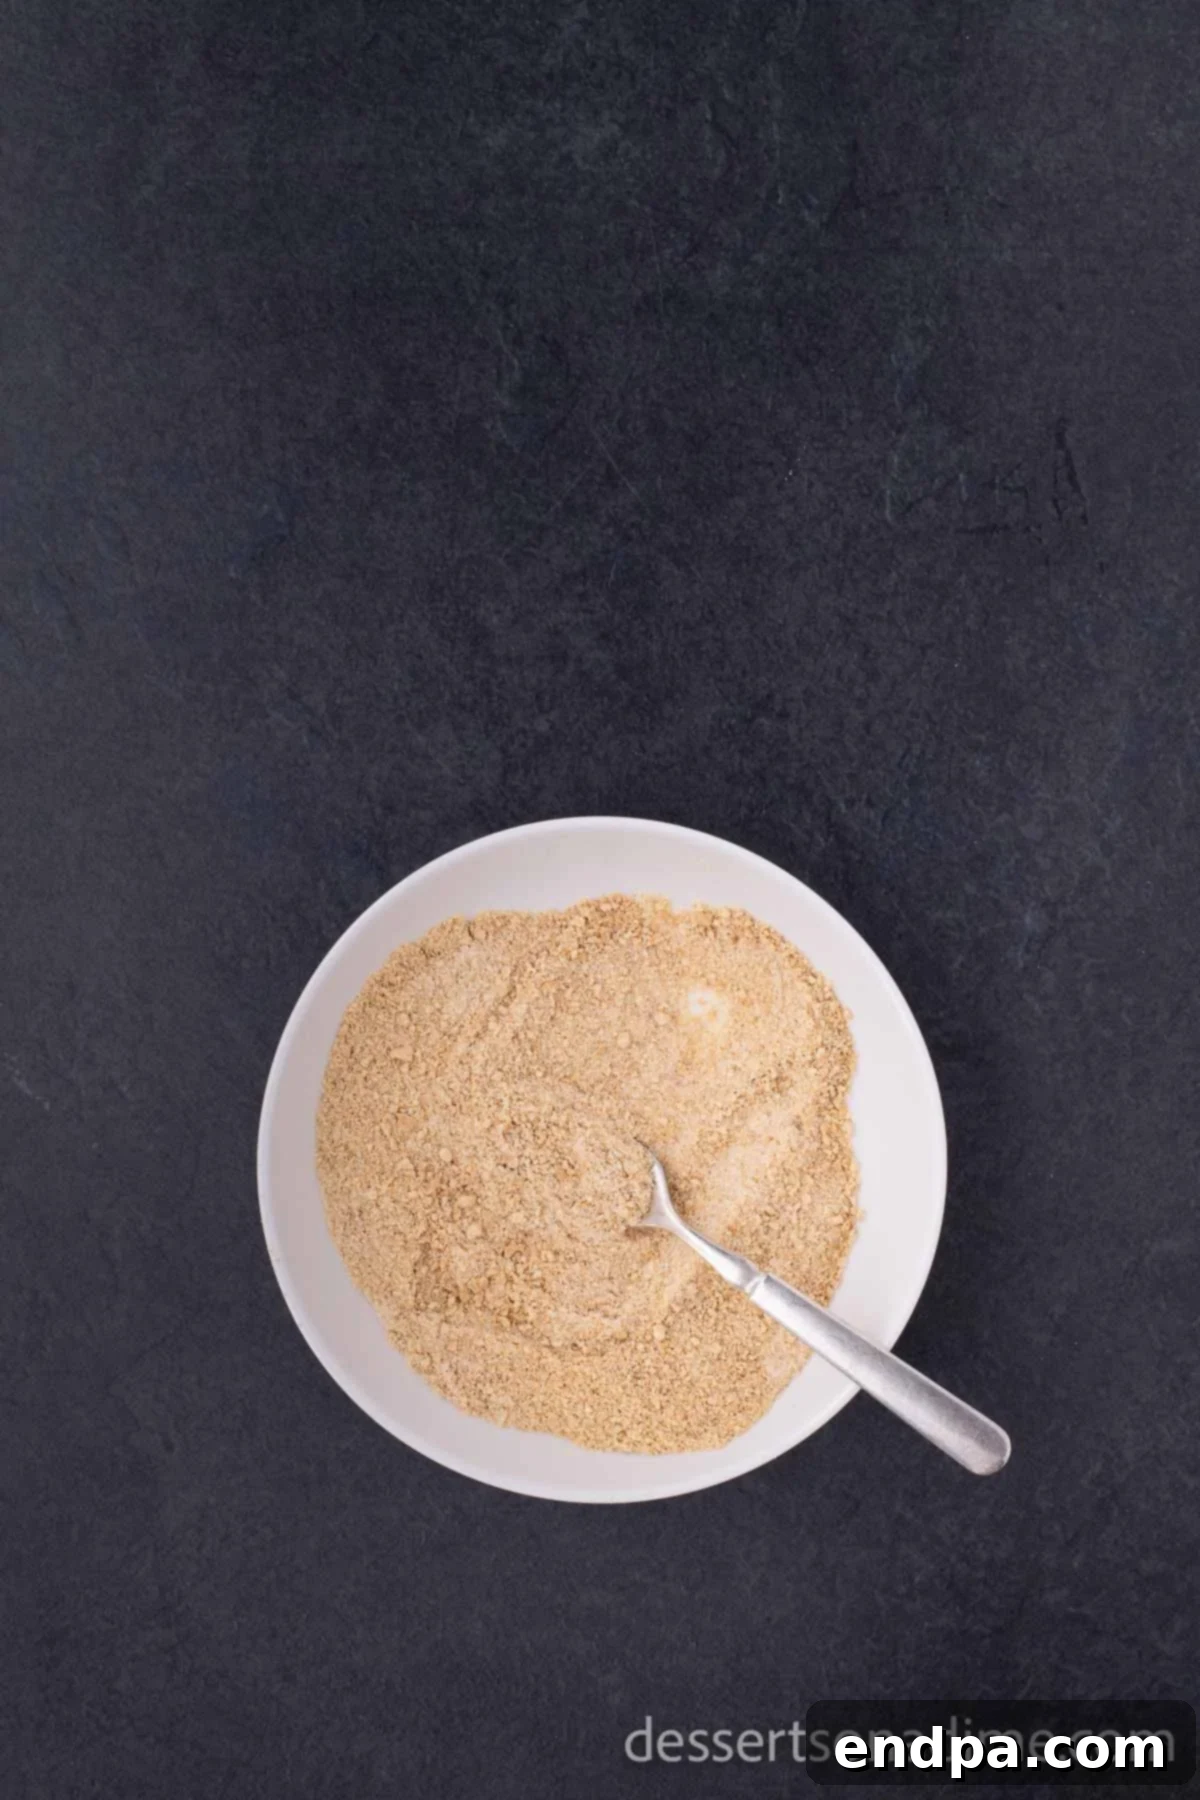
Step 1: Preheat and Prepare. Start by preheating your oven to 400 degrees F (approximately 200 degrees C). In a shallow bowl, stir together the graham cracker crumbs and granulated sugar until well combined. Next, gently stab each tortilla 6-7 times with a fork across its entire surface; this small but important step helps prevent unwanted air bubbles from forming as they bake, ensuring flat, even shells.
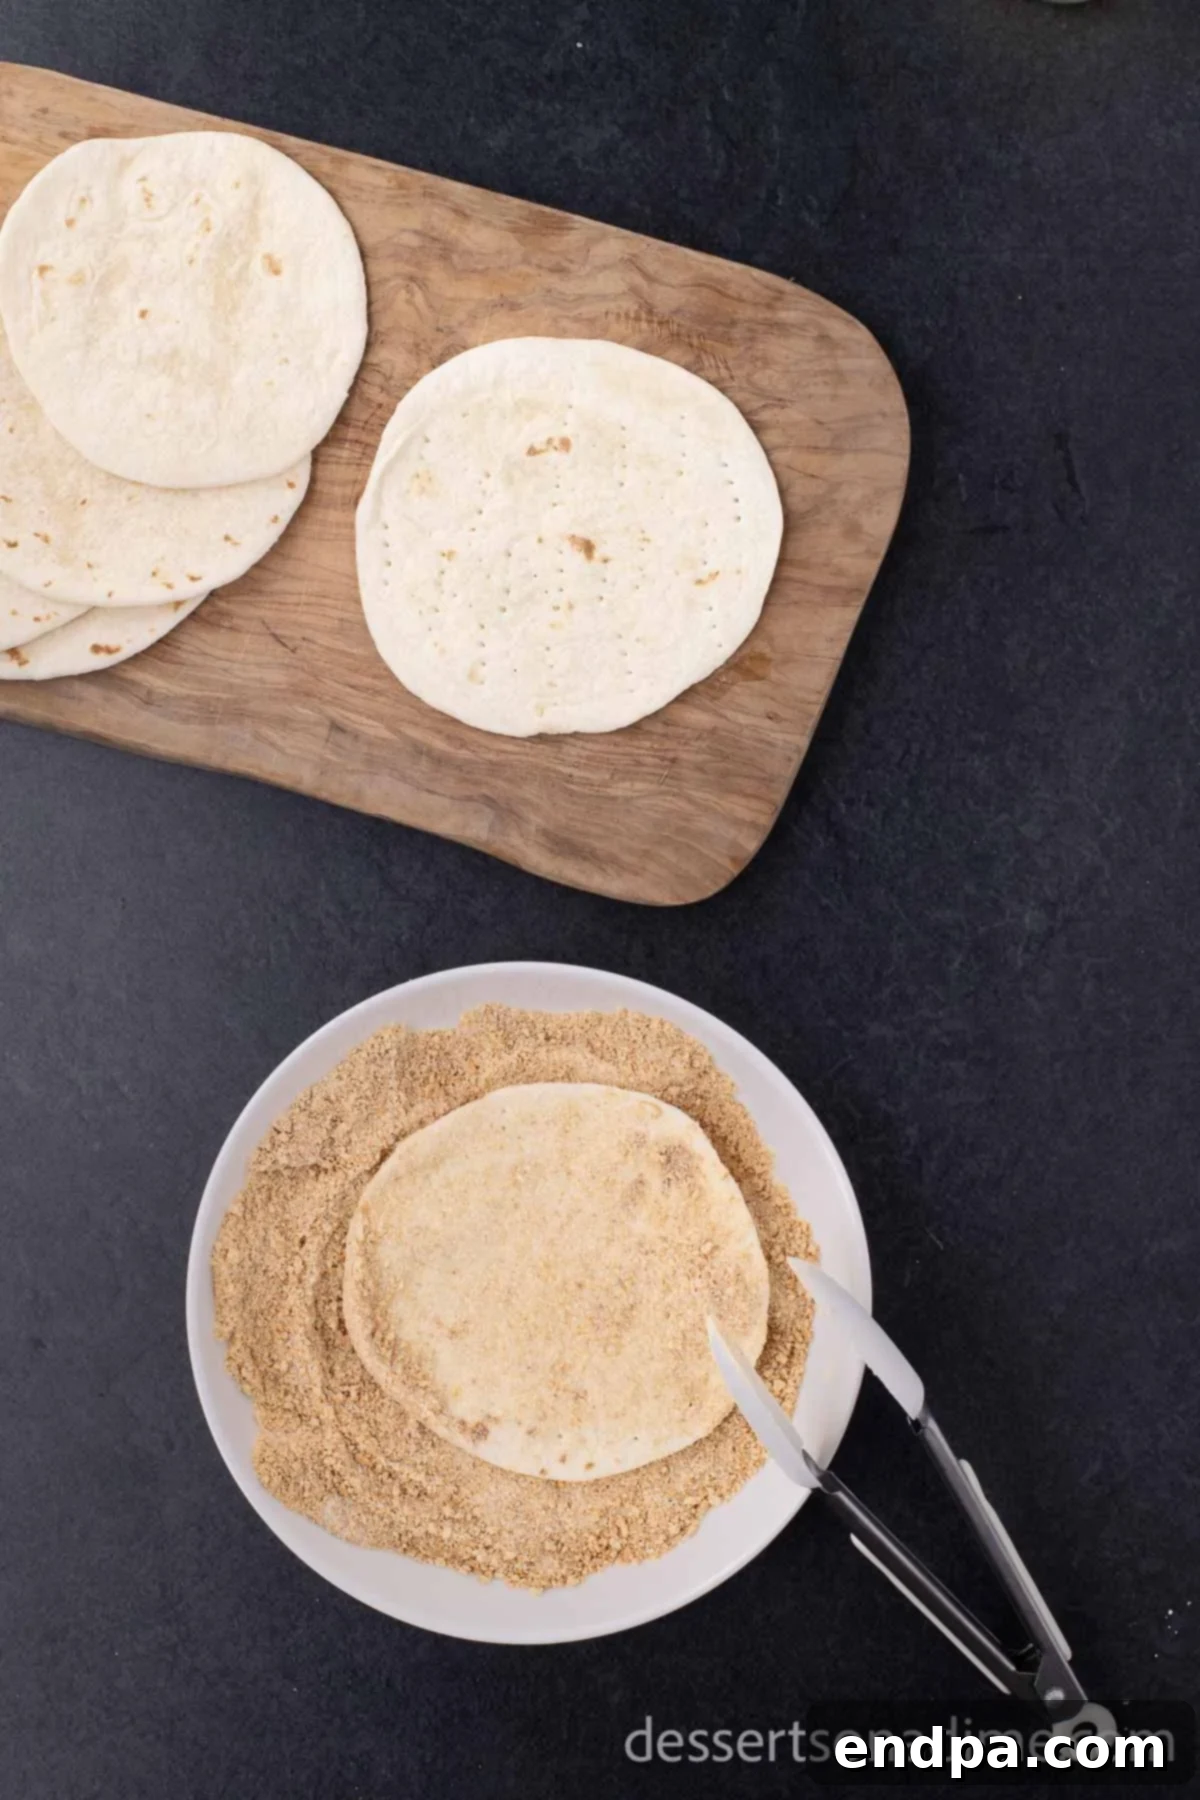
Step 2: Coat the Tortillas. Using a basting brush, lightly coat both sides of each tortilla with melted butter. Ensure an even application. Once buttered, carefully press each tortilla down into the graham cracker and sugar mixture, making sure both sides are thoroughly coated. This creates the delicious, sweet, and crunchy crust for your taco shells.
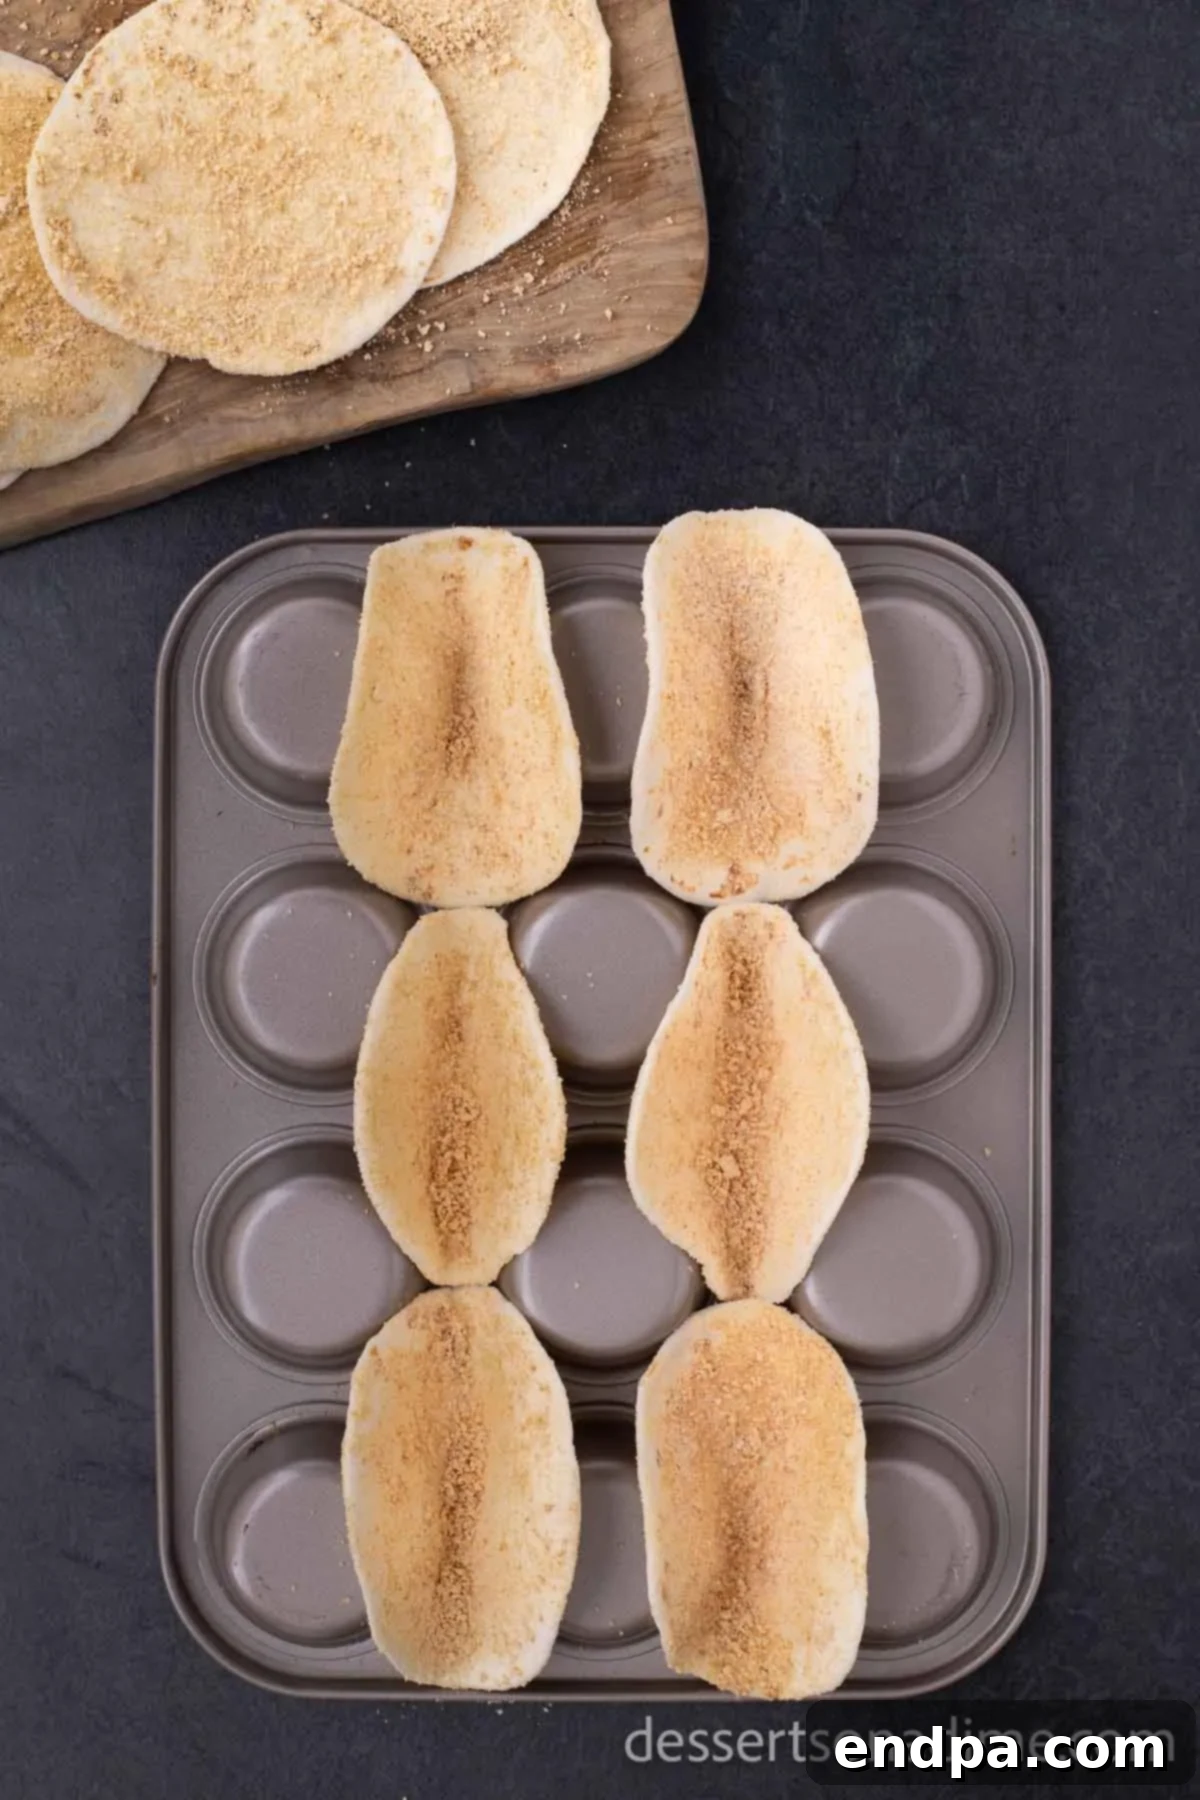
Step 3: Bake to Perfection. Get a standard cupcake or muffin pan and flip it upside down. Carefully fold each coated tortilla in half and drape it over two of the inverted cups, allowing it to hold its taco shape as it bakes. Bake for 10-11 minutes, or until the shells turn a beautiful golden brown and become perfectly crispy. Allow them to cool completely on the pan; this step is crucial for maintaining their crispness before you add the filling.
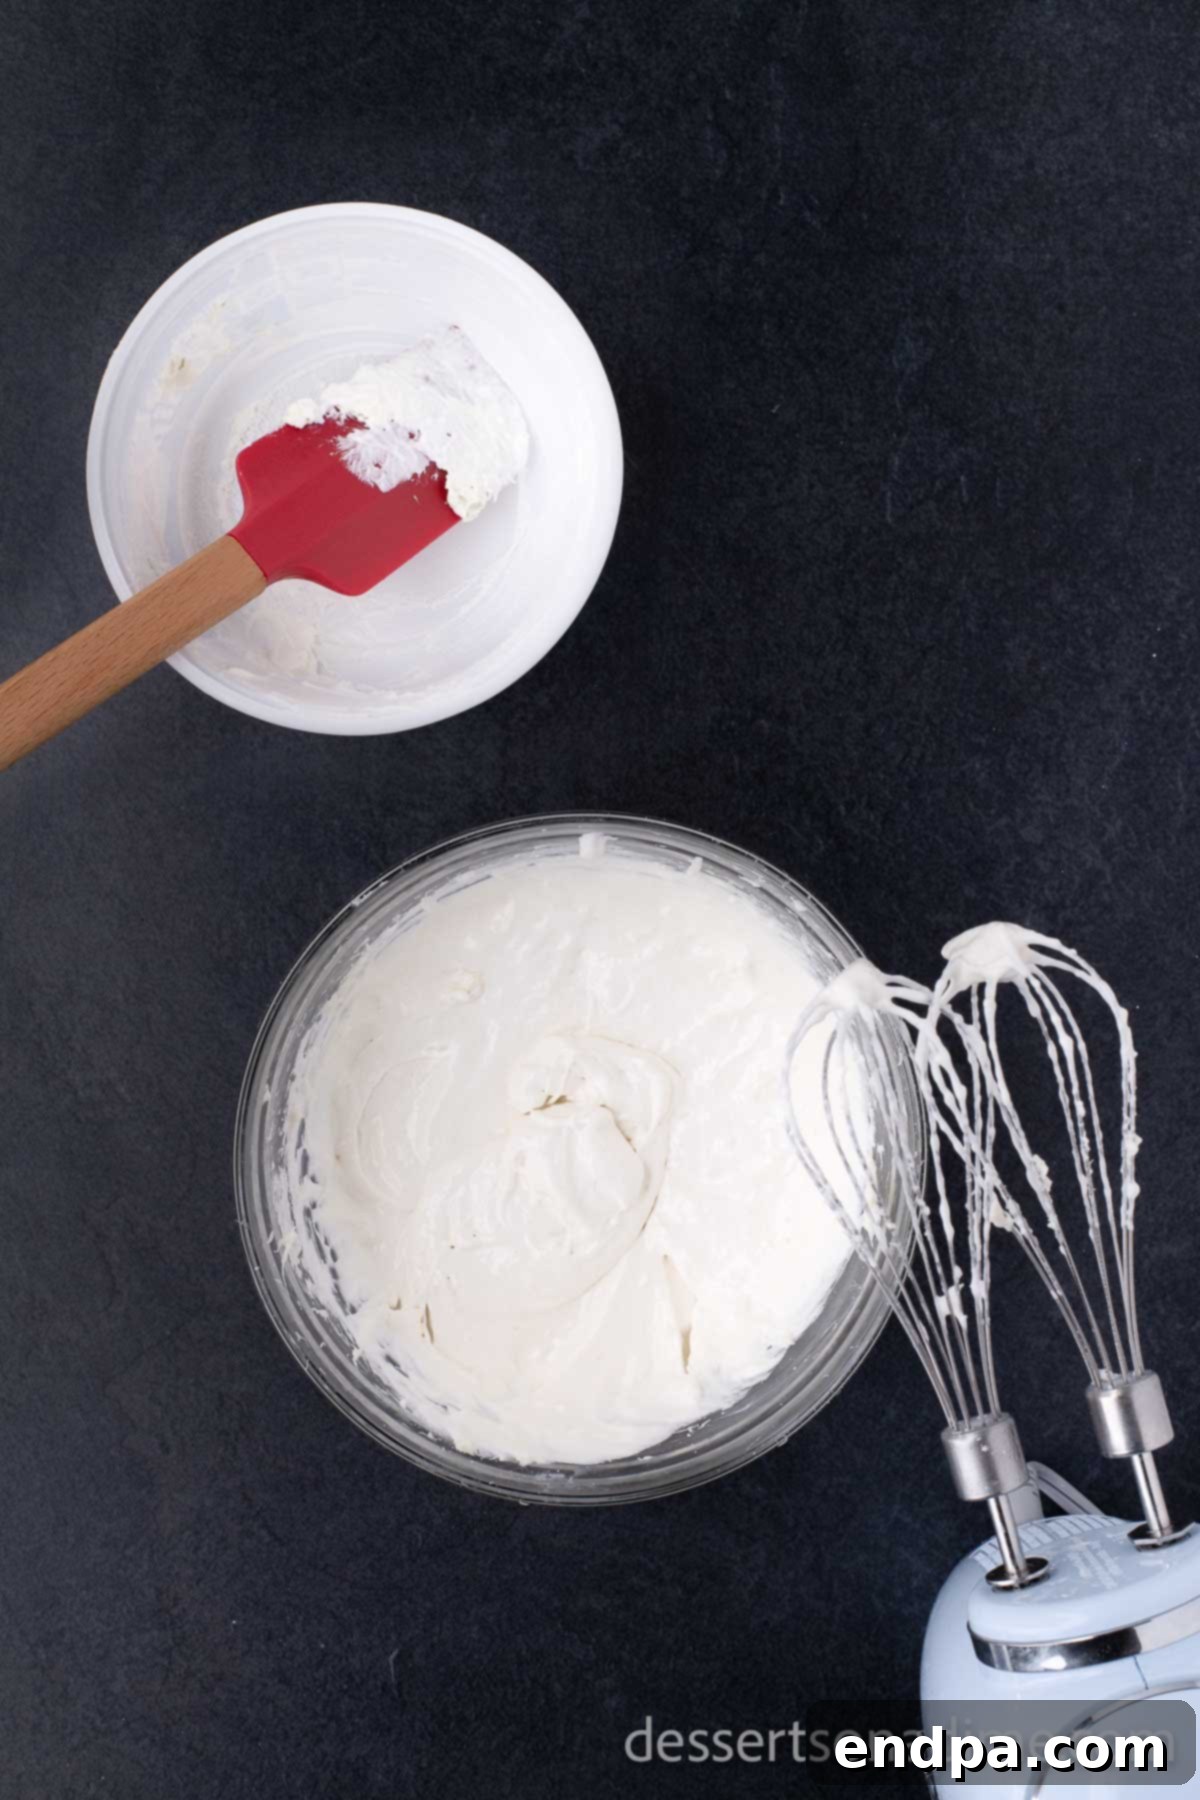
Step 4: Prepare the Cheesecake Filling. While the taco shells cool, begin making the luscious cheesecake filling. In a large mixing bowl, beat together the softened cream cheese, powdered sugar, and vanilla extract using a hand mixer or stand mixer until the mixture is completely smooth and thoroughly combined, with no lumps remaining. Then, gently fold in the thawed whipped topping (such as Cool Whip) until the filling is light, airy, and wonderfully fluffy. This recipe does not traditionally include sour cream, but you can add a tablespoon or two for an extra tangy note if desired.
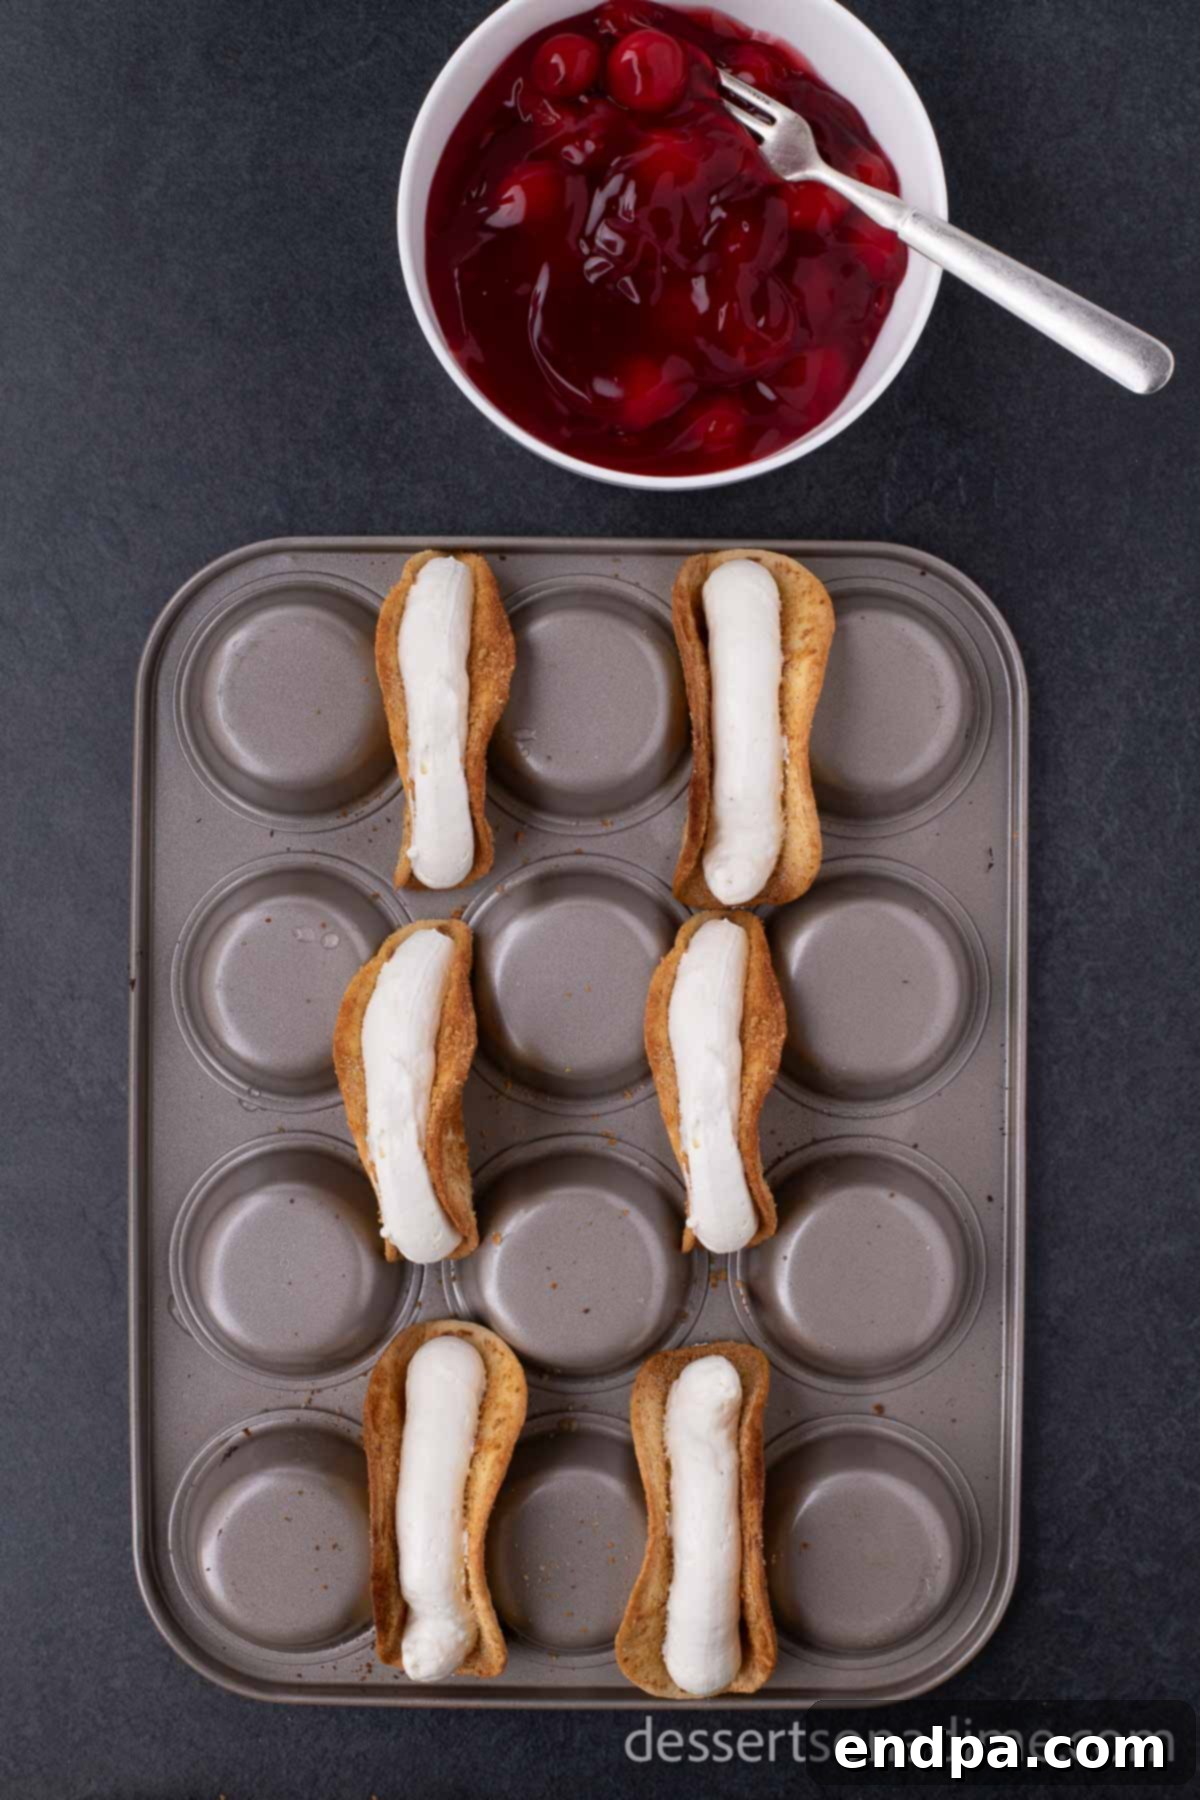
Step 5: Chill and Fill. Refrigerate the prepared cheesecake mixture for at least 30 minutes. This chilling time is important as it allows the filling to firm up slightly, making it much easier to handle and pipe. Once chilled, transfer the filling to a piping bag (or a large Ziploc bag with one corner neatly snipped off). Carefully pipe the smooth, creamy mixture into each of the completely cooled taco shells, filling them generously.
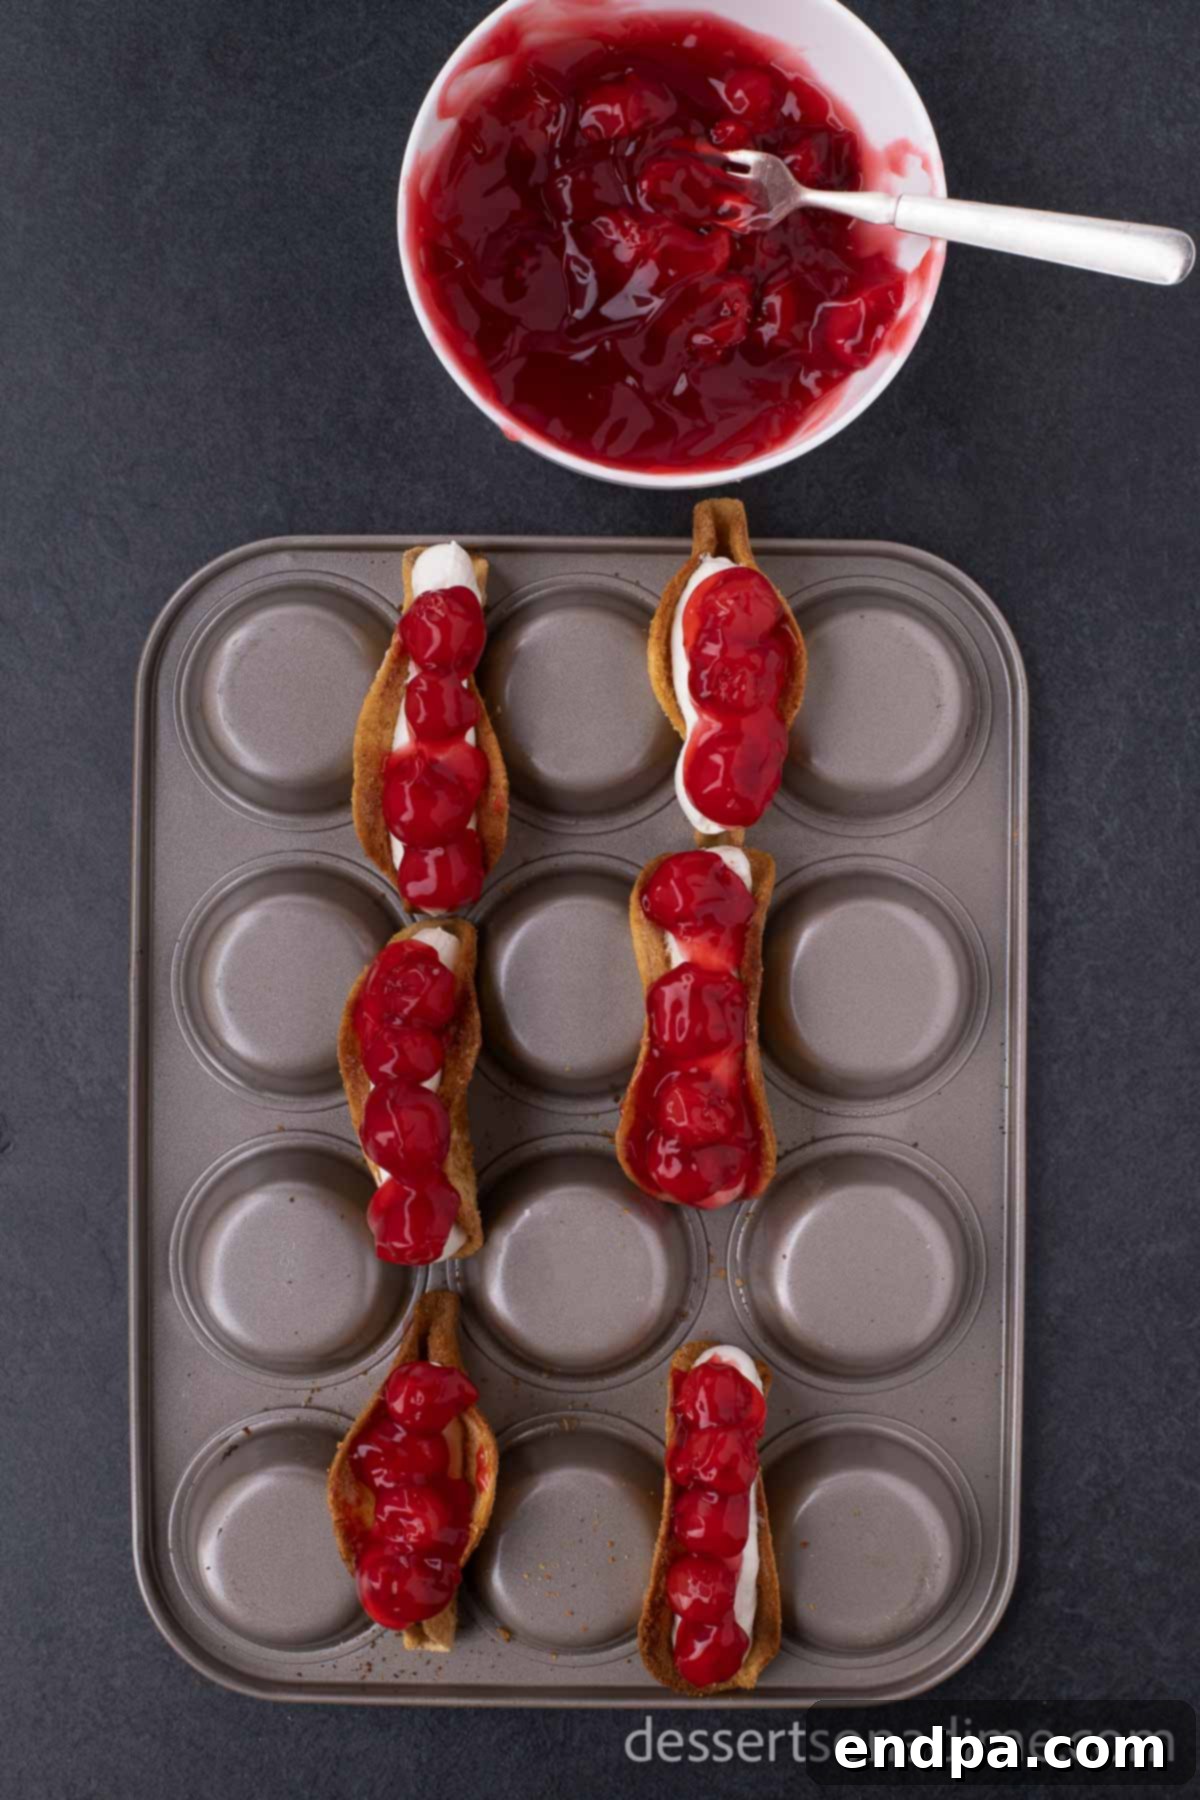
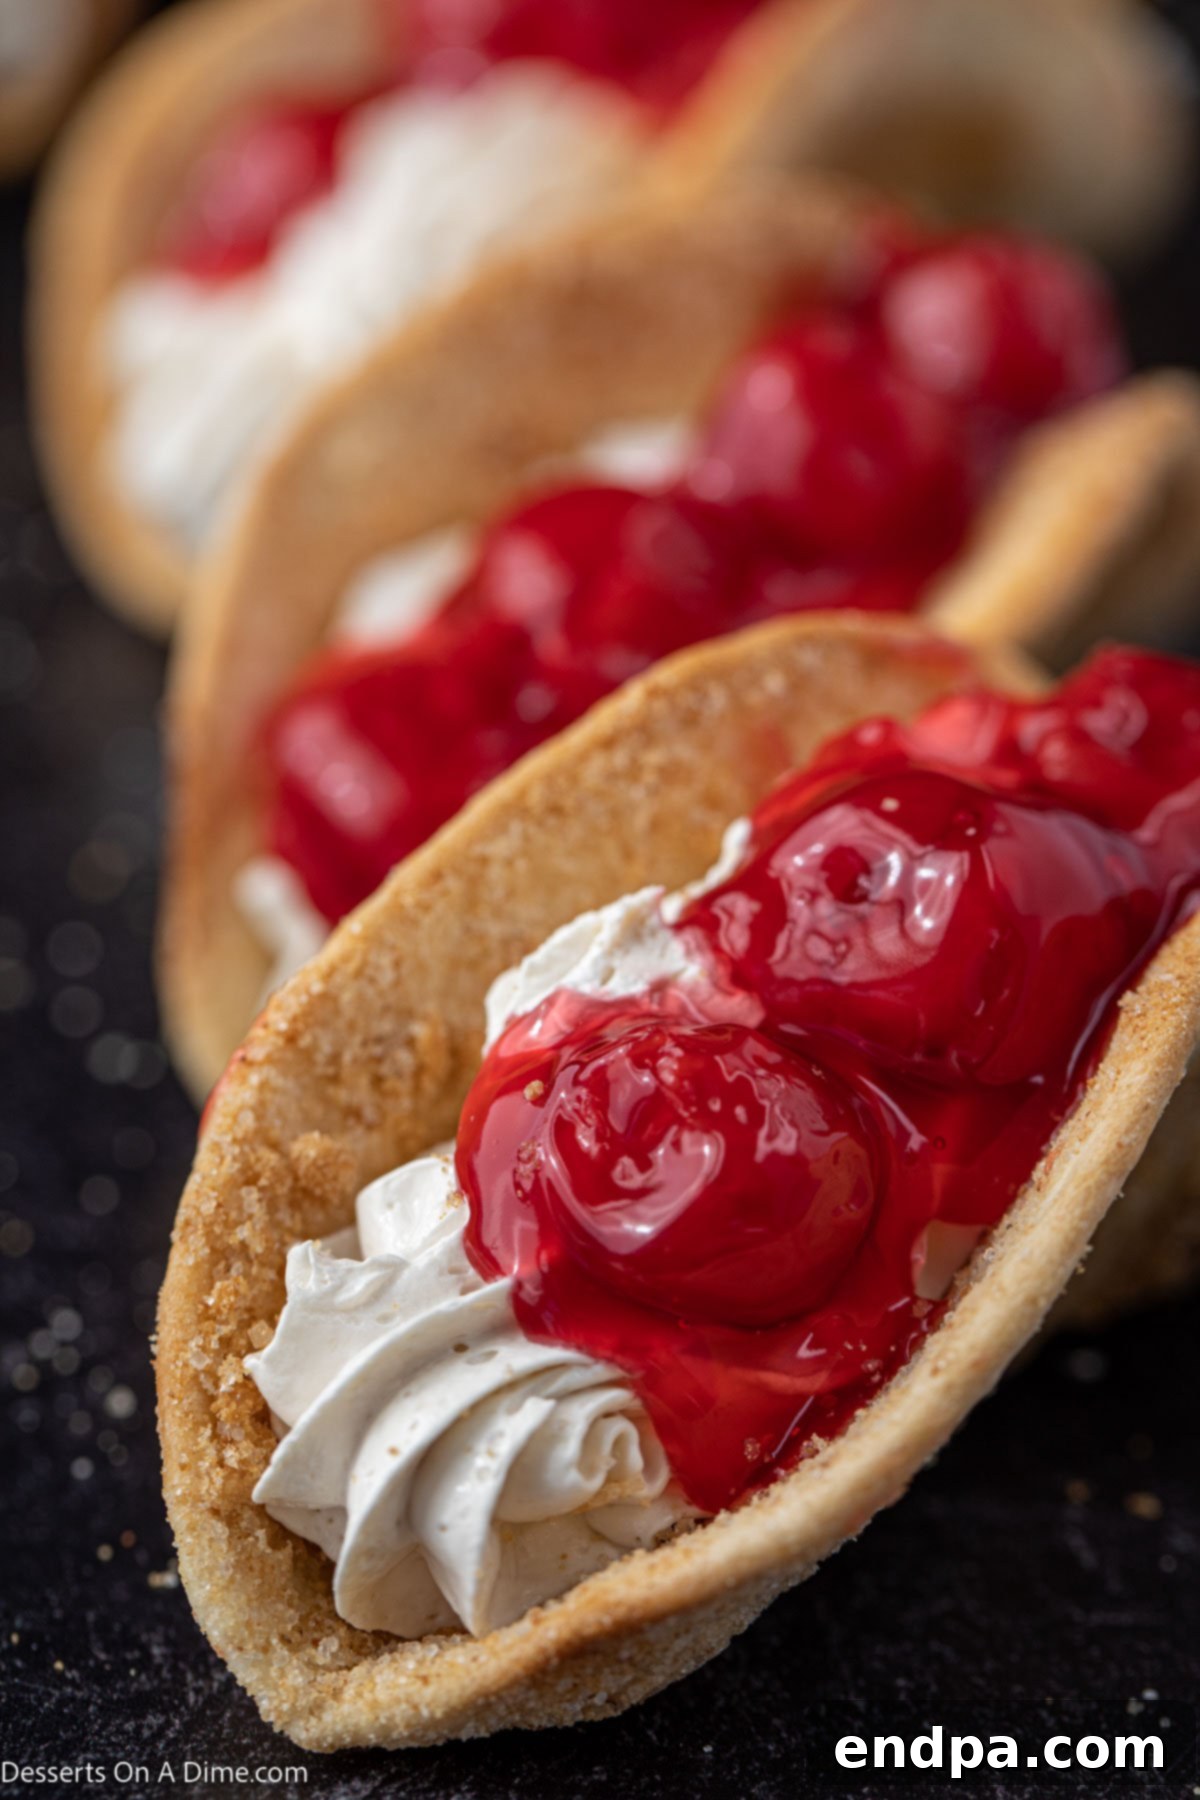
Step 6: Top and Serve. The final step is to generously top each filled taco with cherry pie filling. You can add a few whole cherries and a spoonful of the luscious cherry sauce for an appealing presentation. For the best flavor and texture experience, serve your irresistible cheesecake tacos immediately and enjoy!
Creative Topping Ideas for Your Cheesecake Tacos
While cherry pie filling is a beloved classic choice, these cheesecake tacos are incredibly versatile, serving as a perfect canvas for a wide array of flavors. Feel free to unleash your culinary creativity with various toppings to suit any preference, dietary need, or festive occasion!
- Strawberry Sensation: Opt for freshly sliced strawberries or a vibrant strawberry pie filling for a refreshing and sweet alternative. These Strawberry Cheesecake Tacos are always a huge hit, especially when strawberries are in season during spring and summer.
- Fresh Fruit Medley: For a lighter and more colorful option, dice an assortment of seasonal fresh fruits such as plump blueberries, juicy raspberries, sweet pineapple chunks, or tangy kiwi slices. This creates a refreshing, vibrant, and healthful topping.
- Chocolate Lovers’ Dream: Transform your tacos into decadent “choco tacos” by drizzling them generously with warm chocolate sauce, scattering milk or dark chocolate chips, or even incorporating a rich chocolate cheesecake filling for an ultimate indulgent treat. A sprinkle of cocoa powder can add a sophisticated touch.
- Apple Pie Perfection: For a cozy, autumnal twist, spoon warm, spiced apple pie filling over your cheesecake tacos. A light dusting of ground cinnamon or a sprinkle of toasted pecans would beautifully complete this comforting combination.
- Blueberry Bliss: If you’re a devoted fan of blueberries, this sweet and slightly tart blueberry pie filling pairs wonderfully with the creamy, rich cheesecake. It offers a delightful balance of flavors.
- Caramel Drizzle: A generous drizzle of creamy, golden caramel sauce adds a buttery, deeply sweet, and irresistibly decadent element that is incredibly hard to resist. A pinch of sea salt can elevate the flavor profile.
- Hot Fudge Delight: The classic combination of rich, warm hot fudge and cool, creamy cheesecake is a timeless match made in dessert heaven. It’s a guaranteed crowd-pleaser for chocolate enthusiasts.
- Brownie Bits: Crumble some homemade or store-bought brownies over the top of your filled tacos for an extra layer of chocolatey texture, richness, and depth of flavor.
- Festive Sprinkles: Make your tacos extra festive and fun with colorful rainbow sprinkles for birthdays, chocolate sprinkles, or themed sprinkles specifically for holidays like Halloween, Christmas, or Valentine’s Day.
- Lemon Curd Zest: For a bright and zesty contrast, a dollop of tangy lemon curd can beautifully cut through the richness of the cheesecake, offering a refreshing citrusy note.
- Nutella Swirl: A luscious swirl of hazelnut chocolate spread offers a rich, nutty, and undeniably delicious option. This is particularly appealing to both children and adults who love the classic chocolate-hazelnut combination.
Pro Tips for Perfect Dessert Tacos
Achieving perfectly crisp shells and a wonderfully smooth, flavorful filling is crucial for these irresistible dessert tacos. Here are some expert tips and tricks to ensure your batch turns out absolutely flawless and delicious every single time:
- Tortilla Size Matters: While street taco-sized tortillas are the ideal choice for their convenient individual portions, don’t fret if you can’t find them! You can easily adapt by cutting larger soft taco tortillas into approximately 4-inch round circles. Simply use a cookie cutter or the rim of a glass for a consistent and manageable size, making assembly much smoother.
- Room Temperature Cream Cheese: This is arguably the most critical step for achieving a smooth, velvety filling. Cold cream cheese will inevitably result in a lumpy mixture, no matter how vigorously you beat it. To avoid this, allow your cream cheese to sit on the kitchen counter for at least one hour (or longer, depending on your room temperature) to soften thoroughly before you begin mixing.
- Prevent Soggy Shells: For the ultimate crispy texture, always, always wait to add the creamy cheesecake filling and any wet toppings (like fruit pie filling or sauces) until just before you’re ready to serve. This crucial step prevents the beautifully crispy shells from absorbing moisture and becoming unpleasantly soggy.
- Frying Alternative for Extra Crispness: If you prefer an even richer, more golden, and incredibly crispy shell, you have the option to pan-fry the tortillas instead of baking them. After coating them in the butter and graham cracker mixture, briefly fry them in a shallow amount of oil (like vegetable or canola) until they are golden brown and crisp. Immediately after frying, place them on the upside-down muffin pan to properly shape as they cool.
- Brown Sugar Swap for Depth: For a deeper, more complex flavor with delightful molasses notes in your tortilla coating, consider substituting brown sugar for some or all of the granulated sugar. This adds a lovely caramel dimension to the shell.
- Scaling the Recipe: These cheesecake tacos are an absolute crowd-pleaser, so don’t hesitate to double or even triple the recipe if you’re serving a larger gathering or simply want plenty of delicious leftovers to enjoy throughout the week. The recipe scales up beautifully without any fuss.
- Avoid Corn Tortillas: For this specific dessert taco recipe, it’s highly recommended to stick exclusively to flour tortillas. Corn tortillas have a distinctly different texture and are significantly less pliable, making them much harder to shape and achieve the desired crispy, light, and sweet dessert-like shell.
- Evenly Pierce Tortillas: When piercing the tortillas with a fork, aim for an even distribution of small holes across the entire surface. This meticulous approach will help to prevent large, unsightly air bubbles from forming and ensures that the shells bake uniformly, resulting in a more appealing and consistently crispy product.
- Cool Shells Completely: Patience is truly a virtue when it comes to cooling the shells. Ensure your baked taco shells are completely and thoroughly cooled before you even think about piping in the filling. Introducing warm shells to the cheesecake filling can cause the delicate cream cheese mixture to soften or even melt, compromising the texture and presentation.
Storage and Make-Ahead Tips
To keep your cheesecake tacos fresh and delicious, proper storage is paramount. While they are undoubtedly best enjoyed fresh, there are smart ways to prepare components in advance or effectively store any tempting leftovers:
- Storing Leftovers: Any leftover cheesecake tacos that have already been assembled should be carefully placed in an airtight container and refrigerated. They will remain enjoyable for up to 2-3 days. However, it’s important to be aware that the crispy tortilla shells may gradually lose some of their initial crispiness over time as they absorb moisture from the creamy filling.
- Storing Filling Separately: For optimal crispness and quality, it is highly recommended to store the cheesecake filling and the crispy shells separately. The prepared cheesecake filling can be kept in its own airtight container in the refrigerator for up to 1 week, allowing for flexible assembly.
- Make-Ahead Shells: The crispy taco shells are perfect for making in advance! You can bake them a day or two ahead of time and store them in an airtight container at room temperature. If they happen to lose a slight bit of their crispness, a quick reheat in a toaster oven for a few minutes (watch them closely to prevent burning) before filling will bring them back to life.
- Optimal Assembly Time: To ensure the absolute best eating experience – characterized by maximum crispness of the shell and ultimate freshness of the filling – always assemble the tacos (fill and top) just before you plan to serve them.
- Freezing Assembled Tacos (Not Recommended): We generally do not recommend freezing fully assembled cheesecake tacos. The delicate texture of both the crispy shells and the creamy filling would likely suffer significantly upon thawing, leading to a less enjoyable dessert.
- Freezing Unfilled Shells (Yes!): If you want to prepare shells far in advance, the unfilled, baked, and cooled shells can be frozen in an airtight container or freezer bag for up to 1 month. When ready to use, simply thaw them at room temperature and reheat briefly for crispness if desired.
Frequently Asked Questions
Here are answers to some common questions about making, serving, and enjoying these delightful cheesecake tacos, ensuring you have all the information for a perfect dessert experience:
How to prevent air bubbles in taco shells?
The best trick to preventing unsightly air bubbles from forming in your taco shells is to generously pierce each tortilla all over its surface with a fork before you bake it. This allows steam to escape during the baking process, which in turn helps to keep the shells flat and beautifully even. If, despite your diligent efforts, a small air bubble still manages to develop, quickly puncture it with the tip of a knife or fork as soon as the shell comes out of the oven. You must act fast, as the shells become crispy and set very quickly once removed from the heat!
How to store Cheesecake dessert Tacos?
For assembled cheesecake tacos, any leftovers should be carefully stored in an airtight container and placed in the refrigerator. They will remain enjoyable for up to 2-3 days. However, for the very best crispness, it is highly recommended to store the creamy cheesecake filling separately in its own airtight container in the refrigerator for up to 1 week. This way, you can fill the shells just before serving, ensuring each bite is as fresh and crisp as possible.
How long will these Cheesecake Tacos last?
Assembled cheesecake tacos will typically last up to 3 days when stored properly in an airtight container in the refrigerator. However, it’s important to note that the delicious tortilla shells will gradually start to lose their signature crispiness and may become a bit stale over this period due to moisture absorption from the filling. To truly maintain the best possible quality and texture, we strongly recommend filling the tacos only when you are absolutely ready to enjoy them. They are undeniably at their peak when served fresh.
What meals are these dessert tacos good with?
Cheesecake tacos make a fantastic and fun dessert to follow a wide variety of meals, particularly those with a Mexican-inspired theme, or really any occasion where you want a unique sweet finish. They pair wonderfully after serving classic dishes like cheesy quesadillas, savory Chicken Enchiladas with Special Sauce, flavorful rice and beans, or sizzling fajitas. For a heartier main course, these dessert tacos beautifully complement rich pork carnitas, fresh shrimp tacos, tender carne asada, or spicy chorizo. Don’t forget to try our Flan Cake Recipe as another great Mexican-inspired dessert option to round out your meal!
More Irresistible Cheesecake Desserts
If you’ve fallen completely in love with the creamy, dreamy goodness of cheesecake, you’re in luck! Here are even more easy and utterly delicious cheesecake-inspired desserts to explore, ensuring you’ll always have a delightful treat to satisfy your cravings:
- No-Bake Cherry Cheesecake Recipe: A wonderfully simple, cool, and refreshing take on a classic cheesecake, perfect for warm weather or when you want dessert without turning on the oven.
- Pumpkin Pie Tacos: Another incredibly creative and popular dessert taco idea, boasting the comforting, spiced flavors of pumpkin pie, ideal for fall festivities and holiday gatherings.
- Oreo Cheesecake Recipe: An undeniably indulgent and universally crowd-pleasing dessert, featuring everyone’s favorite chocolate sandwich cookie swirled into a creamy cheesecake.
- No-Bake Strawberry Cheesecake in a Jar: These are perfectly portioned, super easy to assemble, and delightfully portable, making them great for picnics, potlucks, or individual treats.
- Oreo Cheesecake Cookies Recipe: The delightful, familiar flavors of Oreo and cheesecake are cleverly combined and baked into a soft, chewy, and irresistible cookie form.
- Strawberry Cheesecake Tacos: A bright, fresh, and fruity variation of our incredibly popular dessert tacos, perfect for strawberry lovers and summer celebrations.
Go ahead and whip up these incredibly fun and deliciously creative dessert tacos for your next gathering or simply as a special sweet treat for yourself. We’re utterly confident you’ll find them to be even better than some traditional cheesecakes and a delightful addition to your recipe collection!
Cheesecake Tacos Recipe Card
Overall Rating: 4.85 out of 5 stars (based on 13 votes)
Cheesecake Tacos
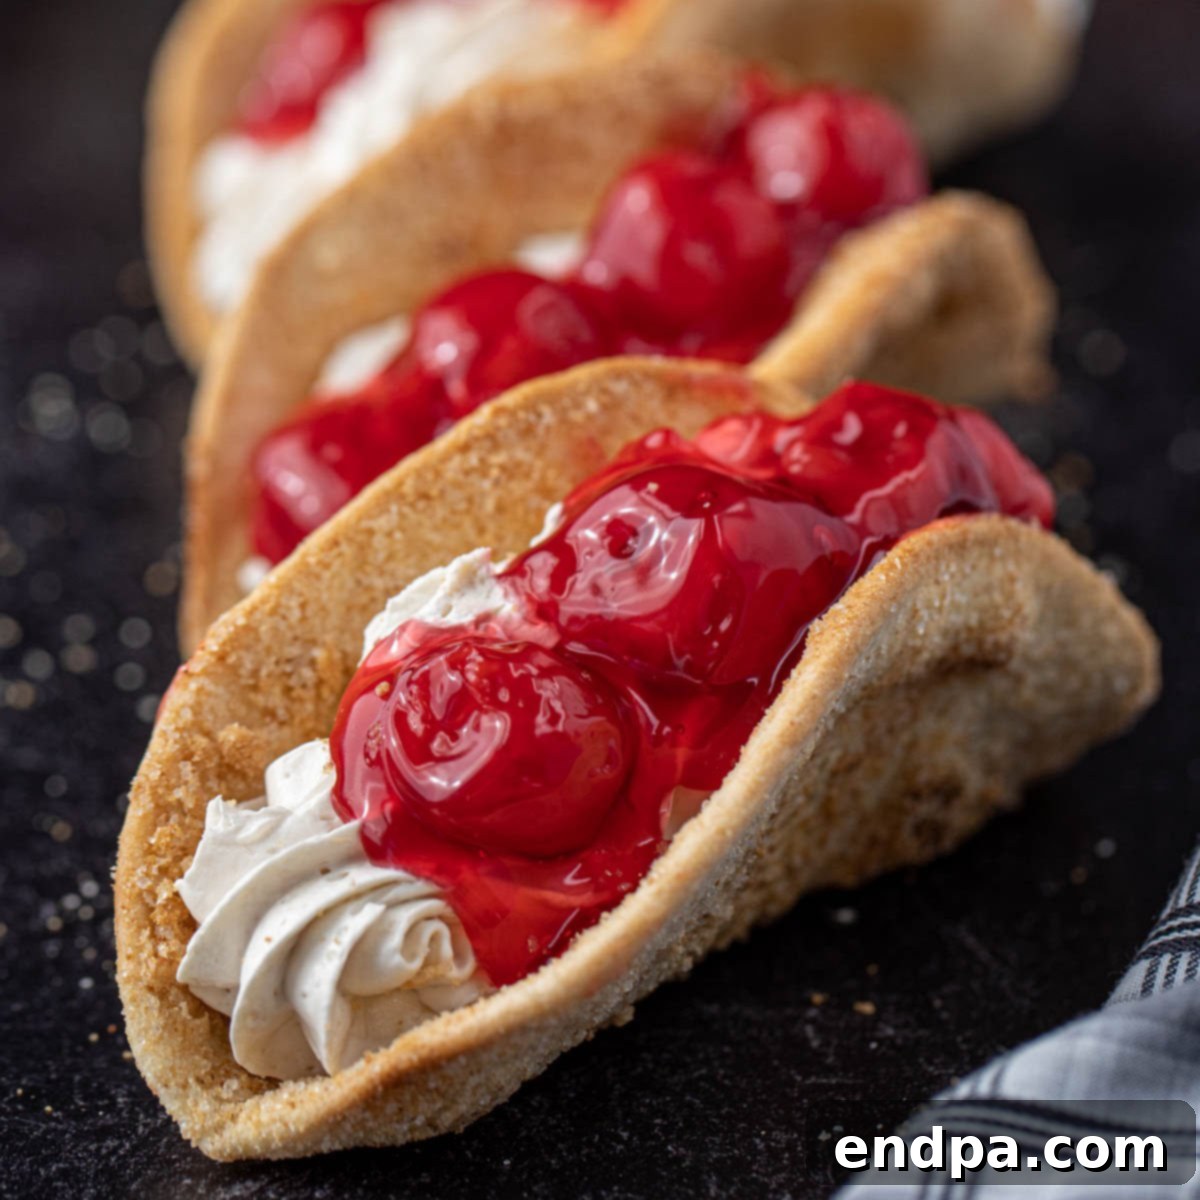
These delightful Cheesecake Tacos feature a crispy, sugar-coated shell generously filled with a luscious cheesecake mixture. We’ve topped ours with a vibrant cherry pie filling for an outstanding dessert experience.
Ingredients
For the Taco Shells:
- 18 Street Taco Size Flour Tortillas
- 1 cup Graham Cracker Crumbs
- 2 Tablespoons Granulated Sugar
- ⅓ cup Butter, melted
For the Filling:
- 8 ounces Cream Cheese, softened
- ⅓ cup Powdered Sugar
- 2 teaspoons Vanilla Extract
- 8 ounces Whipped Topping, thawed (like Cool Whip)
- 21 ounces Cherry Pie Filling
Instructions
For the Crispy Shells:
- Preheat your oven to 400 degrees F (200°C).
- In a shallow bowl, combine the graham cracker crumbs and granulated sugar. Gently pierce each tortilla 6-7 times with a fork to help prevent air bubbles during baking.
- Using a basting brush, coat both sides of the tortillas evenly with melted butter. Then, gently press the buttered tortillas into the graham cracker mixture, ensuring both sides are fully coated with the sweet crumbs.
- Flip a cupcake pan upside down. Carefully fold each coated tortilla in half and strategically place them between the cups of the inverted pan, allowing them to hold a distinct taco shape as they bake.
- Bake for 10-11 minutes, or until the shells achieve a beautiful golden brown color and become wonderfully crispy. It’s crucial to let the shells cool completely on the pan before attempting to fill them. This step is essential for maintaining their crispness and structural integrity.
For the Creamy Filling:
- In a large mixing bowl, use either a hand-held mixer or a stand mixer to beat together the softened cream cheese, powdered sugar, and vanilla extract until the mixture is thoroughly combined, exceptionally smooth, and completely free of any lumps.
- Gently fold in the thawed whipped topping until the entire mixture is light, airy, and wonderfully fluffy, creating a perfect cheesecake consistency.
- Chill the cheesecake mixture in the refrigerator for at least 30 minutes. This chilling period allows the filling to firm up slightly, making it much easier to handle and pipe with precision.
- Transfer the chilled mixture to a piping bag (or a large Ziploc bag with one corner neatly snipped off, creating a makeshift piping bag). Carefully pipe the smooth, creamy filling into each of the completely cooled taco shells.
- Generously top each filled taco with 3-4 cherries and a spoonful of the luscious sauce directly from the cherry pie filling can.
- Serve immediately and prepare to enjoy your delightful, homemade cheesecake tacos!
Recipe Notes
- If street taco-sized tortillas are unavailable in your local grocery store, you can easily cut larger soft taco tortillas into 4-inch round circles. A cookie cutter or even the rim of a glass works perfectly for this purpose.
- Always ensure your cream cheese is at room temperature and thoroughly softened before you begin mixing. This is vital for achieving a lump-free, perfectly smooth, and creamy filling consistency.
- For optimal crispness and enjoyment, always add the creamy filling and any desired wet toppings (like fruit pie filling or sauces) just before you intend to serve the tacos. Store the crispy shell components and the filling separately until ready to assemble.
Nutrition Facts (per serving)
- Calories: 267 kcal
- Carbohydrates: 35g
- Protein: 4g
- Fat: 12g
- Saturated Fat: 7g
- Polyunsaturated Fat: 1g
- Monounsaturated Fat: 3g
- Trans Fat: 0.1g
- Cholesterol: 22mg
- Sodium: 333mg
- Potassium: 112mg
- Fiber: 1g
- Sugar: 9g
- Vitamin A: 351IU
- Vitamin C: 1mg
- Calcium: 73mg
- Iron: 1mg
Pin This Now to Remember It Later!
Pin Recipe
