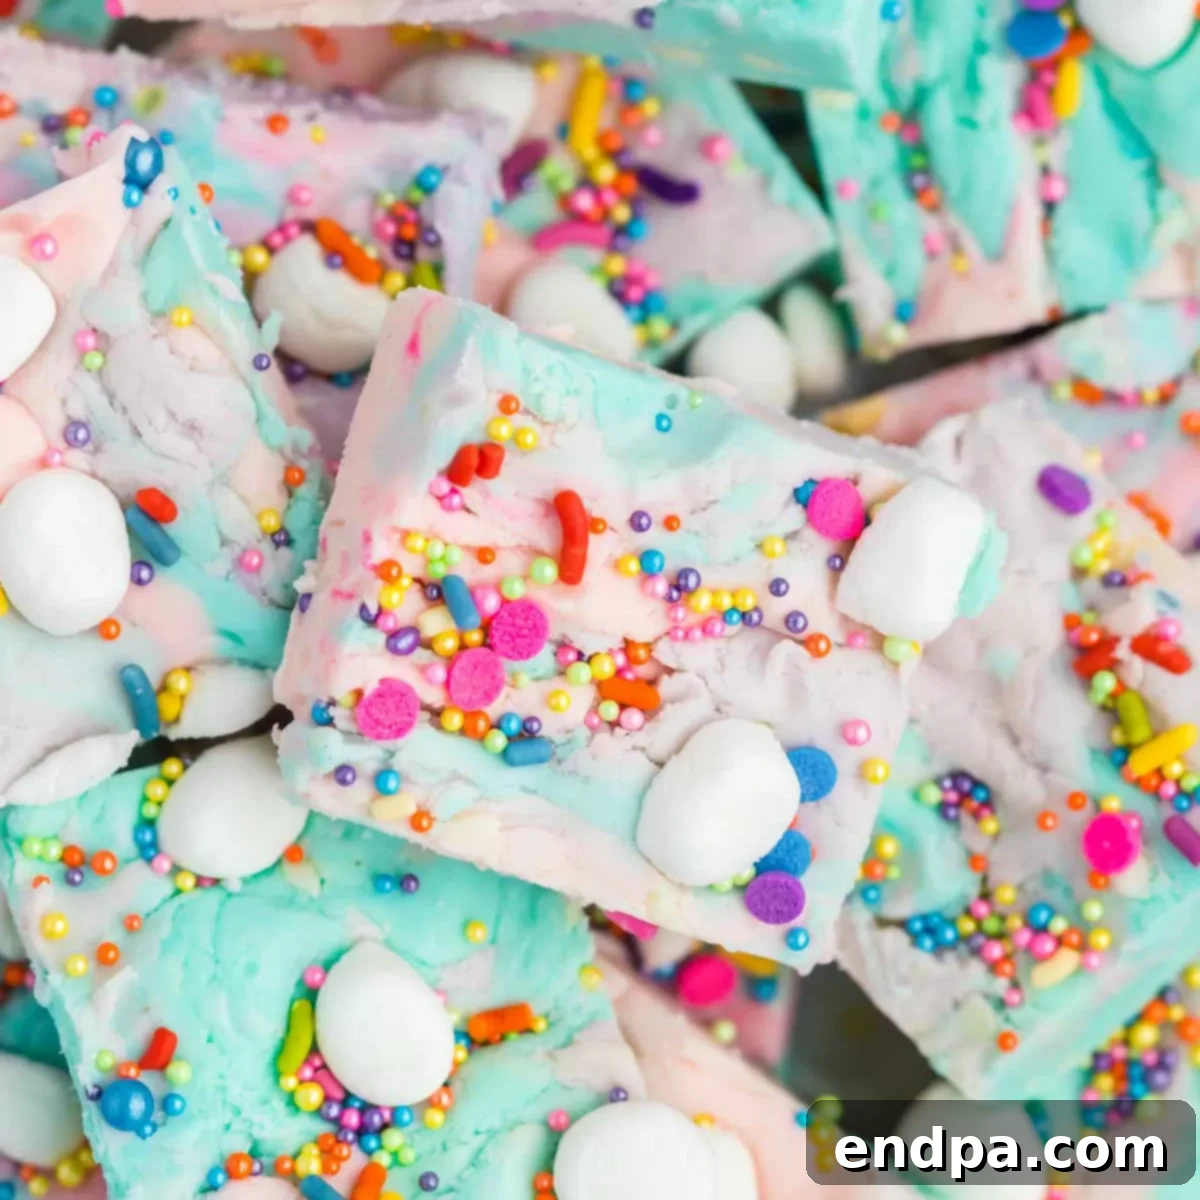
Step into a world of vibrant color and irresistible sweetness with our incredibly easy **Unicorn Fudge recipe**! Crafted with just 5 simple ingredients, this magical no-bake dessert is a show-stopping treat perfect for any occasion. Whether you’re planning an enchanting birthday party, a whimsical baby shower, or simply looking for a fun kitchen activity with the kids, this **colorful fudge** is guaranteed to delight.
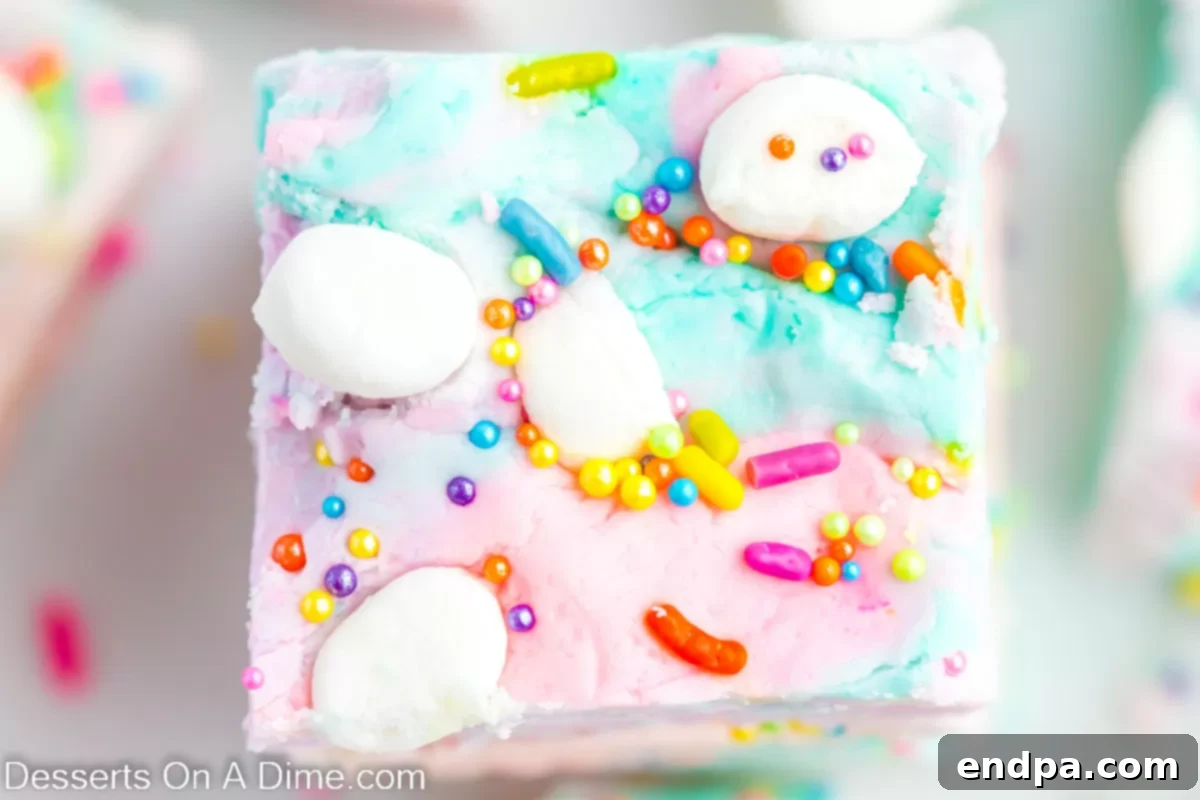
Unicorn fudge is more than just a dessert; it’s a celebration of joy and imagination. Each bite offers a delightful explosion of flavor, coupled with an eye-catching display of swirled pink, purple, and blue hues, generously topped with an array of rainbow sprinkles. Its smooth, creamy texture melts in your mouth, leaving a sweet, satisfying finish that both children and adults will adore. This recipe makes creating that magical experience surprisingly simple, proving that you don’t need to be a seasoned baker to whip up something truly extraordinary.
Beyond its visual appeal, this **easy no-bake fudge** recipe stands out for its minimal effort and maximum impact. It requires no oven time, no complex techniques, and comes together in a flash, making it an ideal choice for busy parents, party hosts, or anyone craving a quick and delightful sweet treat. Imagine the smiles when you present this vibrant confection at your next gathering—it’s destined to be the centerpiece of any dessert table and a talking point for all your guests.
If you’re already captivated by the allure of unicorns, then this **homemade fudge** is a must-try. To complete your magical dessert spread, consider pairing it with other enchanting treats like Unicorn Cupcakes, playful Unicorn Poop Cookies, or a creamy Unicorn Dip. Our simple fudge recipes category also offers a treasure trove of delightful options for every taste and occasion.
Table of Contents
- What is Unicorn Fudge?
- Why We Love This Unicorn Fudge Recipe
- Essential Ingredients for Unicorn Fudge
- Equipment You’ll Need
- Recipe Variations and Substitutions
- Step-by-Step: How to Make Unicorn Fudge
- Proper Storage for Your Unicorn Fudge
- Expert Tips for Making the Perfect Unicorn Fudge
- Frequently Asked Questions (FAQ)
- More Easy Fudge Recipes
What is Unicorn Fudge?
Unicorn Fudge is a delightful and visually stunning confection that combines the creamy texture of traditional fudge with a vibrant, whimsical aesthetic. Typically featuring swirls of pink, purple, and blue food coloring, it’s often adorned with colorful sprinkles, mini marshmallows, or edible glitter to evoke the magical imagery of unicorns. Made primarily from melted white chocolate and frosting, this no-bake treat is incredibly easy to prepare, making it a favorite for themed parties, holiday celebrations, and spontaneous moments of joy. It’s a sweet, melt-in-your-mouth dessert that brings a touch of fantasy to any occasion.
Why We Love This Unicorn Fudge Recipe
There are countless reasons to fall in love with this enchanting Unicorn Fudge recipe. Its simplicity, vibrant appearance, and delicious taste make it an undeniable winner for any dessert lover:
- Effortlessly Fun and Festive: The dazzling array of colors and festive sprinkles instantly make this fudge a standout treat. It’s the ideal dessert for birthdays, holidays, themed parties, or any event where you want to add a touch of magic and whimsy. Its eye-catching appeal guarantees it will be the first to disappear from the dessert table.
- Quick, Easy, and No-Bake: Say goodbye to complicated baking steps and preheating ovens! This recipe comes together quickly with just a few readily available ingredients, making it perfect for novice bakers or those short on time. The no-bake aspect means less clean-up and more time to enjoy your delightful creation.
- A Joyful Kid-Friendly Activity: Get the whole family involved in the kitchen! Kids will absolutely adore helping with the fun parts of this recipe, from swirling the vibrant colors to generously adding the sprinkles. It’s a wonderful way to create lasting memories and foster a love for cooking in a playful, low-stress environment.
- Endlessly Versatile for Any Occasion: While designed with a unicorn theme in mind, this fudge is incredibly adaptable. Easily customize the colors to match any holiday (think red and green for Christmas, orange and black for Halloween) or event. You can also experiment with different flavor extracts or creative toppings to make it uniquely yours.
- Creamy, Sweet, and Utterly Indulgent: This fudge boasts a rich, smooth, and creamy texture that simply melts in your mouth. With just the right balance of sweetness, it satisfies every craving without being overly cloying, ensuring each bite is pure indulgence.
- Perfect for Thoughtful Gifting: Homemade gifts always carry a special touch. Once set, cut the fudge into neat squares, arrange them in pretty boxes or bags, and tie with a ribbon. It makes for a delightful, heartfelt gift that friends, teachers, and loved ones will truly appreciate.
Essential Ingredients for Unicorn Fudge
Creating this magical unicorn fudge requires only a handful of common ingredients. The key is to choose quality components to ensure the best flavor and texture:
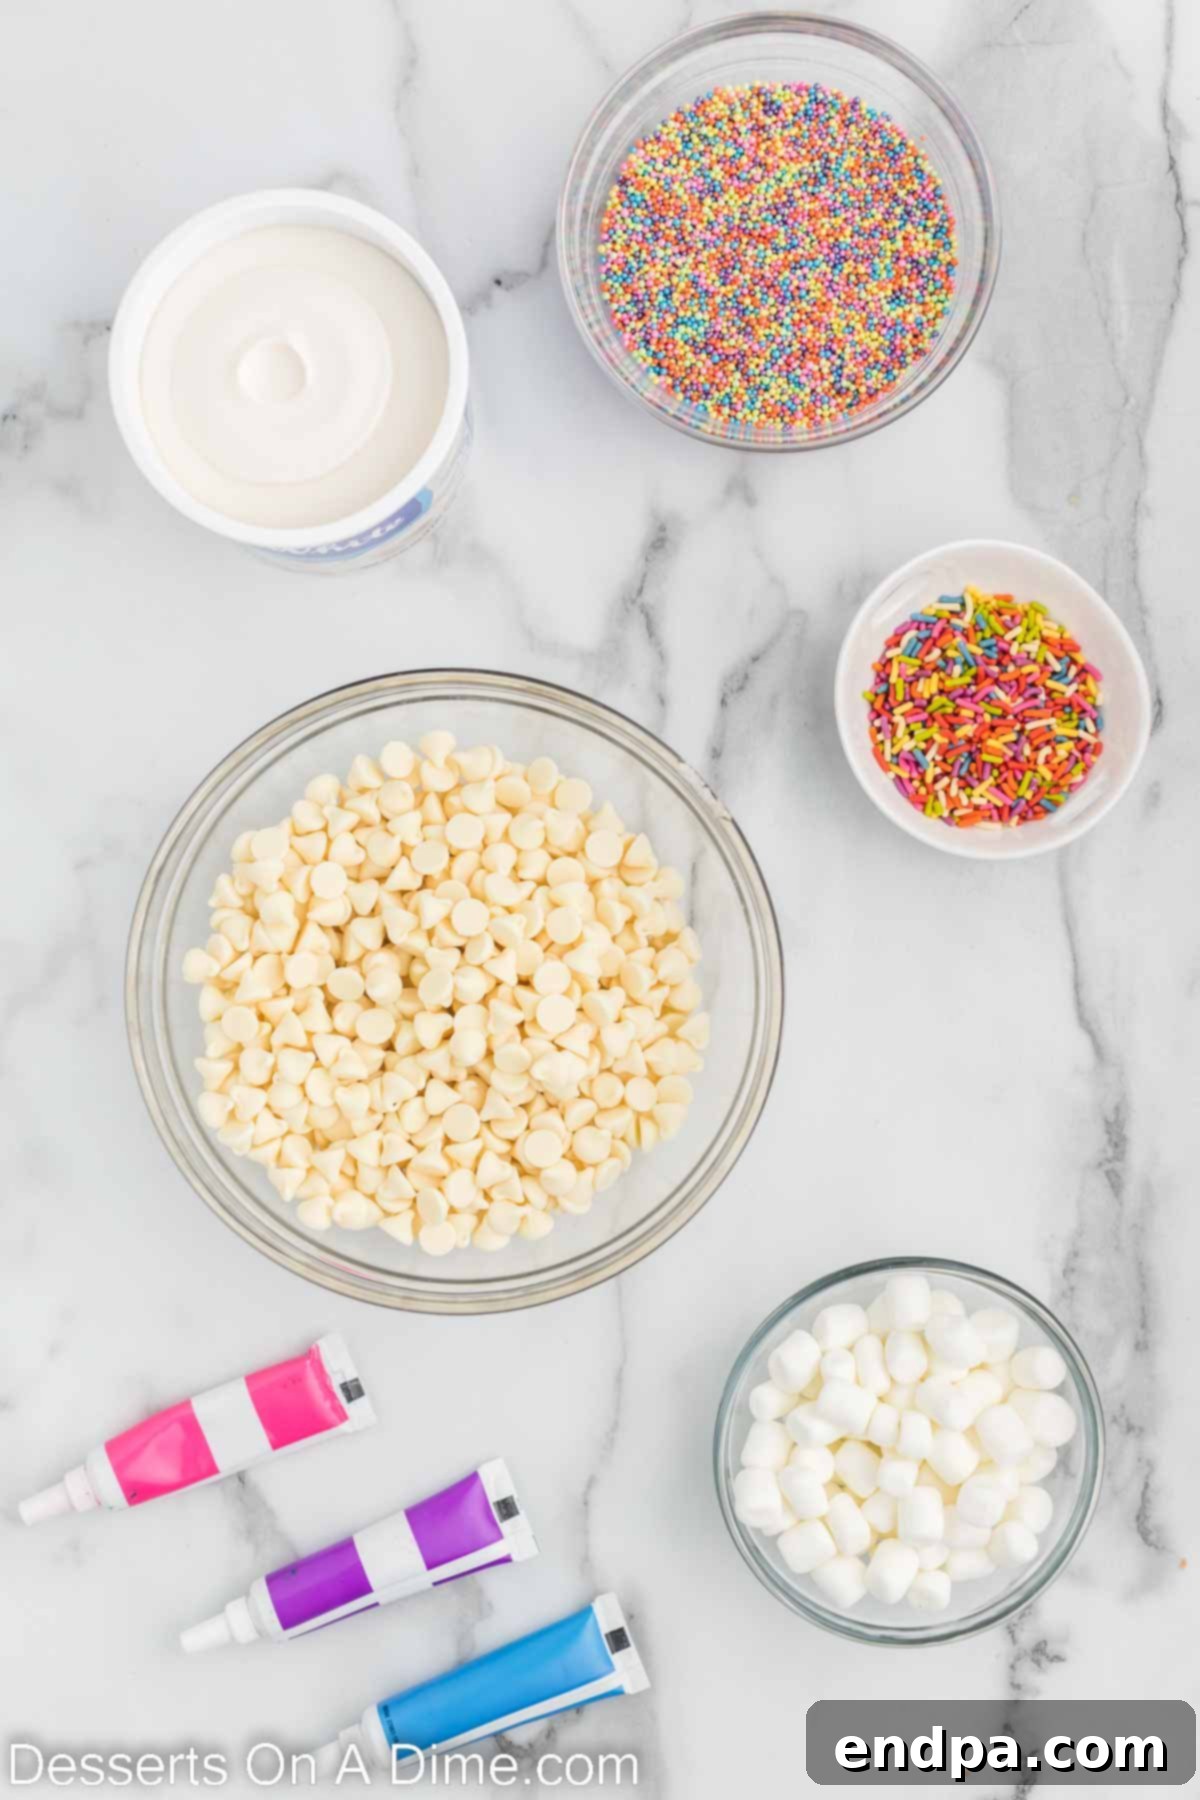
- White Chocolate Chips: The foundation of our creamy fudge. For superior flavor and a smooth, consistent melt, we highly recommend using high-quality white chocolate chips. Brands like Ghirardelli or Guittard offer excellent results, ensuring your fudge is rich and luxurious. Avoid candy melts if you’re looking for a true chocolate flavor, as they often contain less cocoa butter.
- White Frosting: This secret ingredient simplifies the recipe tremendously, eliminating the need for complex sugar cooking. A store-bought container of vanilla or white buttercream frosting works perfectly, lending a wonderfully smooth and sweet base to the fudge. Opt for a classic creamy frosting rather than a whipped variety for optimal texture.
- Food Coloring (Pink, Purple, Blue): These are the magic makers! Gel food colorings are preferred over liquid ones as they provide more vibrant, concentrated hues without adding excess moisture to your fudge mixture. You can easily customize the shades to create your perfect unicorn palette or adapt them for other festive occasions.
- Mini Marshmallows: These tiny additions provide a delightful softness and a subtly chewy texture that complements the fudge beautifully. Their small size integrates seamlessly into the mixture, adding an extra layer of sweetness and fun. If you only have large marshmallows, you can snip them into smaller pieces.
- Rainbow Sprinkles: The crowning glory of our unicorn fudge! Choose a mix of colorful sprinkles – jimmies, nonpareils, or even a whimsical unicorn-themed blend. They add a festive crunch and that unmistakable magical sparkle, tying the whole unicorn theme together.
For a complete, precise list of ingredients and their measurements, please refer to the detailed recipe card at the bottom of this page.
Equipment You’ll Need
Making this delightful unicorn fudge doesn’t require any fancy kitchen gadgets. Here’s a quick list of the basic tools you’ll need to get started:
- 8×8 Inch Baking Pan: A square pan of this size is ideal for creating fudge squares of a good height.
- Foil or Parchment Paper: Essential for lining the pan, ensuring easy removal and clean-up.
- Non-Stick Cooking Spray: For extra insurance against sticking, especially when using foil.
- Microwave-Safe Bowl: For melting the white chocolate chips efficiently.
- Rubber Spatula or Spoon: For stirring the chocolate and frosting, and for folding in colors.
- 3 Small Bowls: To separate the fudge mixture for coloring.
- Knife or Toothpick: For creating those beautiful, ethereal swirls.
- Sharp Knife: For clean, precise cuts once the fudge is set.
Recipe Variations and Substitutions
One of the best things about this unicorn fudge recipe is how versatile it is! Feel free to get creative and customize it to suit your taste or specific occasion:
- Creative Topping Combinations: While rainbow sprinkles and mini marshmallows are classic, don’t limit yourself! Consider adding edible glitter for extra sparkle, crushed candy pieces, mini chocolate chips, or even small edible pearls. You can also vary the type of sprinkles—think themed sprinkles for specific holidays or events, or even just a single color for a more minimalist look.
- Alternative White Chocolate Bases: If white chocolate chips aren’t readily available, or you prefer a different base, you can substitute almond bark or white baking chocolate. These alternatives melt smoothly and provide a similar creamy consistency, making them excellent choices for this no-bake fudge. Ensure they are of good quality for the best results.
- Experiment with Colors: The “unicorn” aesthetic typically uses pink, purple, and blue, but the possibilities are endless! This recipe is incredibly adaptable for any holiday or theme. Use red and green for Christmas, orange and black for Halloween, pastels for Easter, or school colors for a graduation party. Simply choose your desired gel food colorings and let your imagination guide you.
- Add Flavor Extracts: Elevate your fudge with different flavor profiles. A few drops of vanilla extract are already included, but you could try almond extract for a nutty depth, peppermint extract for a festive twist, or even a fruit-flavored extract like strawberry or raspberry to complement the colors.
- Include Mix-ins: For an extra layer of texture and flavor, gently fold in other ingredients before swirling. Crushed shortbread cookies, chopped nuts (if not for a party with nut allergies), or even white chocolate chunks could be fantastic additions.
Step-by-Step: How to Make Unicorn Fudge
Follow these simple instructions to create your enchanting unicorn fudge. Each step is designed to be easy and enjoyable, even for beginners!
- Step 1 – Prepare the Baking Pan. Before you begin melting, it’s crucial to prepare your pan for easy removal of the fudge. Line an 8×8-inch baking pan with either aluminum foil or parchment paper. Make sure to leave an overhang on all sides; this will act as “handles” later on to lift the set fudge out of the pan. For extra assurance that the fudge won’t stick, lightly spray the foil or parchment paper with a non-stick cooking spray. This preparation step is key for clean, perfect squares.
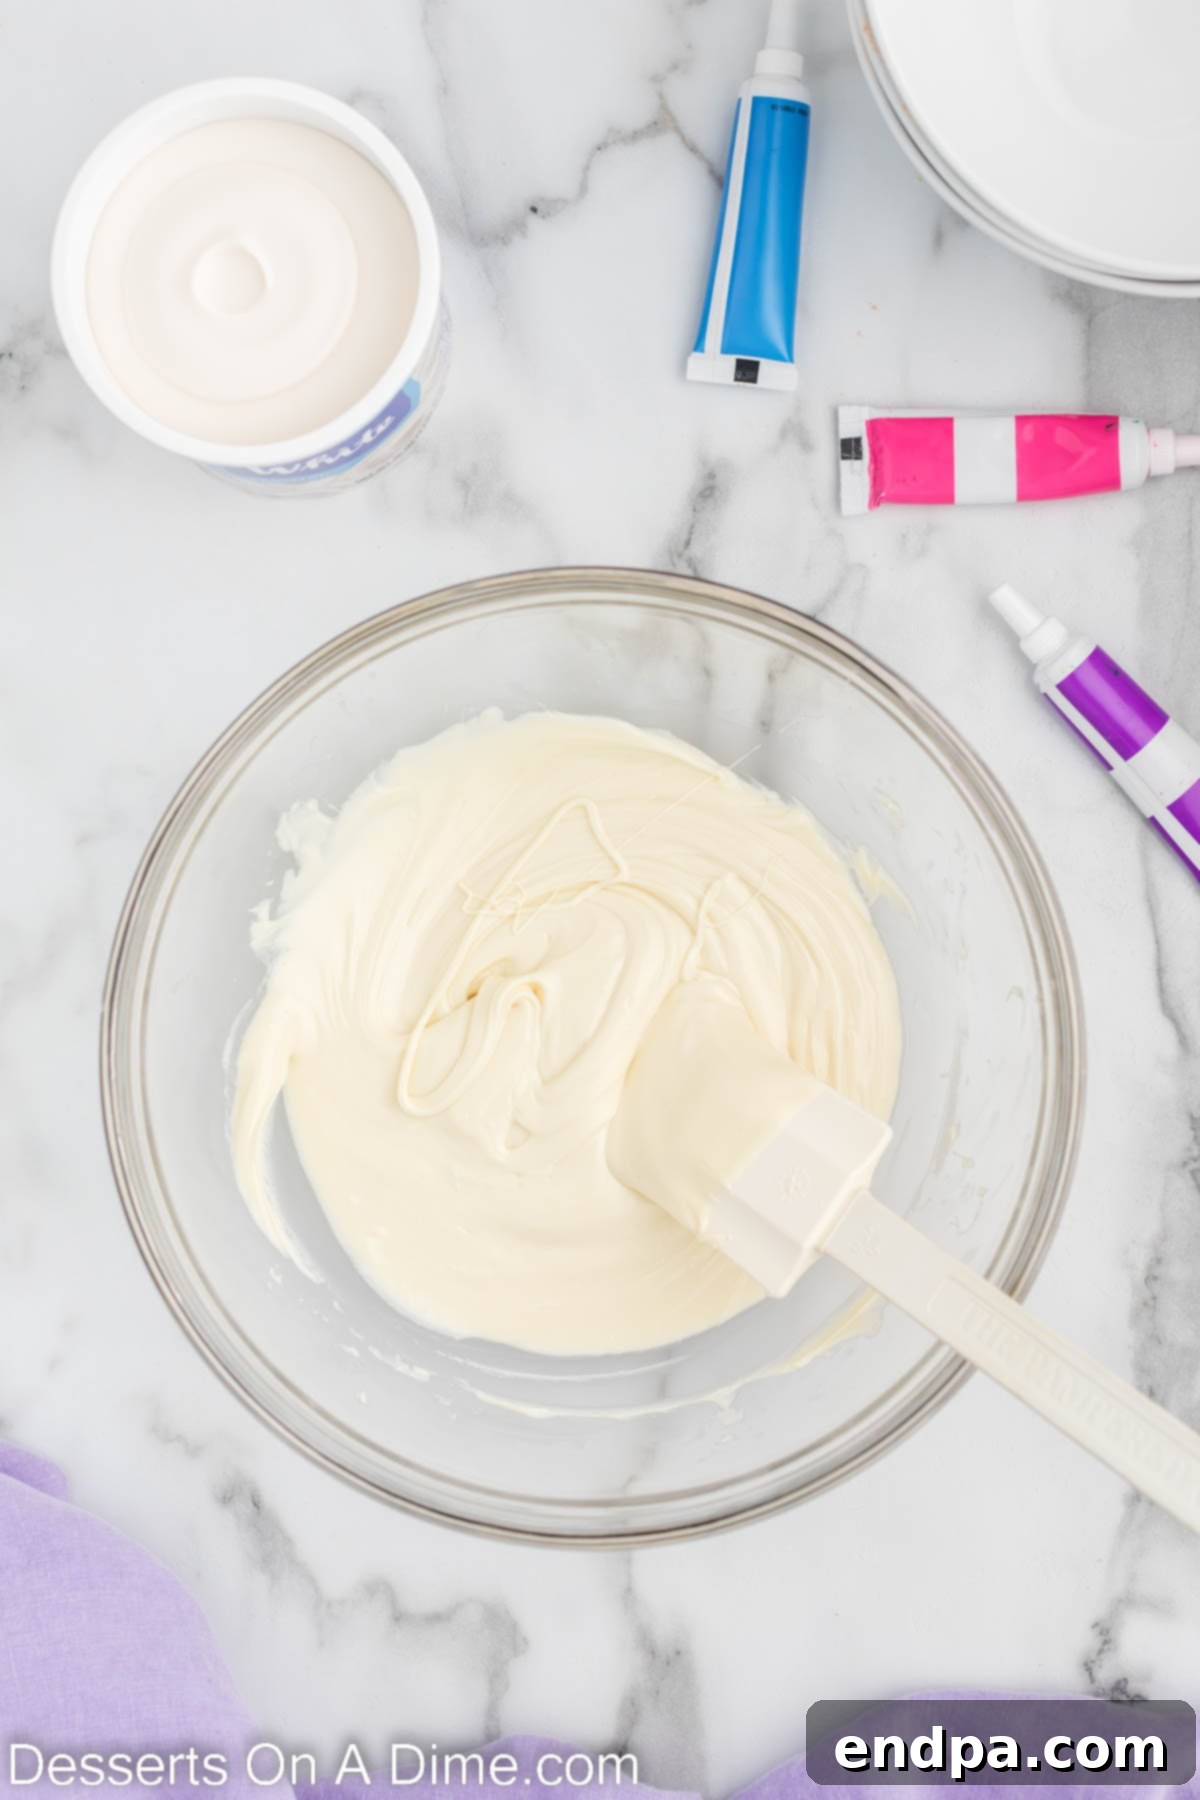
Step 2. Melt the White Chocolate Chips. Place your white chocolate chips into a microwave-safe bowl. Heat the chips in 30-second increments, stirring thoroughly after each interval. White chocolate can seize or burn easily if overheated, so patience is key. Continue this process until the chocolate is completely melted and beautifully smooth, without any lumps. Avoid the temptation to rush this step.
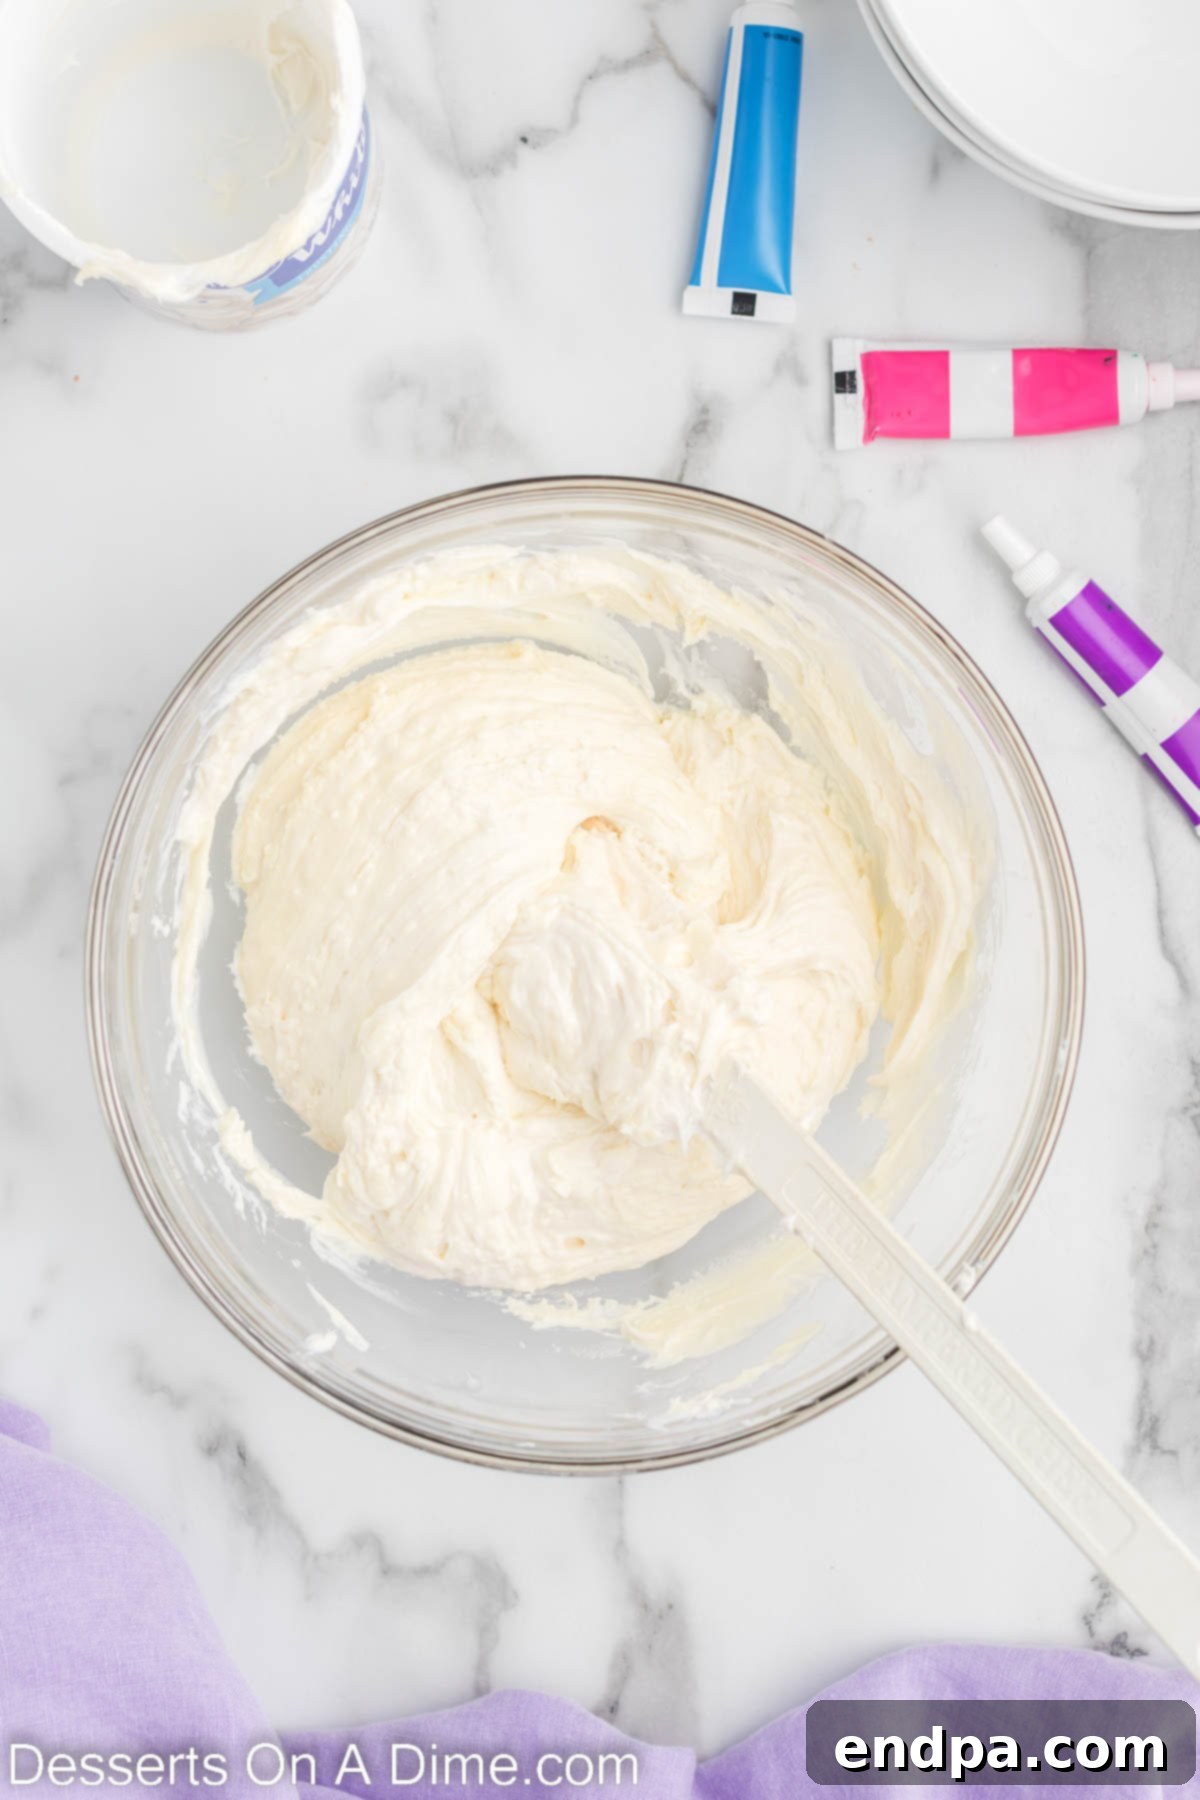
Step 3. Incorporate the Vanilla Frosting. Once the white chocolate is fully melted and smooth, add the entire container of white (or vanilla) frosting into the bowl. Stir the mixture vigorously with a rubber spatula or spoon until the frosting is fully combined with the melted chocolate. You should achieve a uniform, creamy, and well-blended fudge base. Work relatively quickly here as the mixture will start to set as it cools.
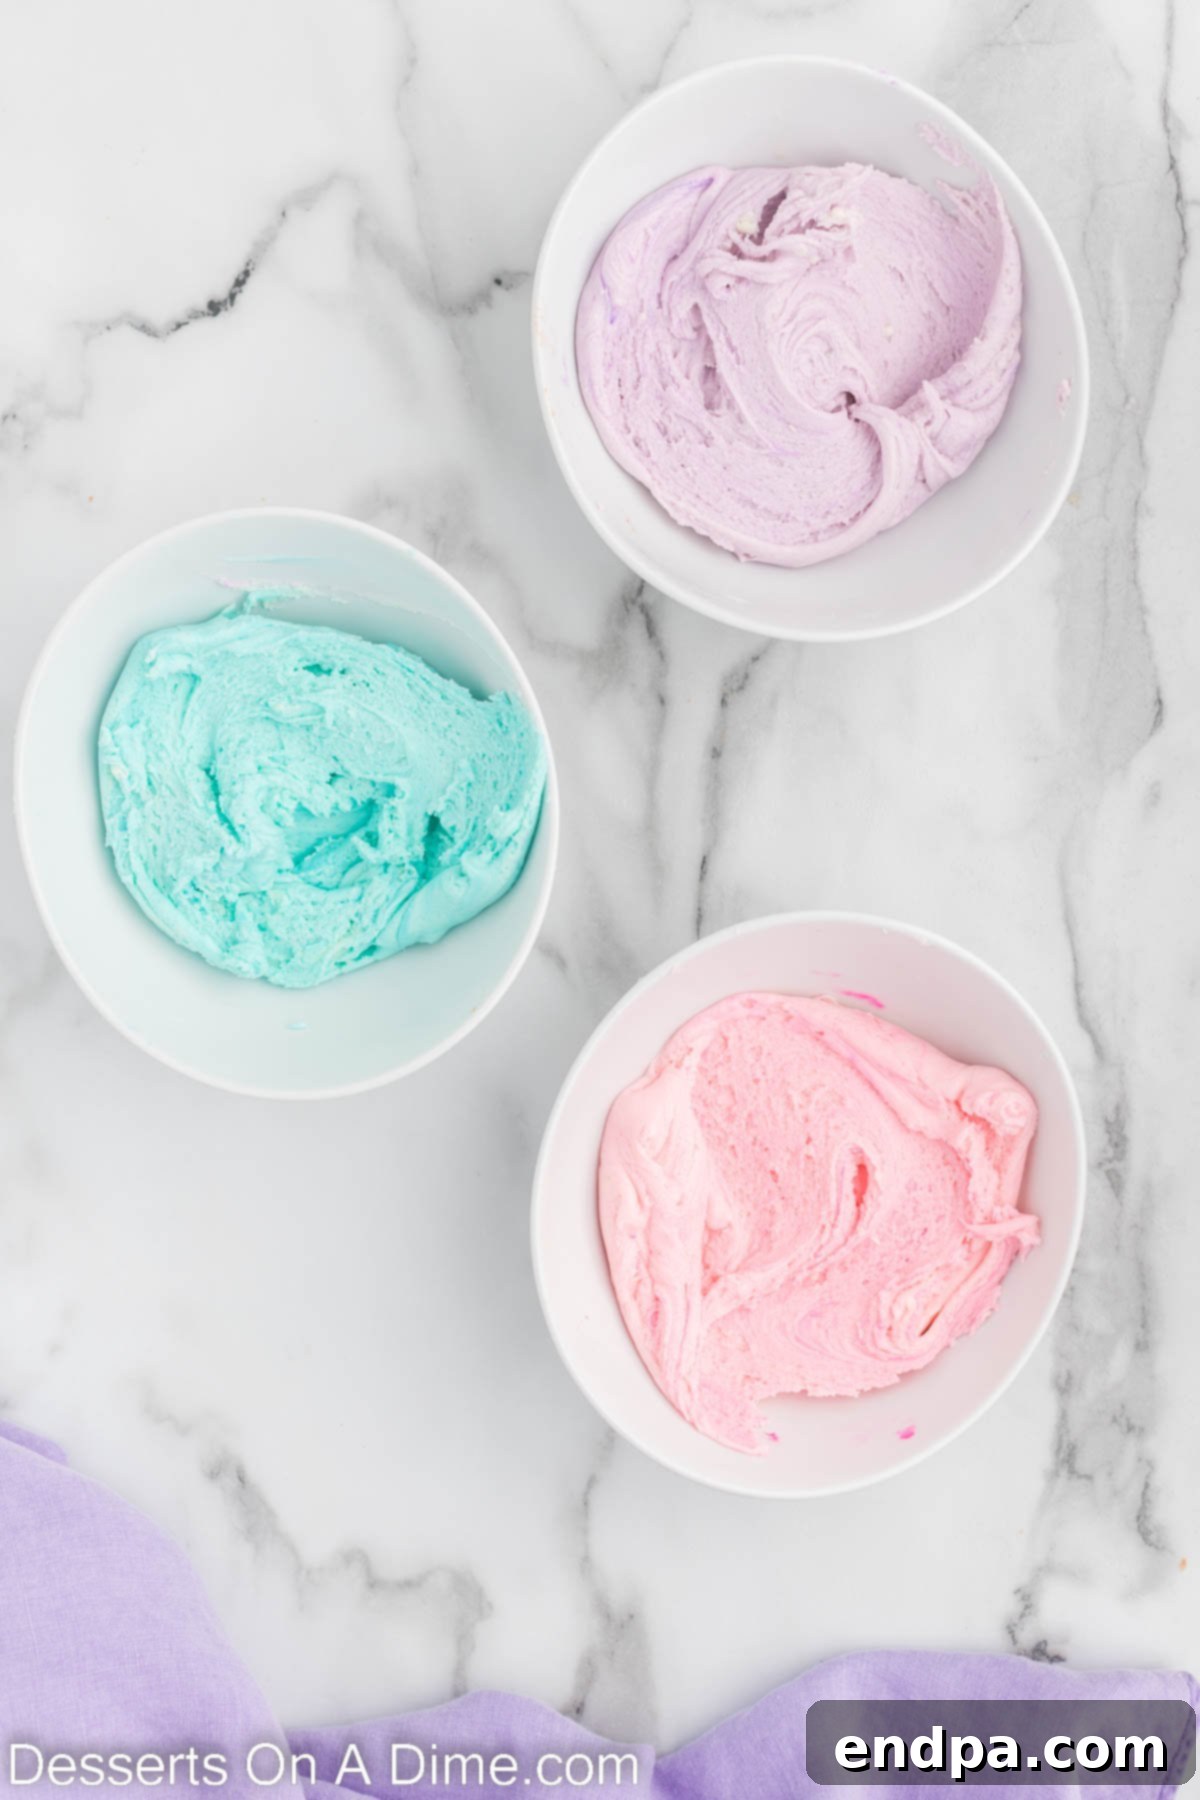
Step 4. Divide and Color the Fudge Mixture. Carefully separate the creamy fudge mixture evenly into three separate bowls. This will allow you to create your vibrant unicorn colors. Into one bowl, stir in a few drops of pink food coloring. Into the second, add purple, and into the third, blue. Mix each bowl until the color is thoroughly blended and reaches your desired magical shade. Remember that gel food coloring provides the most vivid results.
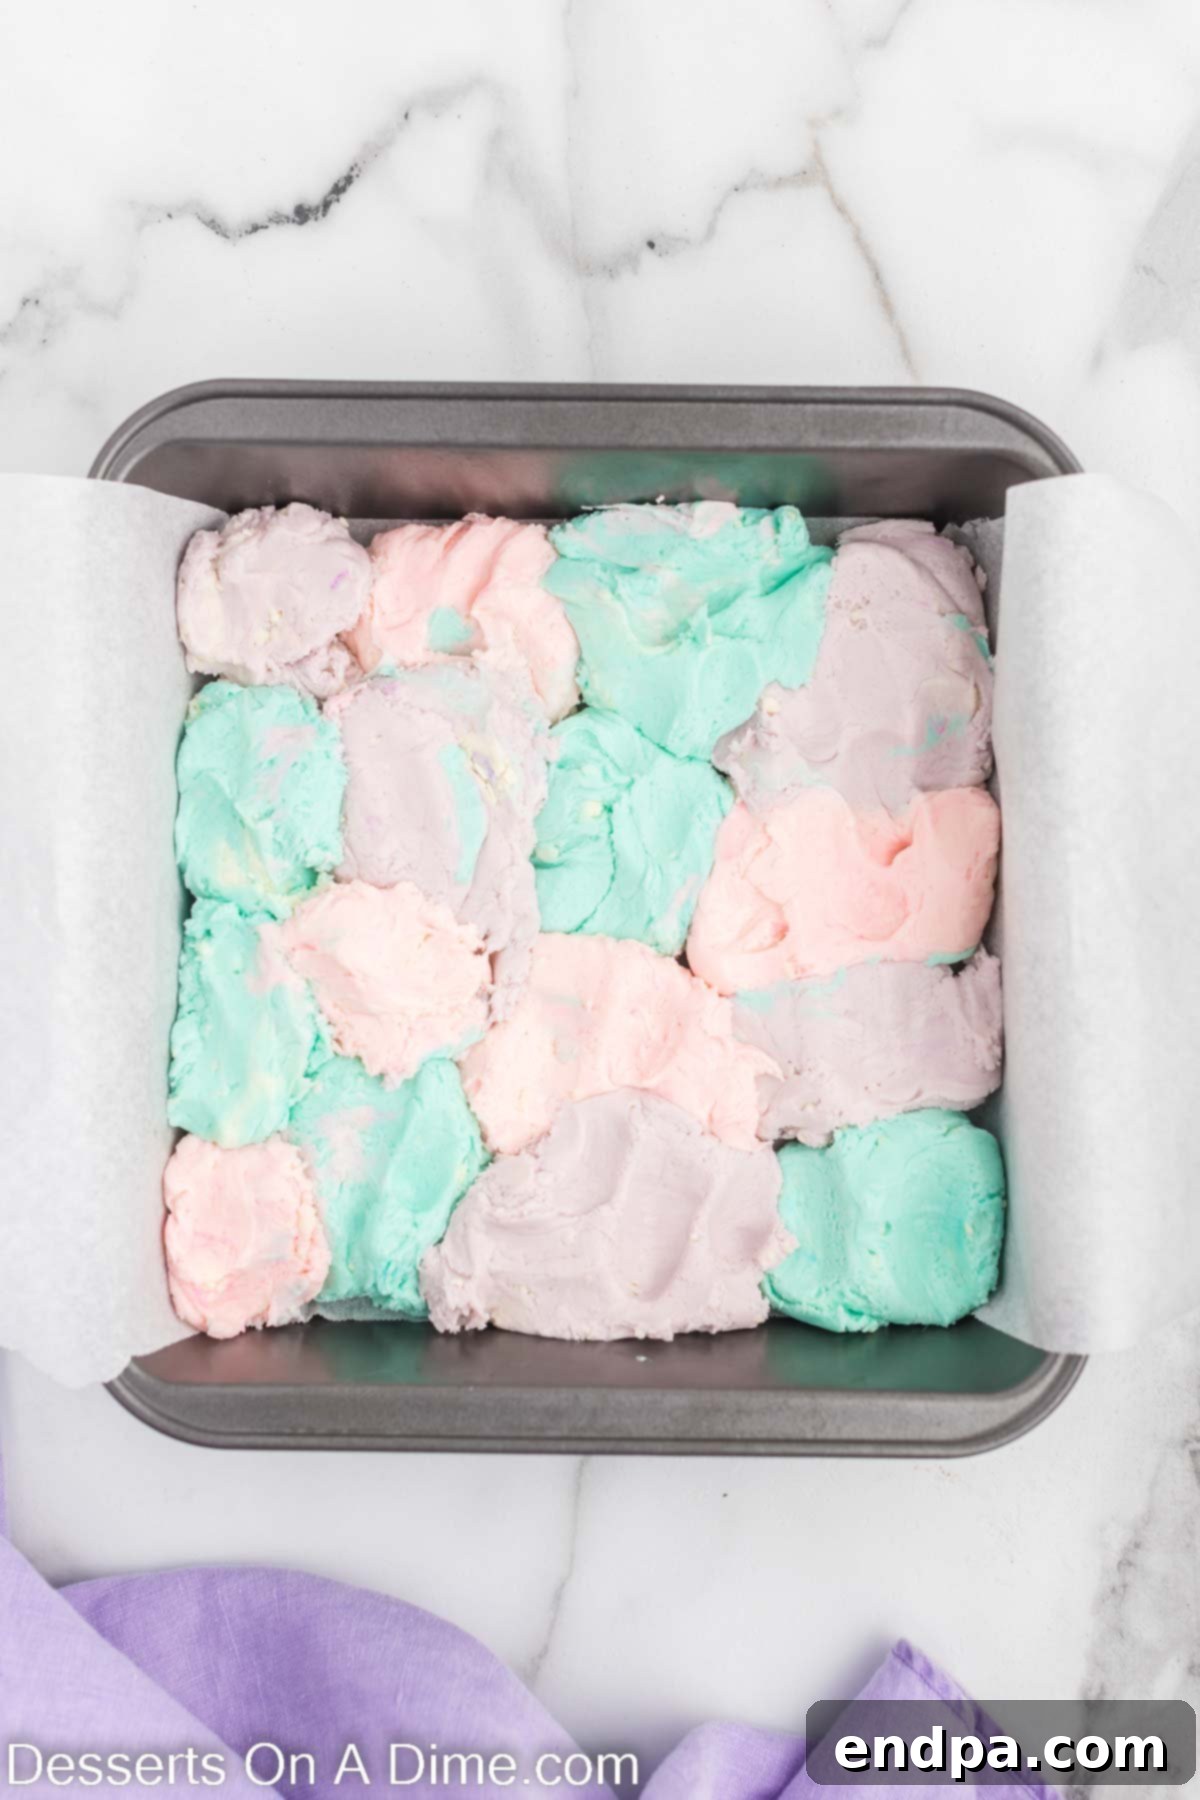
Step 5. Dollop Colors into the Pan. Now for the fun part! Take a spoonful of each colored fudge and randomly drop alternating dollops into your prepared 8×8-inch pan. Continue layering and alternating the pink, purple, and blue fudge until all the mixture has been transferred to the pan. Don’t worry about perfection at this stage; the random placement will contribute to a beautiful swirl.
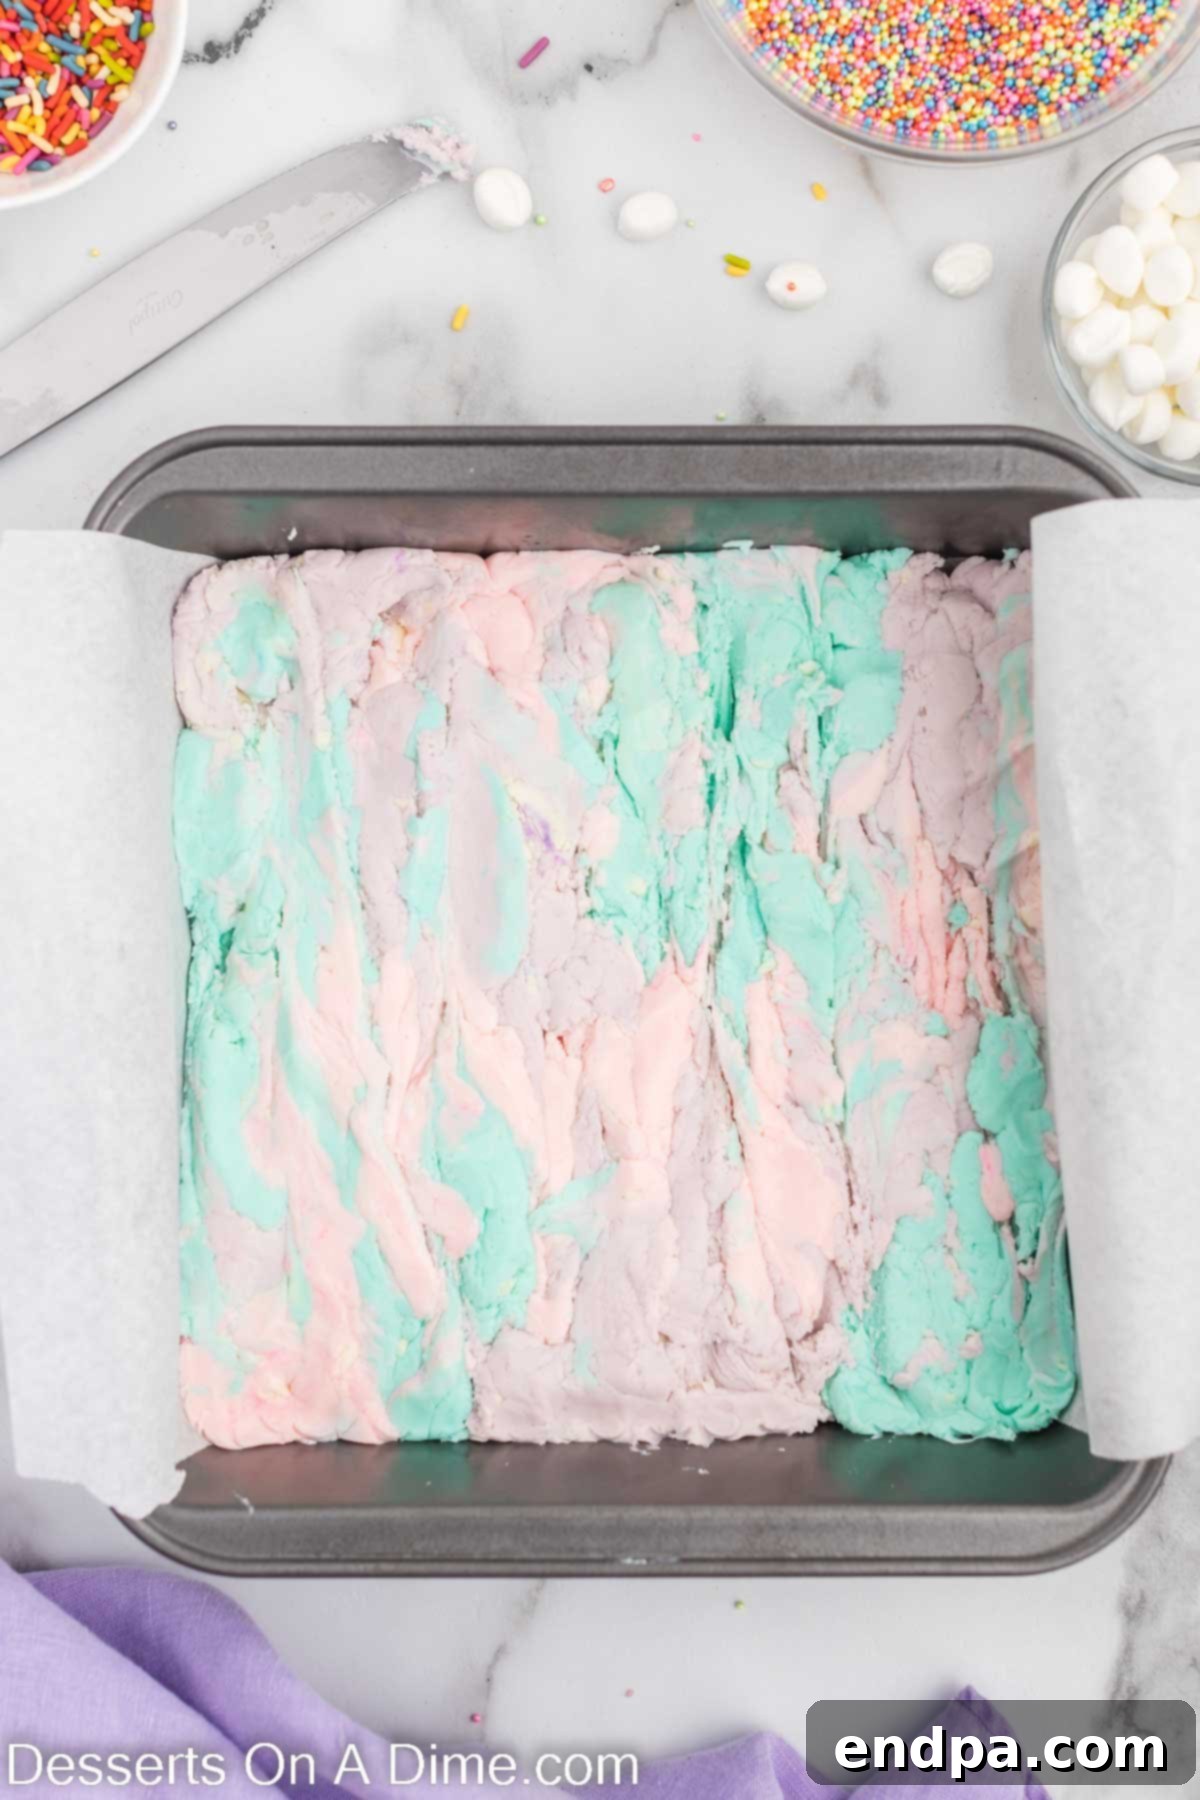
Step 6. Create the Magical Swirl. Using a butter knife or a clean toothpick, gently run it through the dolloped fudge in a swirling motion. Move your knife in S-shapes or figure-eights to create a beautiful, marbled effect. Be careful not to over-swirl, as too much mixing will cause the colors to blend completely and lose their distinct “unicorn” contrast. A few deliberate passes are all you need to achieve that enchanting pattern.
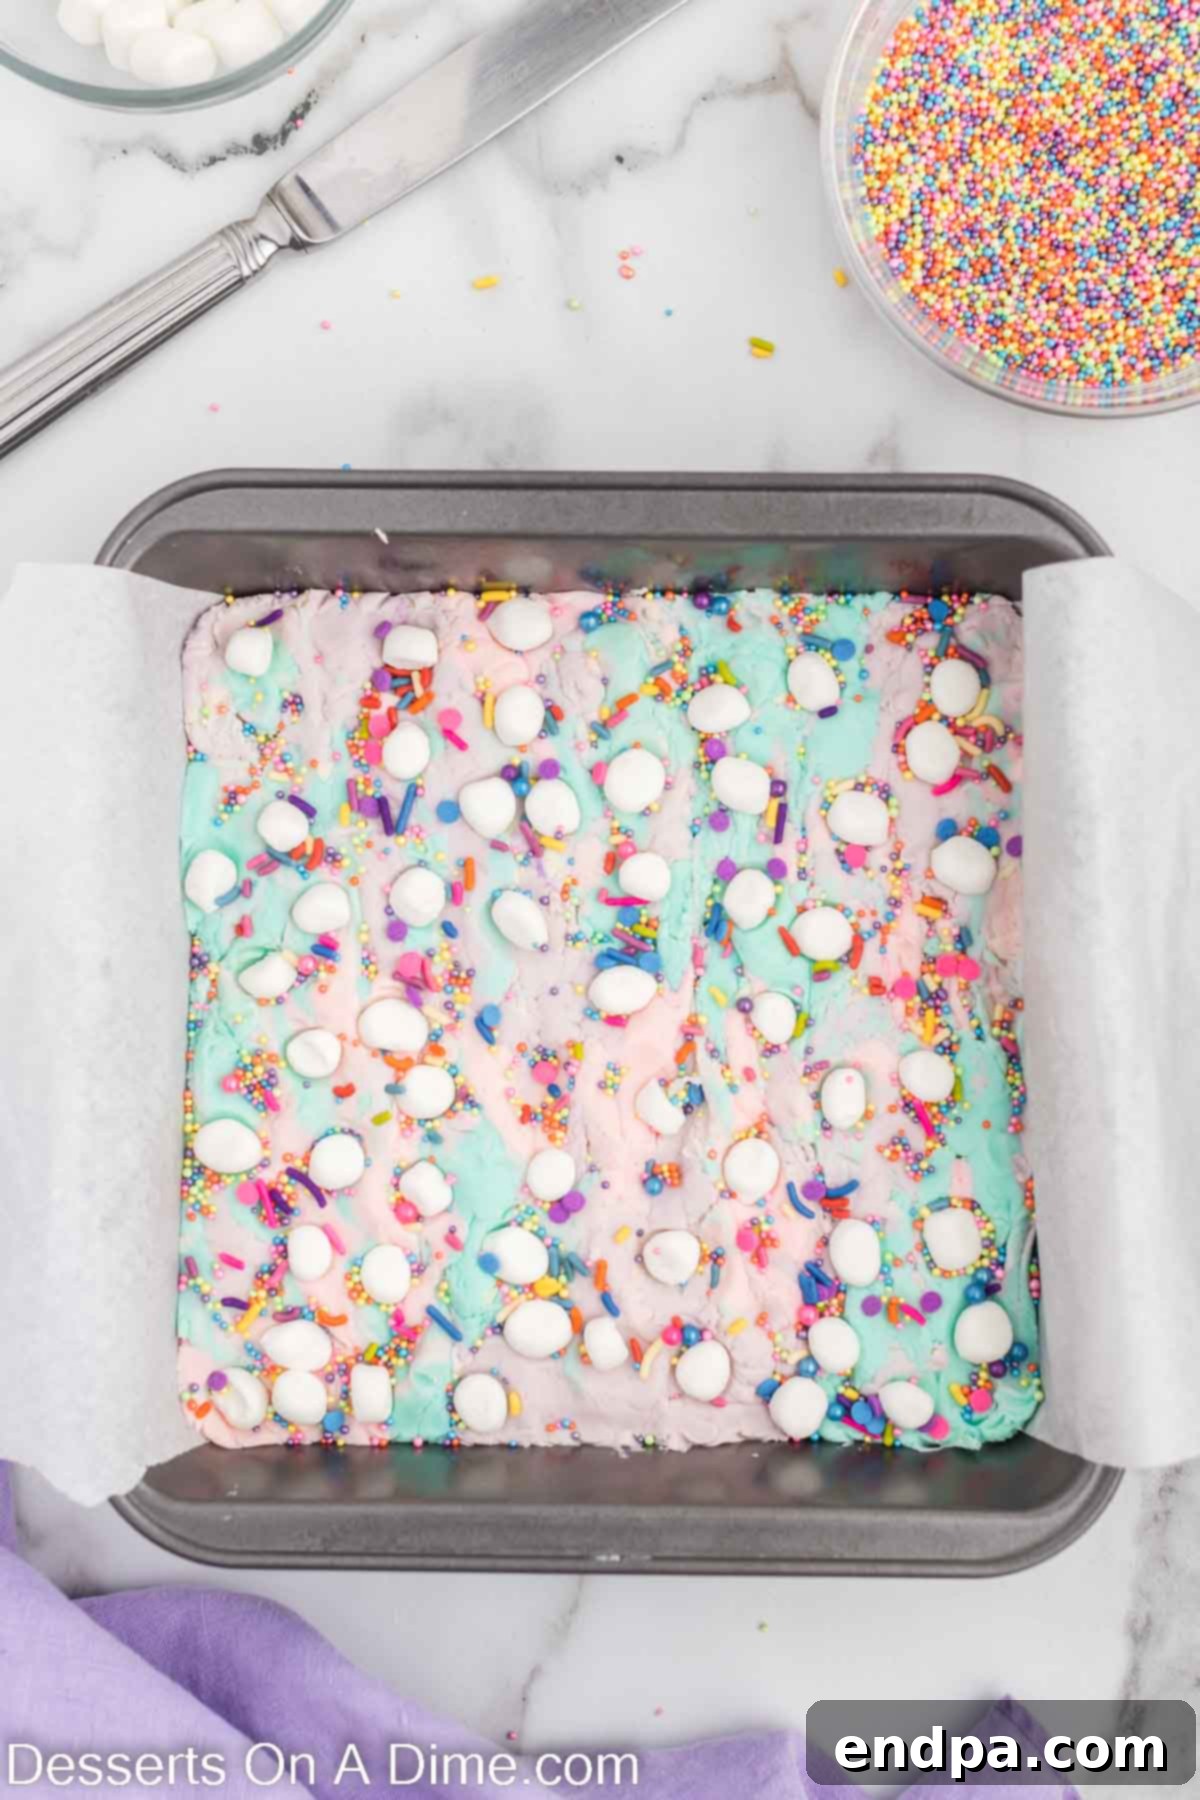
Step 7. Add Toppings and Chill. Immediately after swirling, generously sprinkle your mini marshmallows and rainbow sprinkles over the entire surface of the fudge while it’s still soft. Gently press them down with your hand or a clean spatula to ensure they adhere to the fudge as it sets. Once topped, transfer the pan to the refrigerator and allow the fudge to chill for 2-3 hours, or until it is completely firm. The chilling process is essential for the fudge to fully set and achieve its perfect sliceable texture.
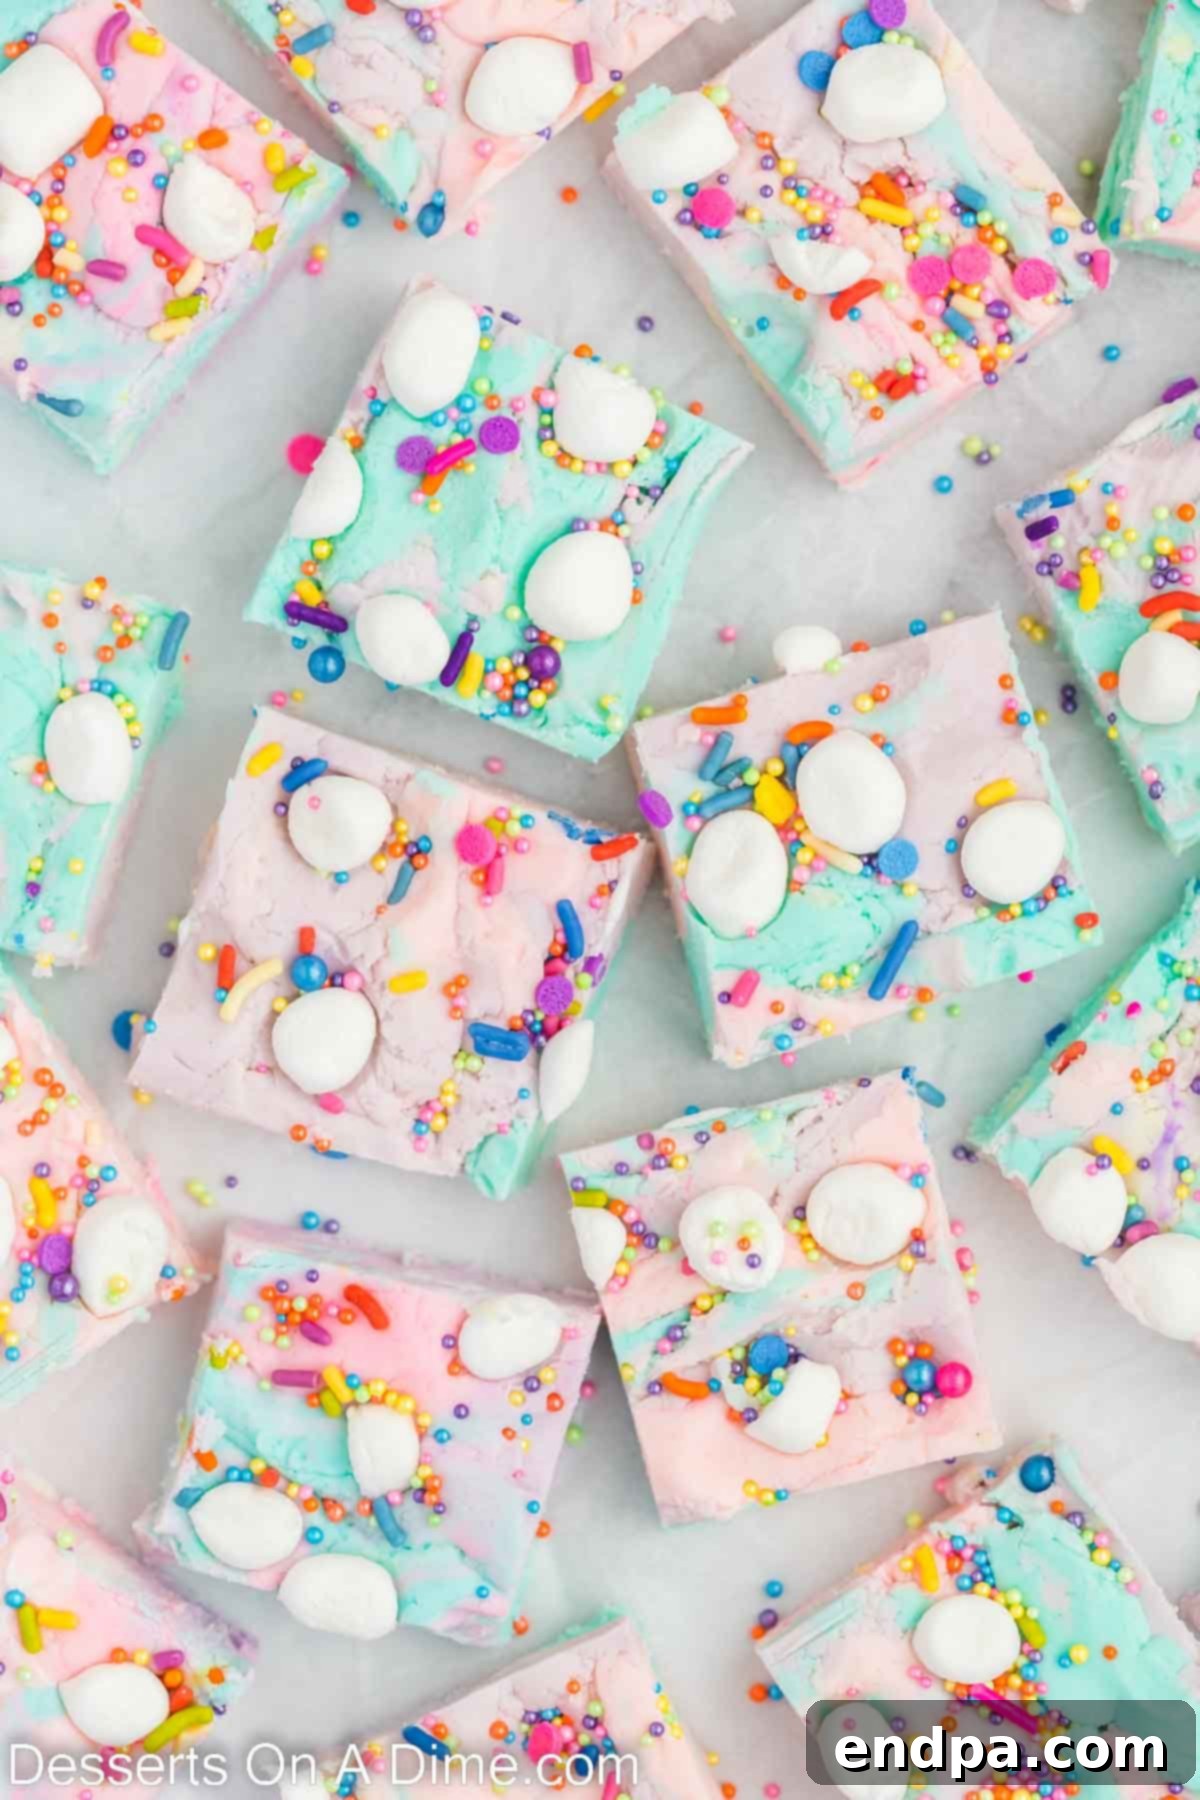
Once your magical unicorn fudge has fully set, lift it out of the pan using the foil or parchment paper overhang. Place it on a cutting board, slice into desired squares, and prepare to enjoy the enchanting results of your efforts!
Proper Storage for Your Unicorn Fudge
Ensuring your delicious Unicorn Fudge stays fresh and delightful is easy with proper storage techniques:
Room Temperature Storage: For short-term enjoyment, store any leftover unicorn fudge in an airtight container at room temperature. Placed in a cool, dry place away from direct sunlight, the fudge will maintain its quality for up to 1 month. The airtight container prevents it from drying out or absorbing other odors.
Refrigeration: While not strictly necessary for short-term storage, refrigerating fudge can help it stay firmer, especially in warmer climates. If you choose to refrigerate, store it in an airtight container. Allow it to come to room temperature for about 15-20 minutes before serving for the best, creamiest texture.
Freezing for Longer Freshness: Unicorn fudge freezes exceptionally well, making it a great option for meal prep or enjoying a batch over several months. For longer storage, you can freeze the fudge for 3 to 4 months. To prevent sticking and freezer burn:
- Cut the fudge into individual squares first.
- Place pieces in a single layer on a parchment-lined baking sheet and freeze until firm (about 1-2 hours).
- Once firm, transfer the frozen fudge squares to a freezer-safe container or a resealable freezer bag.
- Place a sheet of wax paper or parchment paper between layers of fudge to prevent them from sticking together.
- Label the container with the date.
- When ready to enjoy, let the frozen fudge thaw at room temperature for several hours before serving. This allows the texture to return to its optimal creamy state.
Expert Tips for Making the Perfect Unicorn Fudge
Achieving perfectly smooth, colorful, and delicious unicorn fudge is simple with these expert tips:
- Achieve Clean Cuts with a Sharp Knife: For beautifully neat squares, always use a very sharp knife. For even smoother, cleaner slices, you can lightly warm the blade of your knife under hot water and wipe it dry between each cut. This technique helps the knife glide through the fudge without dragging or tearing.
- Melt White Chocolate Slowly and Carefully: White chocolate is delicate and can seize or burn easily. Always melt it in short intervals (15-30 seconds) in the microwave, stirring thoroughly after each interval. Continue until just melted and smooth. Avoid overheating, as this will compromise the texture and flavor of your fudge.
- Swirl Gently for Distinct Colors: When creating your magical swirl, use a light hand. A butter knife or a toothpick is ideal. Make broad, gentle S-shapes or figure-eights across the fudge. The goal is to marble the colors without fully blending them. Excessive swirling will mix the colors into a muddy, less appealing shade, losing that distinct “unicorn” look.
- Add Toppings While Fudge is Soft: Time is of the essence! Sprinkle your marshmallows, sprinkles, or any other decorations immediately after swirling, while the fudge mixture is still soft and pliable. Gently press them into the surface to ensure they adhere properly before the fudge begins to set.
- Always Line Your Pan: This tip is a lifesaver for easy removal and minimal cleanup. Use parchment paper or aluminum foil to line your baking pan, making sure to leave an overhang on the sides. Once the fudge is set, you can simply use these overhangs to lift the entire block of fudge out of the pan, making slicing much easier.
- Work Quickly Once Chocolate and Frosting are Combined: The fudge mixture begins to firm up relatively fast once the melted chocolate and frosting are combined. Have all your food colorings, small bowls, toppings, and your prepared pan ready to go before you start mixing. This ensures you have ample time to color, dollop, swirl, and top the fudge before it becomes too stiff to work with.
- Chill Thoroughly to Set: Patience is a virtue here. Refrigerate the fudge for at least 2-3 hours, or even longer (up to 4 hours or overnight), until it is completely firm. Attempting to slice the fudge before it’s fully set will result in a messy, gooey outcome. A properly chilled fudge will cut cleanly and hold its shape beautifully.
Frequently Asked Questions (FAQ)
Here are some common questions about making and enjoying unicorn fudge:
- Can I use chocolate chips other than white chocolate?
Yes, while white chocolate is essential for the vibrant colors, you can certainly experiment with other types of chocolate for different fudge recipes. However, for “Unicorn Fudge” specifically, white chocolate provides the perfect neutral base for the food coloring to truly pop. - My fudge didn’t set. What went wrong?
The most common reasons for fudge not setting are incorrect ratios of ingredients or not enough chilling time. Ensure you’re using the exact measurements specified in the recipe. Also, make sure your white chocolate chips were fully melted but not burned, and give the fudge ample time in the refrigerator (at least 2-3 hours, sometimes more). - How can I make the colors more vibrant?
For the most vibrant colors, use gel food coloring instead of liquid food coloring. Gel colors are highly concentrated and won’t thin out the fudge mixture. Add a small amount at a time and mix until you achieve your desired intensity. - Can I use homemade frosting instead of store-bought?
While store-bought frosting is used for its convenience and consistent results in this particular recipe, you could potentially use a very thick, stable homemade buttercream frosting. However, ensure it’s not too soft or watery, as this could affect the fudge’s setting consistency. - How far in advance can I make this fudge?
This unicorn fudge can be made up to a week in advance and stored in an airtight container at room temperature. For longer storage, it freezes well for up to 3-4 months, making it a fantastic make-ahead dessert. - What if I don’t have an 8×8 inch pan?
You can use a similar sized pan, but be aware it might change the thickness of your fudge. A slightly larger pan will result in thinner fudge, and a smaller pan will yield thicker fudge. Adjust chilling time accordingly.
More Easy Fudge Recipes
If you’ve enjoyed making this Unicorn Fudge, you’ll love exploring our collection of other simple and delicious fudge recipes:
- Butterscotch Fudge
- Peanut Butter Chocolate Chip Fudge
- Butterfinger Fudge
- Sugar Cookie Fudge Recipe
- Harry Potter Butterbeer Fudge Recipe
- Easy Rocky Road Fudge Recipe
This no-bake Unicorn Fudge Recipe is as whimsical as it is delicious. We hope you and your loved ones enjoy this delightful treat. Give it a try, then come back to leave a comment and a star rating to let us know how it turned out! Your feedback helps us improve and share more amazing recipes with our community.
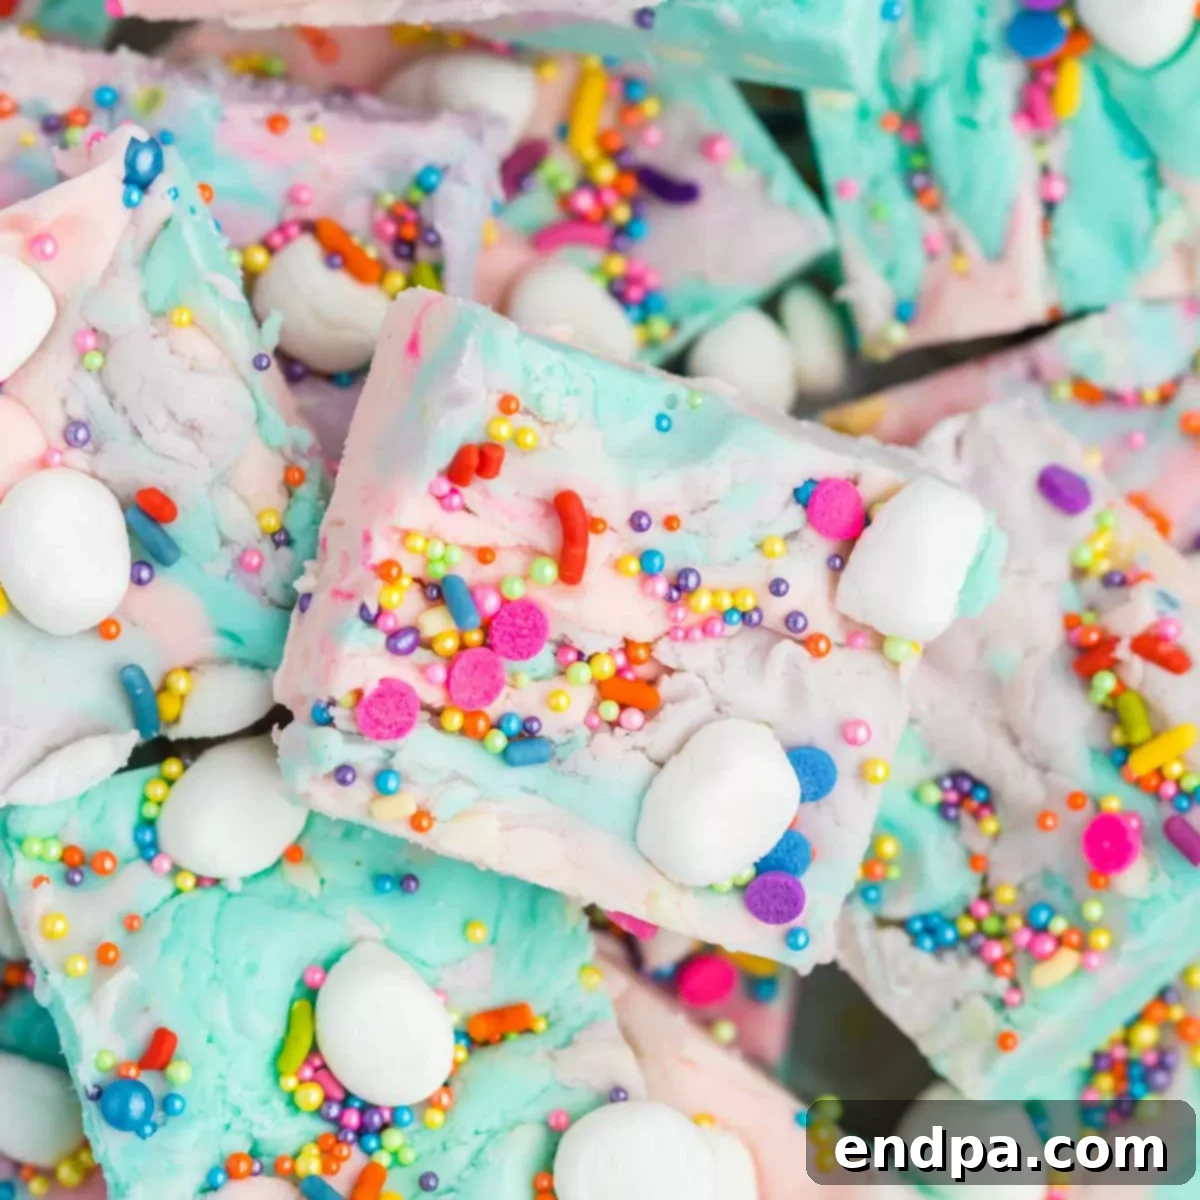
Unicorn Fudge
Unicorn Fudge is a magical mix of easy ingredients. Rainbow Unicorn Fudge is perfect for parties and makes the best sweet treat.
Rating: 4.75 out of 5 stars (based on 8 votes)
Prep Time: 20 mins
Chill Time: 2 hrs
Total Time: 2 hrs 20 mins
Servings: 24
Cuisine: American
Course: Dessert
Calories: 116 kcal
Author: Carrie Barnard
Ingredients
- 12 oz White Chocolate Chips
- 1 Container White Frosting
- Pink, Purple, or Blue Food Coloring (gel recommended)
- 1/2 cup miniature marshmallows
- Rainbow Sprinkles
Instructions
- Line an 8×8 baking dish with foil or parchment paper and spray with a non-stick cooking spray for easy removal of the fudge.
- Melt the chocolate chips in a microwave-safe bowl. Heat in 30-second increments and stir between each one. Heat until the chocolate is melted; do not overcook the white chocolate.
- Stir in the vanilla frosting until well combined and smooth.
- Then separate the mixture evenly into 3 bowls.
- Stir in the pink, purple, and blue food coloring into each one of the bowls until each bowl is your desired color.
- Then drop spoonfuls of each color into the 8×8 pan using a random pattern.
- Take a knife and run it through the fudge to create a swirl pattern. Be careful not to over-swirl to maintain distinct colors.
- Quickly top the fudge with the marshmallow and rainbow sprinkles and gently press them down into the fudge.
- Refrigerate the fudge for 2-3 hours until the fudge is set.
- Then remove the fudge from the pan using the parchment paper. Cut into squares and enjoy!
Recipe Notes
Store the leftovers in an airtight container at room temperature for up to 1 month or freeze for up to 3-4 months.
Nutrition Facts (per serving)
- Calories: 116 kcal
- Carbohydrates: 15g
- Protein: 1g
- Fat: 6g
- Saturated Fat: 3g
- Polyunsaturated Fat: 1g
- Monounsaturated Fat: 2g
- Cholesterol: 3mg
- Sodium: 29mg
- Potassium: 43mg
- Fiber: 0.03g
- Sugar: 14g
- Vitamin A: 4 IU
- Vitamin C: 0.1mg
- Calcium: 29mg
- Iron: 0.1mg
