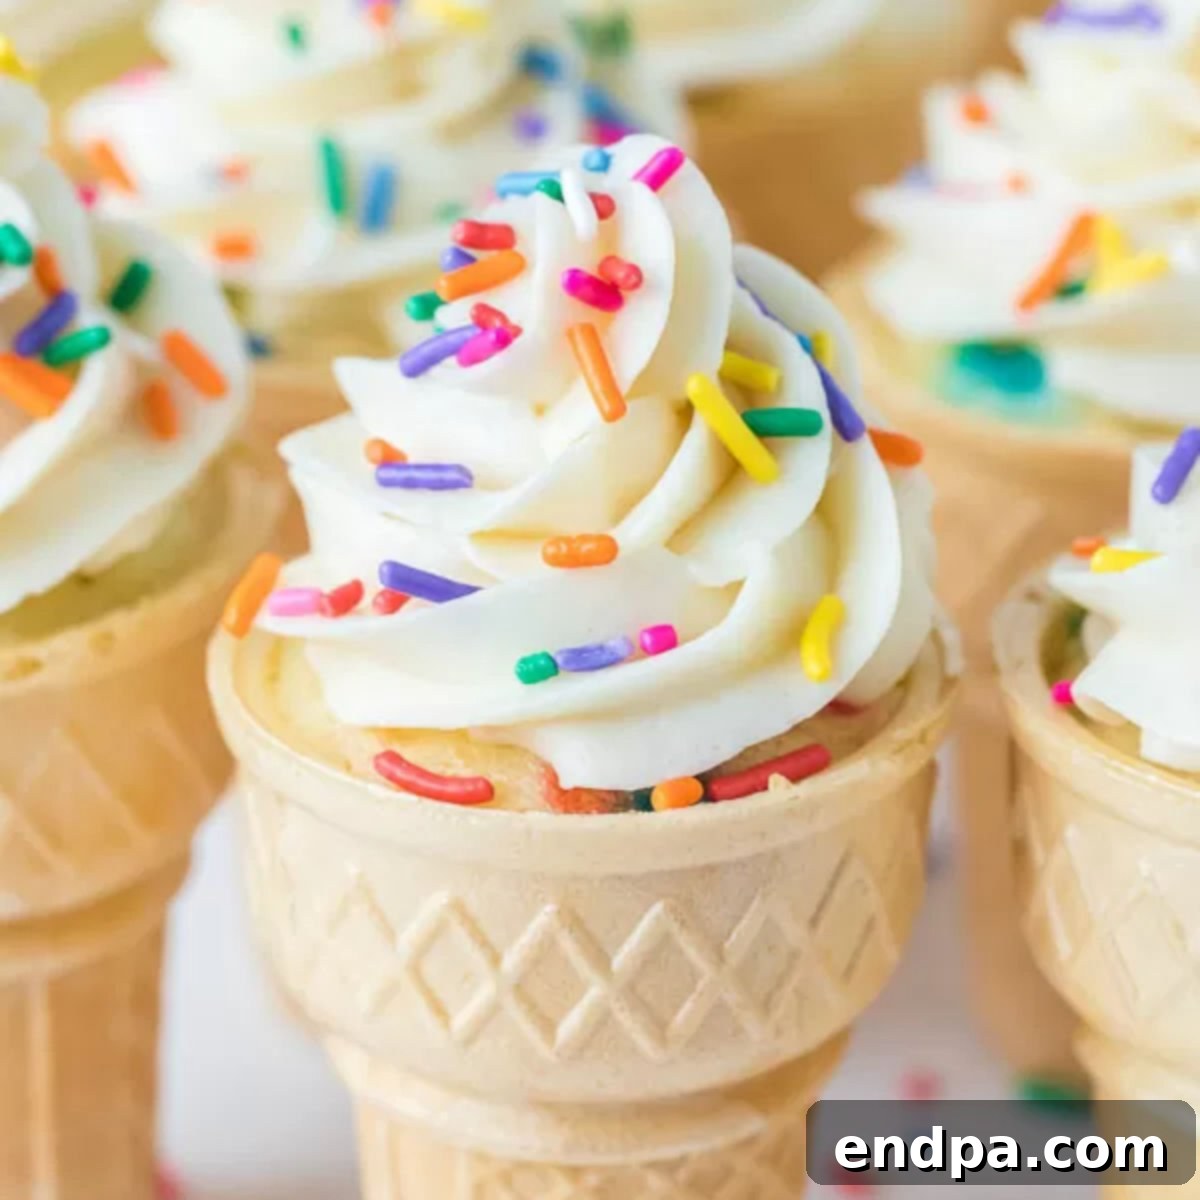
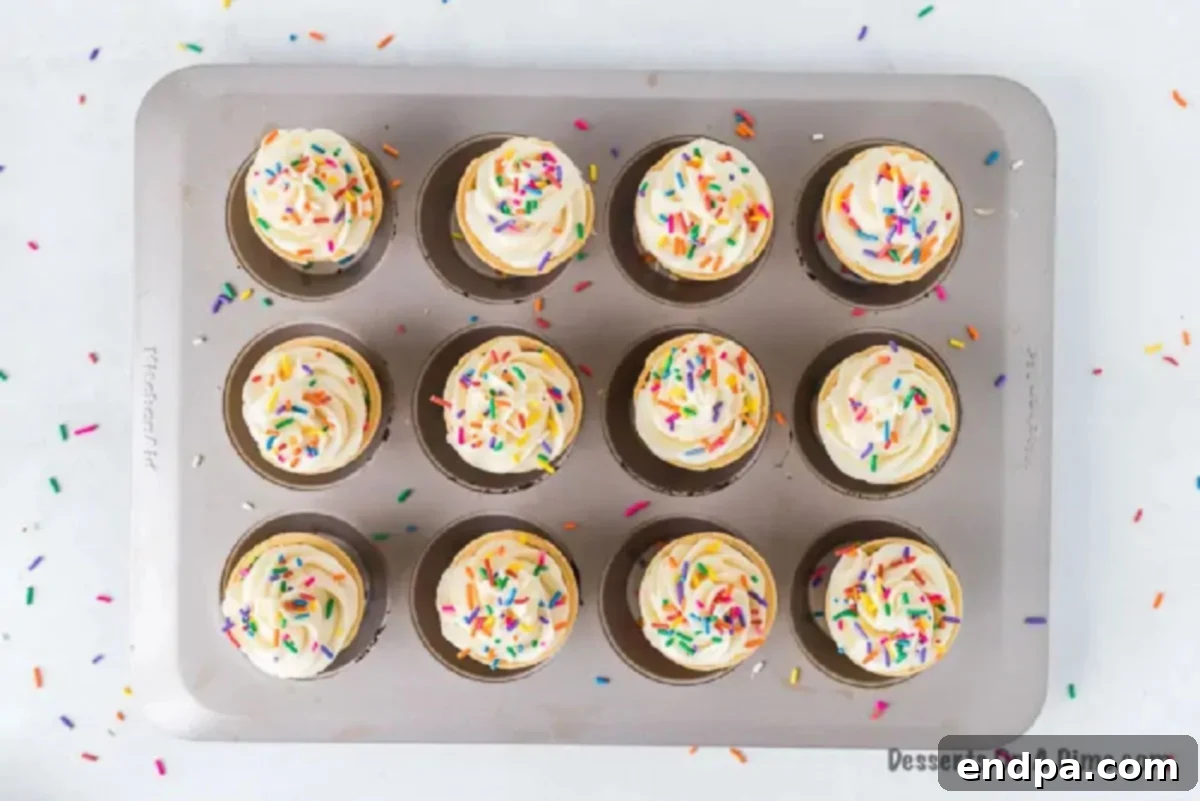
Prepare to delight your taste buds and spark joy with an absolutely charming dessert that combines the best of two worlds: the classic appeal of a cupcake and the playful presentation of an ice cream cone. Our Ice Cream Cone Cupcakes are an instant hit, transforming ordinary cake into an extraordinary treat that kids and adults go crazy over. These delightful creations are not only incredibly fun and festive but also surprisingly simple to make, especially with our proven tips and tricks for guaranteed success.
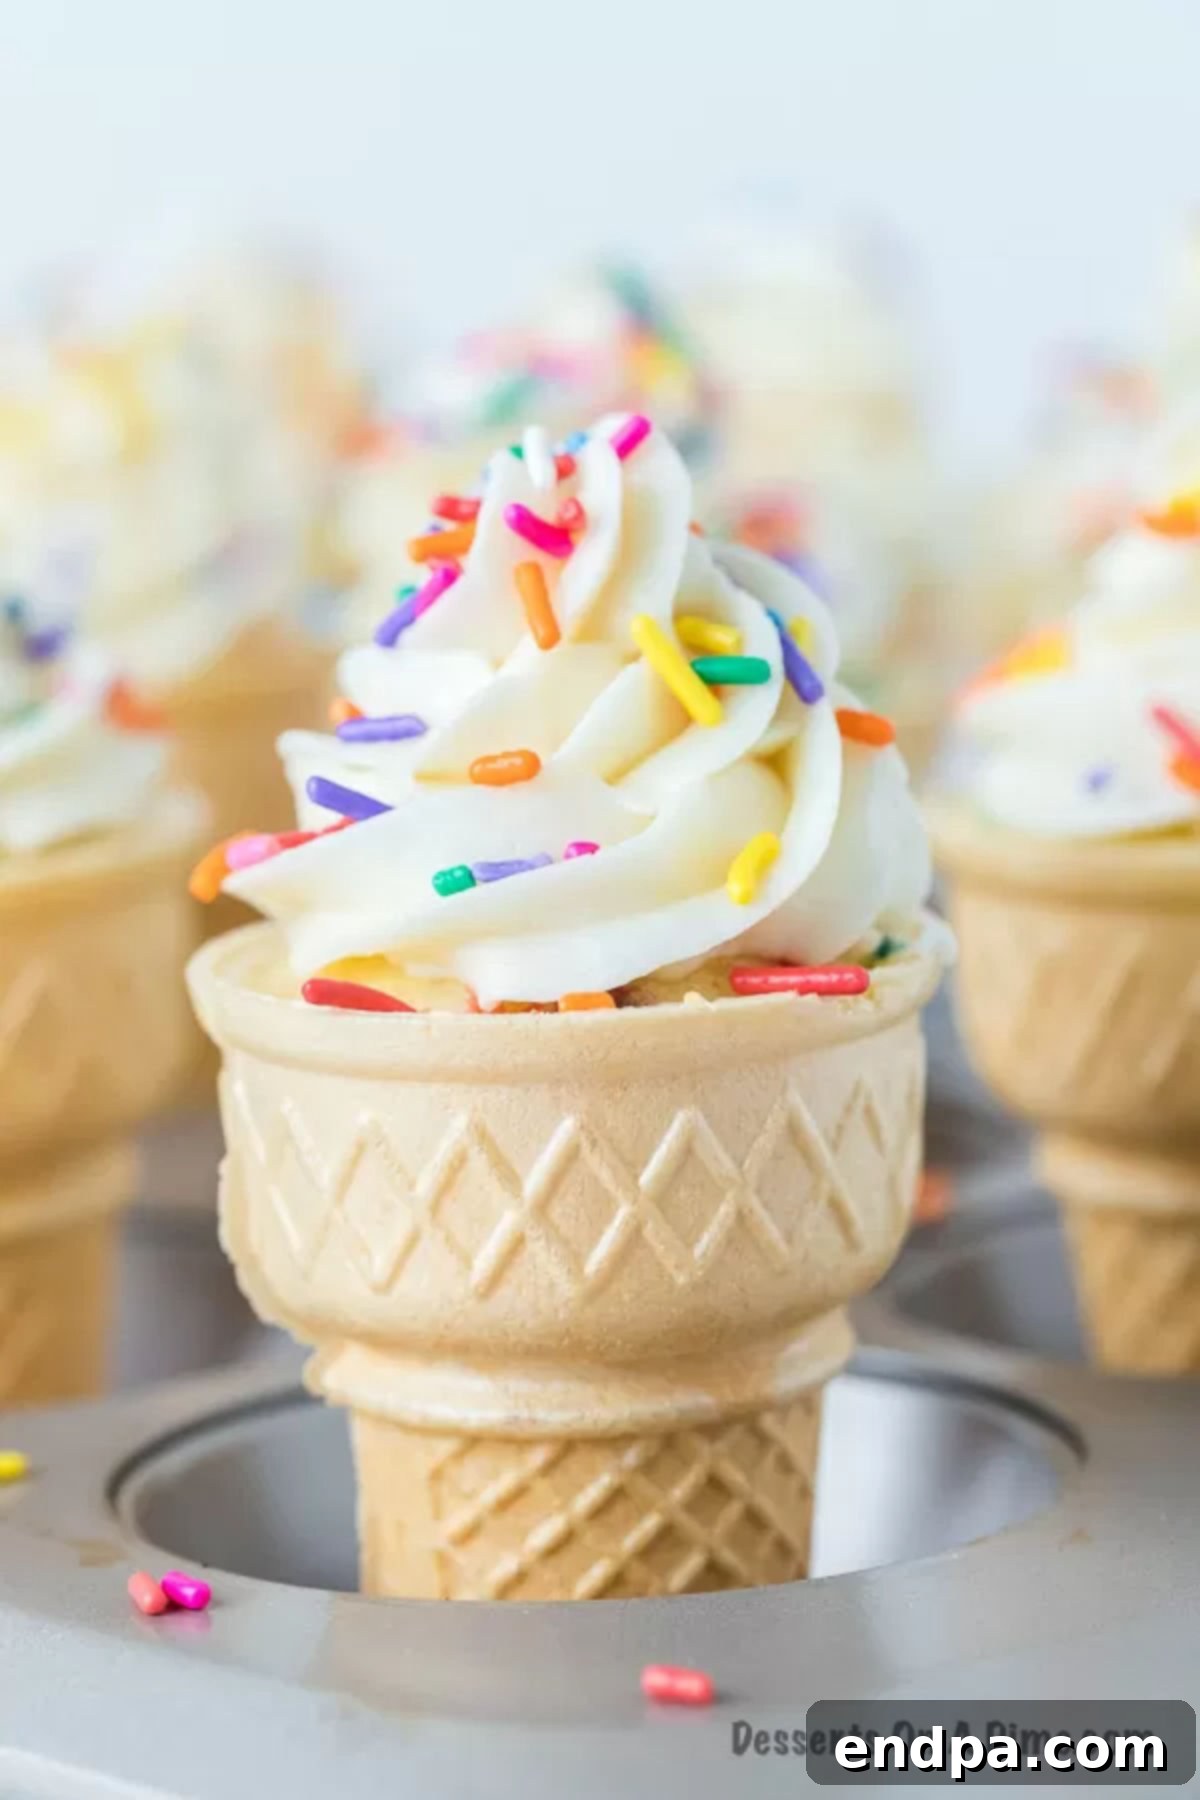
If you’ve never experienced the magic of cupcakes baked directly into an ice cream cone, you’re truly missing out on a culinary adventure! This unique dessert concept is a must-try and is guaranteed to be a huge hit at any gathering. Imagine the smiles when you serve these whimsical treats alongside a scoop of Birthday Cake Ice Cream – a pairing that screams celebration!
The next time you’re searching for something distinctly different and utterly delightful for the little ones, look no further than these amazing cone cupcakes. They stand out as one of the best birthday desserts, ideal for birthday parties, vibrant pool parties, summer cookouts, or genuinely any occasion that calls for a touch of sweetness and fun. The beauty of this recipe lies in its simplicity; there’s no need for complicated scratch baking when a quality cake mix makes preparation incredibly easy and enjoyable.
While we adore the classic charm of these cone cupcakes, we also enjoy experimenting with other fantastic flavors like our Pink Velvet Cupcakes and indulgent Salted Caramel Cupcakes. For an even grander dessert spread, consider presenting your ice cream cone cupcakes alongside an Ice Cream Charcuterie Board, overflowing with various Ice Cream Desserts and toppings. And for a burst of color, don’t forget our vibrant Rainbow Cupcakes!
Table of Contents
- What Are Ice Cream Cone Cupcakes?
- Why You Will Love This Recipe
- Ingredients You’ll Need
- Essential Tools & Equipment
- Creative Variation Ideas
- How to Make Ice Cream Cone Cupcakes Step-by-Step
- Pro Tips for Perfect Ice Cream Cone Cupcakes
- Serving and Storage Tips
- Frequently Asked Questions
- More Easy Cupcake Recipes to Explore
What Are Ice Cream Cone Cupcakes?
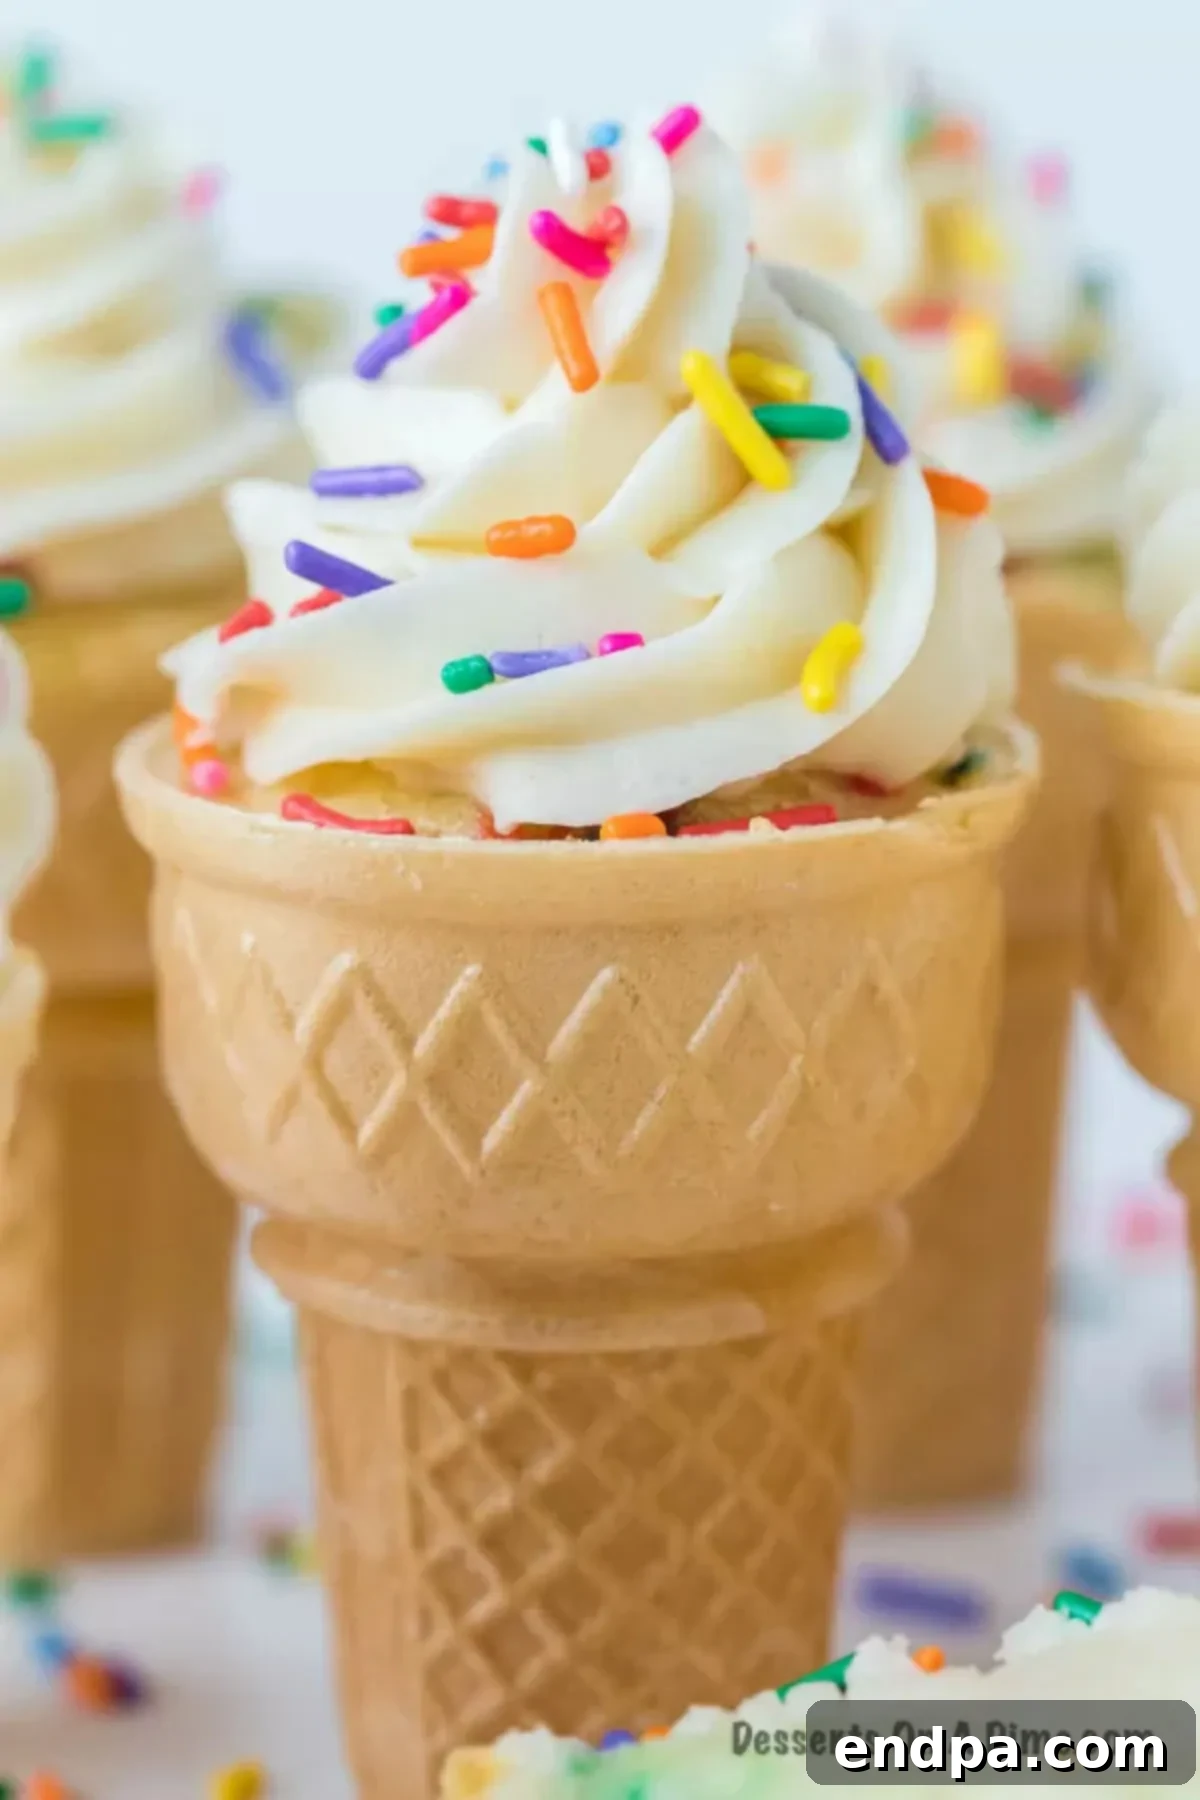
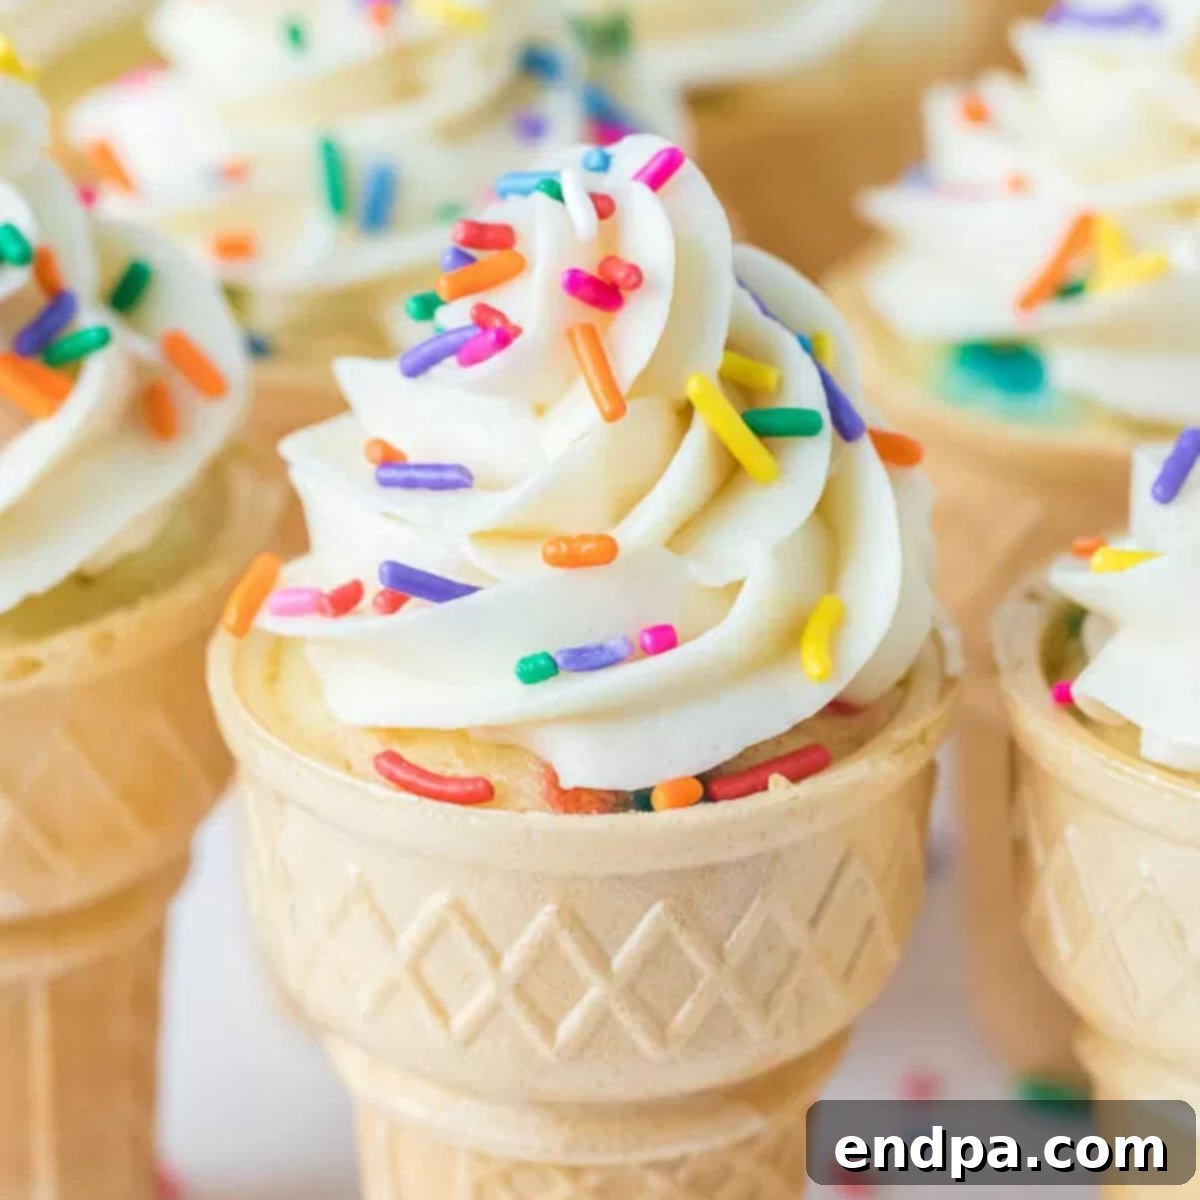
Ice cream cone cupcakes are exactly what they sound like: delicious cupcakes baked directly inside an ice cream cone. This clever presentation gives them the delightful appearance of a real ice cream scoop, especially when you pile the frosting high to mimic soft-serve or a perfectly rounded scoop of your favorite flavor. The cone acts as both a baking vessel and an edible holder, making them incredibly fun to eat and perfect for parties as they require no plates or forks. They offer the portability of an ice cream cone with the comforting taste of a fresh cupcake, creating a unique and memorable dessert experience.
Why You Will Love This Recipe
These adorable ice cream cone cupcakes aren’t just a pretty face; they come with a host of advantages that make them a go-to dessert for any home baker, whether seasoned or novice:
- Kid-Friendly & Engaging: Children absolutely adore these treats. The novelty of eating a cupcake from a cone is incredibly exciting, and they love helping with the decorating process.
- Easy & Quick Preparation: Utilizing a boxed cake mix streamlines the process significantly, cutting down on prep time without sacrificing flavor. Even beginners can achieve fantastic results.
- Customizable for Any Occasion: From birthday themes to holiday celebrations, these cupcakes can be easily adapted with different cake flavors, frosting colors, and sprinkles.
- Less Mess, More Fun: The cone serves as a built-in holder, minimizing sticky fingers and the need for plates and utensils, making them perfect for grab-and-go party desserts.
- Unique Presentation: They offer a charming and unexpected twist on traditional cupcakes, making them a standout item on any dessert table.
- Perfect for Baking with Kids: The simple steps and exciting outcome make this a wonderful recipe to involve young helpers in the kitchen.
Ingredients You’ll Need
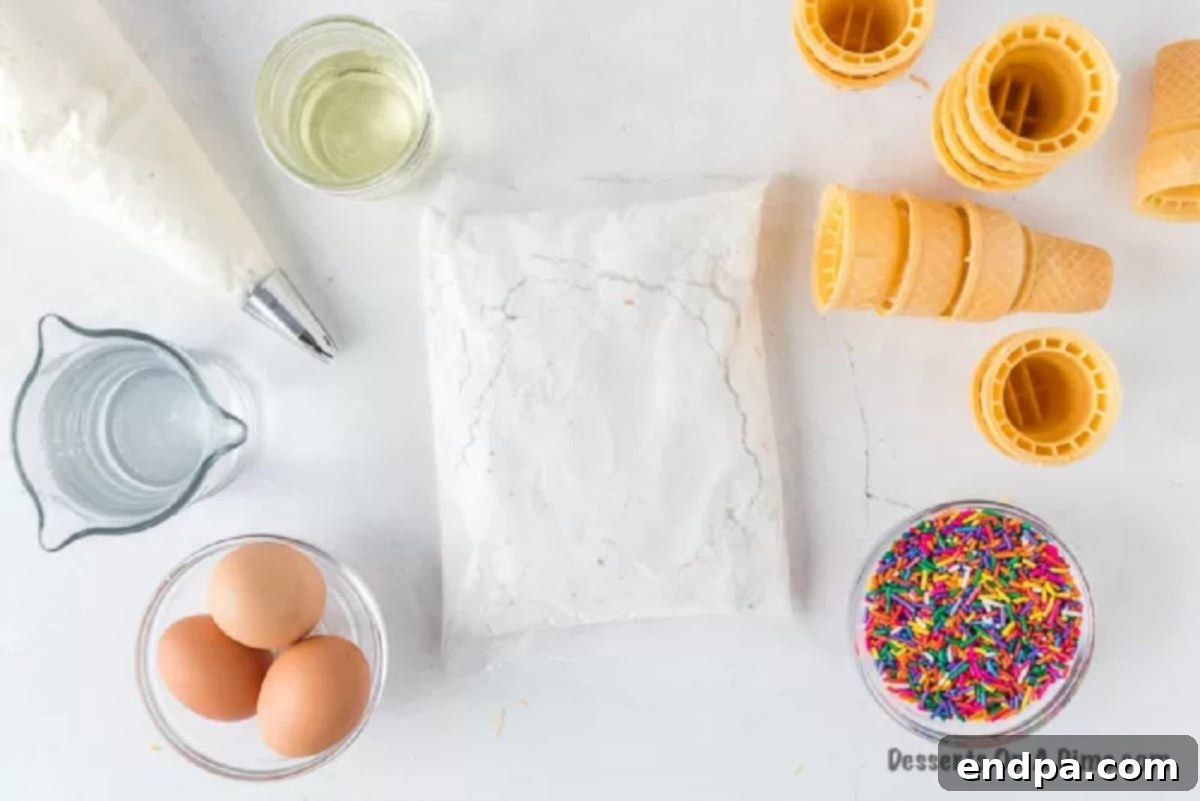
The beauty of this recipe lies in its simplicity, requiring just a few basic ingredients that are likely already in your pantry or easily found at any grocery store:
- Funfetti Cake Mix: We love the festive look and vanilla flavor of Funfetti, but feel free to unleash your creativity! You can easily use your favorite type of cake mix to create chocolate cupcakes, strawberry cupcakes, classic yellow, or even rich chocolate cake as another popular favorite.
- Ingredients as per Cake Mix Instructions: Typically, this includes eggs, water, and vegetable oil. Always follow the specific quantities listed on your chosen cake mix box for optimal results.
- Ice Cream Cones: This is crucial! Make sure to get flat-bottom ice cream cones (sometimes called “cupcake cones”). These stand upright in a muffin tin, making them much easier to fill and bake without tipping over.
- Frosting: Whether you prefer the convenience of store-bought frosting or the rich taste of homemade, either will work wonderfully. For homemade options, we highly recommend our Homemade Cream Cheese Frosting or a classic Vanilla Buttercream Frosting for a smooth, pipeable consistency.
- Multi-Colored Sprinkles: These are essential for that signature “ice cream” look! Choose jimmies, nonpareils, or even themed sprinkles to match your occasion.
Essential Tools & Equipment
To make these ice cream cone cupcakes, you’ll need a few common kitchen items:
- Muffin Tin (or Cupcake Pan): This is key for holding the flat-bottom ice cream cones upright during baking. A standard 12-cup muffin tin is ideal.
- Large Mixing Bowl: For combining your cake mix and wet ingredients.
- Electric Mixer (Handheld or Stand Mixer): While you can mix by hand, an electric mixer makes the batter smooth and lump-free with minimal effort.
- Measuring Cups and Spoons: For accurate ingredient measurements.
- Rubber Spatula: For scraping down the sides of the bowl.
- Ice Cream Scoop or Piping Bag: To neatly fill the cones with batter. An ice cream scoop works great for portioning, or a piping bag provides more precision.
- Wire Rack: For cooling the baked cupcakes completely before frosting.
- Piping Bag and Star Tip (Optional, for decorating): If you want to achieve that classic swirled “ice cream” look with your frosting, a piping bag fitted with a large star tip (like Wilton 1M) is highly recommended.
Creative Variation Ideas
While the Funfetti version is always a crowd-pleaser, the versatility of these ice cream cone cupcakes means you can adapt them for virtually any special occasion or personal preference:
- Seasonal & Holiday Themes:
- Christmas: Decorate with vibrant green frosting and festive red sprinkles, or try red and white swirl frosting for a candy cane effect.
- 4th of July: Top with crisp white frosting and patriotic red, white, and blue sprinkles for a dazzling display.
- St. Patrick’s Day: Opt for a cheerful light green frosting and dark green sprinkles, or even gold edible glitter for a “pot of gold” effect.
- Halloween: Use orange or purple frosting with spooky sprinkles like bats or ghosts, or even a drizzle of “blood” red icing.
- Easter: Pastel-colored frostings (pink, blue, yellow) with spring-themed sprinkles or mini edible eggs would be adorable.
- Flavor Combinations:
- Chocolate Lovers: Use a chocolate cake mix and chocolate buttercream frosting. Top with chocolate chips, chocolate sprinkles, or a chocolate syrup drizzle.
- Strawberry Delight: A strawberry cake mix with strawberry frosting or a classic vanilla buttercream is a fresh and fruity choice.
- Red Velvet Indulgence: Red velvet cake mix paired with cream cheese frosting creates a sophisticated and delicious treat.
- Lemon Zest: A lemon cake mix with lemon-flavored frosting or a simple vanilla frosting with lemon zest for a bright, tangy flavor.
- Ultimate Ice Cream Sundae Toppings:
- Soft Serve Experience: Instead of traditional icing, consider topping your cooled cupcakes with a scoop of your favorite ice cream just before serving for a true soft serve feel. Be mindful of melting!
- Classic Sundae Add-ons: Drizzle with chocolate syrup, caramel sauce, or strawberry topping. Add a dollop of whipped cream and a maraschino cherry on top for that iconic sundae look.
- Crunchy & Sweet: Sprinkle with chopped nuts, crushed cookies (like Oreos), mini chocolate chips, or even mini M&Ms for extra texture and flavor. Explore all our Ice Cream Sundae Toppings for inspiration!
How to Make Ice Cream Cone Cupcakes Step-by-Step
Creating these delightful ice cream cone cupcakes is a straightforward process. Just follow these simple steps:
Step 1: Preheat Oven. First, heat your oven to 350 degrees F (175 degrees C). This ensures your oven is at the correct temperature for even baking.

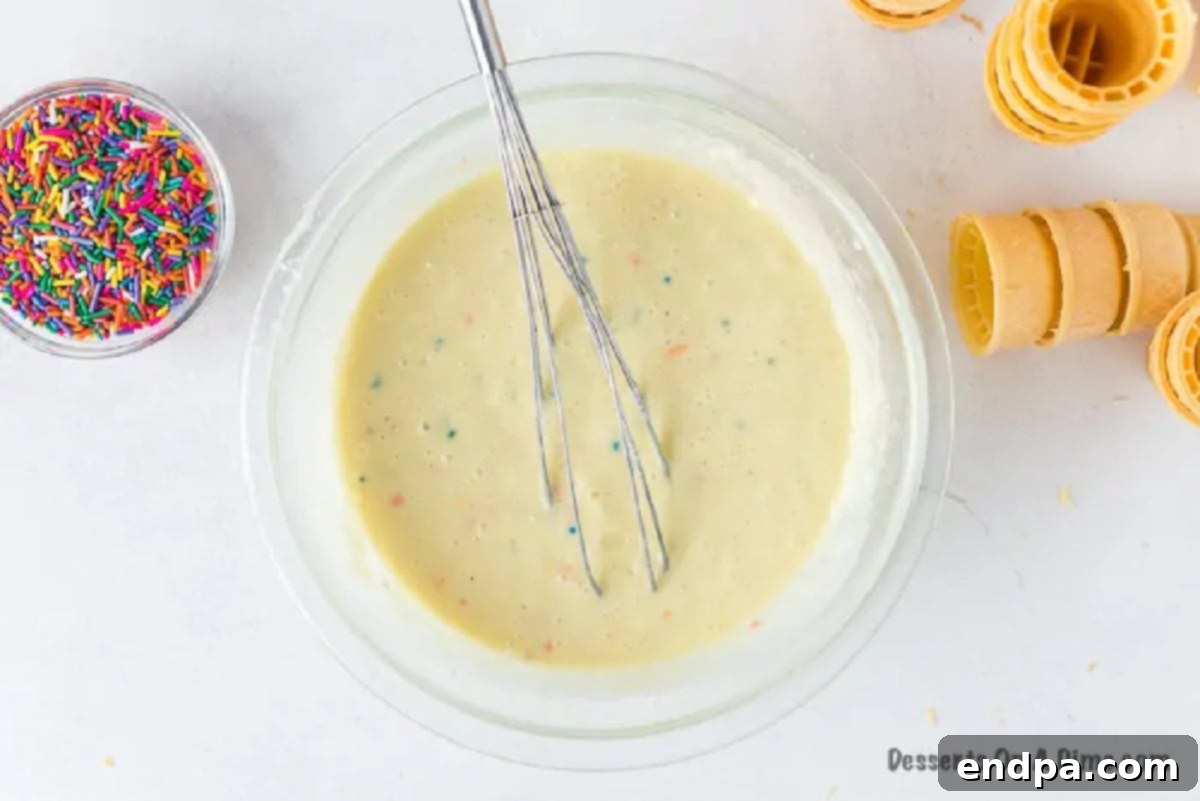
Whip up your favorite cake mix following package directions until smooth. Step 2: Prepare Batter. In a large mixing bowl, combine the cake mix according to the package instructions. This typically involves adding eggs, water, and oil. You can use a stand mixer for ease or a hand mixer. We used Funfetti, but any flavor works! Stir the dry ingredients and wet ingredients until well blended, making sure no lumps remain. Don’t overmix; just combine until smooth.

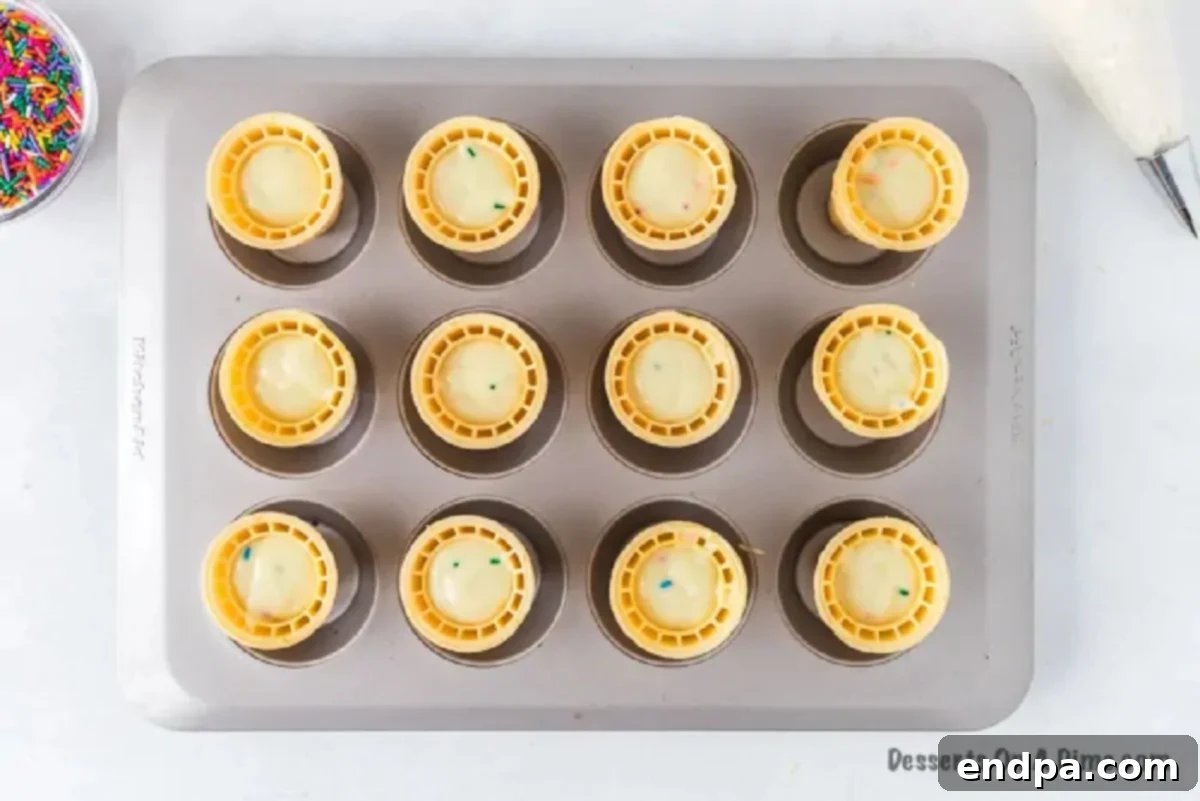
Place cones in a muffin tin and fill them about halfway with batter. Step 3: Fill Cones. Carefully place the flat-bottom ice cream cones into a muffin pan. This helps stabilize the cones and prevents them from tipping over during baking. Fill each cone with the cake batter mixture about halfway. A small ice cream scoop or a piping bag works perfectly for this, ensuring even portions and less mess.

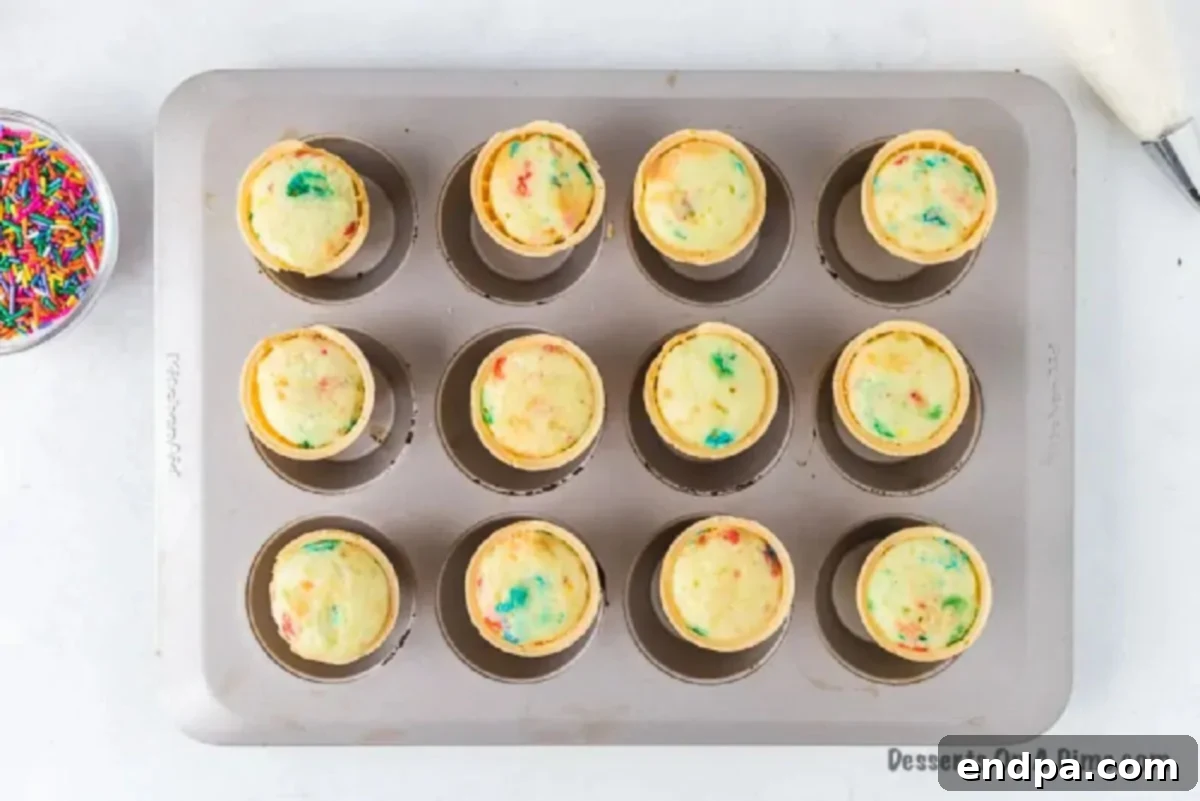
Allow baked cupcakes to cool completely before decorating. Step 4: Bake. Transfer the muffin pan with the cones to the preheated oven. Bake for approximately 18-21 minutes, or until the cupcakes are golden on top, and a toothpick inserted into the center of a cupcake comes out clean. Baking times may vary slightly depending on your oven.

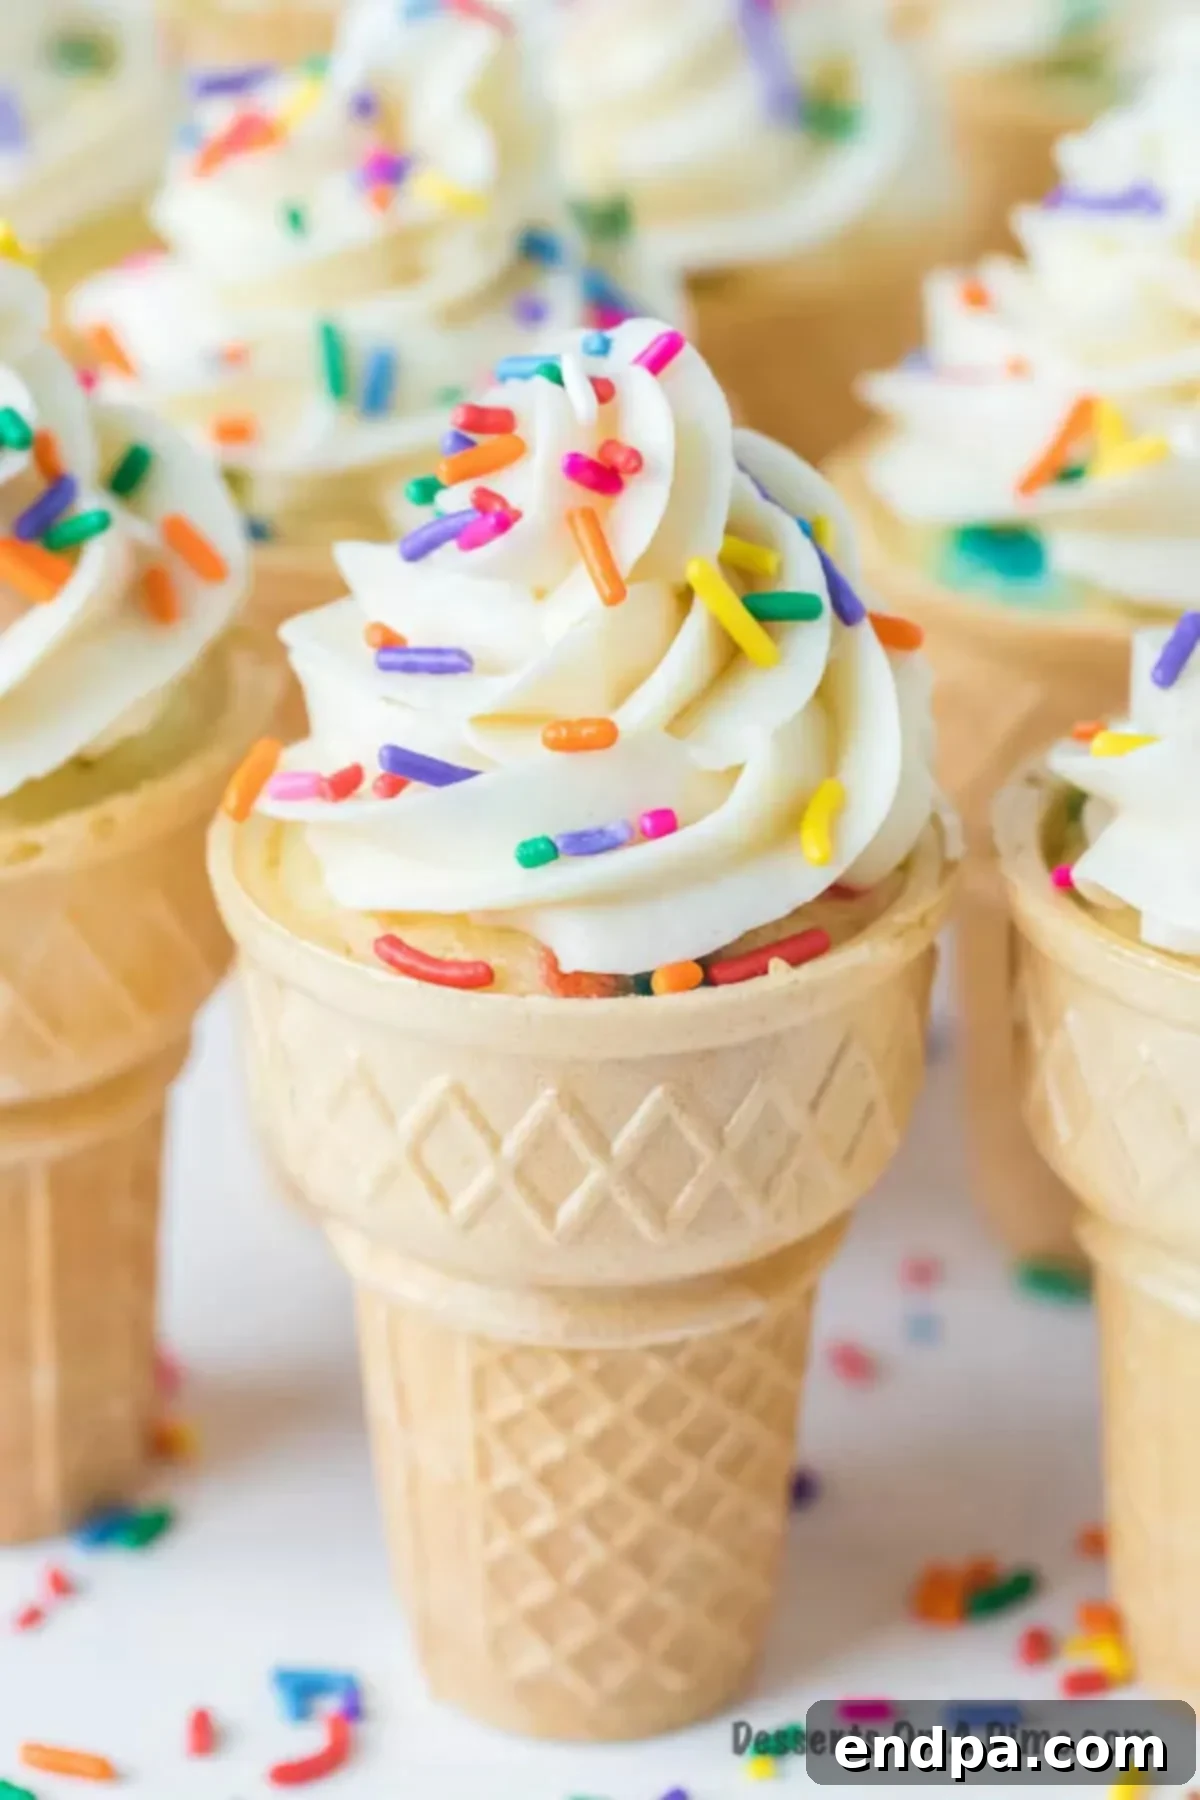
Frost your cooled cone cupcakes with your favorite icing and a generous sprinkle of fun. Step 5: Cool & Frost. Once baked, carefully remove the cupcakes from the oven and let them cool completely in the muffin pan or on a wire rack. This is a crucial step to prevent soggy cones. Once thoroughly cooled, it’s time to decorate! Frost each cone with your desired icing. You can use store-bought frosting for convenience, but making homemade frosting is easy and adds an extra touch of deliciousness. Use a piping bag with a star tip for that classic ice cream swirl, then finish with plenty of colorful sprinkles!
Pro Tips for Perfect Ice Cream Cone Cupcakes
Achieving perfectly baked and beautifully decorated ice cream cone cupcakes is easy with a few insider tricks:
- Choosing the Right Cones: Always opt for flat-bottomed cones. Waffle cones or pointed cones are much harder to stabilize and will likely tip over in the oven, leading to spilled batter and a messy cleanup.
- Preventing Soggy Cones: This is a common concern! After the cupcakes come out of the oven and are cooled, gently poke a few tiny holes in the bottom of each cone with a toothpick. This allows steam and moisture to escape, helping the cones stay crisp. Another trick is to brush the inside of the cone with a thin layer of melted chocolate before filling with batter and baking; the chocolate acts as a moisture barrier.
- Filling the Cones: Do not overfill! Filling the cones halfway to two-thirds full is usually sufficient. Remember, cupcakes rise as they bake. Overfilling will cause the batter to overflow, creating an uneven top and a sticky mess.
- Even Baking: Ensure your oven is fully preheated before putting the cupcakes in. Rotating the muffin pan halfway through baking can also help ensure even browning.
- Cooling Completely: Patience is key! Frosting warm cupcakes will result in melted, runny icing. Allow your cone cupcakes to cool entirely on a wire rack before you even think about decorating them.
- Decorating for Impact:
- Pipe with a Star Tip: For that iconic “ice cream scoop” look, use a large star tip (like Wilton 1M) and a piping bag. Start in the center, swirl outwards, and then create a peak in the middle.
- Color Your Frosting: Use gel food coloring to dye your frosting vibrant colors to match party themes or specific “ice cream” flavors.
- Sprinkle Generously: Don’t be shy with the sprinkles! They add texture, color, and undeniable fun.
Serving and Storage Tips
Make sure your ice cream cone cupcakes stay as fresh and fantastic as possible with these guidelines:
- Best Served Fresh: These cupcakes are undoubtedly at their absolute best when served the same day they are made. The cones will be crisp, and the cake moist.
- Short-Term Storage: If you have leftovers or need to make them a few hours in advance, they can be stored in an airtight container at room temperature. However, be aware that the cones will gradually soften when stored for an extended period, typically after 24 hours. Placing a paper towel at the bottom of the container can sometimes help absorb excess moisture.
- Avoid Refrigeration (for extended periods): While refrigeration is fine for a few hours if your frosting needs to set, prolonged storage in the fridge can actually accelerate the softening of the cones and dry out the cake.
- Freezing is Not Recommended: Due to the delicate nature of the cone, freezing is generally not recommended as it will lead to extreme sogginess upon thawing.
How to Transport:
Transporting these unique treats requires a little care to prevent them from toppling over and ruining your beautiful frosting:
- In the Baking Pan: The safest way to transport them is often in the same muffin pan you baked them in. This keeps each cone securely upright.
- Foil-Lined Baking Pan: If you used the foil-lined 9×13 pan method (see FAQ), keep them in that pan. Arrange them snugly next to each other to prevent movement.
- Travel Cupcake Carrier: A specialized travel cupcake bin with a lid is an excellent investment if you frequently make cupcakes. The individual compartments hold each cupcake securely.
- DIY Cardboard Holder: For a quick solution, you can create a makeshift holder by cutting holes in a sturdy cardboard box to fit the cones.
Frequently Asked Questions
What type of pan should I use to bake these cupcakes?
I’ve found that it’s best to make these cupcakes in a standard muffin tin baking pan. Each cone fits snugly into a cup, providing excellent stability during baking.
However, if you don’t have a muffin tin, you can improvise! Simply cover the top of a 9×13 inch baking pan tightly with aluminum foil. Then, poke small holes in the foil, spaced evenly, just large enough to hold the ice cream cones securely upright. I typically poke about 12 holes when using this method, mirroring the capacity of a standard muffin tin.
What kind of cake can be baked in ice cream cones?
While I used a funfetti cake mix for these ice cream cone cupcakes, you have complete freedom to use any of your favorite cake mix flavors! The possibilities are endless, allowing you to tailor them to any taste or theme.
Other yummy ideas include: classic chocolate, sweet strawberry, rich red velvet, or simple vanilla. Generally, I opt for a box cake mix for its convenience and consistent results in this recipe. However, if you prefer baking from scratch, you can certainly use a homemade vanilla cake recipe to create delicious vanilla cupcakes. The addition of vanilla extract always adds a perfect depth of flavor.
What kind of frosting should I use?
The good news is that almost any type of frosting will work wonderfully in this recipe! For ease, I’ve often used pre-made store-bought frosting, and it yields excellent results, saving time and effort.
However, if you enjoy the taste and texture of homemade frosting, you can certainly use one of our favorite recipes:
- Buttercream Frosting with Powdered Sugar
- Cream Cheese Frosting
- Marshmallow Frosting
How do you decorate cone cupcakes?
I love topping each cupcake with a generous amount of frosting, swirled high to beautifully mimic a traditional ice cream cone. For the best “soft-serve” effect, I recommend using a Wilton piping bag fitted with a large star tip (like a 1M or 2D).
Here’s how to do it: Fill your piping bag with the frosting of your choice. Once the tip is cut, start piping by placing a small dot in the center of the cupcake, then move to the outside edge and swirl inwards, building up the frosting to create a peak. Finish by adding a showering of colorful sprinkles on top, and voilà – they’re ready to enjoy!
For an extra special touch, you can also drizzle the frosting with chocolate syrup and crown it with a maraschino cherry to make it look just like a mini ice cream sundae.
How do you keep ice cream cone cupcakes from getting soggy?
This is a very common and simple fix! The key is proper cooling and moisture release. Once the cupcakes come out of the oven, immediately transfer them to a wire rack (still in their muffin tin or foil setup) and let them cool completely. Once cooled, gently poke a few small holes in the bottom of each cone with a toothpick. Now, any residual moisture or steam can be released, helping your cones stay wonderfully crispy when it’s time to serve them. You can also brush the inside of the cone with a thin layer of melted chocolate before adding the batter; this creates a barrier against moisture.
More Easy Cupcake Recipes to Explore
If you loved making these ice cream cone cupcakes, you’re in for a treat! Here are more fantastic and easy cupcake recipes that are sure to impress:
- Mini Brownie Cupcakes Recipe
- Cupcakes in a Jar
- Piñata Cupcakes
- Orange Soda Cupcakes
- Unicorn Cupcakes Recipe
We hope you thoroughly enjoy making this fun and unique ice cream cone cupcakes recipe. It’s truly a memorable treat that brings smiles to every face. Once you try it, please share your experience and consider leaving a comment or a star recipe rating!
Ice Cream Cone Cupcakes Recipe
Rating: 4.75 out of 5 stars based on 27 votes
This recipe for Ice Cream Cone Cupcakes is guaranteed to be a party favorite. Simple, fun, and delicious, these treats are perfect for any celebration!
- Prep Time:
- 10 mins
- Cook Time:
- 20 mins
- Total Time:
- 30 mins
- Servings:
- 12 cupcakes
- Cuisine:
- American
- Course:
- Dessert
- Calories:
- 332 kcal per serving
- Author:
- Carrie Barnard
Ingredients
- 1 Funfetti Cake Mix (or your favorite type of cake mix)
- Ingredients to make the cake based on the package instructions (e.g., eggs, water, oil)
- 12 Ice Cream Cones with a flat bottom
- 1 container of Frosting (store-bought or homemade butter cream frosting)
- Multi-Colored Sprinkles
Instructions
- Preheat the oven to 350 degrees F (175 C).
- Mix up the Funfetti cake mix based on the back of the package instructions in a large bowl.
- Place the flat-bottom ice cream cones in a muffin tin (1 cone per tin) to keep them upright while baking.
- Pour the cake batter into the ice cream cones, filling them approximately ½ way. You can use a piping bag or a spoon for this.
- Bake for 18-21 minutes, or until the cake is slightly brown on top of the ice cream cones and a toothpick inserted comes out clean.
- Remove from the oven and allow them to cool completely on a wire rack.
- If desired, dye your frosting a fun color.
- Frost the top of each cone with the icing. Use a piping bag with a star tip to make it look like the top of an ice cream cone.
- Top generously with sprinkles and enjoy your festive treats!
Recipe Notes
This recipe is highly adaptable! Feel free to use your favorite flavor of cake mix and icing to create custom cone cupcakes for any occasion.
Nutrition Facts
- Calories: 332 kcal
- Carbohydrates: 42g
- Protein: 2g
- Fat: 18g
- Saturated Fat: 2g
- Trans Fat: 1g
- Sodium: 342mg
- Potassium: 130mg
- Fiber: 1g
- Sugar: 26g
- Vitamin A: 1IU
- Calcium: 56mg
- Iron: 2mg
Want to share this recipe? Pin Recipe on Pinterest
