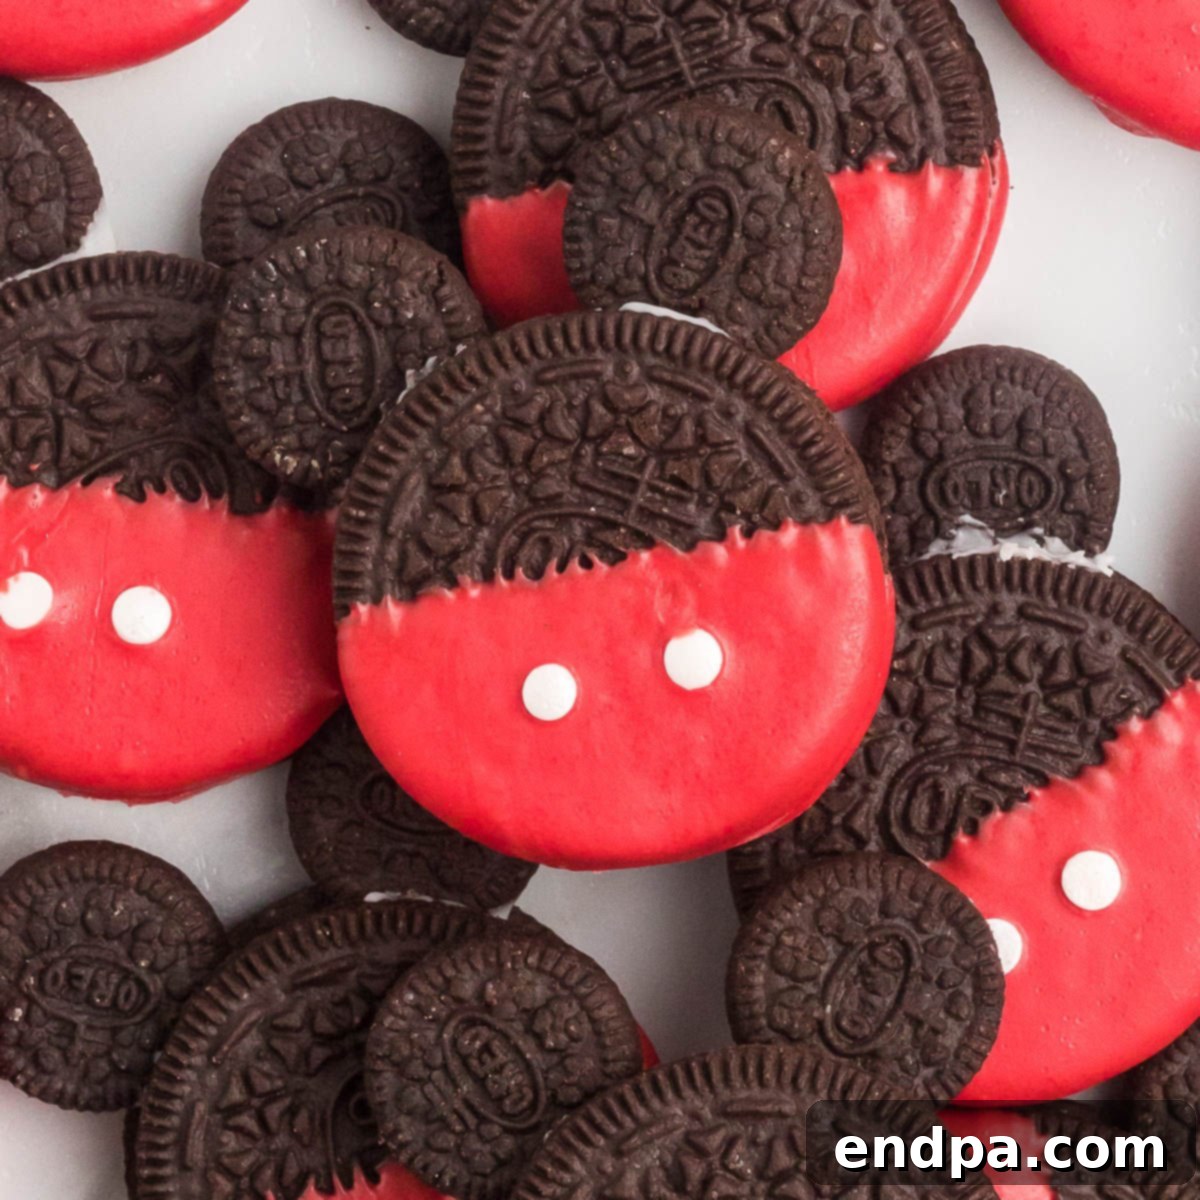
Easy No-Bake Mickey Mouse Oreo Cookies: Bring Disney Magic to Your Kitchen
Step into a world of enchantment and culinary delight with our incredibly fun and easy Mickey Mouse Oreo Cookies! These adorable treats are a celebration of all things Disney, guaranteed to bring smiles to faces of all ages. Whether you’re planning a themed party, a cozy movie night, or simply want to add a touch of magic to your day, this no-bake recipe is an absolute must-try. With just a handful of simple ingredients and minimal effort, you can transform ordinary Oreo cookies into delightful Mickey-shaped masterpieces, ready to charm and satisfy.
For years, our kitchen has been a hub of Disney-inspired culinary adventures, and these Mickey Mouse Oreo cookies are a cherished favorite. Their charm lies not only in their irresistible taste but also in the sheer joy of creating them. Forget complicated baking processes or specialized tools; this recipe simplifies the art of dessert-making, making it accessible and enjoyable for everyone. Just like our popular Copycat Disney Churro Recipe and other beloved Mickey Mouse Cookies, these Oreo creations promise to transport you straight to the heart of Disneyland with every bite.
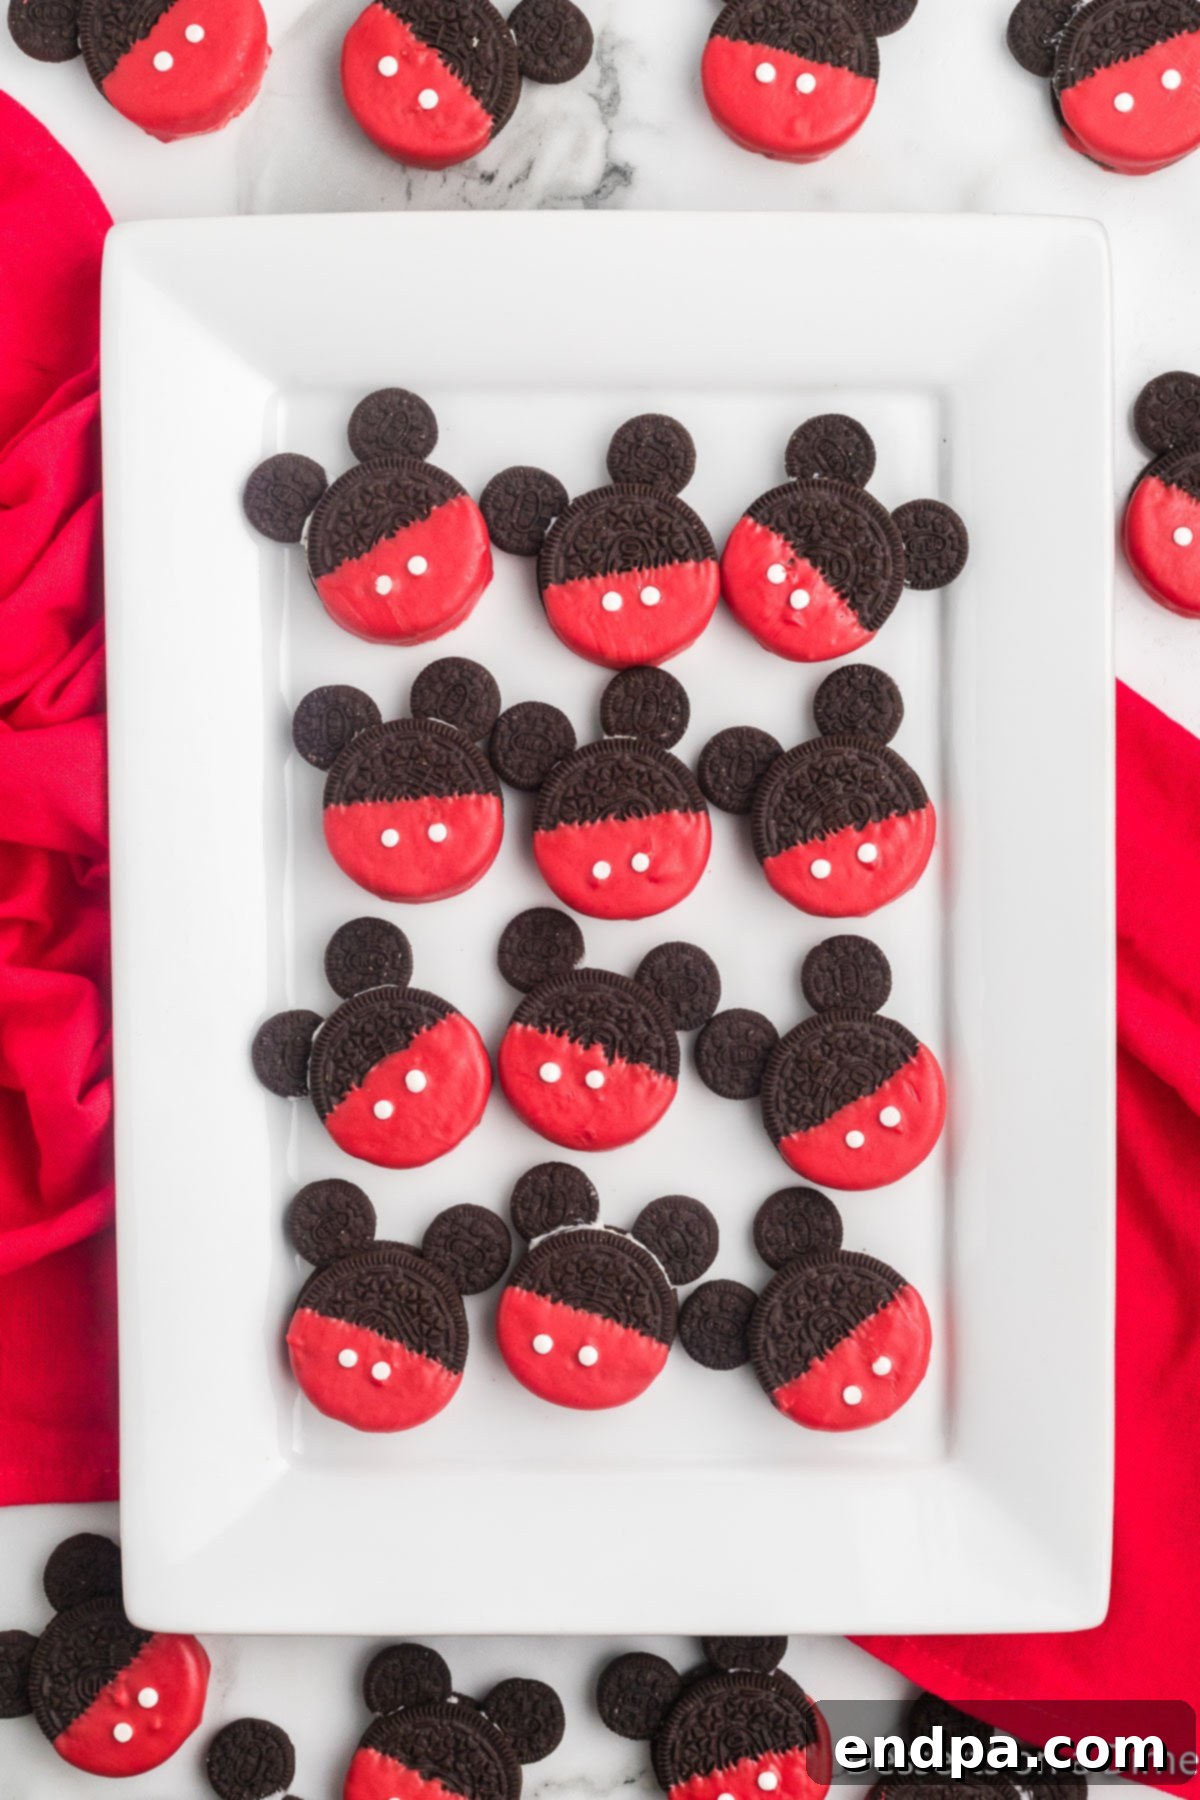
This delightful cookie recipe is an effortless way to infuse your home with the enchanting spirit of Disneyland. It’s an ideal activity for kids, allowing them to participate in the magic of creation, and the finished cookies are perfect for sharing with the entire family. These Mickey-themed treats are versatile enough for any occasion, from Christmas celebrations and birthday parties to school events or just as a special everyday surprise. Get ready to sprinkle some pixie dust on your snack time!
What’s in this Post: Your Guide to Mickey Mouse Oreo Cookies
- Why We Absolutely Love This Recipe
- Ingredients for a Magical Treat
- Creative Variations to Spark Your Imagination
- Step-by-Step Guide to Perfection
- FAQs: Your Questions Answered
- Pro Tips for Sweet Success
- More Fun Oreo Recipes to Explore
- Mickey Mouse Oreo Cookies Recipe Card
Why We Absolutely Love This Recipe
There are countless reasons to adore these Mickey Mouse Oreo Cookies. Their charm goes beyond just their adorable appearance; they embody convenience, versatility, and pure joy, making them a staple for any Disney enthusiast or anyone looking for a simple, delightful dessert.
- Perfect for Any Celebration: These cookies aren’t just snacks; they’re conversation starters! They add a wonderfully festive touch to school events, Disney movie marathons, or especially Disney-themed birthday parties. Imagine the delight on a child’s face when they see these iconic characters served up as treats! They are excellent for baby showers, graduation parties, holiday gatherings, or even as a unique addition to a dessert platter. Their cheerful design brightens any table.
- Effortlessly Easy & No-Bake: One of the biggest advantages of this recipe is that it requires absolutely no baking. You won’t need to preheat an oven or worry about baking times, making it a fantastic option for busy parents, beginner cooks, or anyone short on time. This also means fewer dishes and less heat in your kitchen, which is particularly great during warmer months. Plus, there’s no need for a special Mickey Mouse cookie cutter – we’re crafting these shapes with simple Oreos and candy melts!
- Irresistibly Adorable and Delicious: Not only do these cookies capture the beloved Mickey shape perfectly, but they also taste incredible. The combination of classic Oreo chocolate and cream with the sweet, smooth candy melt coating is a match made in dessert heaven. They are a delightful blend of crunchy cookie and creamy, sweet chocolate, making them a treat that pleases both the eyes and the palate. The contrast in textures and flavors is simply irresistible.
- Engaging for All Ages: Making these cookies is a fantastic family activity. Kids will love helping to dip, decorate, and assemble, fostering creativity and providing a memorable bonding experience in the kitchen. It’s a wonderful way to introduce little ones to the joy of cooking and crafting without the complexities of baking. Even teenagers and adults find the process therapeutic and fun!
- Quick to Prepare: From start to finish, these cookies come together in a flash. With a prep time of just 15 minutes and a quick chill, you can have a batch of these magical treats ready in under an hour. This makes them ideal for last-minute party preparations, spontaneous dessert cravings, or when you need a quick, impressive treat.
- Only 5 Simple Ingredients: You don’t need a pantry full of specialty items for this recipe. Just five basic ingredients transform into these spectacular cookies. This simplicity makes the recipe incredibly accessible and budget-friendly, proving that amazing desserts don’t have to be complicated.
Ingredients for a Magical Treat
Crafting these iconic Mickey Mouse Oreo Cookies requires only a few accessible ingredients, making your journey to Disney-inspired deliciousness smooth and simple. Here’s a detailed look at what you’ll need to gather to bring these beloved characters to life in your kitchen:
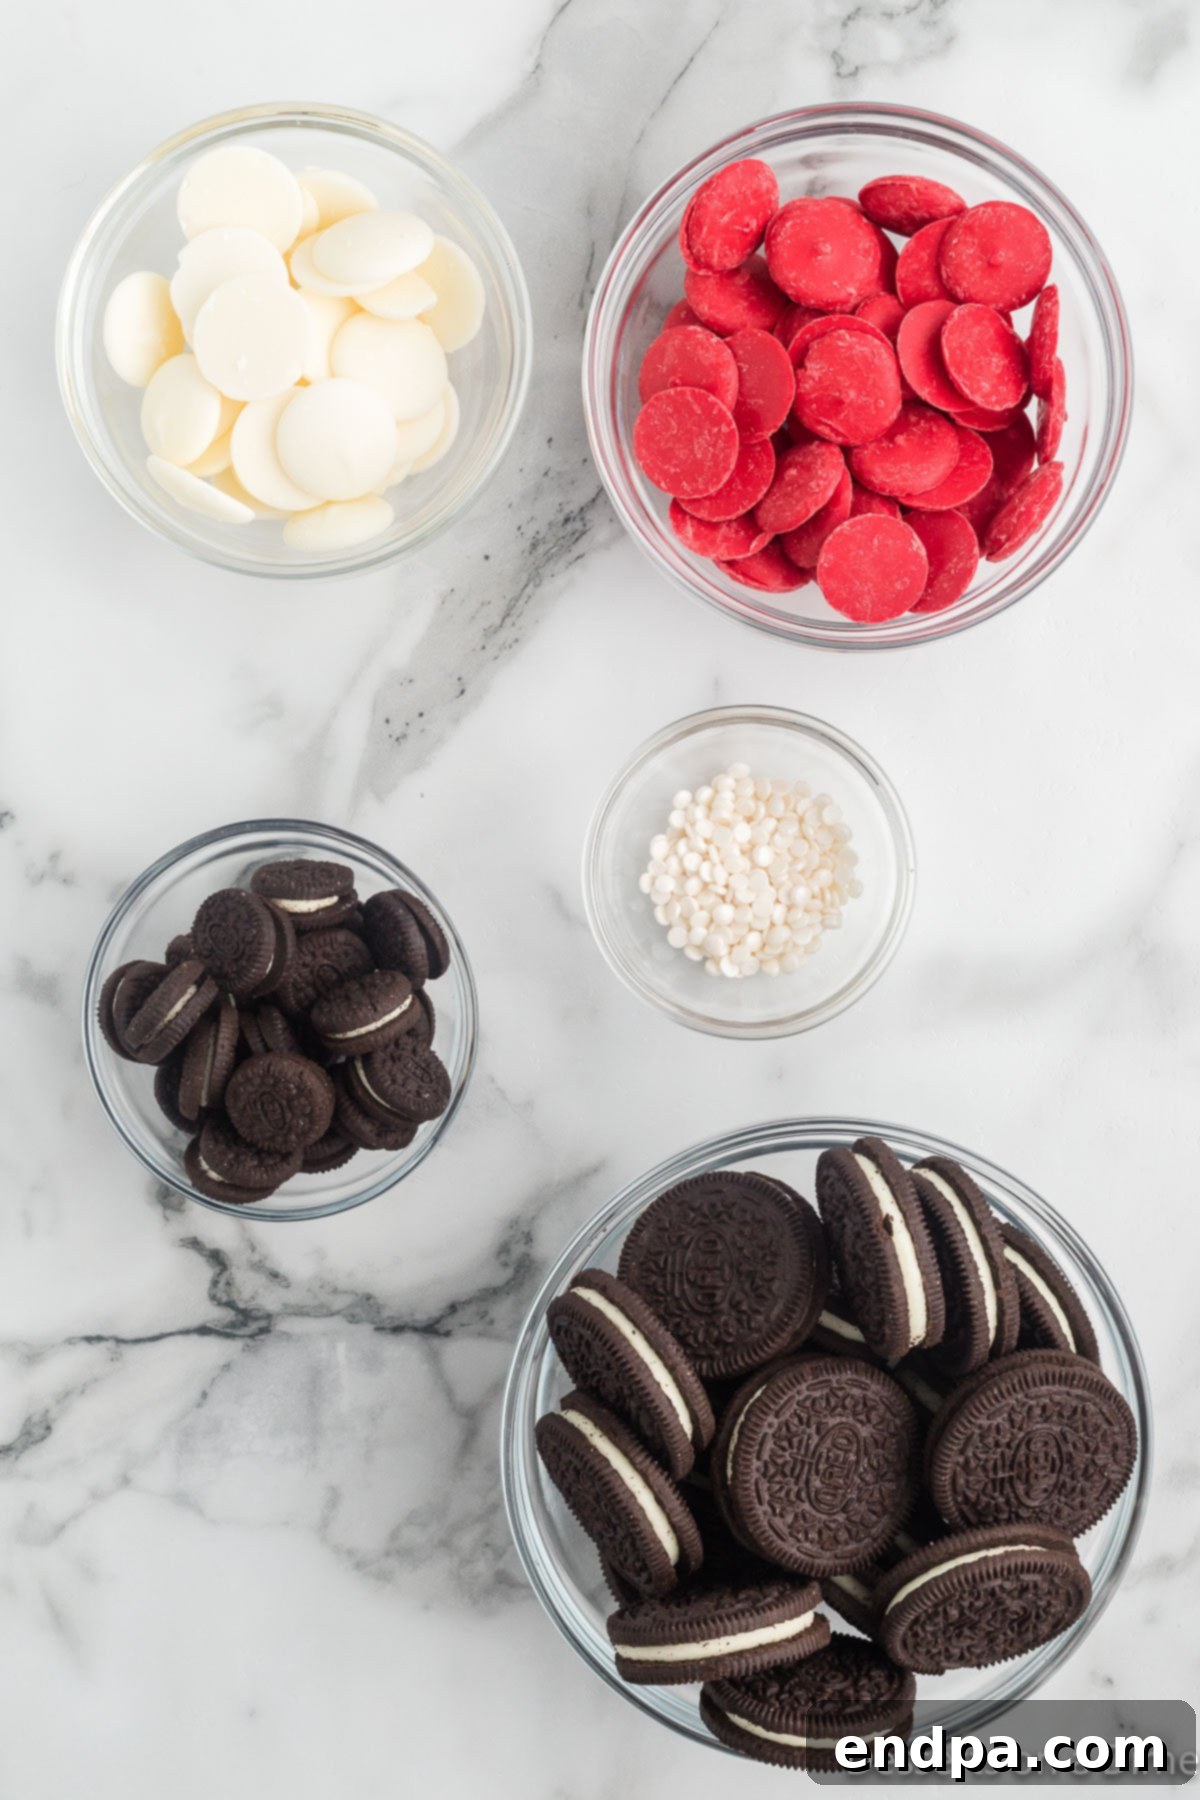
- Double Stuffed Oreo Cookies: These form the main “head” of Mickey. We highly recommend using double-stuffed Oreos because their extra-thick cream filling provides a much more stable base. This makes it significantly easier to insert the mini Oreo ears securely, ensuring your Mickey shapes hold together beautifully without wobbling or detaching. The generous cream layer also adds to the cookies’ indulgent taste and texture.
- Mini Oreo Cookies: These tiny, perfectly sized cookies are essential for crafting Mickey’s iconic ears. Their smaller diameter is ideal for creating that classic silhouette. While you could technically use other small cookies, mini Oreos offer the best visual authenticity and are readily available. For a slightly different ear, you might consider Oreo thin bites, but the classic mini Oreos create a more pronounced and robust ear shape.
- Candy Melts (Red and White): You’ll need both vibrant red and pure white candy melts. These specific melts are chosen for their superior melting properties, which consistently result in a wonderfully smooth, glossy, and consistent coating. Unlike some types of chocolate, candy melts harden quickly and maintain their brilliant color, which is crucial for Mickey’s distinct red shorts and for securing the ears. The red gives him his signature look, and the white is essential for binding the ears firmly to the main cookie.
- White Circle Candy Sprinkles: These aren’t just any sprinkles! It’s important to opt for small, circular white sprinkles that are relatively flat. These will perfectly mimic Mickey’s classic white buttons on his red shorts, adding an authentic and charming detail. White nonpareil sprinkles, or small disc-shaped sprinkles, work exceptionally well for achieving this specific, cartoon-like detail.
You can find the precise quantities for each ingredient, along with detailed step-by-step instructions, in the complete recipe card conveniently located at the bottom of this page. Gather these items, and prepare to bring a little bit of Disney magic into your home!
Creative Variations to Spark Your Imagination
While the classic Mickey Mouse Oreo Cookie is undeniably charming and a showstopper on its own, there’s always room to get creative and personalize your treats. These variations allow you to add your own unique flair, adapt them for different occasions, or simply try new flavor combinations:
- Transform Them into Whimsical Cookie Pops: To make these treats even more whimsical and easier for little hands to hold, simply insert a lollipop stick, sucker stick, or even a sturdy pretzel stick into the top center of each Double Stuffed Oreo before dipping. Once coated and decorated, you’ll have delightful Mickey Mouse Oreo Pops – perfect for party favors, dessert buffets, or an on-the-go magical snack. Secure the stick by dipping it slightly into melted candy melt before inserting.
- Create Adorable Minnie Mouse Cookies: It’s easy to give Mickey a friend! To make Minnie Mouse Oreo Cookies, swap out the vibrant red candy melts for cheerful pink candy melts. Once the pink coating is set, add Minnie’s signature bow. You can create the bow using small, pre-made candy bows (often found in baking supply stores), by piping a small bow shape with contrasting white candy melts, or even by inserting the bottom tip of a pink conversation heart candy into the cookie for a charming 3D effect. For Minnie’s classic style, add small white polka dots using tiny white sprinkles or carefully piped white candy melt dots.
- Experiment with Different Coatings: While candy melts provide a classic, colorful look and quick setting time, you can certainly try other delicious coatings. Dip the entire cookie in melted chocolate wafers (milk, dark, or white chocolate), or use melted almond bark for a smooth, creamy finish. If using white chocolate, you can then color it with food-safe oil-based candy coloring to achieve your desired shade. Once dipped, get creative with toppings: a sprinkle of red or pink crystal sprinkles for a sparkling finish, mini chocolate chips, or even a light dusting of edible glitter for extra sparkle.
- Pipe Your Buttons for a Polished Look: Instead of using pre-made sprinkles for Mickey’s buttons, for an even more custom and polished appearance, melt a small amount of white candy melts (or even white chocolate chips) and transfer it to a small Ziploc bag. Snip a tiny corner off the bag to create a makeshift piping bag. Then, carefully pipe two small, perfectly round dots onto the red-dipped portion of each cookie. This method gives you precise control over the size and placement of the buttons, creating an even more professional and authentic appearance.
- Seasonal and Holiday Themes: Get inspired by different holidays and seasons! For Christmas, use green candy melts for Mickey’s shorts and red sprinkles for buttons, or reverse the colors for a festive look. For Halloween, use spooky orange candy melts and black sprinkles or candy eyes. For Valentine’s Day, try pink or purple melts and heart-shaped sprinkles. The possibilities for seasonal customization are truly endless!
- Flavor Infusions: Experiment with flavored candy melts (such as peppermint for the holidays, or caramel for a unique twist). Alternatively, add a tiny drop of food-grade flavoring extracts (like almond, vanilla, or even orange zest) to your melted candy melts for an extra burst of flavor that complements the Oreo.
Step-by-Step Guide to Perfection
Creating these magical Mickey Mouse Oreo Cookies is a fun and straightforward process that even beginner bakers (or no-bakers!) can master. Follow these detailed steps to bring your delightful Disney treats to life!
- Step 1: Prepare Your Workspace. Begin by laying out a sheet of parchment paper or wax paper on a sturdy baking sheet or large flat surface. This will prevent your cookies from sticking and make cleanup an absolute breeze, ensuring they can set properly without any fuss or mess. Have all your ingredients pre-measured and ready to go for a smooth process.
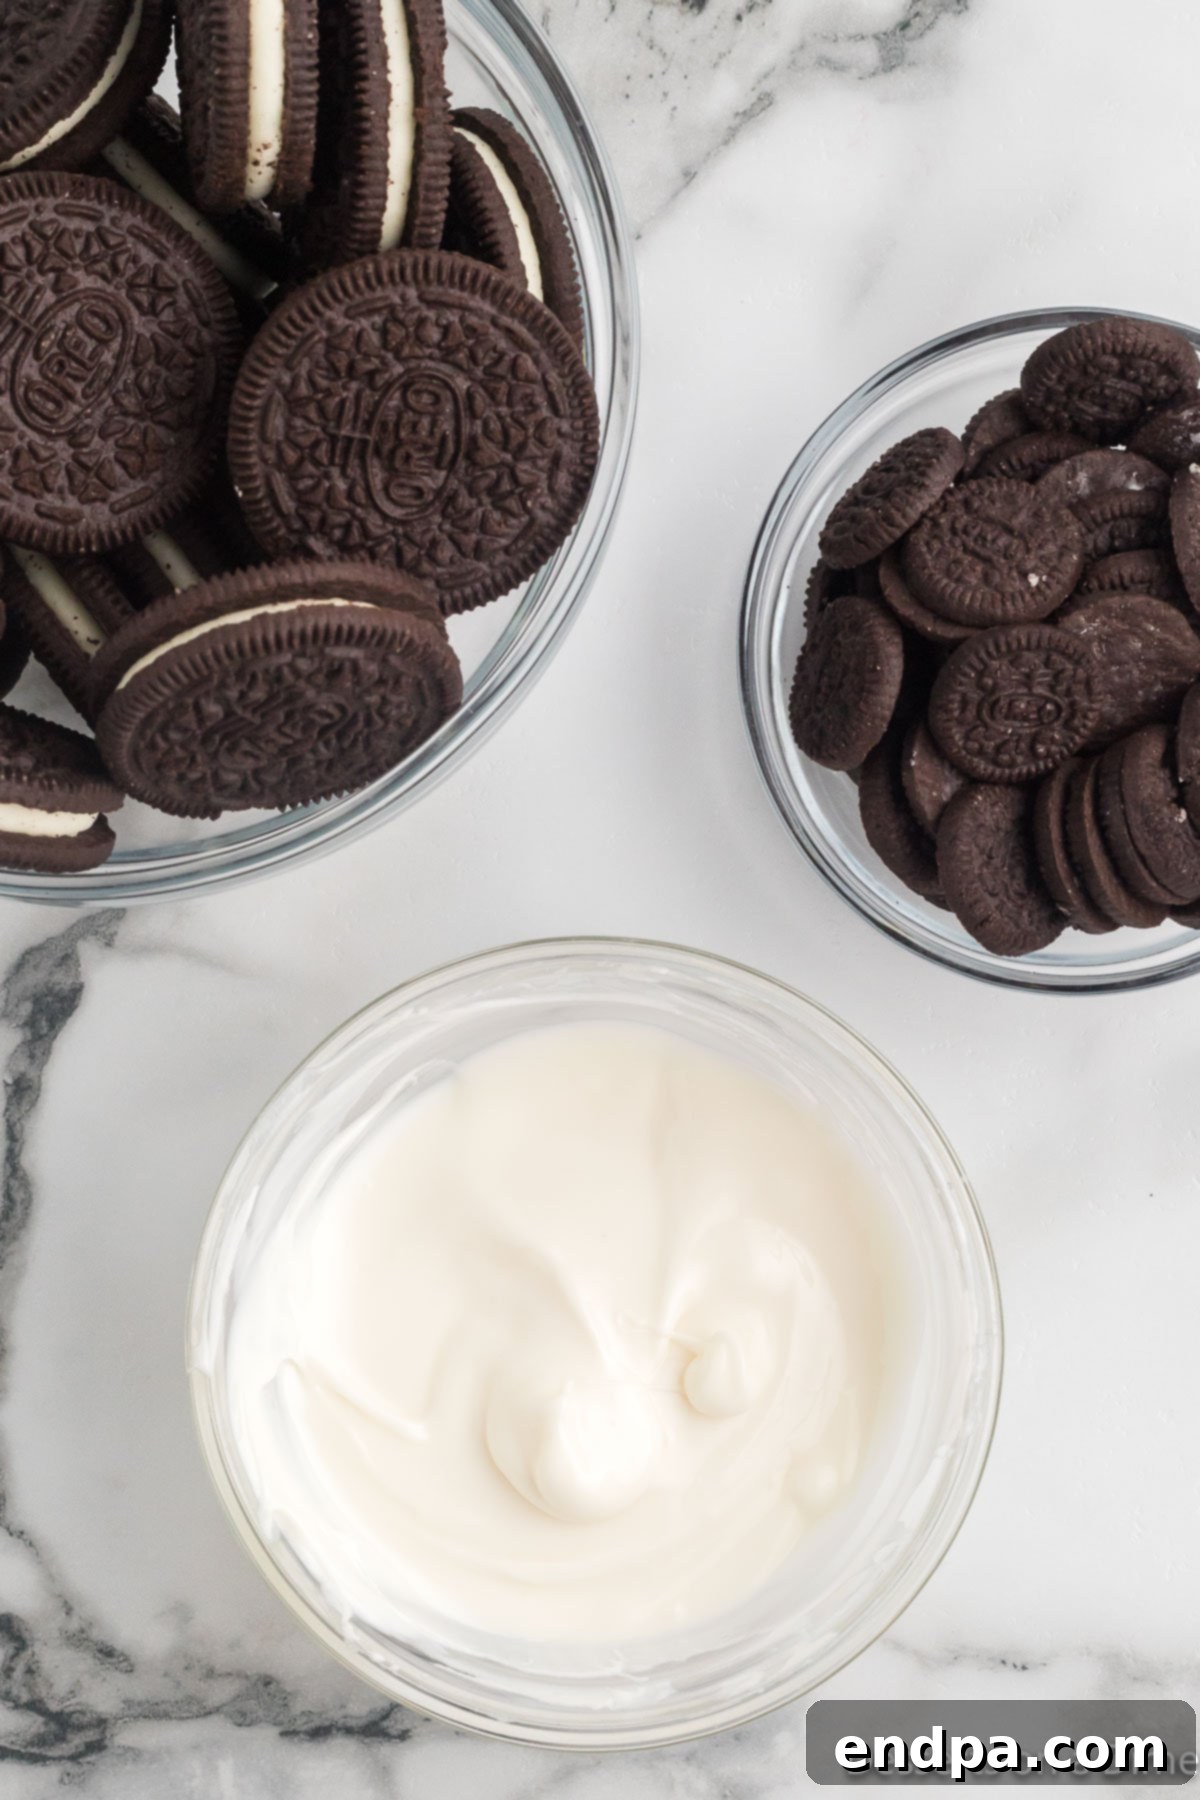
Step 2: Melt the White Candy Melts. Place your measured white candy melts in a clean, dry, microwave-safe bowl. Heat them in short bursts, typically 30-second intervals, stirring thoroughly and gently after each one with a spoon or rubber spatula. Continue this process until the candy melts are completely smooth, liquid, and free of any lumps. Be extremely careful not to overheat the candy melts, as this can cause them to seize and become unusable. If they start to look thick, refer to the “Pro Tips” section for thinning.
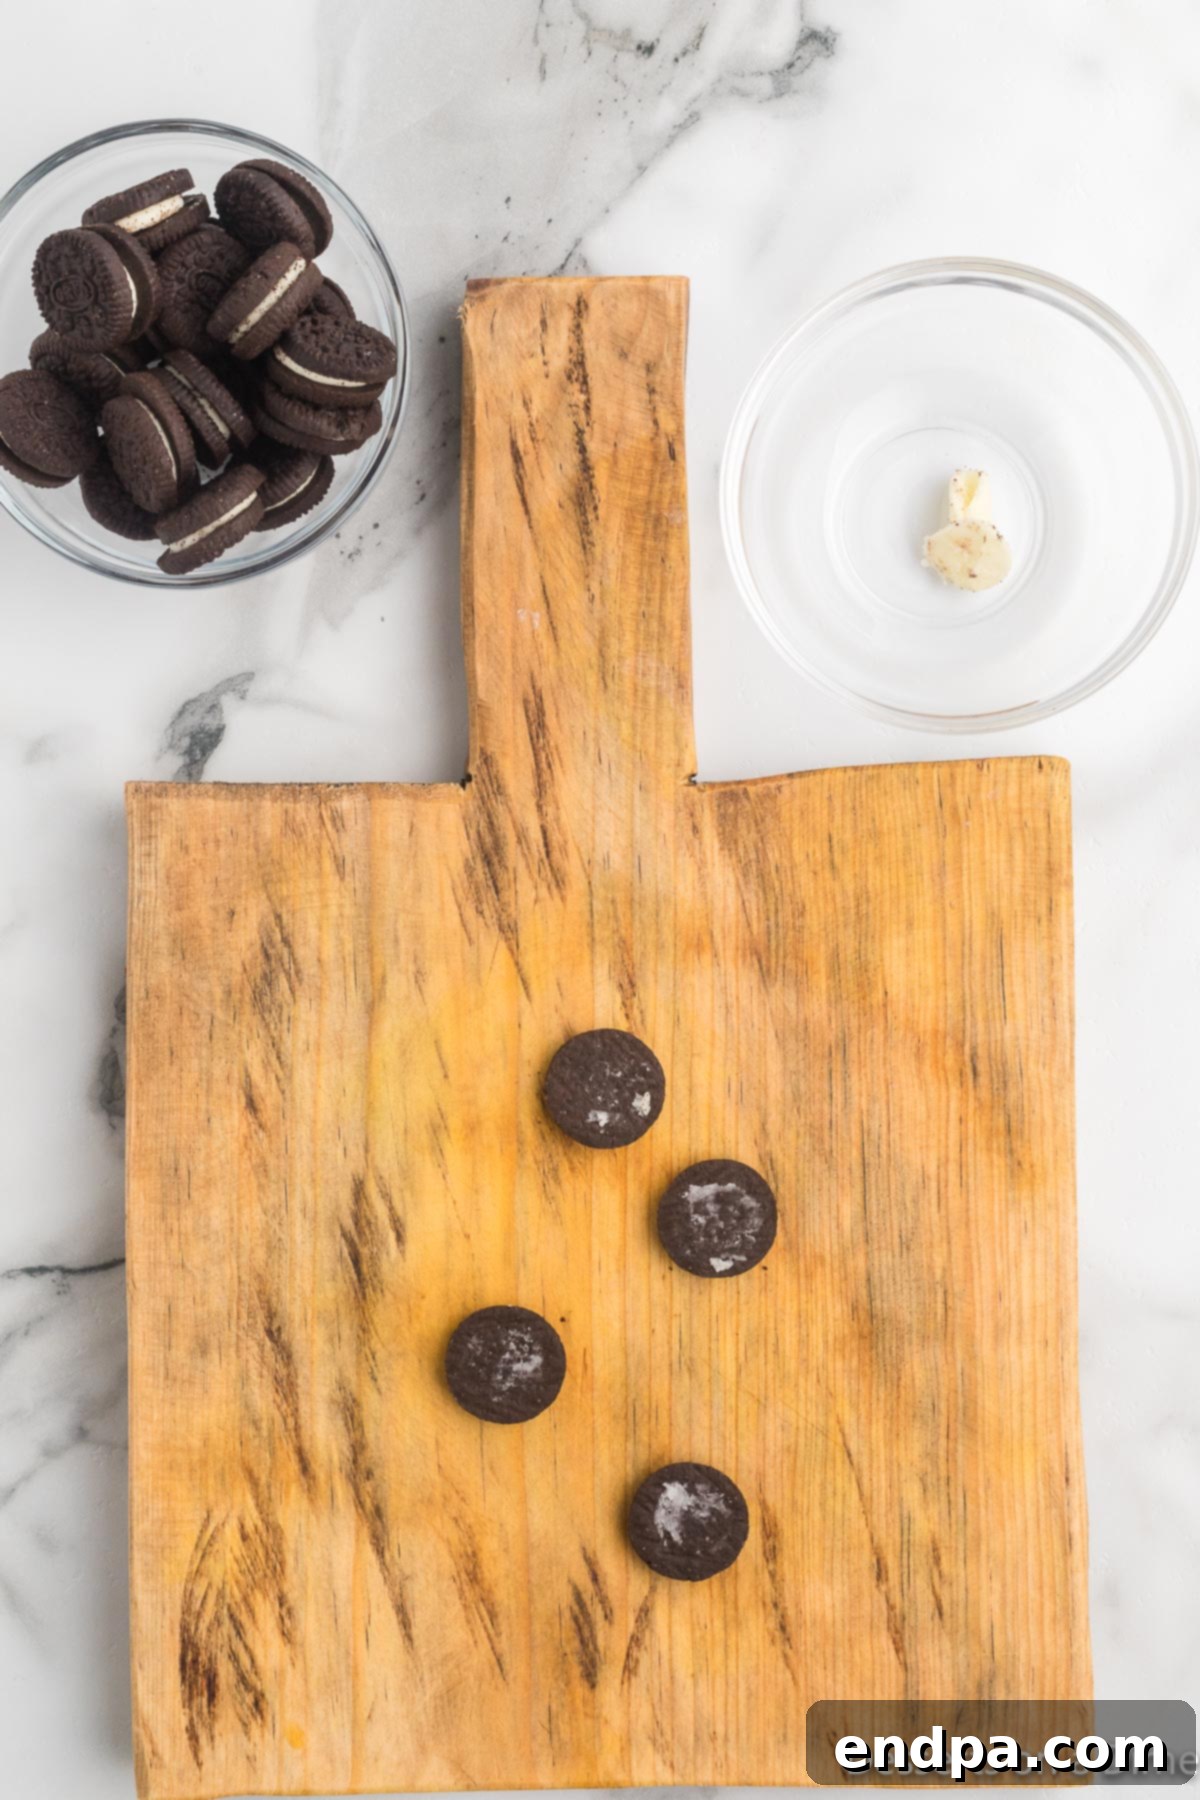
Step 3: Prepare the Mini Oreo Ears. Take your mini Oreo cookies and carefully twist them apart into individual halves. Using a small, sharp knife, or even your finger, gently scrape away or remove the cream filling from the center of each mini Oreo half. You’ll only be using the plain chocolate cookie wafers for Mickey’s ears. Lay the separated and cleaned cookie halves on the counter, ready for immediate assembly.
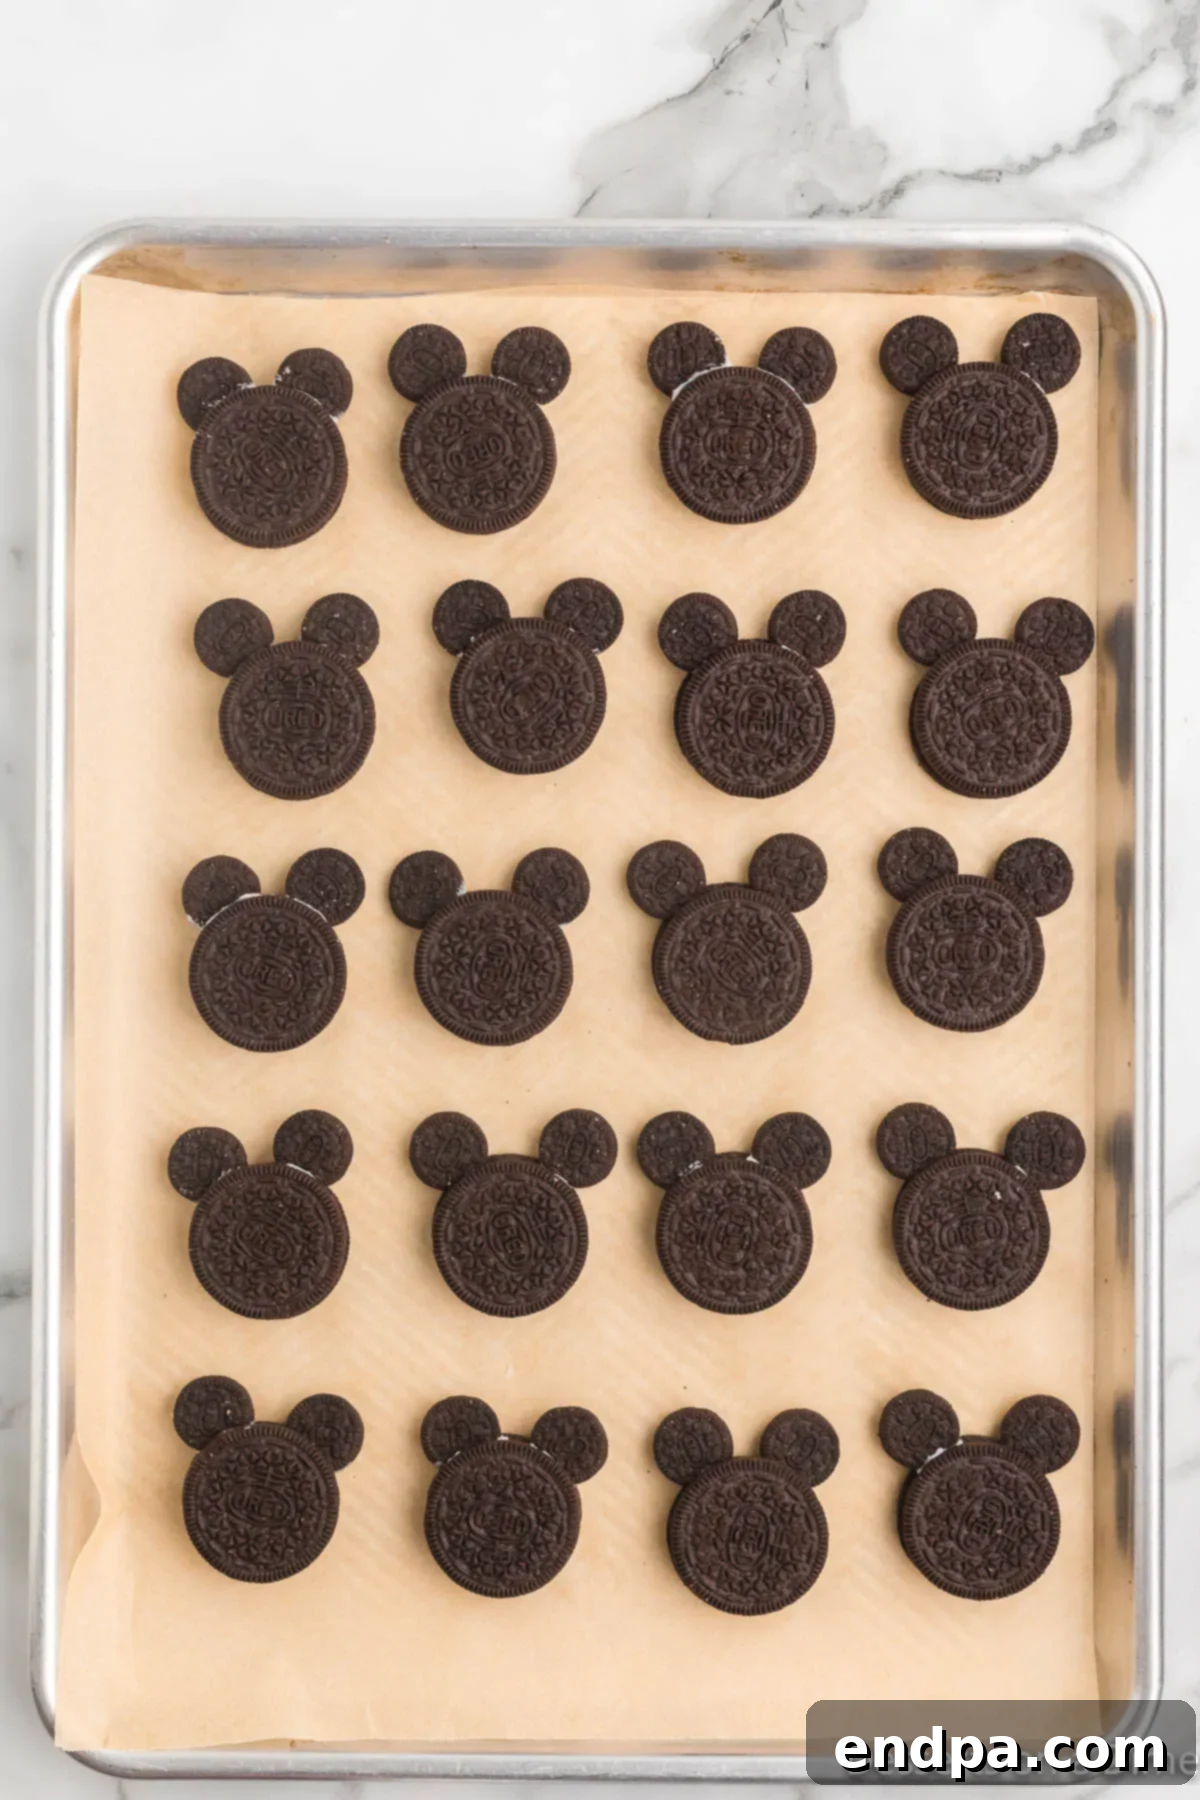
Step 4: Attach Mickey’s Ears. Pick up a Double Stuffed Oreo cookie. Take one half of a prepared mini Oreo cookie and dip one edge into the melted white candy melts. Immediately and gently press this dipped edge into the cream filling of the Double Stuffed Oreo, positioning it on one side to form an ear. Repeat this process for the other side, using a second mini Oreo half to create the second ear. Ensure the ears are positioned symmetrically to resemble Mickey’s iconic silhouette. Place these assembled cookies carefully onto your prepared baking sheet.
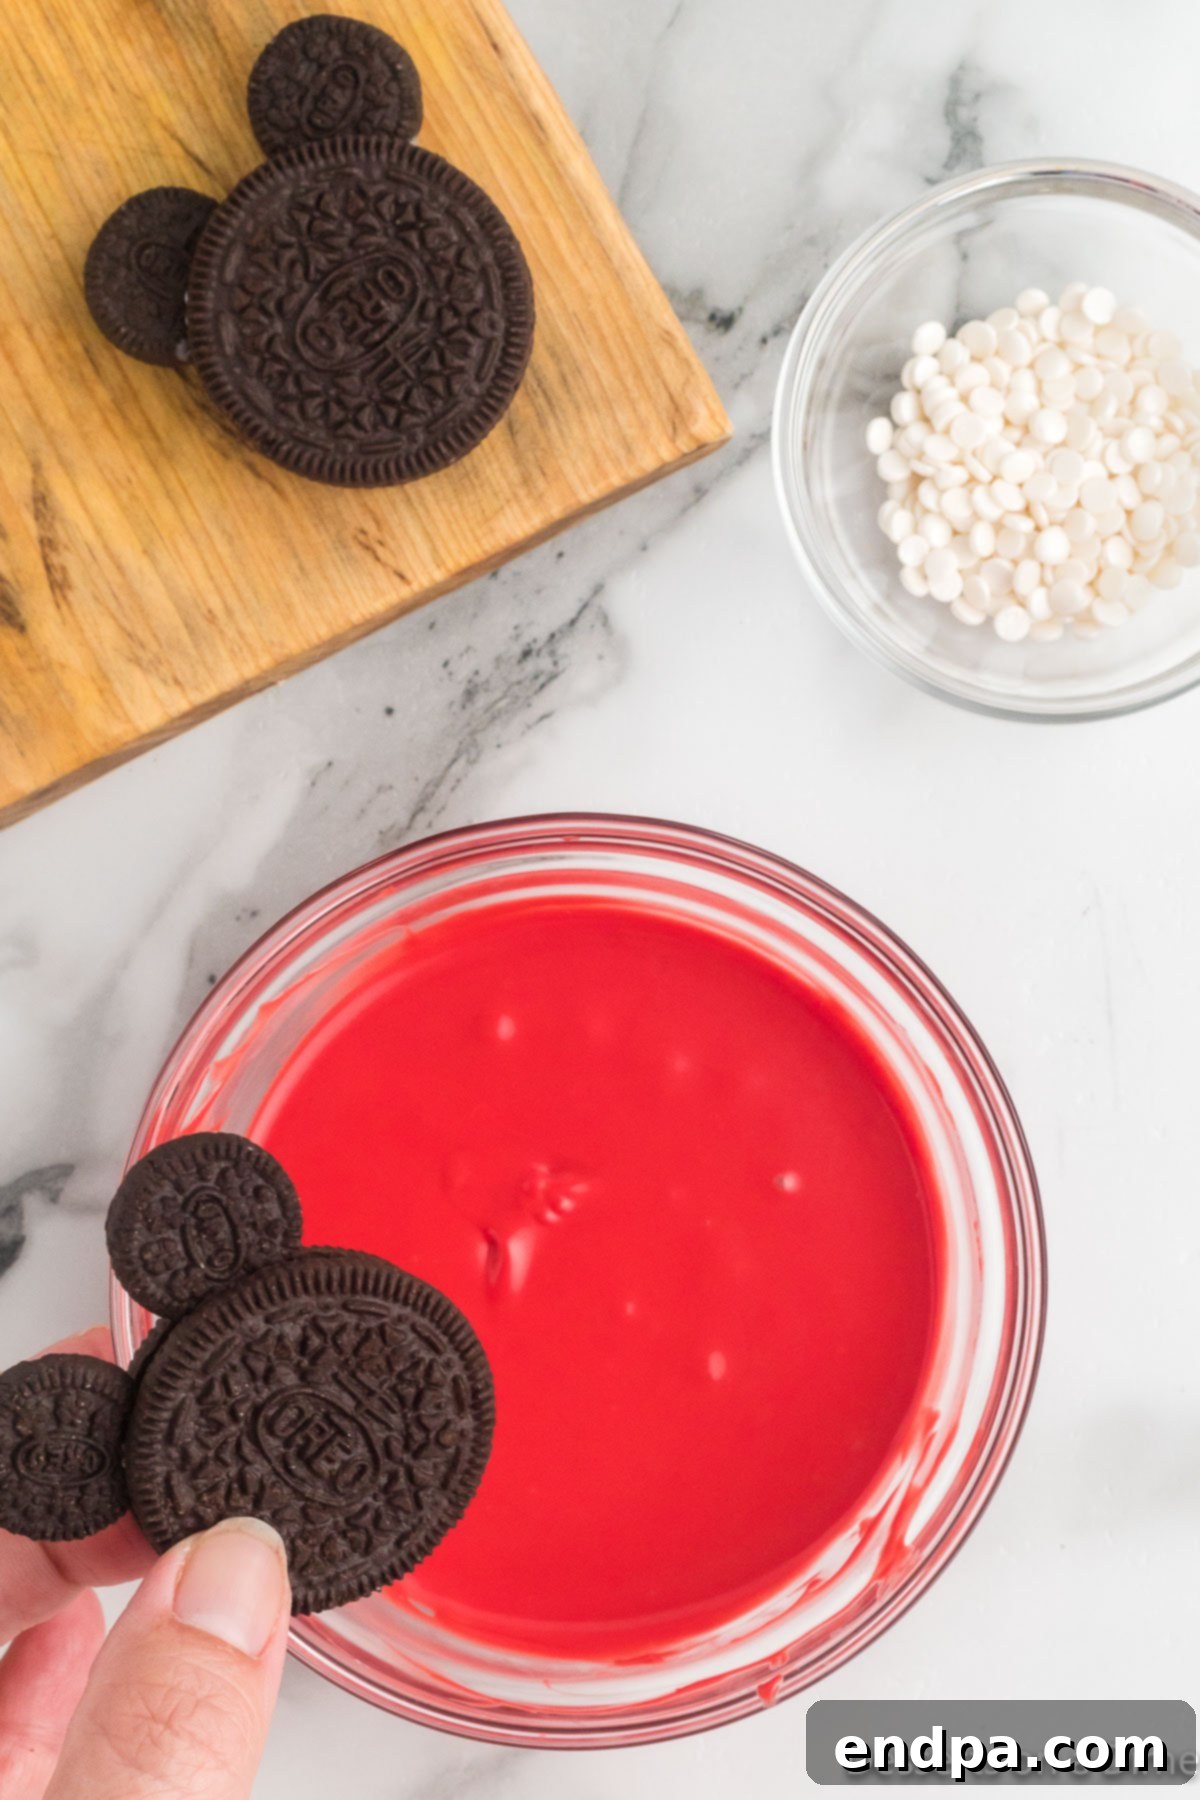
Step 5: Dip in Red Candy Melts. In another clean, microwave-safe bowl, melt the red candy melts using the same 30-second interval method as before, stirring until completely melted and smooth. Once the ears on your cookies have slightly set (a quick chill in the fridge for 5 minutes can help), hold a Double Stuffed Oreo (with attached ears) by the top and carefully dip the bottom half of the cookie into the melted red candy. Allow any excess candy to drip off by gently tapping the cookie against the side of the bowl with a fork. Aim for a clean, straight line to create Mickey’s signature red shorts.
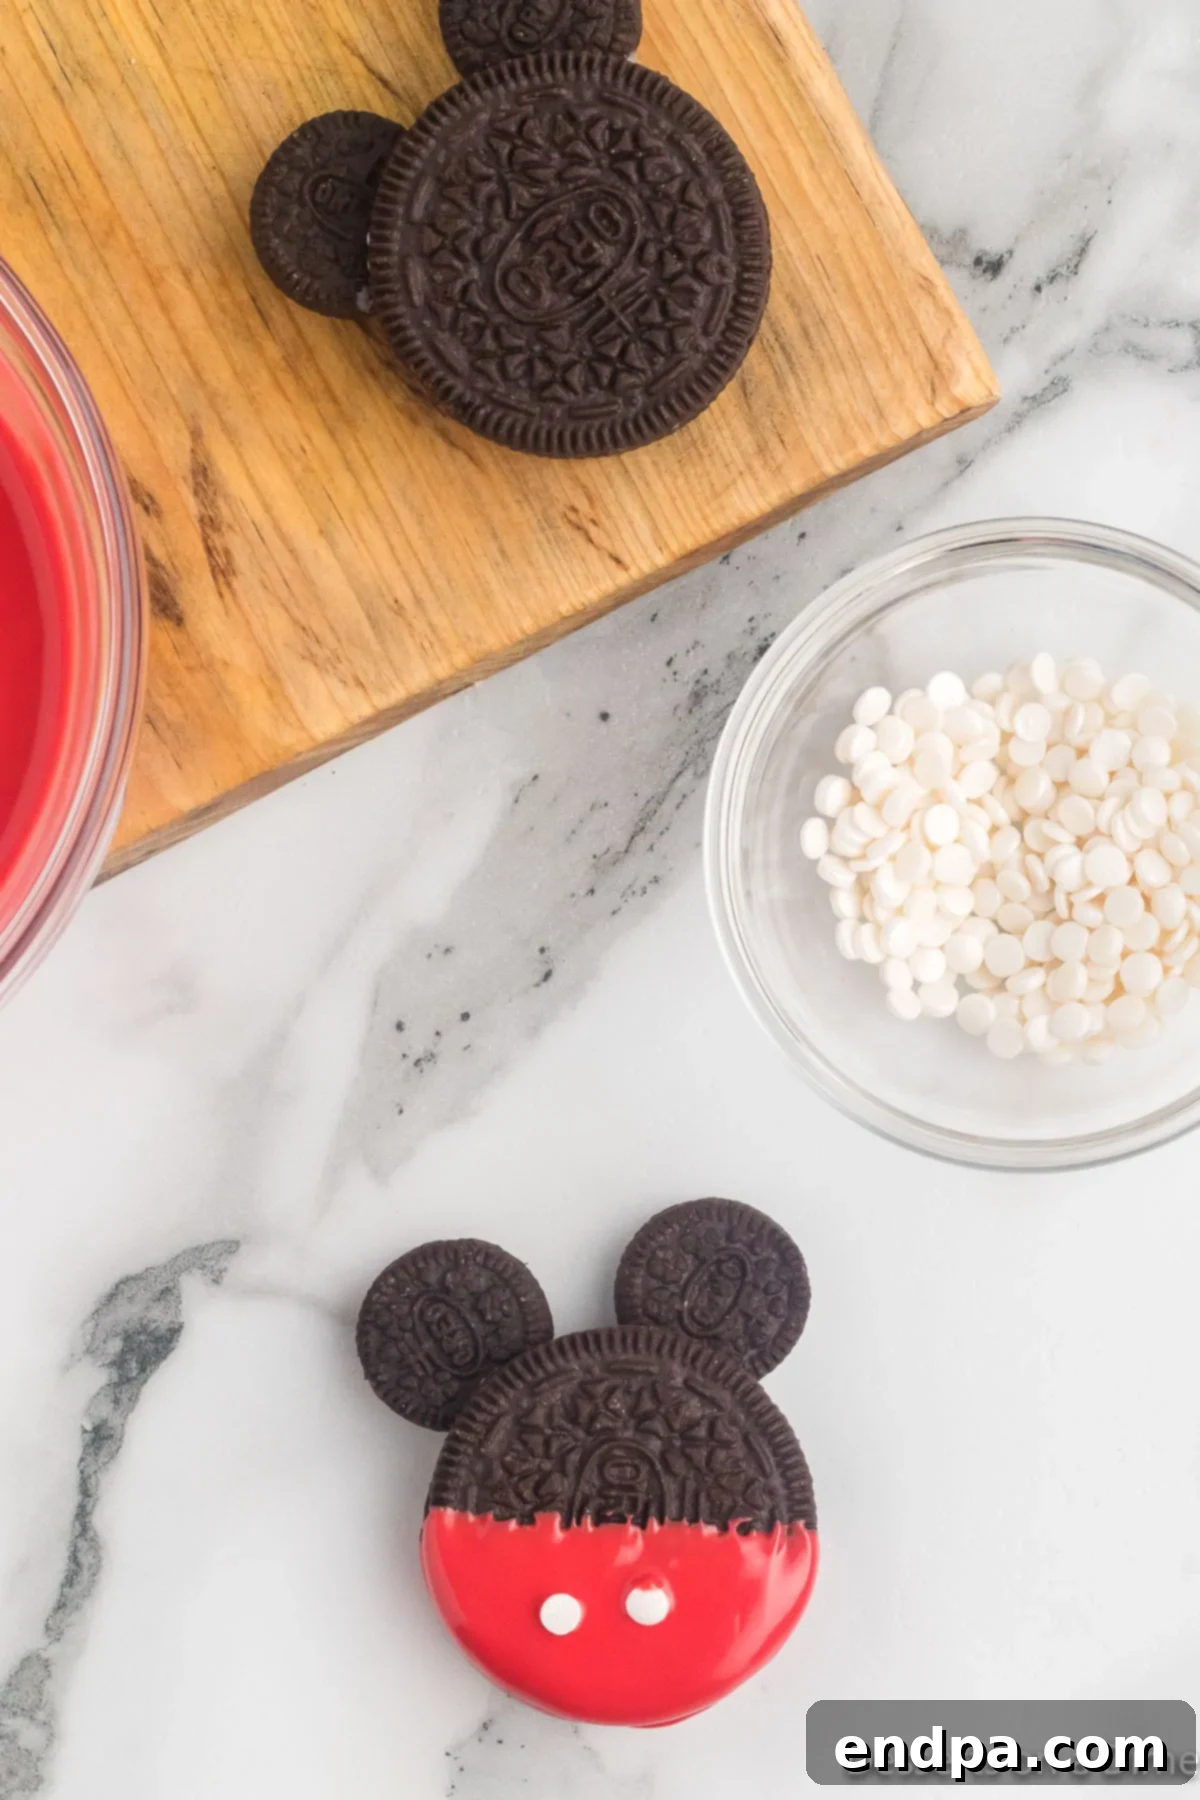
Step 6: Add the Buttons. While the red candy melt coating is still wet and pliable, immediately but carefully place two white circle candy sprinkles onto the red-dipped portion of each cookie. These will perfectly represent Mickey’s signature buttons. Work quickly, as candy melts set rather fast. It’s helpful to have your sprinkles in a small bowl right next to your dipping station. If the candy begins to harden, you can use a toothpick to gently dab a tiny bit of fresh melted candy onto the cookie before placing the sprinkle to help it adhere.
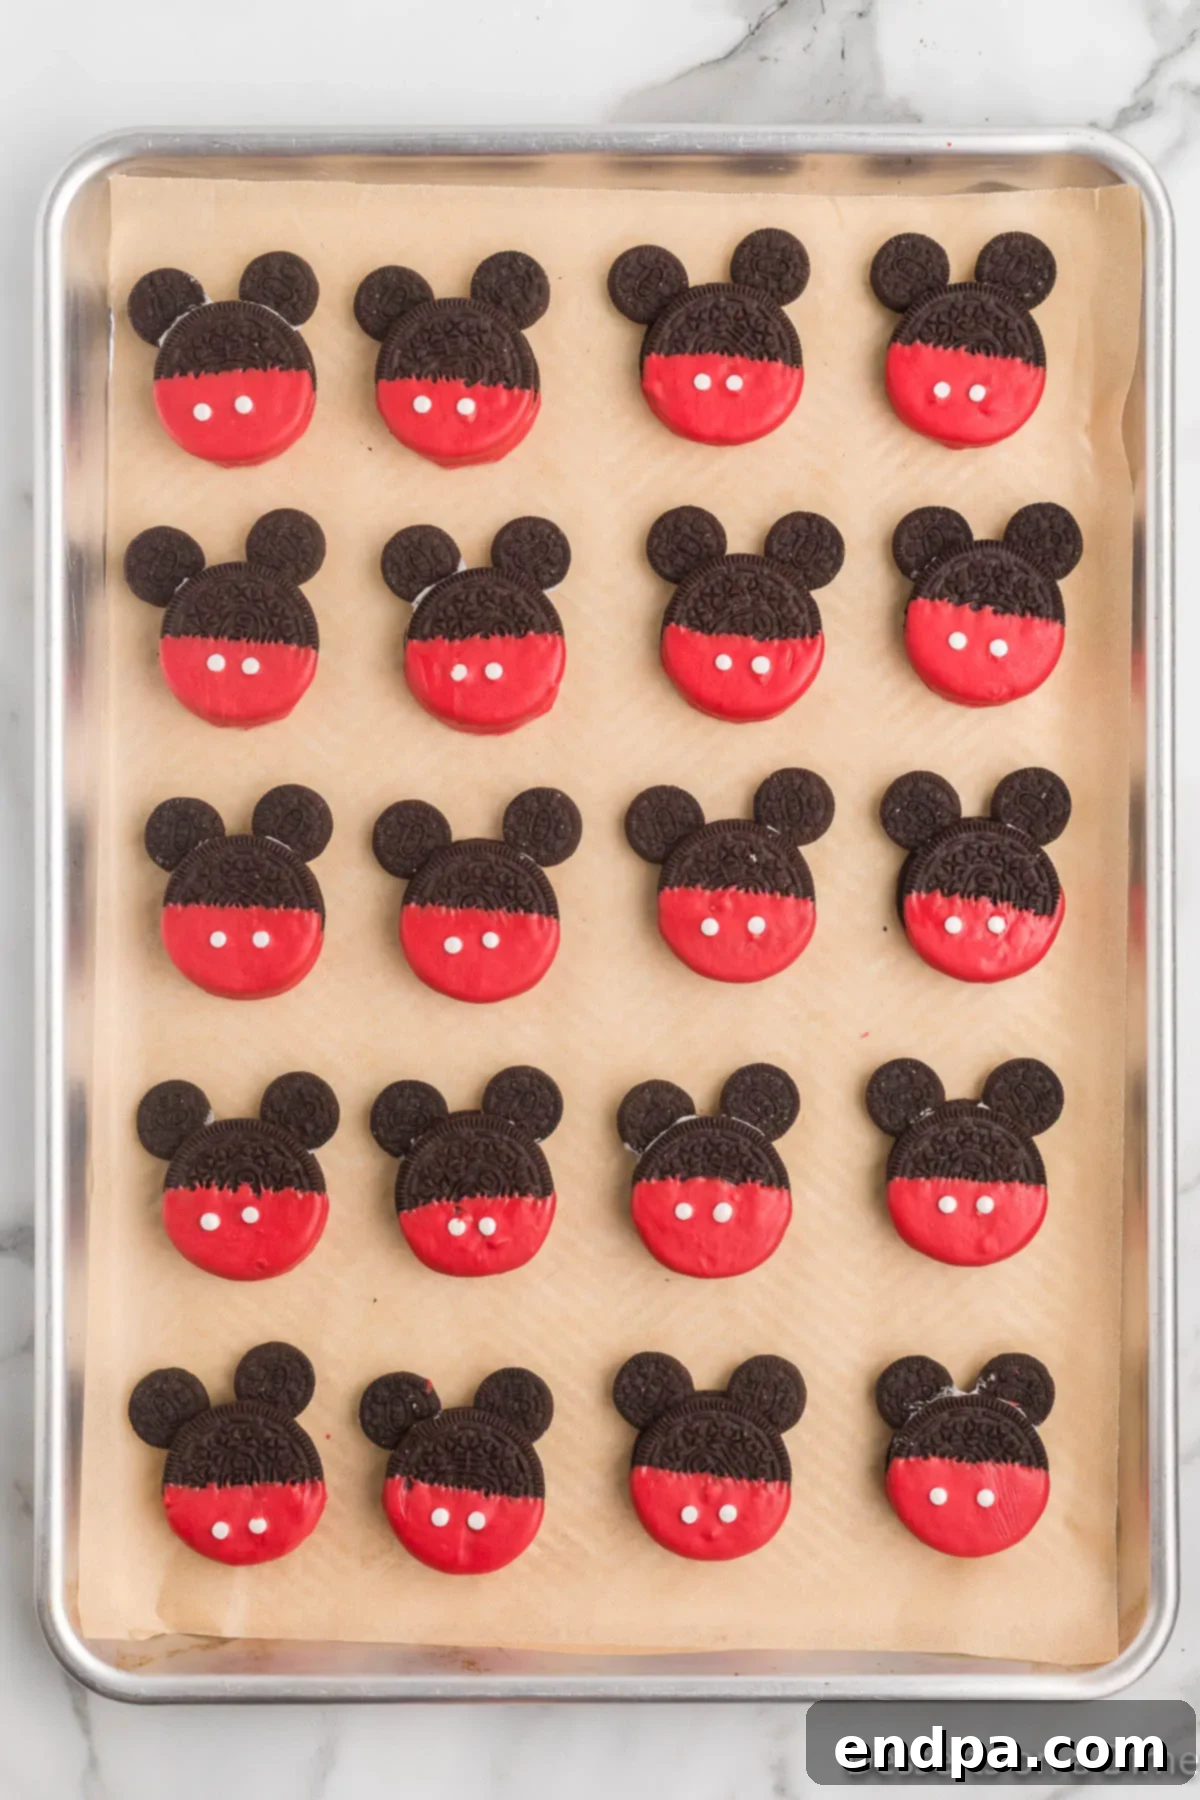
Step 7: Allow to Set. Continue this process until all your Double Stuffed Oreos have been transformed into adorable Mickey Mouse heads with ears, red shorts, and white buttons. Arrange the decorated cookies in a single layer on your parchment-lined baking sheet, ensuring they don’t touch each other. Allow them to set completely at room temperature, which typically takes about 20-30 minutes, depending on the humidity and temperature of your kitchen. For quicker results, you can place the baking sheet in the freezer for about 10-15 minutes until the candy melts are firm and solid to the touch. Once set, they are ready to serve and bring joy!
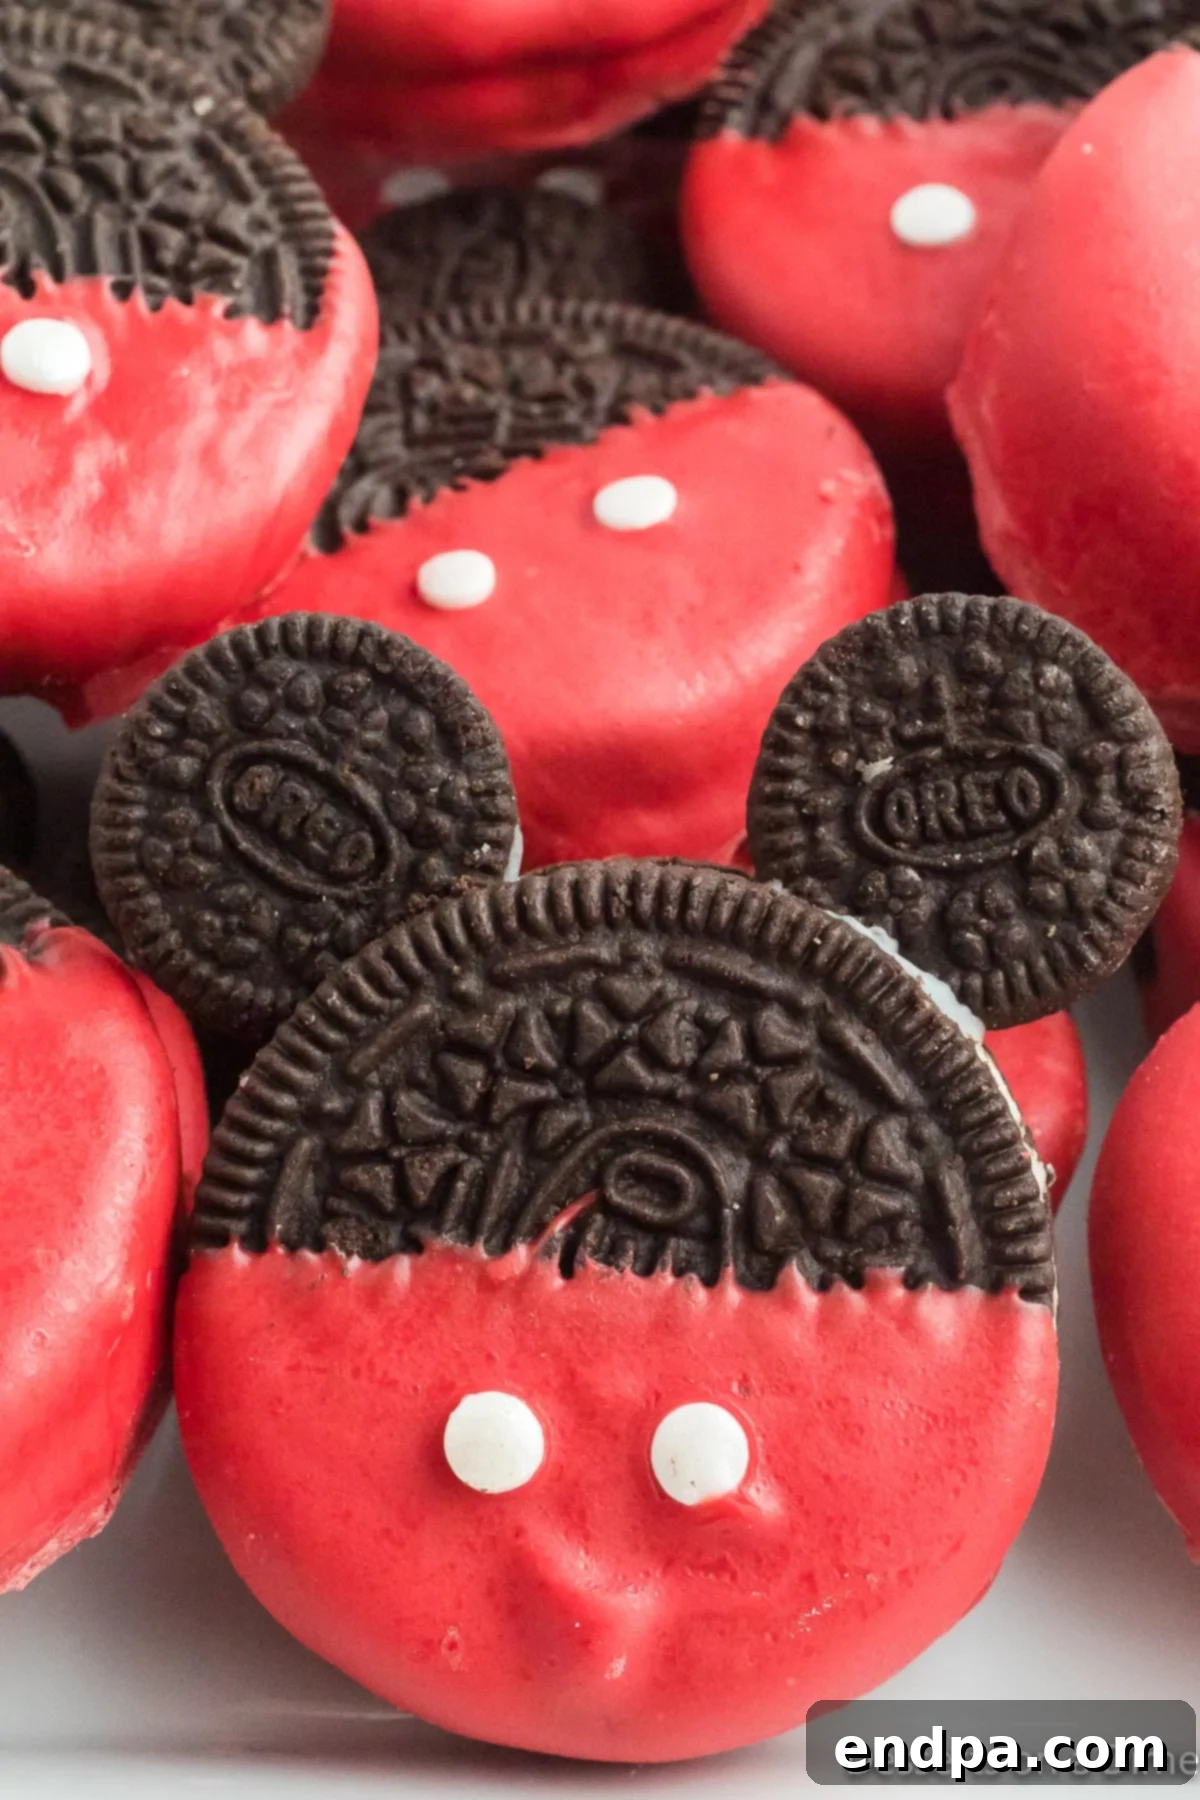
FAQs: Your Questions Answered
We’ve gathered some of the most common questions about making these delightful Mickey Mouse Oreo Cookies to help ensure your success and answer any concerns you might have.
To keep your Mickey Mouse Oreo Cookies fresh and firm, store any leftovers in an airtight container at room temperature. You can layer them with parchment paper in between to prevent sticking and preserve their delicate decoration. They will remain delicious for up to 1 week. We highly recommend keeping them in a cool, dry place away from direct sunlight or any heat sources, as this can cause the candy melts to soften, melt, or become sticky. Refrigeration is not strictly necessary but can help them last longer in very warm or humid climates, though it might cause a slight condensation on the candy coating when brought back to room temperature.
Absolutely, feel free to get creative with your Oreo choices! While Double Stuffed Oreos are highly recommended for their stability in holding the ears, you can certainly experiment with other classic or flavored Oreo varieties for the main cookie. Imagine Mickey Mouse with Golden Oreos for a lighter look, Mint Oreos for a festive twist, or even Peanut Butter Oreos for an extra burst of flavor! Just ensure the chosen Oreo has a sufficient amount of cream filling to securely hold the mini Oreo ears in place.
If your melted candy melts seem too thick or clumpy for a smooth, even dipping, don’t worry – this is a common issue with an easy fix! You can easily thin them out. Add a teaspoon of solid vegetable shortening (like Crisco) or a teaspoon of coconut oil to the melted candy melts and stir gently until fully incorporated and smooth. Add more in small increments (half a teaspoon at a time) until you achieve your desired smooth, dippable consistency. Be careful not to add too much, as it can make the candy too runny or prevent it from setting properly. A good rule of thumb is up to 1 tablespoon of coconut oil or shortening per 12-ounce bag of candy wafers.
Yes, these Mickey Mouse Oreo Cookies are an excellent choice for making in advance! Since they store wonderfully in an airtight container for up to a week (as mentioned above), you can easily prepare them a few days before your event. This allows you to spread out the preparation, reducing stress on the day of the party, and ensuring you have fresh, festive treats ready to go when you need them. Just ensure they are completely set and firm before storing to prevent any smudging or sticking.
Candy melts can seize (become thick, grainy, and unusable) if exposed to too much heat or moisture. To prevent this, always use clean, dry bowls and utensils. Heat them in short 30-second intervals in the microwave, stirring well after each. Avoid adding any water or water-based food coloring; use oil-based candy colors if you want to change their hue. If they do seize, sometimes adding a small amount of vegetable shortening or paramount crystals can help salvage them, but it’s best to prevent it in the first place.
Pro Tips for Sweet Success
To ensure your Mickey Mouse Oreo Cookies turn out perfectly every time, looking professionally crafted and tasting absolutely delightful, keep these expert tips in mind. A little foresight and technique go a long way in creating picture-perfect Disney treats!
- Act Fast with Sprinkles: The moment you dip your cookies in the red candy melts, immediately add the white circular sprinkles for Mickey’s buttons. Candy melts harden very quickly upon exposure to air, and if you wait even a minute too long, the sprinkles simply won’t adhere properly. Have your sprinkles ready in a small bowl, positioned right next to your dipping station, so you can grab and place them without delay.
- Remove Mini Oreo Filling Completely: It might seem tempting or easier to leave the cream in the mini Oreos, but we strongly advise against it. The cream filling makes the mini cookies too heavy and adds bulk, causing them to potentially detach or make the ears unstable on the larger Oreo. Removing the cream ensures lighter, more secure ears for your Mickey cookies, creating a cleaner silhouette and better structural integrity.
- Ensure Complete Setting is Crucial: Patience is truly key for perfect no-bake treats! Allow your decorated cookies to set completely and firmly before you attempt to handle them further, stack them, or store them. This prevents smudges, ensures the candy coating is fully hardened, and helps the ears stay securely in place. If time is short or you’re in a warm environment, a quick chill in the freezer for 10-15 minutes works wonders to speed up the setting process.
- Precision with Tweezers (or a Toothpick): Those small white candy circles for Mickey’s buttons can be quite tricky to place accurately with just your fingers. For perfect button placement, consider using a pair of clean, food-safe tweezers. Alternatively, you can moisten the very tip of a toothpick slightly with water or a tiny bit of fresh melted candy to pick up and accurately position the sprinkles onto the cookies. This allows for fine-tuned control and a more professional finish.
- Always Have Extra Oreos on Hand: Breakage can happen, especially when working with delicate cookies and candy. We always recommend having a couple of spare Double Stuffed Oreos and a few extra mini Oreos on hand. This way, if a few cookies break during the separation, assembly, or dipping process, you won’t interrupt your magical cookie-making flow, and you’ll still be able to complete your desired batch size.
- Thinning Thick Candy Melts: As discussed in the FAQs, if your candy melts appear too thick for a smooth, even coating, a small amount of coconut oil or solid vegetable shortening (starting with 1 teaspoon per bag of wafers, and adding gradually) can thin them to a perfect dipping consistency. This helps achieve a beautiful, glossy, and thin coating without unwanted clumps or excessive thickness.
- Work in Manageable Batches: If you’re planning to make a large quantity of these cookies, consider working in smaller, more manageable batches. This ensures that the melted candy doesn’t begin to harden in your bowl before you’ve had a chance to dip all your cookies and add the sprinkles. Reheat candy melts as needed in short intervals if they start to thicken.
- Clean Drips Immediately: If you get any stray drips, smudges, or excess candy melt on the non-dipped part of the cookie, gently scrape them off with the tip of a toothpick or a small, sharp knife while the candy is still slightly soft. This helps maintain a clean and professional appearance for your finished Mickey Mouse cookies.
- Utilize Good Quality Candy Melts: Invest in reputable brands of candy melts. Cheaper alternatives can sometimes be more difficult to melt smoothly, may seize more easily, or may not have the vibrant color saturation needed for Mickey’s iconic look.
More Fun Oreo Recipes to Explore
If you’ve fallen in love with these Mickey Mouse Oreo Cookies and are now looking for more creative ways to enjoy the versatile Oreo, you’re in for a treat! The humble Oreo knows no bounds when it comes to transforming into delectable desserts. Here are more fantastic Oreo-inspired recipes that are sure to become new family favorites and crowd-pleasers:
- Football Oreo Balls: Perfect for game day, tailgating parties, or any sports-themed gathering, these rich, chocolatey, and easy-to-make bites are always a crowd-pleaser and disappear fast!
- White Chocolate Covered Oreos: A simple yet elegant treat that allows for endless customization. Dip classic Oreos in melted white chocolate and then decorate with sprinkles, drizzles of contrasting chocolate, or crushed candies for any occasion.
- Easy Oreo Fluff Recipe: This light, creamy, and incredibly simple dessert comes together in minutes with just a few ingredients. It’s a refreshing, no-bake option that’s perfect for warm weather or a quick indulgence.
- Oreo Cake Pops: Delicious, bite-sized, and endlessly fun to make and decorate, these cake pops are always a hit at parties, celebrations, or as a delightful homemade gift.
- Cookies and Cream Muddy Buddies: A delightful and addictive twist on a classic snack mix, packed with irresistible Oreo flavor. This sweet and crunchy treat is perfect for sharing, movie nights, or school lunchboxes.
We are absolutely thrilled for you to try your hand at making these enchanting no-bake Disney cookies. They are more than just a dessert; they are a delightful experience that brings joy and a touch of magic to any occasion. The simplicity of the recipe combined with the iconic design makes them truly special. Once you’ve whipped up a batch and seen the smiles they create, be sure to come back and share your experience and comments – we absolutely love hearing from you and seeing your wonderful creations! We’re confident that these Mickey Mouse Oreo Cookies will quickly become your new favorite go-to recipe, adding a sprinkle of unforgettable Disney magic to your culinary repertoire for years to come.
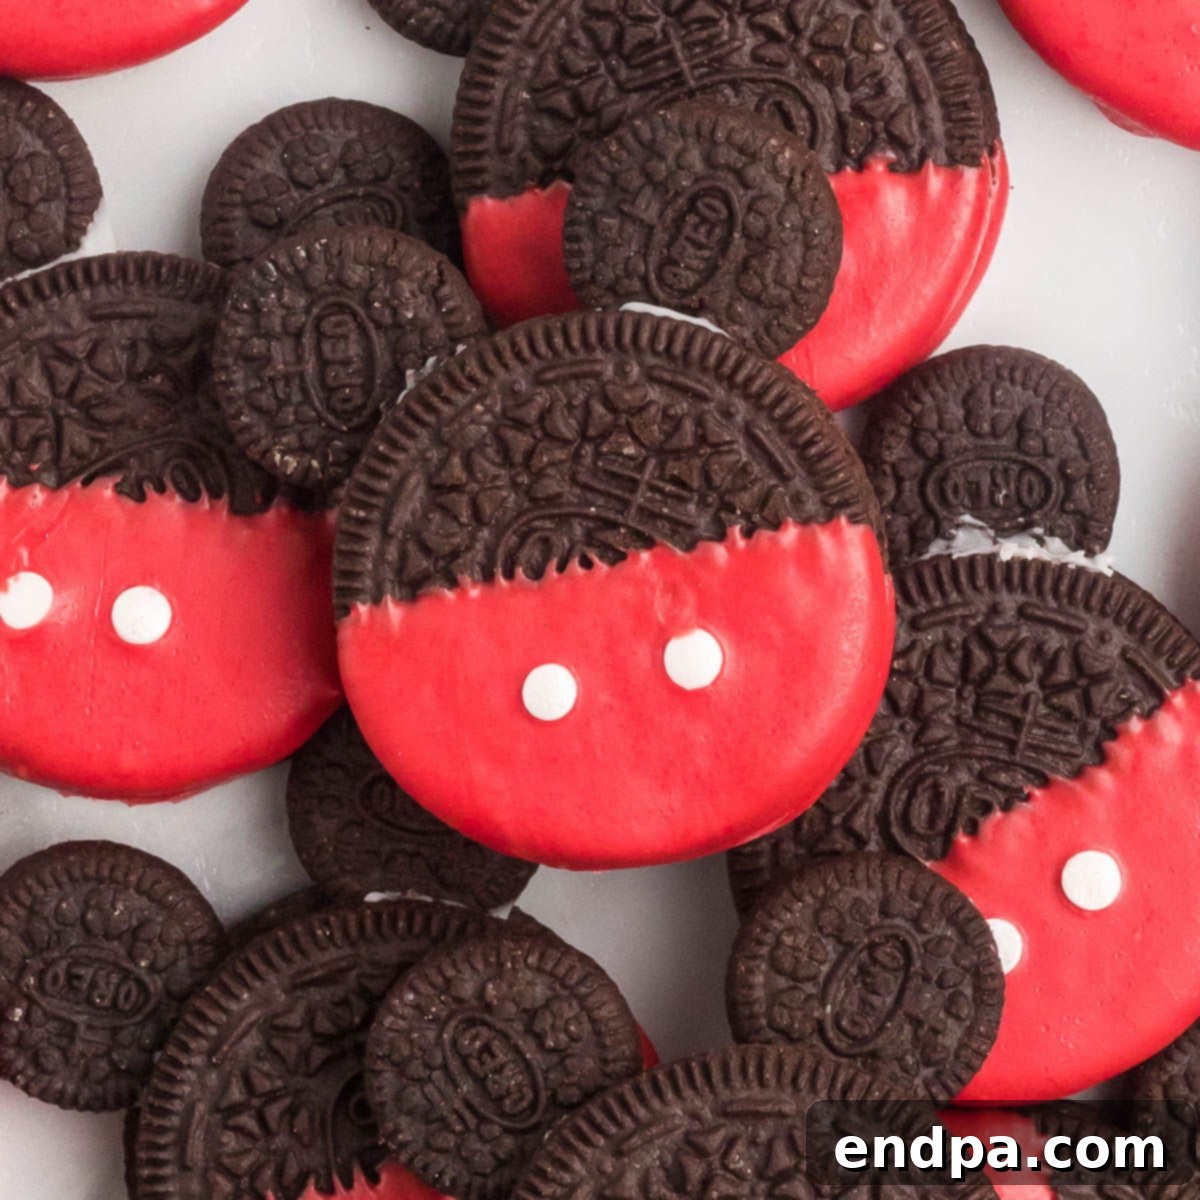
Mickey Mouse Oreo Cookies
These adorable Oreo Mickey Mouse Cookies are so much fun and incredibly easy to make. They are perfect for parties, Disney-themed events, movie nights, or just a magical treat at home. If you love all things Disney, this simple no-bake recipe is an absolute must-try for your family and friends!
Prep Time: 15 minutes
Chill Time: 15 minutes
Total Time: 30 minutes
Yields: 20 cookies
Cuisine: American
Course: Dessert, Snack
Calories: 149 kcal (per cookie)
Author: Carrie Barnard
Ingredients
- 20 Double Stuffed Oreo Cookies
- 40 Mini Oreo Cookie halves (from 20 mini Oreos, cream removed)
- ½ cup White Candy Melts
- 1 cup Red Candy Melts
- 40 White Circle Candy Sprinkles
Instructions
- Prepare Baking Sheet: Line a large baking sheet with parchment paper or wax paper. This will be your clean surface for assembling and setting the cookies.
- Melt White Candy Melts: Place the ½ cup of white candy melts in a small, microwave-safe bowl. Heat in 30-second intervals, stirring thoroughly after each interval, until the candy is completely melted and smooth. Be careful not to overheat.
- Prepare Mini Oreo Ears: Carefully twist apart the 20 mini Oreo cookies to get 40 individual halves. Using a small knife or your fingers, gently remove all the cream filling from each mini Oreo half. You will only use the chocolate cookie wafers for the ears.
- Attach the Ears: Take one Double Stuffed Oreo cookie. Dip one end of a cream-less mini Oreo cookie half into the melted white candy melts. Gently press the dipped end into the cream filling of the Double Stuffed Oreo, positioning it on one side to form an ear. Repeat this process immediately with a second mini Oreo half on the opposite side of the Double Stuffed Oreo to create the second ear. Ensure the ears are securely attached and symmetrical. Place the assembled cookie on your prepared baking sheet.
- Repeat and Chill: Continue attaching ears to all 20 Double Stuffed Oreos in the same manner. Once all the “Mickey heads” are assembled, place the baking sheet into the refrigerator for 10-15 minutes to allow the white candy melts to set and firmly secure the ears.
- Melt Red Candy Melts: While the cookies are chilling, place the 1 cup of red candy melts in a separate microwave-safe bowl. Heat in 30-second intervals, stirring until completely melted and smooth. This will create Mickey’s iconic red shorts.
- Dip for Shorts: Once the white candy melts are firm and the ears are set, take each Mickey-shaped Oreo from the fridge. Holding it by the top (the plain Oreo part), carefully dip the bottom half of the cookie into the melted red candy melts. Ensure you get a nice, even coating, creating a clean, straight line for Mickey’s shorts. Gently tap the side of the cookie against the rim of the bowl to remove any excess candy melts.
- Add Buttons: Immediately after dipping each cookie in red candy, and while the red candy is still wet and pliable, carefully place two white circle candy sprinkles onto the red-dipped portion. These are Mickey’s signature buttons. Work quickly as the candy will begin to set very fast.
- Allow to Fully Set: Place the fully decorated cookies back onto the parchment-lined baking sheet, ensuring they are not touching. Allow them to set completely at room temperature, which typically takes about 20-30 minutes. For faster results, you can place the baking sheet in the freezer for 10-15 minutes until the candy melts are firm and solid to the touch.
- Serve and Enjoy: Once fully set, your adorable and delicious Mickey Mouse Oreo Cookies are ready to be served and enjoyed!
Recipe Notes
Store leftover Mickey Mouse Oreo Cookies in an airtight container at room temperature for up to 1 week. For best results and to maintain the firmness and appearance of the candy melts, keep them in a cool, dry place, away from direct sunlight or heat. Layer with parchment paper between cookies if stacking to prevent sticking or smudging of the decorations.
Nutrition Facts (per cookie, estimated)
- Calories: 149 kcal
- Carbohydrates: 22g
- Protein: 1g
- Fat: 7g
- Saturated Fat: 3g
- Polyunsaturated Fat: 1g
- Monounsaturated Fat: 2g
- Trans Fat: 0.01g
- Sodium: 101mg
- Potassium: 56mg
- Fiber: 1g
- Sugar: 14g
- Vitamin A: 0.5IU
- Calcium: 5mg
- Iron: 3mg
Loved this recipe? Pin it now to save for later!
Pin Recipe
Want to save this recipe?
Just enter your email below, and we’ll send it straight to your inbox, along with more delightful new recipes every week!
