St. Patrick’s Day Cake Pops offer a delightful and vibrant way to celebrate the luckiest day of the year! These festive treats are not only bursting with color and flavor but are also incredibly simple to prepare, requiring just a few basic ingredients. Perfect for any St. Patrick’s Day gathering, from school parties to family celebrations, these cake pops are sure to be a hit with both kids and adults alike.

This engaging cake pop recipe is specifically designed to bring joy and a touch of Irish charm to your St. Patrick’s Day festivities. The clever use of white heart sprinkles allows you to easily transform each cake pop into an adorable four-leaf clover, adding an extra layer of fun and whimsy. Imagine the smiles when your children discover these edible good luck charms!
Creating these charming cake pops is surprisingly straightforward, proving that you don’t need to be an expert baker to make impressive holiday treats. This recipe is just as manageable as other popular holiday desserts, like our St. Patrick’s Day Lime Jell-O Poke Cake or the ever-popular St. Patrick’s Day Rice Krispie Treats. We’ve been crafting simple yet spectacular holiday delights for years, and these cake pops consistently rank among the kids’ favorites!
Beyond cake pops, we love embracing the spirit of St. Patrick’s Day with a variety of themed desserts. Don’t miss out on our rich Guinness Brownies or the irresistible St. Patrick’s Day Chocolate Covered Oreos. And for those who enjoy cake pops year-round, our Starbucks Cake Pops Recipe is a fantastic option that can be customized for any occasion.
Table of Contents
- Why These St. Patrick’s Day Cake Pops Are a Must-Try
- Ingredients for St. Patrick’s Day Cake Pops
- Creative Variations to Customize Your Cake Pops
- Step-by-Step Guide: How to Make Shamrock Cake Pops
- Expert Tips for Perfect St. Patrick’s Day Cake Pops
- Proper Storage for Fresh and Tasty Cake Pops
- More Enchanting St. Patrick’s Day Desserts
Why These St. Patrick’s Day Cake Pops Are a Must-Try
There are countless reasons to fall in love with this St. Patrick’s Day cake pop recipe! First and foremost, its simplicity is unmatched. You can effortlessly transform a basic boxed cake mix into a show-stopping festive treat. The process is incredibly rewarding, starting with infusing your cake batter with vibrant green food coloring, then crumbling it down to create the perfect base. Mixing this with frosting yields a pliable dough that’s ideal for shaping into neat cake balls.
This recipe also shines as an excellent opportunity for family fun. Kids absolutely adore helping out, especially when it comes to the exciting part of dipping the cake balls into shimmering green candy melts. It’s a delightful hands-on activity that fosters creativity and creates lasting holiday memories. Not only do these cake pops look amazing, but their rich, moist texture and sweet candy coating make them an irresistible treat that will disappear quickly from any dessert table. Their individual serving size makes them convenient and mess-free, perfect for little hands at a party!
Ingredients for St. Patrick’s Day Cake Pops
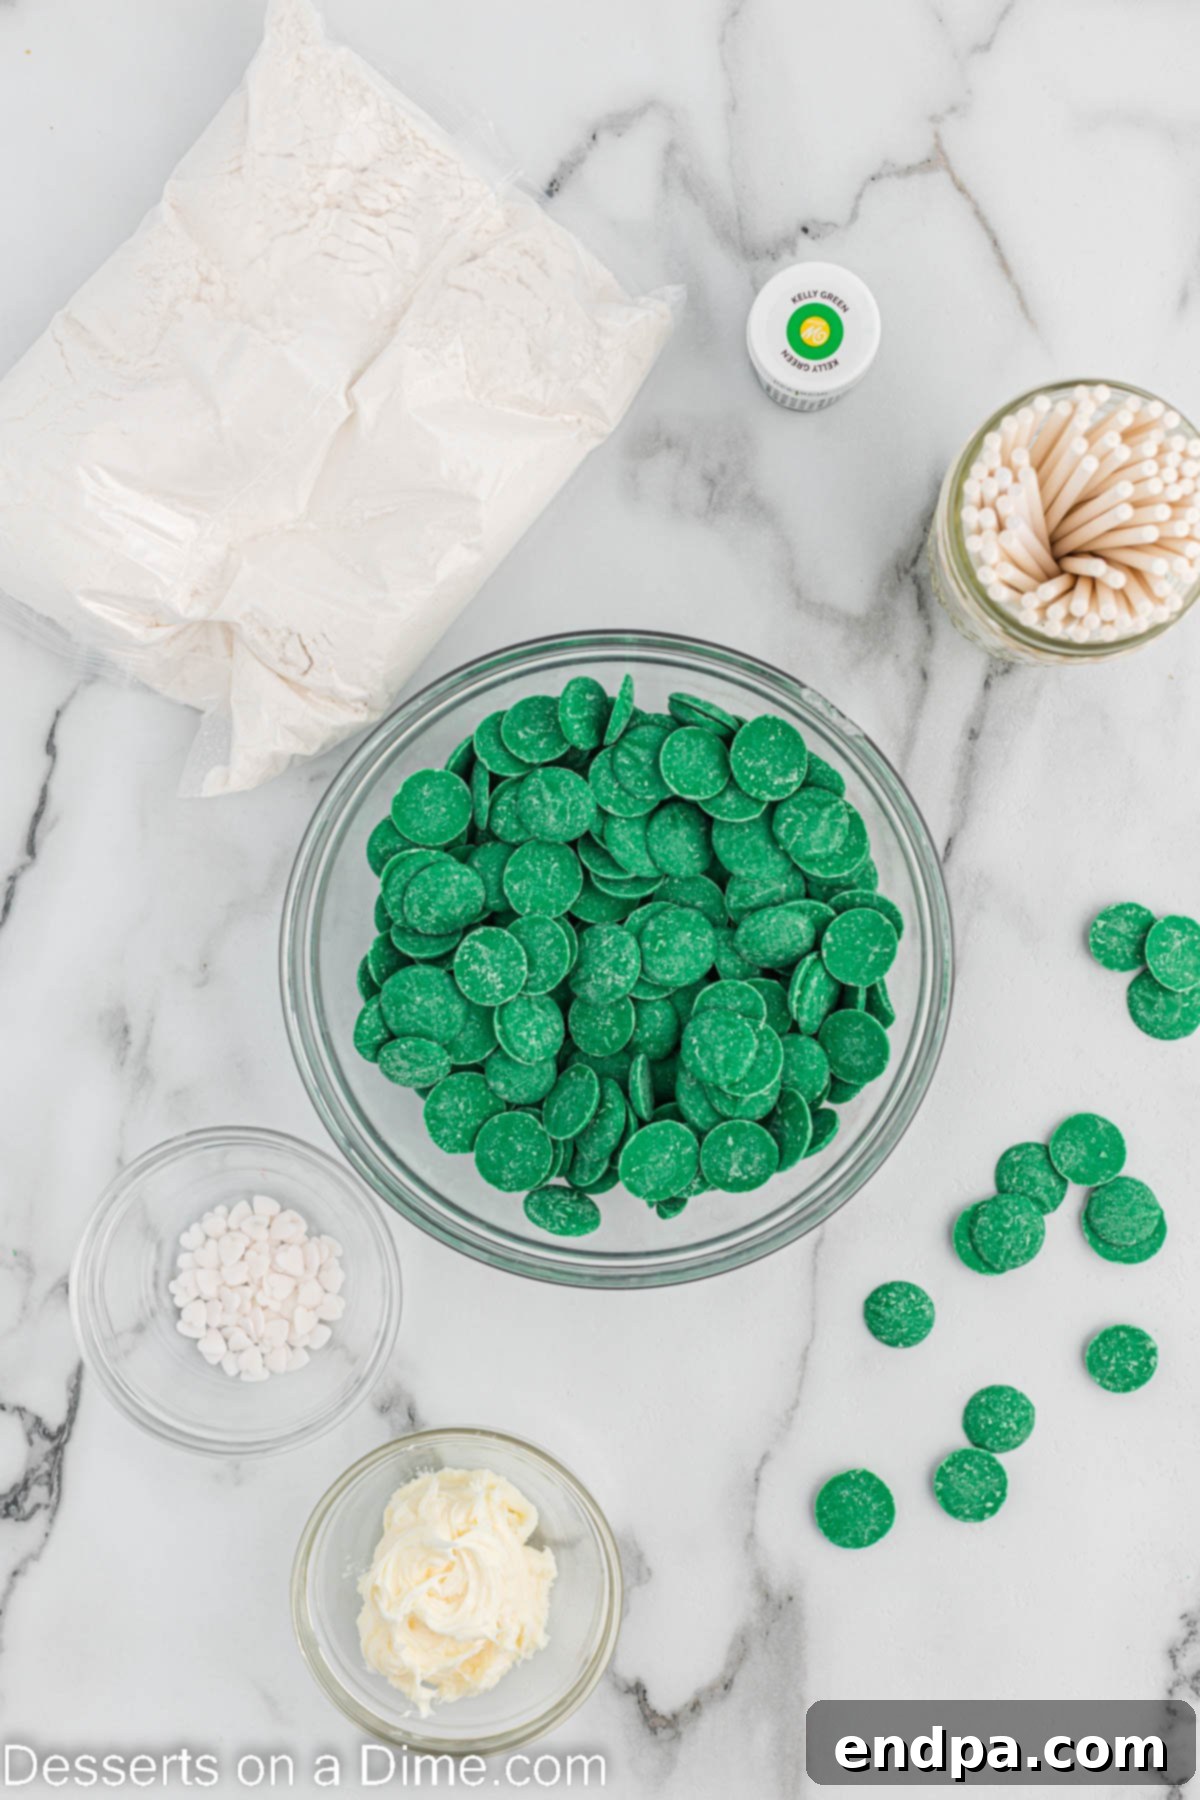
Gathering your ingredients for these festive cake pops is a breeze. Here’s a closer look at what you’ll need:
- Classic Boxed Cake Mix: While you can choose any flavor, a white cake mix is highly recommended. Its light color provides the perfect canvas for achieving that vivid, celebratory green hue with food coloring. Alternatively, a vanilla or yellow cake mix would also work well. Remember to have the additional ingredients listed on your cake mix box (like eggs, oil, and water) ready for preparing the cake batter.
- Green Gel Food Coloring: For the most striking and intense green color without altering the cake’s texture, gel food coloring is superior to liquid drops. It’s highly concentrated, meaning a small amount goes a long way to achieve that bright, St. Patrick’s Day-ready shade.
- Cream Cheese Frosting: This ingredient acts as the binder that holds your crumbled cake together, creating a rich, moist, and delicious cake pop dough. You can opt for the convenience of store-bought cream cheese frosting, or for an extra touch of homemade goodness, prepare our easy Homemade Cream Cheese Frosting Recipe.
- Cake Pop Sticks or Lollipop Sticks: These essential tools allow you to easily dip, decorate, and serve your cake pops. You can typically find them in the baking aisle of your local craft store or supermarket. Ensure they are sturdy enough to support the weight of the cake balls.
- Green Candy Melts: These provide a smooth, shiny, and festive coating for your cake pops. Brands like Wilton’s are a popular choice due to their vibrant colors and ease of melting. They solidify quickly, making the decorating process much faster.
- White Heart Sprinkles: These are crucial for creating the iconic four-leaf clover design that makes these cake pops extra special for St. Patrick’s Day. Their heart shape perfectly mimics the leaves of a clover.
The complete, detailed recipe list with precise measurements can be found at the bottom of this page in the recipe card section.
Creative Variations to Customize Your Cake Pops
One of the best things about cake pops is how incredibly versatile they are! Don’t hesitate to get creative and customize this recipe to suit your taste or enhance the St. Patrick’s Day theme even further. Here are some inspiring variations:
- Change Your Candy Decorations: While white heart sprinkles are perfect for shamrocks, feel free to experiment with other small candy hearts or even tiny green or gold sprinkles to adorn your cake pops. For an extra touch of “luck,” you could even attach a small edible gold coin candy to the side of a few finished pops, symbolizing a leprechaun’s treasure!
- Experiment with Cake Mix Flavors: While white cake mix is ideal for achieving a bright green, don’t limit yourself! A lemon or lime-flavored cake mix could add a zesty twist, naturally complementing the green theme. Chocolate cake pops with green coating would offer a delicious contrast. If you’re feeling ambitious and prefer a homemade touch, you can certainly bake a cake from scratch instead of using a boxed mix. Just ensure the cake is cooled completely and has a fine crumb before mixing with frosting.
- Alternative Melting Chocolate Coatings: If green candy melts aren’t available or you prefer a different flavor, you have options. You can use white chocolate chips or white chocolate melting wafers and tint them green using oil-based food coloring (water-based food coloring can cause chocolate to seize). For a richer flavor, milk chocolate or dark chocolate can also be used, though the green coloring won’t be as vibrant. When working with melting chocolate, remember to thin it slightly with a teaspoon of vegetable oil or coconut oil for a smoother dipping consistency, as pure melted chocolate can be quite thick.
- Flavor Boosters: Add a few drops of mint extract or a hint of almond extract to your cake mix or frosting for an extra layer of flavor that complements the festive theme. Just be mindful not to add too much liquid.
- Different Sprinkles and Toppings: Instead of heart sprinkles, consider green and white nonpareils, edible glitter, or even a drizzle of contrasting white chocolate over the green coating once it’s dry for an elegant touch.
Step-by-Step Guide: How to Make Shamrock Cake Pops
Creating these festive St. Patrick’s Day cake pops is an enjoyable process. Follow these easy steps to bring your delicious shamrock treats to life:
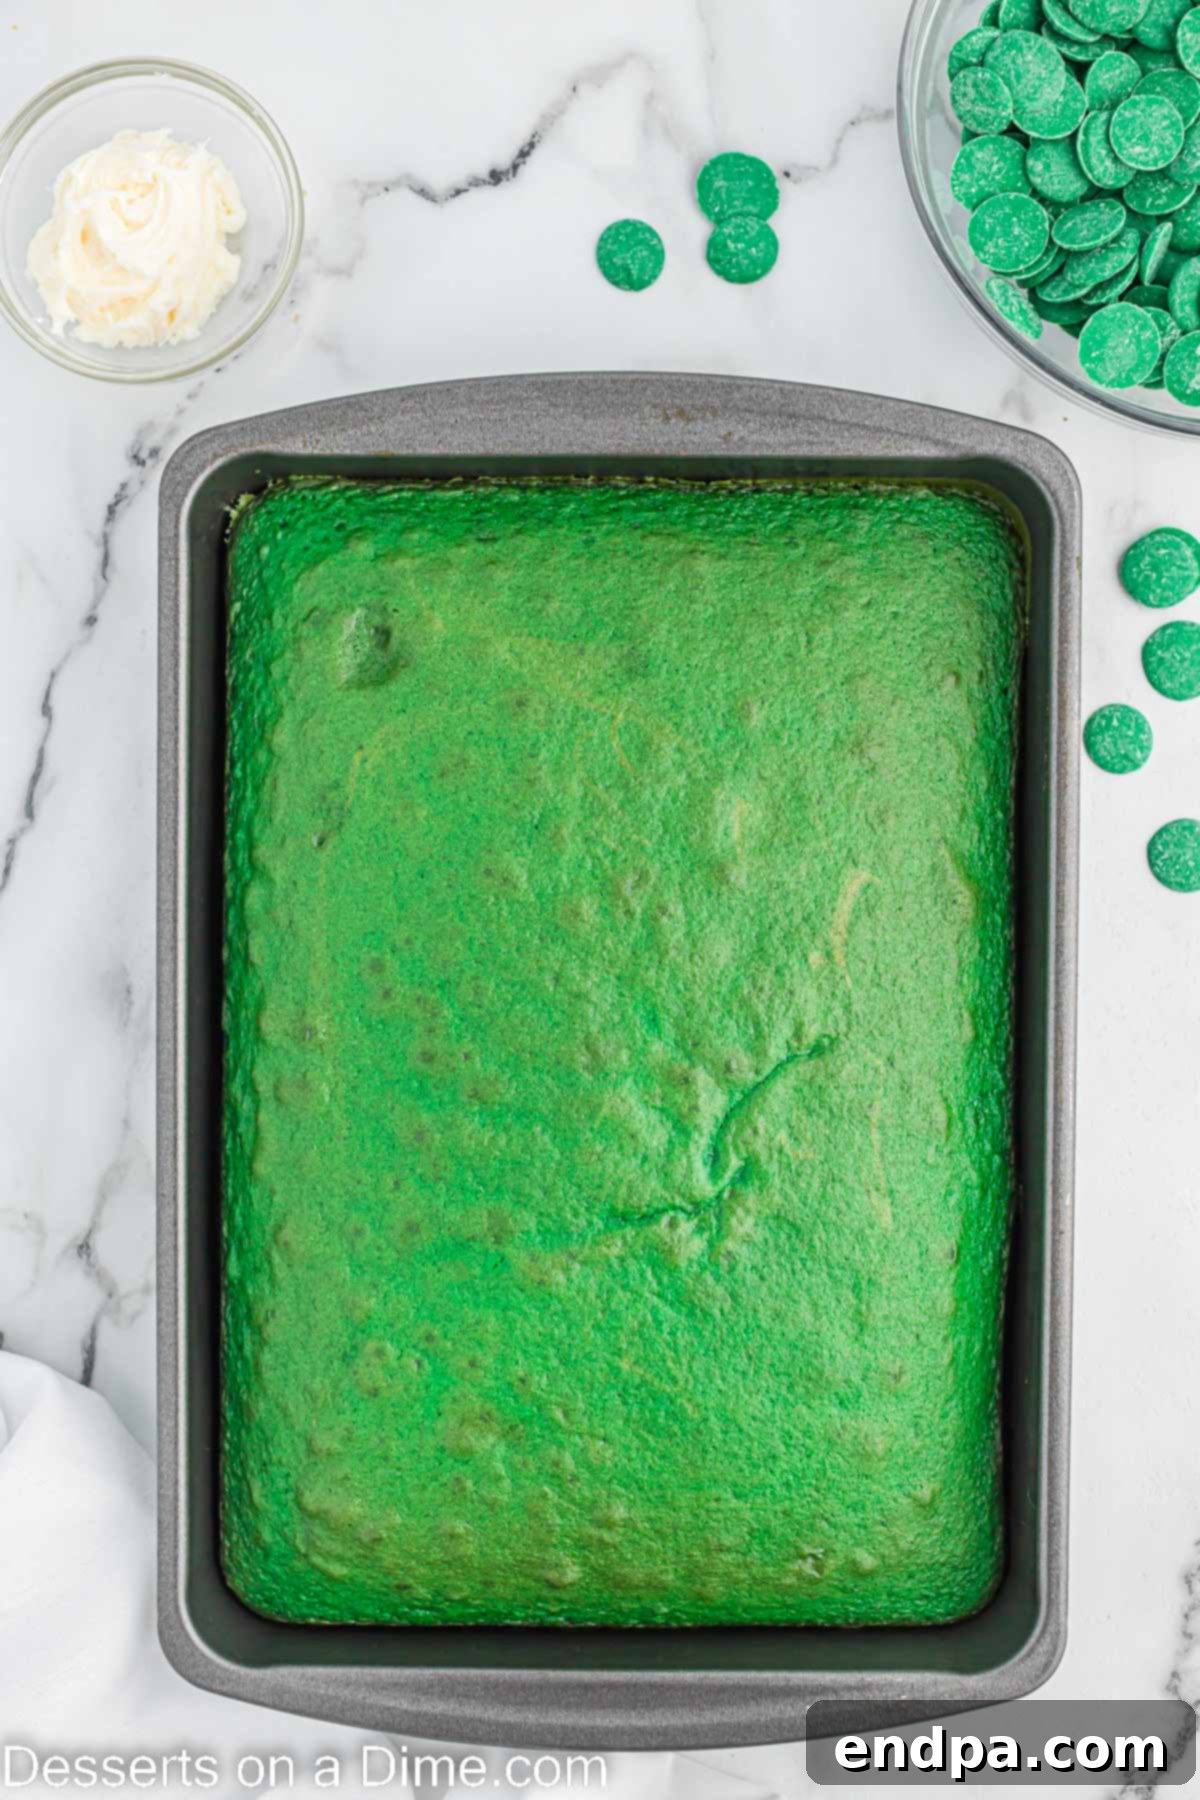
Step 1: Prepare and Crumble the Cake. Begin by preparing your cake batter according to the instructions on your boxed cake mix, typically using a hand mixer. Once the batter is ready, add your green gel food coloring until you achieve a bright, festive green color. Bake the cake in the oven as directed on the box. After baking, allow the cake to cool completely to room temperature. This is crucial for easy handling. Once cool, remove the cake from its pan. Carefully trim and discard any browned outer layers, as these can affect the color and texture of your cake pops. Finally, crumble the remaining green cake into a large mixing bowl until it resembles fine crumbs.
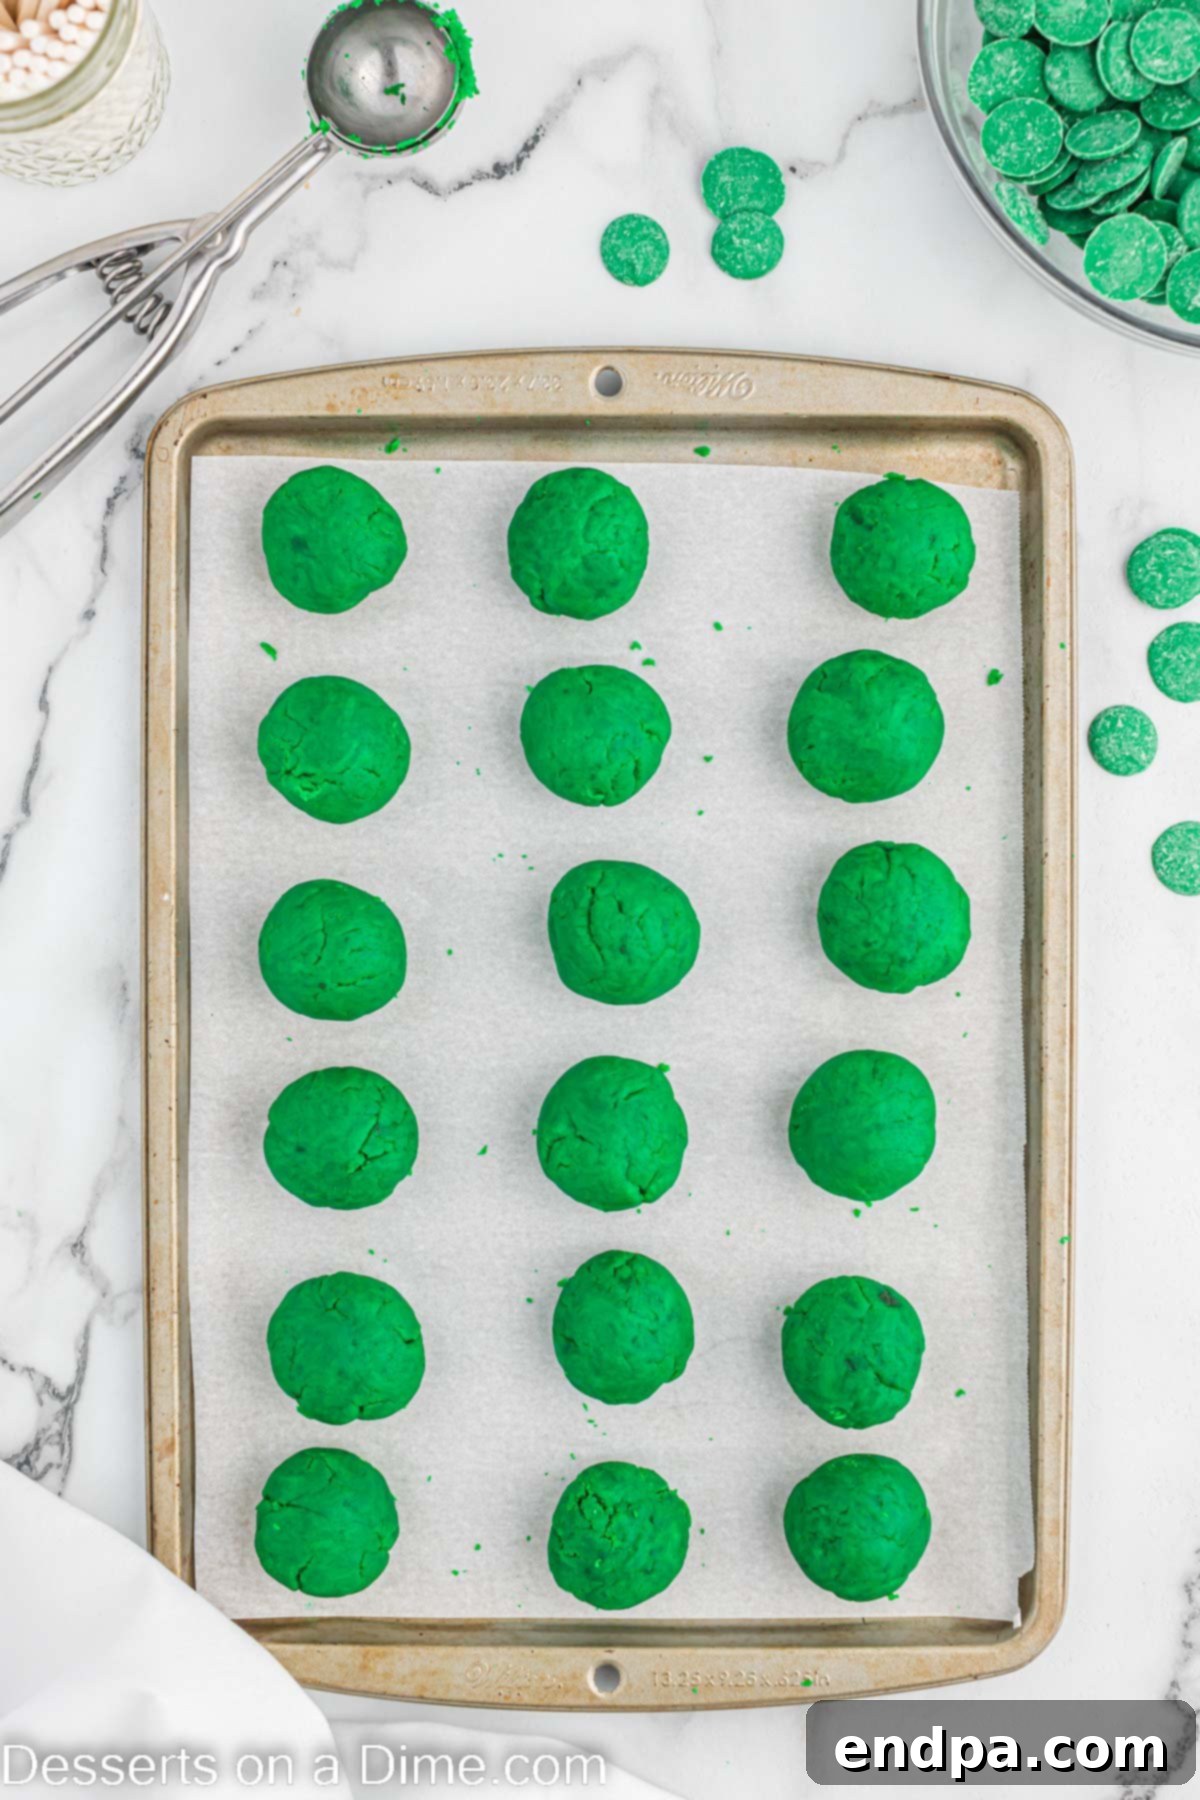
Step 2: Form the Cake Balls. To your bowl of cake crumbs, add the cream cheese frosting. Using a sturdy spoon or clean hands, thoroughly mix the frosting into the cake crumbs until everything is well combined and forms a moist, firm dough. The consistency should be similar to Play-Doh – firm enough to hold its shape without being sticky. Scoop and roll portions of this mixture into uniform cake balls, aiming for about 24-36 balls depending on your desired size. A cookie scoop can help ensure consistent sizing. Place these perfectly round cake balls onto a baking sheet lined with parchment paper or wax paper.
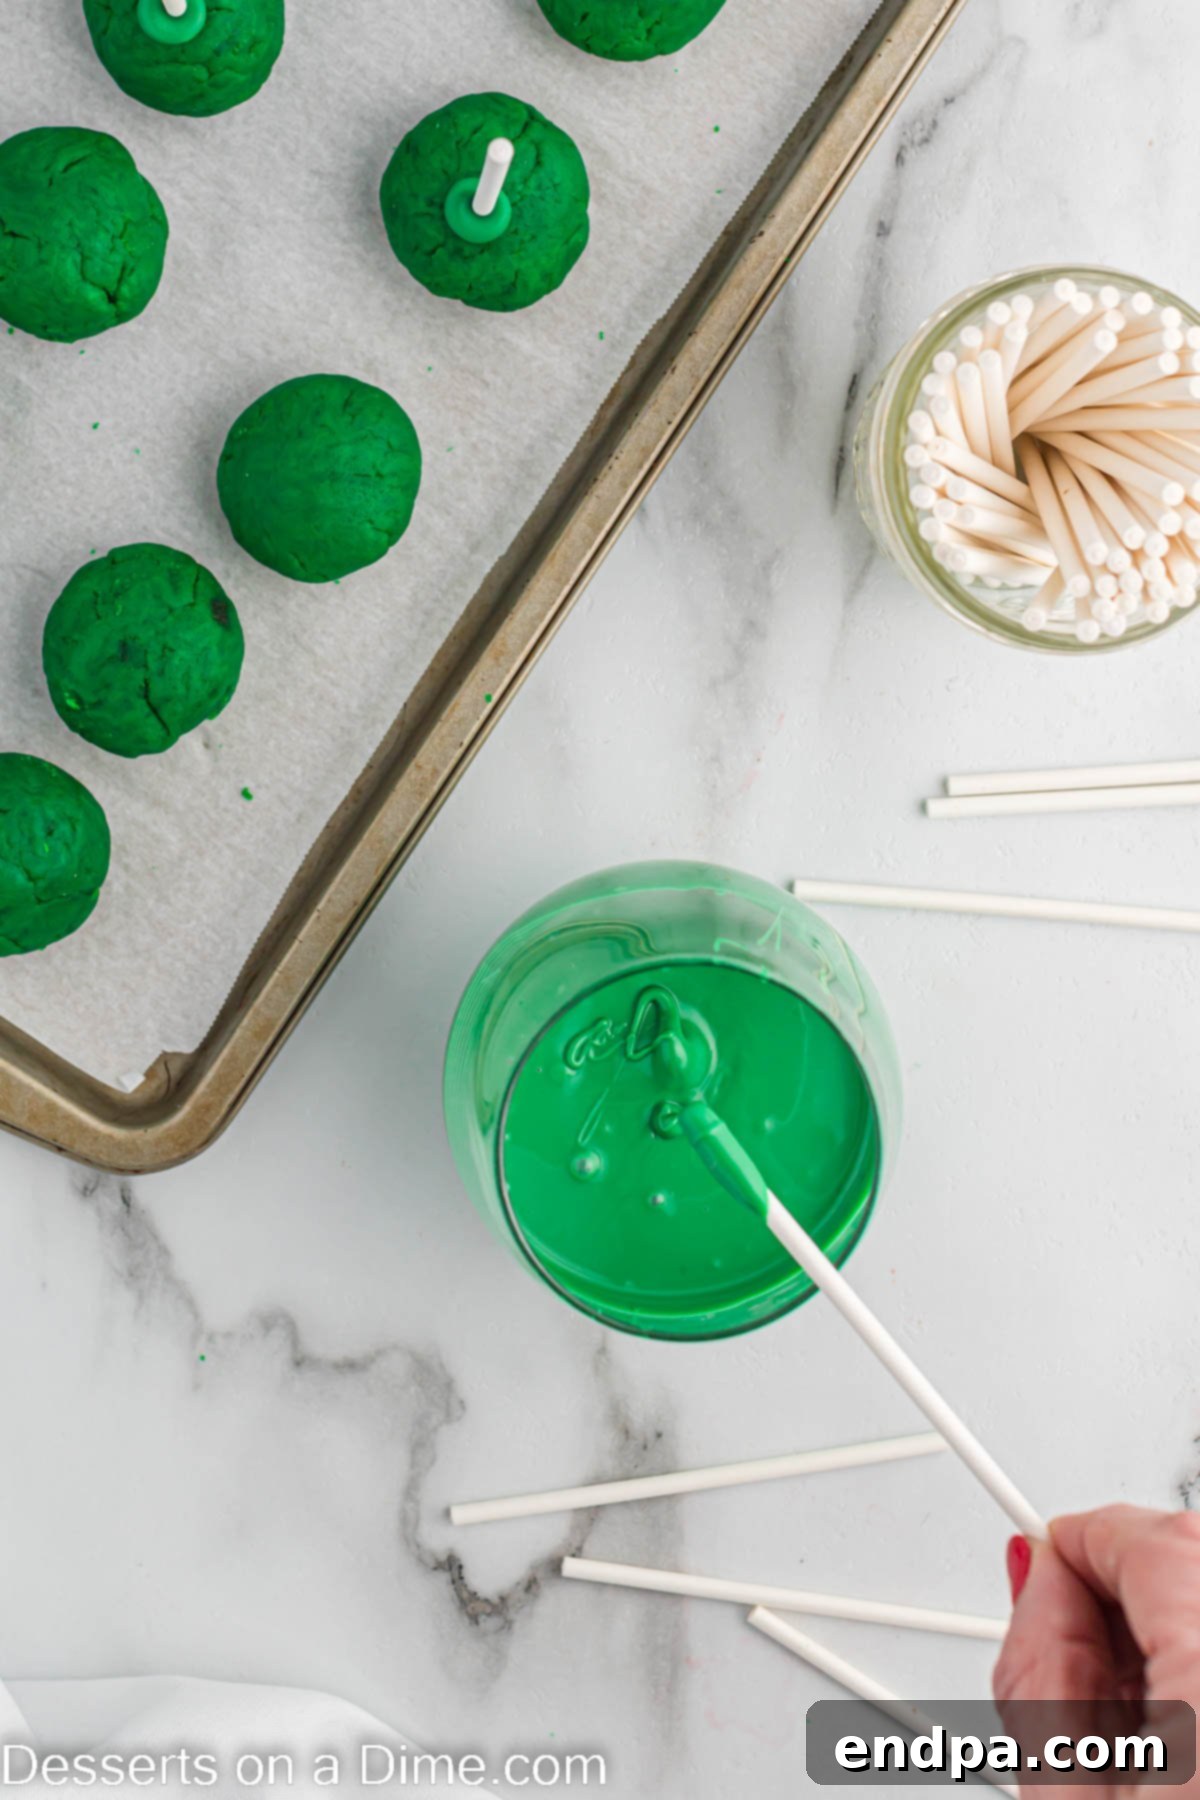
Step 3: Insert Sticks and Chill. Place the green candy melts into a small, microwave-safe bowl. Microwave on high for 30 seconds, then stir. Continue heating in 15-20 second intervals, stirring well after each, until the candy melts are completely smooth and creamy. Next, dip the tip of each cake pop stick into the melted green candy, then insert the stick about halfway into the center of each cake ball. This candy acts as “glue” to secure the stick. Once all sticks are inserted, place the baking sheet with the cake pops into the freezer for 10-15 minutes. This chilling step is essential for firming up the cake balls, making them easier to dip and preventing them from falling apart.
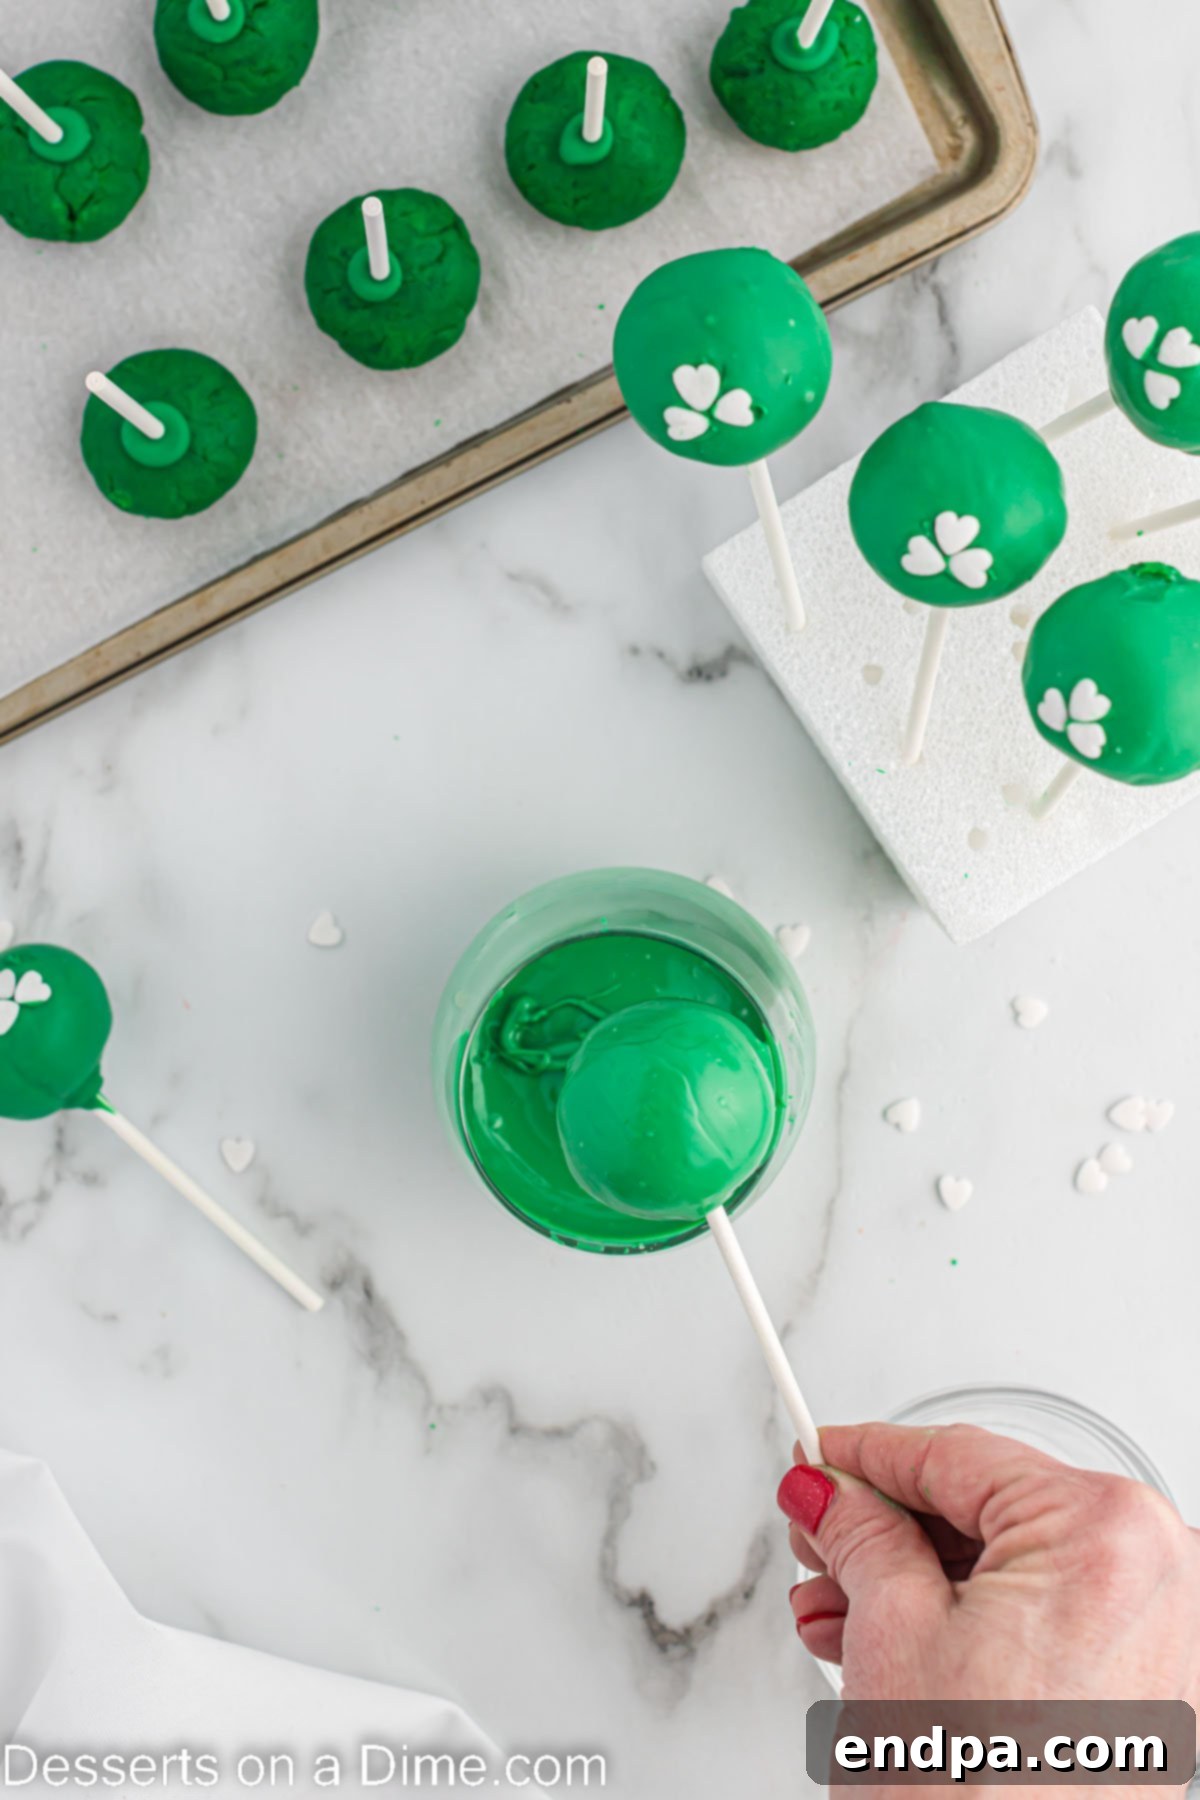
Step 4: Dip and Coat. Remove the chilled cake pops from the freezer. If your candy melts have solidified, re-melt them until smooth again. Dip each cake pop into the melted green candy, ensuring it’s fully coated. Gently tap the stick against the side of the bowl to allow any excess candy coating to drip back off. This helps achieve a smooth, even finish and prevents puddling at the base of the cake pop. Work quickly but carefully to ensure an even coating.
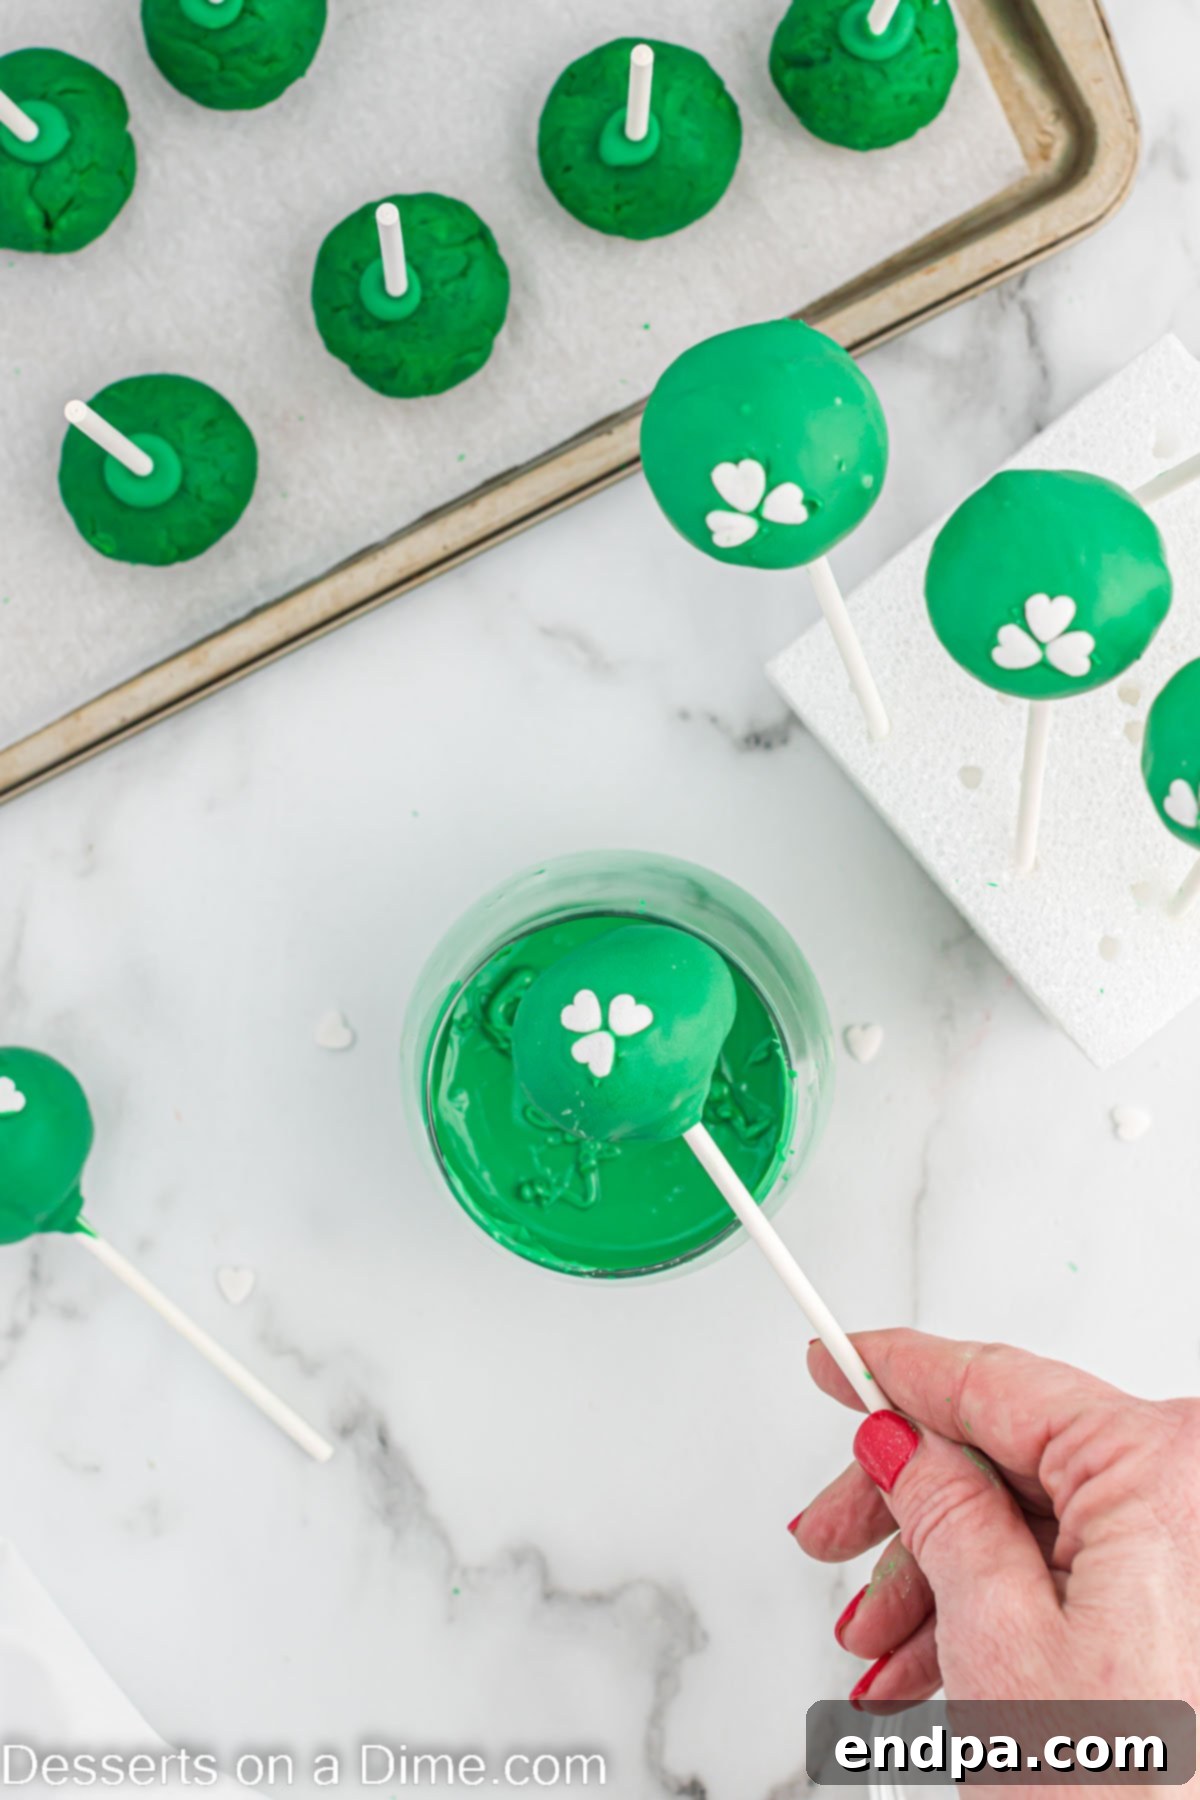
Step 5: Decorate with Clovers. Immediately after dipping each cake pop, and before the candy melts have a chance to dry and harden, gently place three white heart sprinkles onto the front of the cake pop. Arrange them to form the shape of a charming three-leaf clover. This step is time-sensitive, so it’s best to decorate each pop right after dipping. These simple decorations instantly transform your green cake pops into festive shamrocks, making them look incredibly appealing and perfect for the holiday.

Step 6: Dry and Serve. Once decorated, insert the stick of each cake pop into a Styrofoam block or a similar stand. This allows them to dry upright, preventing the coating from getting smudged or flattened. Continue this process until all cake pops are covered and adorned. Allow the candy coating to fully set and dry, which typically takes about 15-20 minutes at room temperature. Once the green coating is completely hard, your beautiful St. Patrick’s Day cake pops are ready to be served and enjoyed! Prepare for them to be a crowd-pleaser!
Expert Tips for Perfect St. Patrick’s Day Cake Pops
Achieving bakery-quality cake pops at home is entirely possible with a few insider tricks. These pro tips will help ensure your St. Patrick’s Day treats are flawless:
- Secure the Cake Pop Stick: Always dip the very end of your cake pop stick into the melted candy coating before inserting it into the cake ball. This melted candy acts like a strong adhesive, ensuring the cake ball stays firmly attached to the stick during the dipping process and while being handled. Without this step, your cake pops might slide off!
- Proper Candy Melting Technique: When melting candy melts, always do so in short intervals (e.g., 30 seconds at a time) in a microwave-safe bowl, stirring thoroughly after each interval. Overheating can cause the candy melts to seize, become clumpy, or lose their smooth consistency. If they appear too thick, you can add a small amount of vegetable oil or coconut oil (about 1/2 teaspoon at a time) to thin them to a workable consistency. A double boiler method can also provide more gentle and even melting.
- Don’t Skip the Freeze Time: After forming your cake balls and inserting the sticks, freezing them for at least 10-15 minutes is crucial. This firms up the cake balls, making them cold and solid. This coldness helps the warm candy coating set quickly and smoothly when dipped, preventing the cake pop from crumbling or falling apart, and creating a crisp, even shell.
- Utilize Parchment Paper: Always line your baking sheets with parchment paper or wax paper when placing the cake balls (before and after freezing) and for any excess drip. This prevents sticking and makes cleanup much easier.
- The Styrofoam Block Method: To ensure your freshly dipped and decorated cake pops dry perfectly without any flat spots or smudges, invest in a Styrofoam block. Simply insert the sticks into the block so the cake pops stand upright as the coating hardens. This is an inexpensive and indispensable tool for any cake pop maker.
- Choosing Your Coating: While candy melts are excellent for their vibrant colors and smooth finish, you can use other types of chocolate. If opting for white chocolate or milk chocolate, remember that pure melted chocolate can be quite thick. To achieve the ideal dipping consistency, stir in a teaspoon or two of a neutral oil like vegetable oil or coconut oil. This will thin the chocolate and give it a beautiful, smooth flow, allowing for an even coating.
- Maintain Temperature: Keep your melted candy coating warm as you work. If it starts to thicken, return it to the microwave for a few seconds or place it over a bowl of warm (not boiling) water to maintain its fluidity.
- Work Smart, Not Hard: Divide your cake pops into smaller batches if necessary. Dip and decorate a few at a time to ensure you can apply sprinkles before the coating sets.
Proper Storage for Fresh and Tasty Cake Pops
To keep your St. Patrick’s Day cake pops as fresh and delicious as possible, proper storage is key. After the candy coating has fully hardened, transfer any leftover cake pops to an airtight container. They should be stored in the refrigerator to maintain their freshness, moisture, and structural integrity. When stored correctly, these delightful treats will stay fresh and enjoyable for up to one week. If you need to stack them, place a layer of parchment paper between each row to prevent them from sticking or smudging. For longer storage, cake pops can also be frozen for up to a month in an airtight container, then thawed in the refrigerator before serving.
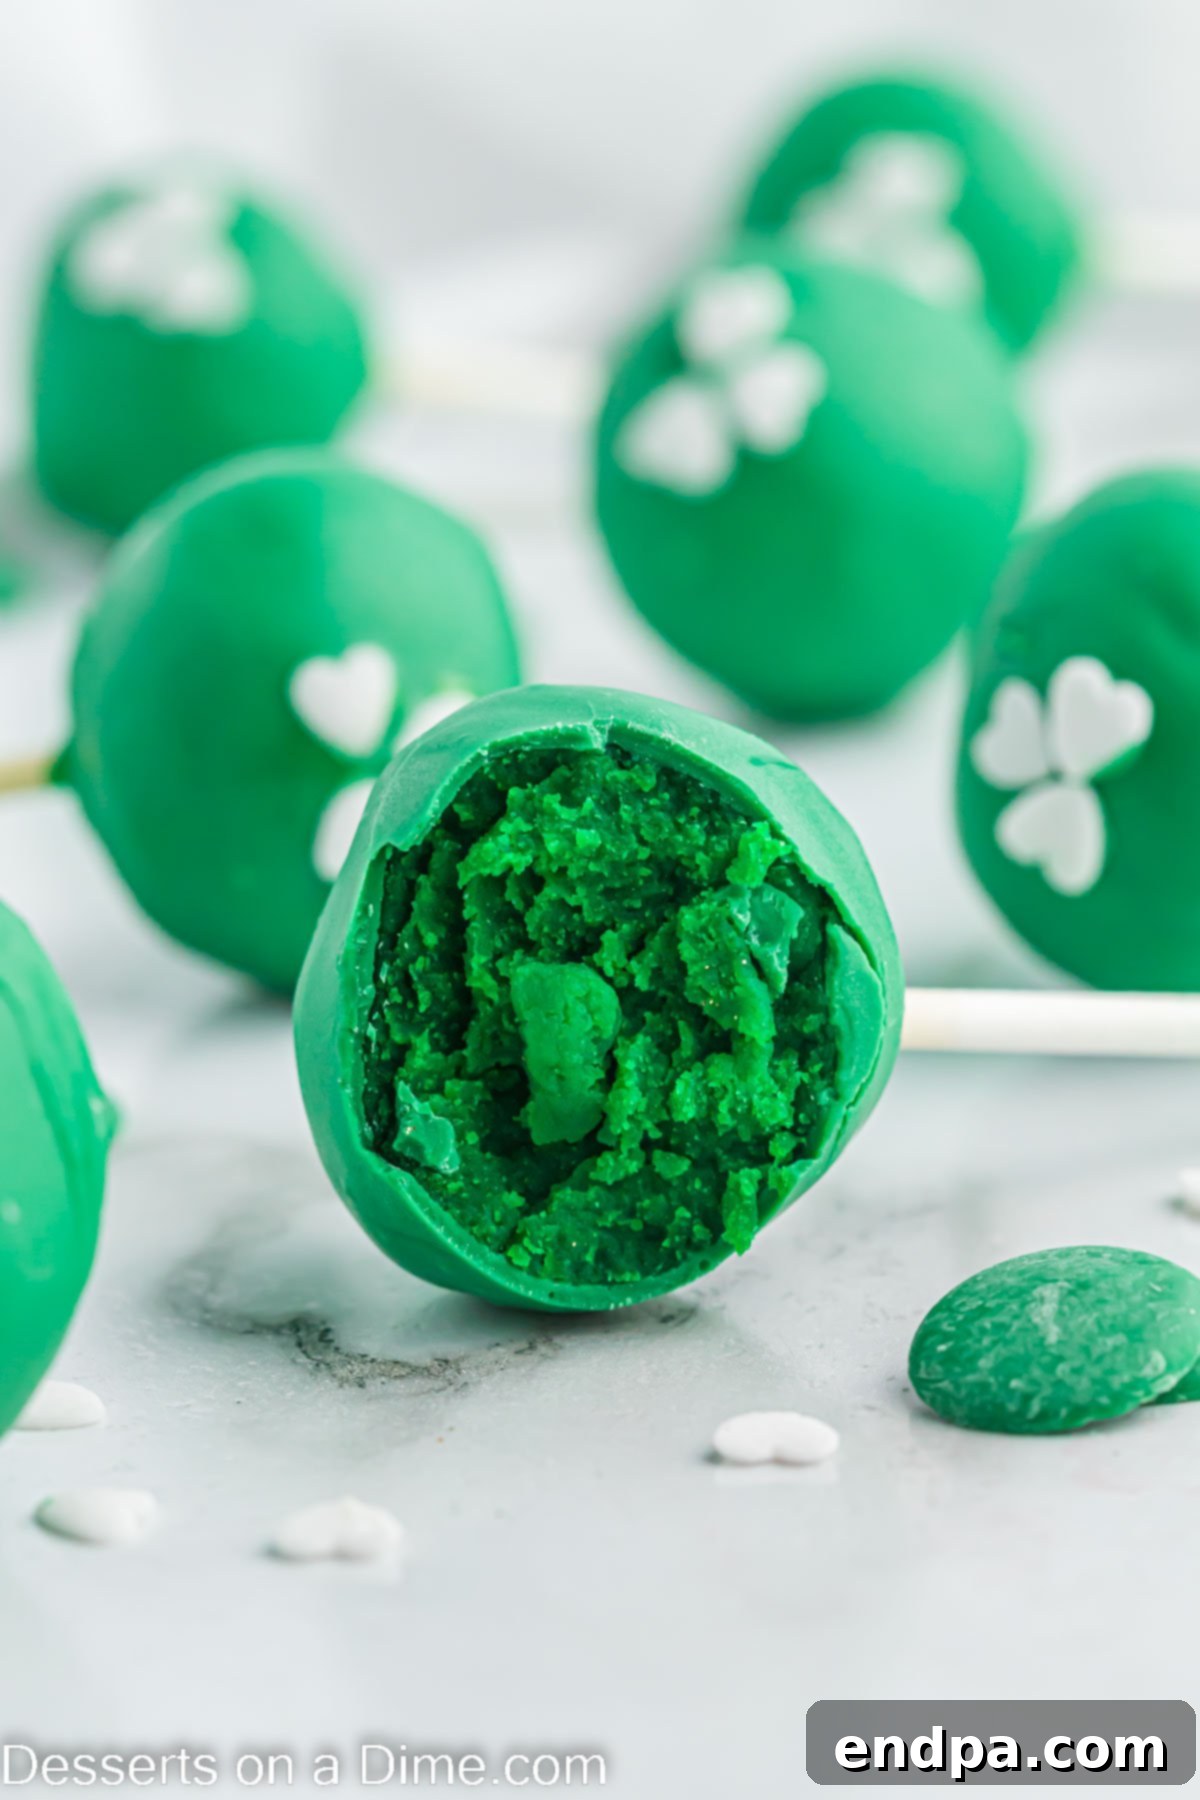
More Enchanting St. Patrick’s Day Desserts
St. Patrick’s Day is the perfect excuse to indulge in an array of green-themed and Irish-inspired treats. If you’re looking to expand your holiday dessert table beyond these delightful cake pops, here are some other fantastic recipes that will bring even more luck to your celebration:
- St Patrick’s Day Puppy Chow Recipe: A fun, easy, and addictive snack mix with a festive green twist.
- St Patrick’s Day Cake Mix Cookies: Simple, soft, and chewy cookies made effortlessly with a boxed cake mix.
- Lime Jell-O Poke Cake Recipe: A refreshing and vibrantly green cake that’s always a crowd-pleaser.
- Shamrock Cookies: Adorable, cut-out cookies shaped and decorated like lucky shamrocks.
- Shamrock Pretzels: Sweet and salty chocolate-covered pretzels, shaped into festive clovers.
- St. Patrick’s Day Cupcakes: Individual serving-sized cakes, perfect for customization with green frosting and sprinkles.
- Leprechaun Bait: A magically delicious and easy snack mix that’s fun for kids and perfect for sharing.
Get ready to impress all the kiddos and guests with these festive St. Patrick’s Day desserts, especially these vibrant cake pops! Don’t forget to come back and leave a star rating and comment to share your experience – we love hearing from you!
Pin
St. Patrick’s Day Cake Pops
Ingredients
- 1 box classic cake mix (and ingredients called for on box to make the cake)
- Green Gel Food Coloring
- 3 Tbsp Cream Cheese Frosting (I used pre-made)
- 24-36 Cake Pop Sticks or Lollipop Sticks
- 12 oz Green Candy Melts
- 36 White Heart Sprinkles
Instructions
- Prepare the cake batter based on the package instructions. Dye the batter a bright green color with the food coloring. Bake according to box instructions. Then let the cake cool completely at room temperature.
- Remove the cake from the pan. Remove the brown outside layer from the cake and discard it. Crumble up the remaining cake into a large bowl until it forms fine crumbs.
- Add the cream cheese frosting to your crumbled cake and stir everything together until well combined, forming a firm, pliable dough.
- Shape the mixture into about 24-36 uniform cake balls (depending on their size) and place them on a baking sheet lined with parchment paper. Using a cookie scoop can help ensure consistent sizing.
- Put the green candy melts in a small microwave-safe bowl and microwave for 30 seconds, then stir. Continue to heat in 30-second intervals, stirring between each one until the candy melts are fully melted and creamy.
- Dip each cake pop stick into the green melted candy (about ¼ inch deep) and then insert the sticks into the center of the cake balls, about halfway through. Then place the baking sheet with the cake pops in the freezer for 10-15 minutes to chill and set.
- After the cake pops have been in the freezer, dip each cake pop into the melted candy melts (you may need to re-melt the candy if it has solidified some). Make sure that the candy covers the cake pop completely. Gently tap the stick on the side of the bowl to allow the excess melted candy to drip back into the bowl for a smooth finish.
- Then place the stick of each cake pop into a block of Styrofoam while the candy dries and solidifies. Before the candy melts dry, quickly add 3 white heart sprinkles to each cake pop to form the shape of a clover on the front of the cake pop. These decorations add such a festive touch.
- Continue until all the cake pops have been covered and decorated. Once all the green cake pops are dry and the coating is set, they are ready to serve and enjoy!
Recipe Notes
You can easily use any small candy hearts or alternative sprinkles if you prefer to create the shamrock design or other festive decorations on the front of the cake pop.
Nutrition Facts
Pin This Now to Remember It Later
Pin Recipe
