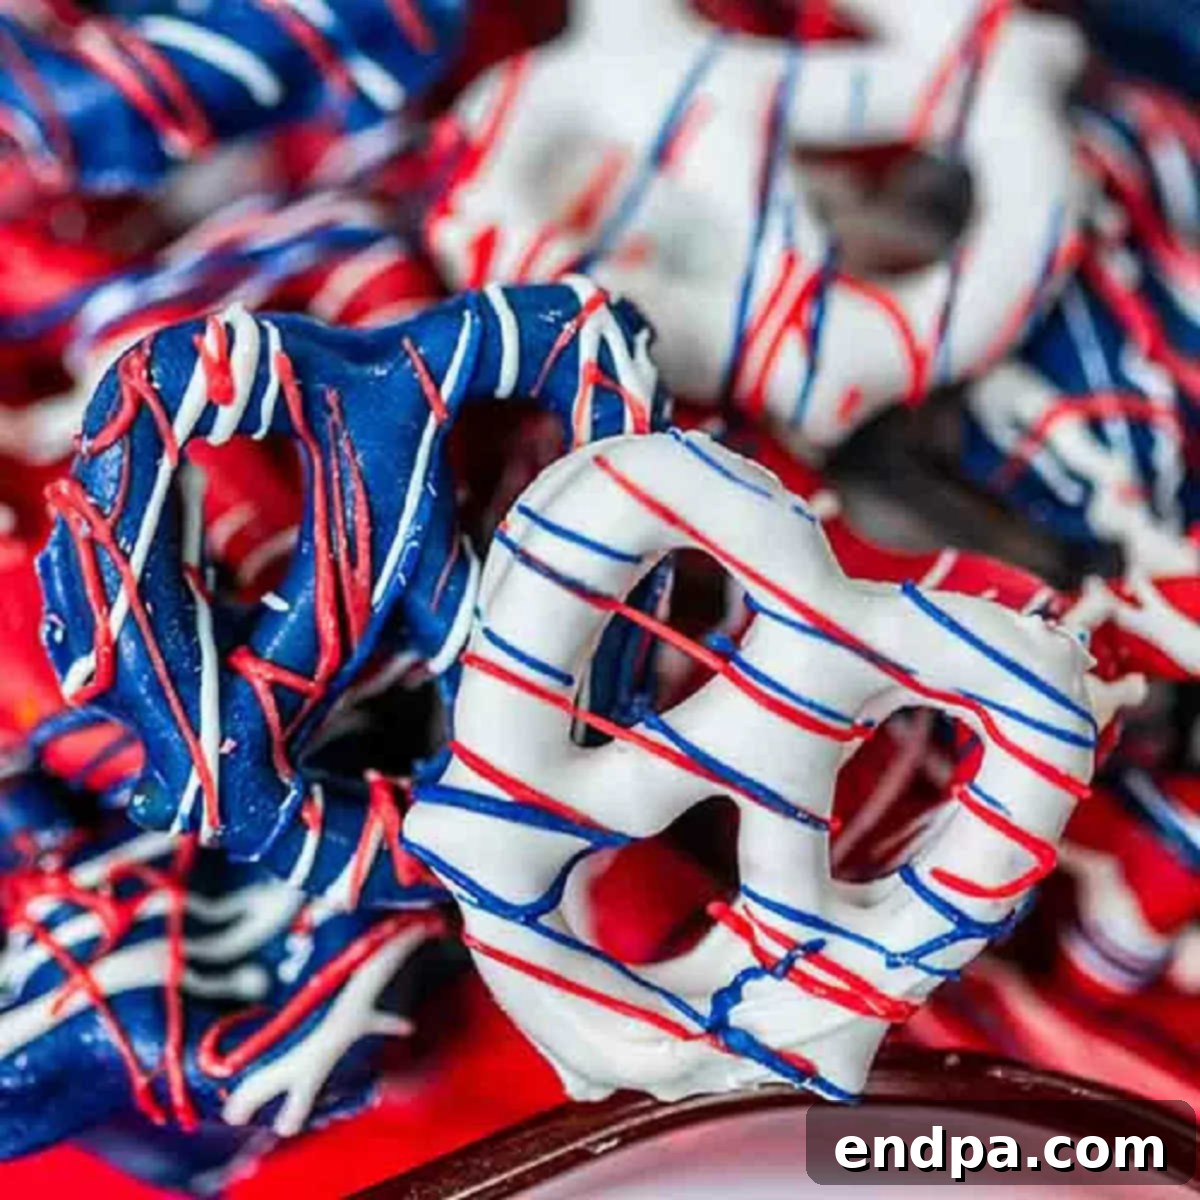
Celebrate the spirit of patriotism with these incredibly easy, vibrant, and utterly delicious Red, White, and Blue Chocolate Covered Pretzels. Perfect for any American holiday, from the joyous Fourth of July to the solemn remembrance of Memorial Day, these festive treats bring a burst of color and a delightful sweet-and-salty crunch to your celebration table. With just a handful of ingredients and a simple, no-bake method, you can create a stunning dessert that looks like it took hours but comes together in minutes. Their eye-catching patriotic hues make them an instant crowd-pleaser, appealing to guests of all ages.
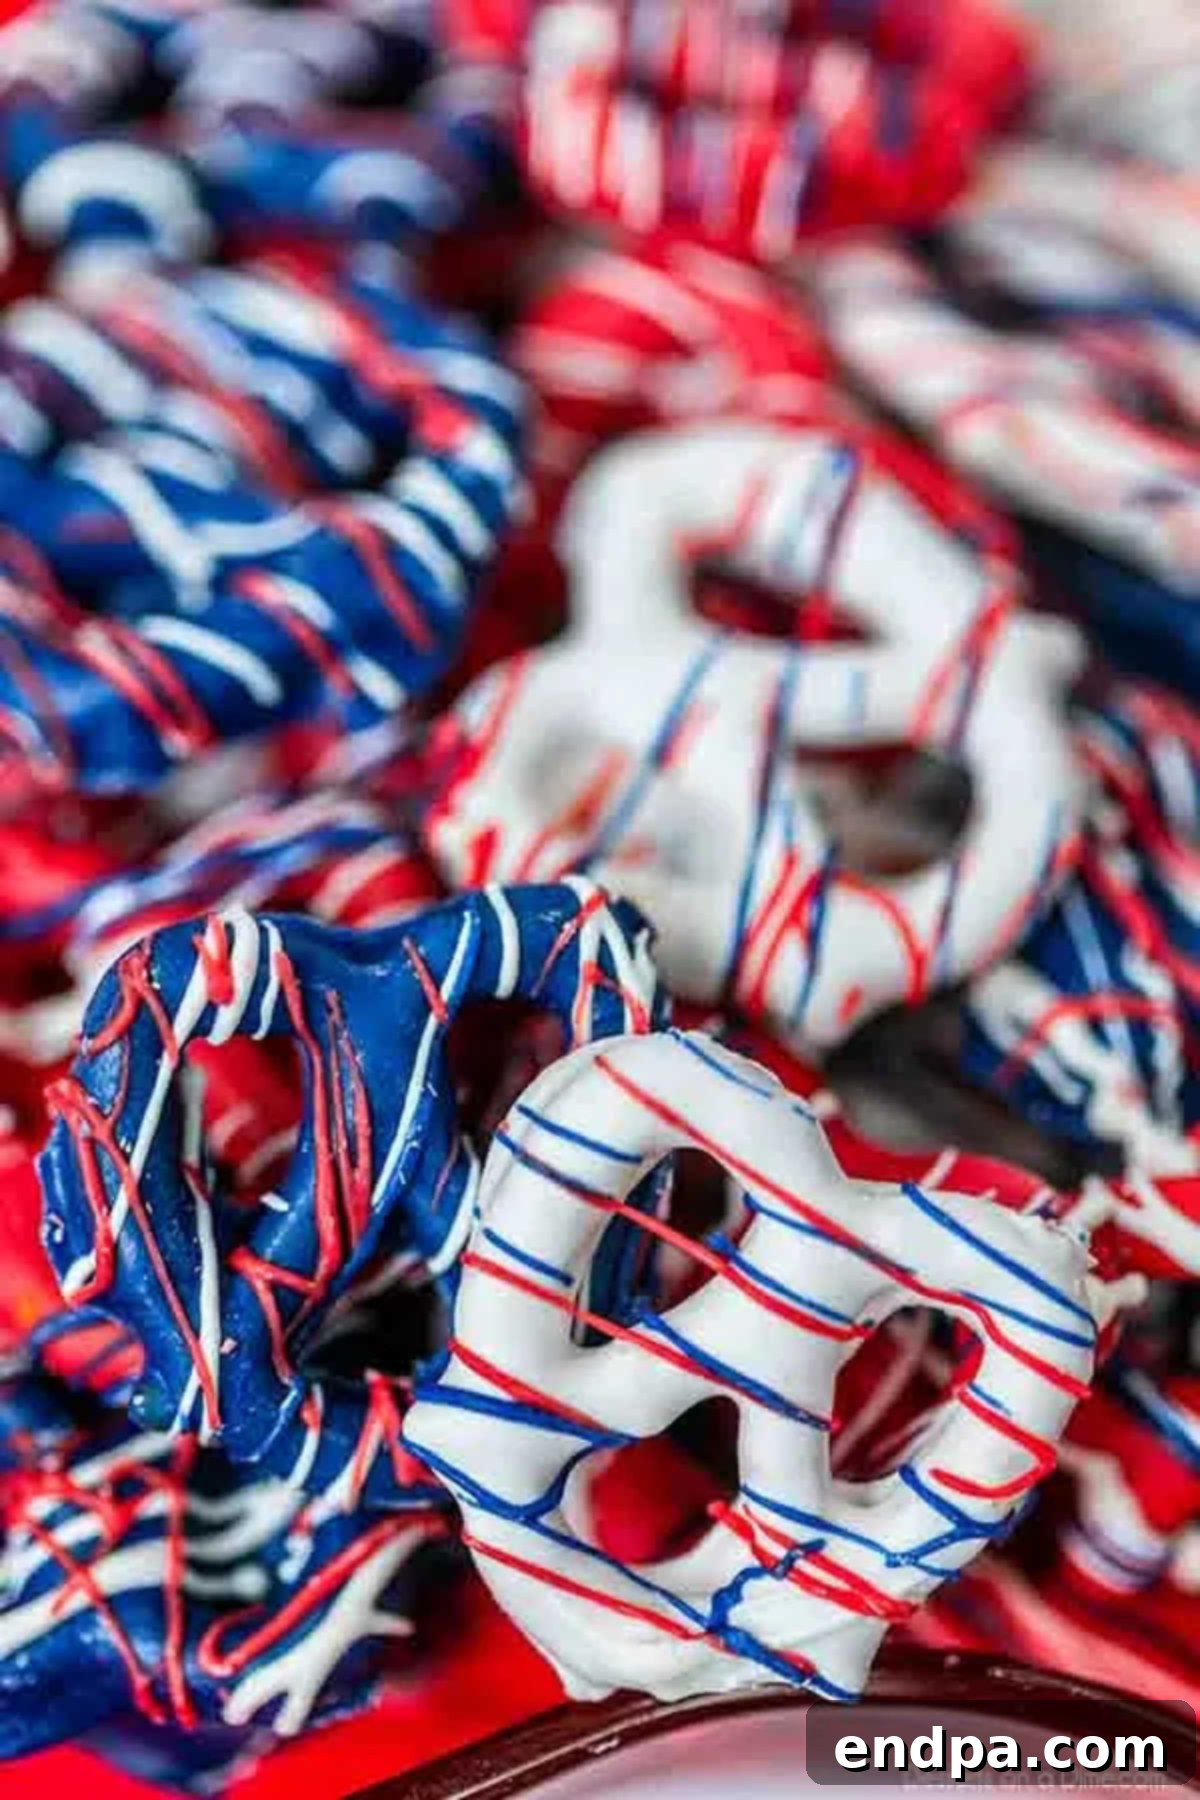
These delightful pretzels are the quintessential no-bake dessert. They require no oven time, minimal effort, and deliver maximum impact. Whether you’re planning a grand backyard barbecue, a casual family gathering, or simply need a fun, engaging activity with the kids, these chocolate-dipped pretzels are an ideal choice. Their versatility extends beyond just snacks; they make fantastic edible gifts, party favors, or a charming addition to any dessert platter. Kids especially love helping with the dipping and decorating, making it a wonderful bonding activity that results in a beautiful, tasty reward. You can even try your hand at 4th of July Chocolate Dipped Pretzel Rods for a different shape and presentation, adding to your collection of Red, White, and Blue Desserts.
Table of Contents
- Why These Patriotic Pretzels Are a Must-Have for Celebrations
- Why We Adore This Simple Recipe
- Essential Ingredients for Your Patriotic Pretzels
- Creative Variations to Customize Your Treats
- Step-by-Step Guide: How to Make Red, White, and Blue Chocolate Covered Pretzels
- Proper Storage for Lasting Freshness
- Expert Tips for Perfect Chocolate Covered Pretzels
- Frequently Asked Questions About Chocolate Covered Pretzels
- More Red, White, and Blue Desserts to Explore
Why These Patriotic Pretzels Are a Must-Have for Celebrations
There’s something uniquely charming about food that doubles as a celebration of national pride. These Red, White, and Blue Chocolate Covered Pretzels are not just a treat for your taste buds; they’re a visual spectacle that instantly sets a festive tone. They embody the vibrant spirit of American holidays, adding a playful yet sophisticated touch to any event. Their delightful crunch paired with smooth chocolate makes them irresistible, ensuring they’re devoured quickly by guests of all ages. From backyard barbecues to school events, these pretzels are versatile enough to fit seamlessly into any patriotic gathering, making them an indispensable addition to your holiday menu.
Why We Adore This Simple Recipe
- Effortlessly Easy & No-Bake: This recipe is a dream come true for busy hosts and novice bakers alike. There’s no need to preheat an oven or worry about complicated baking steps. The entire process involves simple melting, dipping, and decorating, making it accessible for everyone, even young children eager to help in the kitchen. Its no-bake nature also means you won’t heat up your kitchen during warm summer celebrations.
- Minimal Ingredients, Maximum Impact: With just four core ingredients, this recipe proves that you don’t need a lengthy shopping list to create something extraordinary. The simplicity of the ingredients ensures that this treat is budget-friendly and quick to prepare, allowing you to spend less time in the kitchen and more time enjoying the festivities with your loved ones.
- The Irresistible Sweet and Salty Symphony: The magic of these pretzels lies in their perfect balance of flavors. The crispy, savory crunch of the pretzel twist harmoniously contrasts with the smooth, sweet candy coating. This classic sweet-and-salty combination creates an addictive snack that is hard to resist, leaving everyone reaching for just one more. It’s a flavor profile that truly satisfies every craving.
Essential Ingredients for Your Patriotic Pretzels
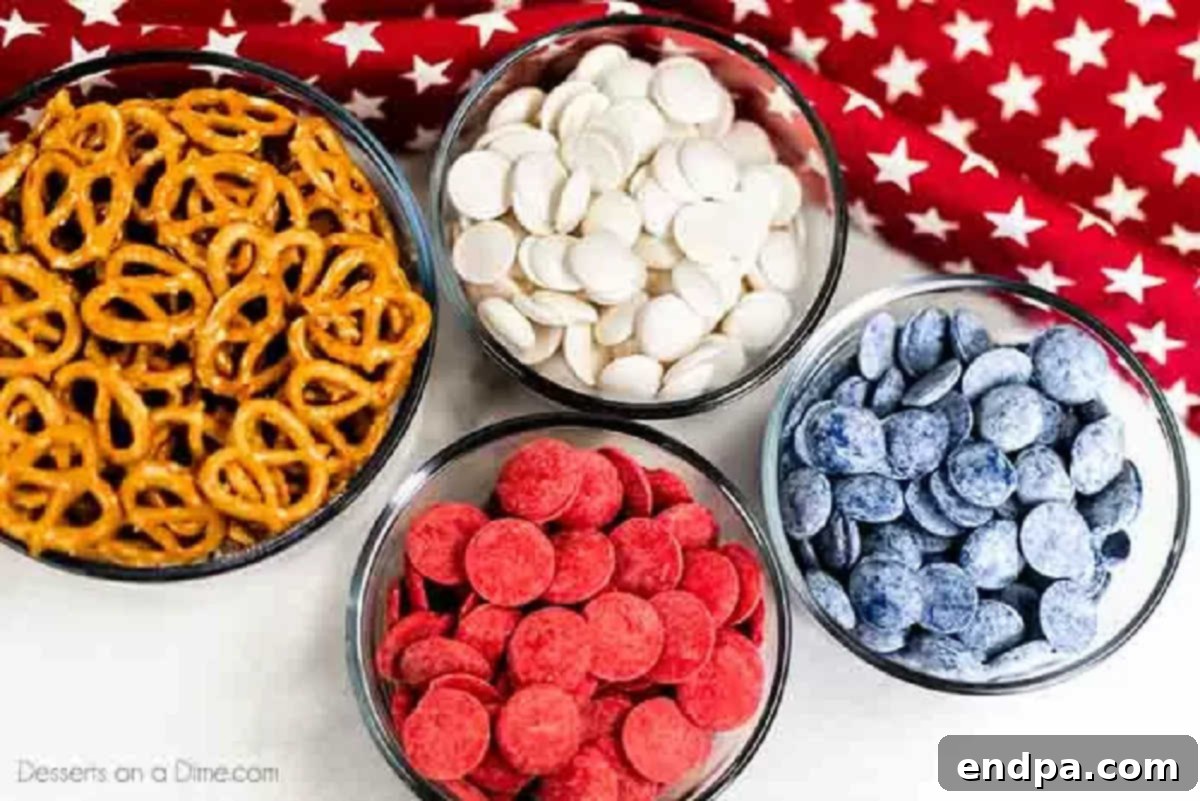
Creating these vibrant treats requires just a few readily available items. The key to their striking appearance and delightful taste lies in selecting the right components:
- Miniature Pretzel Twists: These classic pretzels provide the perfect crunchy base and salty counterpoint to the sweet chocolate. Their small size makes them ideal for bite-sized snacks, and their twisted shape holds the chocolate beautifully. While mini twists are recommended for ease, you can also use pretzel rods for a different presentation, which are equally delicious and visually appealing. Ensure your pretzels are fresh and not stale for the best texture.
- Red Candy Melts: Candy melts are specially designed confectionery coatings that melt smoothly and set quickly, providing a vibrant, consistent color that true chocolate might not easily achieve without special dyes. The red melts will give your pretzels that bold, festive hue essential for patriotic themes. Look for high-quality candy melts for the best results and a smooth finish.
- Royal Blue Candy Melts: Just like the red, royal blue candy melts are crucial for achieving the iconic patriotic color scheme. These melts ensure a deep, rich blue that stands out. They are typically found in the baking aisle of most craft stores, large supermarkets, or online. Their smooth texture when melted makes them a joy to work with.
- White Candy Melts: Completing the triumvirate of patriotic colors, white candy melts provide a crisp, clean contrast. They melt just as easily as their colored counterparts and are essential for creating stripes, drizzles, or a solid white base. Using candy melts rather than white chocolate chips helps prevent seizing and ensures a glossy, professional finish.
The full ingredient list and detailed recipe for these delightful 4th of July pretzels can be found in the comprehensive recipe card below.
Creative Variations to Customize Your Treats
While the classic Red, White, and Blue design is timeless, this recipe offers immense flexibility for customization. Feel free to unleash your creativity and tailor these chocolate-covered pretzels to any occasion or personal preference:
- Sprinkle Fun: Full Coverage or Drizzles: Instead of simply drizzling, try fully coating some pretzels in a single color of candy melt (e.g., white) and then immediately dipping them into festive sprinkles while the coating is still wet. Patriotic-themed sprinkles (stars, stripes, or mixed red/white/blue) are perfect for this, especially when the kids are helping. This adds a delightful textural element and an extra burst of color.
- Pretzel Rods for a Different Look: Swap out the miniature pretzel twists for pretzel rods. These longer pretzels offer a different dipping experience and presentation. You can dip them halfway, or even fully coat them, and they provide a larger canvas for intricate drizzling patterns or extensive sprinkle coverage. They are also easier for little hands to hold and nibble on.
- Seasonal & Themed Colors: This recipe is incredibly adaptable for year-round celebrations. Easily modify the candy melt colors to suit other holidays or party themes. Think orange and black for Halloween, red and green for Christmas, pastels for Easter, or even school colors for graduation parties. The possibilities are endless, making this a go-to recipe for any festive occasion.
- Diverse Chocolate Options: While candy melts offer vibrant colors, don’t hesitate to experiment with different types of chocolate for the base coating. Dip the pretzels in melted white chocolate, milk chocolate, or even dark chocolate for varying flavor profiles. Once dipped, you can still add colorful candy melt drizzles or sprinkles to achieve your desired aesthetic. Just be aware that real chocolate may require tempering for a truly professional, shiny finish and to prevent bloom.
Step-by-Step Guide: How to Make Red, White, and Blue Chocolate Covered Pretzels
Making these patriotic pretzels is a straightforward process that’s enjoyable for cooks of all ages. Follow these simple steps for perfectly coated, festive treats:
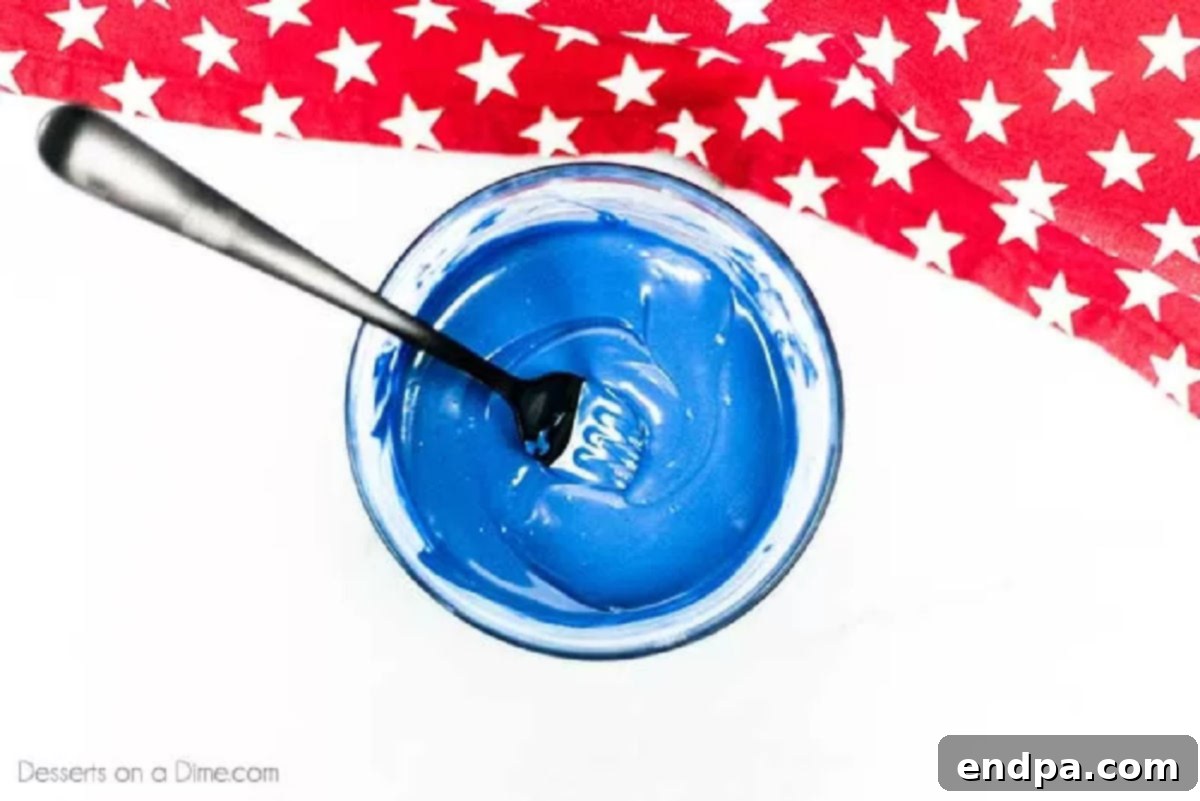
Step 1: Melt the Candy Melts. Begin by placing each color of candy coating melts into separate microwave-safe bowls. Using individual bowls for each color is crucial to prevent them from mixing. Microwave each bowl in 30-second intervals, stirring thoroughly after each interval. Continue this process until the candy melts are fully smooth and melted, with no lumps remaining. Be cautious not to overheat, as this can cause the candy to seize or burn.
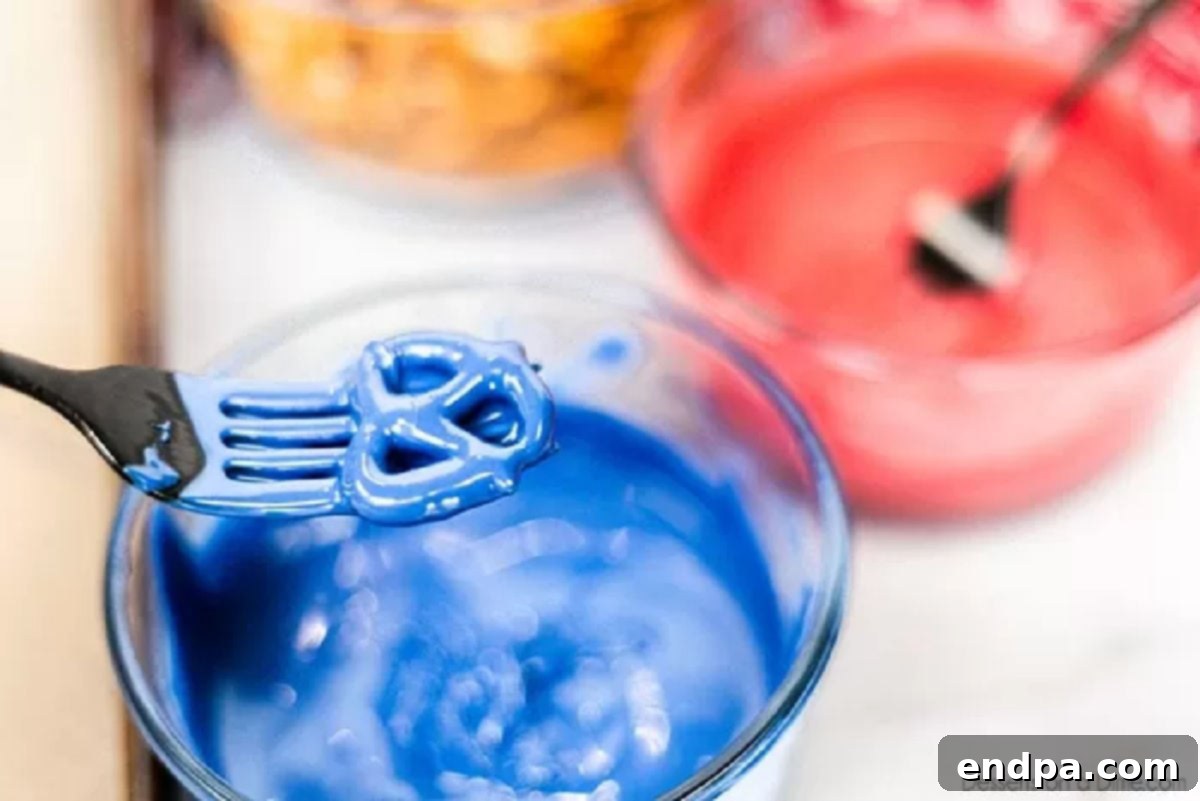
Step 2: Dip the Pretzels. Once your candy melts are perfectly smooth, it’s time to dip! Submerge each miniature pretzel twist into the melted candy, ensuring it’s fully coated. For easier handling and coating, use a fork or a dipping tool. Gently lift the pretzel out of the melted candy, allowing excess to drip off. This step is key to achieving an even coating without too much build-up.
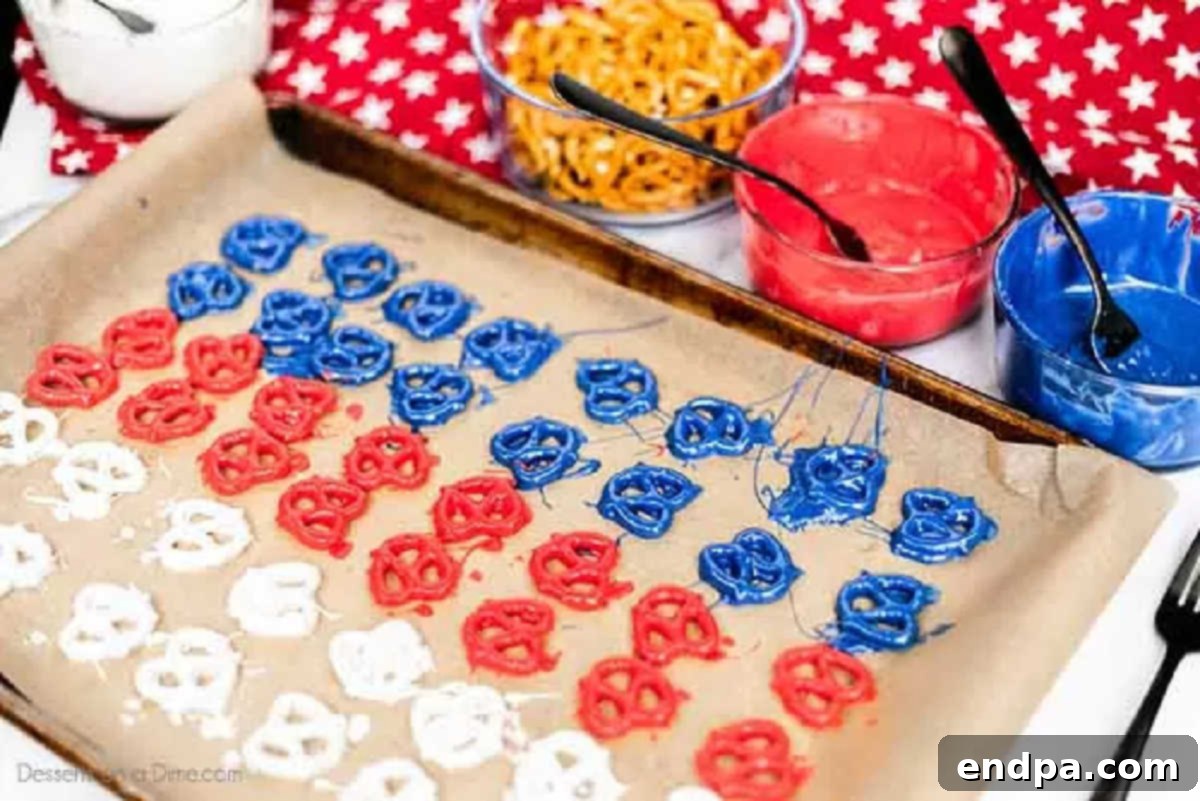
Step 3: Remove Excess and Arrange. After dipping, carefully tap the fork holding the pretzel against the side of the bowl. This action helps to remove any excess candy coating, resulting in a cleaner, more professional finish and faster drying time. Once the excess is removed, gently place each coated pretzel onto a baking sheet that has been lined with parchment paper or wax paper. This prevents sticking and makes cleanup a breeze.
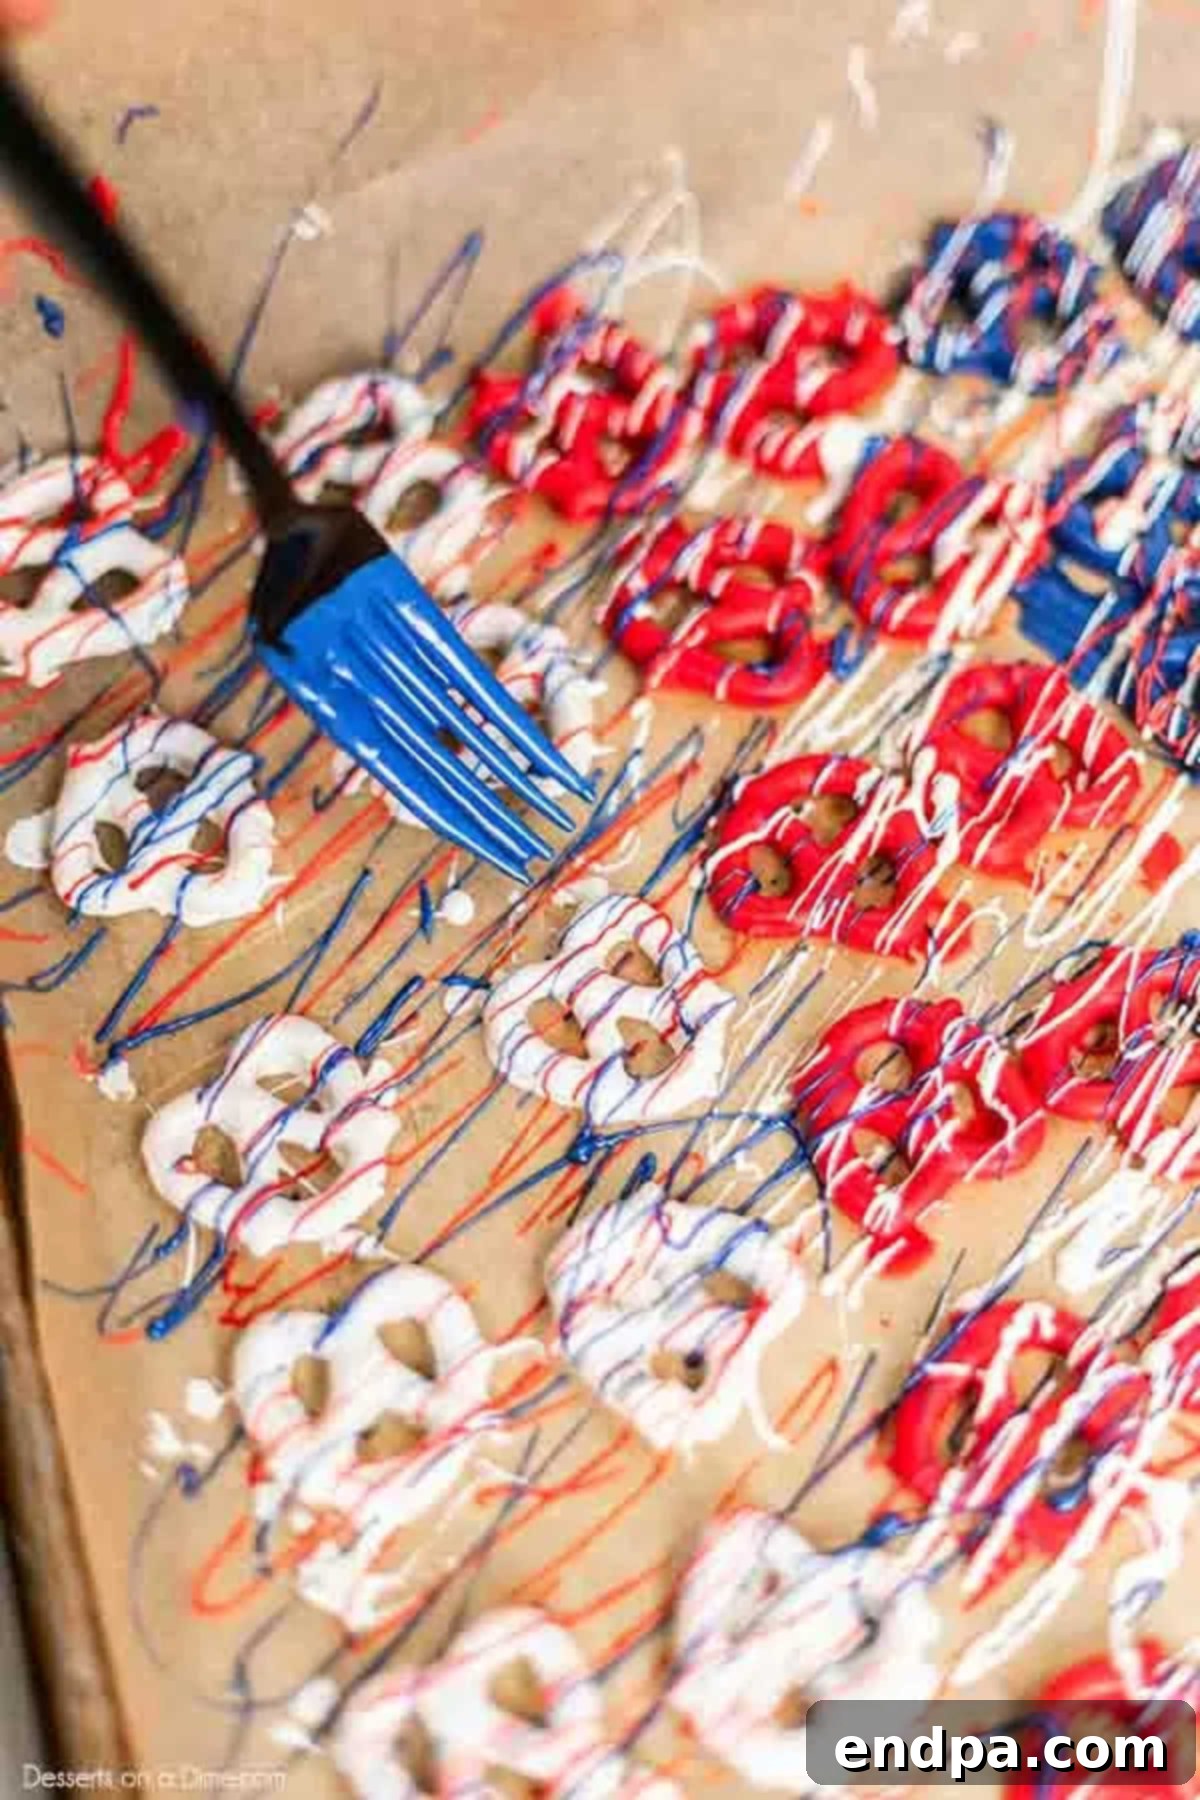
Step 4: Drizzle and Dry. Using a clean fork (or a pastry bag with a very small snip in the corner), drizzle the other colors of melted candy over the pretzels. You can create artistic stripes, zigzags, or random patterns. For an extra festive touch, add red, white, and blue sprinkles immediately while the drizzled candy is still wet, ensuring they adhere. Once decorated, allow the pretzels to sit undisturbed until the candy coating is completely dry and set. This will typically take about 1 hour at room temperature, or you can speed up the process by placing the baking sheet in the refrigerator for approximately 30 minutes.
Proper Storage for Lasting Freshness
To ensure your beautiful Red, White, and Blue Chocolate Covered Pretzels remain fresh and delicious for as long as possible, proper storage is key. Once the candy coating has fully hardened, transfer the pretzels to an airtight container. Layer them carefully, with parchment paper or wax paper between layers to prevent them from sticking together or damaging the decorative drizzles. Store the container at room temperature in a cool, dry place away from direct sunlight and heat. Stored this way, your festive pretzels will maintain their crispness and flavor for up to 2 weeks, making them a fantastic make-ahead treat for any celebration. Avoid storing them in humid conditions, which can make the pretzels soft and the chocolate sticky.
Expert Tips for Perfect Chocolate Covered Pretzels
Achieving bakery-worthy chocolate-covered pretzels is easier than you think, especially with these insider tips:
- Keep Colors Separate: Always use separate bowls for each color of candy melt. This prevents cross-contamination and ensures that your red, white, and blue colors remain distinct and vibrant, creating that stunning patriotic effect. Mixing colors can lead to muddy hues and compromise the visual appeal of your treats.
- Avoid Overheating Candy Melts: Candy melts can be delicate. It is crucial to melt them in short, 30-second intervals in the microwave, stirring diligently between each. Overheating can cause the candy to seize, becoming thick and crumbly, or even burn, rendering it unusable. A smooth, fluid consistency is essential for easy dipping.
- Efficient Excess Removal: Don’t skip the step of tapping off excess chocolate. Not only does this create a neater, more professional-looking pretzel by preventing thick pools of chocolate, but it also helps the pretzels dry faster. Less excess means less waste and a more enjoyable eating experience.
- Line Your Baking Sheet: Always line your baking sheet with parchment paper or wax paper. This simple step is a game-changer for cleanup, as it prevents the coated pretzels from sticking to the sheet. Once dry, they will lift off effortlessly, preserving their perfect shape and decorations.
- Time Your Sprinkles Perfectly: If you plan to add sprinkles, do so immediately after drizzling the additional candy colors, while the drizzled coating is still wet. The wet candy acts as an adhesive, ensuring the sprinkles firmly attach and don’t fall off once the pretzels are dry.
Frequently Asked Questions About Chocolate Covered Pretzels
Can I use regular chocolate chips instead of candy melts?
While you technically can use regular chocolate chips, candy melts are highly recommended for this recipe. Candy melts are designed to melt smoothly, offer vibrant colors without additional dyes, and set with a firm, glossy finish. Regular chocolate chips can be more prone to seizing, may require tempering for a smooth coating, and often don’t achieve the same bright, consistent color.
How long do chocolate covered pretzels stay fresh?
When stored correctly in an airtight container at room temperature, your chocolate covered pretzels will remain fresh and delicious for up to two weeks. Ensure they are fully set before storing and consider placing parchment paper between layers to prevent sticking.
Can I make these pretzels ahead of time for a party?
Absolutely! These patriotic pretzels are an excellent make-ahead dessert. Since they keep well for up to two weeks, you can prepare them several days or even a week in advance of your event, saving you precious time on the day of your celebration.
What should I do if my candy melts seize or become too thick?
If your candy melts seize (become thick and clumpy), it’s usually due to overheating or exposure to a tiny amount of water. You can sometimes salvage seized melts by stirring in a small amount of vegetable oil or shortening (about half a teaspoon per cup of melts) until smooth. For thick melts, adding a small amount of paramount crystals or shortening can thin them out to a dippable consistency.
Are these pretzels suitable for gifting?
Yes, these chocolate covered pretzels make wonderful homemade gifts! Once completely set, arrange them in clear cellophane bags tied with festive ribbons, or layer them in decorative tins. They’re perfect for host gifts, party favors, or a thoughtful treat for friends and family.
More Red, White, and Blue Desserts to Explore
If you loved these festive pretzels, you’ll surely enjoy these other patriotic treats that are perfect for any American holiday:
- The Best Red, White, and Blue Cake to Impress!
- Red, White, and Blue Strawberries
- How to Make Red, White, and Blue Jello
- Red, White, and Blue Popsicles
- 4th of July Rice Krispie Treats
- No-Bake 4th of July Desserts
Whip up this easy and delightful recipe for Labor Day, Independence Day, Memorial Day, Veterans Day, or even Flag Day! Once you’ve created your batch of patriotic pretzels, come back and share your experience by leaving a comment and a star rating. We love hearing from you!
Pin Recipe
Print Recipe
Red, White, and Blue Chocolate Covered Pretzels
30 mins
1 hr
1 hr 30 mins
24
American
Dessert
76
Carrie Barnard
Ingredients
- 50 miniature pretzel twists
- 4 ounces red candy melts
- 4 ounces royal blue candy melts
- 4 ounces white candy melts
Instructions
- Place the candy melts in separate microwave-safe bowls for each color to prevent mixing.
- Microwave each bowl in 30-second increments, stirring well after each interval until the candy is fully melted and smooth. Be careful not to overcook.
- Dip the pretzels into the melted candy melts. Use a fork to coat each pretzel completely. Tap the fork gently against the side of the bowl to remove any excess candy coating from the pretzel.
- Place the dipped pretzels on a cookie sheet lined with parchment paper or wax paper.
- Using a clean fork, drizzle the other colors of melted candy over the coated pretzels for decoration. If adding sprinkles, do so immediately while the candy is still wet.
- Let the pretzels sit until completely dry and set. This will take approximately 1 hour at room temperature or about 30 minutes if placed in a refrigerator.
- Serve your festive pretzels, or store them in an airtight container for up to 2 weeks.
Nutrition Facts
Calories 76kcal,
Carbohydrates 13g,
Protein 1g,
Fat 2g,
Saturated Fat 2g,
Sodium 156mg,
Potassium 16mg,
Fiber 1g,
Sugar 4g,
Calcium 2mg,
Iron 1mg
Pin This Now to Remember It Later
Pin Recipe
