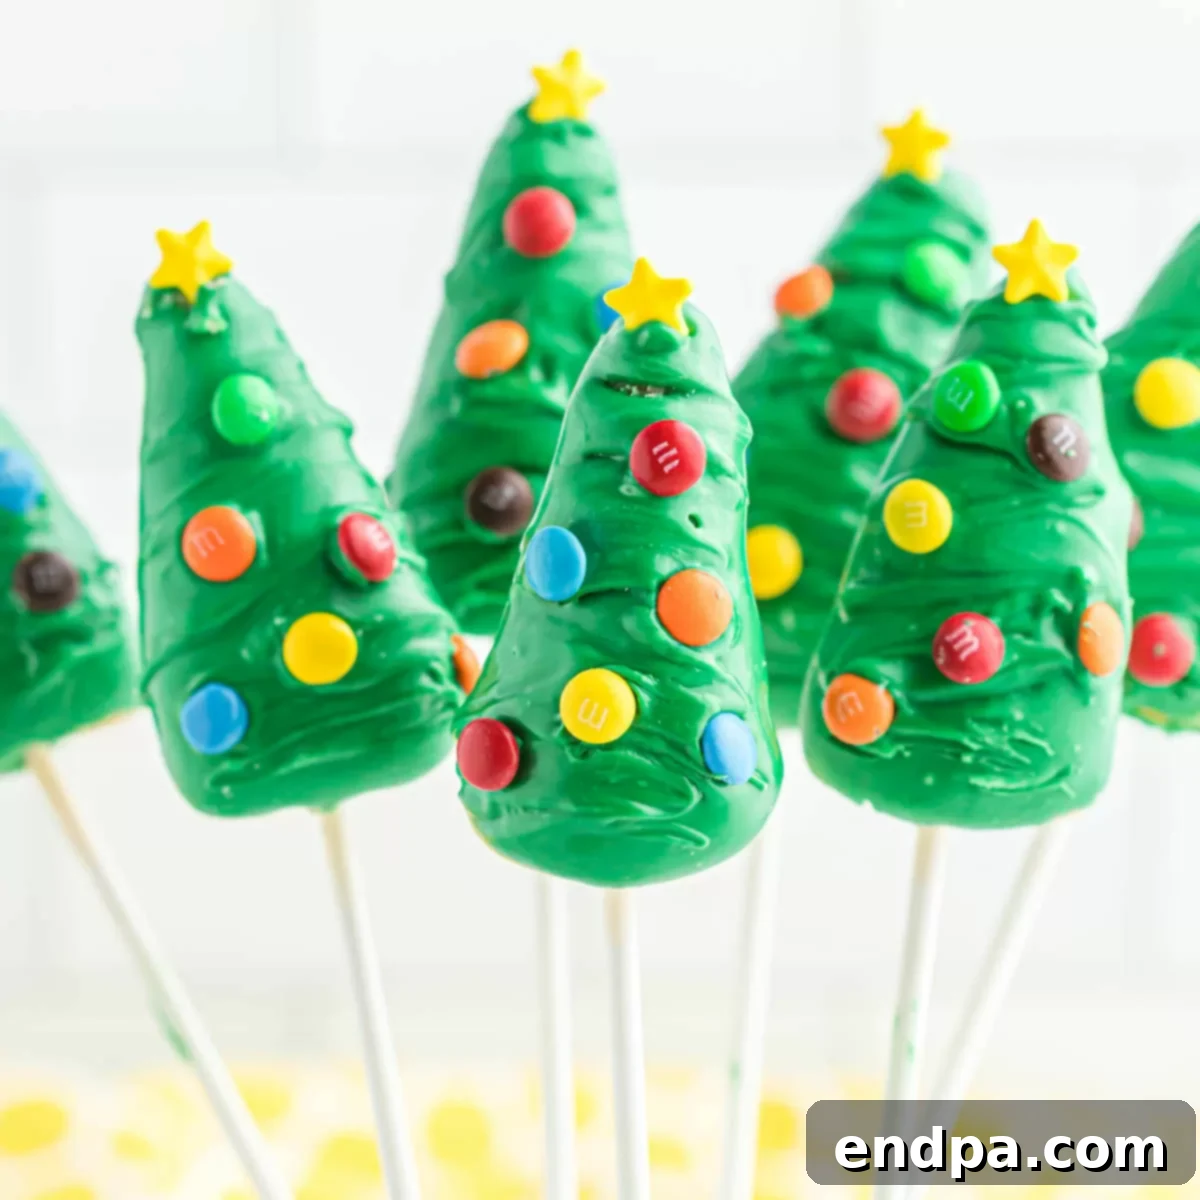
Christmas Tree Cake Pops are undeniably a highlight of the holiday season, offering a delightful blend of whimsical charm and irresistible flavor. These festive treats are not just desserts; they’re an experience, promising fun in preparation and joy in every bite. Designed to bring smiles to faces of all ages, our easy-to-follow recipe ensures that creating these beautiful cake pops becomes a cherished part of your holiday traditions.
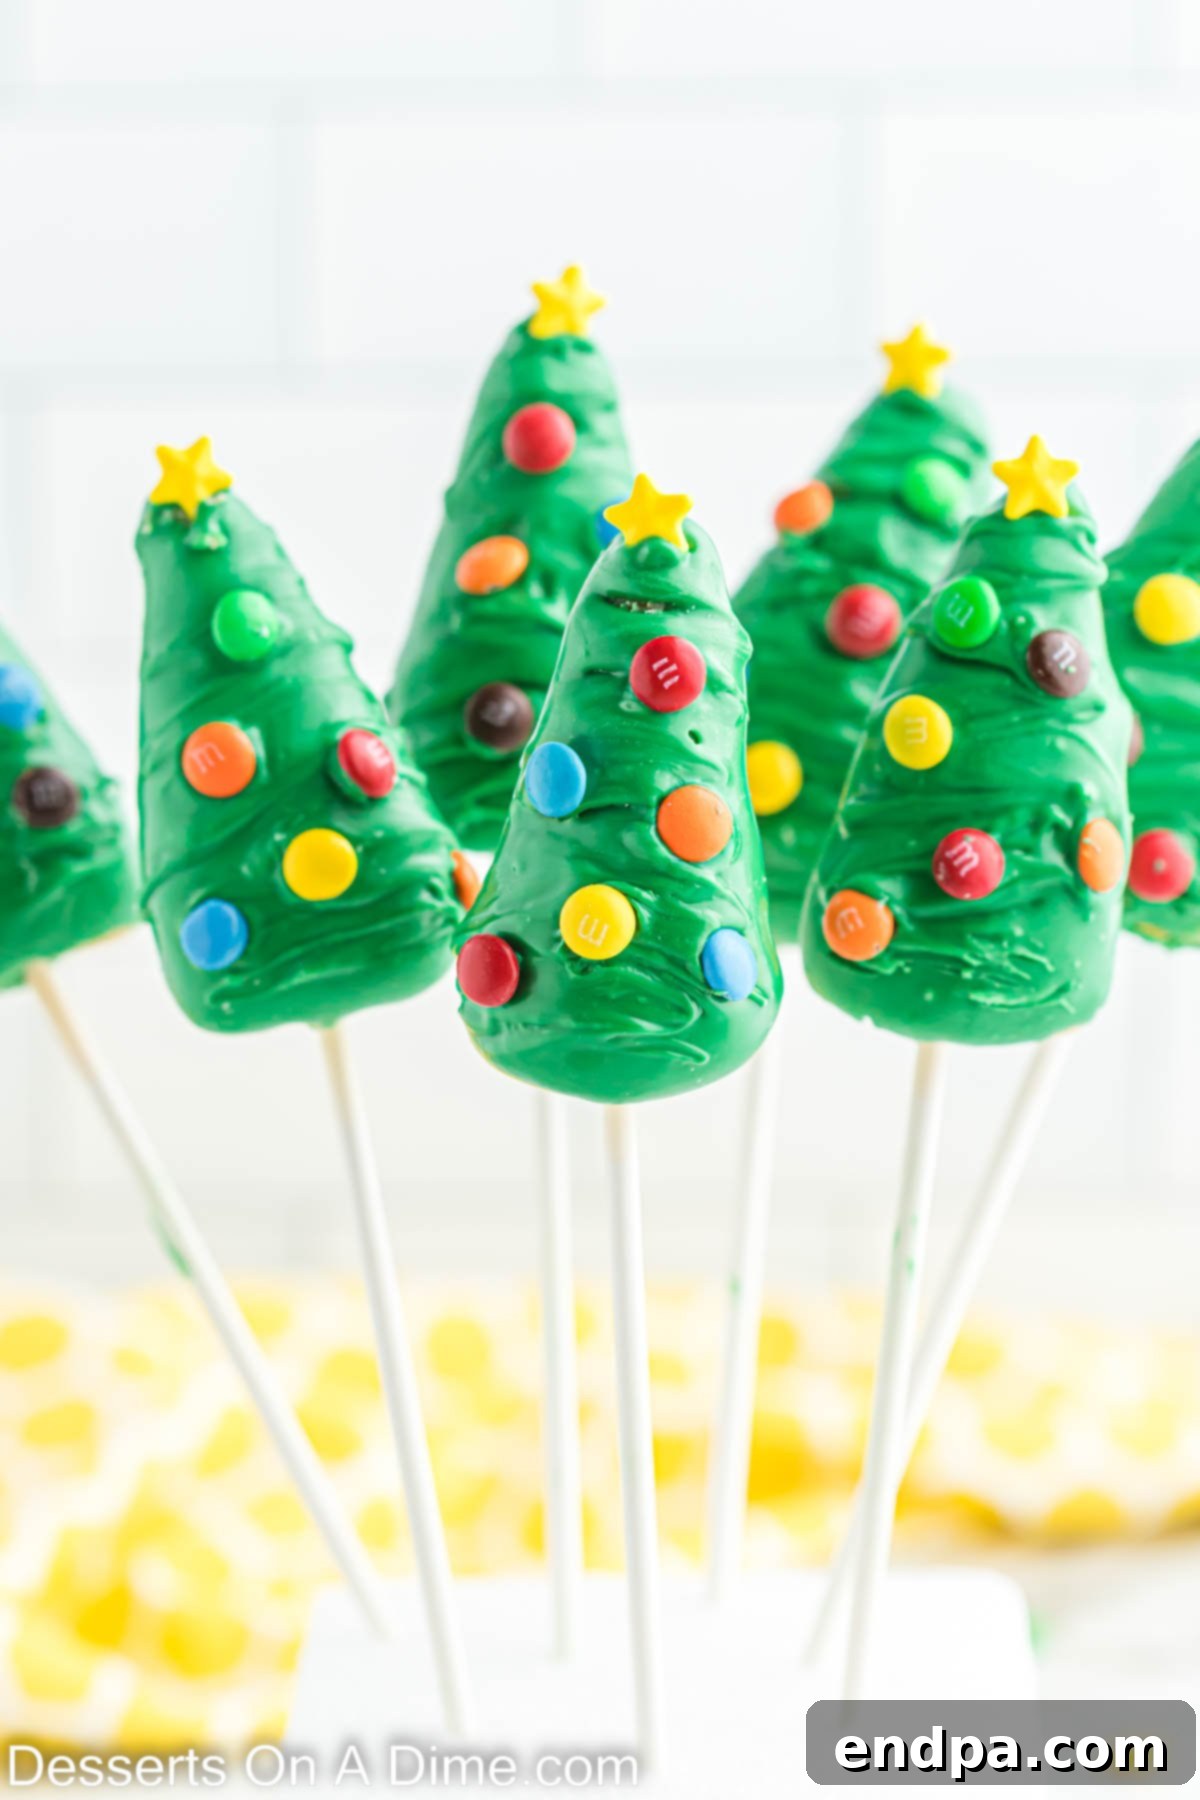
There’s something uniquely magical about Christmas, and these Christmas Tree Cake Pops perfectly capture that spirit. Year after year, they remain a top choice for holiday baking in our home, beloved for their playful “cake on a stick” format. They’re the ultimate Christmas dessert, offering a wonderful opportunity for families to gather in the kitchen, bond over baking, and create edible art together. The simplicity of starting with a cake mix makes them accessible even for novice bakers, allowing more time for creative decoration and less stress over complex preparations.
Imagine the delight as you present a platter of these stunning Christmas Tree Cake Pops at your next holiday gathering, school party, or festive event. Not only are they incredibly delicious, but their intricate, vibrant appearance makes them an instant showstopper. Each cake pop is a miniature edible masterpiece, guaranteed to be the center of attention and a memorable highlight of any celebration. Beyond cake pops, our kitchen often buzzes with the creation of other festive delights like Meringue Christmas Trees, charming Christmas Tree Cupcakes, classic Candy Cane Cookies, and the impressive Christmas Tree Cupcake Cake. But these cake pops? They hold a special place in our holiday repertoire for their undeniable festive charm and joyful appeal.
Why You’ll Adore This Christmas Tree Cake Pop Recipe
This recipe for Christmas Tree Cake Pops isn’t just another dessert; it’s a celebration in itself. We absolutely love it for so many reasons, making it a holiday tradition that we eagerly anticipate each year. Here’s why these festive treats will quickly become your family’s favorite:
- **Effortless Preparation:** Starting with a convenient cake mix is a game-changer. It drastically cuts down on prep time without compromising on flavor, allowing you to focus on the fun part: decorating! This simplicity ensures that anyone, regardless of baking experience, can achieve fantastic results.
- **Irresistibly Festive:** The tree shape and vibrant green coating immediately scream “Christmas!” They bring an undeniable festive cheer to any setting, instantly transforming a simple dessert table into a holiday wonderland. They’re designed to be a visual treat as much as a culinary one.
- **Fun for All Ages:** This recipe is a fantastic activity for families. Kids absolutely adore crumbling the cake, mixing in the frosting, and especially shaping and decorating their own little trees. It’s a wonderful way to create lasting holiday memories together.
- **Perfect for Parties:** Cake pops are inherently shareable and easy to eat, making them ideal for holiday parties, school events, or office potlucks. Their individual portions mean no messy slicing, and their delightful appearance ensures they’ll be snatched up quickly.
- **Versatile & Customizable:** While we love the classic vanilla, the base cake and frosting can be easily swapped for other flavors. The decoration possibilities are endless, allowing for personalized creations that truly reflect your holiday spirit.
- **Gift-Giving Gold:** Wrapped individually, these cake pops make charming and thoughtful homemade gifts for neighbors, teachers, or friends. They’re a sweet gesture that shows you’ve put in extra love and effort.
In essence, these Christmas cake pops combine ease, charm, and deliciousness, solidifying their status as a must-make holiday treat that you’ll want to revisit every single year!
What’s in this post: Festive Christmas Tree Cake Pops
- Why You’ll Adore This Christmas Tree Cake Pop Recipe
- Ingredients You’ll Need
- Exciting Variations & Customization Ideas
- How to Make Perfect Christmas Tree Cake Pops: A Step-by-Step Guide
- Creative Decorating Ideas for Your Christmas Trees
- Expert Tips for Cake Pop Success
- Frequently Asked Questions
- More Easy Cake Pop Recipes
- More Easy Christmas Treats
- Christmas Tree Cake Pops Recipe Card
Ingredients You’ll Need for Christmas Tree Cake Pops
Crafting these festive Christmas Tree Cake Pops begins with a simple yet essential list of ingredients. The beauty of this recipe lies in its accessibility, often utilizing pantry staples and readily available items to create a spectacular dessert. Each component plays a crucial role in ensuring your cake pops are moist, flavorful, and perfectly coated for that stunning Christmas tree effect.
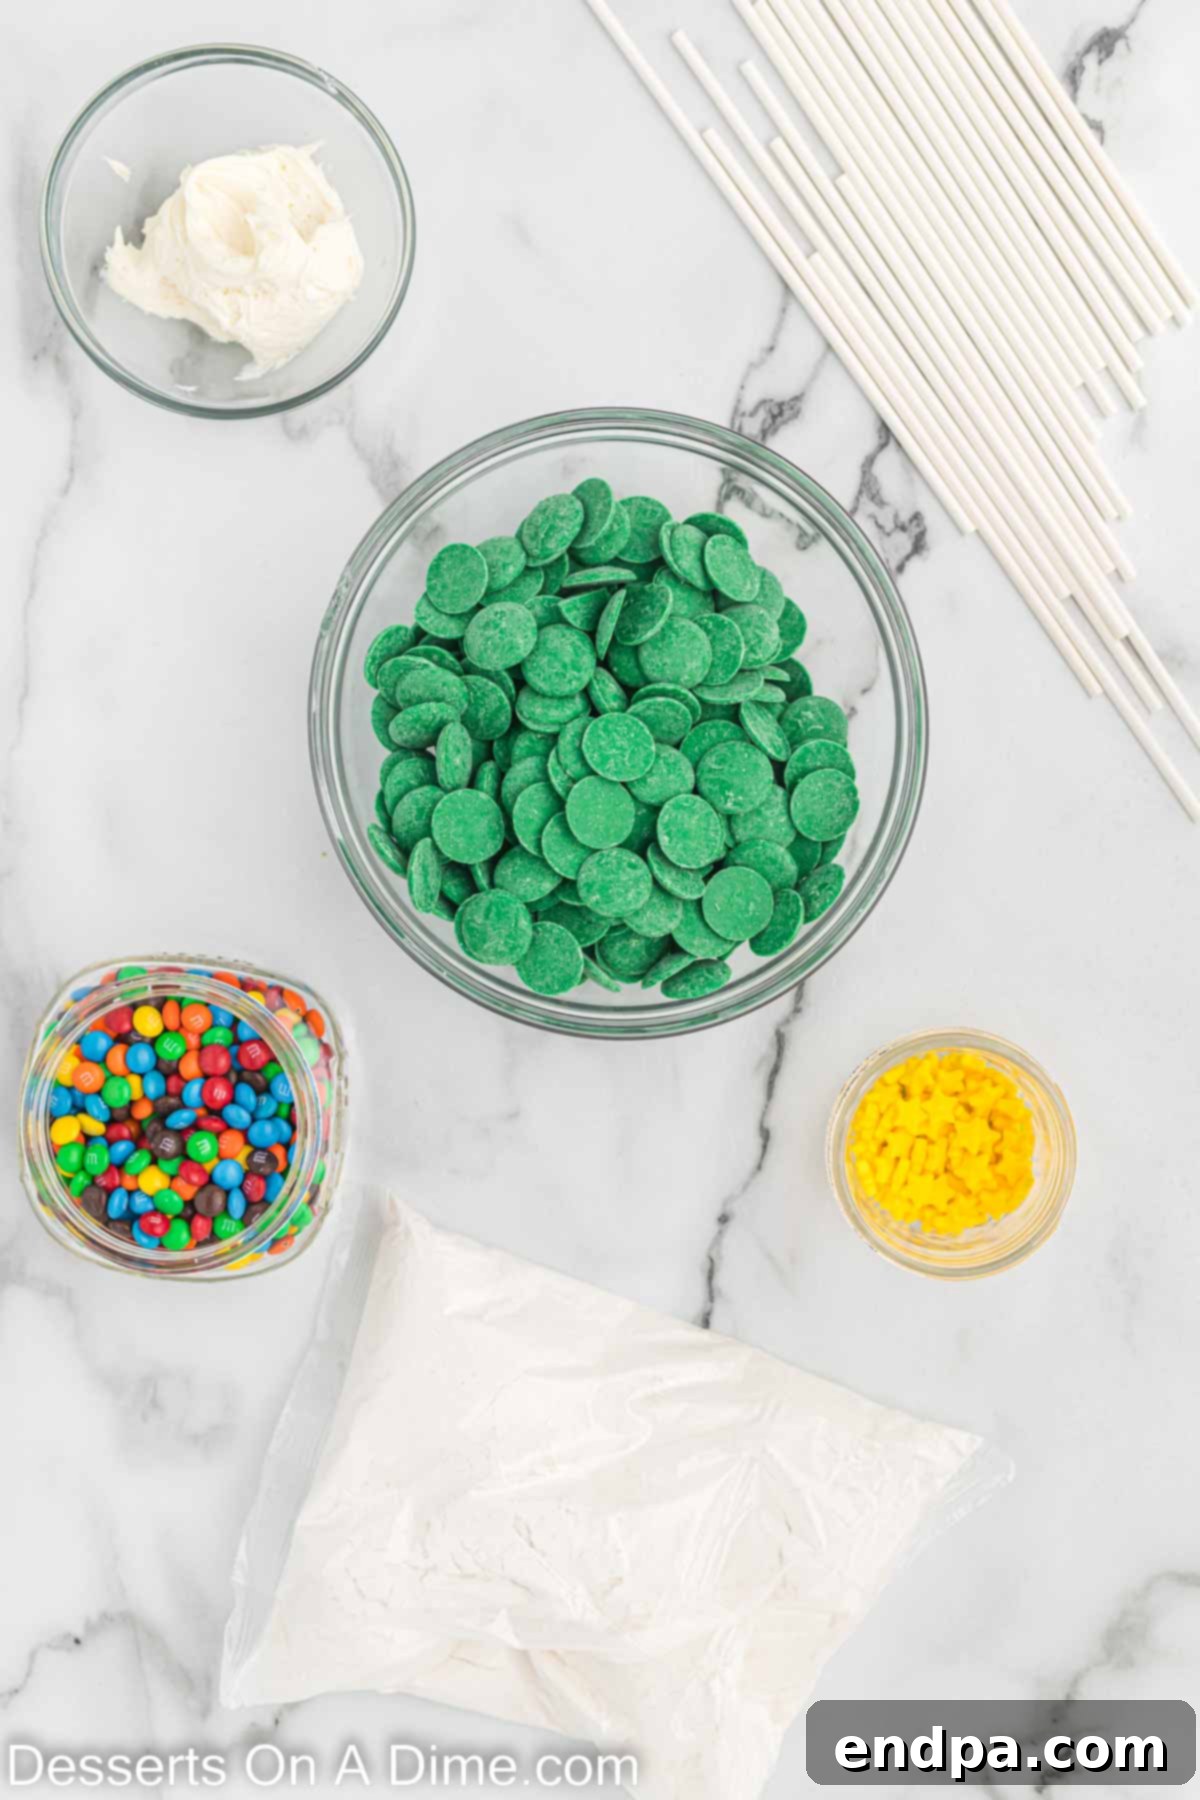
- Super Moist Vanilla Cake Mix (16.5 oz box): This is your foundational ingredient, offering a quick and reliable start to perfectly baked cake. The “super moist” variety is recommended for a tender crumb that binds beautifully with the frosting, forming the ideal cake pop base. Remember to also have on hand the additional ingredients (eggs, oil, water, etc.) required to prepare the cake according to the box instructions.
- Vanilla Frosting (⅓ cup): The secret binder that transforms cake crumbs into a pliable dough. Vanilla frosting provides a sweet, creamy flavor that complements the cake and helps achieve the perfect consistency for shaping. You’ll need about ⅓ cup, but this can be adjusted slightly based on the texture of your cake crumbs.
- Green Candy Melts (16 oz): These specialized confectionary wafers are designed to melt smoothly and harden quickly, providing a vibrant, festive coating. Their easy-to-work-with nature ensures a glossy, even finish for your Christmas trees.
- Mini M&Ms: These colorful, bite-sized chocolates serve as delightful “ornaments” for your miniature Christmas trees, adding a playful touch and a satisfying crunch.
- Yellow Star Sprinkles: A quintessential topping for any Christmas tree, these star sprinkles crown your cake pops with a brilliant, iconic finish.
- Lollipop Sticks: Essential for turning your cake balls into convenient “pops,” these sticks make handling, dipping, and eating your festive treats a breeze.
The complete ingredient list and detailed instructions can be found in the comprehensive recipe card at the bottom of this post, ensuring you have all the information needed to create these charming Christmas Tree Cake Pops.
Exciting Variations & Customization Ideas
While our classic Christmas Tree Cake Pops are a holiday favorite, this recipe is wonderfully versatile, inviting you to unleash your creativity and tailor them to your taste and holiday theme. Don’t hesitate to experiment with different flavors and decorations to make these treats uniquely yours!
- Explore Different Cake Flavors:
- Chocolate Cake: For a rich, decadent base, swap vanilla for a chocolate cake mix.
- Red Velvet Cake: The subtle cocoa and vibrant red hue of red velvet add an extra layer of elegance and flavor.
- Spice Cake: Infuse your cake pops with warm holiday spices like cinnamon, nutmeg, and cloves for a cozy, aromatic treat.
- Funfetti Cake: For an extra burst of color and joy inside, a funfetti cake mix makes for a delightful surprise.
- Switch Up the Frosting:
- Homemade Cream Cheese Frosting: Elevate the flavor profile with a tangy and rich homemade cream cheese frosting, an excellent alternative to store-bought vanilla.
- Chocolate Frosting: Pair with a chocolate cake for a double chocolate delight, or use with vanilla cake for a contrast.
- Peppermint Frosting: Introduce a refreshing burst of peppermint, perfect for pairing with chocolate or vanilla cakes.
- Alternative Coatings & Colors:
- White Chocolate Bark: Instead of candy melts, use good quality white almond bark. You can easily tint it green (or any other color) with oil-based food coloring.
- Dark or Milk Chocolate: For a more traditional chocolate tree, use melted dark or milk chocolate.
- Rainbow Christmas Trees: Why stick to green? Use red, white, or even blue candy melts for a whimsical, colorful array of Christmas trees.
- Diverse Decorating Options:
- Assorted Christmas Sprinkles: Beyond M&Ms, use various Christmas-themed sprinkles, edible glitter, or edible pearls to mimic colorful lights and ornaments.
- Drizzle Design: Once the green coating is dry, drizzle contrasting colors of melted candy melts (white, red, or gold) in zig-zag patterns for extra flair.
- Crushed Candy Canes: Sprinkle crushed peppermint candy canes over the wet coating for a refreshing, minty crunch and festive look.
- Mini Chocolate Chips: Instead of M&Ms, mini chocolate chips can serve as adorable, edible ornaments.
- Change the Shape:
- Classic Cake Balls: If the cone shape feels too intricate, simply roll the cake mixture into traditional round cake balls. They are equally delicious and festive when decorated as ornaments.
- Mini Bundt Shapes: For a truly unique look, consider using a mini Bundt cake pop mold to create miniature Bundt-shaped cake pops before dipping.
These variations ensure that your Christmas Tree Cake Pops can be as unique and imaginative as your holiday celebrations!
How to Make Perfect Christmas Tree Cake Pops: A Step-by-Step Guide
Making Christmas Tree Cake Pops is a delightful and rewarding process, blending the simplicity of a boxed cake mix with creative decoration. Follow these steps to craft your own batch of festive holiday treats.
- Step 1: Bake Your Cake. Begin by preparing your favorite cake mix (we recommend Super Moist Vanilla) according to the package directions. Pour the batter into a 9×13 inch baking pan and bake until a toothpick inserted into the center comes out clean. Once baked, remove the cake from the oven and allow it to cool completely to room temperature. This step is crucial for achieving the right cake pop consistency.
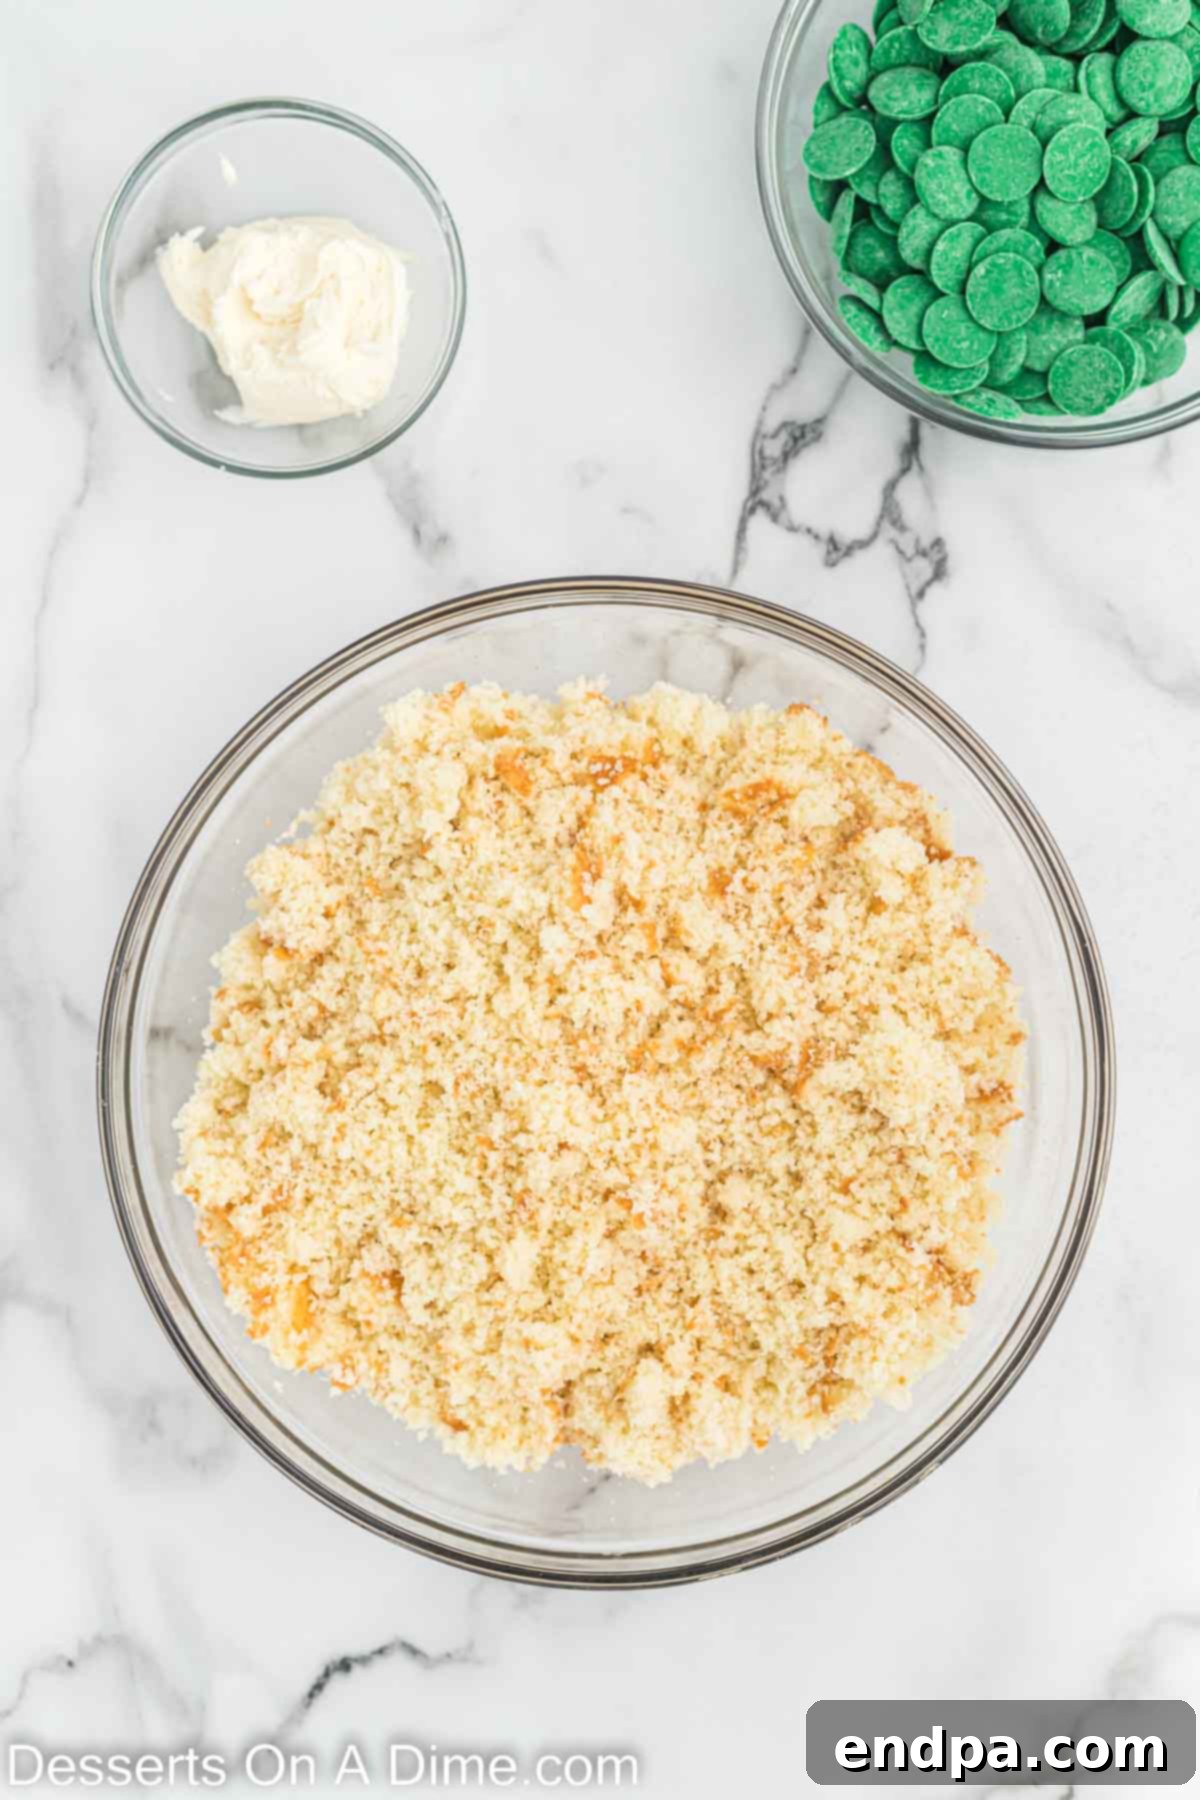
Step 2: Crumble the Cake. Once your cake is fully cooled, gently remove it from the pan. Carefully cut away and discard the slightly browned outer edges of the cake. These edges can make your cake pops less moist and harder to form. Place the remaining soft cake into a large mixing bowl and crumble it thoroughly with your hands or a fork until no large lumps remain, creating fine, even crumbs.
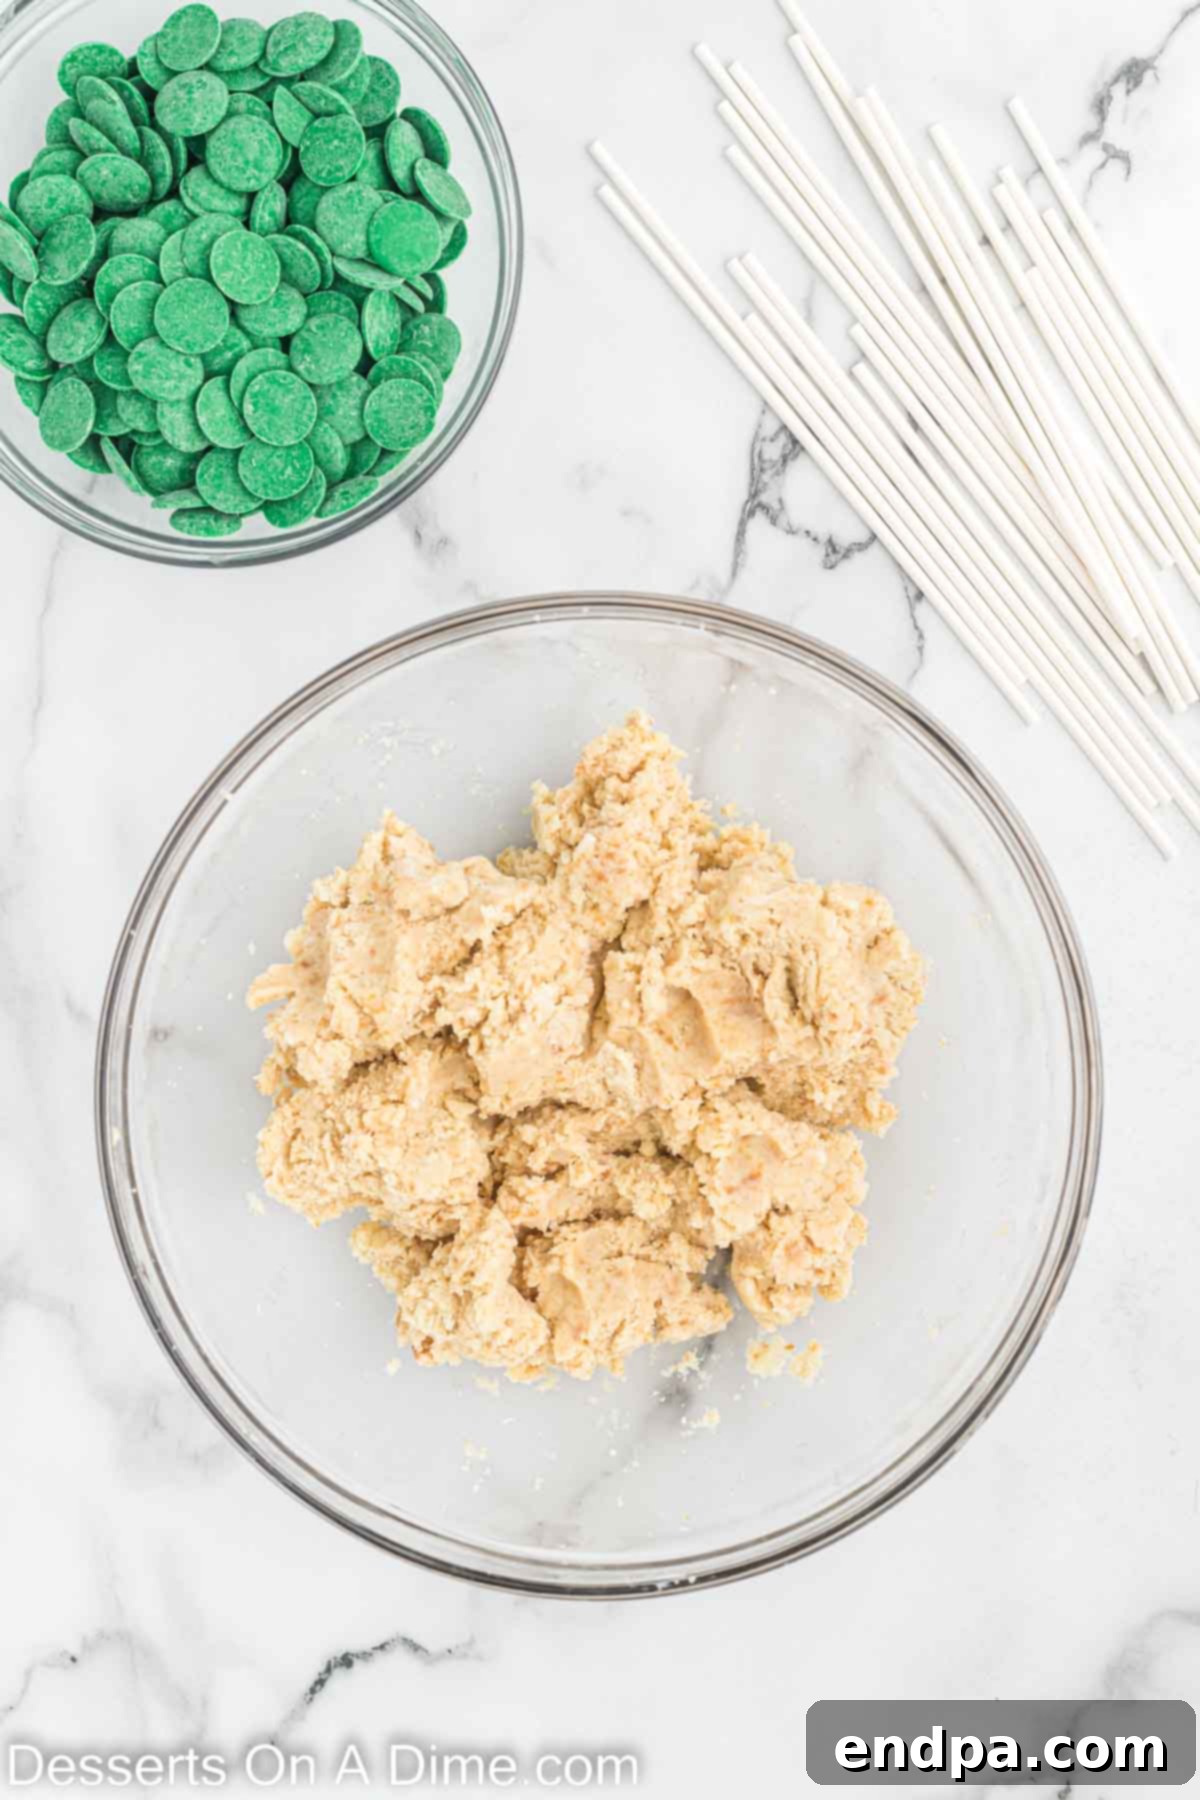
Step 3: Combine with Frosting. Add the vanilla frosting (starting with ⅓ cup) to the crumbled cake in the mixing bowl. Using your hands or a sturdy spoon, mix everything together until the frosting is fully incorporated and the mixture forms a moist, pliable dough. The consistency should be similar to play-doh – firm enough to hold its shape but soft enough to mold easily. Adjust the frosting amount if needed; add a little more if it’s too dry, or a few more crumbs if it’s too sticky.
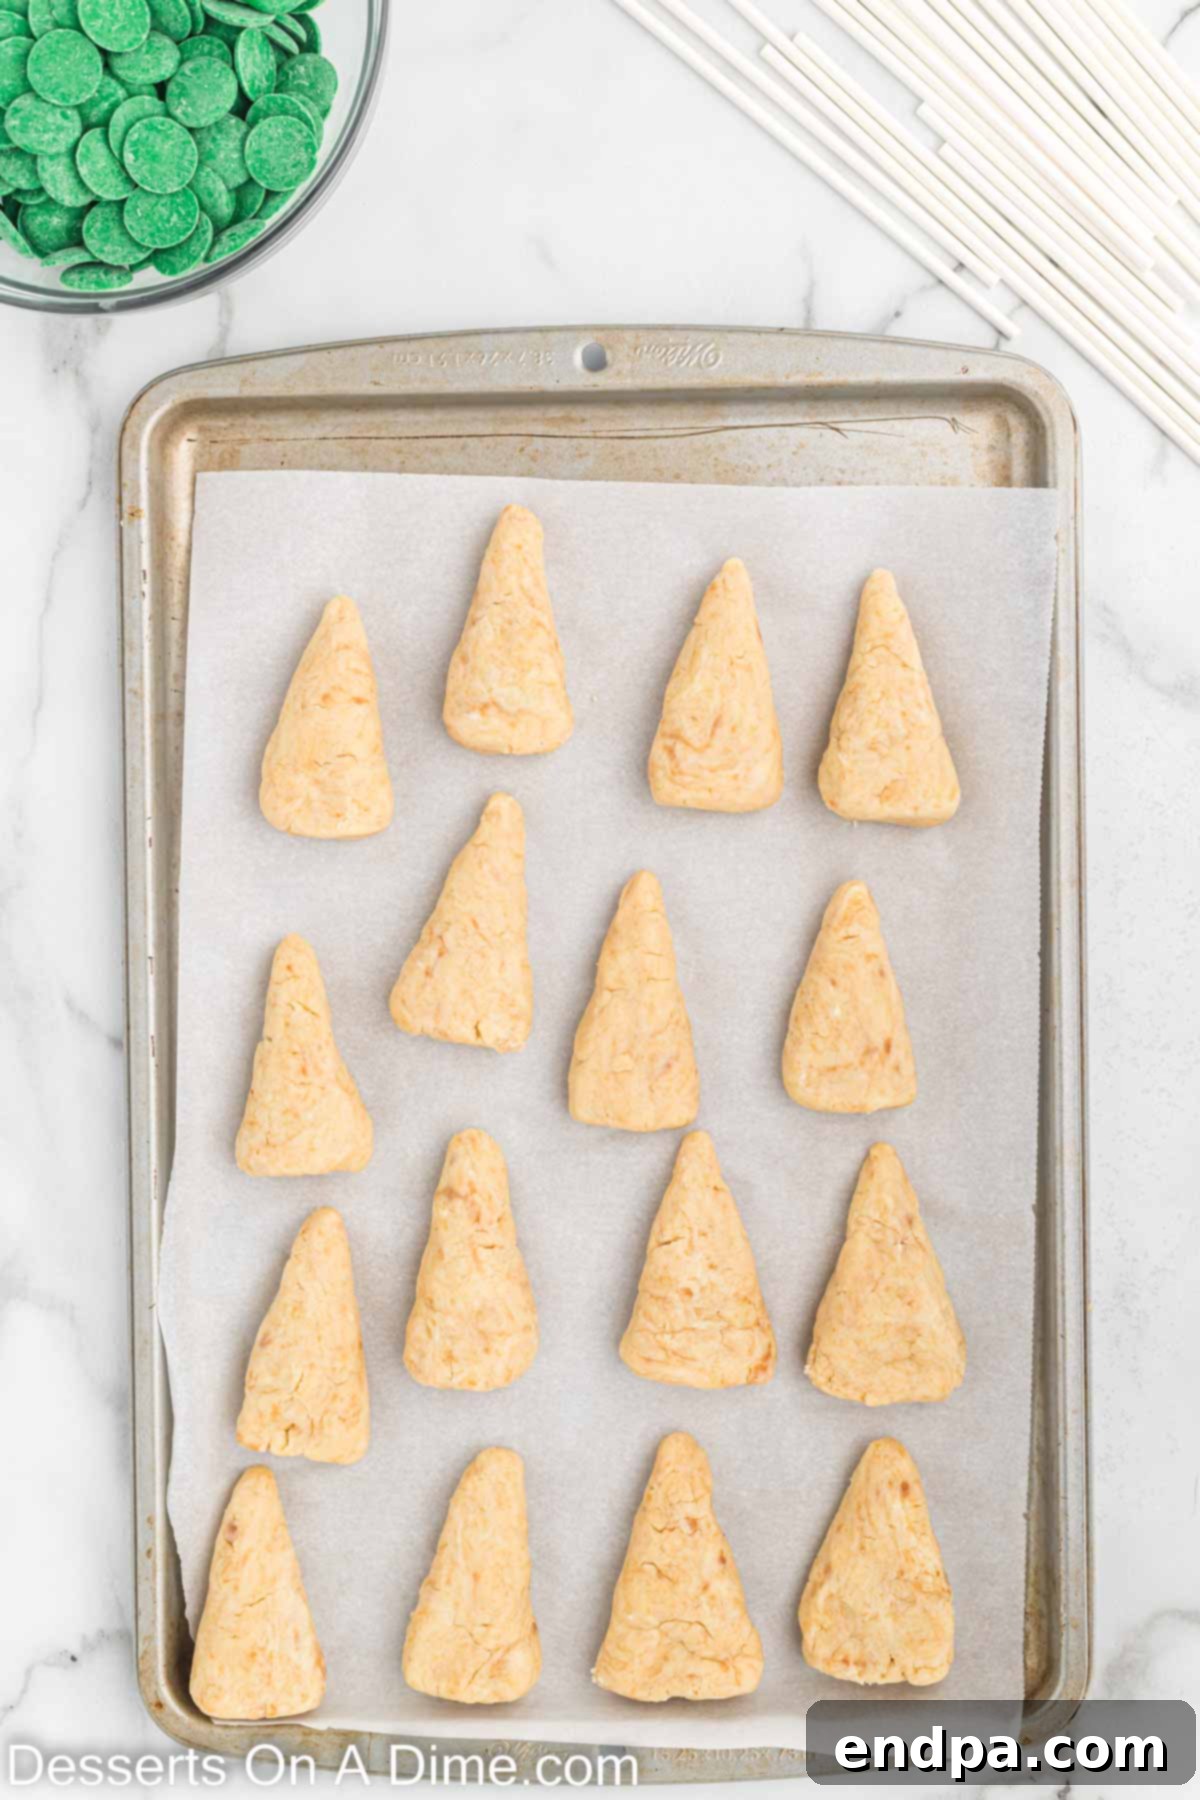
Step 4: Shape into Cones. Take approximately 1 tablespoon of the cake mixture and firmly roll it into a cone shape, resembling a miniature Christmas tree. Pinch the top to create a point and flatten the base slightly. Place each shaped cone onto a baking sheet lined with parchment paper. Continue this process until all the cake mixture has been transformed into perfectly formed cones.
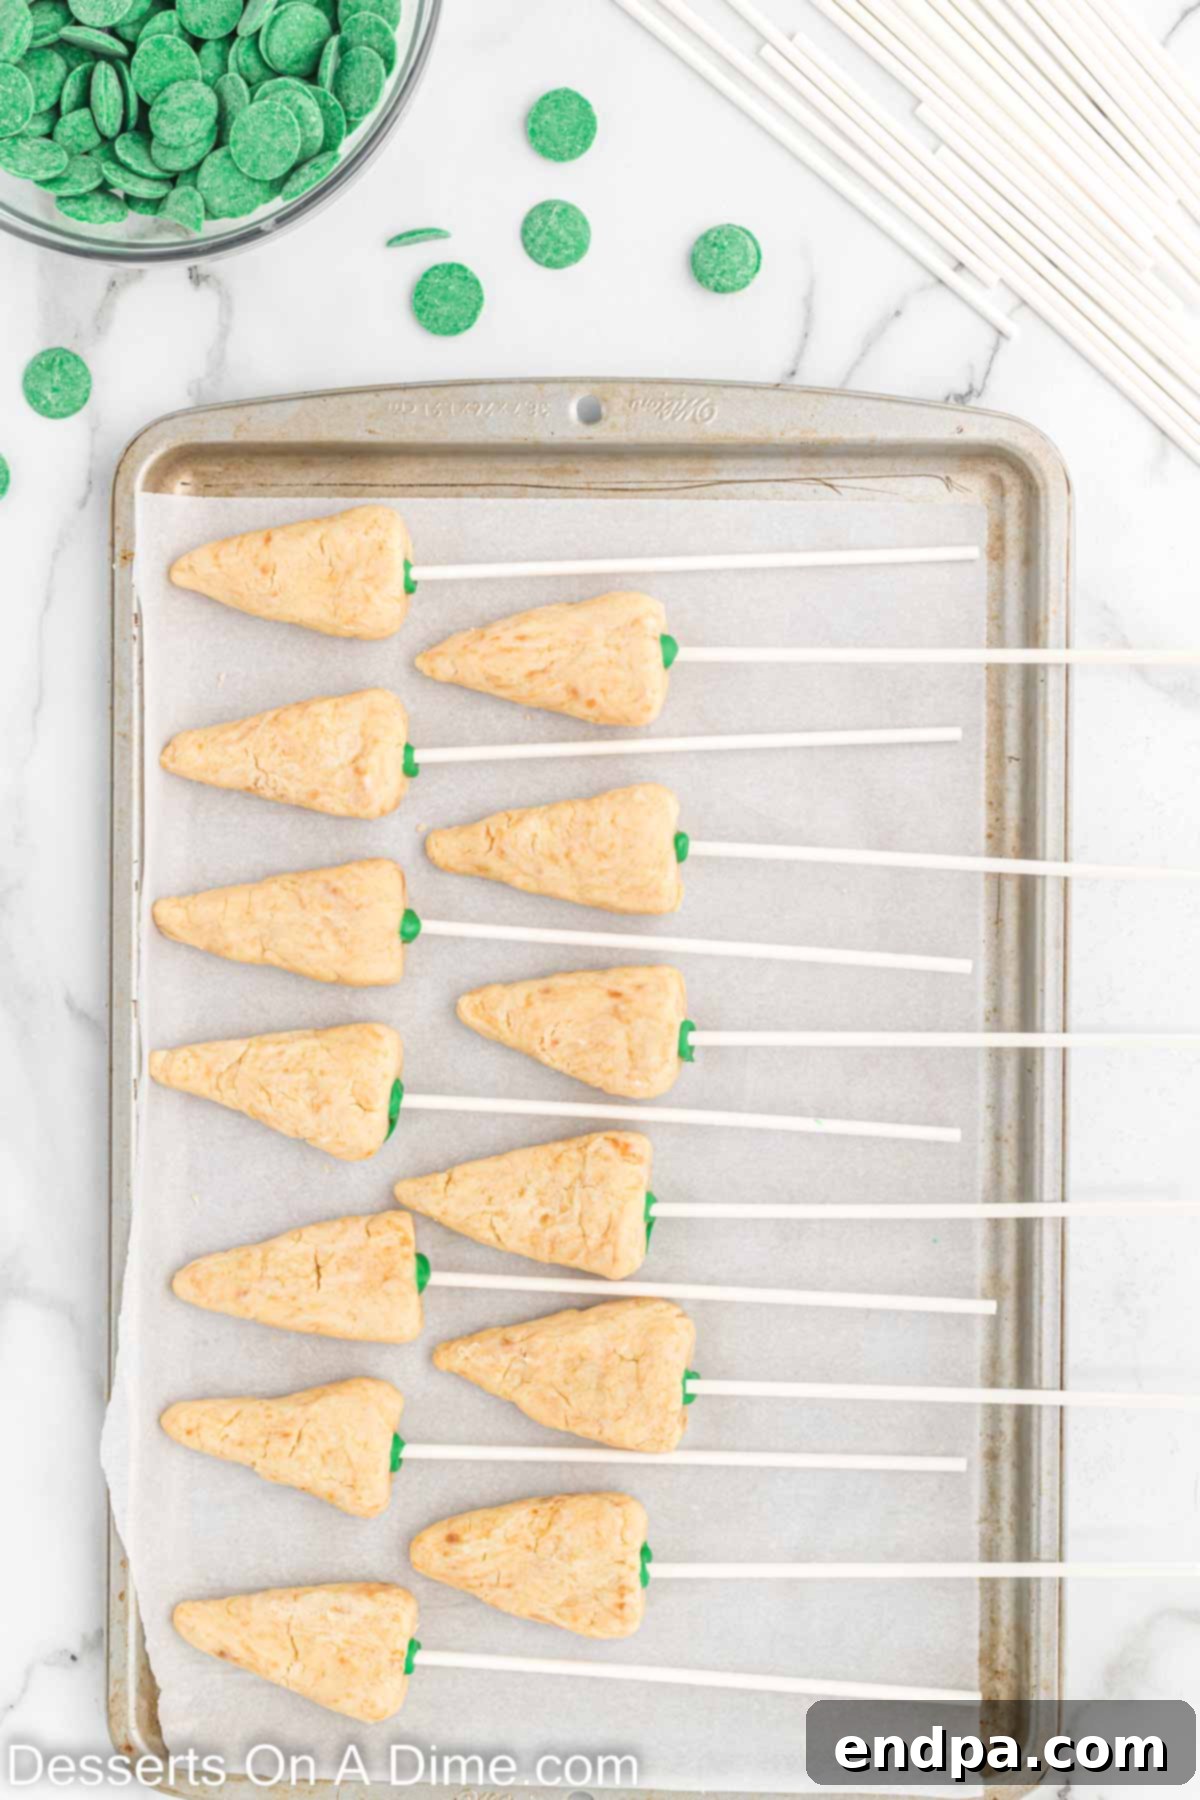
Step 5: Insert Lollipop Sticks & Freeze. Melt a small amount of the green candy melts in a microwave-safe bowl, heating in 30-second intervals and stirring until smooth. Dip the tip of each lollipop stick into the melted candy melt, then gently insert the coated end about halfway into the wider base of each cake cone. The melted candy acts as an edible glue, securing the stick. Once all sticks are inserted, place the baking sheet with the cake pops in the freezer for 10-15 minutes. Freezing helps the cake pops firm up, preventing them from falling apart during dipping. Using the freezer rather than the fridge is recommended for a quicker and firmer set.
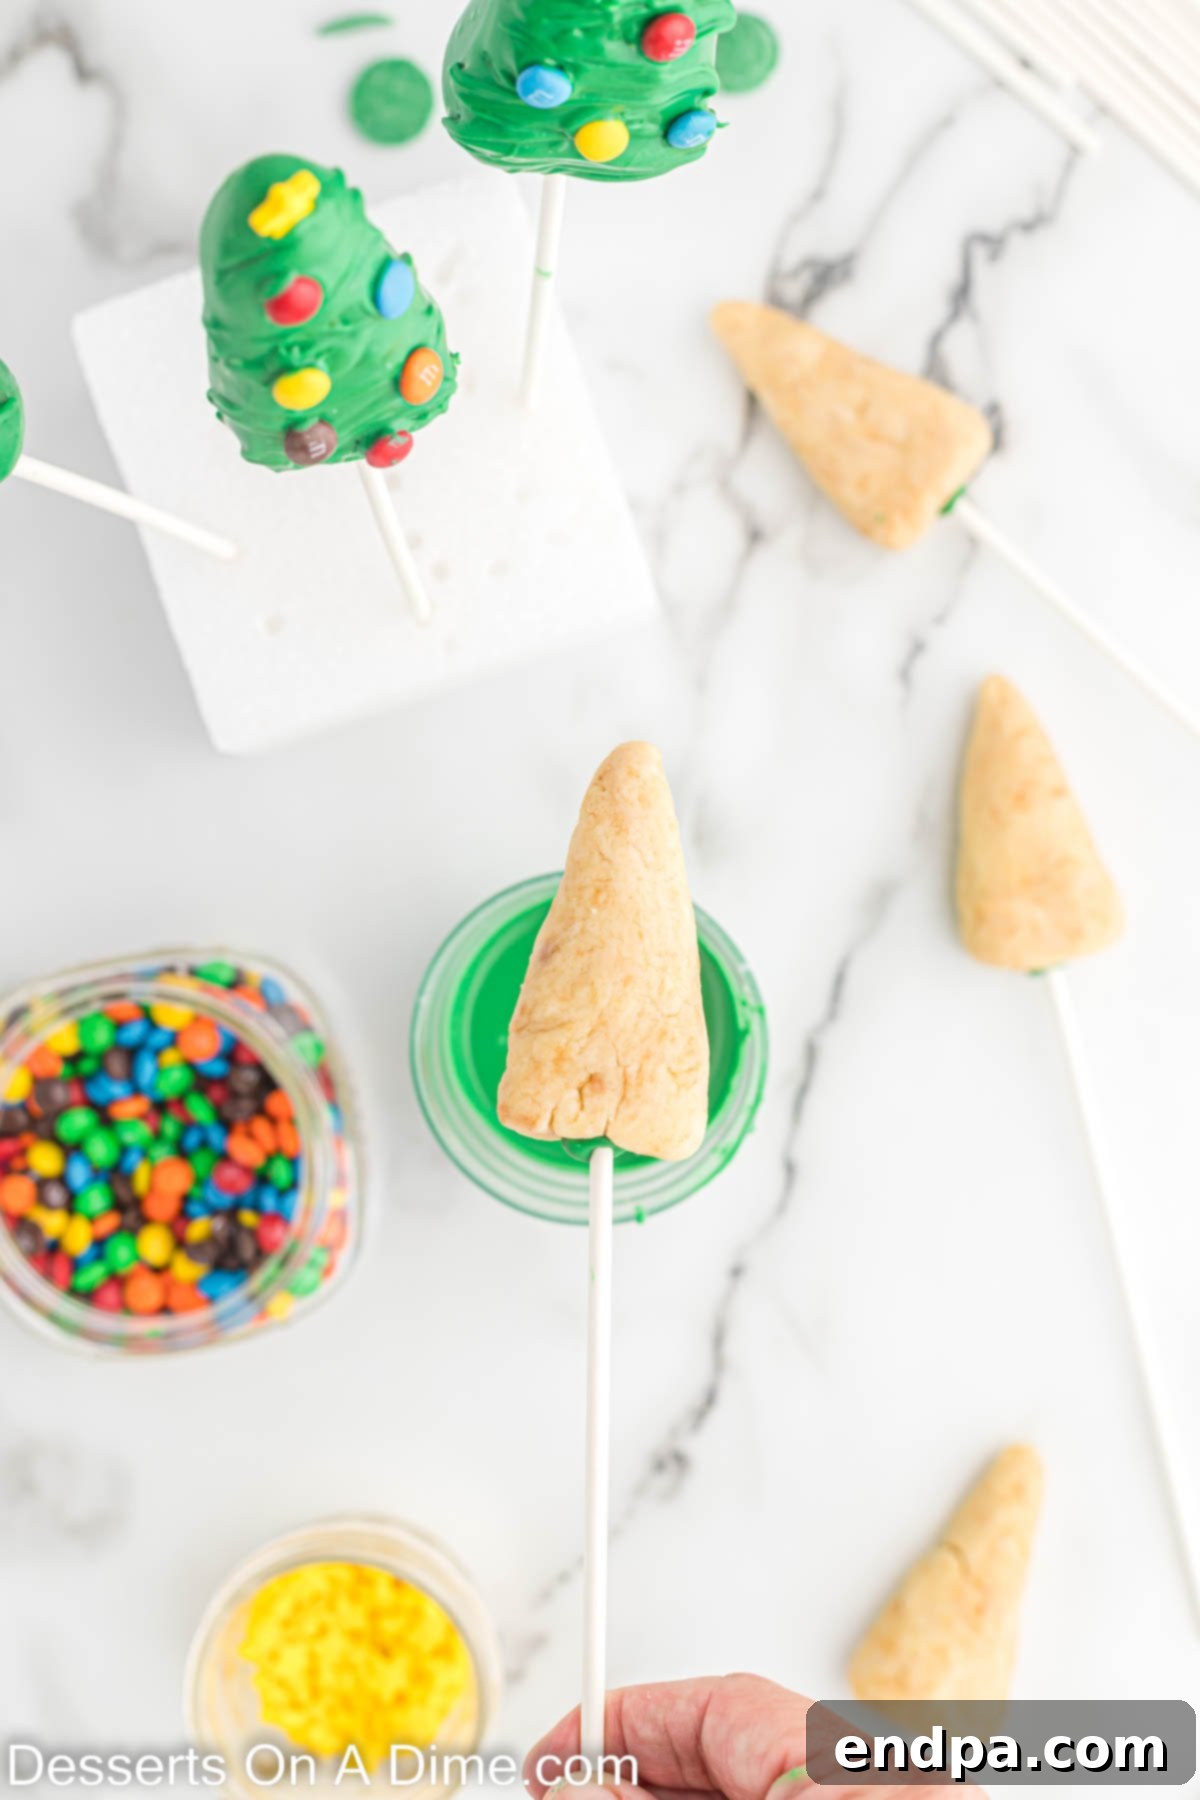
Step 6: Dip and Coat the Trees. Re-melt your green candy melts (if necessary) until smooth and fluid. Holding the cake pop by its stick, carefully dip the entire tree portion into the melted green candy. Ensure the coating is even. Gently tap the stick against the edge of the bowl to remove any excess chocolate, allowing it to drip off completely. This ensures a smooth, clean finish without pooling at the base.
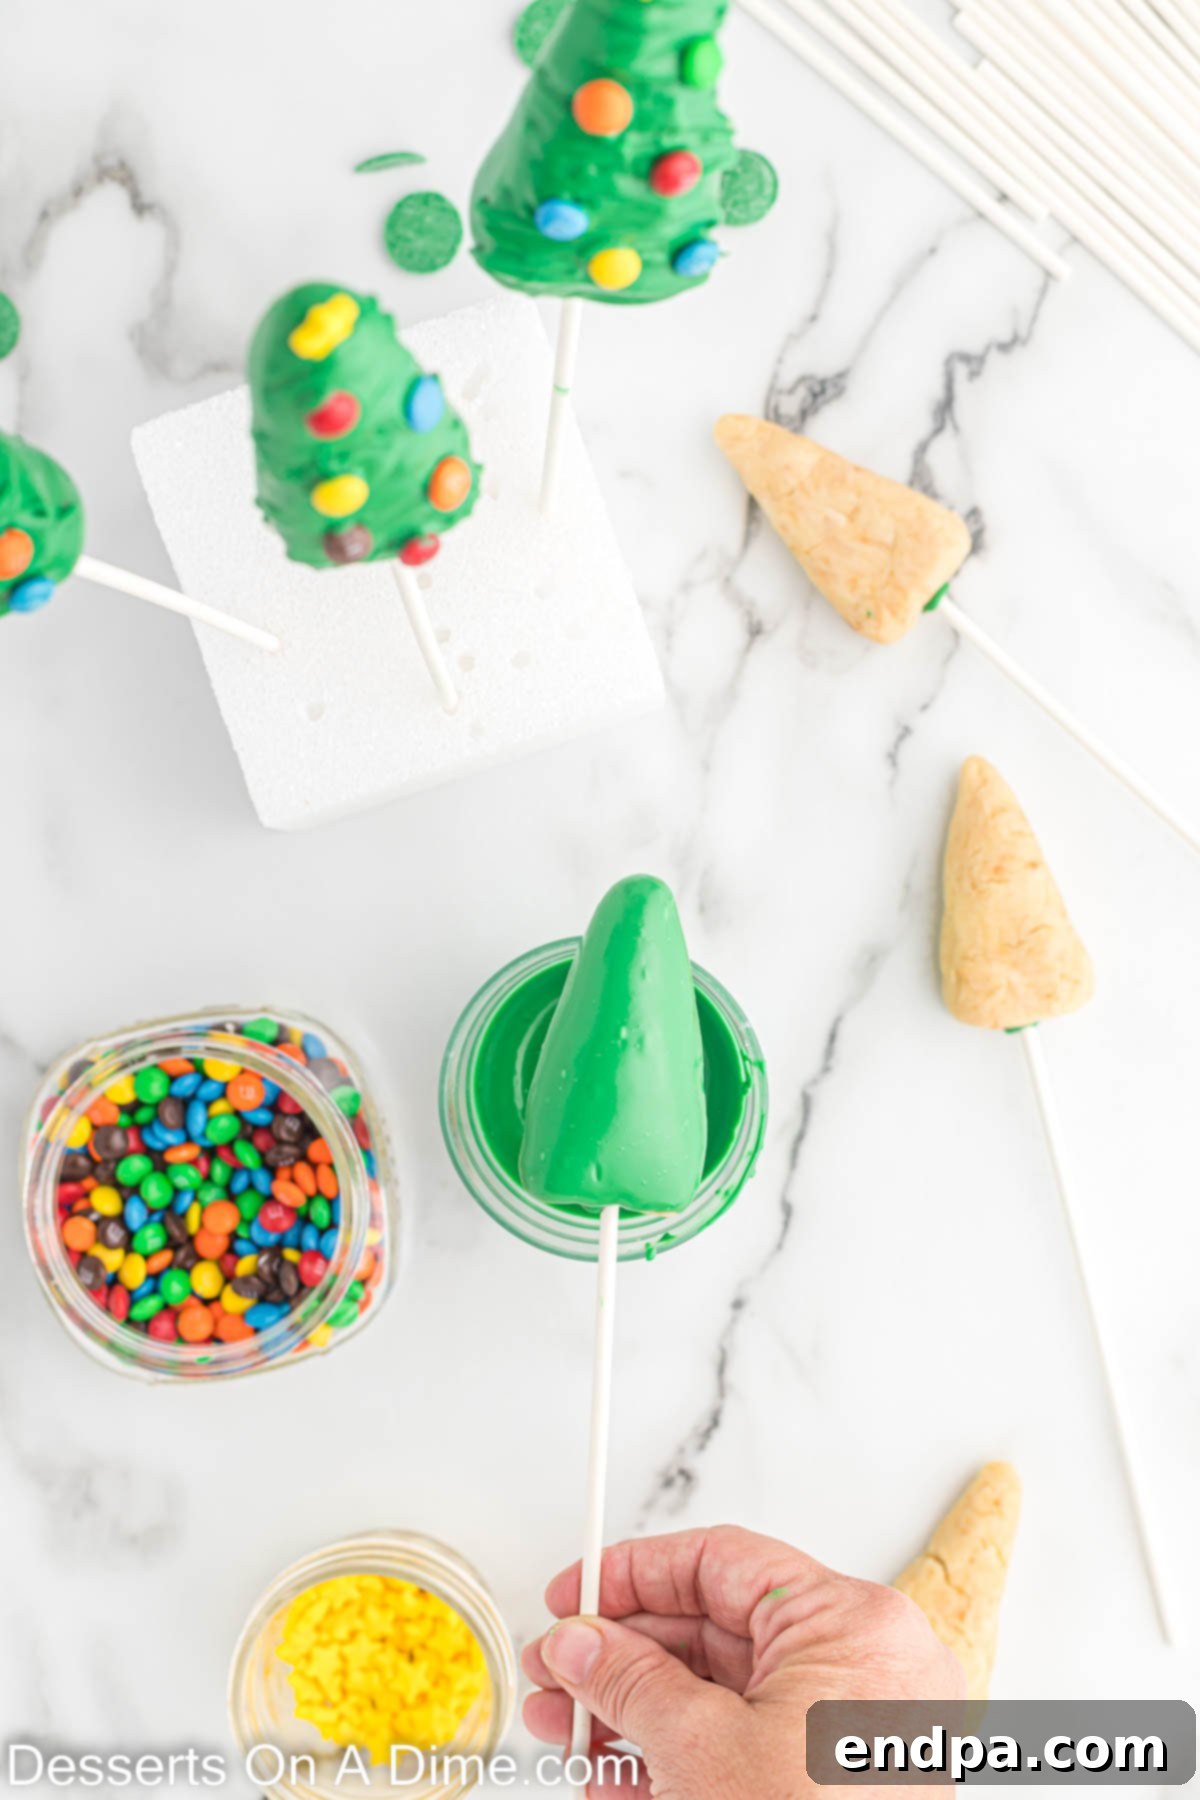
Step 7: Create Branch Texture. While the candy melt coating is still wet, use a toothpick to gently create small, upward-flicking motions on the surface of the green coating. This technique mimics the textured look of pine needles or branches on a real Christmas tree, adding depth and realism to your edible creations.
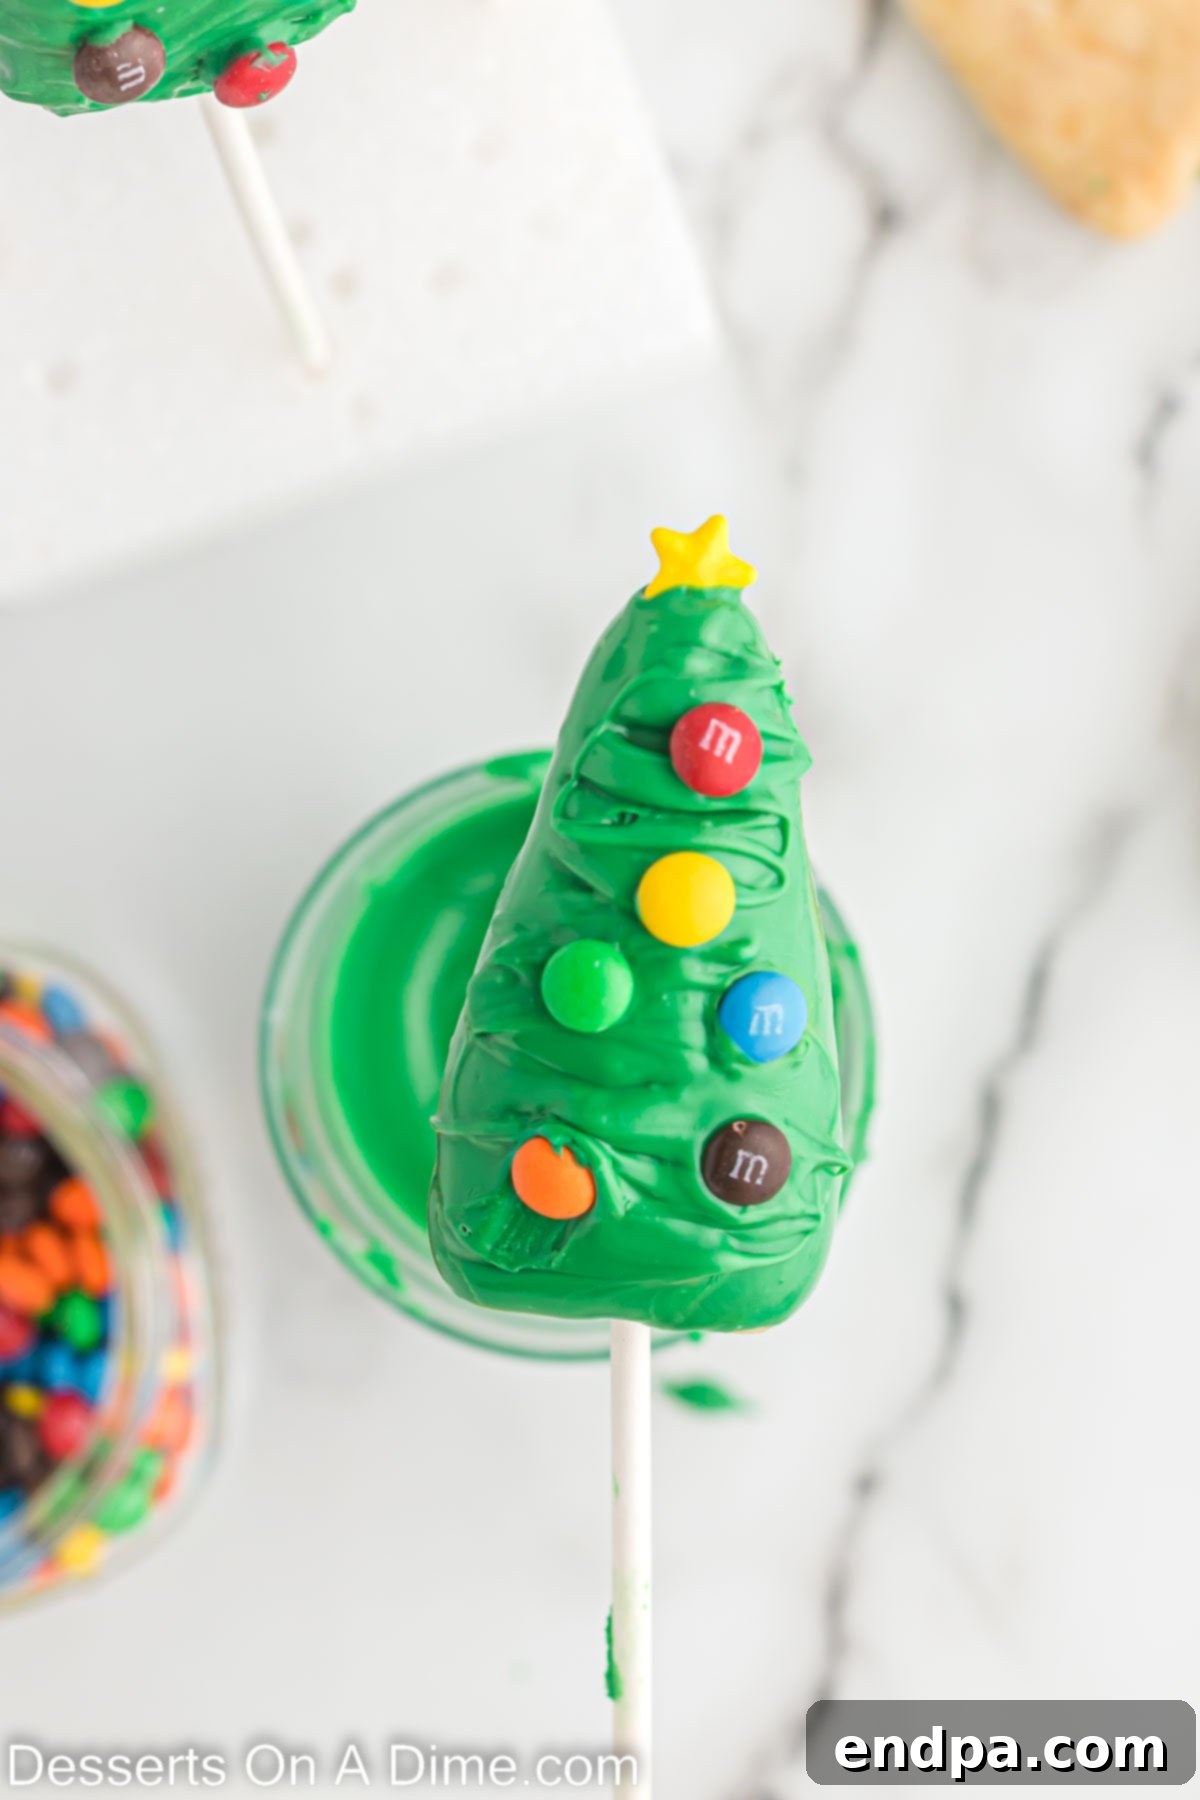
Step 8: Decorate Your Trees. Immediately after creating the branch texture and while the coating is still wet (this is key!), carefully place Mini M&Ms onto the green coating to act as colorful ornaments. Gently press them in slightly to ensure they adhere. Finish each tree by placing a yellow star sprinkle at the very top. Work quickly as the candy melt will harden fast.
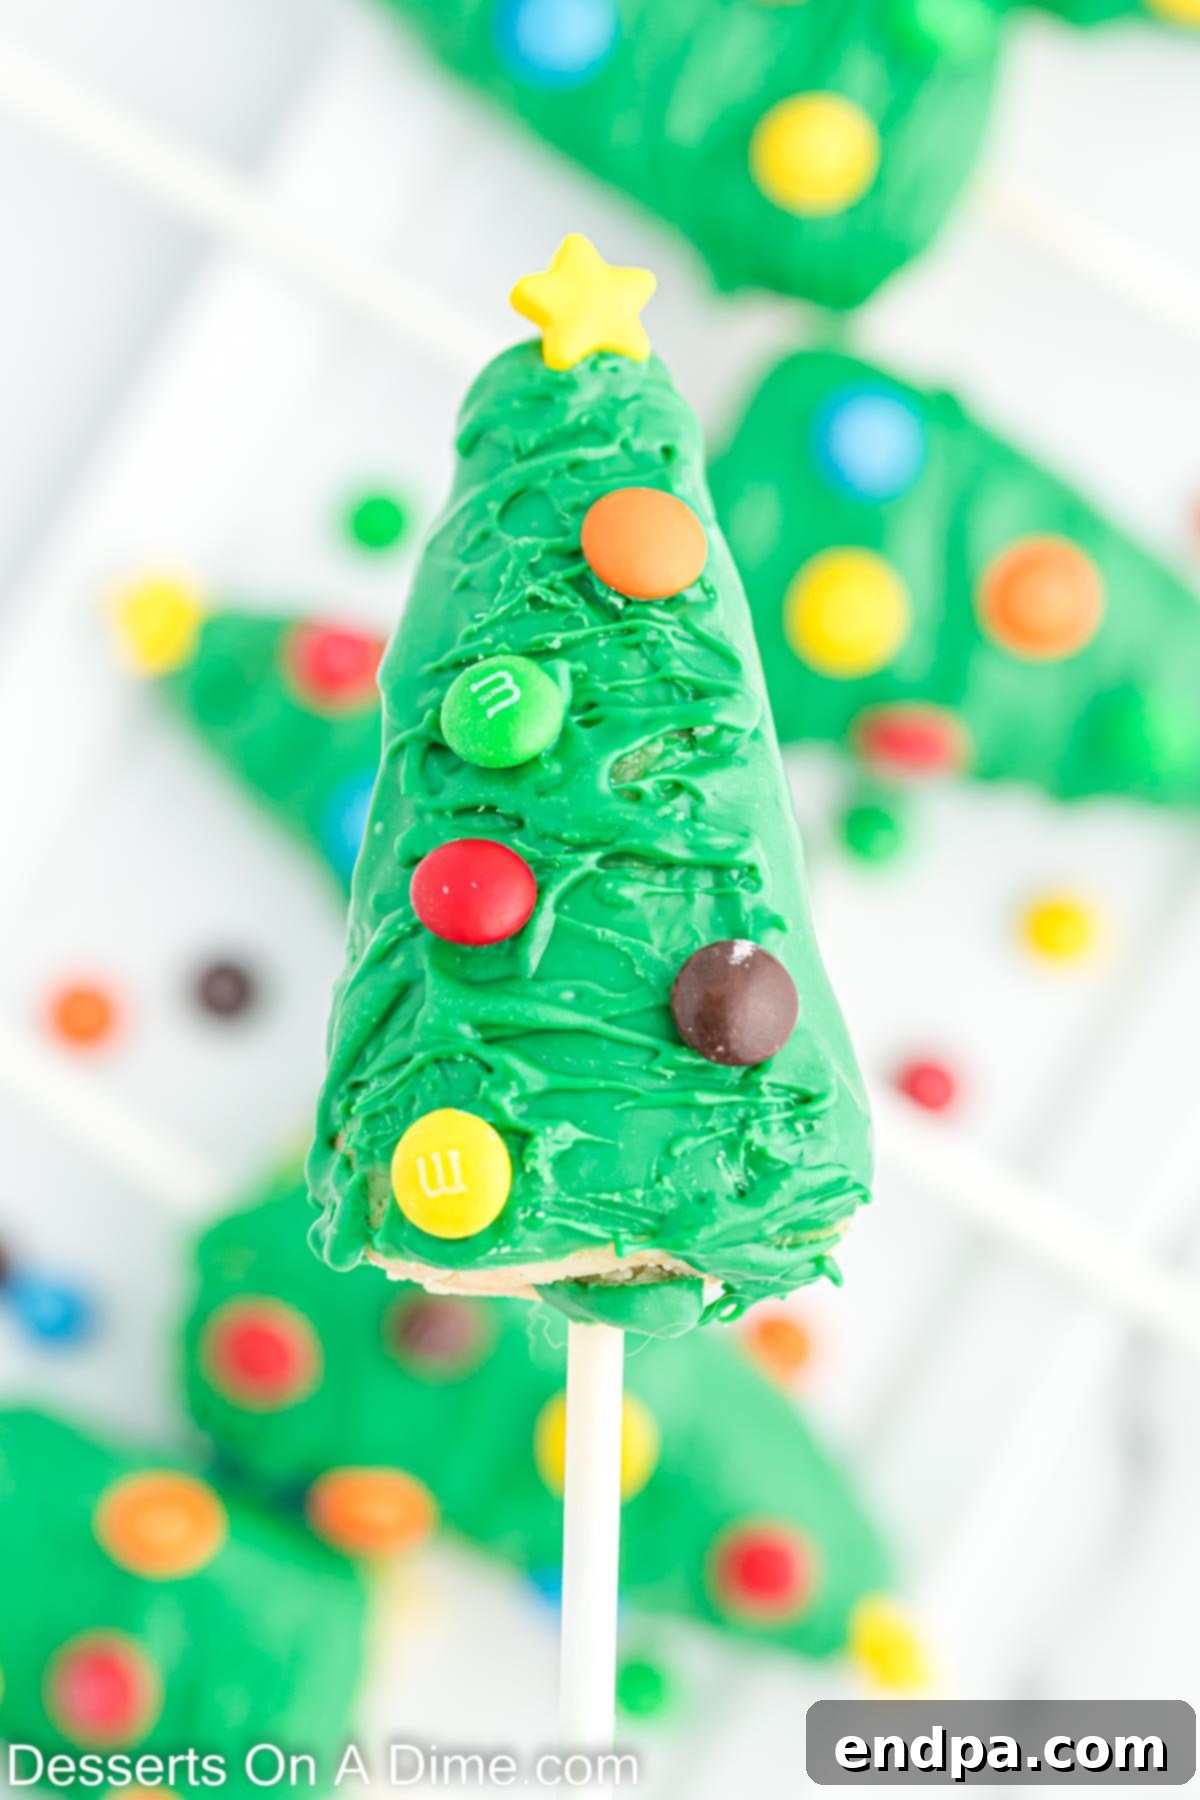
Step 9: Allow to Harden & Serve. Place the decorated cake pops upright in a block of styrofoam or a cake pop stand to allow the candy coating to fully set and harden. This usually takes about 15-30 minutes at room temperature, or quicker in the refrigerator. Once completely dry and firm, your beautiful Christmas Tree Cake Pops are ready to be served and enjoyed! For gifting or school parties, you can individually wrap them in small cellophane bags tied with a festive ribbon.
Creative Decorating Ideas for Your Christmas Trees
The true magic of Christmas Tree Cake Pops lies in the decorating! This is where you can let your creativity shine and make each tree unique. While the classic M&Ms and star sprinkles are adorable, there are countless ways to adorn your edible conifers. Remember, the key is to apply decorations while the candy melt coating is still wet so they adhere properly!
- Almond Bark vs. Candy Melts: If you prefer to use almond bark instead of colored candy melts, you absolutely can! Simply melt plain white almond bark and then add oil-based food coloring (not water-based, as it will seize the chocolate) to achieve your desired shade of green. This gives you more control over the color intensity.
- Sprinkle Wonderland: Don’t limit yourself to just Mini M&Ms.
- Christmas Sprinkle Mixes: Use a festive mix of green, red, and white sprinkles to mimic colorful lights and tinsel.
- Edible Glitter: Dust your freshly dipped trees with edible green or iridescent glitter for a shimmering, snowy effect.
- White Nonpareils: Sprinkle tiny white nonpareils to look like freshly fallen snow.
- Edible Pearl Candies: Small silver or gold edible pearls make elegant, glistening ornaments.
- Vary the Frosting Colors: Who says all Christmas trees have to be green? While green is traditional, consider dipping some trees in different colored candy melts.
- Snowy White Trees: Dip some in white candy melts for a snow-covered look, then decorate with red and green accents.
- Festive Red Trees: Use red candy melts for a bold, cheerful color.
- Mix and Match: Create an array of green, white, and red trees for a truly vibrant and varied display.
- Chocolate Chip Ornaments: Mini chocolate chips (milk, dark, or white) can be pressed into the wet coating as simple, delicious ornaments. They offer a more subtle color palette compared to M&Ms.
- Elegant Drizzles: For an extra touch of sophistication, once the main green coating has fully dried, melt a contrasting color of candy melt (like white, gold, or red) and use a fork or a piping bag with a tiny hole to drizzle fine lines over your trees. This creates a beautiful, intricate pattern.
- Candy Cane Crunch: For a burst of minty flavor and a beautiful texture, crush some peppermint candy canes and sprinkle them over the wet green coating.
- Alternative Shapes – The Classic Cake Ball: If the cone shape proves too challenging or you’re short on time, simply roll your cake mixture into traditional round cake balls. You can still dip them in green and decorate them as festive “ornaments” or “baubles” for your holiday spread.
With these decorating ideas, your Christmas Tree Cake Pops will be as unique and enchanting as a winter wonderland!
Expert Tips for Cake Pop Success
Achieving perfectly smooth, beautifully coated, and delicious Christmas Tree Cake Pops requires a few key techniques. These expert tips will help you navigate common challenges and ensure your festive treats turn out flawlessly every time.
- Thinning the Candy Melts for a Smooth Finish:
- **Achieving the Right Consistency:** Melted candy melts should be fluid enough to easily dip your cake pops, but not so thin that they don’t coat evenly. If your melted candy melts appear too thick or clumpy, they will result in a lumpy, uneven coating.
- **Using Vegetable Shortening:** The best way to thin candy melts is by adding a small amount of vegetable shortening (like Crisco) or paramount crystals. Add it slowly, about ½ teaspoon at a time, to the melted candy and stir until fully incorporated. Continue adding and stirring until you reach a smooth, pourable consistency that coats the back of a spoon evenly. Avoid adding water or milk, as this will cause the chocolate to seize.
- Preparing the Cake for Ideal Texture:
- **Remove Outer Layers:** After baking and cooling, it’s crucial to remove the browned outer crusts and any rough edges from your cake before crumbling. These drier parts can make your cake pop mixture inconsistent, leading to less moist or harder-to-form cake pops. Focus on using only the soft, moist interior of the cake.
- **Fine Crumbs are Key:** Ensure your cake is crumbled into very fine, even crumbs. Large chunks will create bumps in your cake pops and make them difficult to shape smoothly.
- Mastering the Dipping Technique:
- **Dip, Don’t Swirl:** When dipping your cake pops, immerse them in the melted candy melts with a confident, swift motion. Avoid swirling or twisting the cake pop within the melted candy. Dip straight down and then pull straight up.
- **Remove Excess:** After dipping, gently tap the stick against the edge of the bowl. This helps to shake off any excess coating, preventing thick, heavy drips and ensuring a clean, streamlined finish. A smooth, thin coating not only looks better but also allows for easier decoration.
- **Chill Factor:** Ensure your cake pops are sufficiently chilled (10-15 minutes in the freezer) before dipping. A cold cake pop helps the candy coating set faster and prevents the cake from sliding off the stick.
- Temperature Control is Crucial:
- **Don’t Overheat Candy Melts:** Overheating candy melts can cause them to become grainy or lose their smooth texture. Melt them in short intervals (30 seconds at a time) in the microwave, stirring well after each interval, until just melted and smooth.
- **Work in Batches:** If making a large quantity, consider keeping half of your cake pops in the freezer while you work on dipping the other half to maintain their chilled state.
- Drying and Setting:
- **Use a Styrofoam Block or Stand:** After dipping and decorating, immediately place the cake pops upright into a styrofoam block or a specialized cake pop stand. This allows the coating to set evenly without smudging or creating flat spots.
Frequently Asked Questions About Christmas Tree Cake Pops
Absolutely! These Christmas Tree Cake Pops are the perfect make-ahead holiday dessert, which is a huge bonus during the busy festive season. You can prepare the cake balls (formed into cones with sticks inserted) and freeze them in an airtight container for up to a month. This means you can get all the messy prep work out of the way well in advance. When you’re ready to decorate, simply take them out of the freezer, allow them to thaw slightly (about 10-15 minutes, still keeping them very cold), and then proceed with melting the candy melts, dipping, and decorating. Having the cake bases ready makes the final decorating stage much quicker and more enjoyable.
Proper storage is key to keeping your Christmas Tree Cake Pops fresh and delicious. Once the candy coating has fully hardened, transfer the cake pops to an airtight container. They can be stored in the refrigerator for up to 5 days. If you’ve opted to make them ahead and froze the cake bases, the finished, decorated cake pops can also be frozen in an airtight container for up to 2-3 weeks. Thaw them in the refrigerator overnight or at room temperature for an hour before serving for the best taste and texture.
If your candy melts are too thick for smooth dipping, add a small amount of vegetable shortening or paramount crystals, about ½ teaspoon at a time. Stir continuously until the melts achieve a smooth, pourable consistency. Avoid adding water or milk, as this will cause the chocolate to seize and become unusable.
This is a common issue! It usually happens if the cake mixture wasn’t firm enough, the cake pops weren’t chilled sufficiently before dipping, or if the melted candy wasn’t used as “glue” when inserting the sticks. Ensure your cake mixture is well-combined and firm, the cake pops are thoroughly chilled (freeze for 10-15 minutes), and always dip the lollipop stick tip into melted candy before inserting it into the cake pop. This creates a strong bond.
More Easy Cake Pop Recipes to Enjoy
If you’ve fallen in love with the fun and convenience of making cake pops, you’re in for a treat! The versatility of cake pops extends far beyond Christmas, allowing for creative delights for almost any occasion. Here are some more easy cake pop recipes to inspire your baking adventures throughout the year:
- Spooky Mummy Cake Pops Recipe: Perfect for Halloween, these adorable mummy-themed cake pops are wrapped in white candy melts and adorned with edible eyes for a hauntingly good treat.
- Decadent Red Velvet Cake Pops Recipe: Indulge in the rich, subtle cocoa flavor and vibrant red hue of red velvet cake pops, ideal for Valentine’s Day, anniversaries, or any occasion that calls for a touch of elegance.
- Adorable Reindeer Cake Pops: Another fantastic festive option for the holiday season! These charming reindeer cake pops feature pretzel antlers and candy eyes, bringing even more holiday cheer to your dessert table.
- Fun Halloween Cake Pops Recipe: Explore a variety of spooky and silly designs, from pumpkins to monsters, with this versatile Halloween cake pop recipe. Great for parties and trick-or-treat bags!
More Easy Christmas Treats for a Festive Season
The holiday season is all about spreading joy, and what better way to do that than with an array of delicious, homemade treats? If these Christmas Tree Cake Pops have sparked your festive baking spirit, you’ll love exploring these other easy and delightful Christmas dessert recipes that are perfect for sharing, gifting, or simply enjoying with loved ones:
- Colorful Christmas Rice Krispie Treats: A classic childhood favorite, transformed for the holidays! These festive Rice Krispie treats can be shaped and decorated with red and green colors and sprinkles, making them quick, easy, and incredibly fun to make with kids.
- Charming Christmas Tree Cupcakes Recipe: If you love the Christmas tree theme but prefer cupcakes, this recipe is for you. Decorated with green frosting and edible ornaments, these cupcakes are a delightful individual dessert for any holiday gathering.
- Easy Candy Cane Pie Recipe: For a refreshing and creamy dessert, this no-bake candy cane pie is a dream! With its cool peppermint flavor and festive crushed candy cane topping, it’s a light yet indulgent option for your holiday meal.
- Festive Christmas Sugar Cookie Bars Recipe: All the joy of decorating sugar cookies, but in a much easier bar form! These soft, chewy bars are topped with a sweet frosting and plenty of sprinkles, perfect for feeding a crowd without the fuss of individual cookie cutting.
We hope these recipes inspire you to create a truly delicious and memorable holiday season filled with sweet treats and cherished moments!
We invite you to try this wonderfully festive Christmas Tree Cake Pops recipe and experience the joy of holiday baking. Once you’ve created your own batch of these delightful treats, please come back and share your experience by leaving a comment and a star recipe rating. We absolutely love hearing from you and seeing your beautiful creations!
Christmas Tree Cake Pops
25
mins
30
mins
15
mins
1
hr
10
mins
16
American
Dessert
322
Carrie Barnard
Ingredients
- 1 box Super Moist Vanilla Cake Mix 16.5 oz box
- *Plus ingredients to prepare the cake on the back of the box
- ⅓ cup Vanilla Frosting
- 16 oz Green Candy Melts
- Mini M&Ms
- Yellow Star Sprinkles
- Lollipop Sticks
Instructions
- Prepare and bake the cake according to the box instructions in a 9X13 inch pan. Allow the cake to cool completely at room temperature.
- Remove the cake from the pan. Carefully remove and discard the brown outer layer from the cake. Crumble the remaining soft cake into a large bowl until no large lumps remain.
- Add the vanilla frosting (start with ⅓ cup) to your crumbled cake and stir everything together until well combined and the mixture forms a pliable dough.
- Take approximately 1 tablespoon of the mixture and form it into a cone shape, resembling a small Christmas tree. Place each shaped cone onto a baking sheet lined with parchment paper. Continue until all the cake mixture is formed into cones.
- Place the green candy melts in a microwave-safe bowl. Heat in 30-second intervals, stirring after each, until fully melted and smooth. Be careful not to overheat.
- Dip the end of a lollipop stick into the melted green candy melt, then gently insert the coated end into the larger base of each cake cone, about halfway through. Place in the freezer for 10-15 minutes to firm up.
- Dip the entire tree portion of the cake pop into the melted green candy melt. Gently tap the stick against the bowl’s edge to remove any excess. While the coating is still wet, use a toothpick to create small upward motions to resemble tree branches.
- Immediately place the stick of cake pops in a block of styrofoam or a cake pop stand. Top the cake pops with Mini M&Ms as ornaments and a yellow star sprinkle on top before the candy coating dries.
- Continue until all Christmas trees have been covered and decorated. Once all the cake pops are dry and firm, they are ready to serve and enjoy!
Recipe Notes
Feel free to customize these cake pops with your favorite type of cake mix, frosting, and festive decorations!
Nutrition Facts
Carbohydrates 49g,
Protein 2g,
Fat 13g,
Saturated Fat 7g,
Polyunsaturated Fat 1g,
Monounsaturated Fat 3g,
Trans Fat 0.2g,
Cholesterol 3mg,
Sodium 257mg,
Potassium 22mg,
Fiber 1g,
Sugar 35g,
Vitamin A 40IU,
Vitamin C 0.1mg,
Calcium 91mg,
Iron 1mg
