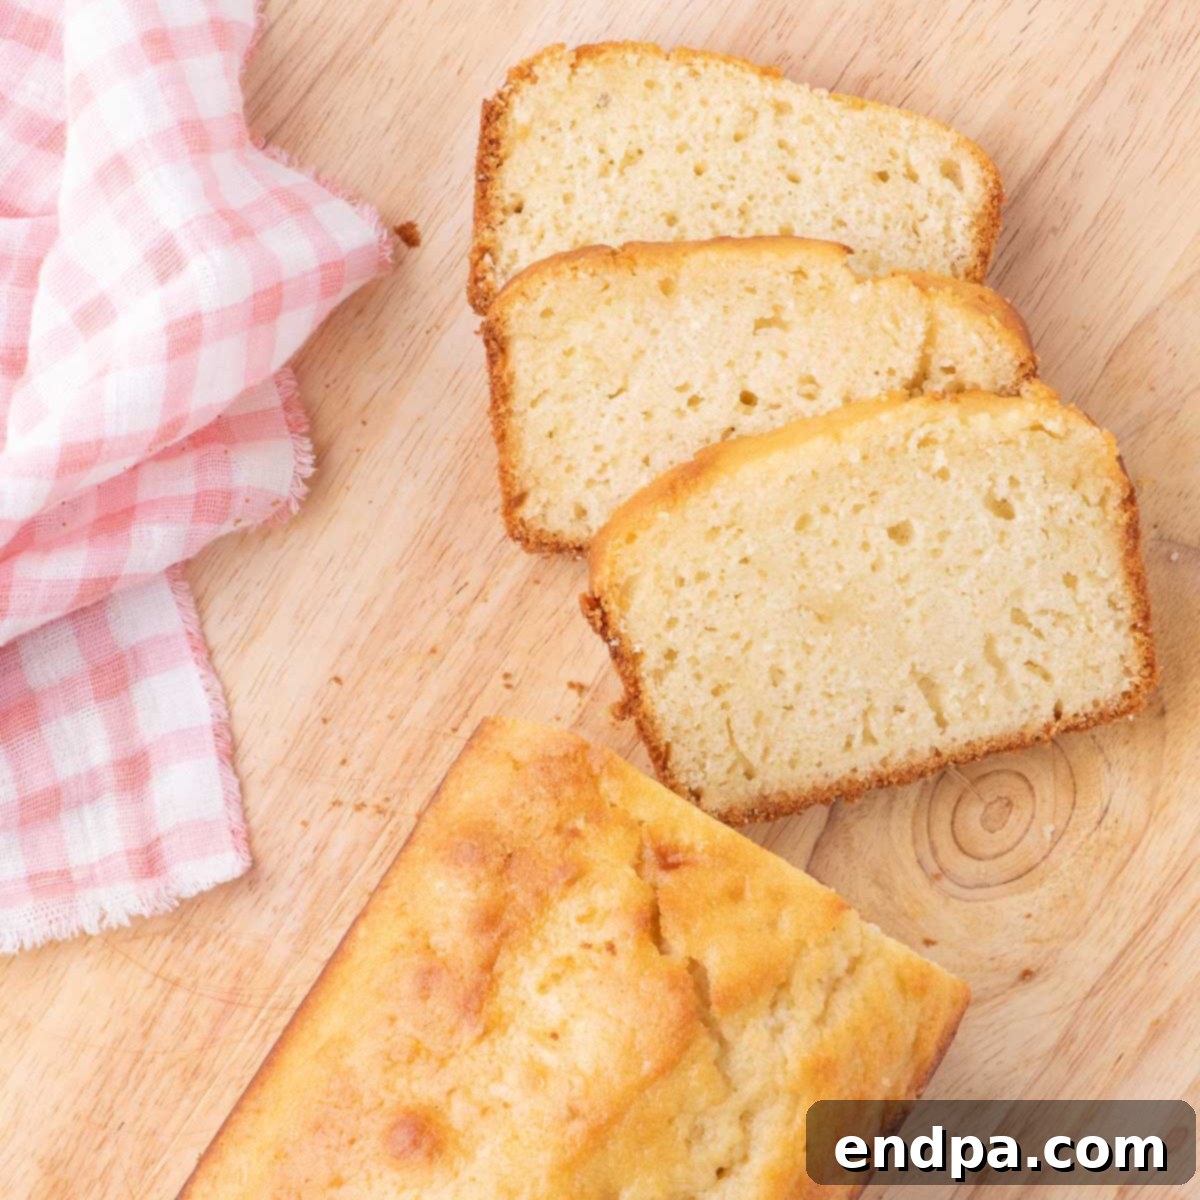
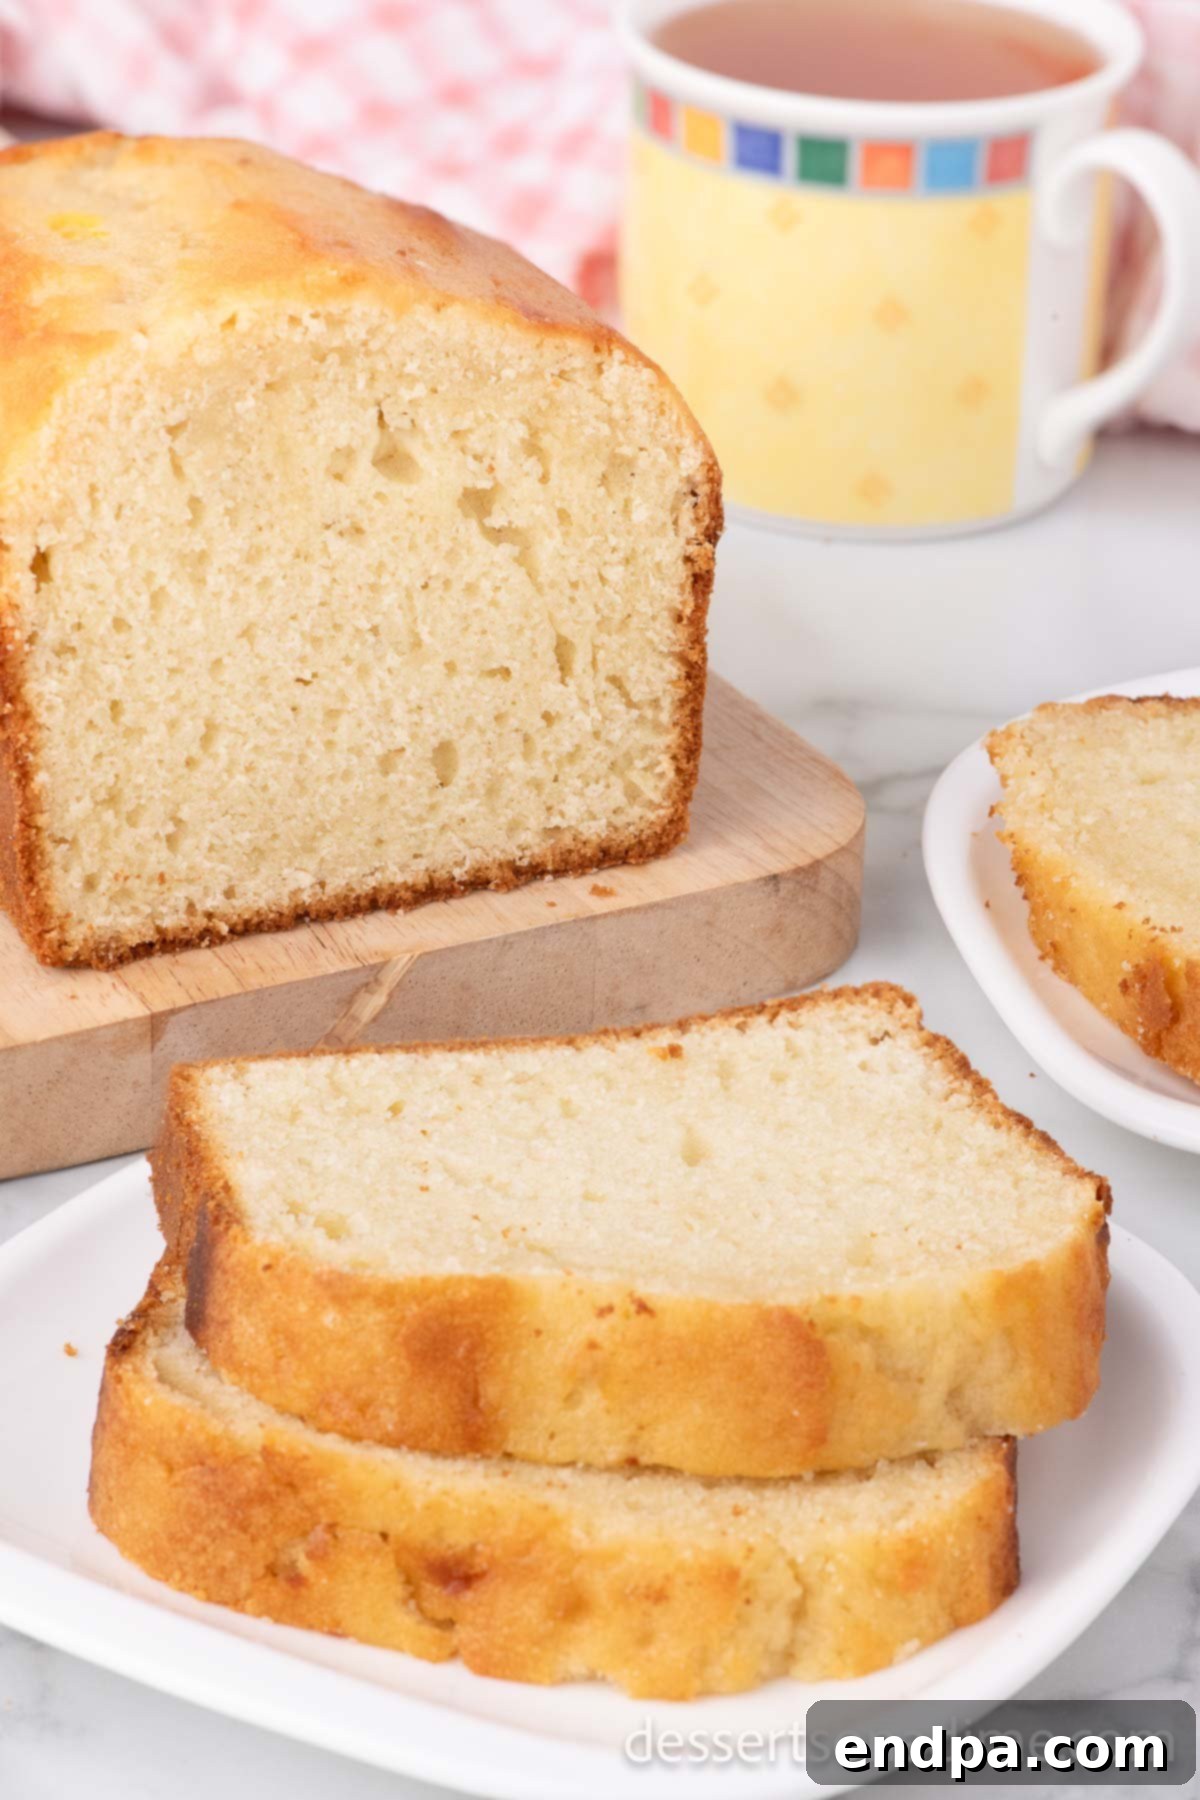
Sweet Bread is a wonderfully versatile and utterly delicious quick bread that brings an immediate sense of warmth and comfort to any home. This delightful recipe guides you through creating a remarkably moist, tender, and flavorful loaf using only basic pantry staples you likely have on hand. It’s the quintessential treat for a relaxed breakfast, a comforting afternoon pick-me-up, or a thoughtful homemade gift for friends and neighbors. Its inviting aroma as it bakes and its irresistible tender crumb make it an instant family favorite, perfect for enjoying any time of day.
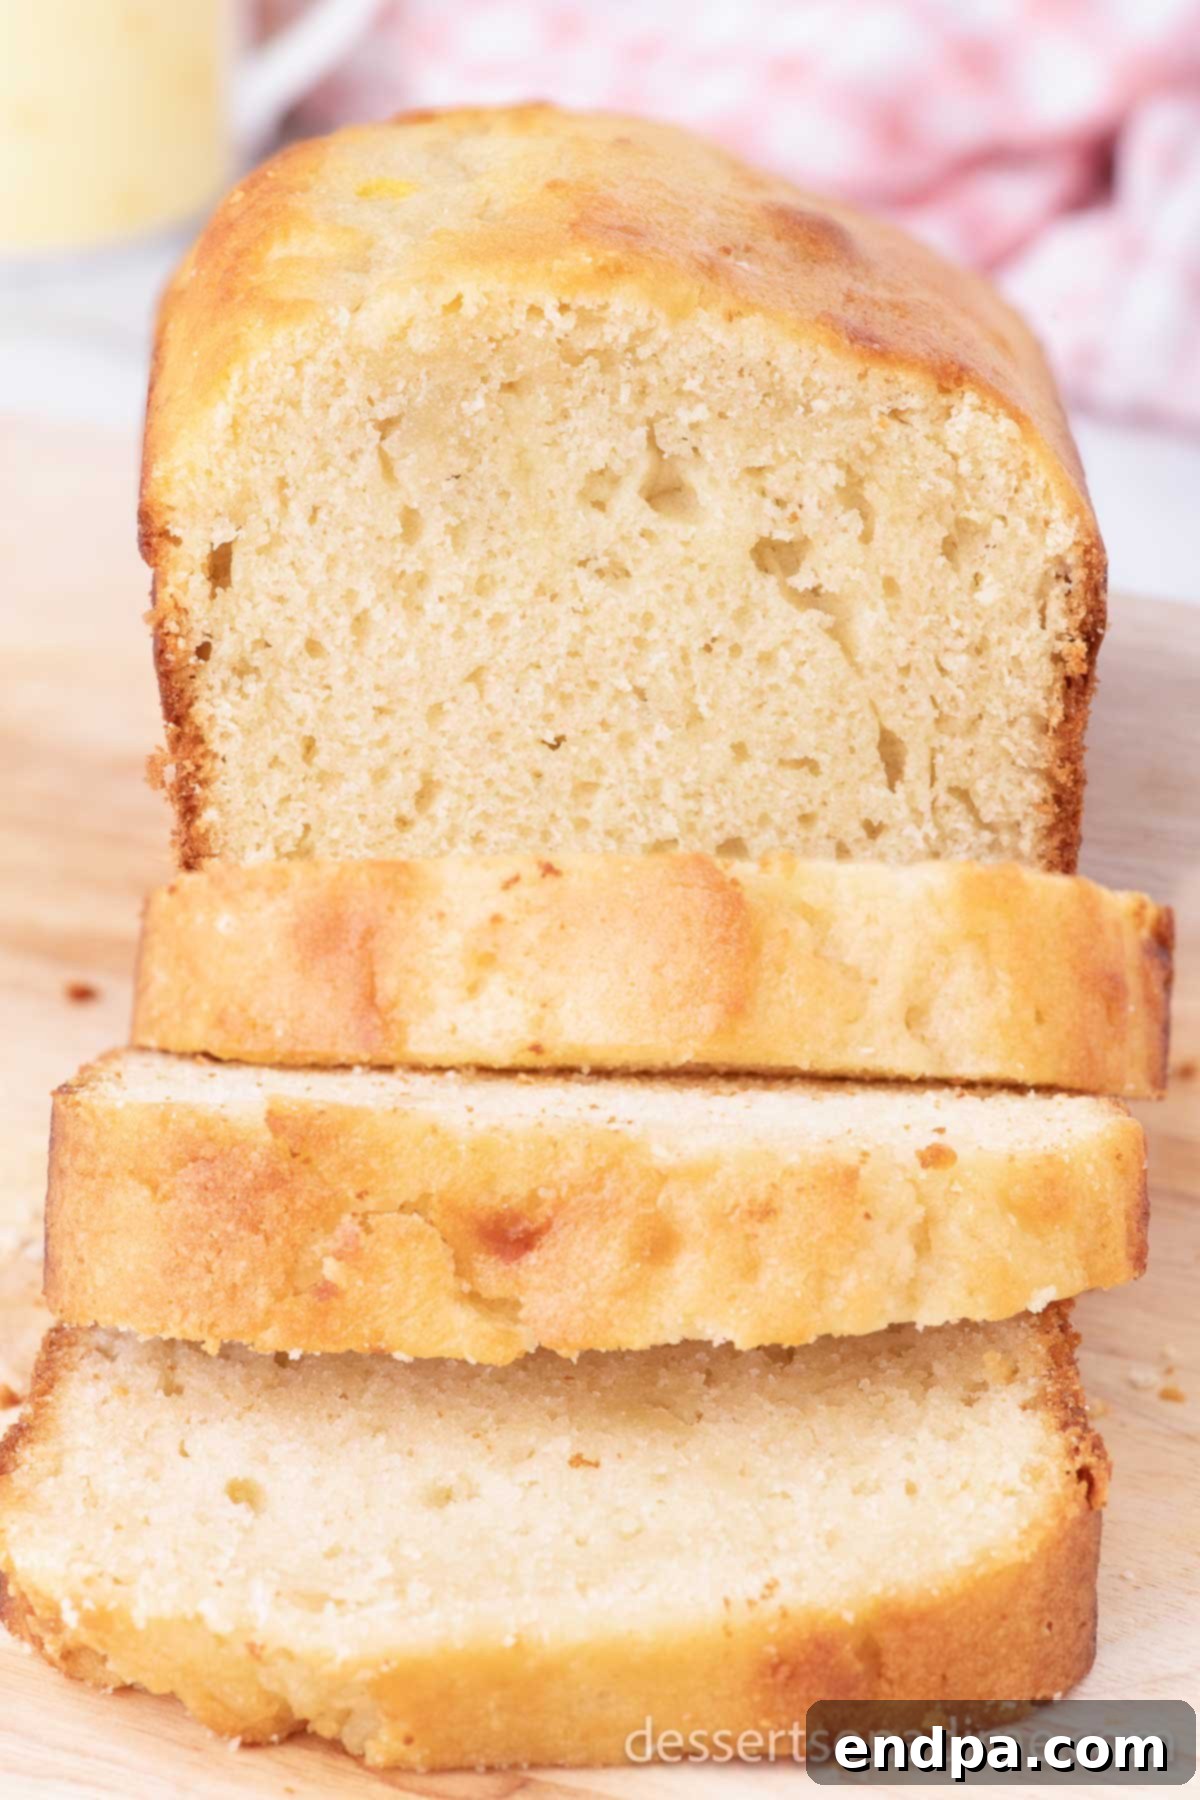
The beauty of this sweet bread recipe lies in its sheer simplicity. It’s an incredibly effortless dish to prepare, making it an ideal project for bakers of all skill levels, from beginners to seasoned pros looking for a quick win. The entire family will fall in love with its soft texture and perfectly balanced sweetness, establishing it as a go-to option for a quick, satisfying bite or a beautiful centerpiece for your breakfast or brunch table. Say goodbye to complicated techniques, lengthy rising times, or hard-to-find ingredients; this recipe prioritizes ease and accessibility without ever compromising on a truly exceptional flavor and texture.
The culinary landscape of quick bread recipes offers truly endless possibilities, and this sweet bread serves as an outstanding foundation for countless delightful variations. Throughout my years of baking, I’ve cherished experimenting with a wide array of quick breads, each bringing its own unique charm and appeal. Among my absolute favorites are the rich and comforting Cinnamon Roll Bread, the timeless classic Cinnamon Bread, the refreshingly fruity Blueberry Banana Bread, and the delightfully tart Cranberry Bread Recipe. As the festive holiday season approaches, my kitchen is often filled with the aromas of special loaves like the celebratory Christmas Bread, the vibrant Orange Cranberry Bread, and the universally adored Libby’s Pumpkin Bread Recipe. These quick breads are more than just delicious treats; they are wonderful edible expressions of joy, perfect for sharing and bringing loved ones together around the table.
Table of Contents: Your Comprehensive Guide to Perfect Sweet Bread
- What Exactly is Sweet Bread? The Comfort of Quick Baking
- Essential Ingredients for a Perfect Sweet Bread Loaf
- Unleash Your Creativity: Exciting Sweet Bread Variations
- Step-by-Step Guide: How to Bake the Perfect Sweet Bread
- Expert Pro Tips for Sweet Bread Baking Success
- Frequently Asked Questions (FAQ) About Sweet Bread
- Explore More Delightful & Easy Quick Bread Recipes
- Printable Sweet Bread Recipe Card
What Exactly is Sweet Bread? The Comfort of Quick Baking
In the culinary world, “sweet bread” typically refers to a cherished category of quick breads, distinguished by their delightful sweetness and ease of preparation. Unlike traditional yeasted breads that require extensive kneading and multiple proofs, quick breads are leavened with chemical agents like baking powder or baking soda. This ingenious method means there’s no need for time-consuming kneading, nor the patient waiting for dough to rise. The result is a much faster, more approachable path to enjoying freshly baked goodness right in your own home. Our sweet bread recipe is a prime example of this delightful simplicity, demanding only basic, readily available ingredients and mere minutes of active preparation. The final product is a comforting, tender loaf that often evokes nostalgic feelings, much like the homemade treats from cherished childhood memories.
The true charm of this sweet bread recipe lies deeply in its remarkable adaptability. It serves as an incredible and versatile base that you can effortlessly customize with a vast array of add-ins and flavor profiles. Whether you’re craving a taste of the season with fresh fruits, experimenting with exotic spices, or simply using what’s in your pantry, the possibilities for personalization are genuinely endless. This flexibility transforms it from being merely a simple recipe into a fertile ground for culinary creativity and personal expression. It’s a wonderful way to experiment and make each loaf uniquely yours, ensuring it perfectly suits any craving, occasion, or dietary preference.
Beyond its role as a delightful indulgence for your own family, a lovingly homemade sweet bread makes an exceptional and deeply appreciated gift. Whether you’re presenting it to neighbors as a welcoming gesture, offering it to friends as a token of affection, or bringing it as a thoughtful hostess offering, a beautifully wrapped loaf of sweet bread is always received with joy. It’s a warm gesture of care and generosity that speaks volumes about your thoughtfulness. For other delightful and kid-friendly quick bread options that are sure to be a hit, my children particularly adore the fruity Strawberry Banana Bread and the rich, decadent Chocolate Banana Bread. These examples further highlight just how incredibly versatile and universally loved these simple, yet profoundly satisfying, baked goods can truly be, appealing to palates of all ages.
Essential Ingredients for a Perfect Sweet Bread Loaf
One of the most appealing aspects of this particular sweet bread recipe is its reliance on common, everyday ingredients that you very likely already have stocked in your pantry. This makes it an ideal candidate for those spontaneous baking urges, requiring no special trips to the grocery store. Each ingredient, though seemingly simple, plays a pivotal and distinct role in achieving that coveted perfect moist texture, golden crust, and delectable flavor profile that defines an excellent sweet bread. Here’s a detailed breakdown of what you’ll need and precisely why each component is so crucial to the success of your bake:

- All-Purpose Flour: This forms the essential structural foundation of your sweet bread. To ensure the lightest and most tender crumb, it’s imperative to measure flour accurately. The best method is to spoon the flour gently into a measuring cup and then level it off with a straight edge. This technique prevents over-packing the flour, which can lead to a dense, heavy, and unpleasantly dry loaf. For ultimate precision, especially in baking, using a digital kitchen scale is always recommended.
- Granulated Sugar: Simple white granulated sugar is not just for sweetness. It actively contributes to the bread’s delightful tenderness by interfering with gluten development, and it plays a key role in achieving that beautiful, appetizing golden-brown crust through caramelization during baking.
- Whole Milk: The higher fat content present in whole milk is invaluable. It dramatically enriches the flavor, imparts crucial moisture, and contributes significantly to a tender, melt-in-your-mouth crumb. While other types of milk (like 2% or even non-dairy alternatives) can be used, whole milk genuinely enhances the overall texture and depth of flavor, making a noticeable difference.
- Vanilla Extract: A generous splash of vanilla extract acts as a flavor enhancer, expertly tying together and elevating all the other ingredients. It adds a warm, inviting, and wonderfully aromatic depth that is absolutely essential for a truly delicious and well-rounded sweet bread. Do not underestimate its power or be tempted to omit it!
- Baking Powder: This is your primary chemical leavening agent, crucial for the bread’s rise and achieving that desirable light, airy, and fluffy texture. Always ensure your baking powder is fresh and active for optimal results; expired baking powder will lead to a flat, dense loaf.
- Salt: Often overlooked, a pinch of salt is absolutely vital. It doesn’t just add its own flavor but keenly balances the sweetness and remarkably enhances the overall flavor profile of the bread. Without it, the bread can taste surprisingly flat or one-dimensional.
- Large Eggs: Eggs serve multiple critical functions in baking. They act as a strong binder, holding the ingredients together, while also adding significant structure, much-needed moisture, and a rich quality to the batter. Furthermore, they contribute to the bread’s leavening, working in conjunction with the baking powder to create a tender, soft crumb.
- Vegetable Oil: Using a neutral-flavored oil such as vegetable oil (or canola oil) is key to ensuring a consistently moist loaf that stays fresh for longer. Unlike butter, which contains a percentage of water, oil is 100% fat, making it an excellent choice for contributing to a softer, more succulent texture throughout the bread’s lifespan.
For your convenience, the complete ingredient list with precise measurements, along with a printable recipe card featuring all the essential details, can be found by simply scrolling to the bottom of this post. Everything is neatly organized to make your baking experience as smooth and enjoyable as possible.
Unleash Your Creativity: Exciting Sweet Bread Variations
This sweet bread recipe is remarkably forgiving and acts as a fantastic blank canvas, inviting you to unleash your culinary imagination. Don’t hesitate to experiment with different add-ins to craft unique flavors and textures that perfectly match your preferences or the occasion. Here are some incredibly popular and undeniably delicious variations to inspire your next baking adventure:
- Mini Loaves: For charming individual servings, delightful party favors, or heartwarming gifts, simply divide the prepared batter among three standard mini loaf pans. Remember to adjust the baking time accordingly; mini loaves typically require a shorter baking period, usually around 40-45 minutes, or until a wooden toothpick inserted into the center of a mini loaf emerges clean. Always keep a close watch to prevent over-browning.
- Chocolate Chips: A timeless and universally adored addition! Stir in approximately ½ to 1 cup of your preferred chocolate chips—whether milk, semi-sweet, dark, or even white chocolate—into the batter just before pouring it into the pan. This ensures delightful pockets of melted sweetness distributed generously throughout every slice of bread.
- Dried Fruit: Elevate your sweet bread with the wonderful addition of various dried fruits. Sweetened cranberries, plump raisins, finely chopped dried apricots, or even diced dried strawberries introduce a fantastic chewiness and vibrant bursts of concentrated flavor. Aim for about ½ to 1 cup, adjusting the quantity based on your personal preference.
- Nuts: For an appealing textural contrast and a rich, earthy flavor, fold in ½ to ¾ cup of finely chopped pecans, walnuts, or almonds. For an even deeper, more pronounced nutty taste, lightly toasting the nuts in a dry pan before incorporating them into the batter can make a significant difference.
- Citrus Zest: Infuse your sweet bread with a burst of bright, zesty freshness by adding the finely grated zest of one lemon, orange, or lime. The fragrant essential oils contained within the zest will permeate the bread, imparting a wonderfully refreshing and tangy note that perfectly complements the sweetness.
- Warm Spices: Introduce comforting warmth and aromatic complexity with ground spices. A teaspoon of ground cinnamon is an excellent starting point for a spiced sweet bread, or you can explore the cozy notes of nutmeg, a hint of allspice, or a touch of aromatic cardamom for more exotic flavors.
- Decadent Glazes and Toppings: Once your sweet bread has cooled completely, consider enhancing it with a simple yet elegant glaze. A basic powdered sugar glaze (prepared by mixing powdered sugar with a small amount of milk or citrus juice) drizzled over the top adds an extra layer of sweetness and visual appeal. Alternatively, a sprinkle of cinnamon-sugar mixture before baking can create a delightful crunchy topping.
- Fruit Purees for Depth: For a richer, more dense texture and a distinct flavor profile, incorporate about ½ cup of mashed ripe bananas or pumpkin puree into the wet ingredients. If adding significant moisture, you might need to slightly increase the baking time to ensure the bread is cooked through.
Step-by-Step Guide: How to Bake the Perfect Sweet Bread
Baking this sweet bread is a straightforward and highly rewarding process, even for those who are just beginning their culinary journey. By carefully following these simple, clear steps, you’ll be well on your way to ensuring a perfectly baked, consistently delicious, and irresistibly moist loaf every single time.
- Step 1: Prepare Your Oven and Pan. Your baking journey begins with preparation. First, preheat your oven to 350 degrees Fahrenheit (175°C). While the oven diligently heats to the correct temperature, take a standard 9×5-inch loaf pan and generously spray its interior with a high-quality non-stick cooking spray. As an alternative, you can thoroughly grease and flour the pan, or even line it with parchment paper (leaving an overhang on the longer sides) for incredibly easy removal later. Proper pan preparation is crucial as it actively prevents the bread from sticking, ensuring a beautiful, unblemished crust on your finished loaf.
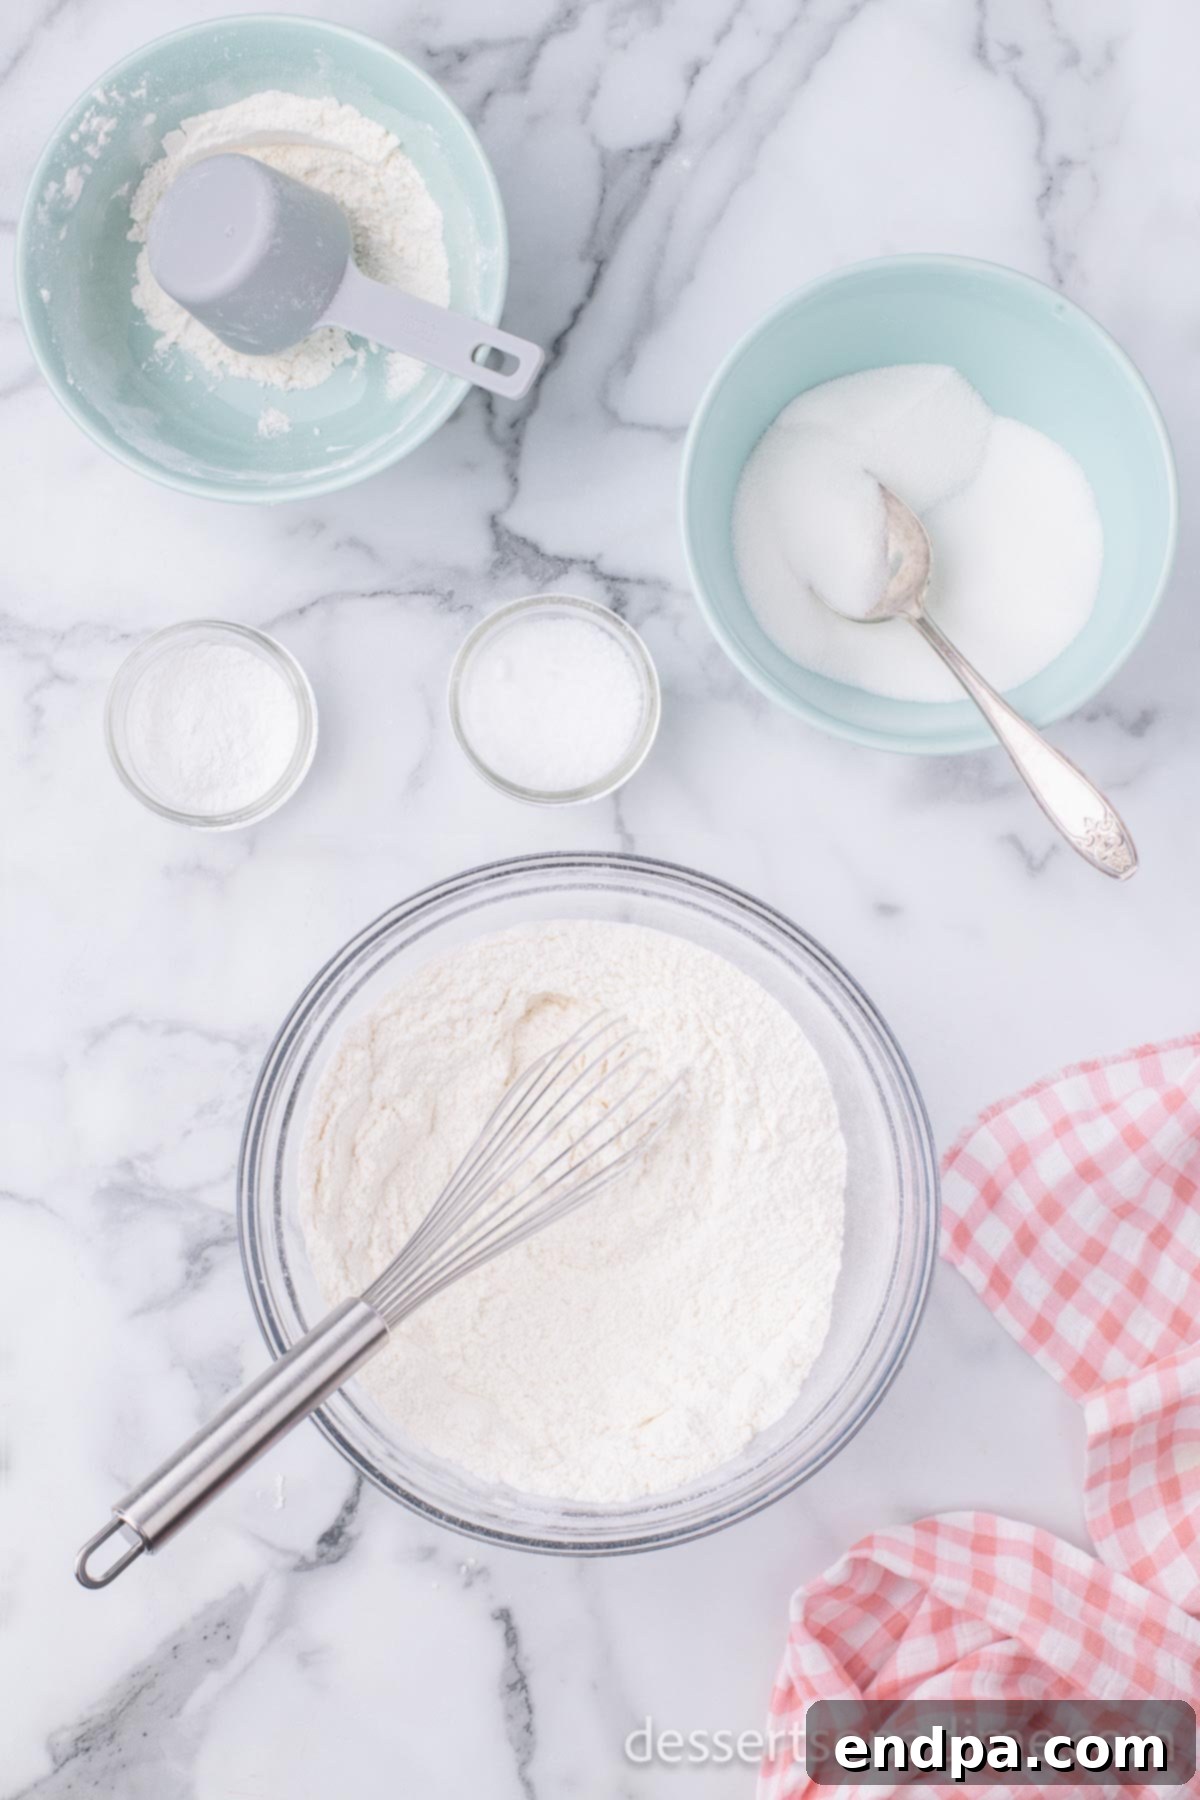
Step 2: Combine the Dry Ingredients. In a sizable mixing bowl, or the bowl of a robust stand mixer equipped with the paddle attachment, carefully combine your precisely measured all-purpose flour, granulated sugar, baking powder, and salt. Take a whisk and thoroughly blend these dry ingredients together. The goal here is to ensure that the vital leavening agent (baking powder) and the seasoning (salt) are absolutely evenly distributed throughout the flour. This meticulous mixing is foundational for achieving an even, consistent rise and a perfectly uniform flavor throughout your baked bread.
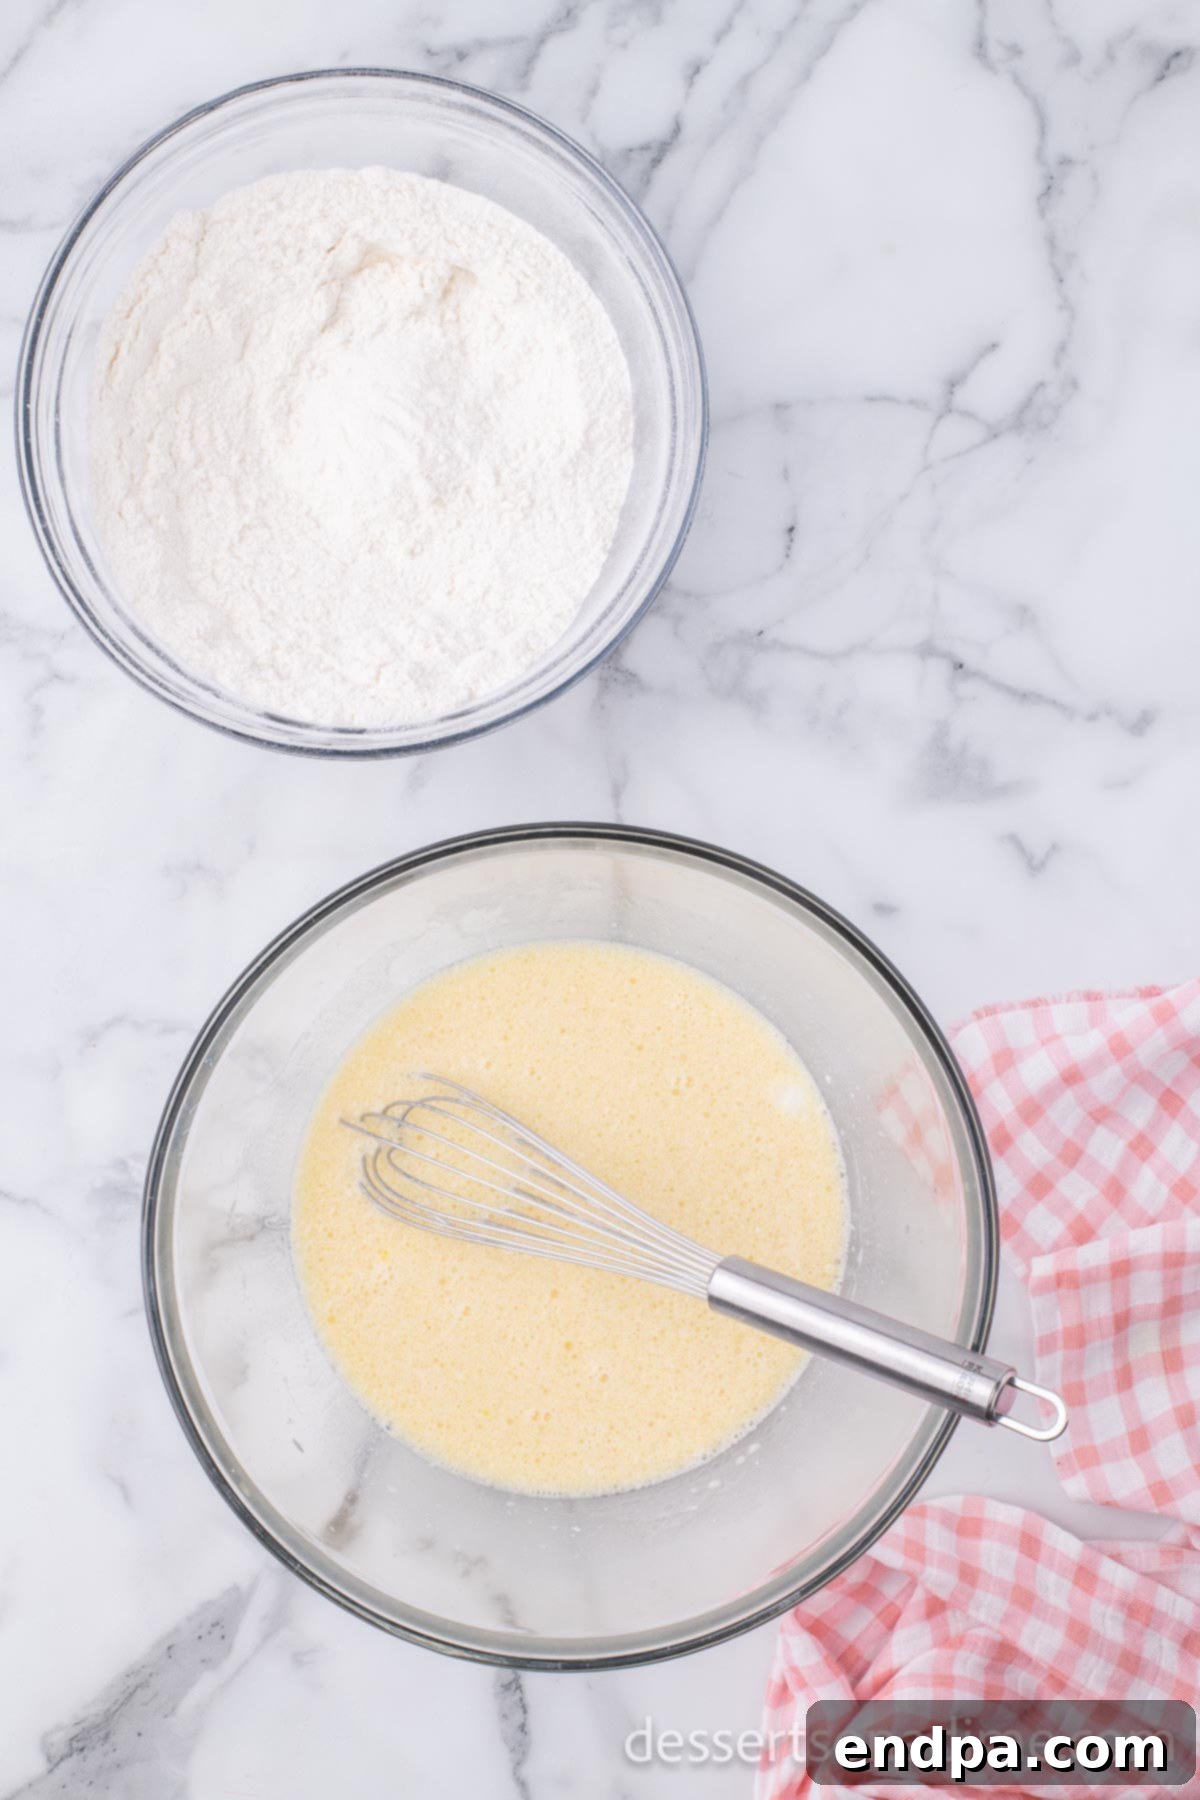
Step 3: Whisk the Wet Ingredients. Now, turn your attention to the wet components. In a separate, smaller mixing bowl, thoroughly whisk together the whole milk, fragrant vanilla extract, large eggs, and vegetable oil. Continue whisking until these ingredients are entirely combined and the mixture presents a smooth, homogenous appearance. This preliminary step ensures that all the liquid components are fully emulsified and incorporated before they are introduced to the dry ingredients, effectively preventing unsightly lumps and guaranteeing a uniformly moist batter.
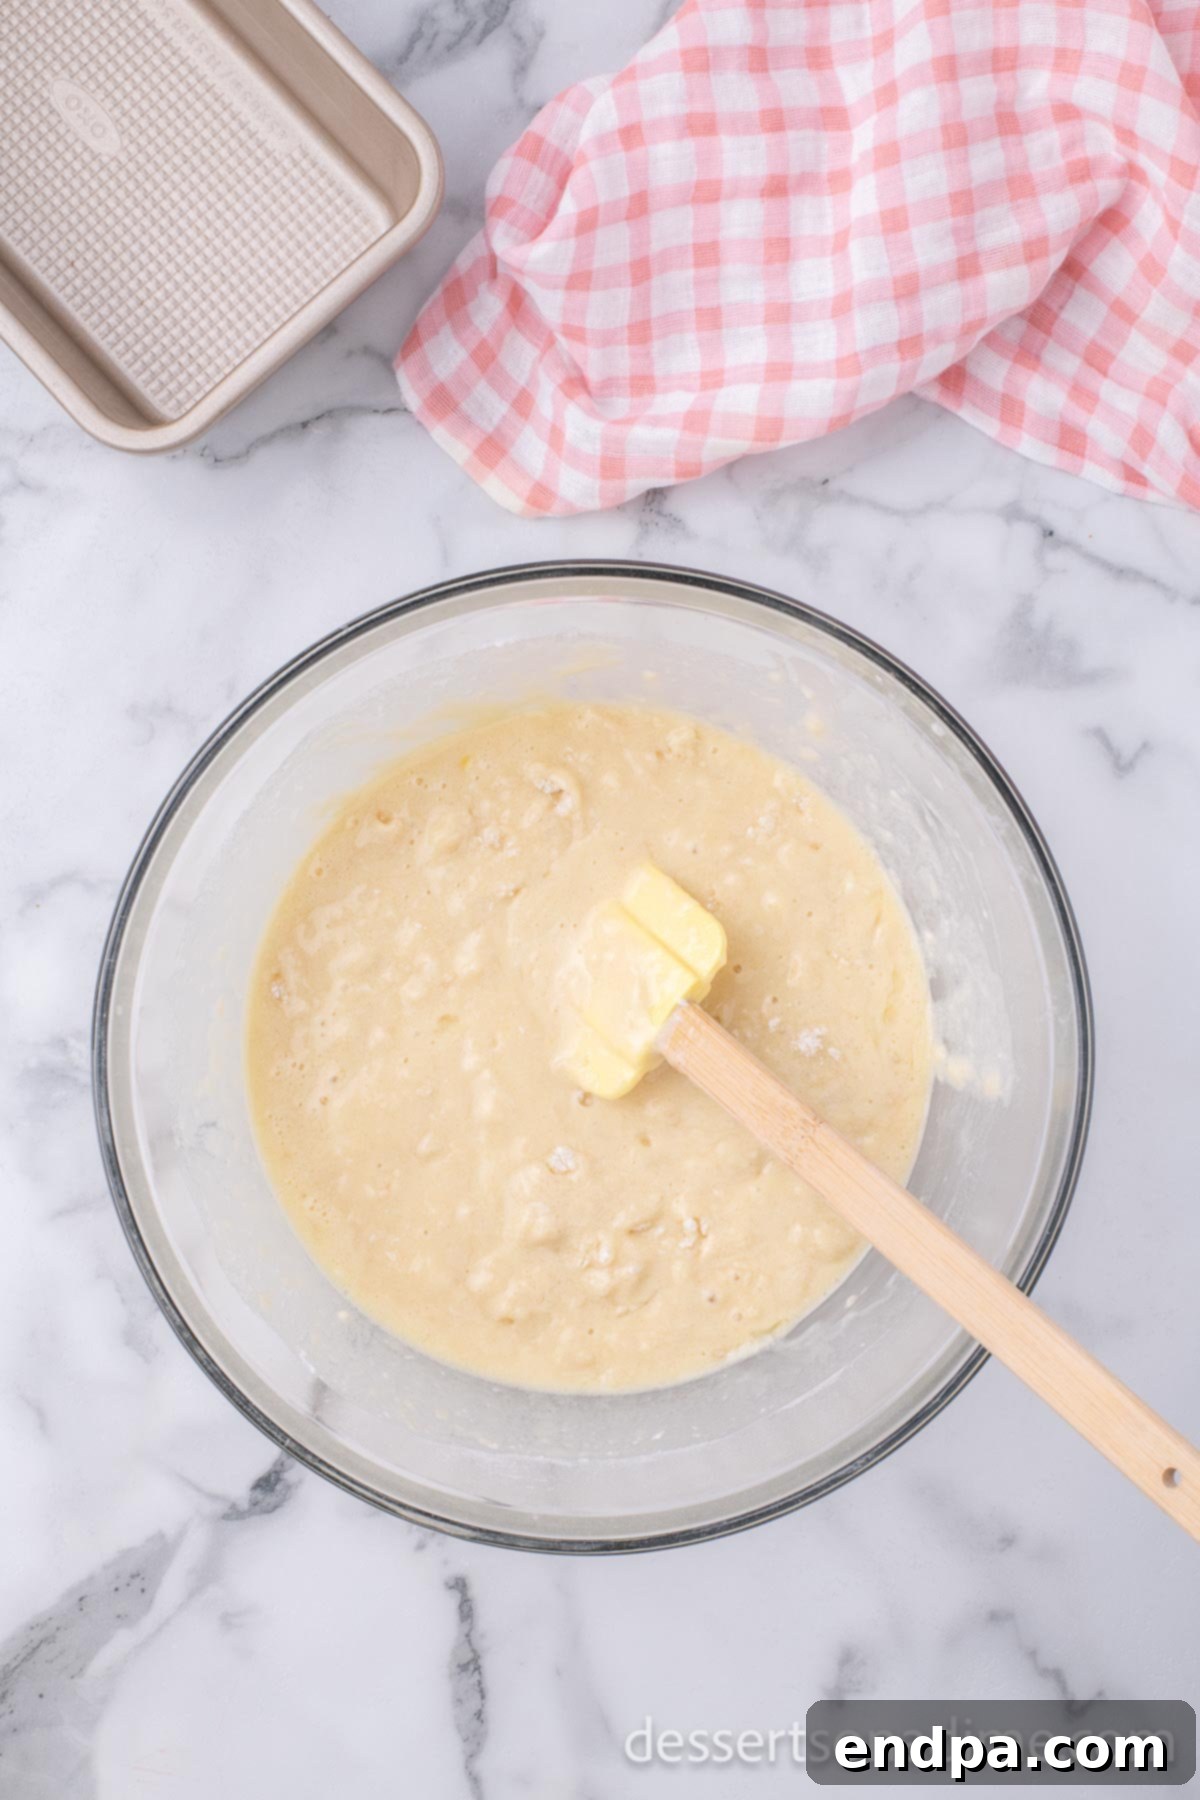
Step 4: Gently Combine Wet and Dry. This is a critical juncture in quick bread baking. Gradually pour the bowl of whisked wet ingredients into the bowl containing the dry ingredients. Using either a sturdy wooden spoon or a flexible rubber spatula, very gently stir the mixture until it is *just combined*. It is absolutely crucial at this stage not to overmix the batter; encountering a few small lumps is perfectly acceptable and even slightly desirable, as it indicates proper handling. Overmixing vigorously develops the gluten in the flour too much, which inevitably leads to a tough, dense, and ultimately dry bread. Remember, a slightly lumpy batter will always yield a superior, more tender quick bread than an overmixed, smooth one. A dough hook is completely unnecessary for this type of bread.
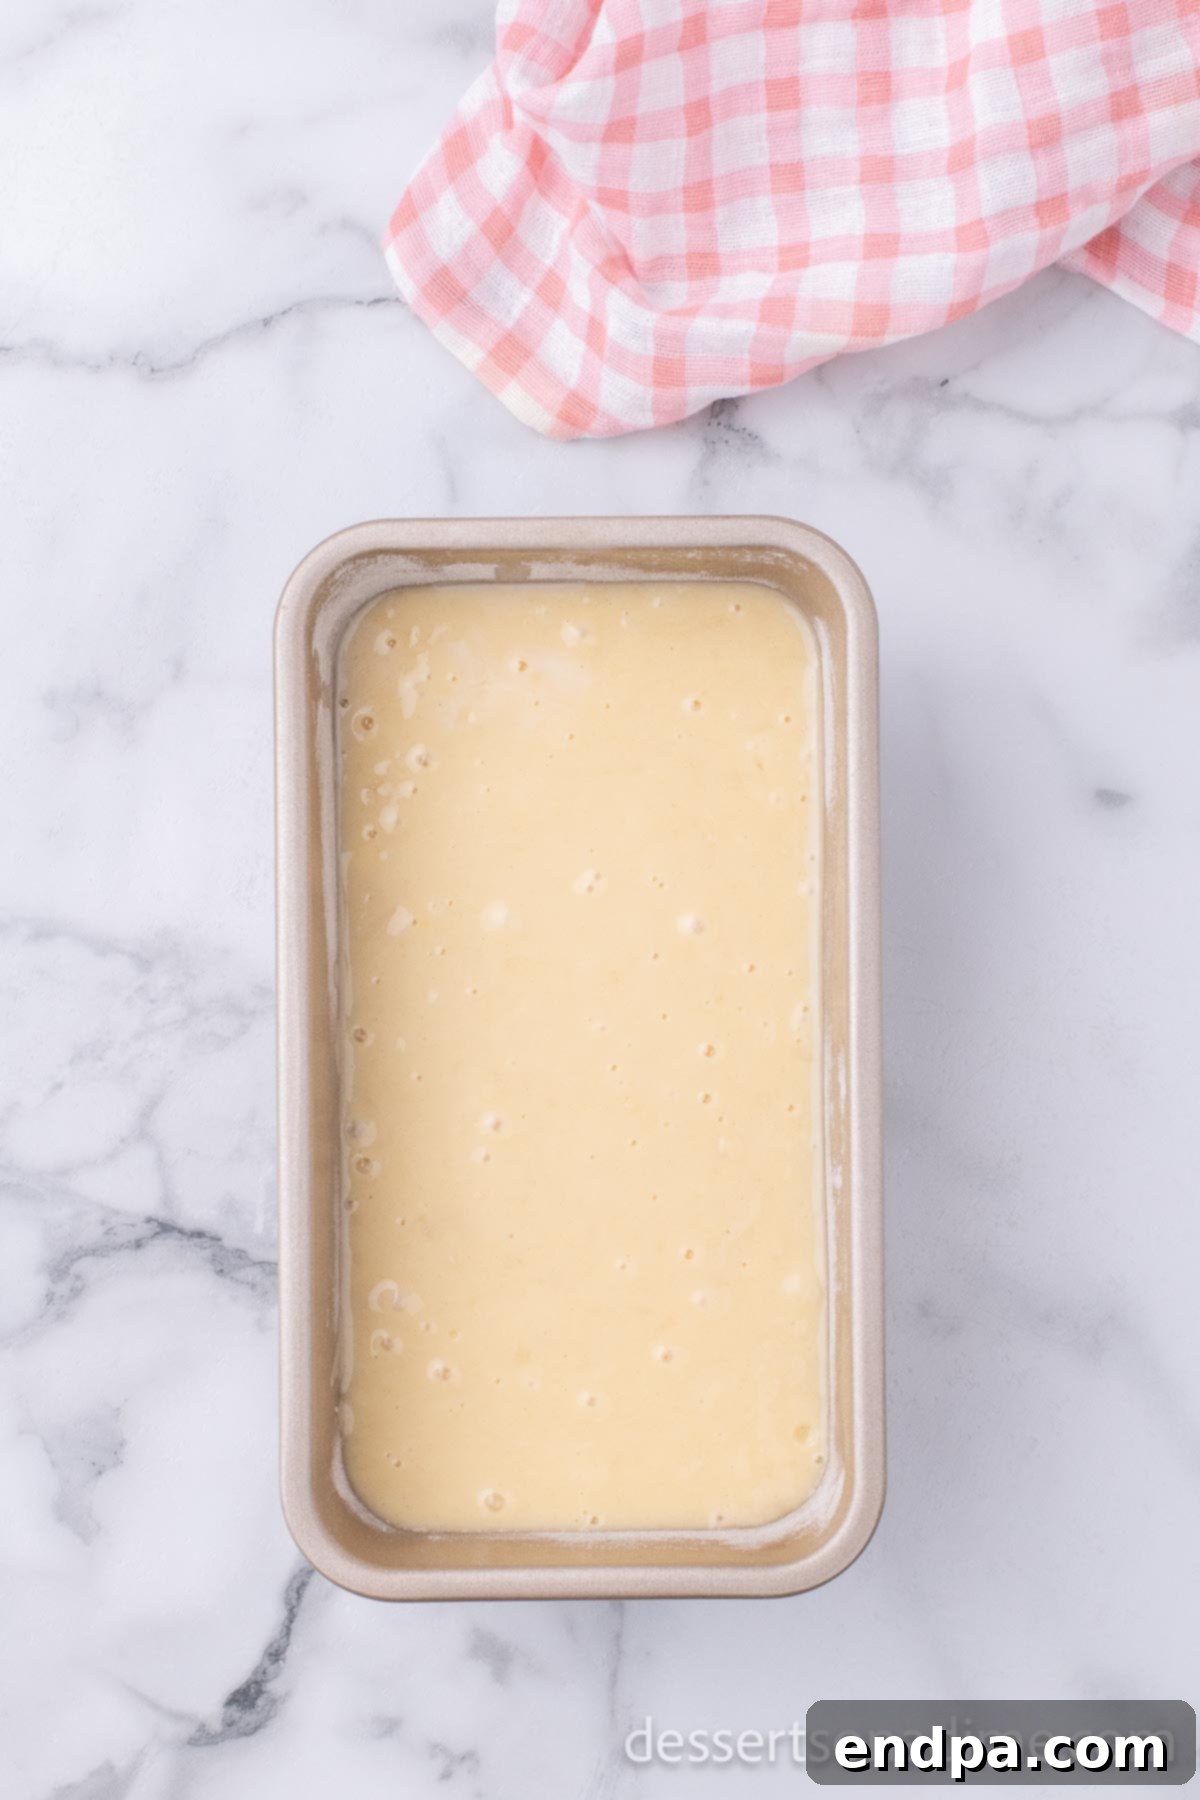
Step 5: Fill the Loaf Pan. Once your batter has been gently combined to the right consistency, carefully transfer and spread it evenly into your previously prepared 9×5-inch loaf pan. Ensure that the top surface of the batter is relatively smooth. This small detail helps to promote even baking and a beautiful, crack-free crust. If you’ve decided to include any optional add-ins, such as chocolate chips, dried fruits, or nuts, this is the perfect moment to gently fold them into the batter just before pouring it into the pan.
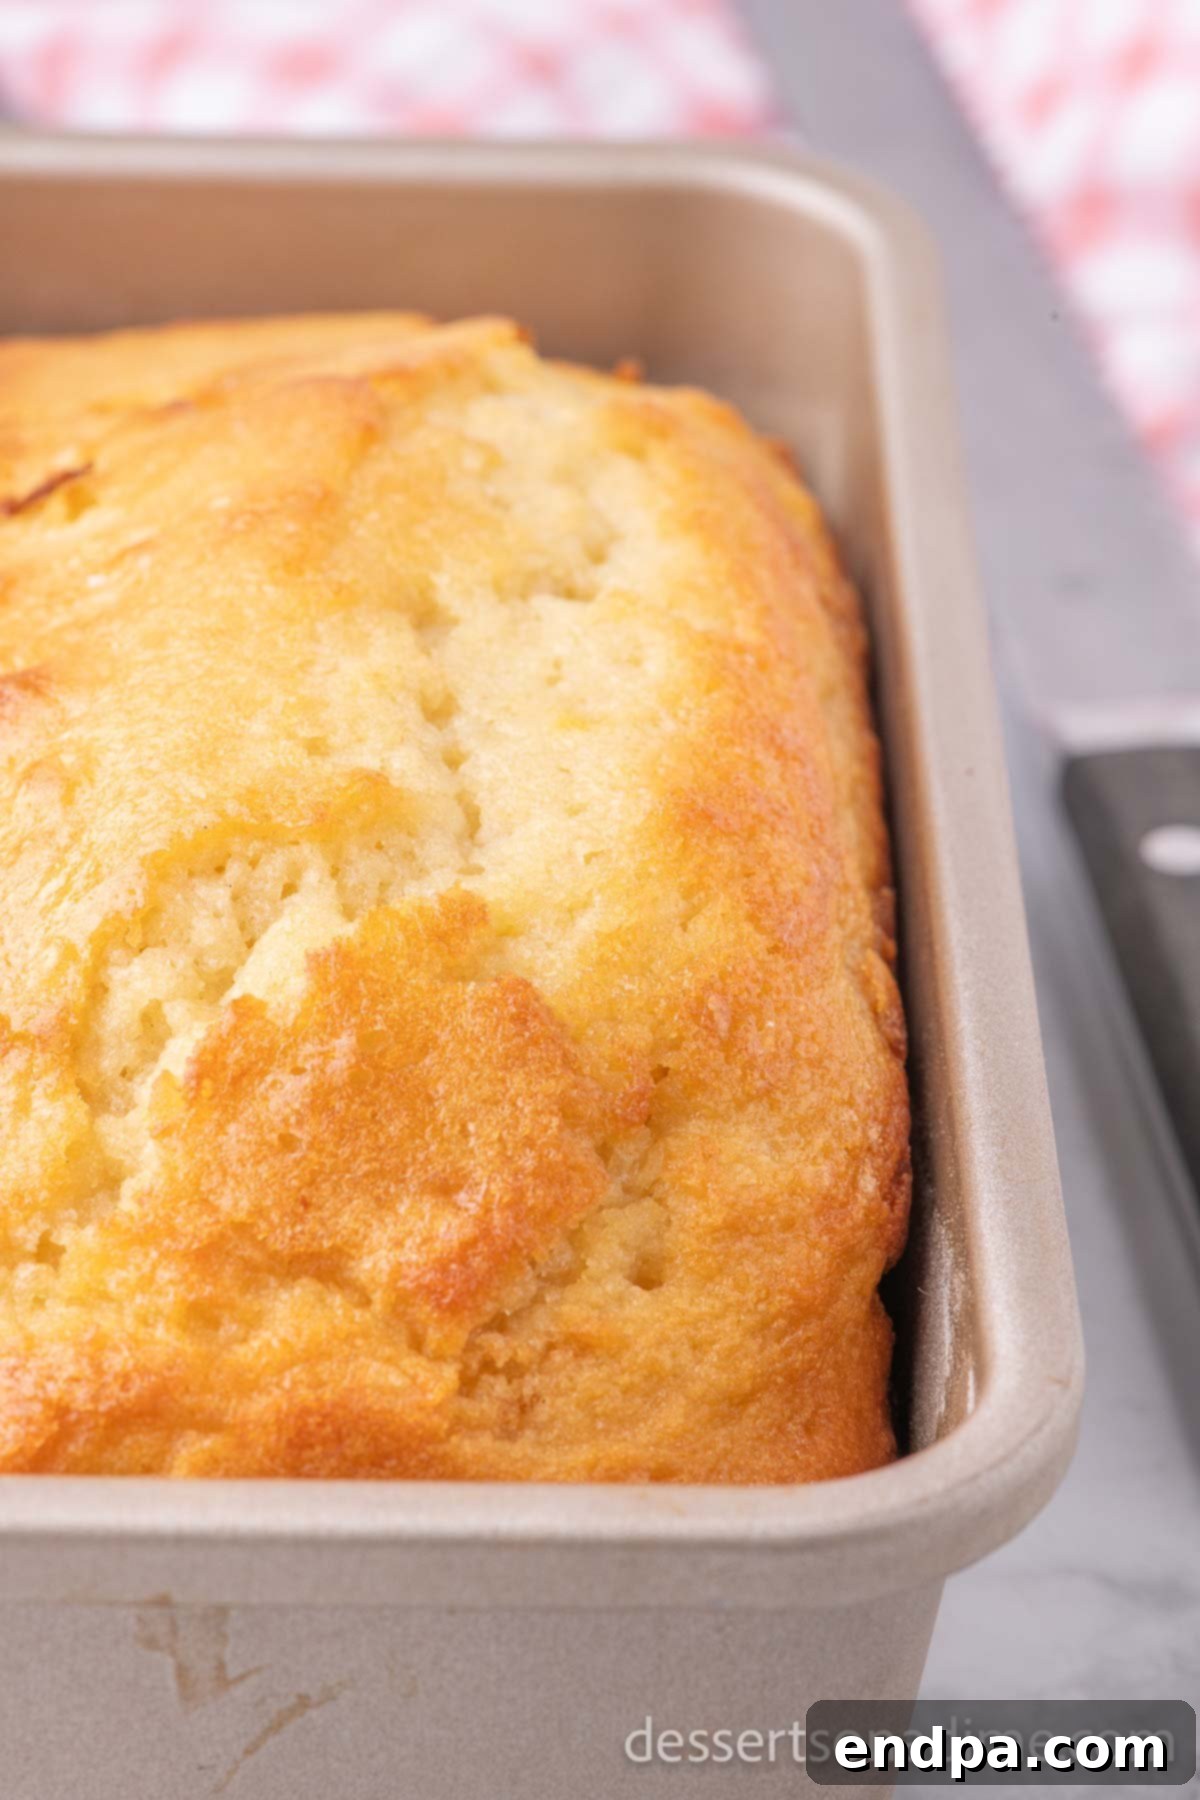
Step 6: Bake to Golden Perfection. Carefully place the filled loaf pan into your preheated oven. Bake for approximately 45 to 50 minutes. It’s important to remember that exact baking times can vary somewhat based on the specific calibration of your oven, so it’s always wise to keep a close eye on your bread, especially towards the end of the baking cycle. Your sweet bread is perfectly baked when a wooden skewer or a clean toothpick, when inserted into the very center of the loaf, comes out clean, indicating no wet batter remains. The top surface of the bread should also be beautifully golden brown.
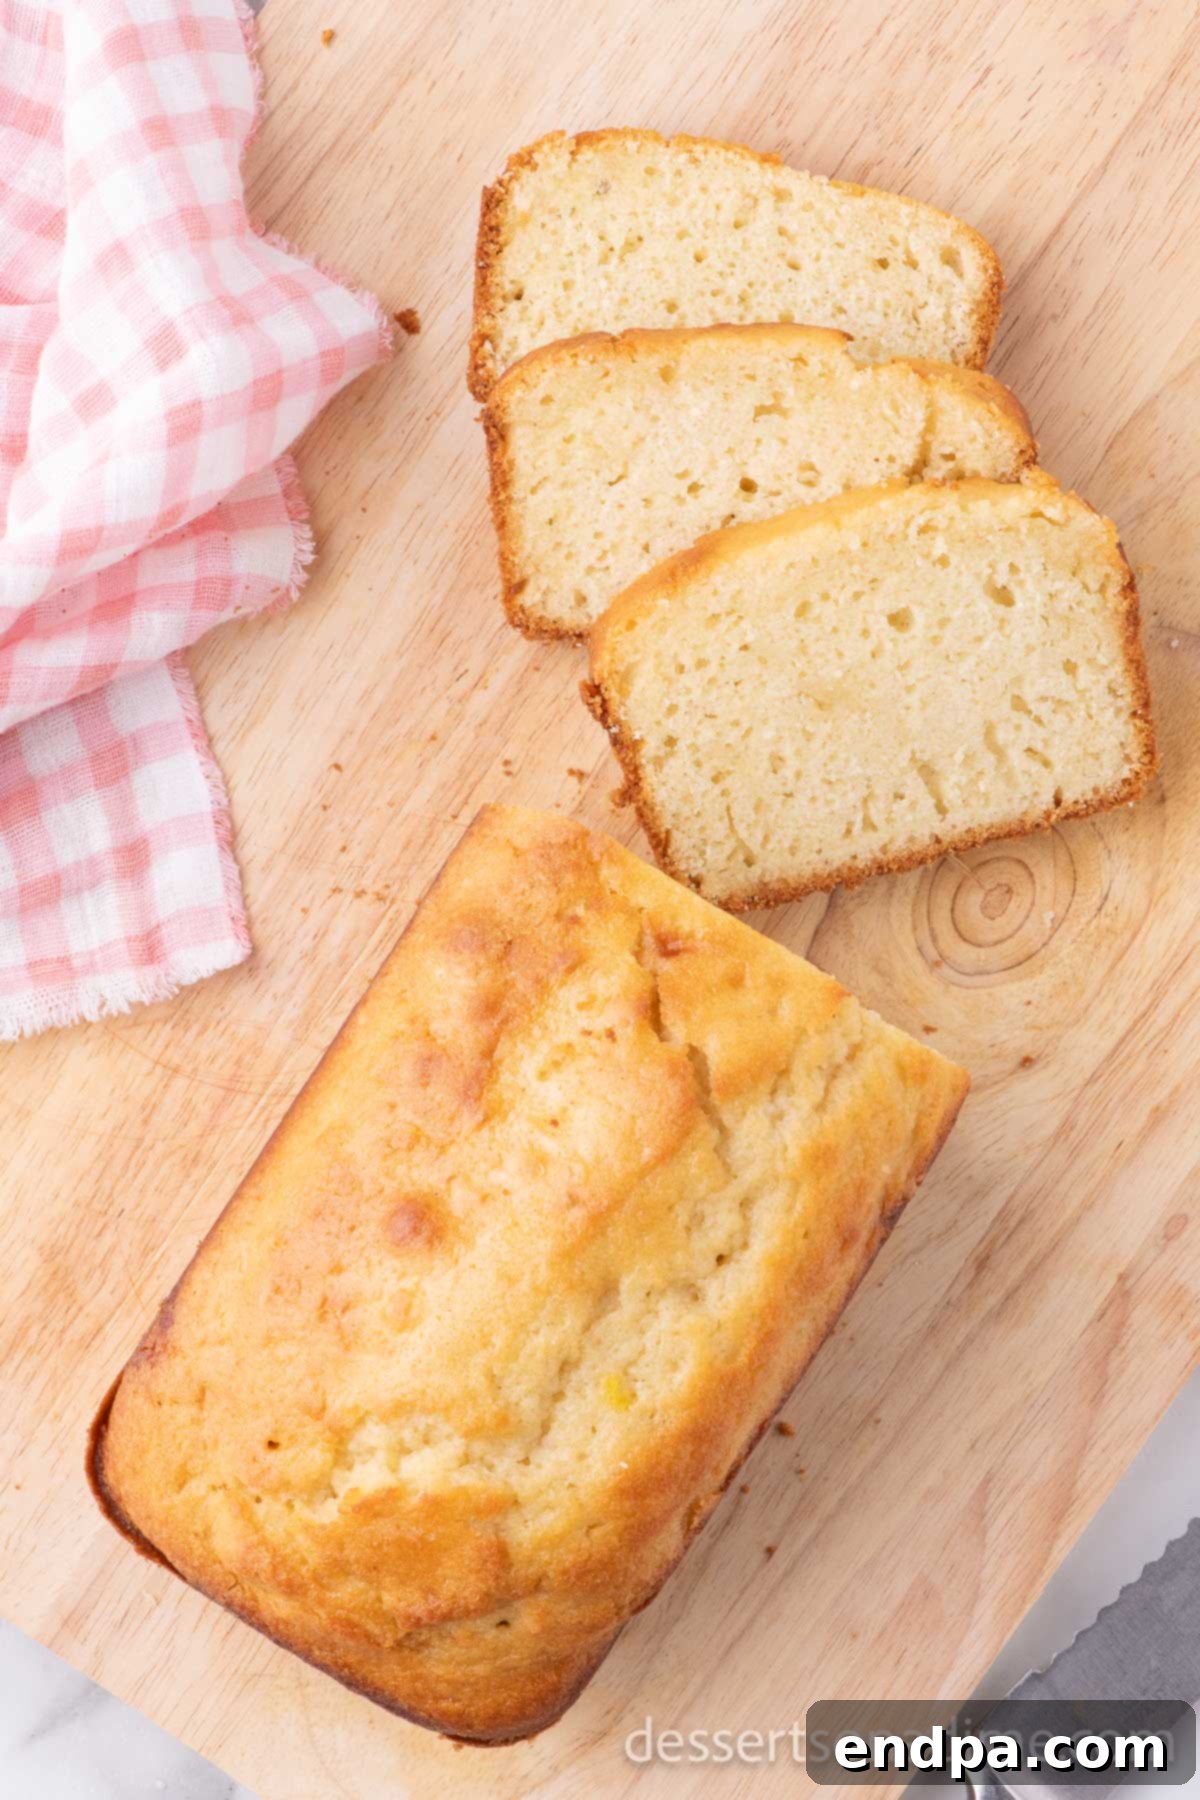
Step 7: Cool and Enjoy. Once the bread is baked to perfection, carefully remove the loaf pan from the oven. Allow the bread to cool undisturbed in the pan for about 10-15 minutes. This initial cooling period is crucial; it allows the internal structure of the bread to properly set and firm up, which in turn prevents it from crumbling or breaking apart when you attempt to remove it. After this essential resting time, gently invert the pan to release the loaf and carefully transfer it to a wire rack to cool completely. While it’s incredibly tempting to slice into a warm, fragrant loaf, doing so can sometimes result in a gummy texture. Therefore, patience is truly key here! Once fully cooled, slice your sweet bread with a sharp serrated knife and savor every bite. It’s absolutely delicious on its own, or even better when served with a generous spread of softened butter, your favorite fruit jam, or a dollop of creamy cream cheese.
Expert Pro Tips for Sweet Bread Baking Success
Achieving a consistently perfect loaf of homemade sweet bread is remarkably easy when armed with a few insider tricks and best practices. These expert tips will help you skillfully navigate common baking pitfalls, ensuring your homemade sweet bread transcends from merely good to truly exceptional, dazzling your taste buds every time.
- Prevent Over-Browning: While a beautifully golden-brown crust is highly desirable and visually appealing, sometimes the top of your bread might start browning too quickly before the center is fully cooked through. If you observe this happening, simply create a loose tent over the loaf with aluminum foil. This clever technique will shield the top from further browning while allowing the inside of the bread to continue baking thoroughly and evenly without scorching.
- Avoid Overmixing the Batter: This tip is, without a doubt, the most crucial piece of advice for baking any quick bread successfully! Overmixing the batter excessively develops the gluten in the flour, which inevitably leads to a tough, dense, and disappointingly dry bread with an unpleasantly chewy texture. To prevent this, combine your wet and dry ingredients only until they are *just* moistened and a few small streaks of flour might still be visible. Remember, a slightly lumpy batter is always far superior to an overmixed, perfectly smooth one; those small lumps will miraculously disappear during the baking process, leaving you with a tender crumb.
- Enhance Flavor with Brown Sugar: For those seeking a deeper, richer, and more complex flavor profile, consider substituting some or all of the granulated sugar with brown sugar. Brown sugar not only introduces a subtle, delicious caramel note but also contributes extra moisture to the batter, resulting in an even more tender and moist crumb. For an added layer of homemade goodness, you could even try making your own using our Homemade Brown Sugar Recipe!
- Room Temperature Ingredients are Key: Always ensure that your eggs and milk are at room temperature before you begin mixing. Room temperature ingredients emulsify much more easily and uniformly when combined, creating a smoother, more consistent batter. This homogeneity in the batter directly translates to a better texture and a more even rise in your finished bread. Simply take them out of the refrigerator approximately 30 minutes before you plan to start your baking.
- Accurate Measuring is Essential: Remember, baking is a precise science, and accurate measurements are fundamental to consistent success. Always use proper dry measuring cups for ingredients like flour and sugar, leveling them off with a straight edge for precision. For liquid ingredients, use transparent liquid measuring cups, ensuring you read the measurement at eye level. As previously mentioned, spooning flour into the cup rather than scooping directly from the bag is vital to prevent unintentional compaction and over-measuring.
- Cool Completely Before Slicing: While the warm, irresistible aroma of a freshly baked loaf can make it incredibly tempting to cut into it immediately, resisting this urge and allowing your sweet bread to cool completely on a wire rack is absolutely essential. Proper cooling allows the internal structure of the bread to fully set and solidify. Cutting into it too soon can cause it to become gummy, dense, or even fall apart when sliced. Patience truly yields the best results!
Frequently Asked Questions (FAQ) About Sweet Bread
Do you have more questions about baking, properly storing, or creatively serving your delightful homemade sweet bread? We’ve compiled comprehensive answers to the most common inquiries to ensure your baking experience is as smooth and successful as possible.
To effectively maintain its freshness and desirable moisture, ensure your sweet bread is completely cooled before storing. Wrap the entire loaf tightly in several layers of plastic wrap, or alternatively, use aluminum foil. For an extra layer of protection, you can then place the wrapped loaf inside an airtight container. When stored at room temperature, your sweet bread will remain wonderfully fresh and delicious for approximately 3 to 5 days. For optimal results, it’s generally best to avoid refrigeration, as the cold temperatures can actually accelerate the drying-out process of the bread.
Absolutely! This sweet bread freezes exceptionally well, making it an excellent candidate for meal prepping, batch baking, or simply ensuring you always have a comforting treat on hand. To freeze, confirm that the bread is entirely cooled to room temperature. Wrap the entire loaf securely in plastic wrap, followed by an additional layer of heavy-duty aluminum foil. If you prefer individual servings, first slice the bread, then wrap each slice (or small stacks of slices) individually before placing them into a freezer-safe bag or an airtight container. Frozen sweet bread can be stored for up to 2 to 3 months. When you’re ready to indulge, simply allow it to thaw overnight in the refrigerator or on the kitchen counter for a few hours. Individual slices offer even more convenience, as they can be quickly reheated in a toaster, toaster oven, or microwave directly from frozen.
Sweet bread is incredibly versatile and can be served in a multitude of delightful ways, making it suitable for various occasions! It’s wonderfully satisfying on its own as a simple, comforting snack. For an elevated culinary experience, serve it with a generous pat of softened butter, a dollop of your favorite fruit jam or preserves, or a creamy smear of cream cheese. Leftover slices of sweet bread are also fantastic for transforming into gourmet French toast or can be cubed and used as the base for a rich and indulgent bread pudding. For breakfast, it pairs beautifully with a hot cup of coffee or tea, a side of fresh seasonal fruit, or a bowl of creamy yogurt. It also serves as a delightful and light dessert after a meal, especially when served with a drizzle of honey or a scoop of vanilla ice cream.
A dry or crumbly sweet bread is a common baking issue, most frequently attributed to either overmixing the batter or overbaking the loaf. Overmixing develops the gluten in the flour too much, creating a dense and tough texture, while overbaking removes excessive moisture, leading to dryness. To prevent this, ensure you only mix the wet and dry ingredients until they are just combined, with a few small lumps still visible. Always use the wooden toothpick test to check for doneness precisely at the minimum baking time recommended and remove the bread from the oven as soon as the toothpick comes out clean.
While whole milk is specifically recommended for this recipe due to its richness and significant contribution to moisture and tenderness, you can generally substitute it with other types of dairy milk, such as 2% or even skim milk, with acceptable results. Non-dairy alternatives like almond milk, soy milk, or oat milk can also be used. However, it’s important to keep in mind that opting for lower-fat or non-dairy options might lead to a slightly less rich flavor and a marginally less tender crumb due to their lower fat content. Despite these minor changes, the overall structure and taste of the bread should still be excellent and enjoyable.
A sunken middle in your sweet bread can be a disheartening sight, and it can be caused by a few common factors. One frequent culprit is opening the oven door too early during the baking process, which causes a sudden and dramatic drop in oven temperature, leading the delicate structure of the bread to collapse. Other reasons include using expired or inactive baking powder, which lacks the necessary leavening power, or overmixing the batter, which creates too much air that subsequently collapses in the oven. To avoid a sunken loaf, ensure your leavening agents are fresh and active, resist the urge to open the oven door until the final 10-15 minutes of baking, and always mix the batter gently and sparingly.
Explore More Delightful & Easy Quick Bread Recipes
If you’ve thoroughly enjoyed the process and delicious results of making this sweet bread, you’ll be thrilled to explore our other simple and deeply satisfying quick bread recipes. They are absolutely perfect for expanding your baking repertoire, discovering new favorite flavors, and consistently keeping your kitchen filled with the most wonderful, inviting aromas of freshly baked goods.
- Pumpkin Bread Recipe
- Cinnamon Roll Bread
- Bread and Butter Pudding Recipe
- Cherry Bread
- Unicorn Bread
- Peanut Butter Bread
- Banana Bread Muffins
- Lemon Blueberry Bread
We wholeheartedly encourage you to give this easy, comforting, and incredibly delicious sweet bread recipe a try! Once you’ve had the pleasure of baking and enjoying it, please take a moment to leave a comment and a star recipe rating below. Your invaluable feedback is greatly appreciated and serves to help other aspiring bakers discover and fall in love with this wonderful, simple treat. Happy baking and enjoy every sweet bite!
Pin
Sweet Bread
10 minutes
45 minutes
10 minutes
1 hour
5 minutes
10
American
Dessert, Breakfast, Snack
262
Carrie Barnard
Ingredients
-
2
cups
All-Purpose Flour
-
1
cup
Granulated Sugar
-
1
Tablespoon
Baking Powder
-
1/2
teaspoon
Salt
-
1
cup
Whole Milk
-
2
teaspoons
Vanilla Extract
-
2
Large Eggs
-
1/3
cup
Vegetable Oil
Instructions
- Preheat your oven to 350°F (175°C) and prepare a 9×5-inch loaf pan by spraying it generously with non-stick cooking spray or greasing and flouring it.
- In a large mixing bowl, whisk together the all-purpose flour, granulated sugar, baking powder, and salt until they are well combined. Ensure no lumps remain in the dry mixture for an even bake.
- In a separate, smaller bowl, whisk together the whole milk, vanilla extract, large eggs, and vegetable oil until the mixture is smooth and fully incorporated.
- Gradually pour the wet ingredients into the dry ingredients. Using a wooden spoon or spatula, stir gently until the ingredients are just combined. Be careful not to overmix; a few small lumps are perfectly acceptable and help maintain a tender crumb.
- Pour the prepared batter evenly into your greased 9×5-inch loaf pan, spreading it slightly to ensure the top is relatively flat for uniform baking.
- Bake in the preheated oven for 45-50 minutes, or until a wooden skewer or toothpick inserted into the center of the bread comes out clean. The top should be golden brown.
- Once baked, remove the loaf pan from the oven and let the bread cool in the pan for 10-15 minutes. This step is crucial to help the bread set and prevent it from breaking when removed.
- Carefully remove the partially cooled bread from the loaf pan and transfer it to a wire rack to cool completely. Cooling thoroughly ensures the best texture and prevents a gummy interior.
- Once fully cooled, slice the sweet bread with a sharp serrated knife and serve. Enjoy it plain, with butter, jam, or your favorite spread!
Recipe Notes
Nutrition Facts
Calories
262
kcal
,
Carbohydrates
41
g
,
Protein
4
g
,
Fat
9
g
,
Saturated Fat
2
g
,
Polyunsaturated Fat
4
g
,
Monounsaturated Fat
2
g
,
Trans Fat
0.1
g
,
Cholesterol
36
mg
,
Sodium
266
mg
,
Potassium
77
mg
,
Fiber
1
g
,
Sugar
21
g
,
Vitamin A
88
IU
,
Calcium
110
mg
,
Iron
1
mg
Pin This Now to Remember It Later
Pin Recipe
