Grinch Cake Pops are the quintessential Christmas treat, bringing a dash of Dr. Seuss whimsy and irresistible flavor to your holiday table. Crafted from moist red velvet cake, generously dipped in a vibrant green candy coating, and adorned with a cheerful red candy heart, these delightful confections capture the spirit of the Grinch in every bite. They are not just desserts; they are miniature works of art that are as fun to make as they are to eat, making them an ideal activity for families during the festive season.

Imagine the smiles these charming cake pops will bring to your next Christmas gathering! Their striking green hue, reminiscent of the Grinch himself, combined with the rich, scarlet red velvet cake inside, creates a truly magical experience. This recipe simplifies the baking process by utilizing a boxed cake mix, ensuring that even novice bakers can achieve stunning results. Paired with creamy cream cheese frosting, each bite is a perfect balance of texture and taste, guaranteed to be a hit with both children and adults.
Making Grinch Cake Pops offers more than just a delicious dessert; it’s an opportunity to create cherished holiday memories. Gather your loved ones, put on some festive tunes, and embark on a fun-filled baking adventure. These cake pops are perfect alongside other Grinch-themed delights, transforming your kitchen into a festive workshop. Consider serving them with a warm mug of Grinch Hot Chocolate or indulging in some decadent Grinch Fudge for a truly immersive holiday experience. For those who love seasonal cake pops beyond Christmas, our Pumpkin Cake Pops Recipe offers another delightful option for autumn celebrations.
What You’ll Find in This Guide: Festive Grinch Cake Pops
- Why Make Grinch Cake Pops This Holiday Season?
- Essential Ingredients for Grinch Cake Pops
- Creative Variations and Customization Tips
- Step-by-Step Guide: Crafting Your Grinch Cake Pops
- Pro Tips for Perfect Cake Pops Every Time
- Storage Solutions and Make-Ahead Advice
- Can You Freeze Cake Pops for Later?
- More Irresistible Grinch-Themed Recipes to Explore
- Full Grinch Cake Pops Recipe Card
Why Make Grinch Cake Pops This Holiday Season?
The holiday season is all about spreading cheer, and what better way to do that than with a batch of homemade Grinch Cake Pops? These charming treats are incredibly versatile, making them perfect for a variety of festive occasions. They serve as fantastic edible gifts for neighbors, delightful party favors, or a whimsical dessert centerpiece for your Christmas feast. The vibrant green exterior and contrasting red interior are instantly recognizable, captivating both children and adults alike. Beyond their visual appeal, the combination of moist red velvet cake and creamy frosting delivers a truly indulgent experience that will leave everyone asking for more. Plus, the joy of decorating them with tiny red hearts adds a personal touch that makes each cake pop unique and memorable.
Opting for a boxed cake mix significantly cuts down on prep time, allowing you to focus on the fun parts of baking and decorating. This recipe is designed to be accessible, transforming basic ingredients into something extraordinary with minimal effort. It’s a wonderful project to undertake with kids, encouraging creativity and fostering a love for baking. Imagine the laughter and excitement as little hands help roll the cake mixture and dip the pops in colorful candy melts. These Grinch Cake Pops are more than just a dessert; they’re an experience that embodies the warmth and magic of Christmas. Their compact size also makes them less messy than traditional cake slices, ideal for mingling at parties or for children’s hands.
Essential Ingredients for Grinch Cake Pops
Creating these festive Grinch Cake Pops requires a handful of readily available ingredients. The beauty of this recipe lies in its simplicity, making it a stress-free addition to your holiday baking repertoire. Here’s a closer look at what you’ll need and why each component is crucial for achieving the perfect result:
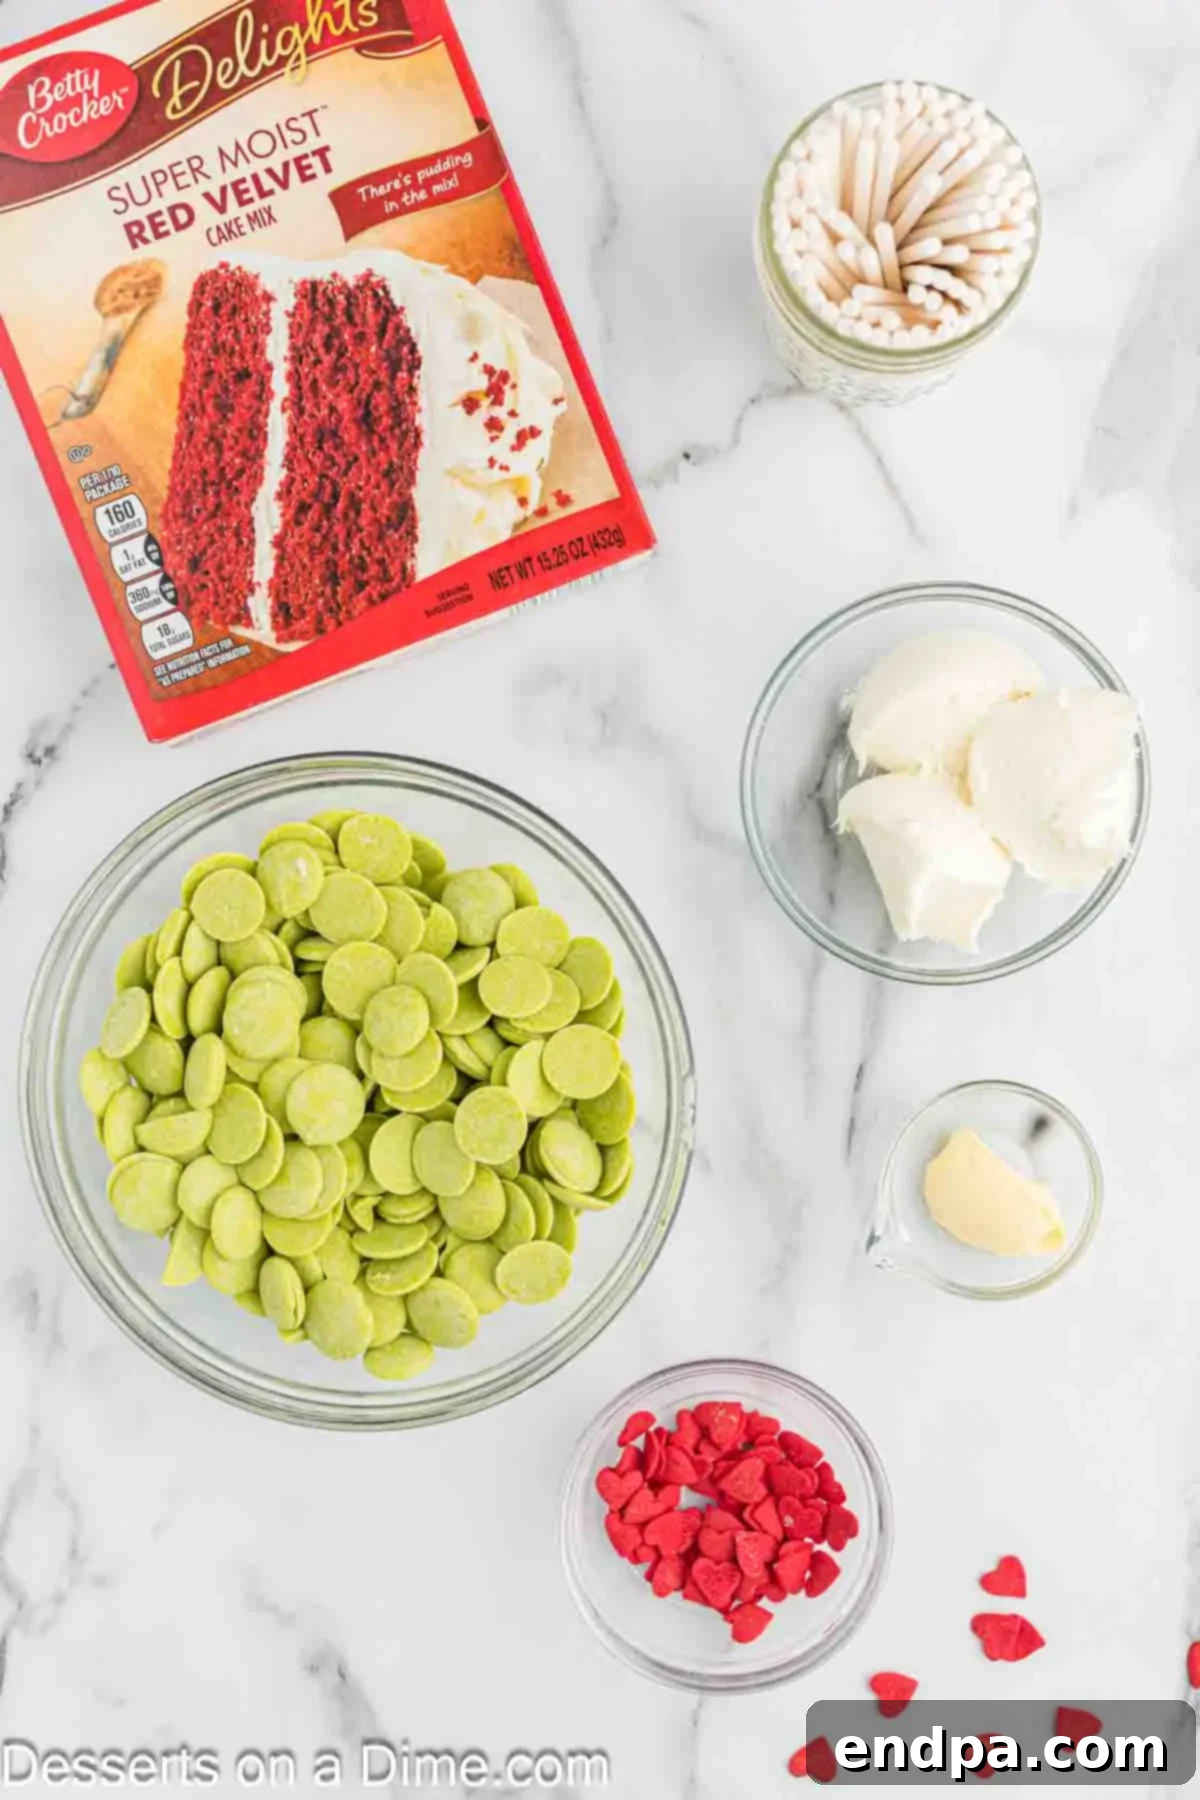
- Red Velvet Cake Mix (and accompanying ingredients): The foundation of our cake pops! A good quality red velvet cake mix provides a rich, moist crumb with that signature subtle cocoa flavor and deep red hue. Always remember to have all the ingredients listed on your specific cake mix box ready (e.g., eggs, oil, water or milk) to ensure proper preparation and baking. The quality of your cake mix directly impacts the final texture and taste of your cake pops.
- Cream Cheese Frosting (pre-made or homemade): This is the “glue” that binds the crumbled cake together and adds an incredible depth of flavor and moisture. Store-bought cream cheese frosting is a fantastic time-saver, offering convenience without sacrificing taste. However, if you prefer, a homemade batch can elevate the taste even further, providing a richer, tangier profile. Its characteristic tangy sweetness perfectly complements the red velvet cake, creating a harmonious flavor blend.
- Cake Pop Sticks or Lollipop Sticks: These are essential for turning your cake balls into actual “pops” and providing a convenient way to eat them. Standard lollipop sticks work perfectly, offering a sturdy handle for dipping and serving. Ensure you have enough sticks for your desired yield, typically 24-36 pops, to avoid any last-minute scrambling.
- Vibrant Green Candy Melts: The iconic Grinch color! Candy melts are specifically designed for easy melting and a smooth, consistent coating, making them ideal for cake pops. Choose a high-quality brand for best results to ensure a vibrant, non-streaky finish that hardens beautifully and quickly, giving your cake pops that professional, polished look.
- Vegetable Shortening: A small amount of vegetable shortening is the secret weapon to help thin the candy melts, making them smoother and much easier to work with. This creates a thinner, more even coating on your cake pops, preventing them from becoming too thick, clumpy, or prone to cracking. It’s crucial for achieving that desirable glossy, flawless exterior.
- Red Candy Hearts (or Red Candy Sprinkles): The charming finishing touch that gives the Grinch his signature “heart” and completes the festive look. Small candy hearts are ideal for that classic Grinch aesthetic. If you can’t find them, red sprinkles (such as nonpareils, jimmies, or sanding sugar) or even a tiny dot of red icing can work just as well to symbolize the Grinch’s growing heart, adding a pop of contrasting color.
With these thoughtfully selected ingredients in hand, you’re well on your way to crafting a batch of these enchanting holiday treats that will undoubtedly steal the show!
Creative Variations and Customization Tips
While the classic Grinch Cake Pop recipe is a showstopper, there’s always room for creativity! Don’t hesitate to experiment with these variations to tailor the treats to your taste, dietary preferences, or to simply use ingredients you already have on hand. Customizing your cake pops can be a fun way to add a personal touch and truly make them your own during the holiday season.
- Explore Different Cake Mix Flavors: The red velvet base is traditional for its color and flavor, but it’s not a strict rule!
- Chocolate Cake Balls: Imagine a rich, dark chocolate cake interior providing a delightful contrast to the sweet green candy coating. This is a guaranteed crowd-pleaser, especially for serious chocolate lovers.
- Vanilla or Yellow Cake Mix: These offer a milder, more classic flavor profile, allowing the vibrant candy coating and creamy frosting to truly shine. You could even add a few drops of red food coloring to a vanilla cake mix to create a custom red interior without the cocoa notes of red velvet.
- Spice Cake: For a more autumnal or warming holiday spice, consider a spice cake mix. Its warm notes of cinnamon, nutmeg, and ginger would be a delightful surprise.
- Strawberry Cake: A subtle strawberry flavor could also be a delightful and unexpected twist, offering a fruity sweetness that pairs well with cream cheese frosting.
- Alternative Coatings with White Chocolate: If you prefer the sophisticated taste and texture of real chocolate over candy melts, high-quality white chocolate is an excellent substitute for the coating.
- Melting White Chocolate: Gently melt the white chocolate in a microwave-safe bowl in short 30-second intervals, stirring thoroughly after each to prevent scorching or seizing. A double boiler method also works wonderfully for controlled melting.
- Achieving the Green Hue: Once melted and perfectly smooth, add green food coloring designed specifically for chocolate (oil-based or gel colors work best; water-based colors can cause chocolate to seize and become unusable). Stir until you achieve your desired vibrant Grinch green. This method gives a slightly more luxurious and less sweet flavor profile.
- Prepare with a Lined Baking Sheet: For effortless handling, easy transfer of your cake balls, and minimal cleanup, always line your baking sheets with parchment paper or a silicone baking mat before placing your rolled cake balls. This simple step prevents sticking and makes the entire process smoother.
- Sprinkle Substitutions for Hearts: If red candy hearts are difficult to find in your local store, don’t fret! Red sprinkles (such as nonpareils, jimmies, or sanding sugar) can create a lovely festive look. You could even use small red edible glitter for an extra sparkle, or tiny edible red pearls for a more elegant touch.
- Add Flavor Extracts for a Twist: Introduce a new layer of flavor by adding a few drops of extract. A hint of peppermint extract to the cake mixture or even directly to the candy melts can introduce a refreshing minty twist, which is incredibly popular during Christmas. Almond extract is another excellent option for a subtle, sweet aroma and flavor.
- Go Nuts! (Allergy permitting): For an added crunch and nutty flavor, finely chop some pecans, walnuts, or even pistachios and mix them into the cake ball mixture before rolling. This adds a delightful textural element that can elevate the cake pops.
- Drizzle Decorations: Instead of just a heart, consider drizzling contrasting colors. A touch of white or yellow candy melt drizzled over the green can add another layer of visual interest, perhaps mimicking snowflakes or other festive patterns.
These creative adjustments allow you to personalize your Grinch Cake Pops, making them uniquely yours and perfectly suited for any holiday gathering or gift-giving occasion.
Step-by-Step Guide: Crafting Your Grinch Cake Pops
Making Grinch Cake Pops is a delightful process that transforms a simple cake into a festive masterpiece. Follow these detailed instructions to ensure your cake pops are perfectly formed, beautifully coated, and utterly delicious:
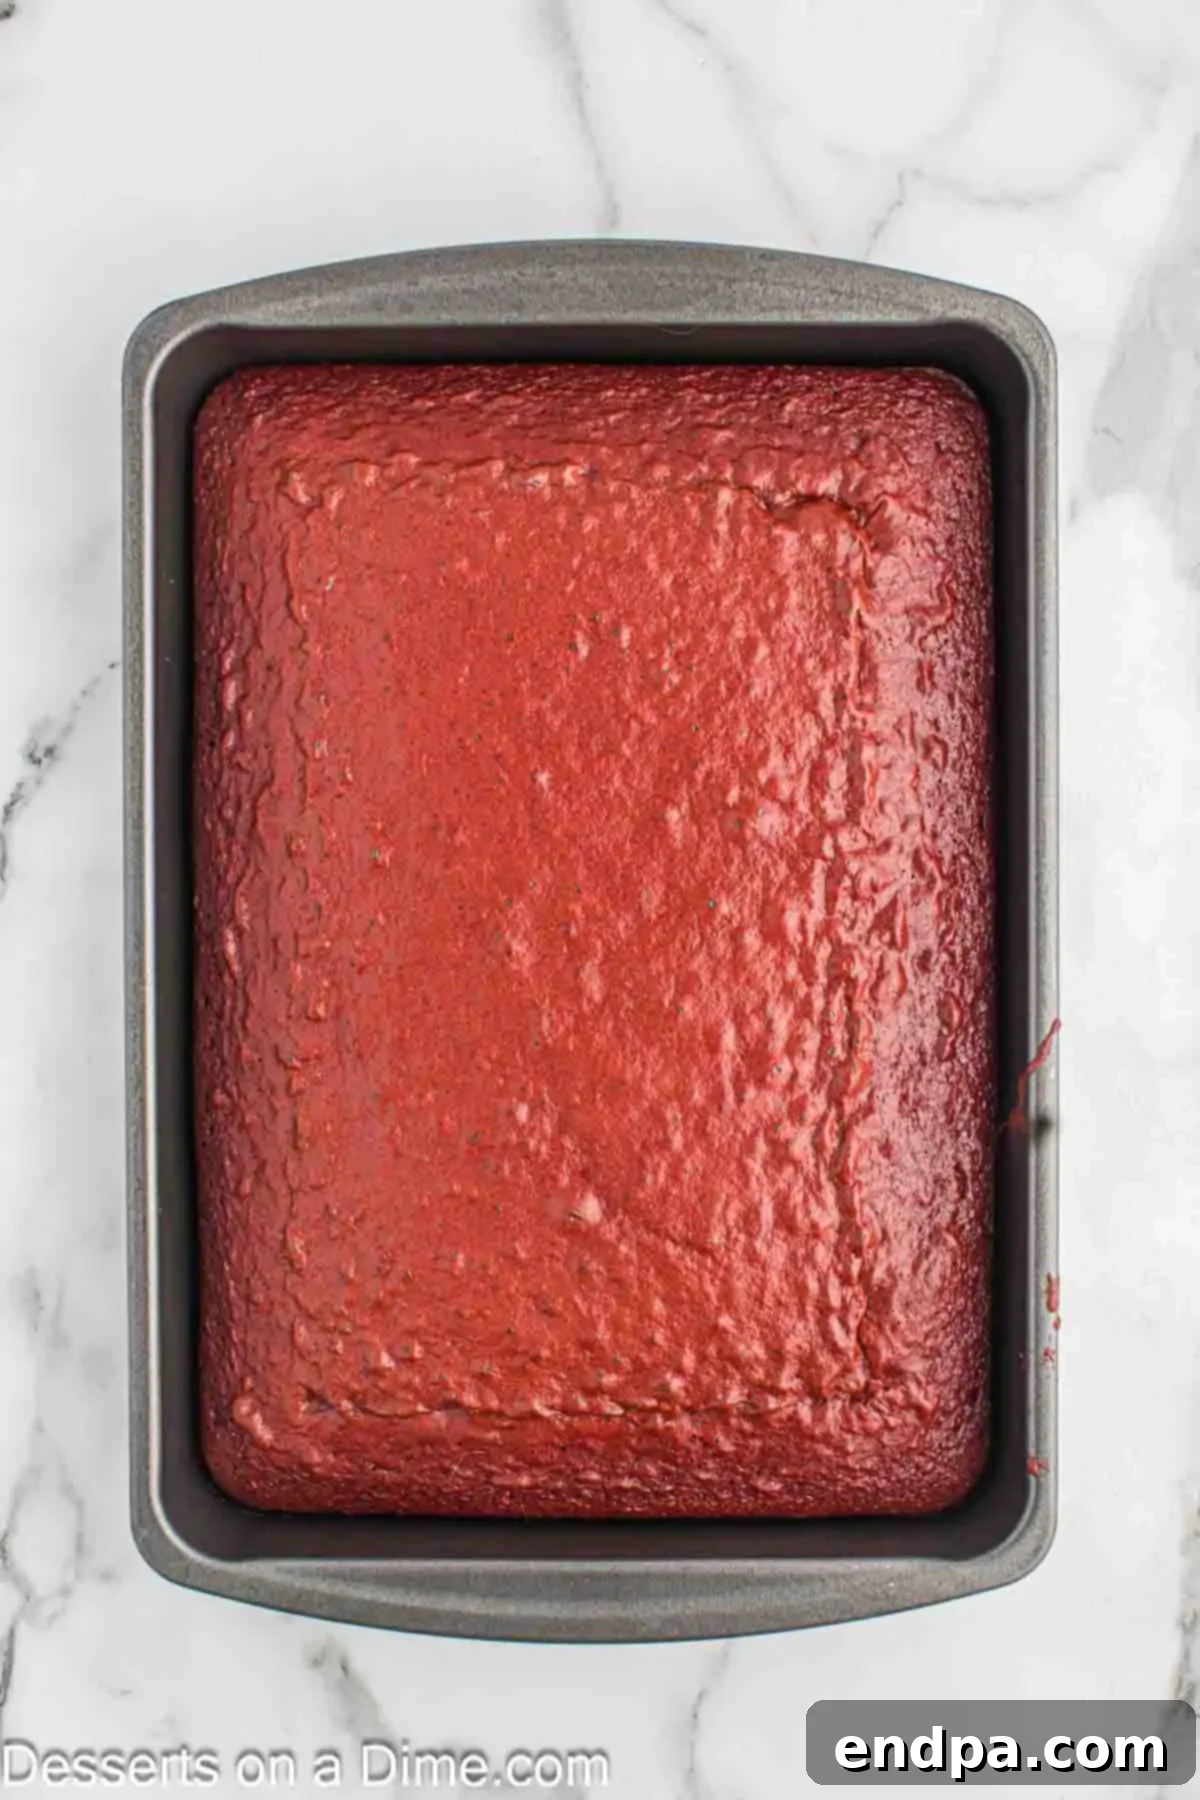
Step 1: Bake the Red Velvet Cake. Begin your cake pop journey by preparing your chosen red velvet cake mix according to the package instructions. This typically involves combining the dry mix with eggs, oil, and water or milk, depending on the brand. Pour the prepared batter into your baking pan and bake for the recommended time, or until a toothpick inserted into the center comes out clean. Once baked, remove the cake from the oven and allow it to cool completely to room temperature. This cooling step is absolutely crucial; attempting to crumble a warm cake will result in a messy, sticky disaster.
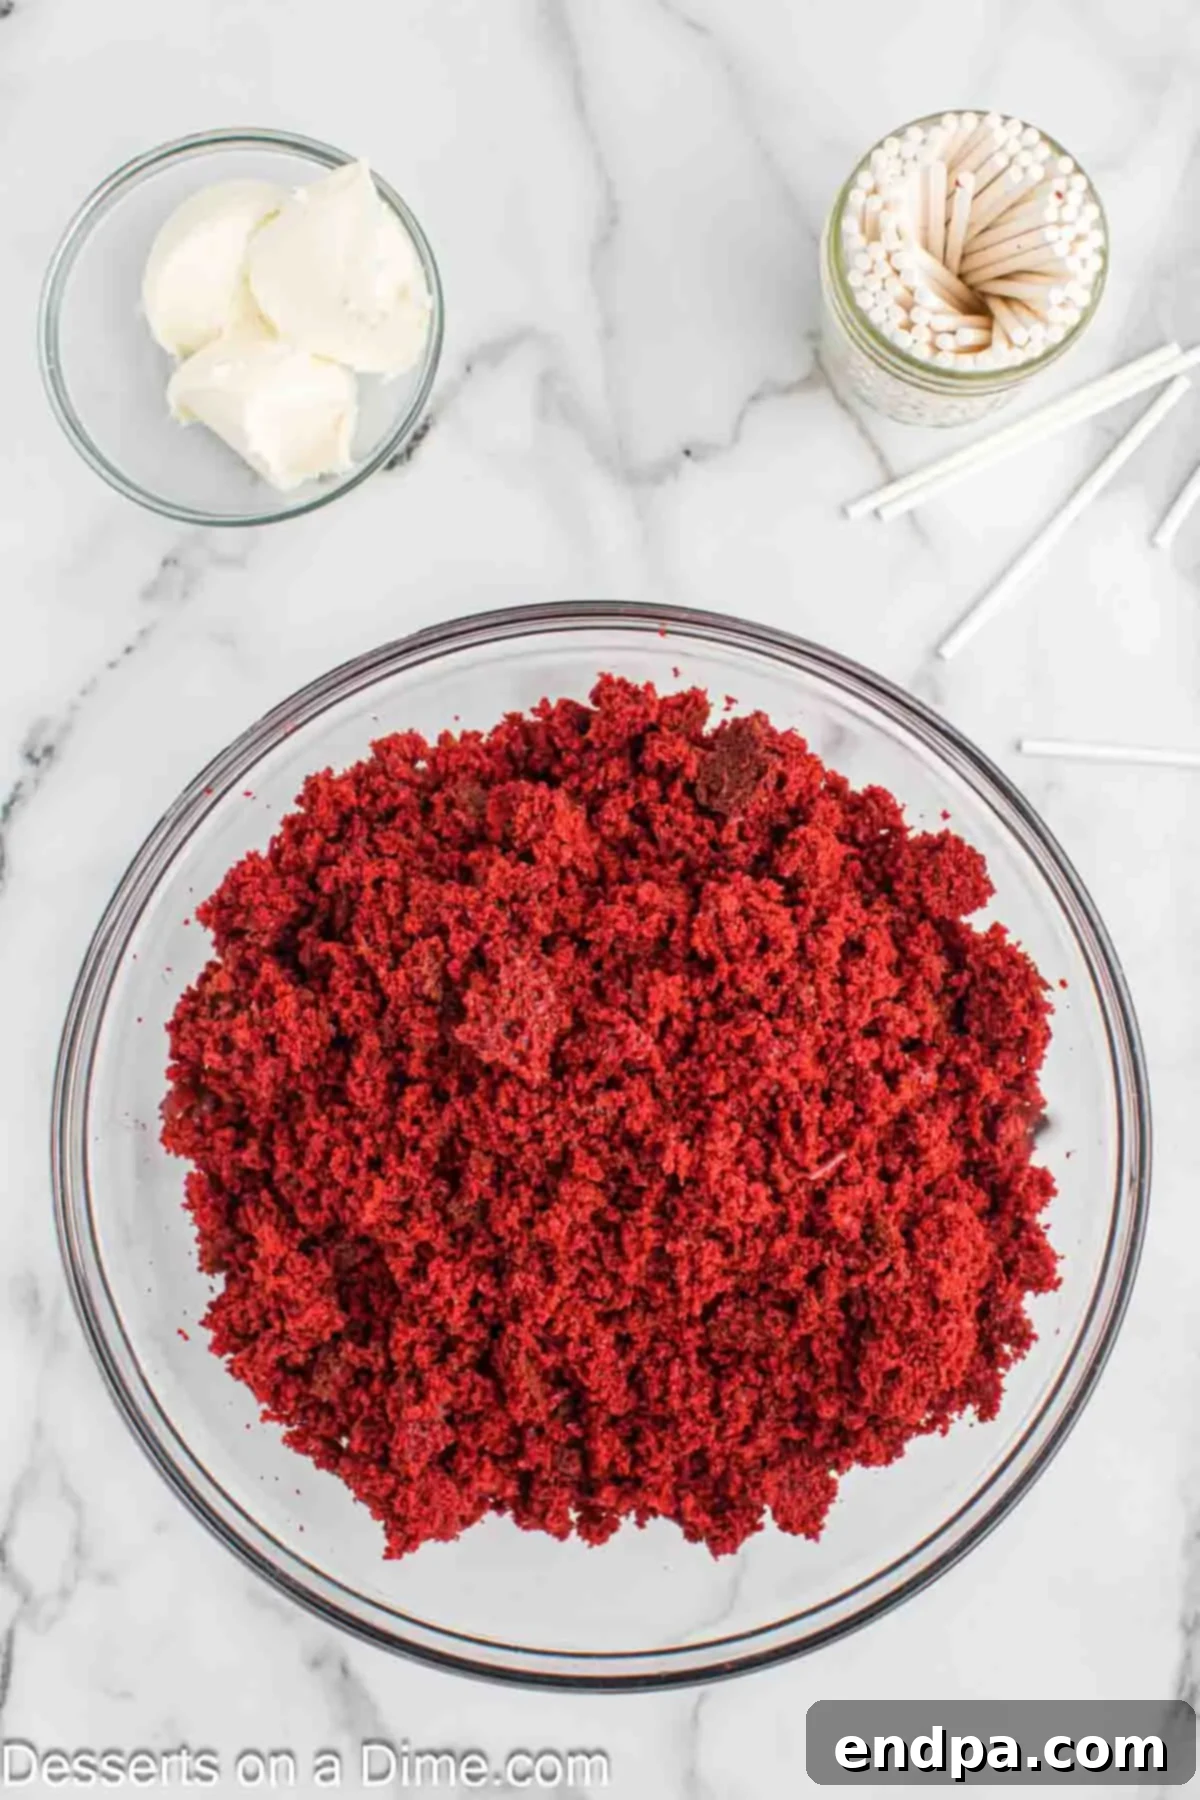
Step 2: Crumble the Cake. Once your cake has fully cooled, carefully remove it from the pan. Using your clean hands, gently remove any excessively brown or crusty edges from the outside of the cake and discard them. These harder pieces can interfere with the smooth texture of the cake pops. Then, crumble the remaining soft, moist interior of the cake into a large mixing bowl. Aim for very fine crumbs without large chunks, as this will result in smoother and more uniform cake balls. You can also use a fork or a pastry blender for this step if preferred.
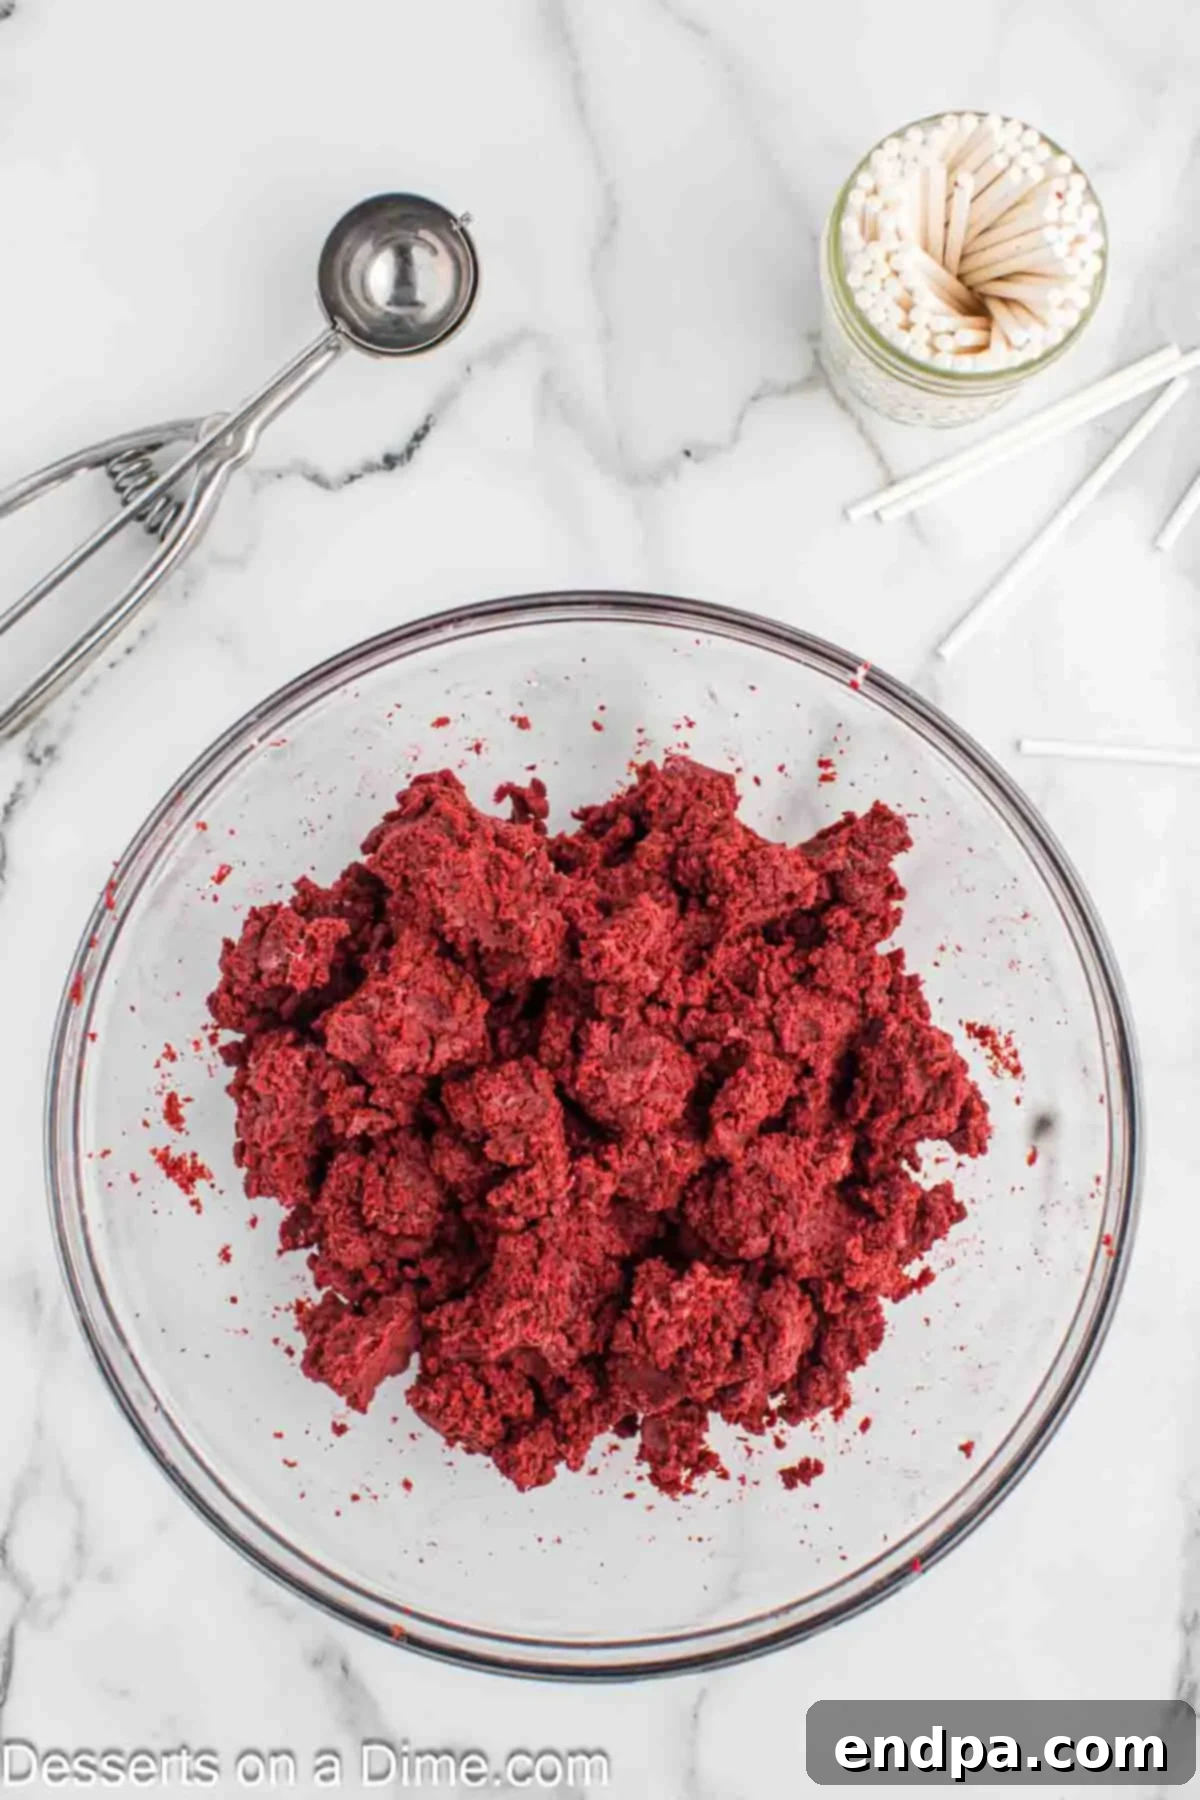
Step 3: Mix in the Frosting. Add the cream cheese frosting to your crumbled red velvet cake. It’s often best to start with a conservative amount, such as 3 tablespoons if using a standard tub of pre-made frosting. Mix thoroughly using a sturdy spoon, a spatula, or your hands. Continue adding frosting gradually, one tablespoon at a time, and mixing well after each addition, until the mixture is well combined and moist enough to hold its shape when pressed together firmly, but not overly sticky or greasy. You’re looking for a consistency similar to play-dough or firm cookie dough.
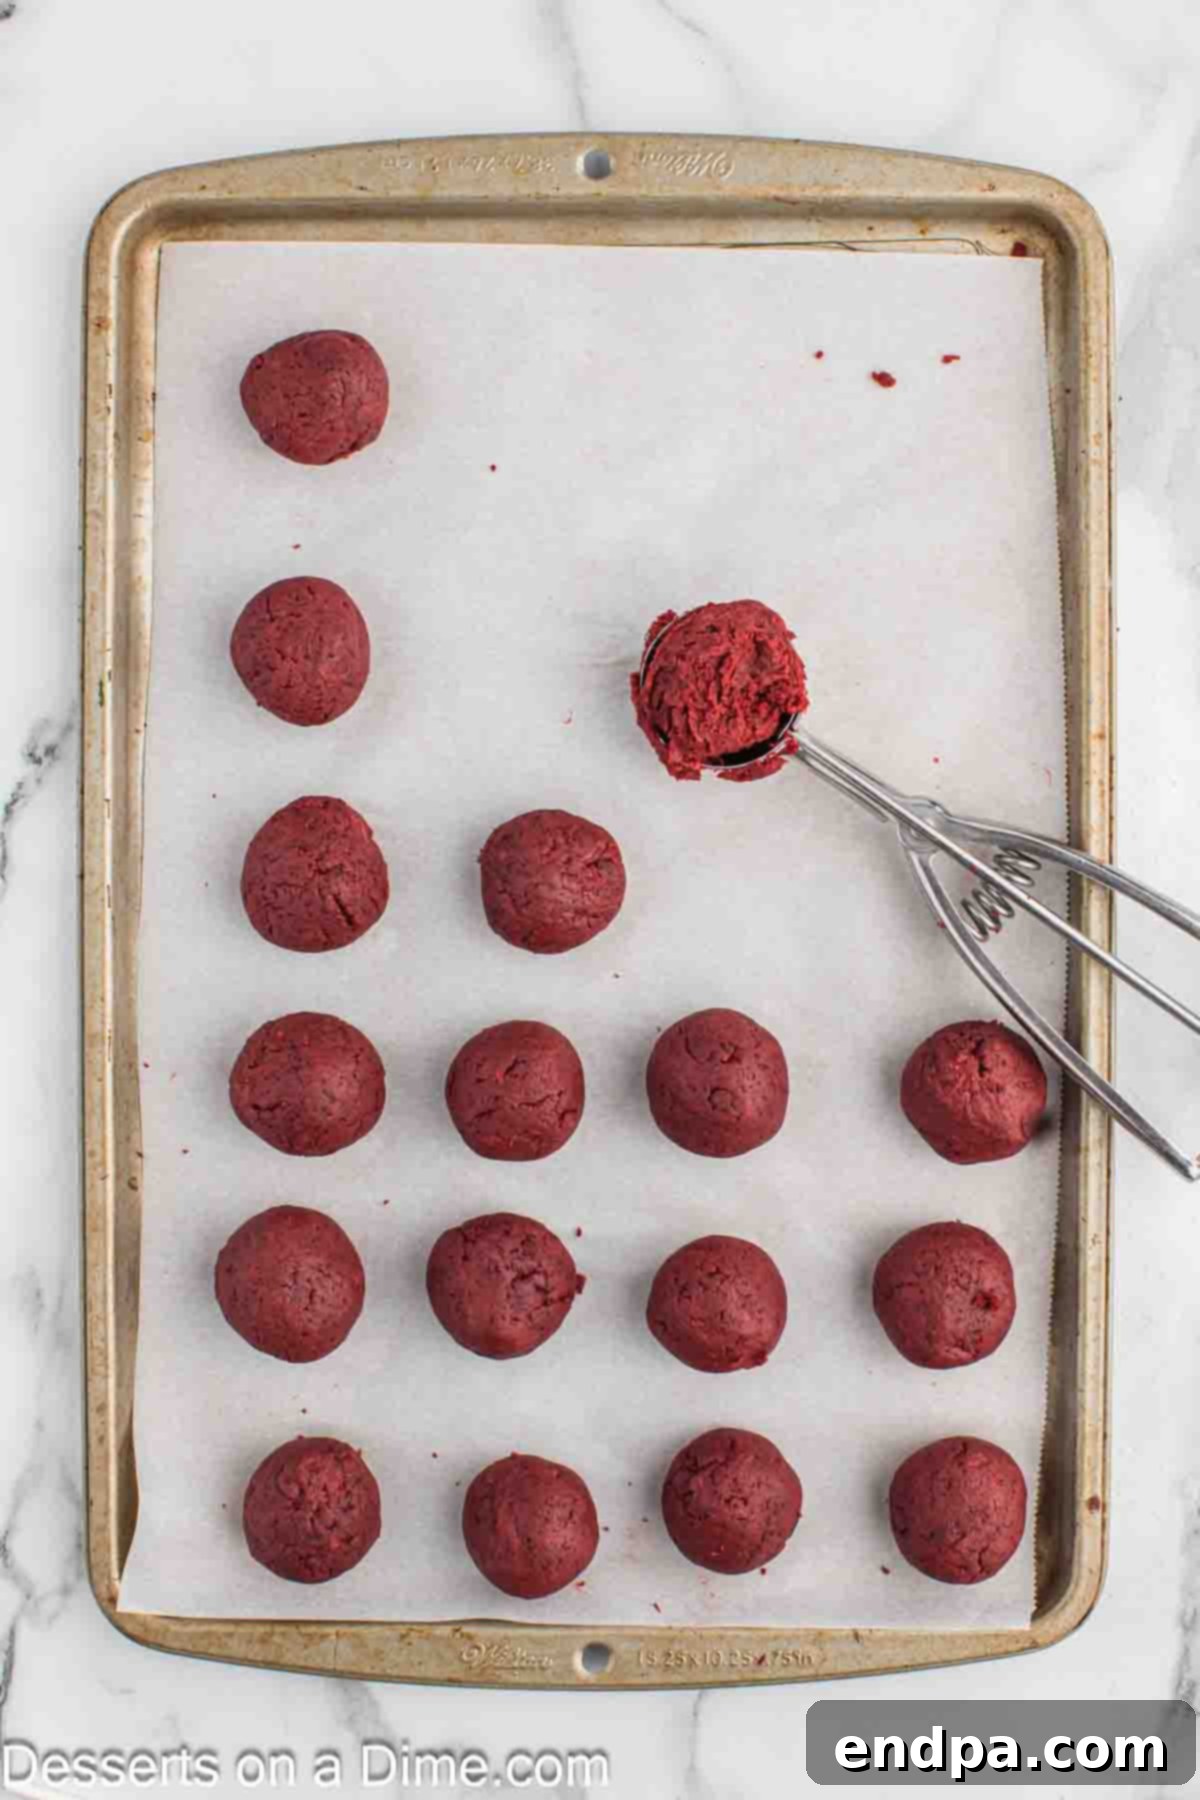
Step 4: Form the Cake Balls. For professional-looking, uniform cake pops, using a cookie scoop (approximately 1.5 to 2 tablespoons in size) is highly recommended. Scoop out even portions of the cake and frosting mixture, then roll them firmly between your palms to create smooth, dense, and perfectly round balls. Place these formed cake balls onto a baking sheet that has been lined with parchment paper or a silicone mat. This recipe typically yields 24-36 cake balls, depending on their size. Once all balls are formed, place the entire baking sheet in the freezer for about 15-20 minutes to firm them up. This makes them much easier to handle and significantly reduces the chance of them falling apart during dipping.
- Step 5: Prepare the Candy Melts. In a small, deep, microwave-safe bowl (deep bowls are better for dipping), combine the vibrant green candy melts and the vegetable shortening. Microwave in short bursts, typically 30-second intervals, stirring thoroughly after each interval, until the candy melts are completely smooth, fluid, and creamy. The shortening helps achieve the perfect dipping consistency and a glossy finish. Be very careful not to overheat the candy melts, as this can cause them to seize, become grainy, or burn, making them unusable.
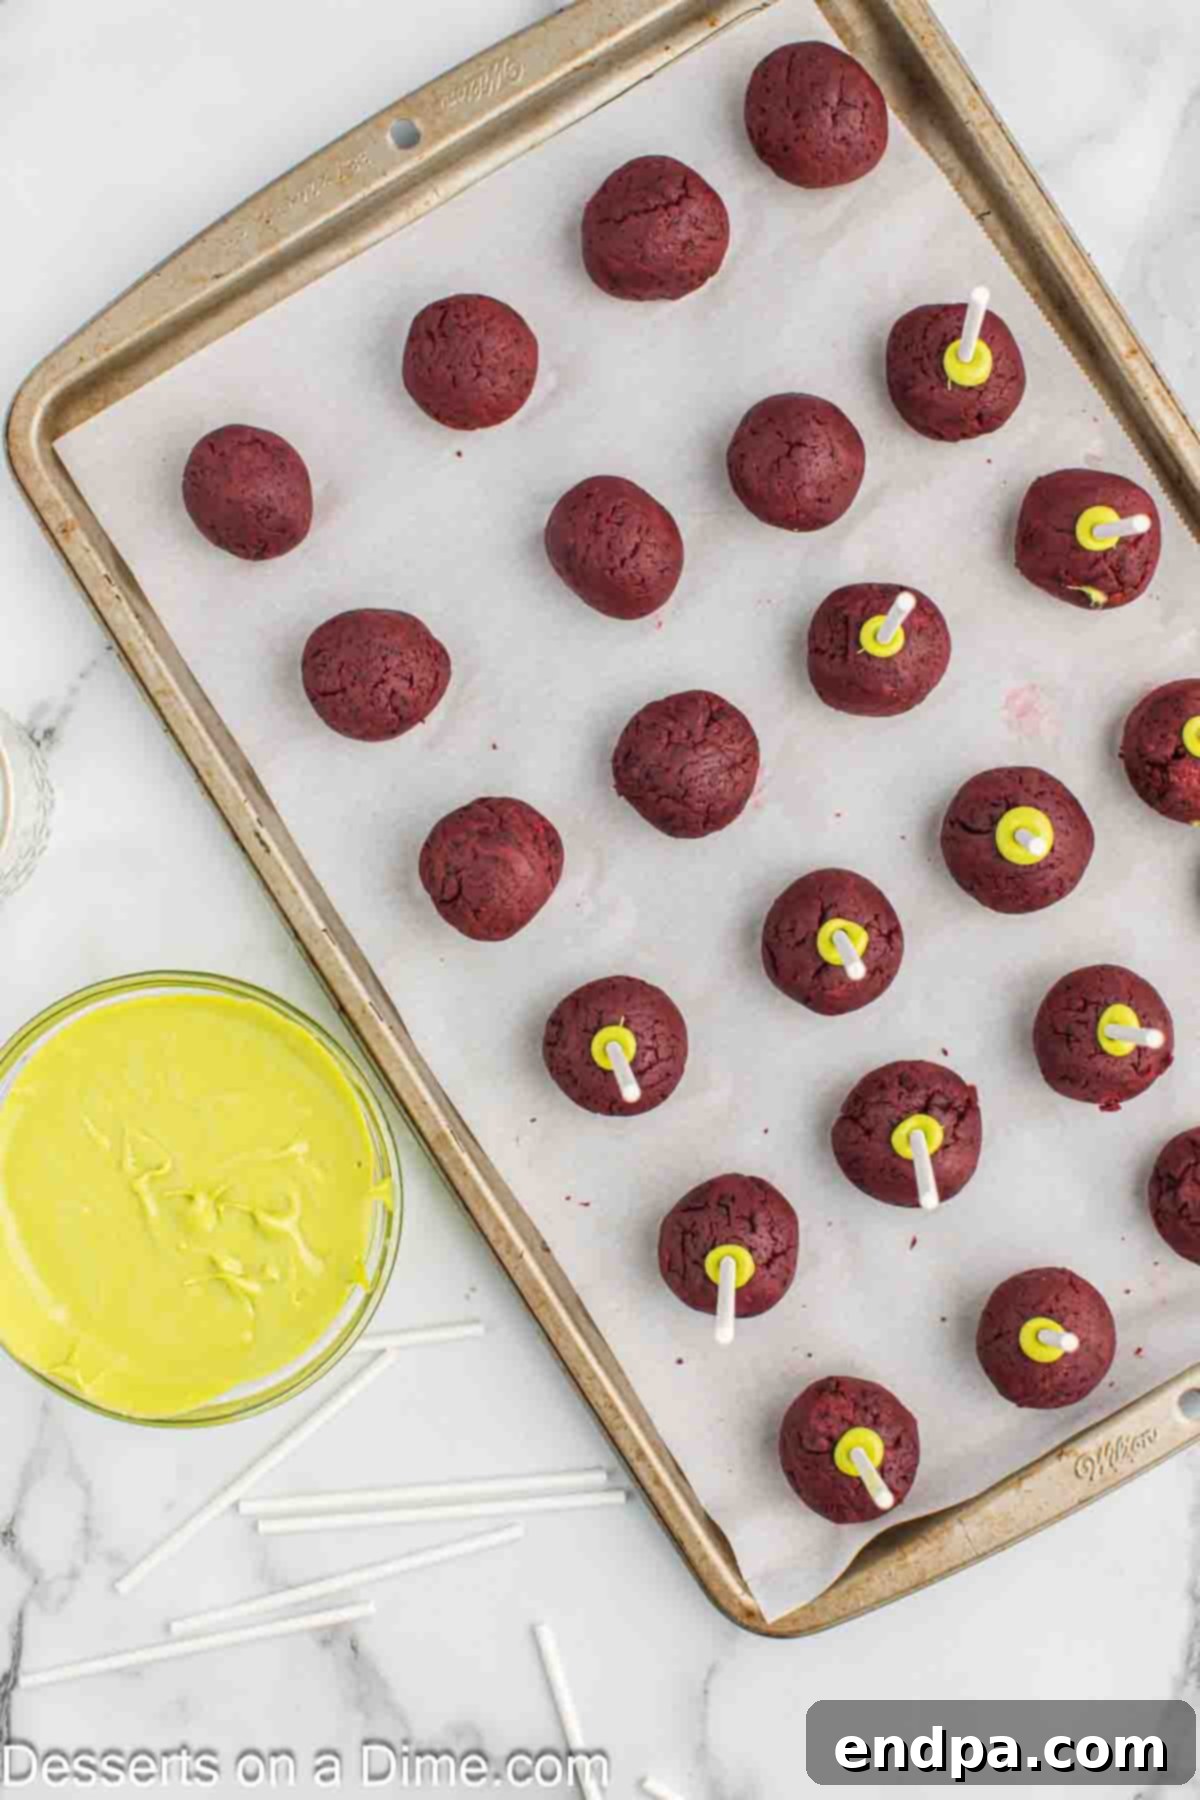
Step 6: Insert the Sticks. Retrieve the chilled cake balls from the freezer. Take one cake pop stick and dip about half an inch of its tip into the melted green candy. Immediately insert the candy-coated end of the stick into the center of a chilled cake ball, pushing it about halfway through. The melted candy will act as a strong adhesive or “glue” to secure the cake ball firmly to the stick, preventing it from slipping off during the dipping process. Repeat this step for all cake balls. Once all sticks are inserted, return the baking sheet with the stick-inserted cake balls to the freezer for another 10-15 minutes to allow the candy “glue” to set firmly.
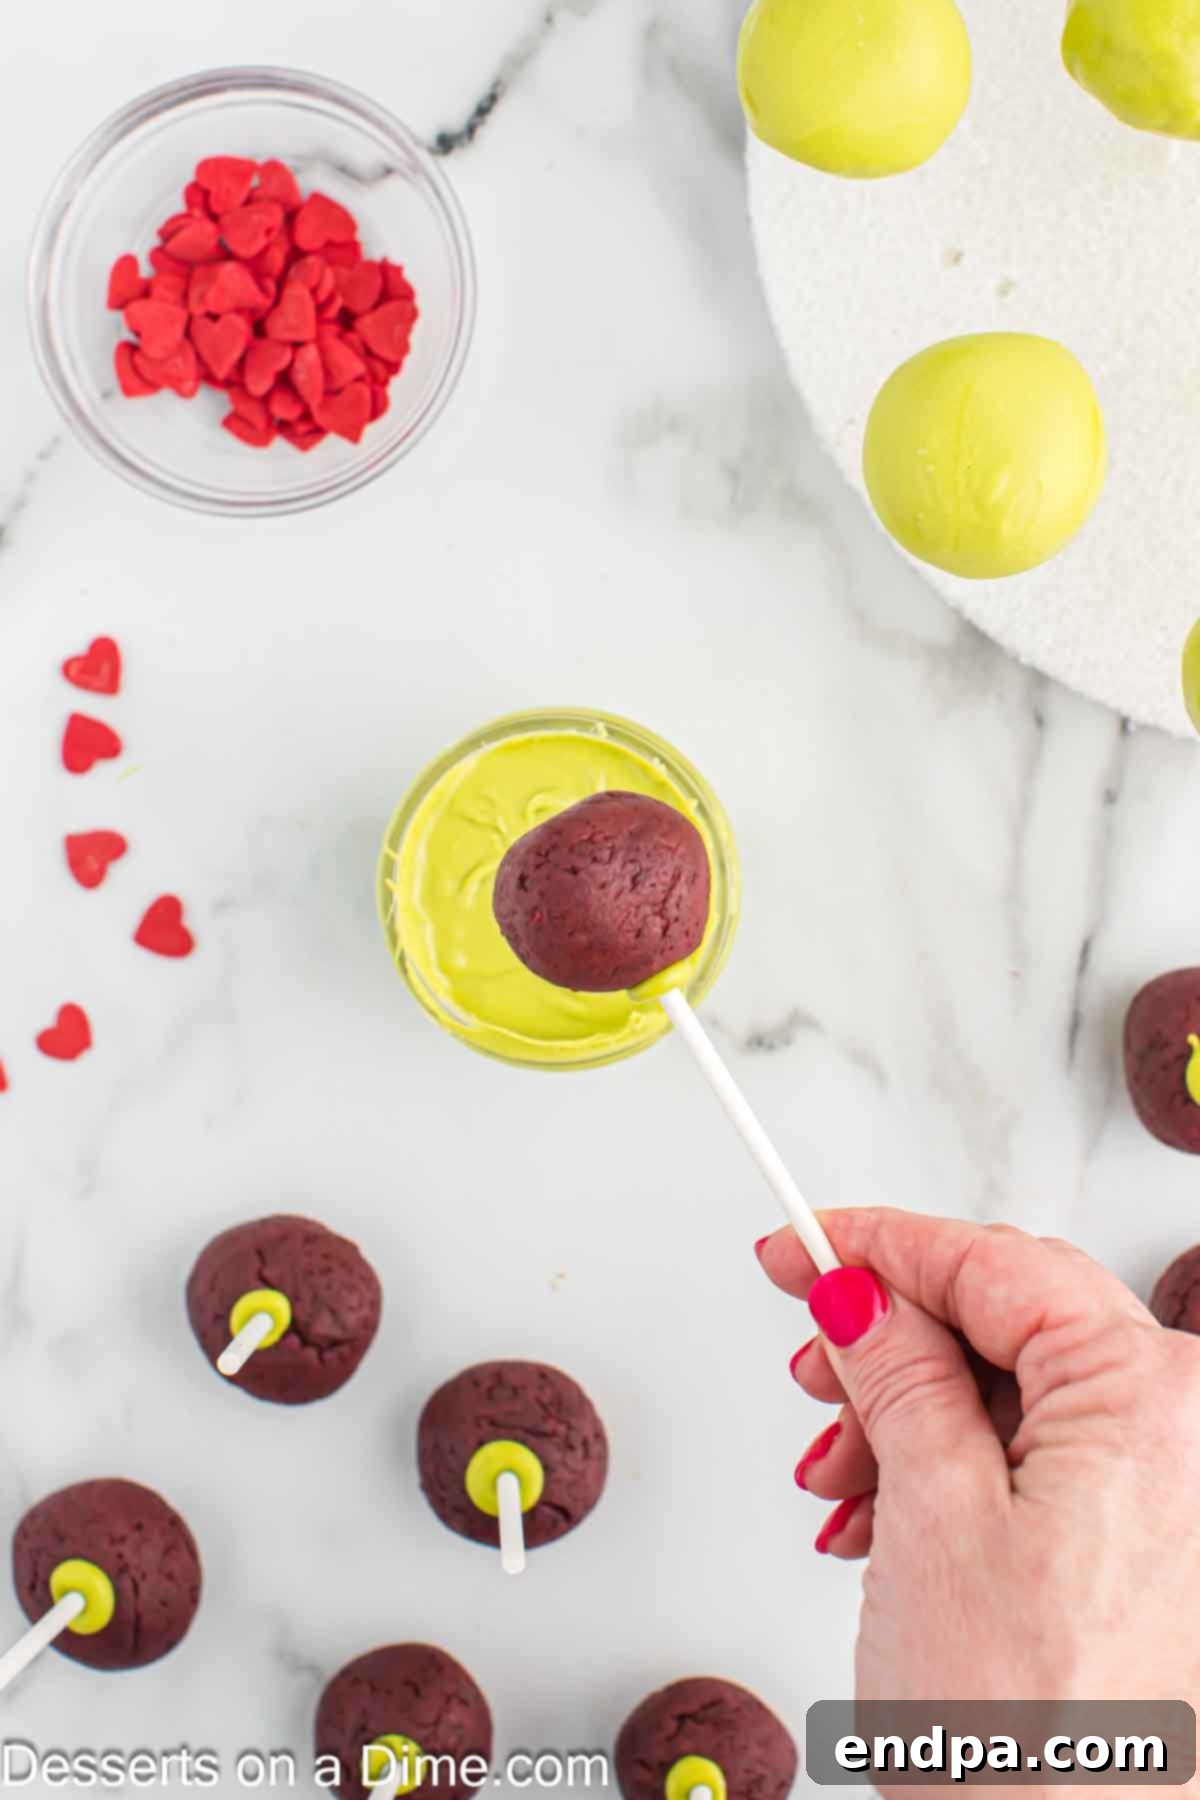
Step 7: Dip the Cake Pops. Take the firm cake pops out of the freezer. If your bowl of candy melts has started to thicken or solidify, re-microwave them in short bursts (15-20 seconds) until they are fluid and creamy again. Hold a cake pop by its stick and immerse the entire cake ball into the melted green candy, twisting gently to ensure full, even coverage. Avoid swirling too much, which can create air bubbles. Gently tap the stick against the rim of the bowl a few times to remove any excess candy coating, allowing it to drip back into the bowl. This creates a smooth, thin, and even shell, which is key for a beautiful finish.
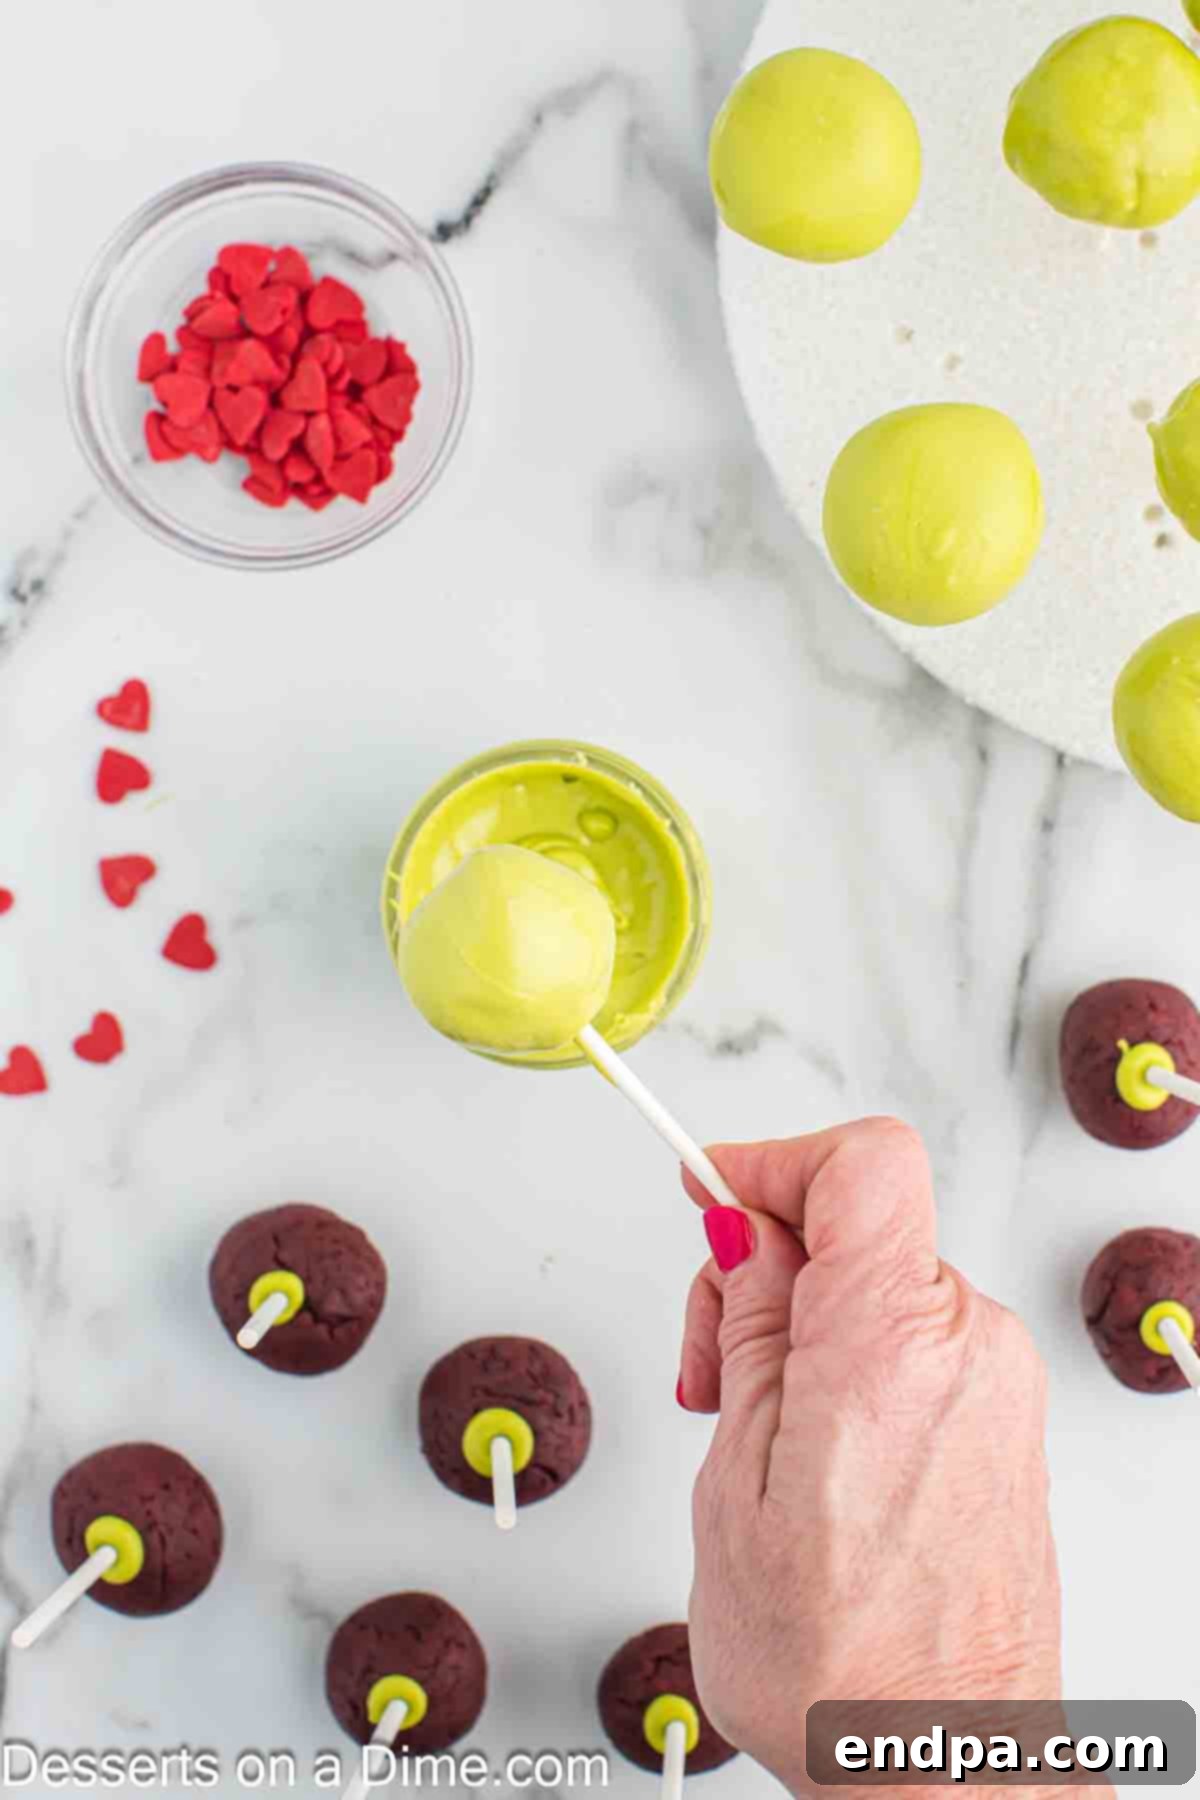
Step 8: Allow to Dry. After dipping each cake pop, carefully place the stick into a block of styrofoam, a piece of floral foam, or even a tall glass filled with rice or sugar. This setup allows the cake pops to stand upright without touching any surface, which is essential for the candy coating to dry and solidify evenly without smudges or flat spots. Work relatively quickly, especially if your kitchen is warm, as the candy coating will set quite fast. This step is critical for maintaining the pristine look of your Grinch Cake Pops.
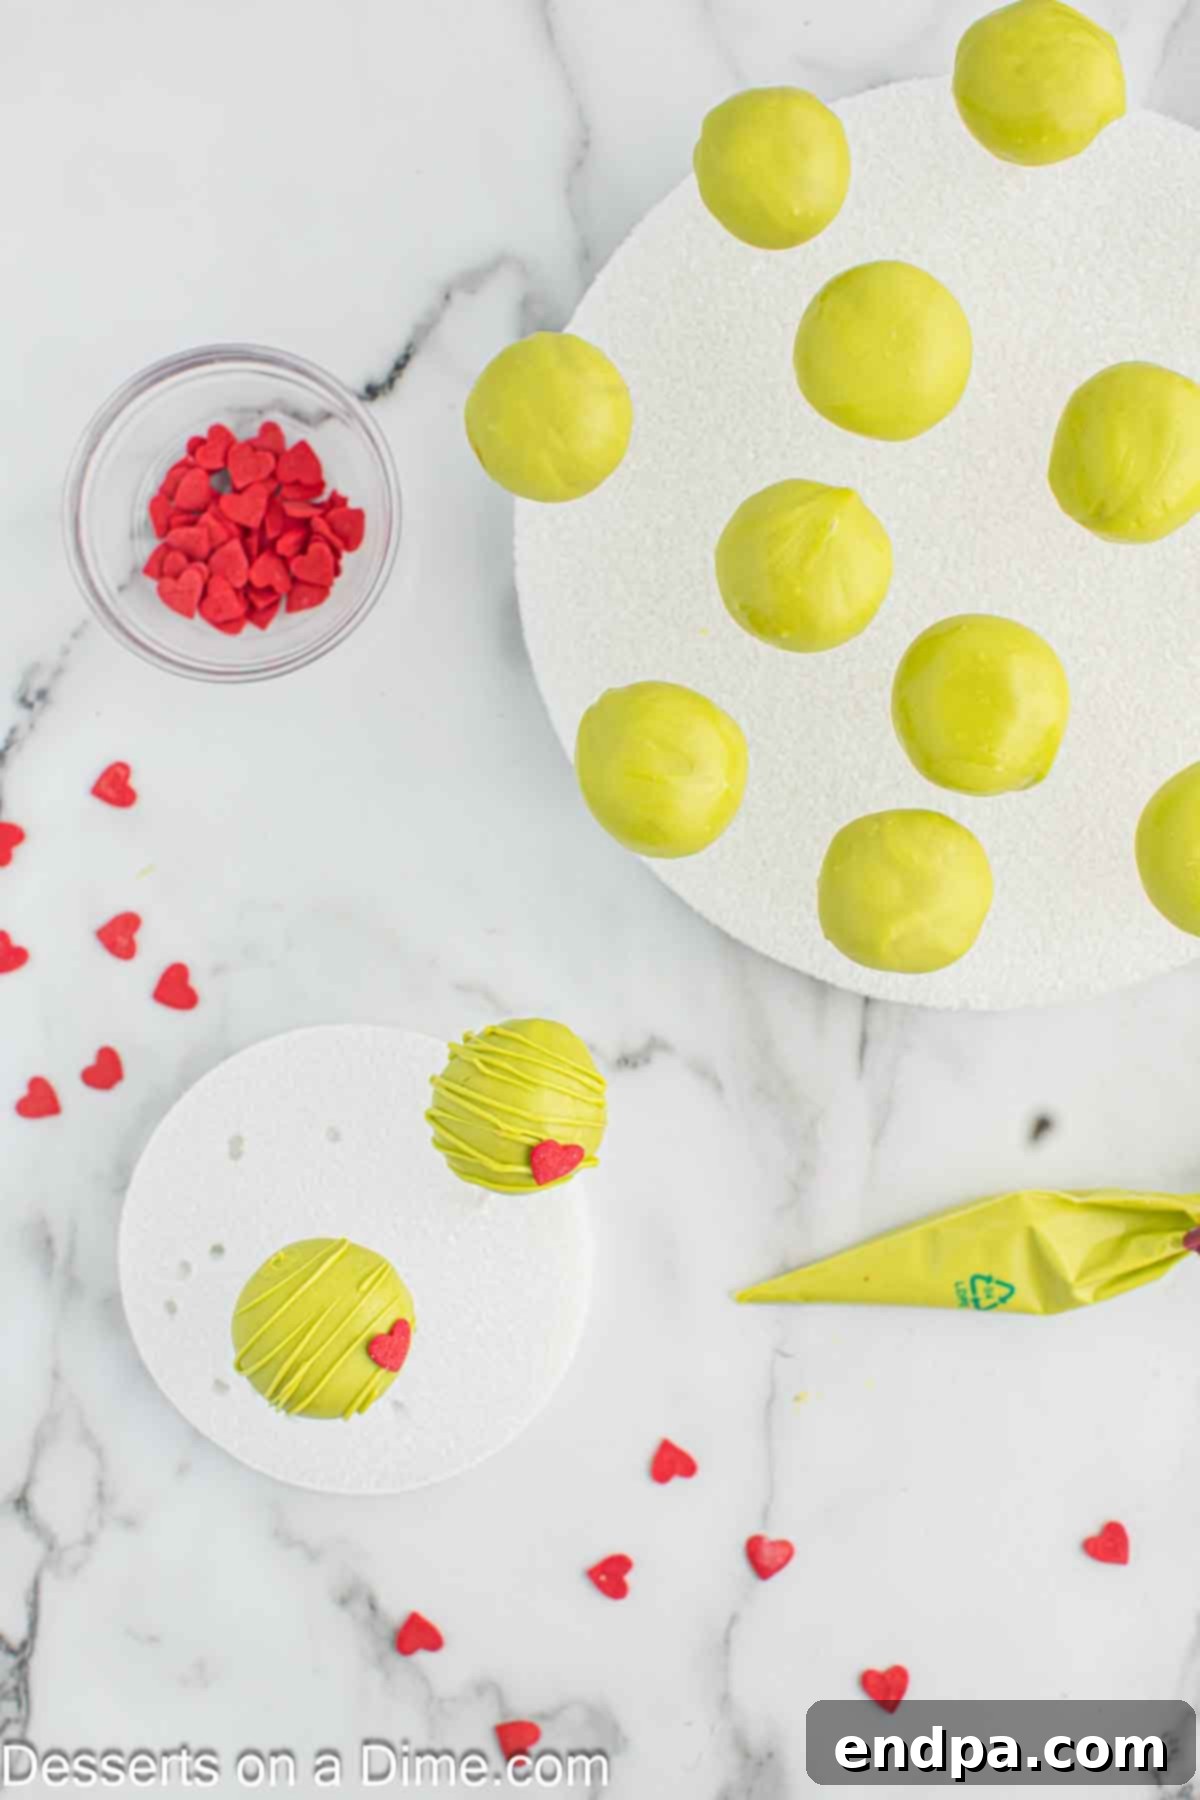
Step 9: Decorate with Hearts. Once the green candy coating on the cake pops has completely set and is firm to the touch, it’s time for the final, iconic Grinch touch. If you have a small amount of leftover candy melts, place them in a small piping bag (a Ziploc bag with a tiny corner snipped off works perfectly). Drizzle a little extra green candy melt over the top of each cake pop in a playful pattern, creating a spot for the heart. Immediately, before this drizzle hardens, place a single red candy heart (or your chosen red sprinkles) onto each pop. This ensures the heart adheres securely and stays in place. Continue this process until all your Grinch Cake Pops are beautifully adorned. Allow them to dry completely before serving.
- Step 10: Serve and Enjoy! Once the candy coating on all cake pops is firm, dry, and cool, they are officially ready to be served and enjoyed! Arrange them creatively on a festive platter, stand them upright in a decorative display, or package them individually for gifts. These delightful Grinch Cake Pops are sure to be a beloved addition to any holiday celebration.
Watch How to Make Grinch Cake Pops
Pro Tips for Perfect Cake Pops Every Time
Achieving bakery-quality cake pops at home is easier than you think with a few insider tips. These suggestions will help you avoid common pitfalls and ensure your Grinch Cake Pops are a smashing success, looking and tasting their absolute best:
- Roll for a Smooth Finish: The secret to perfectly smooth, professional-looking cake pops lies in how you roll them. After combining the cake and frosting, take your time to roll each ball firmly and evenly between your palms. Apply consistent pressure to remove any air pockets and create a dense, smooth sphere. Any bumps, cracks, or loose crumbs at this stage will unfortunately show through the candy coating, so a smooth surface creates a flawless canvas for dipping.
- Consistency is Key with a Cookie Scoop: For truly uniform and visually appealing cake pops, consistency in size is essential. Using a cookie scoop (or even a small ice cream scoop, typically 1.5 to 2 tablespoons) helps ensure that each cake ball is roughly the same size and weight. This not only makes them aesthetically pleasing but also ensures consistent chilling and dipping behavior. It also helps you accurately estimate your total yield.
- The “Glue” Trick: Coat the Stick: Do not, under any circumstances, skip the crucial step of dipping the lollipop stick into the melted candy coating before inserting it into the cake ball. This thin layer of semi-hardened candy acts as a strong adhesive, creating a secure bond between the cake ball and the stick. This vital step prevents your beautifully crafted cake pop from falling off the stick when dipped into the main candy coating, saving you frustration and potential mess.
- No Sticks? No Problem! Make Cake Balls: If you prefer a simpler, stick-free treat or are serving very young children for whom sticks might be a hazard, you can absolutely skip the lollipop stick. Simply form the mixture into cake balls, chill them thoroughly, and then dip them as usual. After dipping, place them in mini paper cupcake liners to set. They will still be adorable and just as delicious, resembling festive truffles.
- Temperature Control for Dipping Success: Optimal temperature management is vital for flawless dipping. Ensure your cake balls are thoroughly chilled and firm (straight from the freezer) before dipping. A cold cake ball helps the warm candy coating set quickly and smoothly, minimizing drips and preventing the cake from becoming too soft. Conversely, ensure your candy melts are warm enough to be fluid but not so hot that they burn, seize, or cause the cake ball to crumble or melt prematurely. If the melts start to thicken, reheat them in short bursts.
- Thinning Candy Melts for a Perfect Coat: If your candy melts appear too thick or gloopy, they will result in a heavy, uneven coating that is prone to cracking. To achieve a thin, smooth, and even layer, add a tiny bit more vegetable shortening (about half a teaspoon at a time) to the melted candy and stir until you reach the desired flowing consistency. This creates a much more appealing and professional-looking finish.
- Patience During Drying: Allow ample time for your cake pops to dry completely after both the dipping and decorating steps. Rushing this process can lead to smudges, messy presentation, or candy coatings that don’t fully harden, leaving them sticky. A cool, dry environment is ideal for setting. Placing them in a cool, draft-free room helps the candy set without condensation.
- Deep Bowl for Dipping: Use a deep, narrow bowl or mug for your melted candy coating. This allows you to fully immerse the cake ball in one smooth motion, ensuring complete and even coverage without having to tilt the bowl too much, which can create mess.
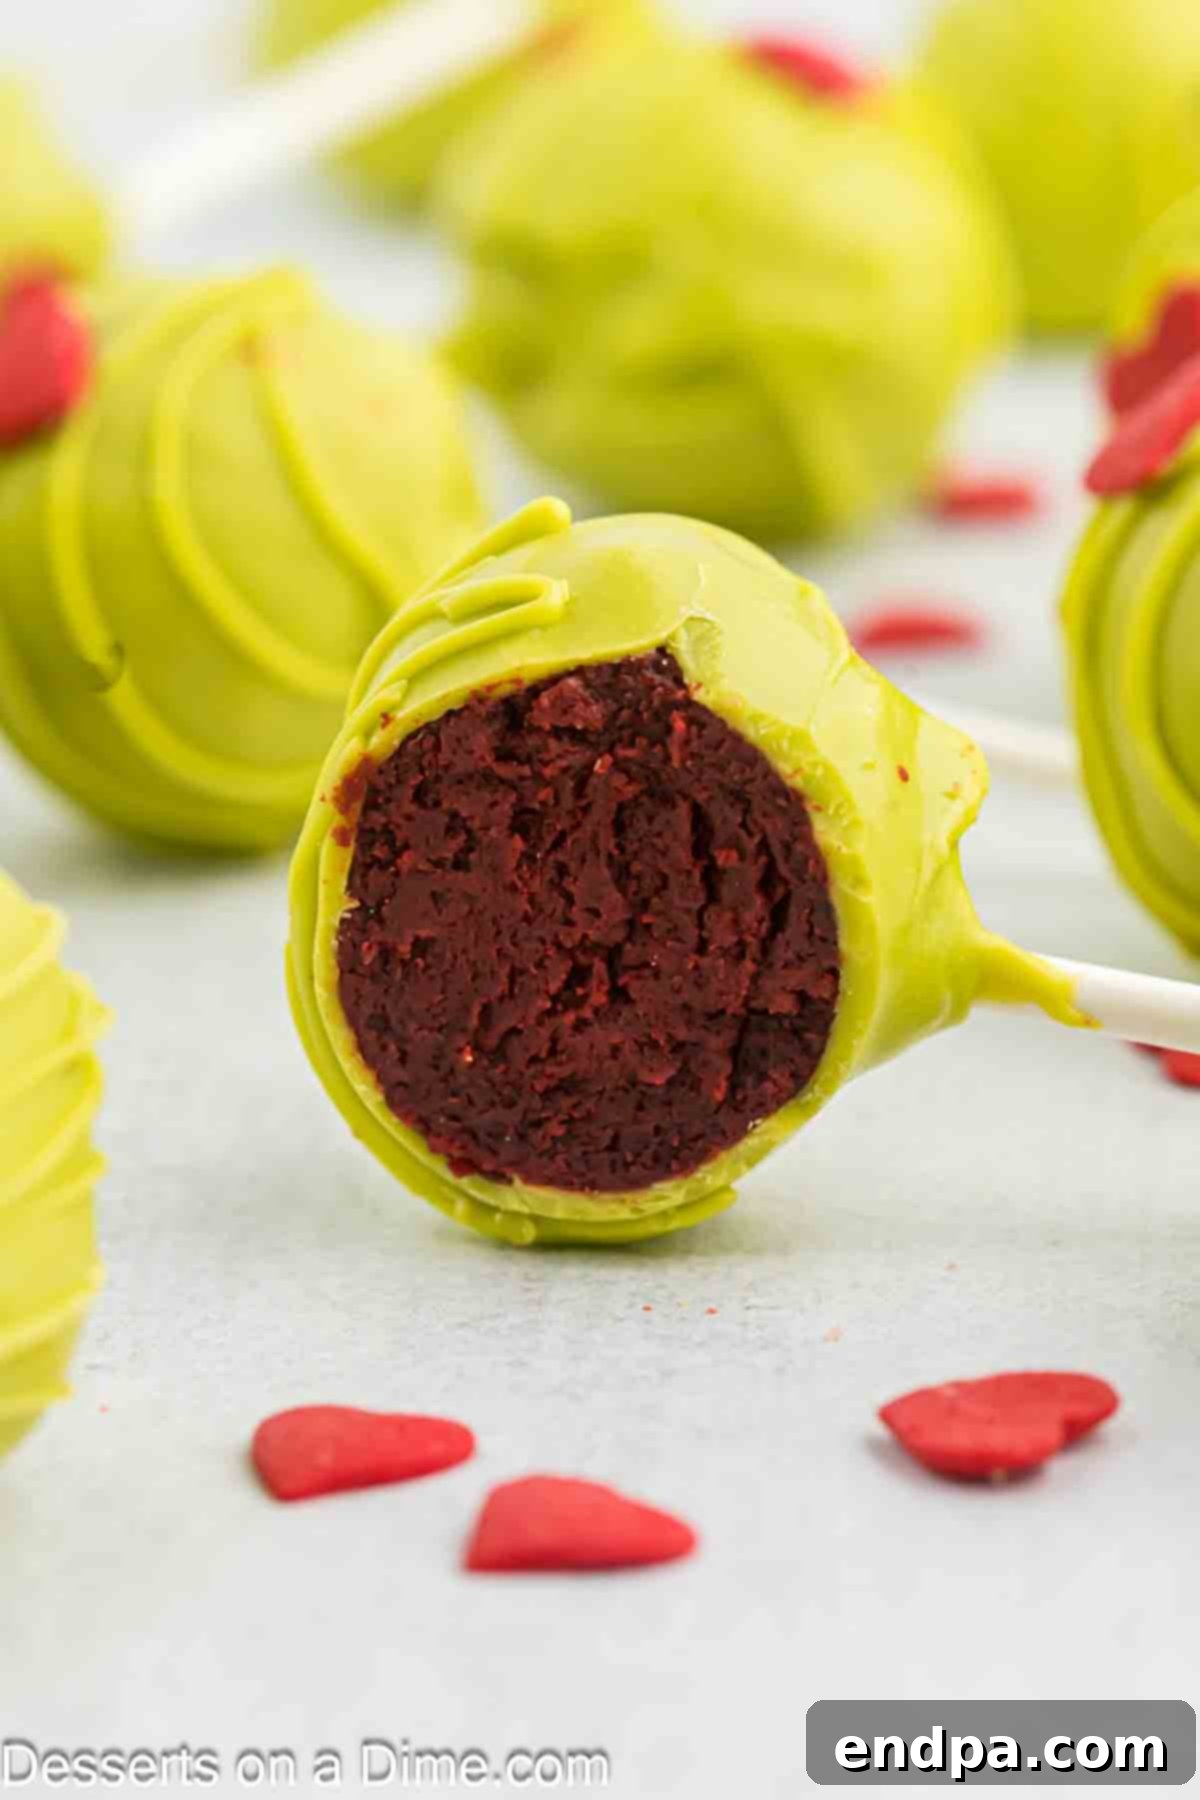
Storage Solutions and Make-Ahead Advice
One of the best features of Grinch Cake Pops is their flexibility when it comes to preparation and storage. This makes them an excellent choice for busy holiday schedules, allowing you to bake in advance and enjoy the festivities without last-minute stress, ensuring your dessert table is ready and beautiful.
- How to Store Finished Cake Pops: Once your Grinch Cake Pops are fully decorated and the candy coating has hardened completely, it’s crucial to store them properly to maintain their freshness, texture, and vibrant appearance. Place any leftover or prepared cake pops in an airtight container. Refrigerate them to keep them nice and fresh. Properly stored in the fridge, these festive treats will remain delicious and enjoyable for up to 1 week. For the best flavor and texture experience, bring them to room temperature for about 15-20 minutes before serving.
- Make Them in Advance: The Grinch Cake Pops recipe is incredibly forgiving and perfectly suited for advanced preparation. This is a huge advantage during the hectic holiday season! You can easily make and decorate these delightful treats 1-2 days before your party or event. This allows you to spread out the work, significantly reducing stress on the day of your gathering. Simply follow the instructions, store them correctly in the refrigerator, and they’ll be ready to impress your guests when the time comes, looking as fresh as if they were just made.
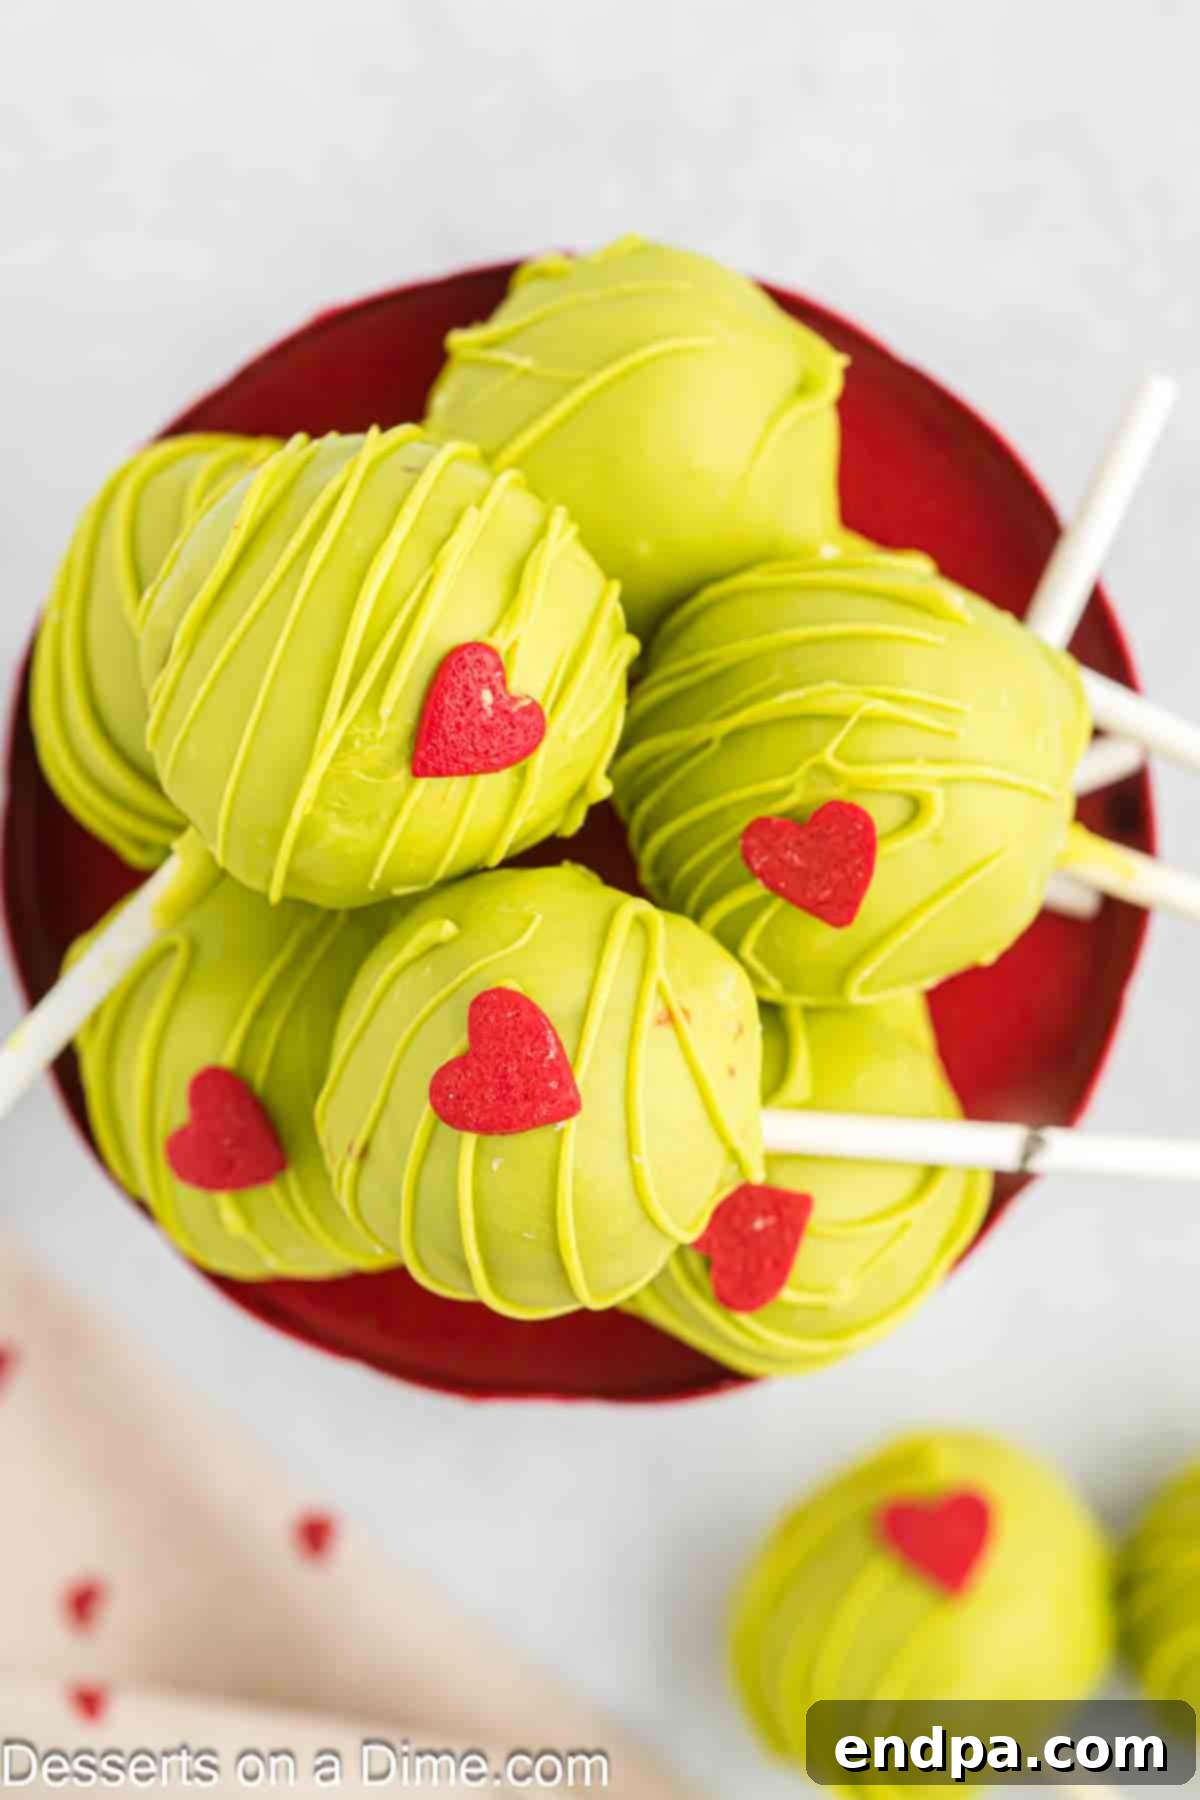
Can You Freeze Cake Pops for Later?
Yes, you can absolutely freeze cake pops, which is a fantastic hack for extended storage or even further advance preparation. This method allows you to get a head start on your holiday baking without compromising on quality. However, for the best results, it’s generally recommended to freeze the cake balls *before* dipping them in candy coating.
- Freezing Plain Cake Balls: After you’ve rolled your cake mixture into uniform balls (as described in Step 4 of the instructions), place them in a single layer on a baking sheet lined with parchment paper. Freeze them uncovered for 1 to 2 hours, or until they are completely solid. This initial flash-freeze prevents them from sticking together.
- Transferring for Long-Term Storage: Once the cake balls are frozen solid, transfer them to a freezer-safe airtight bag or container. Ensure they are packed snugly to minimize air exposure, which helps prevent freezer burn and allows them to retain their flavor and texture. Don’t forget to label the bag or container with the date of freezing for easy tracking.
- Storage Duration: Properly stored, plain frozen cake balls can be kept in the freezer for up to 2 months. This long shelf life makes them an excellent component to prepare weeks ahead of your event.
- Thawing and Decorating: When you’re ready to use them, transfer the frozen cake balls from the freezer to the refrigerator and allow them to thaw overnight, or for several hours until they are soft enough to easily insert sticks. Once thawed, proceed with inserting the sticks and dipping them in candy melts as outlined in the recipe’s subsequent steps (Step 6 onwards). This method is ideal for tackling your holiday baking well in advance, giving you more time to enjoy the festive season!
More Irresistible Grinch-Themed Recipes to Explore
If your heart has grown three sizes and you’re craving more Grinch-themed culinary adventures, you’re in luck! The world of Grinch desserts and treats is vast and delightful, offering many wonderful ways to infuse your holiday celebrations with that signature green charm and playful spirit. Here are some fantastic recipes to complement your Grinch Cake Pops and complete your festive spread:
- Grinch Fudge: A wonderfully rich and creamy fudge, distinctively dyed green and often studded with red candies or sprinkles. It’s a simple yet incredibly effective holiday treat that requires minimal effort but delivers maximum festive impact.
- No Bake Grinch Pie: Perfect for those occasions when you want a showstopping dessert without the hassle of turning on the oven. This light, fluffy, and vibrantly green pie is always a hit, offering a refreshing contrast to heavier holiday desserts.
- Festive Grinch Recipes: An entire collection of various Grinch-inspired treats. This resource will give you even more creative ideas and options for your holiday menu, from cookies to drinks and everything in between.
- Grinch Hot Chocolate Bombs: Elevate your cozy drink experience with these charming spheres! These Grinch-themed hot chocolate bombs melt into a delicious, green-tinted hot chocolate, complete with a delightful surprise of marshmallows and sprinkles erupting from within.
- Grinch Fruit Kabob: For a lighter, healthier, and equally festive option amidst all the holiday sweets. These colorful fruit skewers, often featuring juicy green grapes, a slice of banana for the “fur,” and a strawberry “hat,” cleverly resemble miniature Grinches and are fun for all ages.
We absolutely adore hearing about your kitchen creations! If you decide to make these incredibly easy and festive Grinch Cake Pops, please don’t hesitate to leave us a comment or a review below. Your feedback helps us grow, inspires other home bakers, and allows us to share even more delightful recipes with our community!
Grinch Cake Pops Recipe
Grinch Cake Pops are a holiday favorite, crafted from moist red velvet cake and coated in vibrant green candy. Each pop is crowned with a charming red candy heart, making them perfect for festive celebrations and a delightful addition to any Christmas party spread.
Prep Time: 15 mins
Cook Time: 30 mins
Freeze Time: 15 mins
Total Time: 1 hr
Yields: Approximately 24-36 cake pops
Cuisine: American
Course: Dessert
Estimated Calories: 148 kcal per serving
Author: Carrie Barnard
Ingredients
- 1 box Red Velvet Cake Mix (plus ingredients required on box to make the cake, e.g., eggs, oil, water/milk)
- 3-4 Tbsp Cream Cheese Frosting (pre-made recommended for ease)
- 24-36 Cake Pop Sticks or Lollipop Sticks
- 12 oz Vibrant Green Candy Melts
- 1 teaspoon Vegetable Shortening
- 36 Red Candy Hearts (or Red Candy Sprinkles)
Instructions
- Prepare and bake the red velvet cake according to the package directions. Allow the cake to cool completely at room temperature before proceeding.
- Remove the cooled cake from its pan. Discard any overly browned or crusty outside layers. Crumble the remaining moist cake finely into a large bowl.
- Add the cream cheese frosting to the crumbled cake. Mix thoroughly, using your hands or a sturdy spoon, until the cake mixture is well combined and has a dough-like consistency that can be rolled into firm balls.
- Using a cookie scoop for uniformity, shape the mixture into 24-36 smooth, round cake balls. Place them on a baking sheet lined with parchment paper. Freeze for 15-20 minutes to firm up.
- In a small, deep, microwave-safe bowl, combine the green candy melts and vegetable shortening. Microwave in 30-second intervals, stirring well after each, until smooth, fluid, and creamy.
- Dip about half an inch of each cake pop stick into the melted green candy, then immediately insert the stick halfway into a chilled cake ball. This secures the ball to the stick. Return to the freezer for 10-15 minutes to allow the candy “glue” to set firmly.
- Once the stick’s “glue” has set, dip each cake pop into the melted green candy, ensuring full coverage. Gently tap the stick against the bowl’s rim to remove any excess coating, creating a smooth finish.
- Place the dipped cake pops upright in a styrofoam block or tall glass filled with rice/sugar to allow the candy coating to dry and harden completely.
- For decoration, if desired, place any remaining melted candy into a piping bag (or a small Ziploc bag with the corner snipped). Drizzle a little candy melt over each hardened cake pop, and immediately place a red candy heart (or your chosen red sprinkles) on top before the drizzle sets.
- Continue until all cake pops are covered and decorated. Once completely dry and firm, they are ready to serve and enjoy!
Recipe Notes
Refrigerate leftover Grinch Cake Pops in an airtight container for up to 1 week. Bring to room temperature briefly before serving for optimal enjoyment.
Nutrition Facts (per serving, estimated)
Calories: 148 kcal, Carbohydrates: 18g, Protein: 2g, Fat: 8g, Saturated Fat: 3g, Polyunsaturated Fat: 2g, Monounsaturated Fat: 3g, Trans Fat: 0.04g, Cholesterol: 20mg, Sodium: 167mg, Potassium: 68mg, Fiber: 0.4g, Sugar: 12g, Vitamin A: 30IU, Calcium: 30mg, Iron: 1mg
Pin This Recipe Now to Save for Later!
Pin Recipe
