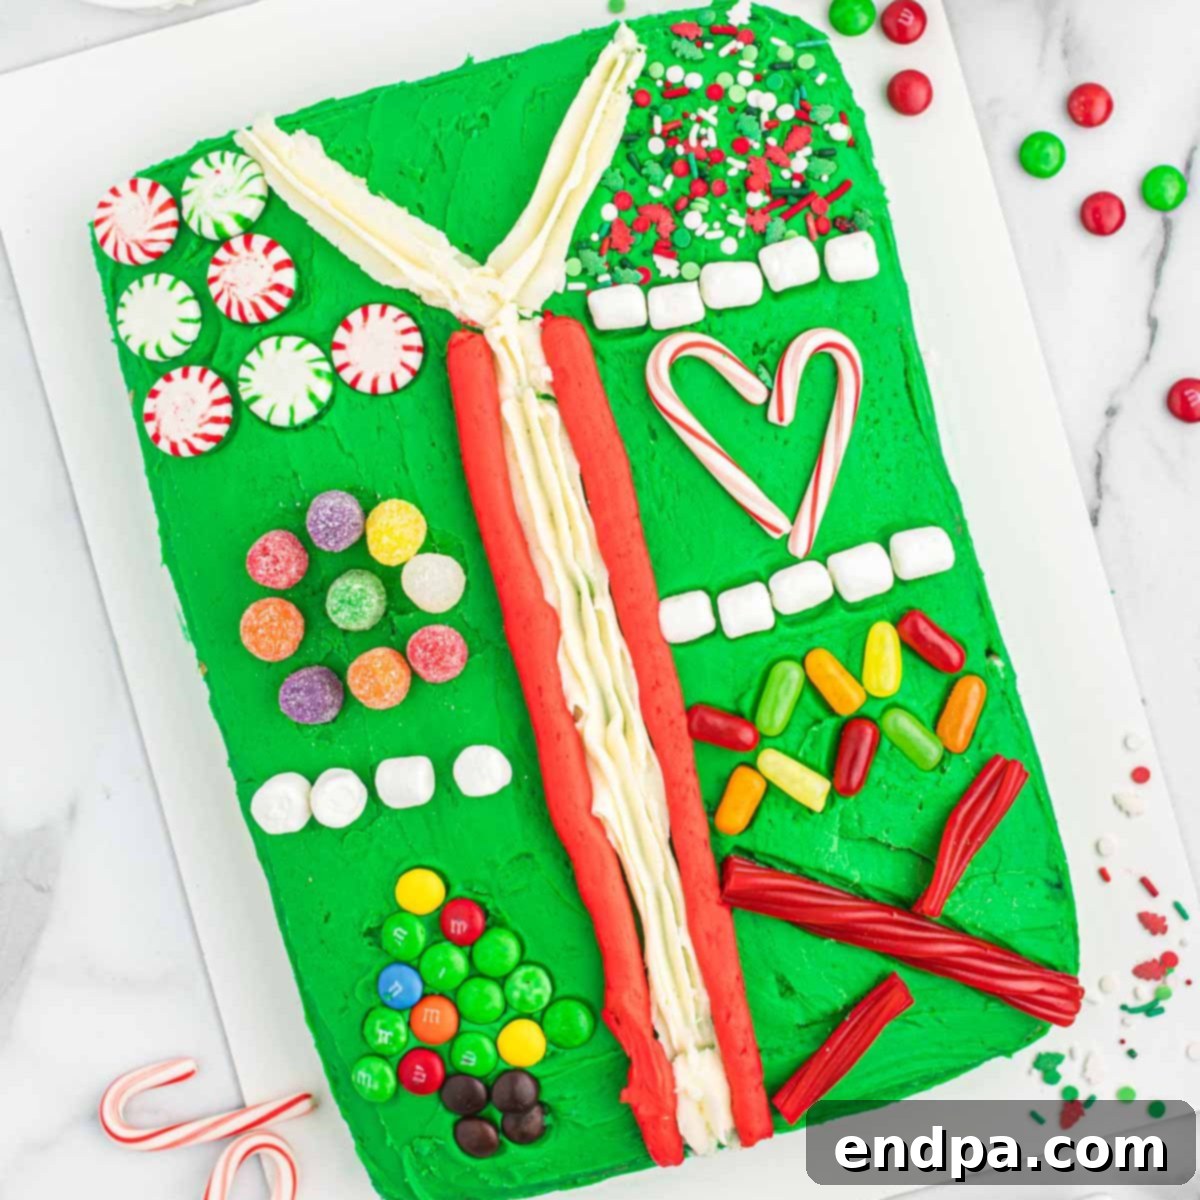
The Ugly Sweater Cake is not just a dessert; it’s a celebration of holiday cheer, creativity, and a touch of delightful tackiness. This festive confection transforms a simple cake into an edible masterpiece, mimicking the outrageous designs of classic Christmas sweaters with vibrant frosting and playful candy decorations. It’s the ultimate centerpiece that promises to spark conversations, spread smiles, and add a unique charm to any holiday gathering.
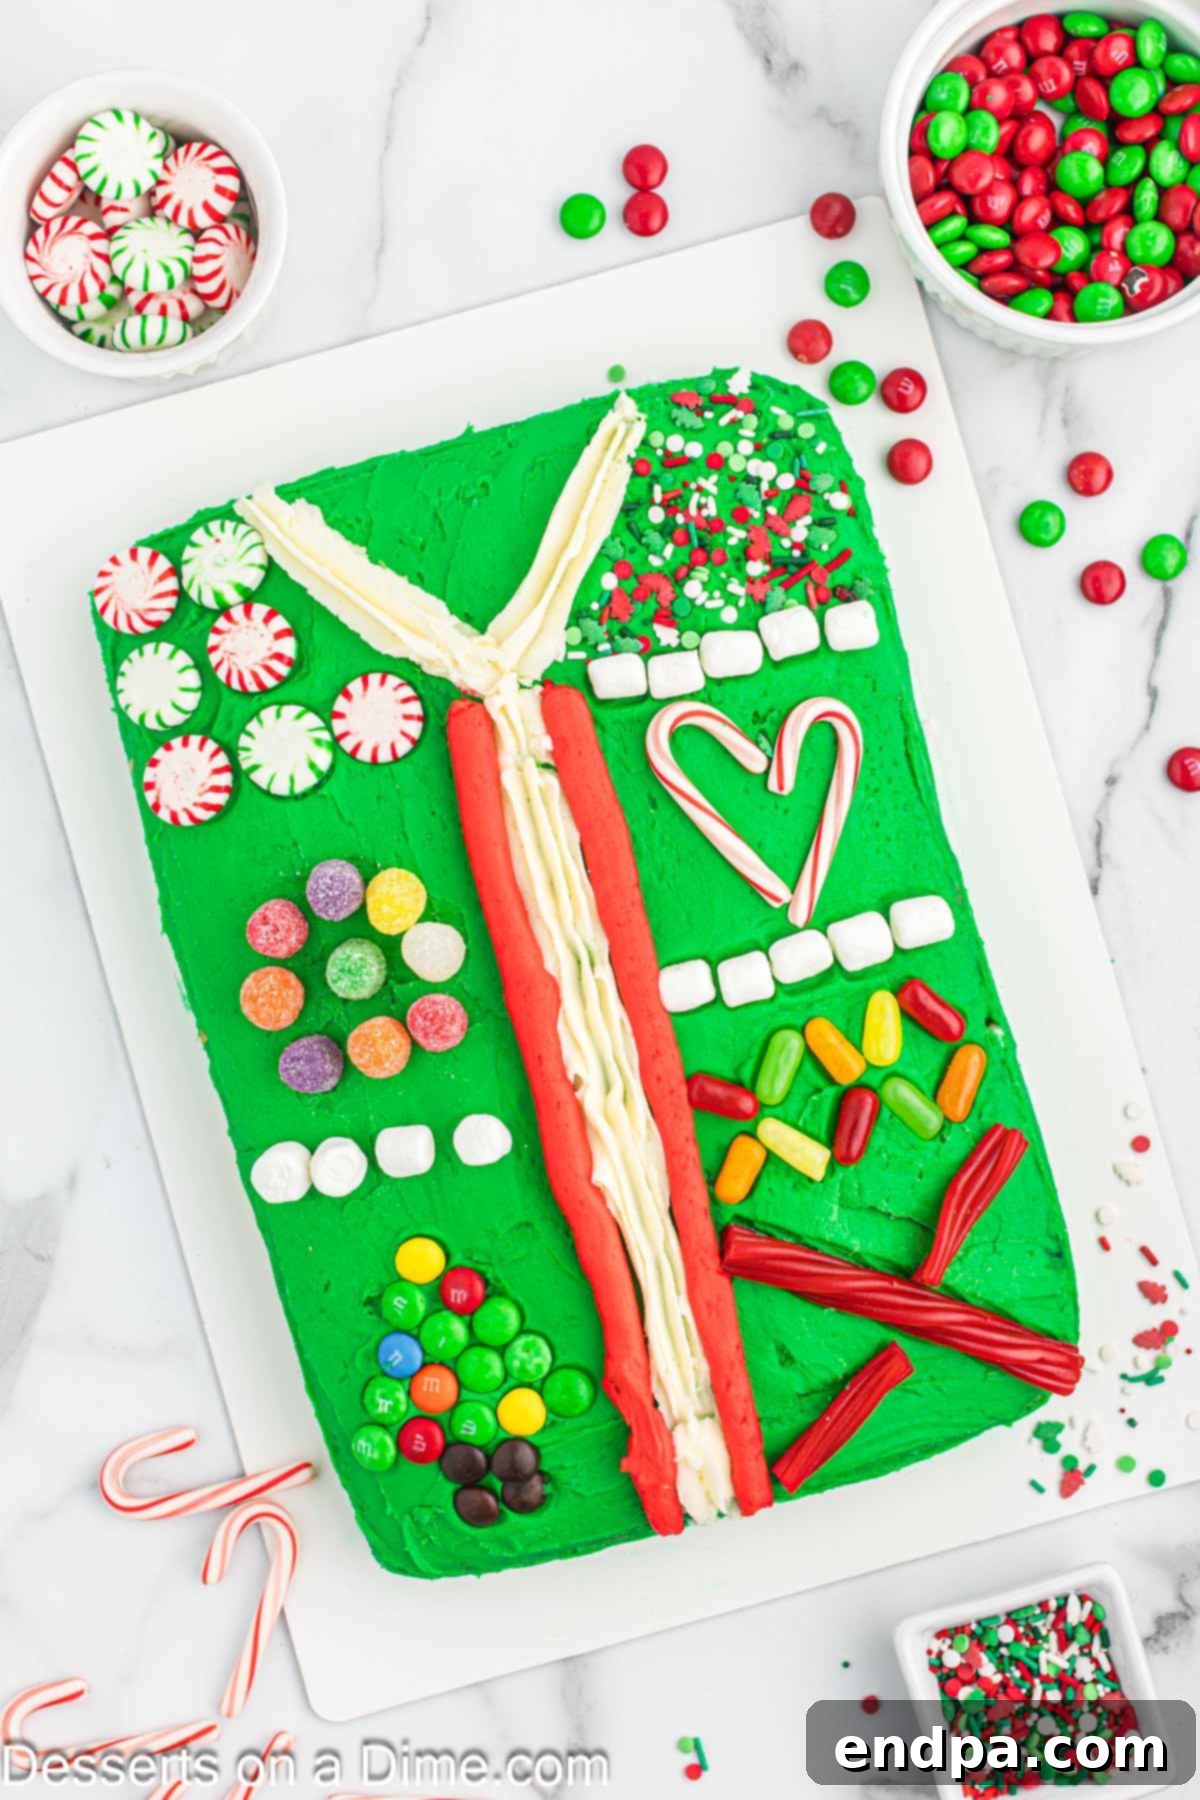
Inspired by the beloved (or humorously dreaded) tradition of ugly Christmas sweaters, this cake invites you to unleash your inner artist. Decked out with bold frosting patterns, a generous scattering of sprinkles, and an array of colorful candies, it embodies the playful spirit of the season. Whether you’re hosting a grand holiday party, participating in a lively cookie exchange, or simply looking for a fun family baking activity, this Ugly Sweater Cake offers an engaging and delicious way to embrace the festive atmosphere.
For more easy and delightful holiday baking ideas, consider trying our Christmas Jello Poke Cake, a light and refreshing treat that’s equally festive.
What’s in this post: Ugly Sweater Cake
- Why You’ll Adore This Ugly Sweater Cake
- Essential Ingredients for Your Festive Cake
- Creative Substitutions and Additions
- Step-By-Step Guide to Decorating Your Cake
- Expert Tips for a Perfect Ugly Sweater Cake
- Proper Storage for Maximum Freshness
- More Adorable Christmas Desserts to Explore
- Ugly Sweater Cake Recipe Card
Why You’ll Adore This Ugly Sweater Cake
- Uniquely Festive and Fun: This cake is more than just a dessert; it’s an edible expression of holiday joy and humor. It perfectly captures the quirky charm of classic holiday sweaters, bringing a smile to everyone’s face even before the first slice is served. It’s the embodiment of festive fun in cake form, designed to be visually engaging and utterly delicious.
- A Show-Stopping Party Centerpiece: Forget predictable holiday desserts. This Ugly Sweater Cake is guaranteed to be the star of your holiday spread. Its vibrant colors and whimsical decorations make it an instant conversation starter and a memorable centerpiece that guests will admire and photograph. It’s perfect for office parties, family dinners, or casual get-togethers.
- A Delightfully Creative Activity: Decorating this cake offers a fantastic, hands-on project suitable for all ages. Gather your family and friends for a fun-filled baking session where everyone can contribute their unique design ideas. It’s an excellent way to bond during the holidays, fostering creativity and making lasting memories together.
- Endlessly Customizable Designs: The beauty of an “ugly sweater” is that there are no rules! You can let your imagination run wild, opting for intricate piped patterns or a minimalist, chic design. Experiment with various candies, sprinkles, edible glitter, or even homemade fondant accents to create a cake that is truly one-of-a-kind, reflecting your personal style and holiday spirit.
- Surprisingly Easy to Make: Don’t let the elaborate appearance intimidate you. This recipe is designed to be accessible for bakers of all skill levels. Whether you prefer the convenience of a boxed cake mix or enjoy baking from scratch, either option works perfectly as the canvas for this fun and tasty holiday treat. The focus is on the decorating, which is as simple or complex as you choose to make it.
Essential Ingredients for Your Festive Cake
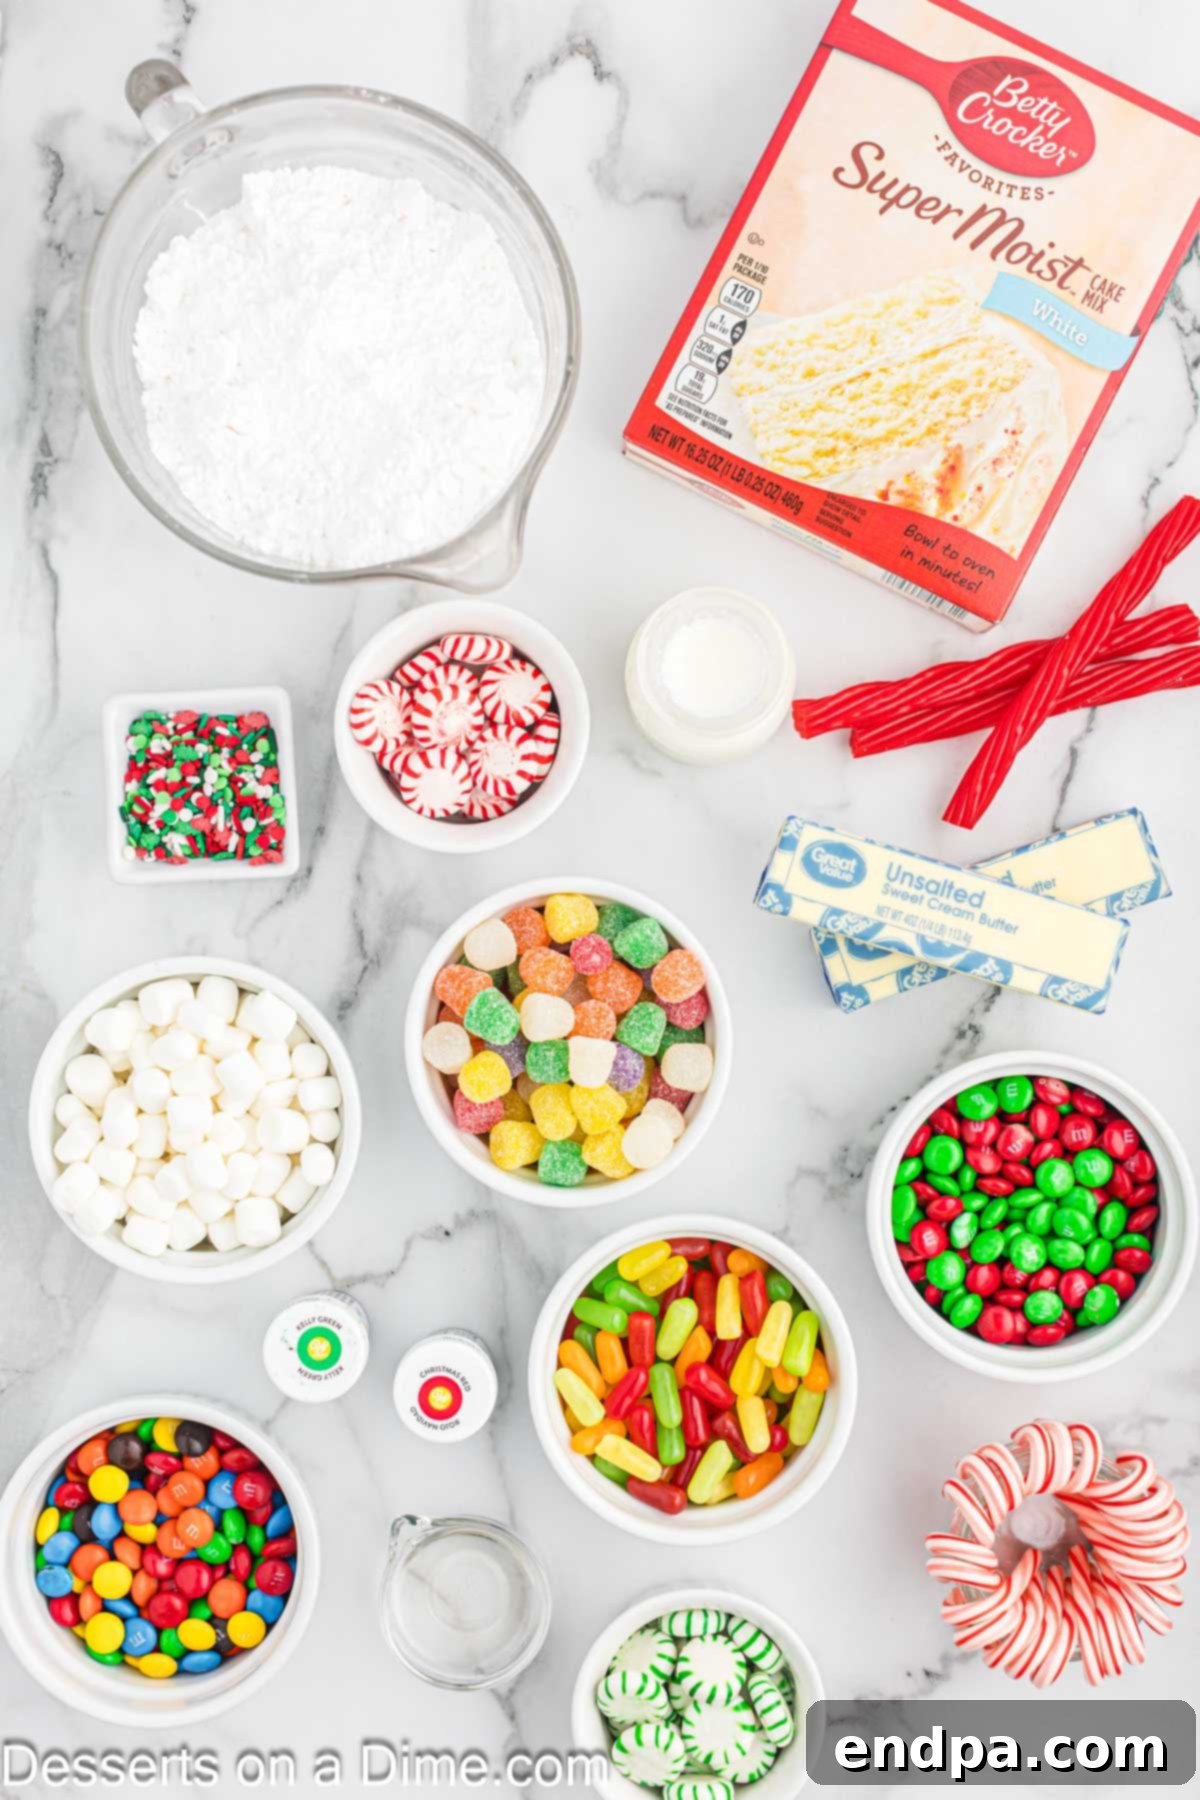
For the Cake
- Boxed White Cake Mix: A versatile and simple base that ensures your cake is easy to bake and provides a neutral canvas for your festive decorations. You can also opt for a yellow cake mix or even a funfetti mix for added color!
- Ingredients as per package instructions: Typically, this includes water, vegetable oil, and eggs. Always follow the specific instructions on your chosen cake mix box for the best results.
For the Rich Buttercream Frosting
- Unsalted Butter (room temperature): Crucial for achieving a creamy, rich, and spreadable buttercream. Room temperature butter creams beautifully, incorporating air for a light and fluffy texture.
- Powdered Sugar (confectioners’ sugar): The foundation of smooth, sweet buttercream. Sifting it can help prevent lumps, ensuring a silky consistency.
- Clear Vanilla Extract: Essential for flavor, using clear vanilla extract helps maintain the bright white color of your frosting, preventing any yellow tint that regular vanilla might impart.
- Heavy Cream: A few tablespoons of heavy cream will give your buttercream the perfect consistency, making it wonderfully smooth and easy to spread or pipe.
- Red Gel Food Coloring: For vibrant, bold accents that pop against the green “sweater” background. Gel food coloring provides intense color without thinning the frosting.
- Green Gel Food Coloring: The primary color for your “sweater base,” bringing your festive vision to life with a classic Christmas hue.
A Bounty of Fun Decorations
- Small Peppermint Candies: Perfect for creating decorative buttons, a festive border, or even crushed for a minty sprinkle effect.
- M&Ms: These colorful chocolate candies add delightful pops of color and a satisfying crunch. Use various holiday-themed colors to enhance the ugly sweater look.
- Miniature Candy Canes: Ideal for edging, creating playful patterns, or as a charming V-neck accent. They add a classic Christmas touch.
- Christmas Sprinkles: An instant dose of festivity! Choose a mix of holiday-themed shapes, jimmies, and nonpareils to cover large sections or add delicate details.
- Gumdrop Candies: Versatile for creating colorful “lights,” bold geometric patterns, or simply adding chewy texture and bright color.
- Pull N Peel Twizzlers: Excellent for crafting intricate borders, stripes, cross-stitching patterns, or sweater “stitching.” Their pliable nature makes them easy to work with.
- Mini Marshmallows: Perfect for adding a cozy, fluffy texture, creating snowdrifts, or forming soft, rounded elements on your sweater design.
- Mike and Ike Candies: Their elongated shape makes them fun for creating rows of “lights,” stripes, or other colorful linear accents.
You’ll find the complete list of ingredients and precise measurements in the recipe card at the bottom of this post.
Creative Substitutions and Additions to Personalize Your Cake
This Ugly Sweater Cake recipe is incredibly flexible, allowing you to tailor it to your preferences, dietary needs, or what you have on hand. Here are some ideas to inspire your customization:
- Store-Bought Frosting for Convenience: If time is of the essence or you prefer to minimize steps, feel free to substitute homemade buttercream with your favorite store-bought vanilla or cream cheese frosting. You can easily divide and color it with gel food coloring just as you would with homemade frosting.
- Experiment with Cake Flavors: While a white cake mix provides a clean canvas, don’t hesitate to use any cake flavor you adore. Yellow cake offers a classic taste, red velvet adds a touch of sophistication, and chocolate cake creates a rich contrast to the festive decorations. Spice cake, gingerbread, or even funfetti are also excellent choices for a holiday theme.
- Dairy-Free Options: For those with dairy sensitivities, many brands now offer dairy-free cake mixes and butter alternatives that can be used in the buttercream recipe. Ensure your heavy cream is also a plant-based alternative like coconut cream or a dairy-free whipping cream.
- Gluten-Free Alternatives: Most major brands offer gluten-free cake mixes that perform just as well as their conventional counterparts. This allows everyone to enjoy a slice of this festive treat.
- Homemade Cake from Scratch: For the avid baker, a homemade vanilla or white cake recipe can be used as the foundation. Just ensure it’s a sturdy enough cake to hold the generous frosting and decorations.
- Alternative Decorations: The list of candies is just a starting point! Consider using pretzel pieces for reindeer antlers, mini chocolate chips for textured areas, edible glitter for sparkle, holiday cookies cut into small shapes, or even melted chocolate to create intricate patterns or drizzle. Get creative with what you love and what fits your “ugly” vision!
- Citrus Zest for Flavor: Add a festive zing to your white cake or frosting by incorporating a tablespoon of orange or lemon zest. It brightens the flavor profile beautifully.
Step-By-Step Guide to Decorating Your Spectacular Ugly Sweater Cake
Transforming a plain cake into an Ugly Sweater masterpiece is a fun and rewarding process. Follow these detailed steps to create a dessert that will be the talk of your holiday gathering.
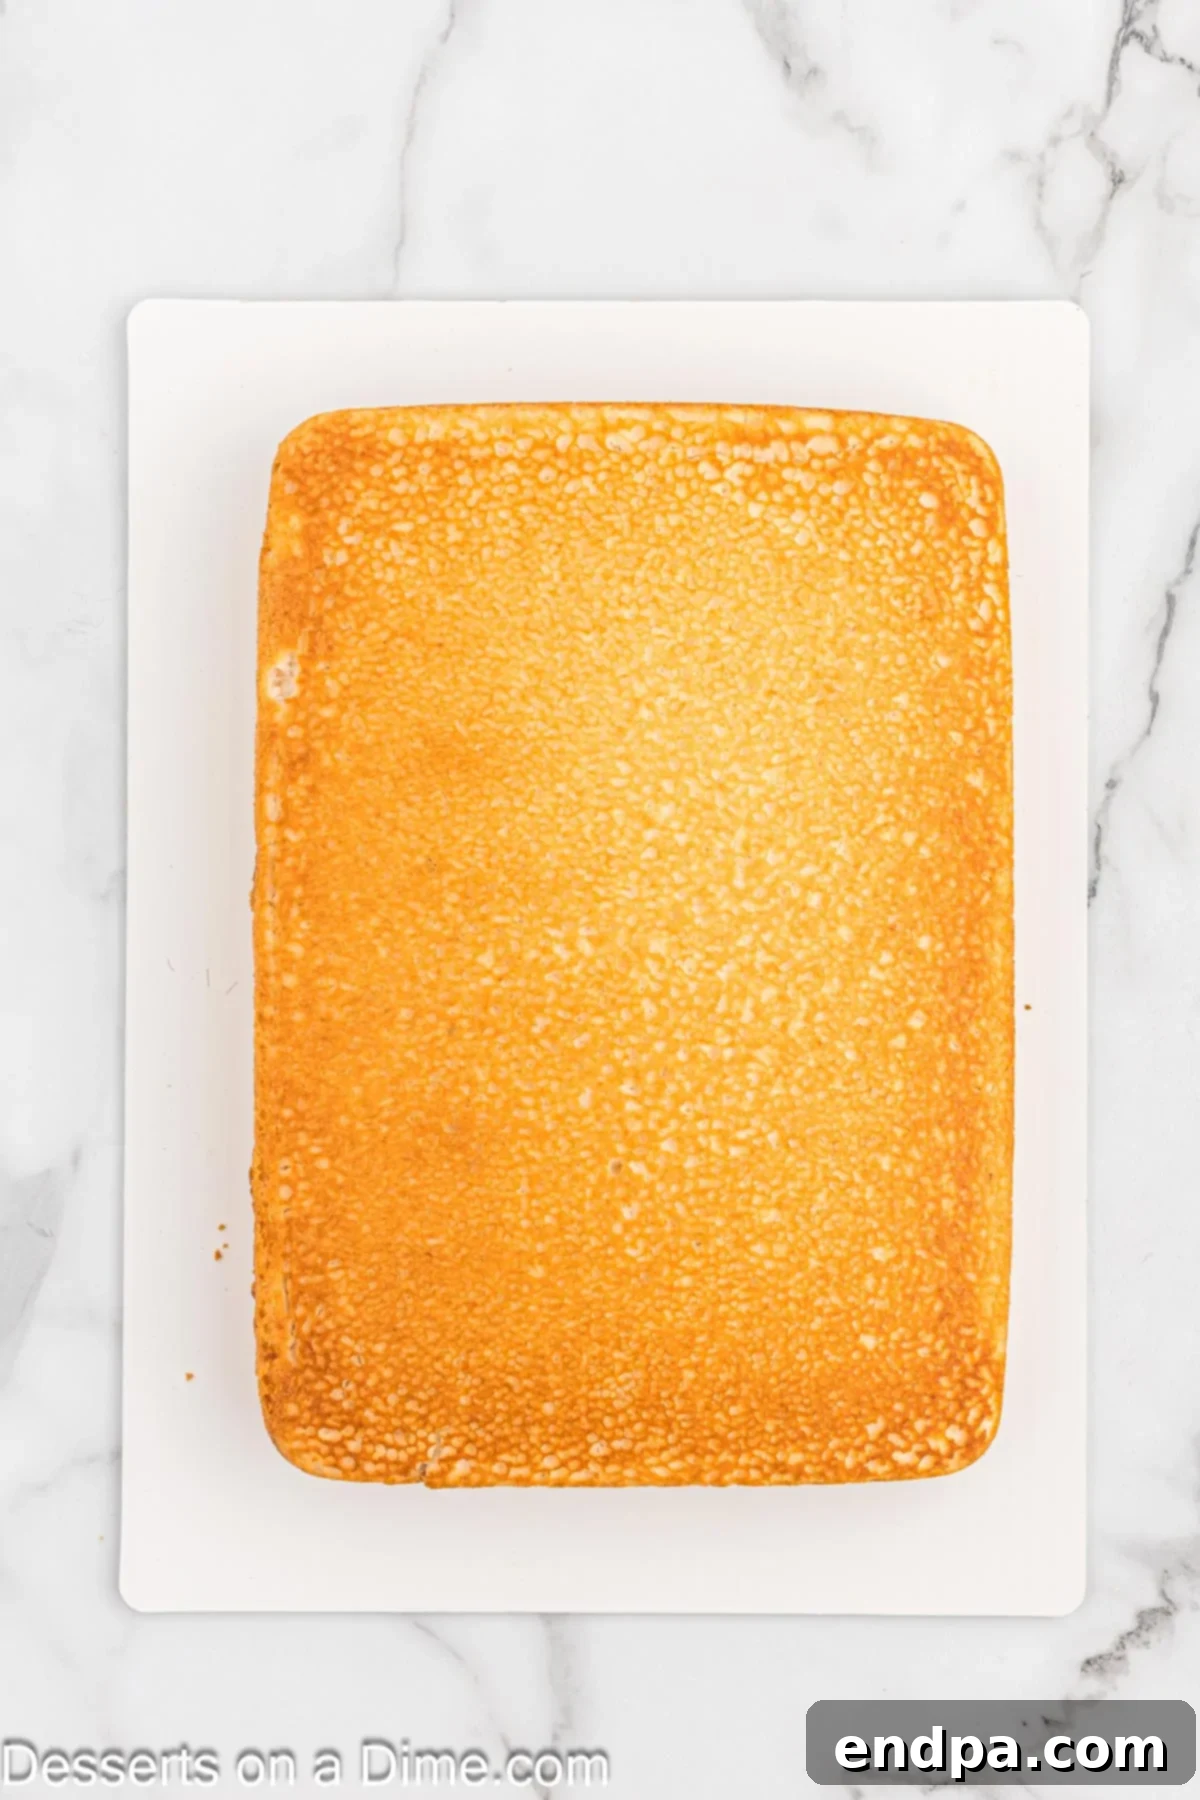
Step 1: Prepare and Cool Your Cake. Begin by baking your chosen cake mix according to the package instructions. A 9×13-inch rectangular baking pan is ideal for achieving that classic sweater shape. Once baked, allow the cake to cool in the pan for at least 10-15 minutes. This cooling period helps the cake firm up and prevents it from sticking. Then, carefully invert the cake onto a wire rack, cake board, or a platter lined with wax paper, and let it cool completely to room temperature. This is crucial before frosting to prevent your frosting from melting and sliding off.
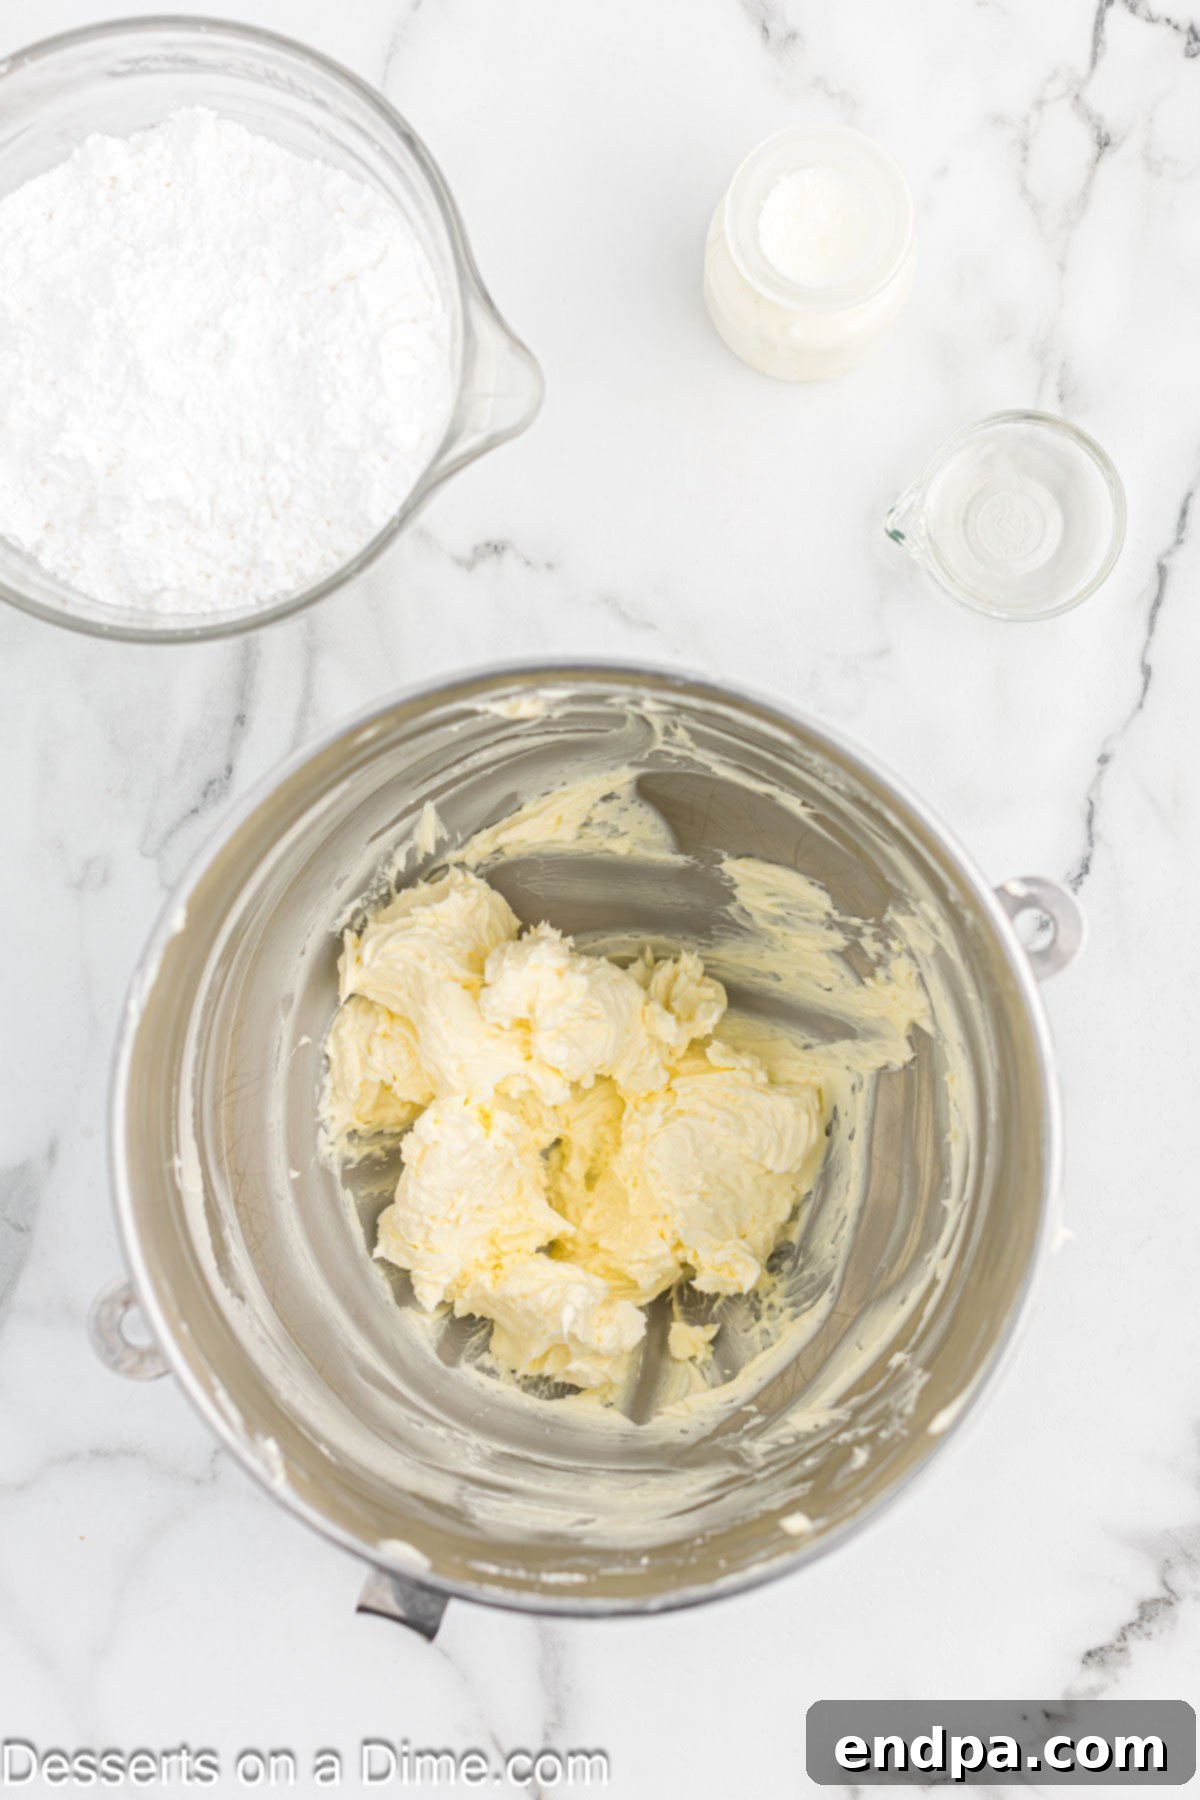
Step 2: Create the Buttercream Base. While your cake is cooling, prepare your homemade buttercream frosting. In a large mixing bowl, using an electric mixer, cream the room-temperature unsalted butter until it’s wonderfully light and fluffy. This usually takes about 2-3 minutes on medium-high speed. Proper creaming ensures a smooth and airy frosting texture.
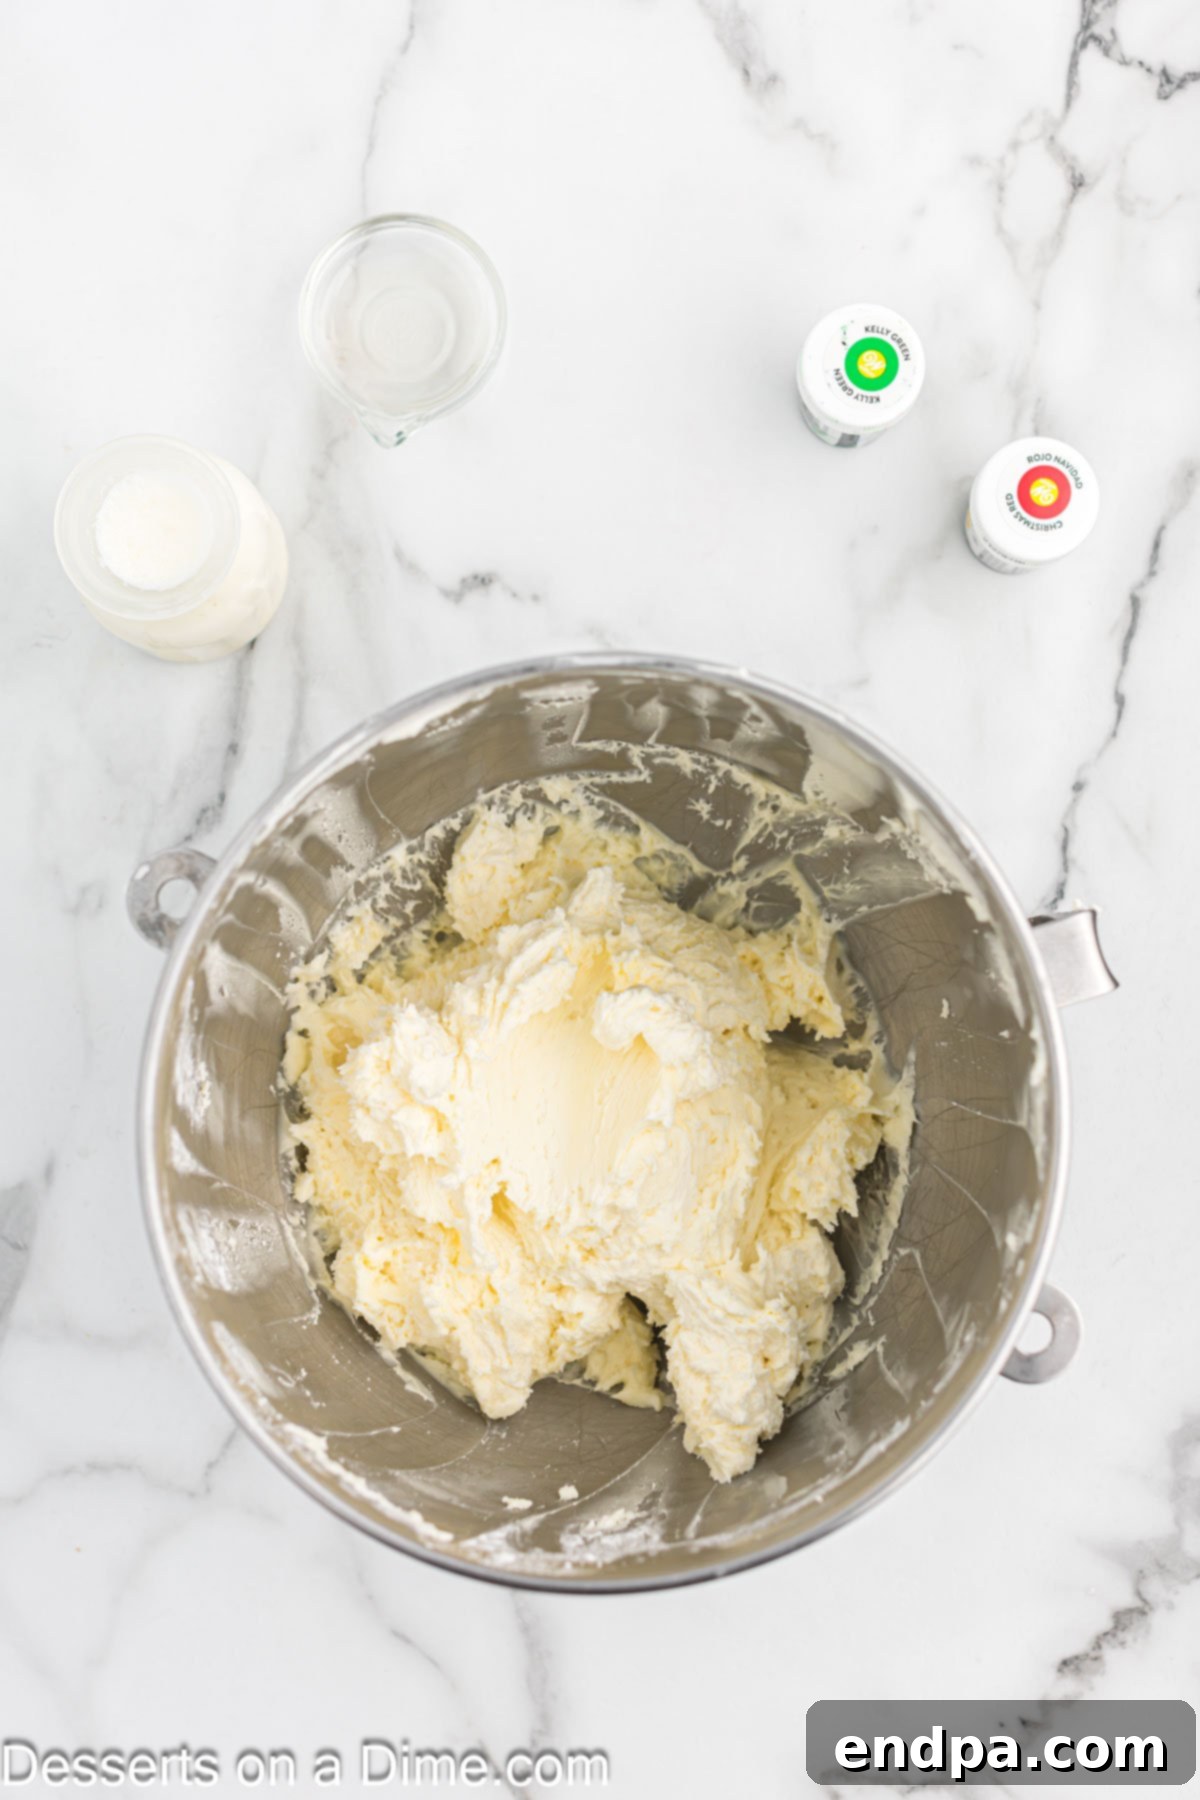
Step 3: Mix in Sugar, Cream, and Vanilla. Gradually add the powdered sugar to the creamed butter, half a cup at a time, mixing on low speed to avoid a cloud of sugar. Once all the powdered sugar is incorporated, increase the speed to medium and beat until smooth. Then, pour in the heavy cream and clear vanilla extract. Continue beating for another 30 seconds to 1 minute until the frosting reaches a smooth, spreadable, and pipeable consistency. If it’s too thick, add a tiny bit more cream; if too thin, add a tablespoon more powdered sugar.
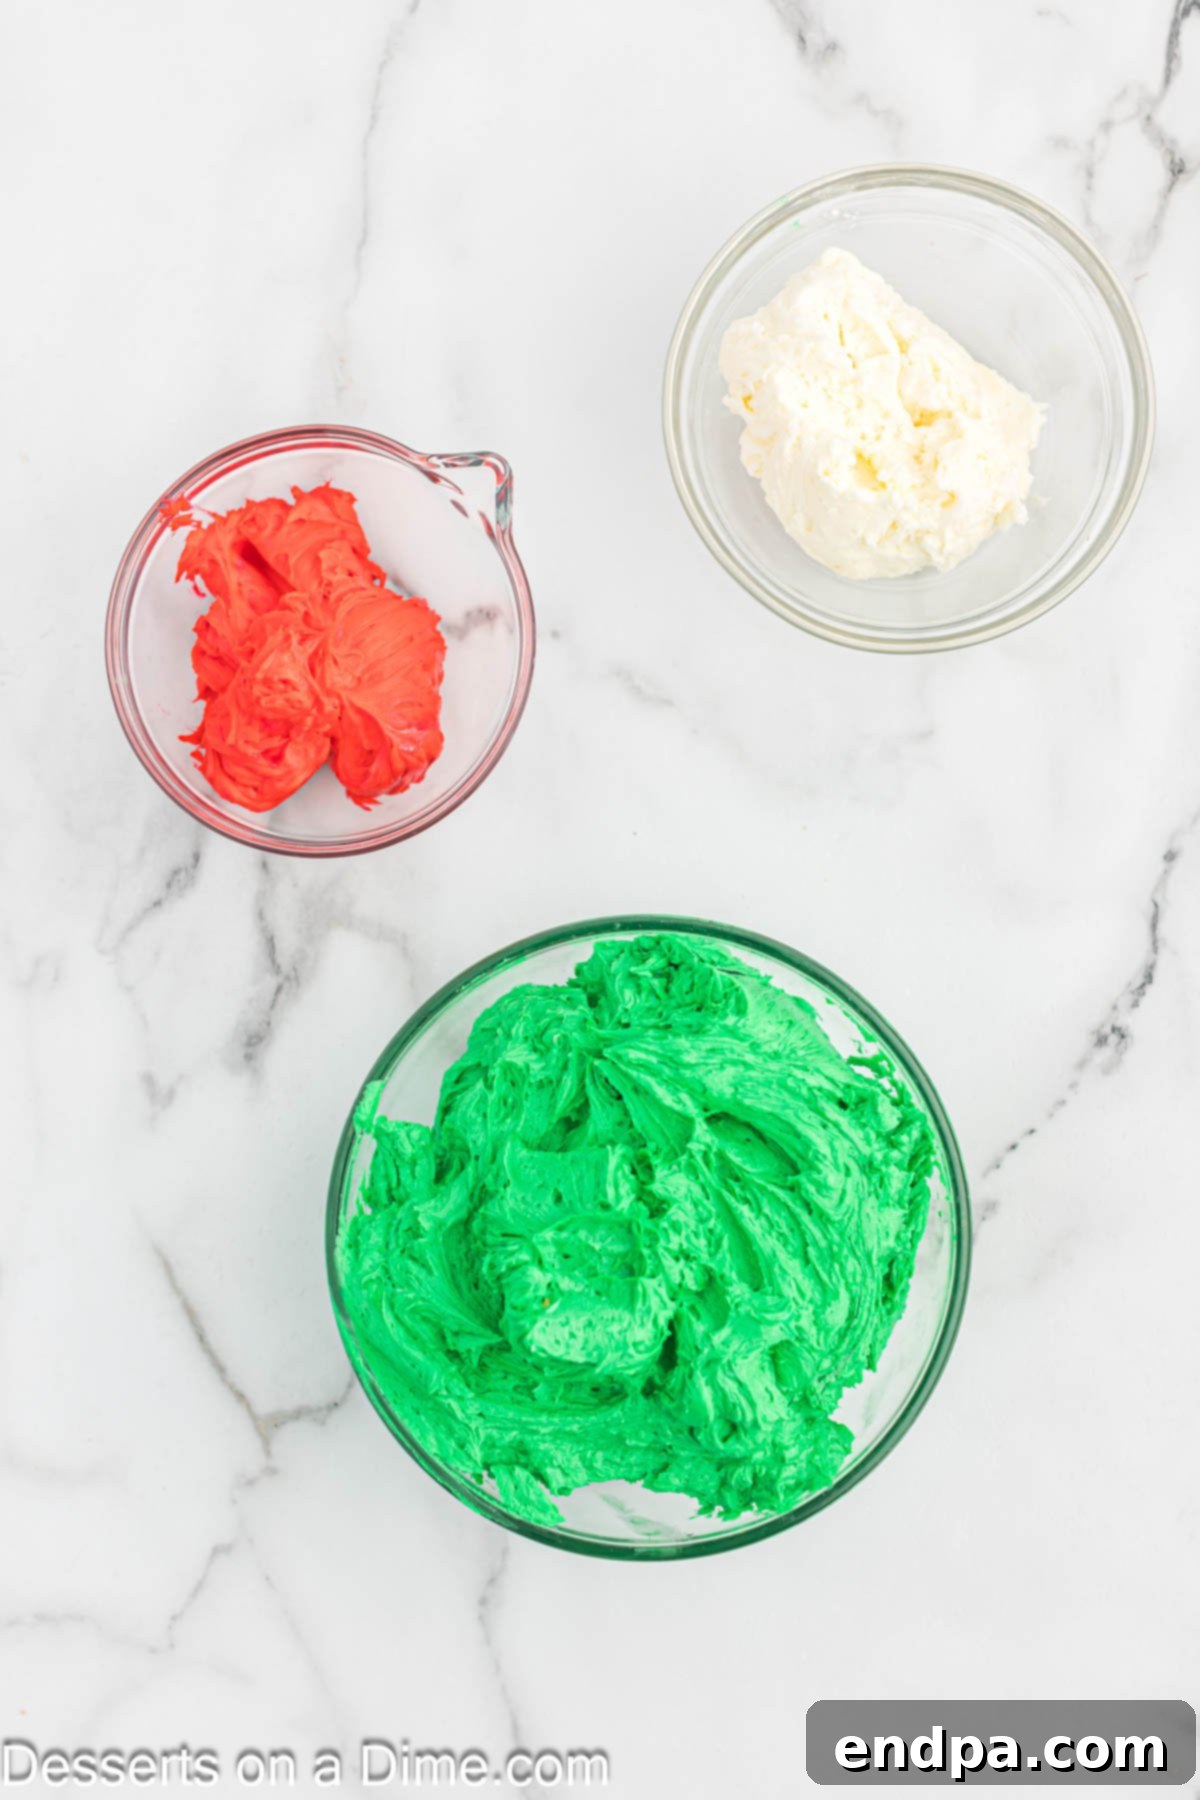
Step 4: Color Your Frosting. Now for the fun part – coloring! Separate approximately one-quarter of the frosting into a smaller bowl; this will remain white. Divide the remaining larger portion of frosting into two separate bowls. Dye the largest portion green using your gel food coloring, mixing until the color is even and vibrant. In one of the smaller bowls, dye the frosting red, again mixing thoroughly. You should now have three distinct colors: a large bowl of green, a medium bowl of white, and a small bowl of red frosting, ready for decorating.
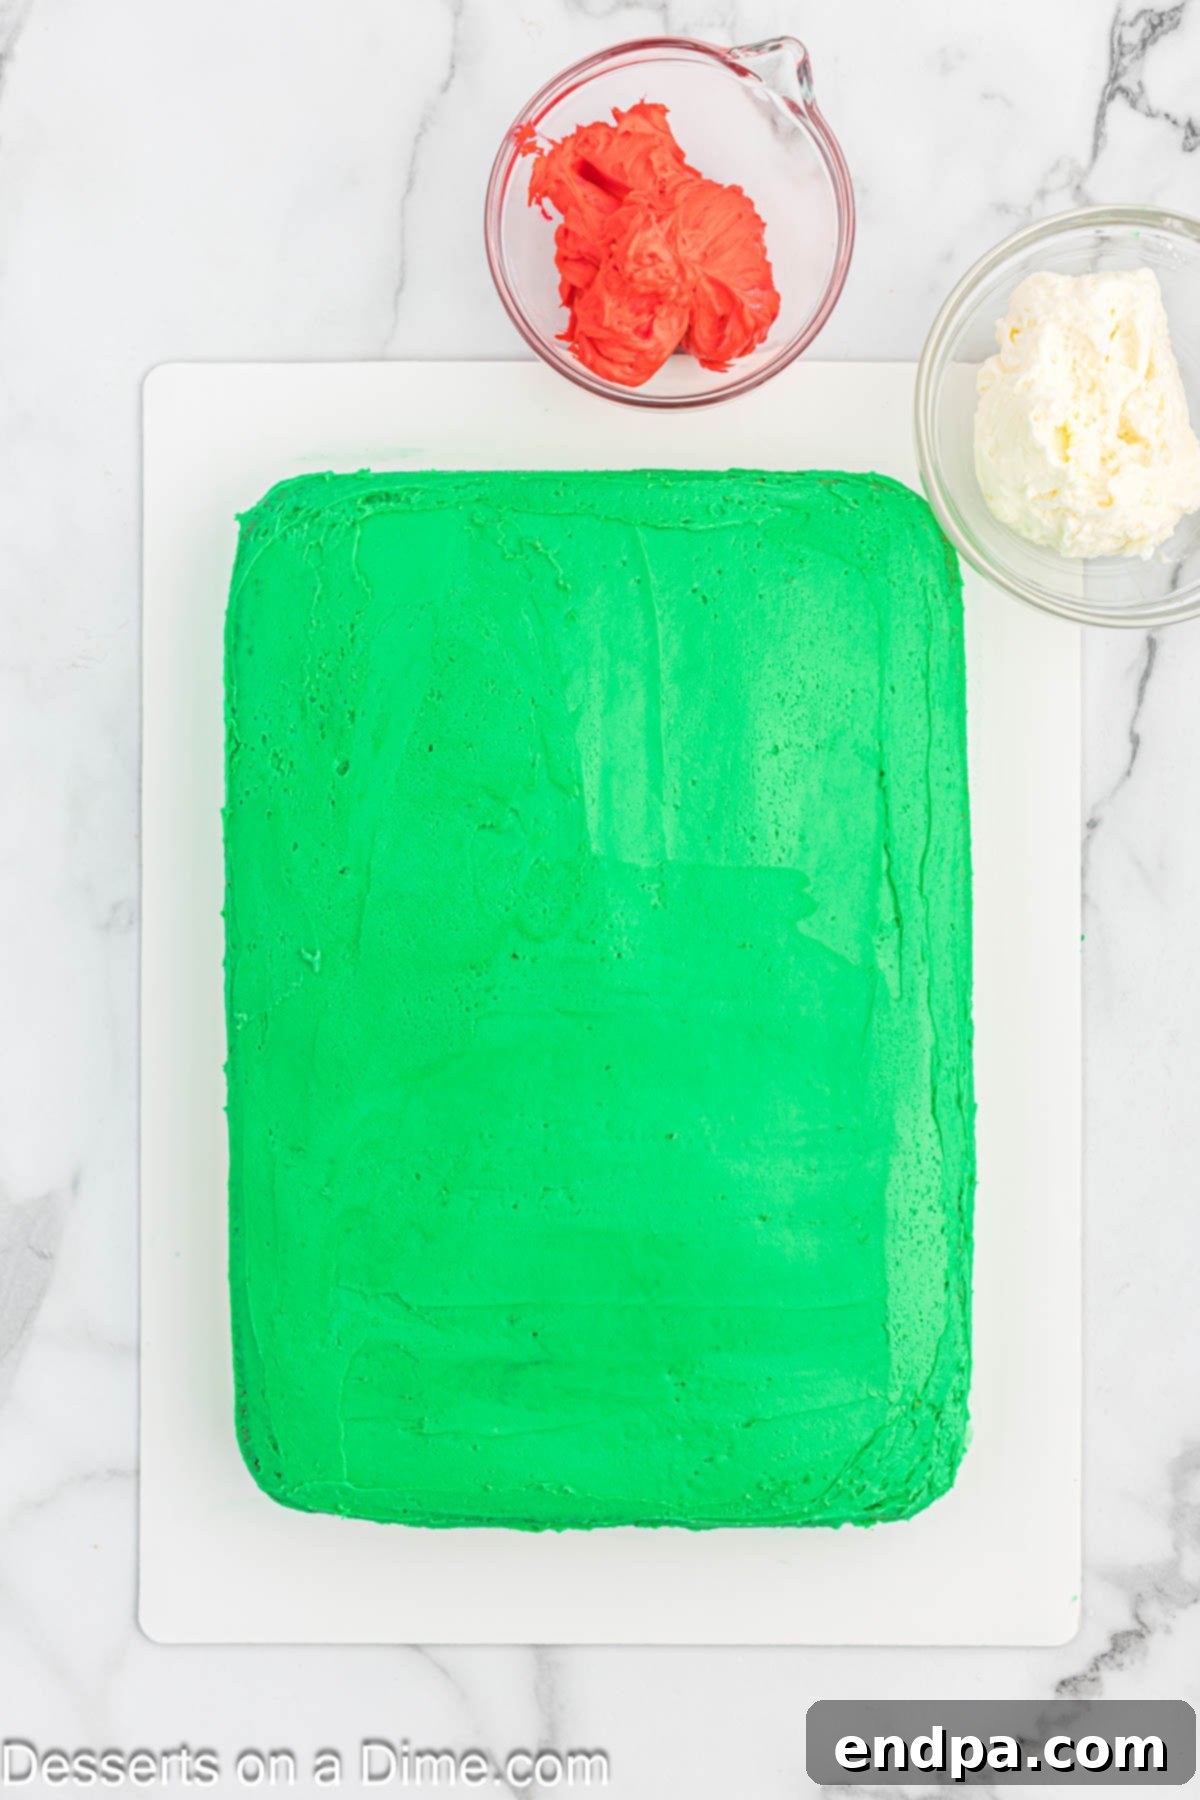
Step 5: Apply the Green Base Frosting. With your cake completely cooled, it’s time to apply the main “sweater” color. Carefully spread the green frosting evenly over the top and sides of the cake using an offset spatula or a butter knife. Ensure the entire cake is completely covered, creating a smooth and uniform base. This will serve as the primary color of your ugly sweater.
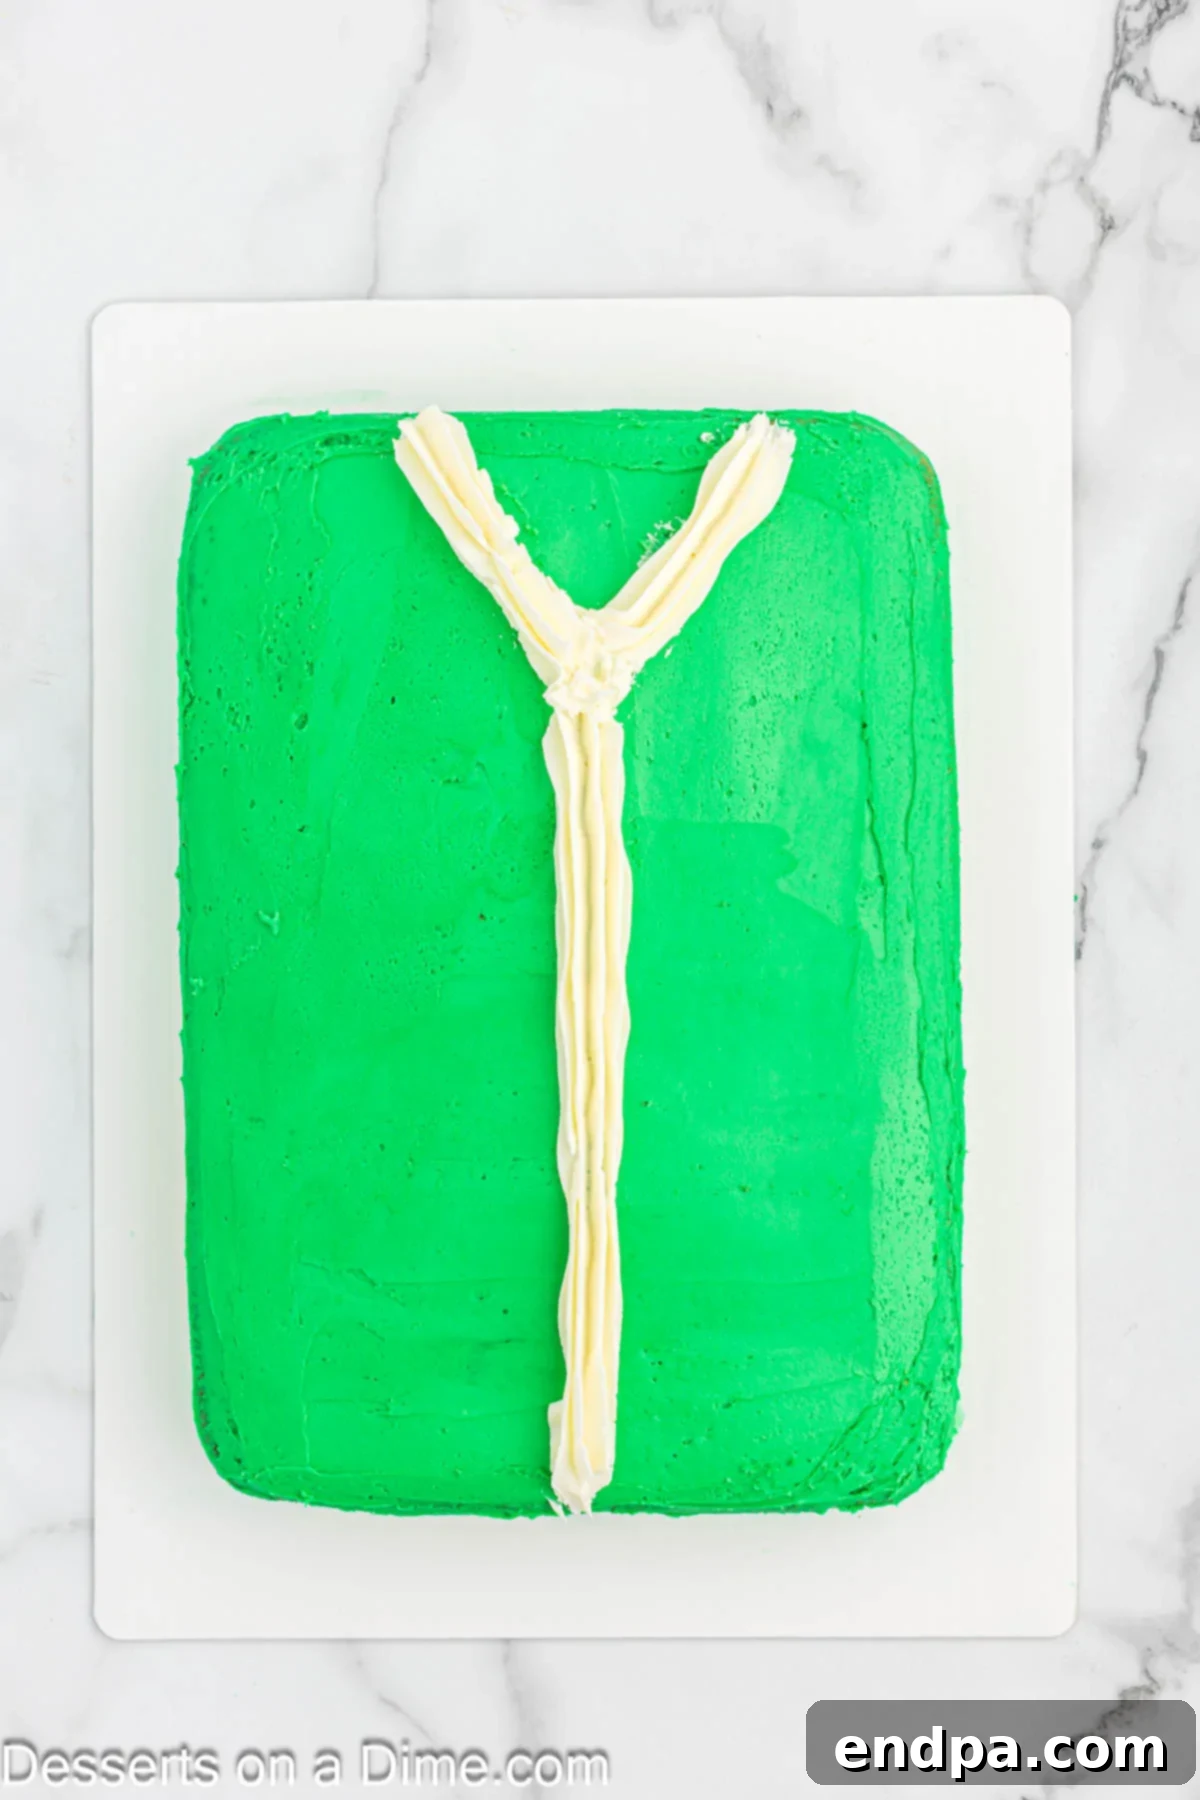
Step 6: Pipe the White V-Neck and Center Line. Spoon the white frosting into a piping bag fitted with a star tip (or a Ziploc bag with a corner snipped off). Pipe a distinct V-neck shape at the top of the cake, creating the collar of your sweater. Then, continue piping a thick, straight line of white frosting down the center of the cake, from the bottom of the V-neck to the cake’s edge. This creates natural divisions, giving you distinct sections to decorate, much like panels on a real sweater.
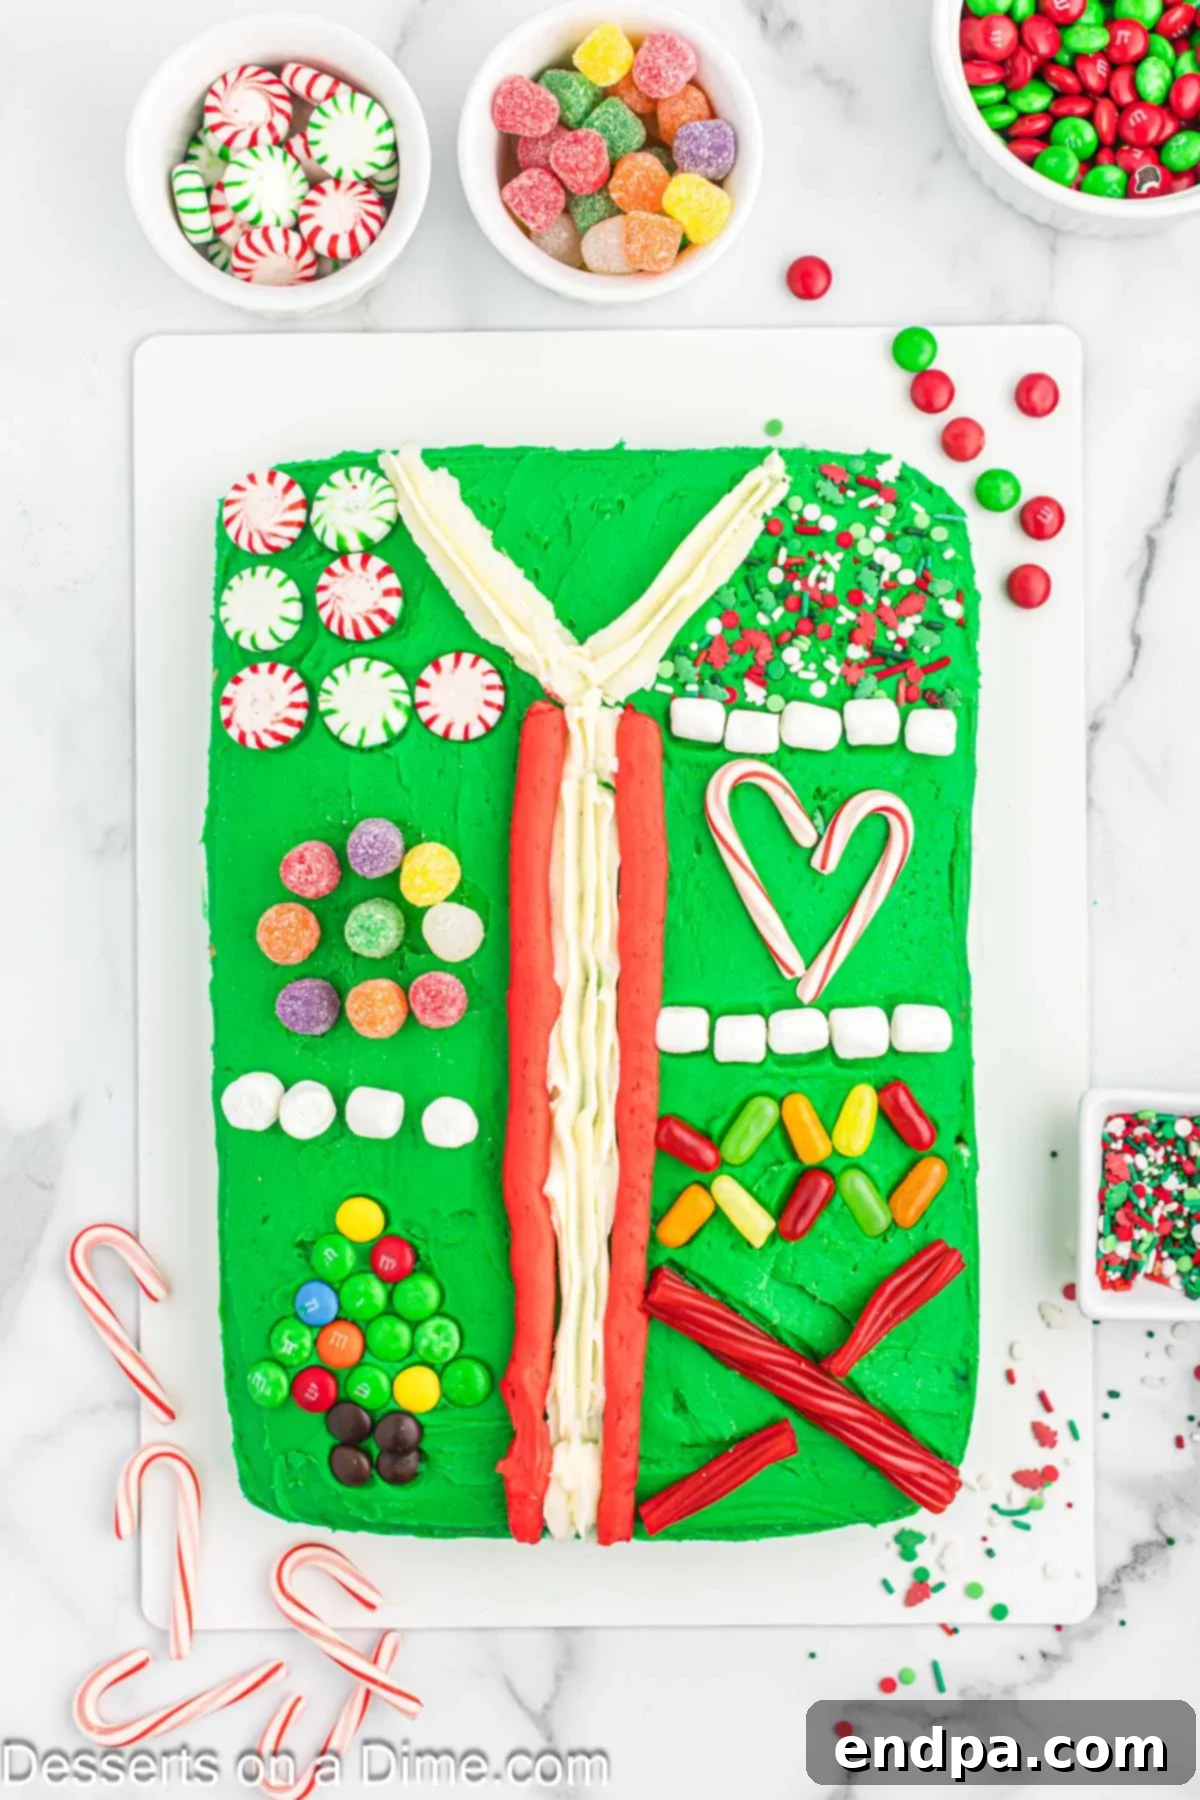
Step 7: Add Red Frosting Accents. Place the red frosting into a separate piping bag with a star tip. Pipe two horizontal lines on either side of the thick white line in the center of the cake, creating a contrasting stripe effect. You can also use the red frosting to add small dots, zigzags, or other patterns around the V-neck or along the edges of the cake to add more visual interest.
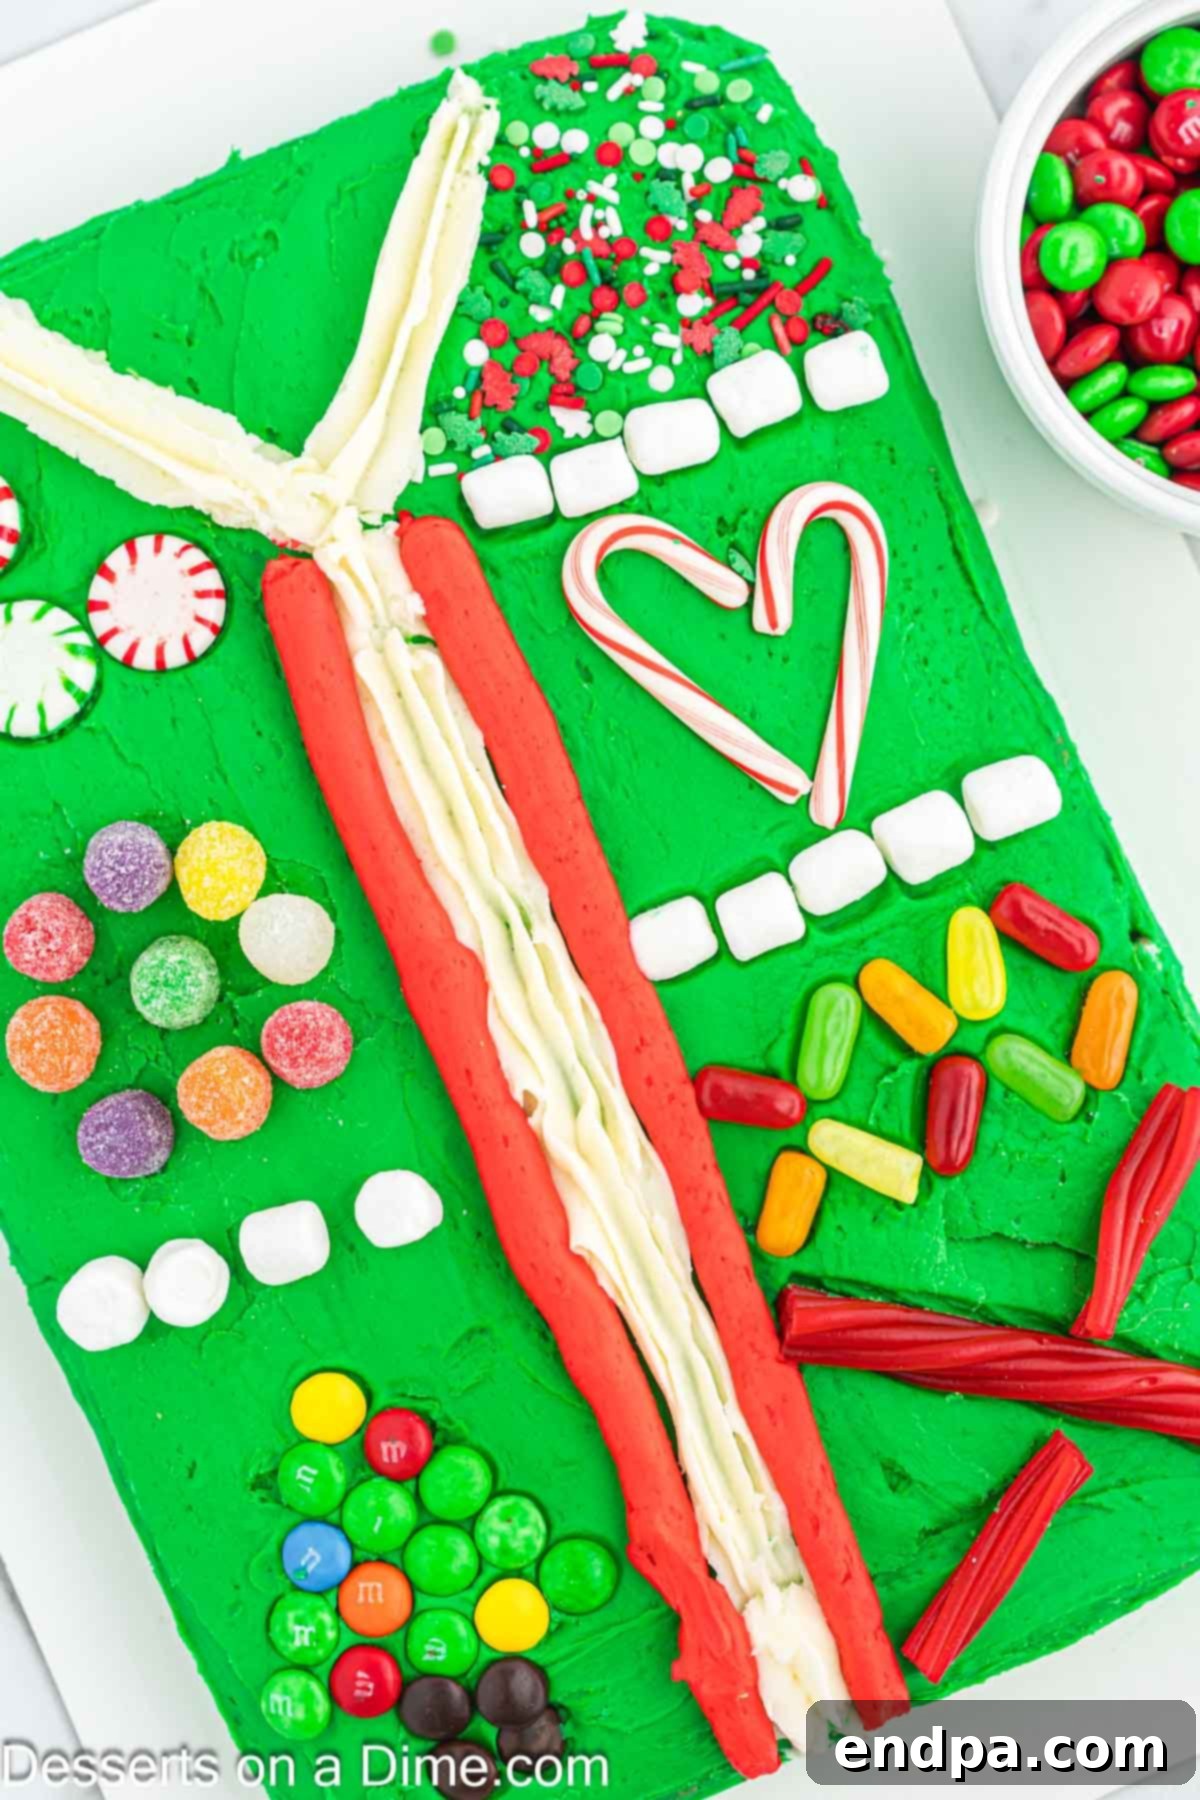
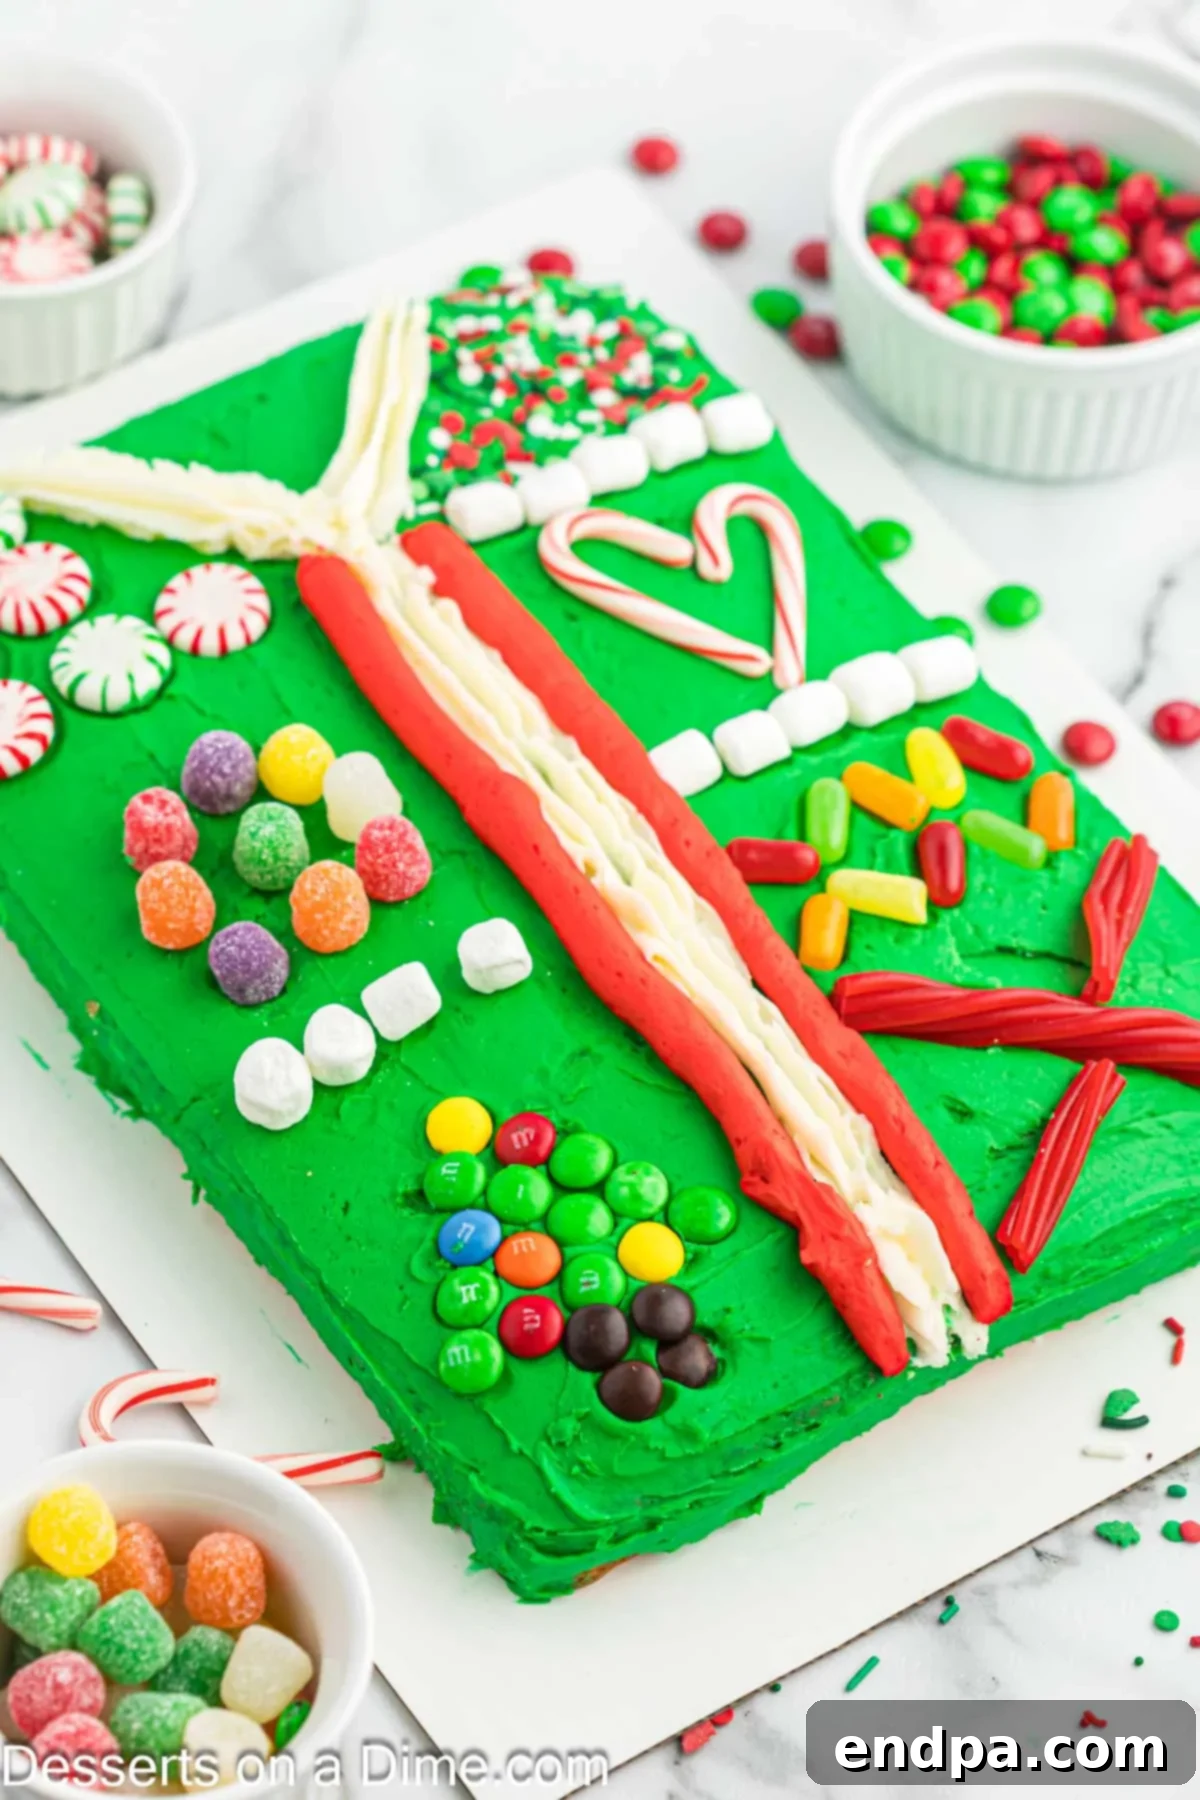
Step 8: Unleash Your Creativity with Decorations. This is where the “ugly” comes to life! Use your assortment of candies and Christmas sprinkles to decorate each section of the sweater differently. Think of each frosted area as a canvas for a unique design. For example, fill one section with M&Ms arranged in a pattern, another with a generous scattering of Christmas sprinkles, and use Mike and Ikes to create rows of “lights.” Use peppermint candies as buttons on the white center stripe, or arrange miniature candy canes around the V-neck. The goal is to make it wonderfully wacky and truly unique. The more diverse and playful your decorations, the more authentic your ugly sweater cake will be!
Expert Tips for Crafting Your Perfect Ugly Sweater Cake
To ensure your Ugly Sweater Cake is not only visually stunning but also delicious and easy to make, keep these professional tips in mind:
- Choose the Right Cake Pan: A 9×13-inch rectangular cake pan is truly your best friend for this recipe. It naturally provides the perfect “sweater shape” and a large, flat surface that’s ideal for all your creative decorating endeavors. This size also yields plenty of servings for a party.
- Always Cool Your Cake Completely: Patience is a virtue in baking, especially when it comes to frosting. Ensure your cake is fully cooled to room temperature before applying any frosting. Attempting to frost a warm cake will lead to melted, sliding frosting and a messy result.
- Level the Cake for a Smooth Canvas: For a professional-looking and perfectly flat decorating surface, use a long serrated knife (like a bread knife) to gently level the top of your cooled cake if it has domed during baking. A level surface makes frosting and applying decorations much easier and more aesthetically pleasing.
- Tint Frosting in Small, Controlled Batches: To avoid wasting frosting or running out of a specific color, separate your white buttercream into smaller bowls and color only the amounts you anticipate needing for each design element. It’s easier to mix in more color if needed than to lighten an overly dark batch.
- Plan Your Design Before You Start: Before you even touch the piping bag, take a moment to visualize or sketch your ugly sweater idea. Decide on a color theme, the placement of your main elements (like the V-neck and center line), and which candies will go where. This strategic planning helps avoid last-minute changes and ensures a cohesive, albeit “ugly,” design.
- Utilize Piping Bags or Ziploc Bags: You don’t need expensive pastry tools! Fill sturdy Ziploc bags with your colored frosting, snip a tiny corner off, and use them as makeshift piping bags. For more intricate designs, investing in a basic piping bag set with a few star and round tips can be very beneficial.
- Keep All Decorations Readily Accessible: Arrange all your candies, sprinkles, and toppings in small bowls or on a tray before you start frosting. Having everything within reach makes the decorating process seamless, efficient, and much less stressful, especially when working with kids.
- Work in Manageable Sections: Approach your cake decoration one section at a time. Frost and decorate one area completely before moving to the next. This helps maintain neatness, prevents smudging, and allows you to focus on creating distinct patterns within each “panel” of the sweater.
- Chill the Cake to Set Decorations: Once your masterpiece is complete, refrigerate the cake for at least 30 minutes to an hour. This chilling period helps the buttercream frosting set firmly, ensuring that all your intricate designs and candy decorations stay perfectly in place during transport and serving.
Proper Storage for Maximum Freshness and Enjoyment
Ensuring your Ugly Sweater Cake remains delicious and visually appealing after the party is key. Here’s how to store it effectively:
- Room Temperature (Short-Term): If your cake is unfrosted or frosted with a purely butter-based buttercream and not adorned with highly perishable items (like fresh cream fillings or delicate fruit), it can be stored at cool room temperature for up to 2 days. Always keep it loosely covered with plastic wrap or in an airtight cake carrier to prevent it from drying out.
- Refrigerate for Extended Freshness: For cakes decorated with buttercream, cream cheese frosting, or a generous array of candies, refrigeration is the best option. Store the cake in an airtight container or loosely covered with plastic wrap to protect it from absorbing odors and drying out. It will stay fresh for 4-5 days in the refrigerator. For the best texture and flavor, allow the cake to come to room temperature for about 30-60 minutes before serving. This softens the frosting and cake layers, enhancing their appeal.
- Prevent Moisture Buildup with Paper Towels: To avoid candy decorations from becoming sticky or frosting from weeping due to condensation, place a piece of paper towel loosely over the cake before covering it with plastic wrap or foil when refrigerating. The paper towel will absorb excess moisture.
- Freeze Unfrosted Layers for Future Enjoyment: You can prepare the cake layers in advance and freeze them. Once completely cooled, wrap individual unfrosted cake layers tightly in several layers of plastic wrap, followed by a layer of aluminum foil. Freeze for up to 2 months. Thaw frozen layers at room temperature for several hours or overnight in the refrigerator before unwrapping and decorating. This method is perfect for getting a head start on your holiday baking!
More Adorable Christmas Desserts to Explore
If you loved creating the Ugly Sweater Cake, you’re sure to enjoy these other delightful and festive Christmas treats. Each recipe is designed to add a special touch to your holiday celebrations!
- Christmas Dirt Cups Recipe: A playful and easy layered dessert featuring crushed cookies, pudding, and festive toppings, perfect for individual servings.
- Christmas Ice Cream Cake: A refreshing and decadent frozen dessert, combining layers of cake and ice cream for a cool holiday treat.
- Festive Christmas Cake Pops: Bite-sized balls of cake mixed with frosting, dipped in candy melts, and decorated with holiday flair—great for gifting or party trays.
- Christmas Sprinkle Cookies: Soft, chewy sugar cookies generously coated in vibrant Christmas sprinkles, a simple yet cheerful classic.
- Christmas Chocolate Covered Strawberries: Elegant and easy, fresh strawberries dipped in white or dark chocolate and adorned with festive sprinkles or drizzles.
We hope you give this fun and truly festive Ugly Sweater Cake a try this holiday season. It’s guaranteed to be a highlight and bring smiles to everyone who sees (and tastes!) it. We’d love to hear about your creative designs, so don’t forget to come back and leave a comment and a star rating to let us know how your unique Ugly Sweater Cake turned out!
Pin
Ugly Sweater Cake
Ingredients
For the Cake:
- 1 box White Cake Mix
- Ingredients to make the cake based on the package instructions.
For the Frosting:
- 1 1/2 cup Unsalted Butter room temperature
- 5 cups Powdered Sugar
- 1 tablespoon Clear Vanilla Extract
- 3 Tablespoons Heavy Cream
- Red Gel Food Coloring
- Green Gel Food Coloring
For the Decorations:
- 5 Small Peppermint Candies
- M&Ms
- Miniature Candy Canes
- Christmas Sprinkles
- Gum Drop Candies
- Pull N Peel Twizzlers
- Mini Marshmallows
- Mike and Ike Candies
- Miniature Candy Canes
Instructions
For the Cake:
- Bake the cake based on the package instructions in a 9X13 baking pan.
- Let the cake cool in the pan for 10-15 minutes.
- Place a cake board or cutting board on top of the pan and carefully invert the cake onto the board.
- Let the cake cool completely before topping with the frosting.
For the Frosting:
- In a large mixing bowl, beat the butter until it’s creamy, light and fluffy with an electric mixer.
- Gradually mix the powdered sugar into the butter mixture ½ cup at a time. Make sure that the powdered sugar is completely mixed in before adding more.
- Turn the mixer speed to low and add in the heavy cream and vanilla extract. Beat for approximately 30 seconds to 1 minute until the frosting is a good consistency.
- Remove approximately ¼ of the icing from the large bowl. Dye the remaining frosting green with the food coloring.
- Separate the frosting removed from the bowl into 2 smaller bowls. Dye one bowl red and leave the other one white.
- Spread the green frosting onto the top and the sides of the cake until fully covered.
- Place the white frosting in a piping bag fitted with a star tip. Then pipe a V-neck shape at the top of the cake and a thick line down the center of the cake.
- Use the red frosting to pipe 2 horizontal lines on both sides of the thick white line in the center of the cake.
- Use the candies and Christmas sprinkles to decorate each section of the sweater differently to make the cake wacky and unique.
- Then the cake is ready to slice, serve and enjoy!
Recipe Notes
Nutrition Facts
Pin This Now to Remember It Later
Pin Recipe
