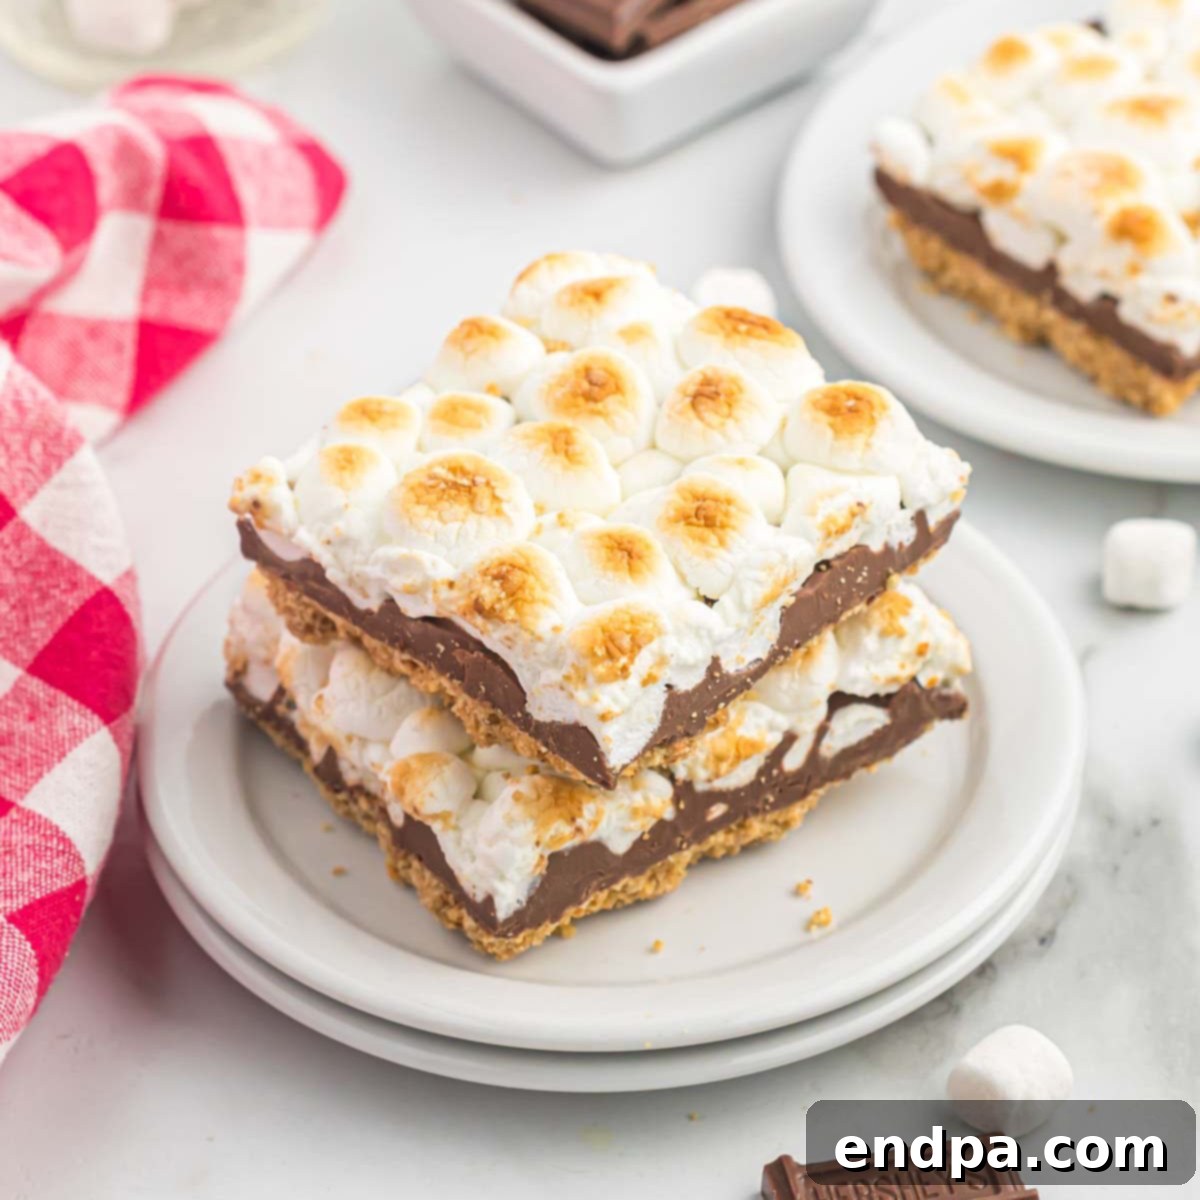
S’mores Bars are the ultimate solution when you crave the nostalgic taste of gooey s’mores but need to effortlessly serve a larger group. Imagine the classic campfire treat transformed into convenient, decadent squares, perfect for parties, game nights, potlucks, or just a cozy evening at home. These bars deliver all the beloved flavors and textures – crunchy graham cracker, melted chocolate, and toasted marshmallow – without the need for a flickering flame or sticky fingers, making them an instant crowd-pleaser and a truly effortless dessert.
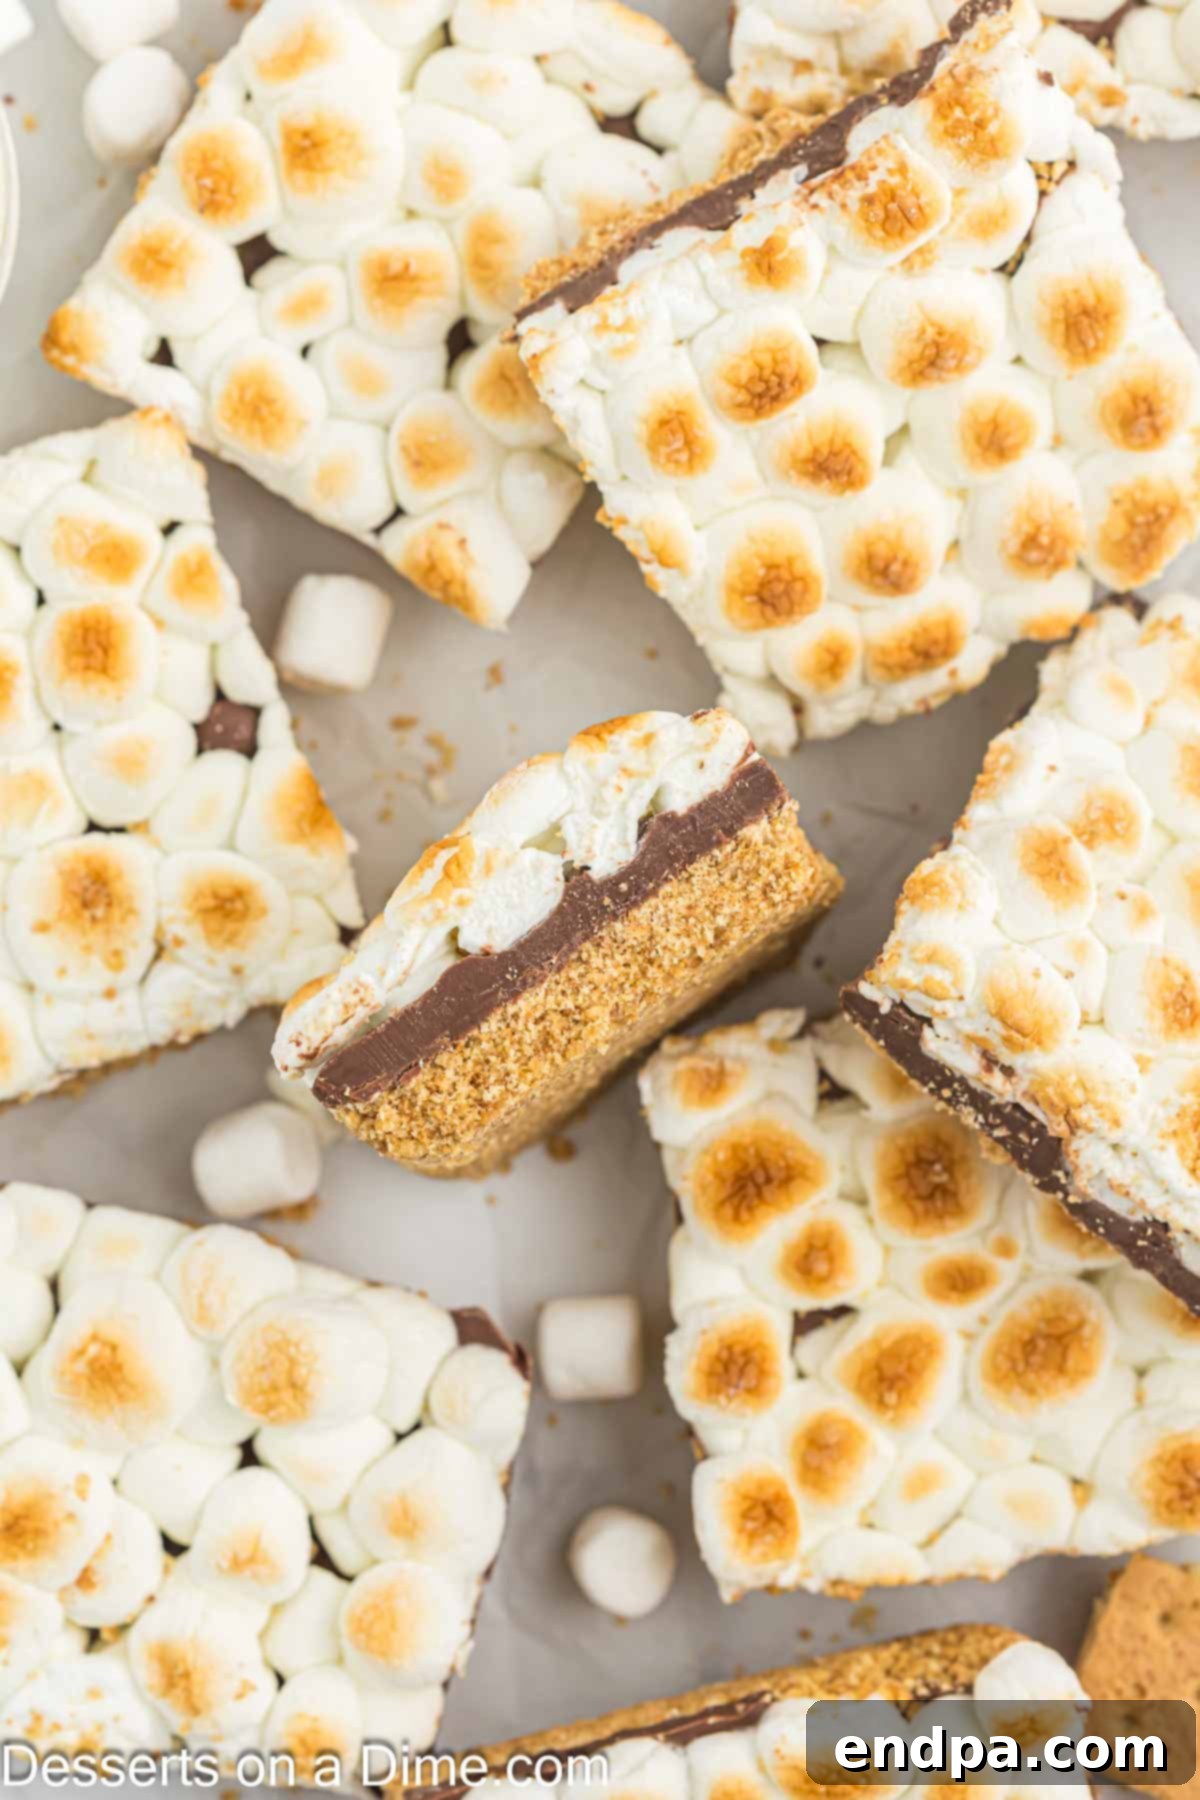
There’s an undeniable magic in the combination of crunchy graham crackers, rich, melted chocolate, and fluffy, caramelized marshmallows. This S’mores Bars recipe captures that magic perfectly, offering a truly indulgent and satisfying dessert experience. If you share our deep affection for all things s’mores, then this recipe is an absolute must-try. For even more s’mores-inspired delights, be sure to explore our S’mores Cookies, S’mores Cheesecake, and S’mores Cones. Beyond the s’mores universe, our collection of fun dessert bars includes favorites like Paula Deen Pumpkin Bars, Sweet Potato Pie Bars, Churro Cheesecake Bars, and Soda Cracker Toffee.
Table of Contents
- Why You’ll Adore This Recipe
- Essential Ingredients
- Creative Variations & Substitutions
- How to Craft Delicious S’mores Bars
- Expert Tips for Perfect S’mores Bars
- Frequently Asked Questions
- More Irresistible S’mores Desserts
Why You’ll Adore This Recipe
These S’mores Bars aren’t just a dessert; they’re a revelation for anyone who loves the classic treat. Here’s why this recipe stands out as a true winner:
- Effortless 5-Ingredient Simplicity: Forget long ingredient lists and complicated steps. All you need for these incredibly easy bars are five pantry staples: graham cracker crumbs, mini marshmallows, butter, brown sugar, and classic Hershey’s Chocolate Bars. No fancy baking powder, salt, or special equipment required. It’s minimalist baking with maximum flavor impact!
- Straightforward Layering Process: The beauty of this recipe lies in its simplicity. You’ll layer the ingredients in a baking pan, then a quick turn under the broiler is all it takes to transform them into golden, gooey perfection. It’s a fun and rewarding process that even novice bakers can master with ease.
- A Campfire-Free S’mores Experience: Enjoy the iconic taste of s’mores anytime, anywhere, without the hassle of building a bonfire. These bars offer the same smoky-sweet goodness, conveniently prepared in your kitchen. Plus, they make enough to feed a crowd, eliminating the individual mess and effort of roasting marshmallows one by one.
- Explosive Flavor in Every Bite: Each square of these S’mores Bars is a harmonious blend of textures and tastes. The buttery, slightly salty graham cracker crust provides a perfect foundation for the generous layer of creamy, melted chocolate, all topped with golden, caramelized marshmallows. It’s a symphony of sweet, crunchy, and gooey that will have everyone reaching for more.
- Perfect for Any Occasion: From casual family gatherings to lively parties, these bars are incredibly versatile. They’re easy to transport, simple to serve, and always a huge hit, making them an ideal dessert for any event where you want to impress without stress.
Essential Ingredients
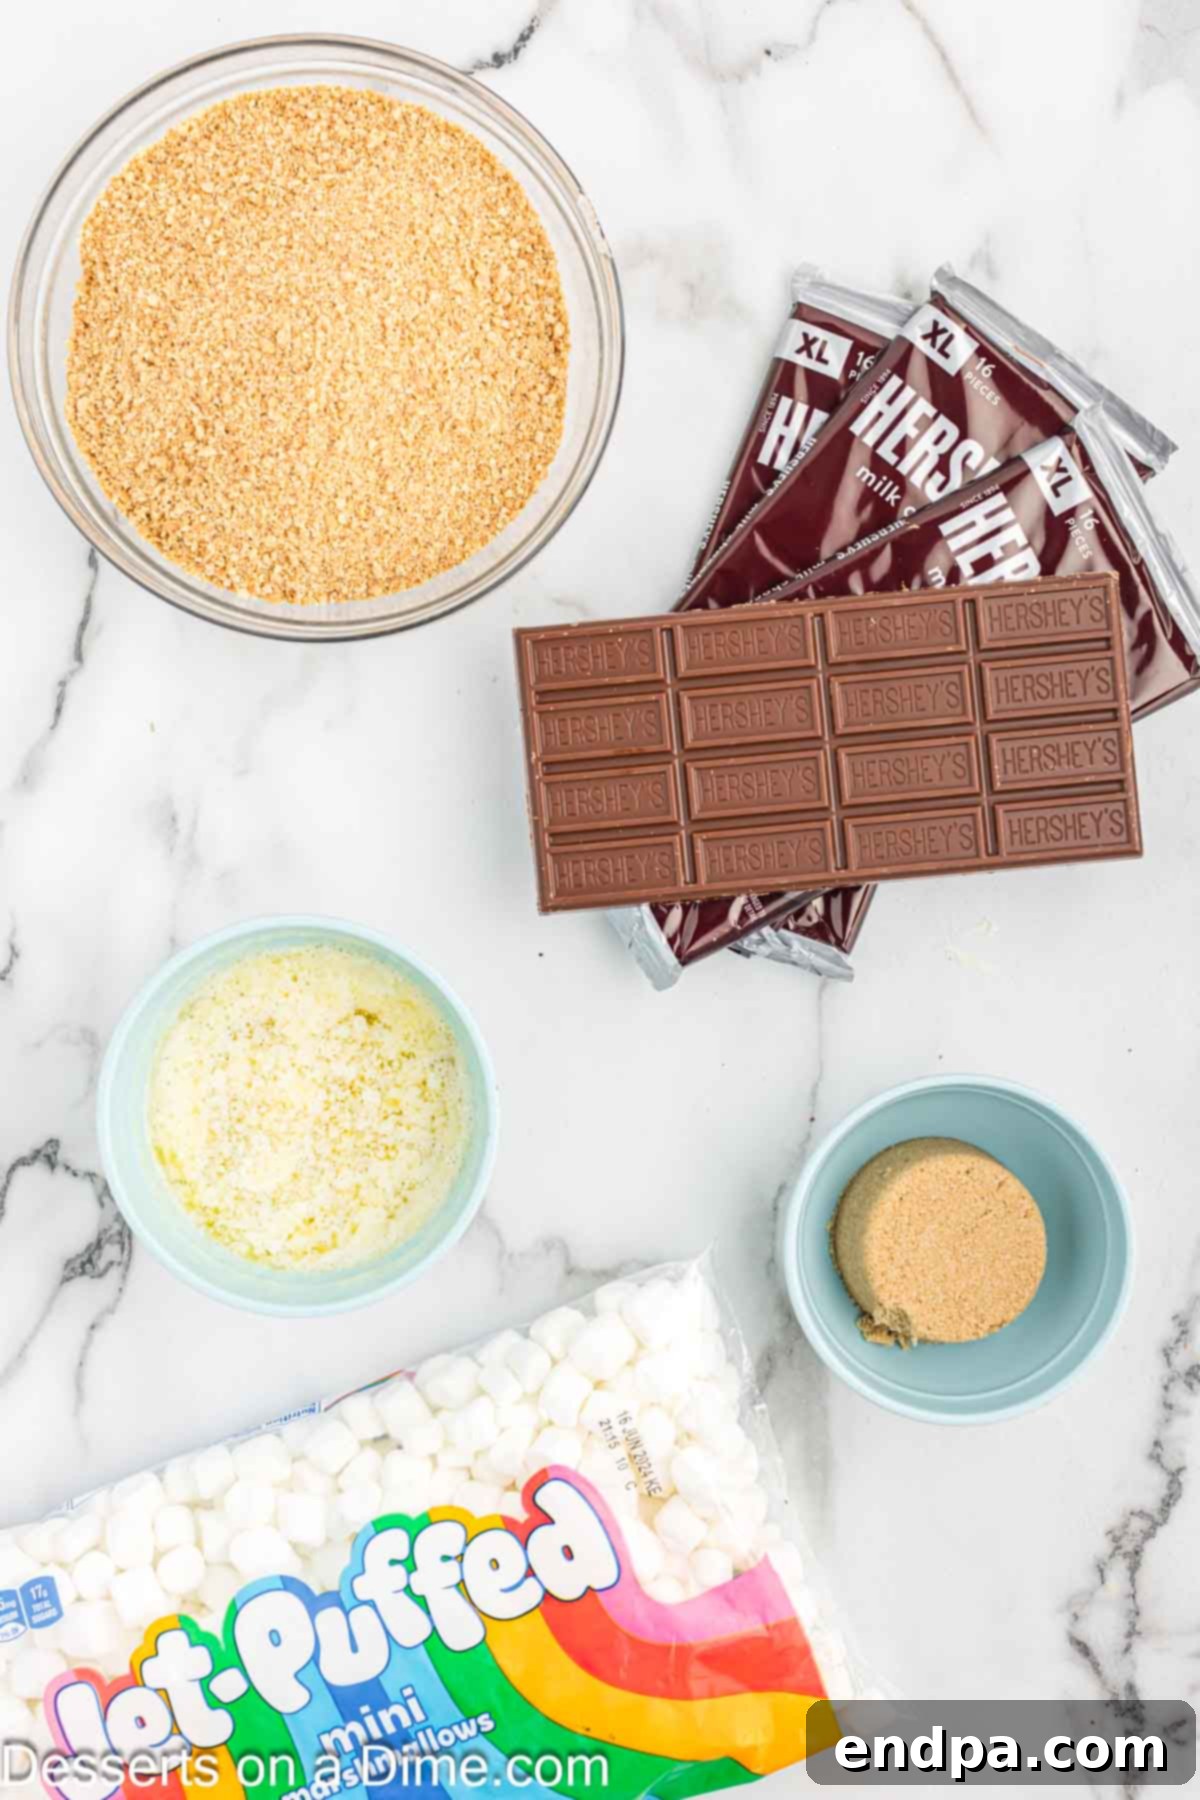
Crafting these heavenly S’mores Bars requires just a handful of readily available ingredients, each playing a crucial role in achieving that perfect balance of flavor and texture:
- Graham Cracker Crumbs (2 Cups): The foundation of our s’mores experience. You have the flexibility to either crush full graham cracker sheets yourself using a food processor or a sturdy bag and rolling pin, or opt for the convenience of pre-made graham cracker crumbs. This forms a wonderfully buttery and slightly sweet base that provides the signature crunch.
- Butter (1/2 cup or 1 stick, melted): Essential for binding the graham cracker crumbs together to form a firm, flavorful crust. Melted butter ensures an even coating, resulting in a rich, golden crust after baking.
- Brown Sugar (1/3 Cup): Adds a deep, molasses-rich sweetness and helps to create a slightly chewy and caramelized graham cracker crust. If you’re out of brown sugar, don’t worry – there are excellent brown sugar substitutes you can use to achieve a similar flavor profile.
- Hershey’s Chocolate Bars (4 bars, 4.4 ounce each): The quintessential s’mores chocolate! We recommend using the traditional Hershey’s Milk Chocolate bars for that authentic, creamy, and melty experience. These bars spread beautifully when heated, creating a smooth, luscious chocolate layer.
- Mini Marshmallows (1 package): The crowning glory of any s’mores dessert. Mini marshmallows are highly recommended for these bars, as they melt evenly and create an ideal gooey layer that’s easier to serve compared to larger marshmallows. Their small size allows for perfect coverage and a delightful golden toast under the broiler.
This simple yet powerful combination of ingredients guarantees a dessert that is both easy to make and utterly irresistible. You’ll find the complete, precise ingredient list with all measurements detailed in the recipe card at the bottom of this page.
Creative Variations & Substitutions
While the classic S’mores Bars are perfect as they are, don’t hesitate to get creative with these delicious variations and substitutions to tailor them to your taste and mood:
- Explore Different Chocolates: The beauty of s’mores is how well chocolate pairs with everything. Instead of traditional milk chocolate, consider using semi-sweet chocolate chips, dark chocolate bars for a richer, less sweet profile, or even white chocolate for a creamy contrast. Peanut butter morsels can be combined with semi-sweet chocolate chips for a delicious peanut butter and chocolate topping that creates a truly unique flavor. Break up your favorite chocolate candy bars like Reese’s Peanut Butter Cups, Snickers, or Rolos into small pieces and layer them on top of the crust for an extra indulgent treat.
- Introduce a Peanut Butter Layer: For the ultimate peanut butter enthusiasts, create a distinct peanut butter layer! You can achieve this by melting creamy or natural peanut butter and spreading it over the warm graham cracker crust before adding the chocolate. Alternatively, mix peanut butter morsels directly into the graham cracker base, or even layer whole Reese’s peanut butter cups. This combination with milk chocolate chips is simply divine.
- Boost the Chocolate Topping: If you’re a dark chocolate connoisseur, simply swap out the milk chocolate bars for your favorite dark chocolate variety. The slight bitterness will beautifully balance the sweetness of the marshmallows and brown sugar, adding a sophisticated depth of flavor. You can also drizzle melted hot fudge or caramel syrup over the chocolate layer before adding marshmallows for an extra layer of decadence.
- Marshmallow Options: While mini marshmallows are our top recommendation for their even melt and ease of serving, marshmallow creme (fluff) can be used as an alternative if you prefer a smoother, less textured topping. If using marshmallow creme, spread it evenly over the chocolate, then give it a quick broil to achieve a lightly browned surface. However, we love the rustic charm and perfect toastiness that mini marshmallows provide under the broiler.
- Crust Adventures: Don’t limit yourself to just graham crackers for the crust! Crushed Golden Grahams Cereal makes a fantastic and flavorful substitute, adding another layer of toasty cereal goodness. For a chocolatey twist, use crushed chocolate wafer cookies. Shortbread cookies or even ginger snaps (for a hint of spice) can also create unique and delicious bases.
- Add a Pinch of Salt: To truly enhance all the sweet flavors, consider adding a tiny pinch of sea salt (about 1/4 teaspoon) to your graham cracker crust mixture. Salt is a flavor enhancer that helps to balance and bring out the best in sweet desserts.
- Sprinkles and Toppings: After the marshmallows are broiled and still slightly warm, you can sprinkle on some colorful sprinkles for a festive touch, or a dash of coarse sea salt for a gourmet finish. Chopped nuts like pecans or walnuts can also be added on top of the chocolate layer for extra texture and flavor.
These variations allow you to customize your S’mores Bars to suit any palate, making this recipe endlessly adaptable and fun to experiment with.
How to Craft Delicious S’mores Bars
Creating these delightful S’mores Bars is a straightforward process, breaking down into a few simple steps. Follow these instructions carefully to ensure perfectly gooey, chocolatey, and toasted treats:
- Step 1: Prepare Your Oven and Pan. Begin by preheating your oven to 350 degrees Fahrenheit (175 degrees Celsius). While the oven heats, generously grease a 9×13 inch baking pan with non-stick butter spray or line it with parchment paper for easier removal and cleanup.
- Step 2: Create the Graham Cracker Crust. In a medium-sized mixing bowl, combine the graham cracker crumbs, melted butter, and brown sugar. Stir them together thoroughly with a spoon or your hands until the mixture is evenly moistened and resembles wet sand.
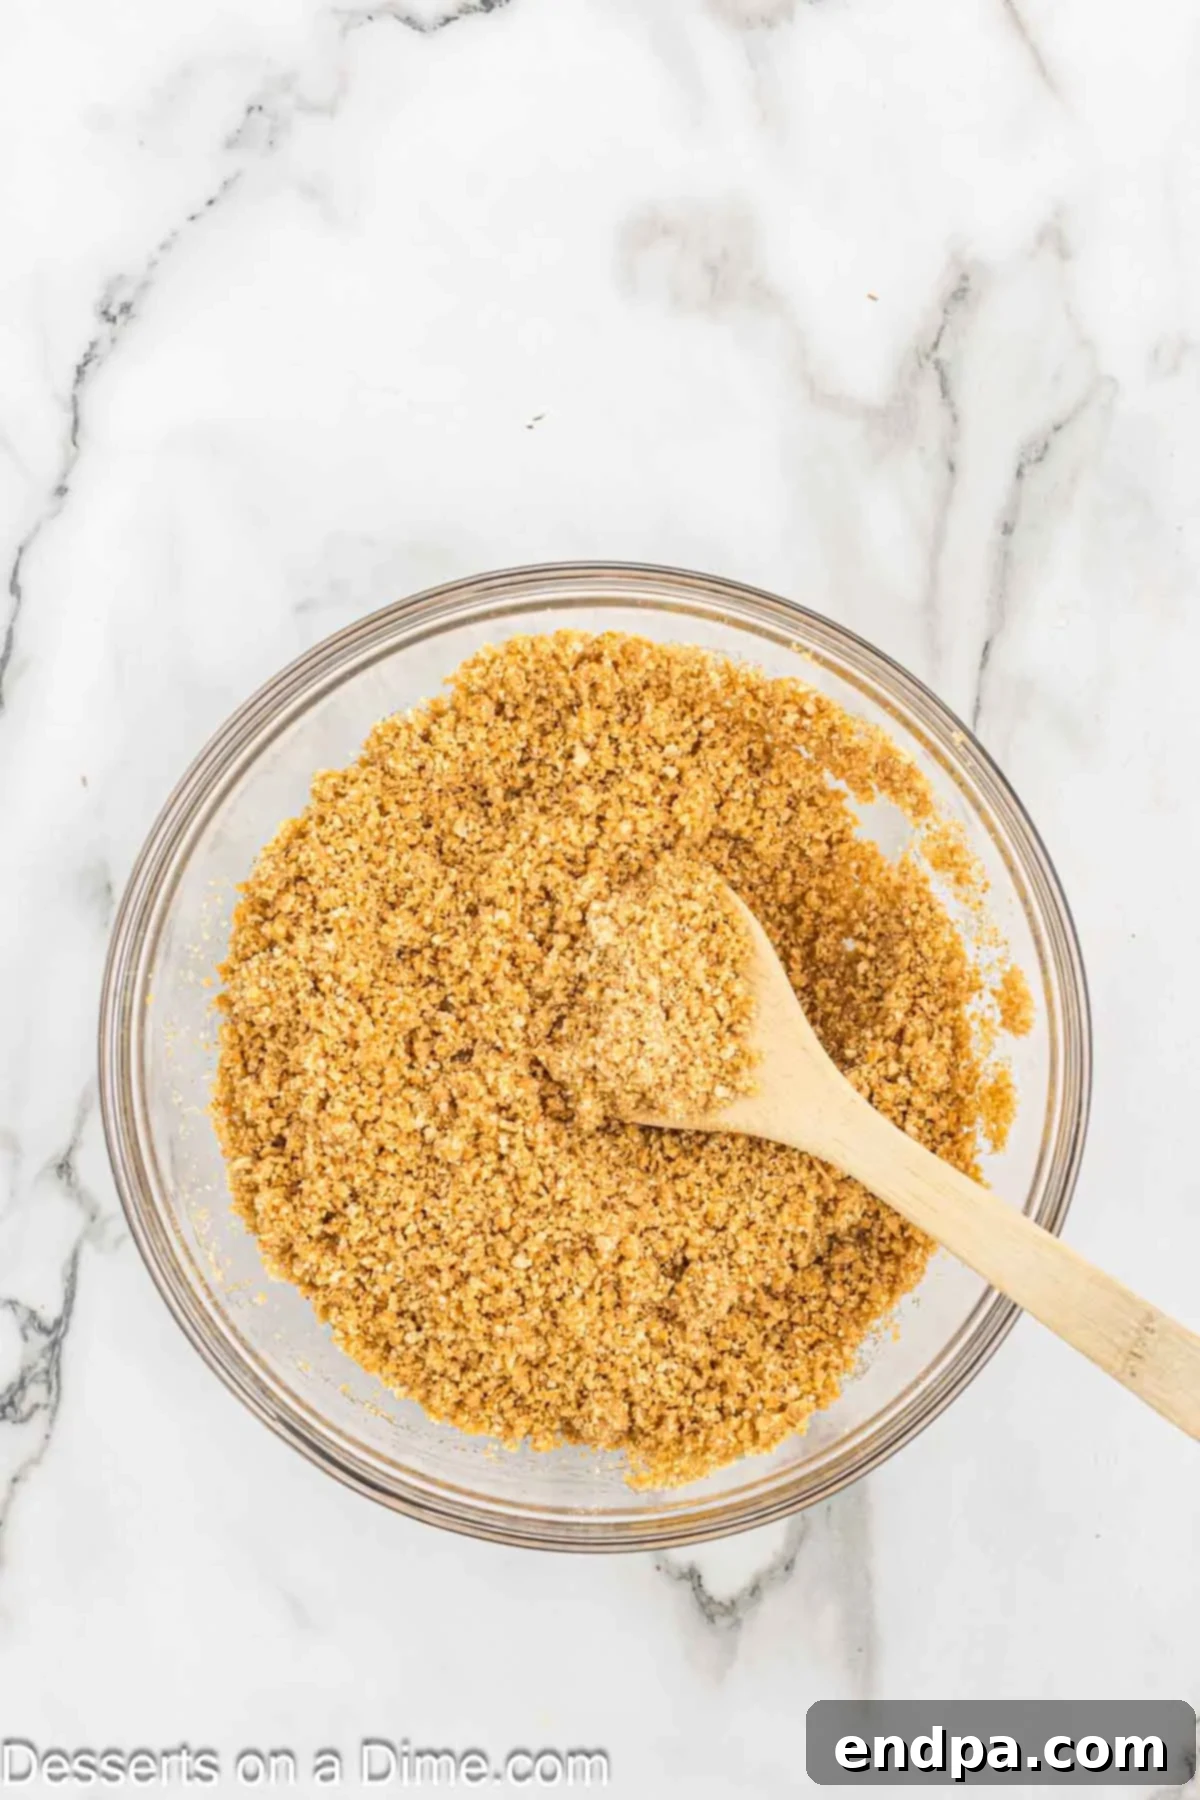
Step 3: Press the Crust into the Pan. Pour the graham cracker mixture into the prepared 9×13 inch baking pan. Using the back of a spoon or your clean fingers, press the mixture down firmly and evenly across the bottom of the pan to form a compact crust. Ensure there are no loose crumbs. This firm base is crucial for structural integrity.
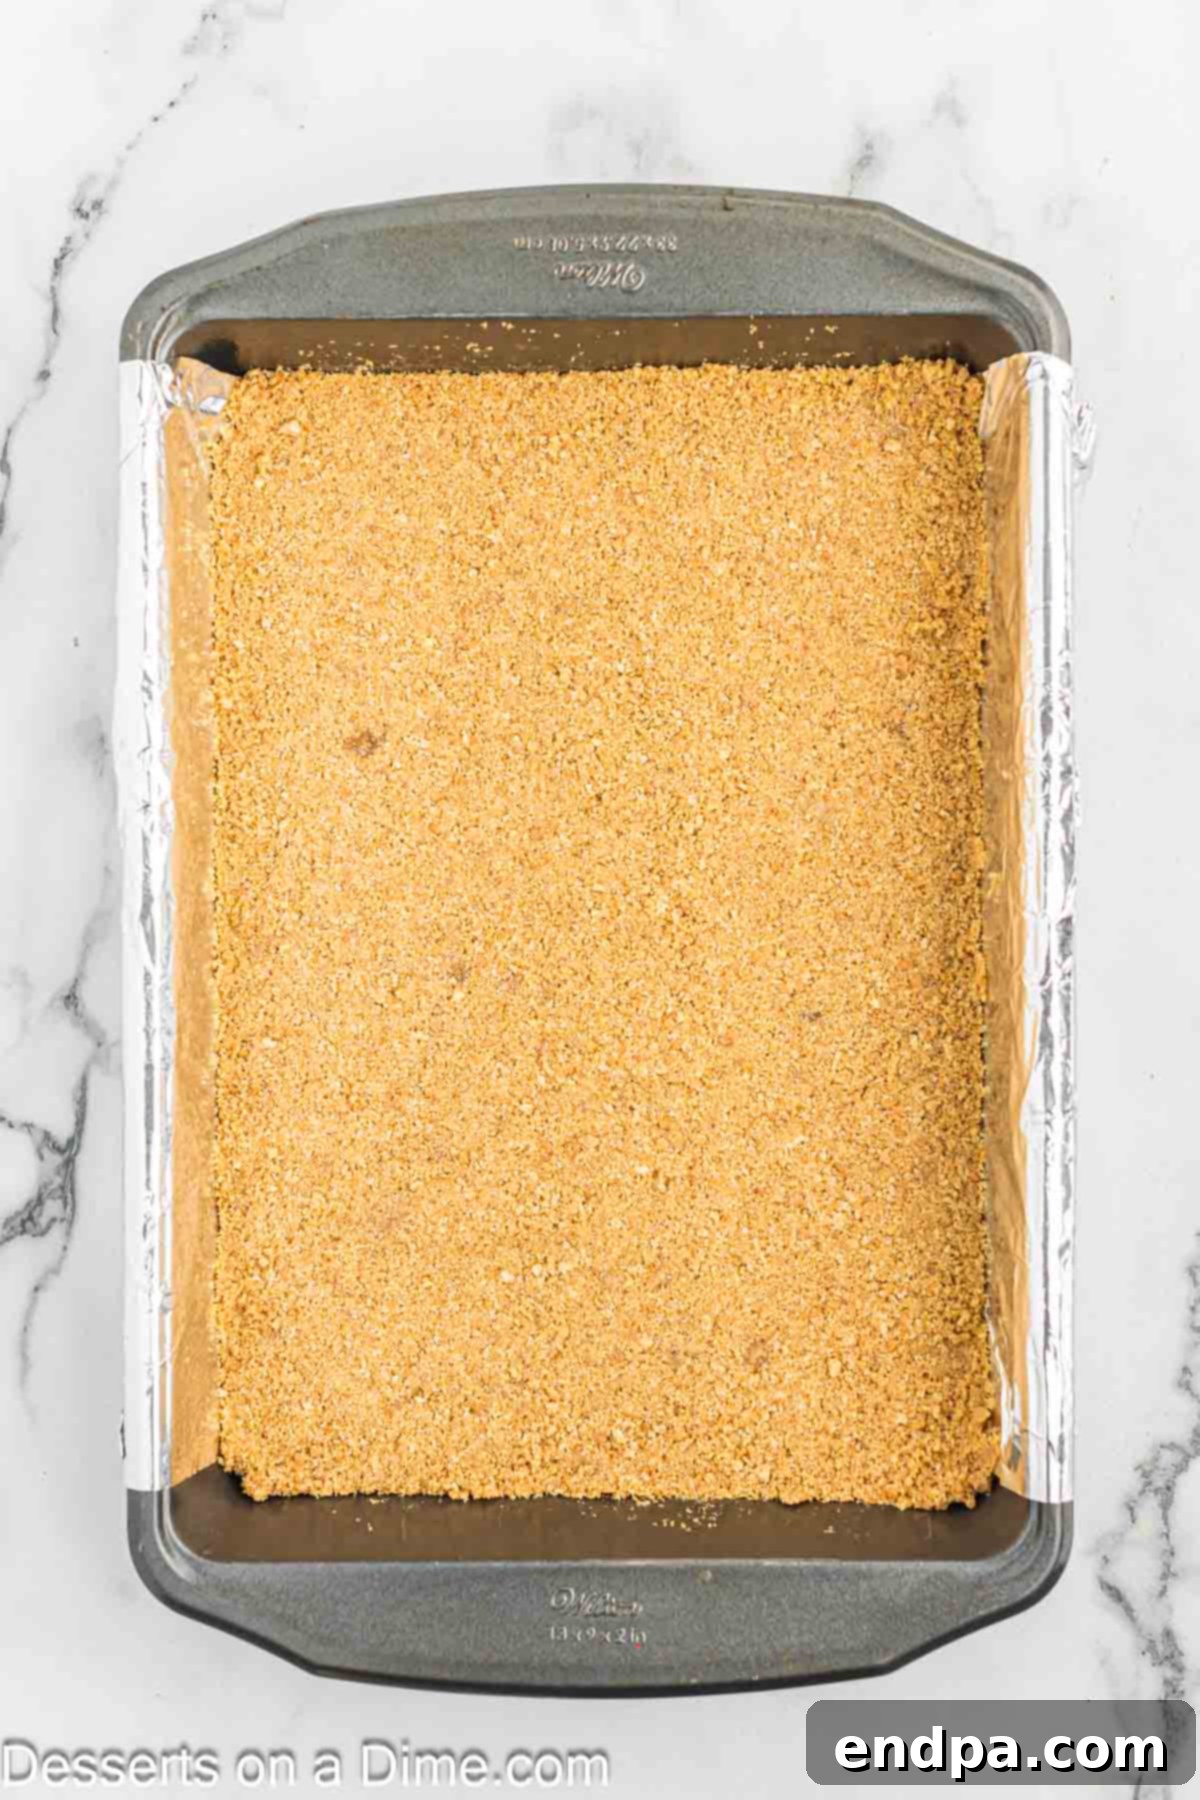
Step 4: Bake and Cool the Crust. Place the pan with the pressed crust into the preheated oven. Bake for approximately 5 minutes, or just until the edges begin to turn a light golden brown. This brief baking time helps to set the crust and give it a slightly toasted flavor. Remove the pan from the oven and allow the crust to cool completely on a wire rack. This is important to prevent the chocolate from melting too quickly when added.
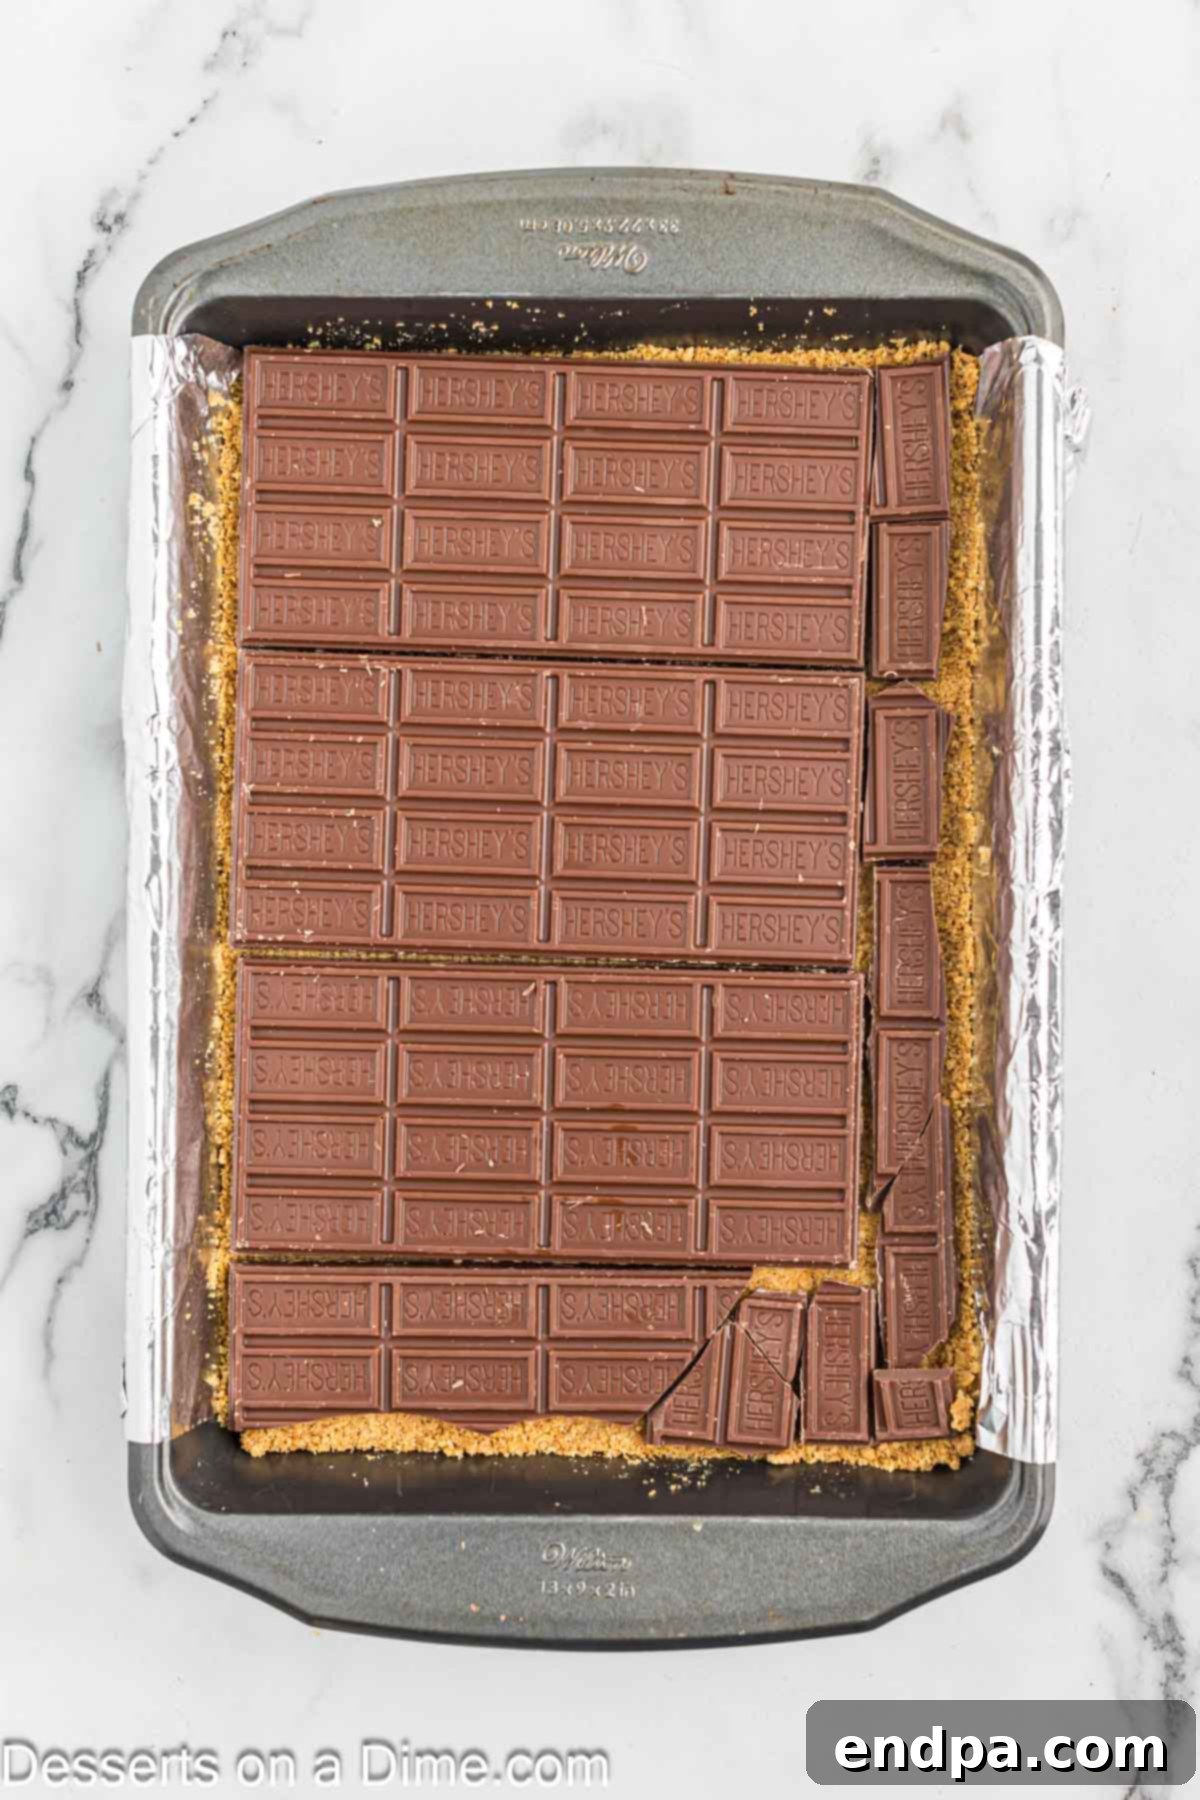
Step 5: Layer the Chocolate. Once the graham cracker crust has cooled, arrange the Hershey’s chocolate bars in a single layer over the entire surface of the crust. Break them into smaller pieces if needed to ensure full coverage. Return the pan to the oven for about 3 minutes, just until the chocolate begins to melt and appears shiny. You don’t want it fully melted into a liquid, just softened enough to spread. Remove from the oven and let cool for 1-2 minutes.
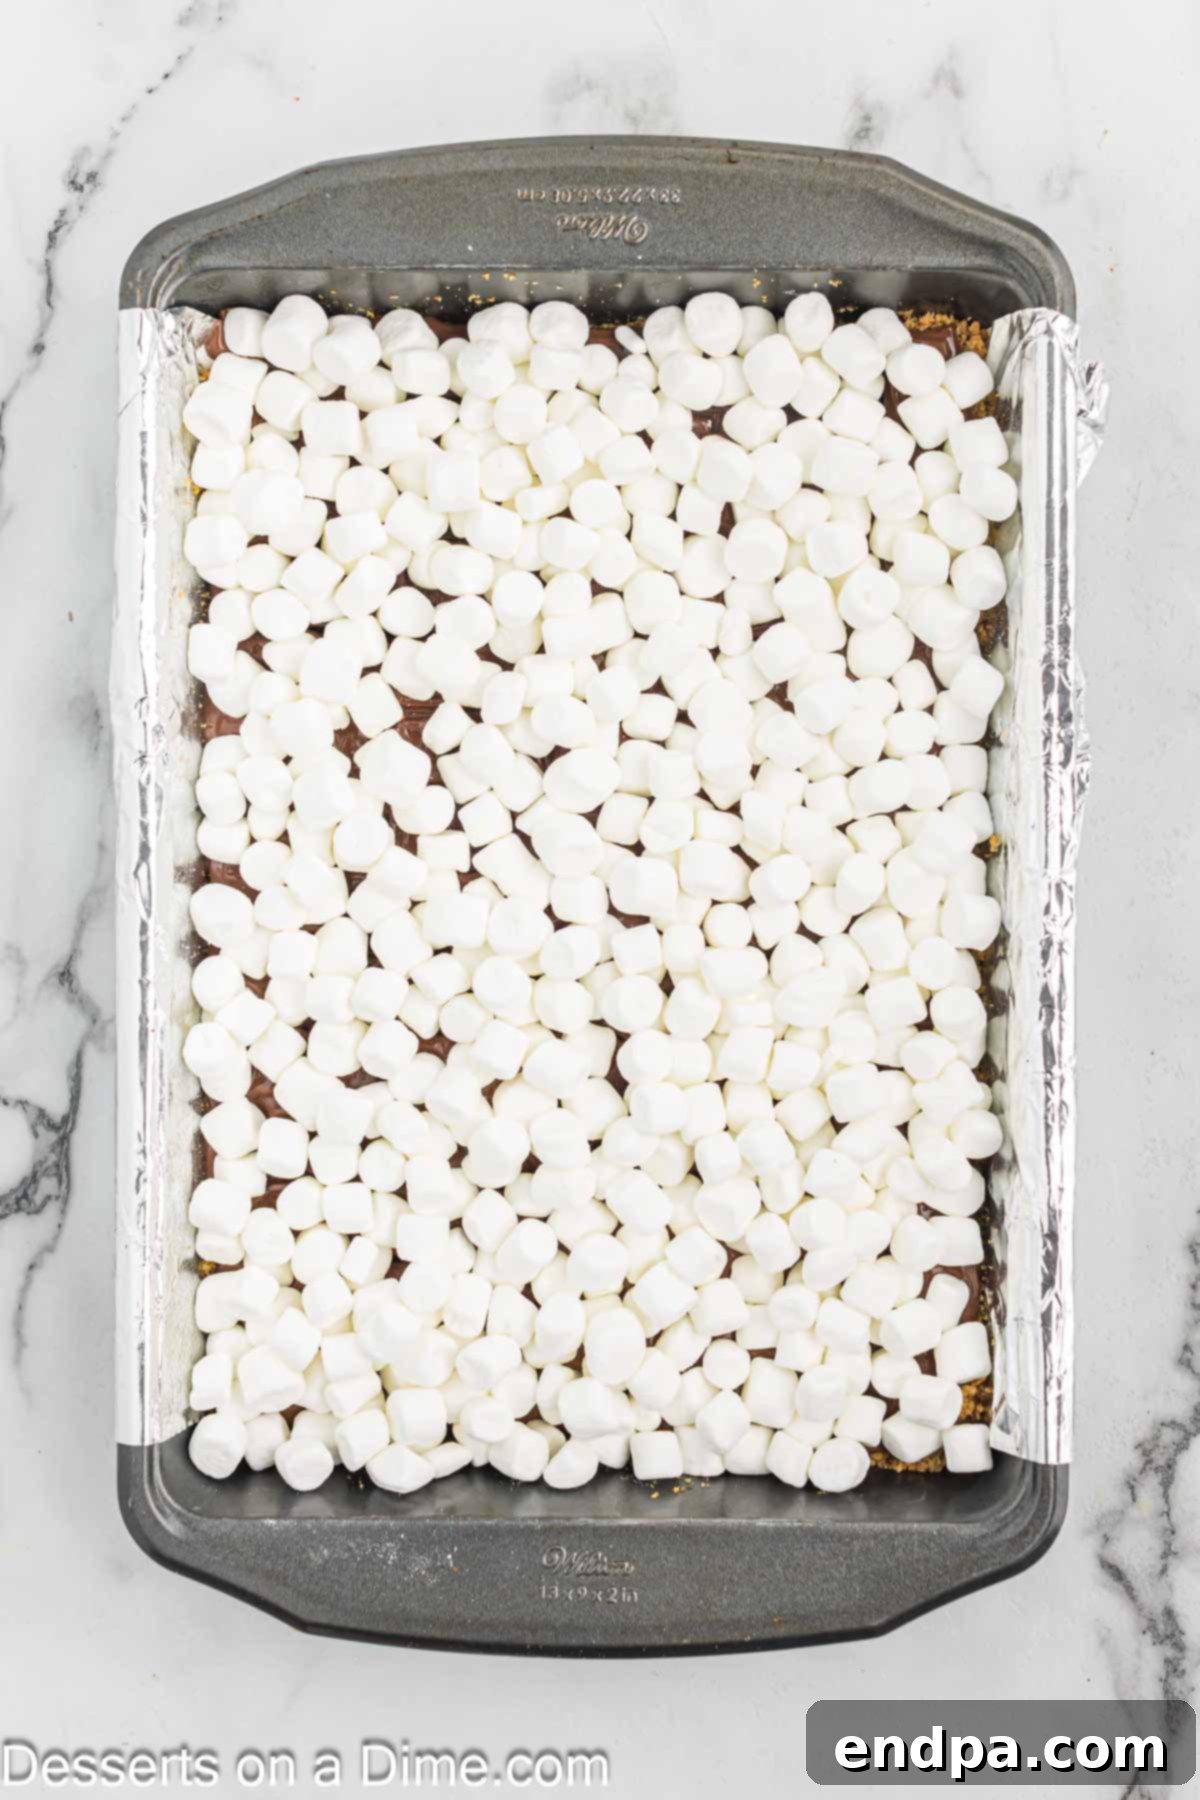
Step 6: Add the Marshmallow Topping. Generously cover the softened chocolate layer with mini marshmallows. Pack them as closely together as possible, ensuring a dense, fluffy blanket across the entire surface. This will create a thick, gooey marshmallow topping when broiled.
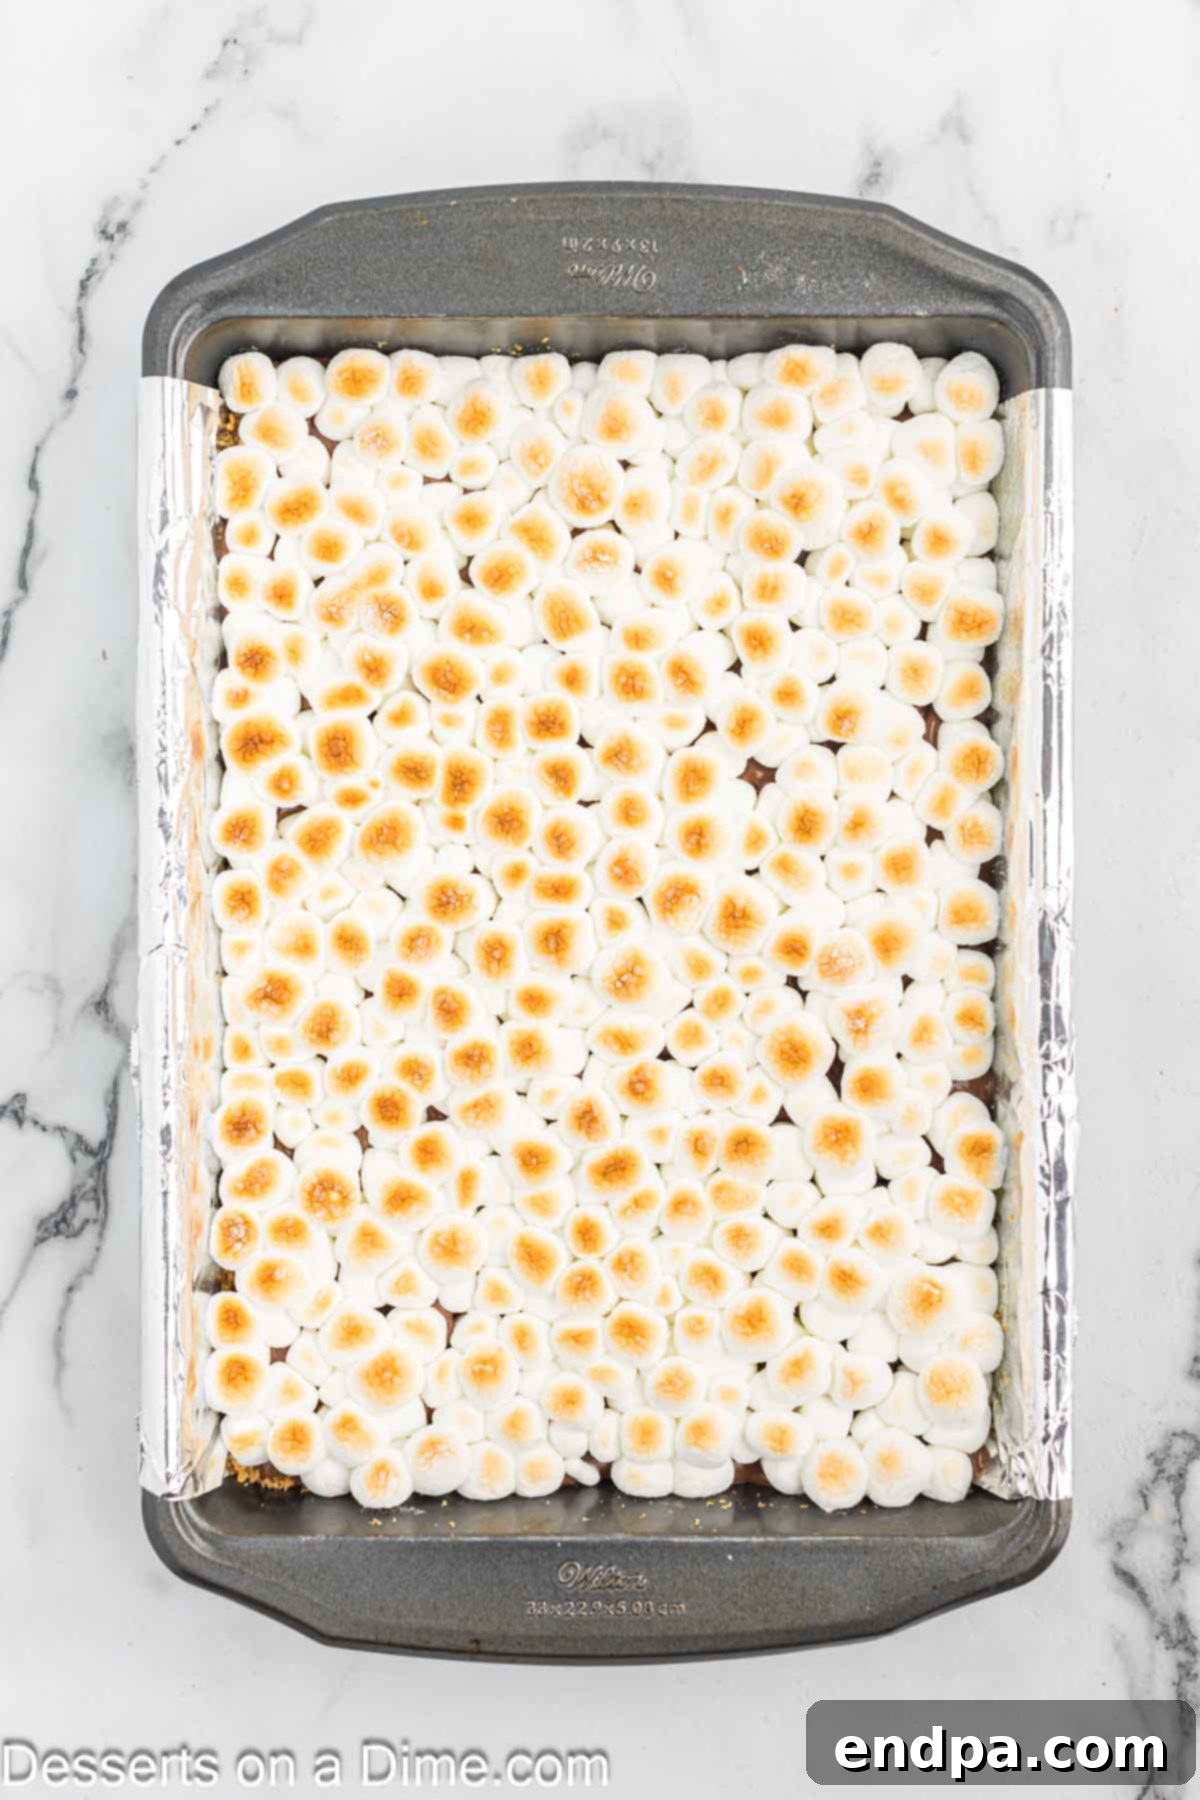
Step 7: Broil for Golden Perfection. Turn your oven setting to “broil” (usually high heat from the top element). Place the pan with the S’mores Bars back into the oven. This step requires constant vigilance – marshmallows can go from perfectly golden to burnt in a matter of seconds! Stay by the oven and watch them closely. As soon as the marshmallows puff up and turn a beautiful golden brown, typically within 1 to 2 minutes, immediately remove the pan from the oven.
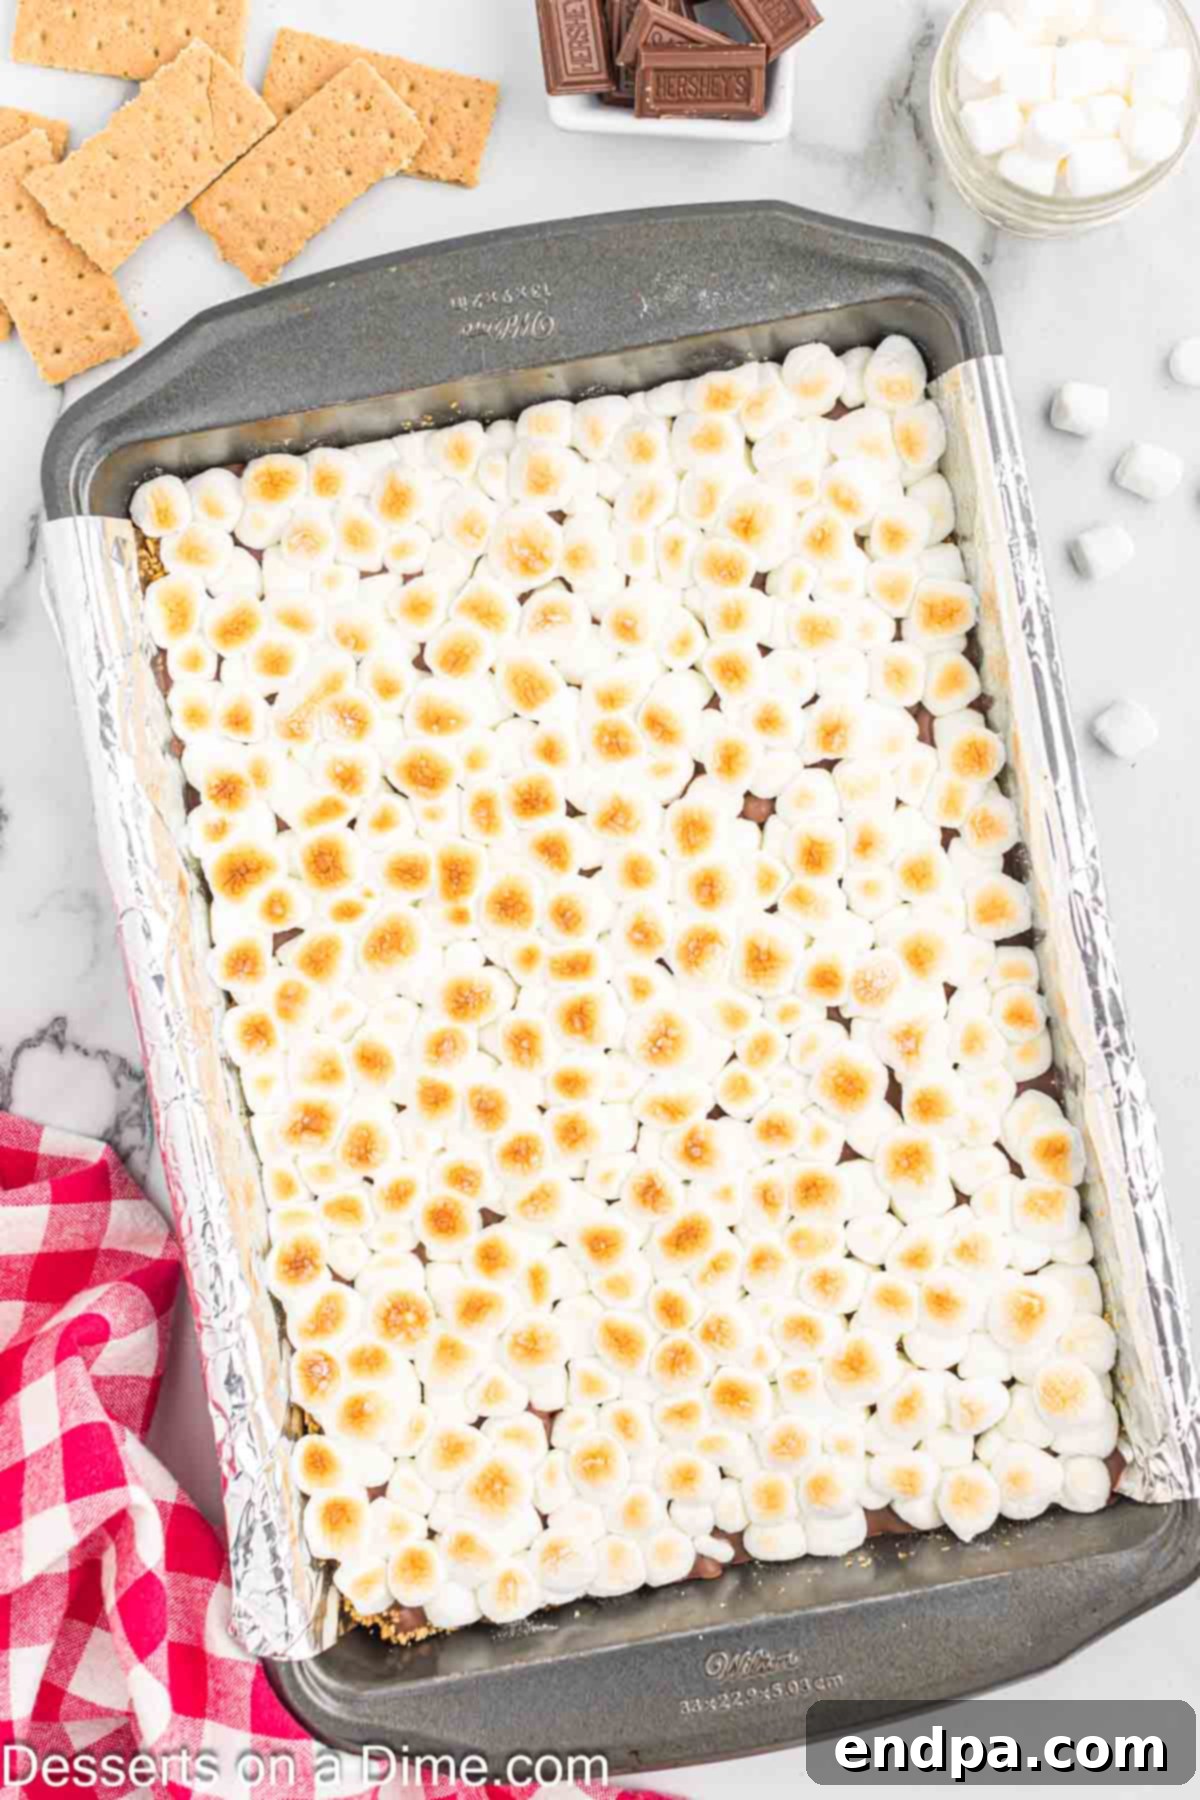
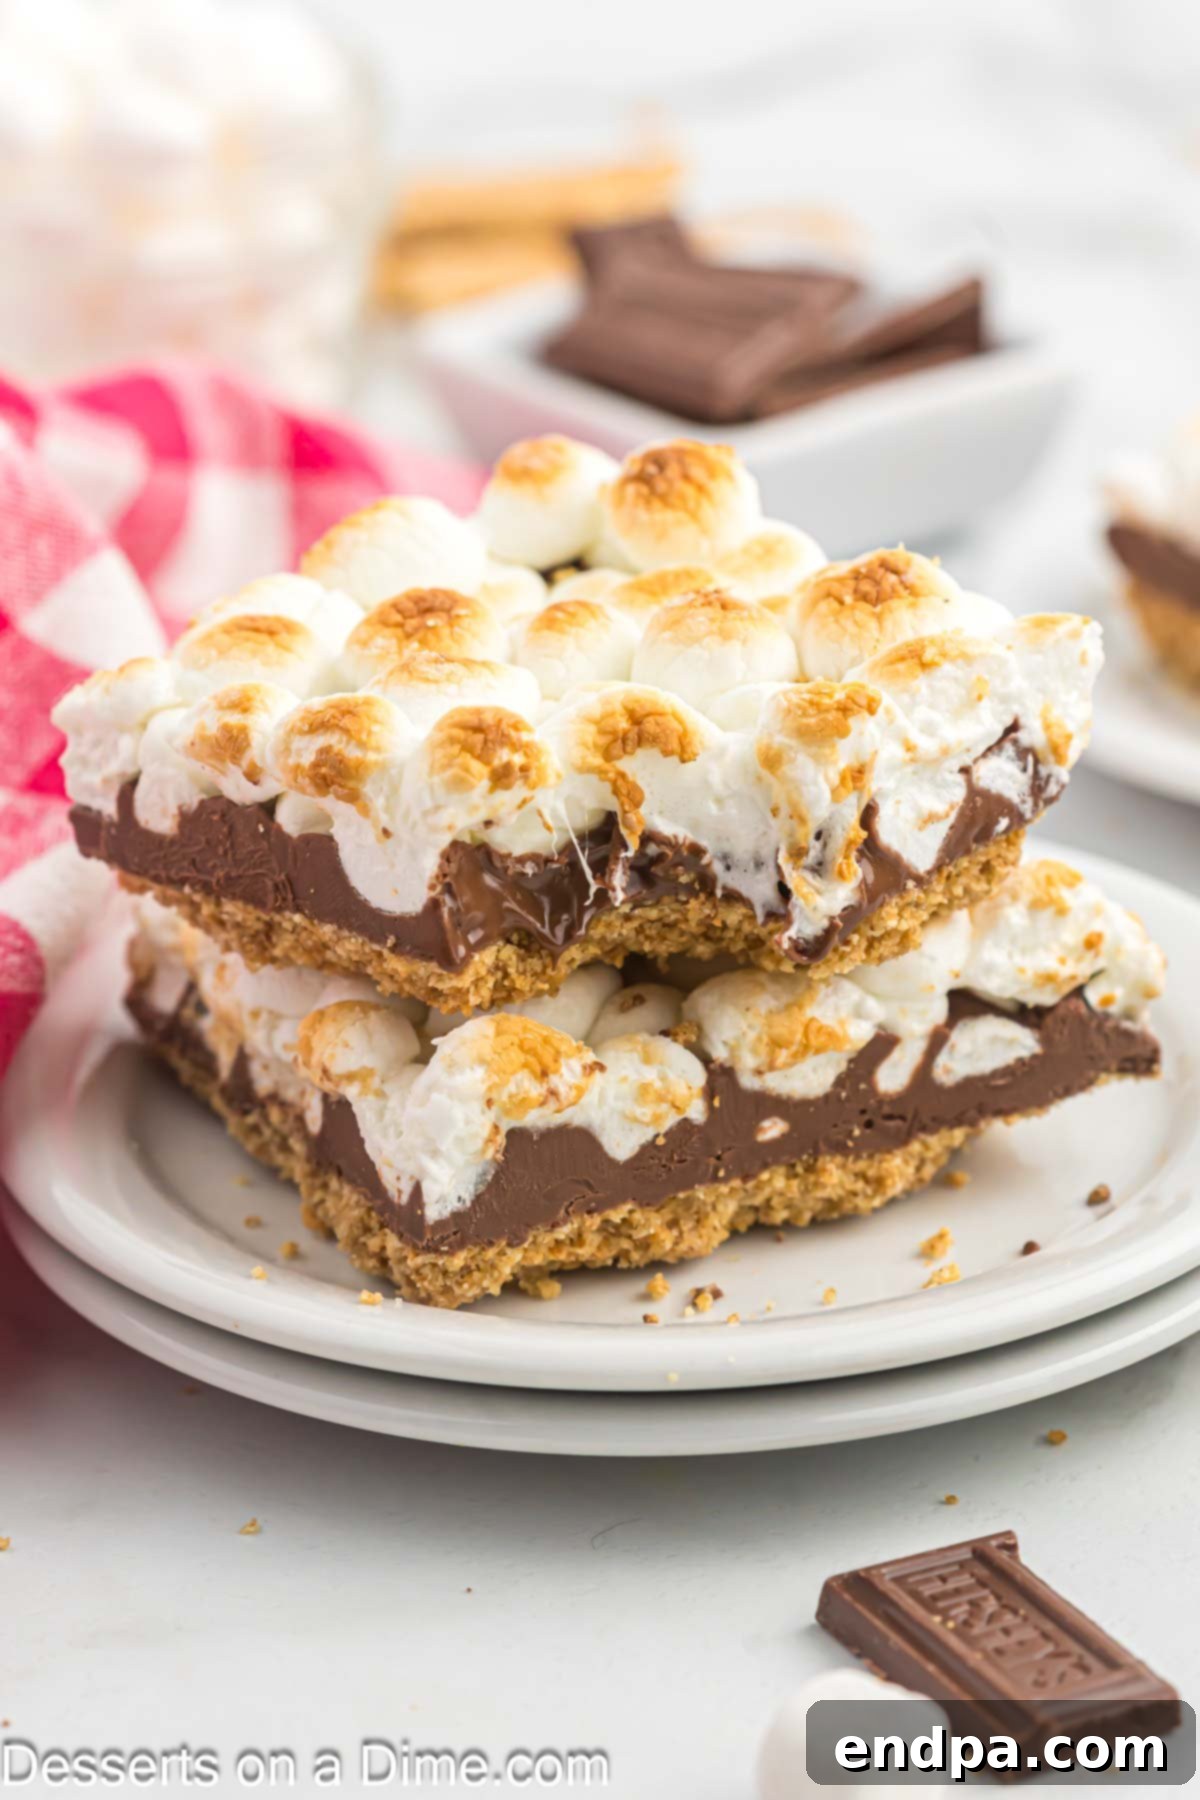
Step 8: Cool, Cut, and Serve. Allow the S’mores Bars to cool completely in the pan on a wire rack. This critical step ensures that the chocolate and marshmallow layers set properly, making them much easier to cut into neat squares. Once fully cooled, cut into desired bar sizes and serve. Enjoy these delightful, crowd-pleasing treats!
Expert Tips for Perfect S’mores Bars
Achieving perfectly gooey, crunchy, and irresistibly delicious S’mores Bars is easy with a few insider tricks. Here are some expert tips to ensure your dessert turns out flawless every time:
- The Warm Knife Trick for Easy Slicing: S’mores bars can become quite sticky once cooled, making them challenging to cut cleanly. The secret is to warm a sharp knife under hot running water, quickly dry it, and then immediately slice the bars. Repeat this process for each cut. The warm blade glides through the sticky marshmallow and chocolate with ease, resulting in neat, clean squares.
- Homemade Graham Cracker Crumbs vs. Store-Bought: While pre-made graham cracker crumbs offer convenience, making your own from whole graham cracker sheets can be just as easy and sometimes more cost-effective. Simply pulse them in a food processor until fine crumbs form, or place them in a zip-top bag and crush them with a rolling pin. The choice often comes down to what’s cheaper or more readily available when you’re baking.
- Choosing the Right Baking Dish: This recipe is ideally suited for a standard 9×13 inch baking dish. This size yields S’mores Bars with the perfect balance of crust, chocolate, and marshmallow thickness. If you prefer thicker bars, you can use a smaller square pan (like an 8×8 or 9×9 inch pan), but be aware that the baking and broiling times may need slight adjustments due to the increased density.
- Always Line Your Pan with Foil or Parchment Paper: This is arguably one of the most important tips for easy cleanup. The melted chocolate and especially the gooey marshmallows can be notoriously sticky and create a messy situation in your baking pan. Lining the pan with aluminum foil or parchment paper (leaving an overhang on the sides) allows you to simply lift the entire cooled slab of bars out of the pan, making cutting and cleanup a breeze.
- Consider a Disposable Pan for Zero Cleanup: For those occasions when you truly want to minimize post-baking chores, such as bringing bars to a potluck or party, disposable aluminum pans are a fantastic option. They perform just as well as reusable pans, and once the bars are served, you can simply toss the dish – no washing required!
- Patience is Key for Cooling: It’s tempting to dive into these bars while they’re still warm, but allowing them to cool completely (preferably for at least 2-3 hours, or even chilling them in the refrigerator for 30-60 minutes) is crucial. This cooling period allows the chocolate to set and the marshmallow to firm up just enough, preventing a messy, falling-apart experience when you cut and serve.
- Broiling with Caution: The broiling step for the marshmallows happens very quickly. Never walk away from the oven during this stage. Keep the oven door slightly ajar and watch constantly. Marshmallows can go from perfectly golden to charred in seconds. Adjust the pan’s position if necessary to ensure even browning.
- Even Crust Thickness: When pressing the graham cracker mixture into the pan, aim for an even thickness across the entire bottom. This ensures uniform baking and a consistent crunch in every bite.
Frequently Asked Questions
If you find yourself with any delicious leftover S’mores Bars, store them in an airtight container at room temperature. They will remain fresh and delightfully gooey for up to 2-3 days. For a slightly warmed, extra-gooey experience, you can gently reheat them in the microwave for about 10-15 seconds before serving.
Absolutely! These delightful bars freeze exceptionally well, making them a fantastic make-ahead dessert. To freeze, ensure the bars are completely cooled and set. Cut them into individual squares, then place them in a single layer on a baking sheet to freeze for about an hour until solid. Once firm, transfer the frozen bars to a freezer-safe airtight container or a heavy-duty freezer bag, separating layers with parchment paper to prevent sticking. They will stay fresh in the freezer for up to 2 months. To serve again, simply remove them from the freezer and let them thaw at room temperature for an hour or two, or pop them in the microwave for a few seconds for a warm treat.
Yes, absolutely! While we love the classic taste of Hershey’s Milk Chocolate mini bars for their traditional s’mores flavor and excellent melt, you have plenty of freedom to experiment with different chocolates based on your preference. Here are some fantastic alternatives and additions we recommend:
- Dark Chocolate: For a richer, less sweet bar with a hint of bitterness that perfectly balances the marshmallow.
- Semi-Sweet Chocolate Chips: A versatile and widely available option that melts beautifully.
- White Chocolate: For a creamy, sweet contrast, though it won’t give the classic s’mores look.
- Mini Peanut Butter Cups: Lay these out on the crust for a decadent peanut butter and chocolate twist.
- Hershey’s Chocolate Kisses: Unwrap and scatter these over the crust for different chocolate flavors.
- Rolos: The caramel centers add an extra layer of gooey sweetness when melted.
- Mini Snicker Bars: Chop them up and sprinkle over the crust for a candy bar-inspired s’mores experience.
- Chocolate chunks: Larger pieces will provide pockets of intense melted chocolate.
- Chocolate with Nuts: For added crunch and flavor.
While you can use large marshmallows, mini marshmallows are generally recommended for S’mores Bars. Mini marshmallows provide a more even layer and toast more consistently under the broiler. Large marshmallows might create larger pockets of melted marshmallow and could be harder to cut cleanly. If you only have large marshmallows, you can cut them into smaller pieces using kitchen shears, but proceed with caution as they are quite sticky.
The good news is you don’t need any specialized equipment. Here’s a list of the essentials:
- 9×13 inch baking pan (or a disposable aluminum pan)
- Large mixing bowl
- Spoon or spatula for mixing and pressing crust
- Measuring cups and spoons
- Aluminum foil or parchment paper (for lining the pan)
- Wire cooling rack
- Sharp knife (for cutting)
More Irresistible S’mores Desserts
If these S’mores Bars have ignited your passion for this classic flavor combination, you’ll love exploring these other easy and delicious s’mores-inspired dessert recipes:
- Easy S’mores Cake Recipe: All the layers of s’mores in a stunning cake format.
- Oven Baked S’mores Recipe: For those times when you want the classic individual s’mores experience, but indoors.
- Frozen S’Mores Recipe: A refreshing twist, perfect for warmer weather.
- S’mores Rice Krispie Treats: A chewy, crispy, and marshmallow-packed delight.
- Golden Graham S’mores Recipe: Another fantastic bar recipe featuring a popular cereal.
Now it’s your turn to experience the magic of these fabulous S’mores Bars. Try out this recipe and prepare to indulge in a treat that truly delivers on flavor and fun!
S’mores Bars
S’mores bars recipe is the perfect treat when you are craving s’mores but need to feed a crowd. These delicious bars make enjoying s’mores so easy!
Prep Time: 15 mins
Cook Time: 10 mins
Total Time: 25 mins
Servings: 12
Cuisine: American
Course: Dessert
Calories: 481
Author: Carrie Barnard
Ingredients
- 2 Cups graham cracker crumbs
- 1/2 cup butter or 1 stick (melted)
- 1/3 Cup brown sugar
- 4 Hershey Chocolate Bars (use 4.4 ounce bars)
- 1 package mini marshmallows
Instructions
- Preheat oven to 350 degrees F (175 C). Grease a 9×13 inch pan with non-stick butter spray or line with parchment paper.
- In a medium size bowl, mix graham cracker crumbs, brown sugar, and melted butter with a spoon until combined.
- Place the mixture in the bottom of the prepared baking pan. Distribute the mixture evenly and press down firmly with your fingers to form a compact crust along the bottom.
- Place in oven and bake for approximately 5 minutes (just until the sides begin to get a bit golden brown).
- Remove from oven and let cool completely on a wire rack.
- Lay the Hershey bars on top of the cooled graham cracker mixture, covering the entire surface as completely as possible.
- Place in oven for approximately 3 minutes (until chocolate just begins to melt and gets shiny).
- Remove from oven and let cool for 1-2 minutes.
- Place mini marshmallows on top of the chocolate layer. Pack them closely next to each other to create a dense marshmallow topping.
- Turn your oven to “broil.” Place the pan back into the oven and watch very closely! Marshmallows brown extremely fast under the broiler, typically needing only 1-2 minutes. As soon as they begin to puff up and turn golden brown, take them out immediately to prevent burning.
- Let them cool completely in the pan on a wire rack. This step is crucial for the bars to set properly.
- Once completely cooled, cut and serve. (Tip: For easier cutting, warm a sharp knife under hot water, dry it off, and immediately slice the bars.)
Nutrition Facts
Calories: 481kcal, Carbohydrates: 58g, Protein: 5g, Fat: 26g, Saturated Fat: 15g, Cholesterol: 22mg, Sodium: 192mg, Potassium: 320mg, Fiber: 5g, Sugar: 35g, Vitamin A: 252IU, Calcium: 49mg, Iron: 5mg
