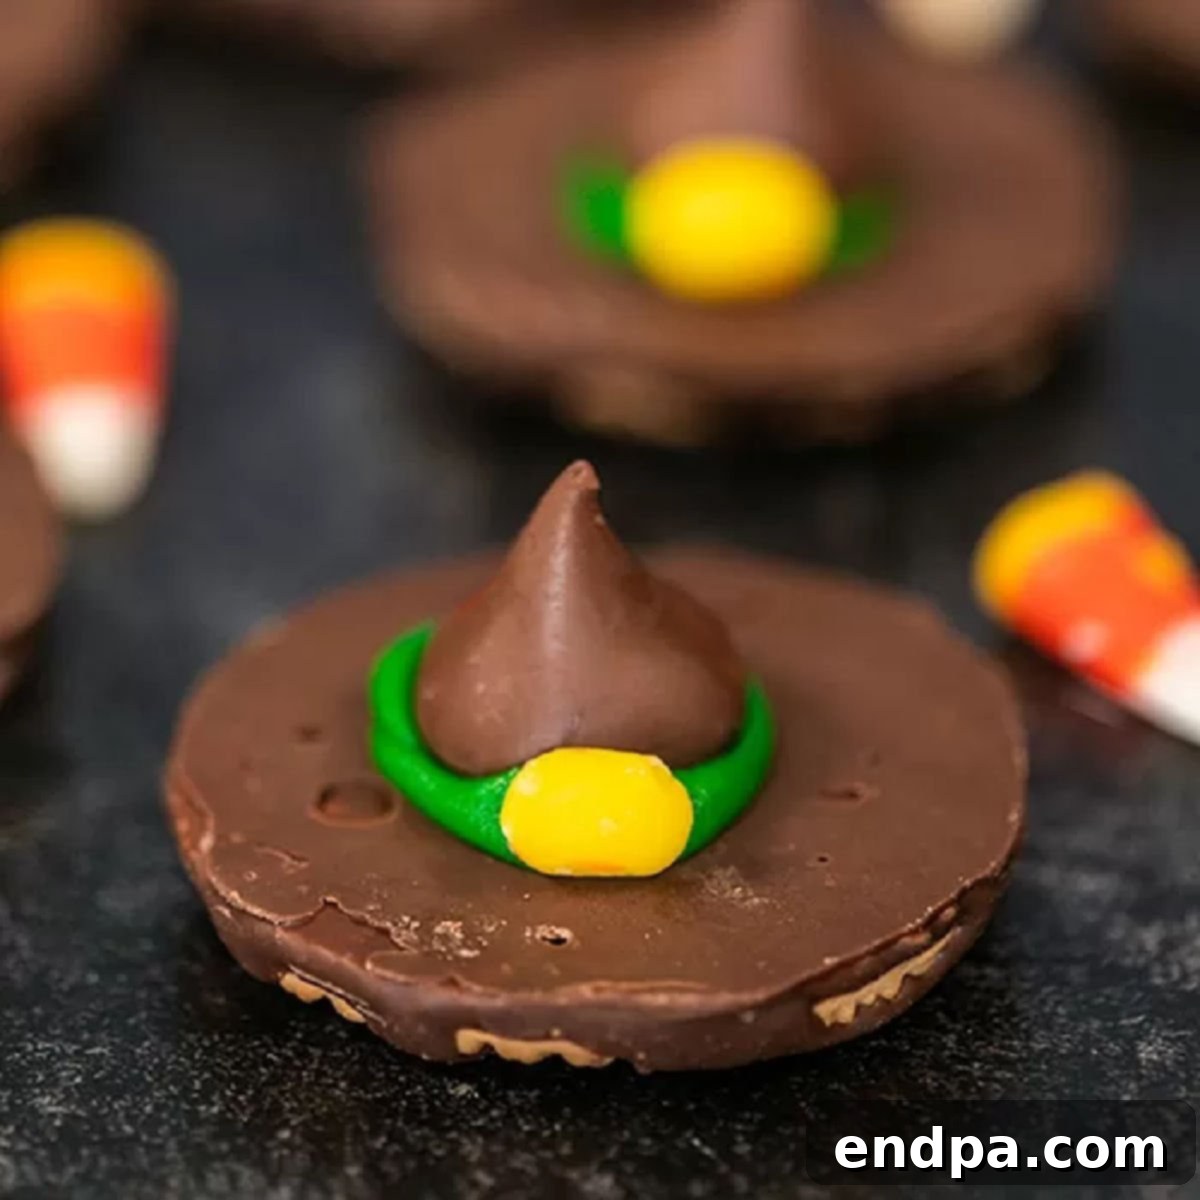
Witch Hat Cookies are the epitome of an effortless yet enchanting no-bake treat, perfect for adding a touch of spooky charm to any Halloween celebration. These adorable cookies are a delight to assemble and will be the star of your dessert table, requiring minimal effort for maximum impact. Imagine charming little witch hats, each a bite-sized masterpiece, ready to impress at school parties, family gatherings, or simply as a fun activity with the kids. Their simplicity makes them an absolute blast to create, ensuring a fun experience for all ages, even the littlest goblins in your kitchen.
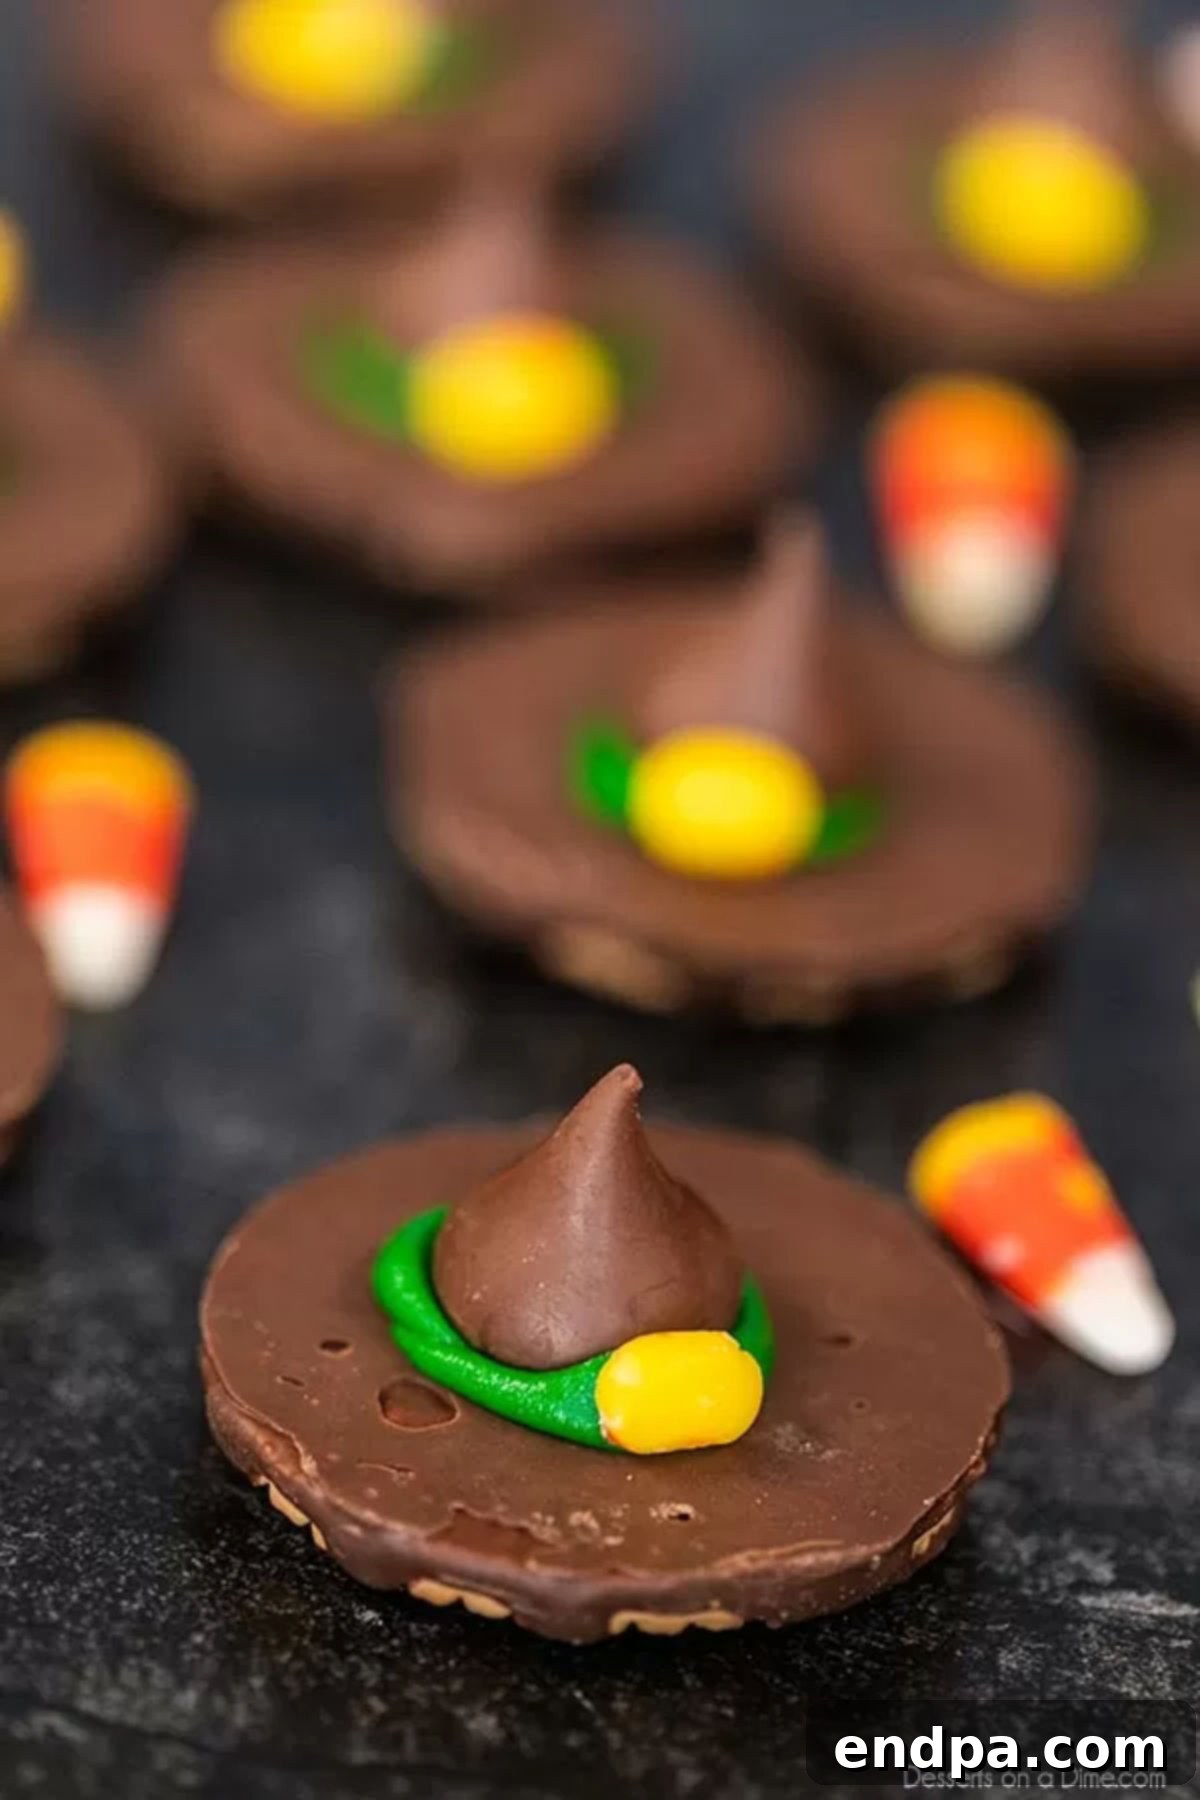
Conjure Up Halloween Magic with No-Bake Witch Hat Cookies
Are you searching for that perfect Halloween treat that’s both wonderfully festive and incredibly easy to make? Look no further! These Witch Hat Cookies are your answer to a truly simple yet spectacularly seasonal delight. As a fantastic no-bake Halloween treat, they boast an irresistible taste that will have everyone reaching for more. The best part? They are so straightforward to prepare that even young children can actively participate in the fun, making it a fantastic family activity. You only need four basic ingredients to bring these magical witch cookies to life, transforming ordinary components into an extraordinary holiday snack.
October is our favorite time of year for crafting delightful and easy Halloween treats. If these charming Witch Hat Cookies cast a spell on you, we encourage you to explore more of our festive recipes. Some of our top picks for a spooktacular celebration include Halloween Dirt Cups, the addictively delicious Halloween Puppy Chow, delightfully eerie Spider Web Cupcakes, and the ever-popular Halloween Cake Pops. If you’re a connoisseur of no-bake wonders, don’t miss our Frankenstein Rice Krispie Treats, charming Pumpkin Sugar Cookies, or The Best Halloween Donuts Recipe. For even more inspiration, browse our extensive collection of Halloween Cookie Recipes. And for those who prefer baking but still seek simplicity, our guide on how to make Cake Mix Cookies offers a wonderfully easy solution.
Table of Contents: Your Guide to Perfect Witch Hat Cookies
- Why These Witch Hat Cookies Are a Halloween Favorite
- Simple Ingredients for Spooky Success
- Creative Substitutions and Additions for Your Witch Hats
- Step-by-Step Guide to Making Witch Hat Cookies
- Expert Tips for Flawless Witch Hat Cookies
- Frequently Asked Questions About Witch Hat Cookies
- More Spooktacular Halloween Treat Recipes
- Witch Hat Cookies: Full Recipe
Why These Witch Hat Cookies Are a Halloween Favorite
There are countless reasons to fall in love with this Witch Hat Cookie recipe, but its sheer simplicity and versatility truly make it shine. Firstly, the requirement for only a handful of readily available ingredients means you can whip up a batch on a whim, without a special trip to the grocery store. This recipe champions ease, using everyday items you likely already have in your pantry. We adore how easily you can customize these cookies with a variety of cookie bases, chocolate toppers, and candies, allowing you to tailor them to any taste preference or party theme. Beyond the convenience, the fact that these hat cookies are a truly no-bake marvel is a game-changer, especially during busy holiday preparations. No need to preheat the oven, no waiting for dough to chill, and no endless baking sheets to monitor. This means less time in the kitchen and more time enjoying the festive atmosphere, making them an ideal treat to bring to any Halloween party, guaranteeing smiles and satisfied sweet cravings. It’s the perfect blend of fun, flavor, and effortless execution.
Simple Ingredients for Spooky Success
Creating these charming Witch Hat Cookies is incredibly straightforward, thanks to a minimal list of easy-to-find ingredients. Each component plays a vital role in constructing the iconic witch hat shape and adding delicious flavor. Here’s what you’ll need to get started:
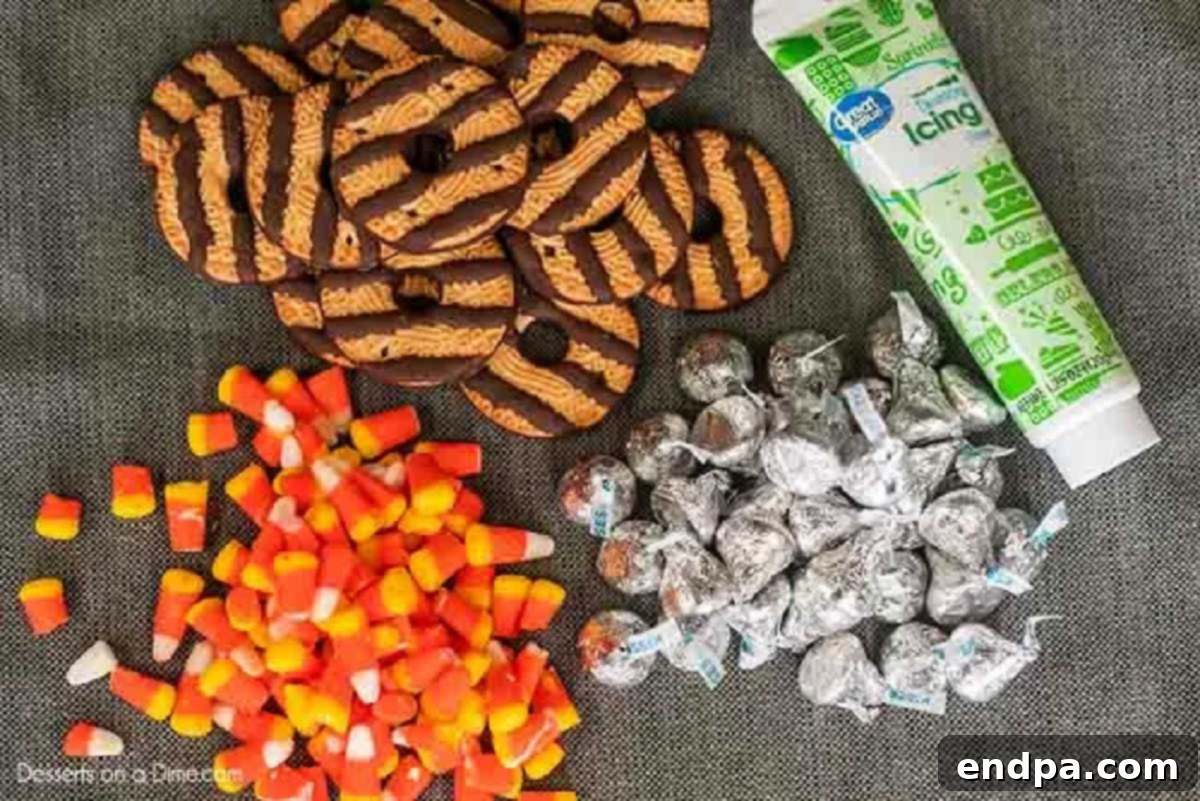
- Fudge Stripe Cookies: These beloved cookies form the sturdy, chocolate-coated base of our witch hats. Their distinct shape and delicious fudge coating make them the ideal foundation for this festive treat.
- Chocolate Kisses: Unwrap these classic chocolate candies to serve as the pointed top of each witch hat. Their iconic shape is perfect for creating the illusion of a miniature witch’s cap.
- Candy Corn: Specifically, the vibrant yellow portion of the candy corn will be carefully cut and used to craft the charming buckle detail on each hat. This adds a pop of color and an extra touch of Halloween spirit.
- Green Decorating Icing: Look for this in the baking aisle of your local grocery store. The icing acts as the “glue” to hold the chocolate kiss in place and creates a vibrant, whimsical band around the base of the hat, adding to its magical appearance.
For detailed measurements and any additional notes, please refer to the comprehensive recipe card below.
Creative Substitutions and Additions for Your Witch Hats
While our classic Witch Hat Cookie recipe is delightfully simple and delicious, one of its greatest strengths lies in its adaptability. Don’t be afraid to get creative and customize these treats to your heart’s desire! Here are some fantastic substitutions and additions to inspire your inner culinary witch:
- Change the Icing Color: The beauty of these cookies is how easily you can switch up the aesthetic. While green is traditional, feel free to use any color of ready-made decorating icing that strikes your fancy. Purple, orange, or even black icing would look wonderfully spooky and add a personalized touch. If you prefer to make your own icing from scratch, that works beautifully too, allowing for even more control over color and consistency.
- Candy Melts for Frosting: Instead of traditional icing, consider melting down candy melts to create a vibrant “frosting.” Simply melt the candy melts according to package directions, then pipe a circle onto your cookie. You can even add a few drops of gel food coloring to white candy melts or homemade frosting in a small bowl to achieve truly vibrant, eye-catching hues that pop. This can offer a smoother finish and a different texture.
- Alternate Buckle Candies: The candy corn buckle is iconic, but you have options! Small M&Ms or tiny red hots make excellent alternative buckles, adding a different flavor and visual appeal. For a fun twist on the chocolate kiss, try using Hug Kisses (the striped variety) or even different flavored Hershey’s Kisses for a subtle taste variation.
- Experiment with Different Cookies: The base cookie is key, but don’t limit yourself to fudge stripe cookies. Classic Oreos or other chocolate cream cookies work wonderfully and provide a rich, dark base. If you’re a fan of nutty flavors, peanut butter cookies can also serve as a delicious foundation for these festive hats.
- Chocolate Chips Instead of Candy Corn: For a simpler, chocolate-focused buckle, use a single chocolate chip. The pointed end of the chip can be gently pressed into the icing to mimic a small buckle, offering a slightly less sweet alternative to candy corn.
- Add a Peanut Butter Layer: For a delightful flavor combination, spread a thin layer of peanut butter on top of your fudge-striped cookie before placing the chocolate kiss. This adds a rich, creamy element and a beloved taste that pairs perfectly with chocolate.
- Sprinkles for Extra Sparkle: Elevate the festive look by adding a dash of Halloween-themed sprinkles! While the icing is still wet, gently scatter some orange, black, purple, or ghost-shaped sprinkles around the base of the chocolate kiss for an extra magical touch.
These suggestions allow you to put your unique spin on this classic Halloween treat, ensuring every batch is as special and creative as you are!
Step-by-Step Guide to Making Witch Hat Cookies
Creating these enchanting Witch Hat Cookies is a breeze! Follow these simple steps to assemble your spooky-sweet treats in no time. Precision isn’t necessary here; part of the fun is in the whimsical, slightly imperfect charm of homemade Halloween desserts.
- Step 1 – Prepare Your Cookie Base: Begin by taking your fudge stripe cookies and placing them upside down on a clean work surface or baking sheet lined with parchment paper. Ensure the flat, chocolate-coated side is facing upwards. This flat surface will serve as the brim of your witch hat.
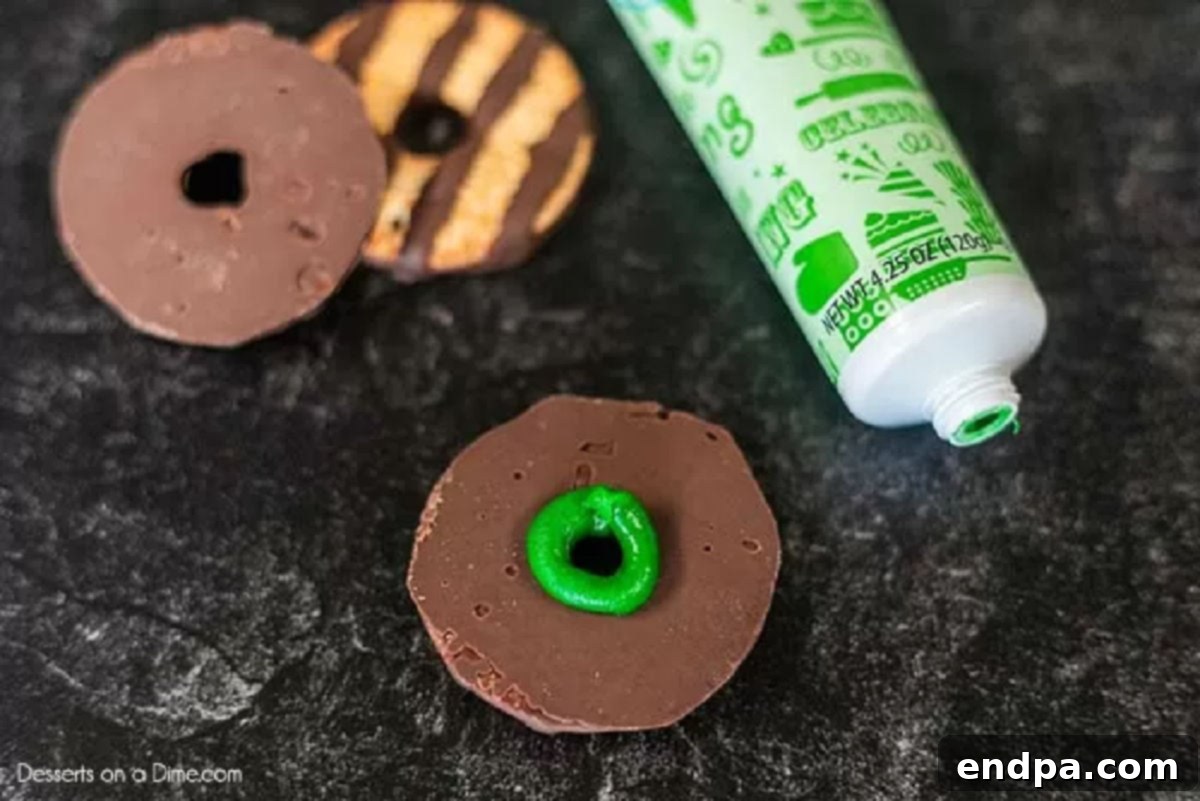
Step 2 – Apply the Icing: Take your pre-made decorating icing (ensure it’s at room temperature for easy piping) and carefully pipe a small circle of icing around the center of the chocolate side of each cookie. This circle of icing will act as the “glue” and also the decorative band for the witch hat.
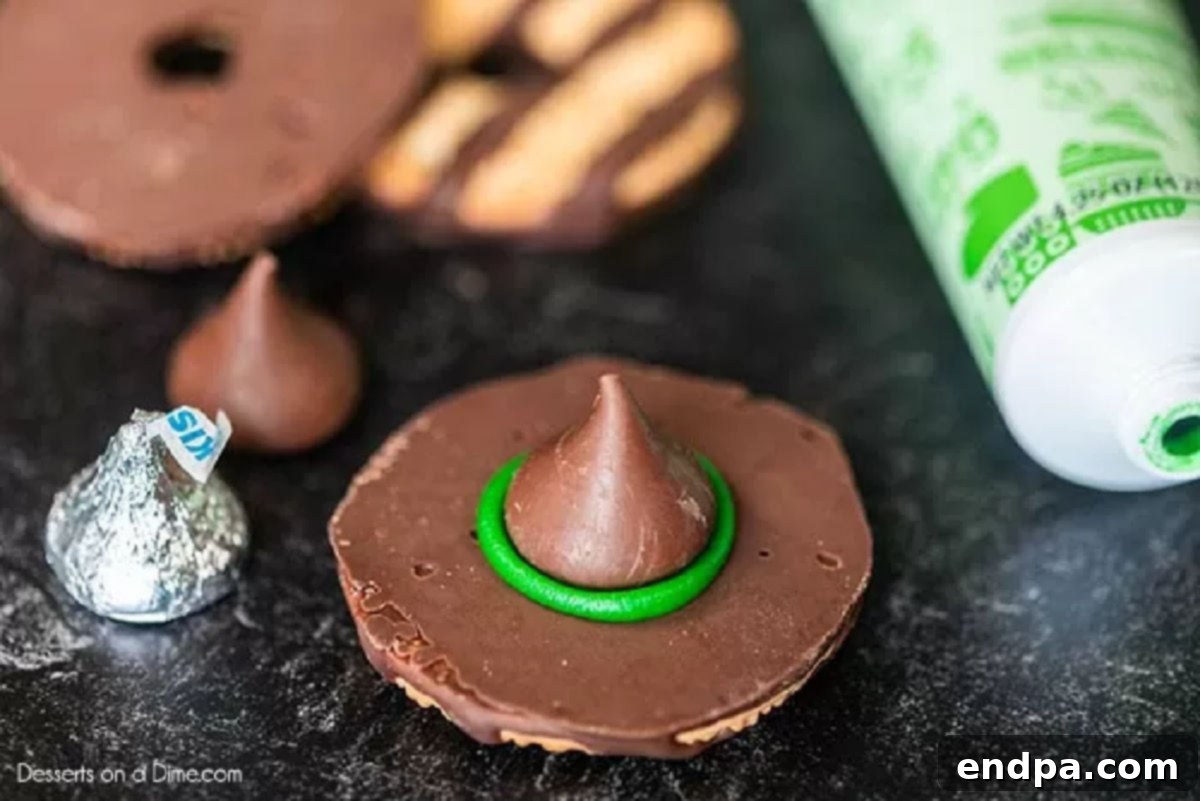
Step 3 – Add the Chocolate Hat Top: Carefully place an unwrapped Hershey’s Kiss on top of the icing circle in the center of each cookie. Gently press the chocolate kiss down into the icing. As you press, the icing will naturally seep out from the sides, creating the illusion of a classic witch hat brim with a vibrant colored band.
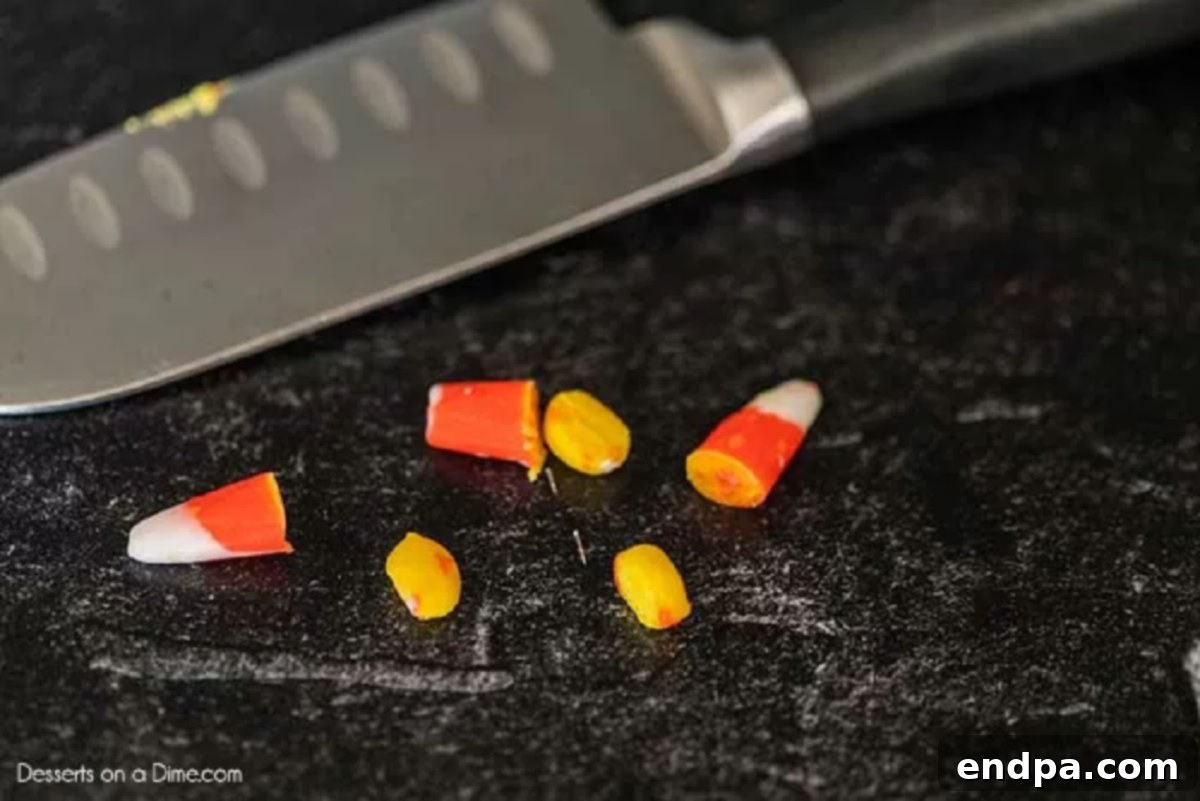
Step 4 – Prepare the Buckle: Take your candy corn pieces. Carefully cut off the yellow portion of each piece. You will use these small yellow segments to form the “buckle” on your witch hats. A small paring knife works well for this, but adult supervision is advised if children are helping.
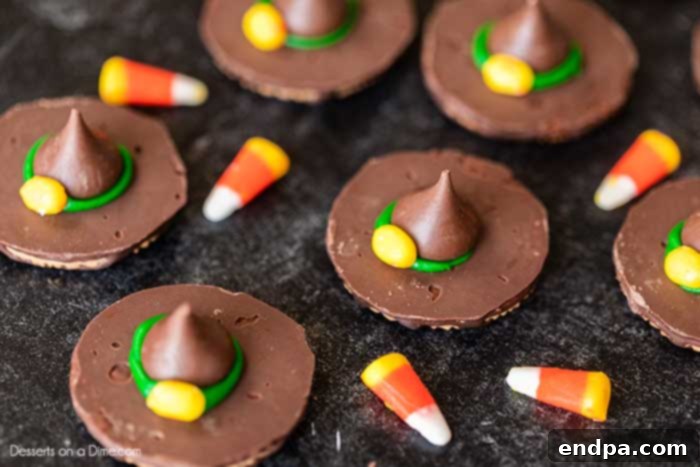
Step 5 – Add the Finishing Touch: Place one of the small yellow candy corn pieces onto the center of the icing “brim,” right where the chocolate kiss meets the cookie. This creates the charming buckle on your witch hat. Allow the cookies to set for a few minutes so the icing can firm up and hold all the components securely. If you’re in a hurry, you can chill them in the fridge for about 10-15 minutes to speed up the setting process.
Once set, your delightful Witch Hat Cookies are ready to be served and enjoyed! It’s that simple to create such a festive and delicious Halloween treat.
Expert Tips for Flawless Witch Hat Cookies
Even with a recipe as straightforward as our Witch Hat Cookies, a few insider tips can elevate your treats from good to absolutely fantastic. These small details ensure perfect assembly, presentation, and enjoyment:
- Room Temperature Frosting is Key: Before you even start piping, make sure your decorating icing is at room temperature. This is crucial for smooth and easy application. Cold icing will be stiff and difficult to squeeze, leading to uneven lines and frustration. If your icing is too cold, let it sit out for about 30 minutes to an hour until it reaches a soft, spreadable consistency. This ensures the icing flows easily and creates a neat, consistent circle on your cookies.
- Work Quickly and Efficiently: Once you’ve piped the frosting onto a cookie, it’s best to add the chocolate kiss and candy corn buckle soon after. The icing will start to set relatively quickly, especially if your kitchen is cool. Working quickly ensures that all the pieces adhere firmly to the icing before it hardens, preventing any candies from falling off. You might even consider having all your chocolate kisses unwrapped and candy corn pieces cut beforehand to streamline the process.
- Allow Ample Setting Time: Patience is a virtue, even with no-bake treats! While the cookies look finished immediately, they need a few minutes for the icing to properly set and bond all the elements together. This prevents the hats from wobbling or detaching when handled. If you have the time, let them sit at room temperature for at least 15-30 minutes.
- Speed Up Setting with Refrigeration: If you’re short on time or eager to serve your treats, a quick chill in the fridge can work wonders. Place the assembled cookies on a plate or baking sheet and refrigerate for about 10-15 minutes. The cold temperature will help the icing firm up much faster, ensuring a stable and ready-to-serve cookie.
- Proper Serving and Storage: These cookies are best enjoyed fresh, but they can certainly be made ahead. If you’re serving them on a platter for a party, we recommend keeping the cookies covered loosely with plastic wrap until just before guests arrive. This helps to prevent them from drying out or absorbing ambient odors. For storing, see our FAQ section for detailed instructions to keep them fresh for longer.
- Involve the Kids Safely: This recipe is fantastic for children, but always ensure adult supervision, especially when cutting the candy corn. Pre-cutting the candy corn can make it safer for younger children to participate in the assembly process, allowing them to focus on the fun parts of piping and placing.
By following these simple tips, you’re guaranteed to create a batch of Witch Hat Cookies that are not only delicious but also look professionally made!
Frequently Asked Questions About Witch Hat Cookies
Here are some common questions about making and enjoying these festive Witch Hat Cookies:
To keep your Witch Hat Cookies fresh and delicious, store them in an airtight container at room temperature. For best results, place a layer of parchment paper between stacked cookies to prevent them from sticking together or the decorations from getting smudged. While these fun Halloween cookies tend to disappear quickly in our house, they generally remain fresh for about a week. You can even keep them in a festive holiday cookie jar for added charm and to maintain freshness.
Absolutely! While store-bought fudge stripe cookies offer ultimate convenience, you can certainly use homemade cookies for the base if you prefer. We’ve found that our Toll House Chocolate Chip Cookies Recipe works wonderfully for this purpose, providing a delightful homemade touch. Just make sure the homemade cookies are completely cooled before assembling your witch hats. You could also use plain sugar cookies or shortbread cookies for a different flavor profile.
Yes, these Witch Hat Cookies are a fantastic make-ahead option for parties! You can assemble them a day or two in advance. Store them in an airtight container at room temperature, making sure they are in a single layer or separated by parchment paper. This allows the icing to fully set and ensures they are ready to go when your event begins, saving you precious time on party day.
No problem at all! If green decorating icing isn’t available, you have a few easy solutions. You can use white frosting and add a few drops of green food coloring to achieve the desired hue. Alternatively, you can opt for another festive color like purple, orange, or even black. The goal is to have a vibrant band around the hat, so any color that complements your Halloween theme will work great!
The traditional recipe uses ingredients that are not typically gluten-free or vegan. However, you can adapt it! Look for gluten-free fudge stripe cookies (or other suitable cookie bases), vegan chocolate kisses or similar chocolate candies, and plant-based decorating icing. Always check ingredient labels carefully to ensure they meet your specific dietary requirements.
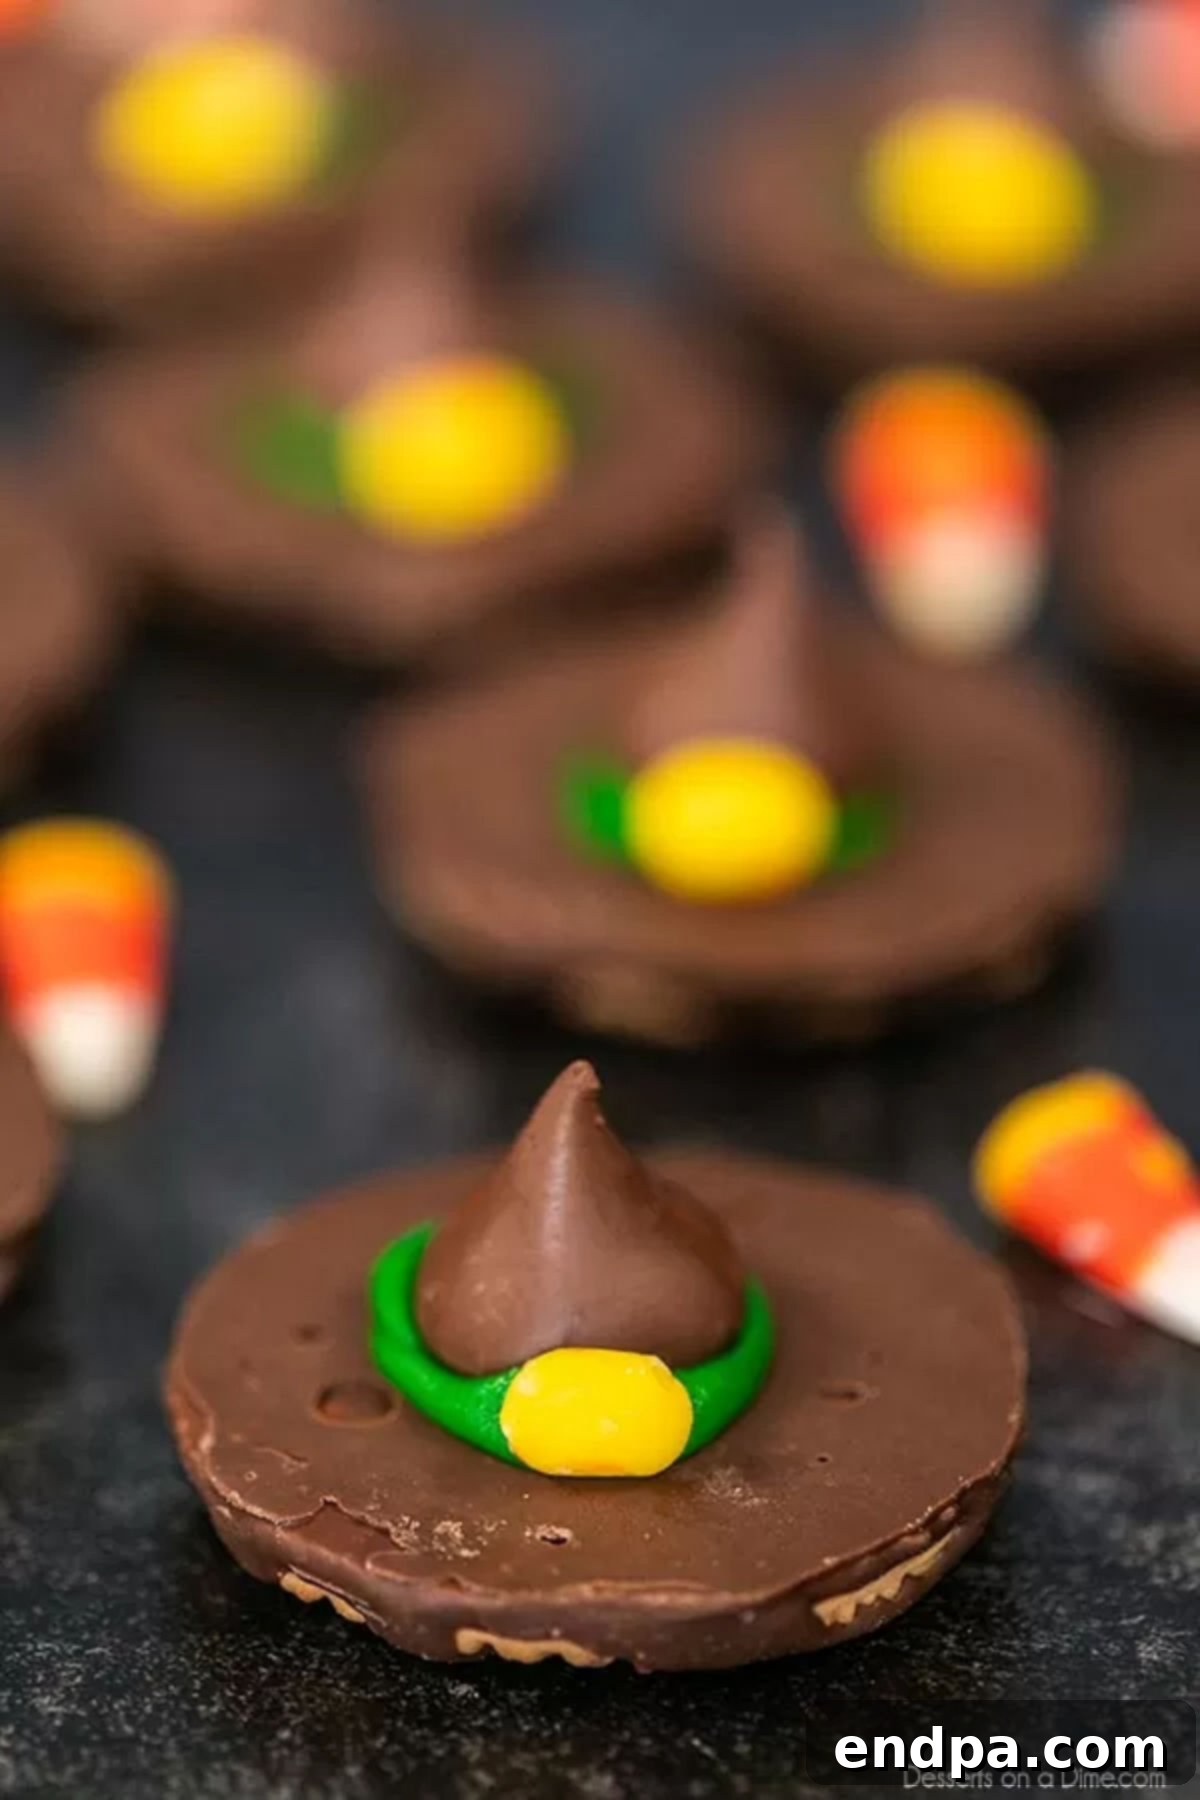
More Spooktacular Halloween Treat Recipes
If you’re looking to expand your repertoire of Halloween delights, we have a cauldron full of other enchanting recipes that are sure to delight. From creepy-crawly brownies to adorable mummy pops, there’s something here for every spooky celebration:
- Jack-O-Lantern Cupcakes
- Spider Brownies Recipe
- Mummy Cake Pops
- Halloween Chocolate Covered Oreos Recipe
- Easy Halloween Spider Cookies
- 55 Delicious Halloween Cupcakes
Each of these recipes is designed to be fun and accessible, ensuring your Halloween festivities are filled with delicious and memorable treats. Happy haunting and happy baking (or no-baking)!
We love hearing from you! If you whip up a batch of these enchanting Witch Hat Cookies, please let us know by leaving a comment or a star review below. Your feedback helps us share the magic with even more dessert lovers!
Witch Hat Cookies: The Easiest No-Bake Halloween Treat
Witch Hat Cookies are the perfect no-bake treat and they are a blast to make. These Halloween witch hat cookies make the cutest treat for parties and more with very little work.
15 mins
15 mins
24 cookies
American
Dessert
102 kcal
Carrie Barnard
Ingredients
- 24 Fudge Stripe Cookies
- 24 Chocolate Kisses, unwrapped
- 24 Pieces Candy Corn
- 4 oz Green Decorating Icing
Instructions
- Place the fudge stripe cookies upside down so that the chocolate part is facing up. This will be the brim of your witch hat.
- With the pre-made frosting (at room temperature), pipe a circle around the center of the chocolate side of each cookie.
- Gently press one unwrapped chocolate kiss onto the middle of the icing circle. Allow the icing to seep out slightly from the sides of the Hershey kiss to create the appearance of a hat band and brim.
- Carefully cut off the yellow portion from each piece of candy corn.
- Place a yellow candy corn piece onto the center of the icing brim, creating a buckle on the hat.
- Allow the cookies to set for 15-30 minutes at room temperature, or chill in the refrigerator for 10-15 minutes to speed up the process.
- Serve and enjoy your delightful Witch Hat Cookies!
- Optional Tip: You can use any color icing or make your own from scratch. M&Ms or small red hots also work great as alternative buckles for the hats.
Recipe Notes
For convenience, you can find premade icing at most grocery stores or online. Ensure all chocolate kisses are unwrapped before you begin assembly to keep the process smooth and quick.
Nutrition Facts (Per Cookie)
Calories: 102 kcal, Carbohydrates: 15g, Protein: 1g, Fat: 4g, Saturated Fat: 2g, Cholesterol: 1mg, Sodium: 70mg, Potassium: 27mg, Fiber: 1g, Sugar: 11g, Calcium: 12mg, Iron: 1mg
