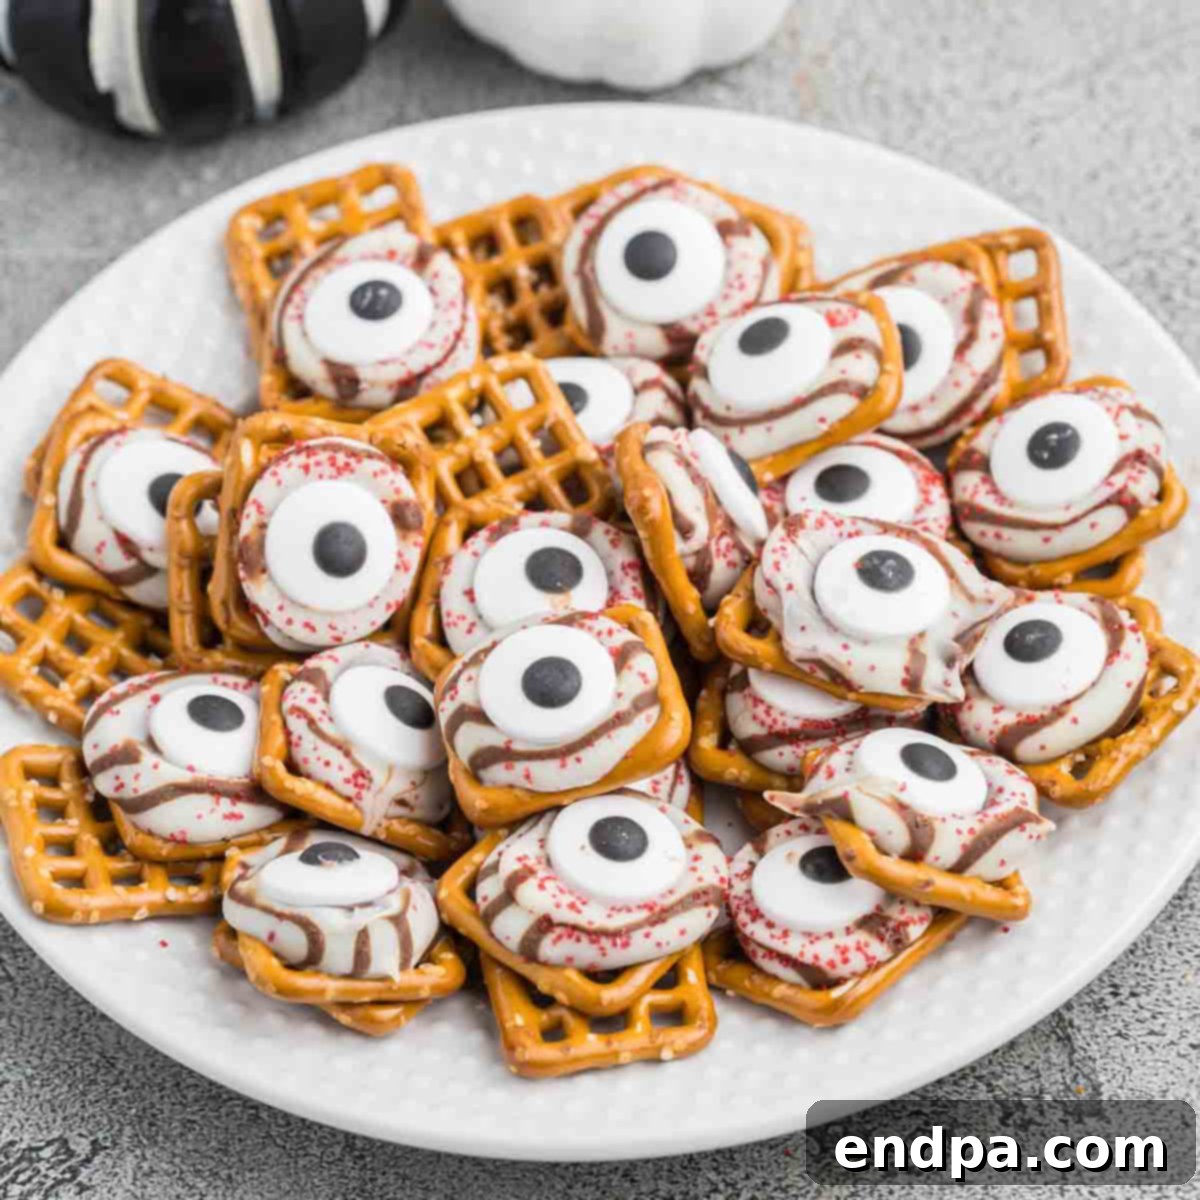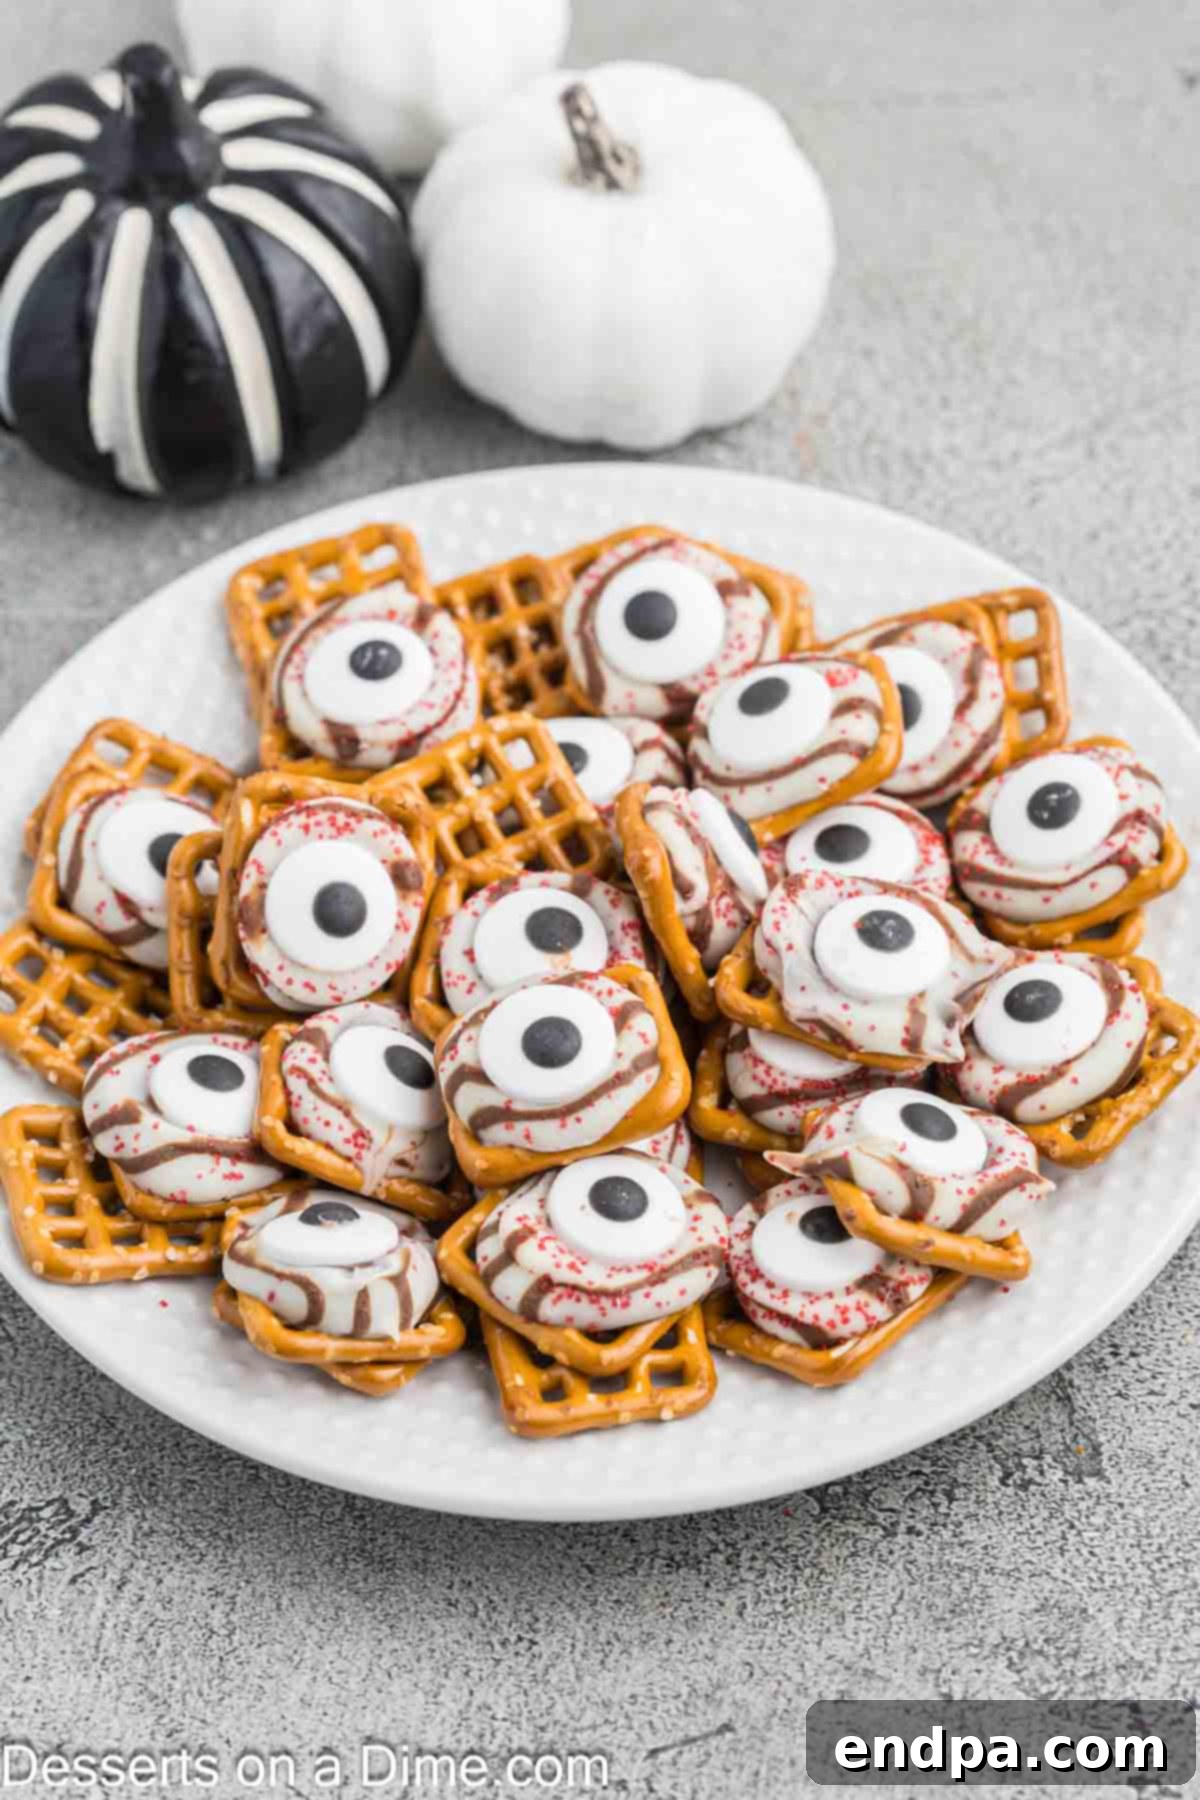
Get ready to impress with these incredibly easy and fun Halloween Monster Eyeball Pretzels! Combining the perfect blend of sweet and salty, these spooky treats require just a few simple ingredients and minimal effort, making them an ideal choice for any Halloween gathering, from school parties to family celebrations. If you’re searching for a quick, delicious, and budget-friendly recipe that kids and adults alike will adore, look no further. These monster eyeballs are truly a show-stopper without the stress.
This recipe has quickly become one of my favorite no-bake Halloween treats to whip up. Its simplicity belies its immense popularity; children absolutely go crazy for these adorable, slightly creepy creations! Our cute Halloween treats are not only kid-tested and approved but also a big hit with the grown-ups, including my husband. They deliver a satisfying sweetness balanced by the crisp saltiness of pretzels, and the best part is how incredibly budget-friendly they are to make. For more effortless holiday ideas, explore recipes like Halloween Dirt Cups, Halloween Witch Cookies, or Halloween Puppy Chow. Don’t forget to check out Monster Donuts, Candy Corn Cookies, and Halloween Cake Pops for a truly frightful feast!
What You’ll Find in This Post: Easy Halloween Monster Eyeball Pretzels
- Why We Love This Recipe: Your Go-To Spooky Snack
- Gather Your Ghastly Good Ingredients
- Unleash Your Creativity: Substitutions and Additions
- Conjuring Your Monster Eyeballs: Step-by-Step Guide
- Frightfully Fantastic Tips for Success
- Your Hauntingly Helpful FAQs
- Beyond the Eyeballs: More Spooky Halloween Treats
- Printable Recipe Card: Halloween Pretzels – Monster Eyeballs
Why We Love This Recipe: Your Go-To Spooky Snack
These Halloween pretzel monster eyeballs are much more than just a treat; they’re a delightful experience packed with sweet and salty flavor, making them irresistible. Here’s why this recipe deserves a permanent spot in your Halloween repertoire:
- Effortlessly Easy: With just a handful of ingredients and a few simple steps, these pretzels come together in minutes. They’re primarily a no-bake creation, requiring only a brief stint in the oven to melt the chocolate, making them perfect for busy schedules.
- Irresistible Flavor Combination: The classic pairing of crunchy, salty pretzels with rich, melting chocolate creates a flavor explosion that satisfies every craving. It’s a balance that appeals to almost everyone.
- Kid-Friendly & Fun: Not only do children absolutely adore the whimsical, spooky appearance of these treats, but they can also actively participate in making them! Pressing on the candy eyeballs and sprinkling sugar are perfect tasks for little hands, fostering fun memories in the kitchen.
- Versatile Customization: While the basic recipe is fantastic, it’s also incredibly adaptable. You can easily switch up the type of chocolate, add different colored sanding sugars, or even use various small candies for a truly unique monster creation. This allows for endless creativity to match any party theme or color scheme.
- Budget-Friendly Goodness: Using readily available and inexpensive ingredients like pretzels, standard chocolate candies, and sprinkles means you can make a large batch of these festive treats without breaking the bank, ideal for parties or large gatherings.
- Perfect for Any Halloween Occasion: Whether it’s a school Halloween party, a neighborhood potluck, a trunk-or-treat event, or just a cozy family movie night with a spooky theme, these monster eyeballs fit right in. They are easy to transport and make for a striking presentation.
Top these pretzel delights with various adornments like colorful M&M’s, classic candy eyes, or even a classic Hershey Kiss for a delightful twist on this already fantastic treat. The possibilities for personalization are truly endless, ensuring each batch is as unique as your Halloween spirit!
Gather Your Ghastly Good Ingredients
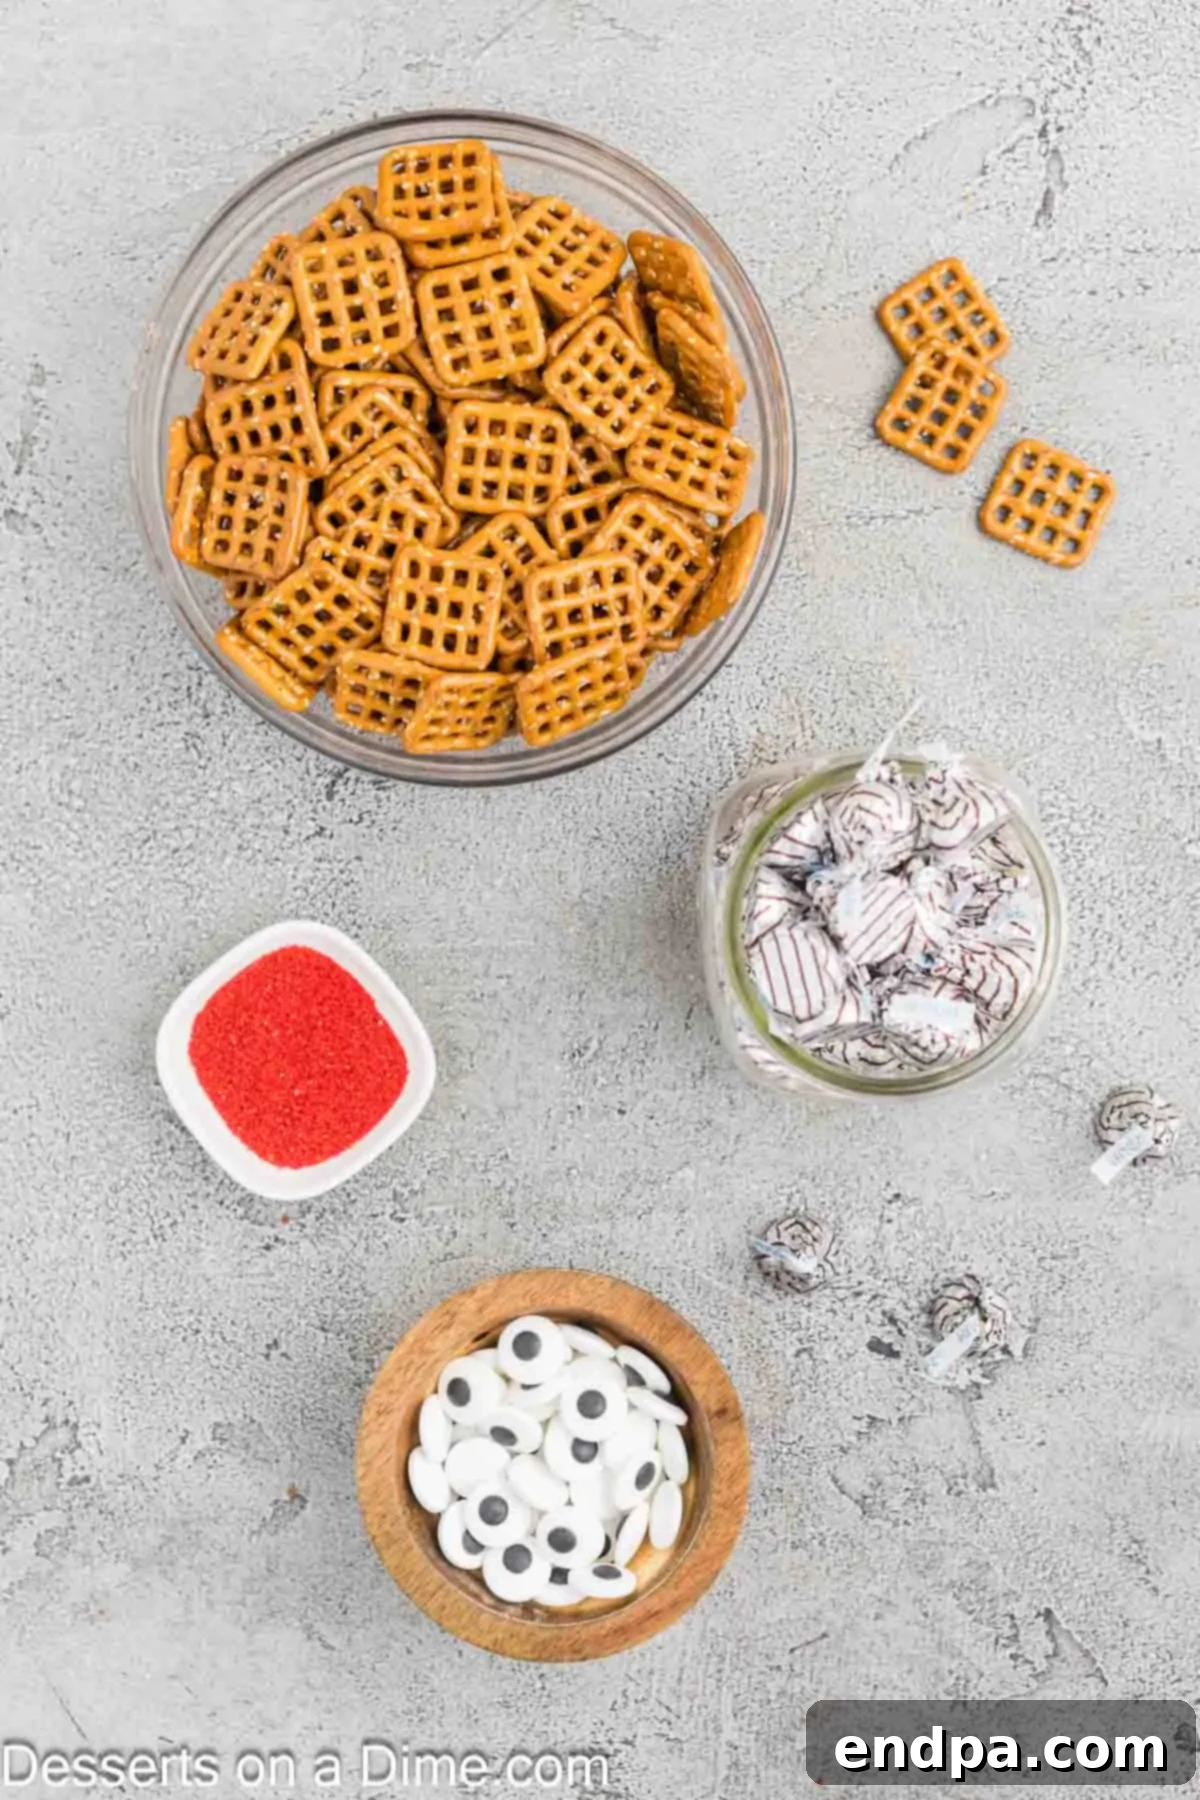
Crafting these adorable monster eyeballs requires only a handful of readily available ingredients. Simplicity is key to this crowd-pleasing Halloween snack!
- Snaps Pretzels: We highly recommend using the square-shaped snaps pretzels for this recipe. Their flat surface provides the perfect base for the chocolate and candy eyeballs, ensuring stability and an ideal canvas for your monstrous creations. While other pretzel shapes can work, square pretzels truly yield the best results for that classic “eyeball” look.
- Hershey Hugs Candy: These delightful chocolate and white swirl candies are not just delicious; they’re visually perfect for our monster eyeballs! As they gently melt, the distinct chocolate and white swirls create an organic, slightly eerie pattern that mimics the texture and appearance of an actual eyeball, adding to the spooky charm.
- Large Flat Candy Eyeballs: These are the stars of the show, bringing our monster pretzels to life! Large, flat candy eyeballs provide that unmistakable creepy-cute aesthetic. You can typically find them in the baking aisle of most grocery stores or at specialty craft and party supply stores, especially around the Halloween season.
- Red Sanding Sugar: A touch of red sanding sugar is all it takes to add that crucial “bloodshot” or “veiny” effect, elevating your monster eyeballs from cute to delightfully ghoulish. Just a tiny sprinkle provides a vibrant pop of color and an extra hint of sugary crunch, enhancing both the visual appeal and texture.
For the precise measurements and the full, detailed recipe, be sure to scroll down to the printable recipe card at the bottom of this post.
Unleash Your Creativity: Substitutions and Additions
One of the best aspects of these Halloween Monster Eyeball Pretzels is how easily they can be customized. Don’t hesitate to experiment with different ingredients to create your unique monstrous masterpieces!
- Change the Candy – While Hershey Hugs provide a fantastic swirled effect, you have many options for the chocolate base.
- Rolo Candy: For a delightful caramel surprise inside your monster eyeballs, simply substitute Hershey Hugs with Rolo candies. The caramel will melt slightly, offering a chewy, sweet contrast.
- Mini Peanut Butter Cups: If you’re a fan of the chocolate and peanut butter combination, mini peanut butter cups make an excellent choice. Their slightly larger size might require a larger pretzel, but the flavor is worth it!
- Hershey Kisses (Various Flavors): Classic milk chocolate Hershey Kisses are always a hit. You could also try dark chocolate, white chocolate, or even flavored varieties to match your preference.
- M&M’s or Reese’s Pieces: Instead of or in addition to candy eyeballs, you can use a single M&M or Reese’s Piece pressed into the melted chocolate to create a colorful “pupil” effect.
- Candy Corn: For a truly seasonal twist, consider placing a small piece of candy corn (either whole if tiny, or a trimmed tip) into the melted chocolate for a vibrant, pointy pupil.
- Pretzel Variations – The square snaps pretzels are ideal for their flat surface, but other pretzel types can also be used.
- Standard Pretzel Twists: While a bit trickier to balance the candy eyeball, standard pretzel twists can still be used. They offer a more traditional pretzel look, but the melted chocolate might spread a little differently.
- Pretzel Rods: For a longer, more dramatic monster treat, melt your chosen chocolate and dip the ends of pretzel rods, then add an eyeball and sprinkles before the chocolate sets.
- Chocolate Covered Pretzels: For an extra decadent treat, you could even start with pre-made chocolate-covered pretzels (or dip your own first), let them set, and then gently melt a small amount of additional chocolate on top before adding the candy eyeball and sanding sugar. This adds an extra layer of chocolatey goodness.
- Additional Decorations – Get creative with your spooky embellishments!
- Different Colored Sanding Sugar: Experiment with green, purple, black, or orange sanding sugar for varying monster moods.
- Chocolate Syrup “Veins”: After the chocolate has cooled, use a fine tip to draw tiny chocolate syrup “veins” around the candy eyeball for a truly gruesome effect.
- Edible Glitter: Add a touch of sparkle with edible glitter in Halloween colors.
- Sprinkles: Use Halloween-themed sprinkles (bats, ghosts, pumpkins) in addition to or instead of sanding sugar.
Conjuring Your Monster Eyeballs: Step-by-Step Guide
Making these spooky sweet and salty treats is incredibly simple! Follow these easy steps to bring your Halloween monster eyeballs to life.
- Step 1 – Prepare Your Oven: Begin by preheating your oven to a gentle 200 degrees Fahrenheit (approximately 93 degrees Celsius). A low temperature is crucial here; we want to soften the chocolate just enough to melt, not burn it, ensuring a smooth, glossy finish.
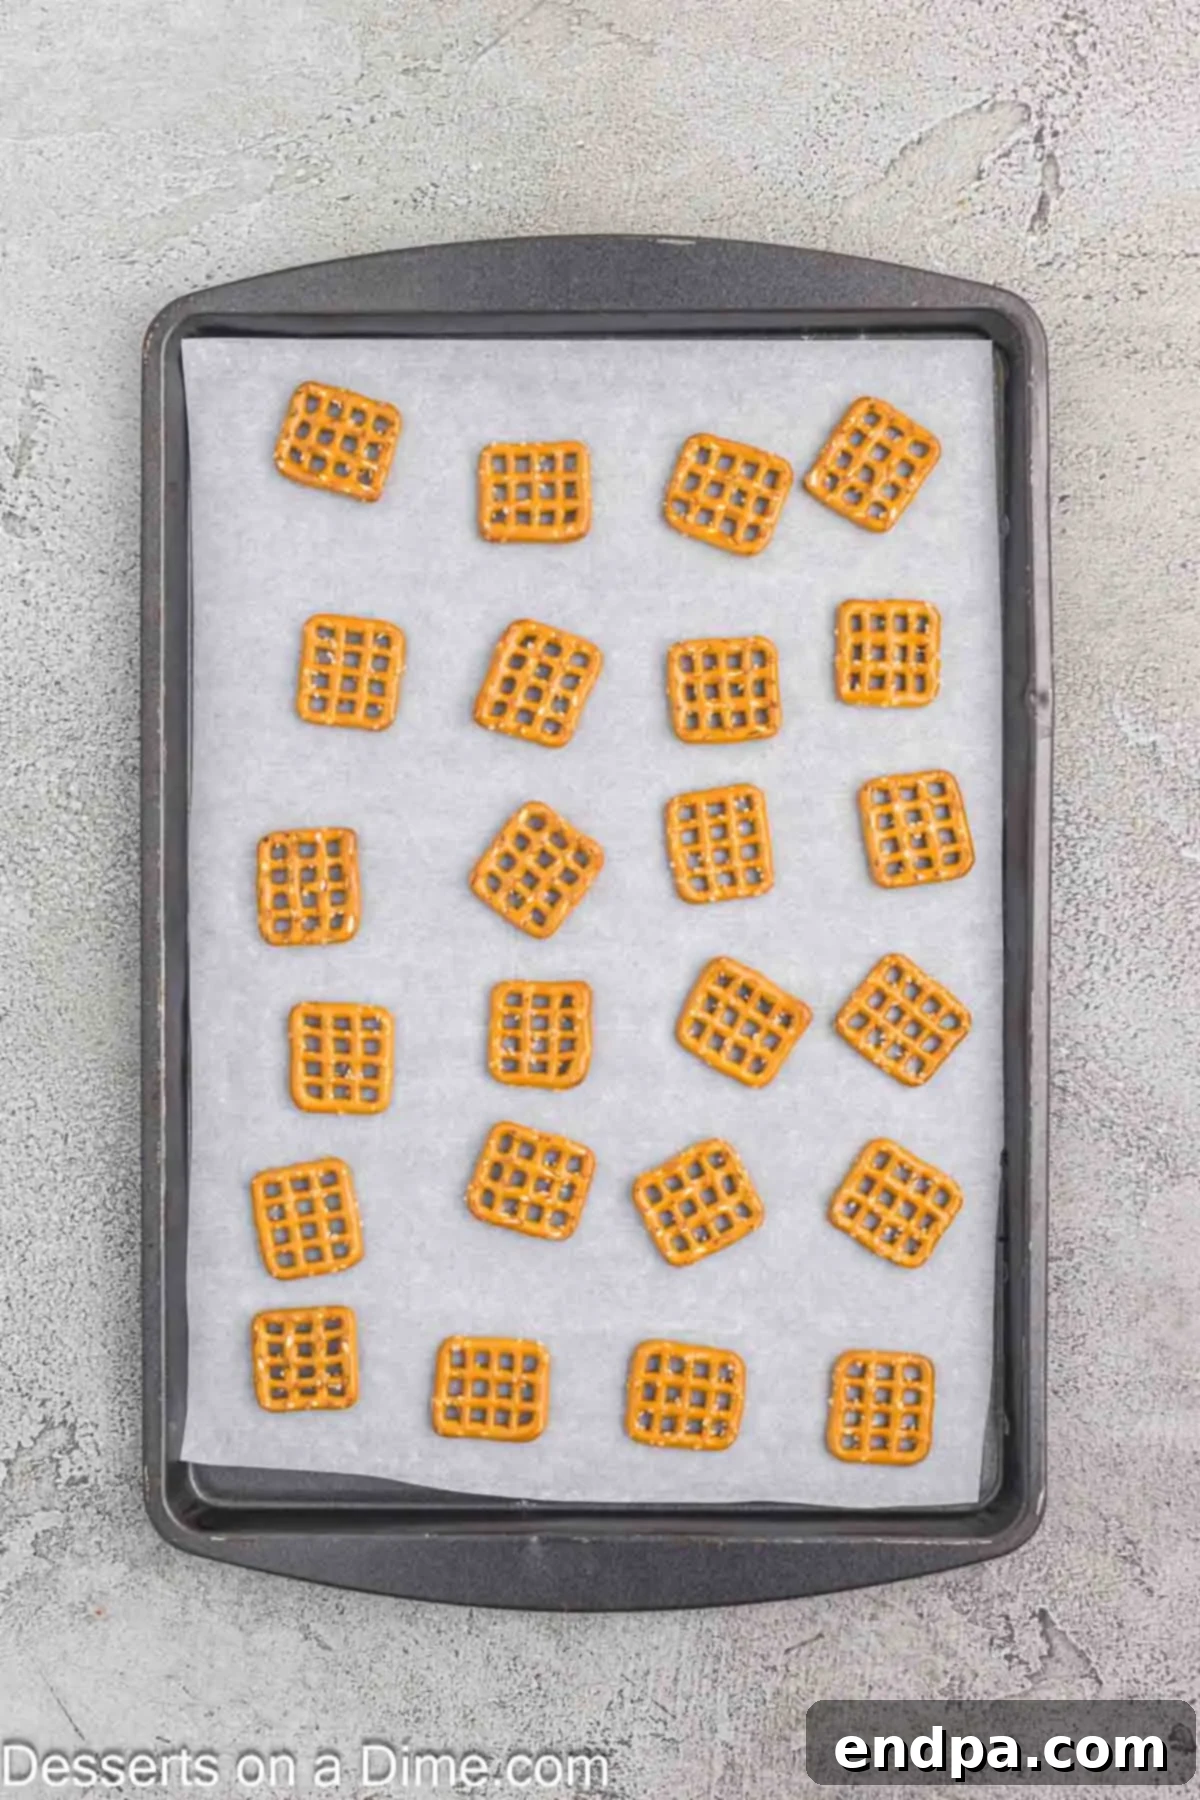
Step 2 – Arrange the Pretzels: Line a large baking sheet with parchment paper. This vital step prevents your pretzels from sticking and makes cleanup a breeze. Carefully spread the snaps pretzels out onto the prepared baking sheet in a single layer, ensuring they are not overlapping. Give them a little space for the chocolate to melt without merging.
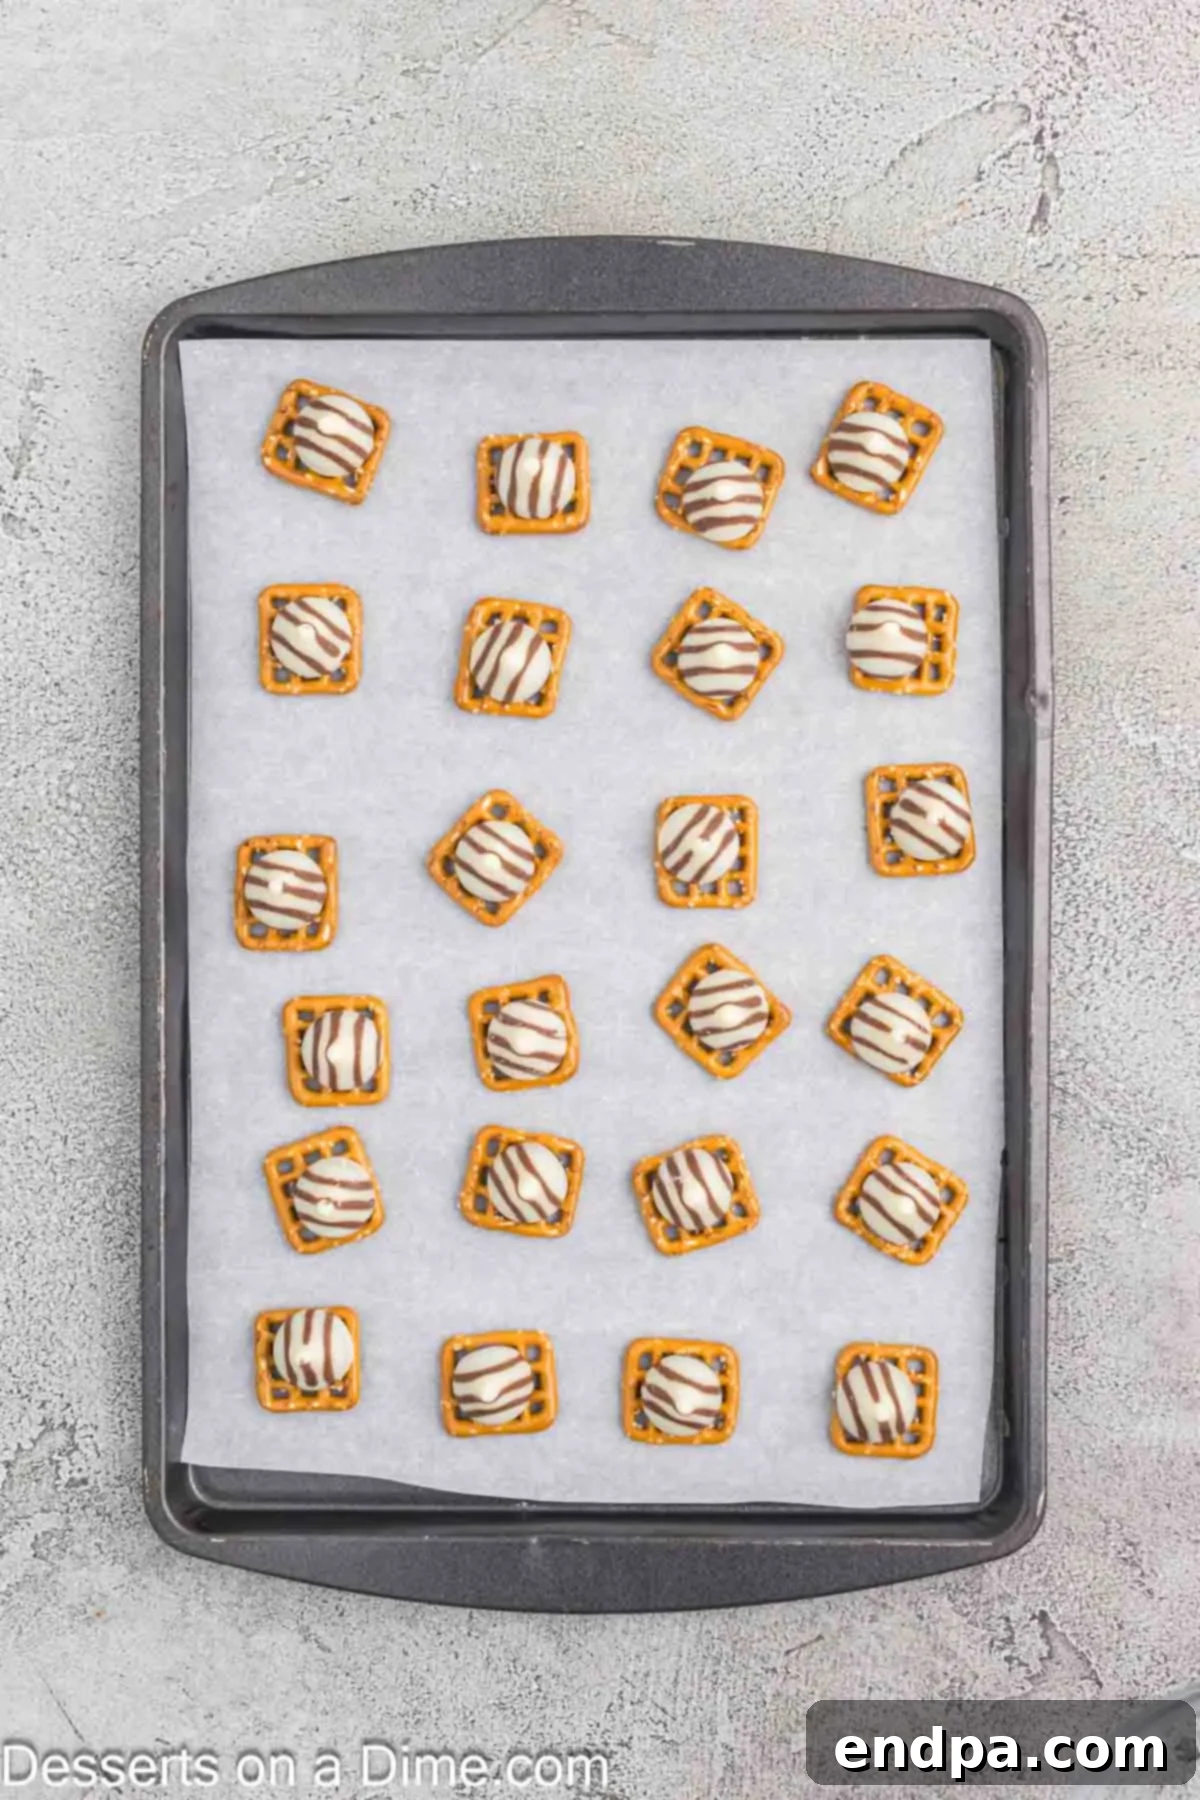
Step 3 – Add the Hugs: While the oven preheats, unwrap all your Hershey Hugs candies. This will save you time once the pretzels are hot. Once unwrapped, place one Hershey Hug directly on top of each pretzel square. The goal is to center the Hugs as much as possible for the best eyeball shape.
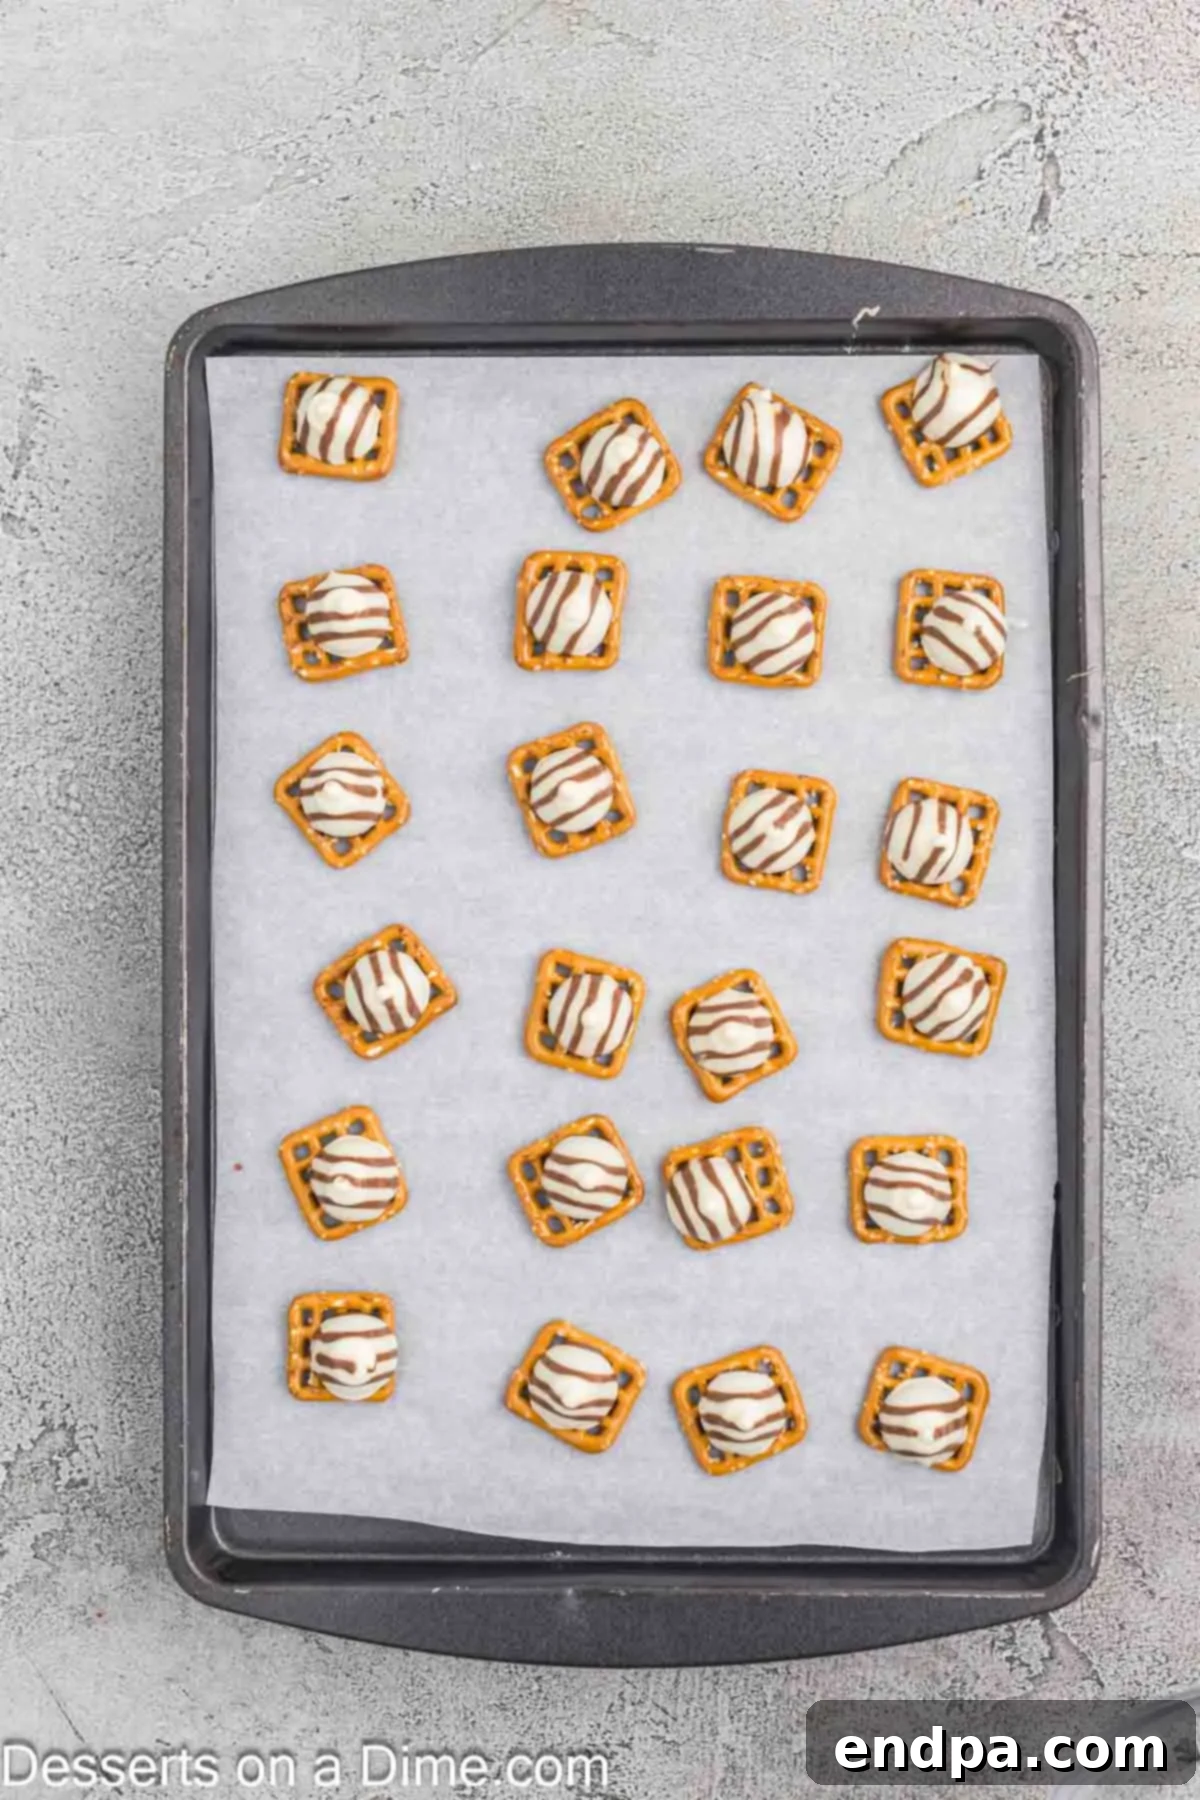
Step 4 – Bake to Melt: Carefully transfer the baking sheet to your preheated oven. Bake for a very short duration, typically 3 to 5 minutes. Keep a close eye on them! The Hugs should appear glossy and slightly softened, but they should still largely retain their shape. You don’t want them completely melted into a puddle.
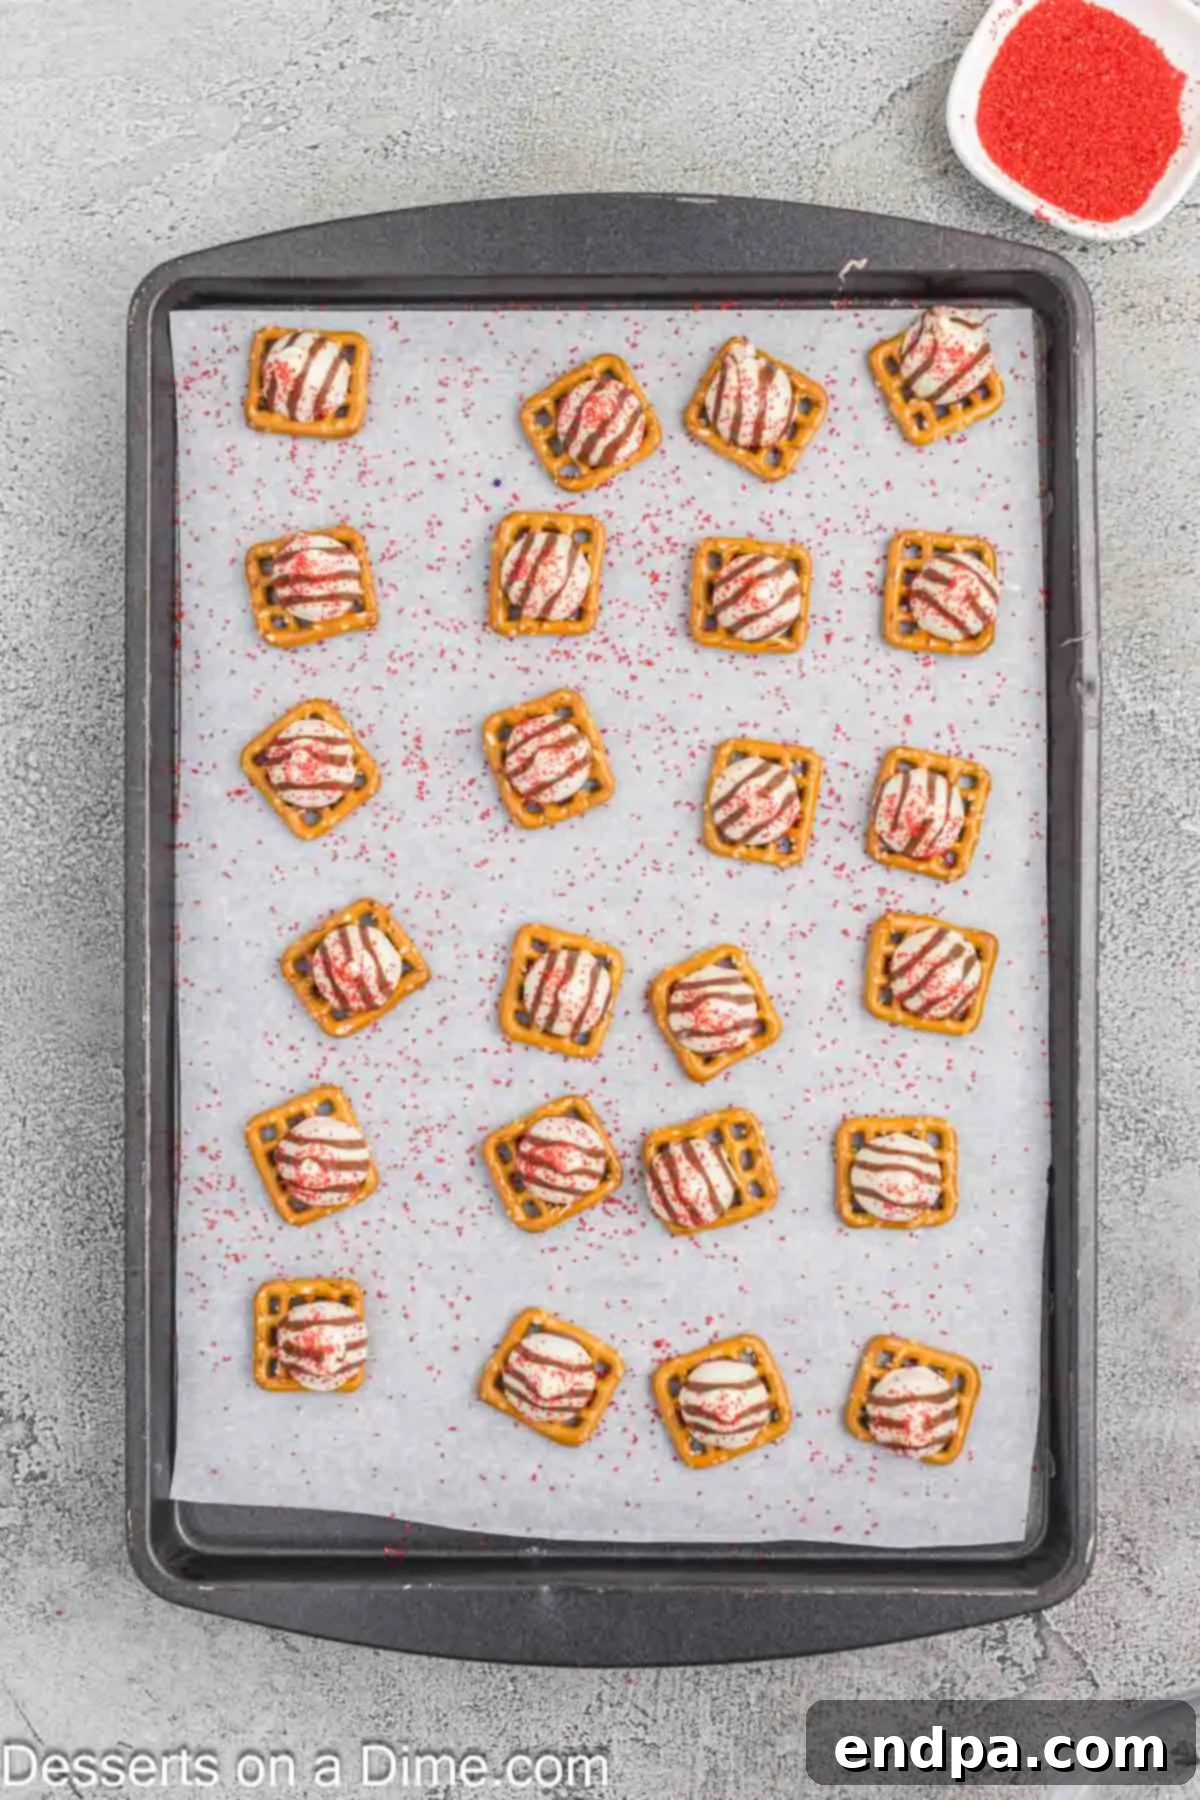
Step 5 – Sprinkle the Spooky Sugar: As soon as you remove the baking sheet from the oven, immediately begin sprinkling the red sanding sugar over each melted Hershey Hug. The warmth of the chocolate will help the sugar adhere perfectly, creating that essential “bloodshot” effect for your monster eyeballs. Work quickly before the chocolate starts to set!
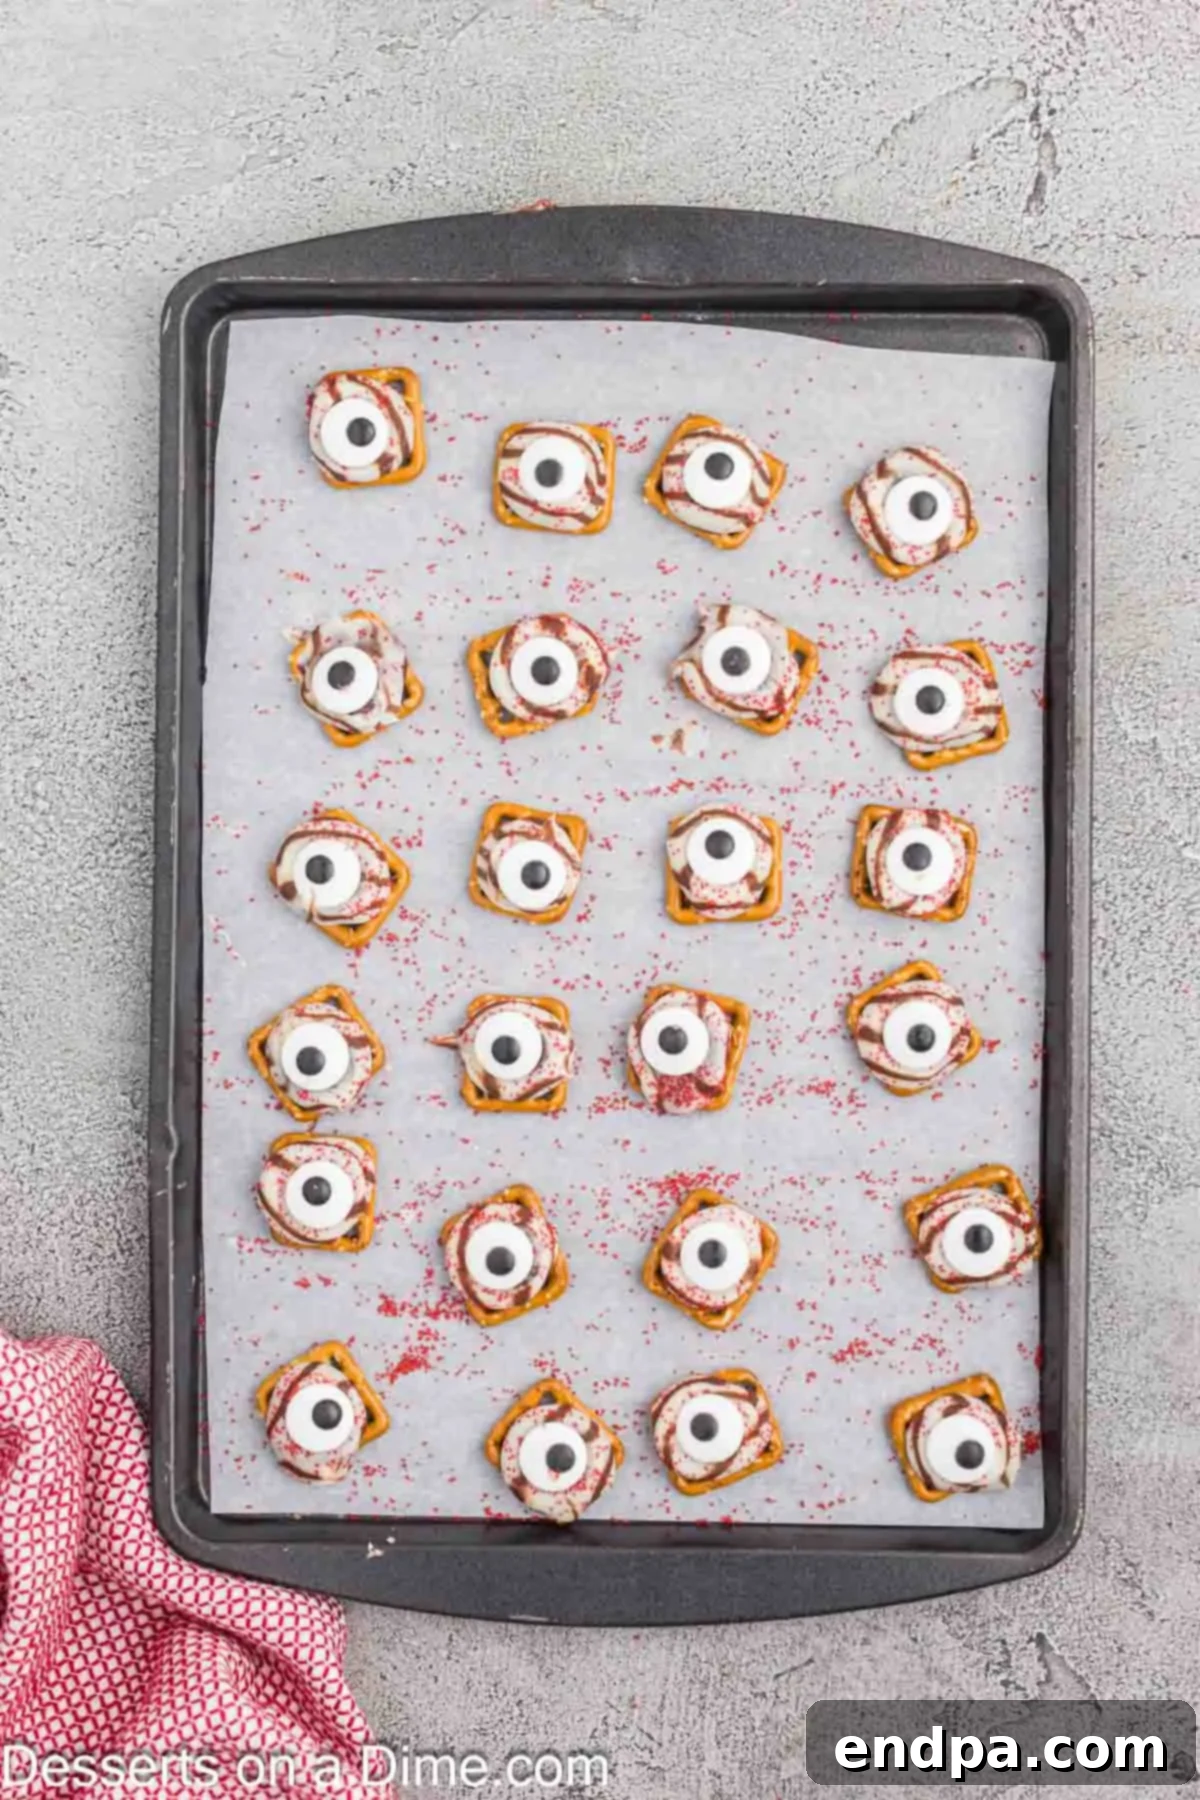
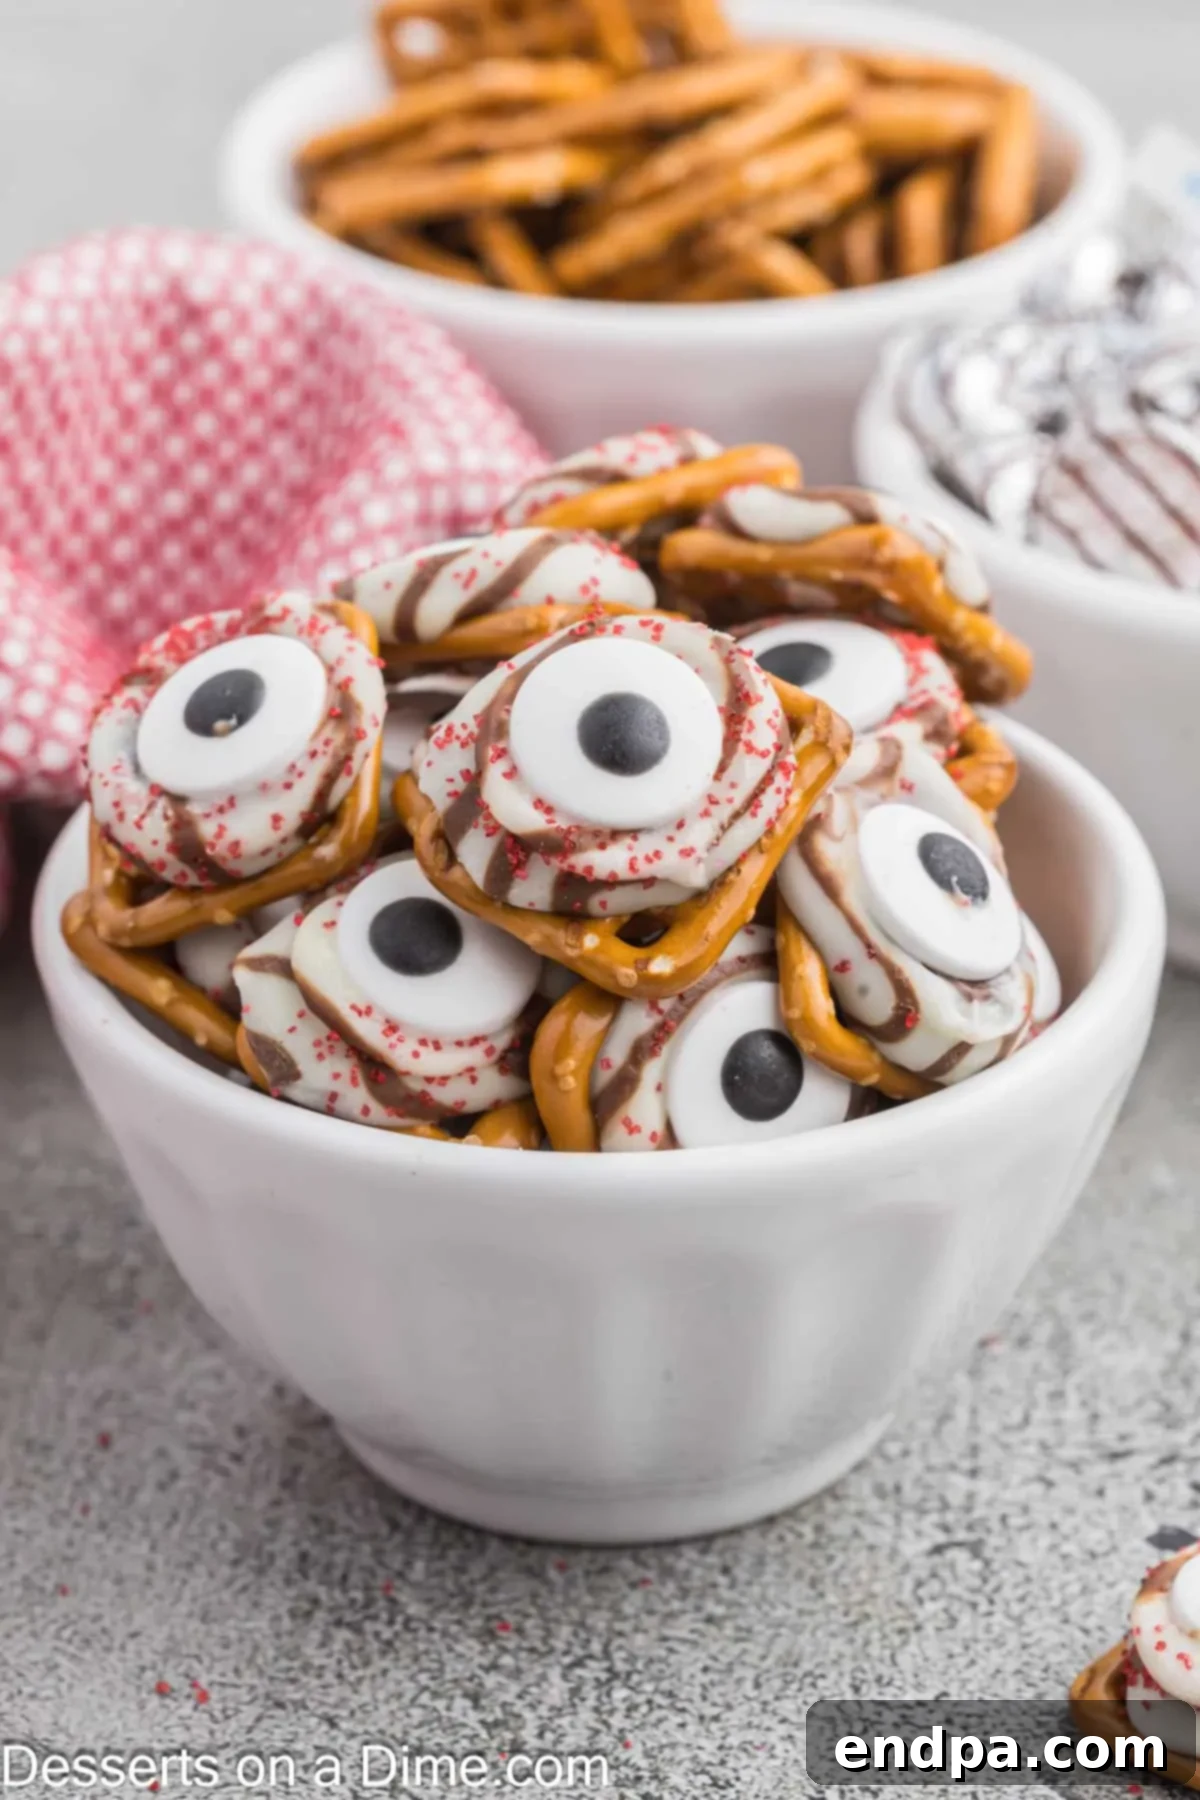
Step 6 – Add the Monster Eyeballs: While the chocolate is still warm and pliable, gently but firmly press one large flat candy eyeball into the center of each melted Hershey Hug. The soft chocolate will conform around the back of the candy eye, securing it in place as it cools. Take care not to press too hard, or you might push the chocolate off the pretzel!
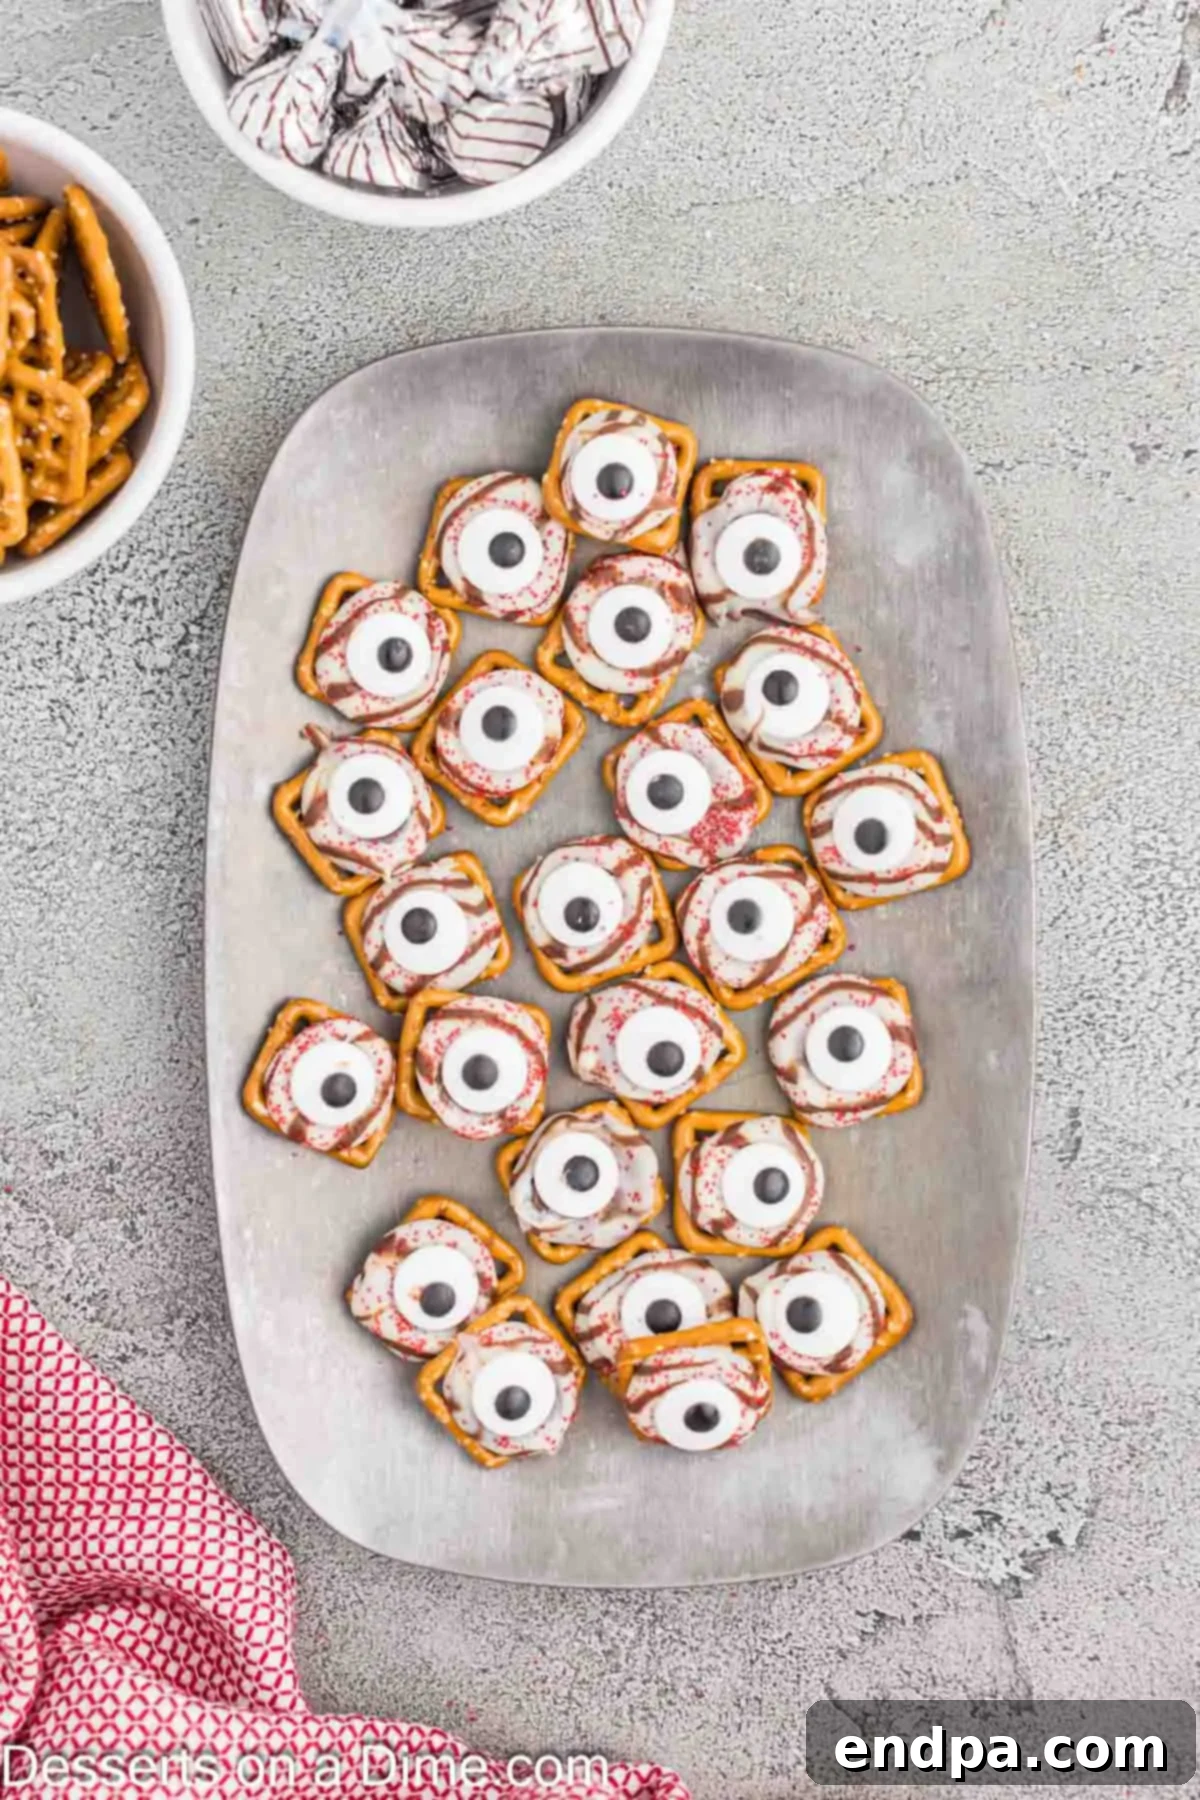
Step 7 – Cool and Harden: The final crucial step is allowing your monster eyeballs to cool completely. This hardens the chocolate and ensures the candy eyes and sanding sugar are firmly set. You can let them cool at room temperature for about an hour, or for a faster set, place the entire baking sheet in the refrigerator for at least 30-60 minutes. Once firm, they are ready to serve and enjoy!
Frightfully Fantastic Tips for Success
Making these monster eyeball pretzels is simple, but a few expert tips can ensure your treats turn out perfectly spooky and delicious every time!
- Watch Your Bake Time Closely: This is perhaps the most critical tip. The goal is to soften the Hershey Hugs just enough so they are malleable, not to fully melt them into a liquid pool. Overbaking can cause the chocolate to seize or burn, and the beautiful swirl effect will be lost. Keep a vigilant eye on the oven; 3-5 minutes is usually sufficient, but ovens vary. They should appear glossy and slightly spread, but still hold most of their dome shape.
- Parchment Paper is Your Best Friend: Always line your baking sheet with parchment paper. This simple step is a game-changer for easy cleanup and ensures that your precious pretzel treats won’t stick to the pan, making them easy to remove once cooled. Wax paper is not recommended as it may melt in the oven.
- Act Immediately After Baking: The window for decorating is short! As soon as the pretzels come out of the oven, the chocolate will begin to cool and set. You must immediately sprinkle the sanding sugar and press the candy eyeballs onto the warm chocolate. If you wait too long, the decorations won’t adhere properly.
- Consider Chocolate Chips for Pupils: If you can’t find large candy eyeballs or prefer a different look, a small chocolate chip (mini or regular, depending on desired pupil size) can be pressed into the center of the melted Hershey Hug. This creates a simpler, yet still effective, “pupil” for your monster.
- Even Spacing for Even Melting: When arranging your pretzels on the baking sheet, ensure they are in a single layer with a little space between each. This allows for even heat distribution and consistent melting of the chocolate.
- Cooling Patience is a Virtue: Resist the urge to handle the pretzels before they are completely cool and the chocolate has fully hardened. Trying to move them too soon can result in smudged chocolate or dislodged candy eyeballs. For the quickest set, a short stint in the refrigerator is ideal.
- Involve the Kids Safely: This recipe is fantastic for getting children involved in the kitchen. They can help unwrap the Hershey Hugs, arrange the pretzels on the baking sheet, and, most excitingly, sprinkle the sanding sugar and press on the candy eyeballs! Just make sure an adult handles the hot baking sheet from the oven.
- Batch Making for Parties: If you’re preparing these for a large party, consider making them in batches. While the oven is only needed for a few minutes per tray, decorating each pretzel quickly is key. Having multiple hands or staging your ingredients can speed up the process.
Your Hauntingly Helpful FAQs
Store your leftover Halloween Monster Eyeball Pretzels in an airtight container at room temperature. For an extra refreshing and unique treat, we’ve even found they taste delicious when placed in the freezer for a frozen surprise! Just ensure they are kept away from direct sunlight or heat to prevent melting.
When stored correctly in an airtight container at room temperature, these delightful pretzel treats will maintain their freshness and delicious taste for up to 7 days. This makes them an excellent make-ahead option for any Halloween celebration.
Absolutely! These monster eyeball pretzels are perfect for preparing in advance, allowing you to focus on other party preparations. You can make them up to 2 days ahead of your event. To prevent them from sticking together, separate layers within your airtight container with sheets of parchment paper. Store at room temperature.
While square snaps pretzels are recommended for their flat surface and stability, you can certainly experiment! Standard pretzel twists or even mini pretzel rods can be used. Just be aware that the chocolate and candy eyeball might not sit as perfectly flat or be as stable. For pretzel rods, you might dip the end in melted chocolate and then place the eyeball.
This usually happens if the oven temperature is too high or the chocolate is baked for too long. Hershey Hugs are designed to melt smoothly at a low temperature. Ensure your oven is accurately preheated to 200°F (93°C) and watch the chocolate very carefully, removing the tray as soon as the Hugs appear glossy and slightly softened, typically 3-5 minutes.
Yes, absolutely! Many brands now offer delicious gluten-free pretzel twists or snaps. Simply substitute the regular snaps pretzels with your favorite gluten-free variety, and the rest of the recipe remains the same. Always check the labels of your chocolate and candy eyeballs to ensure they are also gluten-free if this is a strict dietary requirement.
Beyond the Eyeballs: More Spooky Halloween Treats
If you’re still in the mood for more ghostly goodies and creepy confections, check out these other fantastic Halloween treat ideas that are sure to complete your festive spread!
- Halloween Puppy Chow Recipe
- Monster Cupcakes
- Fast and Easy Halloween Treats
- Halloween Spider Cookies Recipe
- Halloween Chocolate Covered Strawberries
- Halloween Dirt Cake Recipe
We absolutely love hearing from you! After you’ve whipped up these enchanting monster eyeball pretzels, please make sure to leave us a comment and let us know how they turned out. Happy Halloween baking!
Pin
Halloween Pretzels – Monster Eyeballs
Ingredients
- 24 Snaps Pretzels (square-shaped pretzels work best)
- 24 Hershey Hugs Candy
- 24 Large Flat Candy Eyeballs
- Red Sanding Sugar
Instructions
- Preheat your oven to 200 degrees F (93°C). Prepare a baking sheet by lining it with parchment paper for easy release.
- Arrange the snaps pretzels in a single layer on the prepared baking sheet, ensuring they are not touching. Unwrap all Hershey Hugs candies and place one Hug on top of each pretzel.
- Bake in the preheated oven for 3-5 minutes, or until the Hershey Hugs are slightly melted and glossy but still largely maintain their dome shape. Be careful not to overbake.
- Immediately remove the baking sheet from the oven. While the chocolate is still warm and soft, liberally sprinkle red sanding sugar over the top of each melted Hug. Then, gently press one candy eyeball into the center of each Hug-covered pretzel.
- Allow the pretzels to cool completely so the chocolate can solidify. This can be done at room temperature (about 1 hour) or by placing them in the refrigerator for 30-60 minutes to speed up the hardening process.
- Once fully set, your Halloween Monster Eyeball Pretzels are ready to serve and enjoy!
Recipe Notes
Nutrition Facts
Pin This Now to Remember It Later
Pin Recipe
