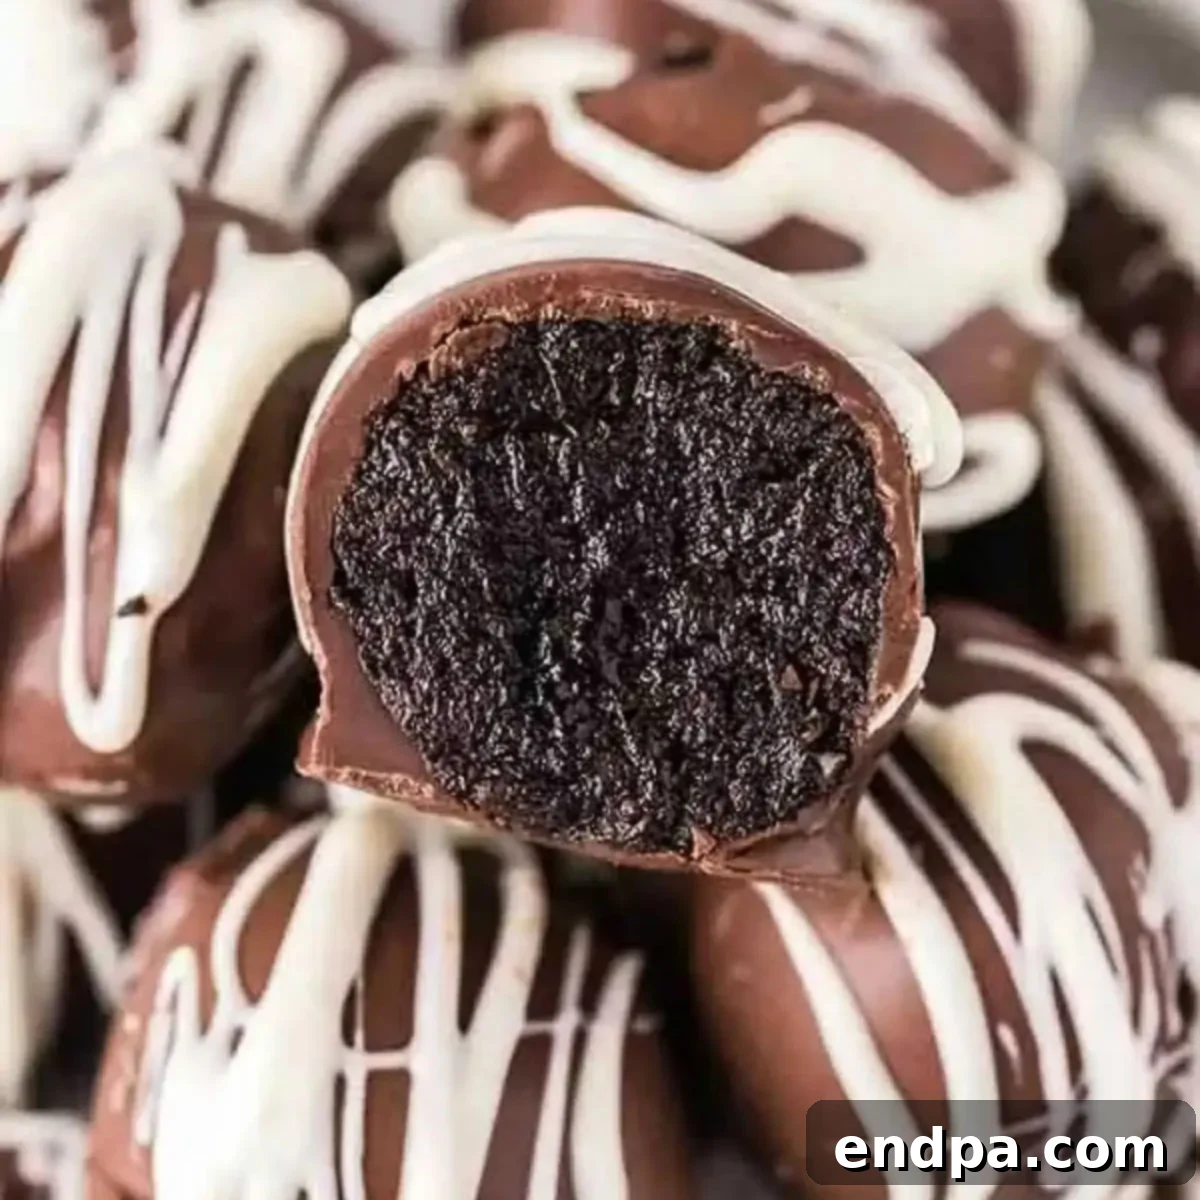
Delight in the ultimate no-bake indulgence with our irresistible Oreo Balls recipe. Also known as homemade Oreo truffles, these treats boast a sophisticated appearance yet are incredibly simple to prepare, requiring just a handful of ingredients. Perfect for any occasion, from elegant holiday gatherings to casual weeknight cravings, these chocolate-covered cream cheese delights promise a decadent experience with every bite.
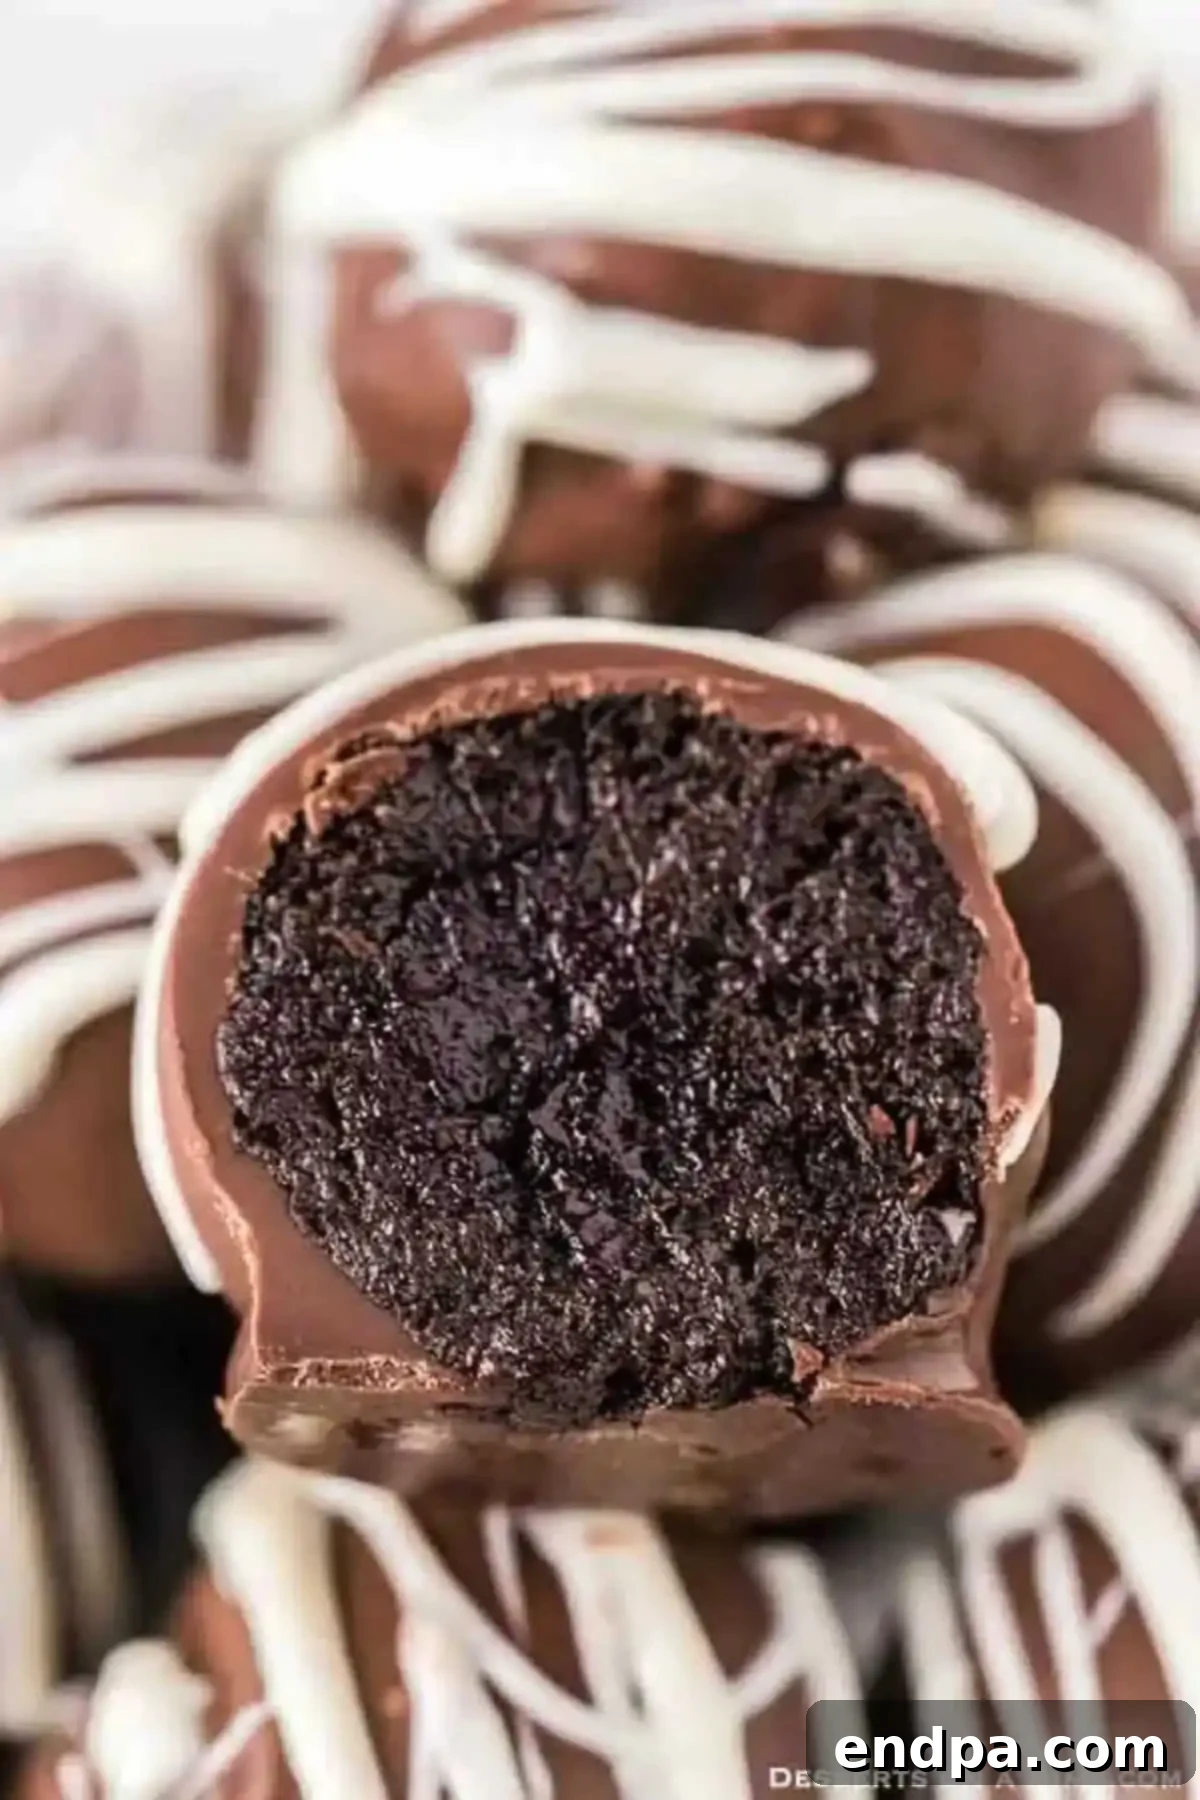
Our journey with Oreo Balls began a few years ago as a Christmas tradition. Since then, they’ve become a staple for countless celebrations, captivating everyone with their rich, creamy texture and delightful flavor. Their versatility is unmatched; whether you’re crafting Patriotic Oreo Balls for summer festivities or whimsical Snowman Oreo Balls for winter, this recipe adapts effortlessly to suit any theme.
The magic of these easy Oreo truffles lies in their simplicity. With only three core ingredients, they are a fuss-free dessert that can be whipped up any time of year. They stand out as one of the best No Bake Oreo Desserts you can make. If you’re a fan of no-bake treats, you might also enjoy our Rolo Pretzel Sandwiches, and for those who adore classic truffles, our Lemon Truffles are a must-try.
Table of Contents
- Why You’ll Love This Oreo Ball Recipe
- The Delightful History of Oreo Truffles
- Choosing the Best Chocolate for Dipping
- Essential Ingredients for Oreo Balls
- Creative Variations to Elevate Your Oreo Truffles
- Step-by-Step: How to Make Oreo Balls
- Expert Tips for Perfect Oreo Truffles
- Achieving a Flawless Smooth Chocolate Finish
- Ideas for Decorating Your Oreo Balls
- Proper Storage for Freshness
- Can You Freeze Oreo Balls?
- Explore More Oreo Dessert Creations
- Discover More Delicious Dessert Ideas
Why You’ll Love This Oreo Ball Recipe
These delightful Oreo Balls are a true crowd-pleaser, making them ideal for any social gathering – from festive holiday parties and thrilling Game Day events to elegant baby showers or simply as a special “just because” treat. They consistently emerge from your kitchen looking incredibly professional and chic, as if they were purchased from a high-end bakery. Yet, the reality is they are remarkably quick and effortlessly easy to assemble.
Each bite delivers a luxurious, creamy, and intensely decadent experience. Their richness means you don’t need many to feel utterly satisfied, making them a perfect portion-controlled indulgence. While we’ve opted for classic milk chocolate for dipping, these truffles are equally delicious when coated in white chocolate. Both options create a stunning contrast and offer a delightful flavor profile.
The Delightful History of Oreo Truffles
The concept of truffles, traditionally a rich chocolate ganache coated in cocoa powder, dates back to 19th-century France. However, the “Oreo truffle” as we know it today is a much more modern, American invention, born from the simple brilliance of combining two beloved ingredients: America’s favorite cookie, the Oreo, and creamy, tangy cream cheese. This ingenious pairing creates a dense, fudgy interior that is then typically enrobed in melted chocolate.
The rise of Oreo truffles, or Oreo balls, can be attributed to their incredible ease of preparation, requiring no baking, and their universal appeal. They quickly became a viral sensation across home kitchens and social media, establishing themselves as a go-to recipe for potlucks, bake sales, and holiday platters. Their customizable nature, allowing for various Oreo flavors and chocolate coatings, further cemented their status as a versatile and beloved dessert.
Choosing the Best Chocolate for Dipping
The secret to a perfectly smooth and beautiful finish on your Oreo Balls often lies in the quality and type of chocolate you choose for dipping. For optimal results, we highly recommend using chocolate melting wafers or high-quality candy melts. These products are specifically formulated to melt smoothly and evenly, creating a thin, crisp shell that hardens quickly without streaking or seizing.
When working with these specialized chocolates, ensure they are thoroughly melted according to package directions, typically in a microwave at short intervals or over a double boiler. Stir frequently to achieve a uniform consistency. If you prefer using standard milk chocolate chips or almond bark, these can also yield excellent results. For chocolate chips, consider adding a tablespoon of coconut oil or shortening to aid in a smoother melt and more fluid dipping consistency. Almond bark is another fantastic, easy-to-use option that melts well and sets quickly, providing a durable coating for your delicious Oreo truffles.
Essential Ingredients for Oreo Balls
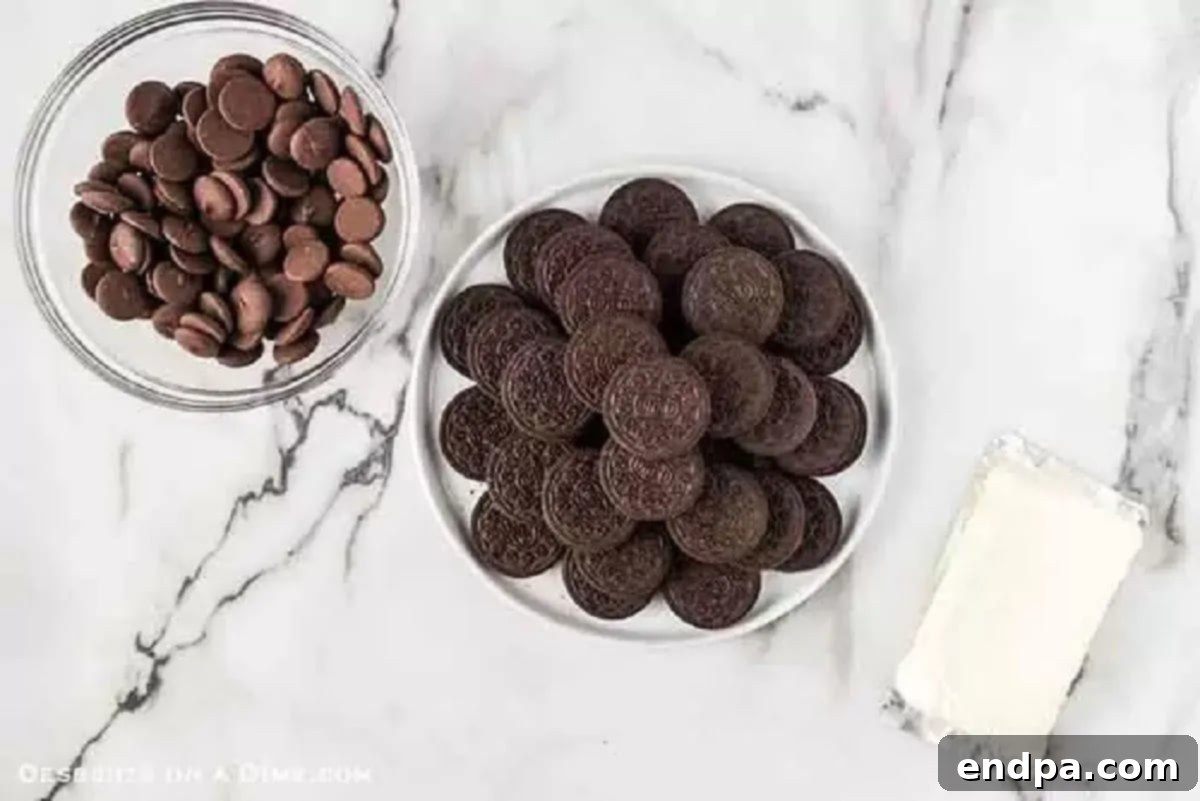
The beauty of this recipe truly lies in its minimal ingredient list, proving that often, less is more when it comes to creating something spectacular.
- Cream Cheese: For the best texture and easiest blending, ensure your cream cheese is softened to room temperature. This allows it to mix seamlessly with the crushed Oreos, creating a smooth and pliable truffle base. Always opt for full-fat cream cheese for that rich, creamy consistency that makes these truffles so irresistible.
- Regular Oreo Cookies: Stick to the classic, regular-stuffed Oreo cookies. Double-stuffed, mega-stuffed, or other varieties with excessive filling can throw off the balance of the truffle mixture, making them too soft or difficult to form. The regular ratio of cookie to cream is perfect for structural integrity and flavor.
- Chocolate Dipping Chips: As discussed, melting wafers, candy melts, or high-quality chocolate chips are ideal for the coating. Choose your favorite, whether it’s milk chocolate, dark chocolate, or white chocolate, to complement the Oreo flavor.
You’ll find the complete list of exact measurements for these simple ingredients at the bottom of this page in the recipe card.
Creative Variations to Elevate Your Oreo Truffles
One of the most exciting aspects of making Oreo Balls is how easily they can be customized to suit different tastes and occasions. Don’t be afraid to experiment with these simple yet impactful variations:
- Experiment with Chocolate Types:
- White Chocolate: A fantastic alternative to milk chocolate, white chocolate provides a beautiful color contrast and a sweeter, creamier coating. Many enjoy a combination, dipping some truffles in milk chocolate and others in white chocolate for a varied platter.
- Dark or Semi-Sweet Chocolate: For those who prefer a less sweet and more intense chocolate experience, dark chocolate chips or melting wafers are an excellent choice.
- Flavored Candy Melts: Expand your palette with flavored candy melts, such as mint, strawberry, or peanut butter, for unique and festive Oreo truffles.
- Dive into Different Oreo Flavors: The world of Oreo cookies offers endless possibilities!
- Mint Oreos: Crushing mint-flavored Oreos creates a refreshing and delightful truffle, especially popular during the holidays.
- Golden Oreos: For a vanilla-forward treat, use Golden Oreos and coat them in white chocolate.
- Red Velvet Oreos: These would yield a stunningly colorful and richly flavored truffle, perfect for Valentine’s Day or other romantic occasions.
- Peanut Butter Oreos: Combine these with a milk chocolate coating for a delightful peanut butter cup-like experience.
- Add Extracts: A few drops of peppermint extract, almond extract, or even a touch of orange zest can infuse new flavors into your cream cheese-Oreo mixture before rolling.
- Spice it Up: For a fall-themed treat, add a pinch of cinnamon or pumpkin pie spice to the crushed Oreos before mixing with cream cheese.
Step-by-Step: How to Make Oreo Balls
Making these decadent Oreo Balls is a straightforward process, broken down into a few simple steps. Follow along to create perfect truffles every time:
- Step 1. Prepare Your Workspace: Begin by lining a large cutting board or a baking sheet with parchment paper. This non-stick surface will prevent your truffles from sticking and make them easy to transfer once dipped.
- Step 2. Crush the Oreo Cookies: The key to a smooth truffle interior is finely crushed Oreos. Place your regular Oreo cookies into a food processor and pulse until they form very fine crumbs, almost like sand. If you don’t have a food processor, you can place the cookies in a large Ziploc bag and crush them with a rolling pin until uniformly fine.
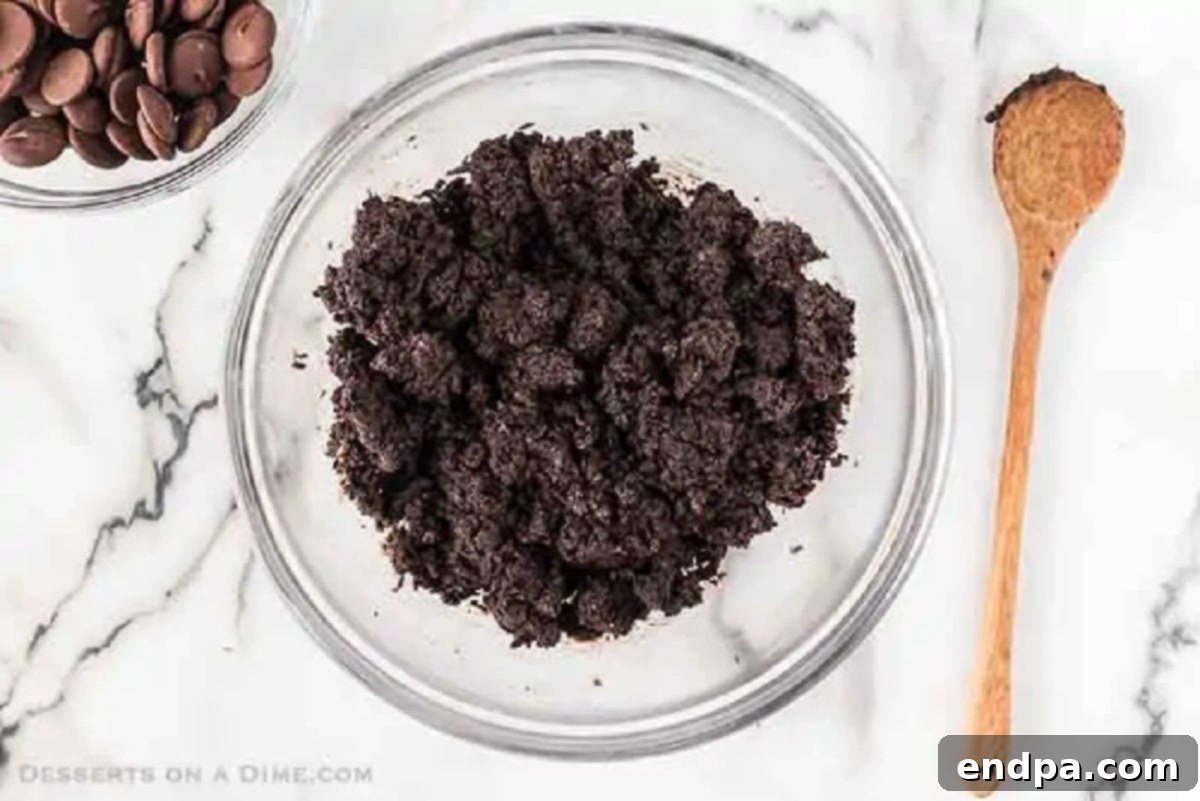
Step 3. Combine Ingredients: In a large mixing bowl, combine the room-temperature softened cream cheese with the finely crushed Oreo crumbs. Use a stand mixer with a paddle attachment, a hand mixer, or even a sturdy spatula to blend these two ingredients together until they are thoroughly mixed and form a cohesive “dough.” Scrape down the sides of the bowl to ensure everything is incorporated.
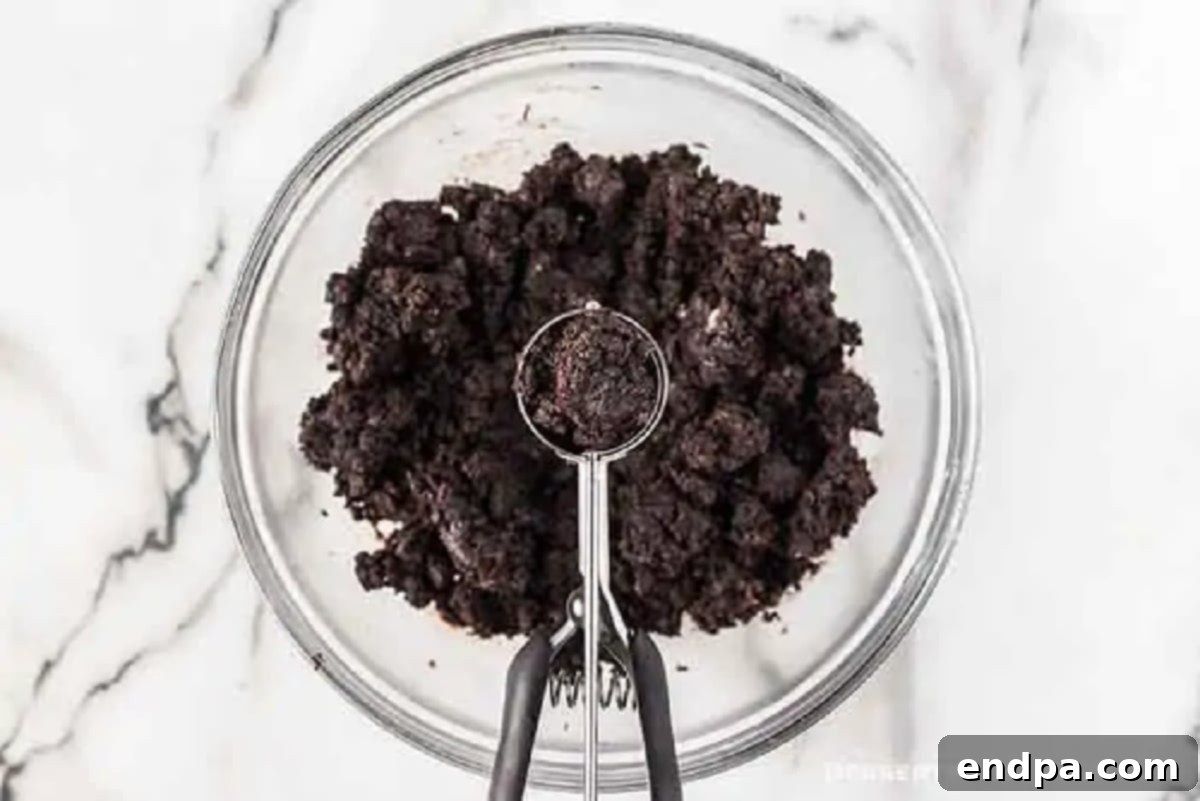
Step 4. Form the Truffle Balls: Once your mixture is ready, it’s time to shape it into balls. For perfectly uniform portions, we highly recommend using a small cookie scoop (about 1-inch in diameter) or a standard teaspoon. Roll the scooped mixture between your palms to create smooth, round balls. Place each formed ball onto your prepared parchment-lined baking sheet.
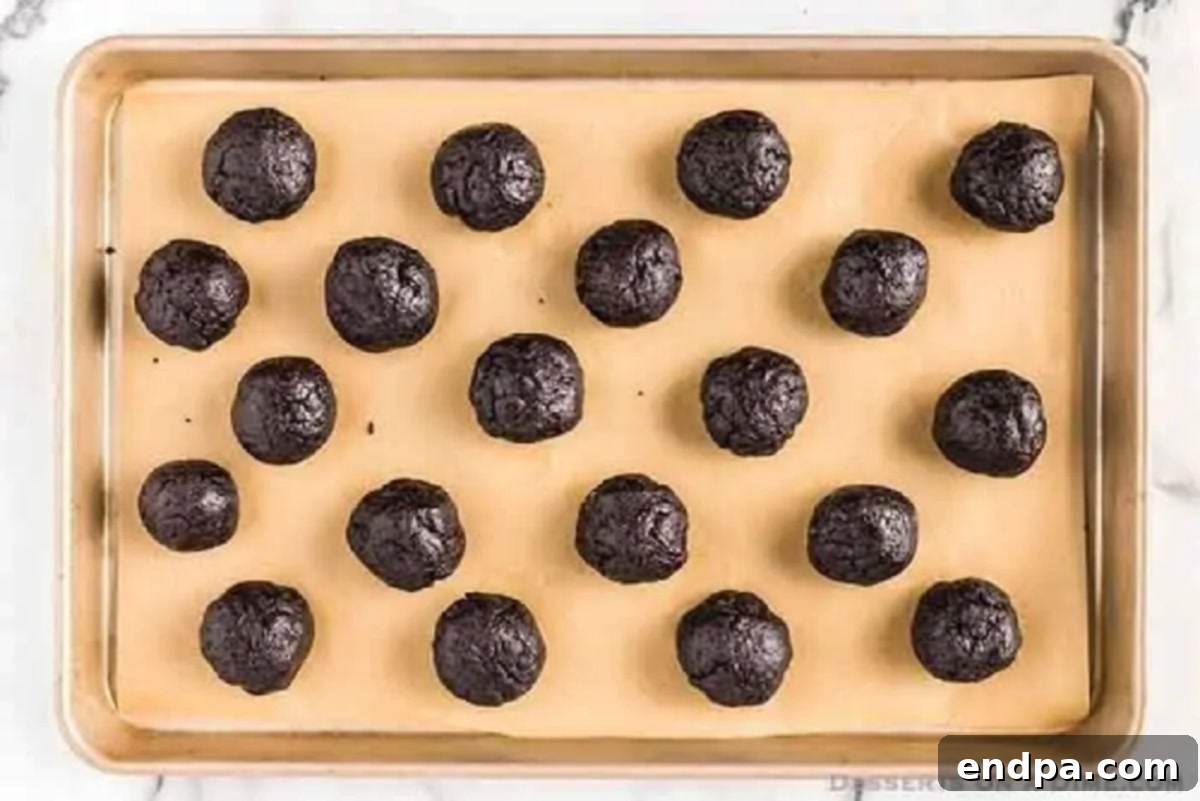
Step 5. Chill for Firmness: Transfer the baking sheet with the formed Oreo balls to the freezer. Allow them to chill for approximately 15 to 20 minutes. This crucial step helps the balls firm up, making them much easier to dip in chocolate without falling apart.
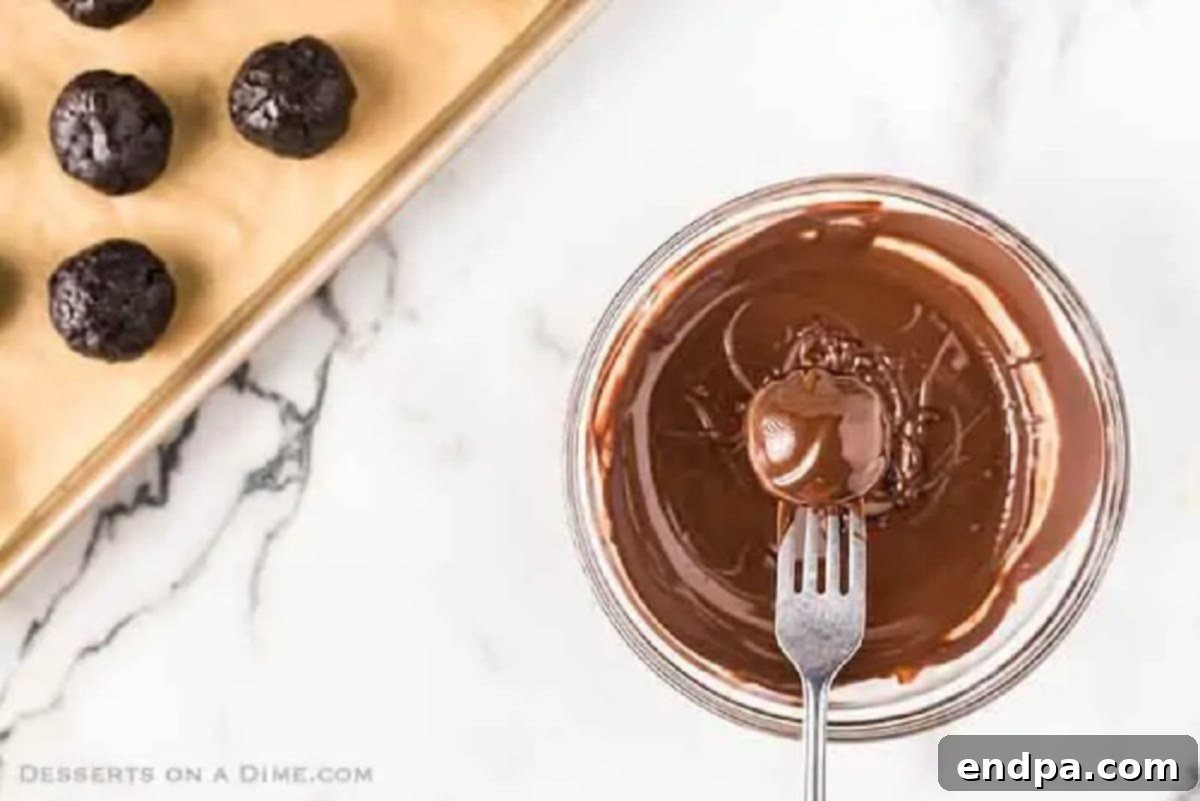
Step 6. Melt the Chocolate: While your Oreo balls are chilling, melt your chosen chocolate. Place the chocolate dipping chips (or other chosen chocolate) into a microwave-safe bowl. Microwave in 30-second intervals, stirring thoroughly after each interval, until the chocolate is completely smooth and melted. Be careful not to overheat the chocolate, as it can seize.
- Step 7. Dip and Coat: Using a fork, carefully submerge each frozen Oreo ball into the melted chocolate, ensuring it’s completely coated. Gently tap the fork against the side of the bowl to allow any excess chocolate to drip off. This helps create a thinner, more even coating. Return the chocolate-coated ball to the parchment-lined tray.
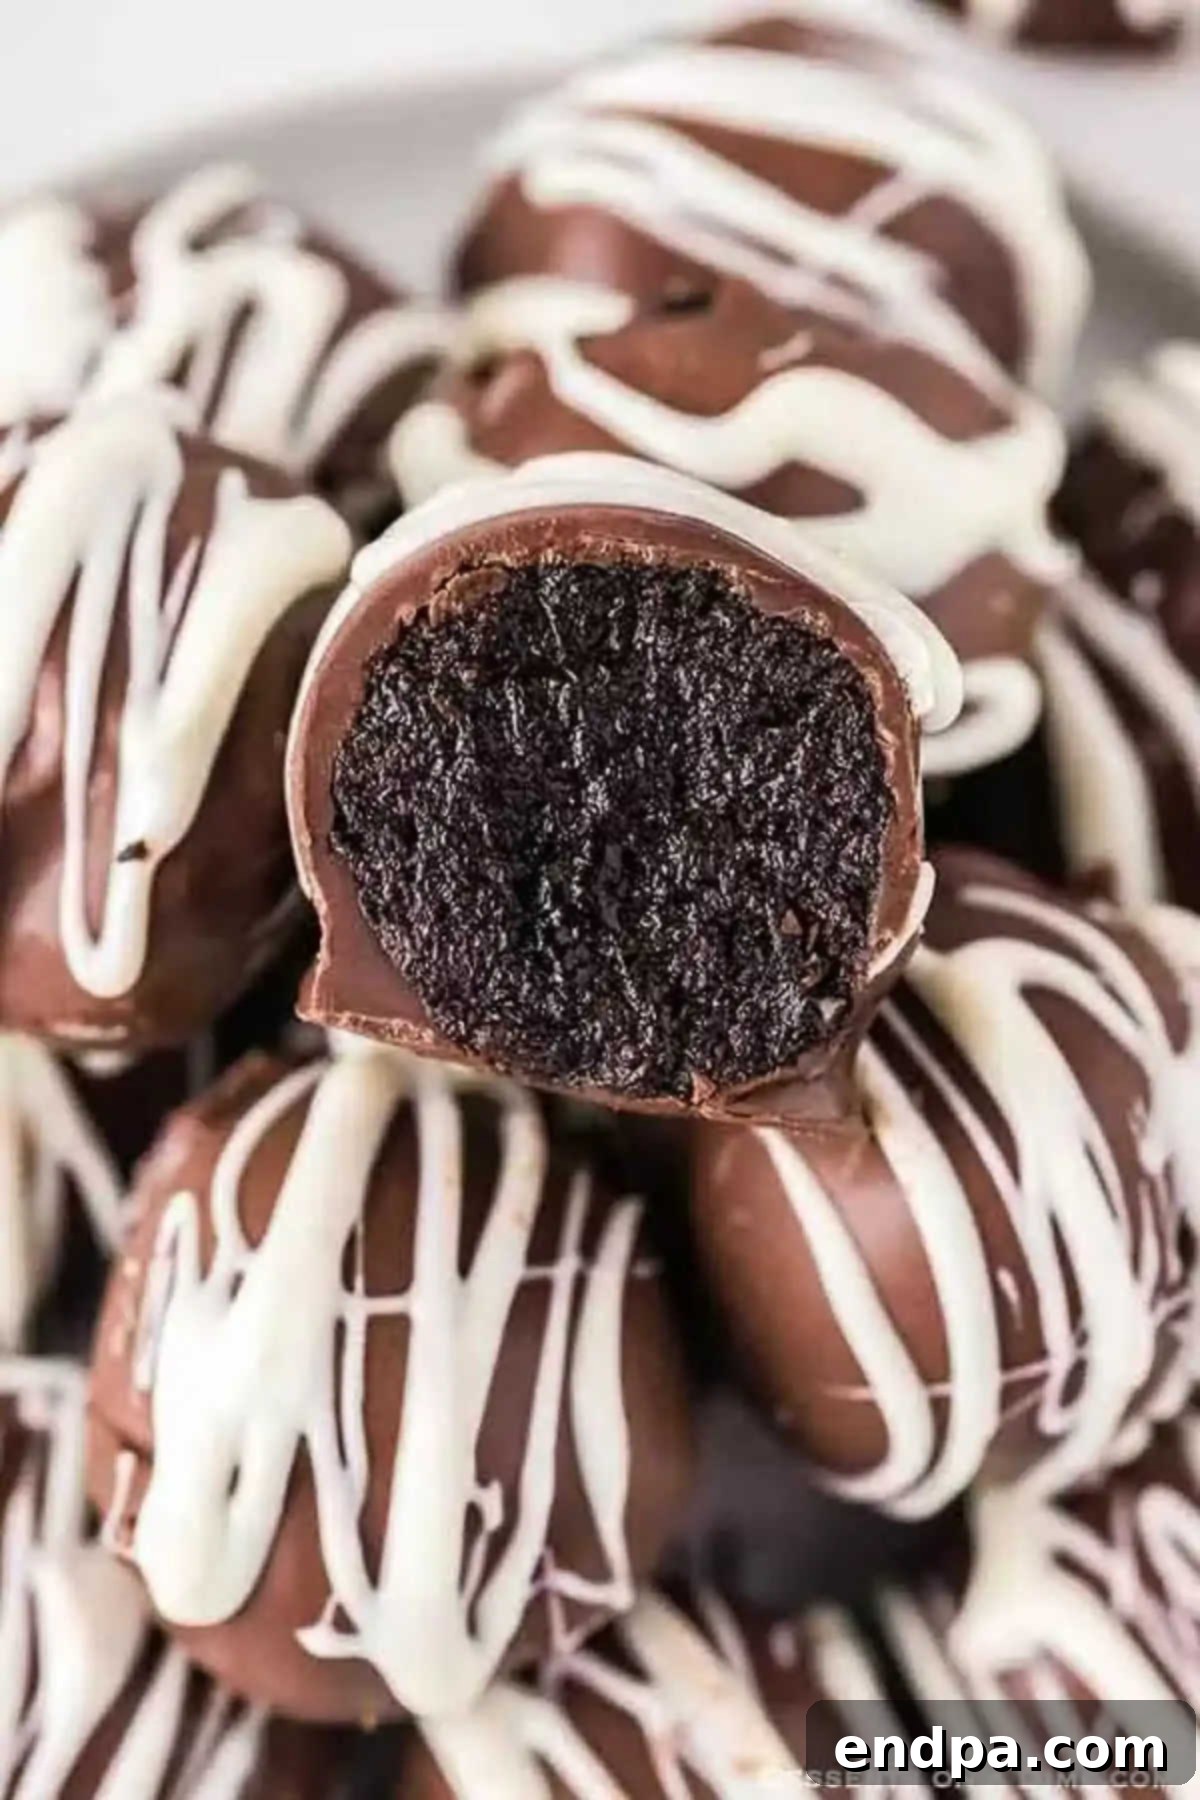
- Step 8. Harden and Decorate: Allow the chocolate coating to harden completely at room temperature or in the refrigerator for a quicker set. Once hardened, if desired, melt white chocolate (following the same microwave method as above) and drizzle it artistically over the coated Oreo Balls for an elegant finish. Let the drizzle harden before serving.
Expert Tips for Perfect Oreo Truffles
Achieving bakery-worthy Oreo Balls is easier than you think, especially with these insider tips:
- Utilize a Food Processor for Fine Crumbs: A food processor is truly your best friend for this recipe. It crushes the Oreo cookies into incredibly fine crumbs, which is essential for a smooth, consistent truffle mixture. If the crumbs are too coarse, the texture of your Oreo balls might be grainy. If you don’t have a food processor, a heavy-duty Ziploc bag and a rolling pin can work, but aim for the finest possible consistency.
- Achieve Uniformity with a Cookie Scoop: For perfectly sized, professional-looking Oreo balls, a small cookie scoop (about 1-inch) is invaluable. It ensures each truffle is the same size, which not only looks appealing but also helps them chill and set evenly. You’ll thank yourself for this time-saving trick!
- Master the Dip with a Fork: When dipping your Oreo balls into the melted chocolate, a fork is far superior to a spoon. The tines of the fork allow excess chocolate to drip off efficiently, preventing thick, clumpy coatings and ensuring a sleek, smooth finish. Use a toothpick or another fork to gently push the dipped ball off the fork onto the parchment paper.
- Opt for Full-Fat Cream Cheese: This is non-negotiable for creamy, rich Oreo balls. Light or fat-free cream cheese contains more water and less fat, which can result in a grainy texture and make the mixture harder to work with. Full-fat cream cheese provides the ideal richness and binding properties.
- Always Freeze Before Dipping: Freezing the formed Oreo balls for 15-20 minutes before dipping is a critical step. The cold, firm truffles hold their shape beautifully and prevent them from crumbling or melting into the warm chocolate. This quick chill dramatically simplifies the dipping process.
- Avoid Water with Chocolate: When melting chocolate, ensure no water comes into contact with it. Even a tiny drop can cause the chocolate to seize and become thick and unusable. If using a double boiler, make sure the water is simmering, not boiling, and that the bowl containing the chocolate isn’t touching the water.
Achieving a Flawless Smooth Chocolate Finish
A glossy, smooth chocolate coating is what truly elevates your Oreo Balls from homemade to gourmet. Here’s how to ensure a perfect finish every time:
- Choose the Right Chocolate: As previously mentioned, melting wafers, candy melts, or good quality almond bark are your best bets. These chocolates are designed for smooth melting and hardening. If using regular chocolate chips, adding a small amount of vegetable shortening or coconut oil (about 1 teaspoon per cup of chocolate) can help thin the chocolate for a smoother dip.
- Ensure Thorough Melting: The chocolate must be completely melted and smooth, without any lumps. Microwave in short bursts (30 seconds), stirring well between each, or use a double boiler for gentle, even melting. Avoid overheating, which can cause the chocolate to burn or seize.
- Work Quickly and Efficiently: Have all your supplies ready – frozen Oreo balls, melted chocolate, and parchment-lined trays. Once you start dipping, move swiftly. The cold truffles will cause the chocolate to cool and thicken, so speed helps maintain a smooth coat.
- The Fork Technique: Use a fork to dip each ball. Submerge it completely, lift, and gently tap the handle of the fork against the edge of the bowl to allow excess chocolate to drip away. This creates a thinner, more elegant coating.
- Place Gently: Carefully slide the coated ball off the fork onto the parchment paper. If you need to, use a toothpick to help ease it off the fork without disturbing the chocolate.
- Allow to Harden Undisturbed: Let the chocolate harden completely before attempting to move or decorate the balls further. Placing them in the refrigerator for 10-15 minutes can speed up this process.
Ideas for Decorating Your Oreo Balls
Decorating Oreo Balls is where you can truly let your creativity shine! Simple additions can transform them for any occasion:
- Holiday Sprinkles: This is the easiest and most versatile way to decorate. Use red and green for Christmas, pastels for Easter, red, white, and blue for patriotic holidays, or black and orange for Halloween.
- Contrasting Chocolate Drizzles: Once the main chocolate coating has hardened, melt a different color of chocolate (e.g., white chocolate over milk chocolate, or vice-versa) and drizzle it decoratively over the tops using a spoon or a piping bag with a very small hole. This adds both visual appeal and an extra layer of flavor.
- Crushed Toppings: Before the chocolate coating sets, sprinkle the freshly dipped truffles with finely chopped nuts (pecans, almonds), shredded coconut, additional crushed Oreo crumbs, or even crushed candy canes for a festive touch.
- Edible Glitter or Luster Dust: For an extra touch of glamour, lightly dust your hardened Oreo balls with edible glitter or luster dust using a small brush.
- Themed Decorations: Get creative with small edible decorations that match your theme. For example, tiny edible candy eyes for Halloween, small sugar flowers for spring, or mini chocolate footballs for game day.
Proper Storage for Freshness
Since these delicious Oreo Balls are made with cream cheese, proper storage is essential to maintain their freshness and prevent spoilage. Once the chocolate coating has completely hardened, transfer any leftovers to an airtight container or a zipped-top bag. Store them in the refrigerator for up to 1 week. The cream cheese ensures they remain wonderfully moist and flavorful during this time.
When serving, you can allow them to sit out at room temperature for a couple of hours. This softens the cream cheese filling slightly, enhancing their creamy texture, but it’s best to return them to refrigeration if they won’t be consumed within that timeframe.
Can You Freeze Oreo Balls?
Absolutely, Oreo Balls freeze exceptionally well, making them an ideal make-ahead dessert for busy periods or for enjoying a sweet treat whenever a craving strikes. Freezing them also helps extend their shelf life significantly.
To freeze them effectively, first place the completely hardened Oreo balls (after they’ve been dipped in chocolate and any decorations have set) in a single layer on a baking sheet. Place this baking sheet in the freezer for at least 1 hour, or until the balls are solid. This “flash freezing” step prevents them from sticking together. Once individually frozen, transfer them to a freezer-safe airtight container or a heavy-duty freezer bag. They can be stored in the freezer for up to 3 months.
When you’re ready to enjoy them, simply remove the desired number of Oreo balls from the freezer and let them thaw in the refrigerator for a few hours, or at room temperature for about 30 minutes to an hour, until softened. For more detailed tips on freezing, check out our comprehensive guide on Can you Freeze Oreo Balls.
Explore More Oreo Dessert Creations
If you’ve fallen in love with the magic of Oreo desserts, you’re in for a treat! There’s a whole world of delightful creations featuring America’s favorite cookie. Expand your dessert repertoire with these other fantastic Oreo-inspired recipes:
- Oreo Magic Bars
- No Bake Oreo Pie
- Peppermint Oreo Balls
- Football Oreo Balls
- Mini Oreo Cheesecake Recipe
- Mickey Mouse Oreo Cookies
Discover More Delicious Dessert Ideas
Beyond the realm of Oreos, there’s an abundance of sweet treats waiting to be discovered and enjoyed. If you’re looking for more simple yet satisfying dessert inspiration, explore these other delightful recipes:
- Homemade Peanut Brittle Recipe
- Easy Microwave Fudge Recipe
- Saltine Cracker Toffee
- Easy Red Velvet Cookies
- Quick and Easy Rolo Pretzels
- Chocolate Chip Cookie Cheesecake Bars
Ready to make these incredibly yummy Oreo Balls today for a truly delicious and easy treat? We encourage you to try this recipe and experience the joy of creating such a delightful dessert. Please come back and leave a comment and a star rating once you do – we love hearing your feedback!
Pin
Oreo Balls
40 minutes
40 minutes
24
American
Dessert
138
Carrie Barnard
Ingredients
-
8
oz
softened Cream Cheese
-
14.5
oz
Oreo Cookies
-
14
oz
Chocolate Dipping Chips
-
4
oz
white chocolate
Instructions
- Line a cutting board or baking sheet with parchment paper.
- Finely crush Oreos in a food processor until sand-like crumbs form.
- Combine softened cream cheese and crushed Oreo cookies in a bowl until well blended and a cohesive mixture forms.
- Form the mixture into 1-inch balls and place them onto the prepared parchment-lined sheet.
- Place the baking sheet with Oreo balls in the freezer for 30 minutes to firm up.
- Melt the chocolate by microwaving in 30-second intervals, stirring after each, until completely smooth.
- Using a fork, dip each chilled ball into the melted chocolate to completely coat. Gently shake off excess chocolate and return to the tray.
- Allow the chocolate coating to harden completely at room temperature or in the refrigerator.
- If desired, melt the white chocolate using the same method until smooth.
- Drizzle the melted white chocolate over the hardened chocolate balls for decoration. Let it set, then enjoy your delicious Oreo Balls!
Nutrition Facts
Calories
138
kcal
,
Carbohydrates
15
g
,
Protein
2
g
,
Fat
8
g
,
Saturated Fat
4
g
,
Cholesterol
11
mg
,
Sodium
113
mg
,
Potassium
63
mg
,
Fiber
1
g
,
Sugar
10
g
,
Vitamin A
127
IU
,
Calcium
22
mg
,
Iron
2
mg
Pin This Now to Remember It Later
Pin Recipe
