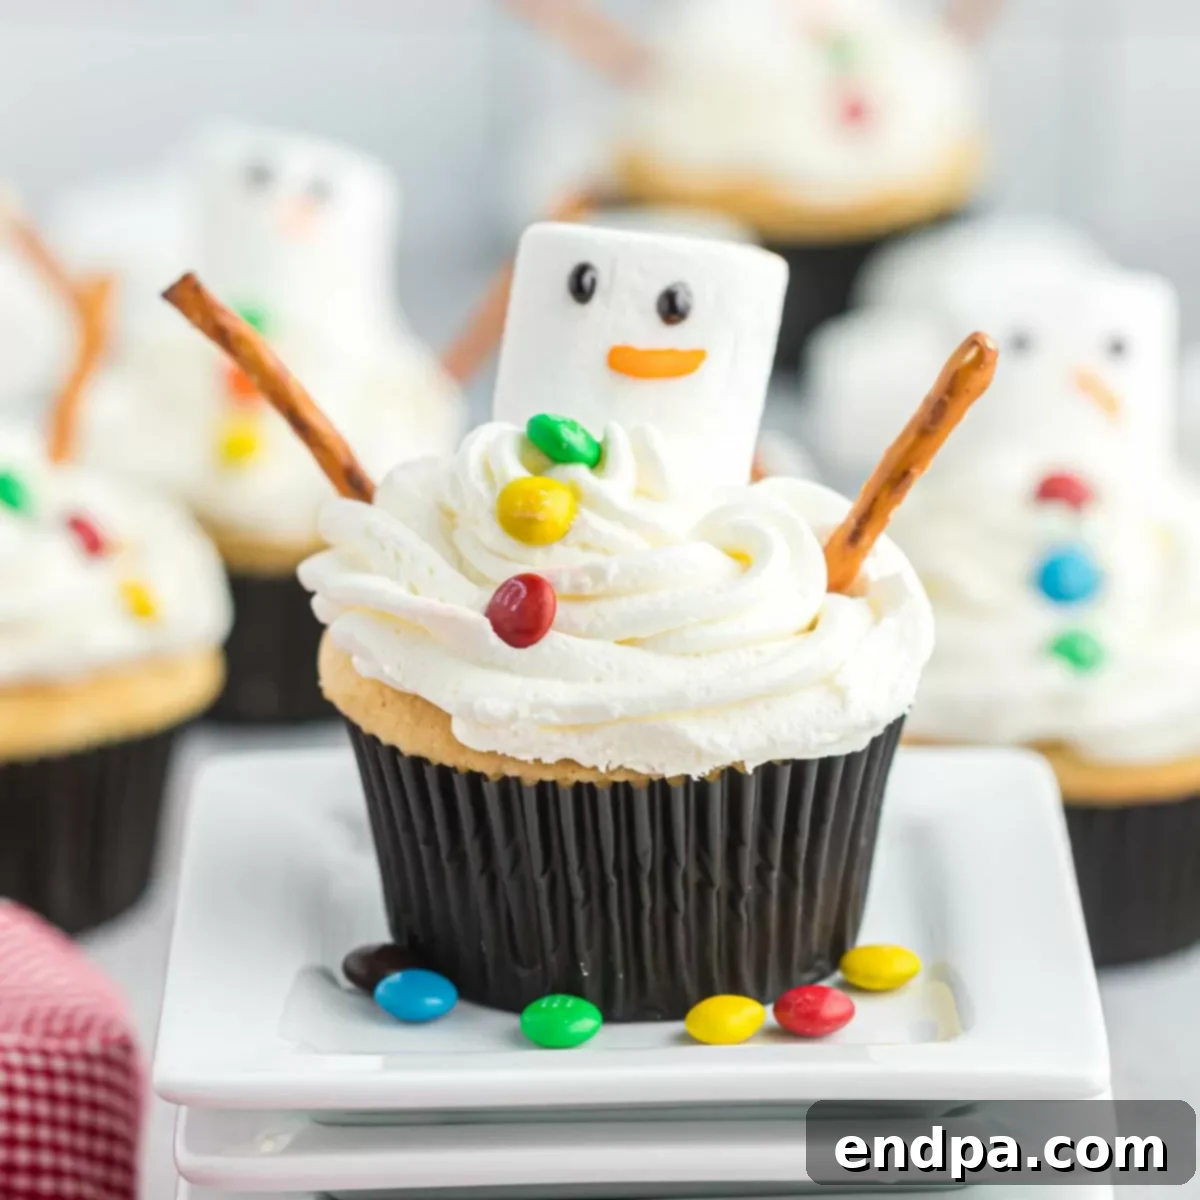
Prepare to delight your guests with these whimsical Melted Snowman Cupcakes, an undeniably charming and utterly delicious treat perfect for any Christmas party or holiday gathering. With just a few simple ingredients and easy decorating steps, ordinary cupcakes are transformed into an enchanting scene of melting snowmen that will bring smiles to faces of all ages. These adorable confections are not only a feast for the eyes but also a joy to create, making them an ideal baking project for families.
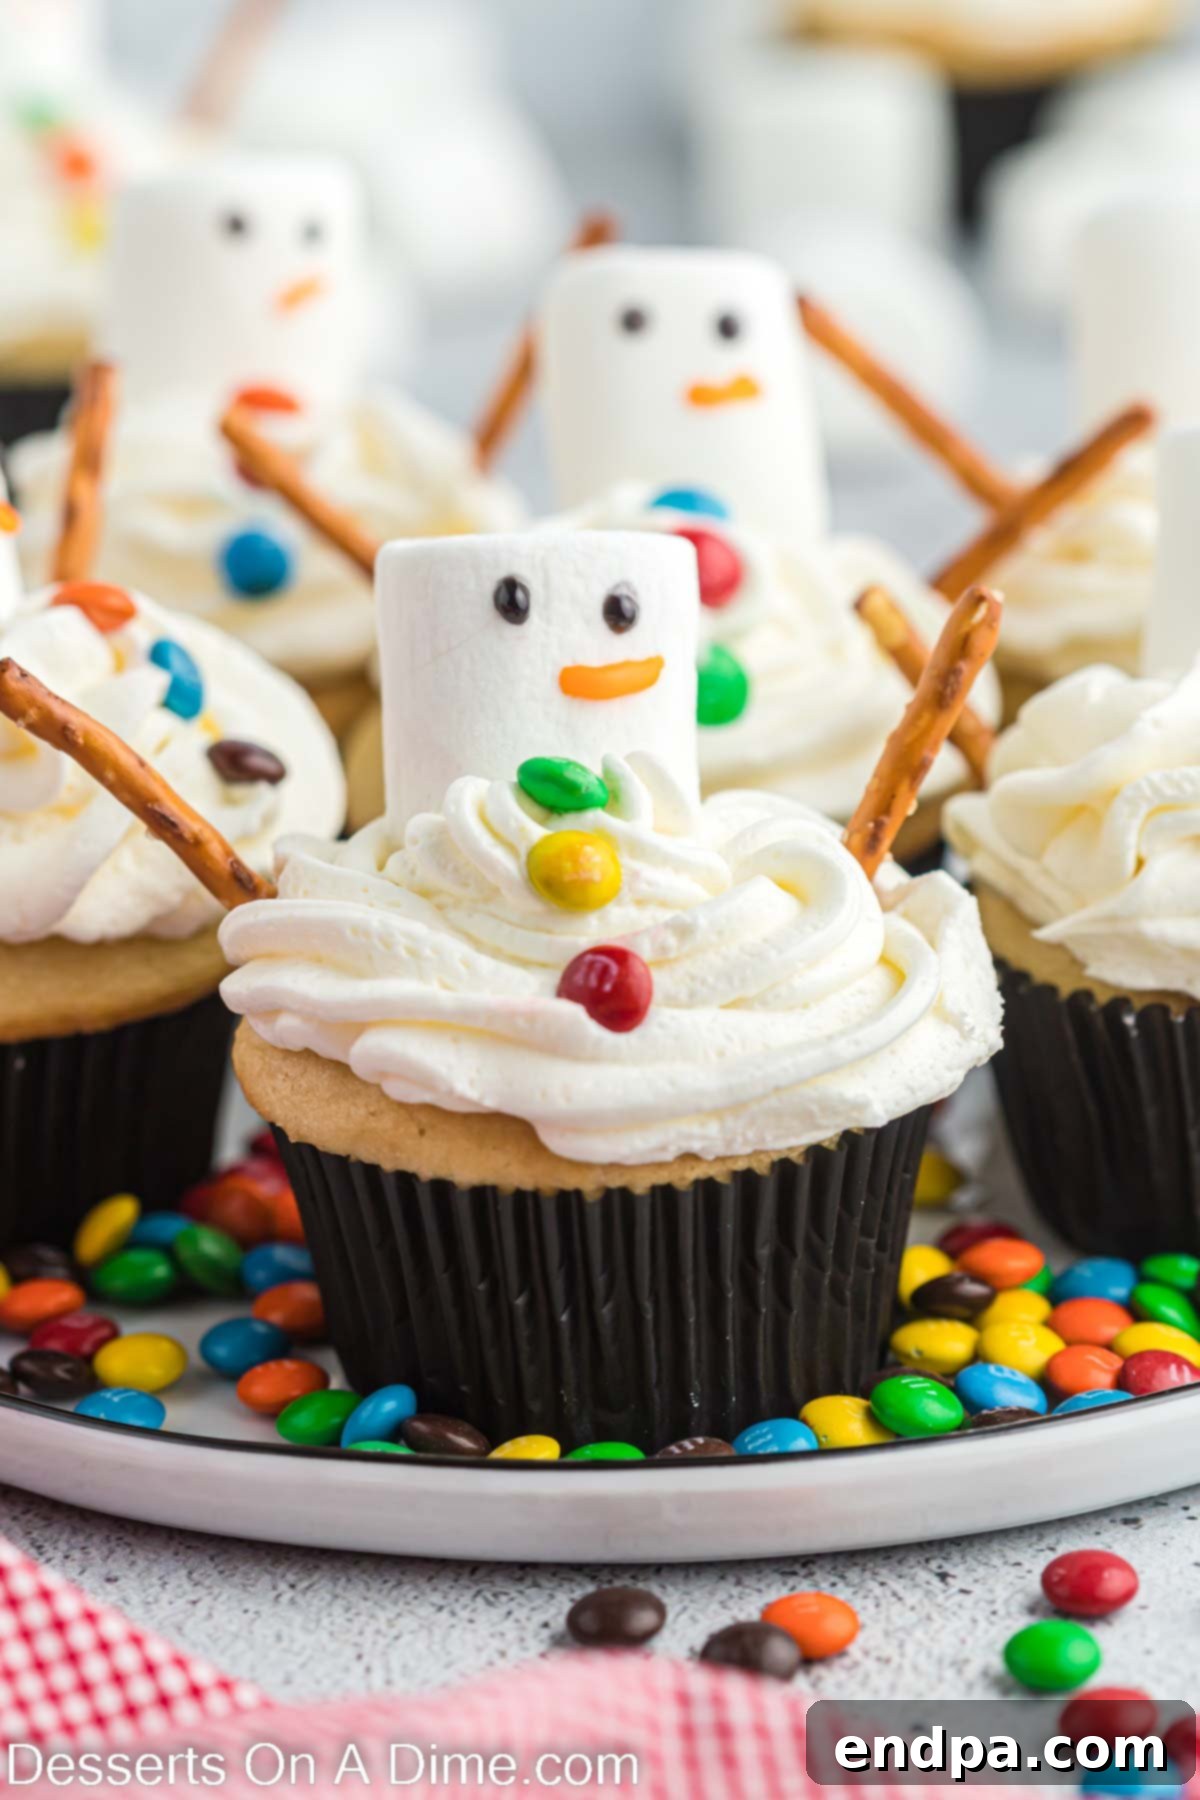
These festive snowman cupcakes are guaranteed to be a sensational hit. Their delightful appearance makes them a fantastic centerpiece, while the straightforward recipe ensures that even novice bakers can achieve impressive results. Imagine the joy of assembling these sweet characters, from their marshmallow “heads” to their colorful candy buttons and pretzel stick “arms.” The entire process is a blast, and you’ll love how simple yet spectacular this holiday dessert truly is.
For those who adore the melted snowman theme, be sure to also explore our delightful Melted Snowman Sugar Cookies and Melted Snowman Bark for a complete collection of winter wonderland treats!
What’s in This Guide: Your Melted Snowman Cupcakes Recipe Journey
- Why You’ll Adore Making These Cupcakes
- Essential Ingredients for Your Snowmen
- Creative Variations to Customize Your Snowmen
- Step-by-Step Guide: Crafting Your Snowmen
- Expert Tips for Perfect Snowman Cupcakes
- Frequently Asked Questions
- More Enchanting Snowman Desserts
- Full Recipe Card: Melted Snowman Cupcakes
Why You’ll Adore Making These Melted Snowman Cupcakes
Beyond their undeniable cuteness, there are several compelling reasons why these melted snowman cupcakes will quickly become a cherished part of your holiday baking tradition:
- Effortless Baking with a Cake Mix Base: This recipe cleverly utilizes a standard white cake mix for the cupcake base. This ingenious shortcut saves you precious time and effort without compromising on taste or texture, allowing you to focus on the fun part – decorating! It’s perfect for busy holiday schedules or when baking with little helpers.
- Simple, Step-by-Step Instructions: Forget complicated baking techniques. Our instructions are incredibly easy to follow, broken down into clear, concise steps. You’ll find the process of transforming plain cupcakes into charming melted snowmen surprisingly straightforward, making it an accessible project for bakers of all skill levels.
- Absolutely Adorable and Instagram-Worthy: From the delightful marshmallow “head” to the colorful candy buttons and rustic pretzel stick “arms,” every element comes together to create a truly adorable confection. These cupcakes aren’t just delicious; they’re tiny works of edible art that are guaranteed to be the star of any dessert table and a favorite among kids and adults alike.
- Perfect for Festive Occasions: Whether it’s a school holiday party, a family Christmas dinner, or a cozy winter get-together, these snowman cupcakes are the ultimate festive treat. They instantly infuse any event with holiday spirit and bring a playful touch to your dessert spread.
- Fun for All Ages: Decorating these cupcakes is an activity the whole family can enjoy. Kids will love adding the mini M&Ms for buttons and drawing on the snowman faces, fostering creativity and making wonderful holiday memories together.
Gather Your Ingredients for These Delightful Snowmen
Creating these magical melted snowman cupcakes requires a blend of pantry staples and a few fun decorative elements. Here’s what you’ll need to bring your edible snowmen to life:
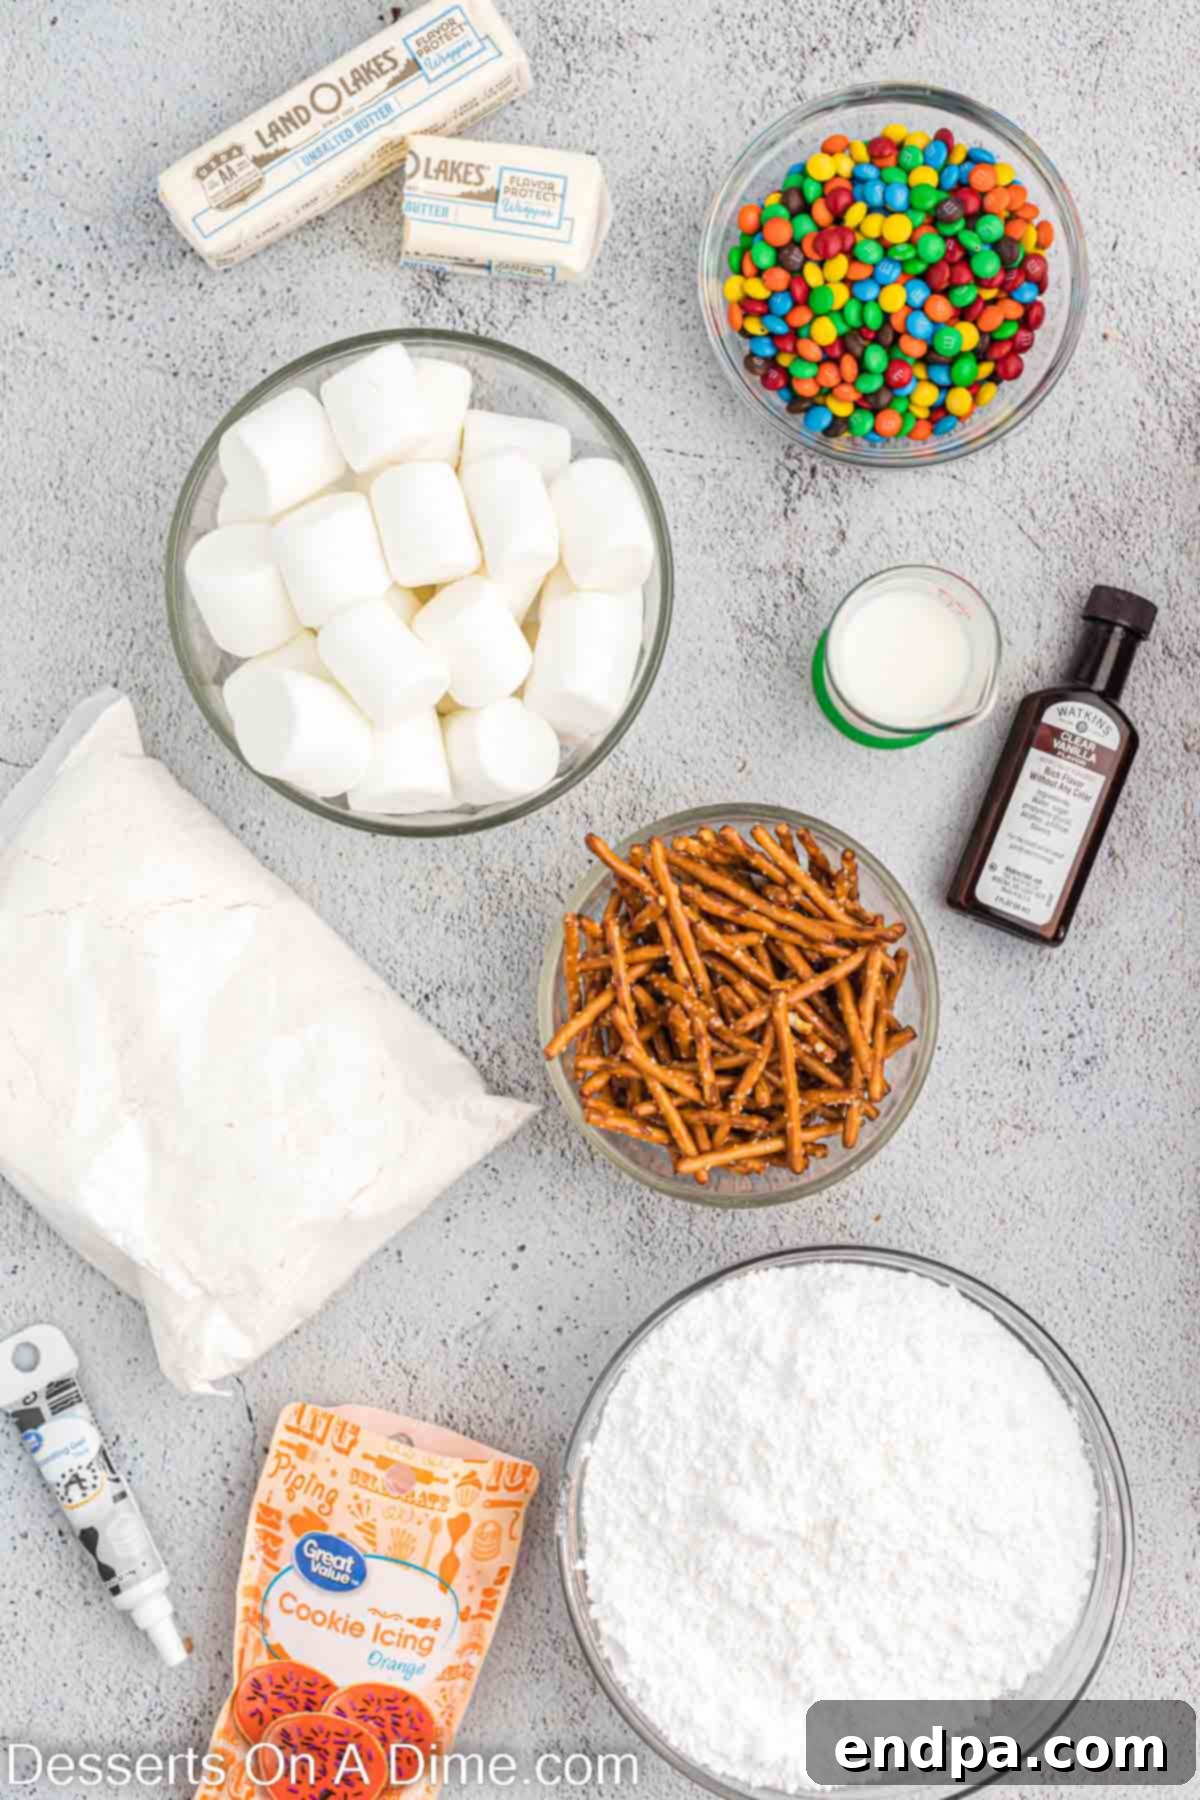
For the Delightful Cupcakes:
- White Cake Mix: This forms the delicious base of your cupcakes. Using a mix simplifies the process significantly, ensuring consistently moist and fluffy results.
- Ingredients to Prepare Cupcakes: Follow the specific instructions on your chosen cake mix box. This typically includes items like eggs, water, and vegetable oil.
- Pretzel Sticks: These act as the adorable “arms” for your melting snowmen, adding a touch of salty crunch that perfectly complements the sweet cupcake.
- Large Marshmallows: The star of the show! These will be the snowmen’s heads, providing a soft, chewy texture and that classic snowman look.
- Mini M&Ms: Perfect for creating colorful and edible “buttons” on your snowmen. Their small size is ideal for detailed decorating.
- Black Decorating Gel: Essential for drawing the eyes and mouths, giving your snowmen their unique expressions.
- Orange Decorating Gel: Used to craft the iconic carrot noses, adding a pop of color to their marshmallow faces.
For the Velvety Buttercream Frosting:
- Unsalted Butter: Ensure it’s softened to room temperature for the smoothest, most delectable buttercream. Unsalted butter gives you control over the overall sweetness.
- Powdered Sugar (Confectioners’ Sugar): The key ingredient for creating a light, fluffy, and sweet frosting with a silky smooth texture.
- Milk: A small amount of milk helps achieve the perfect consistency for piping and spreading the frosting.
- Clear Vanilla Extract: Opt for clear vanilla extract to maintain the bright white color of your “snow” frosting, crucial for the snowman aesthetic.
Creative Variations to Personalize Your Snowman Cupcakes
While the classic melted snowman cupcake is undeniably charming, there’s plenty of room for creativity! Here are some fun variations to make your batch uniquely yours:
- Premade Vanilla Frosting: To save even more time, you can absolutely use a store-bought white or vanilla frosting. Just ensure it’s thick enough to hold the marshmallow head. For a smoother finish, you can even whip store-bought frosting for a minute or two to add air.
- Alternative Buttons: Get creative with your snowman’s buttons! Instead of mini M&Ms, consider using mini chocolate chips, colorful sprinkles, small smarties candies, or even tiny edible pearls. Any small, round candy will work wonderfully.
- Drawn-on Arms: If you prefer not to use pretzels or want a different look, use black decorating gel or black icing to draw simple stick arms on the frosting next to the marshmallow head. This can create a more cartoonish and equally cute effect.
- Cupcake Base Flavor: While white cake mix creates the perfect “melted snow” backdrop, feel free to use chocolate cake mix for a rich, delicious alternative. If you opt for chocolate, ensure your frosting layer is generous enough to fully cover the dark cake, maintaining the snowy appearance. A red velvet or even a funfetti cake mix could also add a delightful surprise!
- Edible Pen Faces: For precision and ease, an edible food marker pen can be a fantastic tool for drawing the snowman’s eyes and mouth on the marshmallow. This allows for fine lines and consistent expressions.
- Snowman Scarves: Add an extra touch of flair by giving your snowmen miniature scarves! Use thin strips of Twizzlers Pull-n-Peel candy, fruit leather, or even thin rolled fondant to wrap around the base of the marshmallow head. This adds a pop of color and an extra layer of adorable detail.
- Different “Snow” Base: Instead of white frosting, you could tint your buttercream a light blue for a frosty, icy look, or even a very pale mint green for a playful winter theme.
- Sparkling Snow: Before the frosting sets, sprinkle a little edible glitter or white sanding sugar over the frosted cupcakes to give them a truly dazzling, sparkling snow effect.
- Tiny Hats: For an advanced touch, you could create tiny hats for your snowmen using mini Reese’s peanut butter cups or even small chocolate-covered caramels, placed on top of the marshmallow head.
Step-by-Step Guide: Crafting Your Melted Snowman Masterpieces
Creating these delightful melted snowman cupcakes is a fun and rewarding process. Follow these detailed steps to bring your festive treats to life:
- Step 1: Bake and Cool Your Cupcakes. Begin by preparing your white cake mix according to the package instructions. Mix the batter in a medium bowl until smooth. Line a muffin tin with festive cupcake liners or silicone liners. Fill each liner about two-thirds full with batter. Bake in the oven as directed by the cake mix package until a toothpick inserted into the center comes out clean. Once baked, remove the cupcakes from the oven and transfer them to a wire rack to cool completely. This is a crucial step; decorating warm cupcakes will cause the frosting to melt.
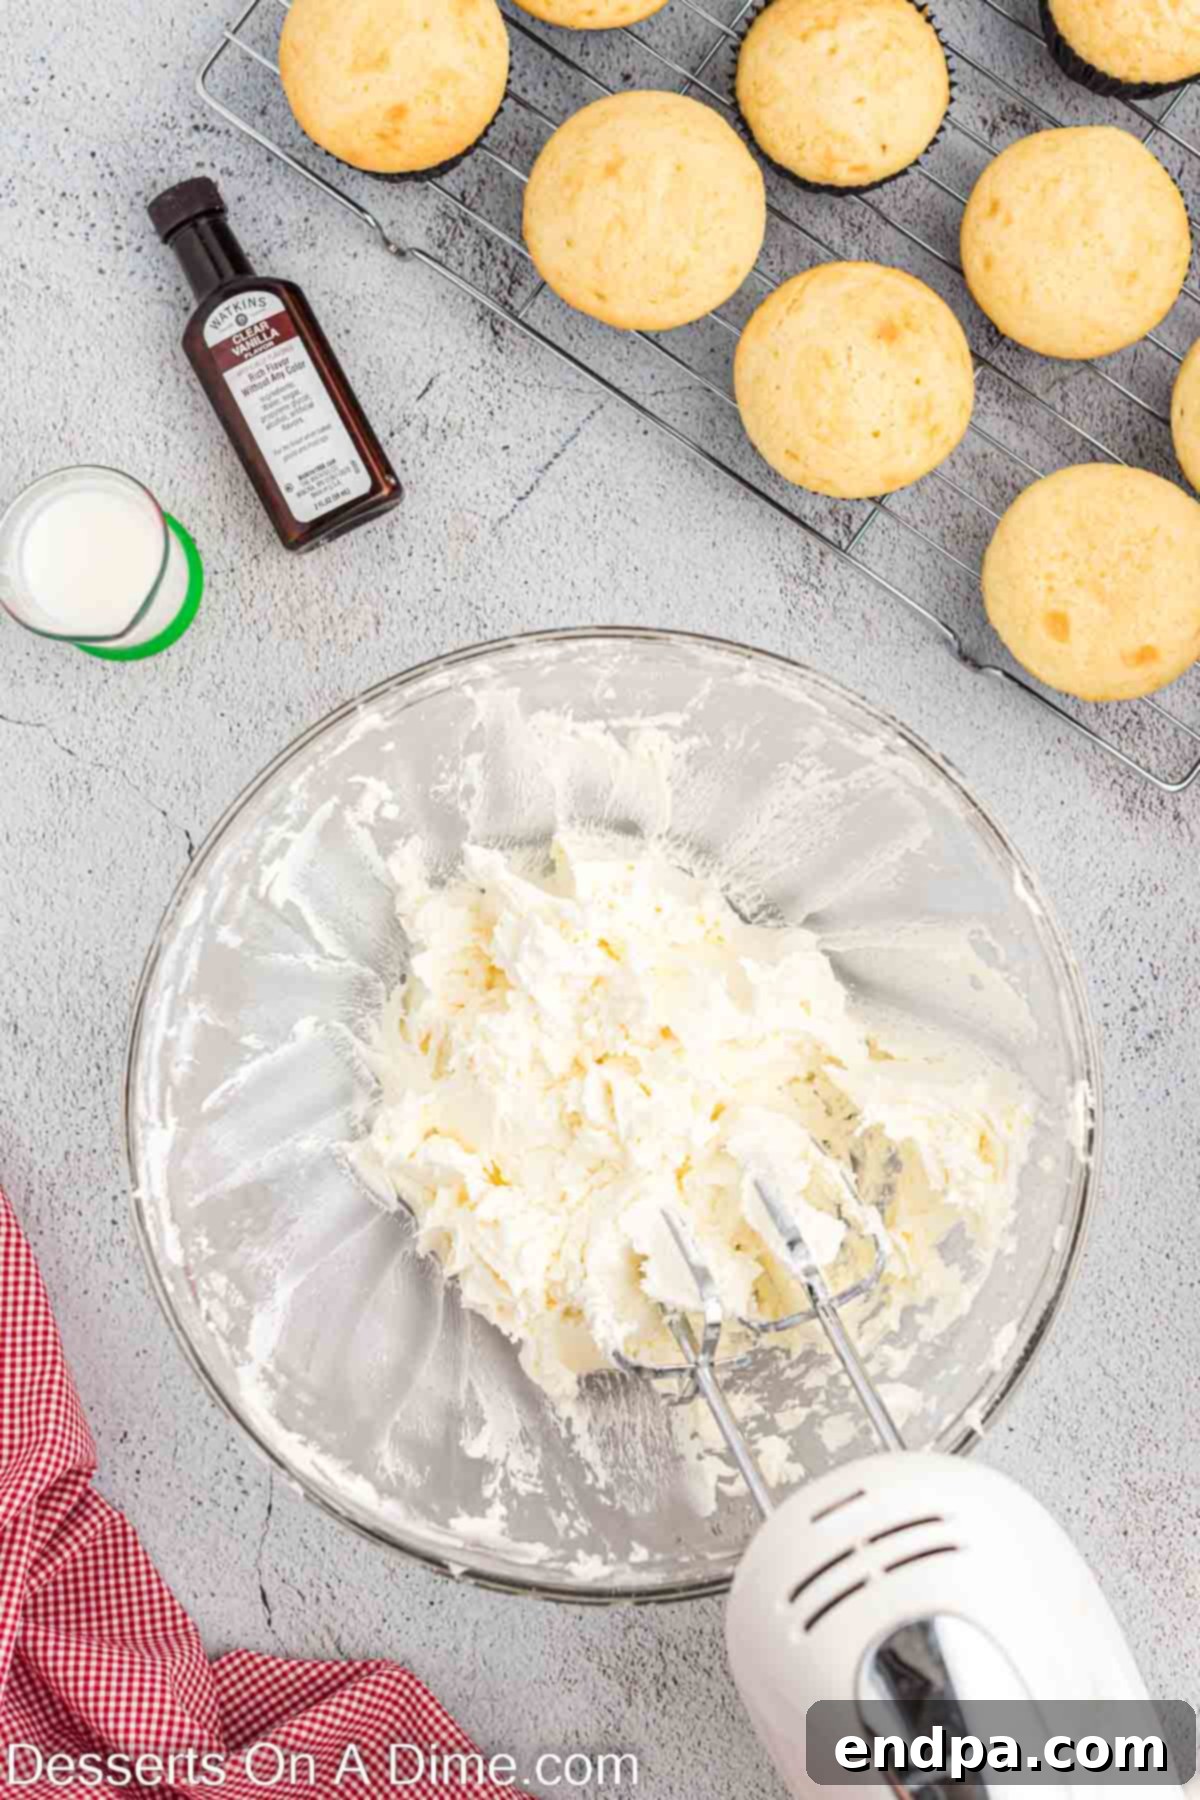
Step 2: Whip Up the Creamy Frosting. While your cupcakes are cooling, it’s time to prepare the luscious buttercream frosting. In a large mixing bowl, cream together the softened unsalted butter and powdered sugar using an electric mixer (either a hand mixer or a stand mixer with a paddle attachment). Beat until the mixture is well combined and smooth. Gradually add in the milk and clear vanilla extract, continuing to mix for 1-2 minutes until the frosting becomes light, airy, and wonderfully fluffy. This smooth consistency is perfect for piping.
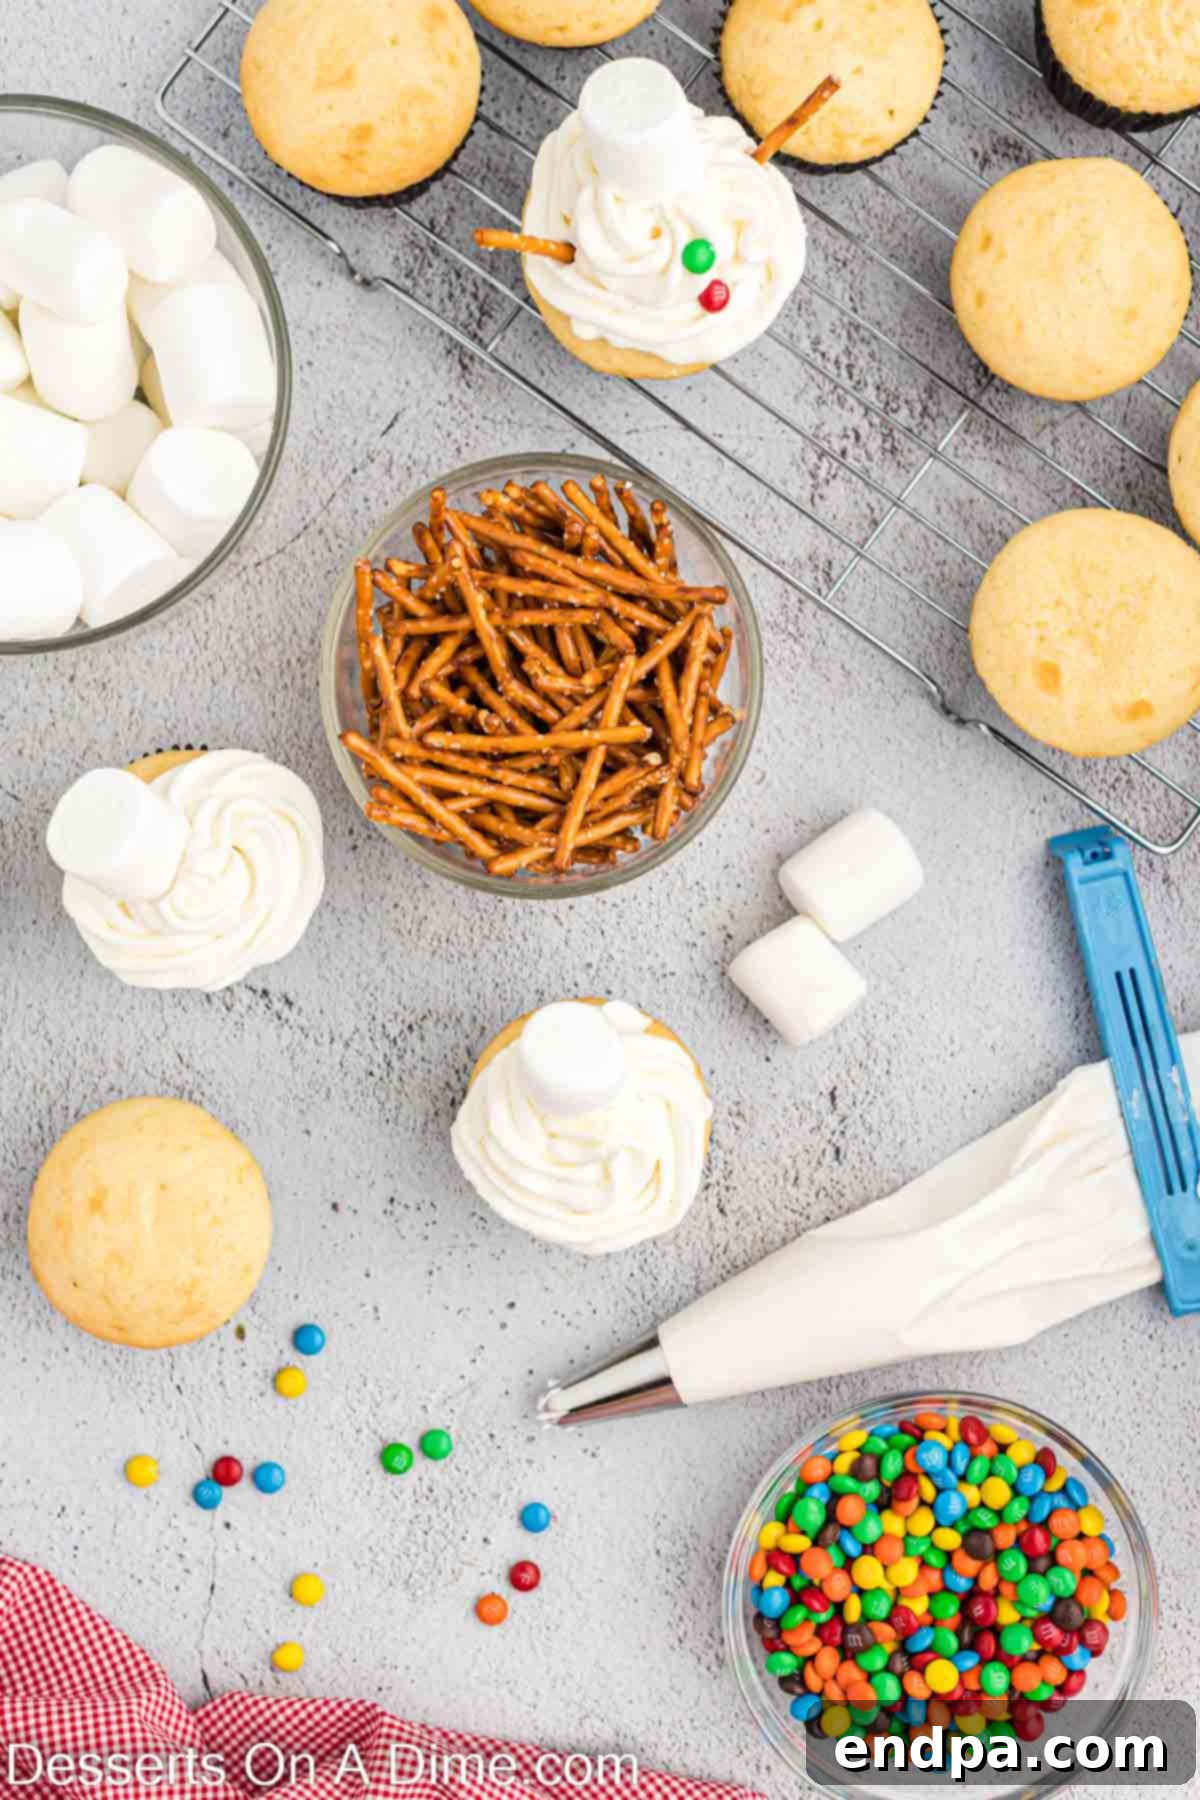
Step 3: Frost and Place Marshmallow Heads. Once the cupcakes are completely cool, transfer your buttercream frosting to a piping bag fitted with your favorite large round or star tip. If you don’t have a piping bag, a large ziplock bag with a corner snipped off works perfectly. Pipe a generous swirl of frosting onto each cupcake, resembling a mound of snow. Immediately after frosting, gently press one large marshmallow onto each cupcake. Position the marshmallow slightly towards the back of the cupcake, creating space in the front for the “melted” body of the snowman.
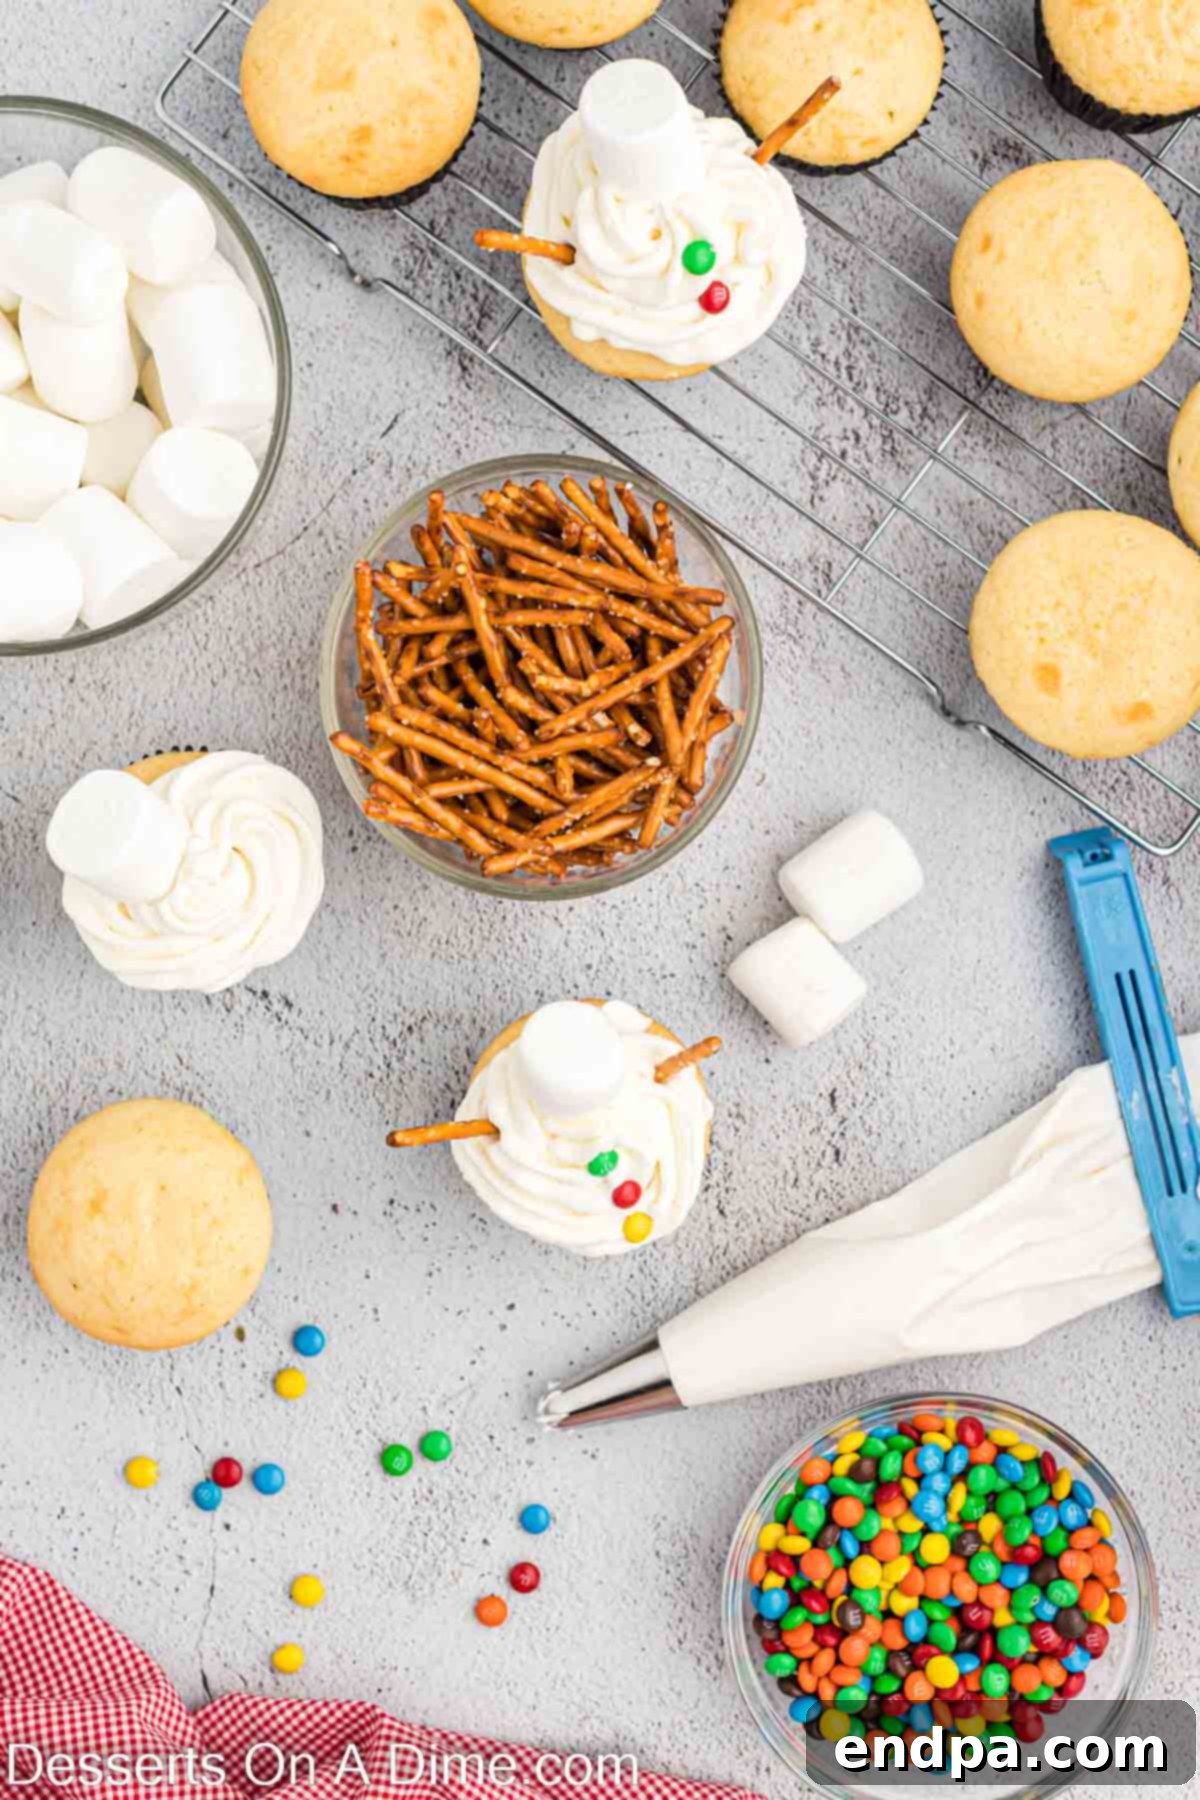
Step 4: Add Buttons and Arms. Now for the adorable details! In the front section of the cupcake (where the frosting resembles the melted body), carefully place three mini M&Ms vertically to create the snowman’s buttons. Next, gently insert two pretzel sticks on either side of the marshmallow head, pushing them slightly into the cupcake to form the snowman’s arms. Be careful not to break the pretzels.
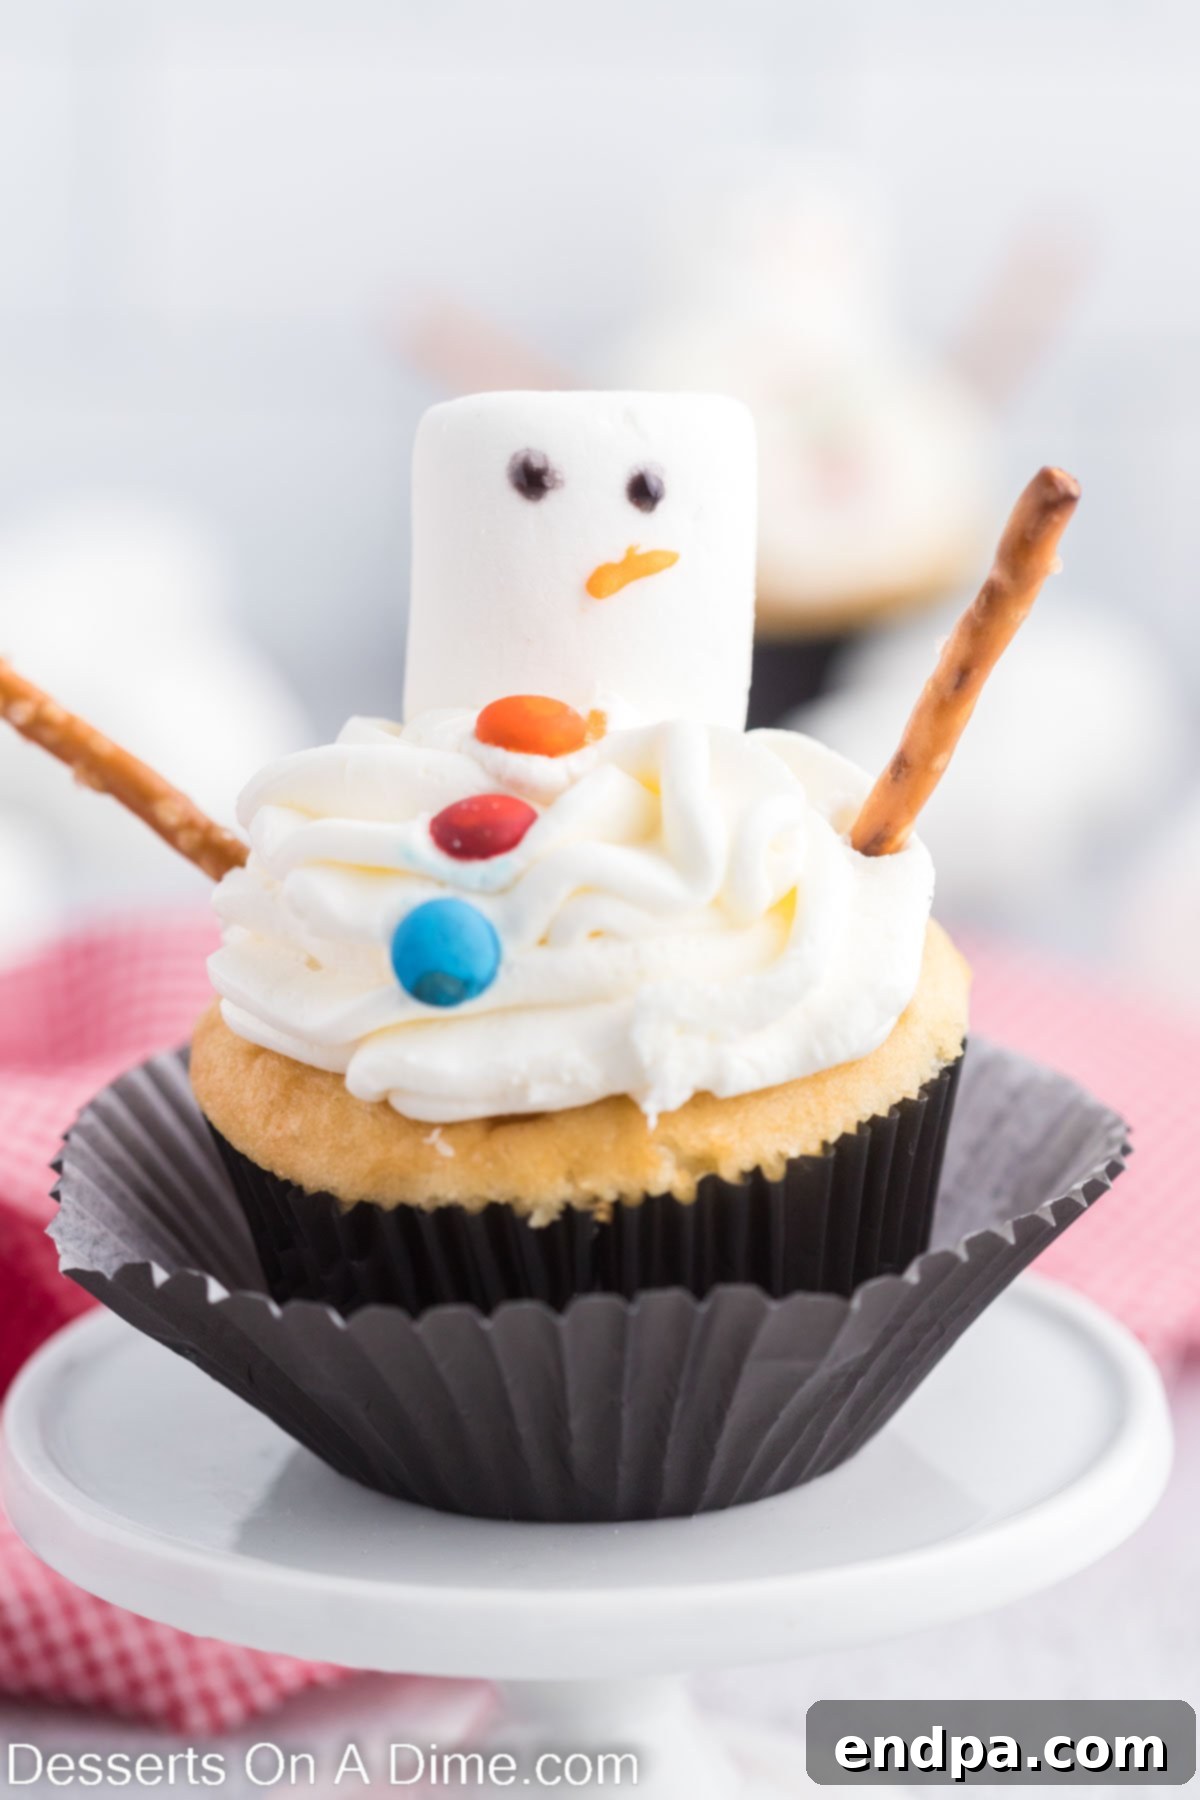
Step 5: Bring Their Faces to Life. The final touch! Using the black decorating gel, carefully draw two small dots for eyes and a curved line for a smile on each marshmallow head. Then, use the orange decorating gel to add a tiny triangle or dot for the carrot nose. Allow the decorating gel to set completely before serving, which usually takes about 15-30 minutes, depending on the thickness. Once dry, your delightful melted snowman cupcakes are ready to be shared and enjoyed!
Expert Tips for Perfect Snowman Cupcakes
Achieve bakery-quality results with these helpful pro tips for your melted snowman cupcakes:
- Piping Bag Alternatives: No piping bags? No problem! A sturdy ziplock bag is a fantastic substitute. Simply spoon the frosting into one corner of the bag, twist the top to secure it, and then snip a small piece off the corner to create your piping tip. This method works just as well for controlled frosting application.
- Cooling is Key: Always ensure your cupcakes are completely cooled before you begin frosting and decorating. Warm cupcakes will melt your carefully piped frosting, leading to a messy, unattractive result. If you’re in a hurry, you can place cooled cupcakes in the refrigerator for 10-15 minutes to chill them further.
- Serve Fresh for Best Results: These charming cupcakes are at their absolute best when served fresh, ideally within a few hours of decorating. While they will keep, the candy elements can sometimes “bleed” into the frosting over time, and the pretzel arms might soften. If you need to prepare them slightly in advance, store them in a cool, dry place.
- Quality Decorating Gels: Invest in good quality decorating gels for vibrant colors and easy application. Practice drawing a few faces on parchment paper first if you’re nervous about getting them just right on the marshmallows.
- Room Temperature Butter: For the smoothest buttercream, make sure your unsalted butter is genuinely at room temperature – soft enough to indent with your finger but not melted. This allows it to cream beautifully with the powdered sugar.
- Keep Frosting Covered: If you’re working in batches or taking a break, keep your buttercream frosting covered with plastic wrap to prevent it from drying out or forming a crust.
- Kid-Friendly Decorating Station: Set up a dedicated decorating station if baking with children. Lay out all the candies, gels, and marshmallows, allowing them to freely create their snowman faces. Embrace the unique and quirky results!
Frequently Asked Questions About Snowman Cupcakes
Here are answers to some common questions you might have while making your delightful snowman cupcakes:
Making homemade buttercream frosting is incredibly easy and yields a far superior taste and texture compared to store-bought varieties. You only need four ingredients! Start by combining room-temperature unsalted butter with powdered sugar using an electric mixer (either a hand mixer or a stand mixer). Beat them together until the mixture is well combined and smooth. Then, gradually add milk and clear vanilla extract, mixing for another 1-2 minutes until the frosting is light, fluffy, and perfectly creamy. This simple process creates a beautiful frosting that’s ideal for decorating. You can find more detailed guidance on how to make buttercream icing to master this essential skill.
For the classic carrot nose, orange decorating gel works perfectly and is what we used in this recipe. However, you have several other creative and delicious options:
- Orange Fondant: Roll a tiny piece of orange fondant into a small carrot shape and press it gently onto the marshmallow.
- Orange Tic Tac: A small orange Tic Tac can make a great, firm nose. Just ensure it’s inserted securely into the marshmallow so it doesn’t fall off.
- Orange Icing: Mix a tiny amount of orange food coloring into a small portion of white frosting, then pipe a small dot or triangle onto the marshmallow for the nose.
- Small Candy Corn: If it’s the right season, a small piece of candy corn can also serve as a cute carrot nose.
Feel free to choose the option that is easiest for you or that best fits your decorative vision. Any of these would make great options for a cheerful snowman nose!
To keep your decorated snowman cupcakes fresh, store any leftovers in an airtight container at room temperature for up to 3-5 days. It’s important to arrange them carefully in the container to prevent the decorations from being smudged or knocked off. If your home is particularly warm, you might consider storing them in the refrigerator, but allow them to come to room temperature for about 15-20 minutes before serving for the best texture.
You can certainly prepare parts of these cupcakes in advance. The plain cupcakes can be baked up to 1-2 days ahead of time and stored in an airtight container at room temperature. The buttercream frosting can also be made a day in advance and stored in the refrigerator in an airtight container. Before using, let it come to room temperature and then re-whip it for a minute or two to restore its fluffy consistency. We recommend decorating the cupcakes on the day of your event for the freshest appearance, as candy decorations can sometimes soften or bleed over extended periods.
For these melted snowman cupcakes, you’ll need standard baking equipment:
- A muffin tin and cupcake liners.
- Mixing bowls (medium and large).
- An electric mixer (handheld or stand mixer) for the frosting.
- A wire cooling rack.
- A piping bag and tip (or a large ziplock bag).
- Measuring cups and spoons.
These basic tools will ensure a smooth and enjoyable baking and decorating experience.
More Enchanting Snowman Dessert Ideas
If you’re utterly charmed by the snowman theme and looking for more delightful treats, explore these other fantastic recipes that capture the magic of winter:
- Snowman Chocolate Covered Oreos: A quick and easy no-bake treat.
- Starbucks Snowman Cookie Recipe: Recreate your favorite cafe classic at home.
- Snowman Oreo Balls: Irresistible bite-sized delights perfect for sharing.
- Melted Snowman Sugar Cookies: Another adorable spin on the melting snowman theme.
We’re confident you’ll have an absolute blast making these incredibly charming melted snowman cupcakes. They are the epitome of festive fun and deliciousness! Once you’ve had a chance to bake them, please consider leaving a star rating for the recipe below – your feedback helps fellow bakers!
Melted Snowman Cupcakes
Make these whimsical melted snowman cupcakes for a super cute treat for a Christmas party. With a few easy toppings, plain cupcakes are transformed into melting snowmen.
Prep Time: 15 mins
Cook Time: 20 mins
Total Time: 35 mins
Servings: 24 cupcakes
Cuisine: American
Course: Dessert
Author: Carrie Barnard
Ingredients
FOR THE CUPCAKES:
- 1 pkg White Cake Mix
- *Ingredients to prepare the cupcakes based on the package instructions (e.g., eggs, water, oil)
- 48 Pretzel Sticks
- 24 Large Marshmallows
- 1 cup Mini M&Ms
- Black Decorating Gel
- Orange Decorating Gel
FOR THE BUTTERCREAM FROSTING:
- ¾ cup Unsalted Butter, softened
- 2 ¼ cup Powdered Sugar
- 2 Tbsp Milk
- 1 tsp Clear Vanilla Extract
Instructions
- Prepare the cupcakes based on the package instructions and allow them to cool completely before decorating.
- While the cupcakes are cooling, prepare the frosting. Cream together the butter and powdered sugar until combined and smooth. Then add in the milk and vanilla extract and mix for 1-2 minutes until the frosting is light and fluffy.
- Pipe the frosting onto each of the cupcakes.
- Immediately add the marshmallows onto each cupcake toward the back of the cupcakes. Then add the mini M&Ms in the front to resemble the buttons on a snowman. Stick 2 pretzel sticks on either side of the marshmallow into the cupcake for the arms of the snowman.
- Use the black and orange decorating gel to add on the face onto the marshmallow.
- Let the decorating gel dry completely, then the cupcakes are ready to serve and enjoy!
Recipe Notes
You can use pre-made frosting to save more time on this recipe if you prefer.
If you cannot find mini M&Ms, you can use mini chocolate chips instead for the buttons.
Store leftover cupcakes in an airtight container for up to 5 days at room temperature.
Nutrition Facts
Calories: 262 kcal, Carbohydrates: 41g, Protein: 2g, Fat: 11g, Saturated Fat: 5g, Polyunsaturated Fat: 1g, Monounsaturated Fat: 3g, Trans Fat: 0.3g, Cholesterol: 17mg, Sodium: 175mg, Potassium: 20mg, Fiber: 1g, Sugar: 30g, Vitamin A: 199 IU, Vitamin C: 0.1mg, Calcium: 61mg, Iron: 1mg
Love this recipe? Don’t forget to Pin It Now to save for later!
Pin Recipe
