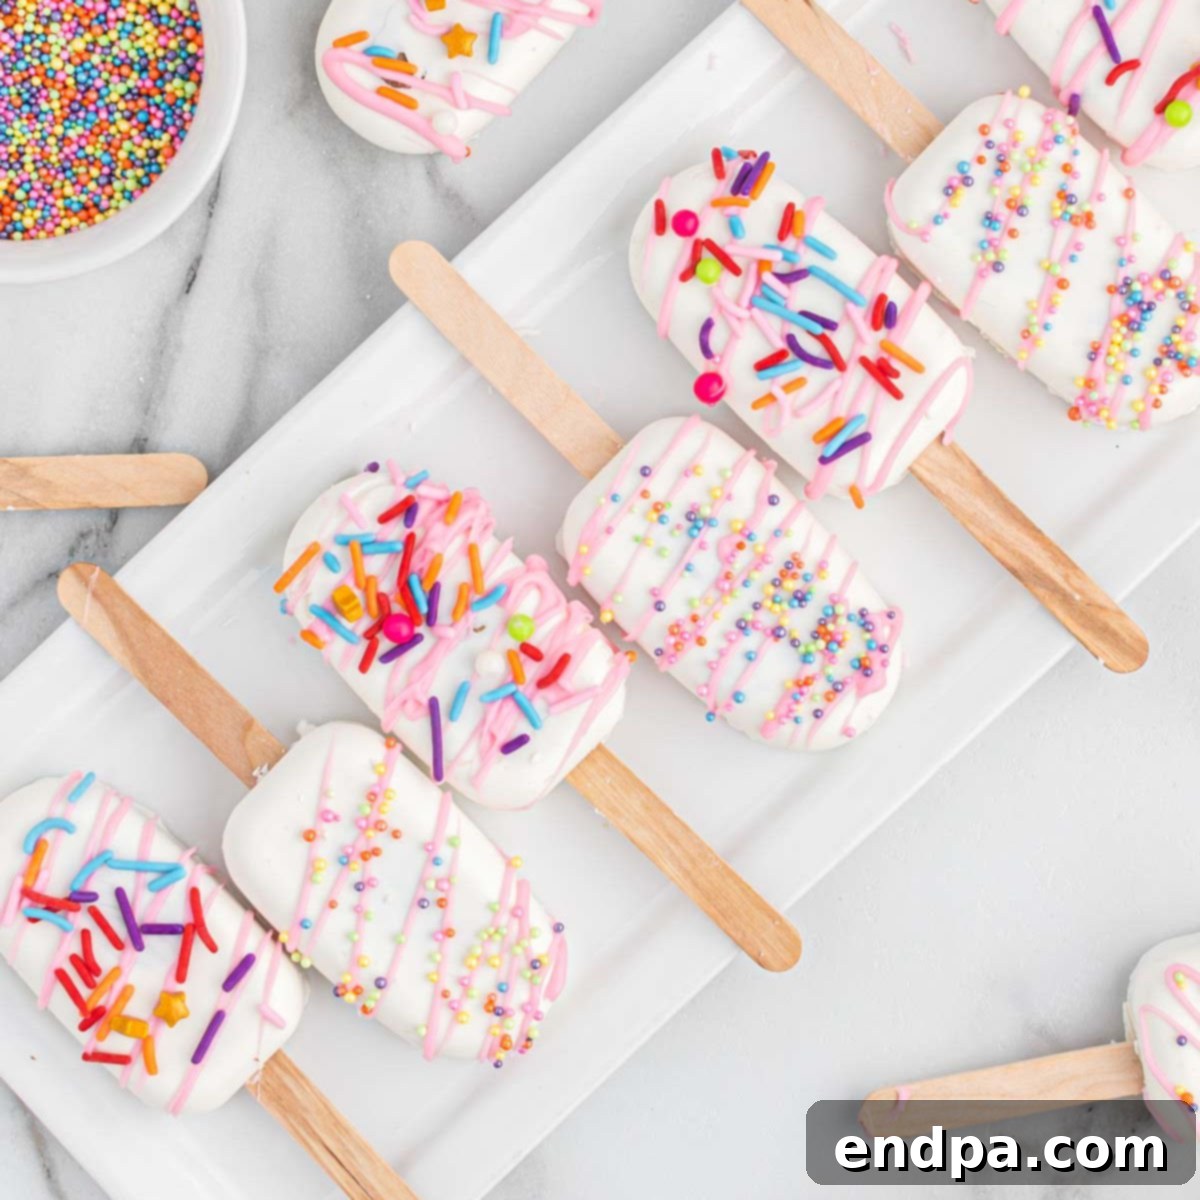
Cakesicles are a delightful and innovative spin on classic cake pops, offering all the joy in a convenient, popsicle-like format. Crafted in charming popsicle molds, these treats are generously coated in a decadent chocolate shell and adorned with a colorful array of sprinkles, making them an instant hit. Cakesicle Popsicles are surprisingly easy to master, promising a fun baking project that kids absolutely adore.
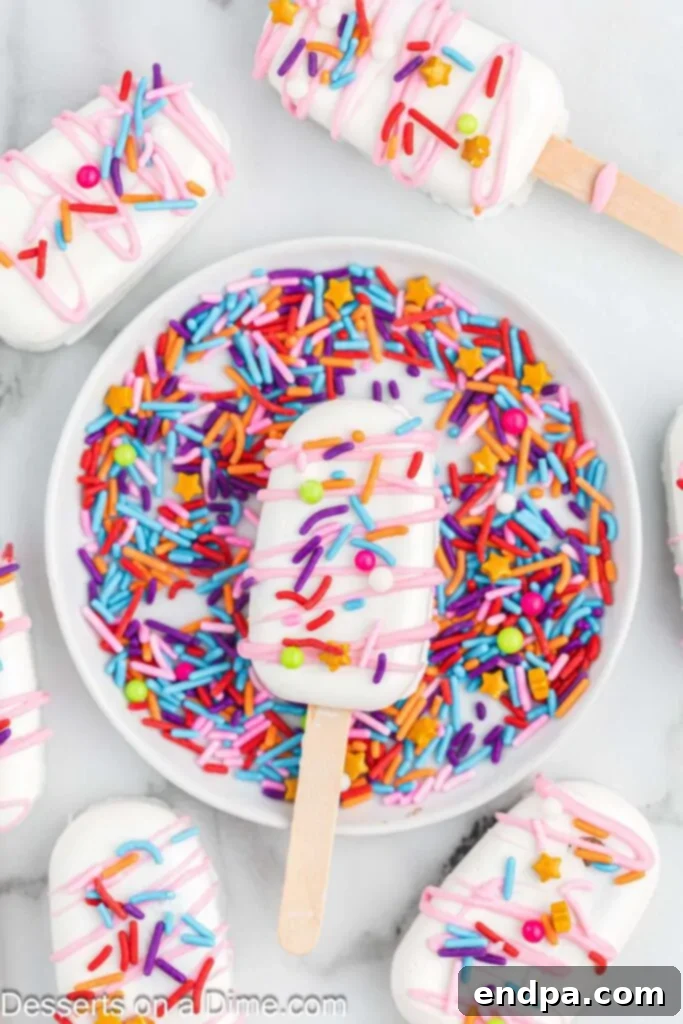
At our house, cake pops have always been a staple for every celebration and casual indulgence, leading us to bake them frequently. Eager to explore new dessert horizons, we experimented with this Cakesicle recipe. The outcome was nothing short of spectacular – an instant favorite that proved both adorable and incredibly delicious!
Beyond cakesicles, our family also loves other frozen delights such as Strawberry Yogurt Popsicles, the nostalgic Strawberry Crunch Bars, and the ever-popular Banana Popsicles. These treats consistently bring smiles and are perfect for warm days or anytime you crave a sweet, refreshing bite.
What’s in this Post: Your Ultimate Cakesicle Guide
- What is a Cakesicle?
- Why You’ll Love This Cakesicle Recipe
- Essential Ingredients
- Substitutions and Creative Variations
- How to Make Cakesicles: A Step-by-Step Guide
- Expert Tips for Cakesicle Success
- Frequently Asked Questions
- More Delightful Cake Pop Creations
- Cakesicles Recipe Card
What is a Cakesicle? The Trendy Twist on Cake Pops
A cakesicle is essentially a cake pop re-imagined. This luscious treat starts with a prepared cake (store-bought mix or homemade), which is then finely crumbled and intimately combined with a creamy frosting. Unlike traditional cake pops that are rolled into spheres, this delightful mixture is carefully pressed into a popsicle-shaped mold, giving it its distinctive, fun silhouette.
Once shaped, the entire confection is enveloped in a smooth, hard chocolate shell, creating a delightful contrast of textures. Each cakesicle is then transformed into a miniature work of art, typically decorated with an abundance of colorful sprinkles, edible glitter, or custom designs. They boast an irresistibly adorable appearance and taste even better, making them a perfect dessert for any occasion, from birthday parties to holiday gatherings. Their unique shape makes them easy to hold and eat, reducing mess and maximizing enjoyment.
Why You’ll Love This Cakesicle Recipe: Easy, Fun, and Totally Customizable
There are countless reasons why cakesicles have captivated dessert lovers, and this recipe highlights all of them. First and foremost, they are incredibly easy to make, even for novice bakers. The process is straightforward, requiring minimal baking skills and mostly assembly, making it a fantastic project to do with kids. They provide a wonderful opportunity for creativity, allowing you to customize flavors, colors, and decorations to perfectly match any theme or personal preference.
Cakesicles are also remarkably versatile. Whether you’re planning a sophisticated dinner party, a playful birthday bash, a baby shower, or a holiday celebration, these treats can be tailored to fit right in. Their individual portion size makes them hygienic and easy to serve, eliminating the need for plates and forks. Plus, their unique, eye-catching appearance instantly elevates any dessert table, sparking joy and conversation among guests. Prepare to be showered with compliments when you serve these charming, delicious creations!
Essential Ingredients for Your Perfect Cakesicles
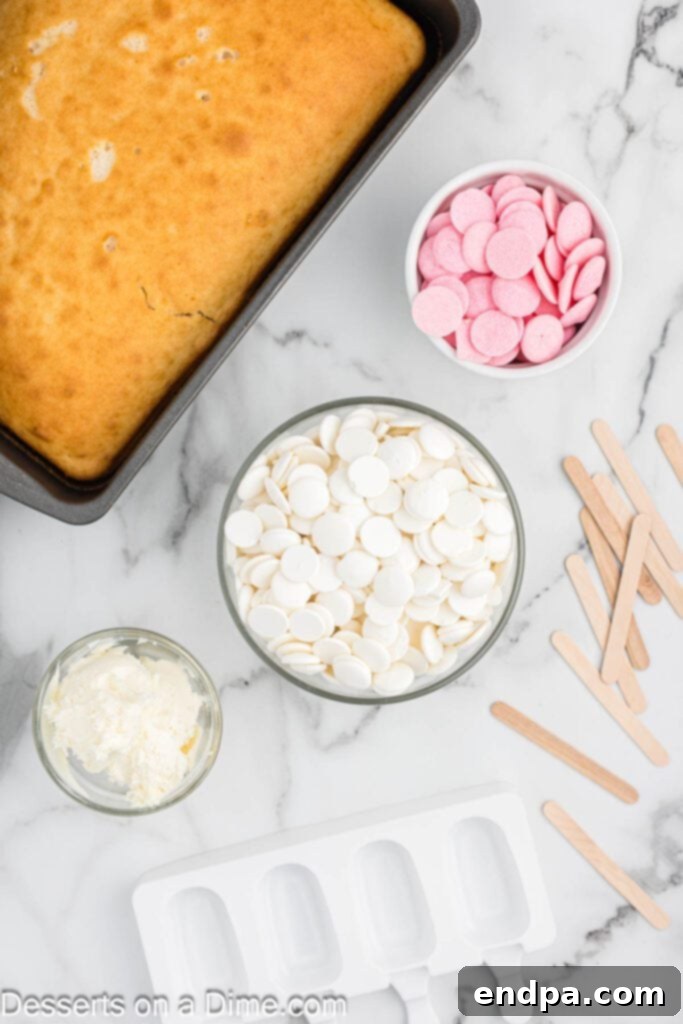
For the Irresistible Cakesicle Filling:
- Prepared Cake: The foundation of your cakesicle! You can use any type of cake you love. A classic yellow cake, rich chocolate, or a festive funfetti mix works wonderfully. Using a store-bought 9×13 inch cake mix can save you time and still deliver fantastic results. Ensure your cake is completely cooled to room temperature before crumbling to prevent the frosting from melting prematurely.
- Frosting: This is what binds your cake crumbs together and adds moisture and flavor. Your favorite canned frosting is perfectly acceptable for convenience, or you can opt for a homemade buttercream for an extra special touch. The key is to add it gradually until you achieve a moldable, yet not overly sticky, consistency.
For the Smooth Chocolate Shell and Dazzling Decorations:
- White Candy Melts or Melting Chocolate: This forms the crisp outer layer of your cakesicle. Candy melts are formulated to melt smoothly and set quickly, providing a professional finish. High-quality melting chocolate or even white chocolate chips (with a touch of coconut oil for fluidity) can also be used. Feel free to choose the option that best suits your preference and availability.
- Sprinkles: The ultimate decorative touch! The possibilities are truly endless here. From classic rainbow sprinkles to themed holiday mixes, nonpareils, jimmies, or even edible glitter, sprinkles add color, texture, and fun to every bite.
- Essential Equipment: A Cakesicle Mold and popsicle sticks are crucial for achieving the signature shape. Silicone molds are highly recommended for easy demolding.
For a complete list of ingredients and detailed instructions, please refer to the recipe card below.
Substitutions and Creative Variations: Unleash Your Inner Pastry Artist!
One of the most exciting aspects of making cakesicles is the endless potential for customization. This allows you to tailor your treats to any occasion, theme, or dietary preference. Don’t be afraid to get creative and make these cakesicles truly your own!
- Cake Base: The world is your oyster when it comes to cake flavors! While vanilla or yellow cake are popular choices, consider using chocolate, strawberry, red velvet, lemon, carrot cake, or even a vibrant funfetti mix for a playful touch. Gluten-free or vegan cake mixes can also be used to accommodate specific dietary needs.
- Frosting Pairings: Elevate your cakesicles by pairing complementary cake and frosting flavors. Imagine a rich chocolate cake with a creamy peanut butter frosting, or a zesty lemon cake with a light cream cheese frosting. For an extra homemade touch, try whipping up a batch of Cinnamon Buttercream or a classic Cream Cheese Frosting. Even a simple vanilla buttercream can be enhanced with extracts like almond or peppermint.
- Chocolate Coating Alternatives: While white candy melts provide a clean canvas, don’t limit yourself! Milk chocolate, dark chocolate, or even colored candy melts can dramatically change the look and flavor profile. A rich dark chocolate coating with a red velvet cake interior, or a vibrant pink candy melt shell for a strawberry cakesicle, can be stunning. You can also mix in a tablespoon of coconut oil to thin out chocolate chips for a smoother dip.
- Dazzling Toppings: Beyond sprinkles, the decoration possibilities are vast!
- Fondant: Use small cut-outs of fondant for intricate designs like flowers, leaves, or geometric shapes.
- Edible Glitter or Dust: Add a touch of sparkle and glamour with edible glitter spray or brush-on dusts.
- Chopped Nuts: For added crunch and flavor, roll your chocolate-coated cakesicles in finely chopped pistachios, almonds, or walnuts before the chocolate sets.
- Shredded Coconut: A tropical twist that adds great texture.
- Mini Chocolate Chips or Candies: Press tiny chocolate chips or crushed candies onto the wet chocolate for a playful look.
- Cookie Crumbs: Crushed Oreos or graham crackers can add a delightful textural element.
- Drizzle Patterns: Use contrasting colors of melted chocolate or candy melts to create artistic drizzle patterns.
- Seasonal and Holiday Themes: Cakesicles are perfect for holiday celebrations!
- For Christmas, use red and green candy melts, festive sprinkles, and perhaps a peppermint flavored cake.
- Valentine’s Day calls for pink and red, heart-shaped sprinkles, and a strawberry or red velvet cake.
- For Halloween, use orange and black chocolate, spooky sprinkles, or even small edible sugar eyeballs.
- Easter can feature pastel colors, bunny sprinkles, and lemon or carrot cake flavors.
How to Make Cakesicles: A Step-by-Step Guide to Perfection
Creating beautiful and delicious cakesicles is an enjoyable process. Follow these detailed steps to ensure your treats turn out perfectly every time.
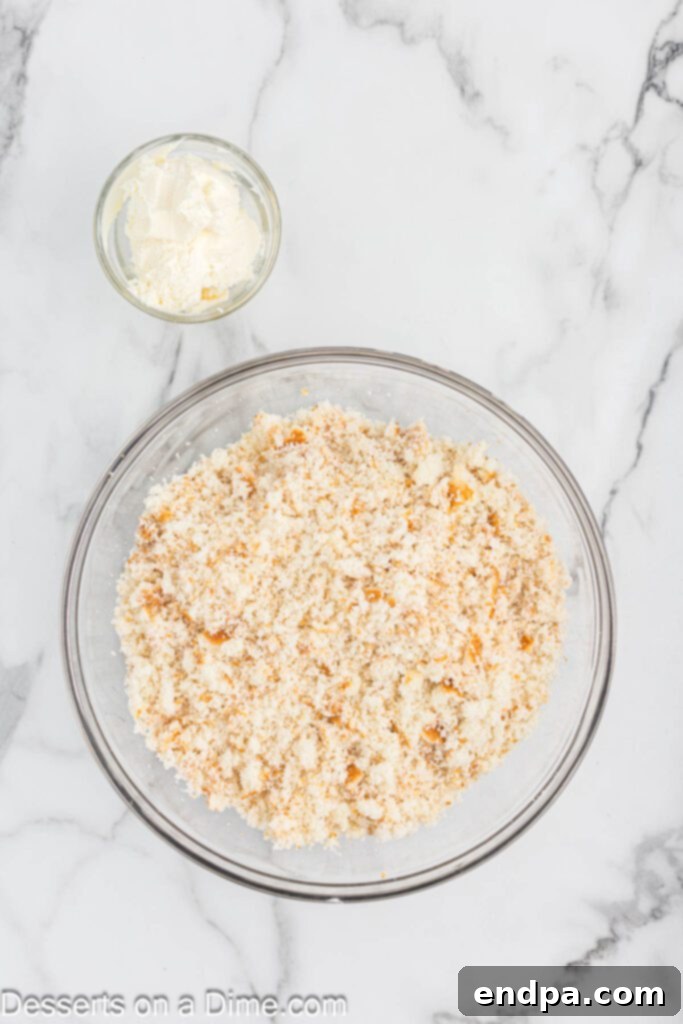
Step 1: Prepare the Cake Filling. Start by baking your chosen box cake mix (or homemade cake) according to package directions. Once baked, allow it to cool completely. This is a critical step – if the cake is warm, the frosting will melt and create a greasy, unworkable mixture. Once cool, crumble the cake into fine pieces in a large mixing bowl. Gradually add your favorite frosting, starting with about half a cup. Mix thoroughly, either with a stand mixer, hand mixer, or your hands, until the cake crumbs hold together when you pinch them, forming a pliable, dough-like consistency that isn’t sticky. Add a little more frosting, a tablespoon at a time, if the mixture is too dry.
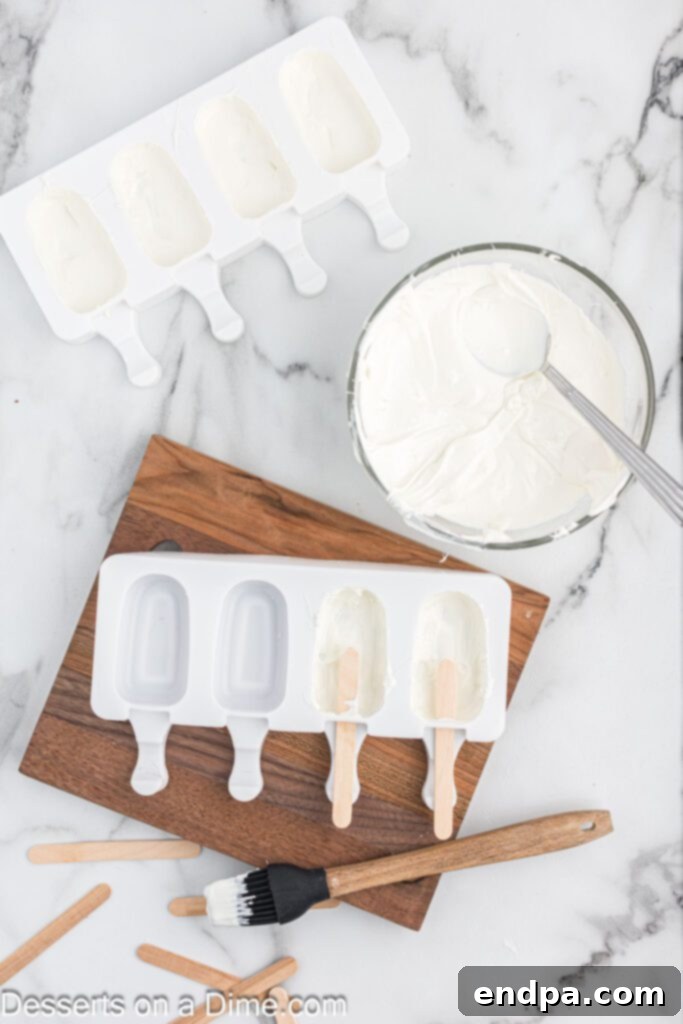
Step 2: Coat the Molds with Chocolate. In a microwave-safe bowl, melt your candy melts or melting chocolate according to the package instructions. Heat in 30-second intervals, stirring thoroughly after each, to prevent burning. Once smooth and fully melted, take a clean, dry popsicle mold. Spoon about 1 tablespoon of the melted chocolate into each cavity of the mold. Use a small spoon or a clean paintbrush to carefully spread the chocolate thinly and evenly up the sides and across the bottom of each cavity. You want a thin, consistent layer to ensure the shell doesn’t crack.
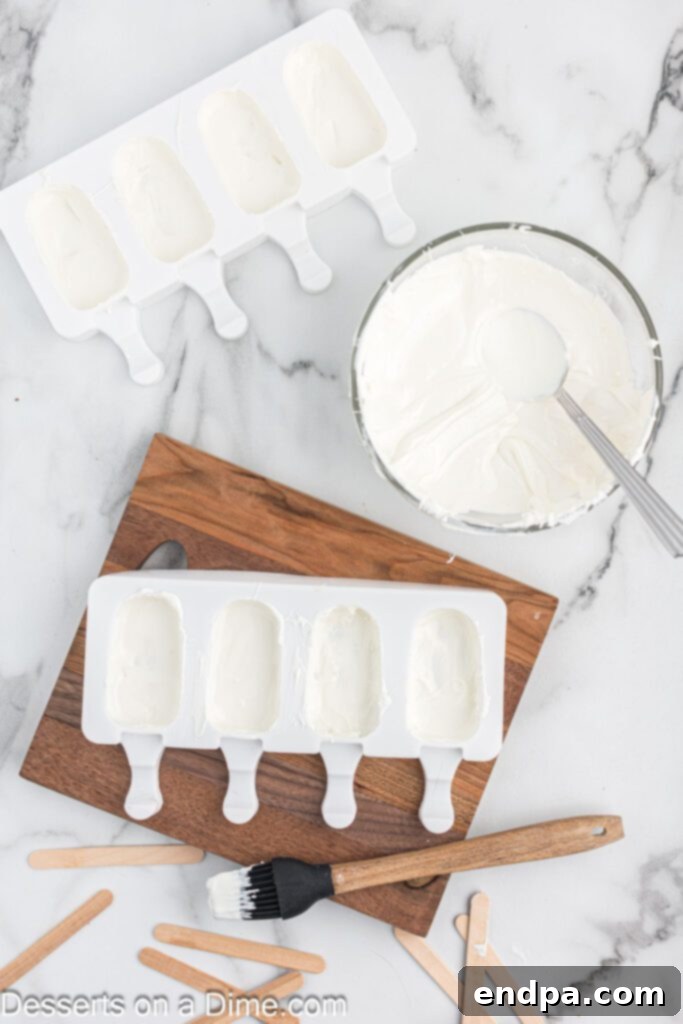
Step 3: Insert Sticks and Chill. Before the chocolate sets, carefully insert the popsicle sticks into each mold. Make sure the stick goes deep enough to be firmly embedded in the cake mixture later, but not so deep that it pokes through the front of the mold. Once the sticks are in place, gently remove them and then re-insert them after the chocolate has slightly set, cleaning any excess chocolate from the stick area. This creates a clean channel for the stick. Place the mold in the freezer for 3-5 minutes if using candy melts, or in the refrigerator for 10-15 minutes if using melting chocolate, until the chocolate shell is firm to the touch.
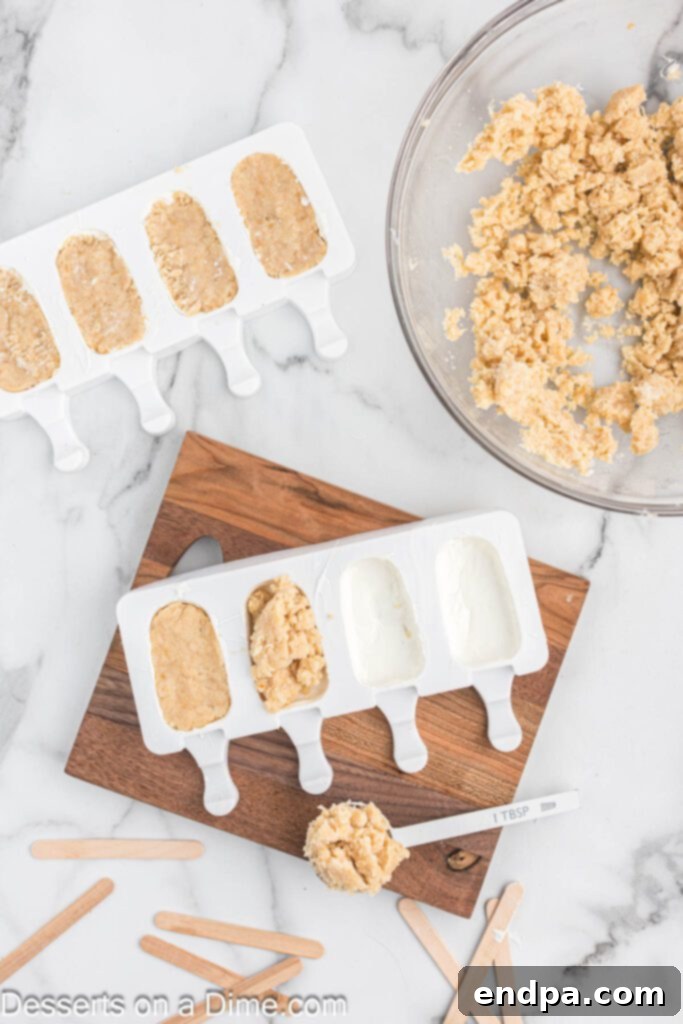
Step 4: Fill the Molds with Cake Mixture. Once your chocolate shells are firm, it’s time to add the delicious cake filling. Scoop approximately 1 tablespoon of your prepared cake mixture for each cakesicle. Gently press the filling into the molds, ensuring it fills the cavity evenly but without overstuffing. Leave at least 1/16 of an inch of space at the top edge of the mold. This small gap is crucial for adding the final chocolate layer to fully encapsulate the cake filling.
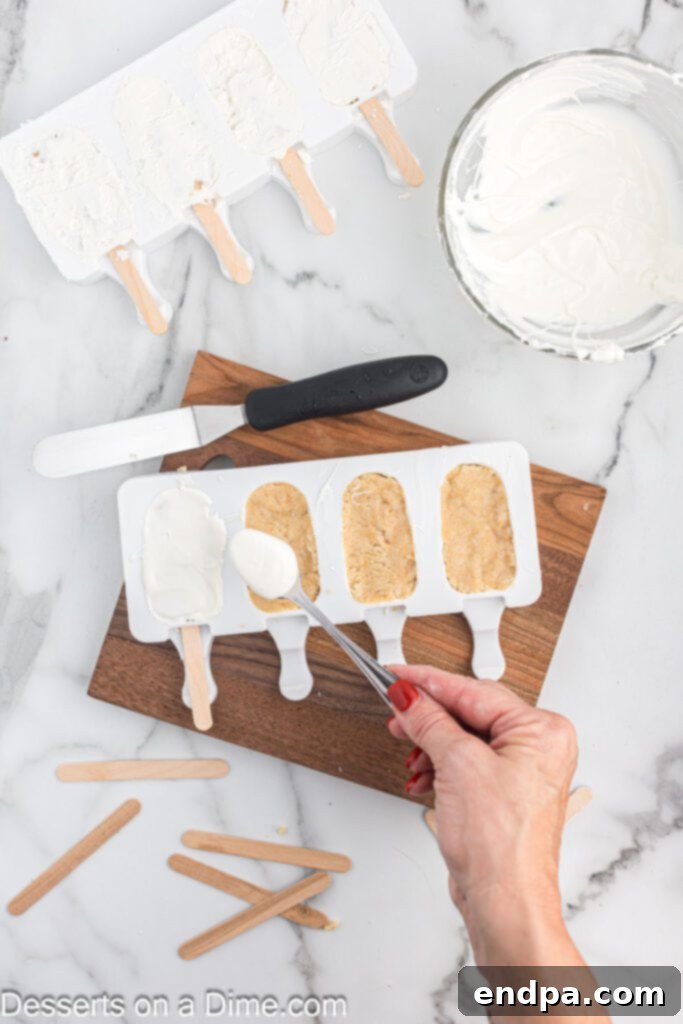
Step 5: Seal with More Chocolate. Spoon about a teaspoon of the melted white chocolate over the top of the cake filling in each mold. Gently spread this chocolate layer thinly and evenly, ensuring it completely covers the cake mixture and reaches the edges of the mold, sealing the cakesicle. Repeat this process for all your cakesicles, making sure each one is fully enclosed in chocolate.
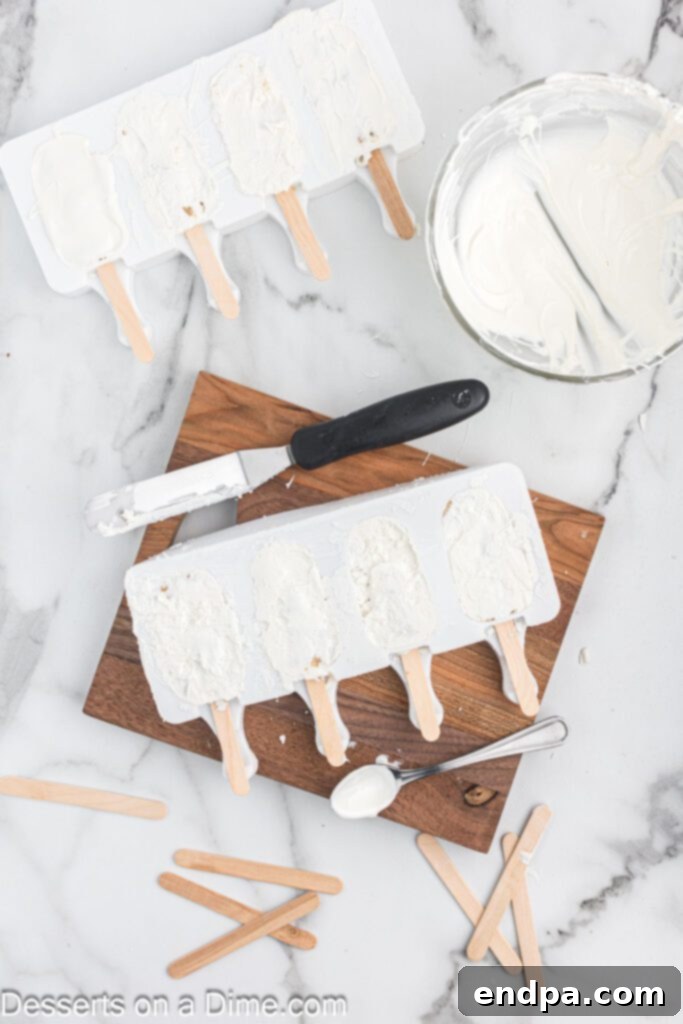
Step 6: Remove Excess Chocolate and Chill Again. After sealing the cakesicles, use an offset spatula or a flat knife to carefully scrape off any excess chocolate from the top surface of the mold. This creates a clean, flat back for your cakesicles. Once scraped, place the molds back into the freezer for approximately 2 minutes (or refrigerator for 5-10 minutes) until the final chocolate layer has completely hardened and set. This firm setting is crucial for easy demolding.
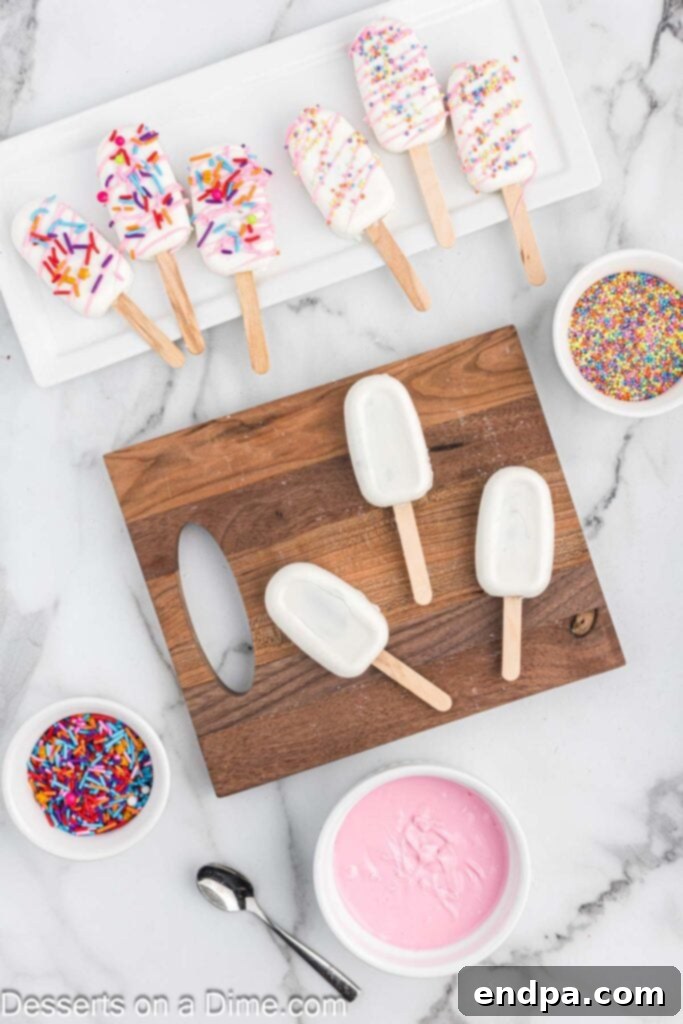
Step 7: Gently Unmold the Cakesicles. Once the chocolate is completely firm, carefully remove the cakesicles from their molds. Silicone molds make this step very easy – simply push from the back of the mold. If using a harder plastic mold, you might need to gently flex the mold to release the cakesicle. Handle them with care to avoid leaving fingerprints or cracking the chocolate shell. If any cakesicles are difficult to remove, chill them for another minute or two.
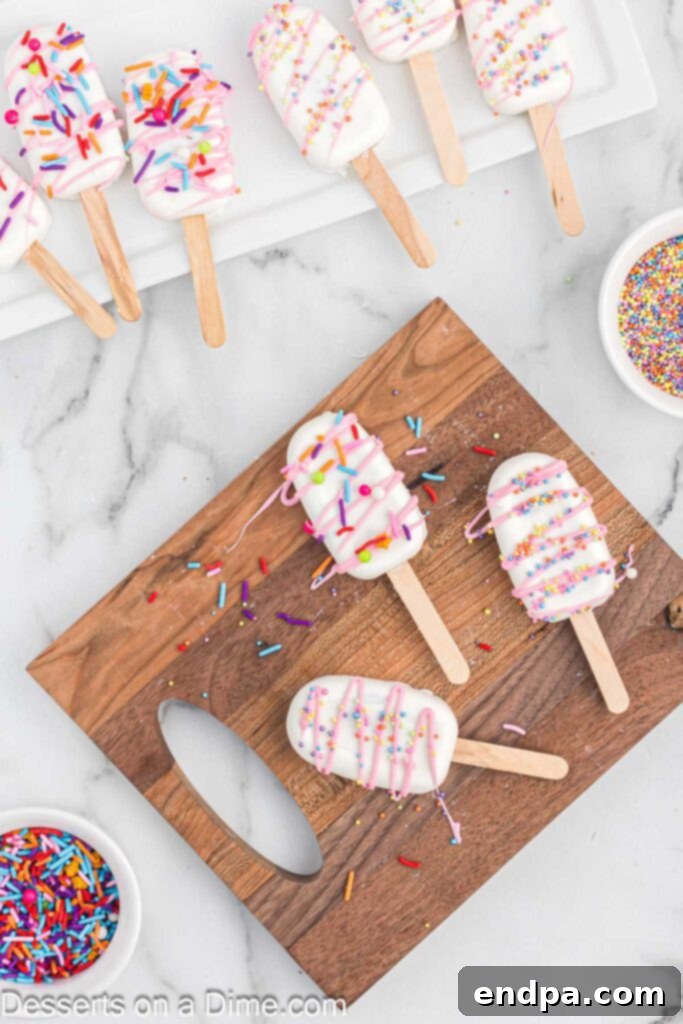
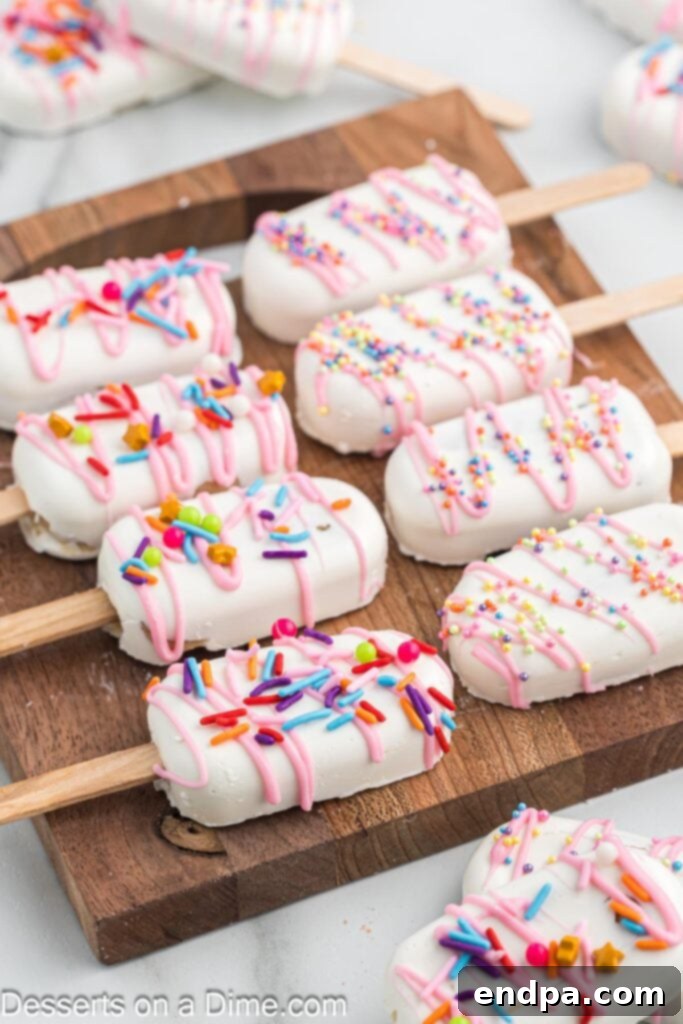
Step 8: Decorate Your Cakesicles. This is where the fun really begins! Drizzle additional melted candy melts (perhaps in a contrasting or complementary color) over the unmolded cakesicles for an artistic touch. Immediately after drizzling, while the chocolate is still wet, generously apply your chosen sprinkles. The wet chocolate acts as a glue, ensuring the sprinkles adhere perfectly. Allow the decorated cakesicles to set completely before serving or storing. You can place them on a parchment-lined tray and chill for a few minutes to speed up the setting process.
Expert Tips for Cakesicle Success: Achieve Bakery-Quality Results
Crafting perfect cakesicles involves a few key techniques and considerations. Keep these expert tips in mind to ensure your treats are not only delicious but also flawlessly presented.
- The Importance of Temperature: Ensure your prepared cake is absolutely at room temperature before crumbling and mixing with frosting. If the cake is even slightly warm, it will melt the frosting, resulting in a greasy, unmanageable mixture that won’t hold its shape properly. Room temperature ingredients blend much more smoothly for a perfect cakesicle core.
- Gradual Frosting Addition: When combining cake crumbs and frosting, start with the recommended amount (e.g., ½ cup) and add more in very small increments (teaspoons or tablespoons) if needed. The goal is a consistency that holds together when pinched but isn’t sticky or overly wet. Too much frosting will make the cakesicles soft and prone to breaking.
- Mastering Chocolate Melting: Melt your candy melts or chocolate in a microwave-safe bowl using short 20-30 second bursts, stirring thoroughly after each interval. Overheating chocolate will cause it to seize, become thick, and unusable. If your chocolate becomes too thick, you can thin it out with a tiny amount of coconut oil or vegetable shortening (about ½ teaspoon per cup of melts), stirring until smooth.
- Thin and Even Chocolate Shell: When coating the molds, aim for a thin, even layer of chocolate. A thick layer is more likely to crack when the cakesicle is unmolded, or when bitten into. Use a small, clean brush or the back of a spoon to ensure full coverage up the sides and bottom of the mold. Double-coating (letting the first thin layer set, then adding another thin layer) can also create a stronger shell if desired.
- Chill Time is Crucial: Allow sufficient time for each chocolate layer to fully harden in the freezer or refrigerator. Rushing this step can lead to messy demolding or cracking chocolate. A firm, set chocolate layer is much easier to work with.
- Careful Handling Post-Hardening: Once the chocolate shell has set, be mindful when handling the cakesicles as they can easily pick up fingerprints. If possible, wear thin gloves for a pristine finish, especially when preparing them for display.
- Topping Adhesion: Always apply sprinkles, edible glitter, or other decorative toppings immediately after drizzling additional melted chocolate or candy melts onto the cakesicle. The wet chocolate acts as a natural adhesive, ensuring your decorations stick firmly in place. For multiple layers of decoration, allow each layer to set slightly before adding the next.
- Painting the Molds vs. Dipping: For cakesicles, coating the molds with chocolate is generally much easier and yields a more consistent, professional finish than attempting to dip the cake filling directly into melted chocolate, which can be messy and lead to uneven coating.
Frequently Asked Questions About Cakesicles
Cakesicles can be stored in an airtight container or wrapped individually in plastic wrap in the refrigerator for up to one week. For longer storage, they freeze exceptionally well! Place them in a freezer-safe bag or container, separated by parchment paper, and they will keep for up to one month. Thaw them in the refrigerator before serving for the best texture.
Several factors can contribute to chocolate cracking:
- Overstuffing the Molds: Adding too much cake filling creates pressure on the chocolate shell. Ensure you leave a small gap (at least 1/16 inch) at the top for the final chocolate layer.
- Pushing Down Too Hard: When pressing the cake mixture into the mold, be gentle. Excessive force can weaken the chocolate.
- Chocolate Temperature: If the chocolate shell is too cold or brittle, it can crack. Sometimes letting the molds come to room temperature for a minute or two before demolding can help.
- Uneven Chocolate Coating: If some parts of the chocolate shell are significantly thinner than others, those weak spots are prone to breaking. Strive for a consistent thin layer.
For the initial coating of the molds, about one tablespoon of melted chocolate per cavity is typically sufficient. This should be spread evenly to coat the bottom and sides in a thin layer. For the top sealing layer, approximately one teaspoon of melted chocolate per cakesicle should be enough to cover the cake filling.
Yes, you can use regular chocolate chips (white, milk, or dark). However, chocolate chips may need a little assistance to melt smoothly and achieve the right consistency for coating. Add about 1/2 to 1 teaspoon of coconut oil or vegetable shortening per cup of chocolate chips while melting. This will help thin out the chocolate and make it easier to spread and prevent it from seizing.
If the cake mixture feels too dry and crumbly, add more frosting, one tablespoon at a time, mixing well after each addition until it reaches a moldable consistency. If it’s too wet and sticky, you can try adding a small amount of extra dry cake crumbs, or chill the mixture in the refrigerator for 15-30 minutes to firm it up slightly.
More Delightful Cake Pop Creations to Enjoy
If you love the fun and flavor of cakesicles, you’ll certainly enjoy these other fantastic cake pop recipes. They’re perfect for any occasion and offer even more ways to enjoy your favorite cake in bite-sized form!
- Starbucks Lemon Cake Pops
- Cookie Dough Cake Pops
- Brownie Cake Pops
We encourage you to try this incredibly fun and satisfying cakesicles recipe for your next gathering or simply as a special treat. Once you do, please come back and share your experience and comments – we’d love to hear from you!
Cakesicles Recipe
Ingredients
Cakesicle Filling:
- 1 9×13-inch prepared cake room temperature
- ½ cup frosting up to ¼ cup more if necessary
Chocolate Shell:
- 3 cups candy melts or melting chocolate
- Sprinkles optional
Instructions
For the Cake Filling:
- Using a mixer or your hands, crumble the cake thoroughly. Ensure the cake is at room temperature to prevent the frosting from melting when combined.
- Add 1 tablespoon of frosting at a time to the crumbled cake and mix until you achieve a moldable consistency. The filling should hold together when you pinch it, but it should not be overly sticky.
For the Chocolate Shell:
- Melt the candy melts or melting chocolate according to the package instructions (usually in 30-second intervals, stirring in between). Spoon about 1 tablespoon of melted chocolate into each popsicle mold cavity.
- Using a small spoon or clean brush, spread the chocolate in a thin, even layer to coat the bottom and sides of the mold cavity.
- Insert the popsicle sticks into each mold. Carefully remove them before the chocolate sets to clear the stick channel, then reinsert once the chocolate is partially set.
- Repeat creating chocolate shells in all desired popsicle mold cavities.
- Place the mold in the freezer if using Candy Melts (for 3-5 minutes) or in the refrigerator if using melting chocolate (for 10-15 minutes). Chill until the chocolate hardens completely.
- Scoop out 1 tablespoon of the cake filling and gently press it into each hardened candy shell, leaving a small gap (at least 1/16 of an inch) at the top for the final chocolate coating.
- Continue this process until all the mold cavities are filled with cake mixture.
- Spoon approximately a teaspoon of melted white chocolate thinly over the top of the cake filling in each mold, ensuring it completely covers and seals the cakesicle.
- Use an offset spatula or a flat knife to scrape off any excess chocolate from the top surface of the mold, creating a clean back.
- Repeat covering all the cakesicles with the top chocolate layer.
- Chill for about 2 minutes in the freezer (or 5-10 minutes in the fridge) until the candy layer hardens completely.
- Carefully unmold the cakesicles from the silicone molds.
- Decorate the cakesicles by drizzling more melted candy melts on top (consider a contrasting color!) and immediately topping with your favorite sprinkles. Allow decorations to set before serving.
Recipe Notes
Nutrition Facts
Carbohydrates 37g,
Protein 3g,
Fat 14g,
Saturated Fat 6g,
Polyunsaturated Fat 2g,
Monounsaturated Fat 5g,
Cholesterol 1mg,
Sodium 113mg,
Potassium 107mg,
Fiber 2g,
Sugar 28g,
Vitamin A 16IU,
Vitamin C 0.1mg,
Calcium 46mg,
Iron 1mg
Pin This Now to Remember It Later
Pin Recipe
