Easy and Festive Easter Dirt Cups: A Delightful No-Bake Dessert for Spring
Individual Easter Dirt Cups are more than just a dessert; they are a delightful celebration of Spring, offering a burst of color and flavor that brightens any table. These charming cups feature rich, decadent layers that are not only incredibly delicious but also visually appealing, making them a centerpiece for any Spring gathering. Imagine digging into a cup filled with creamy pudding, crunchy cookie crumbs, and fluffy whipped topping, each bite a sweet symphony. Perfect for Easter brunches, family dinners, or simply as a fun Springtime treat, these cups promise smiles and satisfaction.

If you’re a fan of classic Oreo Dirt Cake, then you’ll absolutely adore this festive take on the beloved dessert: Easter Dirt Pudding Cups. This recipe delivers all the familiar, comforting flavors of pudding, cookies, and creamy goodness, but in convenient, perfectly portioned individual servings. It’s a seasonal twist on the classic Best Dirt Cups Recipe, specially designed to bring the spirit of Easter and Spring to your dessert menu.
These adorable Easter bunny dirt cups are the epitome of an effortless no-bake dessert. They require minimal kitchen time and maximum flavor, making them ideal for busy hosts. We love crafting memorable Easter Desserts, and alongside these dirt cups, our holiday table often features other festive delights such as Easter Bunny Cupcakes, playful Easter Rice Krispie Treats, and elegant White Chocolate Easter Bark. Each recipe adds its unique charm to our Spring celebrations.
What’s in this post: Easter Dirt Cups
- Why You’ll Love This Recipe
- Essential Ingredients for Easter Dirt Cups
- Creative Variations and Topping Ideas
- Step-by-Step Guide: How to Make Easter Dirt Cups
- Expert Tips for Perfect Dirt Cups
- Can You Make Easter Dirt Cups Ahead of Time?
- More Delightful Peeps Desserts
- More Easy Easter Desserts
- Easter Dirt Cups Recipe Card
Why You’ll Love This Recipe
There are countless reasons why these individual Easter Dirt Cups will become a new favorite in your Spring dessert repertoire. First and foremost, they are incredibly versatile, perfect for any occasion from casual family dinners to elaborate Easter lunches or festive parties. Each cup is a miniature masterpiece, generously topped with whimsical Peeps and colorful Easter candy, transforming a simple dessert into a fun and interactive experience for everyone. The playful presentation makes them particularly appealing to children and adults alike, sparking joy with every glance and every spoonful.
Beyond their charming appearance, these dirt cups offer a wonderful alternative to heavier, more complicated desserts. As a no-bake option, they free up valuable oven space during holiday cooking and reduce preparation stress. This recipe is also highly customizable, allowing you to tailor it to your taste preferences and dietary needs. If you’re looking for other easy, crowd-pleasing treats, don’t forget to check out our Dirt Cake Recipe without Cream Cheese for a lighter take, or the adorable Bunny Bait Recipe for a salty-sweet snack mix.
The individual servings also make these dirt cups incredibly convenient for parties. Guests can easily grab a cup without the need for serving utensils or messy cutting, ensuring a smooth and enjoyable dessert experience. They are truly a fun dessert that embodies the lighthearted spirit of Spring!
Essential Ingredients for Easter Dirt Cups
Creating these delightful Easter Dirt Cups requires just a few simple ingredients, most of which you likely already have in your pantry or can easily find at any grocery store. The beauty of this recipe lies in its simplicity, proving that you don’t need exotic items to make an extraordinary dessert. Each component plays a crucial role in building the layers of flavor and texture that make these cups so irresistible.
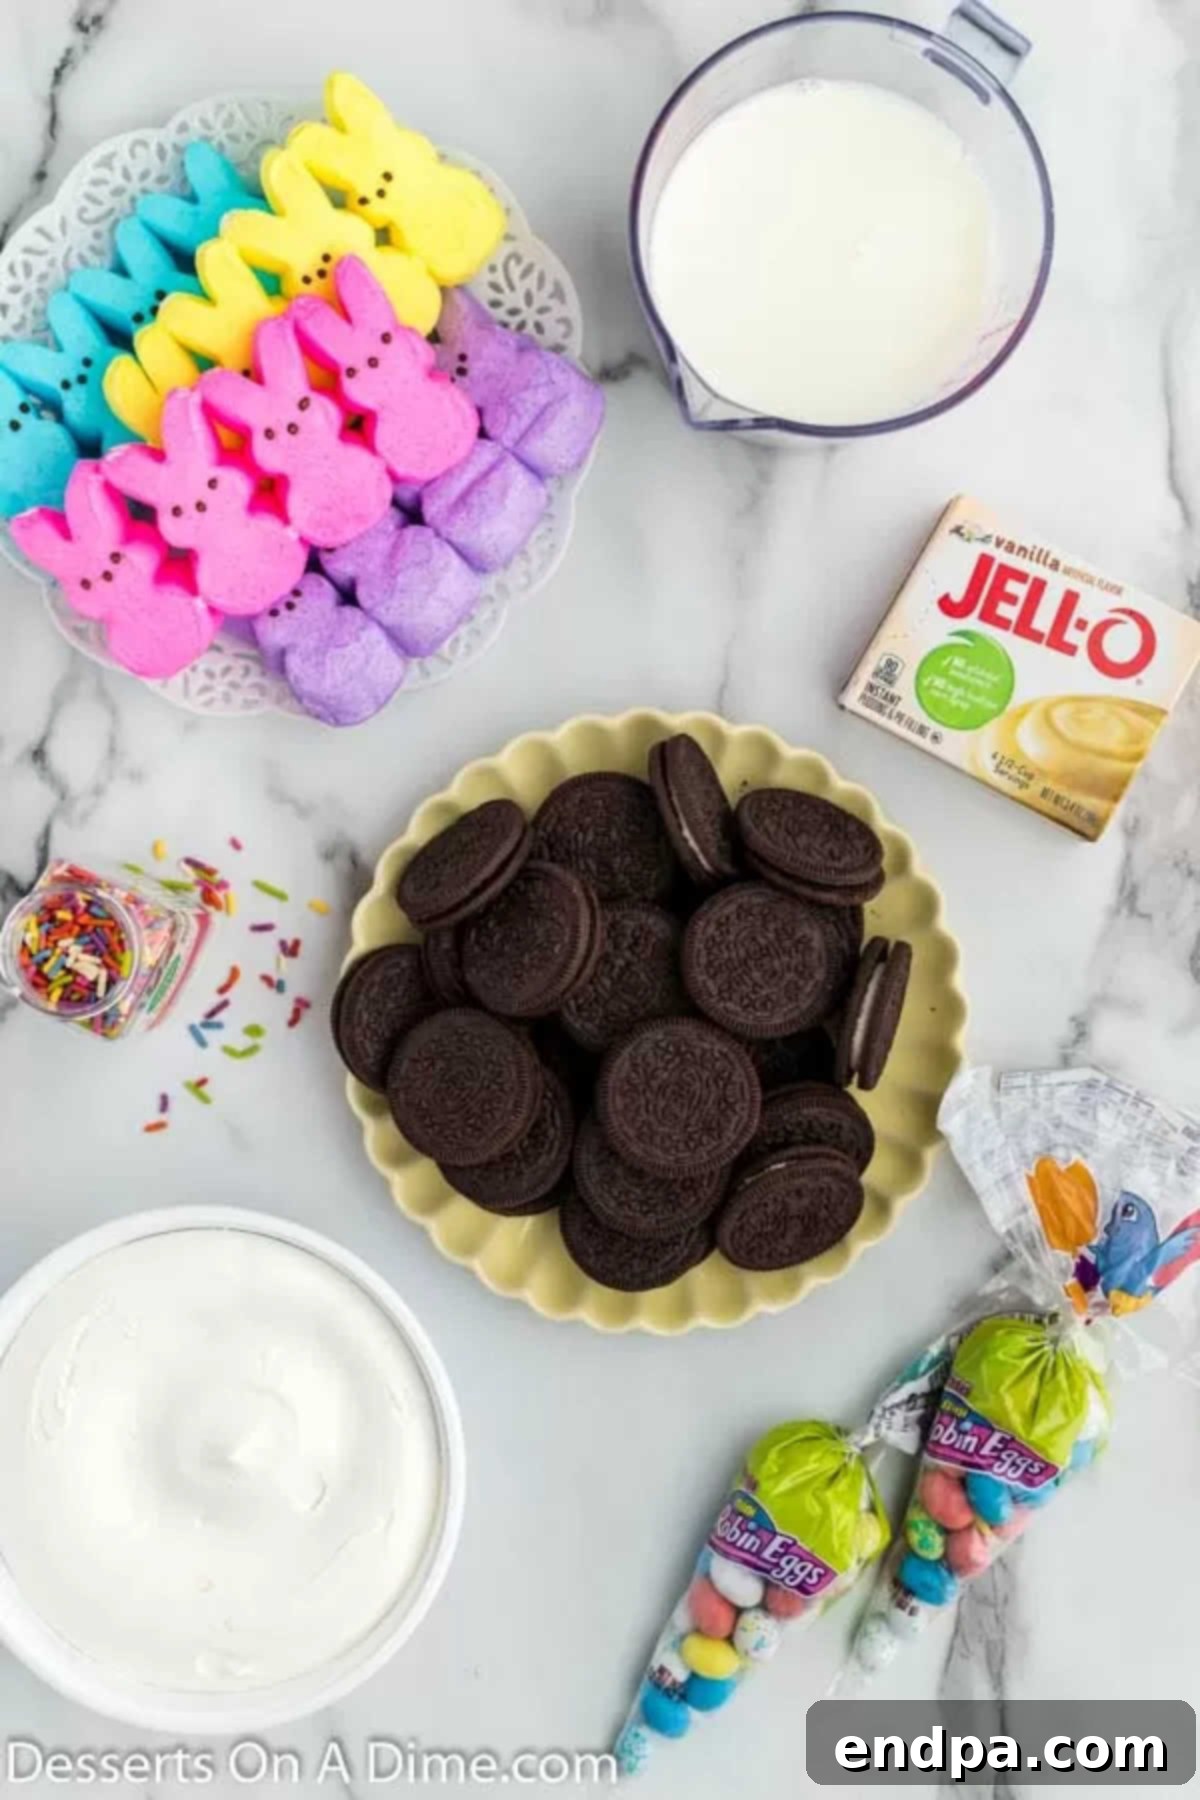
- Oreo Cookies: These iconic chocolate sandwich cookies are the backbone of our “dirt” layer. Their rich chocolate flavor and crunchy texture, when crushed, perfectly mimic moist soil. You can use classic Oreos or experiment with different flavors for a unique twist.
- Cool Whip: This ready-made whipped topping provides the light, airy, and creamy component of the dessert. It’s essential for achieving that delightful, melt-in-your-mouth texture when combined with the pudding.
- Instant Vanilla Pudding Mix: The instant variety is key here, as it sets quickly and forms the base for our creamy layers. While vanilla is traditional, other instant pudding flavors can also be used for creative variations.
- Milk: Used to prepare the instant pudding, milk helps create the smooth, thick consistency needed for the dessert. Whole milk often yields a richer, creamier pudding, but other milk types can be substituted.
- Peeps: These iconic marshmallow treats are a quintessential Easter staple and serve as the most charming edible decoration. Whether you choose bunny or chick shapes, they instantly bring a festive touch to your dirt cups.
- Easter Candy Eggs and Sprinkles: These colorful additions are used to decorate the top layer of “dirt,” making each cup look like a mini Easter garden. Think chocolate eggs, jelly beans, or vibrant sprinkles to enhance the visual appeal.
Find the complete, detailed ingredient list with precise measurements in the recipe card at the bottom of this post, ensuring you have everything you need for success.
Creative Variations and Topping Ideas
One of the most exciting aspects of making Easter Dirt Cups is the endless possibilities for customization. While the classic recipe is undeniably delicious, don’t hesitate to get creative and tailor it to your preferences, theme, or whatever ingredients you have on hand. These variations can transform your dirt cups into an entirely new experience, adding different flavors, textures, and visual appeals.
- Make One Large Dish: Instead of individual cups, this recipe scales beautifully into a single, show-stopping dessert. Prepare it in a large trifle dish, a clear glass bowl, or even a 9×13 inch baking pan. This is perfect for potlucks or when serving a larger crowd, allowing everyone to scoop their desired portion.
- Explore Diverse Toppings: The sky’s the limit when it comes to decorating! Beyond traditional jelly beans and Easter sprinkles, consider adding mini chocolate eggs, chocolate bunnies (whole or broken into pieces), colorful M&M’s, or even toasted coconut dyed green to resemble “Easter grass.” Gummy worms can also be added for a fun, classic “dirt” effect.
- Experiment with Pudding Colors: Elevate the visual appeal by adding a few drops of pastel-colored food dye to your vanilla pudding mixture. Soft green would look like freshly sprouted grass, light blue could mimic a Spring sky, or pink for cherry blossoms. This is a fantastic way to coordinate with your Easter decor.
- Swap Pudding and Cookie Flavors: For a delightful change of pace, try using instant chocolate pudding mix alongside classic Oreos for an extra rich chocolate experience. Alternatively, use Golden Oreo cookies with vanilla pudding for a lighter, creamier flavor profile, or even lemon pudding for a zesty kick.
- Add Cream Cheese for Richness: While the base recipe is light and airy, you can easily transform it into a richer, more decadent “dirt cake” by incorporating softened cream cheese into the pudding mixture. Beat the cream cheese until smooth before folding it into the prepared pudding and Cool Whip until you achieve your desired consistency and taste.
- Vary Individual Containers: The presentation can be as charming as the dessert itself. Instead of standard clear plastic cups, consider using elegant mason jars for a rustic touch, delicate parfait glasses for a more refined look, or small glass tumblers. These options not only look cute but can also be reused.
- Mix and Match Peeps: We often use adorable bunny Peeps, but chick Peeps are equally charming and festive. Feel free to use a mix of both or whatever seasonal Peep shapes are available to add a variety of characters to your edible garden.
- Adapt for Any Season: These dirt cups aren’t just for Easter! By simply omitting the Easter-specific candies and Peeps, you can adapt this recipe for any time of year. Use gummy worms for a classic “dirt” theme, Halloween candies for spooky treats, red and green sprinkles for Christmas, or berries for a summer picnic. The core recipe is a fantastic canvas for year-round fun!
Don’t be afraid to experiment with these variations to make your Easter Dirt Cups truly unique and perfectly suited to your celebration!
Step-by-Step Guide: How to Make Easter Dirt Cups
Creating these festive Easter Dirt Cups is a straightforward and enjoyable process. Even beginner bakers will find this recipe easy to follow, resulting in a delicious and impressive dessert. Follow these simple steps to assemble your vibrant Spring treats:
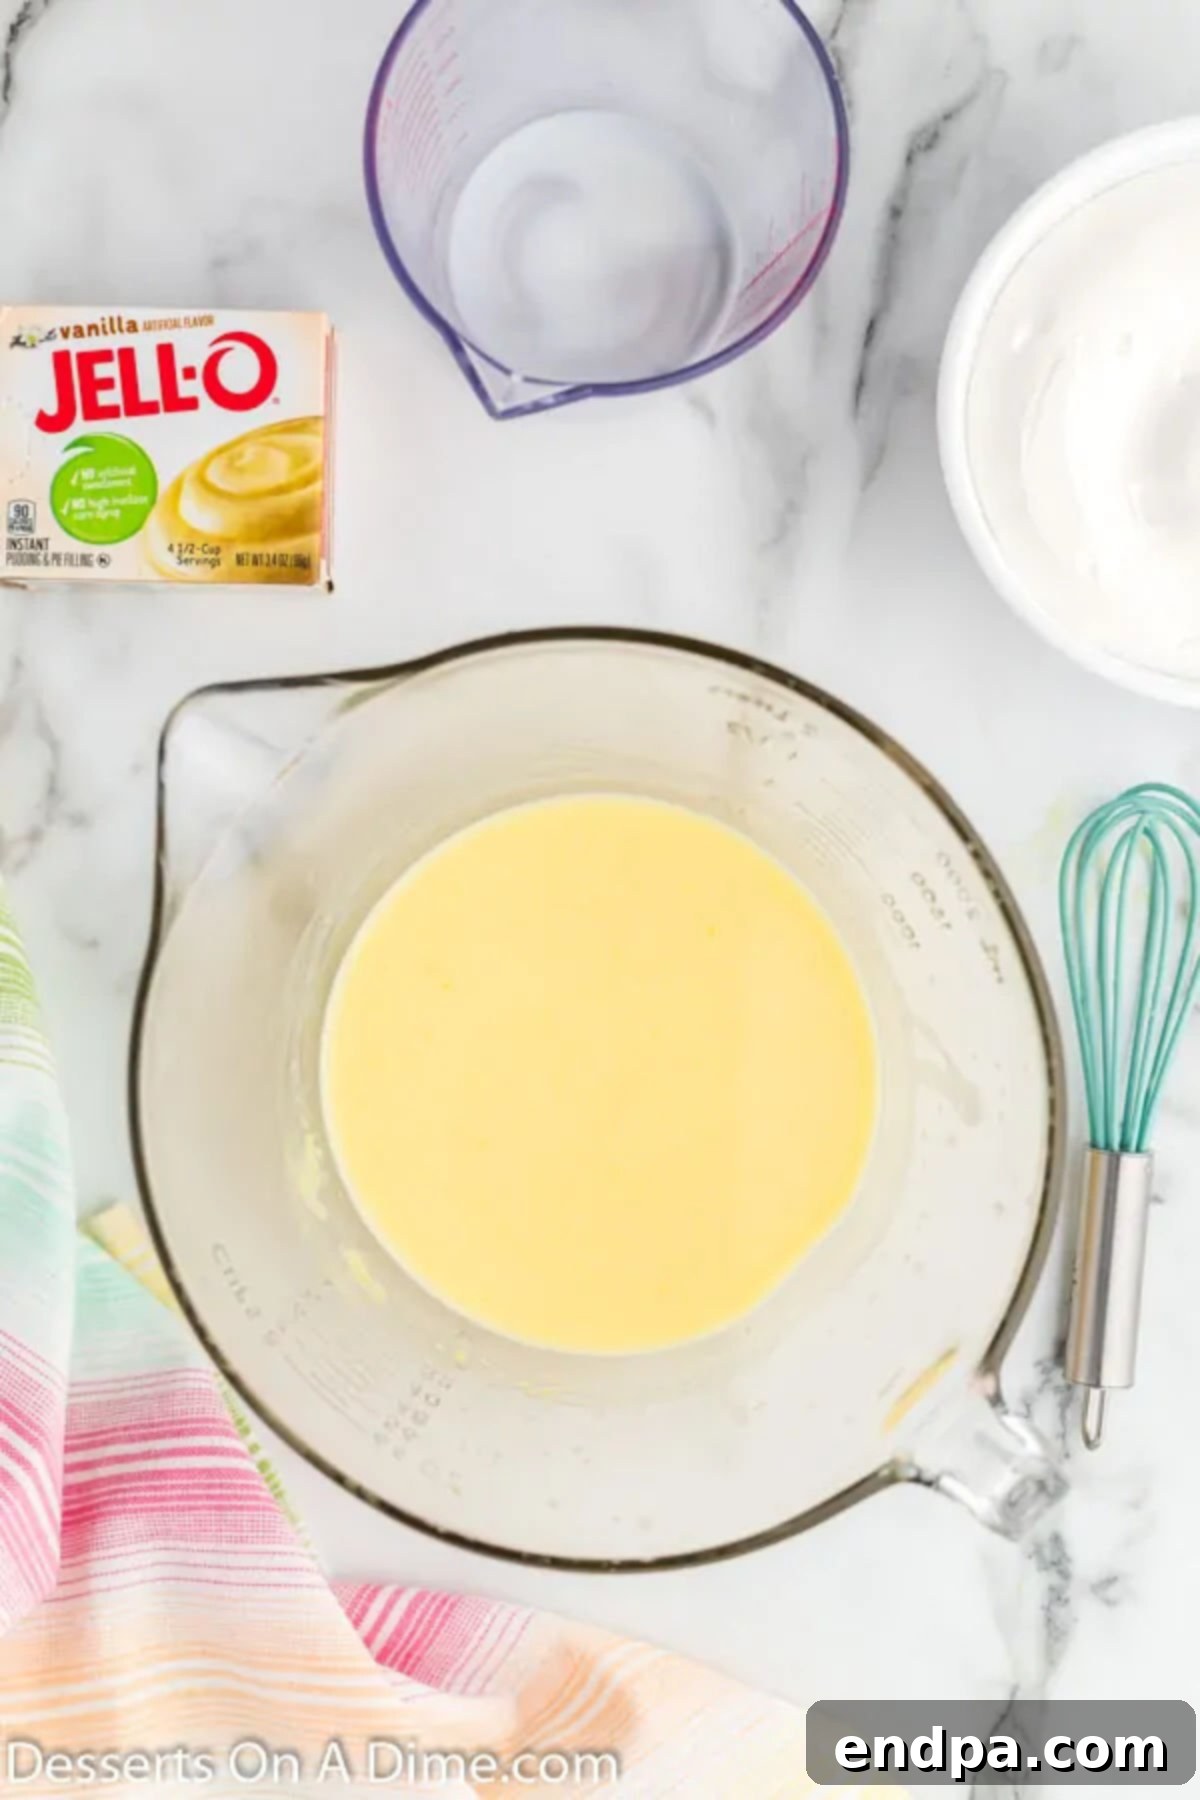
Step 1: Prepare the Pudding. In a large mixing bowl, combine the instant pudding mix with the milk. Whisk vigorously for about 2-3 minutes until the mixture begins to thicken and becomes smooth. Once whisked, place the bowl in the refrigerator for approximately 10 minutes to allow the pudding to set further and achieve a firm, spoonable consistency.
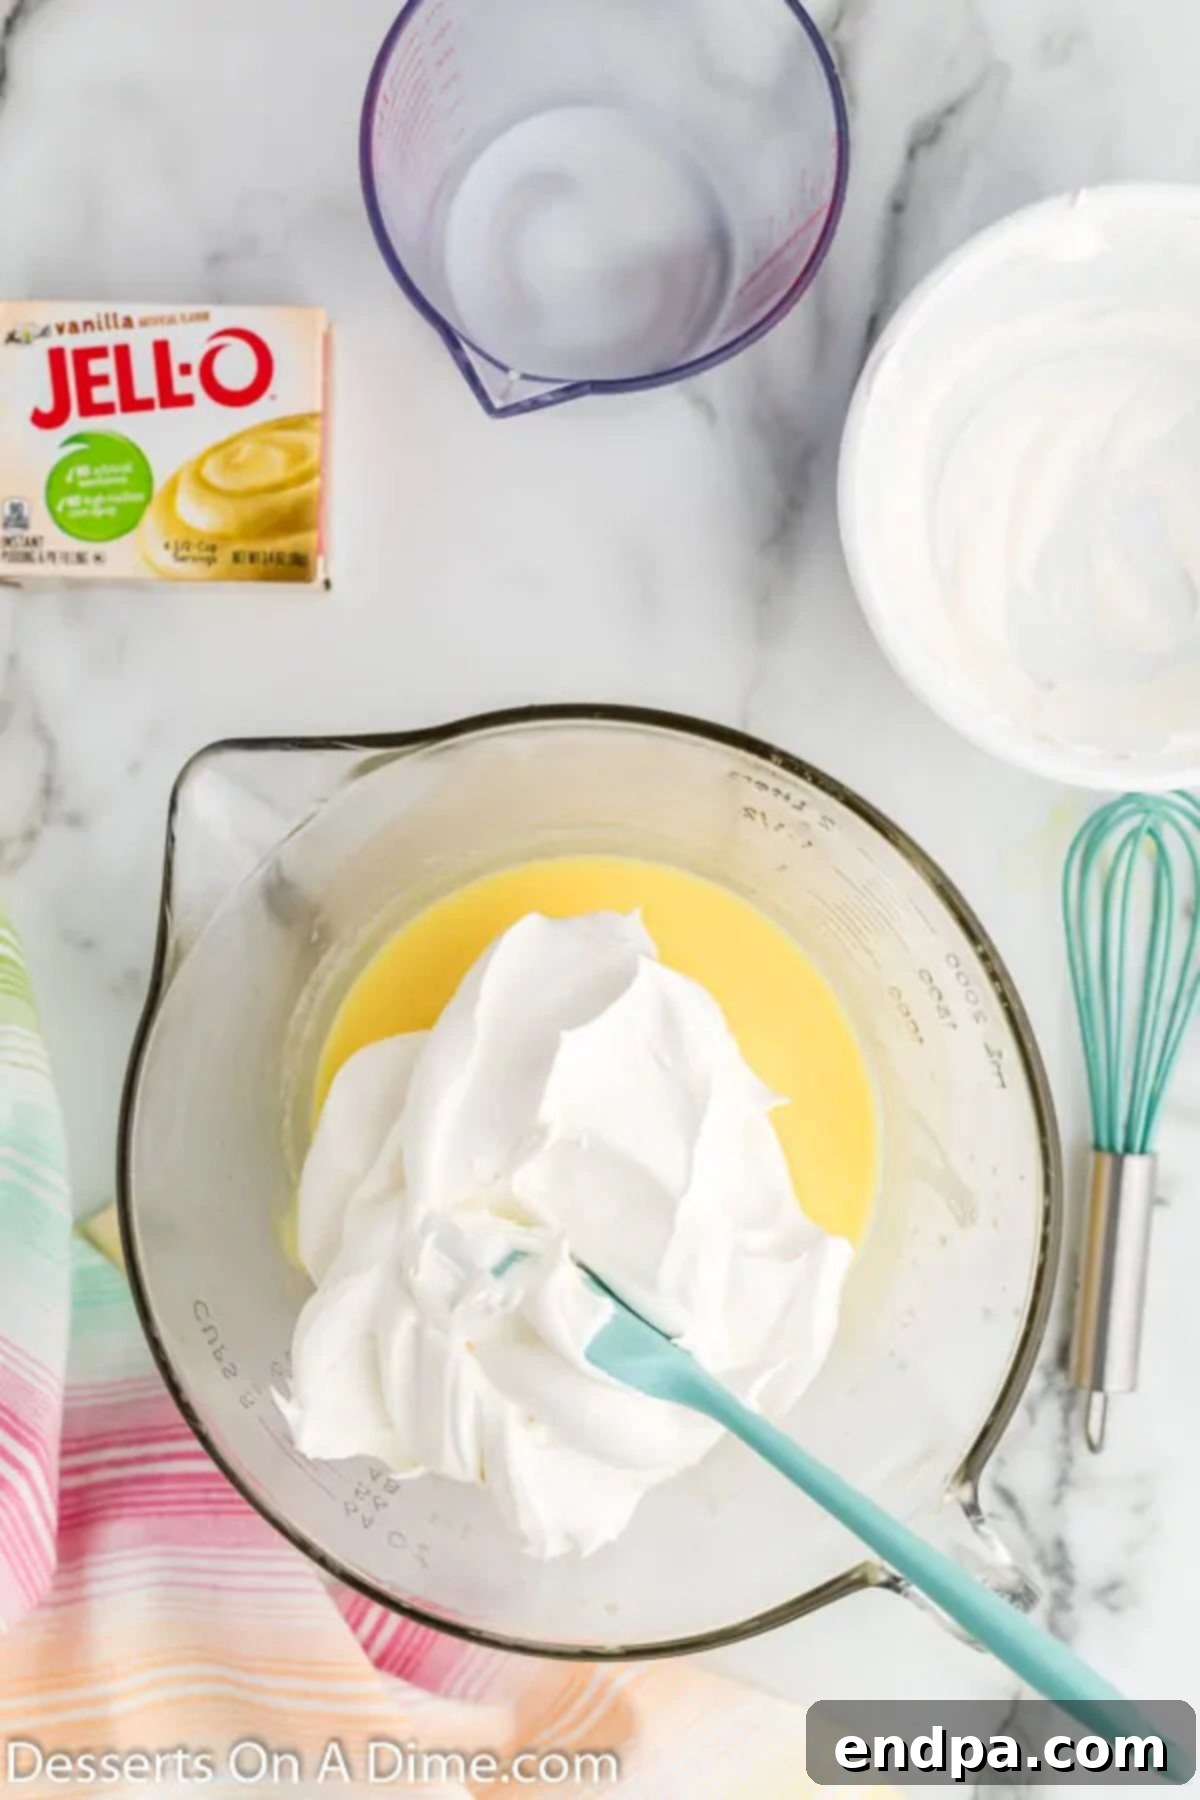
Step 2: Incorporate the Whipped Topping. Once your pudding has chilled and set, remove it from the refrigerator. Gently add the entire tub of Cool Whip to the pudding mixture. Be careful not to overmix, as this can deflate the airy texture of the Cool Whip.
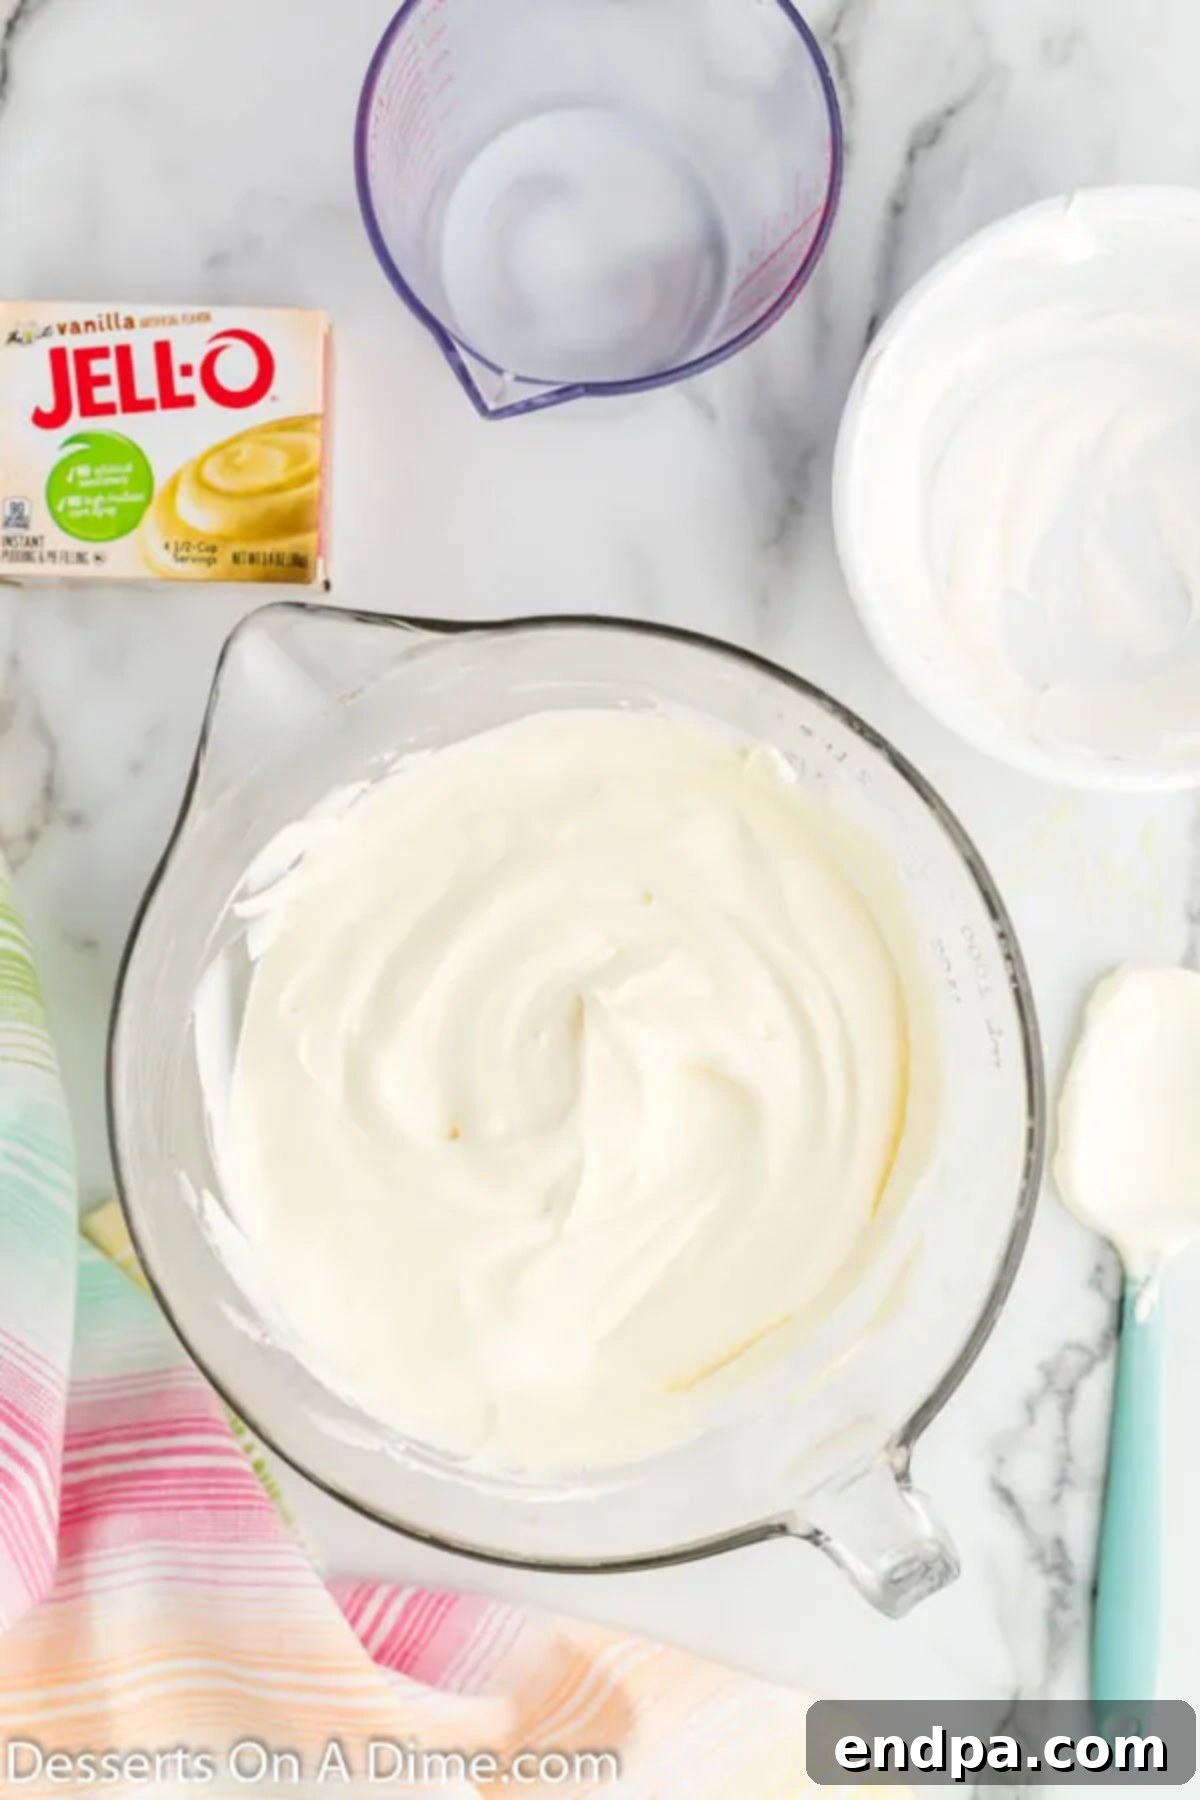
Step 3: Fold Gently and Chill Again. Carefully fold the Cool Whip into the pudding mixture using a spatula. Use a gentle, upward motion to combine the ingredients without losing too much air. Continue folding until no streaks of Cool Whip remain and the mixture is uniformly blended and light. Return the bowl to the refrigerator for another 20 minutes to ensure it’s thoroughly chilled and firm before layering.
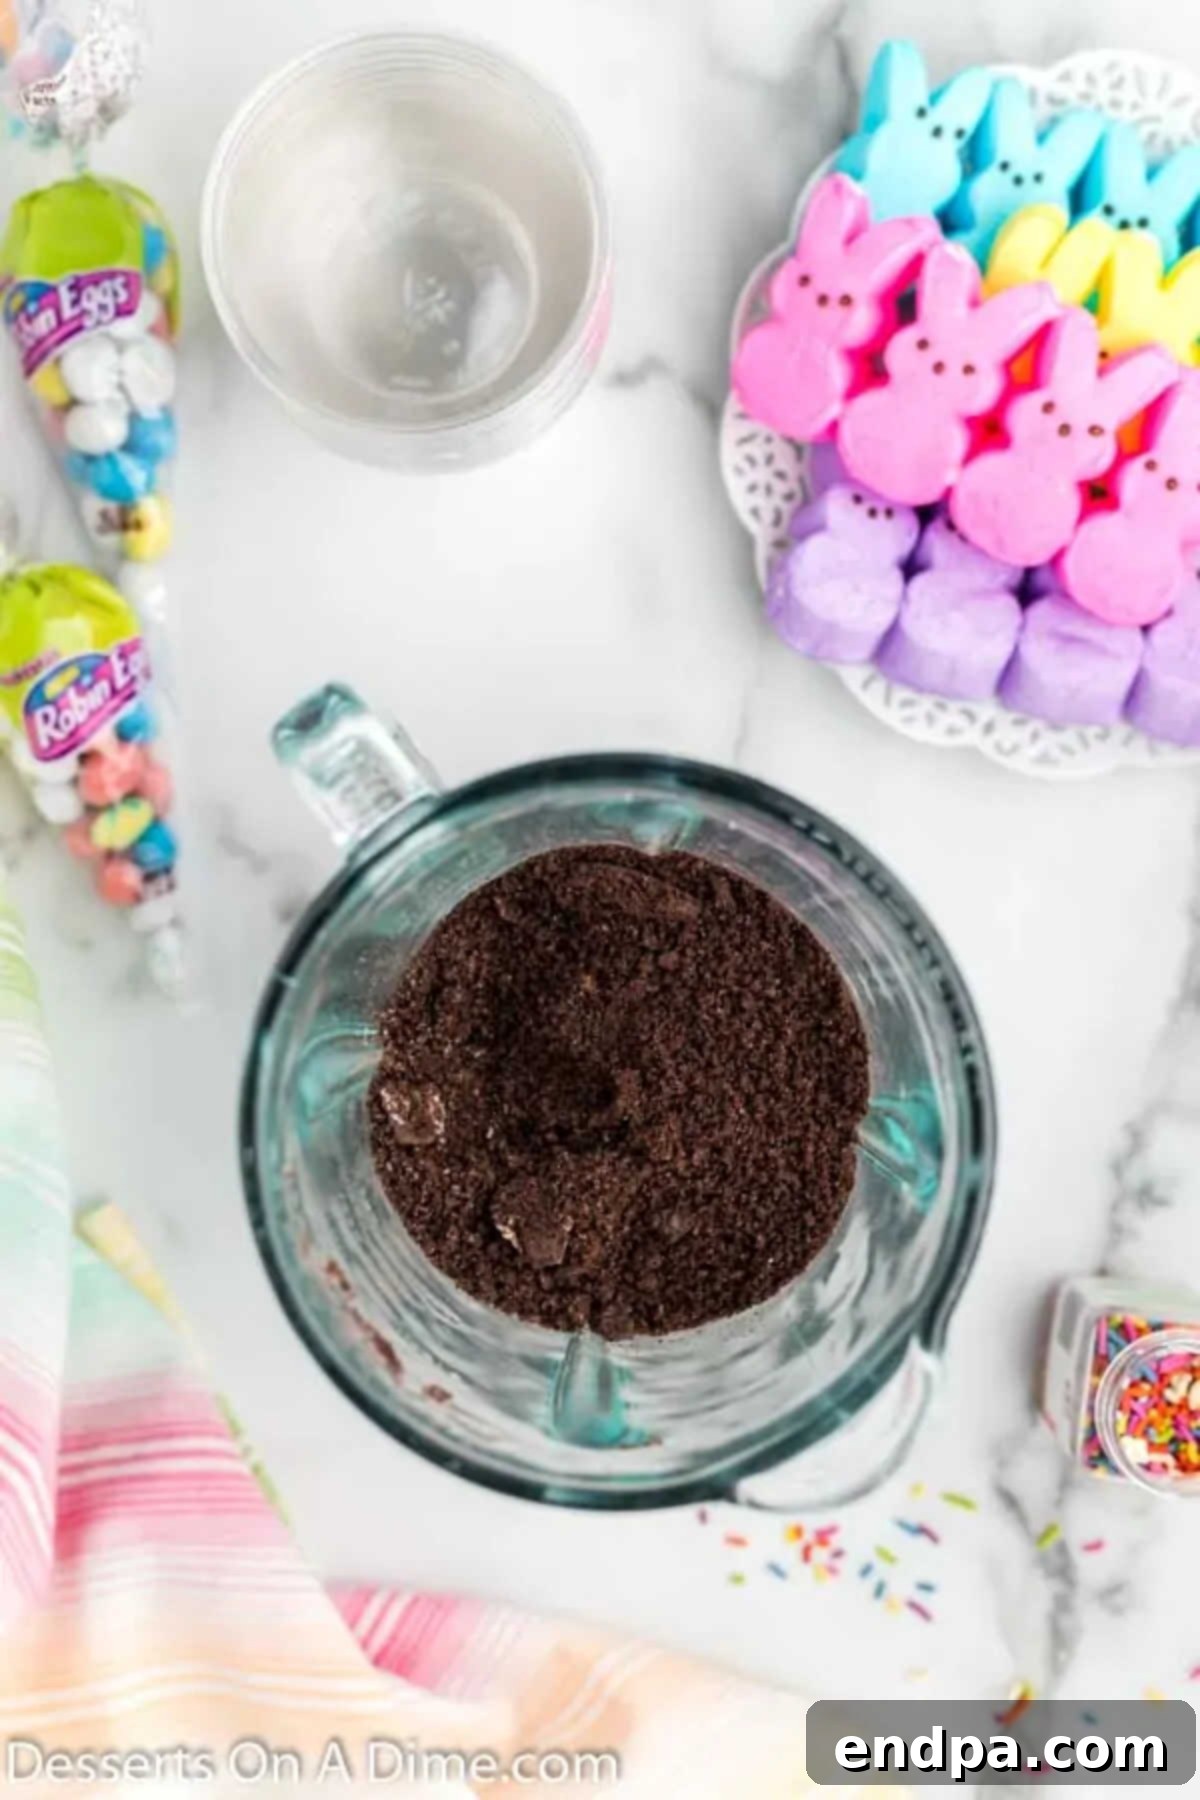
Step 4: Crush the Oreo Cookies. While the pudding mixture is chilling, prepare your “dirt” layer. Place the Oreo cookies into a food processor or blender. Pulse until the cookies are finely crushed, resembling moist soil. If you don’t have a food processor, you can place the cookies in a large Ziploc bag and crush them with a rolling pin or the back of a sturdy mug until fine crumbs are achieved.
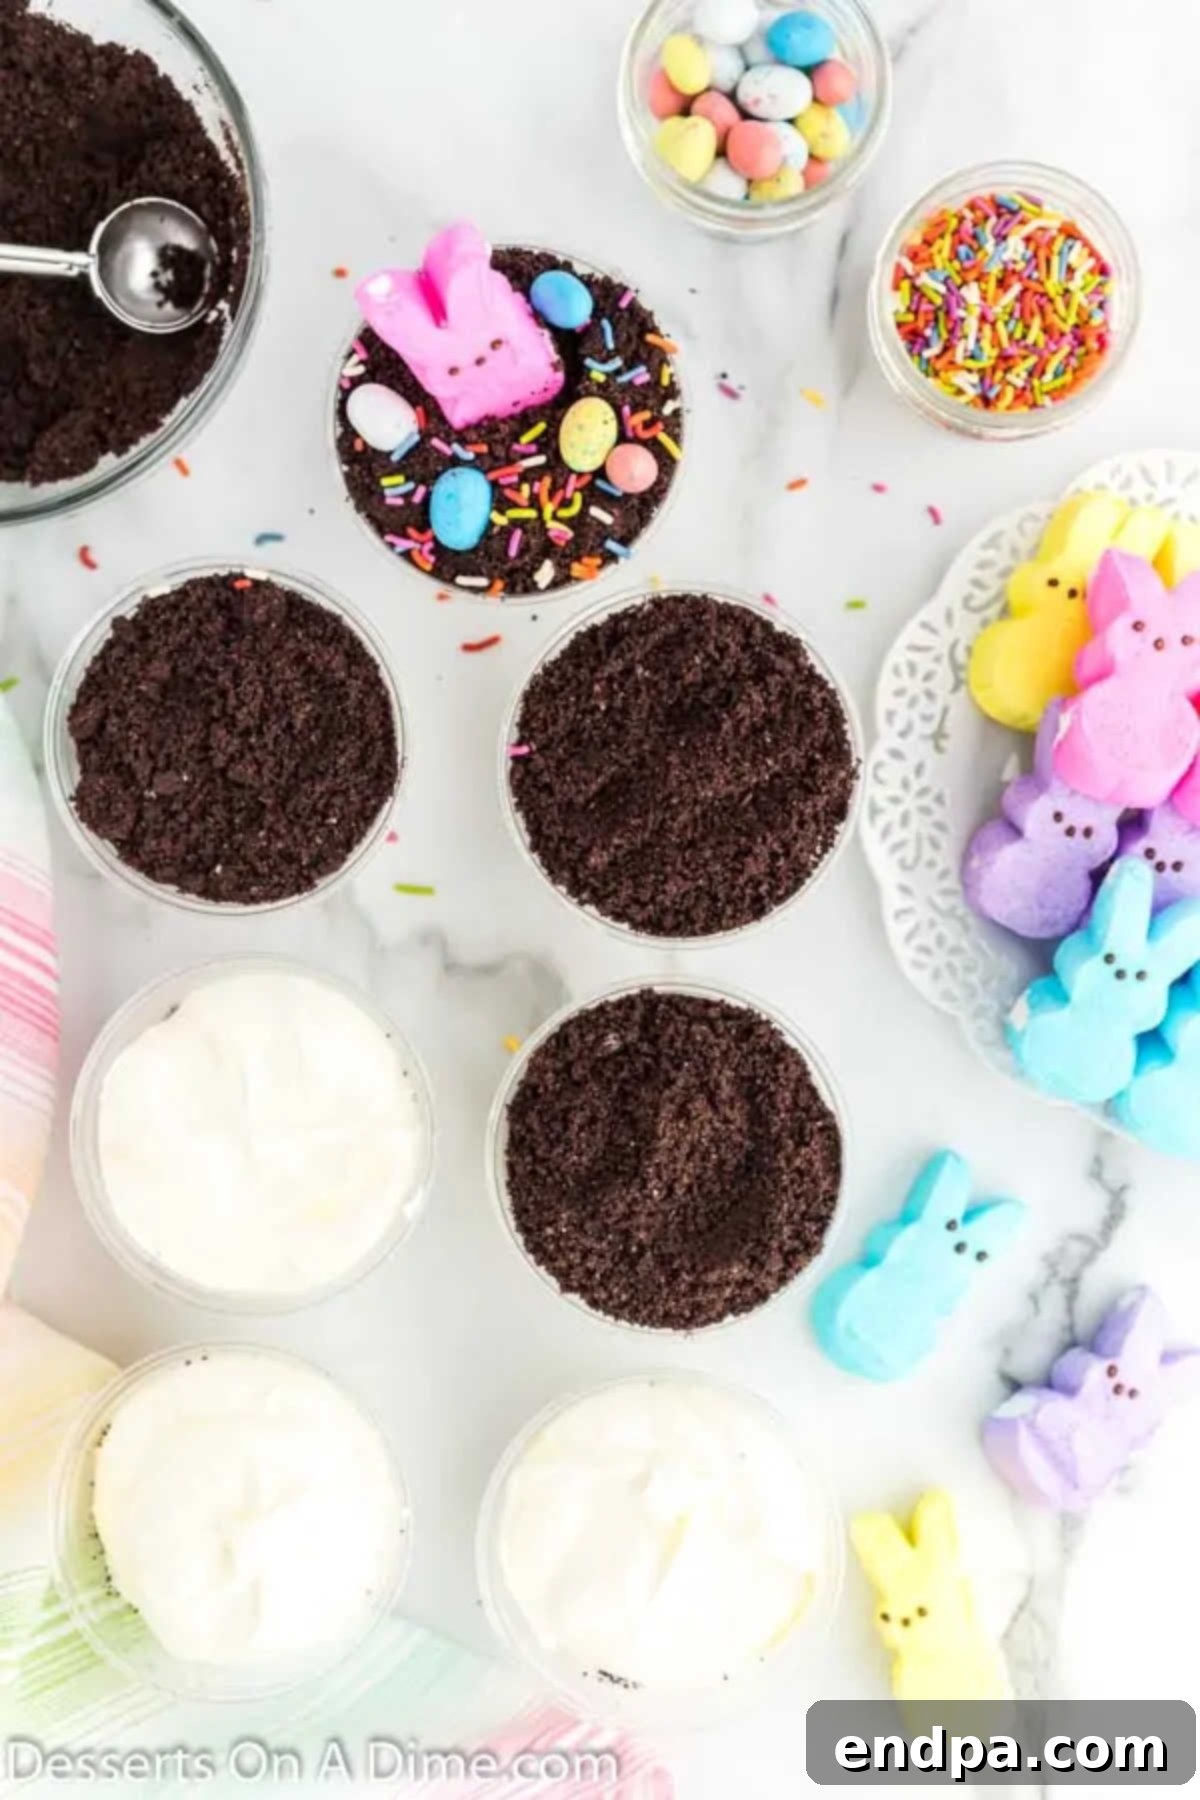
Step 5: Assemble the Layers. Now for the fun part – assembling your cups! For the best visual effect, we recommend using clear individual cups, mason jars, or parfait glasses to showcase the beautiful layers. Start by adding a generous layer of the pudding mixture to the bottom of each cup, filling it approximately one-third of the way. Then, sprinkle a layer of the crushed Oreo cookies over the pudding. Repeat this layering process in all your cups, ensuring each has a good base.

Step 6: Final Layers and Decoration. Continue alternating layers of pudding mixture and crushed Oreo cookies until your cups are nearly full. Always make sure to finish with a final layer of crushed Oreo cookies on top, creating a rich “dirt” surface. To complete your festive Easter Dirt Cups, place a Peep (bunny or chick) on top of the Oreo crumbs in each cup. Finally, scatter colorful Easter sprinkles and a few candy eggs around the Peep to create a charming, edible Easter scene. Serve immediately or chill until ready to enjoy!
Expert Tips for Perfect Dirt Cups
To ensure your Easter Dirt Cups are absolutely perfect and effortlessly delicious, keep these expert tips in mind. These little tricks can make a big difference in both the preparation process and the final outcome of your delightful Spring dessert.
- Time-Saving Shortcut: Use Pre-Made Pudding Cups. If you’re really short on time or preparing for a large event like a classroom party, consider using individual pre-made pudding cups. Simply open them, top each with a generous layer of crushed Oreo cookies, and then decorate with Peeps and sprinkles as you normally would. This quick hack drastically cuts down on prep time without sacrificing much of the fun.
- Strategic Topping Timing: Don’t Add Too Early. For the best presentation and texture, it’s crucial to add your Peeps and other decorative toppings (like candy eggs or sprinkles) just before you plan to serve the dirt cups. If added too far in advance, the marshmallow Peeps can absorb moisture and become soggy, and some candy colors might bleed into the whipped topping, affecting the visual appeal.
- Effortless Cookie Crushing: Ziploc Bag Method. No food processor or blender? No problem! Achieving finely crushed Oreos is still incredibly easy. Simply place the cookies inside a sturdy, freezer-safe Ziploc bag, ensuring it’s sealed tightly to prevent crumbs from escaping. Then, use a rolling pin, the back of a heavy pan, or even a meat mallet to quickly and efficiently crush the cookies into fine crumbs. This method is also a fun way to get kids involved in the preparation!
- Opt for Full-Fat Ingredients for Best Results. While it’s possible to use reduced-fat or non-dairy alternatives, we highly recommend using full-fat ingredients such as whole milk and regular Cool Whip. The higher fat content contributes significantly to the richness, creaminess, and overall stability of the pudding mixture, ensuring a more decadent and satisfying dessert with a better set.
- Chill Time is Crucial. Don’t rush the chilling steps. Allowing the pudding to set properly before folding in the Cool Whip, and then chilling the combined mixture, ensures your dirt cups have a firm, creamy consistency that holds its layers beautifully. Adequate chilling also allows the flavors to meld together, enhancing the overall taste.
- Involve the Kids! This recipe is incredibly kid-friendly. Let your little ones help with crushing cookies (in a bag!), folding the Cool Whip (under supervision), and especially with the fun part of decorating the cups with Peeps, sprinkles, and candies. It’s a wonderful way to create lasting memories in the kitchen.

Can You Make Easter Dirt Cups Ahead of Time?
Absolutely! Easter Dirt Cups are an excellent make-ahead dessert, which makes them perfect for busy holiday preparations. You can assemble the cups (layers of pudding mixture and crushed Oreos) up to a day in advance and store them covered in the refrigerator. Preparing them the day before allows the flavors to meld beautifully and the layers to set firmly, resulting in an even more delicious treat.
However, there’s one crucial tip to remember for optimal presentation: wait to add the Peeps, Easter candy, and sprinkles until just before you plan to serve. This ensures that your marshmallow Peeps remain soft and fresh, rather than absorbing moisture from the pudding and becoming soggy. Additionally, some colorful sprinkles and candy dyes can “run” or bleed into the whipped topping if left too long, which can detract from the vibrant look of your dessert. By adding the final decorations right before serving, each cup will look perfectly fresh and inviting.

More Delightful Peeps Desserts
Peeps are more than just a seasonal candy; they’re a versatile and fun ingredient that can elevate many desserts. Their cheerful colors and marshmallowy texture make them perfect for festive Spring treats. If you love the whimsical charm of Peeps in your Easter Dirt Cups, you’ll definitely want to explore these other fantastic Peeps-centric dessert ideas:
- Easter Dirt Cake: A larger-scale version of our dirt cups, perfect for sharing, with even more room for creative Peeps arrangements.
- Peeps Cupcakes: Transform ordinary cupcakes into a Spring wonderland by topping them with colorful Peeps. Easy and eye-catching!
- PEEPS Chocolate Covered Pretzel Rods: A delightful salty-sweet combination, where Peeps add a cute, colorful touch to chocolate-dipped pretzels.
- Peeps Rice Krispie Treats Recipe: A classic crispy treat gets an Easter makeover with melted Peeps, creating vibrant colors and an extra marshmallowy texture.
More Easy Easter Desserts
Easter is a time for celebration, and a wonderful assortment of desserts is always a must! Beyond our beloved Easter Dirt Cups and Peeps creations, there are plenty of other simple yet delicious recipes that can make your holiday gathering extra special. These easy Easter desserts are designed to be fuss-free, allowing you more time to enjoy with family and friends.
- Easter Bunny Chow: A festive and addictive snack mix, also known as “Muddy Buddies,” made with cereal, chocolate, peanut butter, and powdered sugar, often enhanced with Spring-colored M&Ms or sprinkles.
- Crock Pot Easter Candy Clusters: An incredibly simple no-bake recipe where various candies and nuts are melted together in a slow cooker, then dropped into clusters for an effortless and delicious treat.
- Italian Easter Cookies Recipe: Soft, tender, and often brightly glazed, these traditional cookies are a beloved part of many Easter tables, offering a taste of heritage.
- Easter Chocolate Covered Oreos: A delightful treat where classic Oreos are dipped in colorful melted chocolate and adorned with festive sprinkles or designs.
- Easter Egg Sugar Cookies Recipe: Classic sugar cookies cut into charming egg shapes, frosted with pastel icing, and perfect for decorating with the whole family.
- Easter Candy Charcuterie Board: An impressive and fun display of various Easter candies, chocolates, and sweet treats arranged artfully on a board for easy snacking and a beautiful presentation.
We encourage you to try one of these delightful Easter treats and share your experience. Your feedback and comments are always appreciated!

Easter Dirt Cups Recipe
Individual Easter Dirt Cups are a fantastic and festive dessert, perfect for celebrating Spring. These decadent layers are not only delicious but also incredibly attractive.
Prep Time: 45 mins
Total Time: 45 mins
Servings: 12
Cuisine: American
Course: Dessert
Calories: 256 kcal
Author: Carrie Barnard
Ingredients
- 25 Oreo Cookies
- 16 oz Cool Whip
- 1 box Instant Vanilla Pudding Mix (3.3 oz)
- 2 cups Milk
- 12 Peeps
- Easter Candy eggs and sprinkles (for decoration)
Instructions
- In a medium-sized bowl, whisk together the instant vanilla pudding mix and the milk until smooth and slightly thickened. Refrigerate for about 10 minutes, or until the pudding is set.
- Gently fold in the entire container of Cool Whip into the chilled pudding mixture until well combined and light. Be careful not to overmix.
- Place the combined pudding and Cool Whip mixture back into the refrigerator to chill for approximately 20 minutes, allowing it to firm up further.
- While the pudding mixture is chilling, place the Oreo cookies in a food processor or blender. Pulse until the cookies are finely crushed, resembling dirt. Alternatively, place cookies in a sealed bag and crush with a rolling pin.
- Begin assembling the cups. Fill the bottom of small clear cups (or mason jars/parfait glasses) with a layer of the pudding mixture, filling them approximately one-third of the way.
- Top the pudding layer with a small amount of the crushed Oreos. Repeat these layers in all of your cups, ensuring each cup finishes with a top layer of crushed Oreos.
- For decoration, place one Peep (bunny or chick) on top of the crushed Oreo layer in each cup. Decorate further with colorful sprinkles and a few Easter candy eggs to complete your festive scene. Serve immediately or chill until ready.
Nutrition Facts
Calories: 256 kcal
Carbohydrates: 44g
Protein: 4g
Fat: 8g
Saturated Fat: 3g
Polyunsaturated Fat: 1g
Monounsaturated Fat: 3g
Trans Fat: 1g
Cholesterol: 10mg
Sodium: 212mg
Potassium: 150mg
Fiber: 1g
Sugar: 31g
Vitamin A: 133 IU
Calcium: 93mg
Iron: 2mg
Pin This Now to Remember It Later
Pin Recipe
