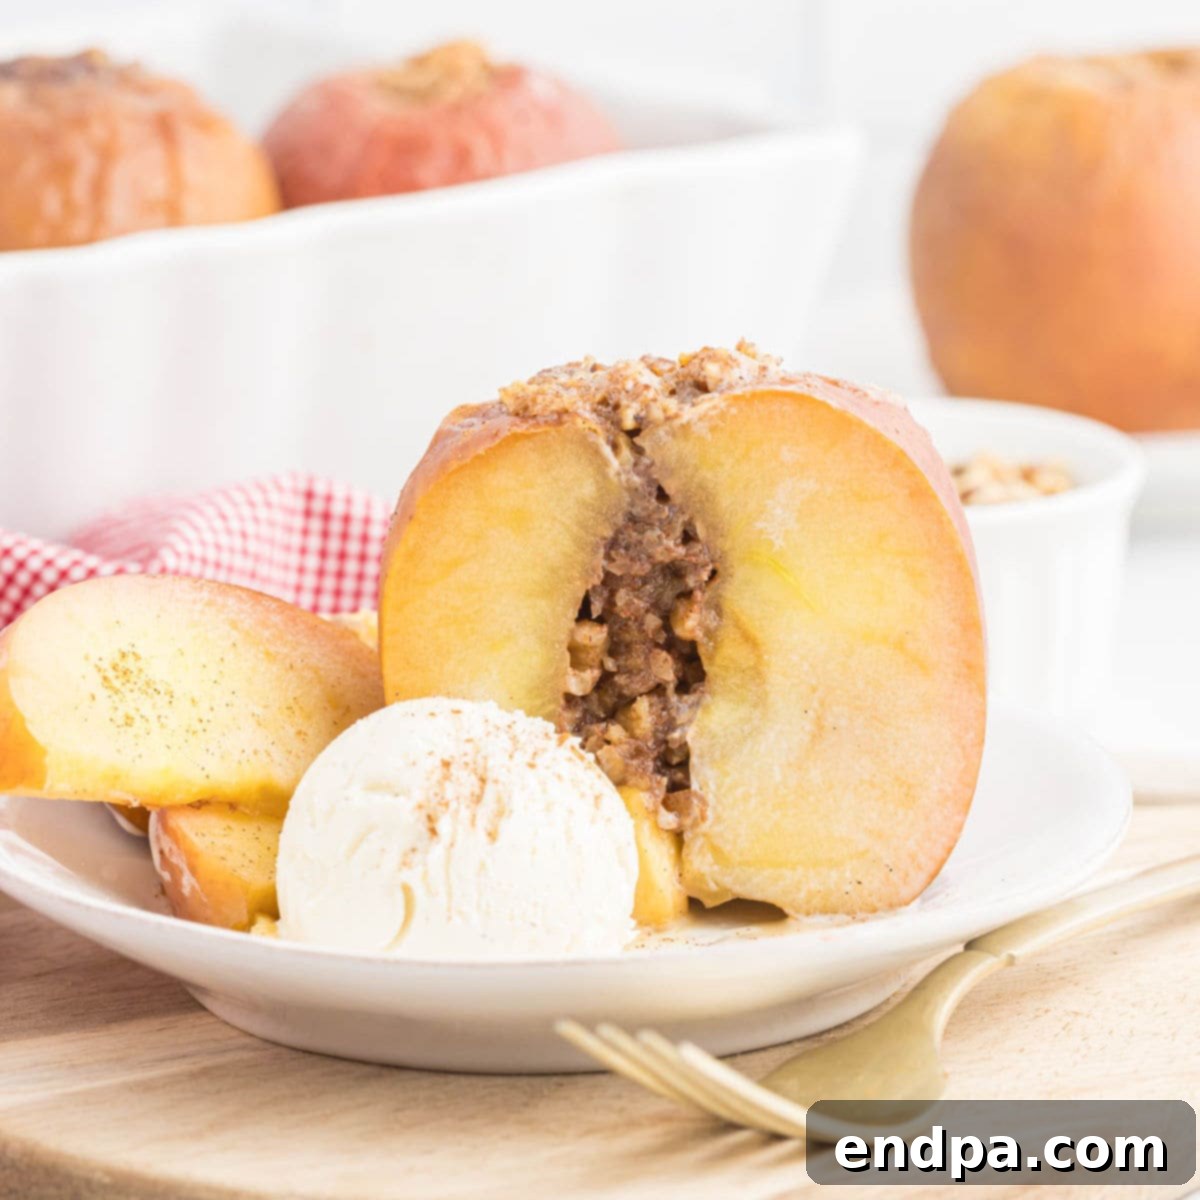
Baked Apples are a quintessential embodiment of warmth and comfort, offering a delightful dessert experience that is both simple to prepare and incredibly satisfying. Imagine biting into a soft, tender apple, its interior infused with a sweet, aromatic blend of cinnamon, sugar, and butter, creating a truly irresistible treat. This easy-to-follow recipe transforms humble apples into a naturally sweet sensation, perfect for embracing the cozy vibes of fall or adding a touch of wholesome indulgence to any time of the year. It’s a testament to the fact that some of the most cherished desserts are often the most straightforward.
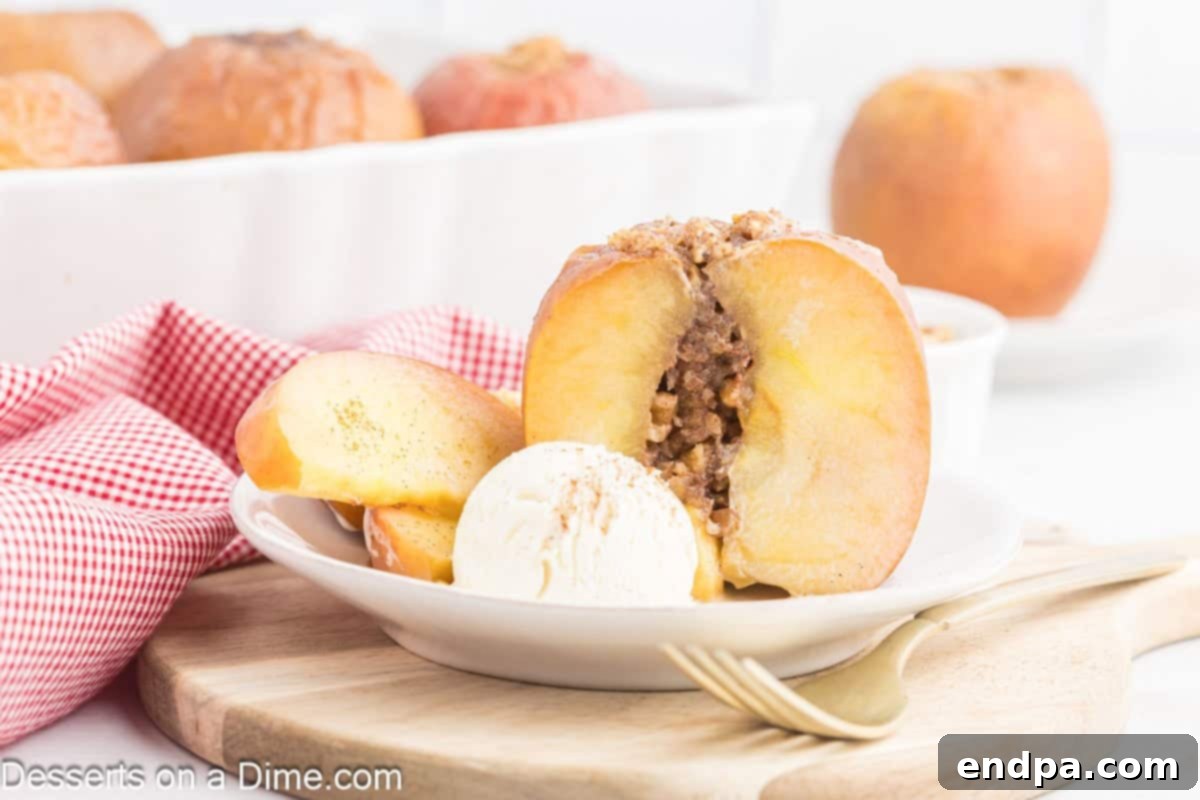
There’s something inherently magical about baked apples. The way their skin softens, the flesh becomes incredibly tender, and the simple filling of cinnamon, brown sugar, and butter melts into a luscious, caramel-like sauce. This harmonious combination perfectly complements the natural sweetness and slight tartness of the fruit, creating a flavor profile that evokes nostalgia and home-cooked goodness. Whether you’re a seasoned baker or a beginner in the kitchen, this recipe is designed for success, promising a delicious outcome with minimal effort.
This effortless apple dessert is more than just a recipe; it’s an invitation to create comforting memories. It’s ideal for a cozy night in, a heartwarming treat after a family dinner, or a simple, wholesome indulgence. Forget complicated confections; these baked apples stand out among other apple desserts for their simplicity and profound flavor. They offer a healthier alternative to many traditional sweets, allowing the natural goodness of the fruit to shine through.
Table of Contents
- Why We Love Baked Apples
- Choosing the Best Apples for Baking
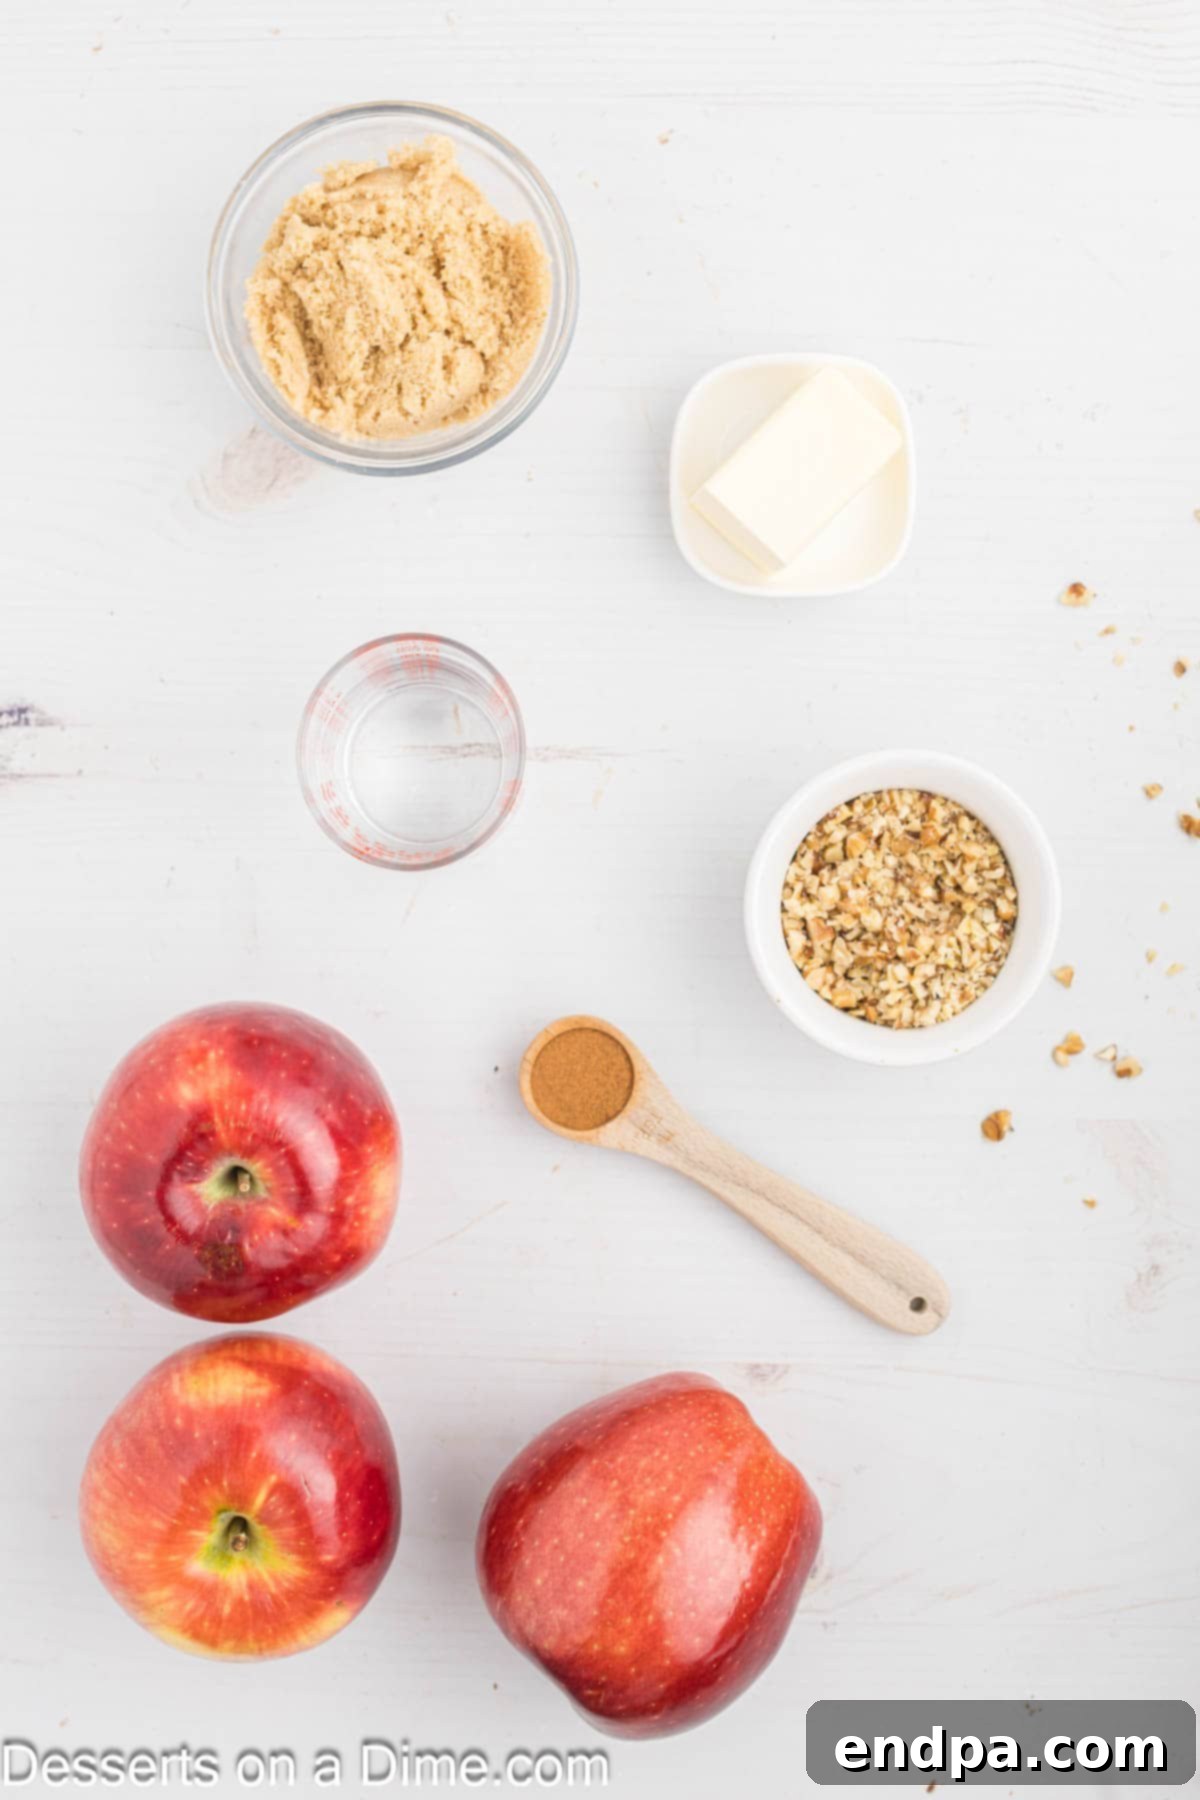
- Essential Ingredients for Perfect Baked Apples
- Step-by-Step Guide to Baking Apples
- Creative Topping & Serving Suggestions
- Storing and Reheating Baked Apples
- Expert Tips for Flawless Baked Apples
- Beyond Basic Baked Apples: Creative Variations
- More Easy and Delicious Apple Recipes
Why We Love Baked Apples
Baked apples are a timeless dessert that consistently wins hearts for numerous reasons. Here’s why this particular recipe is a must-try:
- Effortlessly Simple and Quick: This recipe calls for minimal ingredients and comes together in under an hour, making it perfect for a weeknight treat or an impromptu gathering. You won’t spend hours in the kitchen, but your guests will think you did!
- Naturally Sweet and Wholesome: The star of the show, apples, provide a beautiful natural sweetness. This is delicately enhanced by a warm, spiced filling of cinnamon, brown sugar, and butter, creating a dessert that feels indulgent yet remains relatively light and fruit-focused.
- Ultimate Comfort Food: There’s an undeniable cozy charm to warm, tender apples fresh from the oven. The fragrant aroma filling your home is just as comforting as the first spoonful, making it an ideal treat for chilly evenings or a special holiday gathering.
- A Healthier Indulgence: As a fruit-based dessert, baked apples offer a lighter alternative to many traditional sweets. It’s a wonderful way to enjoy something sweet without excessive guilt, providing fiber and essential nutrients from the apples.
- Versatile and Customizable: While this recipe is fantastic as is, it also serves as an excellent base for customization. You can easily adapt the spices, add different nuts, or experiment with various toppings to suit your taste or what you have on hand.
- Budget-Friendly: Apples are generally an affordable fruit, especially when in season. This recipe uses common pantry staples, making it an economical choice for a delightful dessert.
Choosing the Best Apples for Baking
The success of your baked apples largely depends on selecting the right type of apple. You need varieties that will hold their shape during baking, offer a good balance of sweetness and tartness, and become tender without turning mushy. Here are some top recommendations:
- Honeycrisp: A fantastic choice, known for its crisp texture and perfect balance of sweet and tart flavors. It holds up beautifully in the oven.
- Gala: Sweet and juicy with a mild flavor, Gala apples become wonderfully tender when baked and maintain their structure.
- Fuji: These apples are famously sweet and firm, making them excellent for baking. They retain their shape well and develop a lovely caramelized flavor.
- Braeburn: Offering a pleasant tartness that mellows out during baking, Braeburn apples are firm and hold their shape, providing a great texture contrast to the soft filling.
- Granny Smith: If you prefer a tarter baked apple, Granny Smith is your go-to. Its firm texture stands up well to heat, and its tartness provides a refreshing counterpoint to the sweet filling.
- Golden Delicious: A classic baking apple that softens beautifully and offers a milder, sweeter flavor. It’s a reliable choice for tender results.
- Red Delicious: While popular for fresh eating, Red Delicious can sometimes become a bit mealy when baked. However, with careful monitoring, it can still work if you enjoy its sweeter profile.
Apples to Generally Avoid: Softer varieties like McIntosh or Cortland can turn mushy quickly, so it’s best to stick to firmer apples for the best baked apple experience.
Essential Ingredients for Perfect Baked Apples
Creating these delightful baked apples requires just a handful of simple ingredients, each playing a crucial role in achieving that perfect warm, spiced flavor and tender texture:
- Red Apples: As discussed above, select large, firm apples that are known to hold their shape when baked. Our top picks include Honeycrisp, Gala, Fuji, or Braeburn for a balanced flavor and texture. For a tarter option, Granny Smith works wonders, while Golden Delicious provides a sweeter, milder profile.
- Brown Sugar: This is key for creating a rich, caramel-like sweetness in the filling. Unlike white sugar, brown sugar contains molasses, which adds depth and moisture, contributing to a wonderfully gooey center. You can use light or dark brown sugar, depending on your preference for a milder or more intense molasses flavor.
- Ground Cinnamon: The quintessential spice for apples! Cinnamon enhances the natural sweetness and warmth of the fruit, creating that classic comforting aroma and taste. You can also experiment with a pinch of nutmeg or allspice for added complexity.
- Unsalted Butter: Softened unsalted butter is vital for adding richness to the filling. It melts beautifully into the brown sugar and cinnamon, creating a luscious sauce that permeates the apple as it bakes. Using unsalted butter allows you to control the overall saltiness of the dish.
- Walnuts: Finely chopped walnuts introduce a delightful crunch and a subtle nutty flavor, providing an enjoyable textural contrast to the soft baked apple. Pecans or almonds can be excellent substitutes if you prefer a different nut, or omit them entirely for a nut-free version.
- Water: A small amount of water poured into the baking dish helps the apples bake evenly by creating a moist environment. This prevents the apples from drying out and encourages them to steam gently, resulting in a more tender and juicy final product. Apple cider or apple juice can be used as a flavorful alternative.
- Ice Cream: While optional, a scoop of creamy vanilla ice cream is the perfect accompaniment to warm baked apples. The cold, melting ice cream creates a heavenly contrast with the hot, spiced fruit, making for an extra indulgent experience.
Step-by-Step Guide to Baking Apples
Follow these simple steps to create perfectly baked apples that will impress everyone:
- Step 1: Prepare Your Oven. Begin by preheating your oven to 350 degrees Fahrenheit (175°C). This ensures the oven is at the correct temperature for even baking from the moment your apples go in.
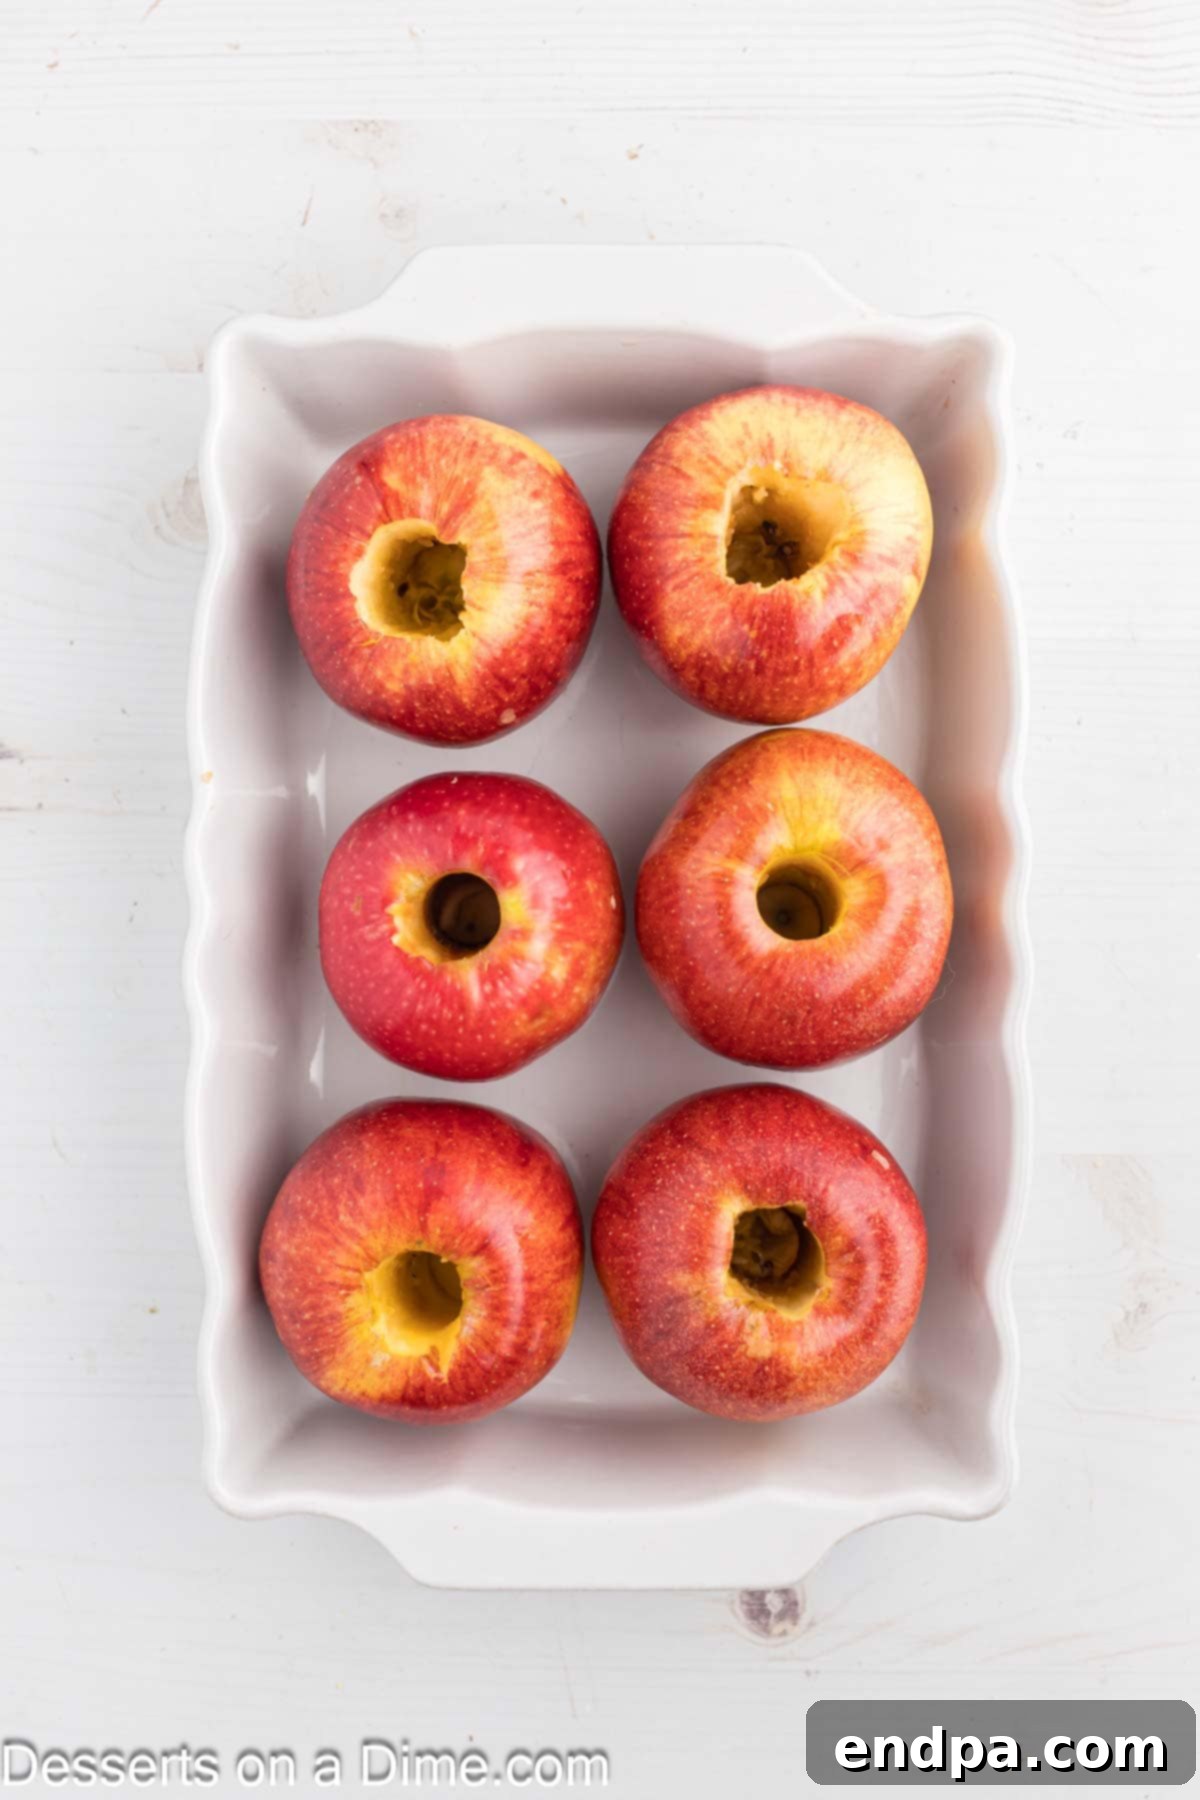
Step 2: Core the Apples with Care. Carefully prepare your apples by removing the core. You can use a small paring knife or, for an easier and cleaner process, an apple corer. The goal is to create a hollow center that will hold the delicious filling. It is crucial to leave about ½ inch of the apple intact at the bottom; this acts as a natural cup, preventing the filling from leaking out during baking and ensuring all that sweet goodness stays right where it belongs. Place the cored apples into a baking dish once prepared.
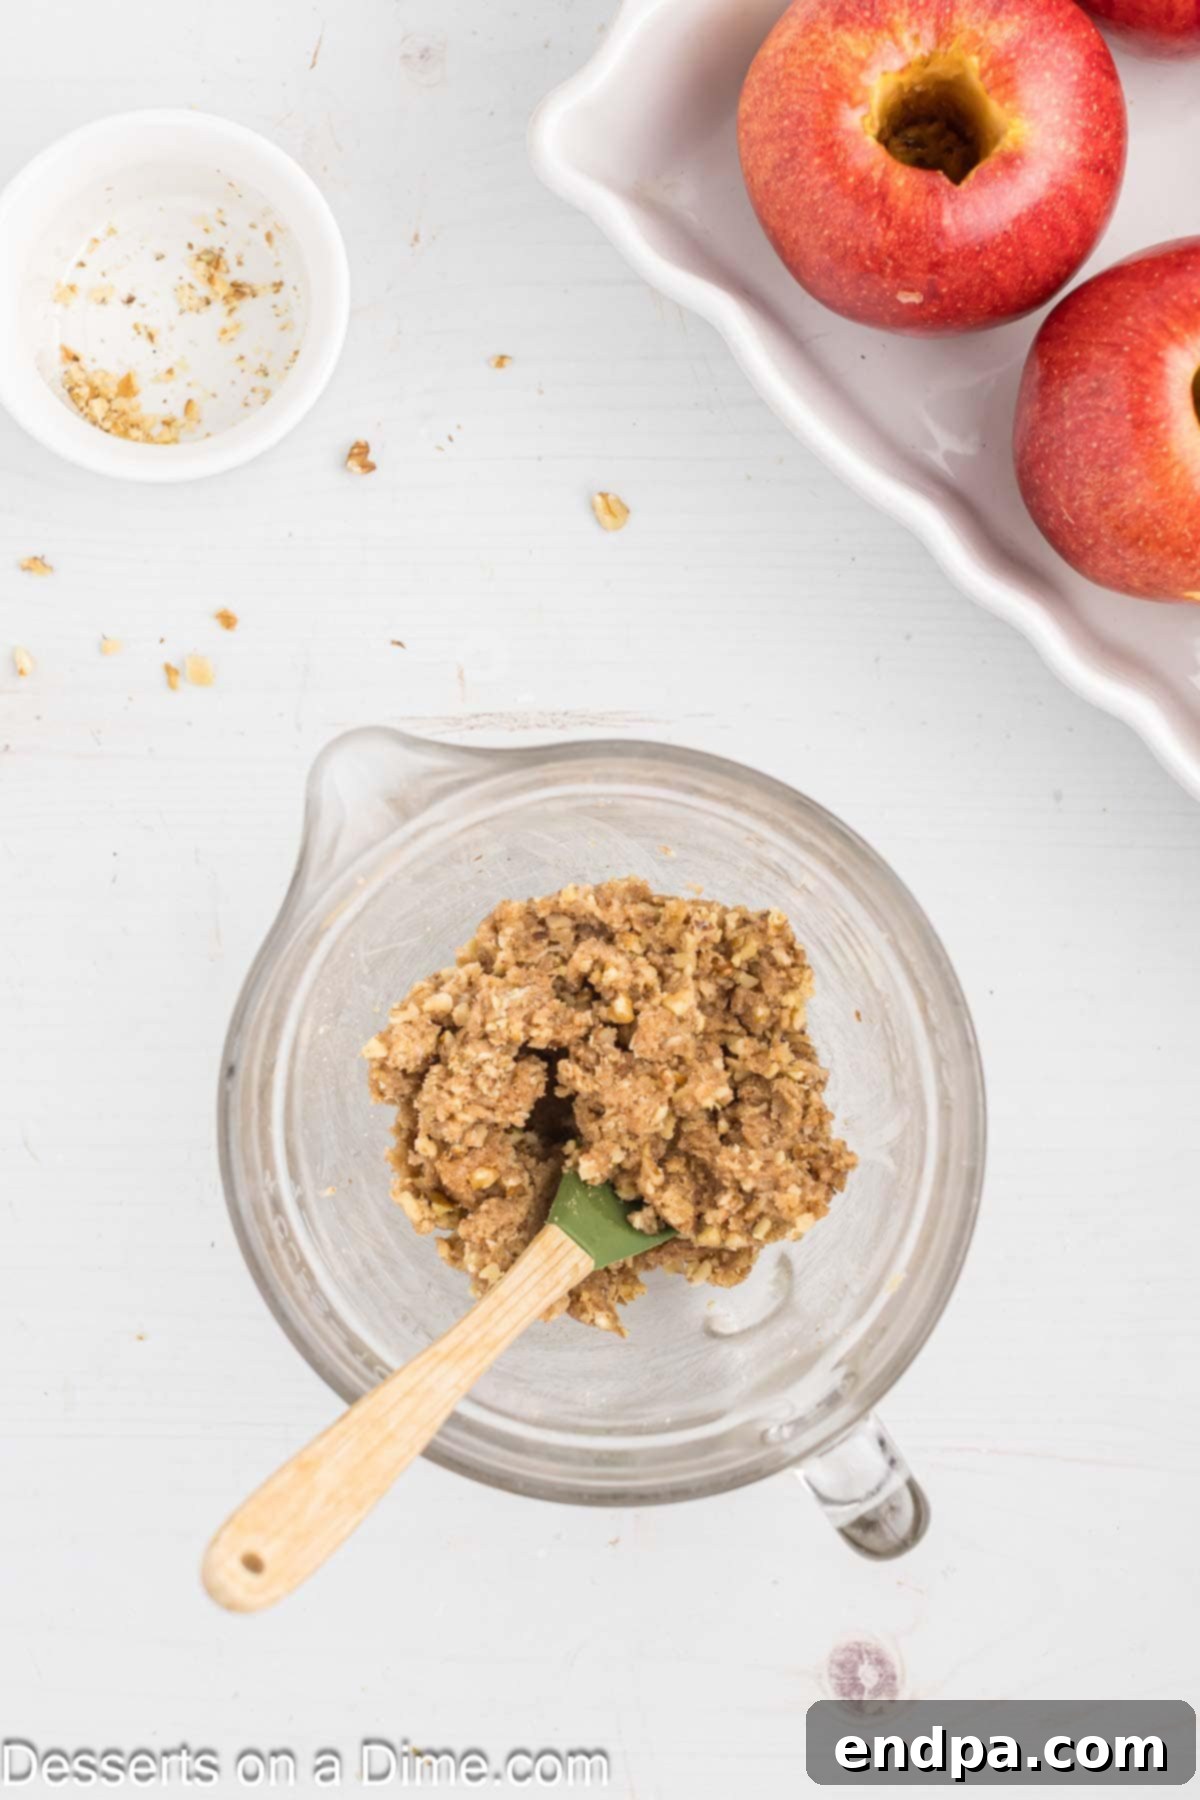
Step 3: Craft the Luscious Filling. In a medium-sized mixing bowl, combine the brown sugar, ground cinnamon, and softened unsalted butter. Mix these ingredients thoroughly until they are well combined and form a thick, fragrant paste. Next, fold in the finely chopped walnuts. The walnuts add a delightful texture and nutty flavor that complements the spiced sweetness perfectly.
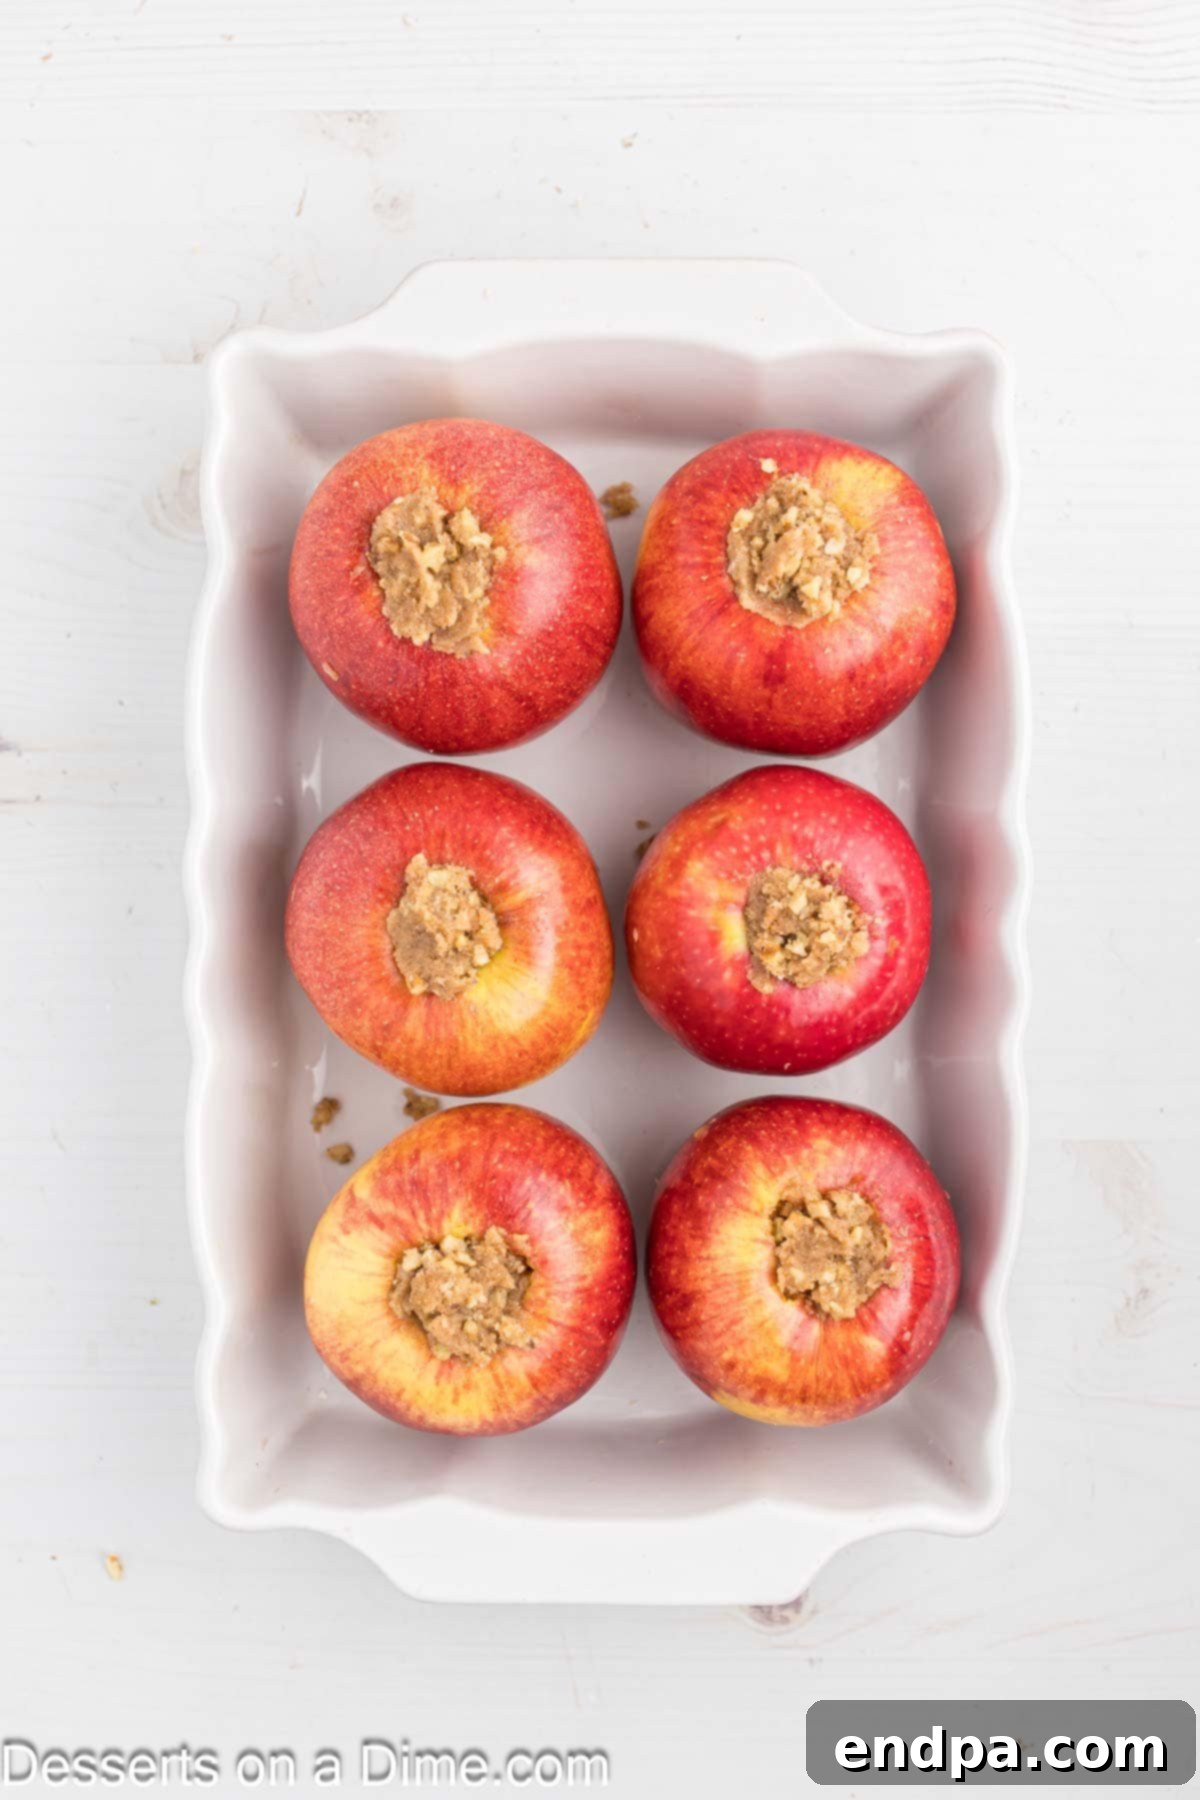
Step 4: Fill and Prepare for Baking. It’s now time to generously spoon the prepared filling mixture evenly into the hollow center of each apple. Don’t be shy – make sure each apple is well-stuffed with the sweet and spiced mixture. Once filled, place the apples carefully into your baking dish. Pour about ½ cup of water into the bottom of the pan around the apples. This water will create steam during baking, ensuring your apples remain moist and tender.
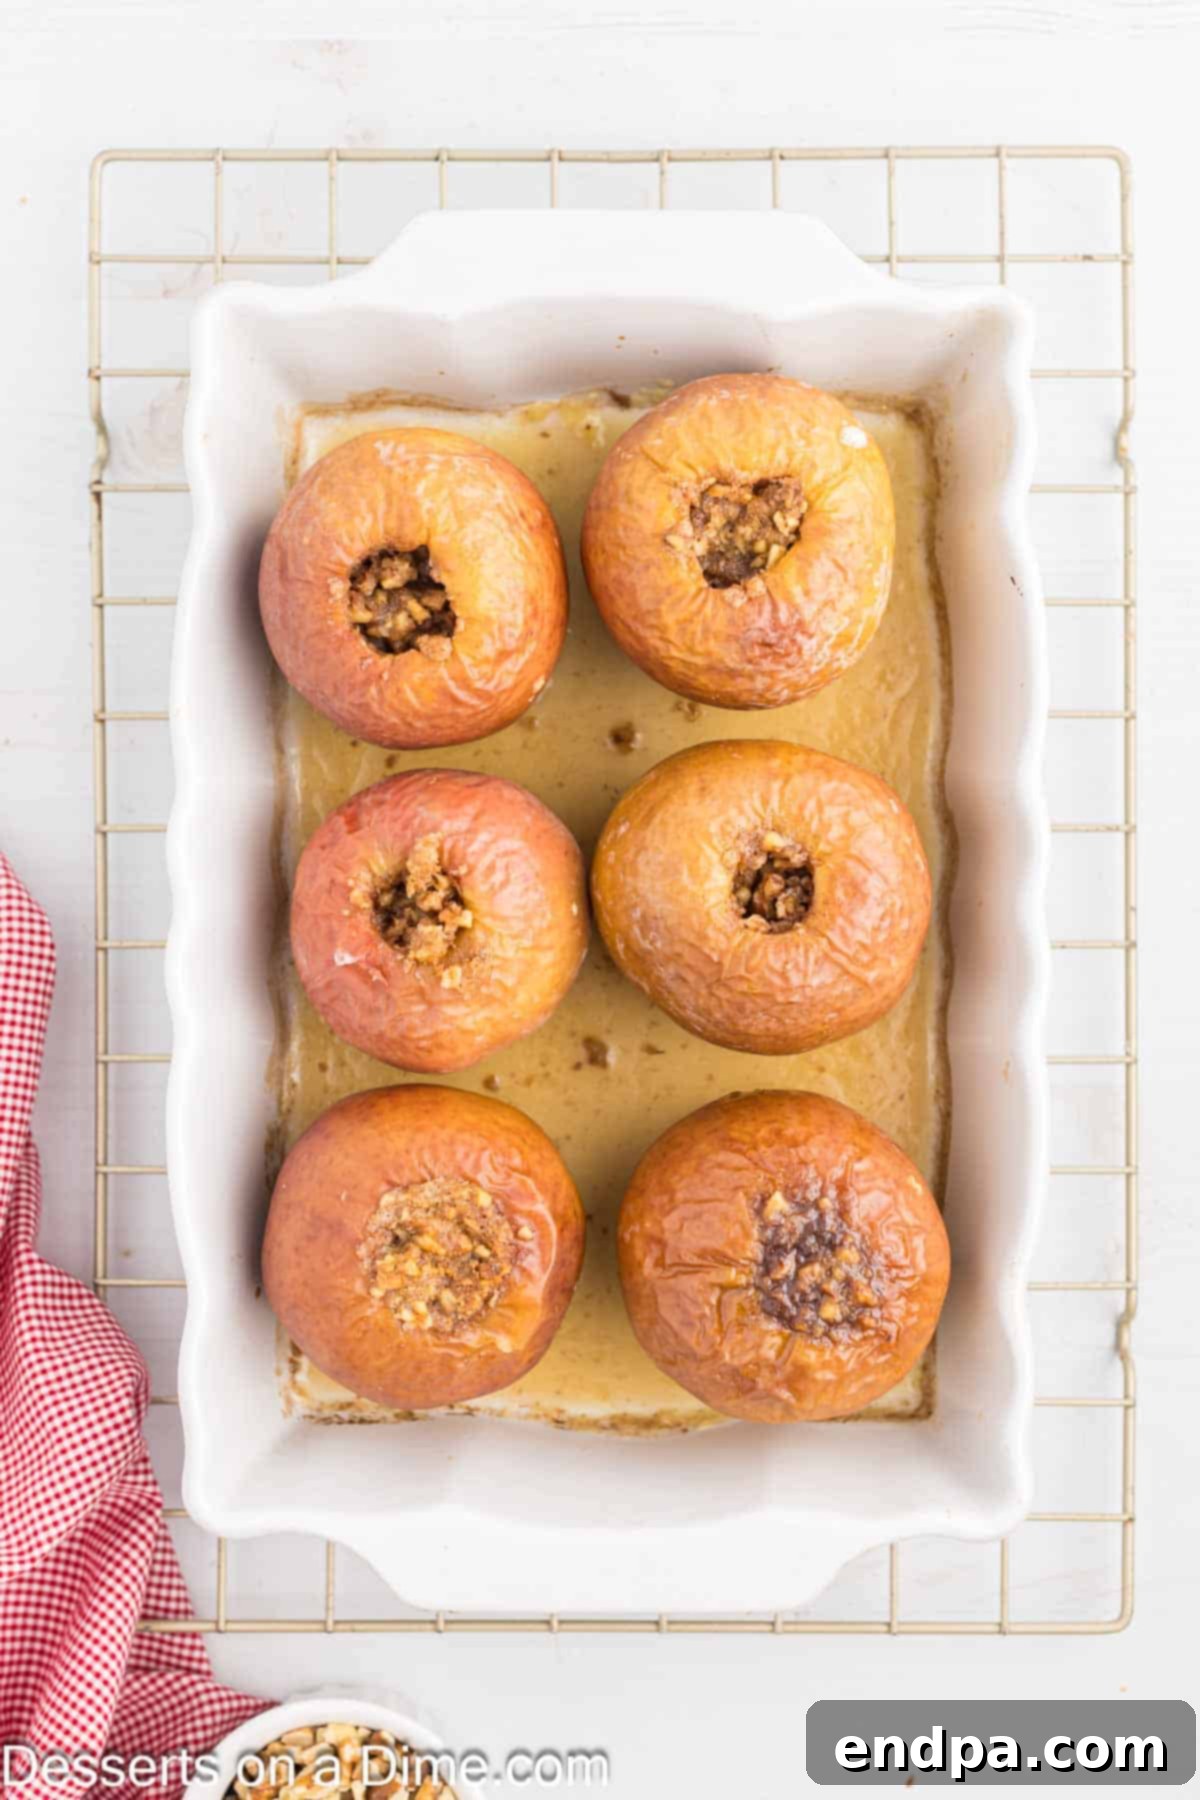
Step 5: Bake to Golden Perfection. Place the baking dish in your preheated oven and bake for 40-45 minutes. The baking time can vary slightly depending on the size and variety of your apples. You’ll know they are ready when they are soft and tender when pierced with a fork, but still hold their shape and are not mushy. The filling should be bubbly and caramelized. Let them cool slightly in the dish before serving. This allows the juices to settle and the apples to firm up a bit.
Creative Topping & Serving Suggestions
Baked apples are wonderful on their own, but they truly transform into an extraordinary dessert with the right toppings. Here are some delicious ideas to elevate your serving:
- Vanilla Ice Cream: A timeless and beloved pairing. The cold, creamy texture of vanilla ice cream offers a delightful contrast to the warm, tender apples. A scoop of homemade vanilla ice cream takes it to the next level.
- Whipped Cream: Light, airy, and fluffy whipped cream adds a touch of elegance and creamy sweetness. It’s a classic choice that beautifully complements the spiced fruit. Try making homemade whipped cream for an extra special touch.
- Caramel Sauce: A decadent drizzle of rich caramel sauce enhances the sweetness and adds another layer of luxurious flavor. The melted butter and brown sugar from the apple’s filling will also form a natural, delicious sauce at the bottom of the pan – don’t let it go to waste! For an ultimate treat, use homemade caramel sauce.
- Chopped Nuts: Sprinkle an extra handful of finely chopped walnuts, pecans, or almonds over your baked apples for an added layer of crunch and nutty depth. Toasting the nuts lightly before sprinkling can further enhance their flavor.
- Cinnamon Sugar Dusting: For a simple yet effective finish, a light dusting of cinnamon sugar can add a beautiful visual appeal and an extra hint of spice.
- Granola: A sprinkle of crunchy granola not only adds a wonderful texture but also makes the dessert feel heartier and more substantial, perfect for a cozy breakfast or brunch.
- Maple Syrup or Honey: A light drizzle of pure maple syrup or golden honey can provide a natural, rich sweetness and a beautiful sheen.
- Yogurt: For a healthier and tangier option, a dollop of Greek yogurt or plain unsweetened yogurt can offer a refreshing counterpoint to the sweetness of the apples.
- Streusel Topping: For a more elaborate touch, whip up a quick oat streusel topping (butter, flour, oats, brown sugar, cinnamon) and sprinkle it over the apples before baking for a delightful crumbly crust.
Storing and Reheating Baked Apples
Baked apples are best enjoyed fresh and warm, but they can be easily stored and reheated for later enjoyment. Proper storage ensures they retain their delicious flavor and tender texture:
Room Temperature Storage: If you plan to enjoy them within a day, allow the baked apples to cool completely at room temperature. Once cooled, place them in an airtight container. They will keep well for up to 1 day. This method is best for short-term storage.
Refrigerator Storage: For longer freshness, place cooled baked apples in an airtight container and store them in the refrigerator for 3-4 days. This is the most common and recommended storage method. When ready to serve, reheat gently for the best experience.
Freezer Storage: Baked apples freeze exceptionally well, allowing you to enjoy this comforting dessert weeks later. To freeze, wrap individual baked apples tightly in plastic wrap, then place them in a freezer-safe bag or container. They can be frozen for up to 2 months. Thaw them overnight in the refrigerator before gently warming them in the oven or microwave.
Reheating Instructions:
- Oven: For best results, reheat apples in a preheated oven at 300°F (150°C) for 15-20 minutes, or until warmed through. This helps to crisp up the skin slightly and bring back that fresh-baked aroma.
- Microwave: For a quicker option, microwave individual apples on a microwave-safe plate for 1-2 minutes, or until heated through. Be careful not to overcook, as this can make the apples mushy.
Expert Tips for Flawless Baked Apples
Achieving perfectly baked apples is simple with a few insider tricks. Here are some expert tips to ensure your dessert is nothing short of amazing:
- Choose Firm Apples Wisely: The foundation of a great baked apple is the apple itself. Opt for firm varieties like Honeycrisp, Gala, Fuji, or Braeburn. These apples hold their shape beautifully during the baking process, preventing them from turning into an unappetizing mush.
- Core with Precision: When coring your apples, be thorough to create ample space for the delicious filling, but be extremely careful to leave the bottom intact. A solid ½ inch at the base is crucial to prevent the filling from leaking out, ensuring all the gooey goodness stays confined within the apple.
- Ensure Even Filling Distribution: Before stuffing, thoroughly mix the brown sugar, butter, chopped nuts, and cinnamon. This ensures that every bite of your baked apple offers a consistent burst of sweet, spiced, and nutty flavor. Don’t be afraid to press the filling gently into the core.
- Master Moisture Management: Always pour a little water (or apple juice/cider for extra flavor) into the bottom of your baking dish. This creates a steamy environment that keeps the apples moist and helps them cook evenly, resulting in a tender interior without drying out.
- Prevent Over-Browning: If you notice the tops of your apples or the filling browning too quickly during baking, simply tent the baking dish loosely with aluminum foil. This will protect the apples from excessive direct heat while allowing them to continue cooking through.
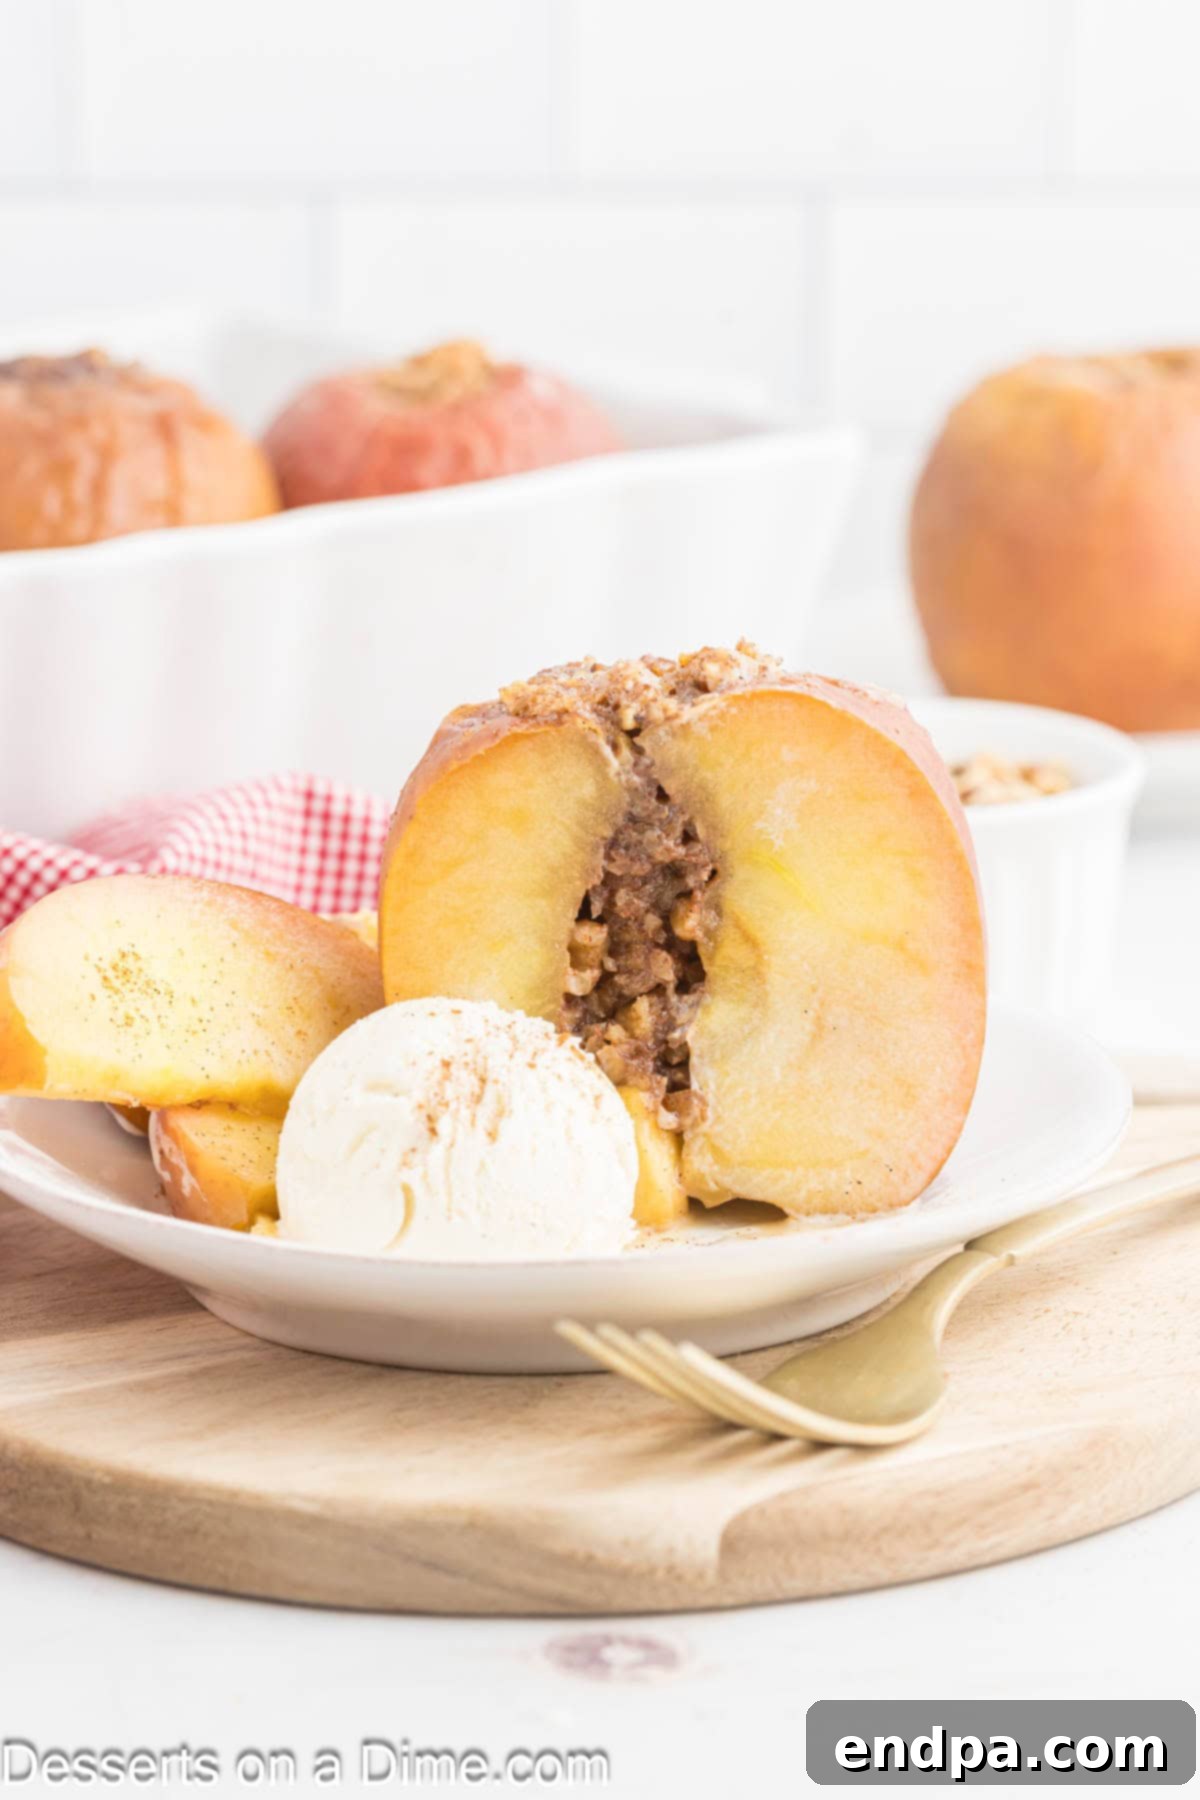
- Serve Warm for Optimal Enjoyment: Baked apples are truly at their best when served warm, straight out of the oven. The warmth enhances the aromatic spices and melts any accompanying toppings like ice cream or whipped cream beautifully.
- Don’t Waste the Pan Juices! The liquid at the bottom of the baking dish, combined with the melted filling that might have escaped, creates a wonderful, caramelized sauce. Spoon this over your baked apples when serving for an extra layer of flavor and moisture.
- Consider Scoring the Skin: For some apple varieties, especially those with thicker skins, making a shallow cut around the circumference of the apple (about halfway down) can help prevent the skin from bursting or splitting during baking.
Beyond Basic Baked Apples: Creative Variations
While the classic baked apple recipe is perfect as is, it also serves as a fantastic canvas for culinary creativity. Don’t hesitate to experiment with different fillings and flavor combinations to suit your taste. Here are a few inspiring variations:
- Oatmeal Crumble Baked Apples: For a texture similar to apple crisp, mix rolled oats, a bit more brown sugar, flour, and cold butter until crumbly. Spoon this mixture on top of the apple filling before baking.
- Maple Pecan Baked Apples: Replace half of the brown sugar with pure maple syrup in the filling. Swap walnuts for chopped pecans for a distinctively autumnal flavor. A touch of maple extract can intensify the taste.
- Nut Butter & Chocolate Chip Baked Apples: For a rich and indulgent twist, mix a tablespoon of peanut butter, almond butter, or cashew butter into your brown sugar and cinnamon filling. Fold in a few dark chocolate chips for pockets of melted chocolate goodness.
- Gingerbread Spiced Apples: Infuse your baked apples with festive flavors. Add a generous pinch of ground ginger, cloves, and allspice to the cinnamon-sugar-butter mixture. A dash of molasses can further enhance the gingerbread taste.
- Dried Fruit & Nut Baked Apples: Incorporate finely chopped dried cranberries, raisins, or apricots into the filling along with your choice of nuts. The dried fruit adds a chewy texture and concentrated sweetness.
- Cheesecake Stuffed Baked Apples: Mix softened cream cheese with a little sugar, vanilla extract, and a touch of cinnamon. Stuff this creamy mixture into the cored apples before baking for a delightful cheesecake-like experience.
- Caramel Apple Pie Stuffed Apples: For a taste reminiscent of apple pie, finely dice a small amount of extra apple and mix it into your filling, along with a tiny drizzle of caramel sauce. Top with a lattice crust made from store-bought pie dough for an impressive presentation.
More Easy and Delicious Apple Recipes
- Apple Crisp Recipe
- Cinnamon Roll Apple Pie Recipe
- Apple Fritters Recipe
- Caramel Apple Dump Cake Recipe
- Apple Bundt Cake
- Homemade Caramel Apples
We invite you to give this incredibly easy and rewarding Baked Apple Recipe a try. It’s a wonderful way to enjoy the simple pleasures of home baking and a warm, comforting dessert. Your family and friends will appreciate the tender apples, the gooey, spiced filling, and the delightful aroma that fills your kitchen. Don’t forget to leave a comment and a star rating to share your experience once you’ve made them. We’d absolutely love to hear your feedback!
Baked Apples
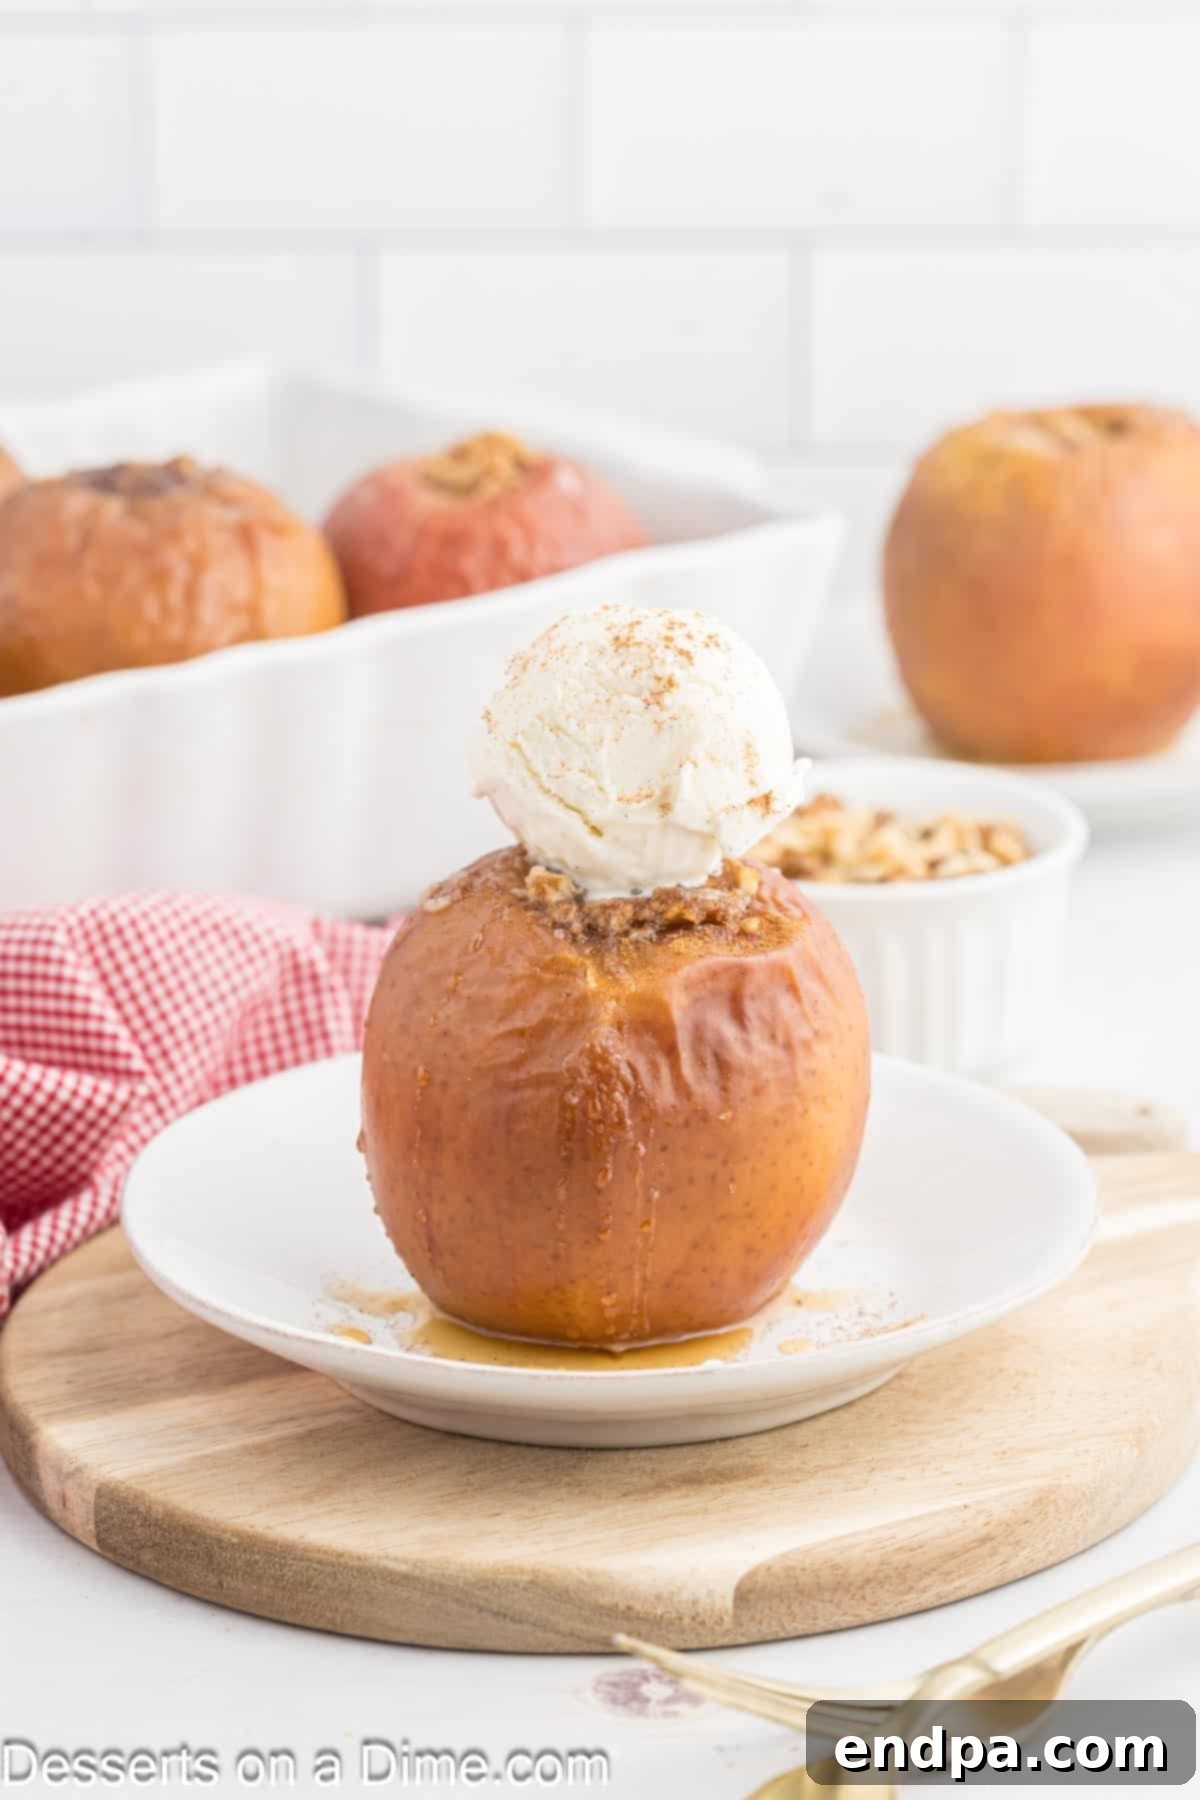
Baked Apples stuffed with brown sugar, cinnamon and nuts taste amazing and smell divine as it bakes. We love it served topped with vanilla ice cream and whipped cream.
Ingredients
- 6 Large Red Apples
- 1/2 cup Brown Sugar
- 1 teaspoon Ground Cinnamon
- 3 Tablespoons Unsalted Butter softened
- 1/3 cup Walnuts finely chopped
- 1/2 cup Water
- Ice Cream for serving
Instructions
- Preheat the oven to 350 degrees Fahrenheit.
- Use a paring knife or an apple corer to carefully remove the core from each apple, creating a hollow center for the filling. Be sure to leave about ½ inch of the apple intact at the bottom to prevent the filling from leaking out during baking.
- In a medium size bowl, stir together the brown sugar, cinnamon and butter until well combined. Then add in the walnuts.
- Spoon the filling mixture evenly into each of the apples.
- Place the apples in a baking dish and pour the water into the bottom of the pan around the apples.
- Bake for 40-45 minutes until the apples are soft and tender but not mushy.
- Let cool slightly.
- Serve topped with the sauce dripping from the bottom of the baking pan and ice cream. Enjoy!
Recipe Notes
Refrigerate the leftovers in an airtight container for up to 2-3 days.
Nutrition Facts
Calories 453kcal, Carbohydrates 67g, Protein 5g, Fat 21g, Saturated Fat 10g, Polyunsaturated Fat 4g, Monounsaturated Fat 5g, Trans Fat 0.2g, Cholesterol 57mg, Sodium 84mg, Potassium 439mg, Fiber 6g, Sugar 57g, Vitamin A 673IU, Vitamin C 9mg, Calcium 159mg, Iron 1mg
Pin This Now to Remember It Later
Pin Recipe
