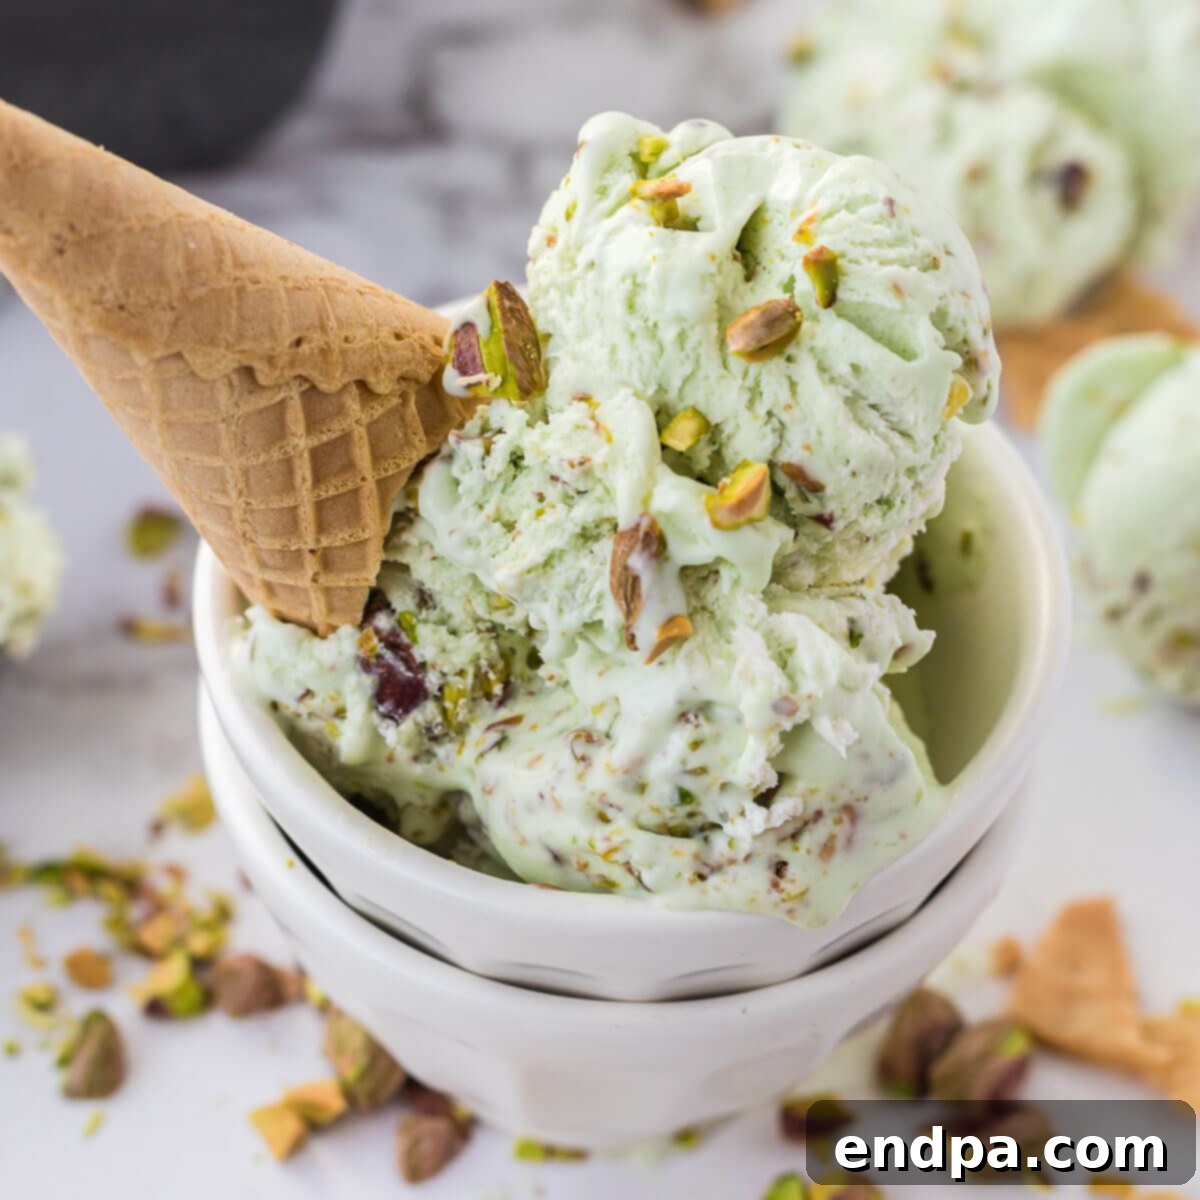
Pistachio Ice Cream: A Creamy, No-Churn Delight for Every Occasion
Indulge in the vibrant allure of homemade Pistachio Ice Cream, a dessert that promises a perfect symphony of sweet and salty flavors, all wrapped in an irresistibly creamy texture. This no-churn recipe makes achieving gourmet quality ice cream surprisingly simple, proving that you don’t need fancy equipment to create an extraordinary frozen treat. Each scoop is studded with finely chopped pistachios, delivering a delightful hint of saltiness and a satisfying crunch that beautifully complements the smooth, rich base.
Imagine a dessert that captures the earthy, nutty essence of pistachios, perfectly balanced with a luscious sweetness and a whisper of salt. Our pistachio ice cream isn’t just a dessert; it’s an experience. It’s the kind of treat that transforms ordinary moments into special memories, whether you’re enjoying a quiet evening at home or hosting a lively summer gathering.
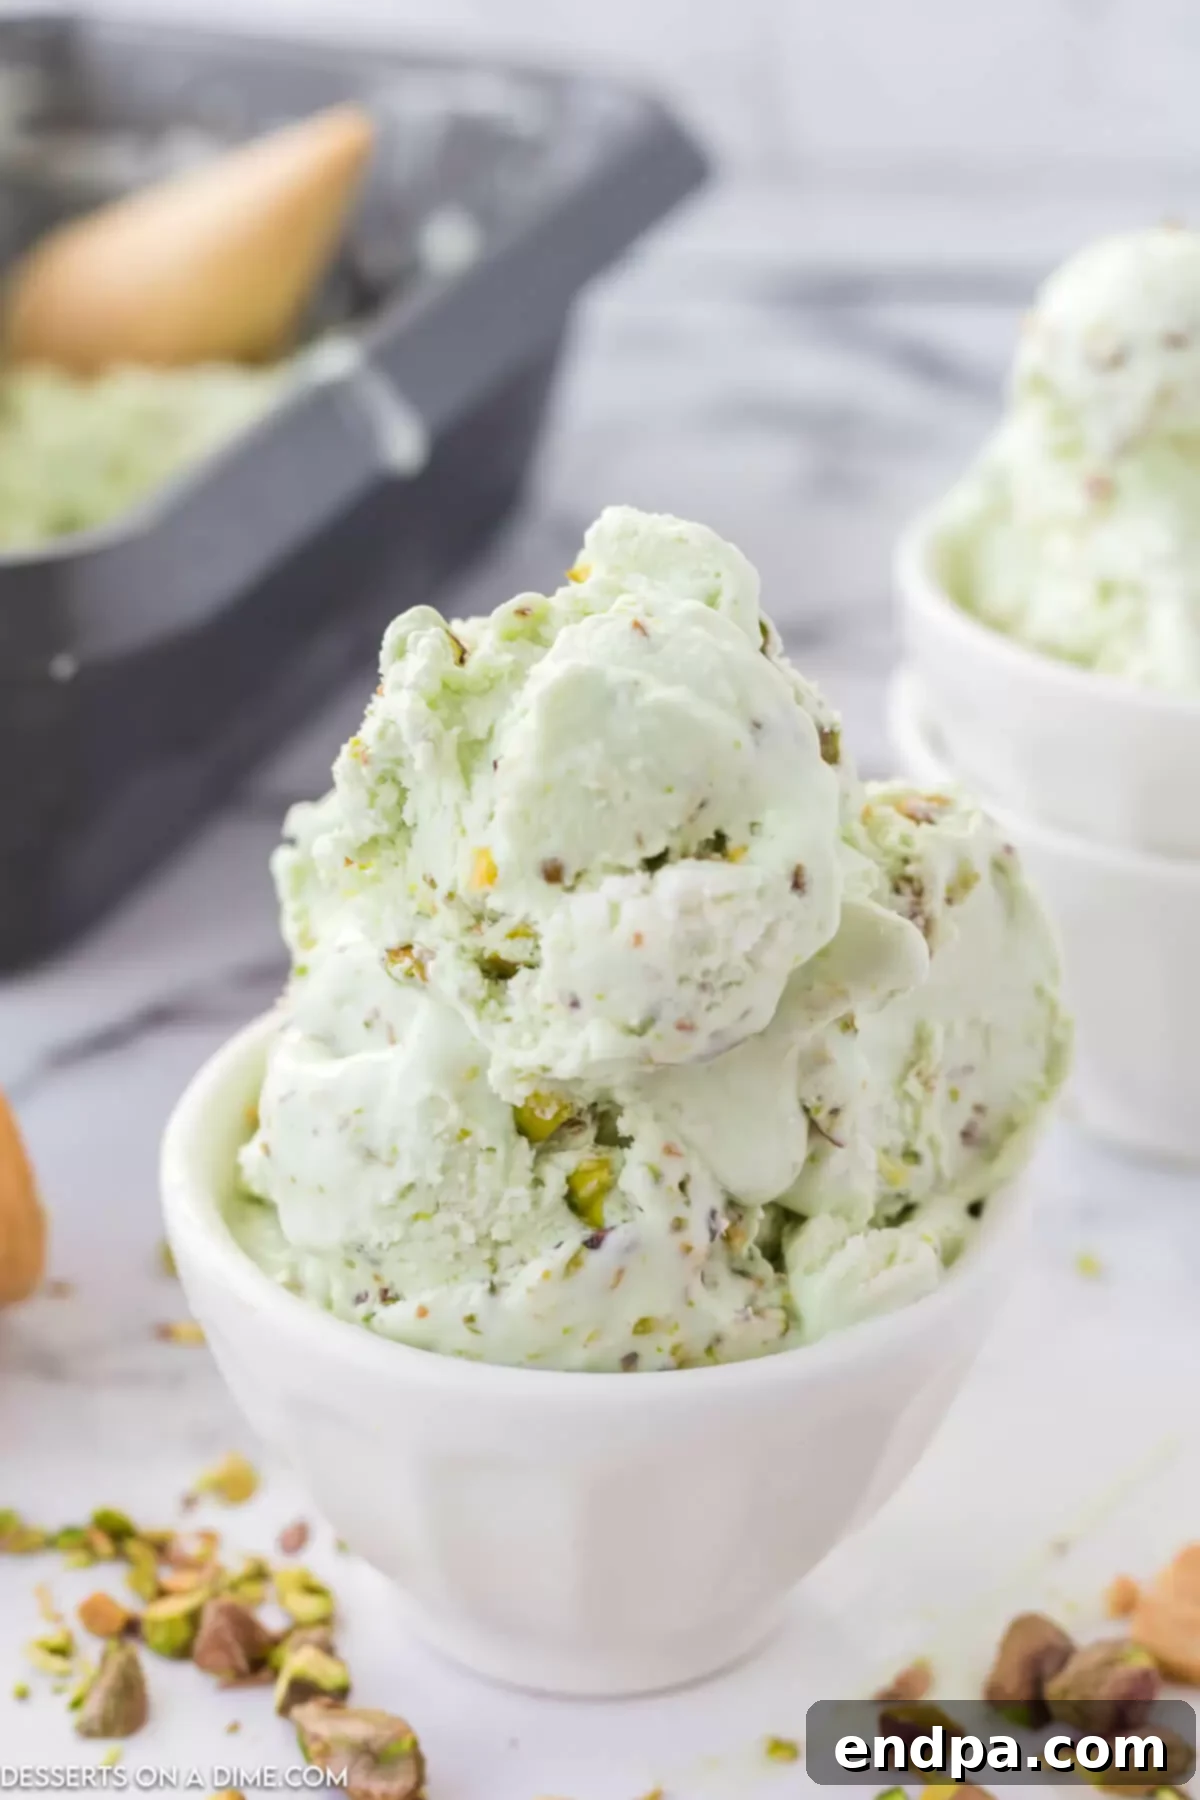
What sets this recipe apart is its incredible ease. This no-churn ice cream recipe eliminates the need for an ice cream maker, making it accessible to anyone, regardless of their kitchen gadget collection. The secret to its velvety consistency lies in the magical combination of sweetened condensed milk and rich whipped cream. The sweetened condensed milk provides the ideal sweetness and helps create a smooth base that resists ice crystals, while the heavy cream, when whipped to perfection, infuses the mixture with a light, airy, and incredibly creamy texture. The unique, earthy taste of pistachios shines through, with each salty piece making every bite an absolute perfection.
Forget the hassle of tempering egg yolks or investing in expensive machinery. This recipe delivers the best homemade ice cream with just a few simple ingredients and minimal effort. For those who adore the distinct flavor of pistachios, you might also enjoy exploring our Pistachio Cookies for another delightful nutty treat.
If you’re looking to expand your homemade dessert repertoire, we have a variety of other fantastic no-churn ice cream recipes to try. Satisfy your candy cravings with our Twix Ice Cream Recipe or the classic Nutter Butter Ice Cream. For something truly unique, give our Corn Ice Cream a whirl, or stick with a timeless favorite like No Churn Chocolate Ice Cream. And when you desire a lighter, refreshing option, our Fruit Ice Cream is always a hit.
Beyond traditional scoops, we also love getting creative with ice cream-based desserts. Discover the fun of making a Melted Ice Cream Cake, mastering the art of Rolled Ice Cream Recipe at home, or enjoying the crunch of Homemade Butterfinger Ice Cream. Our Mason Jar Ice Cream recipe is another delightful and convenient option for individual servings.
Table of contents
- Why We Love This Recipe
- The Magic of No-Churn Ice Cream
- Key Ingredients for Perfect Pistachio Ice Cream
- How to Make Pistachio Ice Cream
- How to Serve Your Pistachio Ice Cream
- Optimal Storage for Homemade Ice Cream
- How Long Will Homemade Ice Cream Last?
- Pro Tips for Unforgettable Pistachio Ice Cream
- More No Churn Homemade Ice Creams Recipes
Why We Love This Recipe
There are countless reasons why this homemade pistachio ice cream has become a staple in our dessert rotation. Its simplicity and phenomenal taste make it an absolute winner:
- Effortless Preparation with Just a Few Ingredients: One of the biggest advantages of this recipe is its minimal ingredient list. You only need five basic items, most of which you likely already have in your pantry or can easily find at any grocery store. This makes it incredibly convenient for a last-minute dessert or when you’re craving something sweet without a lengthy shopping trip. Less fuss, more deliciousness!
- The Marvel of No-Churn Ice Cream: Say goodbye to bulky ice cream makers and complicated churning processes. This recipe is specifically designed to be “no-churn,” meaning you don’t need any special machinery. It’s perfect for beginners or anyone looking for an easy, stress-free way to make creamy, delicious ice cream at home. Plus, it’s free of egg yolks, offering a lighter yet still incredibly rich dessert option. You can even use this fantastic base recipe to create other delights, like Air Fryer Fried Ice Cream.
- A Truly Delicious and Unforgettable Flavor: The star of the show is, of course, the vibrant flavor. The distinct, slightly earthy and nutty taste of pistachios, perfectly blended with the sweet, creamy ice cream base, creates a flavor profile that is simply fantastic. It’s a sophisticated yet comforting treat that appeals to all ages. Enhance its appeal by serving it with a homemade Magic Shell Recipe for an extra layer of chocolatey goodness.
The Magic of No-Churn Ice Cream
The concept of “no-churn” ice cream might sound too good to be true, but it’s a culinary marvel that has revolutionized homemade frozen desserts. The key lies in two main ingredients: heavy cream and sweetened condensed milk. When heavy cream is whipped, it incorporates air, creating a light and fluffy texture similar to that achieved by churning. Sweetened condensed milk, on the other hand, is a thick, sweet liquid that provides the necessary sugar and fat content, but more importantly, it has a lower freezing point than regular milk. This helps prevent the formation of large ice crystals, resulting in an incredibly smooth and creamy final product without any special equipment.
This method not only simplifies the process but also opens up a world of possibilities for flavor variations. It means less time in the kitchen and more time enjoying your delicious creations. The minimal effort required makes it an ideal choice for busy households, spontaneous dessert cravings, or impressing guests with a seemingly complex treat that was, in reality, incredibly easy to prepare.
Key Ingredients for Perfect Pistachio Ice Cream
Crafting this delectable pistachio ice cream requires just a handful of quality ingredients. Each plays a crucial role in achieving that signature creamy texture and delightful flavor profile:
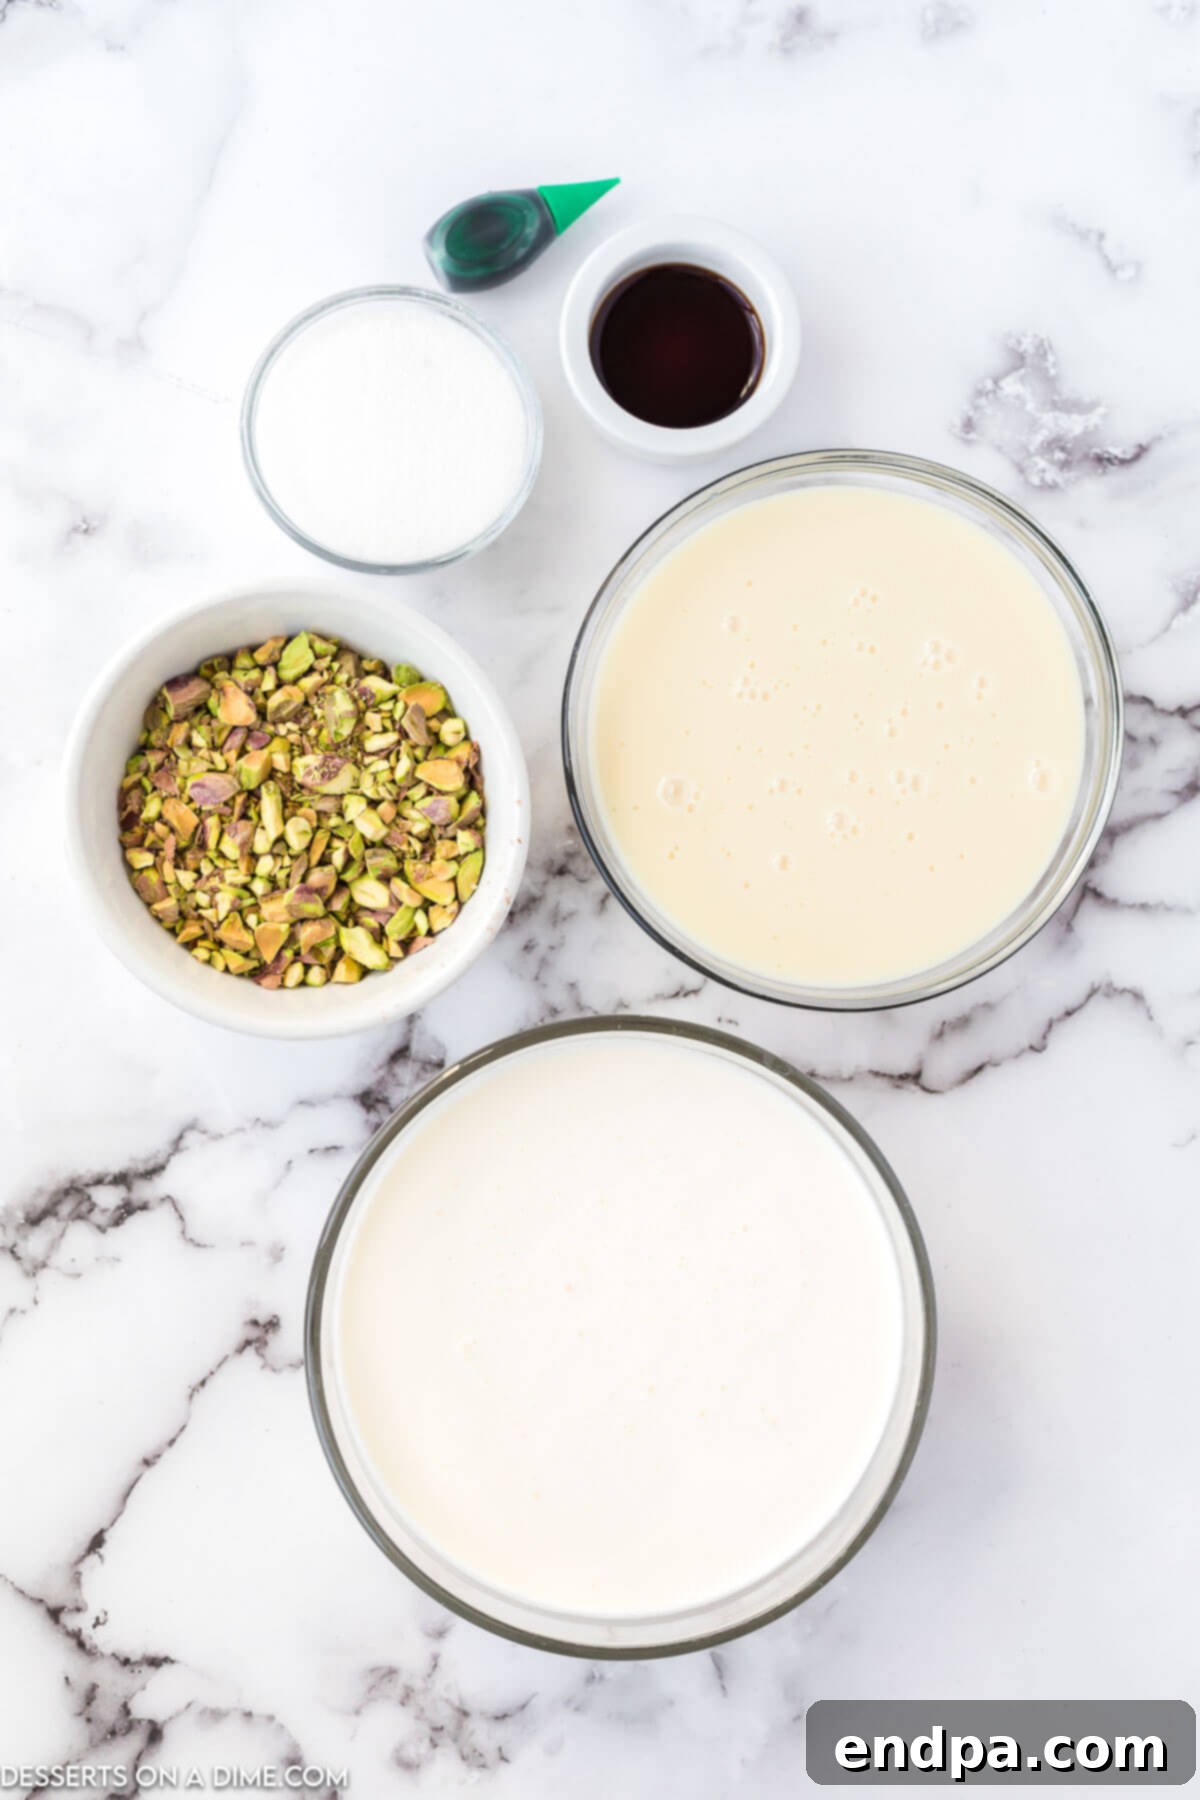
- Heavy Cream: This is the foundation of our no-churn ice cream, providing the essential fat content and airy structure. When whipped, it transforms into a light, fluffy cloud that gives the ice cream its signature creamy texture and luxurious mouthfeel. Ensure your heavy cream is very cold for optimal whipping results.
- Sweetened Condensed Milk: More than just a sweetener, sweetened condensed milk is the magical ingredient that eliminates the need for an ice cream maker. Its high sugar content and thick consistency help prevent ice crystal formation, resulting in an incredibly smooth and luscious ice cream. It also provides the perfect level of sweetness, requiring no additional sugar.
- Vanilla Extract: Pure vanilla extract adds a foundational layer of warmth and complexity to the ice cream base. It enhances the overall flavor profile, creating a harmonious balance that allows the pistachio to truly shine. Opt for a good quality pure vanilla extract for the best taste.
- Green Food Coloring: While entirely optional, a few drops of green food coloring give this pistachio ice cream its iconic, vibrant hue. It makes the dessert visually appealing and instantly recognizable as pistachio, adding to the overall enjoyment. You can skip it for a more natural, pale green color if preferred.
- Crushed Pistachios: The undisputed star of the recipe! Chopped pistachios not only infuse the ice cream with their distinctive nutty flavor but also contribute a wonderful salty crunch that contrasts beautifully with the creamy base. Their vibrant green specks also add to the visual appeal.
You can find the precise measurements and a printable version of this delicious recipe at the bottom of the page in our detailed recipe card.
How to Make Pistachio Ice Cream
Creating this rich and creamy pistachio ice cream is a breeze, requiring only a few simple steps. Follow these instructions carefully for the best results:
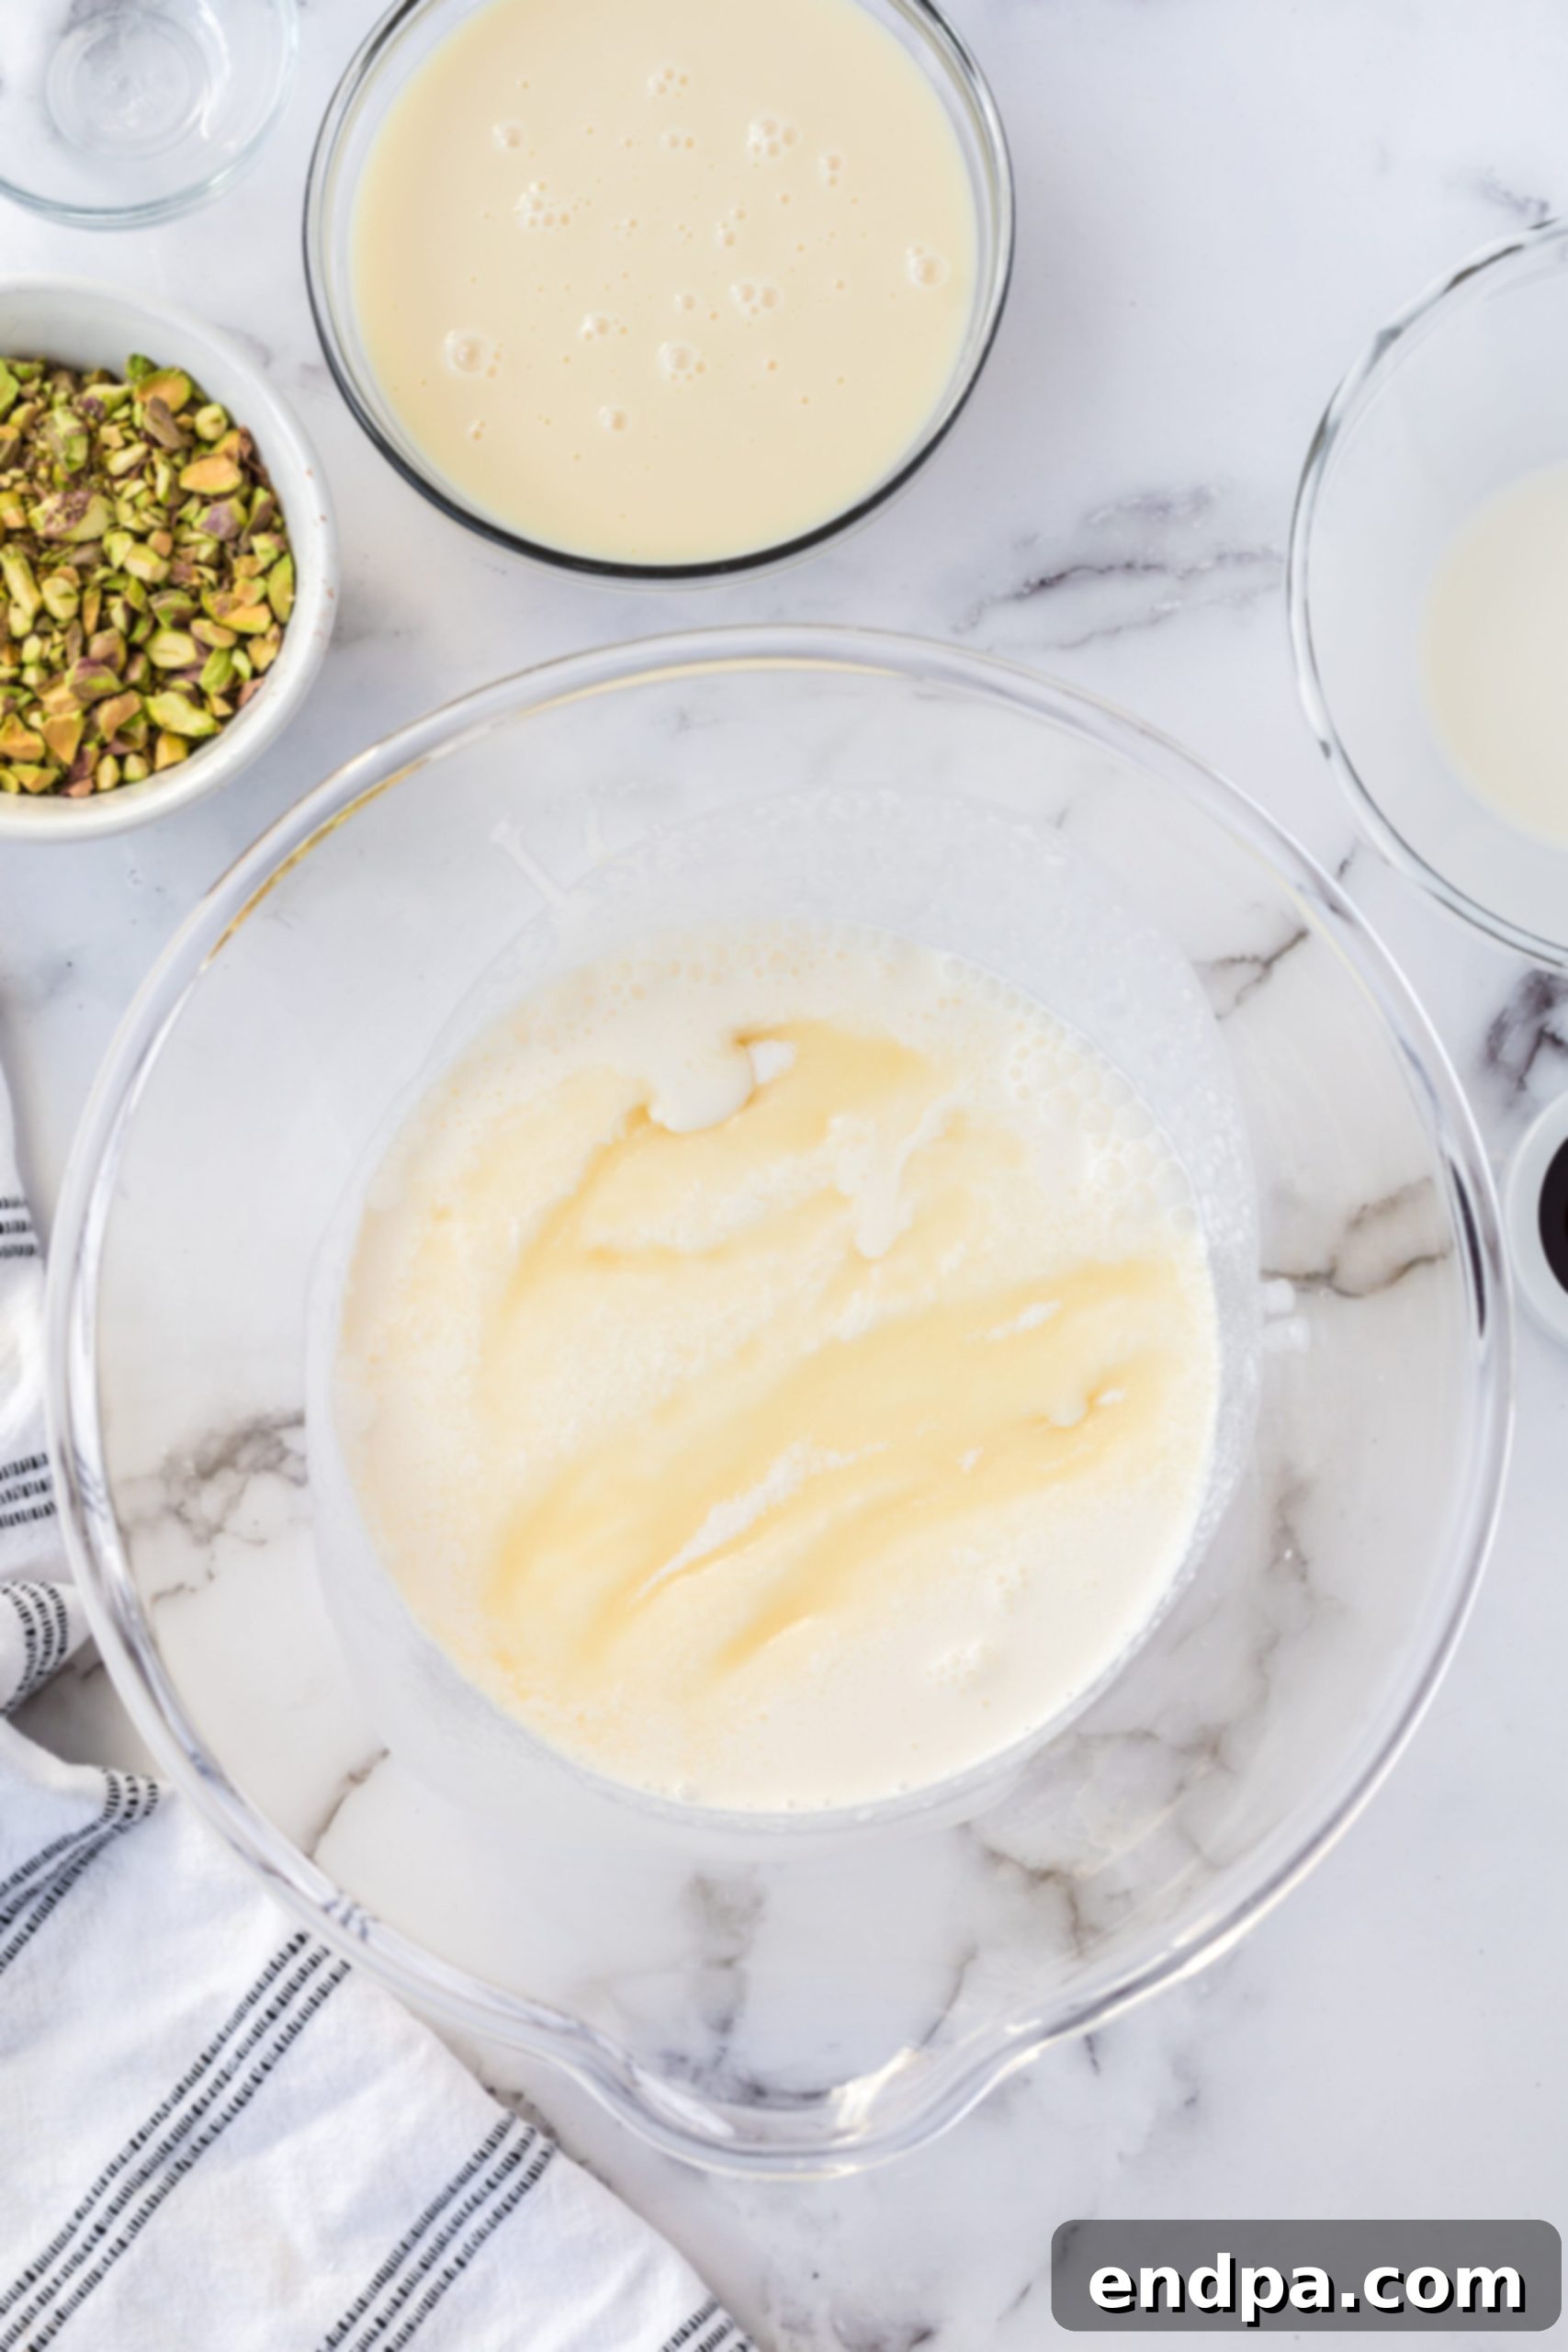
Step 1. Whip the Heavy Cream: Begin by pouring your very cold heavy cream into a large mixing bowl. Using an electric mixer (either a stand mixer with a whisk attachment or a hand mixer), beat the cream on medium-high speed until stiff peaks form. This means the cream will hold its shape when the beater is lifted, appearing nice and fluffy. Be careful not to overbeat, as it can turn into butter.
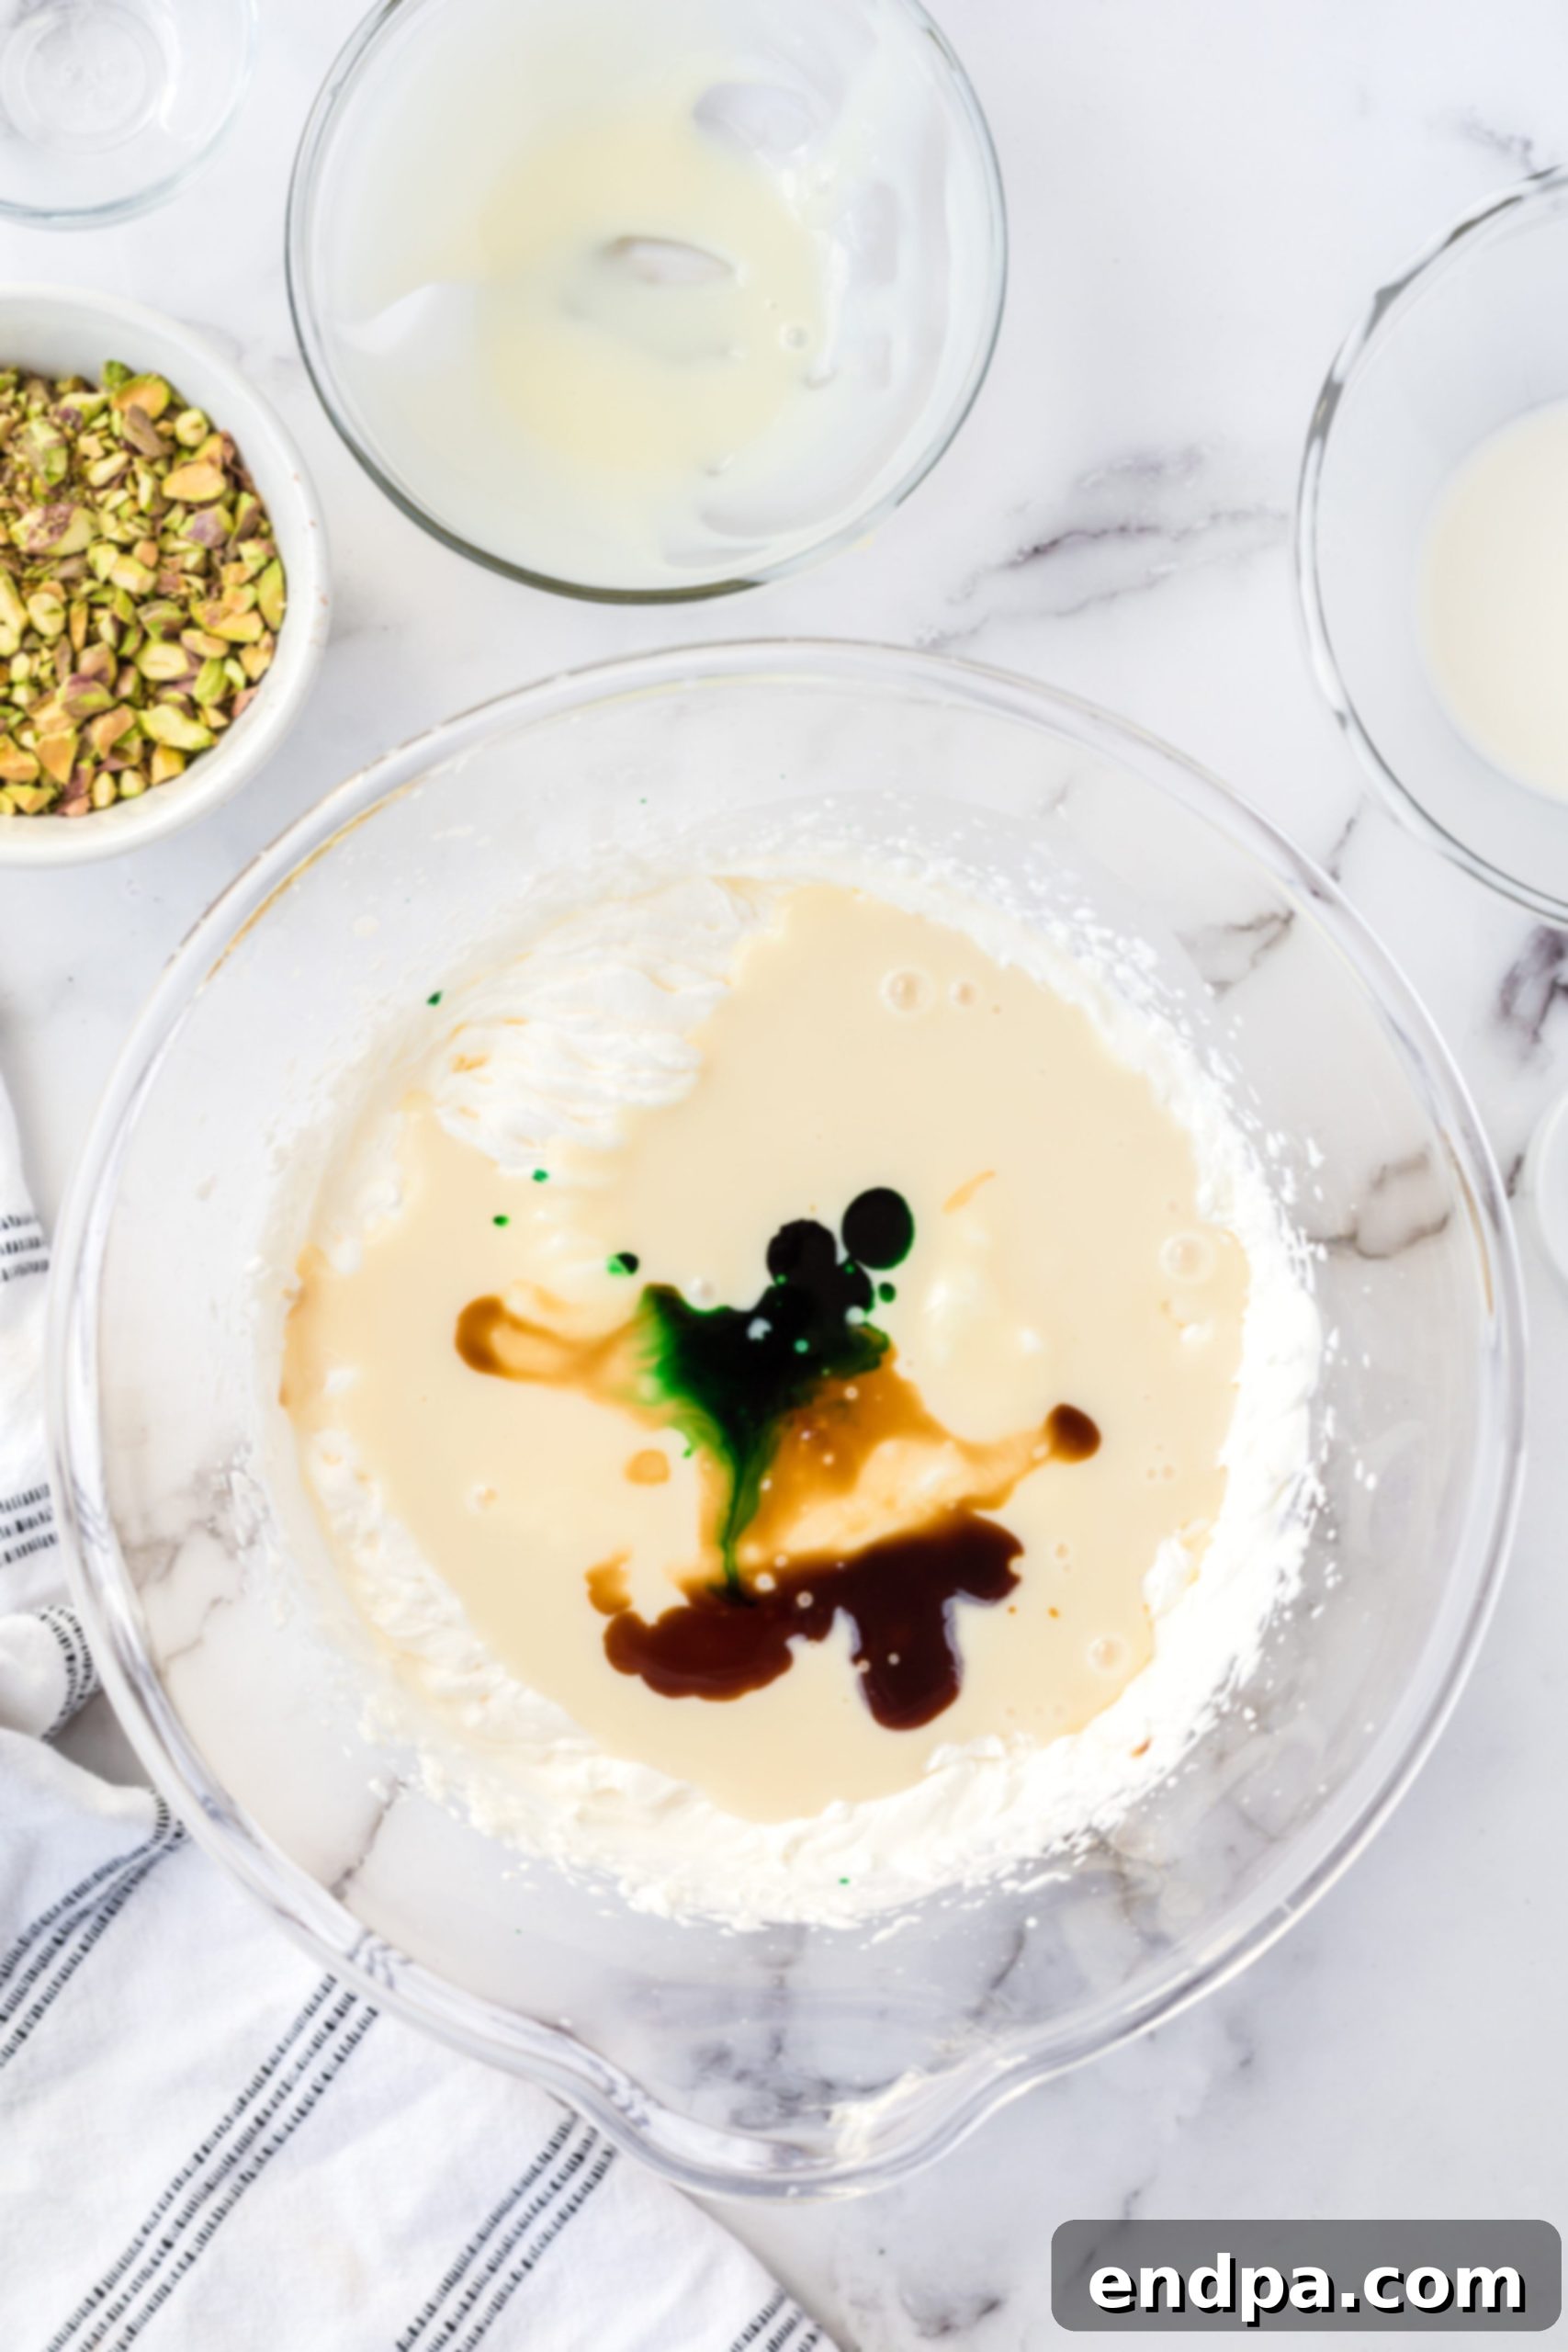
Step 2. Gently Fold in the Base Ingredients: Once the heavy cream is whipped, add the sweetened condensed milk, vanilla extract, and your desired amount of green food coloring to the bowl. Use a rubber spatula to gently fold these ingredients into the whipped cream. The key here is to use a light hand, folding from the bottom up, to avoid deflating the air you’ve incorporated into the cream. Continue folding until all ingredients are just combined and the color is homogenous.
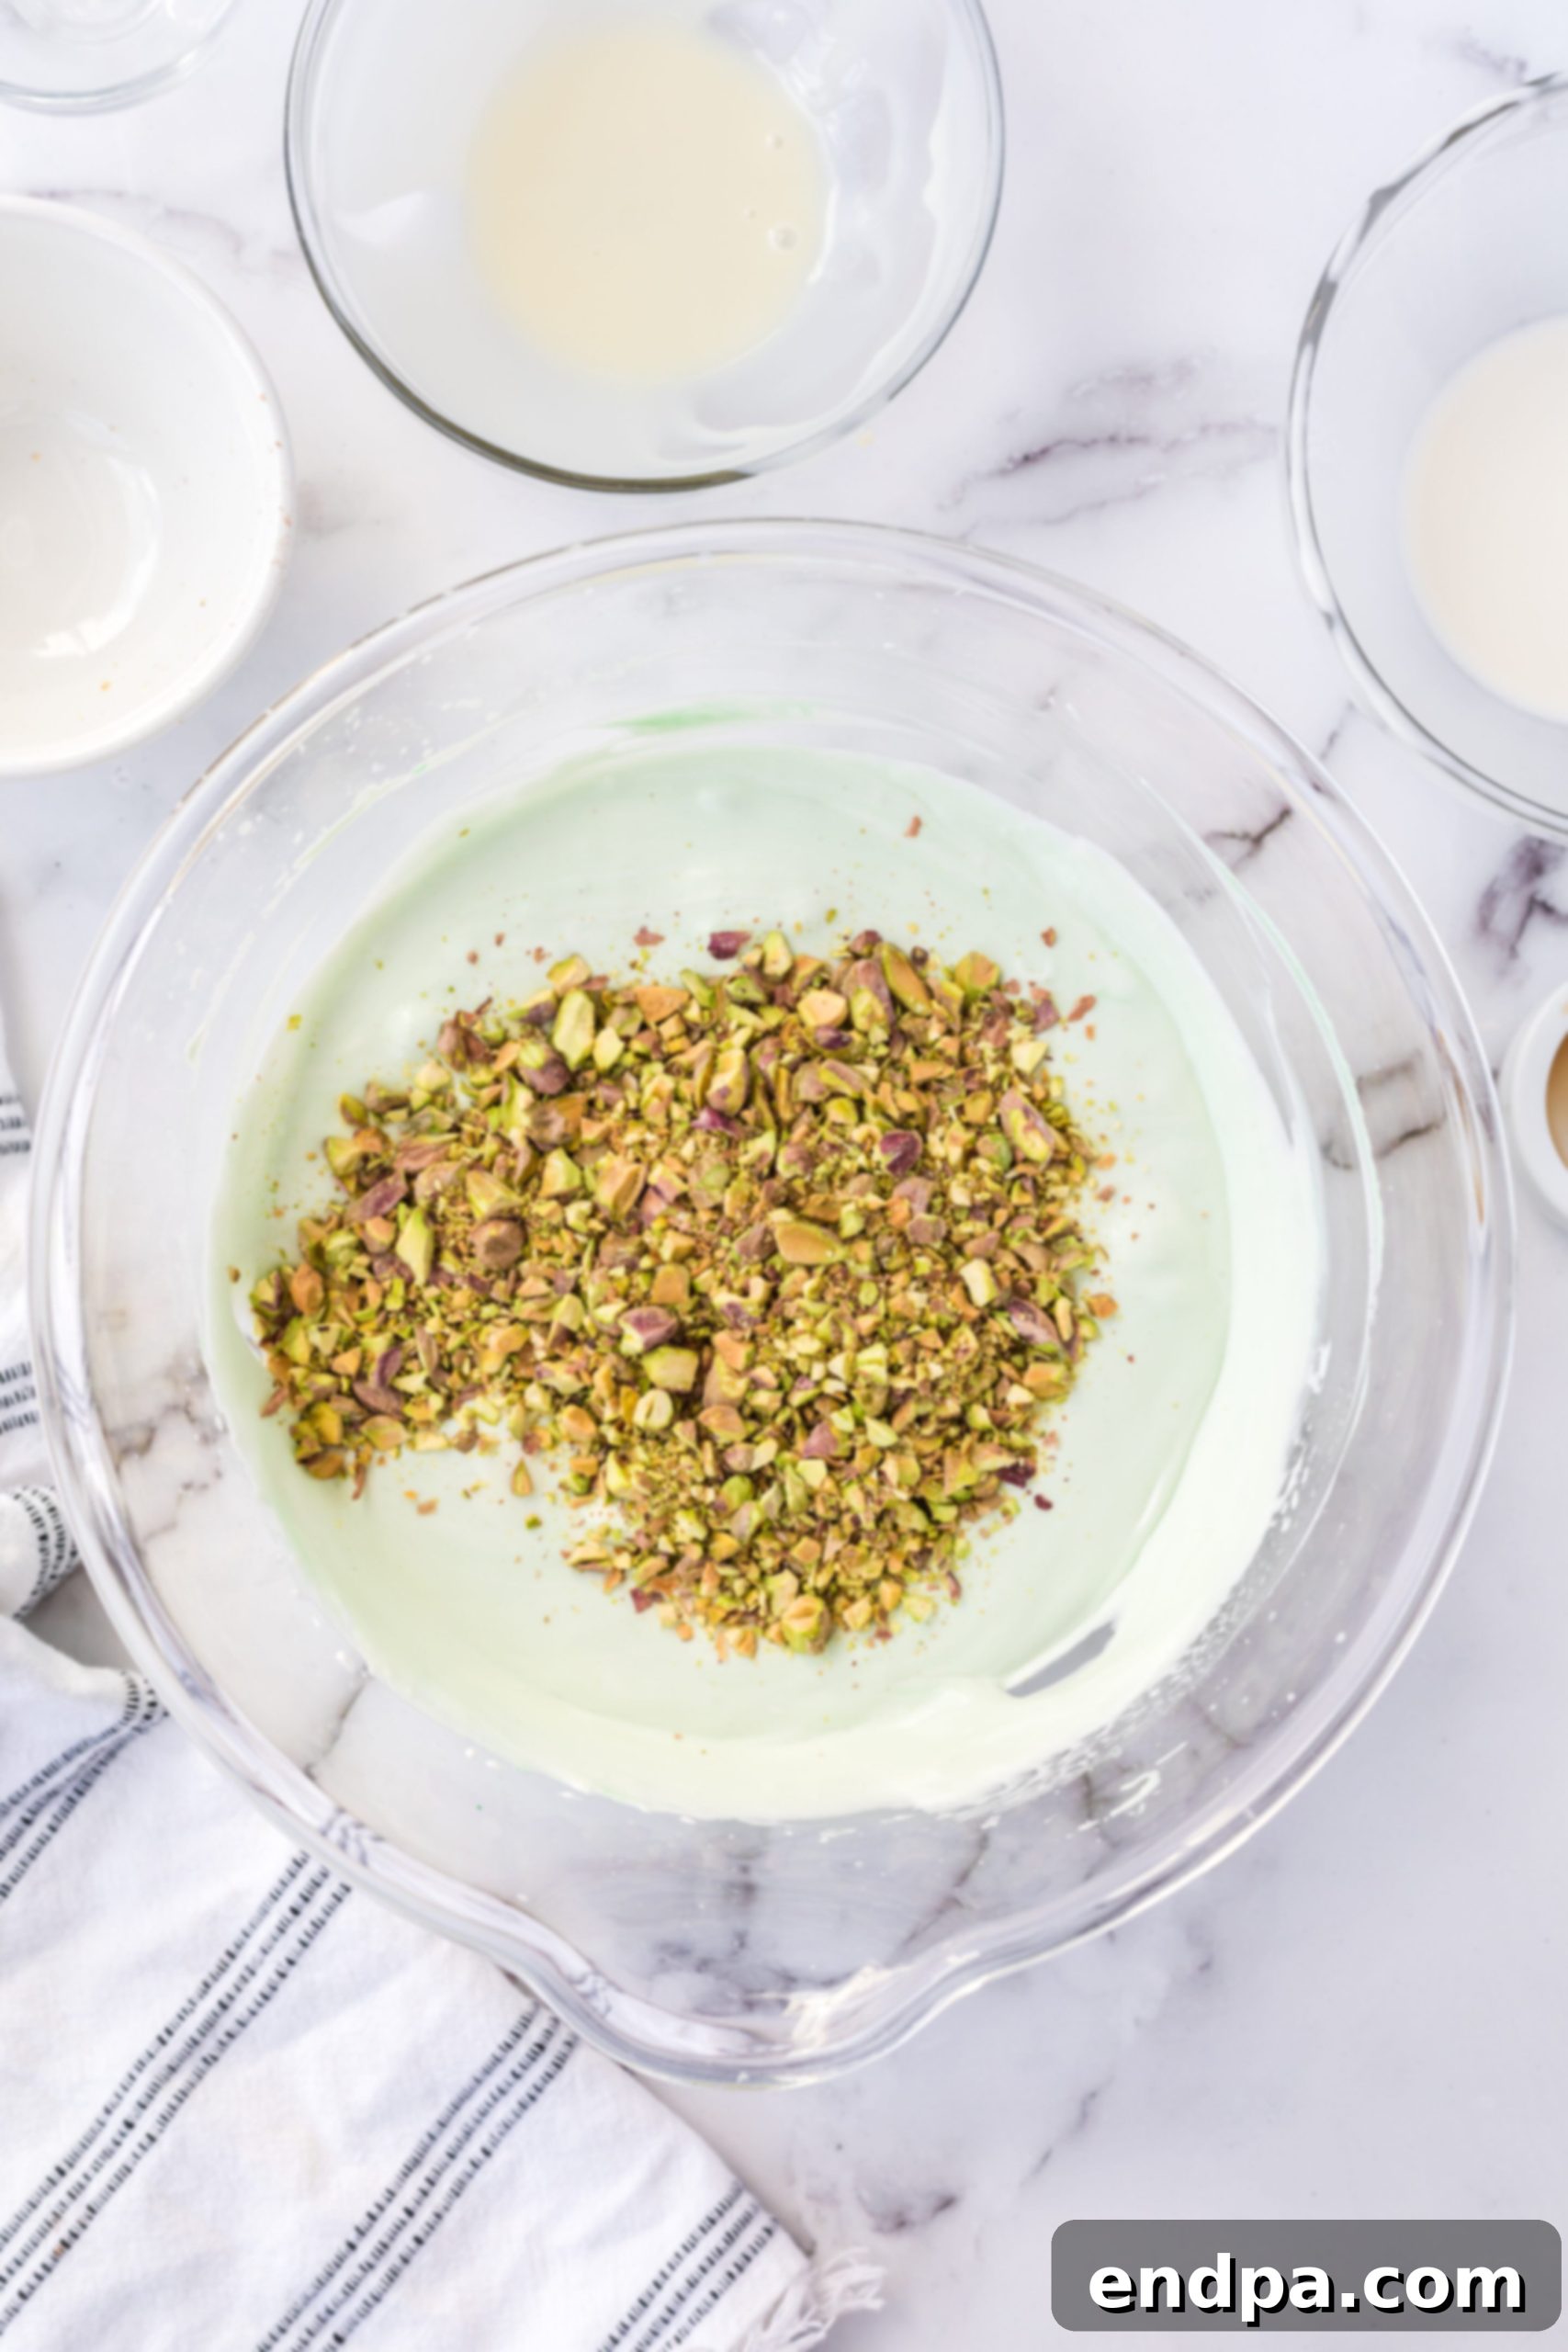
Step 3. Incorporate the Pistachios: Now, it’s time to add the star ingredient! Gently fold the crushed pistachios into the milk mixture. Again, be careful to maintain the airiness of the whipped cream. Continue folding just until the nuts are evenly distributed throughout the creamy base. Overmixing can lead to a less airy, denser ice cream.
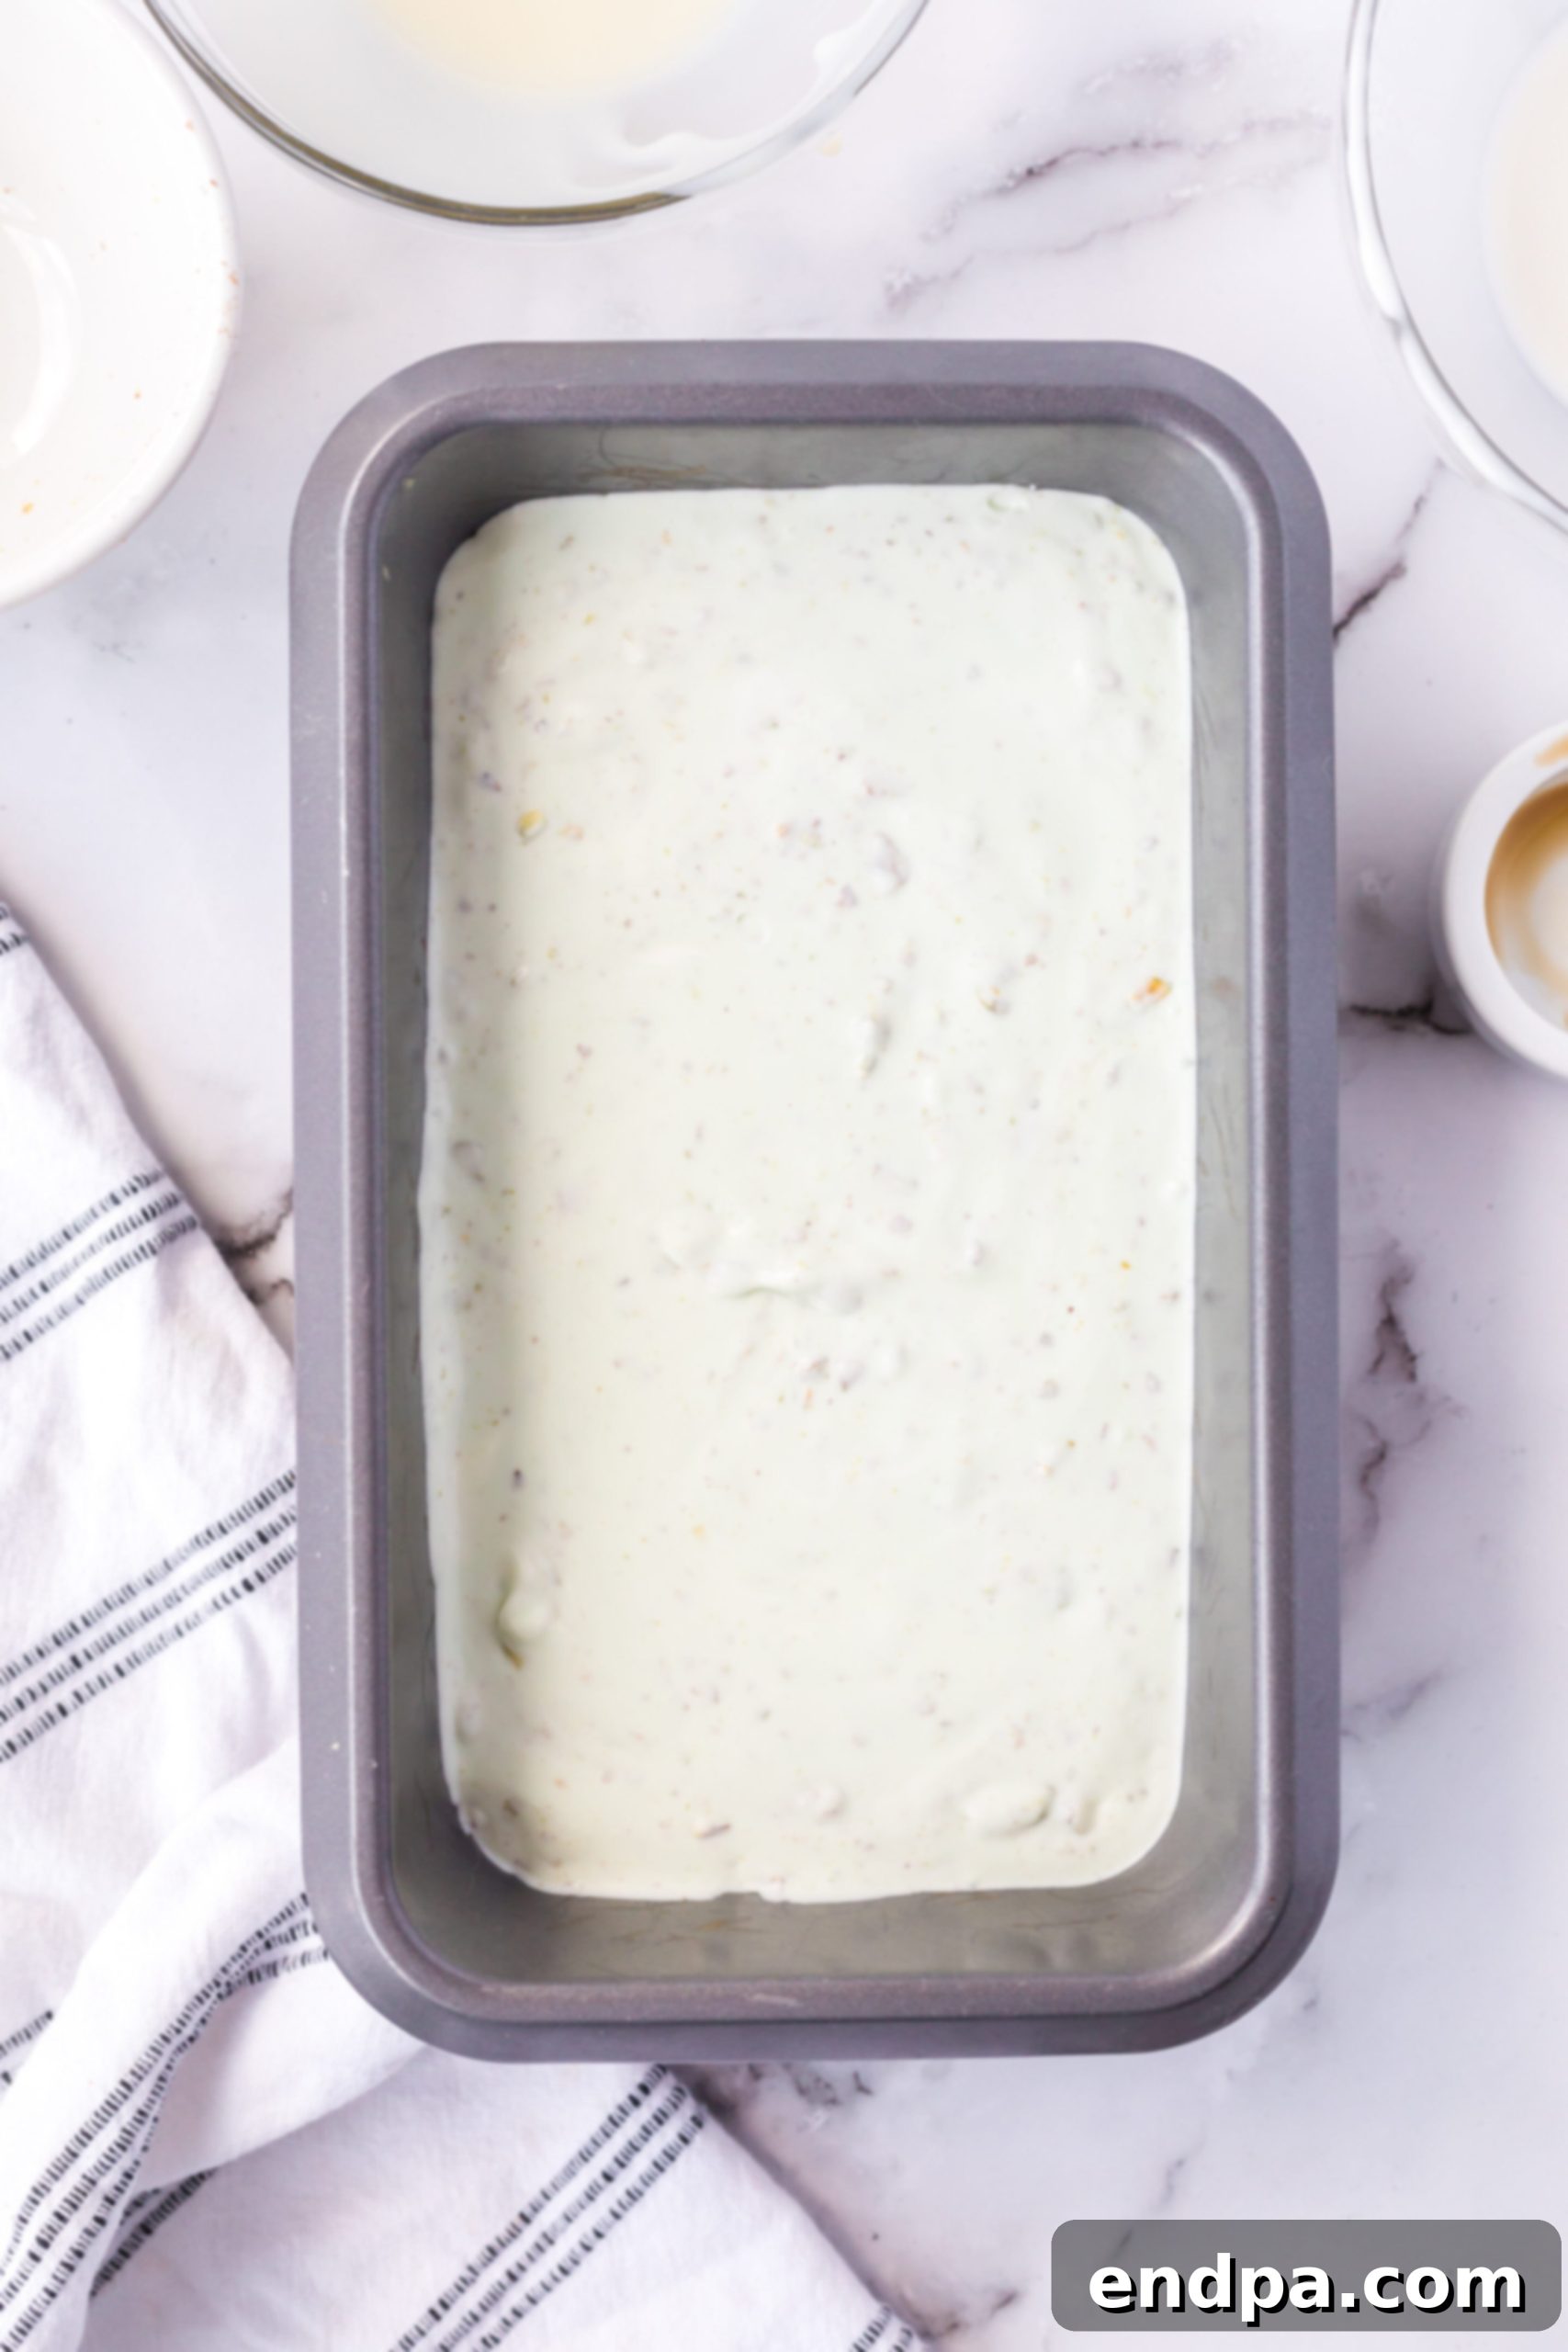
Step 4. Freeze to Perfection: Carefully transfer the pistachio ice cream mixture into a freezer-safe container. A 9×5 inch loaf pan works perfectly, but any shallow container with a lid will do. Cover the surface of the ice cream directly with plastic wrap to prevent ice crystals from forming, then cover the entire pan with a lid or another layer of plastic wrap. Place the pan in the freezer and allow it to set for at least five hours, or until the center is firm to the touch. For best results, freeze overnight.
Once frozen, your homemade pistachio ice cream is ready to be scooped and savored!
How to Serve Your Pistachio Ice Cream
Once your homemade pistachio ice cream is perfectly set, the fun truly begins with serving! This versatile dessert can be enjoyed in many delicious ways, making it ideal for any occasion:
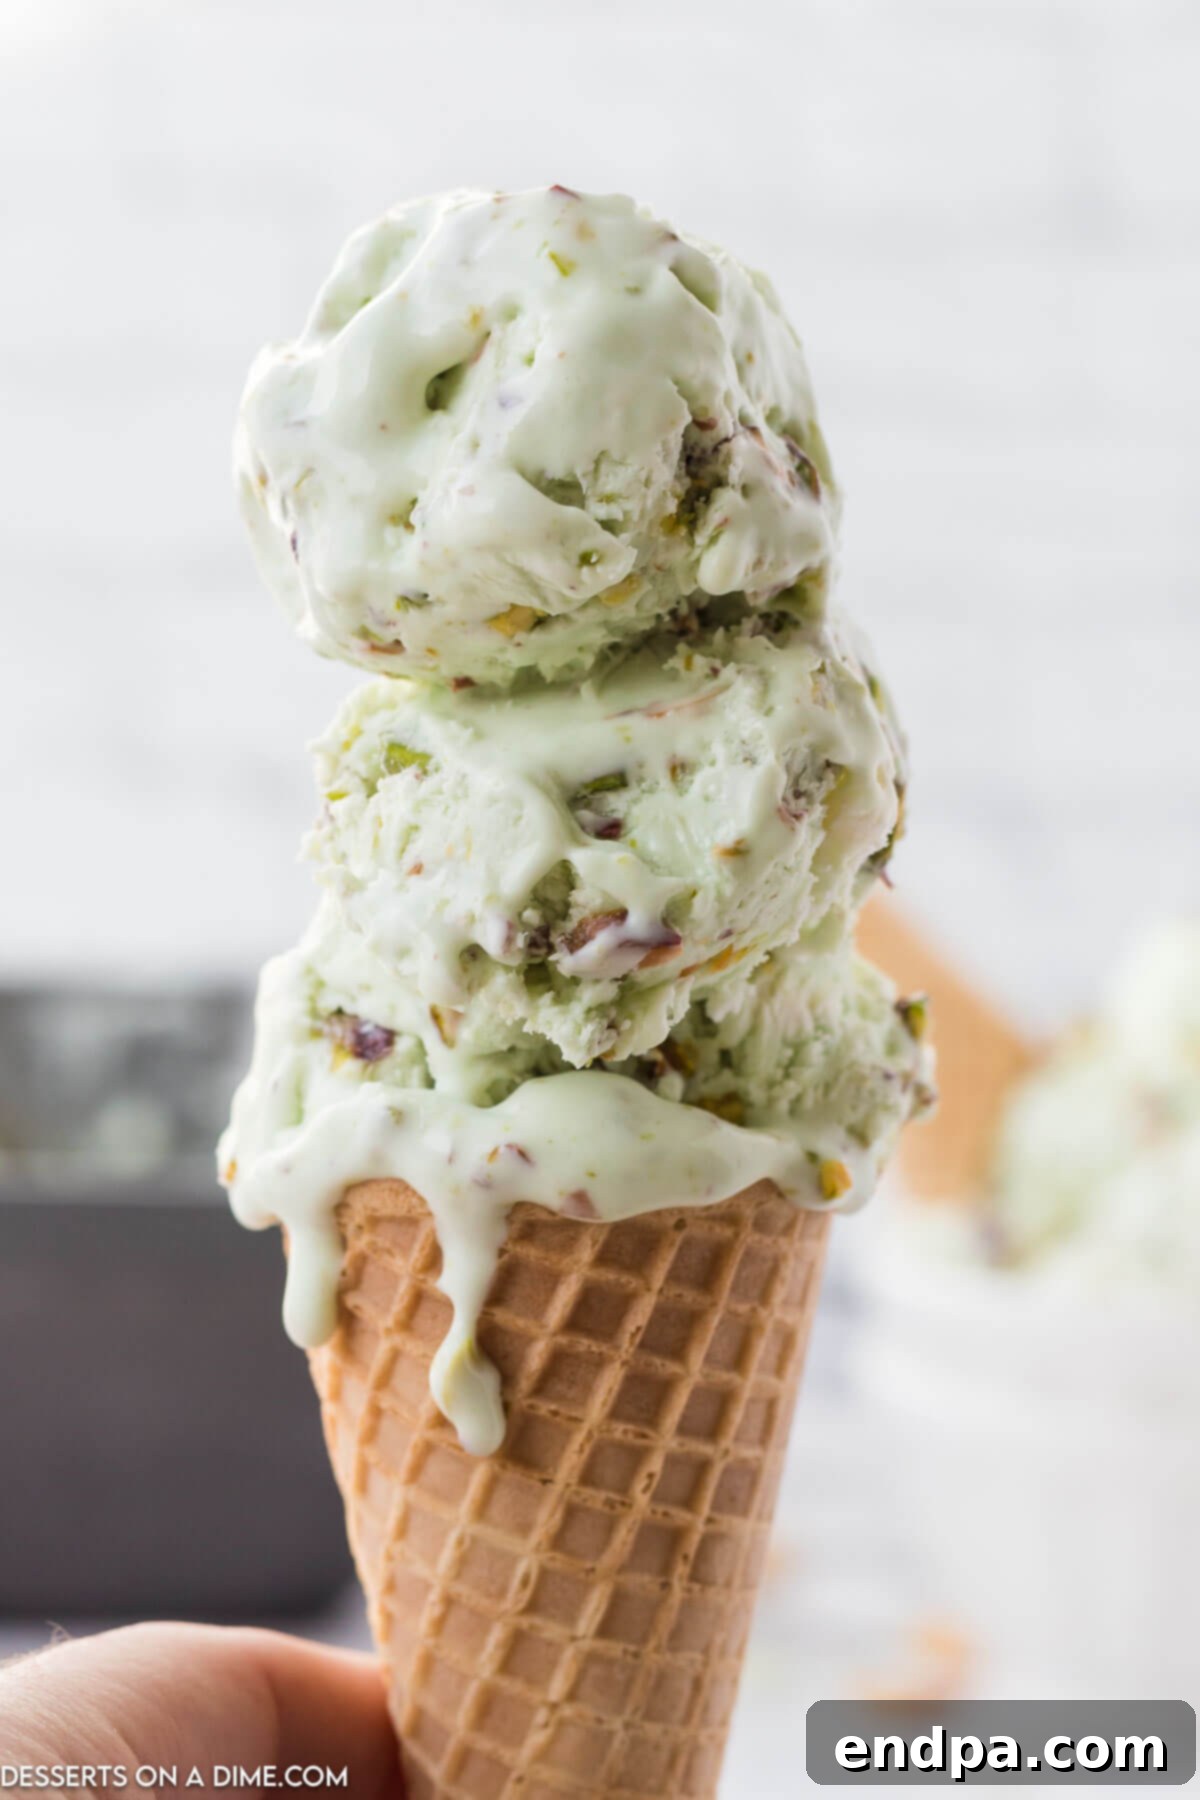
- Classic Cones and Bowls: The most popular way to enjoy ice cream is, of course, in a crisp waffle cone, a traditional sugar cone, or a simple bowl. We particularly love serving it in waffle cones for that extra layer of texture and sweetness, and the kids absolutely adore them.
- Elegant Garnishings: Elevate your pistachio ice cream with simple yet effective garnishes. A sprinkle of extra chopped pistachios not only enhances the flavor but also adds a beautiful visual appeal. A drizzle of chocolate syrup, a dollop of whipped cream, or a maraschino cherry can turn a simple scoop into a more decadent dessert.
- Ice Cream Sundae Bar: For parties and gatherings, our pistachio ice cream is a fantastic addition to an Ice Cream Sundae Bar. Lay out a variety of toppings like hot fudge, caramel sauce, sprinkles, nuts, and more fresh fruit. Your guests will love customizing their own creations.
- Pair with Baked Goods: Pistachio ice cream makes an incredible accompaniment to a wide range of baked goods. Serve a scoop alongside a warm brownie, a slice of apple pie, a berry cobbler, or even a simple vanilla cake for an unforgettable dessert experience. The creamy, nutty notes perfectly complement the richness of other sweets.
- Affogato Style: For an adult-friendly treat, place a scoop of pistachio ice cream in a small bowl and pour a shot of hot espresso over it. The melting ice cream and bitter coffee create a luxurious, balanced dessert.
No matter how you choose to serve it, this pistachio ice cream is sure to be a crowd-pleaser!
Optimal Storage for Homemade Ice Cream
Proper storage is crucial to maintaining the creamy texture and fresh flavor of your homemade pistachio ice cream. Here’s how to ensure it stays delicious:
- Airtight Container is Key: Always store your ice cream in a freezer-safe, airtight container. This prevents freezer burn, which occurs when air comes into contact with the ice cream, leading to ice crystals and a less pleasant texture.
- Direct Contact with Plastic Wrap: For an extra layer of protection against ice crystals, place a piece of plastic wrap directly on the surface of the ice cream before putting on the lid. This creates a barrier that minimizes air exposure. Parchment paper can also be used effectively for this purpose.
- Minimize Air Space: Fill your container as much as possible. Less empty space in the container means less air, and less air means less chance of ice crystals forming and freezer burn. If you have a larger container, pressing the plastic wrap or parchment paper firmly onto the surface of the ice cream is even more important.
- Consistent Freezer Temperature: Store the ice cream in the coldest part of your freezer, typically towards the back, where temperatures are most consistent. Avoid storing it in the freezer door, which is subject to frequent temperature fluctuations when the door is opened.
By following these simple storage tips, you can enjoy your homemade pistachio ice cream at its best for an extended period.
How Long Will Homemade Ice Cream Last?
When stored properly in an airtight, freezer-safe container with the surface covered by plastic wrap or parchment paper, your homemade pistachio ice cream can maintain its quality for up to two months. However, for the absolute best taste and texture, we recommend enjoying it within the first few weeks. The longer it sits, the more susceptible it becomes to developing small ice crystals, even with the best storage practices.
In our experience, this delicious ice cream rarely lasts that long because everyone loves it so much! It tends to disappear rather quickly, a testament to its irresistible flavor and creamy consistency.
Pro Tips for Unforgettable Pistachio Ice Cream
Mastering homemade ice cream, even the no-churn variety, involves a few expert tricks that can elevate your dessert from good to absolutely incredible. Here are our top pro tips:
- Food Coloring Nuances: Liquid food coloring works wonderfully for achieving that signature green hue. If you prefer to use gel food coloring, which is more concentrated, you’ll need significantly less—start with about ½ tsp and add more gradually. Always adjust the amount based on your preferred shade of green. Remember, a little goes a long way!
- The Art of Folding Whipped Cream: When incorporating the sweetened condensed milk and pistachios into the whipped cream, the technique of “folding” is crucial. This gentle method involves using a spatula to cut down through the middle of the mixture, across the bottom of the bowl, and then up and over the top. This helps limit how much air is knocked out of the whipped cream, preserving its airy structure. This airy texture is what gives your ice cream its incredibly smooth and desirable consistency.
- Allow to Soften Slightly: If you store your ice cream in a deep freezer, which often maintains very low temperatures, it might be quite firm when you first take it out. For easier scooping and a more enjoyable texture, allow the ice cream to sit on the counter for a minute or two before serving. This brief tempering period makes it perfectly pliable.
- Omit Food Coloring for Natural Charm: Don’t have green food coloring? No problem! It can be entirely omitted. The ice cream will still have a very slight, natural green tint from the pistachios and will taste exactly the same. It’s a great option for those who prefer to avoid artificial colors.
- Understanding the No-Churn Magic: The combination of heavy cream and sweetened condensed milk is the genius behind this no-churn recipe. The high fat content of the heavy cream provides richness and volume when whipped, while the sweetened condensed milk contributes sweetness and acts as a stabilizer, preventing the formation of large ice crystals. This chemical synergy gives you a texture very similar to churned ice cream, but without any of the hassle.
- A Hint of Almond Extract: For an extra layer of nutty flavor that complements pistachios beautifully, consider adding 1 teaspoon of almond extract to the mixture along with the vanilla. It adds a wonderful depth and complexity.
- Pistachio Preparation Made Easy: Save yourself time and effort by purchasing pistachios that are already shelled. For crushing, you can either finely chop them into small pieces with a sharp knife or use a food processor for a quicker, more uniform result. Just be careful not to over-process them into a paste.
- Choose Your Freezing Container Wisely: A standard loaf pan (9×5 inches) is ideal for freezing, but any shallow, freezer-safe container with a lid will work. If you happen to have a dedicated ice cream freezer container, that’s even better! For optimal results, consider chilling your chosen container in the freezer for about 30 minutes before adding the ice cream mixture.
- Efficient Mixing with the Right Tools: While you can whip heavy cream by hand, it’s significantly easier and more efficient to use a stand mixer with a whisk attachment or a powerful electric hand mixer. These tools ensure you achieve those perfect stiff peaks without tiring your arm, making the process quick and effortless.
- Temperature of Ingredients: Always ensure your heavy cream is very cold before whipping. Cold cream whips up faster and holds its peaks better, which is crucial for the airy texture of no-churn ice cream.
- Adding Other Mix-ins: Feel free to experiment with other mix-ins! White chocolate chips, a swirl of caramel, or even a different type of nut can add exciting variations to your pistachio ice cream. Add these during the final folding stage with the pistachios.
More No Churn Homemade Ice Creams Recipes
If you’ve fallen in love with the simplicity and deliciousness of this no-churn pistachio ice cream, you’re in for a treat! The world of no-churn desserts is vast and exciting. Here are some more of our favorite recipes that allow you to create fantastic homemade ice cream without an ice cream maker:
- Peanut Butter Banana Ice Cream: A delightful combination of creamy peanut butter and sweet banana, perfect for a satisfying and slightly healthier treat.
- Puppy Chow Ice Cream recipe: All the fun and flavor of the classic snack, transformed into a rich and playful ice cream.
- Pecan Praline Ice Cream Recipe: Indulge in the buttery, crunchy goodness of pecan pralines swirled into a luscious ice cream base.
- Pumpkin Chocolate Chip Ice Cream: A wonderfully spiced and comforting ice cream, perfect for fall or any time you crave pumpkin flavor.
- No Churn Vanilla Ice Cream: The timeless classic, made incredibly easy with our no-churn method. A versatile base for endless customization.
- Kool Aid Ice Cream Recipe: A fun, fruity, and colorful ice cream that kids (and adults!) will adore, bursting with vibrant flavors.
We encourage you to embark on your own homemade ice cream adventure with these fantastic recipes. Each one is designed for simplicity and maximum flavor, proving that gourmet desserts are well within your reach.
Pistachio Ice Cream
10
5
5 10
8
American
Dessert
453
Carrie Barnard
Ingredients
- 2 cups heavy cream
- 1 ½ cups sweetened condensed milk
- 1 tsp vanilla extract
- 3 drops green food coloring
- ¾ cup crushed pistachios
Instructions
- Whip the heavy cream to stiff peaks in a large mixing bowl. Once whipped, add the sweetened condensed milk, vanilla, and food coloring. Use a spatula to fold the ingredients together until the food coloring is fully incorporated and the ingredients are homogenous.
- Gently fold in the pistachios until they are evenly distributed throughout the ice cream mixture.
- Pour the ice cream into a 9×5 inch loaf pan. Cover the ice cream with plastic wrap, ensuring it touches the surface, and place it in the freezer to set for five hours, or until the center of the loaf pan is firm to the touch.
- Serve and enjoy!
Recipe Notes
I like to use liquid food coloring; however, you can also use gel food coloring. If using gel, you will need about ½ tsp, adjusting for desired shade.
Folding the ingredients into the whipped cream helps limit how much air is knocked out of the whipped cream. This is important because that airy whipped cream is what gives your ice cream a smooth texture.
If you store your ice cream in a deep freezer, you may need to let the ice cream sit on the counter for a minute or two before it is ready to scoop to allow it to soften slightly.
If you do not have green food coloring, it can be omitted. It just elevates the color of the ice cream. Without food coloring, you will have a very slight green tint to your ice cream, but it will taste exactly the same.
Using heavy cream and condensed milk eliminates the need to churn this ice cream. You will get a very similar texture to churned ice cream without the hassle.
Nutrition Facts
Carbohydrates 36g,
Protein 9g,
Fat 32g,
Saturated Fat 17g,
Polyunsaturated Fat 3g,
Monounsaturated Fat 10g,
Cholesterol 87mg,
Sodium 89mg,
Potassium 388mg,
Fiber 1g,
Sugar 34g,
Vitamin A 1076IU,
Vitamin C 2mg,
Calcium 214mg,
Iron 1mg
We encourage you to make this delightful pistachio ice cream recipe today and discover the joy of homemade desserts. We love hearing from our readers, so please come back and share your experience!
