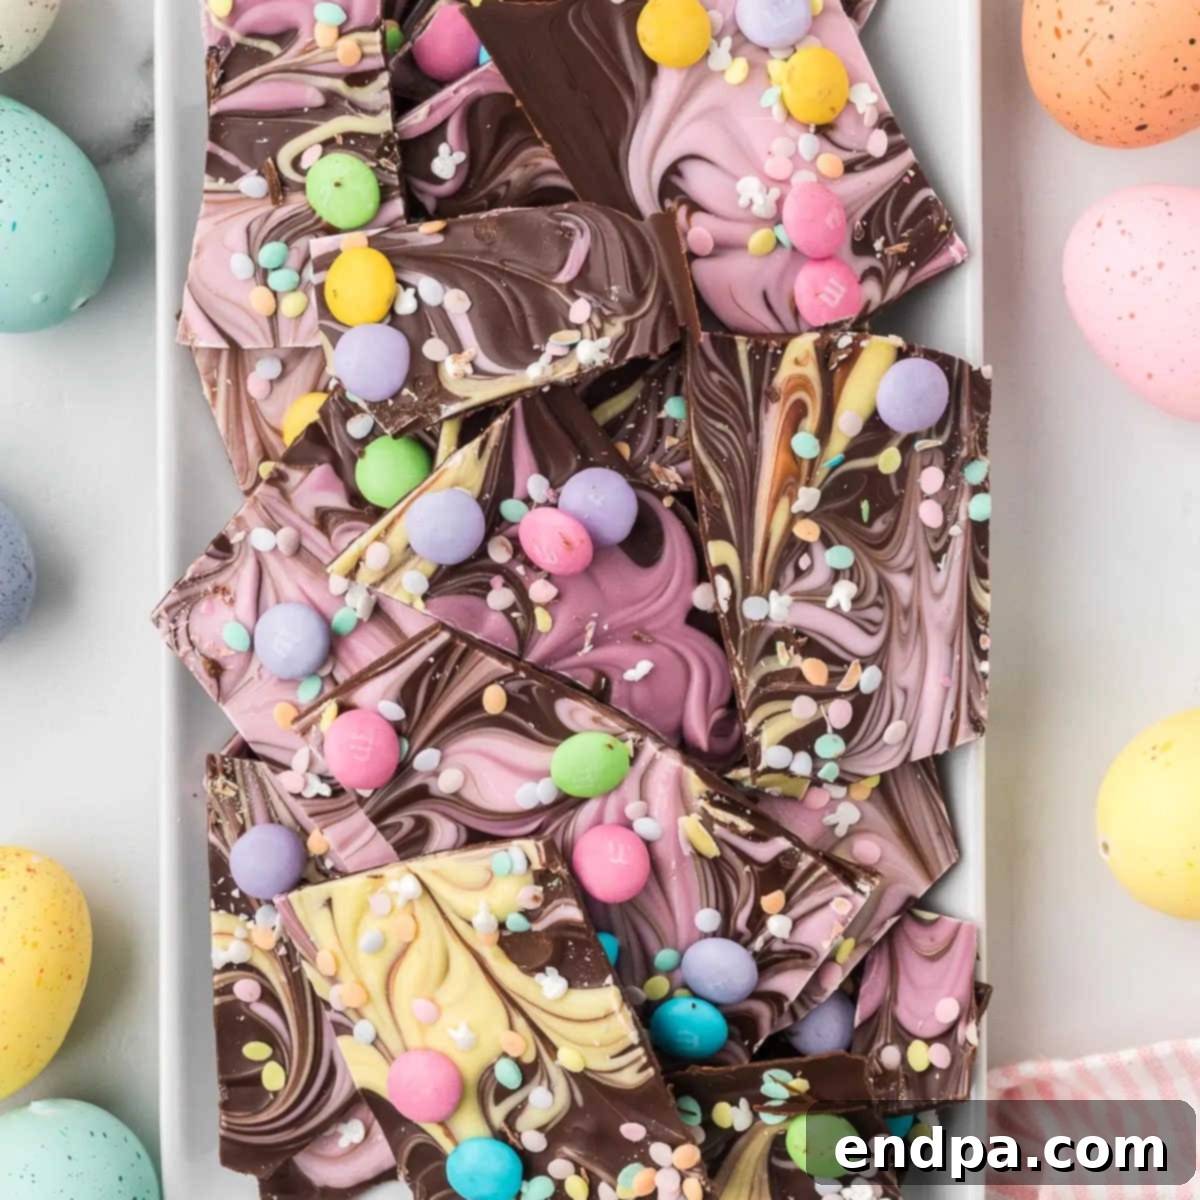
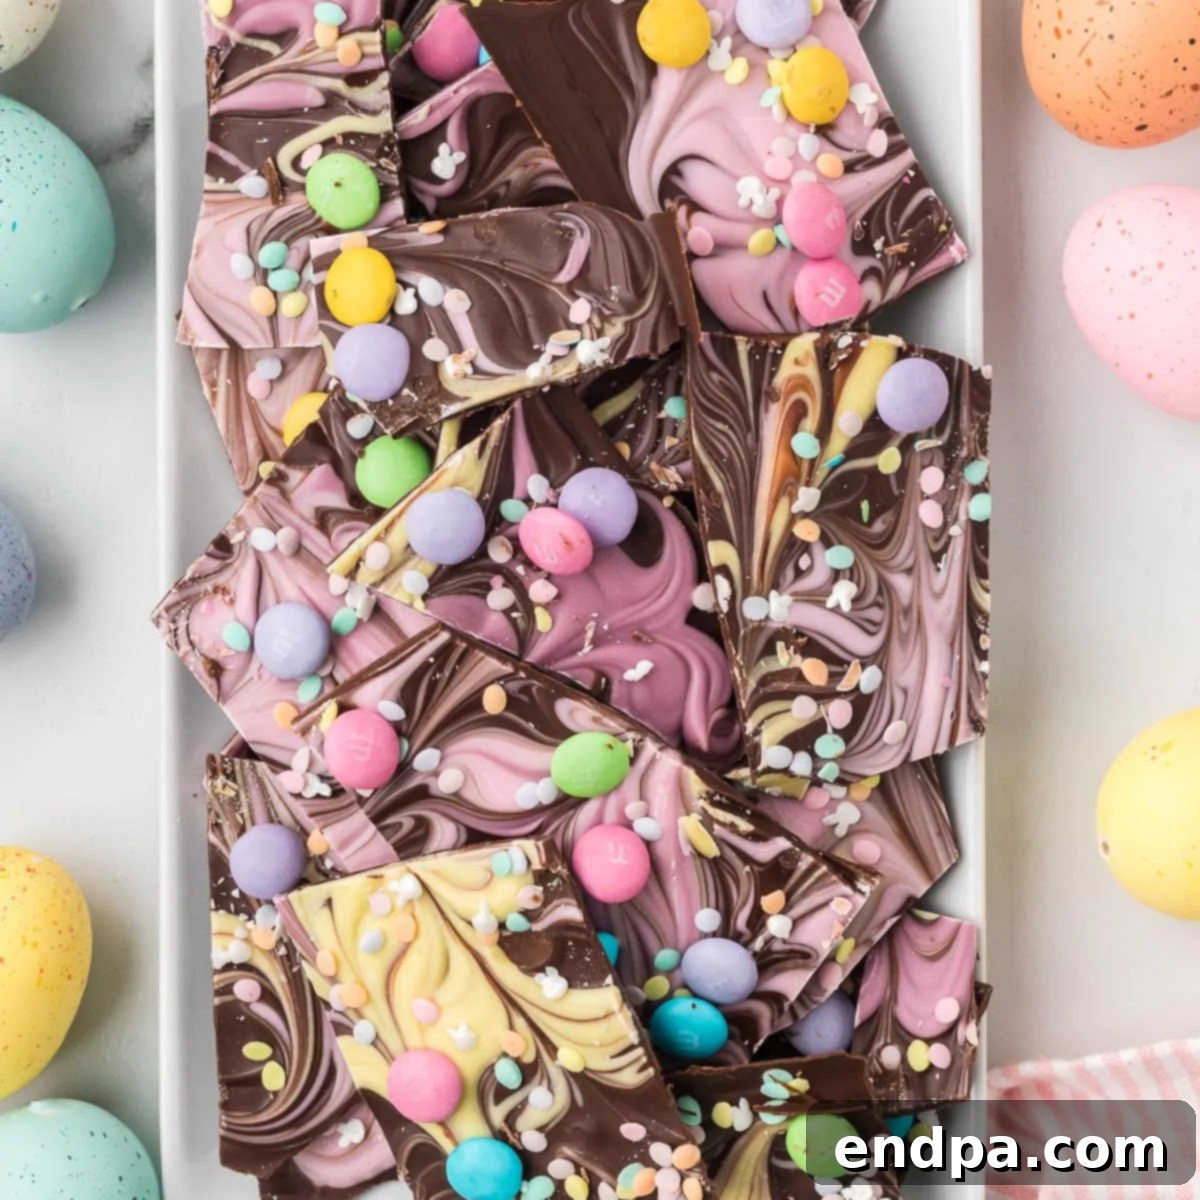
Easter is a time for joy, renewal, and, of course, delightful treats! Among the myriad of festive sweets, Easter Chocolate Bark stands out as an absolute favorite. This enchanting dessert is not only incredibly easy to prepare but also a feast for the eyes, with its beautiful swirls of pastel chocolate and vibrant sprinkles. It’s the perfect no-bake recipe to involve the whole family, allowing even the youngest chefs to contribute to the decoration with an array of colorful candies and festive sprinkles. The simplicity of chocolate bark makes it a go-to choice for busy households looking to add a touch of homemade charm to their Easter celebrations without spending hours in the kitchen.
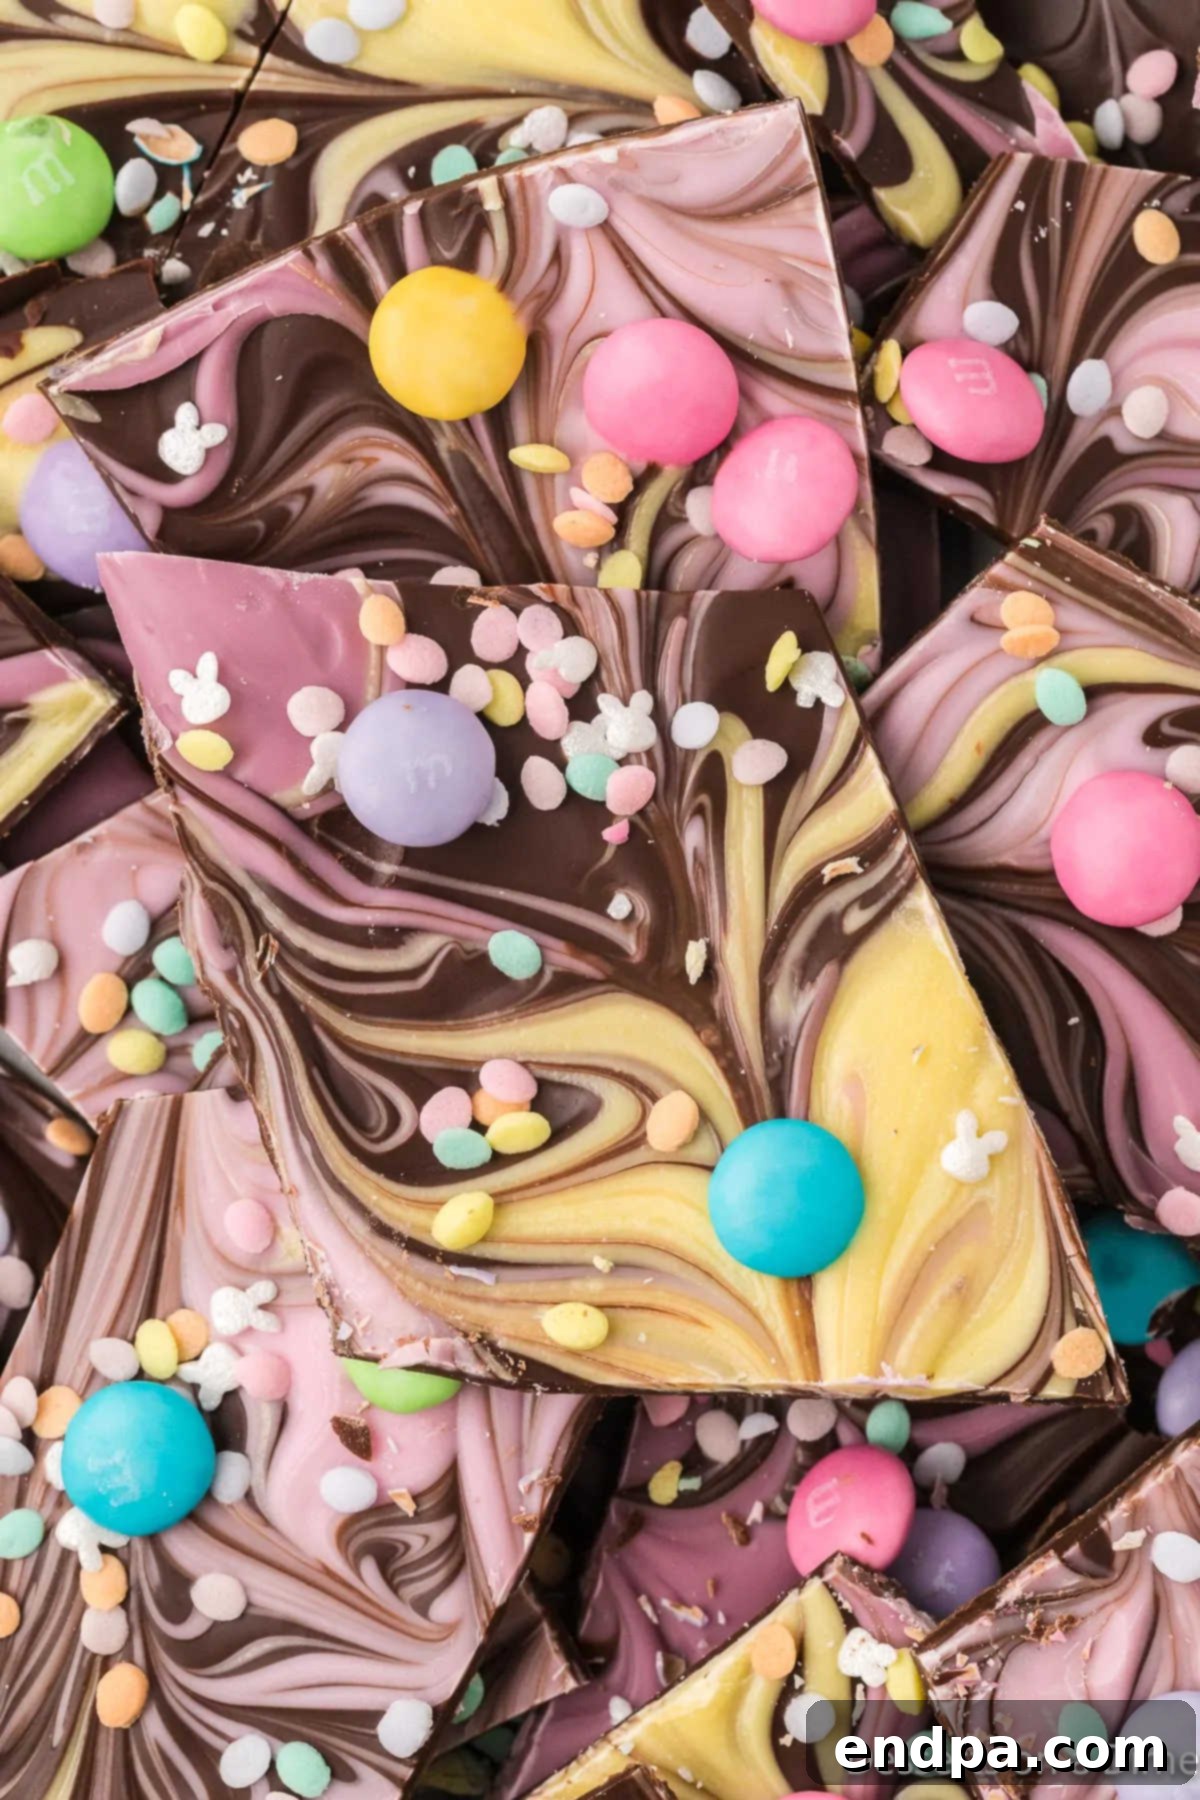
Making chocolate bark is one of those culinary pleasures that delivers maximum impact with minimal effort. It’s an effortlessly adaptable no-bake dessert recipe, making it ideal for customization. For this special Easter rendition, we’ve embraced the spirit of spring by incorporating soft pastel sprinkles and charming spring-themed M&Ms. The result is a vibrant, irresistible chocolate treat that perfectly captures the essence of the holiday.
For years, creating easy Easter desserts has been a cherished family tradition in my home, ever since my children were small. It’s a wonderful way to bond and create lasting memories. Beyond this delightful chocolate bark, we also enjoy crafting festive treats such as Easter Egg Fruit Pizza, whimsical Easter Pretzel Rods, and adorable Easter Birds Nest Cookies. These simple recipes make Easter baking accessible and enjoyable for everyone, regardless of their skill level in the kitchen. If you’re looking for more holiday-themed variations, you might also like our Peeps Rice Krispie Treats Recipe for spring, or our Halloween Bark Recipe for a fun fall twist.
Table of Contents
- Why We Love This Easter Chocolate Bark Recipe
- Essential Ingredients for Easter Chocolate Bark
- Creative Variation Ideas
- Step-by-Step Guide to Making Easter Chocolate Bark
- Storage Tips for Freshness
- Expert Pro Tips for Perfect Bark
- More Easy Easter Dessert Ideas
Why We Love This Easter Chocolate Bark Recipe
This Easter chocolate bark recipe truly embodies everything you could want in a holiday treat: simplicity, versatility, and sheer deliciousness. It’s incredibly easy to whip up, making it perfect for a delightful dessert at home or a charming contribution to class parties and gatherings. Its festive appearance, adorned with vibrant colors and delightful candy, makes it an eye-catching centerpiece that perfectly captures the joyful spirit of Easter. The entire family can get involved in the creative process, turning it into a fun activity that yields delicious results. With just a handful of readily available ingredients and a preparation time that fits seamlessly into even the busiest schedules, this bark is a stress-free solution for satisfying your sweet tooth. It’s also a fantastic make-ahead option, allowing you to prepare it days in advance and free up valuable time during the holiday festivities. The minimal cleanup required is another bonus, letting you enjoy the celebration without the worry of extensive post-baking chores. Plus, the ability to customize toppings and colors means you can make a unique batch every single time, catering to different tastes and occasions beyond just Easter.
Essential Ingredients for Easter Chocolate Bark
Crafting this beautiful Easter chocolate bark requires a simple selection of ingredients, primarily focusing on quality chocolates and festive adornments. The base combines both semi-sweet and white chocolate, providing a rich flavor profile and a canvas for vibrant colors. The key to achieving the signature pastel swirls lies in the use of candy melts in various spring shades, which are then softened by a touch of white chocolate. Finally, a generous sprinkling of M&Ms and sprinkles adds texture and that unmistakable Easter cheer.
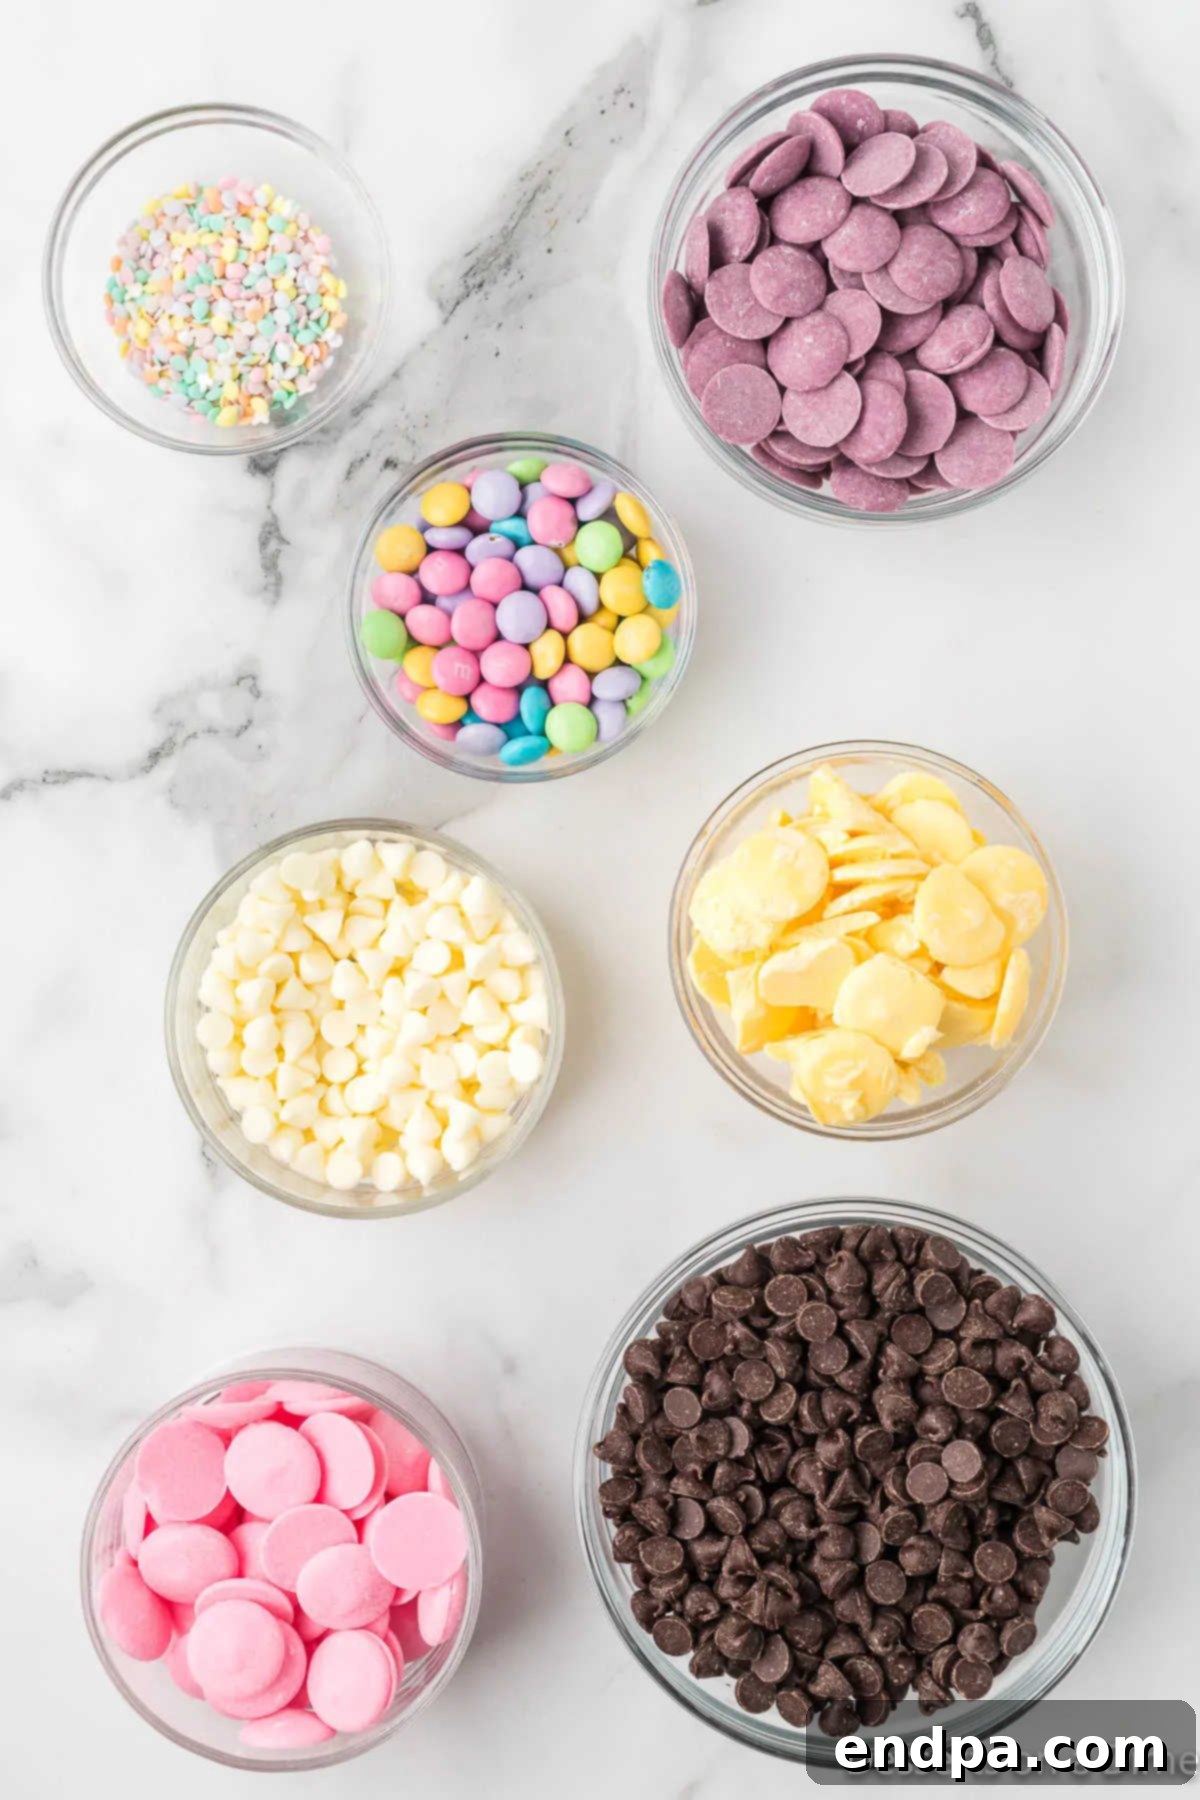
- Semi-Sweet Chocolate Chips: These form the rich, dark base of your bark, providing a classic chocolate flavor.
- White Chocolate Chips: Essential for both melting into the base and mixing with candy melts to achieve those lovely pastel hues.
- Pink Candy Melts: For a soft, classic Easter pink.
- Purple Candy Melts: To add a touch of elegant lavender to your swirls.
- Yellow Candy Melts: Bringing a bright, sunny pop of color reminiscent of spring.
- Pastel M&Ms: These add a satisfying crunch and a burst of candy-coated chocolate, in perfect Easter shades.
- Pastel Sprinkles: A medley of spring-colored sprinkles to add texture and an extra layer of festive decoration.
The complete, detailed recipe with exact measurements and instructions can be found in the recipe card towards the bottom of this page, ensuring you have everything you need for a successful batch of Easter bark.
Creative Variation Ideas
The beauty of chocolate bark lies in its incredible versatility. While our Easter version is delightful as is, don’t hesitate to get creative with your toppings and chocolate bases. Here are some ideas to inspire your next batch:
- Customized Easter Candy Toppings: Beyond sprinkles and M&Ms, Easter offers a treasure trove of candy options. Consider crushing up robin’s eggs, adding mini Reese’s peanut butter eggs, colorful jelly beans, or even small chocolate bunnies for an extra special touch. Cadbury Mini Eggs are another incredibly popular choice that adds a delightful crunch and creamy chocolate. Any of your favorite seasonal candies will be a delicious addition to this festive bark, allowing you to personalize it perfectly.
- Nutty Additions: For those who enjoy a little savory crunch with their sweet, sprinkle some chopped nuts on top. Almonds, pecans, walnuts, or even pistachios would add a wonderful texture and depth of flavor. Toasting the nuts lightly before adding them can enhance their aroma and taste even further.
- All-White Chocolate Bark: If you prefer a lighter, creamier flavor, you can easily transform this into an exquisite white chocolate Easter bark. Simply use white chocolate as your primary base instead of combining it with semi-sweet chocolate. You can still incorporate colorful candy melts for vibrant swirls against the white background.
- Holiday-Specific Color Schemes: This bark recipe isn’t just for Easter! Adapt the colors and toppings to suit any holiday or special occasion. Use red and green for Christmas, green for St. Patrick’s Day, vibrant orange and black for Halloween, or romantic pink and red for Valentine’s Day. This makes chocolate bark a fantastic year-round treat for gifting or entertaining.
- Seasonal M&Ms and Candy: Keep an eye out for seasonal M&Ms or other holiday-themed candies throughout the year. Pumpkin spice M&Ms for fall, peppermint M&Ms for winter, or heart-shaped candies for Valentine’s Day can quickly transform your bark to match any theme.
- Explore Different Chocolate Varieties: Experiment with various types of chocolate for the base. While semi-sweet is classic, try milk chocolate for a sweeter profile, or dark chocolate for a more intense, sophisticated flavor. You could even create layers with different chocolates for a multi-faceted taste experience.
- Personalized Themes: Take customization to the next level by matching the colors and toppings to specific themes. Think school colors for a graduation party, team colors for a sports celebration, or even birthday party themes. The possibilities are truly endless, making this bark a wonderfully adaptable treat for any event.
Step-by-Step Guide to Making Easter Chocolate Bark
Creating this festive Easter chocolate bark is a straightforward process, perfect for bakers of all skill levels. Follow these simple steps to achieve a beautiful and delicious treat:
- Step 1: Prepare Your Baking Sheet. Begin by lining a large baking sheet with either foil or parchment paper. This crucial step prevents the chocolate from sticking and makes for easy removal and cleanup once the bark has set. Ensure the paper covers the entire surface to avoid any chocolate seeping underneath.
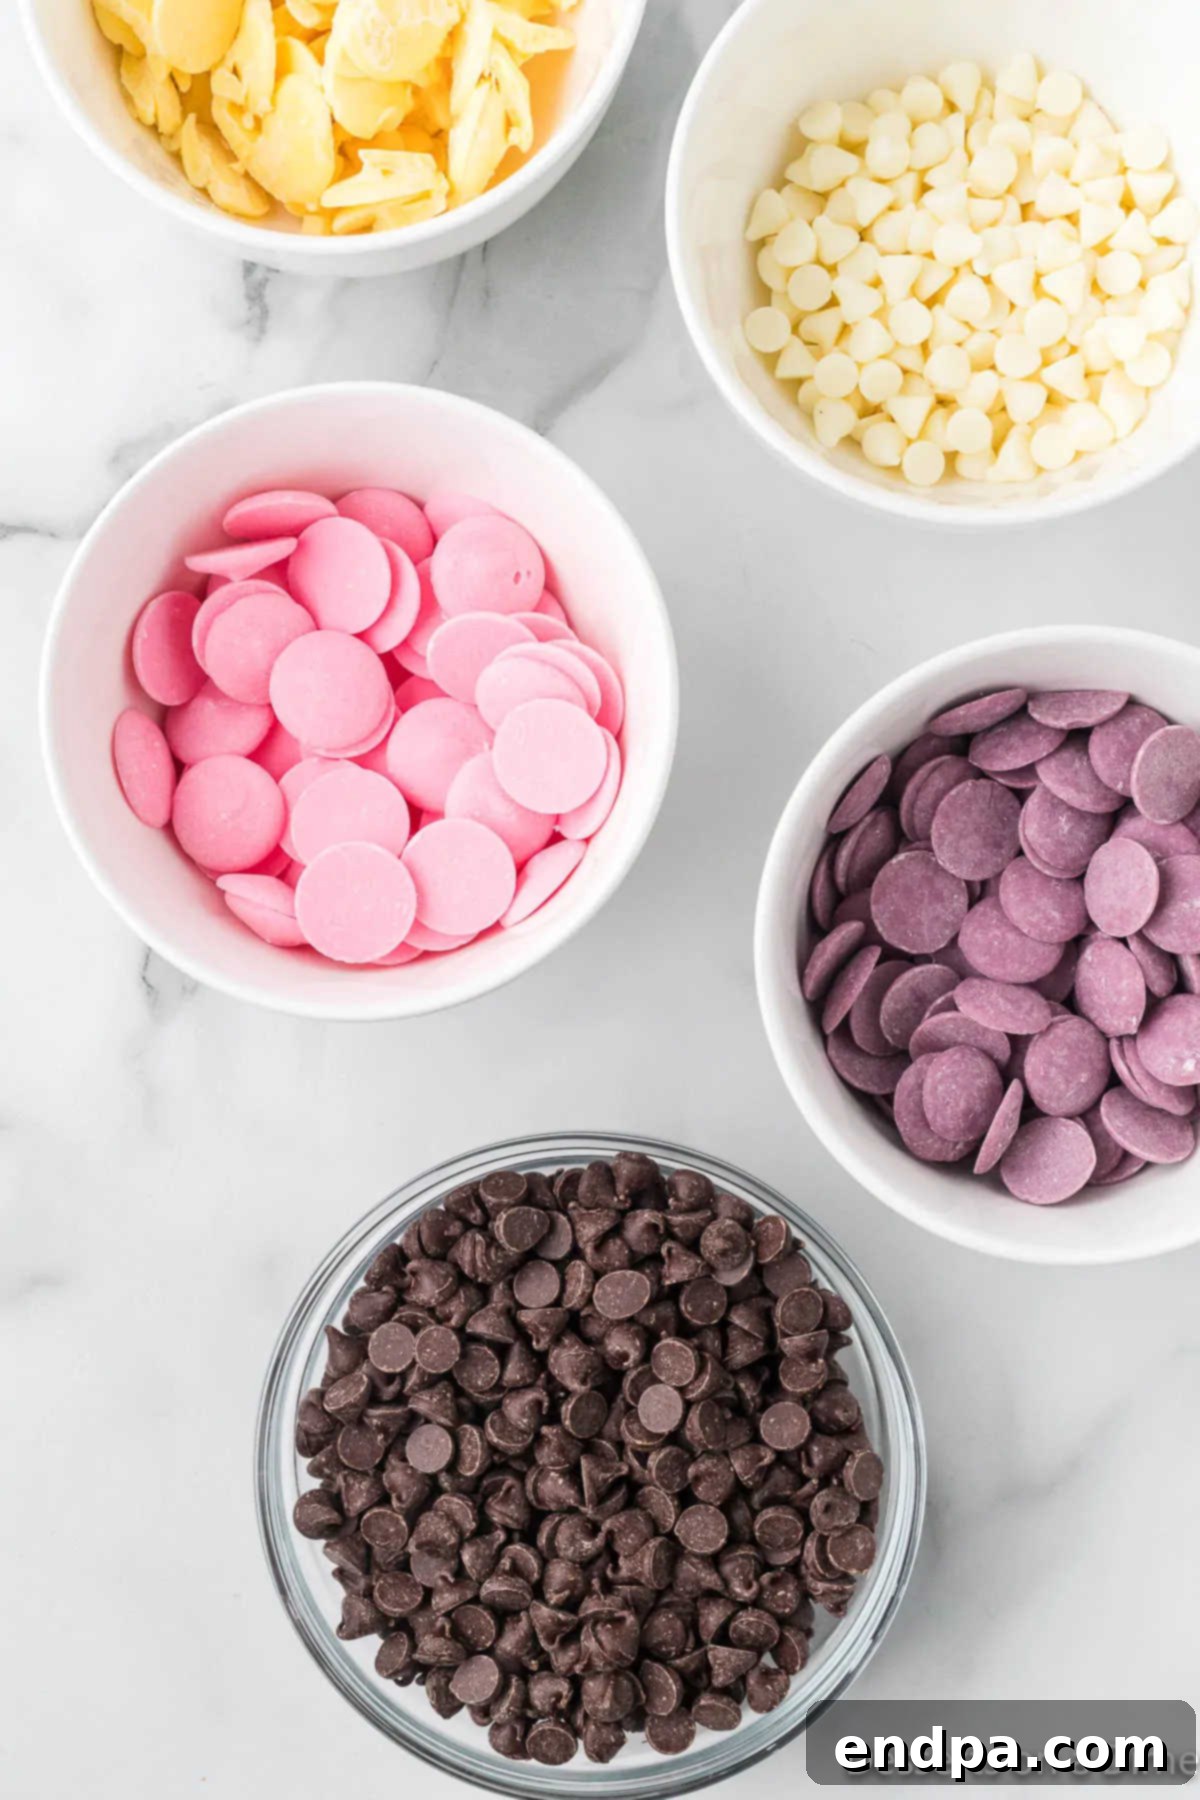
Step 2: Melt the Semi-Sweet Chocolate. Place the semi-sweet chocolate chips into a microwave-safe bowl. Heat them in the microwave using short, controlled intervals. This method prevents burning and ensures a smooth, consistent melt.
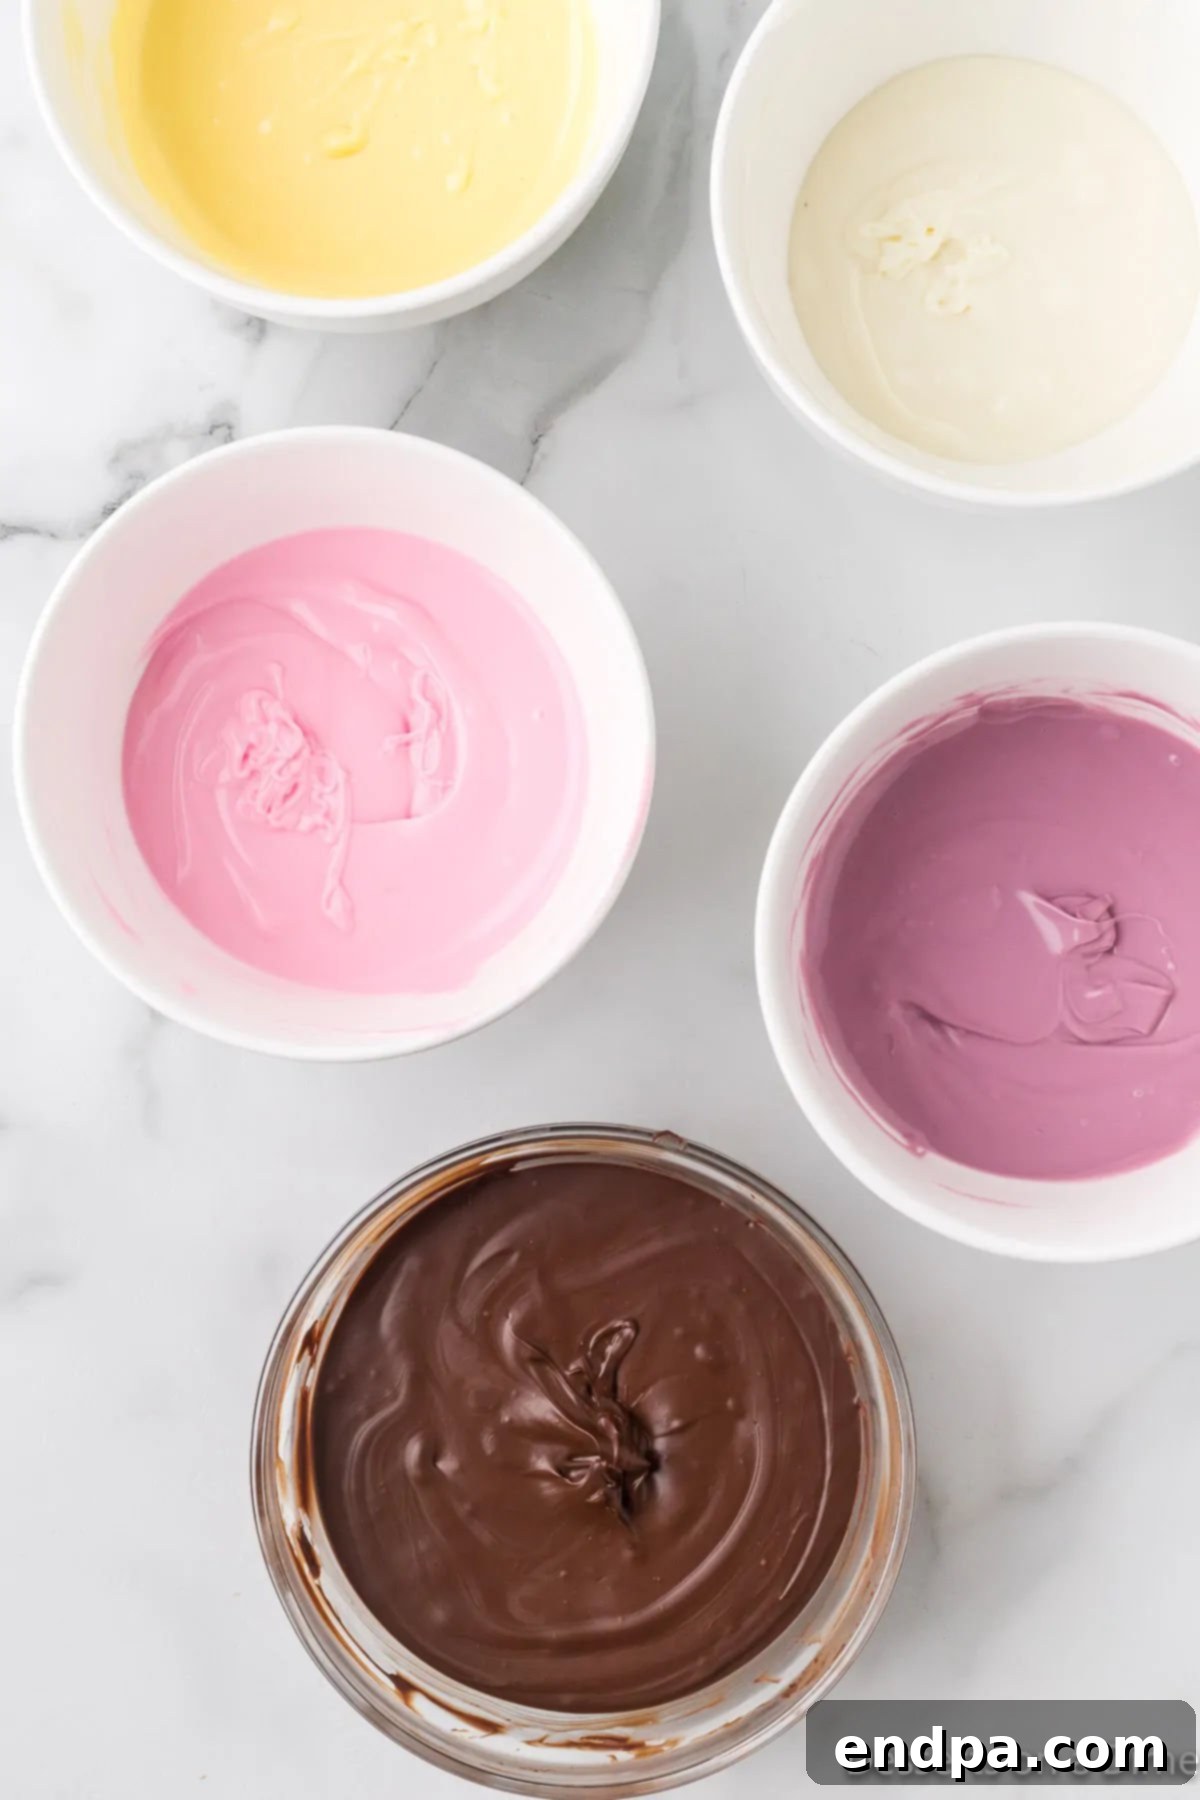
Step 3: Stir and Continue Melting. Heat the chocolate in 20-second bursts, stirring thoroughly after each interval. Continue this process until the chocolate chips are completely melted and have a silky-smooth consistency. Patience is key here to avoid seizing the chocolate.
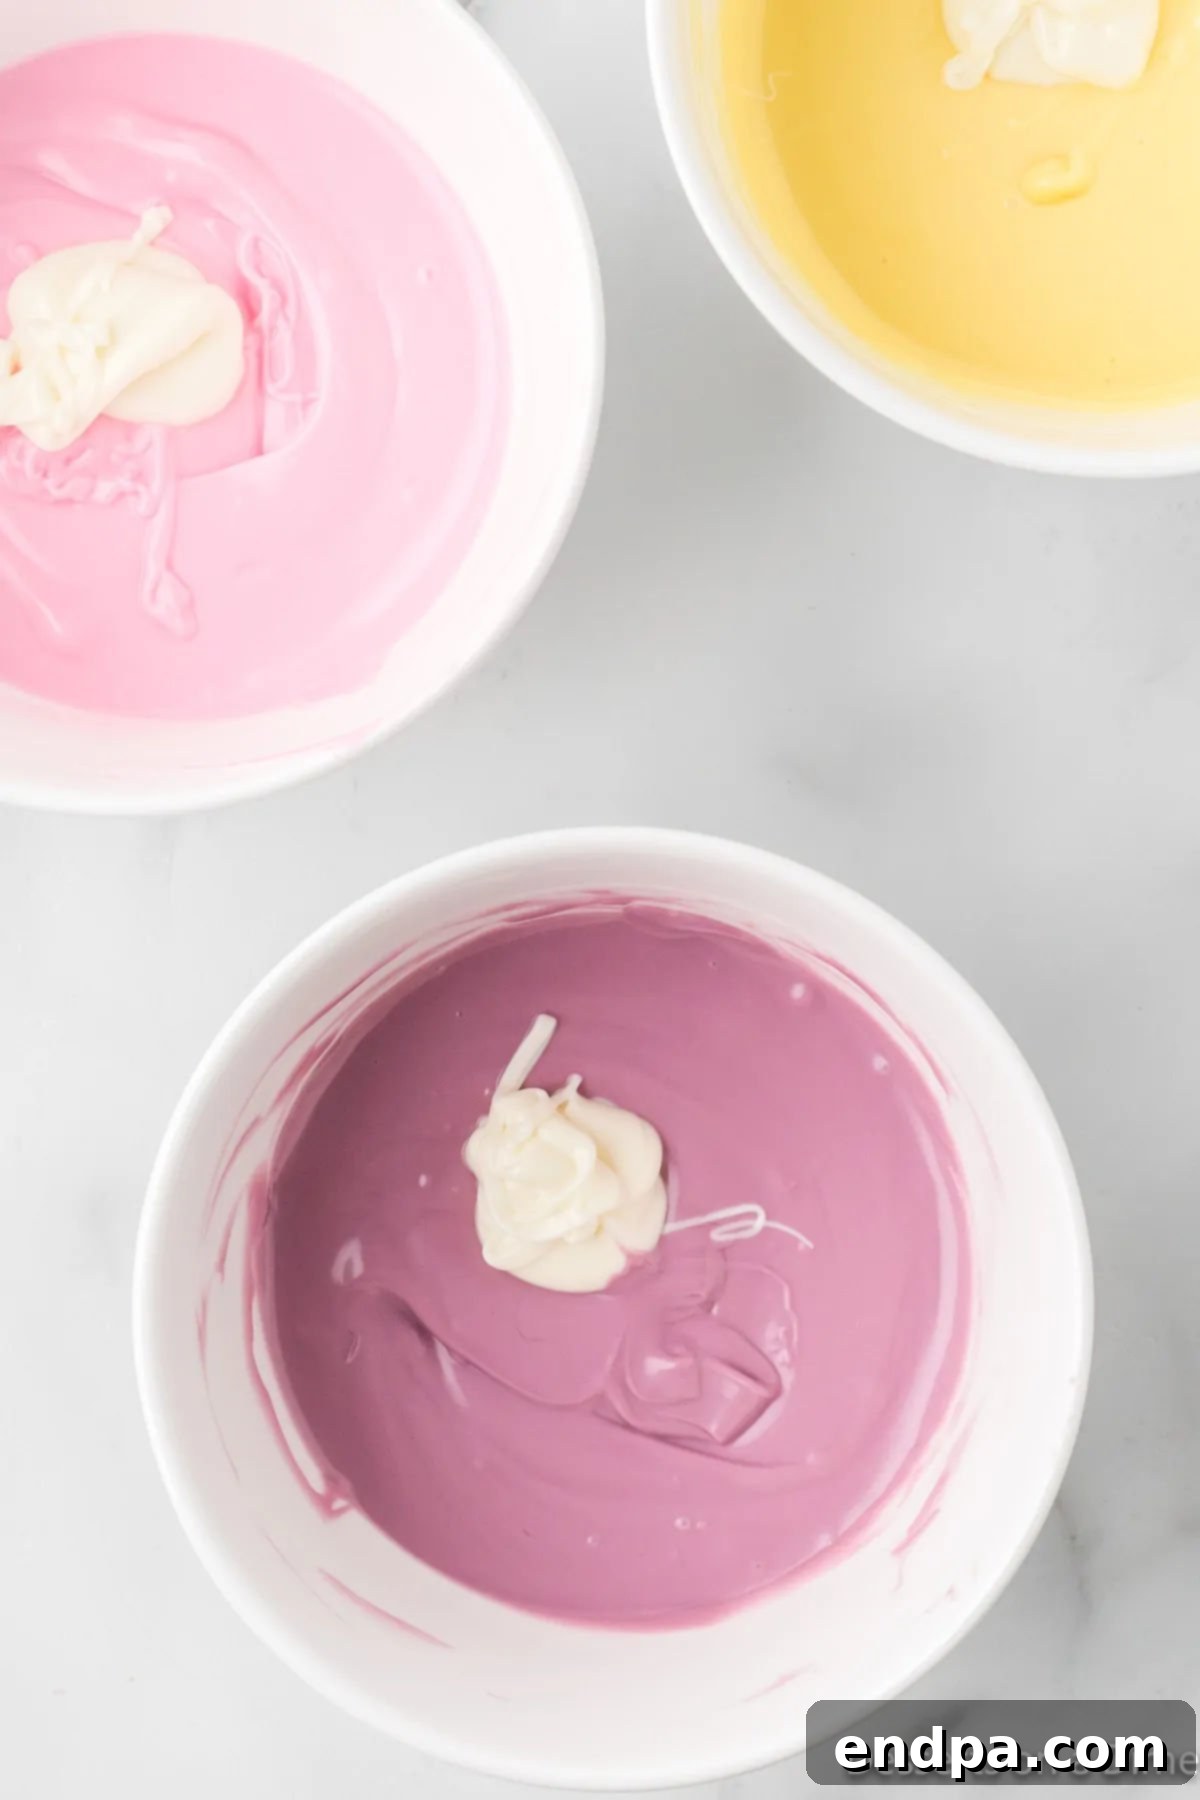
Step 4: Prepare White Chocolate and Candy Melts. Repeat the melting process from Steps 2 and 3 for the white chocolate chips and each individual color of candy melts (pink, purple, yellow). Once melted, stir a small amount of the melted white chocolate into each bowl of colored candy melts. This step will lighten the colors, transforming them into beautiful pastel shades that are perfect for Easter.
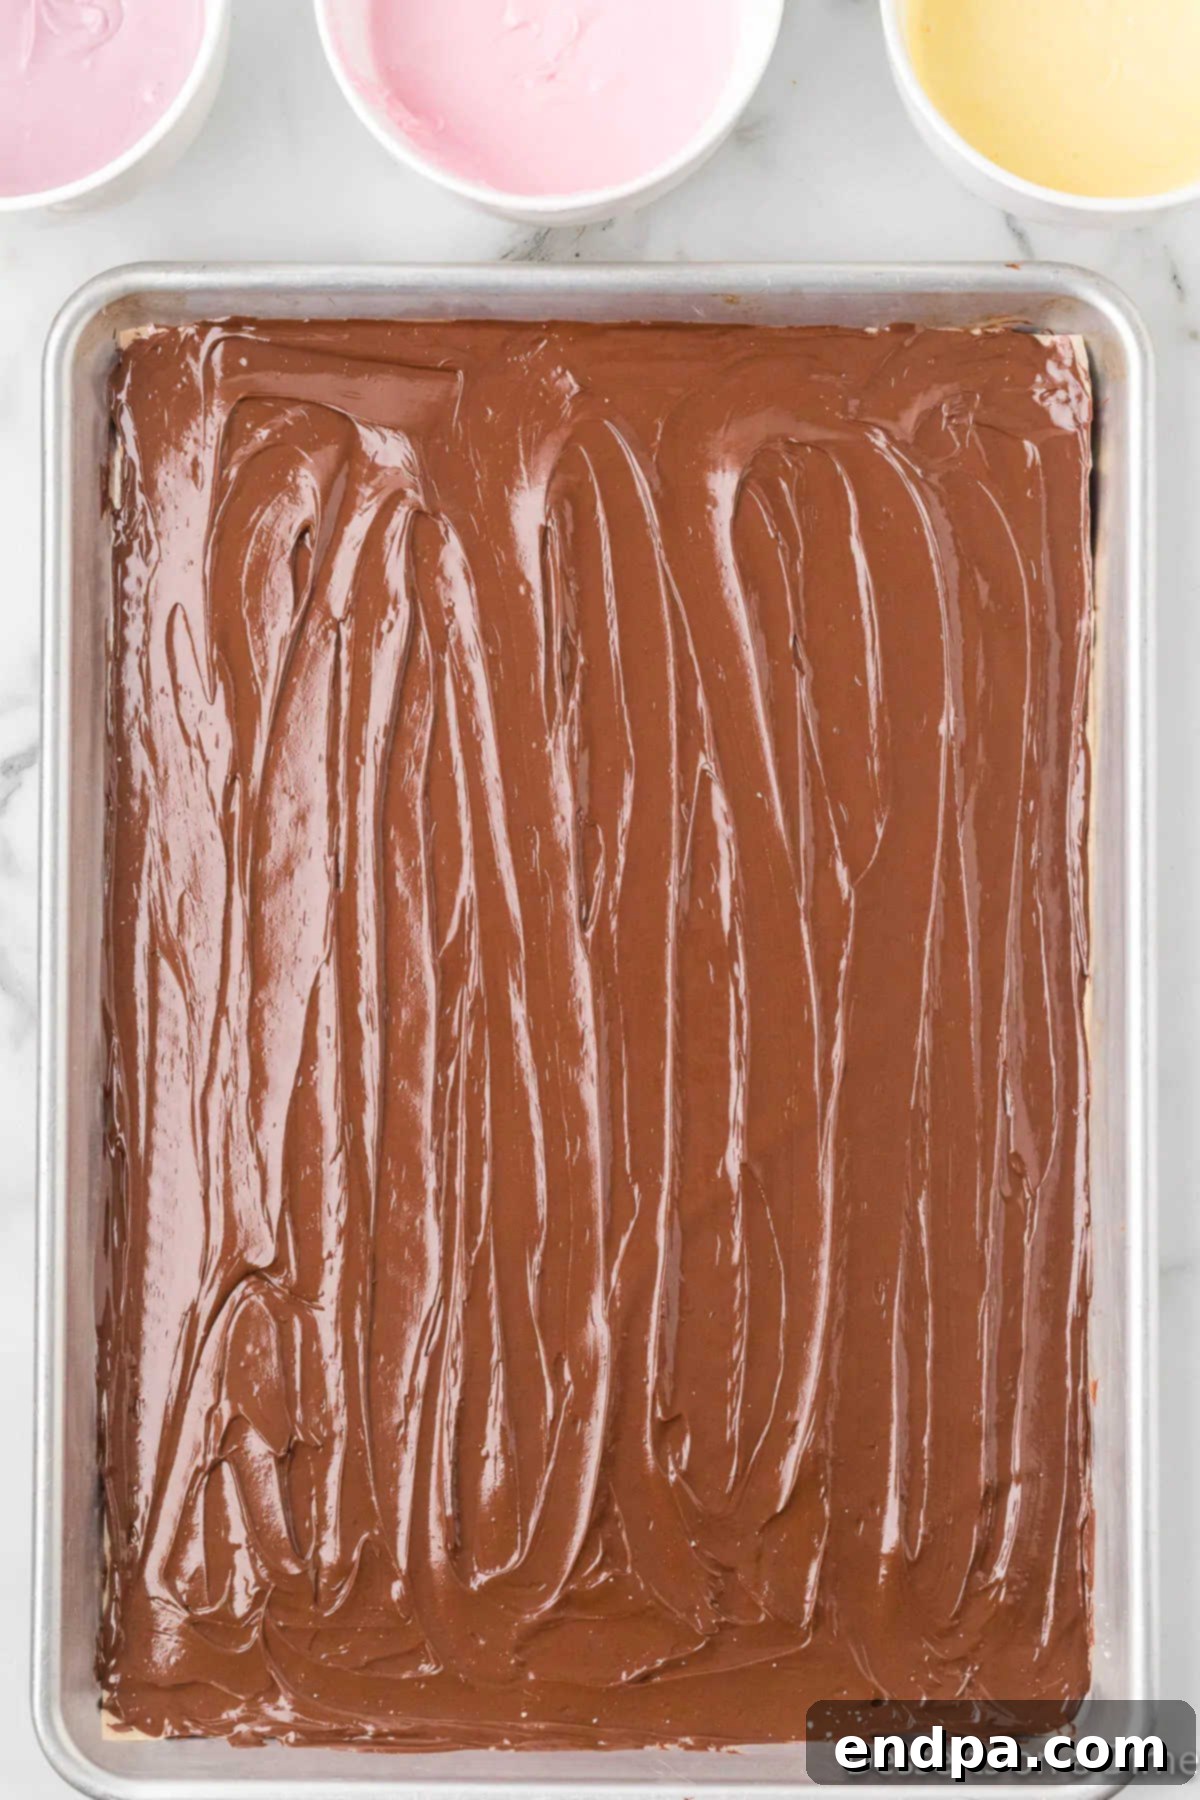
Step 5: Spread the Base Layer. Carefully pour the melted semi-sweet chocolate onto the prepared baking sheet. Using a spatula, gently spread the chocolate out to form an even, relatively thin layer. Aim for consistency across the entire sheet to ensure even hardening.
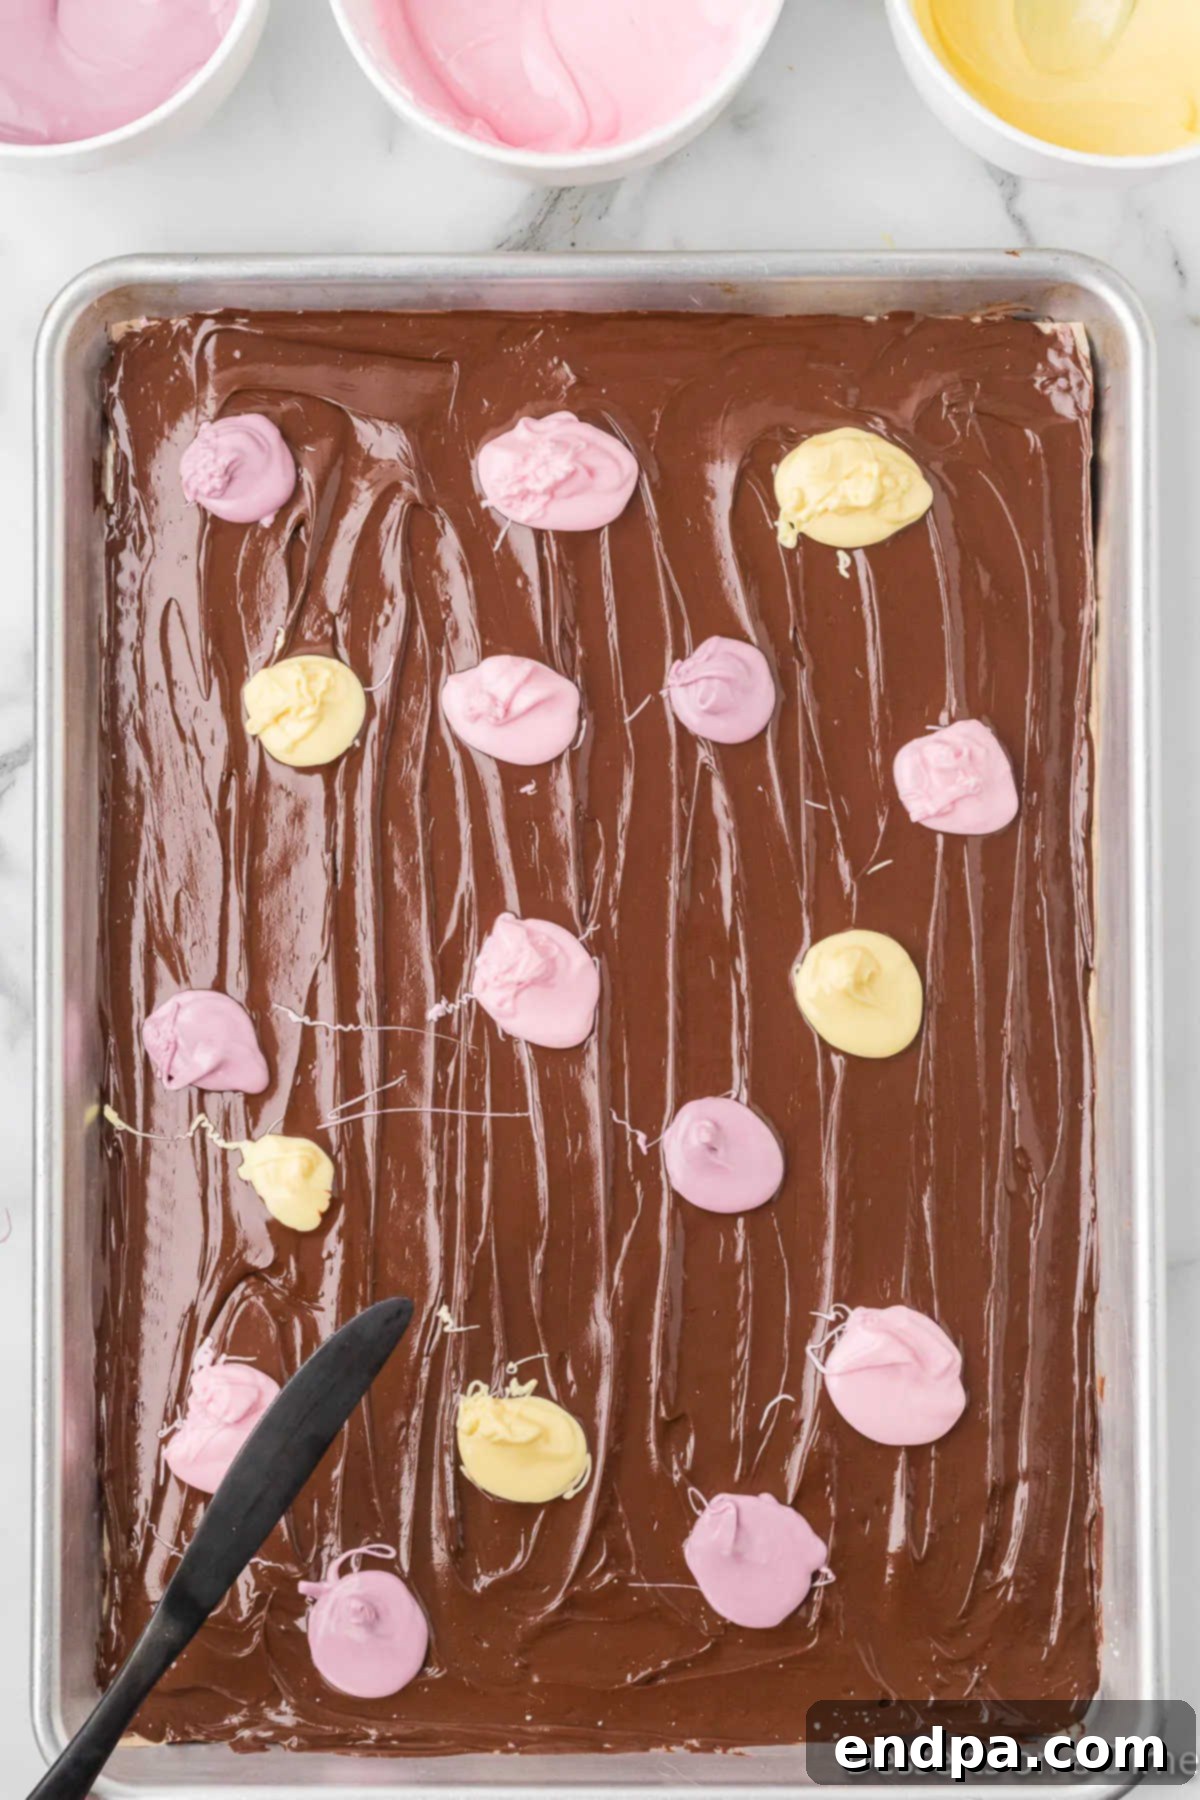
Step 6: Add Color Dollops. Once the base layer is spread, take your bowls of pastel-colored candy melts. Randomly drop dollops of each color on top of the still-wet semi-sweet chocolate base. Distribute them somewhat evenly but don’t worry about perfection—the beauty of bark is its organic look.
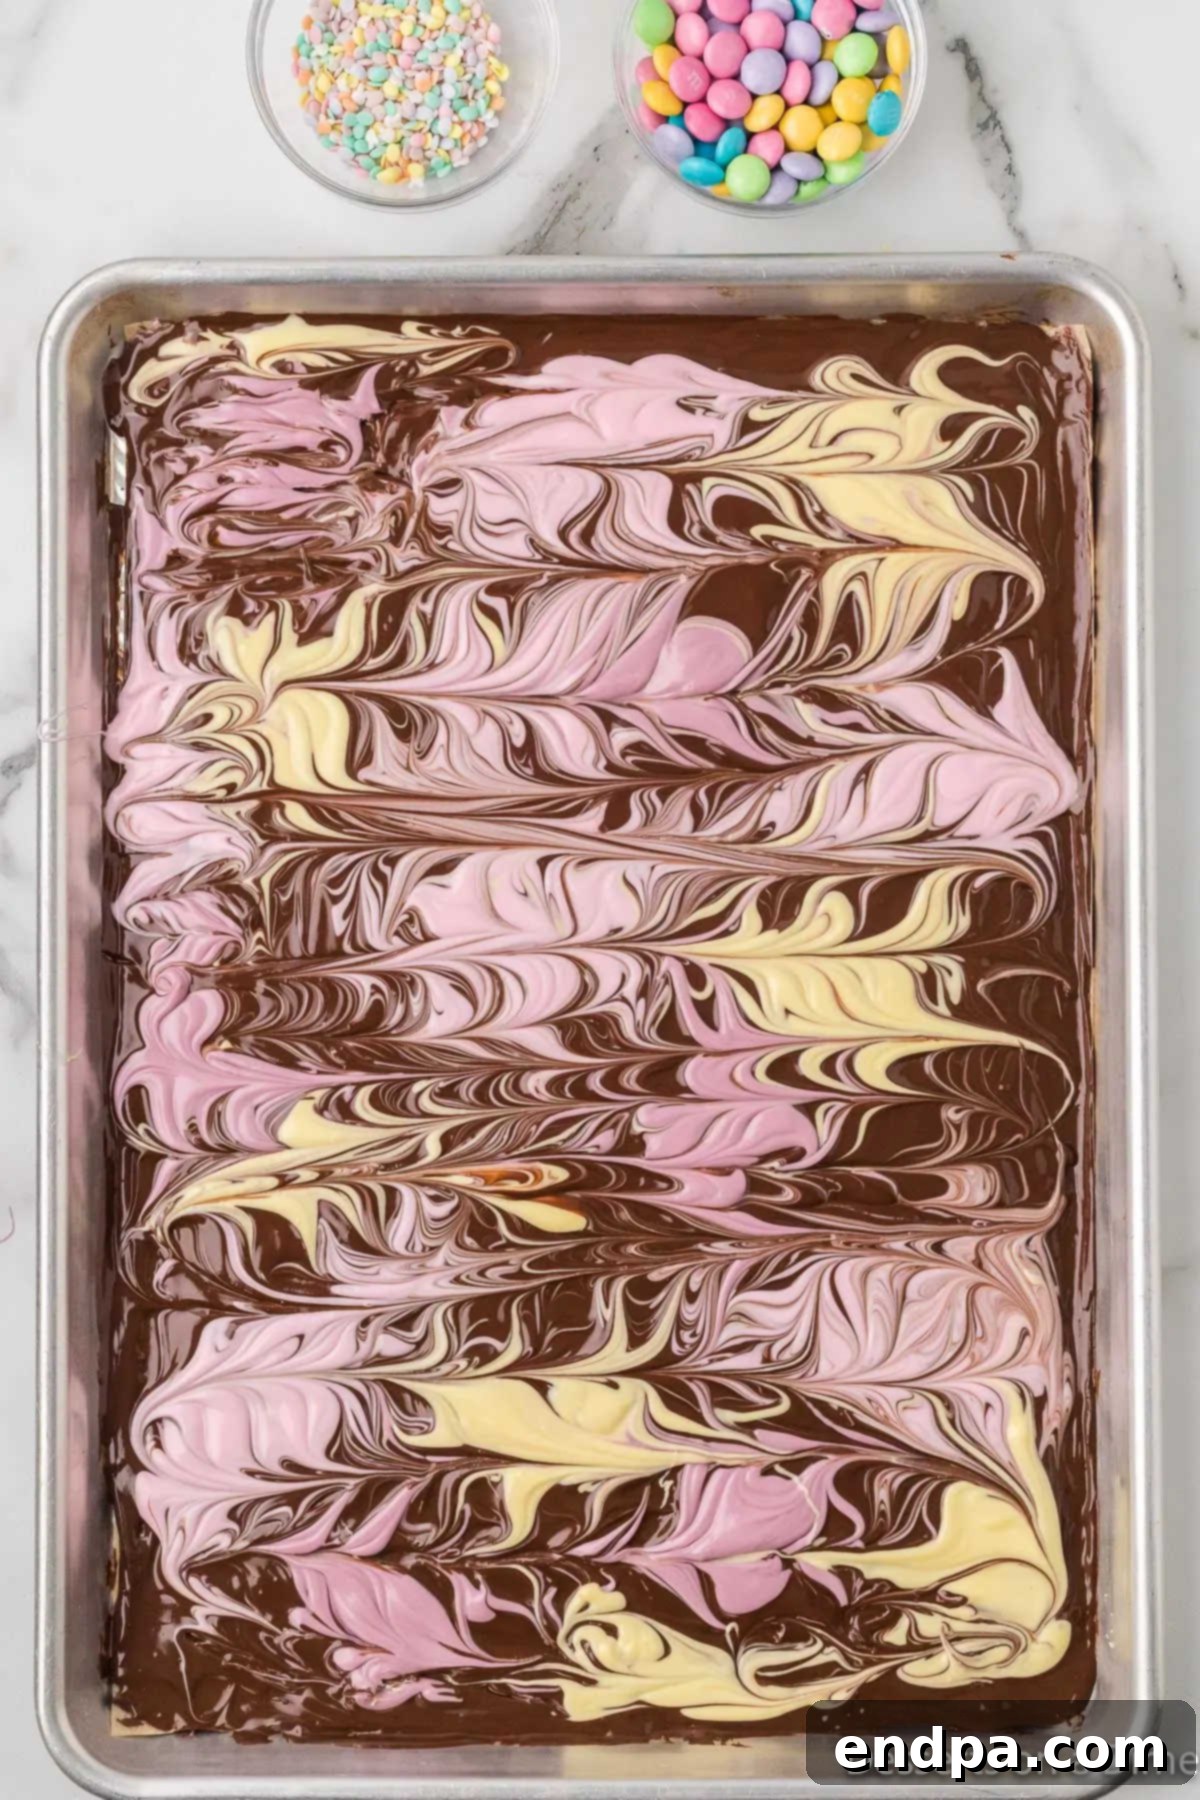
Step 7: Create the Swirl Effect. Now comes the artistic part! Take the tip of a butter knife or a toothpick and gently swirl the melted candy melts through the semi-sweet chocolate. Move the knife in gentle S-shapes or figure-eights to create a beautiful marble effect. Be careful not to over-swirl, as this can cause the colors to completely combine and lose their distinctiveness. The goal is a lovely marbled pattern.
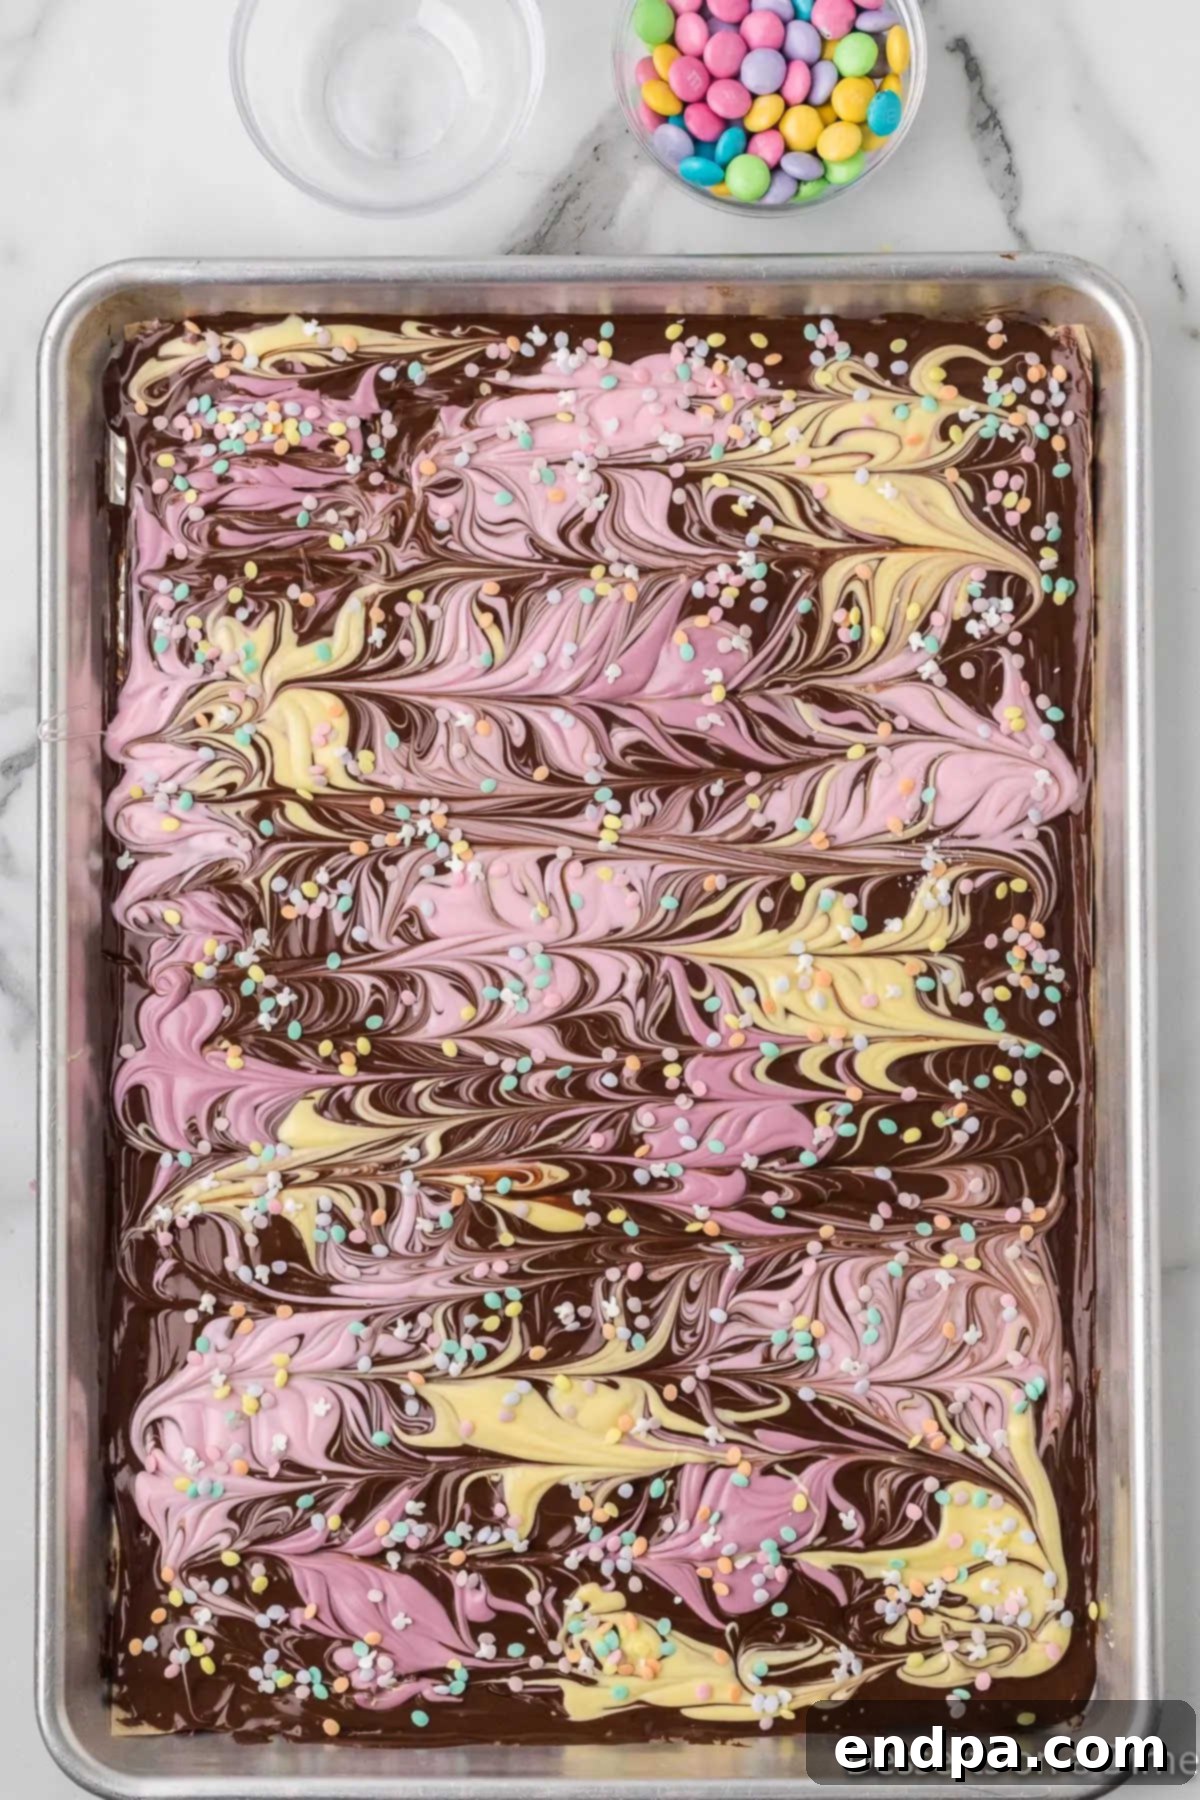
Step 8: Decorate and Chill. Immediately after swirling, generously sprinkle the pastel M&Ms and assorted pastel sprinkles over the entire surface of the bark. Press them gently into the chocolate to ensure they adhere. Once decorated, place the baking sheet into the refrigerator for 30-60 minutes, or until the chocolate is completely hardened and firm to the touch.
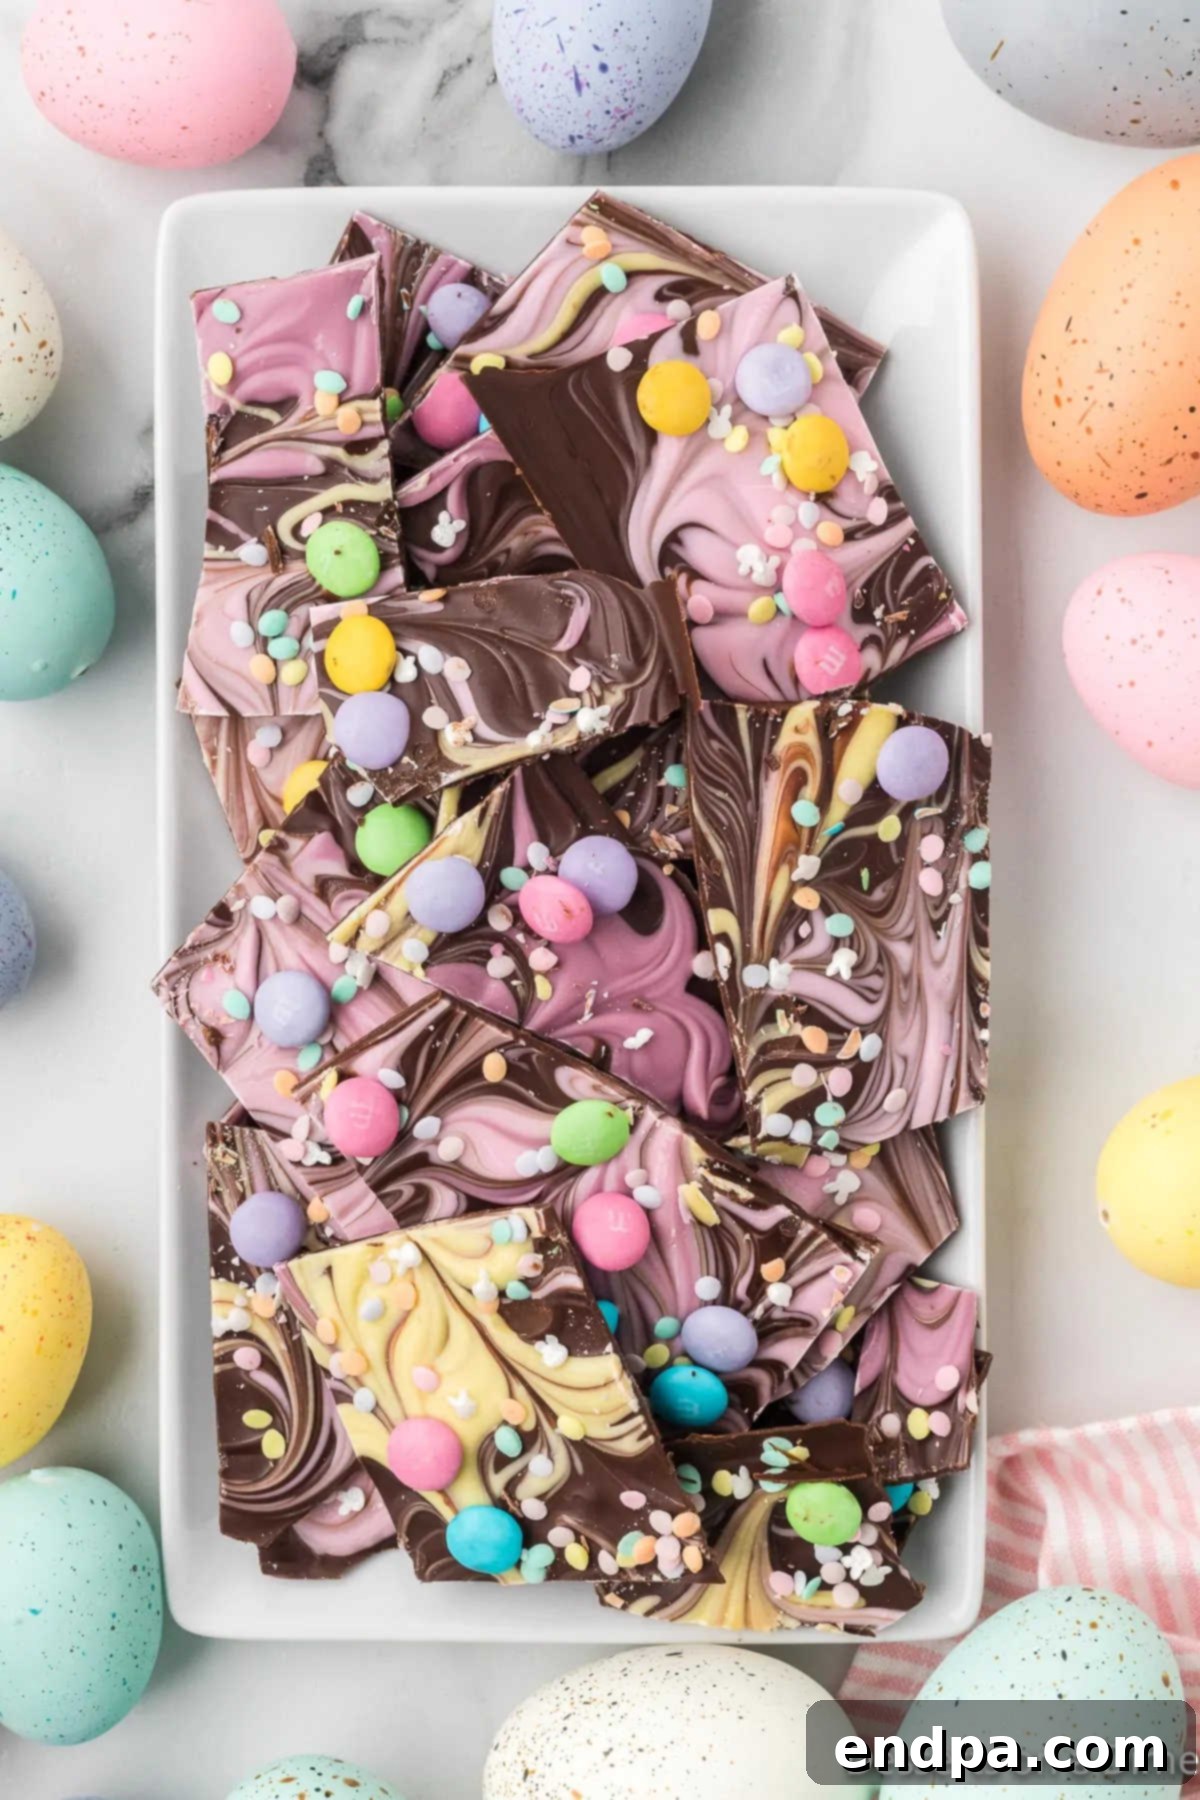
Step 9: Break and Serve. Once the bark has fully hardened, remove it from the refrigerator. Gently peel it off the foil or parchment paper. Then, using your hands, break the large slab of bark into smaller, irregular pieces. This rustic breakage is characteristic of chocolate bark and adds to its homemade charm. Serve immediately and enjoy your beautiful Easter treat!
Storage Tips for Freshness
Proper storage is essential to keep your homemade Easter chocolate bark tasting its best and maintaining its appealing texture. Whether you’re making it ahead of time for a holiday gathering or simply want to enjoy leftovers, these tips will help extend its freshness:
Refrigeration: Any leftover bark should be stored in an airtight container or a heavy-duty freezer bag. Place it in the refrigerator, where it will remain fresh and delicious for up to 1 week. The cool temperature helps prevent the chocolate from melting and keeps the toppings securely in place. This makes chocolate bark an excellent make-ahead dessert for busy holiday periods, allowing you to prepare it several days before your event and free up time on Easter itself.
Freezing: For longer-term storage, homemade bark freezes exceptionally well, provided it is stored correctly. Transfer the broken pieces of bark into a freezer bag, pressing out as much air as possible before sealing. You can also layer pieces between sheets of parchment paper in an airtight container to prevent them from sticking together. When properly frozen, the bark can last for up to 5-6 months. To enjoy, simply remove the desired amount from the freezer and let it come to room temperature for about 10-15 minutes before serving. Freezing is a fantastic option if you want to make a large batch or enjoy this festive treat beyond the immediate holiday season.
Expert Pro Tips for Perfect Bark
Achieving perfectly pretty and delicious chocolate bark is simple with a few expert tricks up your sleeve. These professional tips will help you avoid common pitfalls and ensure your Easter treat turns out beautifully every time:
- Avoid Over-Swirling the Chocolate: This is perhaps the most important tip for beautifully marbled bark. When creating the swirl effect with the candy melts, use a light hand and make only a few passes with your butter knife or toothpick. If you over-swirl, the colors will completely blend into each other, resulting in a muddy appearance rather than distinct, elegant swirls. The goal is a visually appealing contrast between the base chocolate and the pastel colors.
- Allow Ample Time for Setting: Patience is a virtue, especially when it comes to setting chocolate bark. Do not attempt to break the bark into pieces too soon. If the chocolate hasn’t fully hardened, it will be messy, sticky, and difficult to break cleanly, potentially ruining the appearance. Ensure the bark has refrigerated for the full 30-60 minutes (or longer, if needed, especially in warmer climates) until it is firm and snaps easily. A perfectly set bark will produce crisp, clean breaks.
- Experiment with New Toppings: While pastel M&Ms and sprinkles are classic for Easter, don’t limit your creativity! Explore other delightful toppings to add variety and personal flair. Consider mini chocolate eggs, creamy Cadbury mini eggs, fluffy mini marshmallows, crushed pastel candies, or even finely chopped pretzels for a sweet and salty kick. The more diverse your toppings, the more interesting and appealing your bark will be. Think about textures and flavors that complement chocolate well.
- Melt Chocolate Carefully: To prevent your chocolate from seizing or burning, always melt it in short intervals (like 20 seconds) in the microwave, stirring thoroughly after each interval. If using a double boiler, ensure no water gets into the chocolate, as this will also cause it to seize. A smooth melt is crucial for a smooth bark.
- Spread Evenly: When pouring and spreading your base chocolate layer, try to make it as even as possible across the baking sheet. This ensures that the bark hardens uniformly and breaks into pieces of similar thickness, creating a more consistent and enjoyable eating experience.
More Easy Easter Dessert Ideas
If you’ve enjoyed making this Easter Chocolate Bark and are looking for more simple yet festive treats to complete your holiday menu, you’re in luck! Here are some other easy Easter dessert ideas that are perfect for sharing with family and friends, and many can be made with the help of little ones:
- Easter Chocolate Covered Oreos: A delightful twist on a classic cookie, dipped in colorful chocolate and decorated with festive sprinkles.
- Easter White Chocolate Bark Recipe: For those who prefer the creamy sweetness of white chocolate, this bark is a beautiful and tasty alternative.
- Peeps Chocolate Covered Pretzels: Combining salty pretzels with sweet chocolate and iconic Peeps marshmallows for a fun and colorful treat.
- Easter Basket Cupcakes: Adorable cupcakes decorated to resemble mini Easter baskets, complete with candy “grass” and edible “eggs.”
- Easter Egg Rice Krispie Treats: Molded into festive egg shapes and decorated, these classic treats become perfectly holiday-themed.
- Easter Candy Charcuterie Board: A visually stunning and customizable spread of all your favorite Easter candies, chocolates, and small treats.
Easter Chocolate Bark
15
1
1
15
24
American
Dessert
191
Carrie Barnard
Ingredients
- 12 oz bag of semi-sweet chocolate chips
- 4 oz white chocolate chips
- 1 cup Pink Candy Melts
- 1 cup Purple Candy Melts
- 1 cup Yellow Candy Melts
- 1/2 cup Pastel M&Ms
- Pastel Sprinkles
Instructions
- Line a large baking sheet with foil or parchment paper.
- Melt the semi-sweet chocolate chips by placing them in a microwave-safe dish. Heat in the microwave using 20-second intervals, stirring between each interval until chips are completely melted and smooth.
- Follow the same melting process for the white chocolate chips and each color of the candy melts. Once melted, stir some of the melted white chocolate into each bowl of the colored candy melts to create beautiful pastel shades.
- Pour the melted semi-sweet chocolate onto the prepared baking sheet and use a spatula to spread it out as evenly as possible to form the base layer.
- Drop dollops of each pastel-colored candy melt onto the semi-sweet chocolate base. Distribute them randomly across the surface.
- Use the tip of a butter knife or a toothpick to gently swirl the melted candy melts into the base chocolate, creating an appealing marble effect. Be careful not to over-swirl, to maintain distinct colors.
- Generously sprinkle the pastel M&Ms and various sprinkles over the wet chocolate, pressing them gently to ensure they adhere.
- Place the bark in the refrigerator for 30-60 minutes, or until the chocolate is completely hardened and firm.
- Remove the bark from the refrigerator. Gently peel it from the parchment or foil, then break it into irregular pieces for serving.
- Enjoy your delicious Easter chocolate bark! Refrigerate any remaining pieces in an airtight container.
Recipe Notes
Feel free to use any of your favorite Easter candies or toppings to personalize this easy chocolate bark recipe.
Store the finished bark in an airtight container or bag in the refrigerator for up to 1 week, or freeze for up to 5-6 months.
Nutrition Facts
Carbohydrates 21g,
Protein 1g,
Fat 11g,
Saturated Fat 8g,
Polyunsaturated Fat 0.2g,
Monounsaturated Fat 2g,
Trans Fat 0.02g,
Cholesterol 2mg,
Sodium 21mg,
Potassium 94mg,
Fiber 1g,
Sugar 18g,
Vitamin A 18IU,
Vitamin C 0.05mg,
Calcium 23mg,
Iron 1mg
Pin This Now to Remember It Later
We hope you’re inspired to try making this enchanting homemade Easter chocolate bark today! It’s a wonderful opportunity to gather the kids and create delicious memories together. There’s truly nothing quite like a homemade treat to make the holidays feel extra special. We’d love to hear about your experience – feel free to leave a comment below and share your star rating after you’ve made this delightful recipe!
