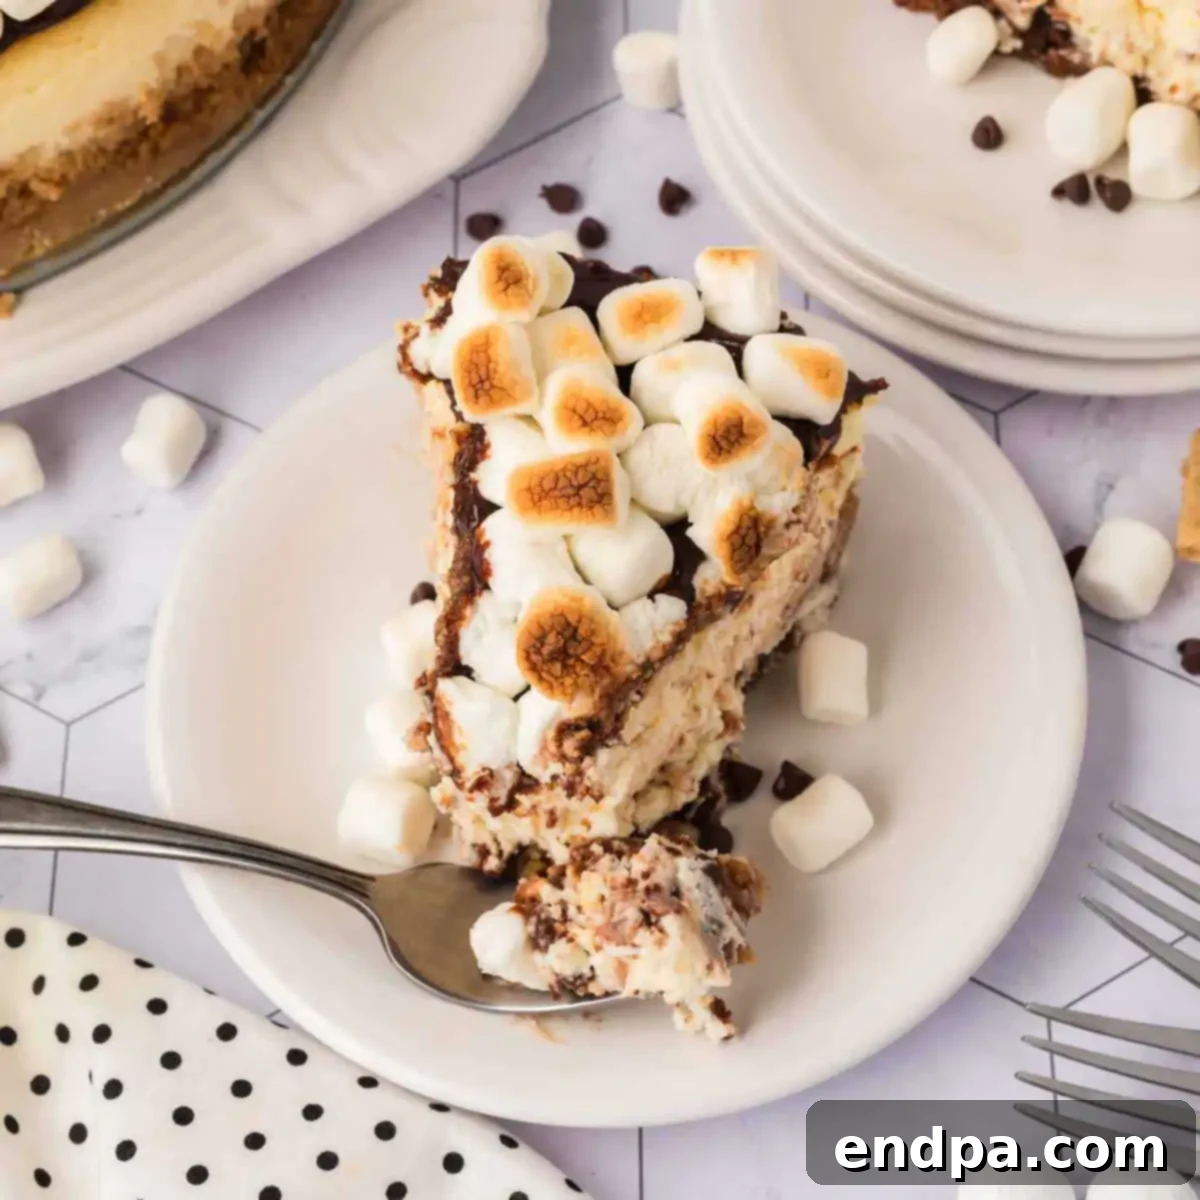
S’mores Cheesecake: The Ultimate Indulgent Twist on a Campfire Classic
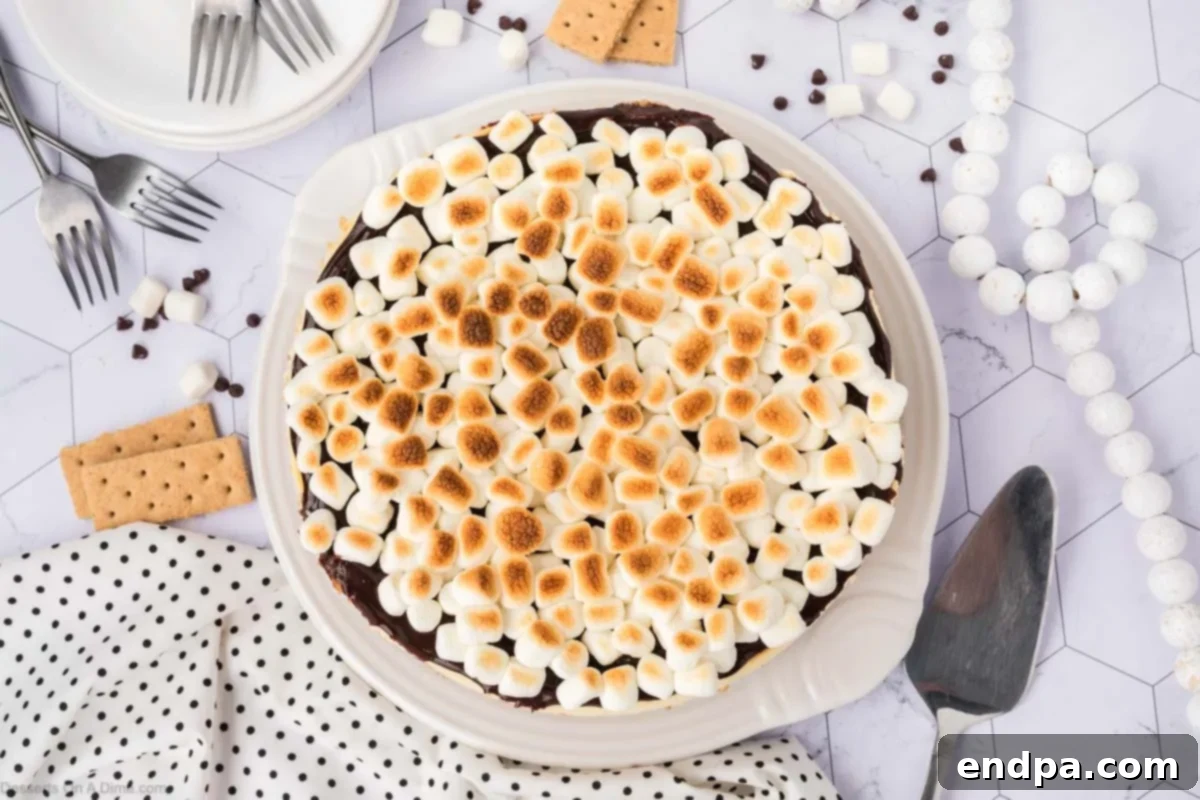
Immerse yourself in the irresistible delight of S’mores Cheesecake, a masterful fusion that elevates two beloved desserts into a single, show-stopping treat. This recipe takes the cherished, nostalgic flavors of a classic campfire s’more – the crunchy graham cracker, the melted chocolate, and the gooey toasted marshmallow – and marries them with the rich, creamy decadence of a homemade cheesecake. The result is an extraordinary dessert that promises to captivate your taste buds and impress any crowd, transforming simple ingredients into a truly unforgettable experience.
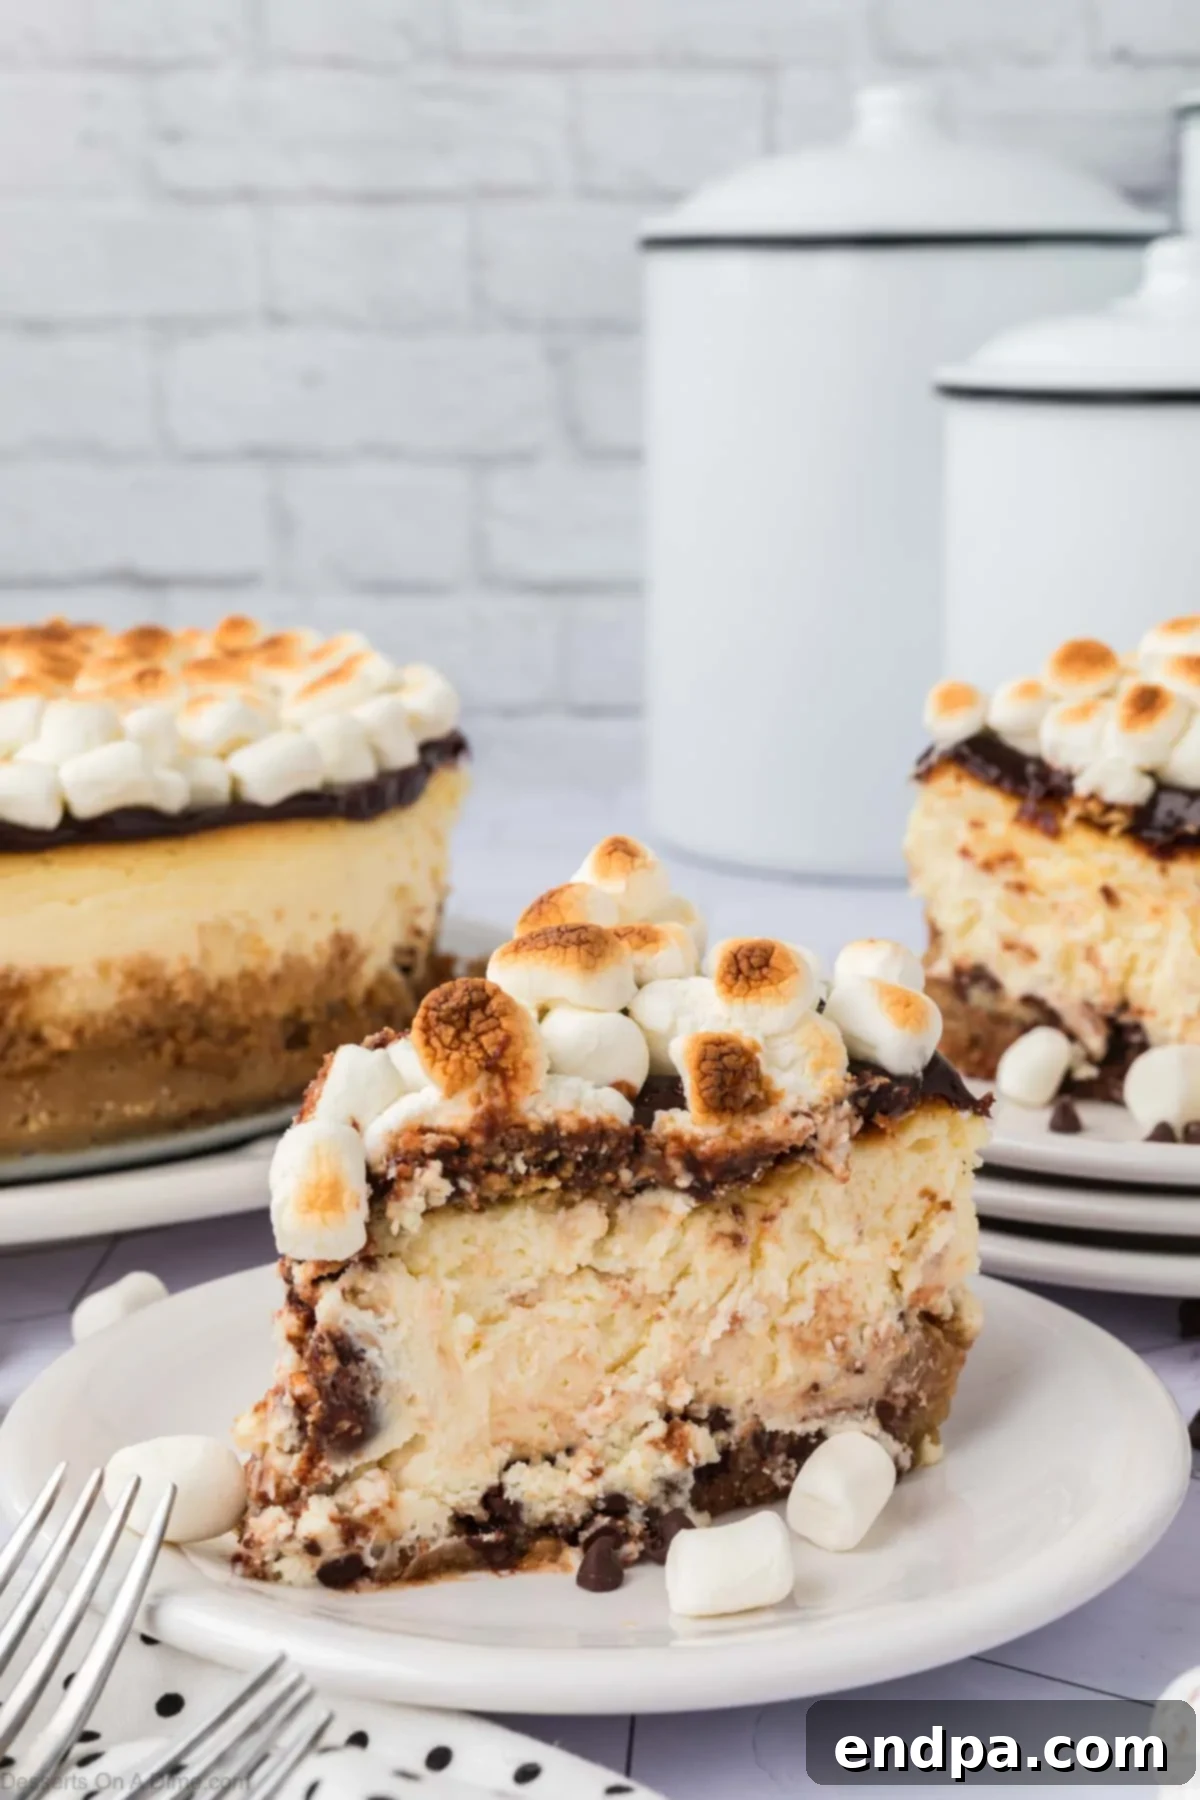
Every bite of this S’mores Cheesecake is a journey through layers of contrasting textures and harmonious flavors. It begins with a buttery, golden-brown graham cracker crust, robust enough to support the luxurious filling. Nestled atop this foundation is a velvety smooth, rich chocolate cheesecake layer, infused with premium cocoa for a deep, satisfying taste. Finally, it’s crowned with a cloud of fluffy mini marshmallows, perfectly toasted to a golden hue, mimicking the char and warmth of a real campfire s’more. This ingenious combination ensures that all the elements you adore about the traditional s’more are present, but re-imagined in a sophisticated, elegant form.
Whether you’re planning a sophisticated dinner party, celebrating a special occasion, or simply seeking an indulgent escape from the everyday, this S’mores Cheesecake stands out as the ideal choice. It’s not just a dessert; it’s an experience, a conversation starter, and a guaranteed crowd-pleaser that evokes cherished memories while creating new ones. Beyond this masterpiece, we also love exploring other s’mores variations like our delightful S’mores Bars and our irresistible S’mores Cookies. And for those who can’t get enough of creamy cheesecake goodness, be sure to explore our rich Butter Pecan Cheesecake and the tropically sweet Banana Cream Cheesecake.
What’s in this post: S’mores Cheesecake
- Why You’ll Love This S’mores Cheesecake
- Essential Equipment
- Key Ingredients for Success
- Step-by-Step Baking Instructions
- Proper Storage for Freshness
- Expert Tips for a Flawless Cheesecake
- More Irresistible S’mores Desserts
- Full S’Mores Cheesecake Recipe Card
Why You’ll Adore This S’mores Cheesecake
This S’mores Cheesecake isn’t just another dessert; it’s a culinary triumph designed to bring joy and awe. Here’s why it quickly becomes a favorite for anyone who tries it:
- An Unforgettable Dessert Experience: This recipe masterfully combines the deep, comforting flavors of s’mores with the sophisticated elegance of a classic cheesecake. It’s more than just a sweet treat; it’s a memorable event for the palate, offering the best of both worlds in a single, magnificent slice. Prepare for rave reviews!
- A Symphony of Textures: The magic of this cheesecake lies in its incredible textural diversity. You’ll experience the satisfying crunch of the graham cracker base, the silky smooth and cool consistency of the chocolate cheesecake filling, and the delightfully gooey, slightly caramelized chew of the toasted marshmallow topping. Each layer contributes to a balanced and exciting mouthfeel that keeps you coming back for more.
- Perfect for Any Grand Occasion: Whether it’s a festive holiday gathering, a sophisticated dinner party, a summer barbecue, or a significant family milestone, this show-stopping dessert is guaranteed to be the centerpiece of your dessert table. Its stunning appearance and universally loved flavors make it a hit for celebrations big and small.
- Convenience of Make-Ahead Prep: One of the greatest advantages of this cheesecake is its suitability for advance preparation. You can bake the entire cheesecake the day before your event, allowing it to chill thoroughly overnight. This not only deepens the flavors but also frees up your time on the day of entertaining, making stress-free hosting a reality.
- Infinitely Customizable to Your Liking: While the classic S’mores Cheesecake is perfect as is, this recipe is incredibly versatile. Feel free to experiment with different types of chocolate, such as dark chocolate chips in the crust or a gourmet chocolate ganache for the topping. You could even swap mini marshmallows for larger ones for extra gooeyness, or add a luxurious drizzle of Homemade Caramel Sauce before serving for an extra layer of decadence. Personalize it to create your signature s’mores experience!
Essential Equipment for Your S’mores Cheesecake
To ensure a smooth and successful baking process for your decadent S’mores Cheesecake, having the right tools on hand is key. Here’s a list of essential equipment:
- 9-inch Springform Pan: Absolutely crucial for easy removal and presentation of your cheesecake.
- Large Roasting Pan: Used for the water bath, which helps the cheesecake bake evenly and prevents cracks.
- Aluminum Foil: For wrapping the springform pan to protect it from the water bath and for cooling.
- Electric Mixer (Stand or Handheld): Essential for achieving a light and fluffy cream cheese mixture and a smooth batter.
- Mixing Bowls (Medium and Large): For preparing the crust and the cheesecake filling.
- Rubber Spatula: Indispensable for scraping down the sides of the bowl to ensure all ingredients are well incorporated.
- Measuring Cups and Spoons: For accurate ingredient measurements.
- Oven Mitts: For safe handling of hot pans.
- Wire Rack: For cooling the cheesecake gradually after baking.
- Broiler-Safe Pan or Sheet: For toasting the marshmallows under the broiler.
Key Ingredients for Success
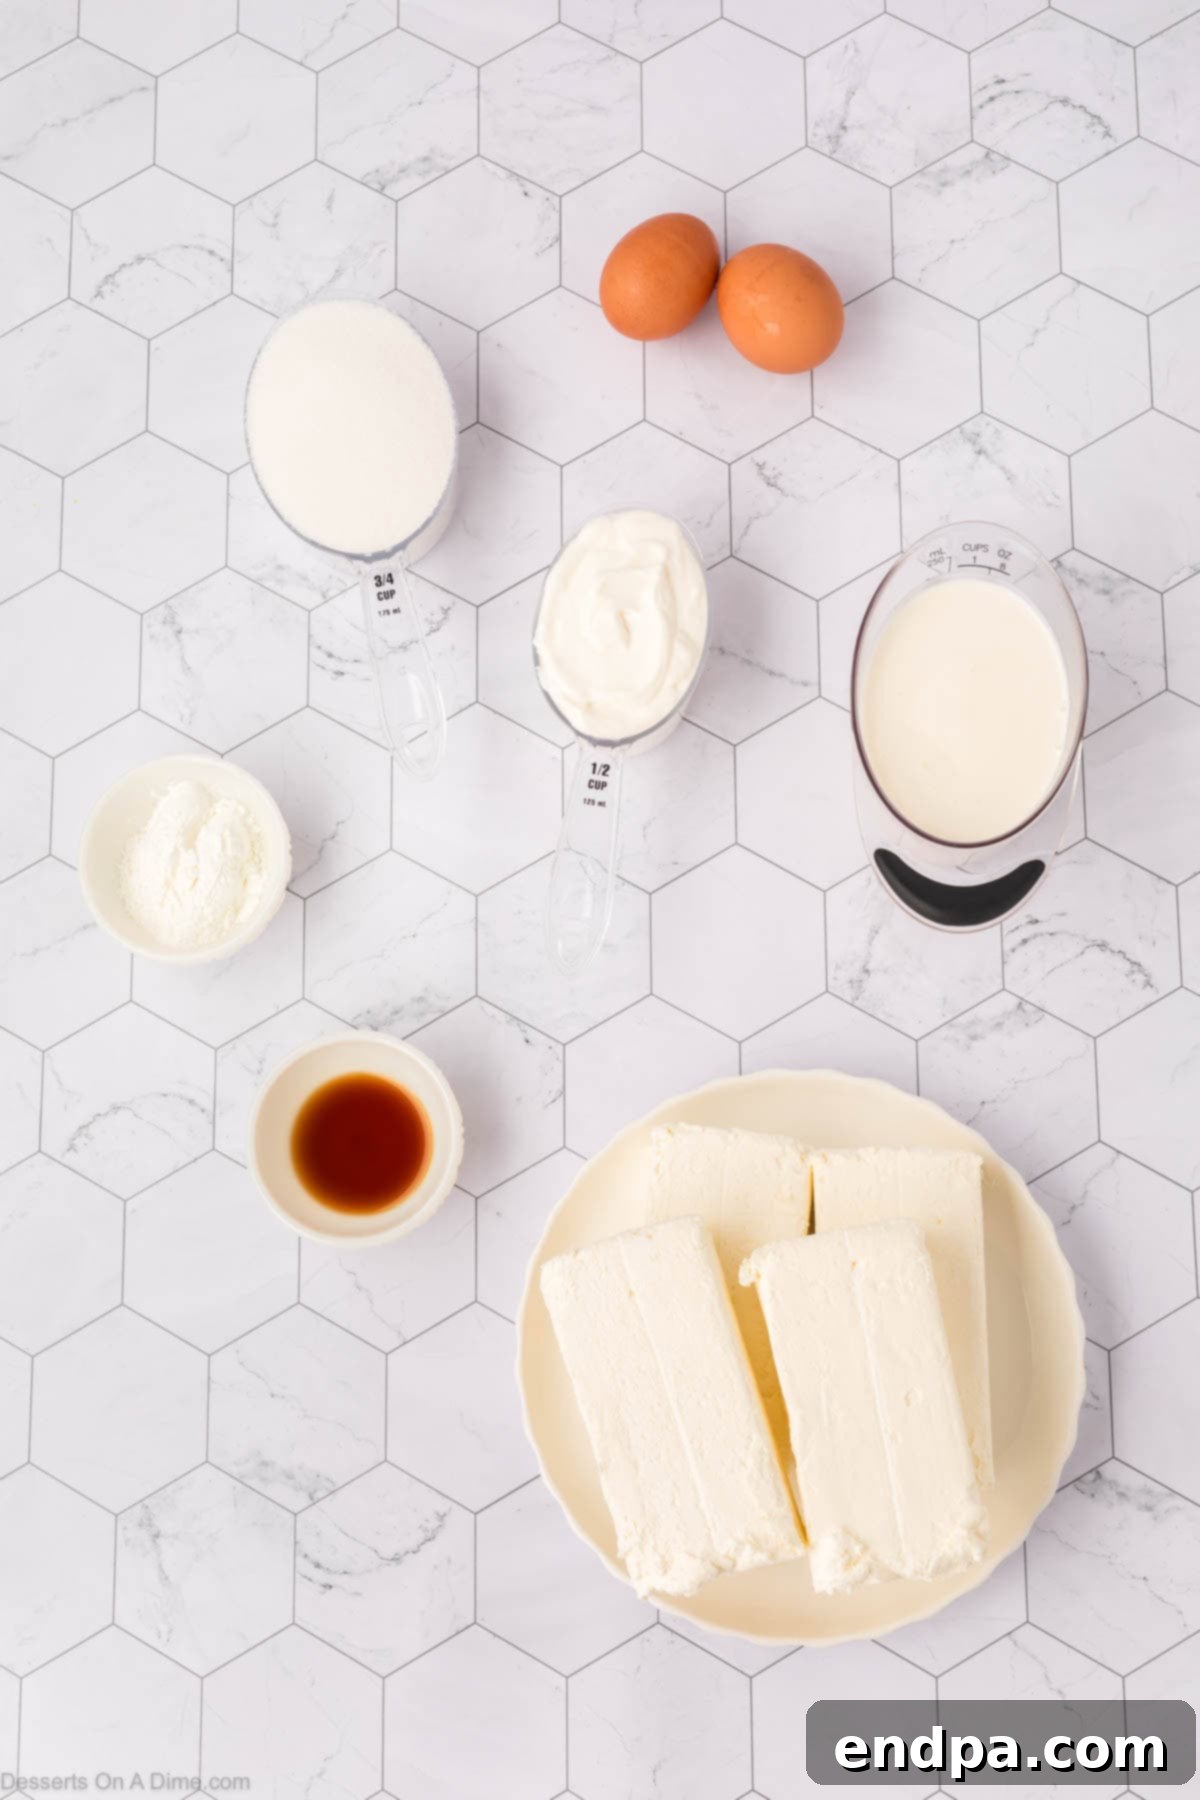
Crafting the perfect S’mores Cheesecake relies on a careful selection of fresh, high-quality ingredients. Each component plays a vital role in achieving the desired taste and texture.
For the Irresistible Graham Cracker Crust:
- Graham Cracker Crumbs: These form the iconic foundation of our s’mores experience. Their slightly sweet, subtly spiced flavor and crisp texture provide the perfect contrast to the creamy filling. For best results, use fine crumbs, which can be achieved by crushing whole graham crackers in a food processor.
- Brown Sugar: Beyond just sweetness, brown sugar introduces a wonderful molasses-like depth and a slight moistness to the crust, enhancing the graham cracker flavor and contributing to its beautiful golden-brown color upon baking.
- Melted Unsalted Butter: The unsung hero of the crust, melted butter acts as the binder, holding the crumbs and sugar together. Using unsalted butter allows you to control the overall sodium content, and its richness ensures a perfectly buttery, firm, and flavorful base.
- Mini Chocolate Chips: A delightful surprise within the crust! These tiny chocolate morsels melt slightly during the initial bake, creating pockets of rich, molten chocolate that add an extra layer of s’mores authenticity and indulgence to every slice.
- Mini Marshmallows: Sprinkled directly onto the crust, these mini marshmallows will toast up beautifully while the crust bakes, providing that essential gooey, subtly caramelized s’mores flavor and a wonderful chewiness right at the base of the cheesecake.
For the Velvety Smooth Cheesecake Filling:
- Full-Fat Cream Cheese: The cornerstone of any great cheesecake! Ensure your cream cheese is full-fat and, crucially, softened to room temperature. This guarantees a truly rich, dense, and luxuriously smooth texture without any lumps.
- Sour Cream: This ingredient adds a delightful tang that perfectly balances the sweetness of the cheesecake, preventing it from being overly rich. It also contributes to the filling’s creamy consistency and moistness.
- Granulated Sugar: Provides the primary sweetness for the cheesecake filling. When properly beaten with the cream cheese, it dissolves completely, contributing to the light and velvety texture.
- Heavy Cream: An essential addition for an extra level of indulgence, heavy cream (or whipping cream) makes the cheesecake extraordinarily smooth, rich, and truly melt-in-your-mouth creamy.
- Large Eggs: Eggs are vital for structure and binding the cheesecake ingredients together, giving it that classic firm-yet-custard-like texture. Always use room temperature eggs for better incorporation into the batter.
- Cornstarch: A secret weapon for cheesecake perfection! Cornstarch provides stability to the filling, helping it set firmly and preventing those unwelcome cracks that can sometimes appear on the surface of a baked cheesecake.
- Pure Vanilla Extract: A splash of high-quality vanilla extract adds warmth, complexity, and a sweet aromatic depth that beautifully complements and enhances the chocolate and graham cracker flavors.
For the Iconic Toasted Marshmallow Topping:
- Hot Fudge Sauce: This forms a luscious, glossy chocolate layer over the cooled cheesecake, providing a rich, intense chocolate flavor that perfectly bridges the gap between the cheesecake and the marshmallow topping, making the s’mores theme complete.
- Mini Marshmallows: Generously scattered over the hot fudge, these miniature marshmallows are the final touch. A quick visit under the broiler transforms them into a beautifully golden, delightfully gooey, and irresistibly charred topping, mimicking the authentic campfire experience.
Step-by-Step Baking Instructions for Your S’mores Cheesecake
Follow these detailed steps carefully to create a show-stopping S’mores Cheesecake that’s perfect every time.
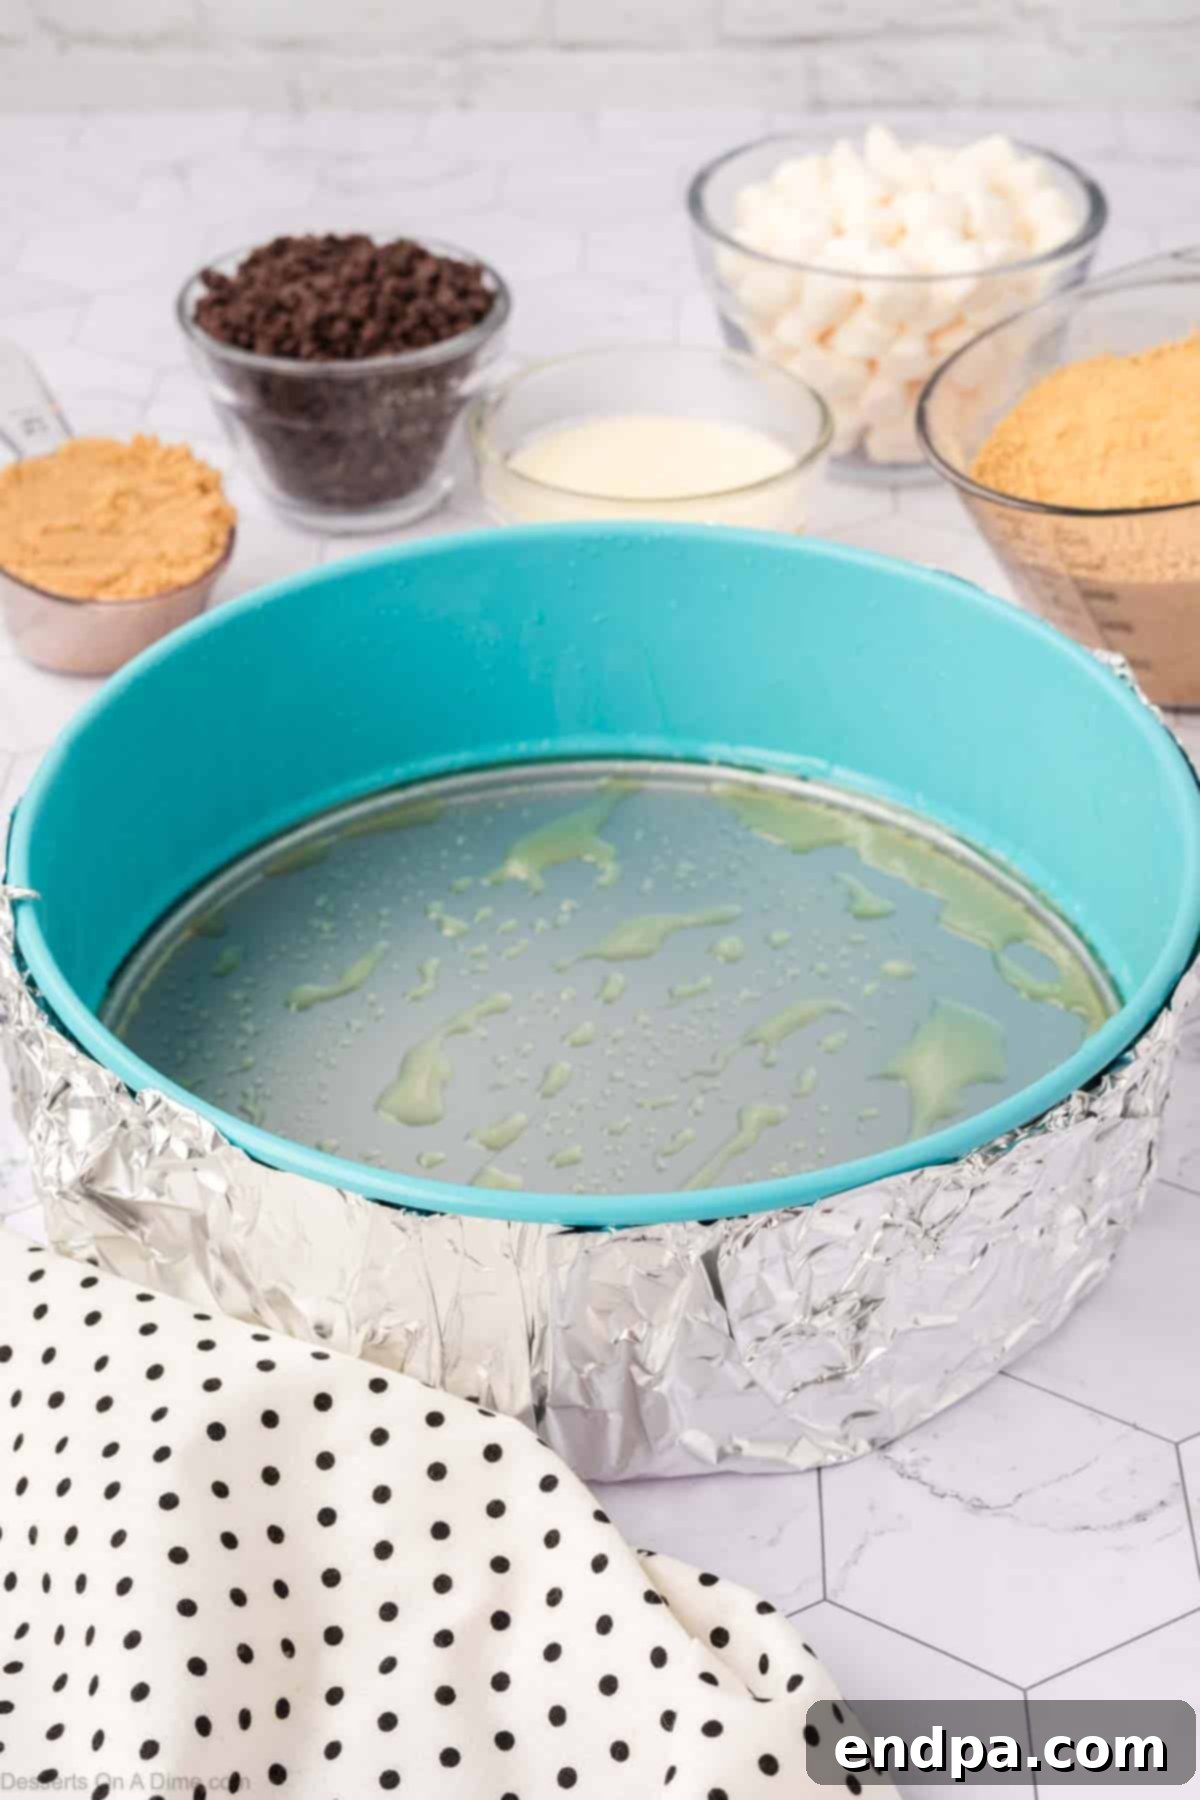
Step 1: Prepare Your Pan and Preheat Oven. Begin by preheating your oven to 325°F (160°C). Lightly coat a 9-inch springform pan with a nonstick cooking spray to ensure easy release. Crucially, wrap the entire outside of the pan, including the bottom and sides, tightly with heavy-duty aluminum foil. This creates a protective barrier, preventing water from seeping into your cheesecake during the water bath baking process.
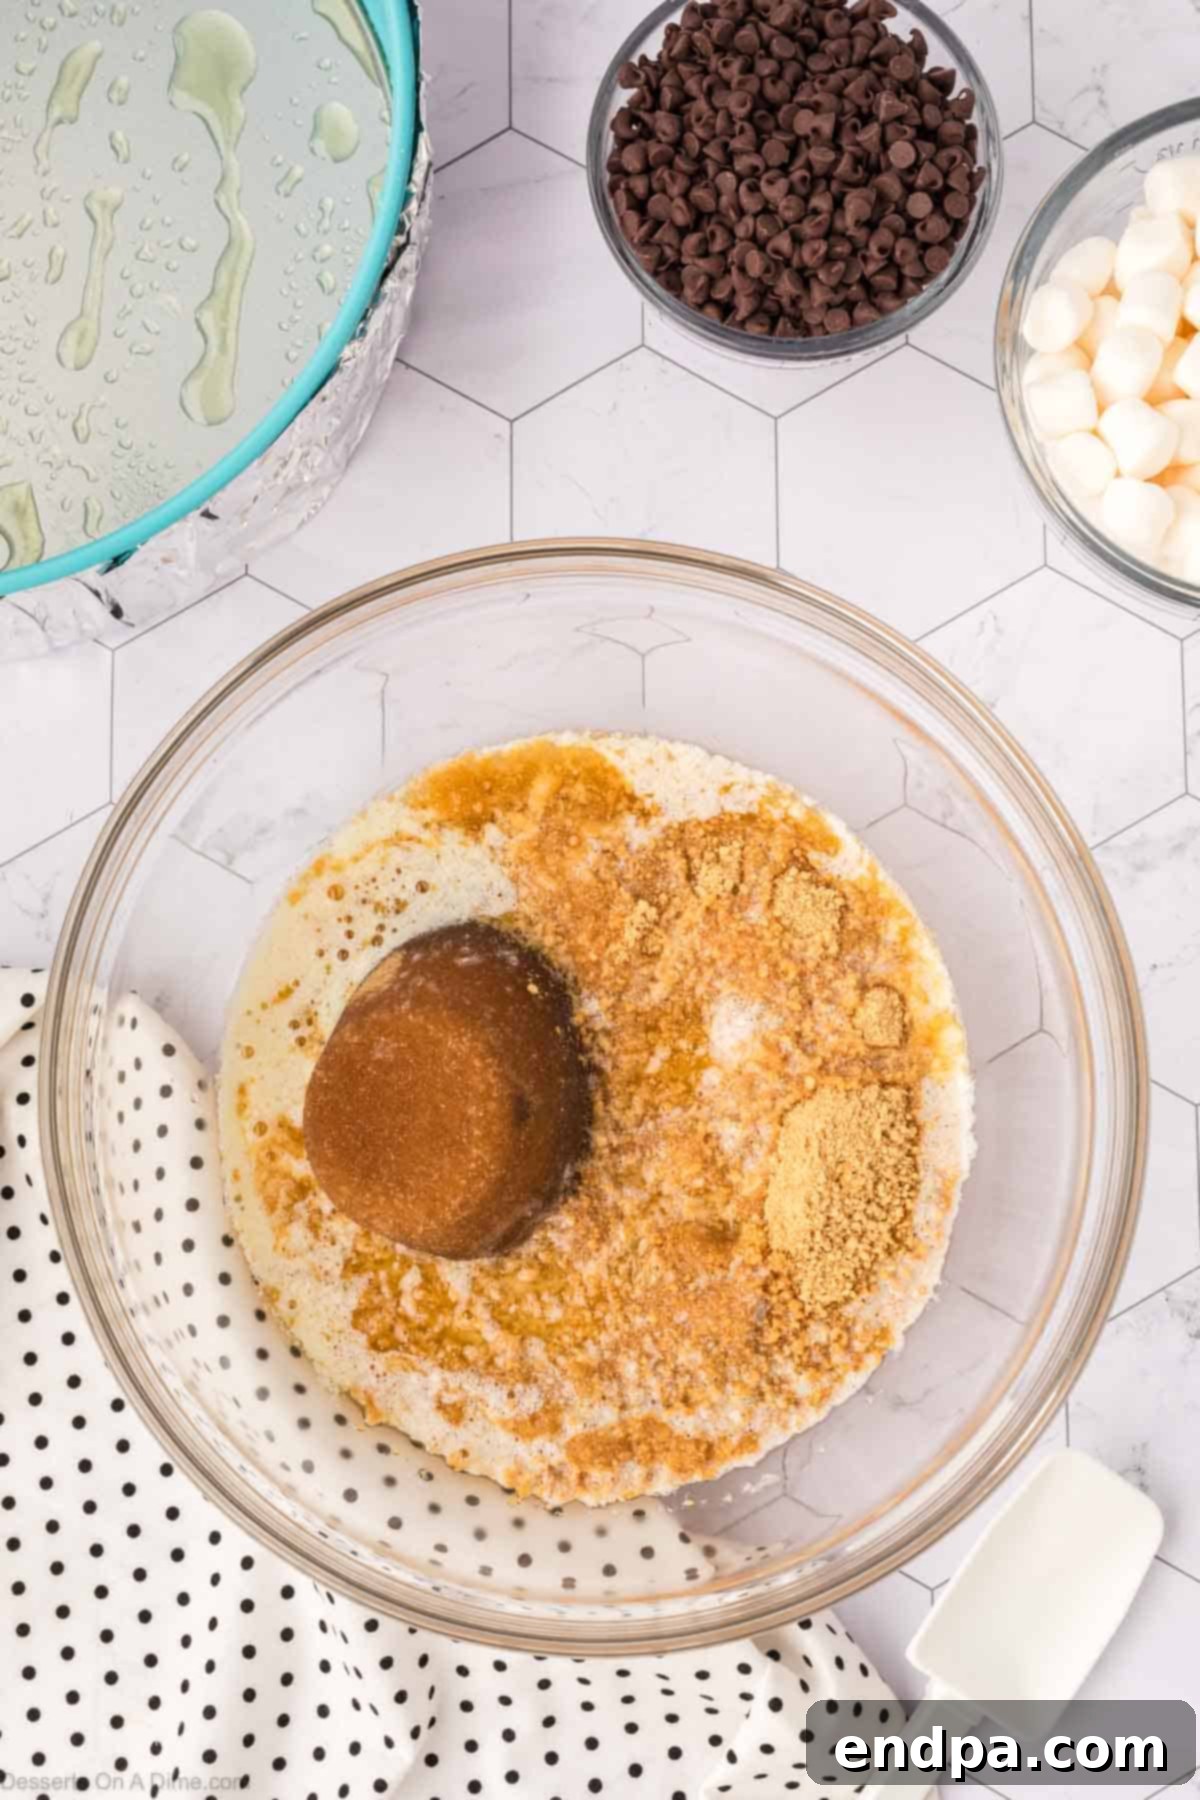
Step 2: Create the Graham Cracker Crust Base. In a medium-sized mixing bowl, combine the graham cracker crumbs, melted unsalted butter, and brown sugar. Use a sturdy spoon or your hands to thoroughly mix the ingredients until the mixture is uniformly moistened and resembles wet sand. This ensures an even and stable crust.
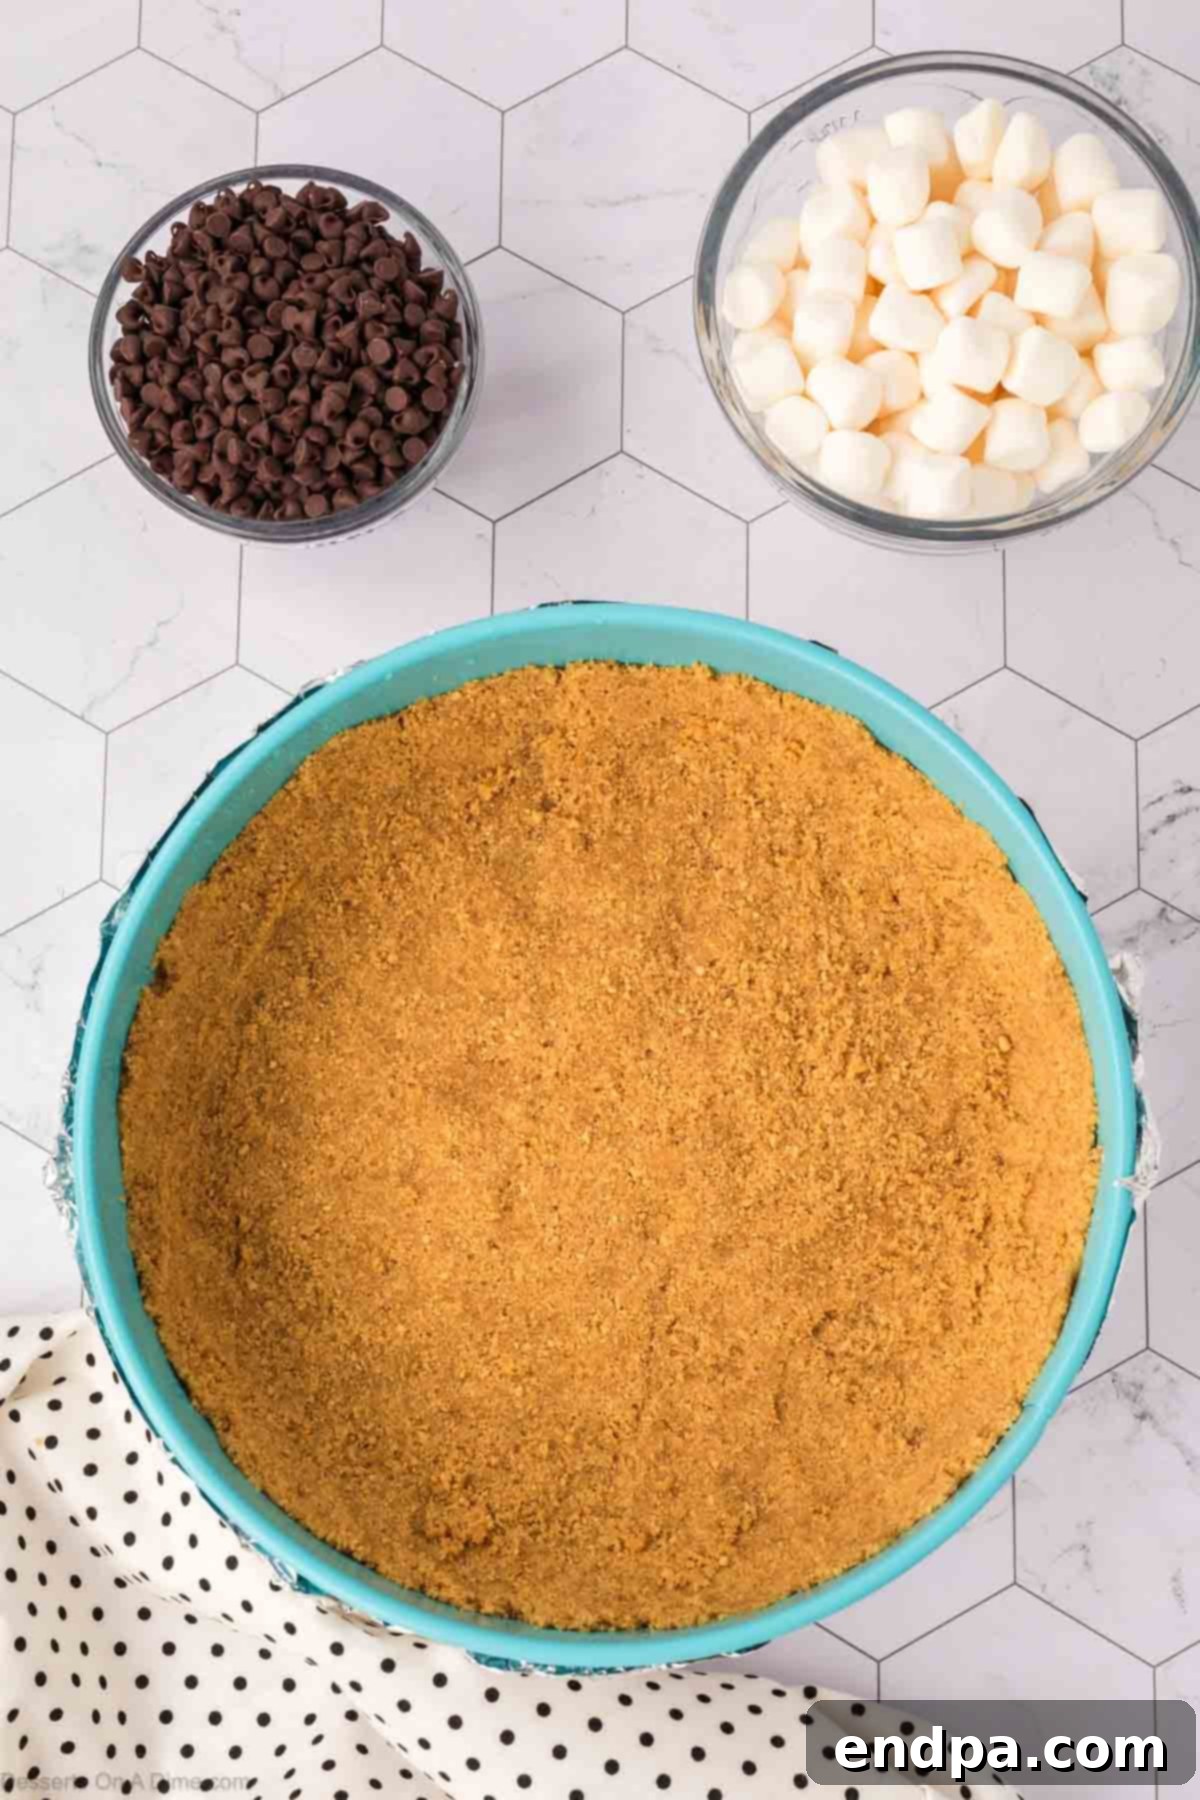
Step 3: Press and Pre-Bake the Crust. Transfer the graham cracker mixture into the prepared springform pan. Using the bottom of a glass or your fingers, firmly and evenly press the mixture across the bottom and about halfway up the sides of the pan. Bake this crust in the preheated oven for 10 minutes. This step helps to set the crust and slightly toast the graham crackers, enhancing their flavor. After baking, remove the pan from the oven and allow the crust to cool completely on a wire rack.
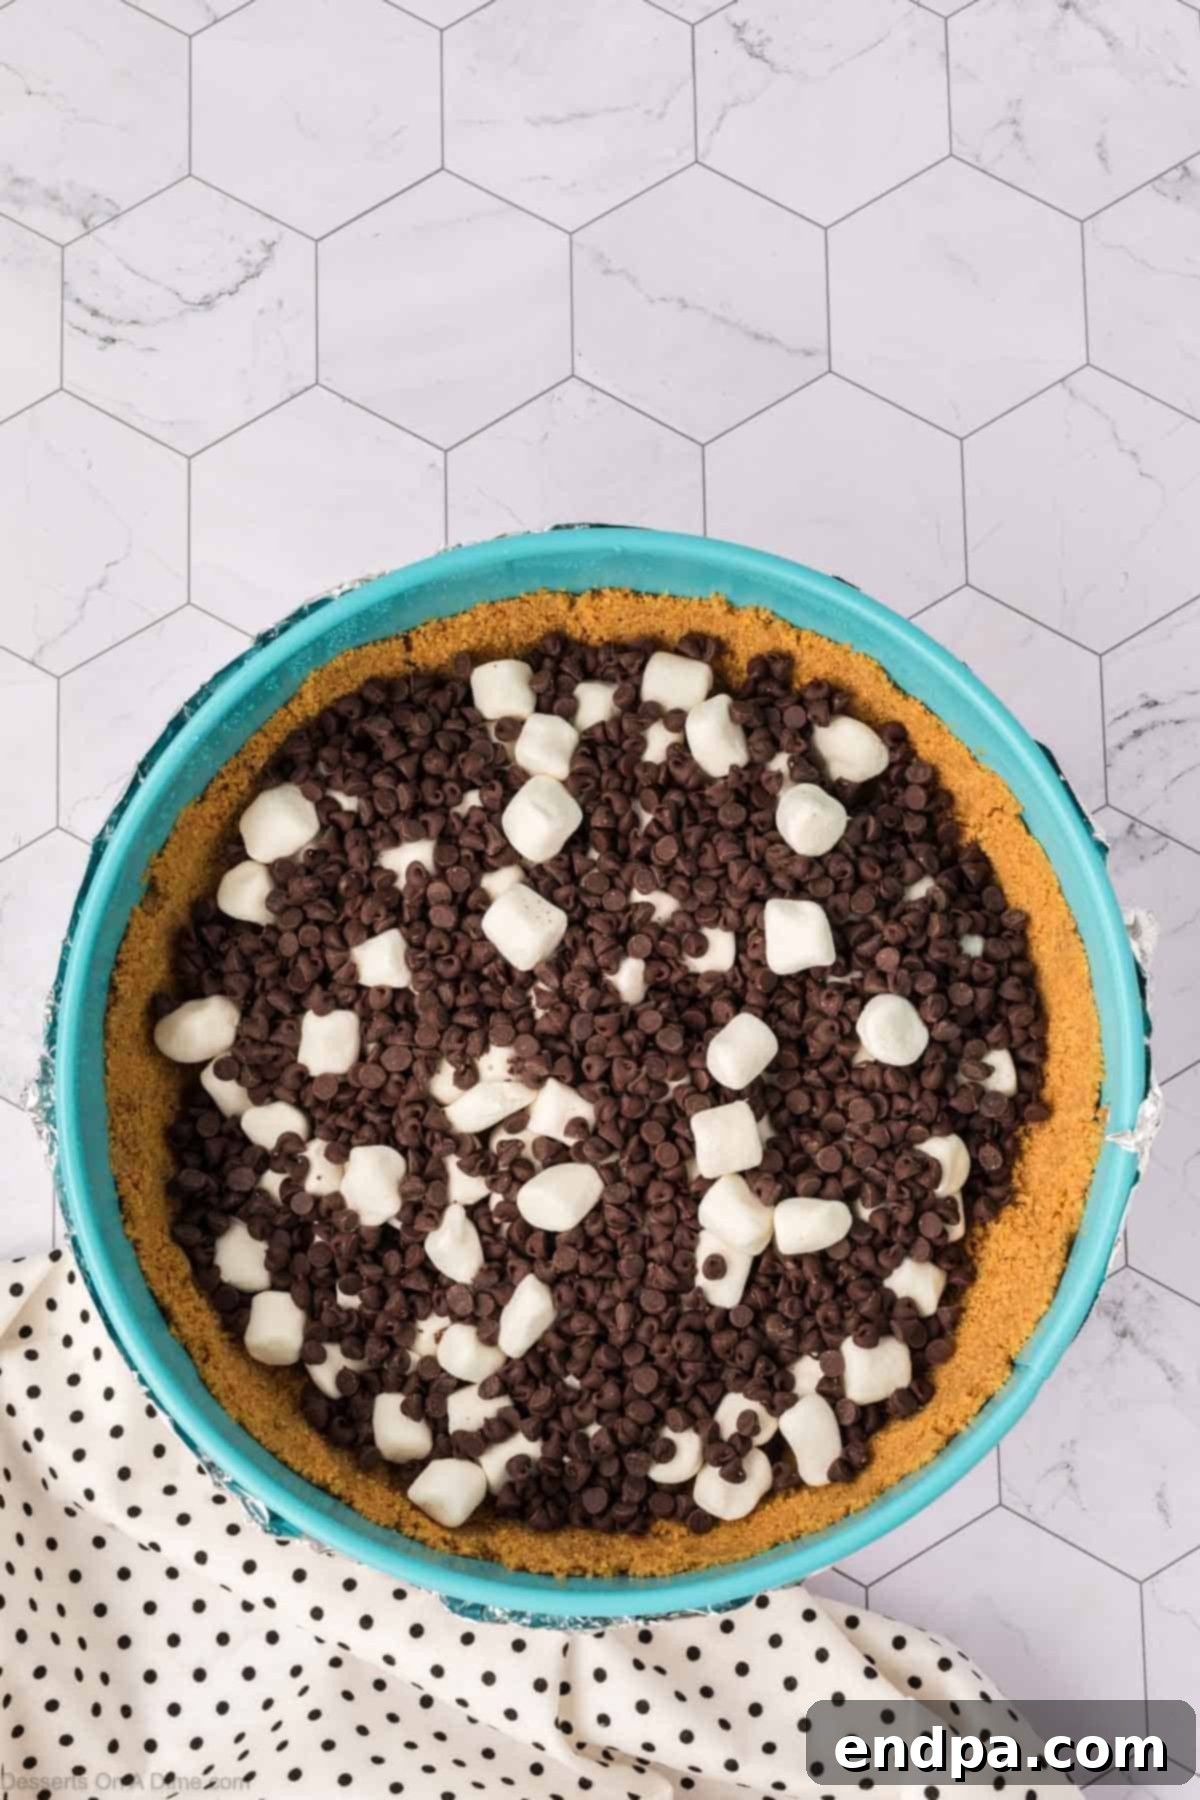
Step 4: Add the S’mores Elements to the Crust. Once the pre-baked graham cracker crust has fully cooled, sprinkle the mini chocolate chips evenly over the bottom layer of the crust. Follow this by distributing the mini marshmallows over the chocolate chips. These elements will melt and become wonderfully gooey as the cheesecake bakes, embedding themselves into the crust and filling.
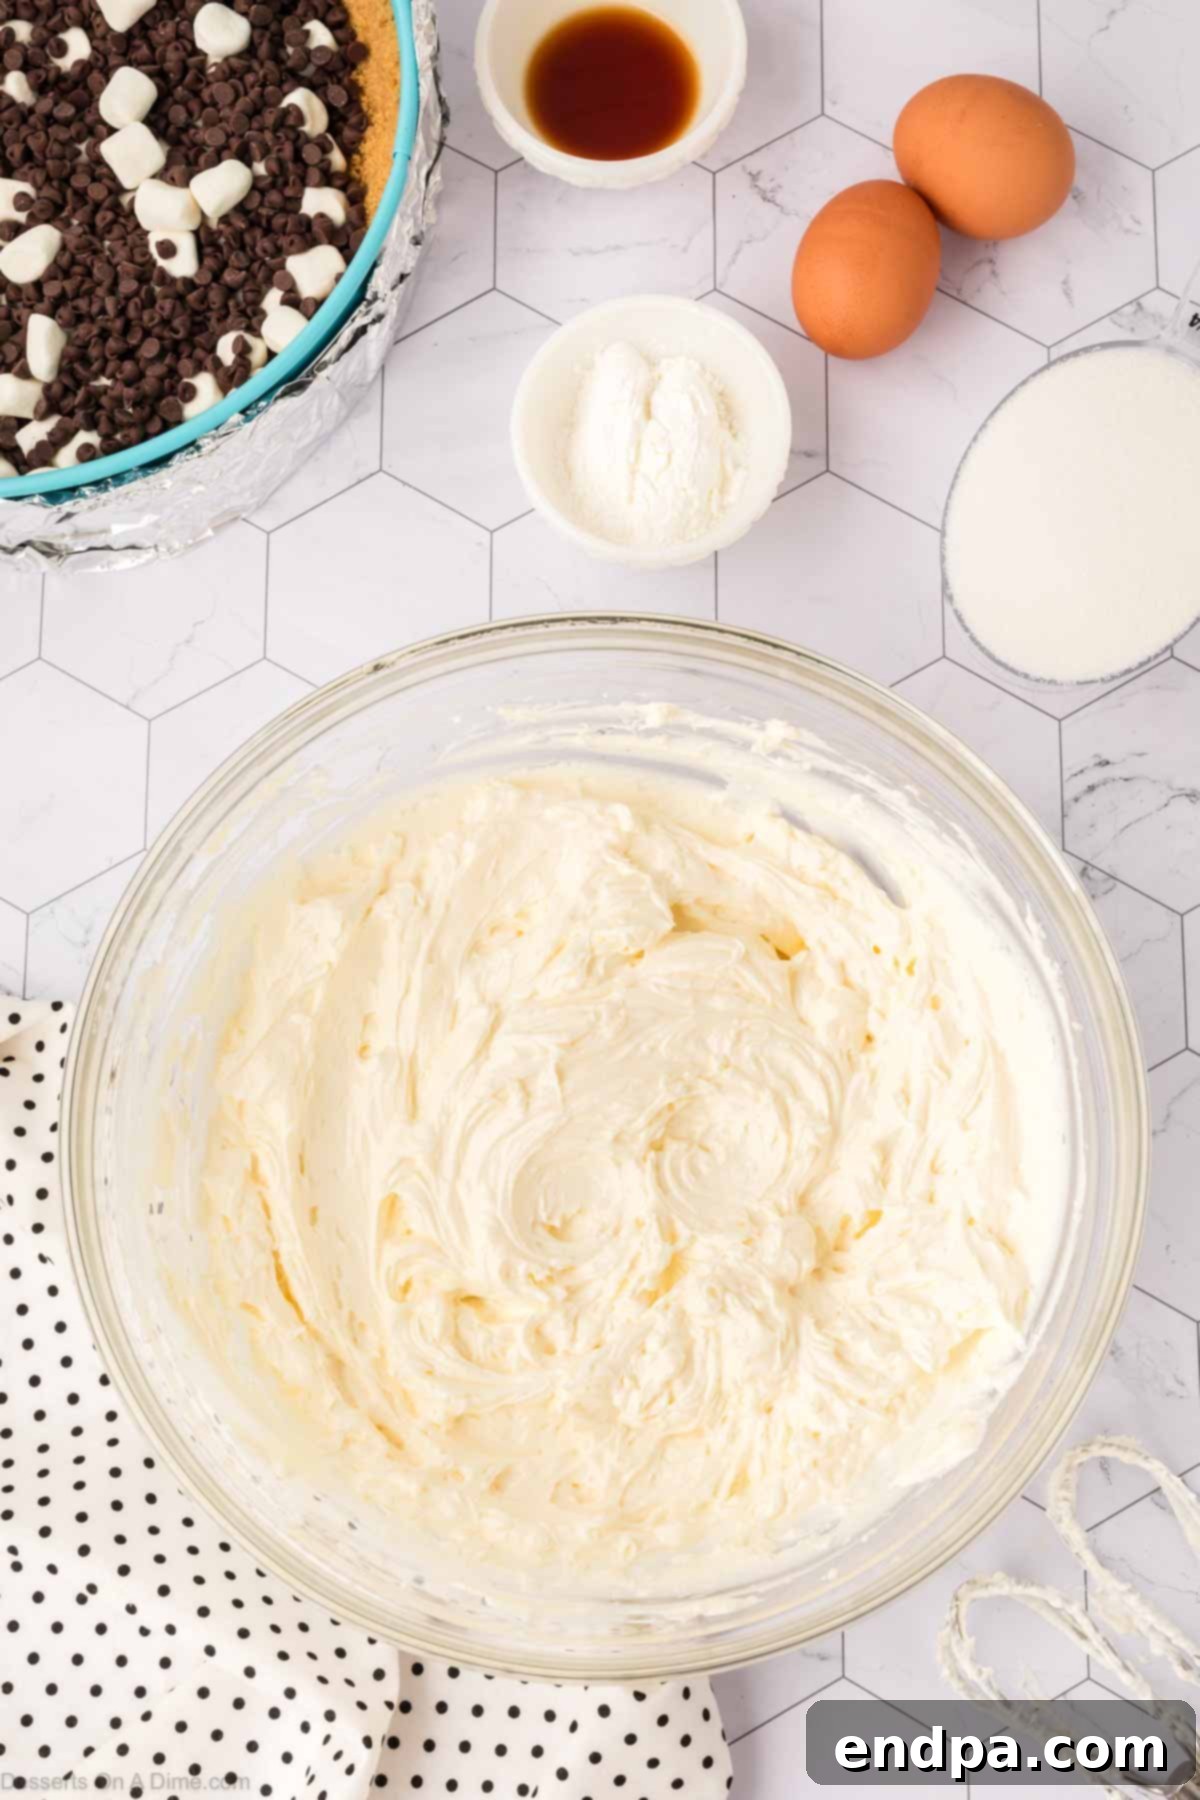
Step 5: Prepare the Cream Cheese Base. In the bowl of an electric mixer (fitted with the paddle attachment), beat the room temperature full-fat cream cheese on medium speed until it becomes incredibly light, fluffy, and completely smooth. This step is critical for a lump-free cheesecake. Pause occasionally to scrape down the sides and bottom of the bowl with a rubber spatula, ensuring all cream cheese is uniformly mixed.
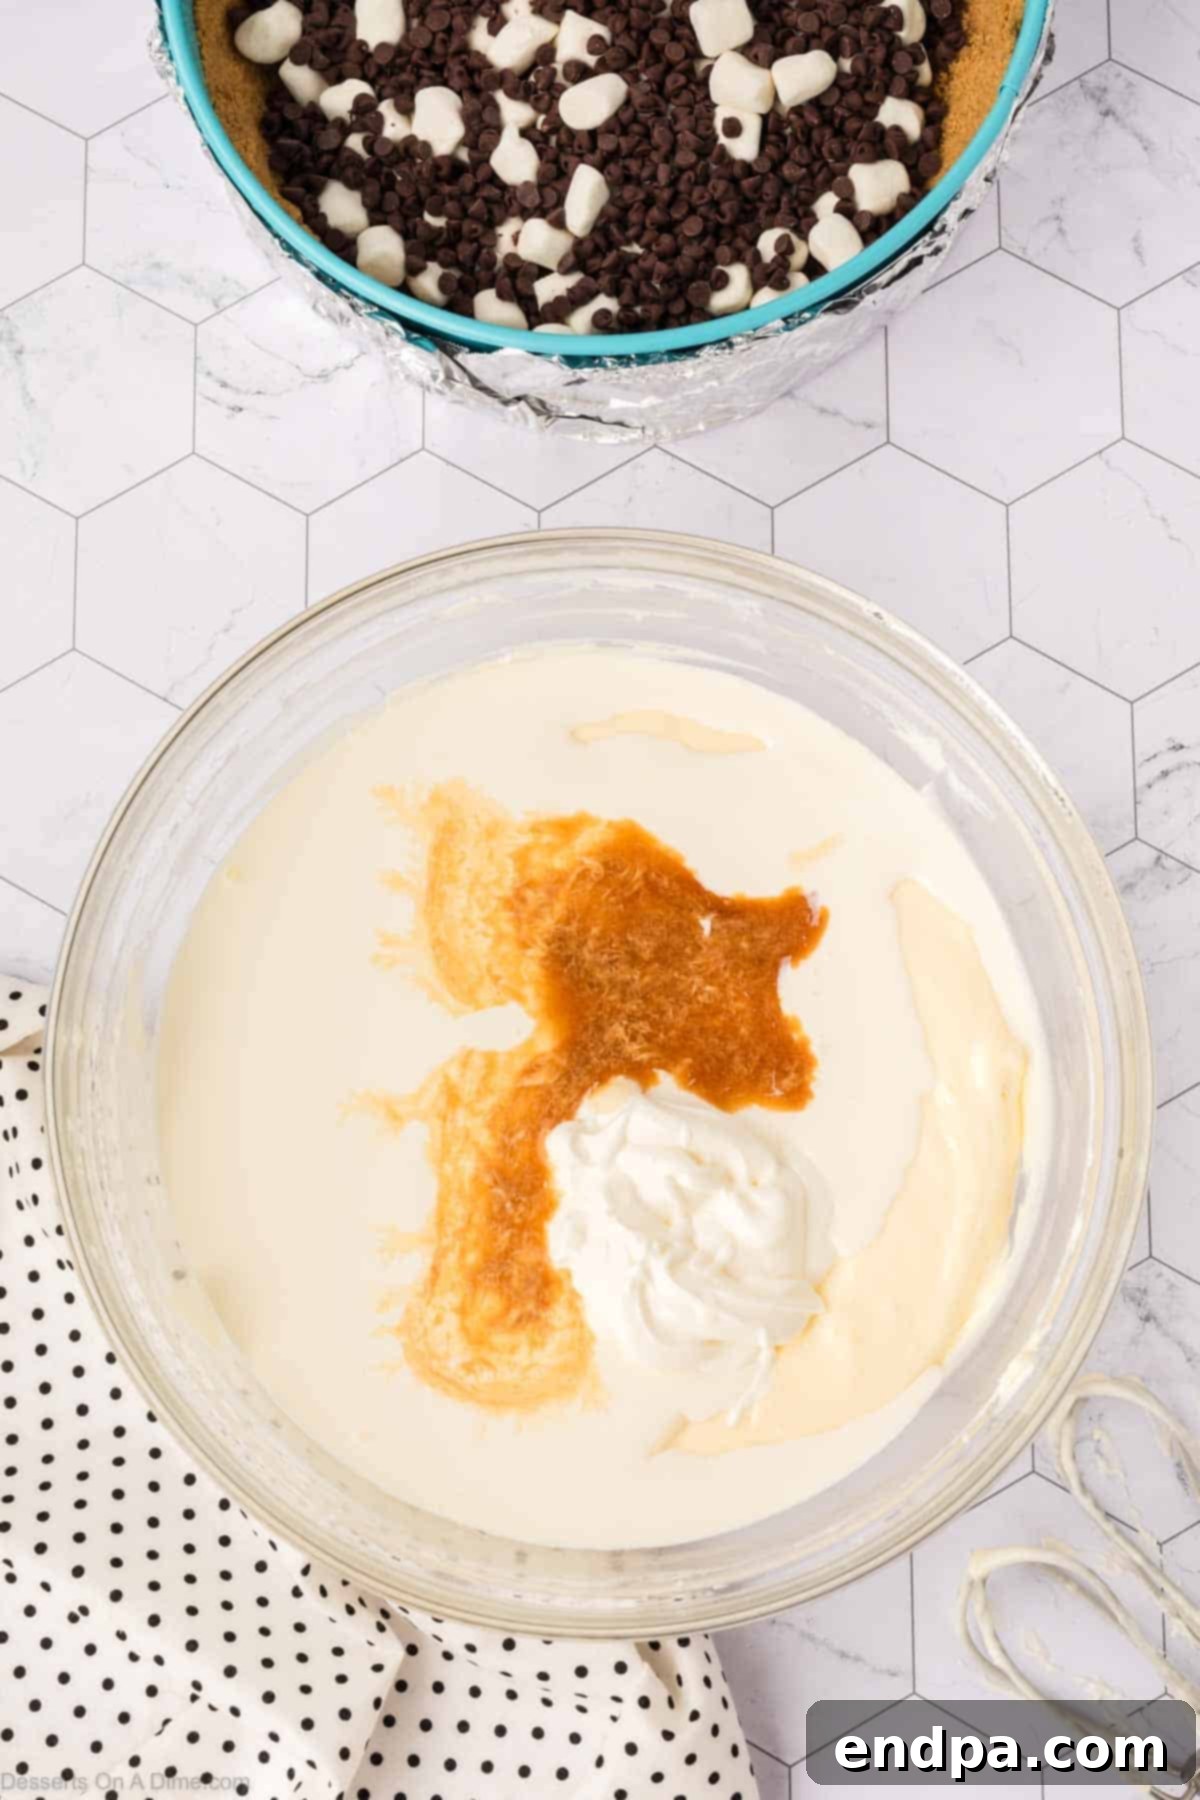
Step 6: Combine Remaining Cheesecake Ingredients. Once the cream cheese is light and airy, gradually add the granulated sugar and cornstarch, mixing on low speed until just combined. Then, beat in the eggs one at a time, incorporating each fully before adding the next. Finally, add the sour cream, pure vanilla extract, and heavy cream. Continue beating on medium-low speed only until the mixture is smooth and fully blended. Be careful not to overmix, as this can introduce too much air and lead to cracks in your cheesecake.
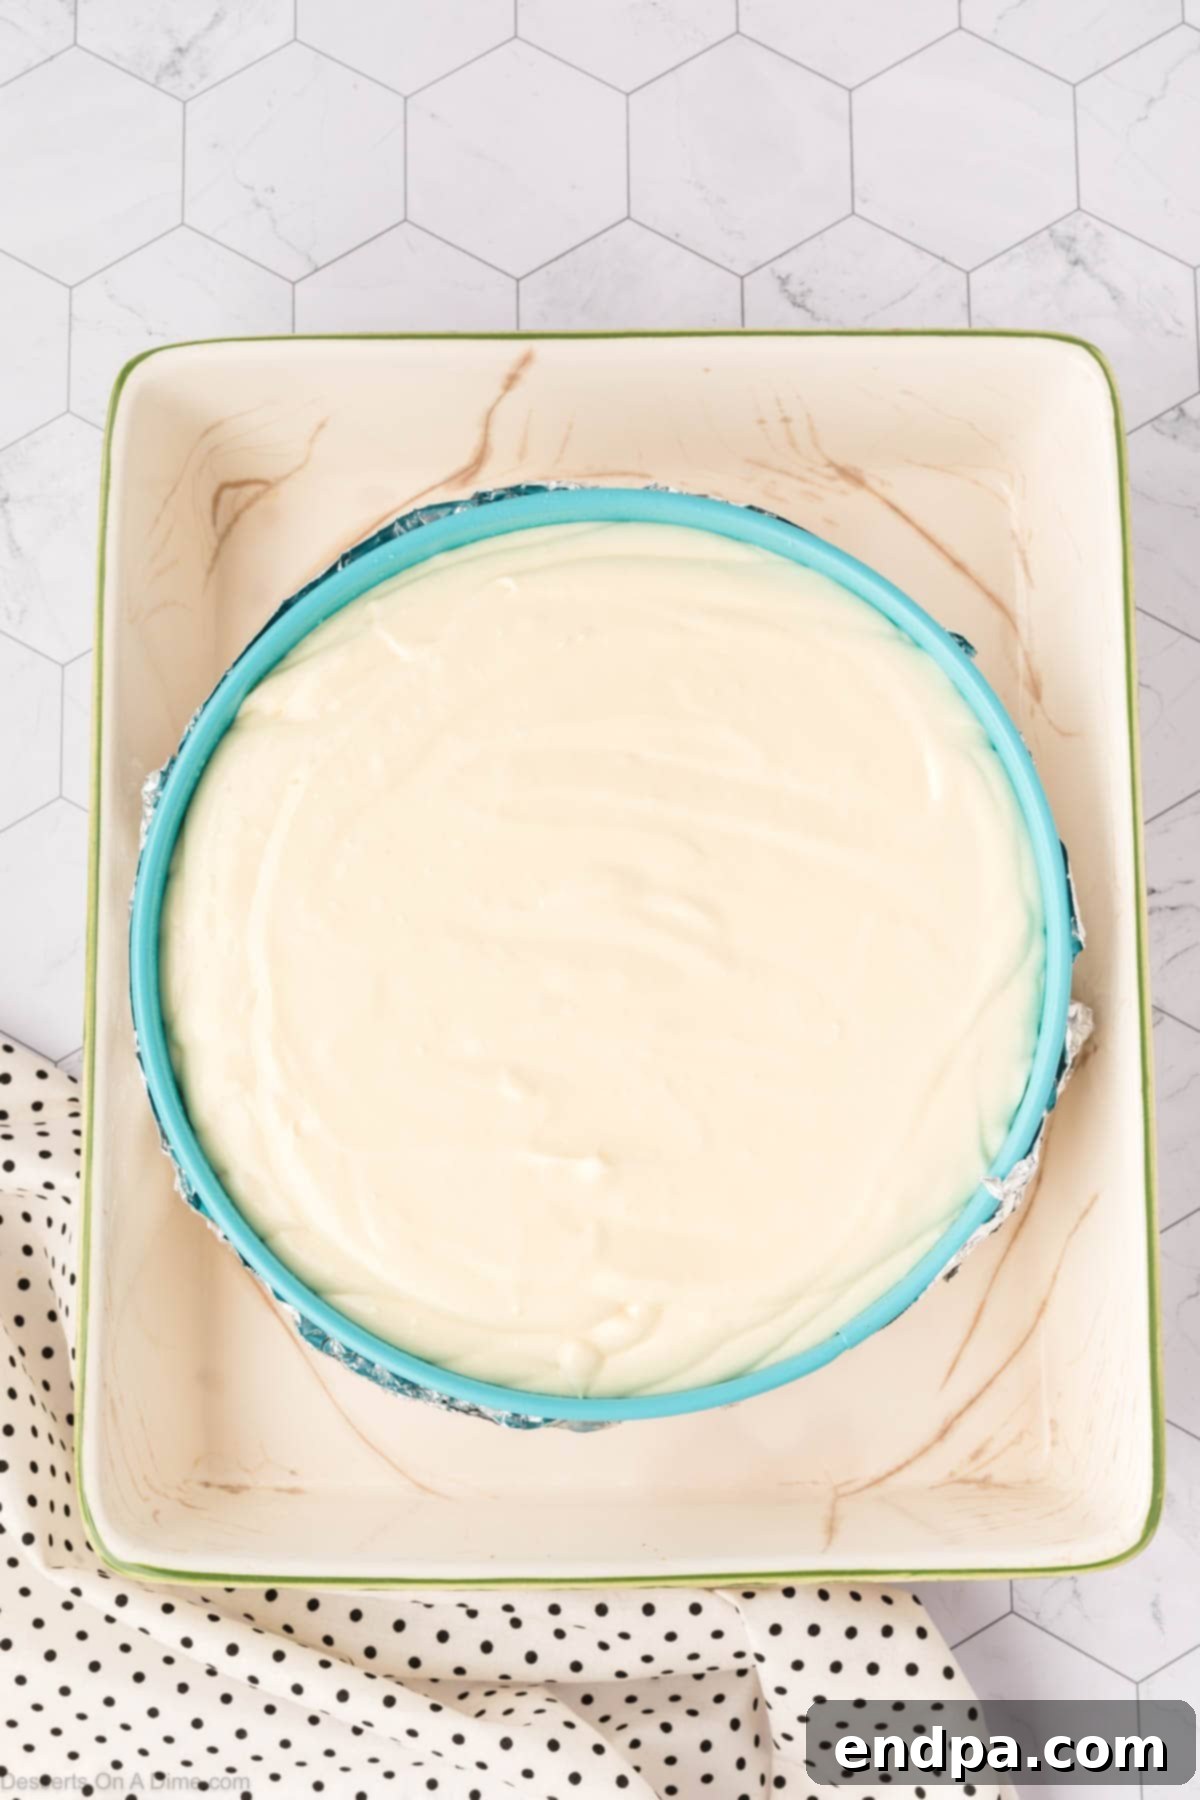
Step 7: Pour Batter and Prepare Water Bath. Gently pour the perfectly smooth cheesecake filling over the prepared crust in the springform pan. To create the essential water bath (Bain-Marie), place the foil-wrapped springform pan inside a larger roasting pan. Carefully pour warm water into the larger pan until it reaches approximately halfway up the sides of the springform pan. The water bath ensures even, gentle baking, resulting in a creamy, crack-free cheesecake.
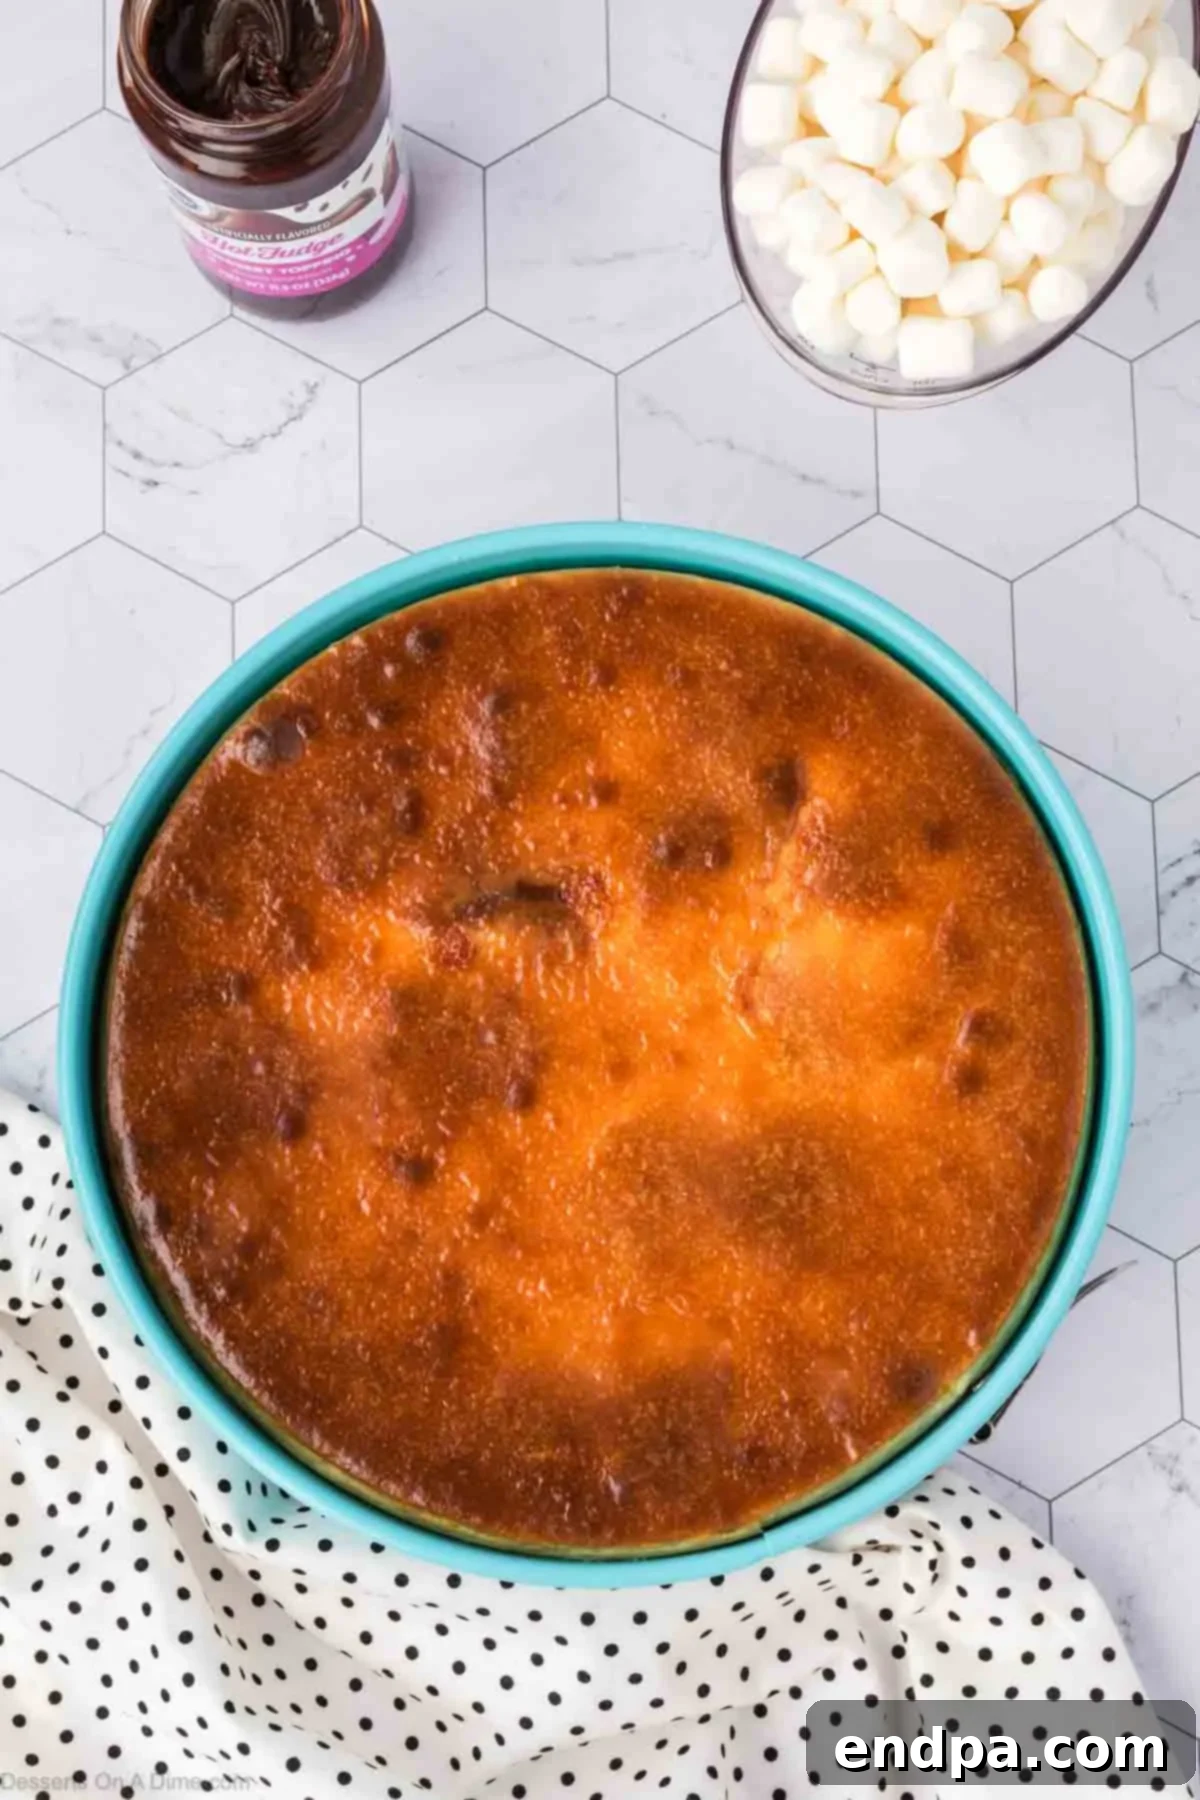
Step 8: Bake and Cool Gradually. Carefully transfer the roasting pan with the cheesecake to your preheated oven. Bake for 85 to 95 minutes, or until the edges of the cheesecake are set and the very center jiggles only slightly when the pan is gently nudged. The entire cheesecake should not be wobbly. If it’s still too jiggly, continue baking in 5-minute increments, checking for doneness starting at 85 minutes. Once baked, turn off the oven and crack the oven door open halfway. Allow the cheesecake to sit in the warm oven for an additional 10 minutes; this gradual cooling prevents temperature shock and cracking. Then, remove it from the oven and water bath, placing it on a wire rack to cool completely at room temperature for at least 1 hour.
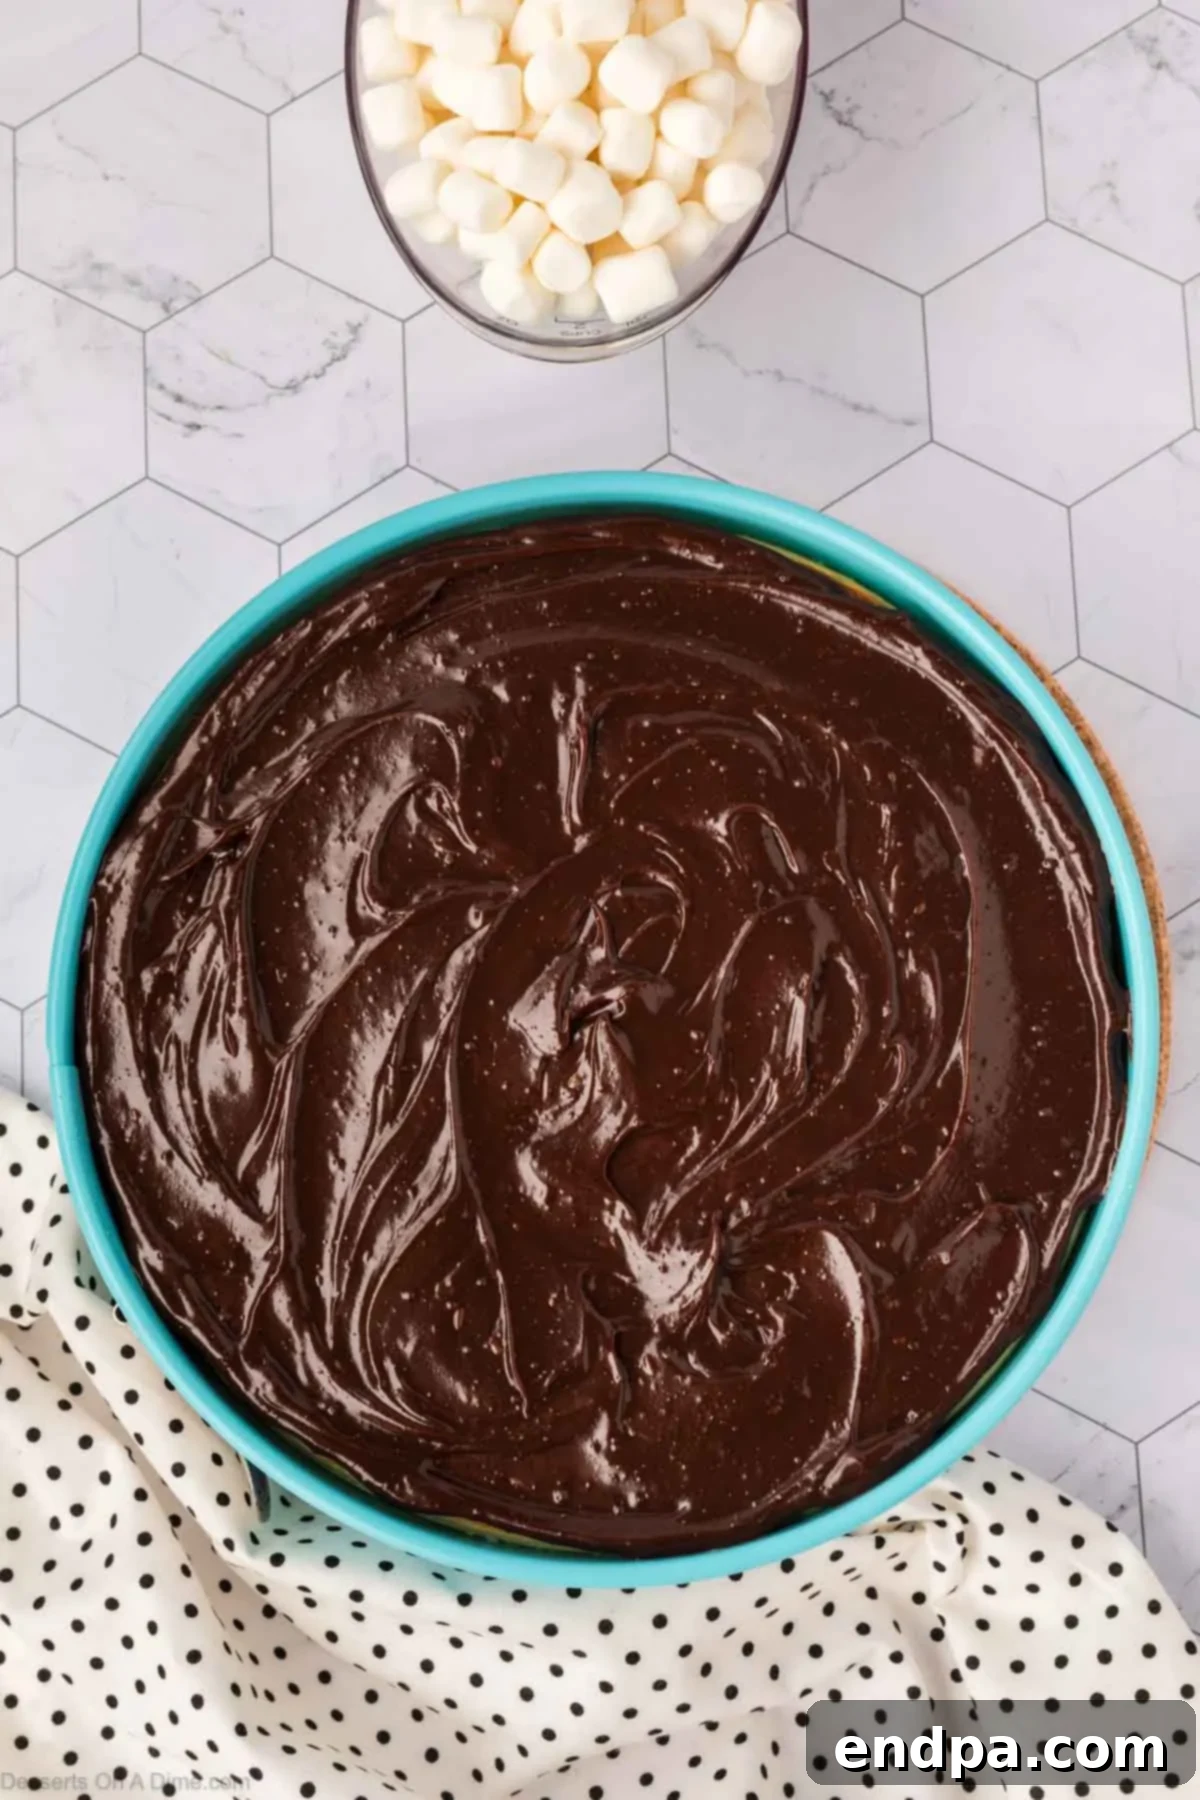
Step 9: Apply the Hot Fudge Topping. Once the cheesecake has cooled completely at room temperature, it’s time for the decadent hot fudge layer. Set your oven broiler to low. Gently warm the hot fudge sauce in the microwave for a few seconds (usually 10-20 seconds) to make it easier to pour and spread. Evenly spread this rich, chocolatey sauce over the top of the cooled cheesecake, creating a smooth, inviting layer.
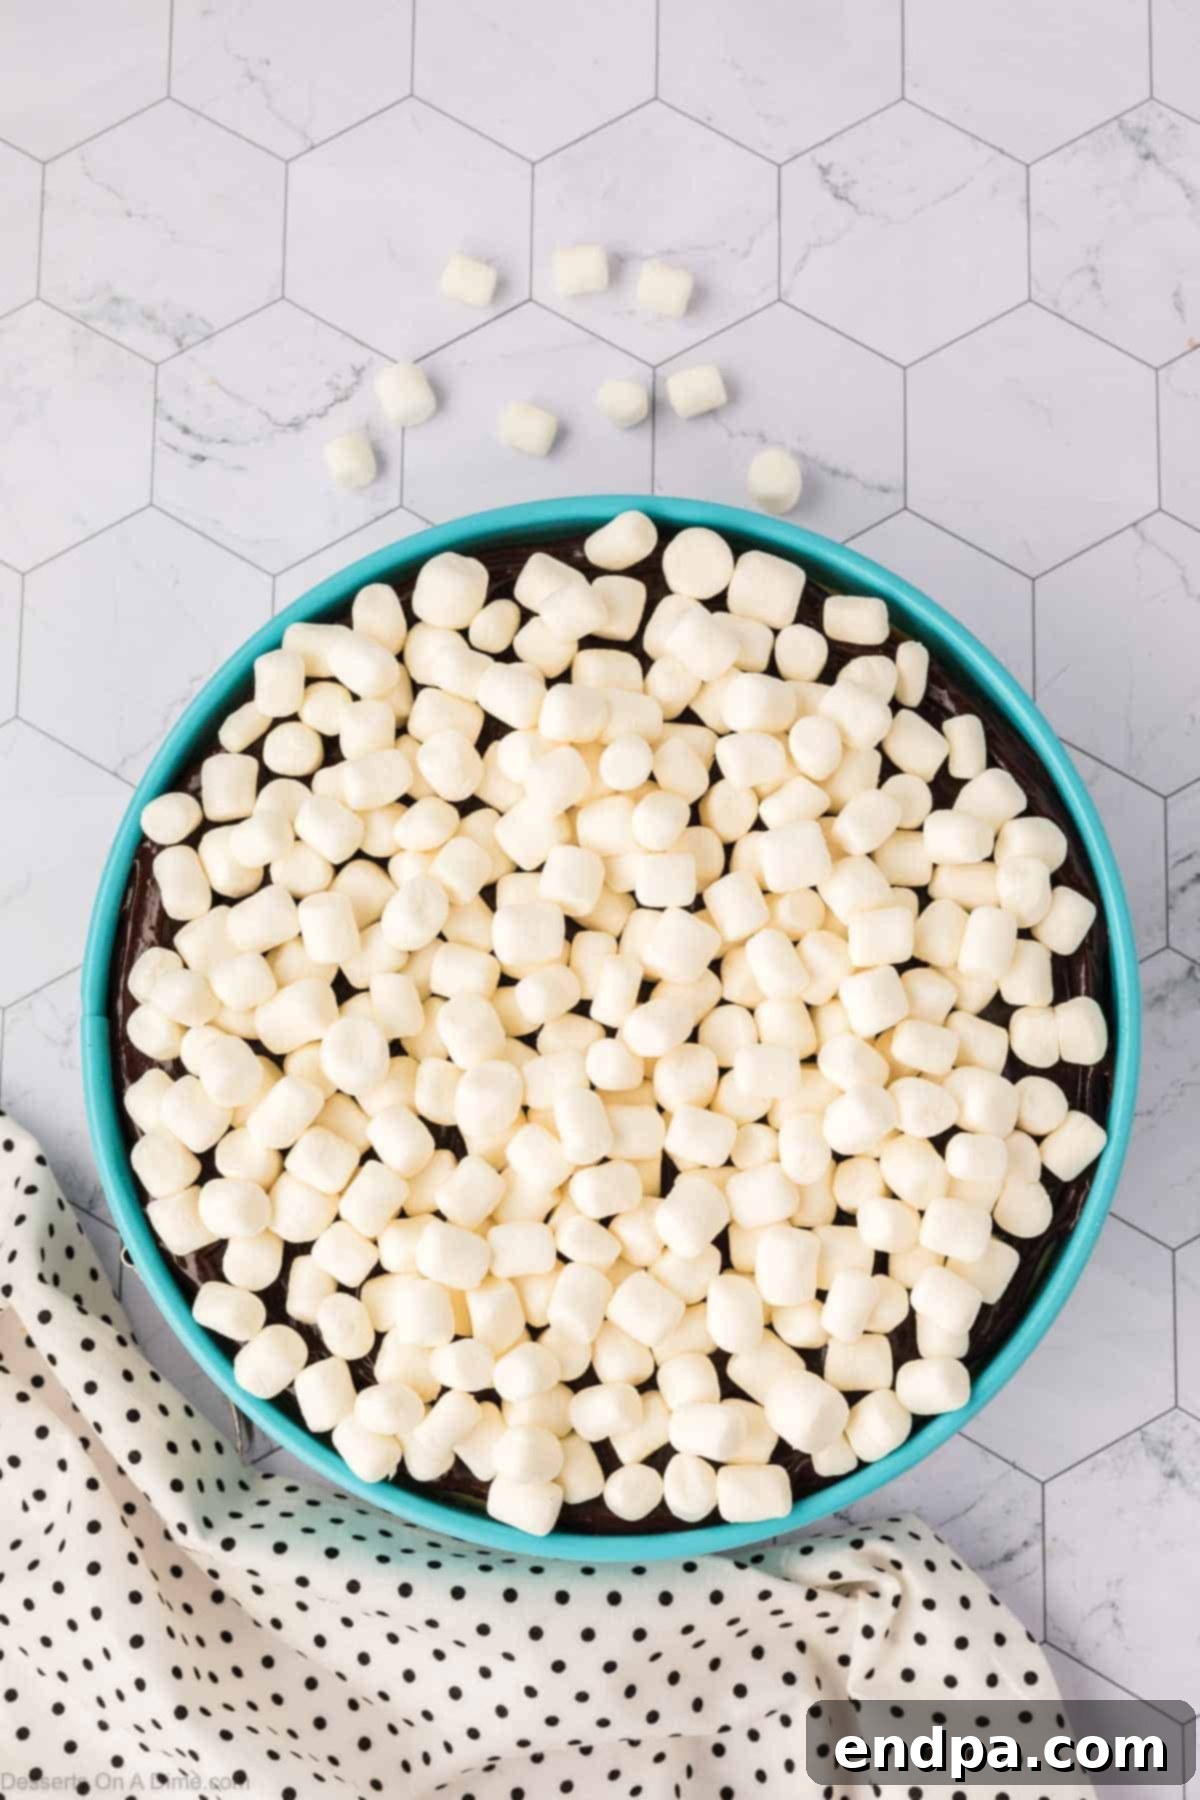
Step 10: Distribute the Marshmallows. Take your remaining mini marshmallows and carefully sprinkle them evenly across the hot fudge layer. Ensure they form a relatively even layer, covering the chocolate surface completely for that authentic s’mores look and taste.
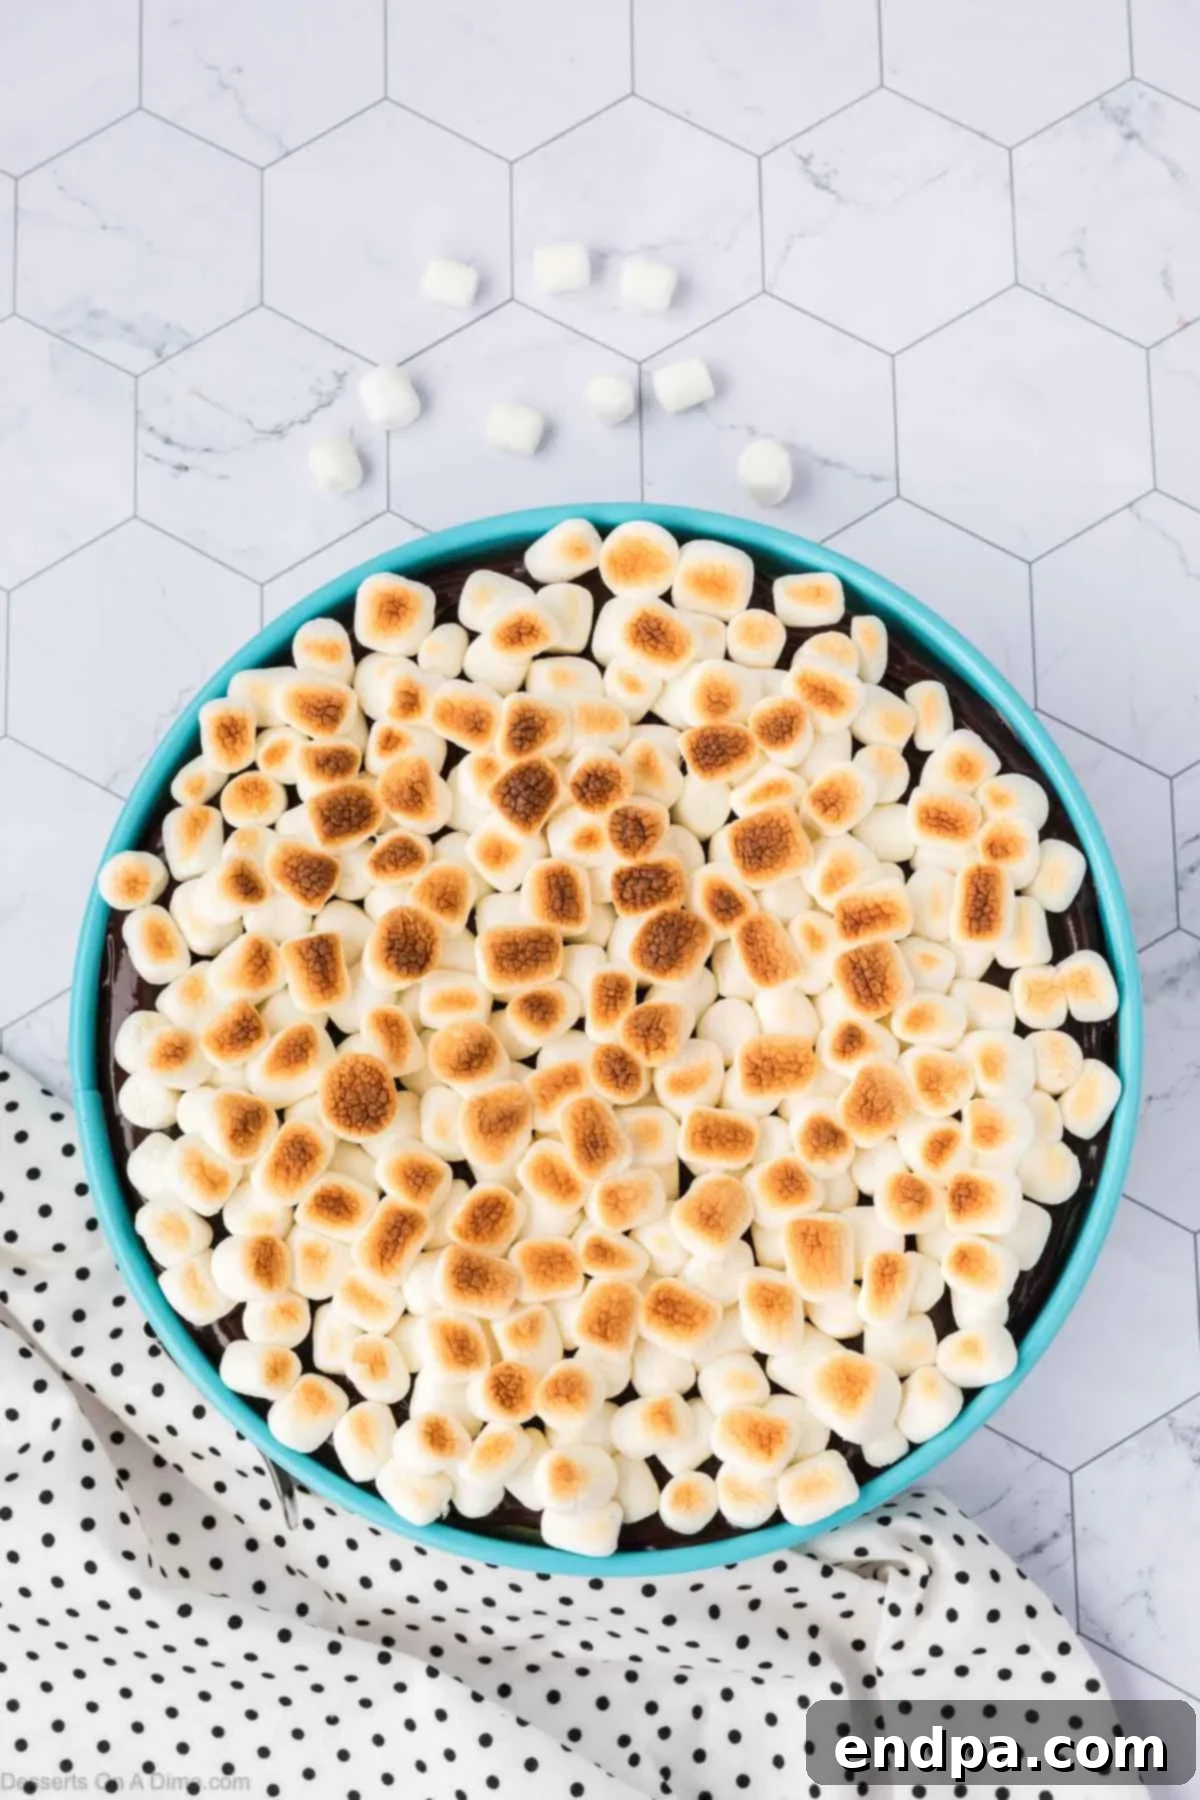
Step 11: Toast the Marshmallows to Perfection. Carefully place the cheesecake under the preheated broiler. This step requires extreme vigilance! Watch the marshmallows continuously as they toast rapidly. They should turn a beautiful light golden brown and become slightly charred in spots, which typically takes about 30 to 60 seconds, but broiler times vary greatly. Remove immediately once desired toastiness is achieved to prevent burning.
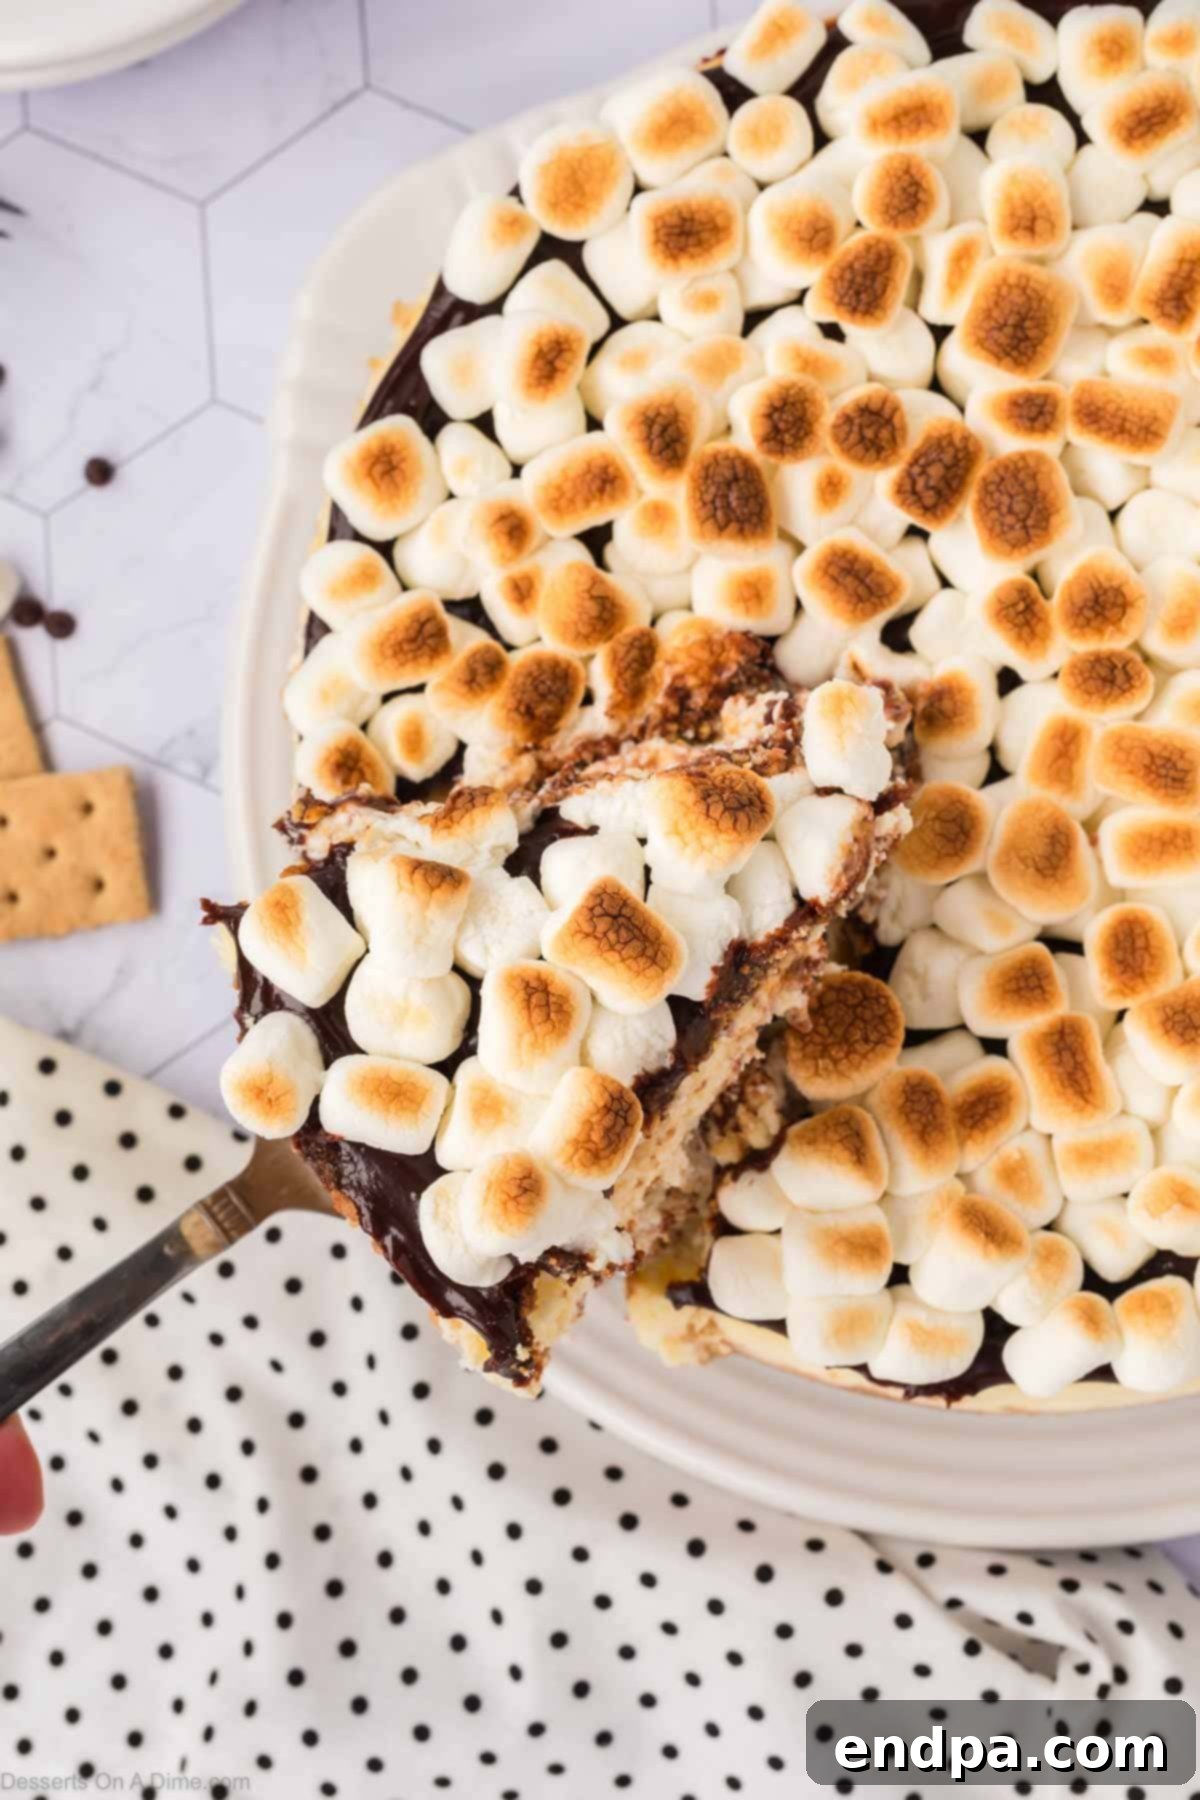
Step 12: Chill, Slice, and Savor. Allow the fully assembled cheesecake to cool completely at room temperature after broiling. This is crucial for the structure. Once cooled, transfer the cheesecake to the refrigerator and chill for a minimum of 4–5 hours, or ideally overnight. Thorough chilling ensures the cheesecake sets perfectly, making for clean, beautiful slices. Before serving, run a thin knife around the edge of the springform pan, then gently release the ring. Slice with a warm, clean knife for the neatest portions. Serve chilled and prepare to enjoy the ultimate S’mores Cheesecake!
Proper Storage for Maintaining Freshness
To preserve the exquisite taste and creamy texture of your S’mores Cheesecake, proper storage is essential. Whether you plan to enjoy it over several days or save a slice for a later craving, here’s how to store it effectively:
Refrigerator Storage: Any leftover S’mores Cheesecake should be covered tightly with plastic wrap or placed in an airtight container and stored in the refrigerator. This will keep it fresh and delicious for up to 4-5 days. For the best flavor and texture experience, always keep your cheesecake chilled until you are ready to serve each slice. Allowing it to sit at room temperature for too long can compromise its structural integrity and freshness.
Freezer Storage: If you wish to extend the life of your cheesecake, it freezes beautifully for up to 2 months. To freeze, ensure the cheesecake is completely cooled and set. For a whole cheesecake, you can wrap it securely in several layers of plastic wrap, followed by a layer of heavy-duty aluminum foil. For individual slices, place them on a baking sheet to freeze solid for about an hour, then wrap each slice individually in plastic wrap and foil. This prevents freezer burn and makes it easy to thaw single portions. When you’re ready to enjoy, transfer the frozen cheesecake (or slices) to the refrigerator and allow it to thaw overnight before serving. Thawing slowly in the fridge helps maintain the creamy consistency.
Expert Tips for a Flawless S’mores Cheesecake
Achieving a perfectly smooth, creamy, and crack-free cheesecake can be a daunting task for some, but with these professional tips, you’ll master this S’mores Cheesecake recipe like a seasoned baker:
- Embrace the Water Bath (Bain-Marie): This is perhaps the most critical tip for cheesecake success. A water bath provides a moist, even heat environment, ensuring the cheesecake bakes slowly and uniformly. This gentle cooking prevents the edges from over-baking and drying out before the center is set, which is the primary cause of cracks. Never skip this step!
- Securely Wrap Your Springform Pan in Foil: To prevent any water from the bath seeping into your precious crust and making it soggy, tightly wrap the outside of your springform pan with at least two layers of heavy-duty aluminum foil. Ensure the foil goes all the way up the sides and is crimped tightly around the bottom.
- Always Use Room Temperature Ingredients: For the cream cheese, eggs, and sour cream, bring them to room temperature before mixing. Cold ingredients do not emulsify properly, leading to a lumpy batter and a less smooth cheesecake texture. Plan ahead and take them out of the refrigerator at least an hour before you begin baking.
- Avoid the Pitfall of Overmixing the Batter: Once you add the eggs, mix on low speed only until just combined. Overmixing incorporates too much air into the batter, which expands during baking and then collapses as the cheesecake cools, leading to unsightly cracks. A smooth, well-blended batter is ideal, but avoid excessive whipping.
- Cool Your Cheesecake Gradually: Sudden temperature changes are the enemy of a perfect cheesecake. After baking, turn off the oven and leave the oven door ajar (propped open with a wooden spoon) for 10-15 minutes. This allows the cheesecake to cool down slowly, minimizing thermal shock and significantly reducing the risk of cracking.
- Run a Knife Around the Edge Before Removing the Pan: Once the cheesecake has cooled for an hour at room temperature, but before it goes into the refrigerator, gently run a thin, sharp knife around the inner edge of the springform pan. This preemptive step prevents the cheesecake from sticking to the sides as it continues to cool and contract, thus preventing cracks when you finally release the springform ring.
- Chill Thoroughly Before Slicing: Patience is a virtue, especially with cheesecake! Refrigerate your S’mores Cheesecake for a minimum of 4-5 hours, or ideally overnight. This allows the cheesecake to fully set and firm up, making it much easier to achieve clean, picture-perfect slices. A warm knife dipped in hot water and wiped dry between each slice also helps for the cleanest cuts.
More Irresistible S’mores Desserts
If you’re a true s’mores enthusiast, the adventure doesn’t have to end with cheesecake! Explore these other fantastic ways to enjoy the classic campfire flavors:
- Frozen S’mores: A cool and refreshing twist perfect for hot summer days, offering the familiar s’mores taste in an unexpected form.
- S’mores Cookie Cups: Individual portions of s’mores goodness, nestled in a soft cookie cup for a bite-sized treat.
- S’mores Poke Cake: A moist cake infused with chocolate and marshmallow, then topped with even more s’mores components.
- S’mores Brownies Recipe: Rich, fudgy brownies layered with graham cracker crumbs and toasted marshmallows for a decadent square.
We encourage you to try this easy-to-follow and truly luscious recipe for S’mores Cheesecake. Once you’ve experienced its magic, please return to share your thoughts by leaving a comment and a star review! Your feedback helps other bakers discover and enjoy this wonderful dessert.
S’Mores Cheesecake Recipe
This irresistible S’mores Cheesecake features a perfectly balanced graham cracker crust, a velvety chocolate cheesecake filling, and a crowning layer of beautifully toasted marshmallows, offering a gourmet twist on the classic campfire treat. It’s a dessert that guarantees to impress with its rich flavors and delightful textures.
45 mins
1 hr 40 mins
5 hrs
7 hrs 25 mins
12 servings
American
Dessert
Carrie Barnard
Ingredients
For the Graham Cracker Crust:
- 1 1/2 Cups Graham Cracker Crumbs
- 1/2 Cup Brown Sugar
- 1/2 cup Unsalted Butter Melted
- 3/4 cup Mini Chocolate Chips
- 1 Cup Mini Marshmallows
For the Creamy Cheesecake Filling:
- 4 x 8 oz packages Full-Fat Cream Cheese, softened to room temperature
- 1/2 Cup Sour Cream
- 3/4 Cup Granulated Sugar
- 3/4 Cup Heavy Cream
- 2 Large Eggs room temperature
- 2 Tablespoons Cornstarch
- 1 teaspoon Pure Vanilla Extract
For the Toasted Marshmallow Topping:
- 10 oz Hot Fudge Sauce
- 2 Cups Mini Marshmallows
Instructions
- Preheat your oven to 325°F (160°C). Lightly spray a 9-inch springform pan with nonstick cooking spray. Wrap the entire outside of the pan (bottom and sides) tightly with several layers of heavy-duty aluminum foil to prevent water seepage during the water bath.
- In a medium mixing bowl, combine the graham cracker crumbs, melted unsalted butter, and brown sugar. Stir until the mixture is thoroughly moistened and resembles wet sand.
- Press the graham cracker mixture evenly into the bottom and halfway up the sides of the prepared springform pan. Bake for 10 minutes, then remove from the oven and allow to cool completely on a wire rack.
- Once the crust is fully cooled, evenly sprinkle the mini chocolate chips over the bottom layer of the crust, followed by the mini marshmallows.
- Using an electric mixer (stand mixer with paddle attachment or handheld), beat the softened cream cheese until it is light, fluffy, and completely smooth, scraping down the sides of the bowl with a rubber spatula as needed.
- With the mixer on low speed, gradually add the granulated sugar and cornstarch to the cream cheese mixture, mixing until just combined.
- Beat in the eggs one at a time, ensuring each egg is fully incorporated before adding the next.
- Next, add the sour cream, pure vanilla extract, and heavy cream. Beat on medium-low speed until the mixture is smooth and fully blended. Be careful not to overmix the batter.
- Carefully pour the cheesecake filling evenly into the springform pan over the prepared crust and s’mores elements.
- Create a water bath by placing the foil-wrapped springform pan into a larger roasting pan. Pour warm water into the larger pan until it reaches about halfway up the sides of the springform pan.
- Carefully transfer the roasting pan with the cheesecake to the preheated oven. Bake for 85 to 95 minutes, or until the edges are set and the center jiggles only slightly when gently nudged. If it’s too jiggly, bake for another 5 minutes, checking frequently.
- Once baked, turn off the oven and prop the oven door open halfway. Allow the cheesecake to sit in the warm oven for 10 minutes to cool gradually. Then, remove it from the oven and water bath, placing it on a wire rack to cool at room temperature for at least 1 hour.
- Set your oven broiler to low. Gently warm the hot fudge sauce in the microwave for a few seconds to make it easily pourable, then spread it evenly over the top of the cooled cheesecake.
- Evenly spread the remaining 2 cups of mini marshmallows over the hot fudge layer.
- Place the cheesecake under the broiler. Watch continuously and toast the marshmallows until they turn a light golden brown and are slightly charred, typically taking 30-60 seconds. Broilers vary, so do not leave unattended to prevent burning.
- Allow the cheesecake to cool completely at room temperature after broiling. Then, transfer it to the refrigerator and chill for 4-5 hours, or preferably overnight, for optimal setting and flavor development.
- Once thoroughly chilled, run a thin knife around the edge of the springform pan before releasing the ring. Slice, serve, and enjoy your spectacular S’mores Cheesecake!
Recipe Notes
Water Bath is Essential: Do not skip the water bath (Bain-Marie). It creates a moist environment that helps the cheesecake bake evenly and prevents the surface from cracking, ensuring a smooth, beautiful finish.
Foil Protection: Always wrap your springform pan tightly with heavy-duty aluminum foil to ensure no water seeps into the crust during the water bath. A soggy crust is easily avoidable with proper wrapping.
Storage: Store any leftover S’mores Cheesecake tightly covered in the refrigerator for up to 5 days. For longer storage, you can freeze it for up to 2 months. Wrap it well in plastic wrap and then foil before freezing. Thaw overnight in the refrigerator before serving to maintain the best texture and flavor.
Nutrition Facts
(Approximate values per serving, based on 12 servings)
- Calories: 725 kcal
- Carbohydrates: 69g
- Protein: 9g
- Fat: 47g
- Saturated Fat: 27g
- Polyunsaturated Fat: 2g
- Monounsaturated Fat: 12g
- Trans Fat: 0.3g
- Cholesterol: 148mg
- Sodium: 427mg
- Potassium: 238mg
- Fiber: 1g
- Sugar: 50g
- Vitamin A: 1595 IU
- Vitamin C: 0.3mg
- Calcium: 140mg
- Iron: 1mg
Disclaimer: Nutritional information is an estimate and can vary based on specific ingredients and preparation methods.
