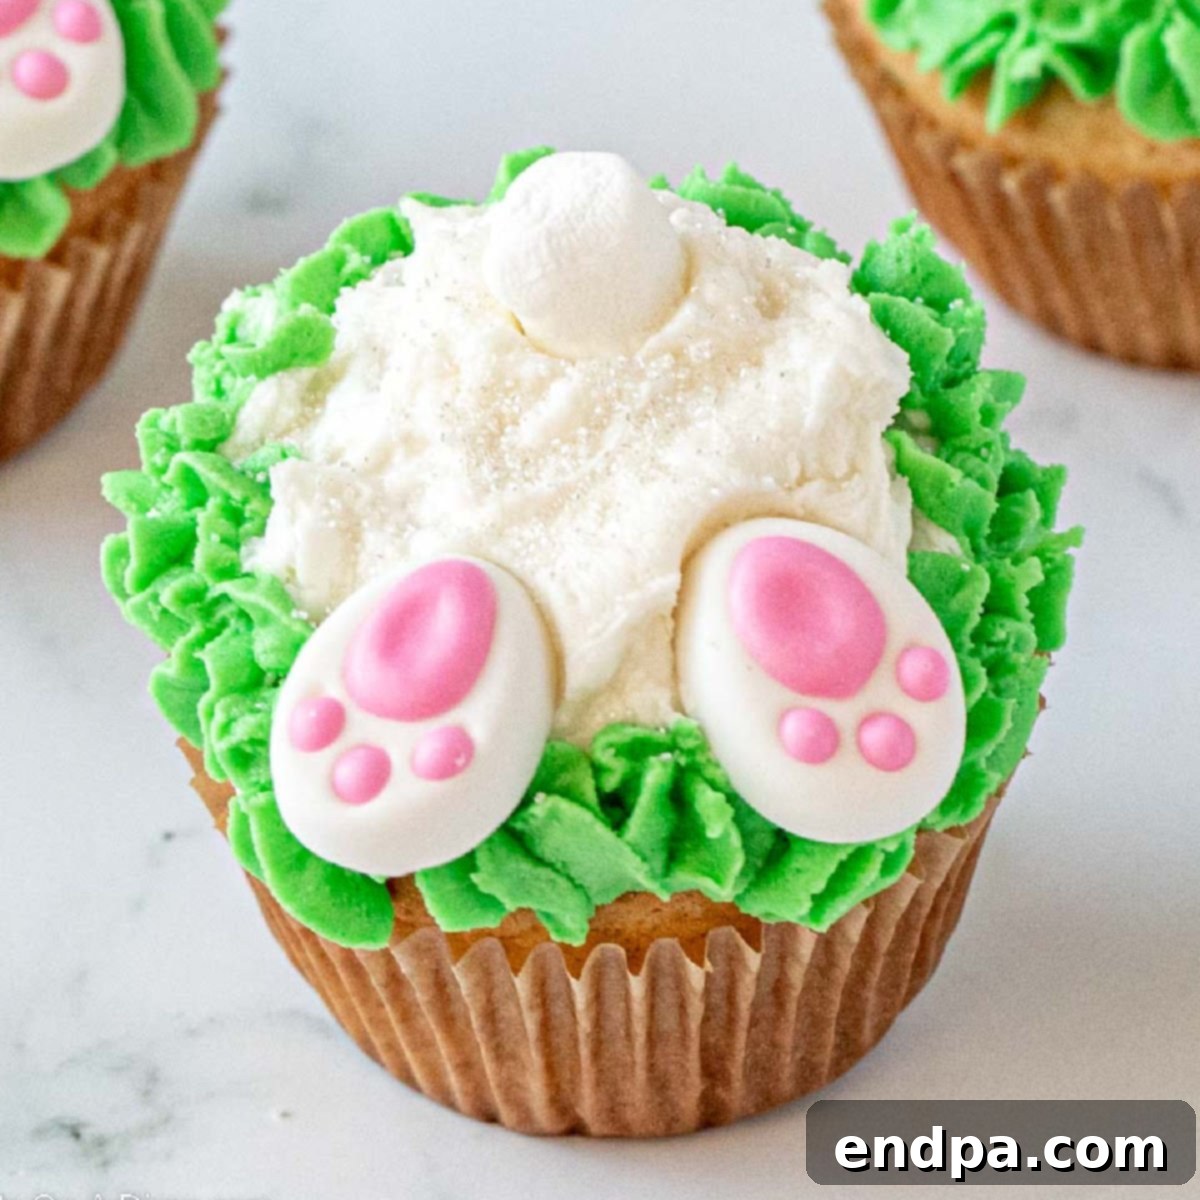
Adorable Bunny Butt Cupcakes: The Ultimate Easter Treat
Get ready to delight everyone this Easter with these utterly charming and easy-to-make Bunny Butt Cupcakes. These delicious homemade cupcakes are transformed into whimsical little bunnies, complete with fluffy tails and adorable feet, making them the *perfect Easter treat* for celebrations, school parties, or simply a fun family activity. Forget complicated desserts; these festive little bunny treats come together in just a few simple steps, promising smiles and sweet indulgence.
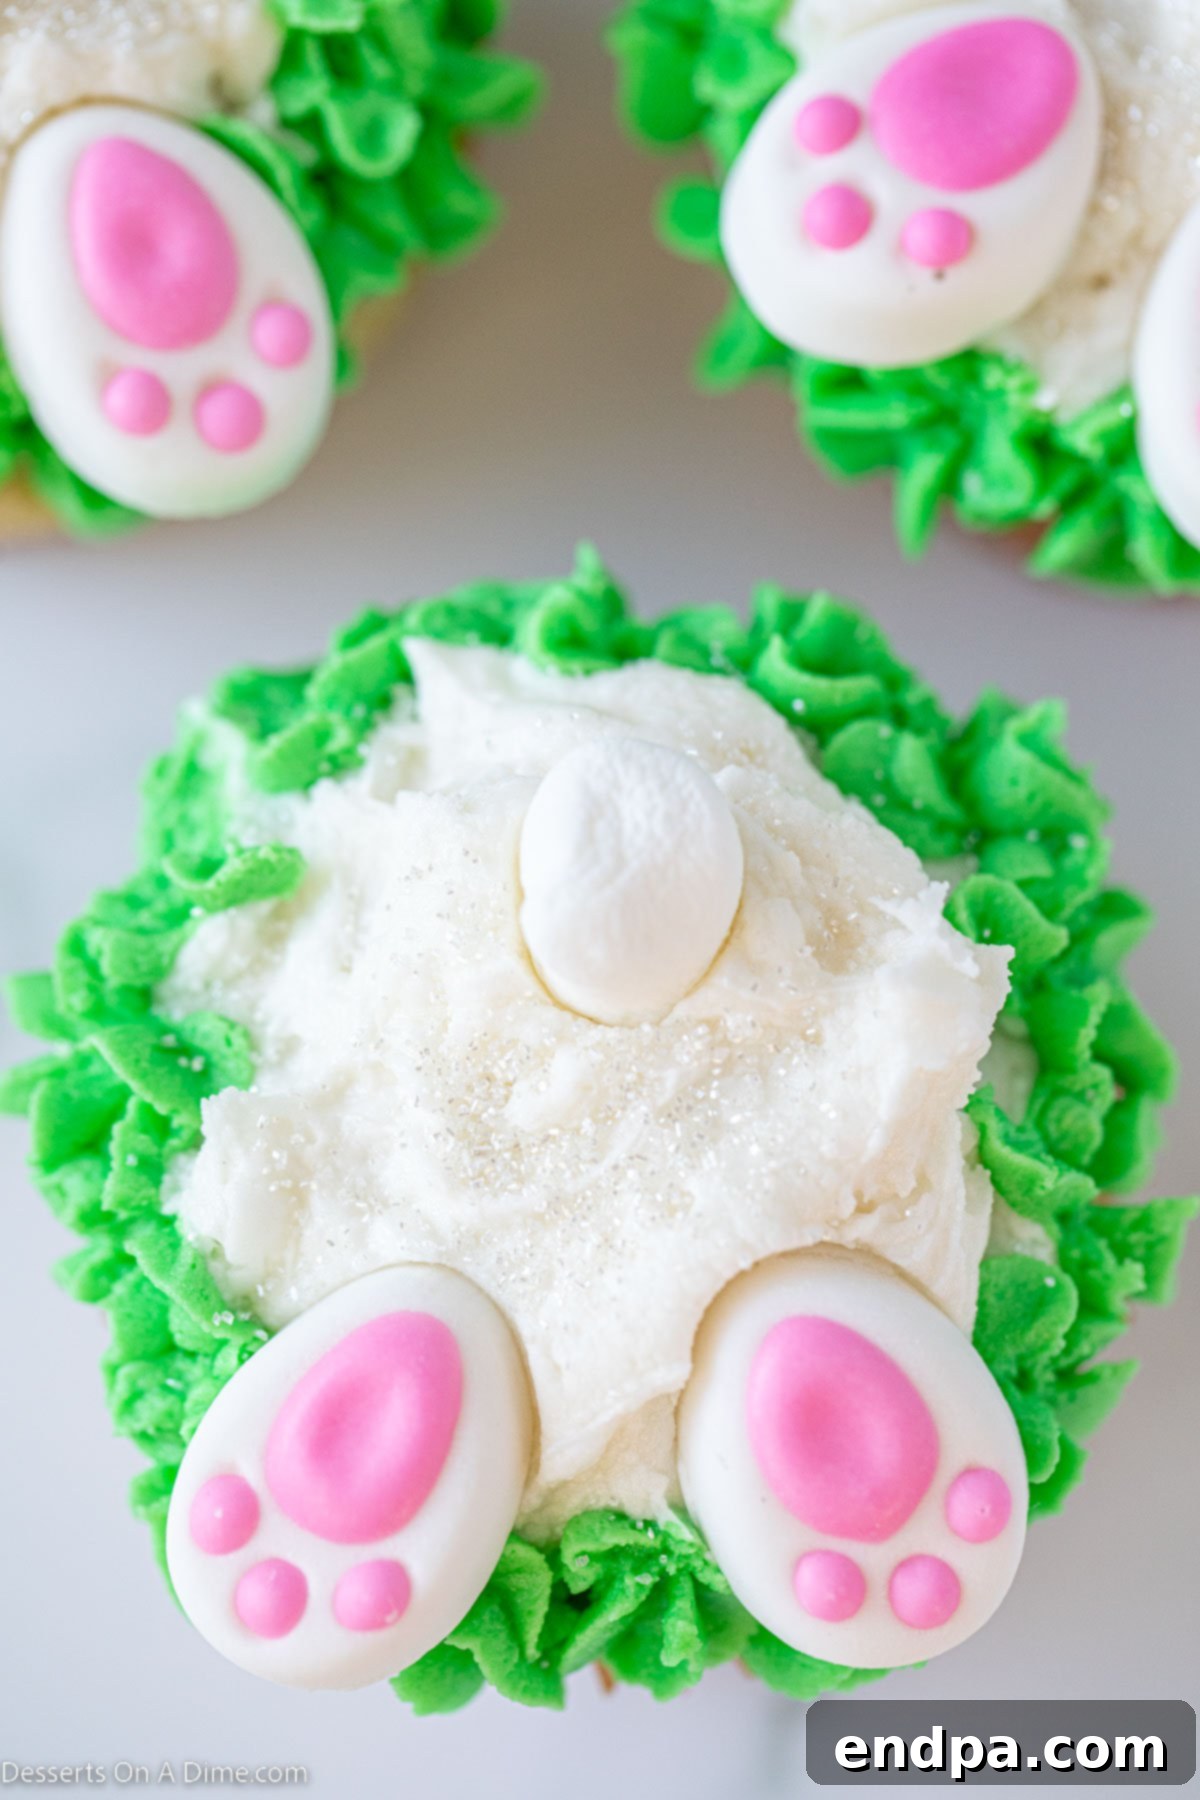
These darling cupcakes are not only cute but also incredibly simple to create, making them an ideal project for bakers of all skill levels. Their festive appearance makes them a fantastic dessert to bring to any Easter gathering, from a casual family lunch to a grand holiday party. We cherish the tradition of making these yearly, often alongside other beloved Easter treats like Crock Pot Easter Candy Clusters and a festive Easter Cookie Cake.
Table of Contents
- What Are Bunny Butt Cupcakes?
- Why You’ll Love This Recipe
- Ingredients for Success
- The Cupcake Base
- Homemade Buttercream Icing
- Fun Bunny Decorations
- Creative Variations & Customizations
- Step-by-Step Guide: How to Make Bunny Butt Cupcakes
- Storage Tips for Freshness
- How Long Will Bunny Butt Cupcakes Last?
- Pro Baking Tips for Perfect Cupcakes
- Frequently Asked Questions (FAQ)
- More Festive Easter Desserts
What Are Bunny Butt Cupcakes?
At their core, Bunny Butt Cupcakes are charmingly decorated cupcakes designed to resemble the hindquarters of an Easter bunny burrowing into the grass. The concept is simple yet incredibly effective: a basic, moist cupcake serves as the foundation, which is then generously frosted with a vibrant green “grass” and a white “bunny butt.” The magic truly happens with the addition of a mini marshmallow for the fluffy tail and two small icing bunny feet peeking out from the “grass.” This whimsical design captures the playful spirit of Easter, making these cupcakes an instant hit with both children and adults alike. They are not just a dessert; they are a delightful conversation starter and a truly memorable treat, perfect for any holiday table. We also enjoy making traditional Easter Bunny Cupcakes, but these offer a unique and humorous twist!
Why You’ll Love This Recipe
These Bunny Butt Cupcakes aren’t just a dessert; they’re an experience! Here’s why this recipe will become your go-to Easter favorite:
- Incredibly Adorable: The unique “bunny butt” design is undeniably cute and brings a touch of whimsy to any Easter celebration. They’re guaranteed to be the star of the dessert table!
- Surprisingly Easy: Don’t let their elaborate look fool you. This recipe utilizes a cake mix for the cupcakes and a straightforward homemade buttercream, simplifying the process significantly.
- Perfect for All Ages: Kids love the playful bunny theme, and adults appreciate the delicious taste and festive presentation. It’s a dessert that truly appeals to everyone.
- Customizable Fun: From choosing your favorite cake flavor to getting creative with the “grass” and bunny feet, there are plenty of opportunities to personalize these treats.
- Crowd-Pleaser: Whether you’re hosting an Easter brunch, contributing to a potluck, or just enjoying a family dessert, these cupcakes are always a hit and disappear quickly!
- Baking Tradition: They are perfect for starting a fun new family baking tradition that creates lasting memories year after year.
Ingredients for Success
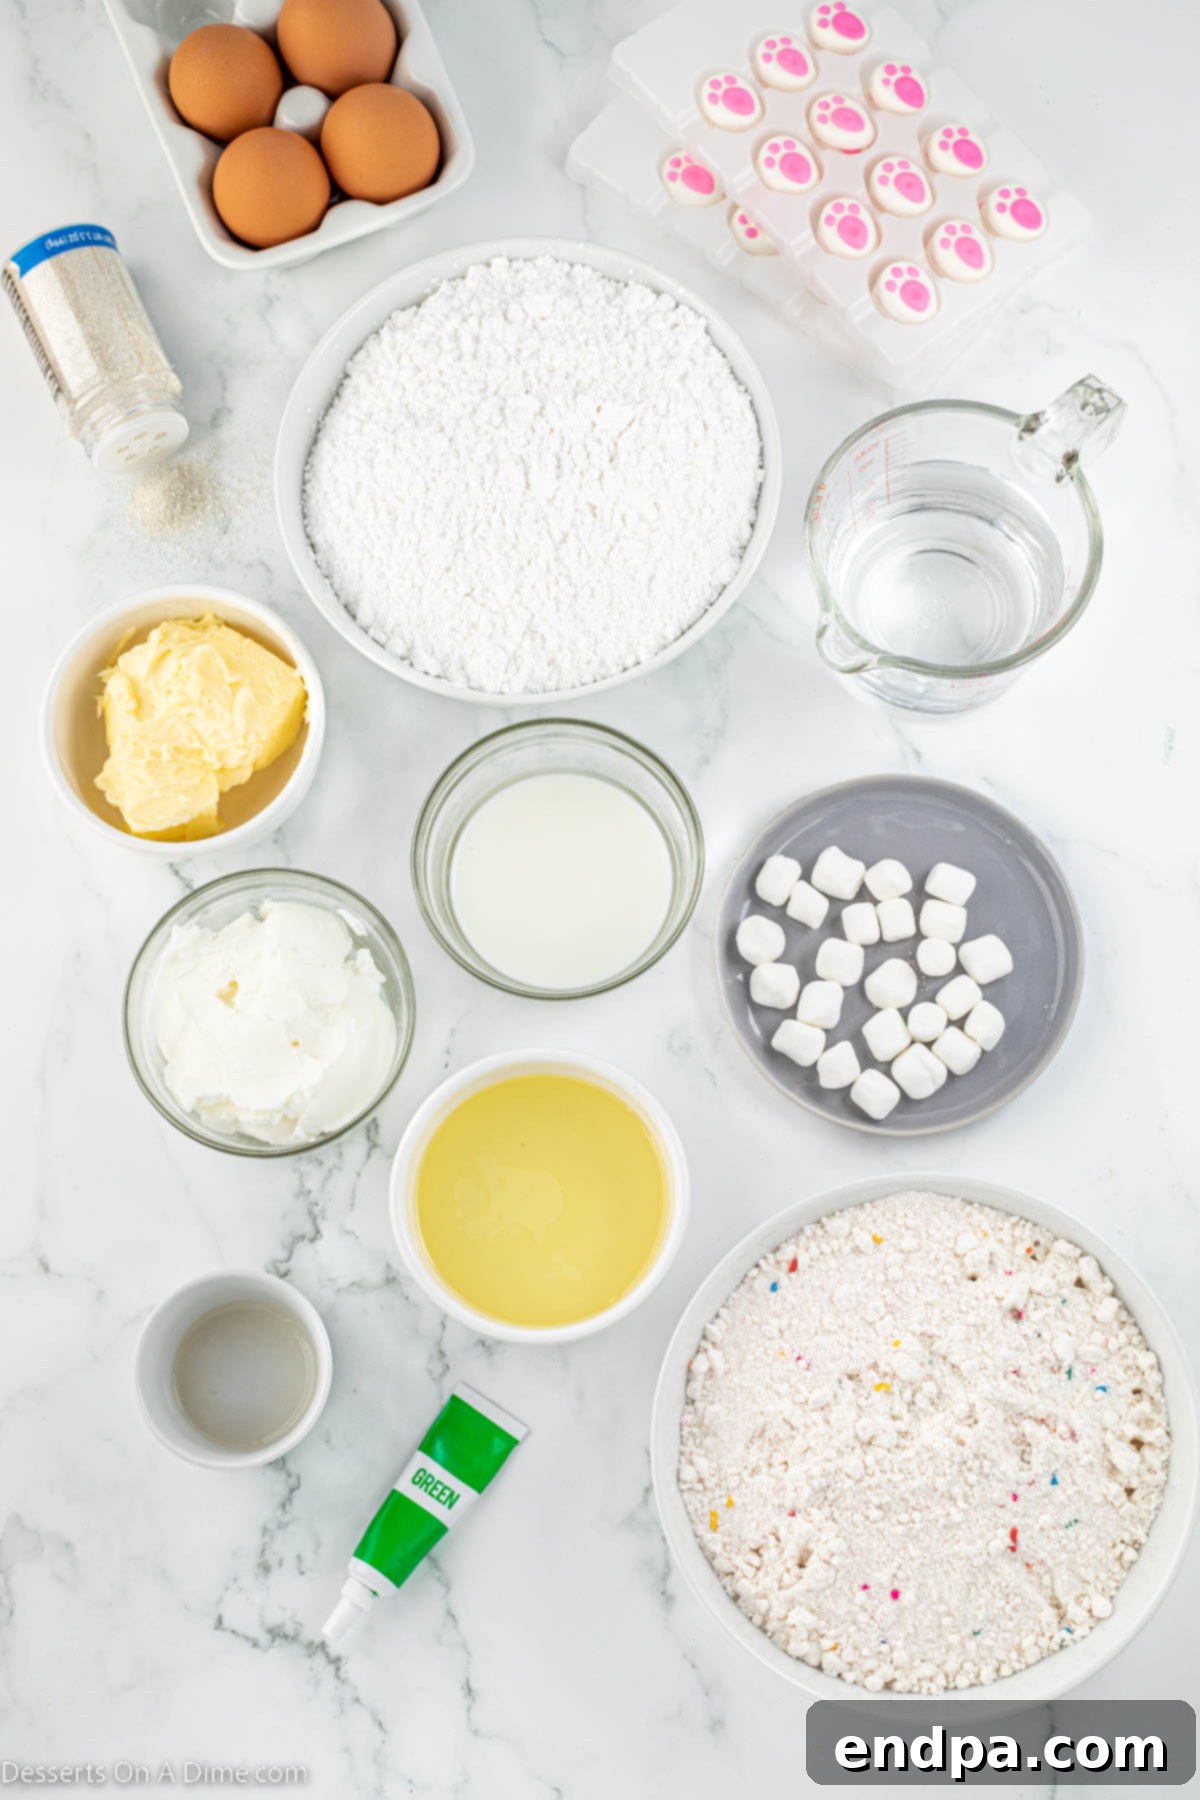
Crafting these adorable Bunny Butt Cupcakes requires a few key components for both the cupcakes themselves, the creamy frosting, and the whimsical decorations. Here’s a detailed look at what you’ll need to gather:
The Cupcake Base
- Funfetti Cake Mix: This vibrant mix adds an extra touch of festivity and fun to the cupcakes with its colorful sprinkles. You’ll also need the additional ingredients typically required to prepare the cake mix, such as eggs, oil, and water, according to the package instructions. Feel free to use your favorite cake mix flavor, such as vanilla, lemon, or even carrot cake for an even more “bunny-like” twist!
Homemade Buttercream Icing
A smooth and stable buttercream is crucial for decorating. Our recipe ensures a fluffy, pipeable frosting:
- Butter: Make sure it’s softened at room temperature. This helps it cream smoothly with the shortening, preventing lumps and ensuring a light, airy texture.
- Solid Vegetable Shortening: This ingredient contributes to the frosting’s stability, especially in warmer temperatures, and helps achieve a perfectly white color.
- Clear Vanilla Extract: Using clear vanilla extract is key if you want your white frosting to remain pristine white. Regular vanilla extract can give your frosting a slightly off-white or yellowish tint.
- Confectioners’ Sugar (Powdered Sugar): Sifting the confectioners’ sugar before using it is a game-changer. It removes any small lumps, ensuring your buttercream is silky smooth and easy to pipe.
- Milk: Whole milk is recommended for the richest flavor and best consistency, but you can certainly use reduced-fat milk or even heavy whipping cream if preferred. The milk helps thin the frosting to the perfect consistency.
- Green Gel Food Coloring: Gel food coloring is superior to liquid food coloring for frosting because it delivers vibrant color without adding excess liquid, which could alter the frosting’s consistency. A few drops are usually enough to achieve a beautiful “grass” green.
Fun Bunny Decorations
- White Sanding Sugar: This adds a lovely sparkle and a subtle textural crunch to the “bunny butt” portion of the cupcake, mimicking a fluffy tail. You could also use white sprinkles for a similar effect.
- Mini Marshmallows: These are absolutely perfect for creating the adorable, fluffy bunny tails. Their small size is just right for a cupcake.
- Pre-made Icing Bunny Feet: These convenient decorations can often be found in the baking aisle of most grocery stores, especially seasonally around Easter. They add an instant touch of professionalism and cuteness.
The complete ingredient list with precise measurements is provided in the recipe card towards the bottom of the page, making it easy to gather everything you need.
Creative Variations & Customizations
While the classic Bunny Butt Cupcakes are undeniably charming, don’t hesitate to get creative and customize them to your liking. Here are a few ideas to inspire you:
- DIY Bunny Feet: If pre-made bunny feet are unavailable or you prefer a homemade touch, you can easily craft them yourself. Simply melt white chocolate chips (or white candy melts) in the microwave and spread small oval shapes onto parchment paper. Allow them to set completely. Once firm, use pink frosting or melted pink candy melts to pipe small “paw prints” onto the white ovals. This method adds a lovely personal touch!
- Cupcake Flavors: While Funfetti is a fantastic choice for a festive look, feel free to use any cupcake flavor you love. Vanilla, chocolate, strawberry, or even lemon cupcakes would work beautifully. For a truly unique and seasonal twist, consider using a carrot cake mix – bunnies love carrots, after all!
- “Grass” Alternatives: Instead of green frosting, you can use shredded coconut dyed green with food coloring. This offers a different texture and a delicious coconut flavor for those who enjoy it. Simply toss shredded coconut with a few drops of green food coloring in a sealed bag until evenly coated.
- Sprinkle Swap: If white sanding sugar isn’t available, or you’re looking for another textural element, use regular white sprinkles or even a mix of pastel Easter sprinkles on the “bunny butt” for a different look.
- Dietary Adjustments: For guests with dietary restrictions, many gluten-free or dairy-free cake mixes and frosting alternatives are available. Ensure any pre-made decorations also align with these needs.
- Frosting Flavors: Beyond vanilla, you could add other flavor extracts to your buttercream, such as almond or a hint of lemon, to complement your chosen cupcake flavor.
These variations allow you to tailor the Bunny Butt Cupcakes to your taste preferences and available ingredients, ensuring they are always a personalized and delightful treat.
Step-by-Step Guide: How to Make Bunny Butt Cupcakes
Creating these festive cupcakes is a fun and straightforward process. Follow these easy steps to bring your adorable bunny butts to life!
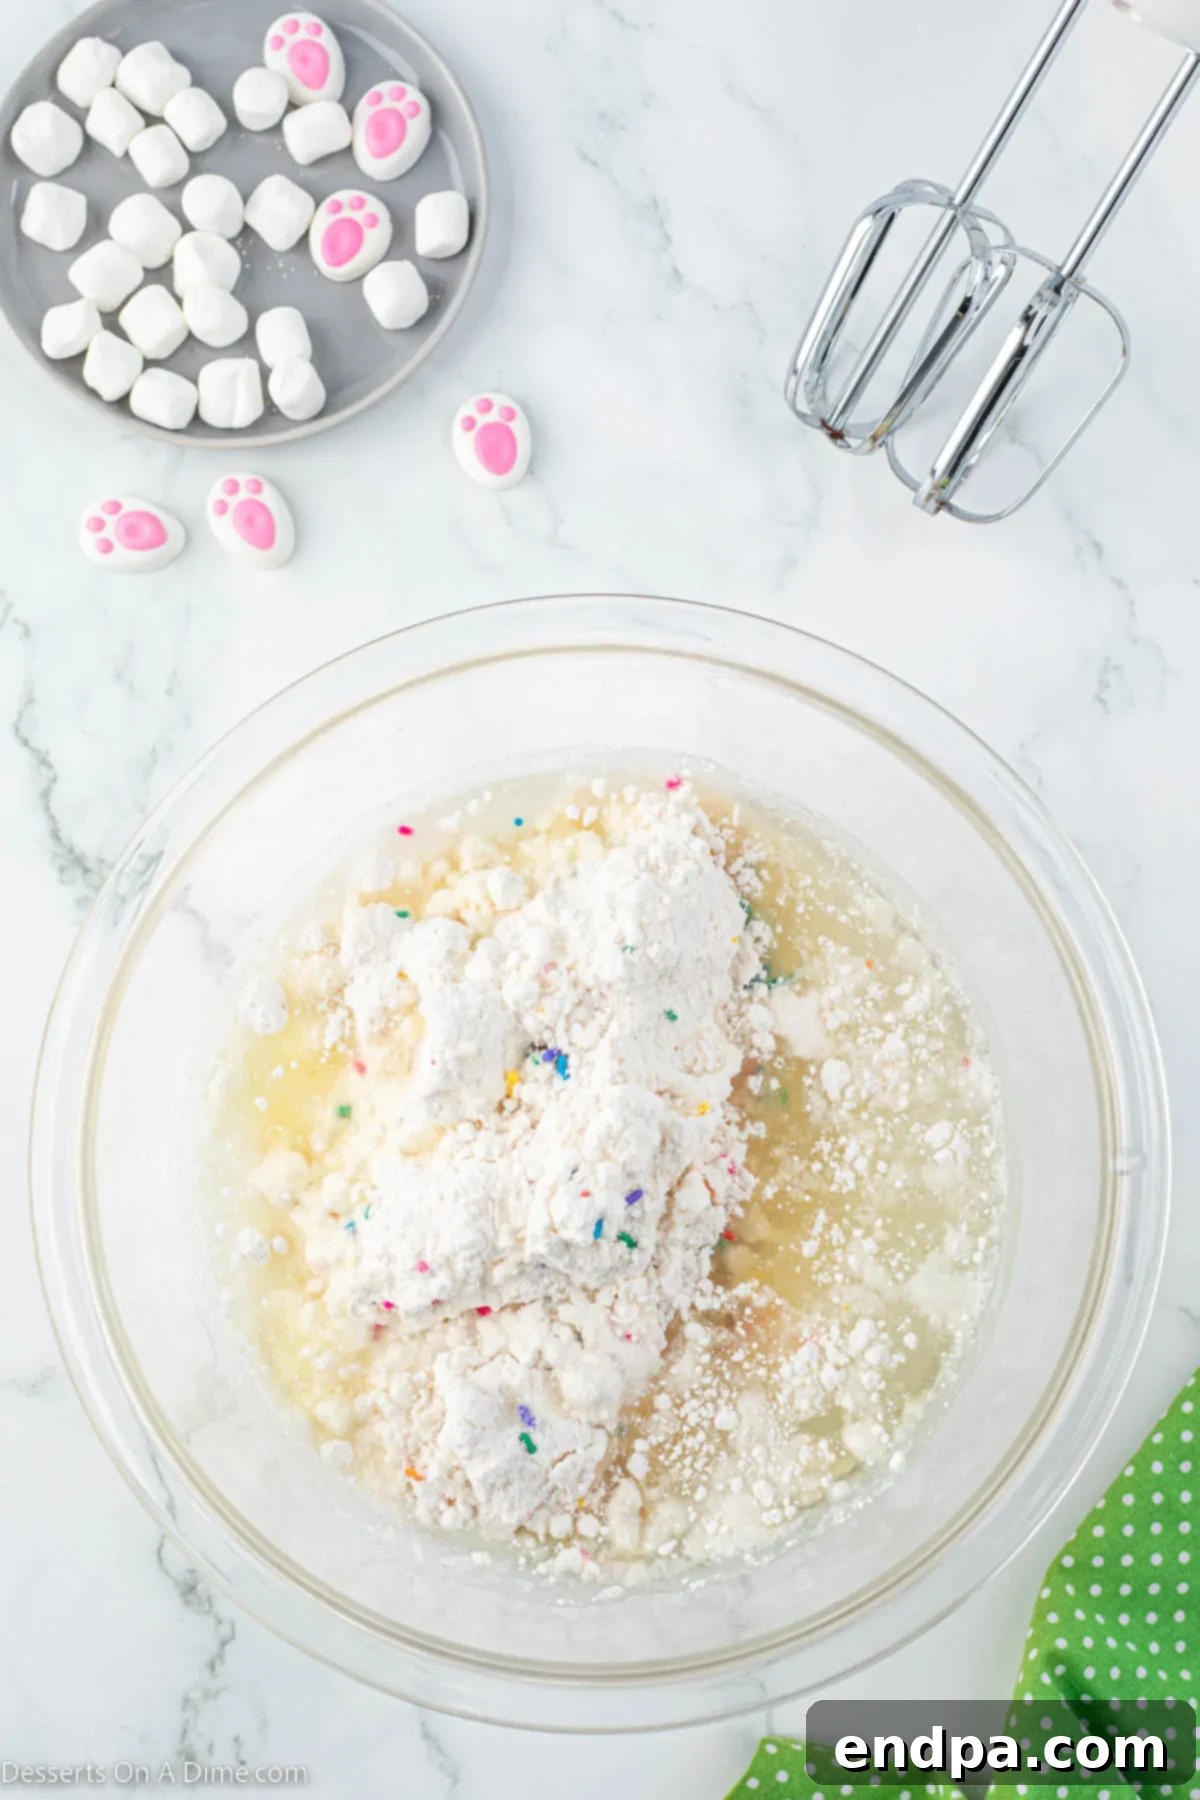
Step 1: Bake Your Cupcakes. Begin by preparing the Funfetti cake batter according to the instructions on the cake mix package. Ensure all wet and dry ingredients are properly combined until smooth, but be careful not to overmix, as this can lead to tough cupcakes.
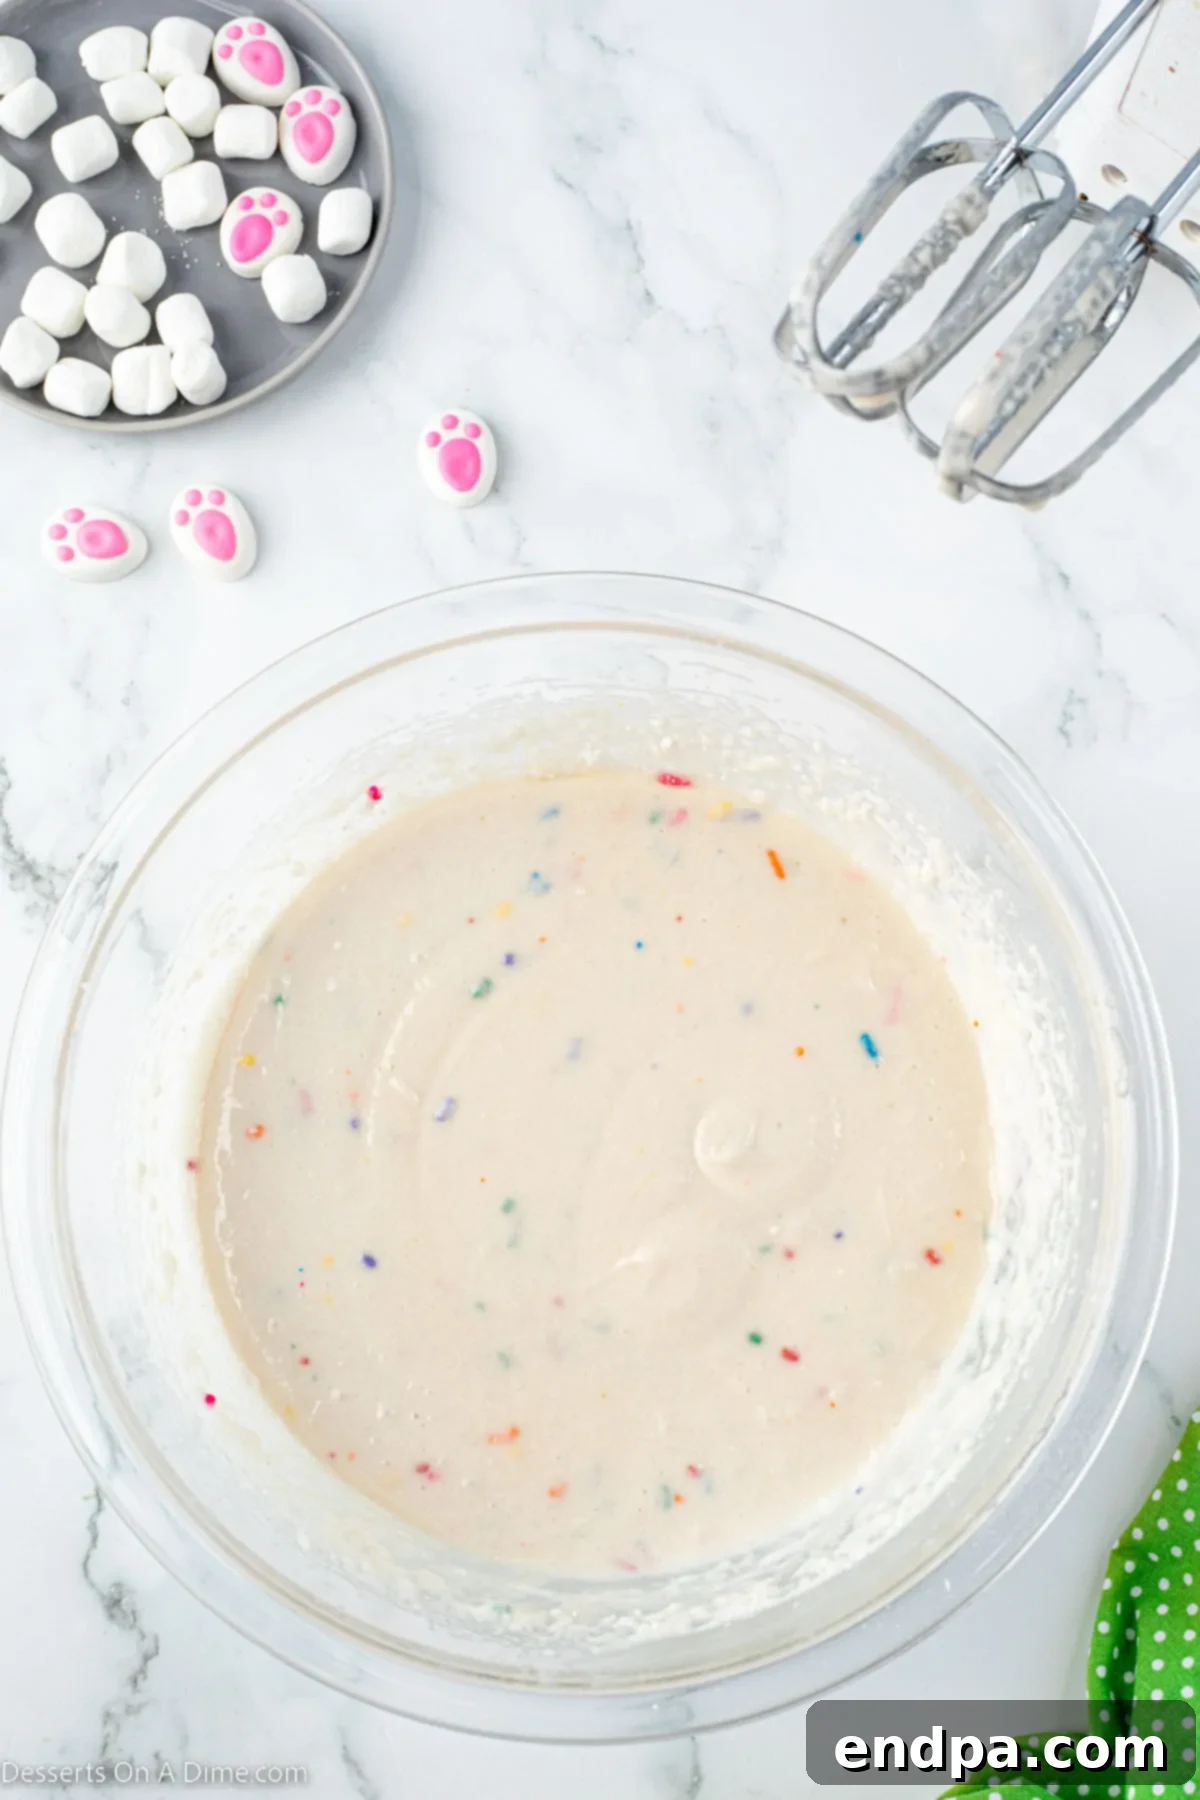
Step 2: Fill & Bake. Line a muffin pan with cupcake liners. Carefully spoon the prepared batter into each liner, filling them about two-thirds full. This ensures the cupcakes bake evenly and don’t overflow. Bake in the preheated oven according to the package directions, typically 18-22 minutes. Once baked, remove from the oven and allow the cupcakes to cool completely on a wire rack at room temperature before frosting. This is crucial for preventing melted frosting.
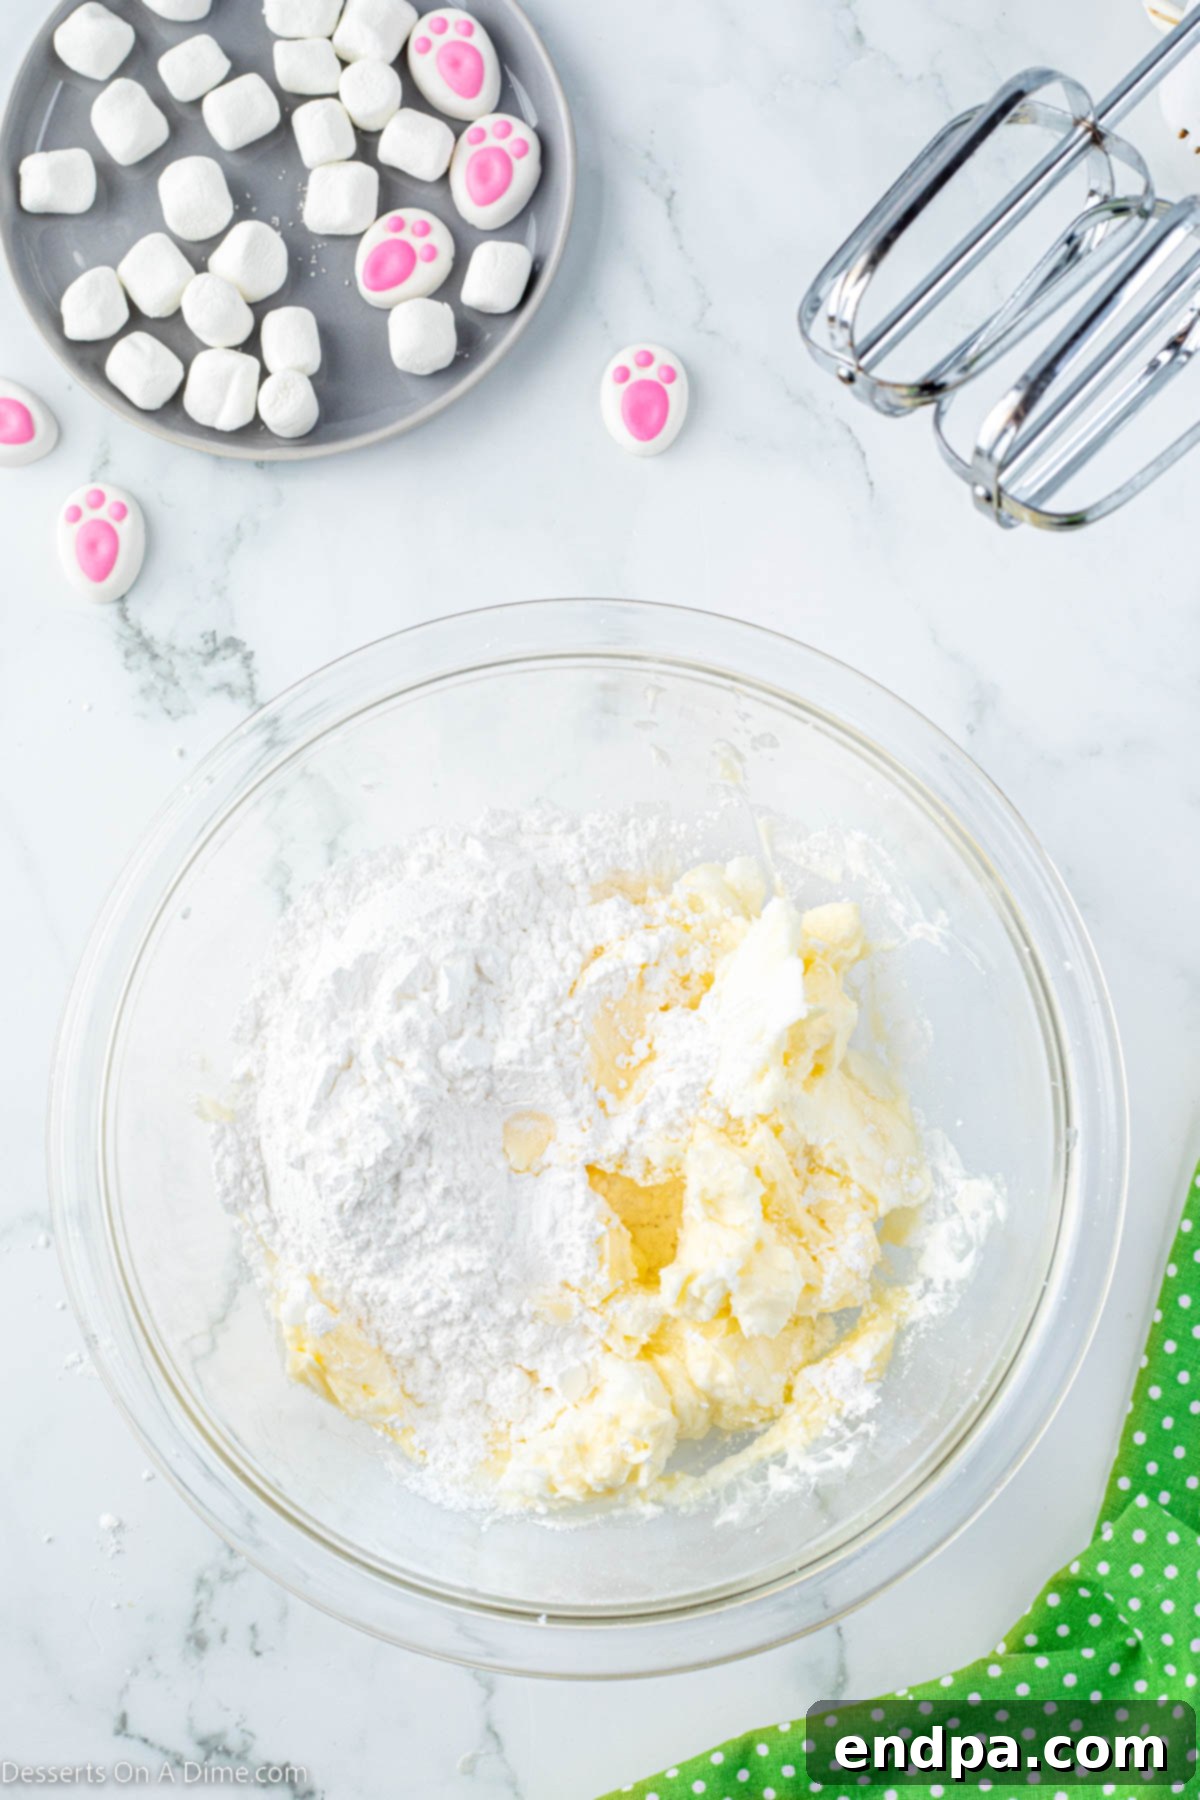
Step 3: Prepare the Buttercream Base. In a large mixing bowl, combine the solid vegetable shortening and softened butter. Using a stand mixer or an electric hand mixer, cream these two ingredients together until they are light, fluffy, and well combined. This process can take a few minutes.
Step 4: Create the Buttercream. Gradually add the sifted confectioners’ sugar, one cup at a time, to the butter and shortening mixture on low speed. Once all the sugar is incorporated, increase the speed to medium-high and beat until light and fluffy. Then, stir in the clear vanilla extract and milk, mixing until the frosting is smooth and reaches a perfect, spreadable consistency. If the frosting is too thick, add a tiny bit more milk; if too thin, add a tablespoon more confectioners’ sugar.
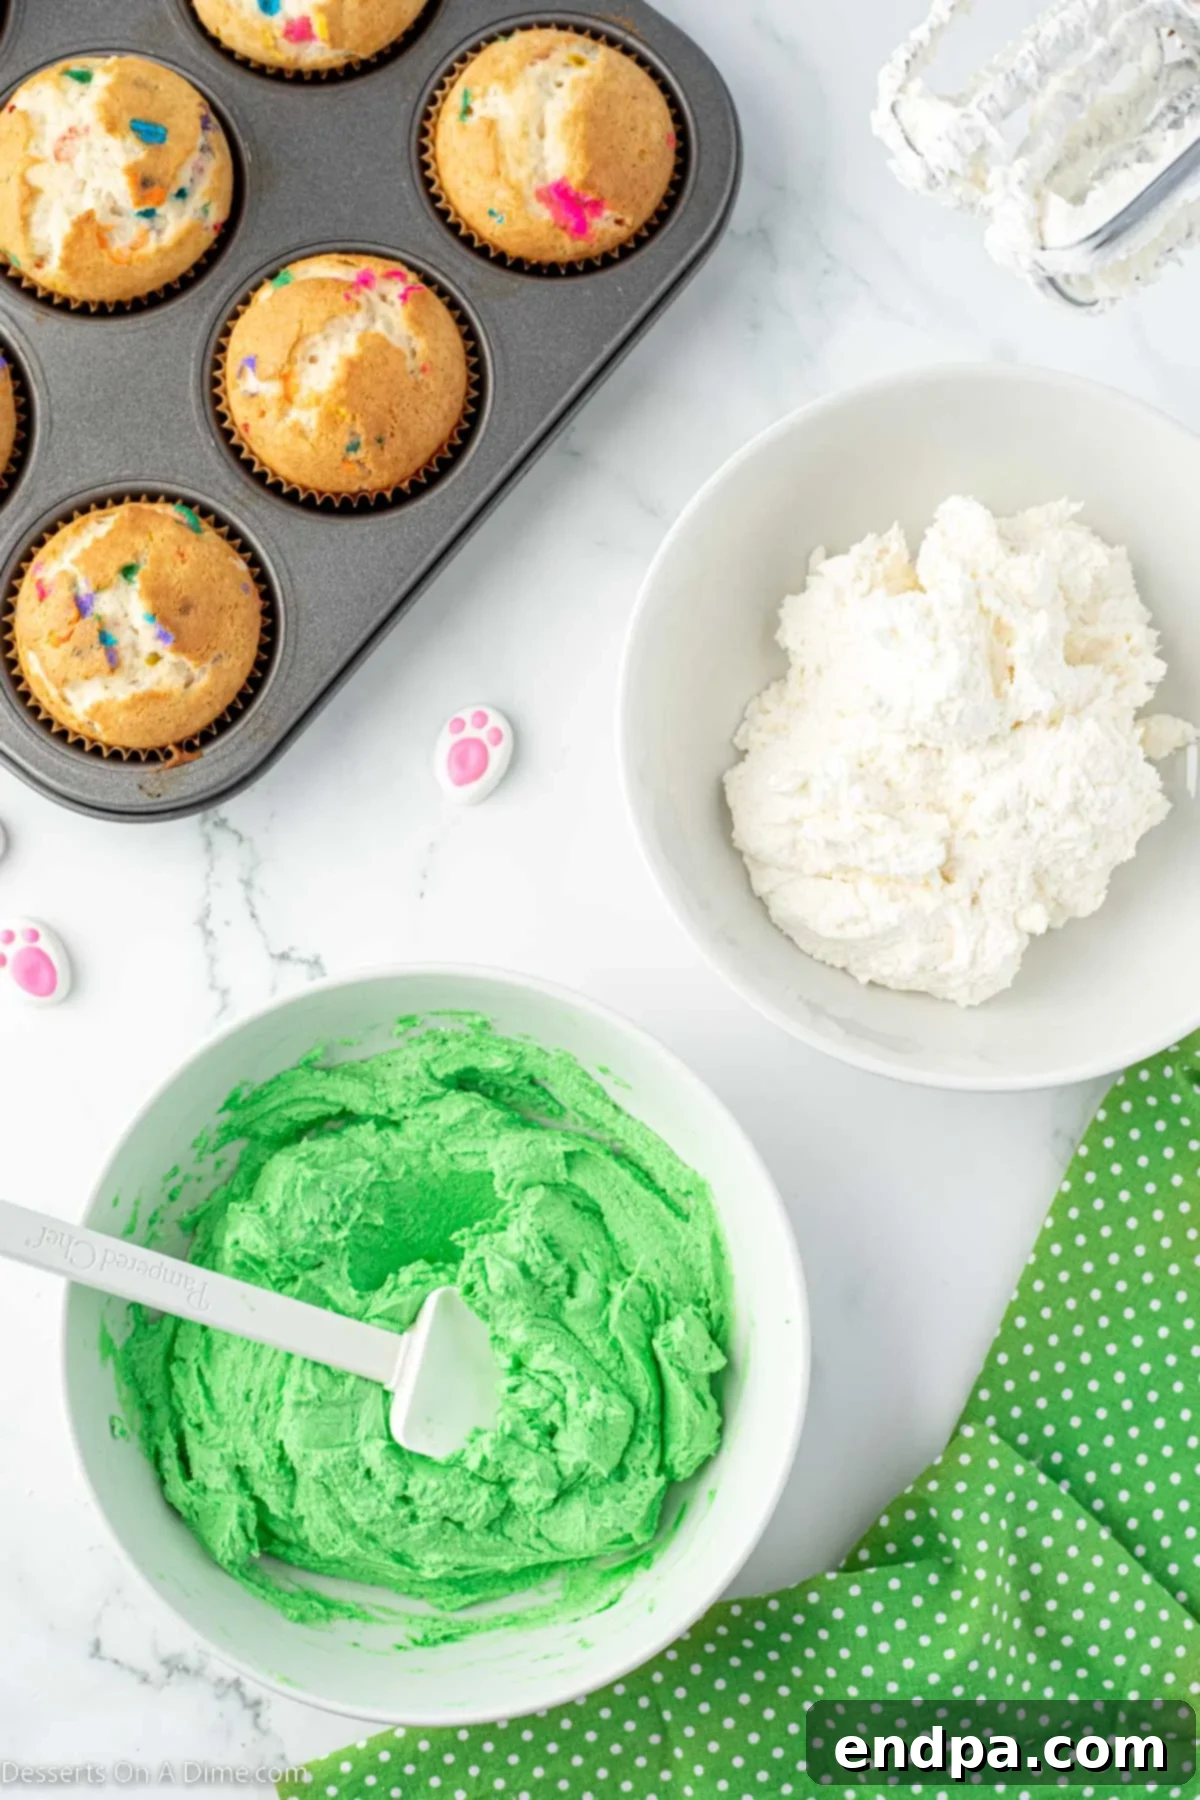
Step 5: Color the Frosting. Divide your freshly made buttercream icing into two separate mixing bowls. Leave one bowl of frosting white, as this will be used for the “bunny butt.” In the other bowl, add a few drops of green gel food coloring and stir until you achieve a bright, vibrant green color, perfect for the “grass.”
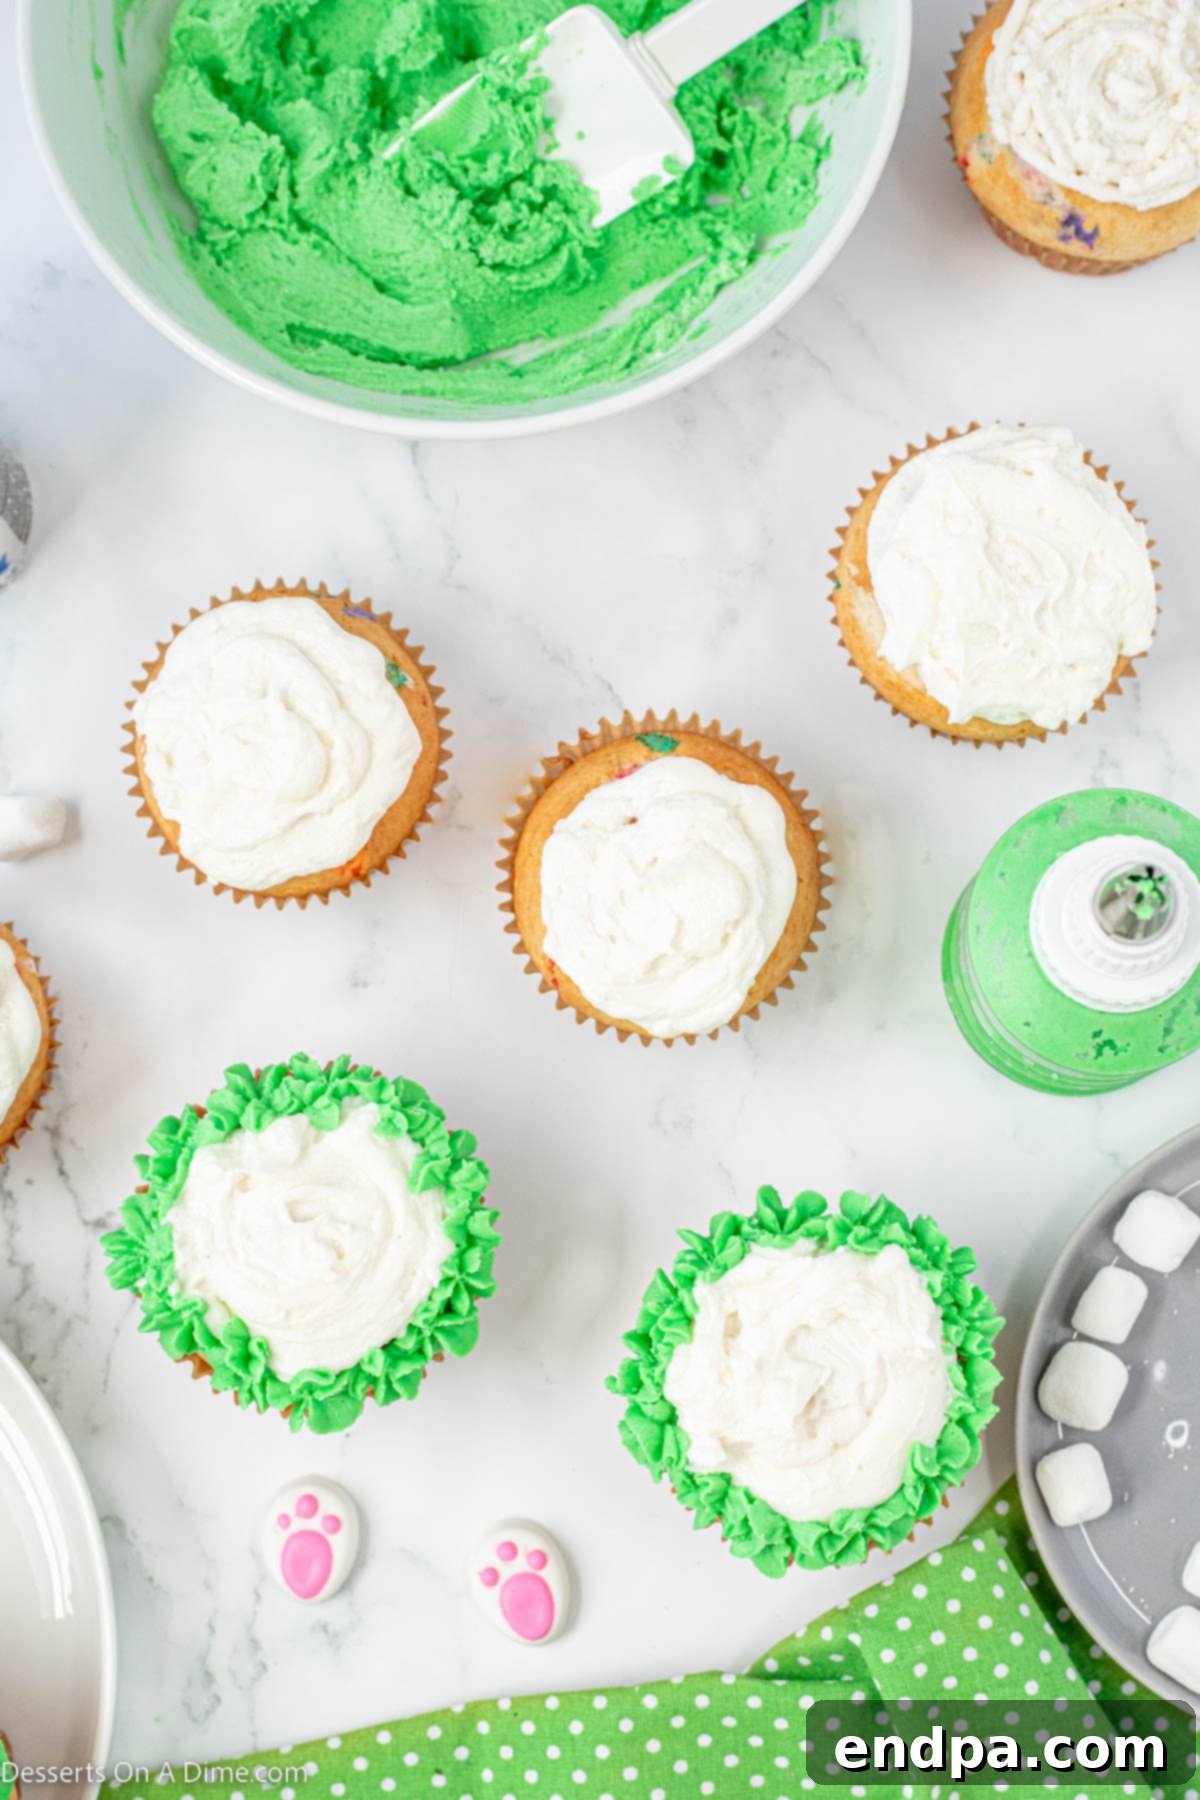
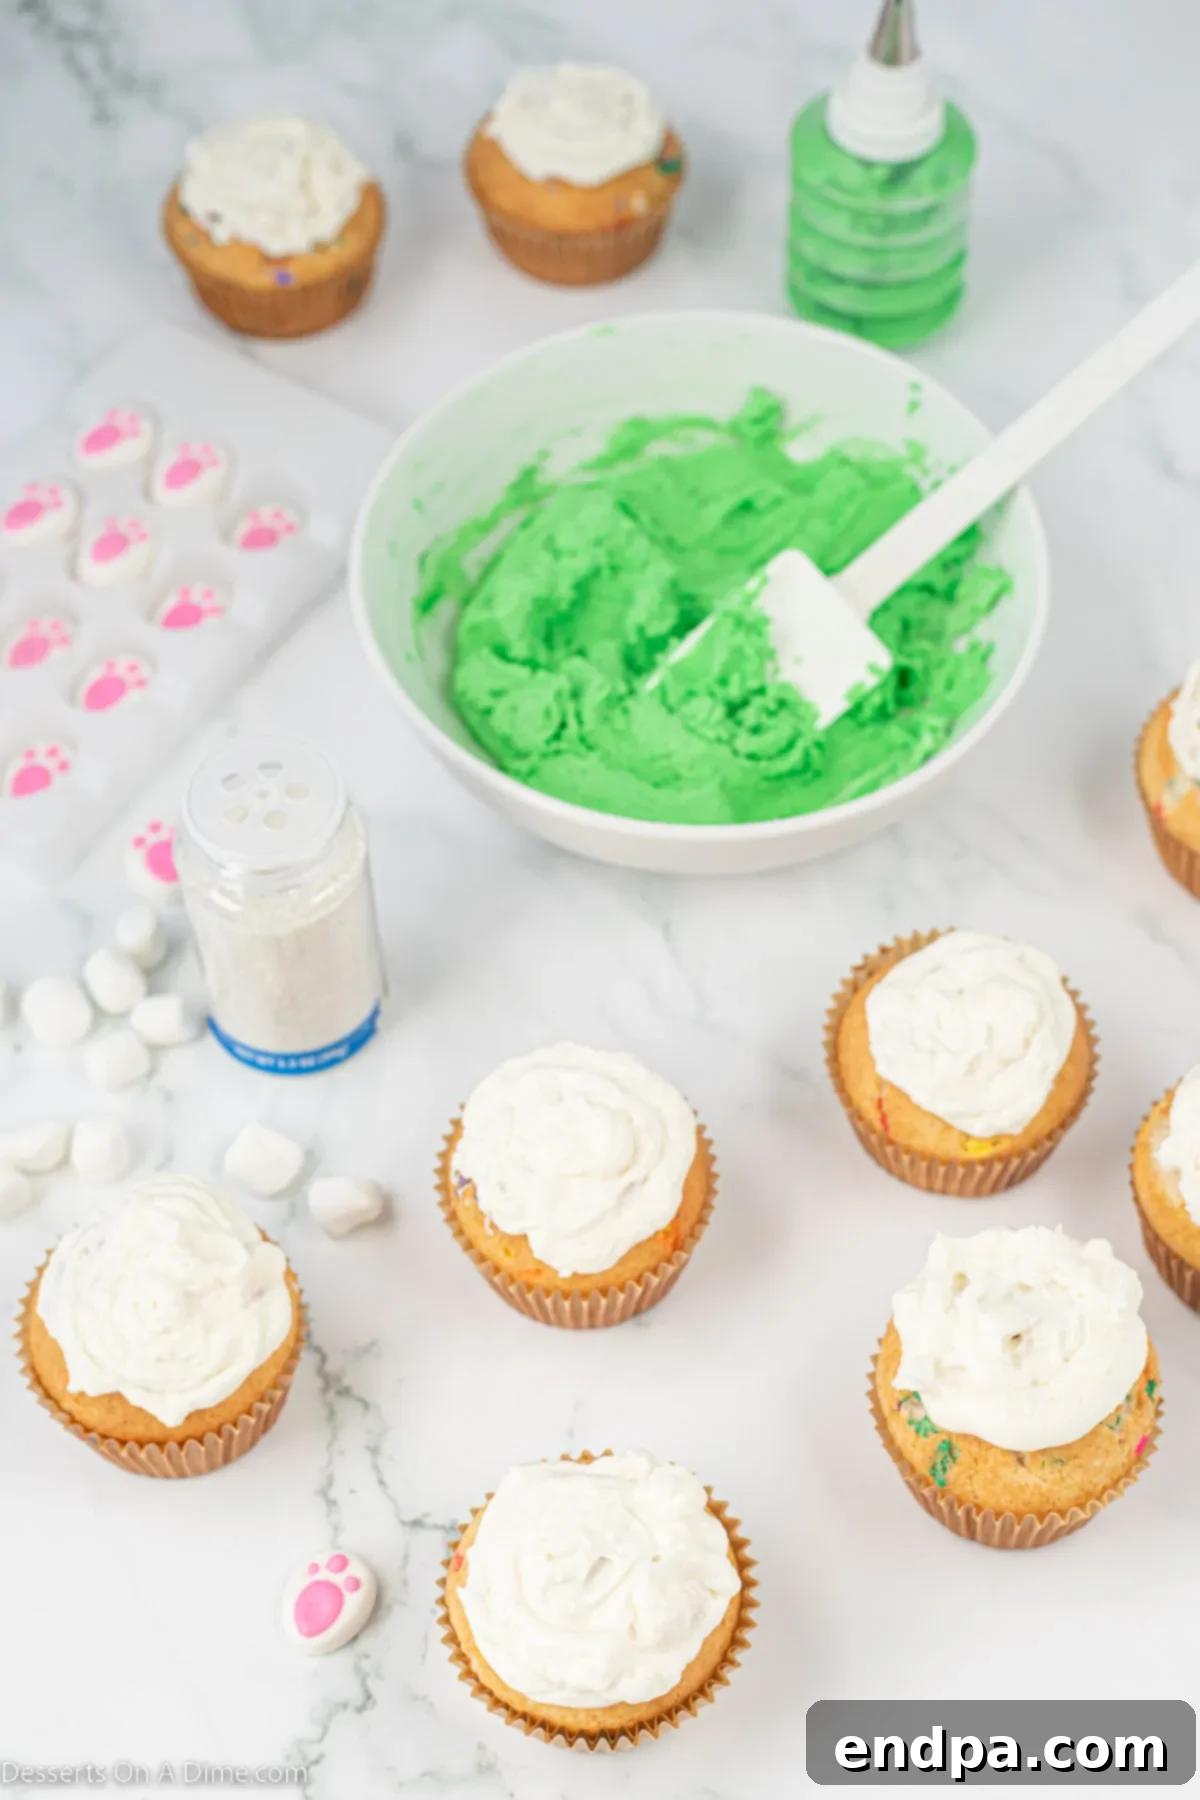
Step 6: Decorate the Base. Prepare two decorator’s bags: one with the green frosting and a star tip (to create the grass effect), and another with the white frosting and a round tip (for the bunny butt). With the white frosting, pipe a small, neat circle in the middle of each cooled cupcake. This circle will form the “bunny butt.” Immediately after piping the white frosting, gently sprinkle it with white sanding sugar (or white sprinkles) to create a soft, fluffy texture.
Step 7: Add the “Grass.” Using the green frosting and the star tip, carefully pipe “grass” around the white “bunny butt” circle. Create short, upward strokes to give the appearance of lush green grass. Cover the remaining exposed cupcake top with green frosting.
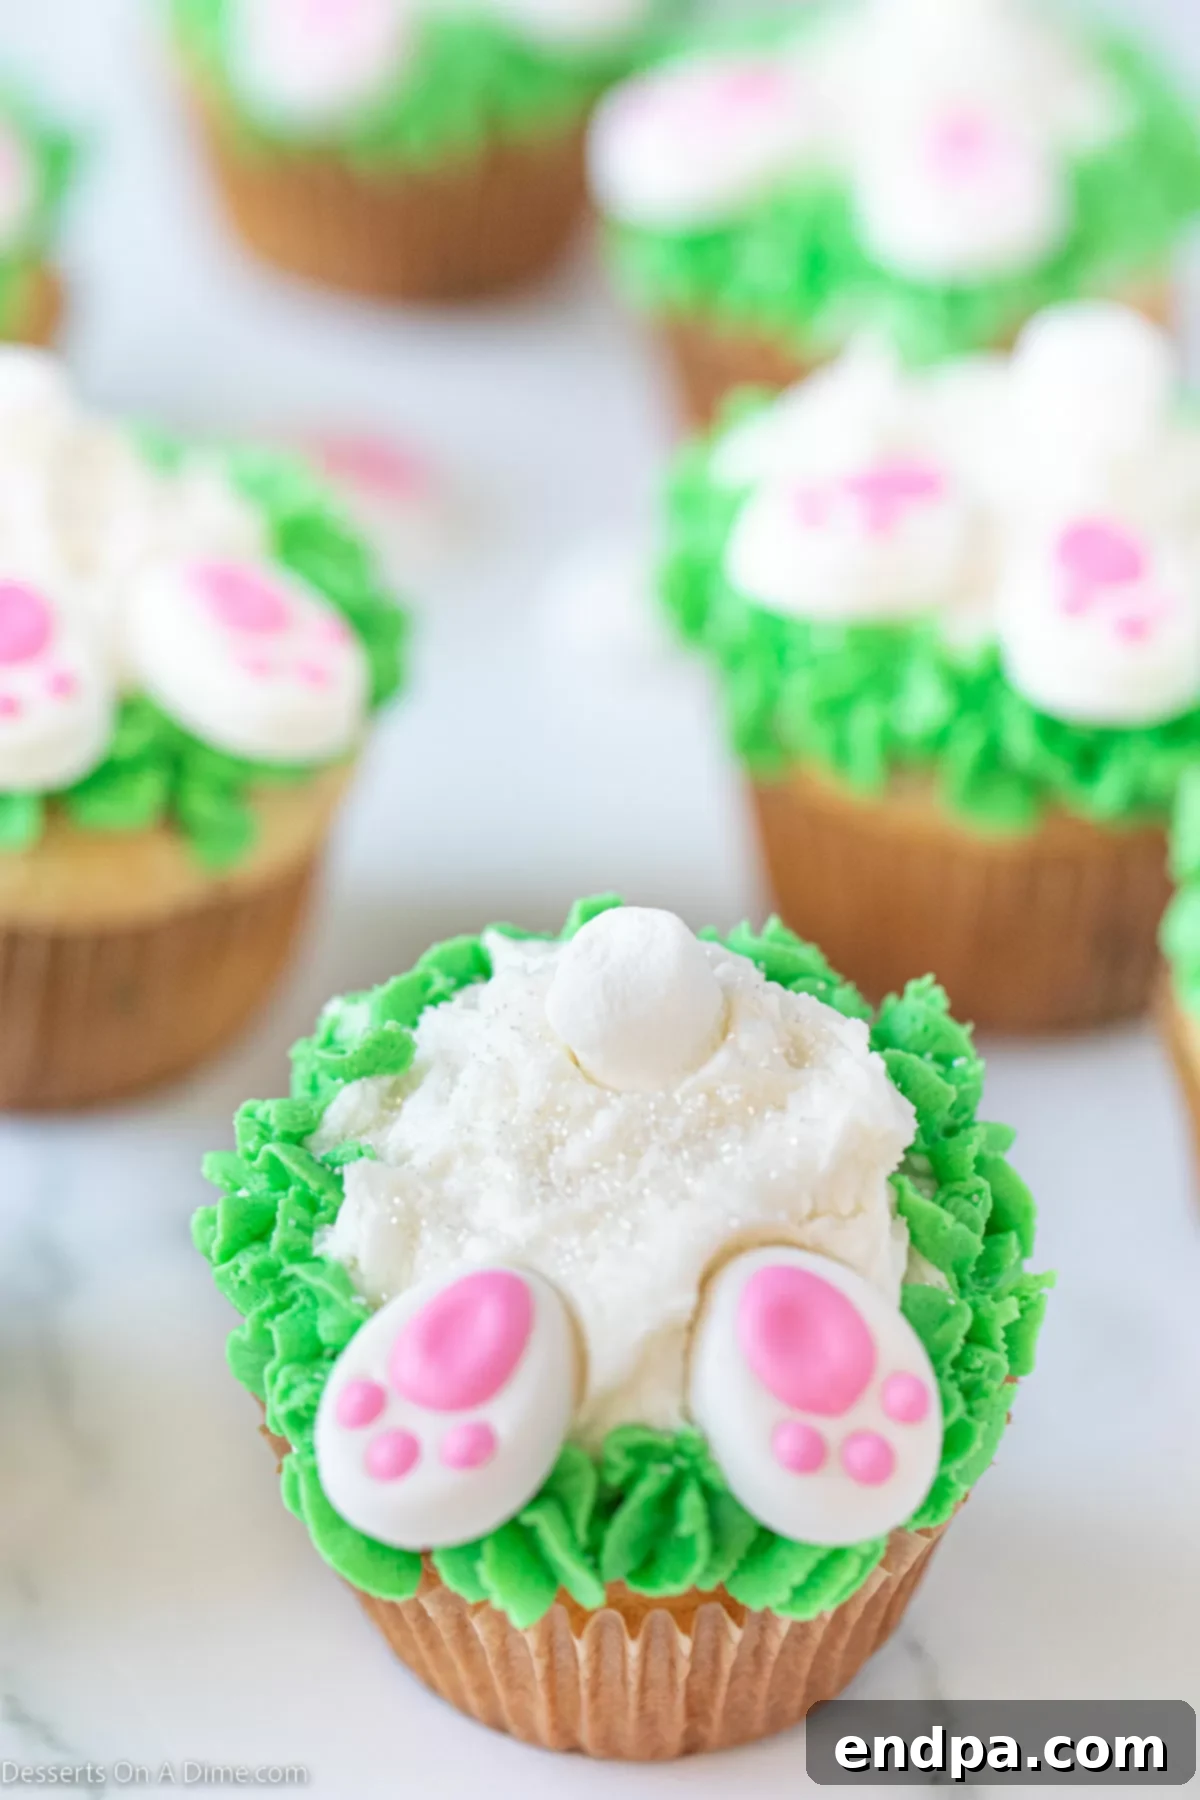
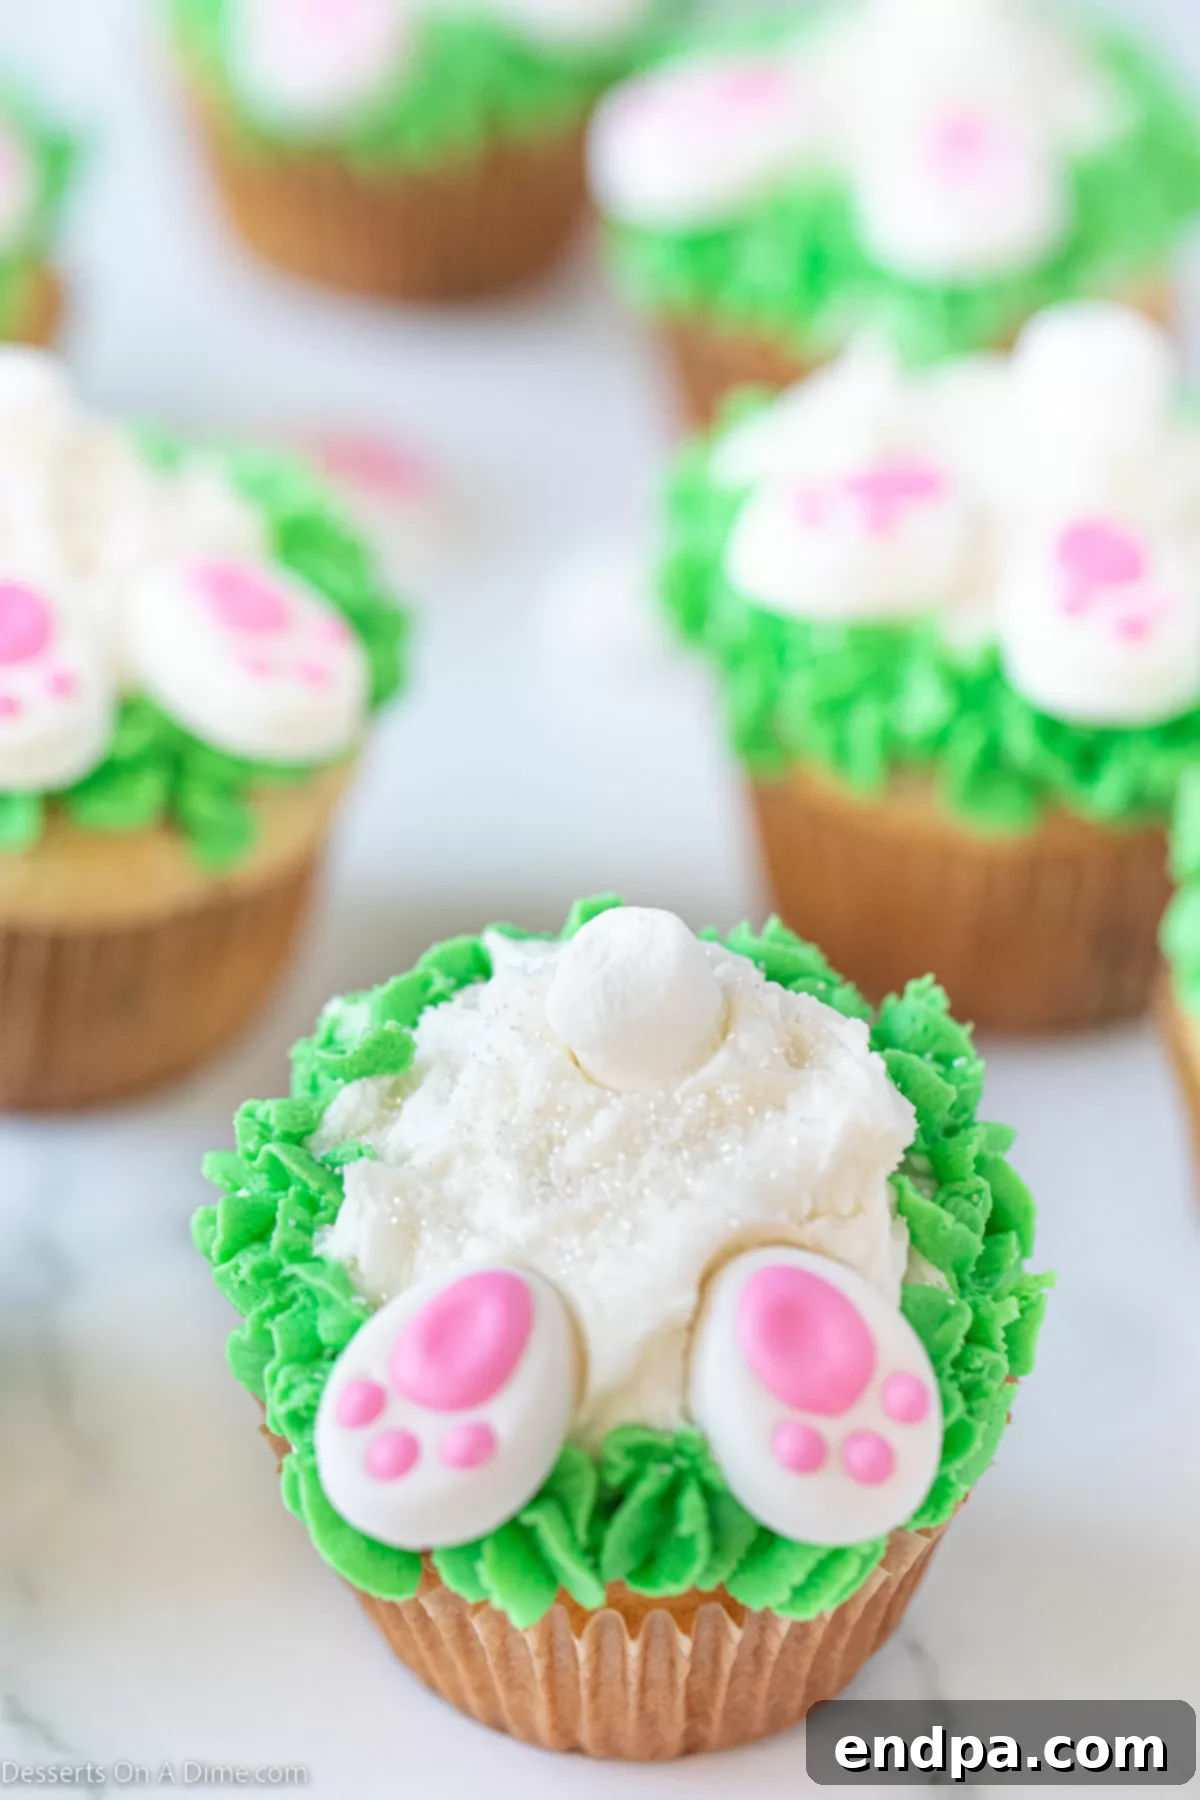
Step 8: Final Decorations. To complete the bunny look, gently place one mini marshmallow onto the white frosting circle to create the fluffy bunny tail. Then, carefully insert two pre-made icing bunny feet into the green “grass” frosting, positioning them as if the bunny is wiggling into its burrow. And voilà! Your adorable Bunny Butt Cupcakes are ready to be served and enjoyed!
Storage Tips for Freshness
Proper storage is essential to keep your Bunny Butt Cupcakes tasting fresh and looking fantastic for as long as possible. Here are some guidelines:
- Room Temperature: Unrefrigerated, these cupcakes will stay fresh for up to 2-3 days when stored in an airtight container at room temperature. A dedicated cupcake carrier is ideal as it keeps the frosting intact, but any container with a tight-fitting lid will work perfectly. Ensure they are out of direct sunlight and away from heat sources.
- Refrigeration: If you need to extend their shelf life beyond a few days, you can refrigerate the decorated cupcakes in an airtight container for up to a week. However, bring them back to room temperature for about 30 minutes before serving to ensure the cake is moist and the frosting is soft and flavorful.
- Freezing Undecorated Cupcakes: To prepare ahead of time, you can bake the cupcakes and freeze them *before* frosting. Allow them to cool completely, then wrap each cupcake tightly in plastic wrap and place them in a freezer-safe bag or container. They can be frozen for up to 2-3 months. Thaw them at room temperature for a few hours or overnight before decorating as usual. This method ensures maximum freshness for the decorations.
- Freezing Decorated Cupcakes: While possible, freezing already decorated cupcakes is not always recommended as the moisture can affect the texture of the frosting and decorations, especially the sanding sugar or marshmallow. If you must freeze them frosted, place them on a baking sheet in the freezer until the frosting is firm (about 1-2 hours), then carefully transfer them to an airtight freezer-safe container, placing parchment paper between layers to prevent sticking. Thaw in the refrigerator overnight before serving.
How Long Will Bunny Butt Cupcakes Last?
When stored correctly in an airtight container, your Bunny Butt Cupcakes will maintain their delicious taste and charming appearance for up to 1 week. For optimal flavor and texture, we recommend enjoying them within the first 3-4 days. If you’ve opted to freeze undecorated cupcakes, they will last for up to 2-3 months, ready to be thawed and decorated when you’re ready to serve.
Pro Baking Tips for Perfect Cupcakes
Achieving bakery-quality Bunny Butt Cupcakes is easier than you think with these expert tips and tricks:
- Decorate Immediately: This is crucial! As soon as you finish piping the white frosting for the “bunny butt,” immediately add the white sanding sugar (or sprinkles). If the frosting sets even slightly, the sugar won’t adhere properly, and you’ll lose that beautiful fluffy texture.
- DIY Piping Bag: No fancy pastry bags? No problem! A sturdy Ziploc bag makes an excellent substitute. Simply spoon your frosting into one corner of the bag, snip off a tiny bit of the tip, and you’re ready to pipe. You can even insert a piping tip into the corner before cutting for more control.
- Cupcake Base Variety: While Funfetti adds a playful touch, experiment with your favorite cake mix flavors. Vanilla, strawberry, chocolate, or even a spiced carrot cake mix would be delightful and seasonally appropriate. The key is to use a good quality mix for a moist and tender cupcake.
- Avoid Overfilling Liners: Be mindful not to overfill your cupcake liners. A good rule of thumb is to fill them about two-thirds full. This prevents the batter from overflowing during baking, creating neat, domed tops that are perfect for decorating. Plus, it leaves ample room for your adorable bunny design.
- Homemade vs. Store-Bought Frosting: This recipe uses a delightful homemade buttercream, which offers superior taste and texture. However, if you’re short on time, a good quality store-bought white frosting can be used. Simply divide and color it as instructed. Just be aware that store-bought frosting might be softer, so chill it slightly if needed before piping.
- Crafting Bunny Feet: If pre-made icing bunny feet aren’t available, or you prefer a custom touch, make your own! Melt white chocolate chips (or white candy melts) and pipe small ovals onto parchment paper. Once these harden, pipe small pink dots or ovals on top to create the paw prints. Allow these to fully set before handling.
- Shredded Coconut “Grass”: For an alternative to green frosting grass, consider using shredded coconut dyed green. Simply place shredded coconut in a Ziploc bag with a few drops of green gel food coloring, shake until evenly coated, then scatter it around your bunny butt instead of piping green frosting. This adds a lovely texture and flavor for coconut lovers.
- Room Temperature Ingredients for Frosting: Ensure your butter and milk for the frosting are at room temperature. This allows them to cream together smoothly with the shortening and sugar, resulting in a perfectly light and fluffy buttercream without lumps.
- Cool Cupcakes Completely: Patience is a virtue when it comes to decorating! Make sure your cupcakes are absolutely, completely cool before applying any frosting. Warm cupcakes will melt the frosting, leading to a messy and disappointing result.
Frequently Asked Questions (FAQ)
Here are some common questions about making Bunny Butt Cupcakes to help you along the way:
- Q: Can I make these cupcakes ahead of time?
- A: Absolutely! You can bake the cupcakes up to 2-3 days in advance and store them in an airtight container. We recommend frosting and decorating them closer to serving time for the freshest appearance. The undecorated cupcakes can also be frozen for up to 2-3 months.
- Q: What if I don’t have clear vanilla extract?
- A: Regular vanilla extract will work just fine, but it might give your white buttercream a slightly off-white or yellowish tint. If a pure white “bunny butt” is important to you, clear vanilla is preferred.
- Q: Can I use different colors for the frosting?
- A: While green frosting typically represents “grass,” you can certainly get creative! Pastel pink, blue, or yellow frosting could also create a lovely spring garden effect. Just ensure your “bunny butt” remains white for contrast.
- Q: My frosting is too stiff/too runny. How do I fix it?
- A: If your frosting is too stiff, add milk (1 teaspoon at a time) until it reaches your desired consistency. If it’s too runny, gradually add more sifted confectioners’ sugar (1 tablespoon at a time) until it thickens up. Always mix well after each addition.
- Q: Are these suitable for a kids’ party?
- A: They are perfect for kids’ parties! The whimsical design is a huge hit with children, and they can even help with some of the decorating steps, like placing the marshmallows and bunny feet.
More Festive Easter Desserts
Looking for more delicious and festive treats to complement your Bunny Butt Cupcakes this Easter? Explore these other popular recipes:
- Easter Rice Krispie Treats
- Easter Egg Fruit Pizza Recipe
- Easy Easter Chocolate Covered Pretzels
- Homemade Easter Bunny Cupcakes Recipe
- White Chocolate Easter Bark
We hope you enjoy making these delightful Bunny Butt Cupcakes for the cutest Easter treat. Don’t forget to leave a comment and star rating if you try them – we love hearing from you!
Bunny Butt Cupcakes
15
20
35
24
American
Dessert
257
Carrie Barnard
Ingredients
FOR THE CUPCAKES:
- 1 box Funfetti Cake Mix
- *Plus the ingredients to prepare the cake mix based on the package instructions (eggs, oil etc)
FOR THE ICING:
- 1/2 cup Solid Vegetable Shortening
- 1/2 cup Butter softened at room temperature
- 1 tsp Clear Vanilla Extract
- 4 cups Confectioners’ Sugar sifted
- 2 Tbsp Milk
- Green Gel Food Coloring
FOR THE DECORATIONS:
- White Sanding Sugar
- 24 Mini Marshmallows
- 2 Packages of Pre-made Icing Bunny Feet 24 count
Instructions
- Prepare the Funfetti cake mix based on the cupcake instructions and allow the cupcakes to cool completely at room temperature.
- In a large bowl, cream together the shortening and butter until combined and smooth.
- Then slowly add in the confectioners’ sugar (1 cup at a time) on low speed until well combined.
- Then stir in the vanilla extract and milk until combined. Separate the icing into 2 mixing bowls. Leave one of the bowls white and then add a few drops of the green food coloring into the other bowl and stir until the frosting is a bright green color.
- Place the green frosting in a decorator’s bag with a star tip and place the white frosting into a decorator’s bag with a round tip.
- With the white frosting, pipe a circle in the middle of the cupcake to form the “bunny butt”. Top the white frosting with the white sanding sugar.
- Use the green frosting to pipe the “grass” around the white frosting.
- Then top each cupcake with a mini marshmallow for the tail and 2 of the bunny feet.
- Then the cupcakes are ready to serve and enjoy!
Nutrition Facts
Carbohydrates 34g,
Protein 1g,
Fat 14g,
Saturated Fat 4g,
Polyunsaturated Fat 3g,
Monounsaturated Fat 6g,
Trans Fat 1g,
Cholesterol 10mg,
Sodium 181mg,
Potassium 63mg,
Fiber 0.4g,
Sugar 27g,
Vitamin A 121IU,
Calcium 30mg,
Iron 1mg
