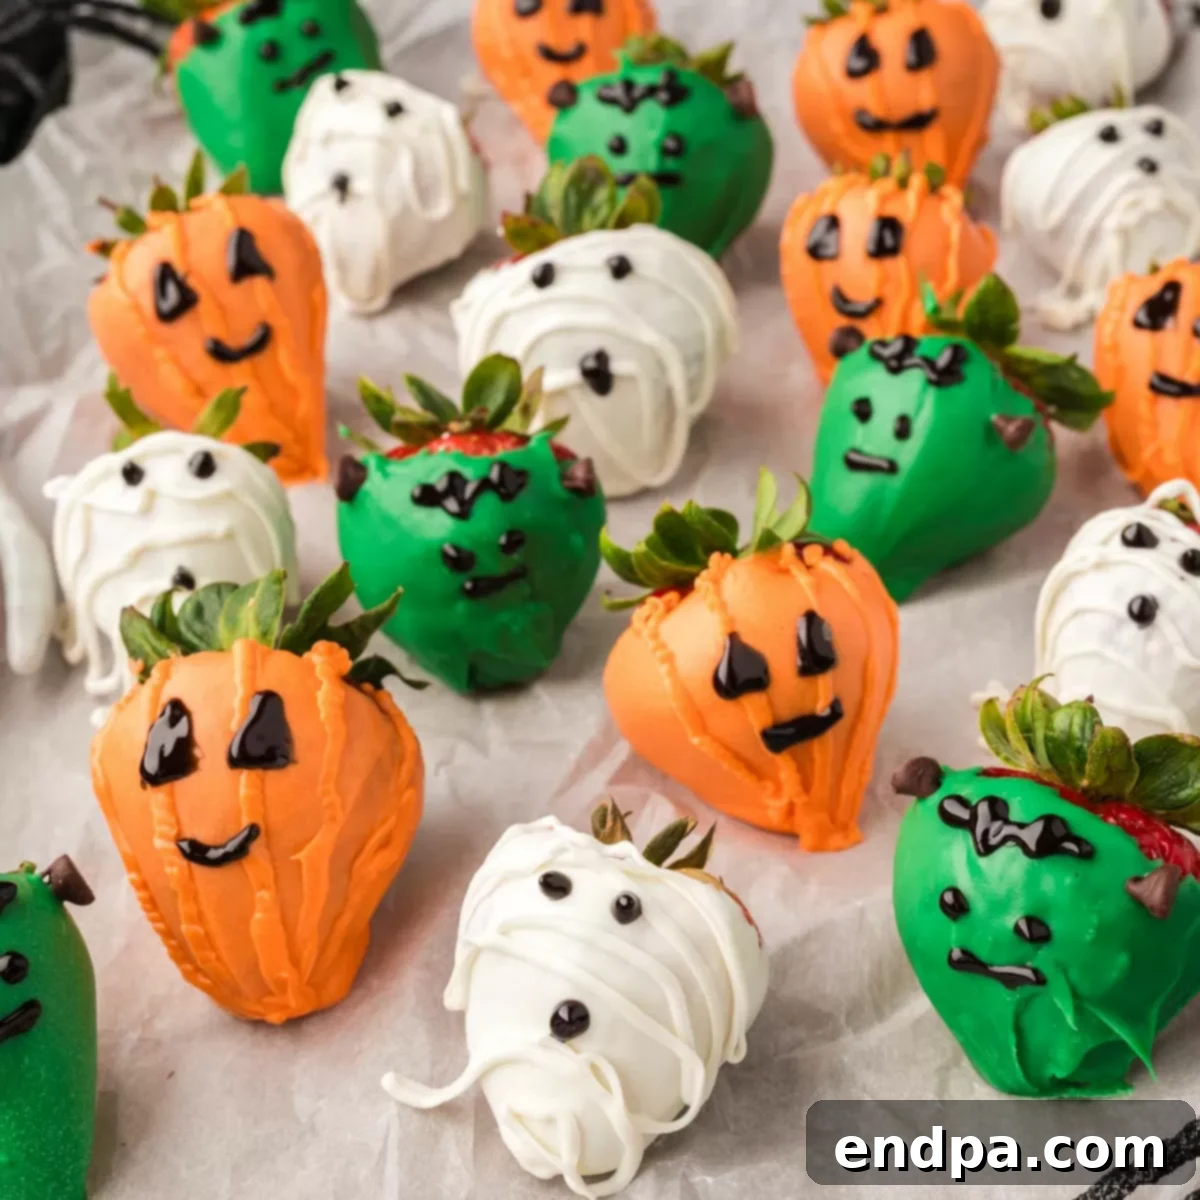
Welcome to the ultimate guide for creating enchanting Halloween Chocolate Covered Strawberries! These delightful and easy-to-make treats are a fantastic way to celebrate the spooky season. Gather your family and immerse yourselves in a fun Halloween tradition that results in irresistibly cute (and slightly creepy) edible masterpieces. From adorable ghost strawberries to vibrant jack-o’-lanterns and quirky Frankensteins, these chocolate-dipped delights are guaranteed to be a hit at any Halloween party or family gathering. Skip the baking and dive into this simple, creative no-bake Halloween treat recipe that combines fresh fruit with festive flair.
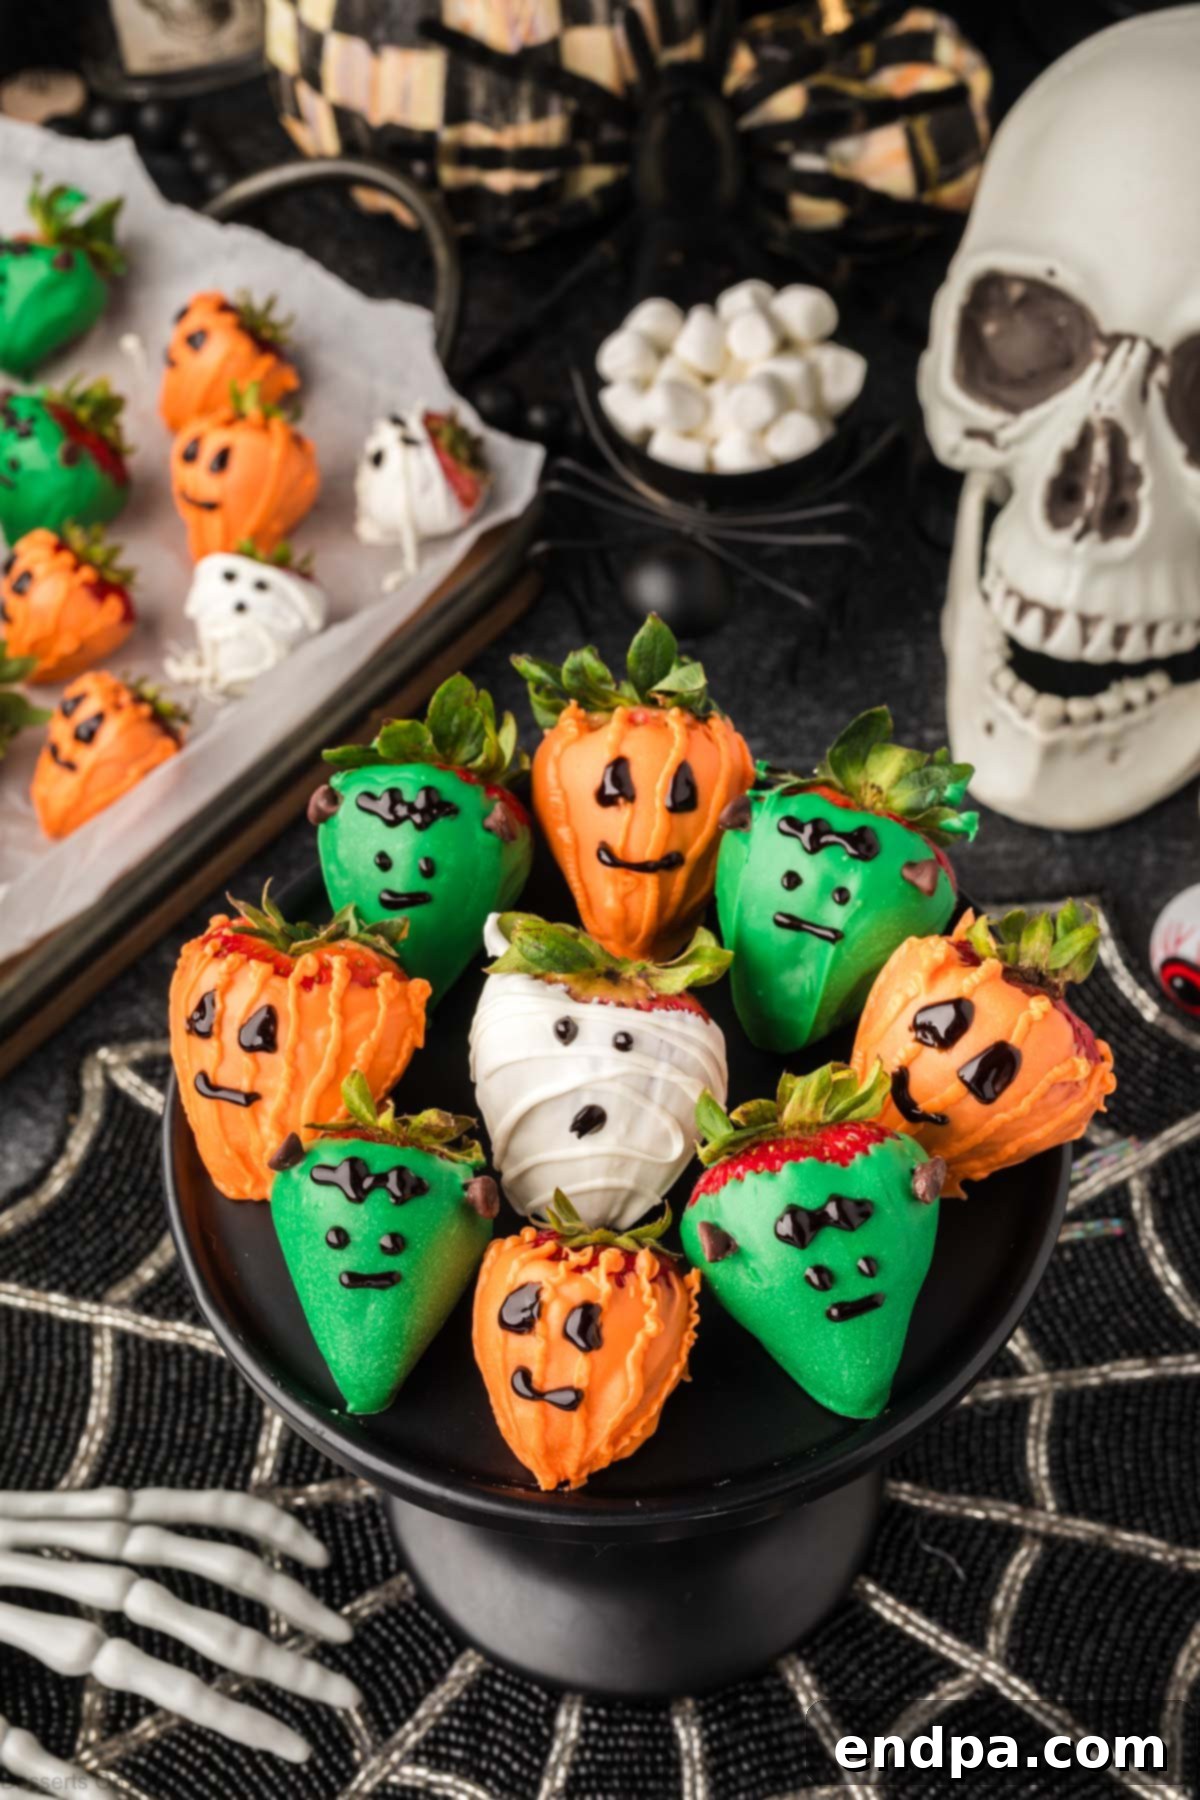
Among a host of creative Halloween desserts, these festive chocolate-covered strawberries stand out as a personal favorite. Their simplicity and the joy they bring make them an ideal no-bake Halloween treat for all ages. While I also cherish other spooky season staples like Pumpkin Rice Krispie Treats, playful Witch Hat Cookies, a savory-sweet Halloween Puppy Chow Recipe, vibrant Halloween Bark, and whimsical Halloween Spider Cookies, there’s something uniquely charming about transforming fresh strawberries into ghoulish characters.
Don’t forget to explore other fantastic Halloween sweet ideas, such as Halloween Chocolate Covered Oreos, quirky Monster Donuts, and a selection of 55 Delicious Halloween Cupcakes. For even more family fun, we regularly whip up Halloween Monster Eyeballs, the delightful Best Monster Cupcakes Recipe, and adorable Halloween Cake Pops with the kids every year. These chocolate-covered strawberries add another layer of excitement and creativity to our annual Halloween menu, offering a healthy and visually stunning option that everyone loves.
What’s in this post: Halloween Chocolate Covered Strawberries
- Why These Halloween Strawberries Are a Must-Make
- Essential Ingredients for Spooky Strawberries
- Step-by-Step Guide to Decorate Your Halloween Strawberries
- Frequently Asked Questions (FAQs)
- Expert Tips for Perfect Halloween Chocolate Strawberries
- Creative Topping and Decoration Ideas
- Storage and Make-Ahead Tips
- More Easy Chocolate Covered Treats
- Halloween Chocolate Covered Strawberries Recipe
Why These Halloween Strawberries Are a Must-Make
These Halloween chocolate-covered strawberries are more than just a dessert; they’re an experience. With only a few simple ingredients, you can effortlessly create a vibrant and festive platter that will captivate everyone at your Halloween party. Their appeal lies in their ease of preparation, allowing even novice decorators to achieve impressive results. They not only look spectacular but also offer a delightful burst of fresh fruit perfectly complemented by sweet chocolate.
The versatility of this recipe means you can involve children in the decorating process, fostering creativity and making lasting memories. Imagine turning plump, juicy strawberries into adorable ghosts, grinning pumpkins, or quirky Frankenstein monsters – the possibilities are endless! They are a refreshing alternative to heavier Halloween sweets and provide a guilt-free indulgence. Plus, being a no-bake treat, they save you precious oven space and time during the busy holiday season. They truly are the star of any Halloween celebration, combining healthy fruit with a fun, themed coating.
Ingredients for Spooky Strawberries
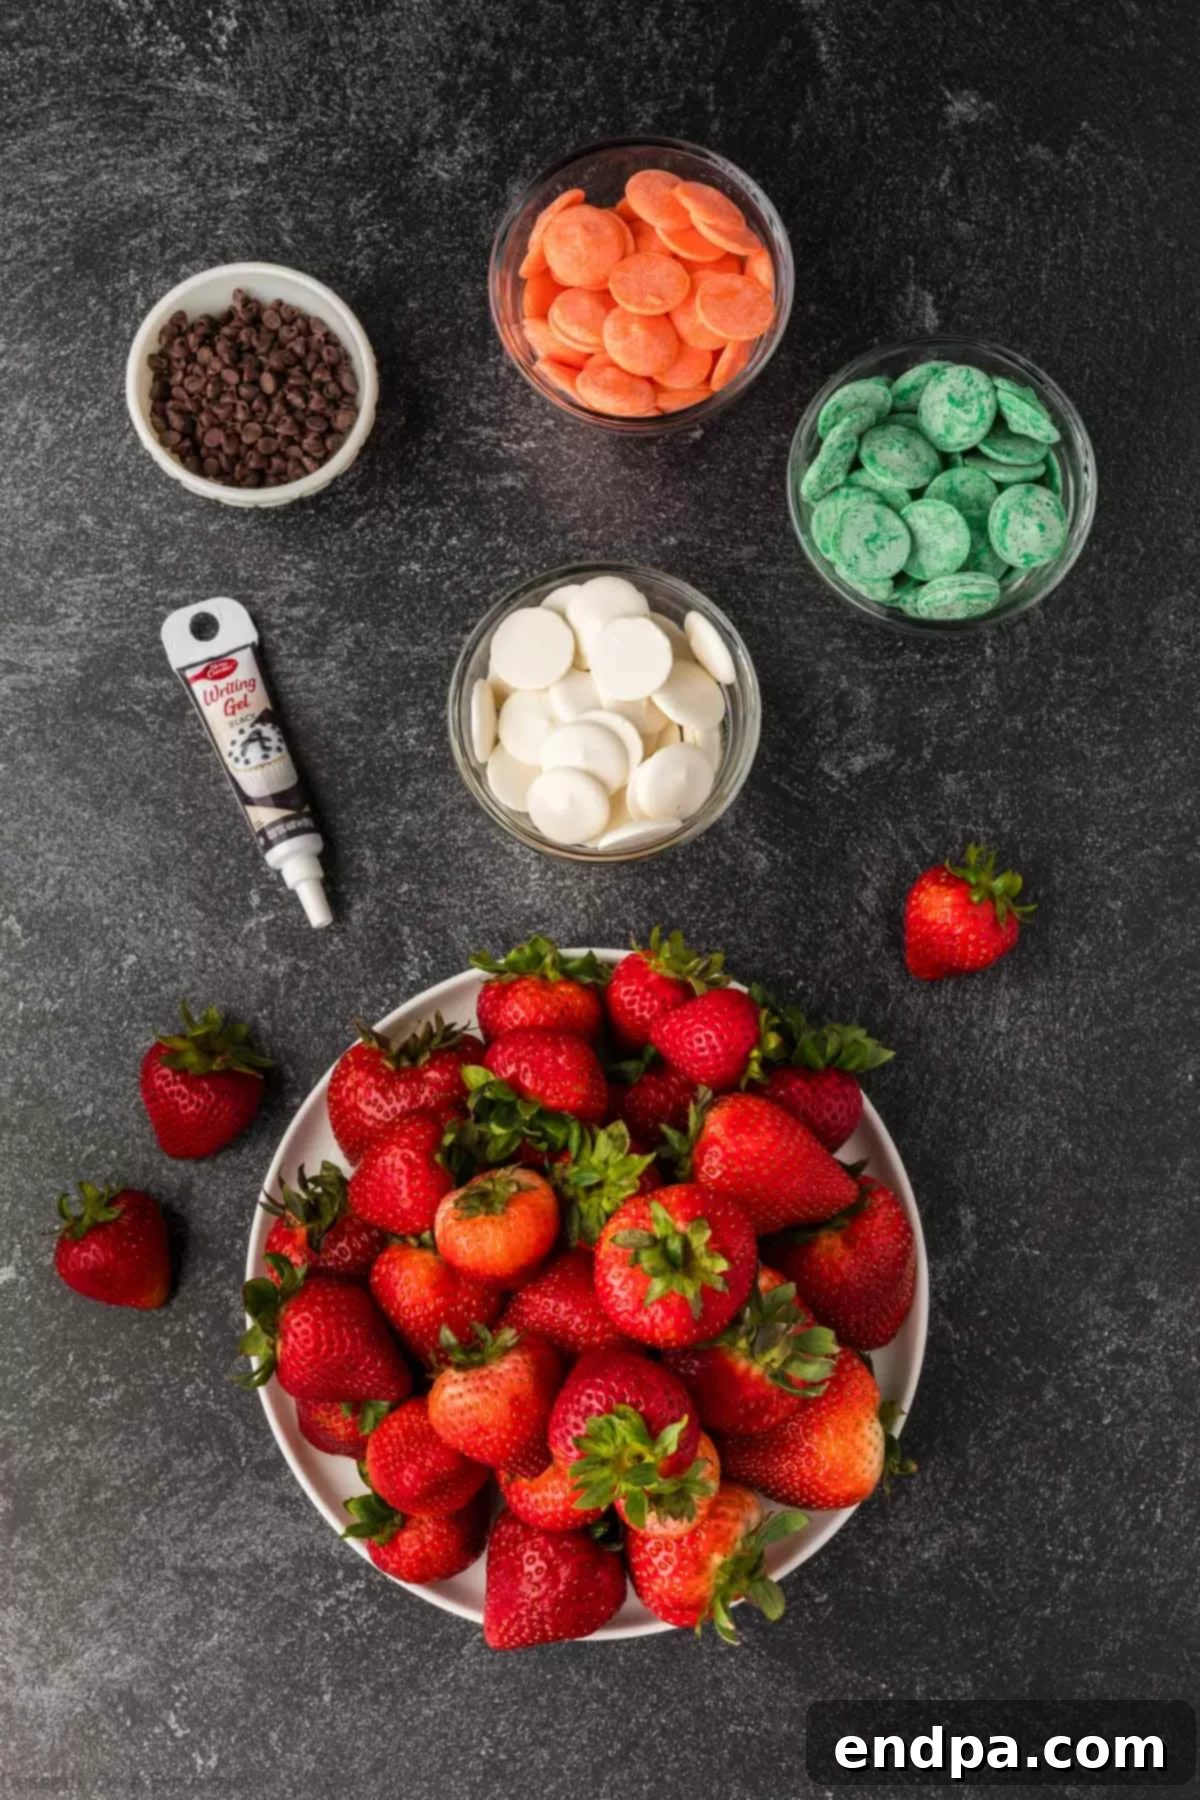
Crafting these festive Halloween treats requires only a handful of readily available ingredients. The key to success lies in selecting high-quality components and preparing them properly. Here’s what you’ll need:
- Fresh Strawberries. Choose plump, firm, and bright red strawberries. They need to be thoroughly washed and completely dried to ensure the chocolate adheres perfectly. Larger strawberries are often easier to dip and decorate.
- Assorted Candy Wafers. For a truly vibrant and spooky assortment, I recommend using orange (for pumpkins), white (for ghosts and mummies), purple, and green (for Frankenstein monsters) candy wafers. These melt smoothly and set quickly, providing a professional finish.
- Black Gel Icing Tube. This is your secret weapon for drawing intricate faces, scars, and details. The fine tip allows for precision, making it incredibly easy to bring your spooky characters to life.
- Mini Milk Chocolate Chips. These tiny chips are perfect for adding details like Frankenstein’s bolts or for creating small, edible eyes when larger candy eyes aren’t available. Their miniature size makes them proportional to the strawberries.
The complete ingredient list and detailed measurements can be found in the recipe card at the bottom of this page.
Step-by-Step Guide to Decorate Your Halloween Strawberries
Follow these simple instructions to create your own spooky and delightful Halloween chocolate-covered strawberries. Remember to work carefully and have fun with the decorating!
- Step 1: Prepare Strawberries. Begin by thoroughly rinsing your fresh strawberries under cool water. Pat them completely dry with paper towels. This step is crucial; any moisture left on the berries will prevent the chocolate from sticking properly. Set them aside on a clean, dry surface.
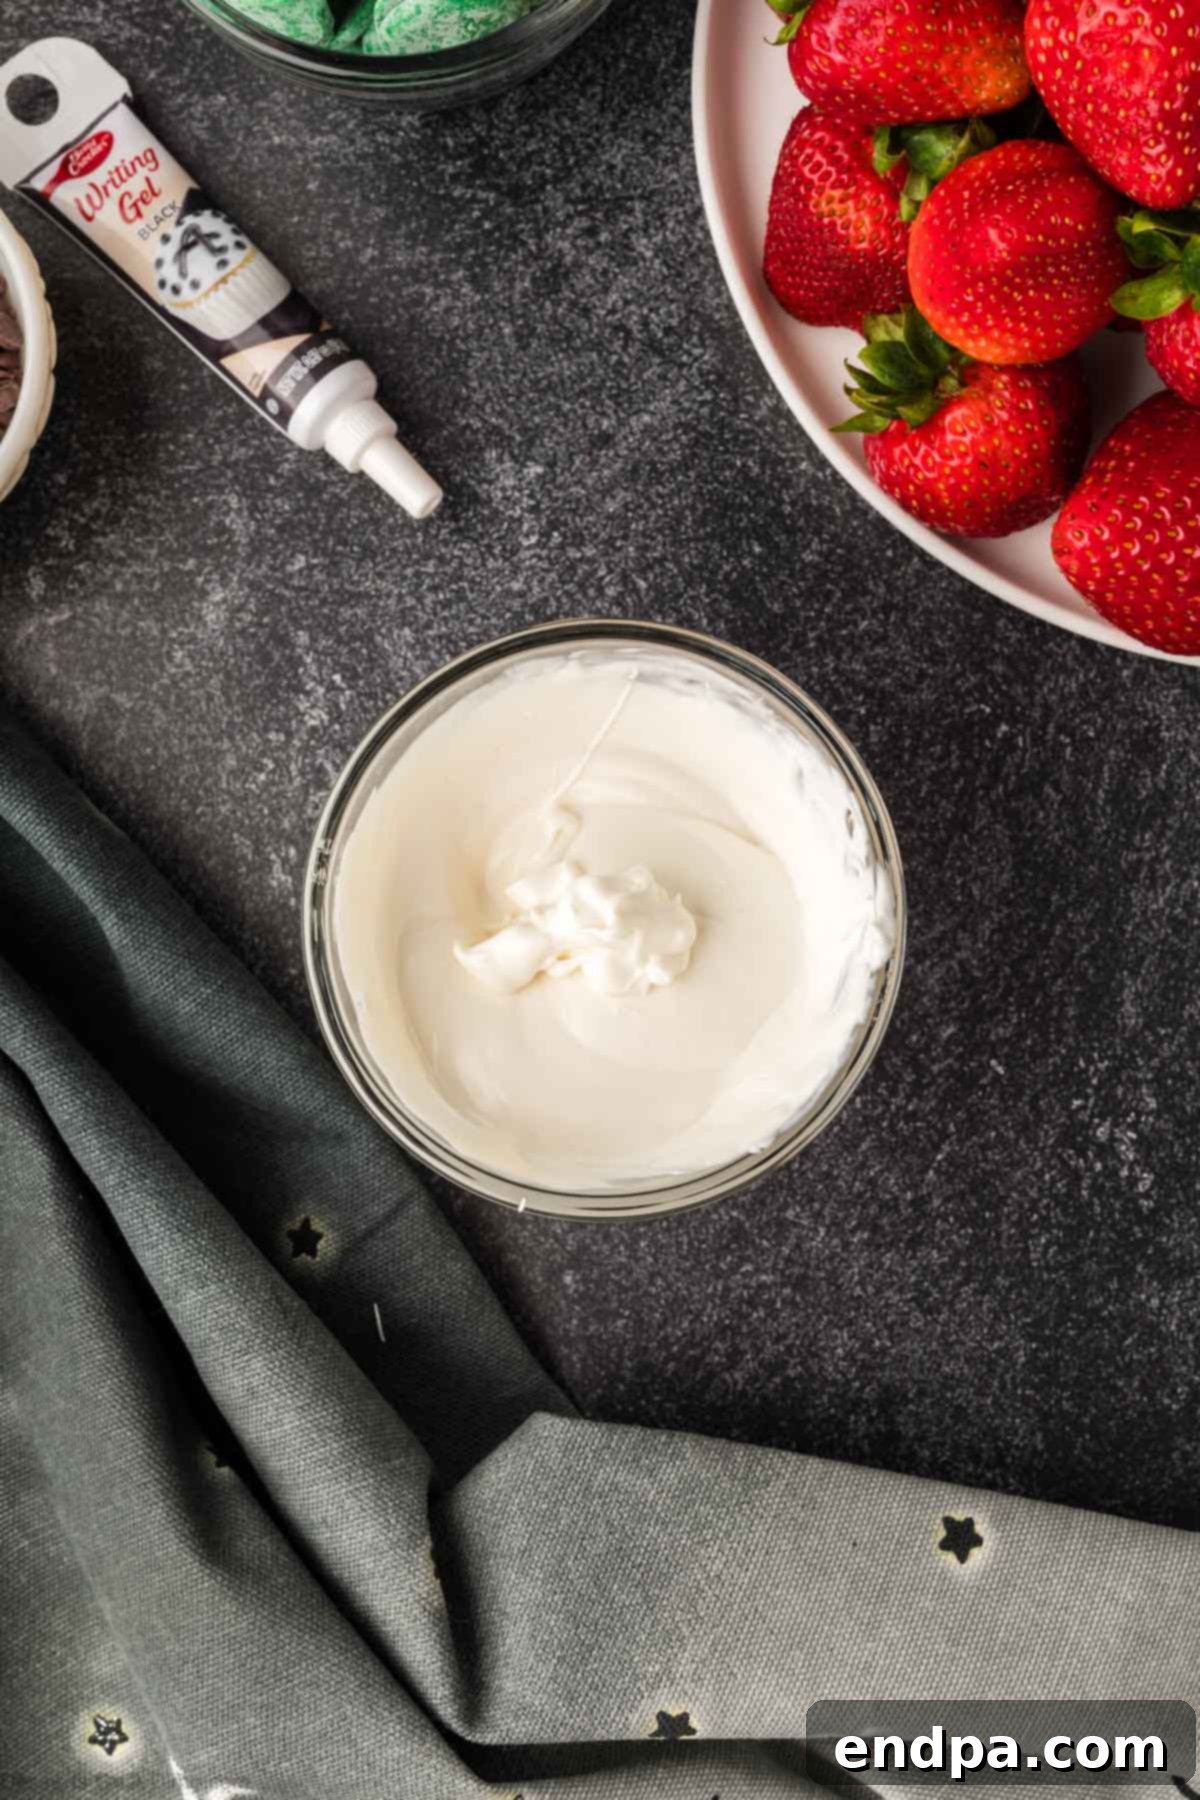
Step 2: Melt Candy Wafers. Place each color of candy wafers (orange, white, purple, green) into separate microwave-safe bowls. Melt them according to package directions, typically in 30-second intervals, stirring well after each interval until smooth and fully melted. Be careful not to overheat the chocolate, as it can seize or burn.
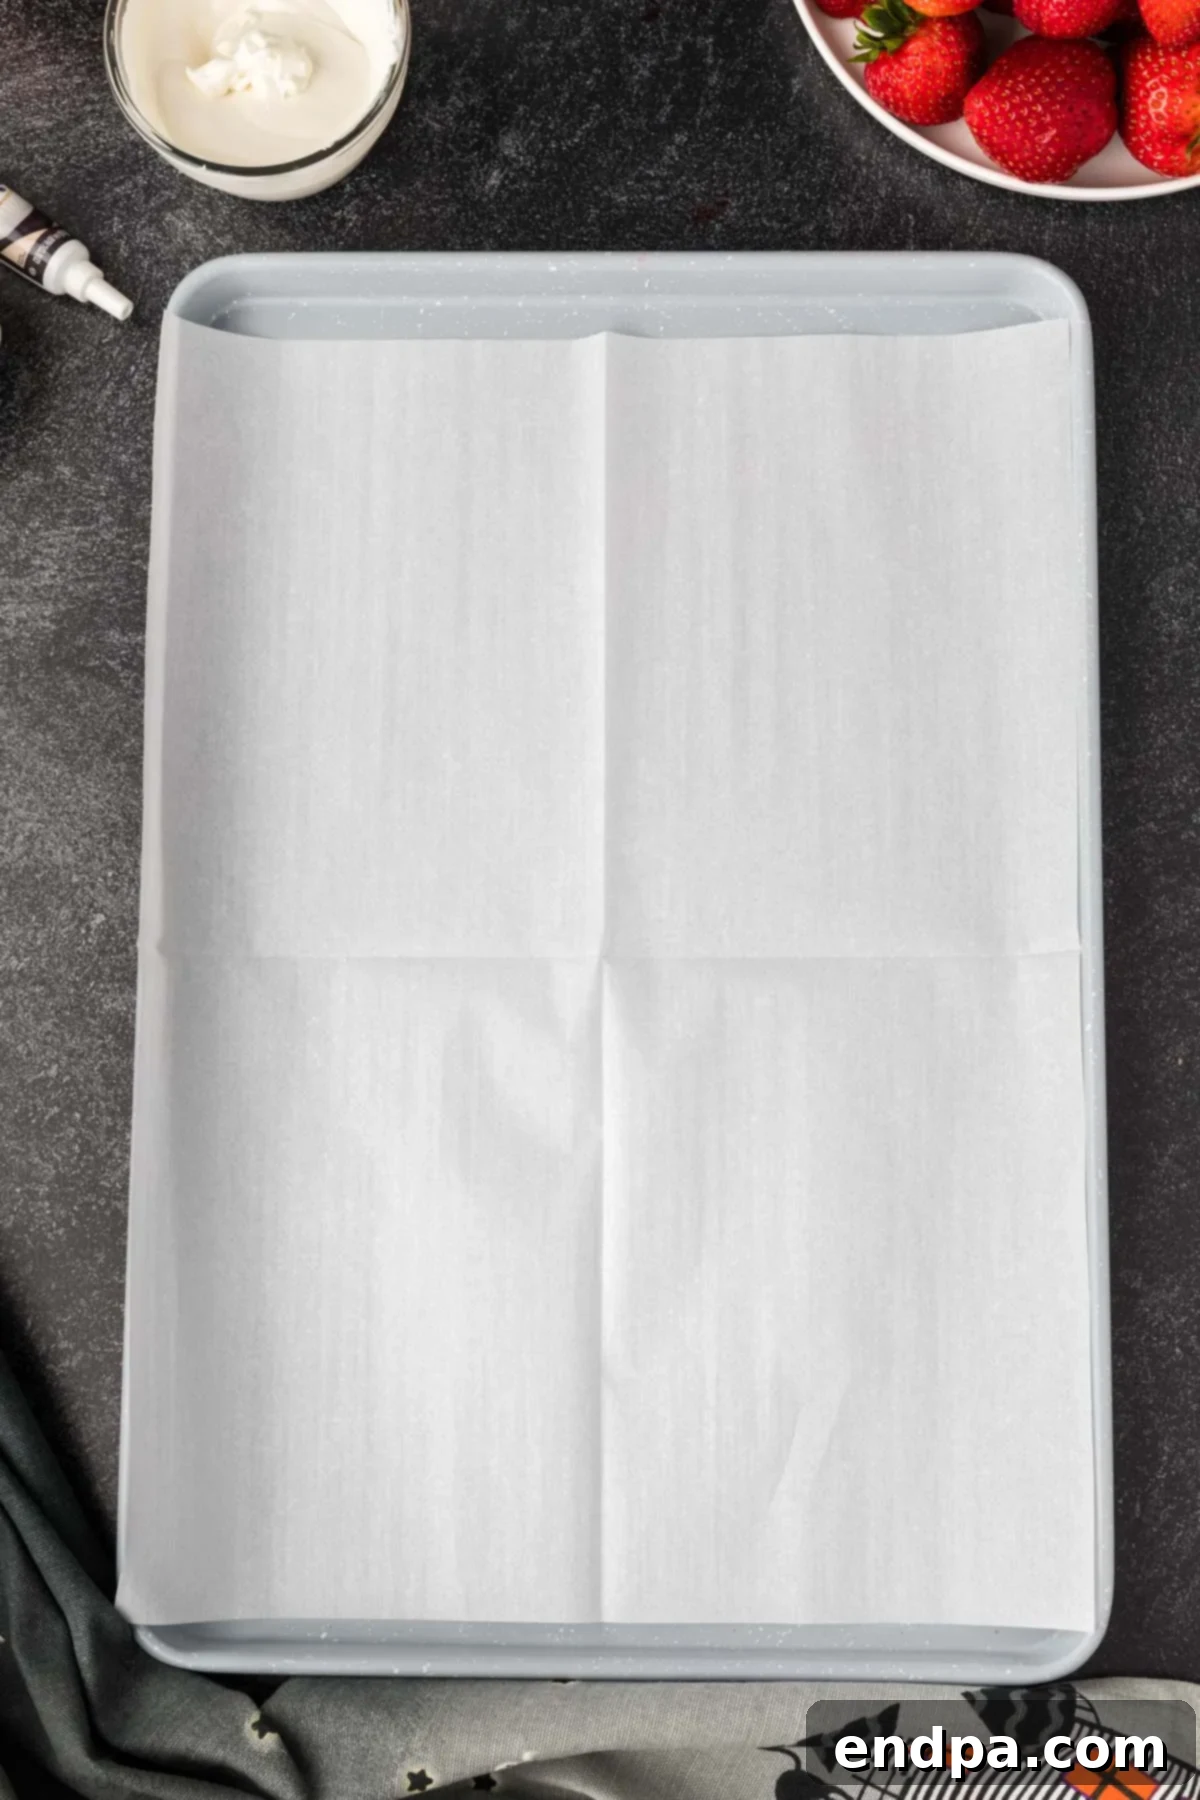
Step 3: Prepare Baking Sheet. Line a baking sheet with parchment paper or wax paper. This will provide a non-stick surface for your dipped strawberries to set and makes for easy cleanup. Keep this sheet nearby for immediate placement of dipped berries.
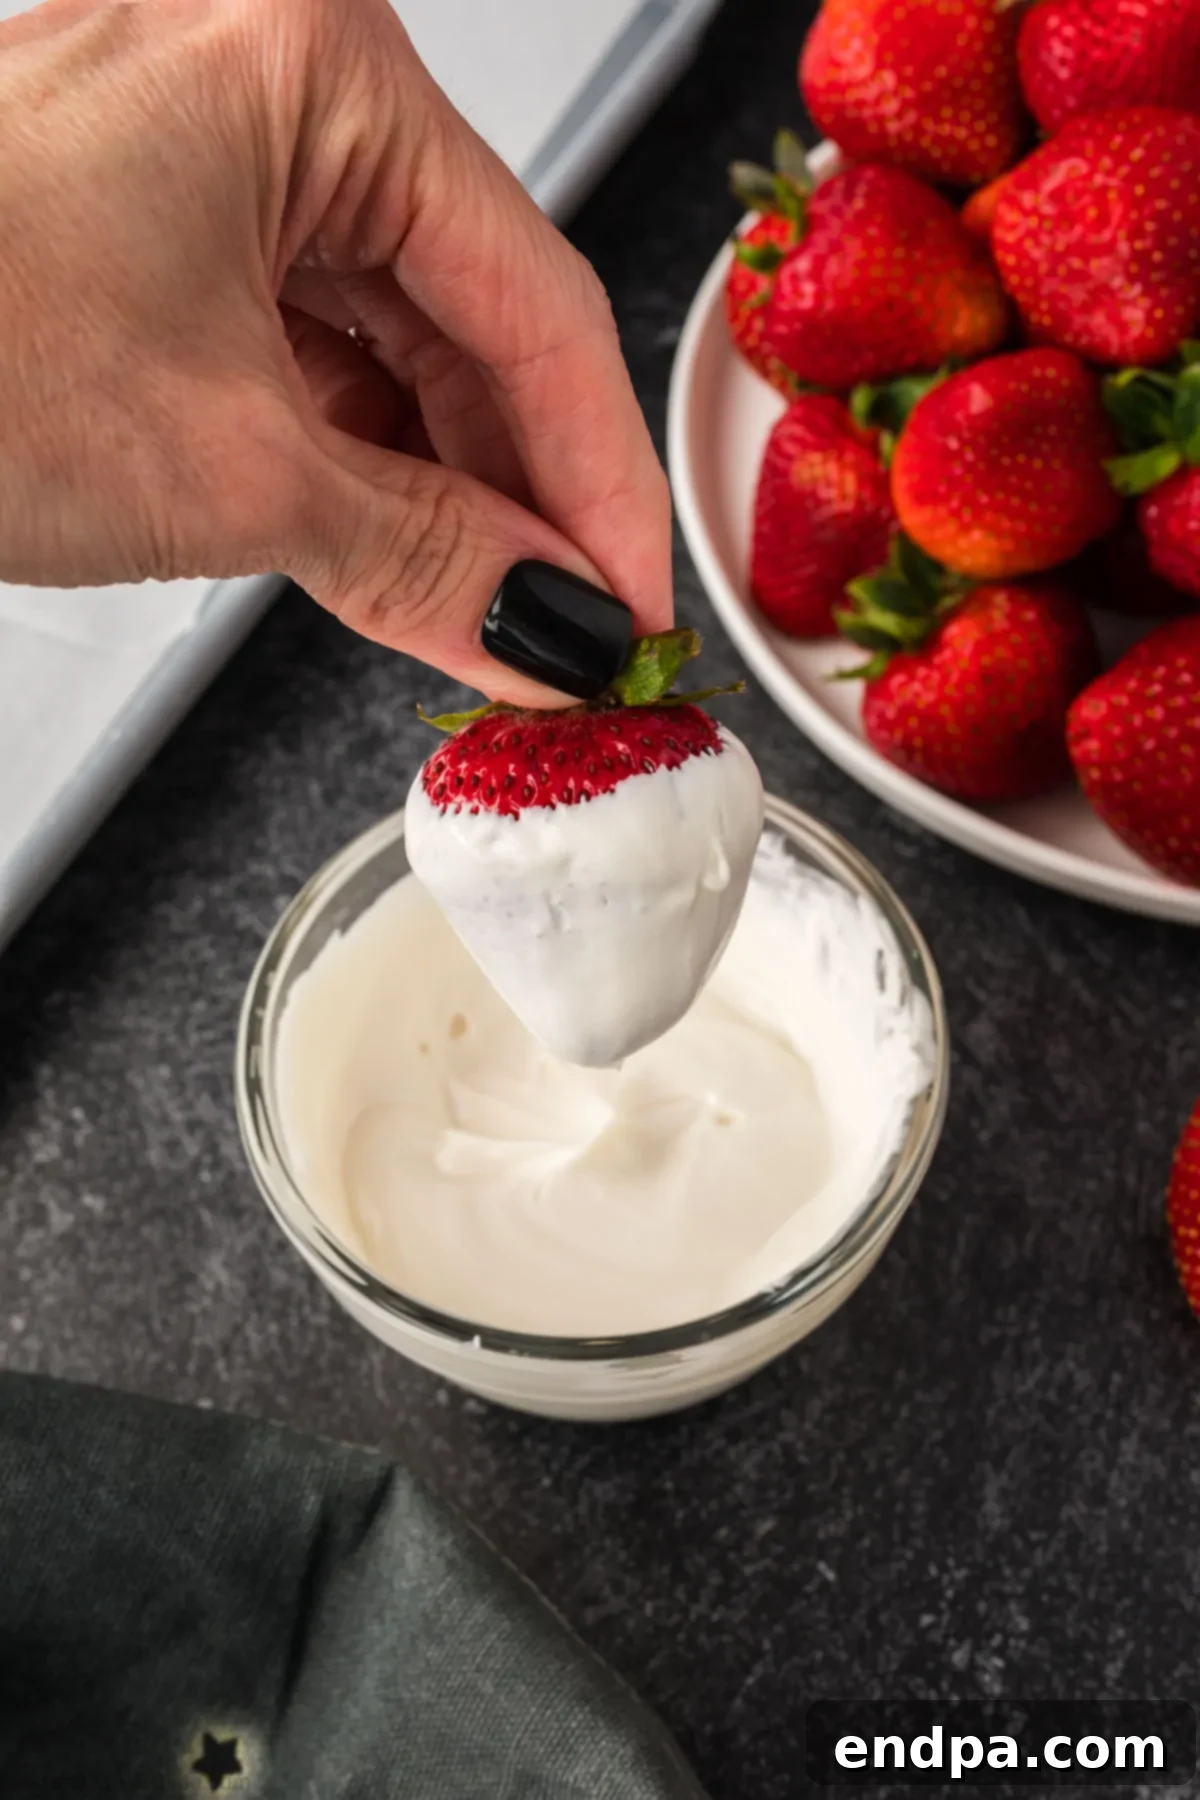
Step 4: Create Ghost Strawberries. Hold a strawberry by its stem or green leaves and dip it completely into the melted white candy wafers. Allow any excess chocolate to drip off, then gently place the coated strawberry onto the prepared parchment paper. Let the white chocolate coating set and harden, which usually takes about 10-15 minutes at room temperature or a few minutes in the refrigerator.
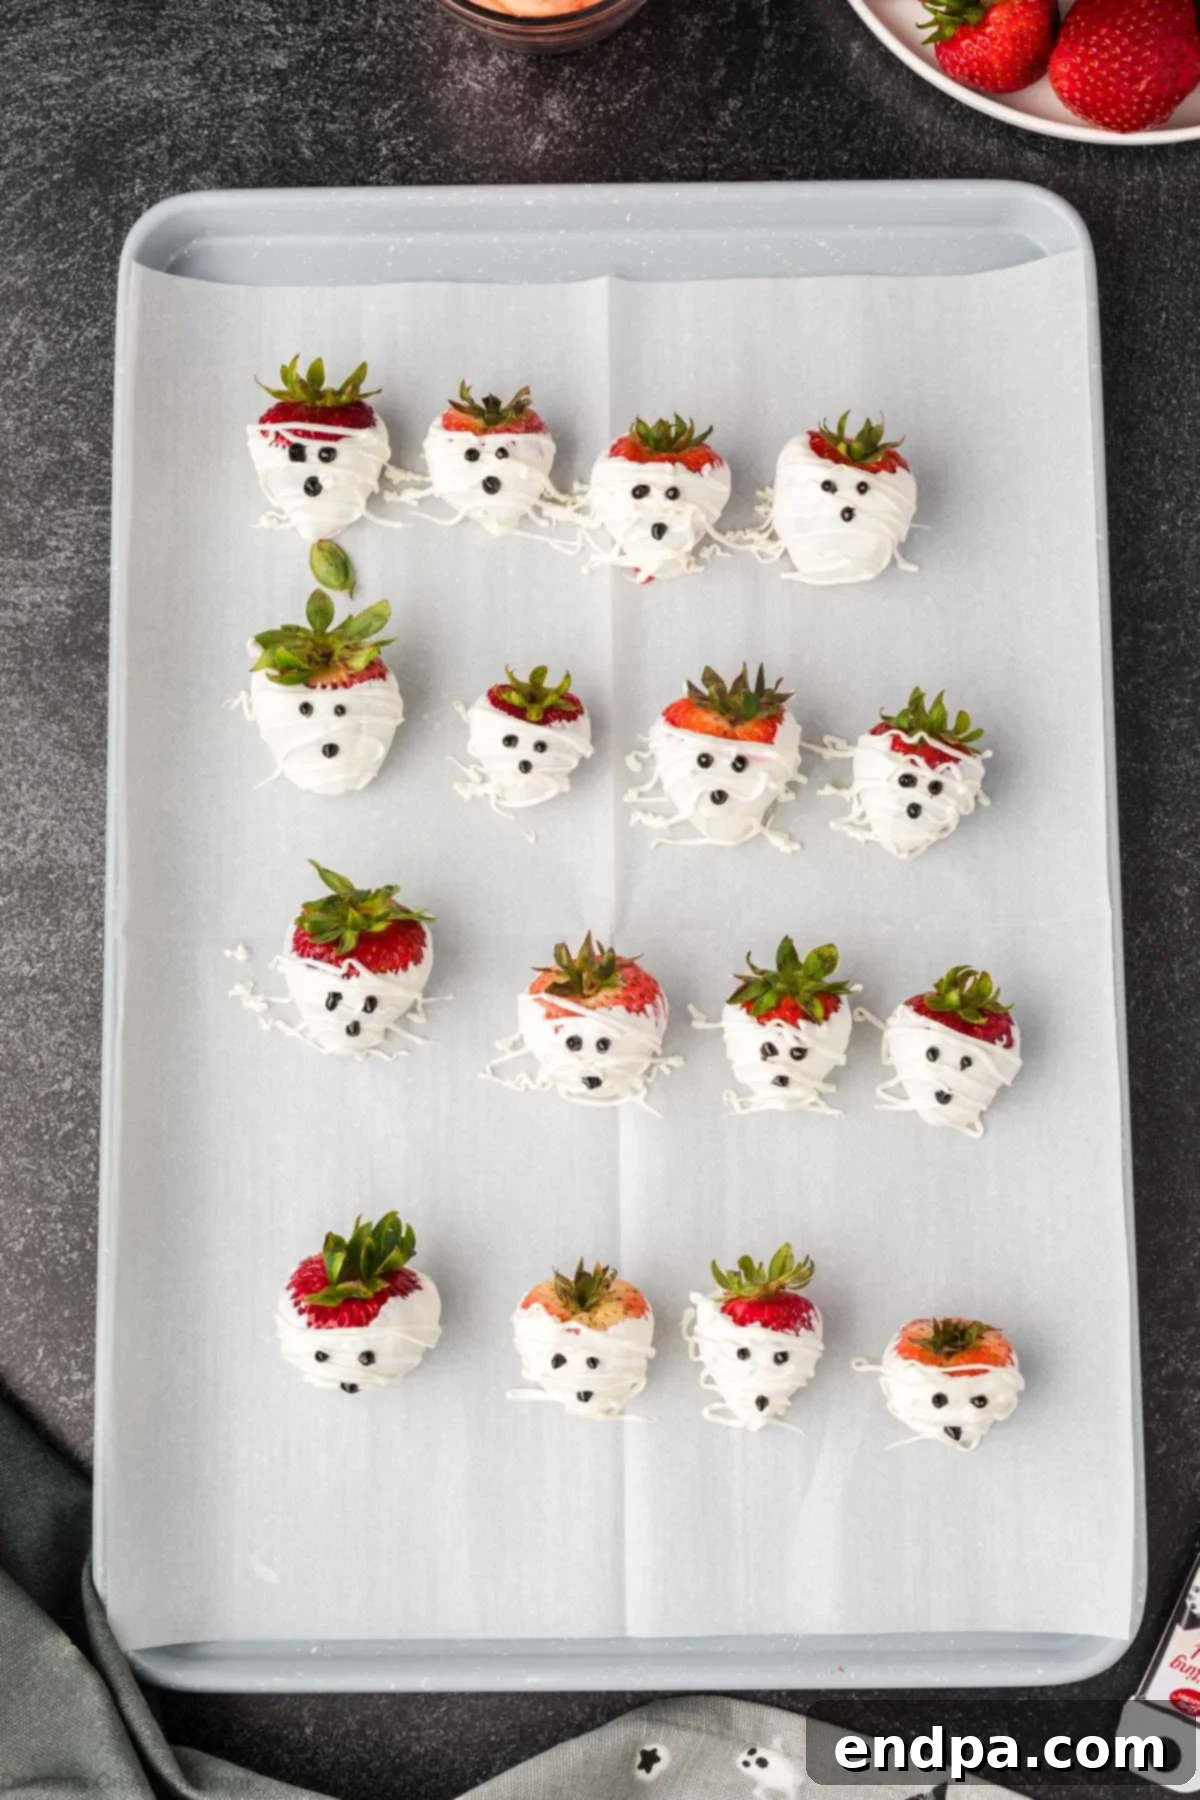
Step 5: Decorate Ghosts and Mummies. Once the white chocolate coating on your ghost strawberries has fully set, you can create mummy designs. Fill a piping bag (or a Ziploc bag with a tiny corner snipped off) with a small amount of the same melted white wafers. Drizzle the white chocolate back and forth across the berry in random lines to resemble mummy bandages. Allow these lines to dry. Then, using your black gel icing tube, carefully add three small dots for the eyes and mouth to create spooky ghost or mummy faces.
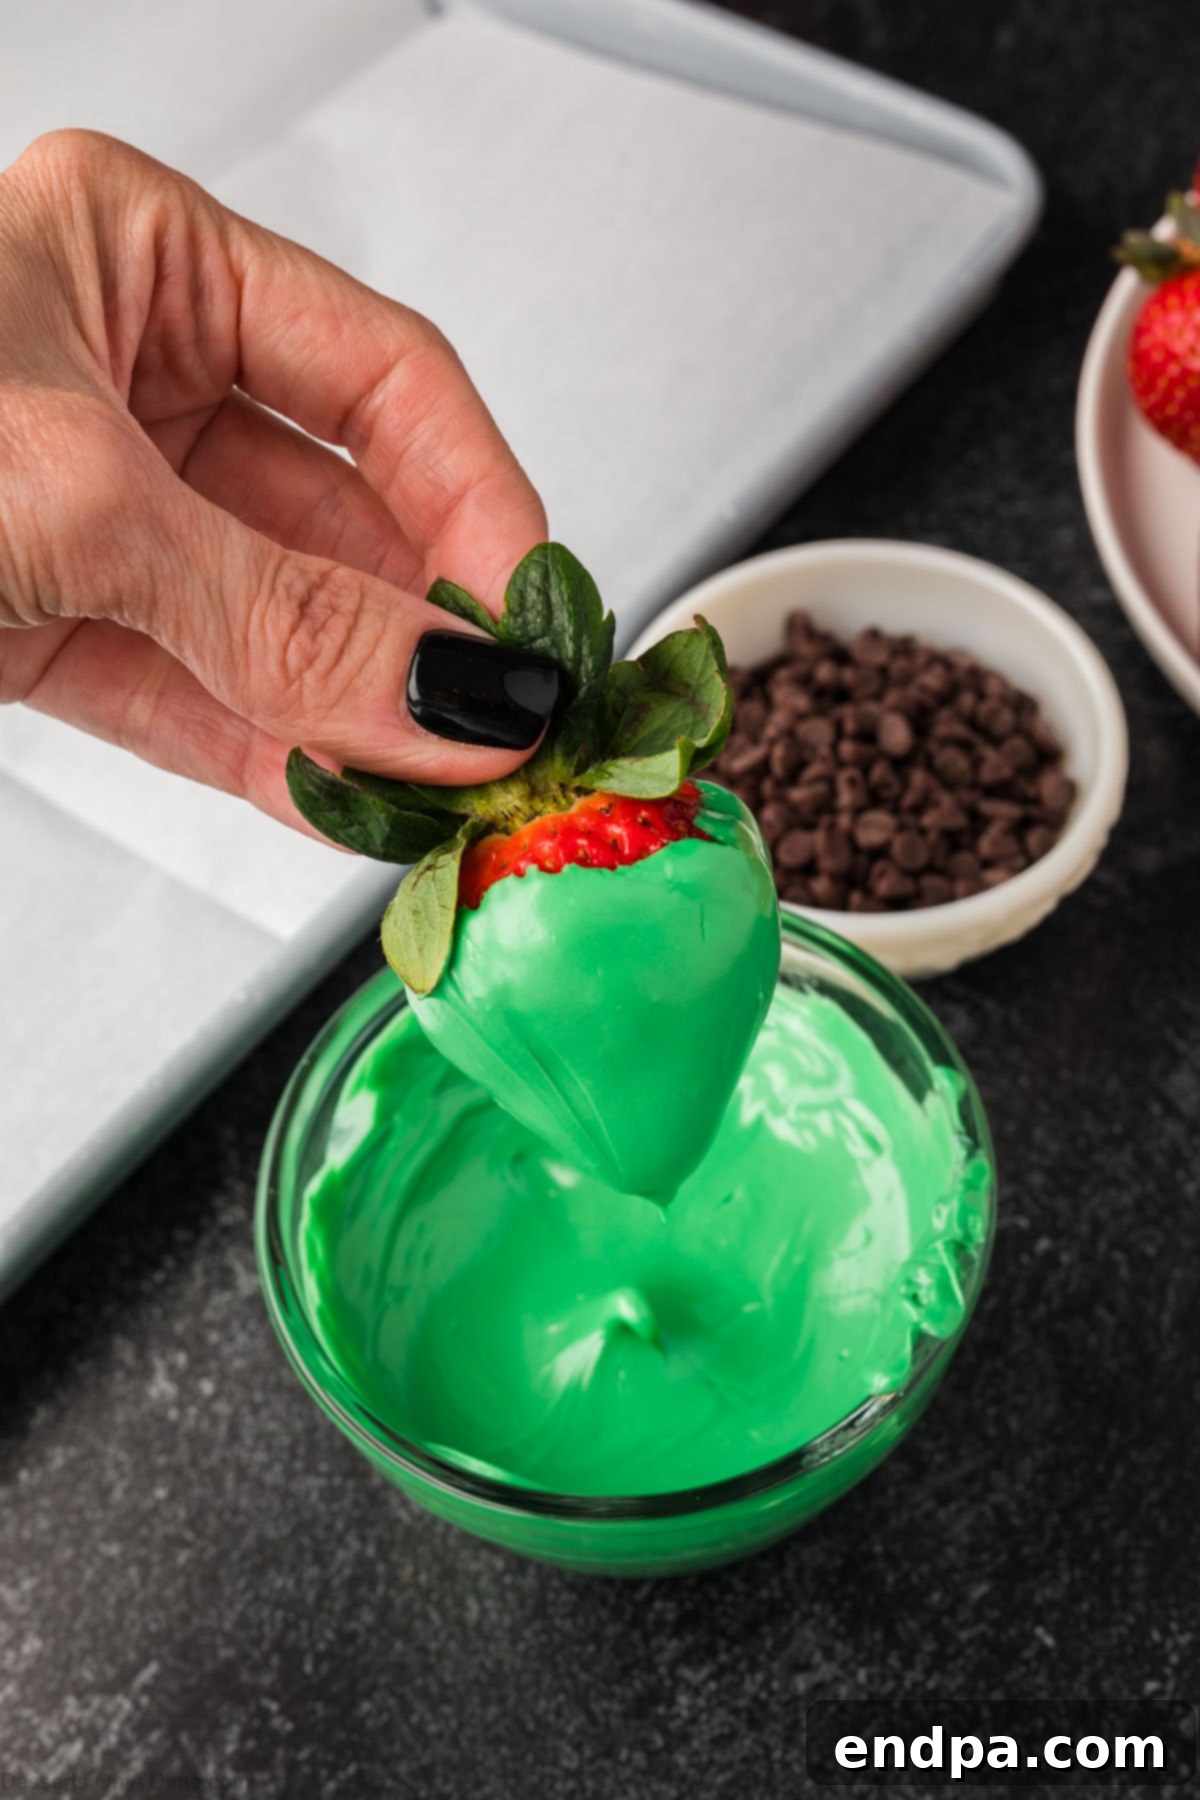
Step 6: Make Frankenstein Strawberries. For the Frankenstein’s monster design, dip a clean, dry strawberry into the melted green candy wafers. Place the coated strawberry on the parchment paper. While the green chocolate is still wet, quickly press one mini milk chocolate chip onto each side of the berry to form the iconic “bolts.” Once the green chocolate has set, use the black gel icing tube to draw eyes, a mouth, and a zig-zag forehead scar to complete your creepy creation.
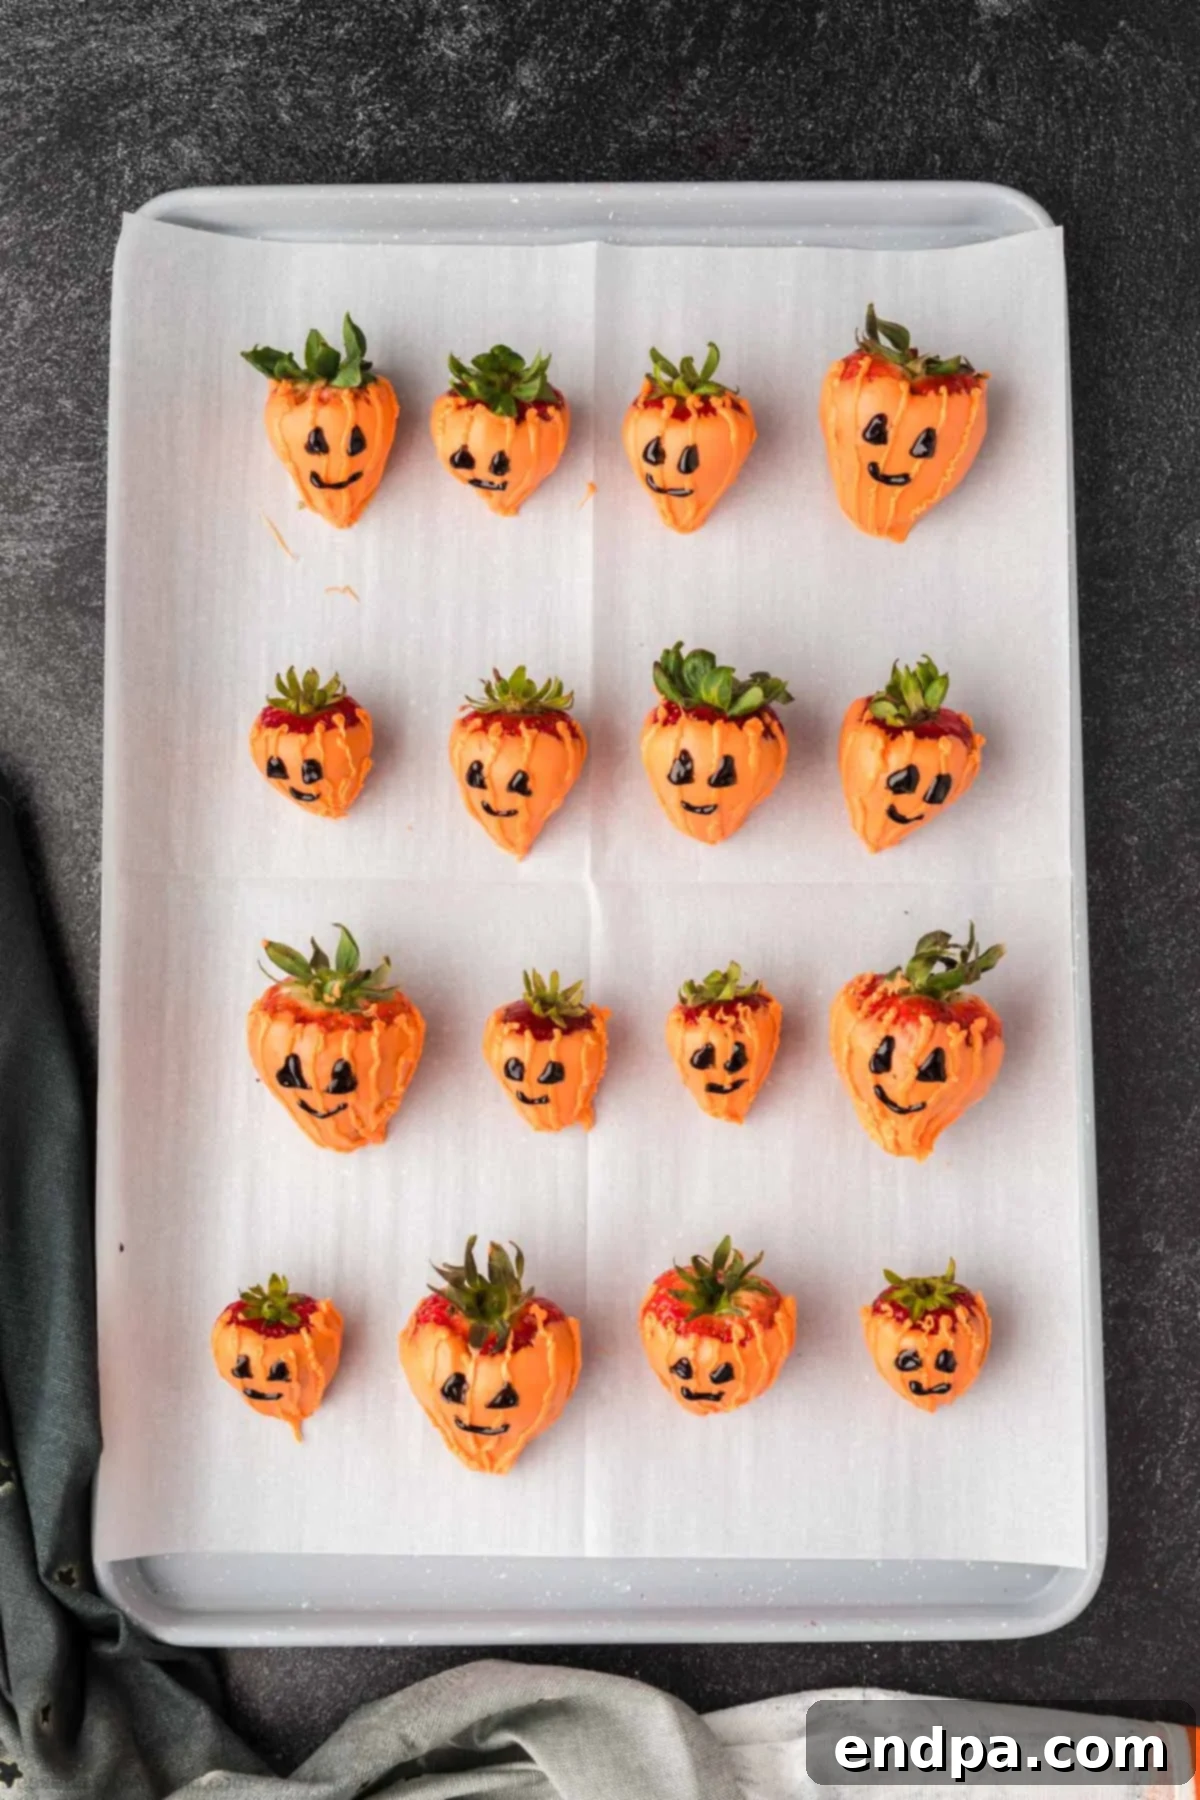
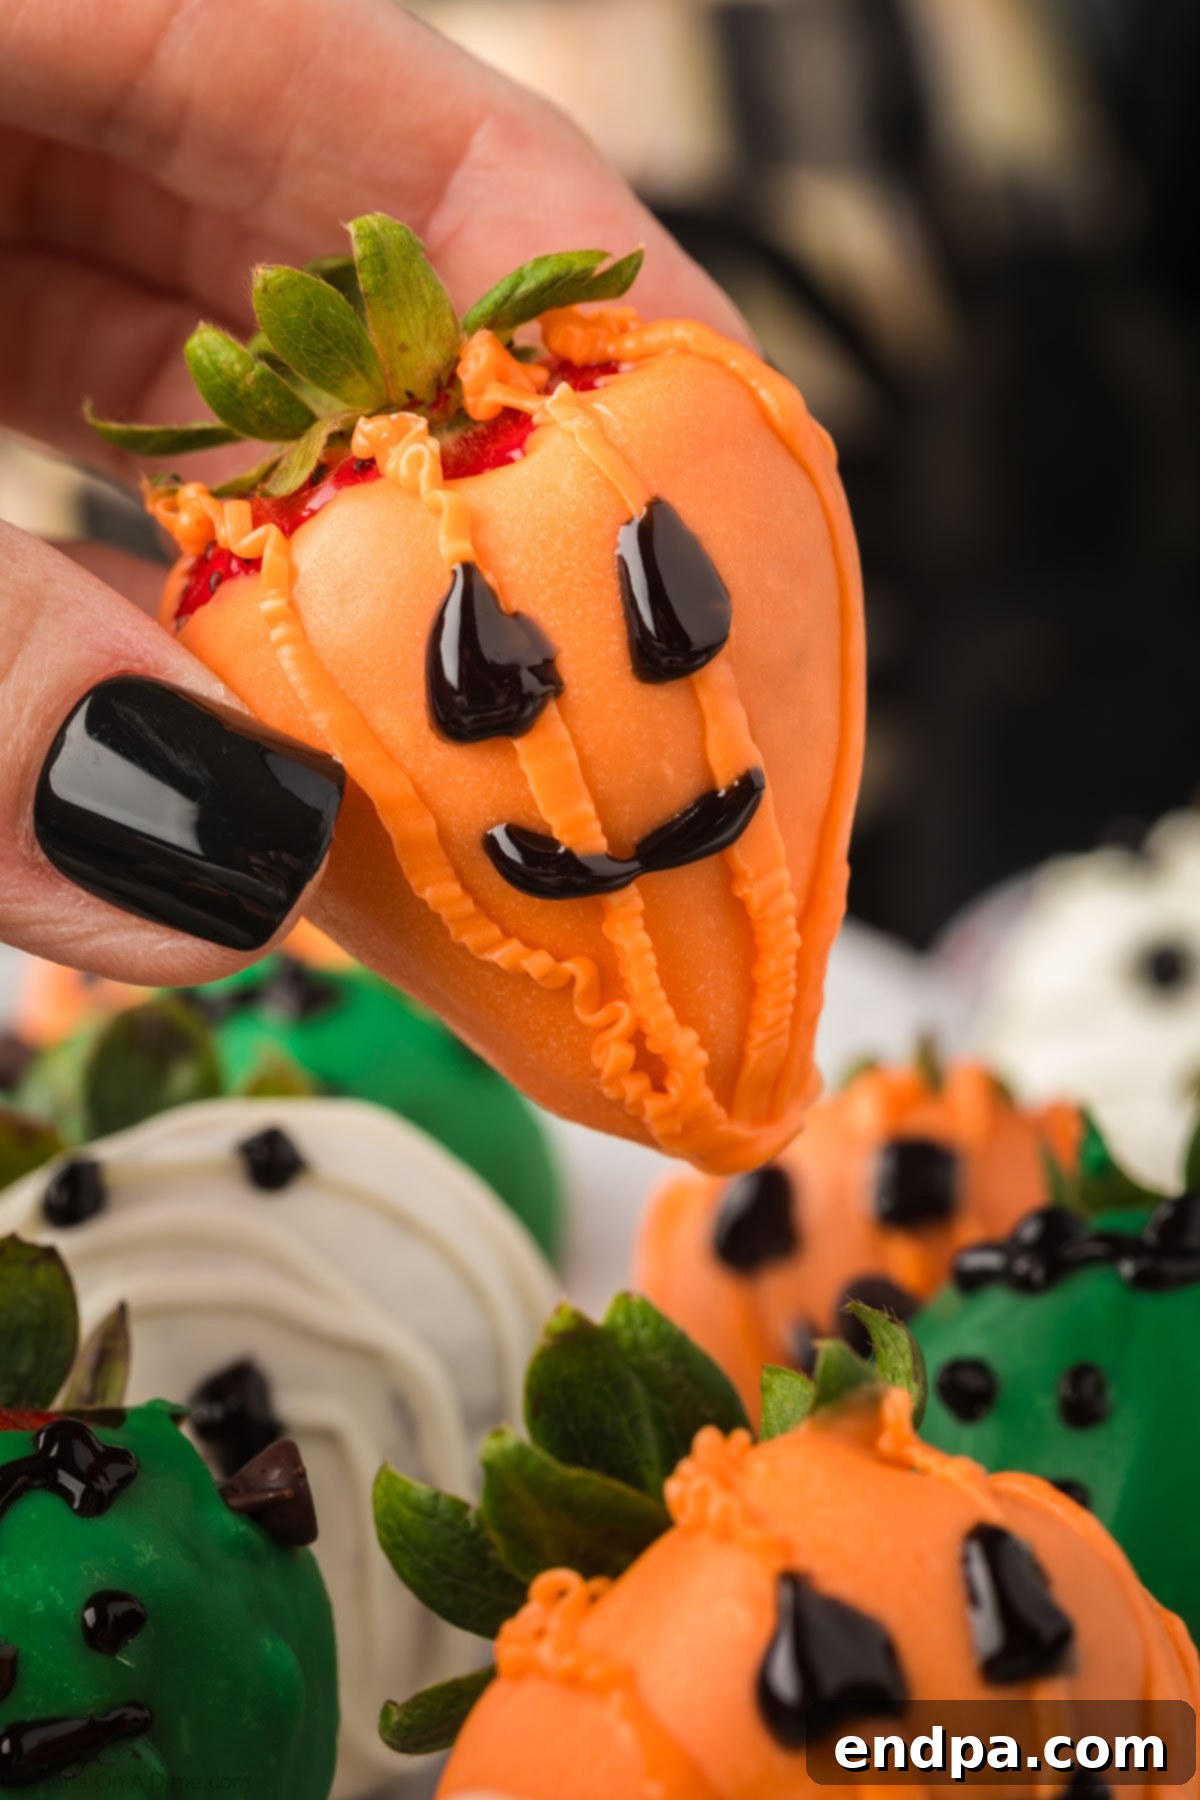
Step 7: Craft Jack-O’-Lantern Pumpkins. To create your pumpkin strawberries, dip each berry into the melted orange candy wafers. Place them on the parchment paper and allow the orange coating to set completely. Next, fill a piping bag with a small amount of the remaining melted orange wafers. Apply straight lines horizontally across the berry, mimicking pumpkin ridges. Let these lines dry. Finally, use the black gel icing tube to carefully draw two triangle-shaped eyes and a classic jagged smile for a festive jack-o’-lantern face.
Frequently Asked Questions (FAQs)
Here are some common questions and helpful answers to ensure your Halloween chocolate-covered strawberries turn out perfectly.
When selecting strawberries for dipping, aim for those that are vibrantly bright red, plump, and firm to the touch. Avoid any berries with bruises, soft spots, or a dull appearance, as these indicate they may be overripe or less flavorful. Opting for larger strawberries often makes the dipping process much easier, allowing for a more substantial canvas for your Halloween designs. Fresh, high-quality berries will not only taste better but also hold up well during the preparation and decorating stages.
This recipe is specifically designed for fresh strawberries. Using frozen strawberries is not recommended, as they contain a high water content. Once thawed, frozen strawberries release excessive moisture, making them mushy and difficult for the chocolate to adhere to. The chocolate will simply slide off, resulting in a messy and disappointing outcome. Always use fresh, firm berries for the best results in chocolate dipping.
Proper preparation of your fresh strawberries is paramount for successful chocolate dipping. Once you bring them home, gently wash them under cool running water. After washing, carefully place them on a baking sheet lined with several layers of paper towels. Allow them to air dry completely, or meticulously pat each berry dry with a clean paper towel. It is absolutely essential that there is no residual moisture on the strawberries, as water causes chocolate to seize and prevents it from sticking smoothly to the fruit. This drying process might take 15-30 minutes, but it’s time well spent.
When working with colorful candy wafers or chocolate, careful melting is key. The microwave method is efficient: place wafers in a microwave-safe bowl and heat in 30-second intervals. After each interval, remove the bowl and stir thoroughly, even if the wafers don’t look fully melted. Continue this process until the wafers are smooth and creamy, being careful not to overheat, which can cause them to burn or become thick and unusable. Alternatively, you can use a double boiler method for a more controlled melt. Place the wafers in a heatproof bowl set over a saucepan of simmering water (ensure the bowl does not touch the water). Stir continuously until melted and smooth. This method provides gentle, even heat and reduces the risk of burning.
If your melted chocolate becomes too thick or seizes (turns clumpy and hard), it’s likely due to overheating or exposure to moisture. To potentially rescue it, you can try stirring in a very small amount (half a teaspoon at a time) of a neutral oil like vegetable oil or coconut oil, or even shortening, until it smooths out. For seized chocolate due to water, it’s often beyond repair, so prevention (ensuring strawberries and tools are dry, not overheating) is best.
Expert Tips for Perfect Halloween Chocolate Strawberries
Achieving perfect, Instagram-worthy Halloween chocolate-covered strawberries is easier than you think with these expert tips:
- Optimal Strawberry Preparation: As emphasized, perfectly dry strawberries are non-negotiable. Even a tiny droplet of water can cause your melted chocolate to seize and become unusable. After washing, arrange them on a paper towel-lined baking sheet and allow them to air dry completely for at least 15-30 minutes, or gently blot each one dry before dipping.
- Mastering Chocolate Melting: Whether using a microwave or a double boiler, melt your candy wafers or chocolate slowly and carefully. When using a microwave, heat in short 20-30 second bursts, stirring thoroughly after each interval. This prevents scorching and ensures a smooth, creamy consistency. If the chocolate becomes too hot, it can seize or burn, giving it an unpleasant taste and texture.
- Precision in Dipping and Setting: Hold each strawberry by its stem or leaves and dip it completely into the melted chocolate. Gently tap off any excess chocolate against the rim of the bowl. Immediately place the dipped berry on parchment paper or wax paper. Allow the chocolate to set completely before adding further decorations. If you’re creating multiple layers or designs (like mummy bandages), ensure the previous layer is firm to the touch before proceeding.
- The Importance of a Prepared Surface: Always line your baking sheets with parchment paper or wax paper. This crucial step prevents the chocolate from sticking to the tray, making it incredibly easy to remove the finished strawberries without damage. It also simplifies cleanup significantly.
- Using the Right Tools for Detail: For intricate facial features and small details, a black gel icing tube with a fine tip is ideal. For even smaller dots or delicate lines, you may find a clean toothpick or a small food-safe paintbrush to be invaluable. Practice on a spare piece of parchment paper first if you’re unsure of your handiwork.
- Creative Eye Alternatives: Instead of drawing eyes with black frosting, consider using readily available candy eyes. These instantly add character and a professional touch to your ghost and Frankenstein strawberries, saving time and ensuring uniform results.
- Customizing Your Chocolate Base: While candy wafers are convenient for their vibrant colors and easy melting, you can absolutely get creative with your chocolate base. Melted white chocolate can be dyed using oil-based food coloring to achieve any hue you desire. This allows for greater customization beyond the standard candy wafer colors. For a rich chocolate base, consider using high-quality compound chocolate or couverture chocolate for a superior taste and shine.
- Temperature Control is Key: Work in a cool, dry environment. If your kitchen is warm, the chocolate may take longer to set or become too runny. If necessary, pop your dipped strawberries into the refrigerator for a few minutes to speed up the setting process, but avoid leaving them in for too long, as condensation can form.
- Don’t Waste Melted Chocolate: If you have leftover melted chocolate, don’t discard it! You can drizzle it over pretzels, cookies, or even fruit for additional simple treats. You can also carefully scrape it onto parchment paper, let it harden, and then break it into shards for baking or snacking.
- Handling and Storage: Use gloves if you want to avoid fingerprints on the set chocolate. Handle the strawberries by their leaves or stem as much as possible to keep the chocolate pristine.
More Topping Ideas
Elevate your Halloween chocolate-covered strawberries with these fun and inventive topping ideas. These additions not only enhance flavor but also add texture and visual appeal to your spooky treats.
- Finely Chopped Nuts: Almonds, walnuts, or pecans add a delightful crunch and nutty flavor, perfect for a sophisticated Halloween touch.
- Shredded Coconut: Toasted or plain shredded coconut can mimic hair for a monster or add a snowy effect for a chilling theme.
- Mini Chocolate Chips: Beyond Frankenstein’s bolts, mini chocolate chips can be used as eyes, freckles, or simply for an extra chocolatey layer.
- Assorted Sprinkles: A classic choice! Use white for a ghostly shimmer, colored sprinkles for a festive pop, or Halloween-themed sprinkles (bats, pumpkins, ghosts) for an extra special touch.
- Crushed Graham Cracker Crumbs: These can create a “dirt” effect for a graveyard theme or add a sweet, biscuity crunch.
- Crushed Pretzels: For a delicious salty-sweet contrast and a satisfying crunch that complements the fruit and chocolate beautifully.
- Edible Glitter or Dust: A touch of edible glitter in orange, green, or silver can make your strawberries sparkle and shine, adding a magical element.
- Spiderweb Design: After dipping in a base color (like orange for a pumpkin), use black gel icing to draw concentric circles on top while the chocolate is still wet. Then, drag a toothpick from the center outwards to create a spiderweb pattern.
- Cereal Crumbs: Crushed sugary cereals can add a fun texture and color, especially bright green or purple ones for monster themes.
- White Chocolate Drizzle: A simple drizzle of contrasting white chocolate over dark-dipped strawberries (or vice-versa) adds elegance and complexity.
Storage and Make-Ahead Tips
To maintain their freshness and appearance, proper storage is essential for your Halloween chocolate-covered strawberries. These treats are best enjoyed when fresh, ideally within 24-48 hours of making them.
Store any leftover Halloween strawberries in an airtight container in the refrigerator. The airtight seal prevents moisture from affecting the chocolate and keeps the strawberries from drying out or absorbing refrigerator odors. It’s important to place them in a single layer if possible, or separate layers with parchment paper, to prevent them from sticking together or smudging the decorations. We highly recommend serving them on the same day you make them for the absolute best taste and presentation, as strawberries can release moisture over time, potentially softening the chocolate.
More Easy Chocolate Covered Treats
If you loved making these spooky strawberries, you’ll definitely want to try these other fantastic chocolate-covered recipes that are equally simple and delicious:
- Football Chocolate Covered Strawberries: Perfect for game day, these treats are a touchdown!
- Easy Chocolate Covered Strawberries: A classic, elegant dessert that’s perfect for any occasion.
- Red White and Blue Strawberries: Patriotic and delicious, ideal for summer holidays.
- Chocolate Covered Cherries: A decadent, juicy treat that’s surprisingly easy to prepare.
We hope you enjoy crafting and sharing these fun Halloween chocolate-covered strawberries! Your feedback is invaluable to us, so please leave a comment and a star rating if you try this recipe. We love hearing about your culinary adventures!
Pin
Halloween Chocolate Covered Strawberries
★★★★★
15
15
Ingredients
- 1 package strawberries washed and dried
- Orange candy wafers
- White candy wafers
- Purple candy wafers
- Green candy wafers
- Black gel icing tube
- Mini milk chocolate chips
Instructions
- Rinse fresh strawberries and meticulously pat them completely dry using paper towels. Ensure there is absolutely no moisture left on the berries.
- Melt each color of candy wafers in separate microwave-safe bowls. Heat in 30-second intervals, stirring thoroughly after each interval until smooth and fully melted, following package directions.
- Prepare your workspace by laying out a large piece of parchment paper or wax paper on a baking sheet. This will be the surface for your dipped berries to set.
- For the Mummies/Ghosts: Hold a strawberry by its stem and dip it into the melted white candy wafers, ensuring it’s fully coated. Gently shake off excess chocolate and place the strawberry on the parchment paper. Allow the white chocolate coating to set and harden completely before proceeding.
- Once the white chocolate has set, fill a piping bag (or a Ziploc bag with a tiny corner snipped) with a small amount of the same white melted wafers. Drizzle the white chocolate back and forth across the berry in random, straight lines to create a mummy-like bandage effect.
- Allow the drizzled white chocolate lines to dry. Then, using the black gel icing tube, carefully add three small dots to represent the eyes and mouth for your ghost or mummy design.
- For the Frankenstein’s Monsters: Dip a strawberry into the melted green candy wafers until fully coated. Place it on the parchment paper.
- While the green chocolate is still wet, quickly attach one mini milk chocolate chip to each side of the berry to represent Frankenstein’s bolts. Once the chocolate has set, use the black gel icing tube to draw eyes, a stitched mouth, and a zig-zag scar on the forehead.
- For the Jack-O’-Lantern Pumpkins: Dip a strawberry into the melted orange candy wafers. Place it on the parchment paper and allow the orange coating to set completely.
- Fill a piping bag with a small amount of leftover melted orange wafers. Drizzle straight vertical lines down the berry to mimic pumpkin ridges. Let these lines dry. Finally, use the black gel icing tube to add two triangle-shaped eyes and a classic jagged mouth for your jack-o’-lantern.
- Allow all decorated strawberries to set completely before serving or storing.
Nutrition Facts
Calories
105
kcal
,
Carbohydrates
13
g
,
Protein
1
g
,
Fat
6
g
,
Saturated Fat
3
g
,
Polyunsaturated Fat
0.2
g
,
Monounsaturated Fat
2
g
,
Cholesterol
4
mg
,
Sodium
16
mg
,
Potassium
94
mg
,
Fiber
1
g
,
Sugar
12
g
,
Vitamin A
9
IU
,
Vitamin C
17
mg
,
Calcium
40
mg
,
Iron
0.2
mg
